
Marisa McClellan's Blog, page 17
October 25, 2018
Canning 101: How to Swap Citric Acid for Lemon Juice and Vice Versa
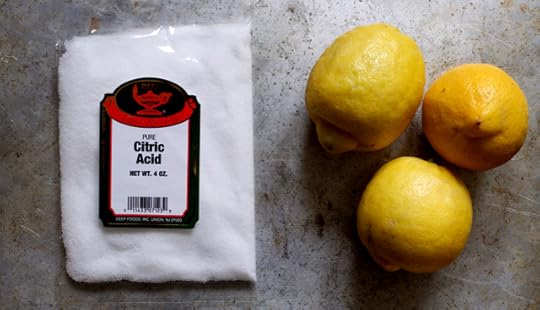
One tablespoon bottled lemon juice = 1/4 teaspoon citric acid
When one is canning something in a boiling water bath, it is vital that that product be high in acid. The reason is that the presence of a concentrated amount of acid is what inhibits botulism spores from germinating into toxin. Many of the fruits we turn into jam are already high enough in acid on their own to be safe for canning, but on occasion we work with items that need some help in the acid department.
Tomatoes are a prime example of a fruit that is needs to be acidified. Depending on the variety of tomato, they can sometimes have a pH (how we judge acid content) that is too high (the pH of the product need to below 4.6) and so that tomato product needs additional acid. Because most home canners aren’t working with a pH meter, it’s recommended that all tomatoes receive additional acid, because it’s impossible to judge acid content based on taste or appearance.
This is why tomato recipes typically call for the addition of either bottled lemon juice or citric acid. Both products deliver a reliable dose of acid that, when added in the recommended amount, ensures that the product is safe for a trip through the boiling water bath canner.
When I write recipes that need acidification, I typically default to bottled lemon juice because I believe it to be a more readily available product (and if you’re curious why it’s bottled lemon juice and not fresh, read this post). However, when I’m making a product that has spent a goodly amount of time cooking down, I will often use citric acid. It comes in powdered form and so doesn’t introduce more liquid that I will then need to reduce.
However, either can be used and they can easily be exchanged one for another. One tablespoon of bottled lemon juice is equal to 1/4 teaspoon citric acid. This means that if a recipe instructs you to add 2 tablespoons of bottled lemon juice to each quart jar before canning, you can easily swap in 1/2 teaspoon of citric acid.
One tablespoon bottled lemon juice = 1/4 teaspoon citric acid
Related Posts:
Canning 101: Why Recipes Call for Bottled Lemon Juice
My Jars Didn’t Seal! What Happened?
My Jam Didn’t Set! What Should I Do?


October 24, 2018
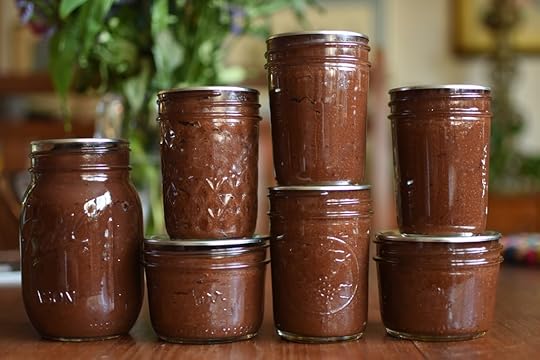
Cranberry Apple Butter
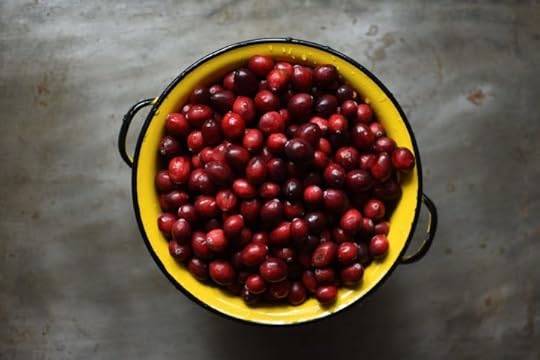
A couple of weekends ago, Scott and I dashed into Costco for toilet paper, dishwasher tabs, and 10 pounds of sugar. While we managed to stick pretty close to the list, a two pound bag of fresh cranberries managed to find it way into our cart.
As is so often the case, I didn’t have a plan for these cranberries, but I felt certain that inspiration would strike. After a little reflection, a thought occurred. I’d never made a fruit butter combining apples and cranberries. It was time to give it a shot.
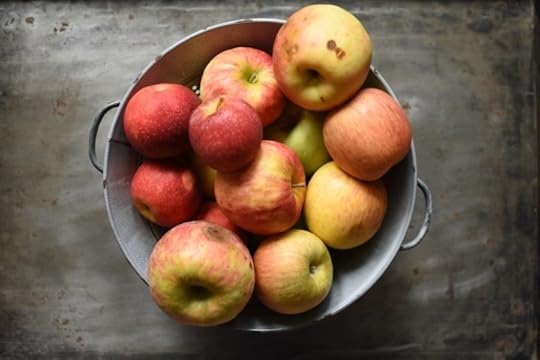
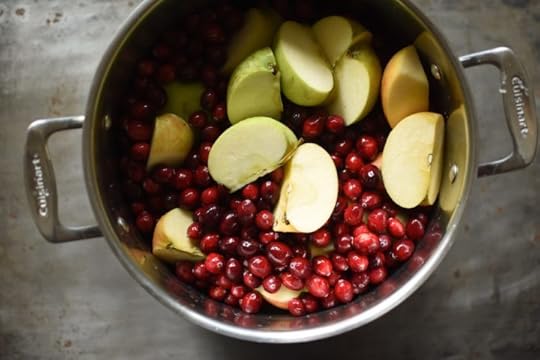
So I did a bit of fridge diving and came up with six pounds of apples that needed to be used that could join my cranberries in a big stock pot.
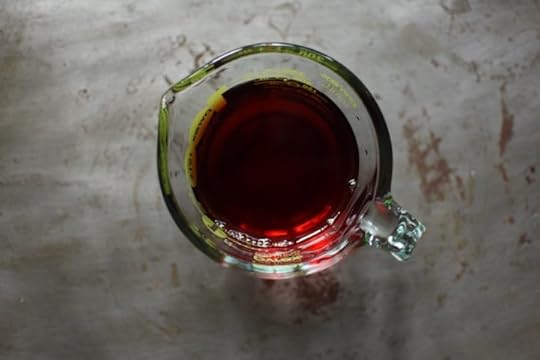
I quartered the apples, tumbled in the cranberries, and added a cup of cranberry juice I happened to have in the fridge (though you could just as easily use water).
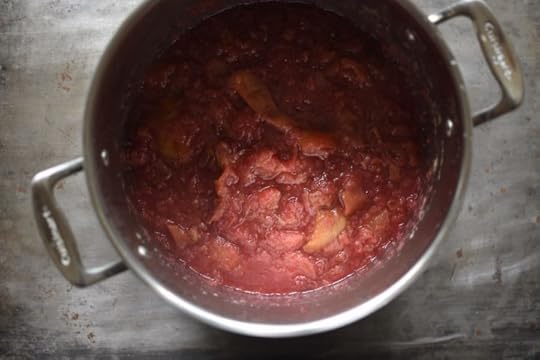
I put the pot on the stove, brought it to a boil, and reduced the heat so that it would simmer for awhile. Once the apples were tender and the cranberries had all popped, I pulled the pot off the heat and let it cool until I could work it through a food mill without burning myself.
I took the milled puree and poured it into my slow cooker and reduced it over the course of three 8-hour sessions, until it was quite thick and reduced by a little more than half.
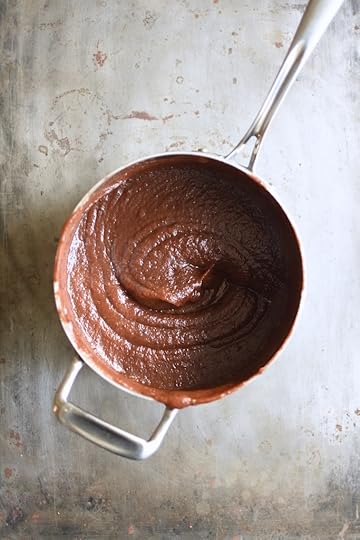
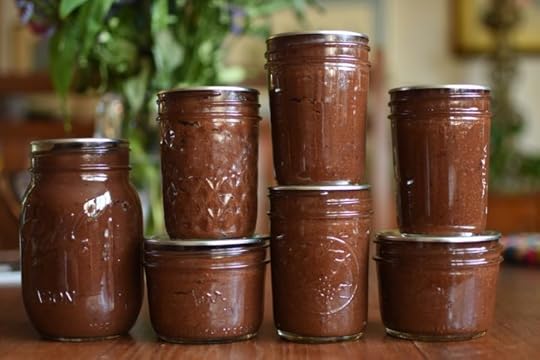
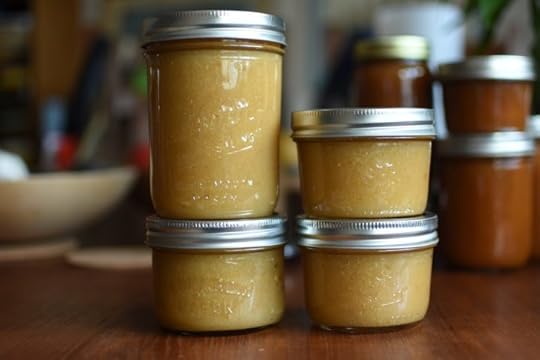
Finally, I took the reduced apple cranberry sludge and scraped it into a smaller pot. Once I had some depth, I used an immersion blender to puree it smooth. I added some sugar to taste, brought it back to temperature (I’d let it cool down overnight), and canned it in an assortment of jars (I’m running low on empties and so it was a bit of a scrounge to find appropriate vessels).
The finished butter is both tangy and just sweet enough. It’s really smooth and would be an excellent Thanksgiving-time condiment.
PrintCranberry Apple Butter
Yield: makes 8 half pints
Ingredients
6 pounds apples, washed and quartered2 pounds cranberries, rinsed
1 cup cranberry juice or water
1 1/2 cups granulated sugar, plus more to taste
Instructions
Combine the apples, cranberries and liquid in a large stock pot. Place a lid on the pot and bring it to a boil. Once it is bubbling away nicely, reduce the heat to medium-low and simmer for 30 to 45 minutes, until the apples soften and the cranberries burst.Once the fruit is very tender, remove the pot from the heat and let it cool to lukewarm.
Work the cooked apples and cranberries through a food mill to separate out the skins and seeds.
Pour the milled fruit into a slow cooker and cook on low for 8 hours with the lid cocked to allow the steam to escape. Stir occasionally.
When the first round of cooking is done, stir the fruit and cook for another 8 hours. If your slow cooker runs hot, use a shorter length of time.
The fruit butter is done when it is quite thick and has reduced by about half.
Scrape the finished butter into a smaller pot and use an immersion blender to puree it smooth. Add the sugar to taste (this butter naturally has enough sugar and acid to be safe to can without the additional sugar. It's simply there to help smooth out the cranberries).
Prepare a boiling water bath and enough jars to hold 8 half pints.
Funnel the finished butter into the jars, leaving 1/2 inch headspace. Use a chopstick to work out the air bubbles that will get trapped (and with a butter this thick, you will have trapped air bubbles).
Wipe the rims, apply the lids and rings, and process in a boiling water bath canner for 15 minutes.
When the time is up, slide the pot off the heat and remove the lid. Let the jars cool slowly for ten minutes in the water. When that time is up, remove the jars and set them on a folded kitchen towel to cool. When the jars have cooled enough that you can comfortably handle them, check the seals. Sealed jars can be stored at room temperature for up to a year. Any unsealed jars should be refrigerated and used promptly.3.1https://foodinjars.com/recipe/cranberry-apple-butter/
Related Posts:
Fruit Butters (Peaches, Pears and Apples)
September Mastery Challenge Round-up: Fruit Butters
Submit your Fruit Butters for the September #fijchallenge
October 23, 2018
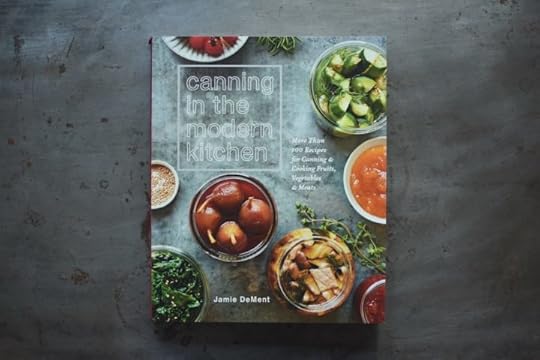
Cookbooks: Canning in the Modern Kitchen
I believe that canning cookbooks have the ability to forge a deeper relationship with home cooks than your average baking or weeknight dinner book. The reason is that when you decide to trust a recipe for a preserve, you are going to have an ongoing relationship with the outcome of that recipe. It’s not over in a night or two. You will continue to eat and experience the outcome of that batch of jam or pickles for months or even years.
It feels like making a dear new friend when you find an author whose writing style, culinary choices, batch sizes, and general sensibility resonates with your own. Their recipes become part of your daily life and there’s a regular exchange happening as you eat through the things you made with their guidance.
I tell you all this to say that I feel like I’m about to start one of these trusting relationships with the new book Canning in the Modern Kitchen by Jamie DeMent. There’s something about the look, feel, and tone that speaks to me. The book contains a number of recipes that are different from my own. And it does a very nice job of dropping use-it-up recipes into the mix.

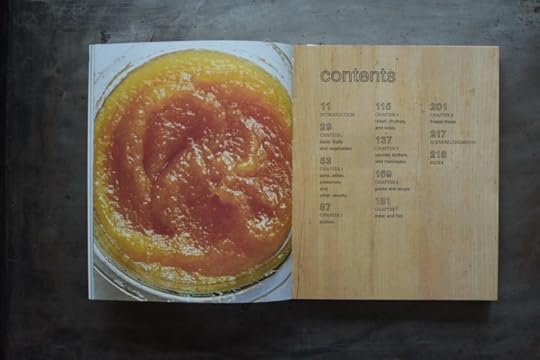
One of the things I particularly like about this book is the fact that it treats water bath canning, pressure canning, and freezing with equal ease. All three techniques are used, but there’s no fanfare. It’s a refreshing normalization of techniques.
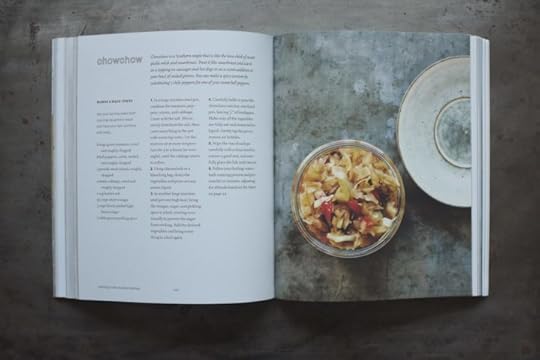
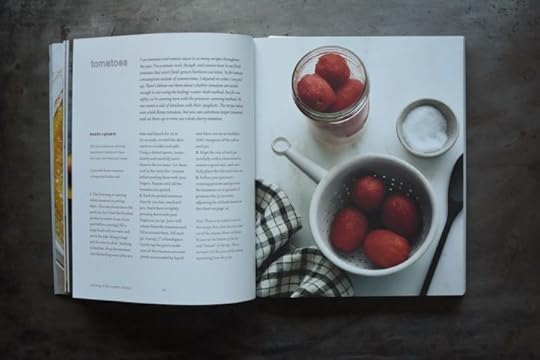
I have a number of recipes flagged in this book, among them the Chow Chow on page 122, the Roasted Tomato Vinaigrette on page 156 (though probably not until next summer), and the Vegetable Soup on page 178. I’m looking forward to digging in.
My bottom line on this book is that I really like it so far. I’ll be making some of its recipes in the coming days and will share more as the opportunity arises.
Disclosure: I was given a free copy of this book for review purposes. No payment was received for this post and all thoughts are entirely my own.
Related Posts:
Cookbooks: The Preservatory
Canning Book: Putting Up More
October 22, 2018
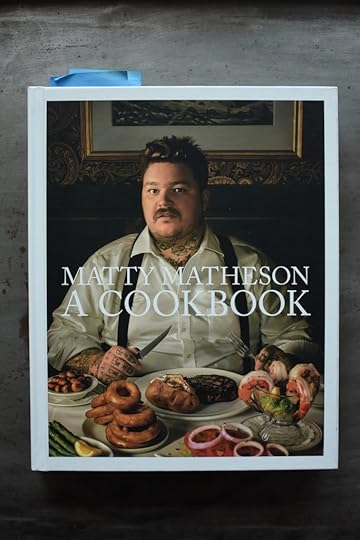
Mustard Pickles from Matty Matheson: A Cookbook
Flavored with dry mustard and turmeric, and featuring a thickened brine, these slightly sweet and very sharp mustard pickles are the condiment you didn’t know you were looking for!
Until a copy of Matty Matheson: A Cookbook landed in my mailbox, mustard pickles were not really on my radar. I’d heard people reference them before, but they’d never registered any interest or curiosity on my part. Then, as I flipped through this book (a really gorgeous, personal, interesting volume), Matty’s recipe for mustard pickles caught my eye.
They seem like a fairly standard mixed pickle at first. Onions, cauliflower, cucumber, sugar, and vinegar. But then, I read down further, I spotted cornstarch. A thickener? In a pickle? I did a little reading and discovered that this is a really traditional pickle in parts of Canada and it’s often used in places where one might use ketchup.

I decided I had to try a batch. Now, because of that cornstarch, I knew I’d have to make them as a fridge pickle rather than a preserved one (unmodified cornstarch isn’t heat stable and because it increases the density, it throws everything we know about processing times for pickles into question).
I have reprinted the recipe below exactly as it is written in the book, but I advise that if you make this recipe, you follow my lead and consider this a fridge pickle. Matty’s instructions tell you to use an open kettle method (fill jars, cap, and let the residual heat create the seal), which isn’t thought to be safe by current safety guidelines.
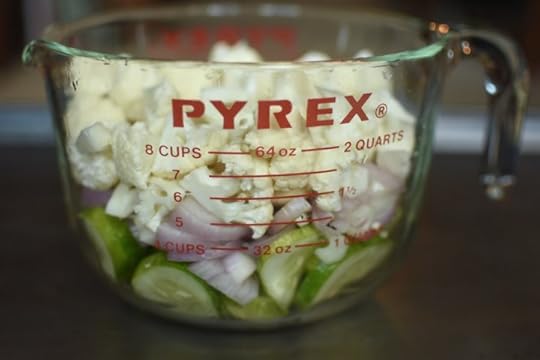
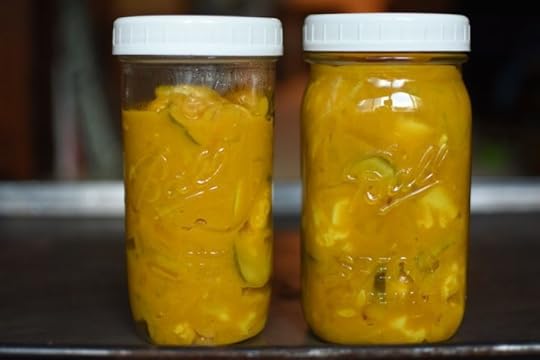
I chopped cucumbers, cauliflower, and shallots (fresh pearl onions were not to be found), and combined them with the sugar and vinegar. I added the mustard powder, turmeric, and salt and brought it to a simmer for 15 minutes to soften. While it cooked, I combined 1/2 cup cornstarch with a couple tablespoons of water.
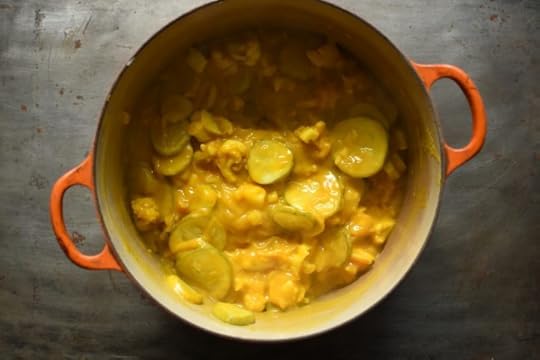
When the veg was sufficiently softened, I turned off the heat and whisked in the cornstarch slurry. I believe this is a spot where my electric stove led me a little astray. Because it takes a while to cool down, the veg was still quite hot and so the cornstarch thickened a heck of a lot. My mustard pickles ended up being a little pudding-y. I don’t believe that’s the desired texture.
Still, the flavor is good and I have every confidence that we’ll manage to eat through these pickles, gloppy though they might be.
Disclosure: I was given a review copy of this book as part of my participation in the Abrams Dinner Party. No additional payment was received and all thoughts and opinions expressed are entirely my own.
PrintMustard Pickles from Matty Matheson: A Cookbook
Yield: makes 2 to 3 pints

Ingredients
2 cups (300 g) pearl onions, sliced 1/4 inch (6 mm) thick2 cups (200 g) cauliflower, cut in 1/4 inch (6 mm) pieces
2 ups (300 g) small cucumbers, seeded and sliced 1/4 inch (6 mm) thick
1 cup (240 ml) white vinegar
1/2 cup (100g) granulated sugar
2 tablespoons dry mustard
1 tablespoon turmeric
1 tablespoon kosher salt
1/2 cup (65 g) cornstarch
Instructions
In a Large pot, place the onions, cauliflower, and cucumbers. Add the vinegar, sugar, dry mustard, turmeric, and salt. Simmer gently until tender, about 15 minutes.Turn off the heat. In a small bowl, combine the cornstarch with about 2 tablespoons of water to make a slurry, then whisk the slurry into the vinegar mixture.
While the mixture is hot, pour it into the Mason jars, cap them, and listen for the "doink" when the cap is pulled in by the cooling of the pickles.
After about 15 minutes, test the tops with a gentle push to make sure they're sucked in. Don't worry: For any that aren't, you can refrigerate or you can reheat and re-cap.
Store your pickles in a cool, dry, dark place. [FIJ note: Please do refrigerate these jars, none of this is proper canning procedure.]
Notes
This recipe is excerpted with permission from Matty Matheson: A Cookbook.
3.1https://foodinjars.com/recipe/mustard-pickles-matty-matheson-a-cookbook/Related Posts:
Check the recipe index for more tasty preserves!
October 17, 2018
Homemade Sunflower Seed Butter
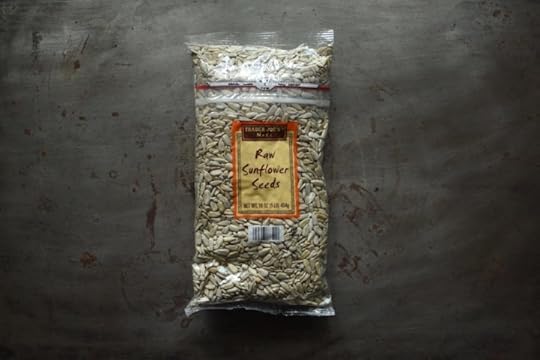
About a month ago, I toasted up several pounds of sunflower seeds, packed up my food processor, and drove to a local library to make sunflower seed butter in front of an audience.
I’ve made a lot of nut and seed butters over the years, but I’ve come to believe that sunflower seed butter gives you the most bang for your time and buck, particularly when you compare it with the cost of a jar bought from the store.
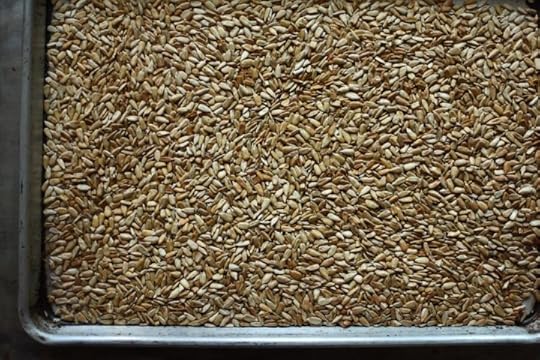
Here’s how you do it. Start with raw, unsalted seeds and toast them. I find that 12 to 15 minutes at 350°F is ideal in my oven (making sure to give the pan a good shake at least once during toasting). You want them to be quite fragrant when you pull them from the oven.
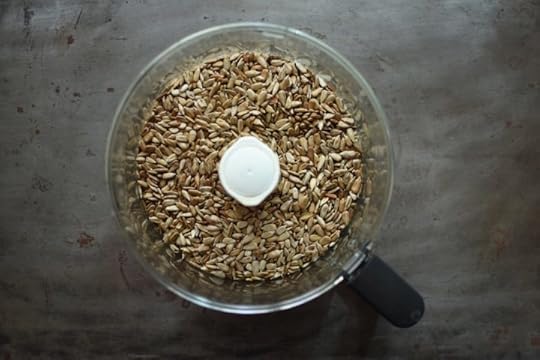
Let them cool for 10 to 15 minutes, until you can tumble them into the bowl of your food processor without burning yourself.
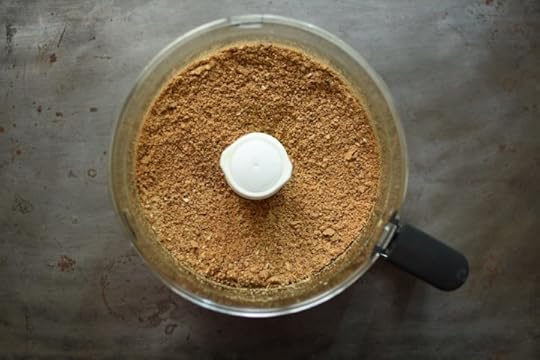
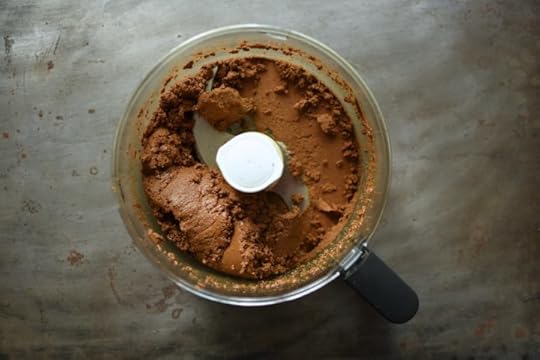
Now it’s time to process. For this first stage, let the processor run for 30 to 45 seconds, until the seeds have been broken down into a sandy meal. This is the stage at which I add salt and other seasonings (my favorite is to add vanilla bean paste, cinnamon, and a little sugar).
Now we process again, until it starts looking like wet sand. In my machine, this takes about a minute. However, it can really vary depending on the freshness of the seeds you started with.
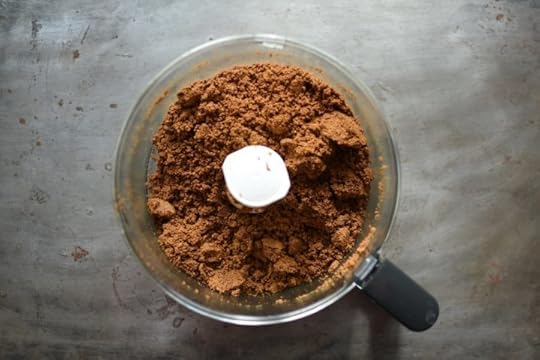
Once you’ve scraped the sides and base of the bowl, it’s time to process again. This time, we’re going to stream in some neutral vegetable oil while the processor runs, to help the butter loosen up. I always have sunflower seed oil in my kitchen, so I reach for it here. I use anywhere from 1-3 tablespoons, depending on the seeds. Start with 1 and work your way up gradually.
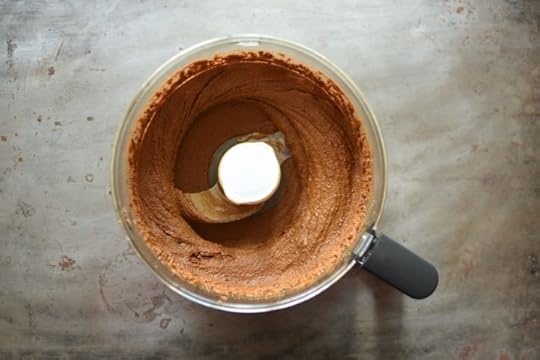
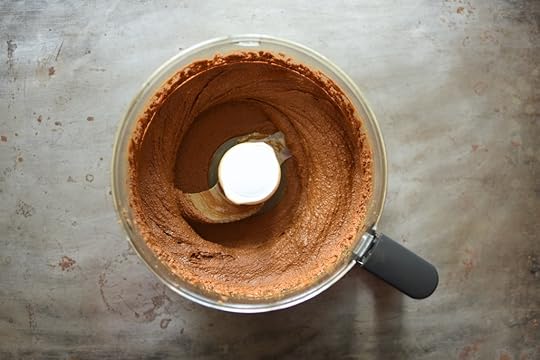
Then you run the processor again until the butter goes from clumpy to runny. I find that this will take another couple minutes. Sometimes I take a five minute break when making sunflower seed butter, to give my food processor a little time to cool off. Sunflower seeds aren’t as hard as peanuts or almonds, but still give the processor motor a workout.
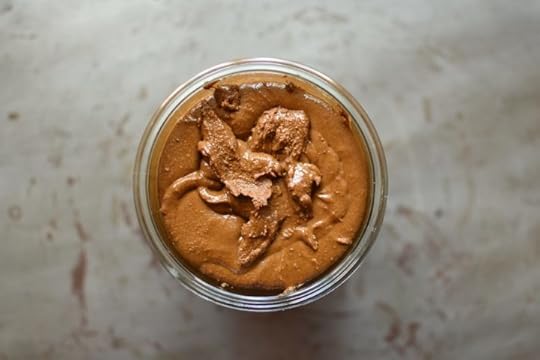
When you’re all done, you’ll have about two cups of delicious, budget-friendly sunflower seed butter. It’s a good skill to have your kitchen arsenal, particularly if you regularly find yourself in places where nuts are prohibited.
Print
Homemade Sunflower Seed Butter
Ingredients
1 pound raw sunflower seeds
1 1/2 teaspoons salt
1-3 tablespoons sunflower oil
Instructions
Preheat oven to 350°F. Spread the sunflower seeds out on a rimmed baking sheet. Roast in the oven for 12 to 15 minutes, stirring the seeds at least once during baking, to ensure even roasting.
When the sunflower seeds are fragrant and golden brown, remove the pan from the oven. Let the seeds cool 10 to 15 minutes. Carefully pour them into the bowl of a food processor.
Process the seeds for about 30 seconds, until the seeds have broken down into a rough meal. Add the salt and process again.
Continue to process in 20-30 second stints, stopping the motor and removing the lid after each stint to break up any clumps and scrape down the sides of the processor.
The sunflower butter will look like wet sand and then will start to roll around the processor in one or two large clumps.
At this point, stream in 1 tablespoon of the sunflower oil and continue to process. If it doesn’t look liquidy and buttery within 15 to 20 seconds, add a second tablespoon. Should it still resist, go with one more.
When the butter pools in the food processor bowl and looks quite spreadable, it is done.
Notes
To make the sunflower seed butter into Cinnamon Vanilla Butter, add 1-2 teaspoons of cinnamon, 2 teaspoons vanilla bean paste, and 2 tablespoons sugar with the salt.
4.29
https://foodinjars.com/recipe/homemade-sunflower-seed-butter/
Related Posts:
How to Grow Your Own Sprouts
Roasted Cashew and Coconut Butter
October 16, 2018
Quick Chopped Cabbage Kimchi from Korean Home Cooking
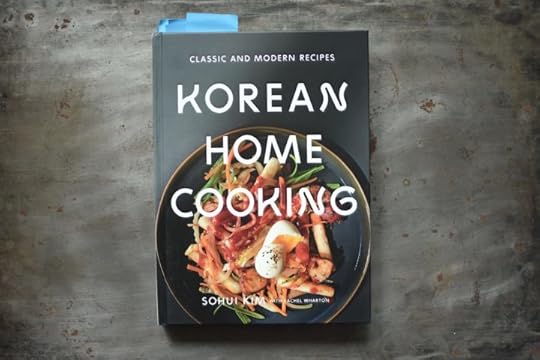
My husband can always tell when I’m really into a cookbook, because he will find it in various locations around our apartment (on the sofa, splayed out in the kitchen, and resting upright against the back of my desk chair). Once such book that has been spotted in all these locations lately is Korean Home Cooking by Sohui Kim and Rachel Wharton.
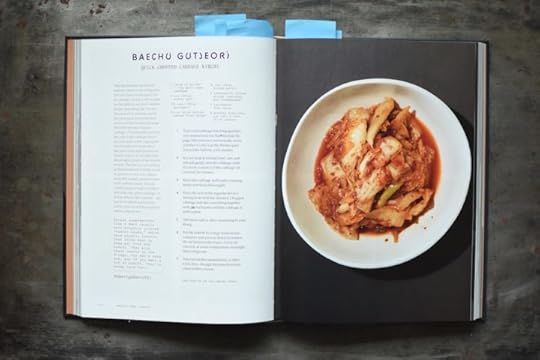
My copy is riddled with sticky notes and the edges are already a little stained from the time it has spend in the kitchen with me. On Monday night, I even demoed the Quick Chopped Cabbage Kimchi over on Facebook. Click the link if you’d like to see the recipe in action.
If you tuned and want to try the recipe, you can find it after the jump. Just know that in the demo, I made a half batch. I’ve included the recipe in it’s entirety here.
Print
Quick Chopped Cabbage Kimchi from Korean Home Cooking
Yield: Makes 10-11 cups
Ingredients
2 large (3 pounds/1.4 kg each) napa cabbage
1 cup (240 g) kosher salt
1 1/2 cups (180 g) gochugaru
1/4 cup (25 g) minced peeled fresh ginger
1/4 cup (35 g) minced garlic
3 tablespoons salted shrimp (optional, but recommended)
1 tablespoon fish sauce
2 bunches scallions, cut into 2-inch (5 cm) pieces
Instructions
Tear each cabbage into long quarters and slice horizontally every 2 inches (5 cm). Cut the thicker part, towards the bottom, a bit smaller.
In your largest mixing bowl, mix and rub salt gently into the cabbage until it's nicely coated. Let the cabbage sit, covered, for 3 hours.
Rinse the cabbage well under running water and drain thoroughly.
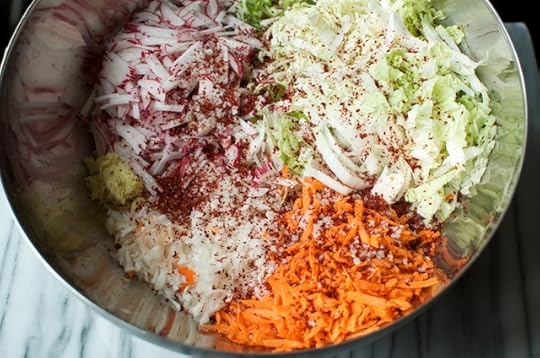
Place the rest of the ingredients in a mixing bowl with the drained, chopped cabbage and mix everything together with gloved hands until the cabbage is well coated.
Add more salt or other seasoning to your liking.
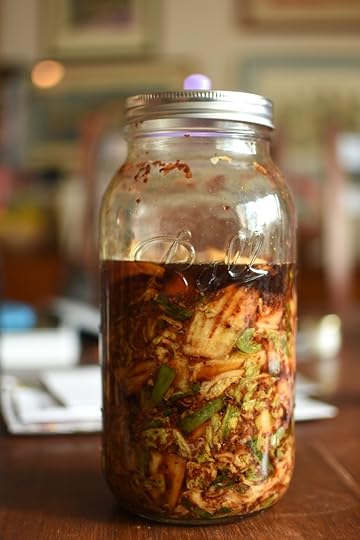
Put the kimchi in a large nonreactive container and press it down to remove the air between the leaves. Let it sit, covered, at room temperature overnight, then refrigerate.
You can eat this immediately or after a few days, though this kimchi is best eaten within a week.
Notes
This recipe is excerpted from Korean Home Cooking by Sohui Kim and Rachel Wharton.
4.29
https://foodinjars.com/recipe/quick-chopped-cabbage-kimchi-from-korean-home-cooking/
Related Posts:
Check the recipe index for more tasty preserves!
October 15, 2018
Cold Cured Gravlax from Cured Meat, Smoked Fish, & Pickled Eggs
Last week, I shared a few images from the interior of Karen Solomon’s terrific new book Cured Meat, Smoked Fish, Pickled Eggs. Today, I want to walk you through one of her recipes.
The initial seed for this post was planted back June, when I got an email from the group that promotes wild seafood from Alaska. They asked if I might be interested in making something with some wild Alaska salmon. I said yes, they sent me a gift card to buy some of their salmon at Whole Foods, and I promptly got lost in the business of summer.
Then Karen’s book arrived and I spotted the recipe for Cold-Cured Gravlax. It brought the request from the wild Alaskan seafood folks right back to the front of my mind. Finally, it was time to get moving.
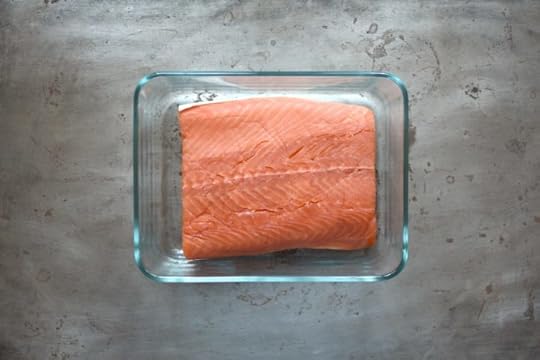
I went to Whole Foods and bought a piece of gorgeous, wild salmon from Alaska. I read through the recipe several times. Half an hour later, the salmon was well-wrapped and in the fridge.
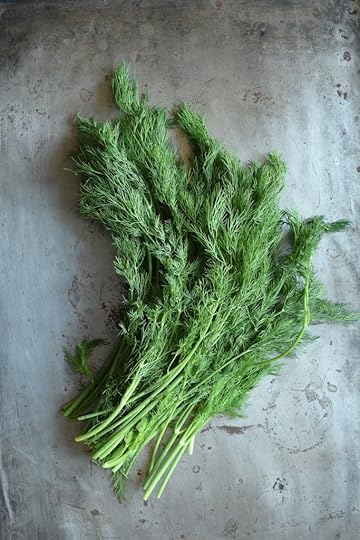
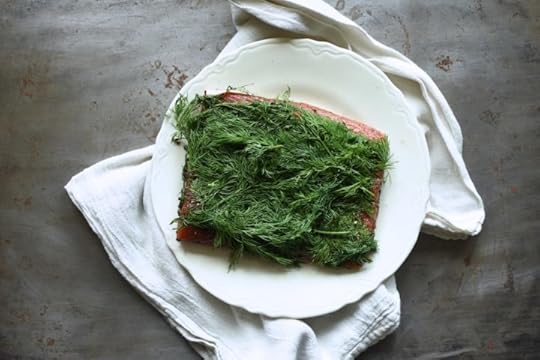
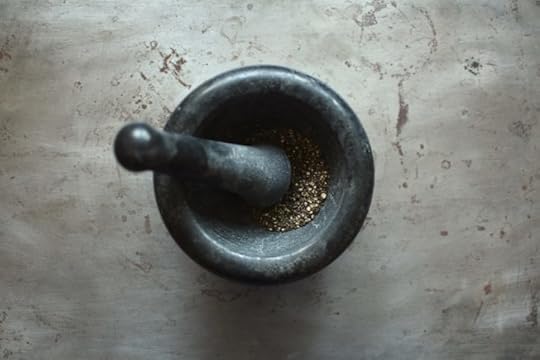
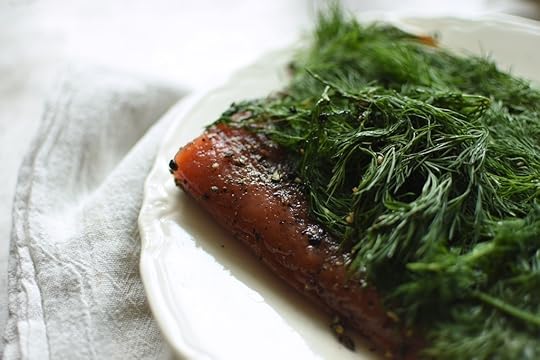
You start by patting the salmon dry with paper towels. Then you mix up salt, sugar, and black peppercorns. You press that salt/sugar/pepper mix into all sides of the salmon and then swaddle it with fresh dill.
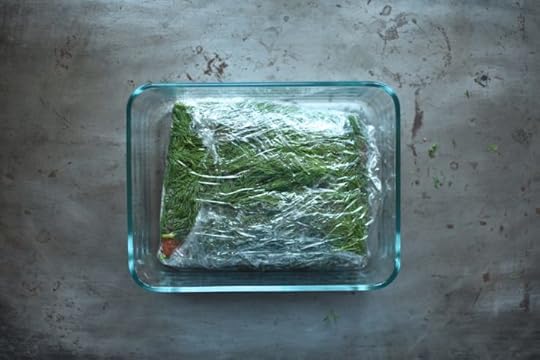
Once the seasoning is on the salmon, you wrap it tightly in plastic wrap and set it in a dish to catch any liquid (and there will be some). Karen also recommends that you weigh the salmon down to help keep the spices in contact with the fish. I used a collection of fermentation weights, but you can use whatever is convenient to you.

After three days, it’s time to wrap your piece of salmon. It will have firmed up, darkened slightly, and gone a bit translucent around the edges. You remove the dill, rinse off the remains of the curing spices, and pat it dry. Traditionally, this would be the point at which your gravlax would be done, but Karen also includes a step for heat treating the salmon, in case you feel strange about eating it as-is.
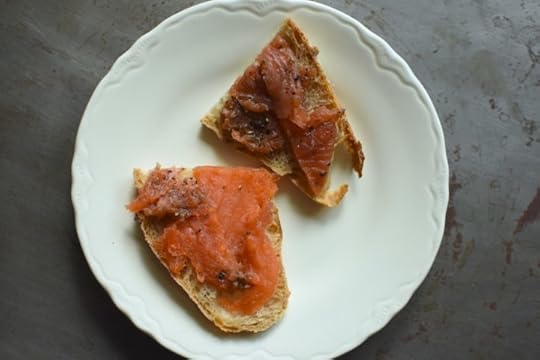
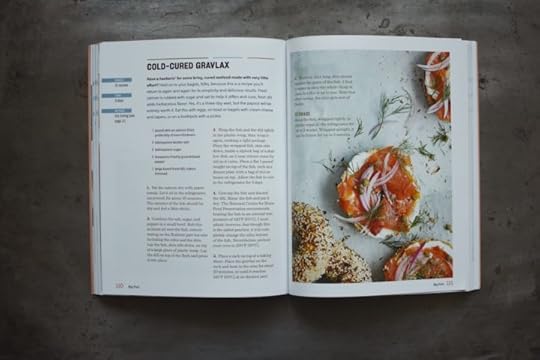
Once the gravlax is finished, you can perch thin slices on bagels or toast. You can toss bits with hot pasta. You can blitz it in the food processor with some goat or cream cheese and call it a dip. However you use it, it’s a hugely delicious, very satisfying kitchen project.
Print
Cold Cured Gravlax from Cured Meat, Smoked Fish, Pickled Eggs
Yield: makes 1 pound gravlax
Ingredients
1 pound skin-on salmon filet, preferably of even thickness
3 tablespoons kosher salt
3 tablespoons sugar
2 teaspoons freshly ground black pepper
1 large bunch fresh dill, stems trimmed
Instructions
Pat the salmon dry with paper towels. Let it sit in the refrigerator, uncovered, for about 30 minutes. The exterior of the fish should be dry and feel a little sticky.
Combine the salt, sugar, and pepper in a small bowl. Rub this mixture all over the fish, concentrating on the fleshiest part but also including the sides and the skin.
Lay the fish, skin side down, on top of a large piece of plastic wrap. Lay the dill on top of the flesh and press it into place.
Wrap the fish and the dill tightly in the plastic wrap, then wrap it again, making a tight package.
Place the wrapped fish, skin side down, inside a ziplock bag or a shallow dish, as it may release some liquid as it cures.
Place a flat 1-pound weight on top of the fish, such as a dinner plate with a bag or rice of beans on top. Allow the fish to cure in the refrigerator for three days.
Unwrap the fish and discard the dill. Rinse the fish and pat it dry. The National Center for Home Food Preservation recommends heating the fish to an internal temperature of 140°F/60°C. I must admit, however, that though this is the safest practice, it will completely change the silky texture of the fish. Nevertheless, preheat your oven to 200°F/90°C.
Place a rack on top of a baking sheet. Place the gravlax on the rack and heat in the oven for about 20 minutes, or until it reaches 140°F/60°C at its thickest part.
To serve, slice long, thin pieces against the grain of the fish. I find it easier to slice the whole thing once, but this is up to you.
Note that after curing, the skin gets sort of flabby.
Storage: Keep the fish, wrapped tightly in plastic wrap, in the refrigerator for up to two weeks. Wrapped airtight, it can be frozen for up to 3 months.
Notes
This recipe is excerpted from Karen Solomon's excellent book, Cured Meat, Smoked Fish, & Pickled Eggs
4.29
https://foodinjars.com/recipe/cold-cured-gravlax-from-cured-meat-smoked-fish-pickled-eggs/
Disclosure: The Alaska Seafood Marketing Institute gave me $50 to cover the cost of salmon used in this post. Storey sent me a review copy of Karen’s book. All thoughts and opinions expressed in this post are entirely mine.
Related Posts:
Cookbooks: Cured Meat, Smoked Fish, & Picked Eggs
Giveaway: Preserving Book Bundle
Cookbooks: Asian Pickles by Karen Solomon
October 14, 2018
Monday Night Facebook Live + Other Updates
Happy Sunday, friends! I’m dropping in with a couple reminders before the week gets under way.
First up is that I’m doing a livestream on Facebook tomorrow night (Monday, October 15, 2018) at 9 pm ET/ 6 pm PT. I’m going to be showing you how to make a batch of the chopped kimchi using the recipe from the gorgeous new book Korean Home Cooking, so make sure to set a reminder and join me.
Next is a reminder to sign up for my Pear Vanilla Caramel Sauce class at the Lampeter Cafe in Lampeter, PA (if you’re in the region) on Saturday, October 27.
In other fun news, I wrote something for the New York Times. It’s a little piece sharing some tips on how to starting packing your lunch without spending too much money on gear.
Also, back in the summer I spent a little time chatting with Shauna Sever about canning for The Splendid Table podcast. The interview went live last month, so I’m a bit late letting you all know.
And if you like listening to me chat with another knowledgeable woman in food, make sure to subscribe to Local Mouthful, the weekly podcast that I make with my friend and fellow food writer, Joy Manning.
Related Posts:
Where I’m Going, Where I’ve Been – March 2018
Small Batch Tomato Jam Livestream
Fermented Hot Sauce Livestream Tonight!
October 10, 2018
Pear Drizzle with Lemon and Ginger
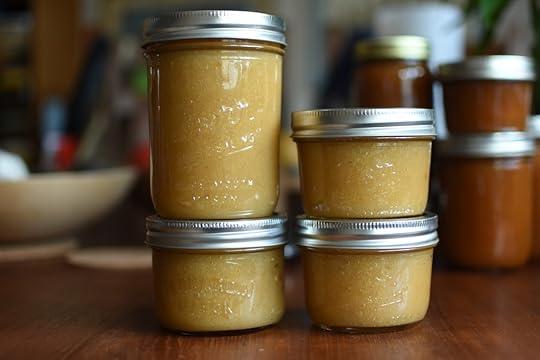
For years now, if I had extra pears laying around the apartment, I would make a little batch of Pear Vanilla Jam or Pear Vanilla Drizzle. However, with the current vanilla prices, I am becoming more and more stingy with my dwindling stash of vanilla beans. Instead of giving up on pears, I’m reaching out for different ways to increase their deliciousness.
This little batch of pear drizzle* is a good example. Instead of reaching for a precious vanilla bean, I looked around the kitchen and found a little knob of fresh ginger and a single withering lemon. The finished drizzle is bright rather than smooth, but lacks nothing in appeal. I took one little jar to a breakfast gathering recently and we spooned thick layers onto flaky pastries. No one complained and a friend was delighted when I suggested she take the rest of the jar home with her.
If you are finding vanilla beans similarly cost-prohibitive these days, I encourage you to join me in looking around the kitchen for alternate inspiration.
*I use this word to describe a preserve that is pureed smooth, but doesn’t have the thicker consistency of a fruit butter.
Print
Pear Drizzle with Lemon and Ginger
Yield: makes 5 to 6 half pints
Ingredients
4 pounds relatively ripe Bartlett, Bosc or Anjou pears
2 1/2 cups granulated sugar
2 tablespoon freshly grated ginger
2 lemons, zested and juiced
Instructions
Prepare a boiling water bath canner and enough jars to hold 6 half pints
Core and chop the pears and place them in a low, wide non-reactive pot. Add the sugar, ginger, and lemon zest and juice
Place pan over medium-high heat. Bring to a boil and cook, stirring regularly, until the fruit softens and the liquid around the edges of the fruit begins to thickens, about 20 to 25 minutes.
When the drizzle is finished cooking, remove the pan from the heat. Use an immersion blender to puree until smooth. If you have to tip the pan slightly to get the immersion blender to work properly, make sure to protect your hands.
Funnel the drizzle into the prepared jars. Wipe the rims, apply the lids and rings, and process in a boiling water bath canner for 10 minutes.
When time is up, remove jars from canner and let them cool on a folded kitchen towel.
When jars are cool enough to handle, check the seals. All sealed jars are shelf stable for up to one year. Any unsealed jars should be refrigerated and used promptly.
4.29
https://foodinjars.com/recipe/pear-drizzle-with-lemon-and-ginger/
Related Posts:
Spiced Pear Jam
Pear and Chocolate Jam
October 9, 2018
Cookbooks: Cured Meat, Smoked Fish, & Picked Eggs
I have been a fan of Karen Solomon’s work since the very earliest days of this site. Her Jam It, Pickle It, Cure It was one of the very first books I bought on the topic of canning and culinary DIY and it continues to be one I turn to often I’m looking for a foundational recipe. Her subsequent books, Can It, Bottle It, Smoke It and Asian Pickles are also mainstays on my shelf.
Over the years, I’ve been lucky enough to get to know Karen in person (including two overnight stays in her amazing San Francisco home during various book tours) and she is just as delightful, knowledgeable, and charming in person as she is in her books.
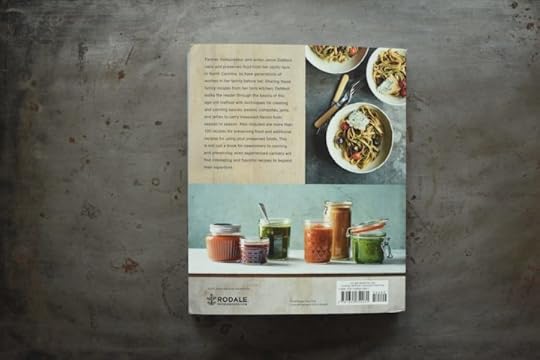
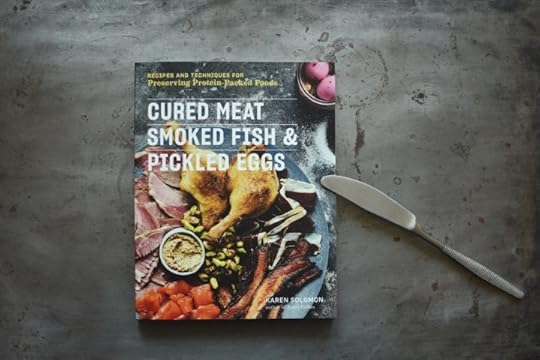
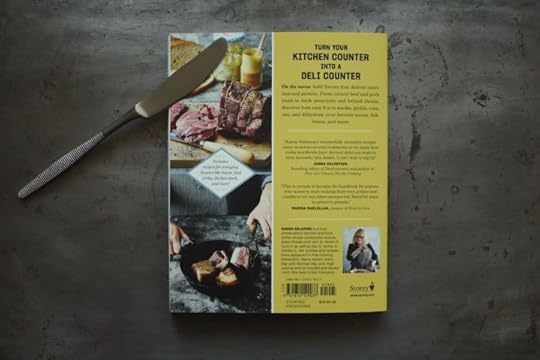
Several months ago, Karen’s latest was published. Called Cured Meat, Smoked Fish, & Pickled Eggs, this book focuses on the art of preserving proteins. The book covers the full spectrum of preservation possibilities, from water bath canning (really applicable only to the pickled beans in the book) to pressure canning, curing, drying, freezing, smoking, and more.

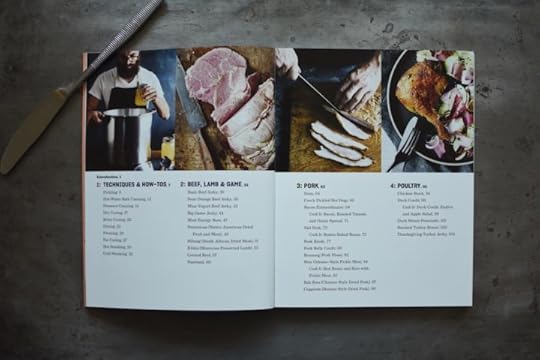
The table of contents for this book spans two full spreads and I’ve included pictures of both in this post. This is to give you a complete idea of what you’ll get from a copy of this book (so much!). I can’t think of a book currently on the market that brings all these techniques and recipes into a single volume and with such glorious photography, to boot.
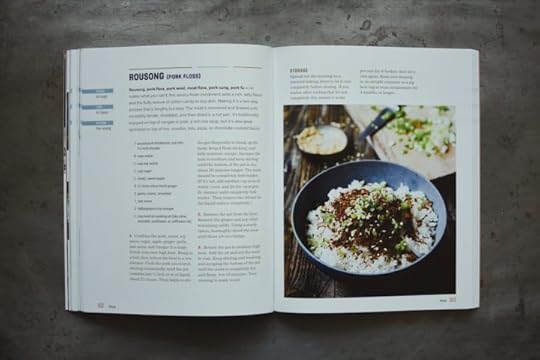
You’ll find recipes for things you never thought to make, like the Pork Floss that’s pictured above, or the Czech Pickled Hot Dogs on page 66 (I never imagined that I’d crave pickled hot dogs, but thanks to Karen’s description of how the pickling process gives them flavor and texture, I am insanely hungry for them).
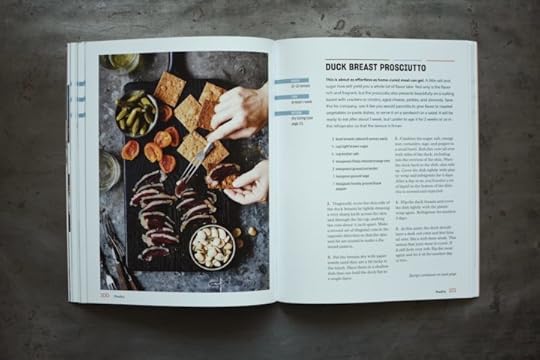
You’ll also classic preserved proteins like Duck Breast Prosciutto, Ham, Corned Beef, Pastrami, and even Canned Tuna. You’ll also find a number of recipes various stripes of jerky, one for Biltong, and even a Meat Energy Bar. If you’re someone who likes to follow a high protein diet and you’re finding that your snack budget is getting out of hand, this book will empower you to make them rather than buy them.
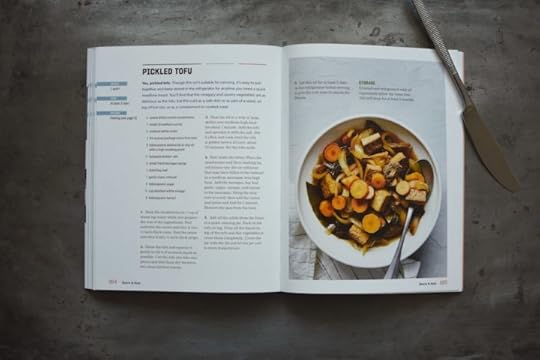
One thing I think it’s important to make clear about this cookbook is that it’s not only for meat eaters. While there is a goodly amount of beef, pork, and poultry in the book, there are also recipes devoted to fish, soy, beans, nuts, dairy, and eggs. You’ll see pickled eggs (several varieties!), canned beans, pickled tofu, and honey-preserved nuts all represented here.
My bottom line on this book is that it’s a necessary library addition for anyone interested in expanding their food preservation practice beyond the canning pot. It is clever, welcoming, well-written, and easy to use. I have a batch of the Cold-Cured Gravlax on page 110 going in my fridge right now and I found the recipe to be so approachable (that project is also why there’s a butter knife holding the pages of the book down. I’d had it splayed out on my counter just before going to take these pictures. After that treatment, it wouldn’t stay neatly closed for a couple of hours).
Disclosure: I received a free review copy of this book from the publisher. All thoughts and opinions remain my own.
Related Posts:
Cookbooks: Asian Pickles by Karen Solomon
Cookbooks: Can It, Bottle It, Smoke It
Cookbooks: Modern Pressure Canning


