
Marisa McClellan's Blog, page 21
August 21, 2018
Roasted Garlic Roma Tomato Sauce from Ball® Fresh Preserving Products
This post is sponsored by Ball® Fresh Preserving Products by Newell Brands.
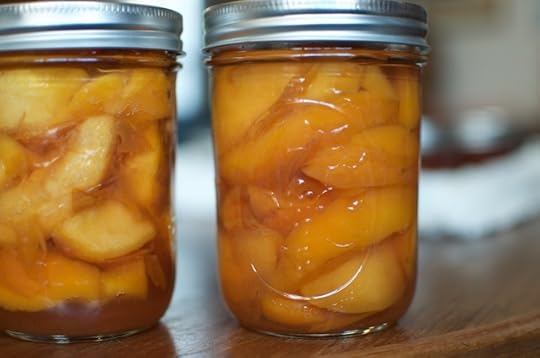
So far this summer, I’ve written three pairs of posts in partnership with my friends at Ball®Fresh Preserving Products by Newell Brands. In May, it was all about their Mixed Berry Jam and the Jammy Baked Oatmeal I made with it. In June, we focused in on Honey Cinnamon Pears and the Honey Cinnamon Pear Sorbet I turned them into. Last month, the starter recipe was Kosher Dill Pickle Spears (so crisp and tangy!) and the transformation was a batch of Pasta and Kosher Dill Pickle Salad.
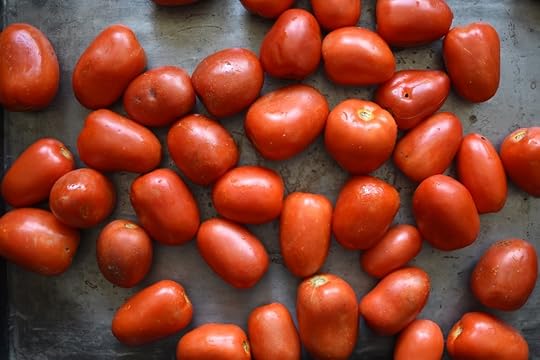
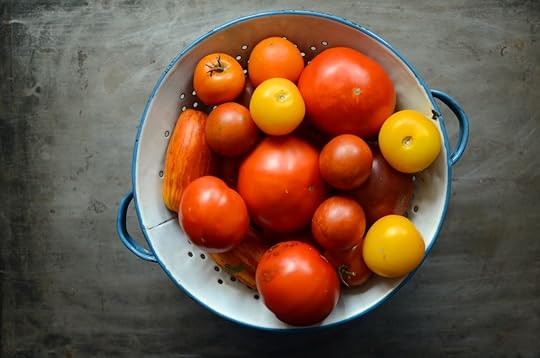
This month, we’re talking tomatoes. In my area, they are finally starting to show up at farmers markets with heady abundance. I am buying them 10 or 25 pounds at a time in order to put up enough various tomato products to get me through the year (my goal is to do enough tomato puree, whole peeled, and salsa to get me through to next August).
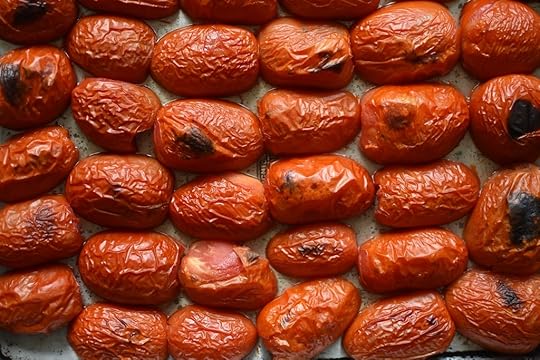
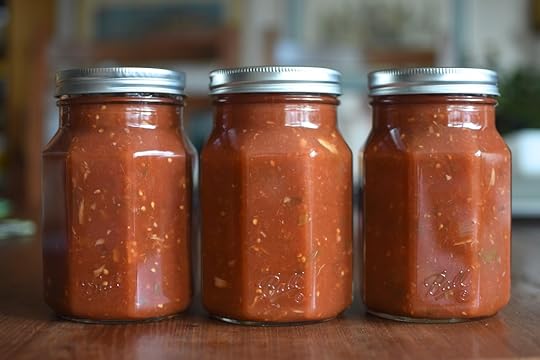
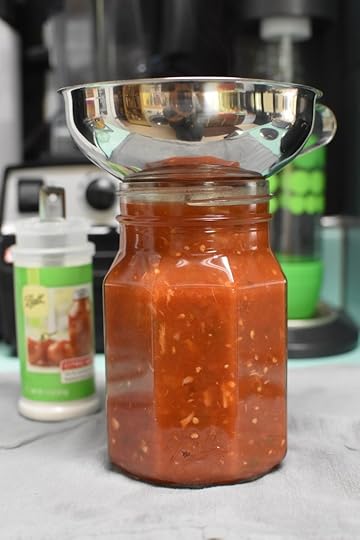
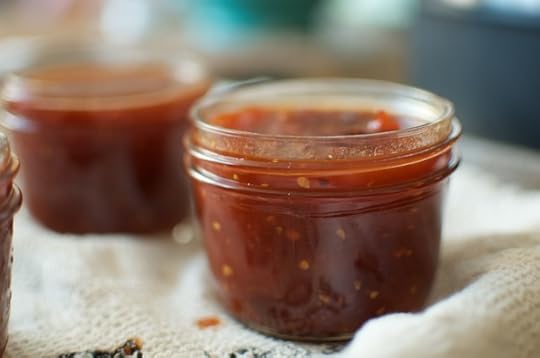
I am also going to make room for several more batches of this Roasted Garlic Roma Tomato Sauce from Ball® Fresh Preserving Products because it is super flavorful. This recipe uses a peeling technique that I’d heard about but never tried before. Instead of blanching the tomatoes in a large pot of water, you broil them (I cut mine in half prior to broiling so that I didn’t have to turn them)! It worked so well. The recipe says you can also do it on the grill, which would be a great way to keep all that heat out of the house.

Once the tomatoes are peeled, you squeeze out the seeds, chop them roughly and heap them in a pot (the tomatoes you see pictured above were just the peeled halves. I seeded and chopped after this).

Once the tomatoes are prepped, you add some chopped onion, three heads of roasted garlic, fresh basil and oregano, and a little salt. Heat to a low simmer and cook until thoroughly warmed through (I confess, I reduced mine a little as the tomatoes put off a good bit of water).
While the sauce heats, prepare a boiling water bath canner and three quart jars.
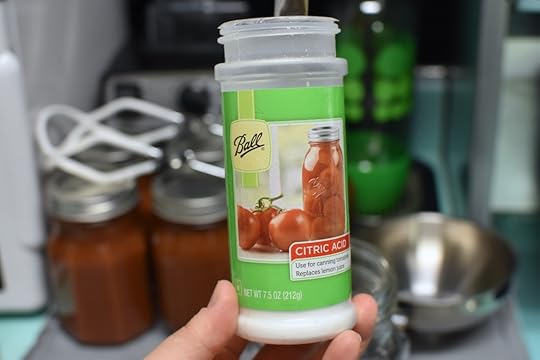
Once you judge that the sauce is done, remove one jar from the canner. Add 1/2 teaspoon citric acid (you could also use 2 tablespoons bottled lemon juice if you prefer), and funnel in some of the sauce, filling to 1/2 inch headspace. Stir with a wooden or plastic chopstick to remove any trapped air bubbles. Wipe the rim, apply a lid and ring, and place the jar back in the canner. Repeat with the remaining jars and sauce.
These jars are processed for 40 minutes at a full rolling boil (remember, if you live at elevation, you need to adjust your processing time accordingly). When the time is up, remove the lid, turn off the heat, and let the jars cool slowly in the canner. Once that time is up, remove the jars from the canner and let them cool on a folded kitchen towel. Once the jars are entirely cool, check them to ensure that the jars have sealed fully and completely.

This sauce is a great pantry builder, because it can be heated and served over pasta, polenta, or sauteed greens. I like to use it in combination with zucchini and eggplant, for a tasty summer vegetable braise. Check back for that recipe tomorrow!
Disclosure: This post is sponsored by Newell Brands as part of a compensated partnership. All thoughts and opinions are entirely my own.
Related Posts:
Summer Vegetable Braise with Roasted Garlic Roma Tomato Sauce
Honey Cinnamon Pear Sorbet
Honey Cinnamon Pears from Ball® Fresh Preserving Products


Vidalia Onion Relish
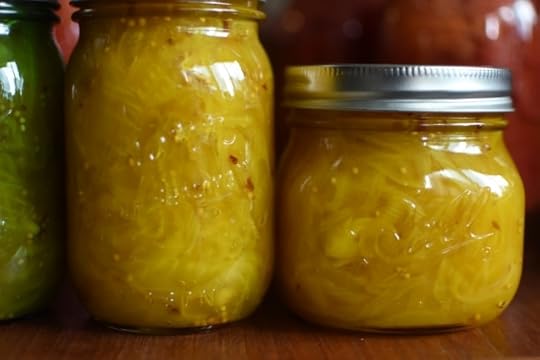
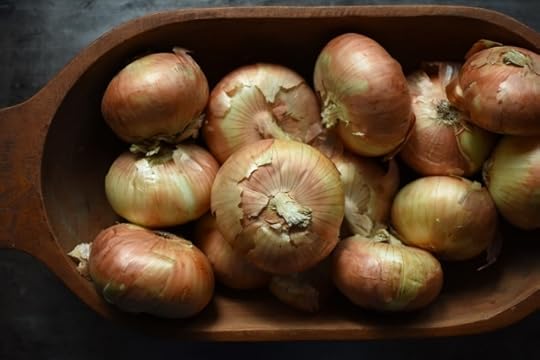
Back in June, a box of Vidalia onions arrived in the mail. I arranged them prettily in a wooden bowl and let them sit. While they’re less storage friendly than other onions, they were far less demanding than the berries and cherries that were tumbling through my kitchen. Each week, I’d look at that bowl and think to myself, “this week. This week I’ll make a batch of onion relish.”
Then, that week would fly by and I’d start the process over again.
However, last night it happened. I made a batch of Vidalia Onion Relish. And I did it live. I riffed on a recipe from the National Center for Home Food Preservation that I first learned about from Lyn at Preserving Now (I trust her implicitly when it comes to ingredients native to Georgia). I’d made it first a few years back and when those jars were gone, I knew I had to make it again.

My version is a fairly thick cut relish, so much so that one might even call it a pickle. Because I like to eat it alongside chicken sausage or on a post-Thanksgiving turkey sandwich, I think of it as a relish. To make it more like a true relish, you could use a grater blade on a food processor rather than a slicer blade, or a grinder attachment on stand mixer (or even an old school hand crank grinder). It’s really up to you.
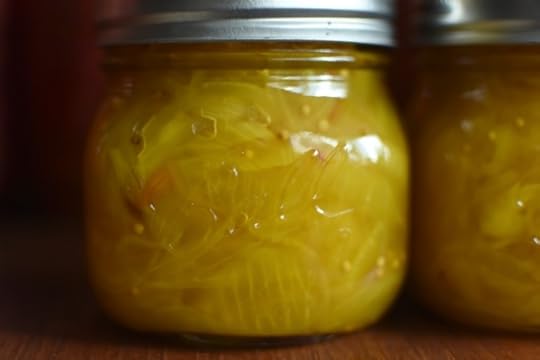
However you make it, this is one worth having in the pantry.
Print
Vidalia Onion Relish
Yield: makes 4 pints
Ingredients
5 pounds sweet onions
2 tablespoons sea salt
2 cups apple cider vinegar
1 cup granulated sugar
1 tablespoon mustard seeds
1 tablespoon red chili flakes
1/2 teaspoons turmeric
Instructions
Slice the onions into thin half moons using a slicing blade on a food processor. Put the onions in a large bowl and add the salt. Massage the salt into the onions and let it stand for 30 minutes.
When the time is up, pour the onions into a large colander and squeeze the onions to remove the liquid that the salt helped draw out.
While the onions drain, prepare a boiling water bath canner and 4 pint jars.
Combine onions, vinegar, sugar, and spices in a large pot. Bring the contents of the pot to a boil and boil for 15 to 20 minutes. You want the onions to soften, the liquid to thicken, and for the whole mess to settle and marry.
Pack the relish into your prepared jars and cover with liquid, leaving 1/2 inch headspace.
Vigorously remove the air bubbles. Wipe the rims, apply the lids and rings, and process in a boiling water bath canner for 15 minutes.
When the time is up, remove the lid from the pot and turn off the heat. Let the jars stand in the cooling canner for an additional five minutes. When that time is up, remove the jars and set them on a folded kitchen towel to cool. When the jars have cooled enough that you can comfortably handle them, check the seals. Sealed jars can be stored at room temperature for up to a year. Any unsealed jars should be refrigerated and used promptly.
4.29
http://foodinjars.com/2018/08/vidalia-onion-relish/
Related Posts:
Check the recipe index for more tasty preserves!
August 19, 2018
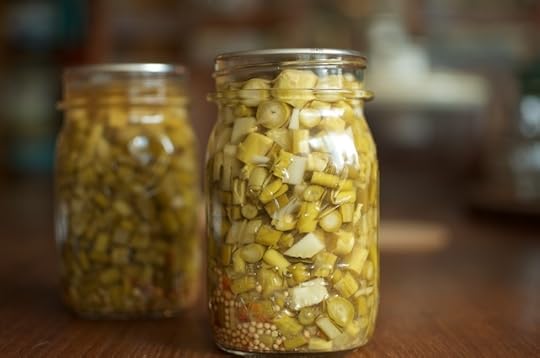
Corn Relish with Turmeric
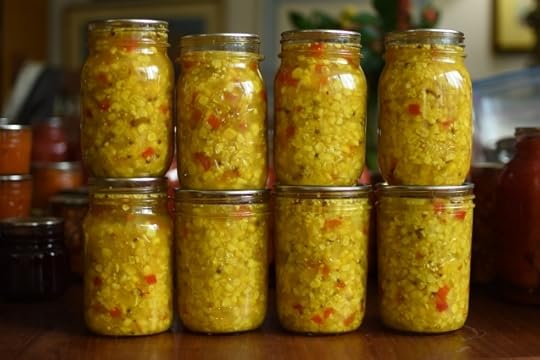
Corn relish has never really been on my radar. I’ve always been of the mind that if I was going to make a corn condiment, I’d make corn salsa and call it done. But this year, I kept seeing relish recipes and the idea of making one started to make sense. Then, when I came home with two dozen ears of corn, it became an inevitability.
I used Ball’s recipe on freshpreserving.com as a starting point, and made just a few (safe!) tweaks to bring it in line with my personal preferences.
I’m really pleased with the result. It’s tangy, sweet, and tastes gorgeously of summer. While I love my corn salsa and will continue to make multiple batches each summer, I think I’ve got a second must-make corn condiment on my personal list.
Print
Corn Relish with Turmeric
Yield: makes 4 pints
Ingredients
6 cups uncooked corn kernels
2 cups cider vinegar
1 cup chopped onion
1 cup chopped red bell pepper
1 cup sugar
1 tablespoon mustard seeds
1 tablespoon coriander seeds
1 tablespoon turmeric
1 tablespoon salt
1 teaspoon red chili flakes
1/2 teaspoon ground black pepper
Instructions
Prepare a boiling water bath canner and 4 pint jars.
In a large pot, combine the corn, vinegar, onion, red bell pepper, sugar, mustard, coriander, turmeric, salt, chili flakes, and black pepper.
Bring to a boil and cook for three minutes, to ensure things are piping hot and heated evenly.
Funnel the relish into the prepared jars, taking care to ensure that you have an even balance of solids and liquid.
Wipe the rims, apply the lids and rings, and process in a boiling water bath canner for 15 minutes.
When the time is up, turn the heat off, remove the lid from the pot, and let the jars cool slowly in the water. After five minutes of slow cooling, remove the jars and set them on a folded kitchen towel to cool.
When the jars have cooled enough that you can comfortably handle them, check the seals. Sealed jars can be stored at room temperature for up to a year. Any unsealed jars should be refrigerated and used promptly.
4.29
http://foodinjars.com/2018/08/corn-relish-with-turmeric/
Related Posts:
Hot Pepper Hoagie Relish
CSA Cooking: Zucchini, Fennel, and Green Pepper Relish
July Can Jam: Cucumber Pepper Relish
August 17, 2018
EcoJarz Relaunches Fermentation Kit
The folks at EcoJarz are some of hardest working jar accessory makers in the business. Not only do they use the highest quality food grade stainless steel and silicone, but they’re also always striving to make their products better and more useful.
For instances, take their newly reissued Fermenter Kit. They’ve offered such a thing for some time, but this latest version is best ever. It includes a Wide-Mouth Stainless Steel Jar Band, a Wide-Mouth Stainless Steel Lid with Silicone Gasket and Silicone Grommet, a Three-Piece Airlock, a Cotton Cloth for covering the jar and a Fermenting Guide. All you need to do is add a jar and some produce!
If you like jars, but fermentation isn’t for you, consider the ToGoJar Travel Set. It’s plastic jar coupler that allows you to carry your lunch and a snack to work without fear of breakage. The set comes with a mesh cozy and a travel bag, for easy transportation.
Disclosure: EcoJarz is a Food in Jars sponsor. All thoughts and opinions expressed here are entirely my own. Remember that the support of sponsors is critical to the success and operation of this site. You like what you read here, please consider supporting the sponsors who help make it all possible.
Related Posts:
October Sponsors: Cuppow, Fillmore Container, EcoJarz, Mason Jar Lifestyle, CanningCrafts, and Mrs. Wages
September Partners: Fillmore Container, EcoJarz, McDonald Paper, and Mason Jar Lifestyle
August Sponsors: Fillmore Container, EcoJarz, McDonald Paper, and Mason Jar Lifestyle
EcoJarz Relaunches Fermentation Kit

The folks at EcoJarz are some of hardest working jar accessory makers in the business. Not only do they use the highest quality food grade stainless steel and silicone, but they’re also always striving to make their products better and more useful.
For instances, take their newly reissued Fermenter Kit. They’ve offered such a thing for some time, but this latest version is best ever. It includes a Wide-Mouth Stainless Steel Jar Band, a Wide-Mouth Stainless Steel Lid with Silicone Gasket and Silicone Grommet, a Three-Piece Airlock, a Cotton Cloth for covering the jar and a Fermenting Guide. All you need to do is add a jar and some produce!
If you like jars, but fermentation isn’t for you, consider the ToGoJar Travel Set. It’s plastic jar coupler that allows you to carry your lunch and a snack to work without fear of breakage. The set comes with a mesh cozy and a travel bag, for easy transportation.
Disclosure: EcoJarz is a Food in Jars sponsor. All thoughts and opinions expressed here are entirely my own. Remember that the support of sponsors is critical to the success and operation of this site. You like what you read here, please consider supporting the sponsors who help make it all possible.
Related Posts:
October Sponsors: Cuppow, Fillmore Container, EcoJarz, Mason Jar Lifestyle, CanningCrafts, and Mrs. Wages
August Sponsors: Fillmore Container, EcoJarz, McDonald Paper, and Mason Jar Lifestyle
July Sponsors: Fillmore Container, EcoJarz, McDonald Paper, and Mason Jar Lifestyle
August 15, 2018
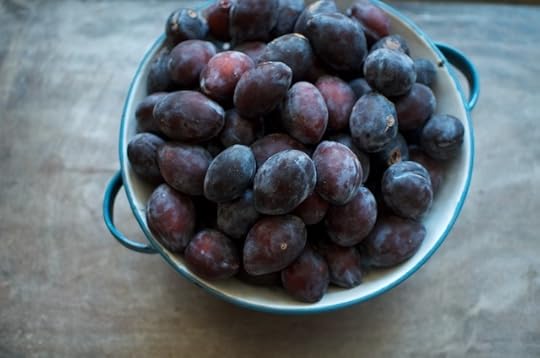
Plum Ginger Sauce
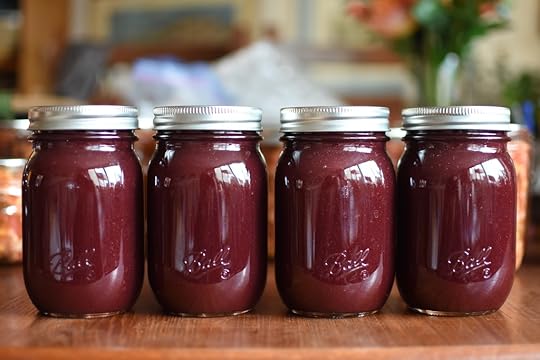
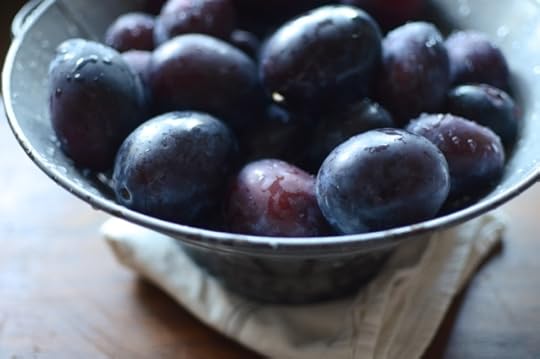
A couple weeks ago, I taught my annual weekend-long workshop up at the Omega Institute in Rhinebeck, NY. I took nearly 150 pounds of produce up with me for the class and came home with just 15 pounds of stone fruit (it was a true canning achievement). The peaches, nectarines, and just a few plums went into the stone fruit drizzle I posted about last week.
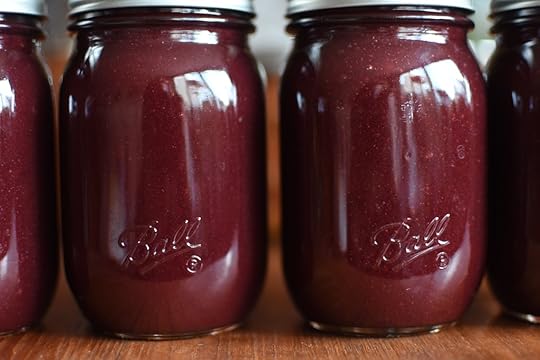
I divided the remaining ten pounds of plums into two colanders. One of the piles became a slightly larger batch of the spiced plum jam I posted last year. The second pile became this plum ginger sauce (though really, you could also call it a drizzle if you prefer).
The finished sauce is a good one for savory applications. It is a tasty player in marinades. Add a squirt of sriracha and use it as a dip for salad rolls. And it makes a really great sweet addition to vinaigrettes.
Print
Plum Ginger Sauce
Yield: makes 4 pints
Ingredients
5 pounds plums, pitted
3 cups sugar
2 tablespoons grated fresh ginger
Instructions
Prepare a boiling water bath canner and four pint jars.
Pit and roughly chop the plums. Place them in a low, wide, non-reactive pan and add the sugar and ginger.
Place pan over medium-high heat. Bring to a boil and cook, stirring regularly, until the fruit softens and had reduced by about half.
When the sauce is finished cooking, use an immersion blender to puree it smooth.
Funnel jam into prepared jars. Wipe rims, apply lids and rings, and process in a boiling water bath canner for 10 minutes.
When time is up, remove jars from canner and let them cool on a folded kitchen towel.
When jars are cool enough to handle, check the seals. All sealed jars are shelf stable for up to one year. Any unsealed jars should be refrigerated and used promptly.
4.29
http://foodinjars.com/2018/08/plum-ginger-sauce/
Related Posts:
Check the recipe index for more tasty preserves!
August 14, 2018
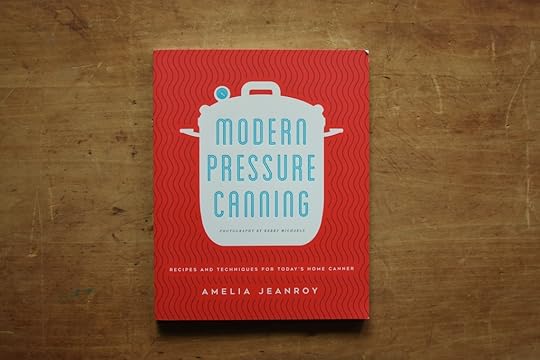
Cookbooks: Modern Pressure Canning

For years now, I have been wishing that someone would write a cookbook that would expand the boundaries of what we know about pressure canning. A book that would make it possible to preserve more things than we are currently able. With Modern Pressure Canning by Amelia Jeanroy, many of my hopes have been realized.
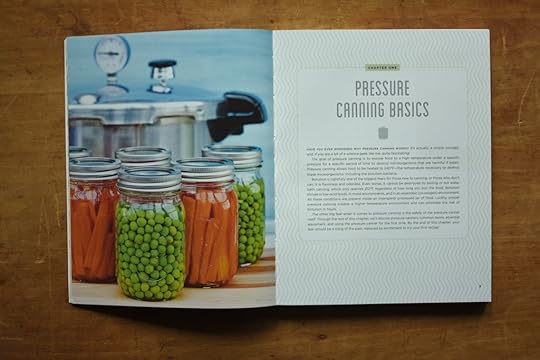
This book does a number of things very well. It demystifies the process of pressure canning and makes it accessible to canners of all stripes. It offers up a full range of pressure canning possibilities. And it includes a recipe for bacon jam that can be processed, which is something I’ve often been asked about.
One thing that surprises me about this book is that it includes a number of recipes that could be processed just as effectively in a boiling water bath canner as a pressure canner. While the actual processing times are shorter than in a water bath, the time necessary to bring the canner up to pressure and then bring it back down means that there aren’t major time savings when processing things like canned peaches or cranberries in a pressure canner.
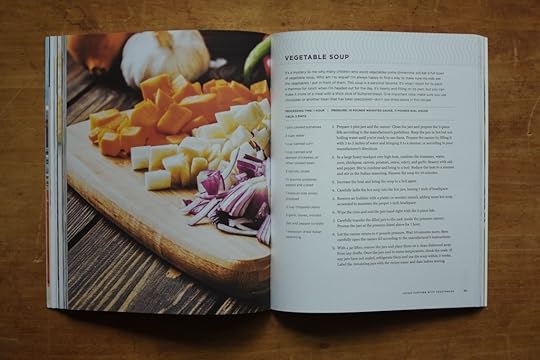
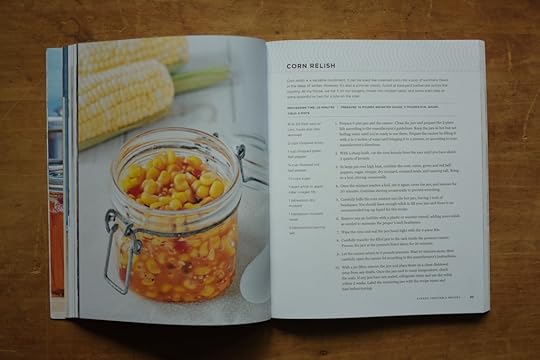
Still, there’s much in here that I’m excited to make. The corn relish pictured above is something I’ll be trying this summer (perhaps even this week, if I can get a good deal on corn). And I can’t wait to cook up that vegetable soup for easy lunches and dinners.

I do wish that there were some dips or spreads in the book, but I understand why there aren’t. Because there aren’t tested recipes from the National Center for Home Food Preservation that enable these sorts of things, there wasn’t anything for the author to work with. And doing the kind of scientific testing necessary to forge truly new ground would have been prohibitively expensive. Still, a girl can dream.
The bottom line on this book is that it is an excellent resource for home canners. If you’re looking to get more out of your pressure canner, you should treat yourself to a copy immediately.
Related Posts:
Cookbook: Jam Session
Cookbooks: Pretty Simple Cooking
Cookbooks: Southern From Scratch
August 13, 2018
Cookbooks: Modern Pressure Canning
For years now, I have been wishing that someone would write a cookbook that would expand the boundaries of what we know about pressure canning. A book that would make it possible to preserve more things than we are currently able. With Modern Pressure Canning by Amelia Jeanroy, many of my hopes have been realized.

This book does a number of things very well. It demystifies the process of pressure canning and makes it accessible to canners of all stripes. It offers up a full range of pressure canning possibilities. And it includes a recipe for bacon jam that can be processed, which is something I’ve often been asked about.

One thing that surprises me about this book is that it includes a number of recipes that could be processed just as effectively in a boiling water bath canner as a pressure canner. While the actual processing times are shorter than in a water bath, the time necessary to bring the canner up to pressure and then bring it back down means that there aren’t major time savings when processing things like canned peaches or cranberries in a pressure canner.

Still, there’s much in here that I’m excited to make. The corn relish pictured above is something I’ll be trying this summer (perhaps even this week, if I can get a good deal on corn). And I can’t wait to cook up that vegetable soup for easy lunches and dinners.

I do wish that there were some dips or spreads in the book, but I understand why there aren’t. Because there aren’t tested recipes from the National Center for Home Food Preservation that enable these sorts of things, there wasn’t anything for the author to work with. And doing the kind of scientific testing necessary to forge truly new ground would have been prohibitively expensive. Still, a girl can dream.

The bottom line on this book is that it is an excellent resource for home canners. If you’re looking to get more out of your pressure canner, you should treat yourself to a copy immediately.
Related Posts:
Cookbook: Jam Session
Cookbooks: Pretty Simple Cooking
Cookbooks: Southern From Scratch
Good Things to Preserve in Late Summer
One of the funny things that happens to me as a result of writing this blog is that I rarely allow myself to repeat preserve recipes. Once I’ve mastered a particular preserve and have shared it here or in a book, I typically move on. The result of this continual search for the new and novel means that I often leave some truly delicious things on the table.
To combat this tendency to forget the successes of the past, I thought I’d do some archive diving and shine a light on some of my favorite late summer preserves.

Smoky, spicy skillet tomato jam (smoked paprika is the magic ingredient here)
Roasted pizza sauce (I made this one with grape tomatoes in the post, but any sweet, meaty tomato will do the job)
Spicy heirloom tomato chutney (this one is magical dolloped alongside a simple grain bowl)
Tomato soup concentrate (so much better than store bought)

Peach jam with brown sugar and bourbon (people love getting this one in a holiday gift basket)
Peach habanero hot sauce (nothing perks up grilled meat better)
Gingery peach butter (I love using this one as the base in a batch of granola)
Peach mostarda (mustard seeds and a pinch of cayenne combine to create something that goes gorgeously with cheese)
Indiana peach chutney (a vintage recipe updated to be less work but no less delicious)
Spiced plum jam (this one tastes like childhood to me)
Plum conserve with golden raisins and toasted walnuts (weird but so good)
Slow cooker brown sugar plum butter (most the work is hands off!)
Yellow plum jam with vanilla (that color!)
Spiced plum butter (also known as Pflaumenmus)
Pickled Italian plums (just enough vinegar to make them wonderfully tangy)
Spicy pickled green beans (first cousin to classic dilly beans)
Pickled fairytale eggplant (sadly, the color doesn’t keep more than 3-4 months)
Pickled green tomatoes (this one is a fridge pickle, but is worth the real estate)
Small batch pickled okra (one of my all-time favorite pickles)
Small batch bread and butter pickles (so good with pulled chicken or pork)

What are your favorite recipes for this end-of-season push? I always love hearing about your go-to recipes!
Related Posts:
Small Batch: Mixed Stone Fruit Jam
Preserving with Mrs. Wages Pickled Okra and Vegetables Mix
Indiana Peach Chutney Recipe
August 12, 2018
Good Things to Preserve in Late Summer

One of the funny things that happens to me as a result of writing this blog is that I rarely allow myself to repeat preserve recipes. Once I’ve mastered a particular preserve and have shared it here or in a book, I typically move on. The result of this continual search for the new and novel means that I often leave some truly delicious things on the table.
To combat this tendency to forget the successes of the past, I thought I’d do some archive diving and shine a light on some of my favorite late summer preserves.
Smoky, spicy skillet tomato jam (smoked paprika is the magic ingredient here)
Roasted pizza sauce (I made this one with grape tomatoes in the post, but any sweet, meaty tomato will do the job)
Spicy heirloom tomato chutney (this one is magical dolloped alongside a simple grain bowl)
Tomato soup concentrate (so much better than store bought)
Peach jam with brown sugar and bourbon (people love getting this one in a holiday gift basket)
Peach habanero hot sauce (nothing perks up grilled meat better)
Gingery peach butter (I love using this one as the base in a batch of granola)
Peach mostarda (mustard seeds and a pinch of cayenne combine to create something that goes gorgeously with cheese)
Indiana peach chutney (a vintage recipe updated to be less work but no less delicious)
Spiced plum jam (this one tastes like childhood to me)
Plum conserve with golden raisins and toasted walnuts (weird but so good)
Slow cooker brown sugar plum butter (most the work is hands off!)
Yellow plum jam with vanilla (that color!)
Spiced plum butter (also known as Pflaumenmus)
Pickled Italian plums (just enough vinegar to make them wonderfully tangy)

Spicy pickled green beans (first cousin to classic dilly beans)
Pickled fairytale eggplant (sadly, the color doesn’t keep more than 3-4 months)
Pickled green tomatoes (this one is a fridge pickle, but is worth the real estate)
Small batch pickled okra (one of my all-time favorite pickles)
Small batch bread and butter pickles (so good with pulled chicken or pork)
What are your favorite recipes for this end-of-season push? I always love hearing about your go-to recipes!
Related Posts:
Small Batch: Mixed Stone Fruit Jam
Preserving with Mrs. Wages Pickled Okra and Vegetables Mix
Indiana Peach Chutney Recipe


