
Marisa McClellan's Blog, page 25
June 4, 2018
Learn to Can with The Domestic Wildflower
One of the things I’ve really come to understand in my years of teaching people how to can is that there are nearly as many learning styles out there as there are people. Everyone receives and integrates information in different ways. And so, for some of you the tutorials and recipes I offer on this site is enough. But I am quite certain that there’s a large population of you who would like their information presented differently.
For you, might I suggest an online class with Jenny, The Domestic Wildflower! She has put together a robust series of online courses designed to help you learn to can and then take those skills to the next level. For beginners, the Start Canning workshop is perfect. For those of you looking to expand your skills, check out her Steam Canning class. And anyone looking to get ready for tomato season should check out her Canning Tomatoes bundle.
If one of the classes appeal to you, make sure to use the code FOODINJARS50 to get 50% off!
Disclosure: Some of the links in this post are affiliate links.
Related Posts:
Check the recipe index for more tasty preserves!


June 1, 2018
June Sponsors: Fillmore Container, EcoJarz, McDonald Paper, Mason Jar Lifestyle, and CanningCrafts
Happy June, dear readers! It’s the start of the month and that means that it’s time to thank the businesses that help make this site possible. Please do show them that you appreciate their support with your time and attention!
Lancaster, PA-based and family-owned Fillmore Container are next! They sell all manner of canning jars, lids, and other preservation gear. As you gear up for this year’s canning season, make sure to check out their blog post, filled with tips on how to get ready for the summer abundance.
Our friends over at EcoJarz are another stalwart sponsor. They make an array of products designed to fit on top of mason jars, including cheese graters, coffee brewers, and stainless steel storage lids. I’m a huge fan of their smoothie lover’s gift set for frosty summer shakes and smoothies!
Back for another month is McDonald Paper & Restaurant Supply. Based in Brooklyn, they are open to the public and sell all manner of culinary supplies. Restaurant supply stores are a great way to get affordable, durable kitchen gear (including jars!)
Mason Jar Lifestyle is a one-stop shopping site for all the jar lovers out there. They sell all manner of mason jar accessories and adaptors. If you’re in the market for lids, straws, sprouting lids, fermentation weights, airlocks, tea light converters, cozies, they are there for you.
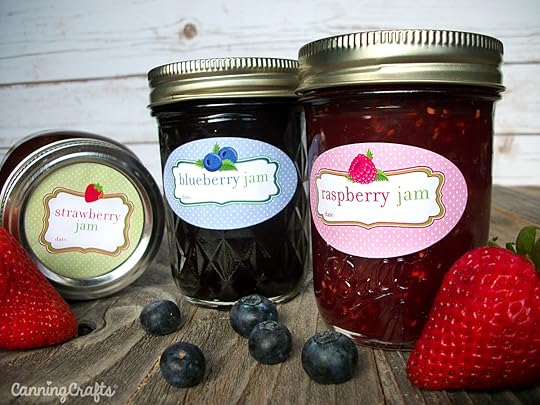
Next up is CanningCrafts. Shop owner Alison sells an array of ready made and custom mason jar labels for all your various preserves, syrups, and backyard honey. I love her Cute Fruit Jam Jar Collection for the jams I’m making to gift and share. Make sure to subscribe to the CanningCrafts newsletter, because you’ll get a 10% off coupon code!
And if your company, shop, or family business is interested in reaching the food-loving and engaged Food in Jars audience, you can find more details here. Leave a comment on this post or drop me a note to learn more!
Related Posts:
May Sponsors: Cuppow, Fillmore Container, EcoJarz, McDonald Paper, Mason Jar Lifestyle, and CanningCrafts
June Sponsors: Cuppow, Fillmore Container, EcoJarz, Mason Jar Lifestyle, CanningCrafts, and Mrs. Wages
April Sponsors: Cuppow, Fillmore Container, EcoJarz, Mason Jar Lifestyle, and CanningCrafts
May 24, 2018
Jammy Baked Oatmeal with Mixed Berry Jam
This post is sponsored by Ball® Fresh Preserving Products by Newell Brands.
Yesterday, I showed you how to make the Mixed Berry Jam on FreshPreserving.com. This easy, small batch of jam is versatile, flexible, and really delicious. You can use it any number of ways. Stirred into oatmeal! On peanut butter toast! In sparkling water! Dolloped in thumbprint cookies! Whisked into vinaigrette!
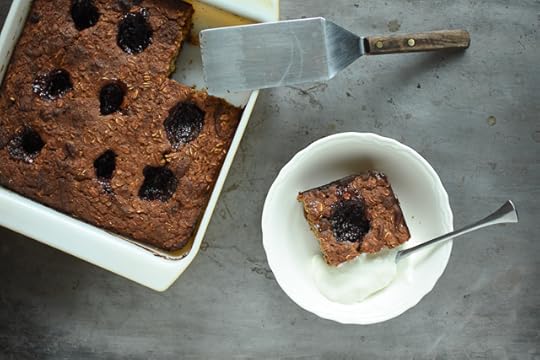
If you are unmoved by those suggestions, I’ve got one more for you. Baked oatmeal. Now, I realize that at first blush, baked oatmeal doesn’t sound like the most exciting dish ever. But here’s the thing. It’s a workhorse. A day saver. A morning mood lifter. Packed with whole grains, applesauce, and a couple eggs for protein and binding. It’s tasty, portable, and easy.
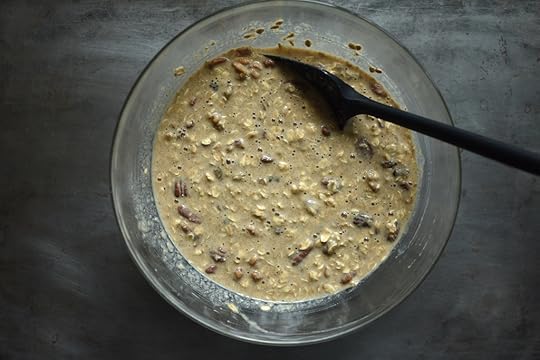
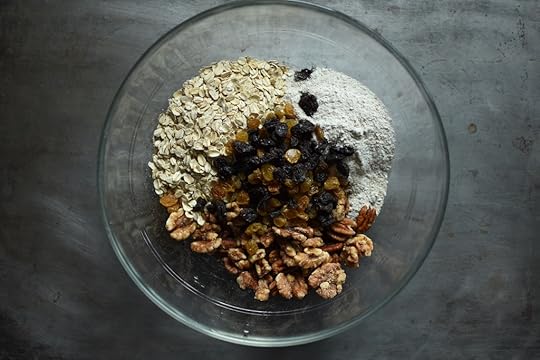
Another truly excellent thing about baked oatmeal is that it’s really easy to make. All you need is a bowl, a two-cup measuring cup, and square baking pan (greased with cooking spray or a small slick of neutral oil). I’ve included weight measurements so if you have a scale, you don’t have to dirty additional measuring cups.
You start by measuring out rolled oats, whole wheat flour (if you’re gluten-free, you can swap in your GF flour of choice), toasted nuts, and raisins (or any other raisin-sized dried fruit). Add some cinnamon (cardamom is another good option, if you prefer), baking powder (to help make it lighter), and salt.
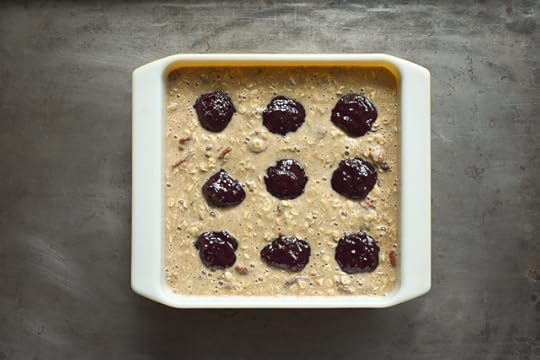
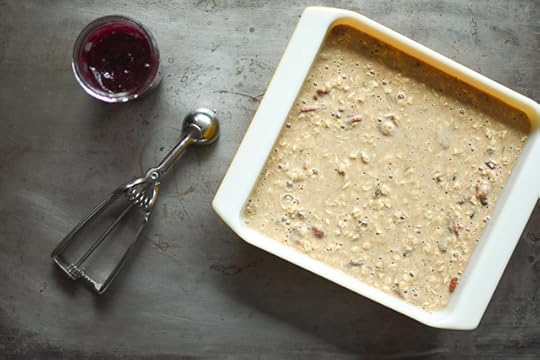
Then, in the measuring cup, portion out milk, applesauce, eggs, and vanilla extract. Whisk, add the wet to the dry, pour it into your prepared baking pan, and add dollops of jam in a grid pattern (like a tic tac toe board).
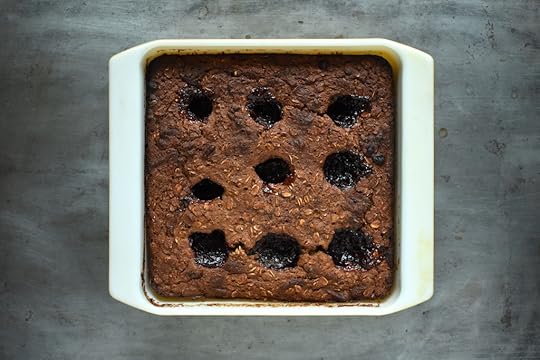
The oatmeal is baked in a hot (375F) oven for 35 to 40 minutes, until the middle has lost its wobble, the edges start to pull away from the corners of the pan, and the puddles of jam sink slightly. You can serve it warm (perfect for mellow weekend brunches) or once it’s cooled, you can portion it out into containers for the work week.
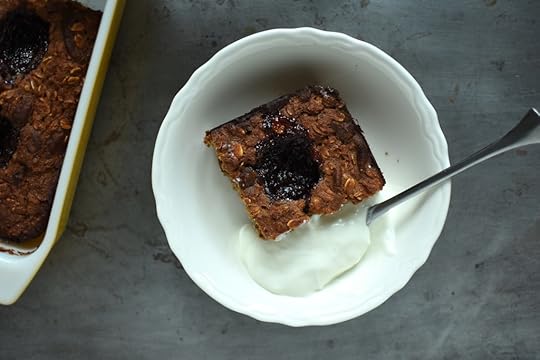
I like to eat it straight from the fridge with a couple spoonfuls of plain yogurt, or warmed up with a little milk. Full recipe below!
Print
Jammy Baked Oatmeal with Mixed Berry Jam from Ball® Fresh Preserving Products by Newell Brands
Yield: 8-9
Ingredients
cooking spray or neutral oil
1 ½ cups/135 g rolled oats
1 cup/110 g whole wheat flour
1 cup/110 g chopped pecans, walnuts, or almonds, lightly toasted
½ cup/85 g raisins
1 teaspoon baking powder
1 teaspoon cinnamon
½ teaspoon salt
1¼ cups/300 ml milk
1/2 cup/120 ml water
2 eggs
1 cup/240 ml applesauce
1 teaspoon vanilla extract
1 cup Mixed Berry Jam
Instructions
Preheat the oven to 375°F/190°C. Grease an 8 x 8 in/20 x 20 cm baking dish.
In a bowl, combine the rolled oats, whole wheat flour, nuts, raisins, baking powder, cinnamon, and salt.
In a spouted measuring cup combine the milk, water, eggs, applesauce, and vanilla extract. Whisk together.
Pour the wet ingredients into the bowl with the oat mixture. Stir to combine.
Scrape the batter into the prepared baking dish. Bake in a preheated oven the edges begin to pull away from the pan and the top is golden brown, about 40 to 45 minutes.
Serve warm or chilled.
4.26
http://foodinjars.com/2018/05/jammy-baked-oatmeal-with-mixed-berry-jam/
Related Posts:
Check the recipe index for more tasty preserves!
May 23, 2018
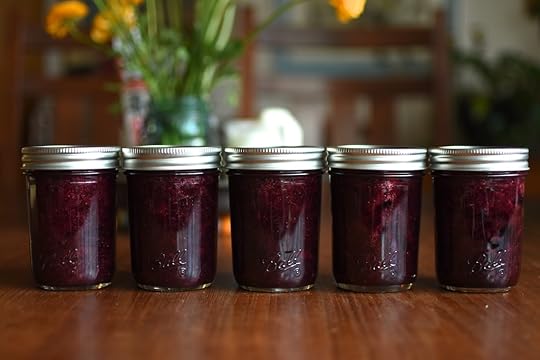
Mixed Berry Jam from Ball® Fresh Preserving Products
This post is sponsored by Ball® Fresh Preserving Products by Newell Brands.
Nearly every summer since 2012, I’ve been issued a preserving challenge by my friends at Ball®Fresh Preserving Products by Newell Brands. Some years, they’ve asked me to develop a few new canning recipes. Other years, I’ve trekked to New York or Indiana to offer canning demos. This year, I’m really excited because they’ve given me a handful of their most popular recipes and asked me to create new ways to use them (a concept that’s much like my upcoming book!).

So from now until September, once a month I’ll be sharing my process for making the preserve and then unveiling a recipe that transforms it into something new and delicious. For this first month, the preserve was Mixed Berry Jam (I preserved it in some of the Ball® Smooth Sided Half-Pint Jars pictured above and available for purchase here. These are the best jars for labeling!).
Right off the bat, I was delighted with their pick of recipe. It’s a relatively small batch, with a short, simple ingredient list. I also know berry jams to be really versatile, so I knew I’d be able to make something interesting with it.
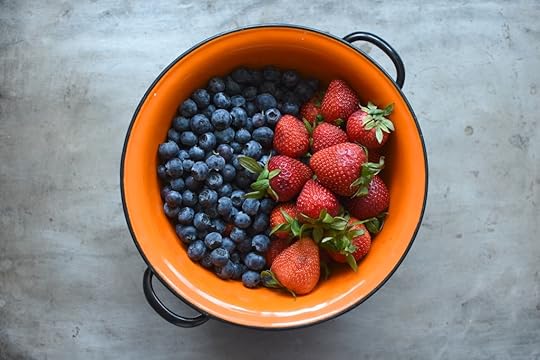
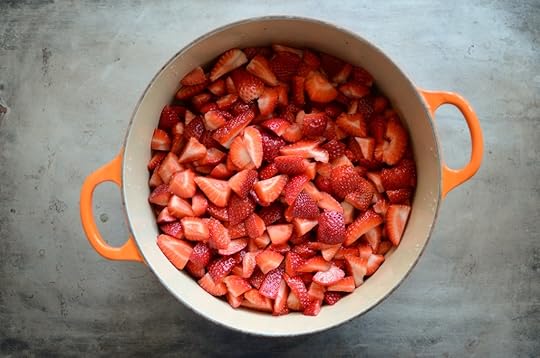
You start by washing and mashing enough fruit to yield 4 cups. For me, this wound up being about 1 3/4 pounds fruit (I used single 1 pound package of strawberries, and 1 1/2 clamshells of blueberries).
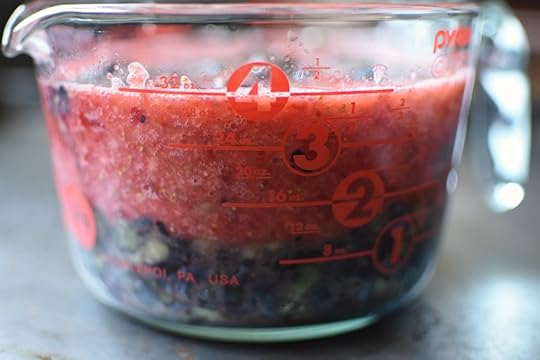
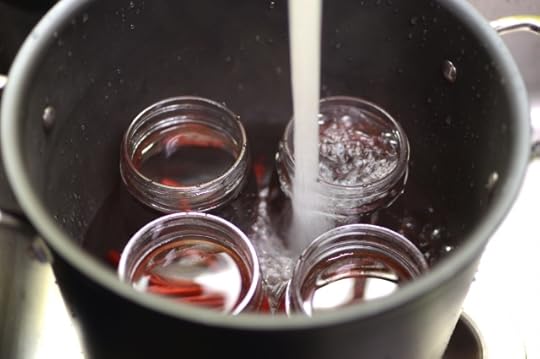
You want to make sure you have your jars warming and the lids washed before you start cooking the jam, because the cook time is quite short and you do want the jars to be ready for you when you’re ready for them.
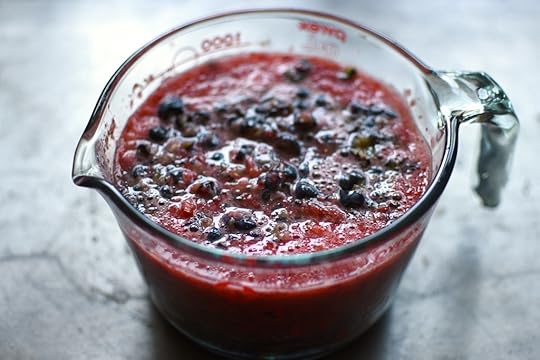
Once the berries are well-mashed, they get scraped into a large pan. You add the pectin powder (4 1/2 tablespoons), stir well to combine and bring the fruit to a boil, stirring constantly.
Always take care when moving pots of hot jam!
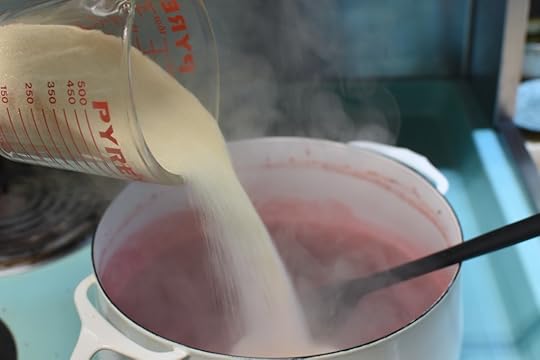
Once the fruit is boiling madly, you stream in the sugar and stir to combine. Bring that to a rapid boil and cook for just a minute longer. Once the time is up, you pull the pot from the stove. As it starts to cool from the boiling point, you should see visible signs of set, both on the spatula and the walls of the pot.

Then, working one at a time, fill each jar to 1/4 inch headspace, wipe the rim clean with a damp cloth, and apply a new, clean lid and ring. When all jars are full, process them in a boiling water bath canner for ten minutes (adjusting your processing time for altitude, if necessary).
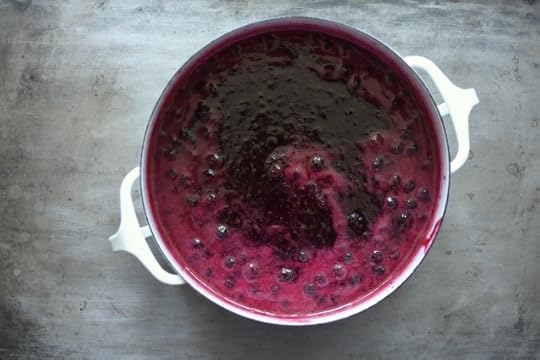
The finished jam is well-set, brightly flavored, and gorgeously colored. Check in tomorrow to discover what I did with it (hint: It’s something you can make on the weekend and eat for breakfast all week long!).
Disclosure: This post is sponsored by Newell Brands as part of a compensated partnership. All thoughts and opinions are entirely my own.
Related Posts:
Sponsored Post: Meet McDonald Paper & Restaurant Supplies
Turkey Party Meatballs with Habanero Apricot Jelly Glaze
Triple Bean and Rice Soup Mix
Mixed Berry Jam from Ball Canning
This post is sponsored by Ball® Fresh Preserving Products by Newell Brands.
Nearly every summer since 2012, I’ve been issued a preserving challenge by my friends at Ball®Fresh Preserving Products by Newell Brands. Some years, they’ve asked me to develop a few new canning recipes. Other years, I’ve trekked to New York or Indiana to offer canning demos. This year, I’m really excited because they’ve given me a handful of their most popular recipes and asked me to create new ways to use them (a concept that’s much like my upcoming book!).
So from now until September, once a month I’ll be sharing my process for making the preserve and then unveiling a recipe that transforms it into something new and delicious. For this first month, the preserve was Mixed Berry Jam (I preserved it in some of the Ball® Smooth Sided Half-Pint Jars pictured above and available for purchase here. These are the best jars for labeling!).
Right off the bat, I was delighted with their pick of recipe. It’s a relatively small batch, with a short, simple ingredient list. I also know berry jams to be really versatile, so I knew I’d be able to make something interesting with it.
You start by washing and mashing enough fruit to yield 4 cups. For me, this wound up being about 1 3/4 pounds fruit (I used single 1 pound package of strawberries, and 1 1/2 clamshells of blueberries).
You want to make sure you have your jars warming and the lids washed before you start cooking the jam, because the cook time is quite short and you do want the jars to be ready for you when you’re ready for them.
Once the berries are well-mashed, they get scraped into a large pan. You add the pectin powder (4 1/2 tablespoons), stir well to combine and bring the fruit to a boil, stirring constantly.
Always take care when moving pots of hot jam!
Once the fruit is boiling madly, you stream in the sugar and stir to combine. Bring that to a rapid boil and cook for just a minute longer. Once the time is up, you pull the pot from the stove. As it starts to cool from the boiling point, you should see visible signs of set, both on the spatula and the walls of the pot.
Then, working one at a time, fill each jar to 1/4 inch headspace, wipe the rim clean with a damp cloth, and apply a new, clean lid and ring. When all jars are full, process them in a boiling water bath canner for ten minutes (adjusting your processing time for altitude, if necessary).
The finished jam is well-set, brightly flavored, and gorgeously colored. Check in tomorrow to discover what I did with it (hint: It’s something you can make on the weekend and eat for breakfast all week long!).
Disclosure: This post is sponsored by Newell Brands as part of a compensated partnership. All thoughts and opinions are entirely my own.
Related Posts:
Sponsored Post: Meet McDonald Paper & Restaurant Supplies
Turkey Party Meatballs with Habanero Apricot Jelly Glaze
Triple Bean and Rice Soup Mix
May 22, 2018
Upcoming Classes: Hillsdale General Store on June 2
Here in the Northeast, the canning season is finally starting to get going. This means that it’s also time for me to hit the road and start teaching classes.
On Saturday, June 2, you’ll find me teaching at the Hillsdale General Store in Hillsdale, NY (convenient for folks in the Hudson Valley and the Berkshires) in one of their Home Chef classrooms. From 11 am to 1:30 pm, I’ll be teaching a class on boiling water bath canning in which we’ll make both strawberry jam and strawberry chutney. You can register for that class here.
From 2:30 to 4 pm, I’ll be teaching a class focused on pressure canning. We’ll make and preserve a batch of onion jam with rosemary and balsamic. This class is a great one to take if you’ve been curious about pressure canning, but you’re a little scared. I’ll walk you through the steps and will send you home feeling empowered to safely preserve low acid foods. You can register for this class here.
Related Posts:
Summer Class Spotlight – HGS Home Chef
Upcoming Classes & Events: April, May, and June 2017
Upcoming Events: Fante’s! Terrain! Morris Arboretum!
May 21, 2018
Giveaway: Printable Jar Labels from Worldlabel
Looking for affordable, beautiful labels for your canning jars that you can easily customize and print at home? Look no further than Worldlabel!

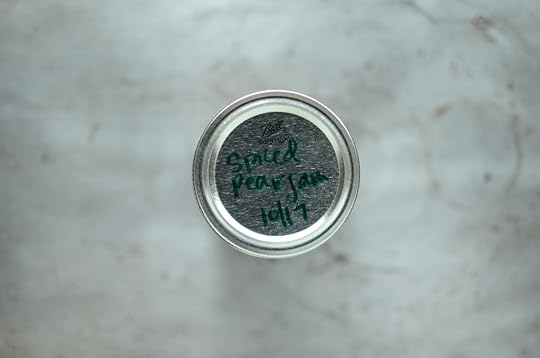
I confess that when it comes to labeling jars, I can be a bit lazy. My first line of labeling defense is typically a quick scrawl with a permanent marker. I write the contents of the jar and the month and year it was made across the top of the lid. This is done to ensure that I keep things like tomato jam separate from the pizza sauce (two preserves that look nearly identical once in the jar).
Often, my first act of labeling is also my last. I’ve been known to give these unadorned jars to my cousins and neighbors without a second though. However, as I move further into my life as a canner (this is my 11th active canning season! The mind boggles!), I find that I do really like having the option of giving people preserves with more detail on the label.
I’ve also been considering the possibility of making limited edition batches to sell, which would require nicer labeling that I currently can muster.
Happily, just as I was pondering ways to up my label game, I got an email from the folks at Worldlabel. They sell a huge assortment of blank labels that can be endlessly customized. They’ve got lots of templates that you can use to design your own labels, or you can use their assortment of free, pre-designed printable label templates.

I wanted to keep things simple for my first attempt at creating my own labels and decided that I would simply make Food in Jars logo stickers that I could use to dress up my jars (and potentially also use to dress up the packages of books I occasionally send out).

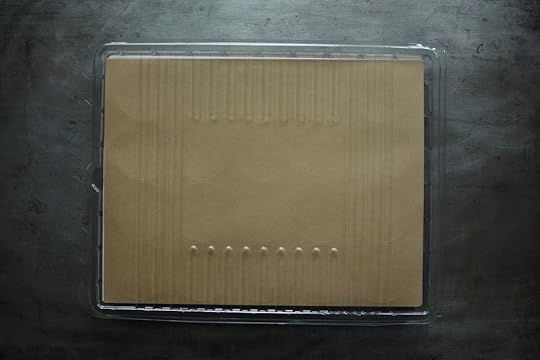
The folks at Worldlabel sent me 2 inch round labels (in both white and craft) and rectangular shipping labels (also in white and craft). I opted to try the white rounds first and headed over to Worldlabel to find the right template. They offer them in a variety of file formats (Word, PDF, Illustrator, etc) and identifying the one I needed was really easy.
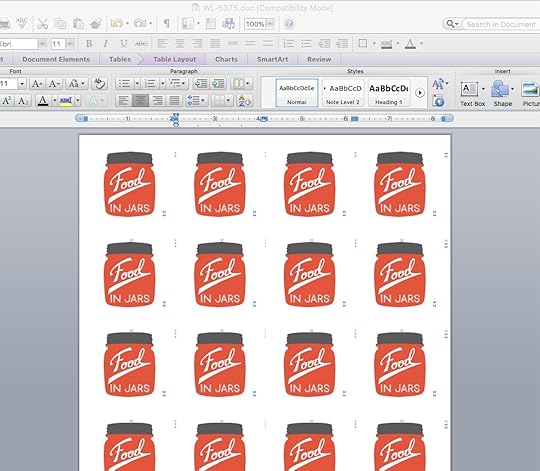
Once I had the right file, I opened it up in Word (I am not a designer), and dropped in my logo file. I had to do a little bit of tweaking, but it wasn’t hard. Then, it was just a matter of saving and printing.
I’m pretty pleased with how approachable it was and how cute my labels look.
Now, if you don’t have a cute logo to drop into a template, fret not. The folks at Worldlabel have a really robust assortment of already-designed labels that you can download and print at home. They also curate a highly useful Pinterest page where they collect free printables that will work with their labels.

I think my finished labels turned out really well and I can’t wait to start using them. And while the company did send me this package of labels at no cost so that I could play around with them, 100 sheets of these labels costs just $18.75. That works out to less than $.19 a sheet, which is pretty darn accessible for even the tightest budgets (far cheaper than the name brands you get at office supply stores).
Because Worldlabel wants to help canners feel empowered to create their own labels, they’re also sponsoring a giveaway. Five lucky readers will each win 20 sheets of labels that they can customize. Use the widget below to enter!
Disclosure: This is a sponsored post. Worldlabel paid to appear in this space and provided the labels pictured above at no cost to me. All thoughts and opinions are honestly conveyed and entirely my own.
Related Posts:
Cookbooks: Eating From the Ground Up
Giveaway: Silicone Sleeves from Mason Jar Lifestyle
Sponsored: Fennel Gruyere Gratin + Anolon Vesta Baker Giveaway
May 18, 2018
How to Make Ramp Butter
This week, regular Food in Jars contributor Alex Jones swings by with a recipe for preserving spring ramps in creamy butter. Enjoy! -Marisa
Spring is the time of year when everything seems to speed up: plants are growing, people emerge from hibernation, things are happening.
And while I do my best to cook with each of those early foraged and farmed foods — nettles, ramps, rhubarb — at least once a season, if not more, the bustle of springtime sometimes makes it tough to cook creatively while those goodies are in season.
That’s why I love preserving what grows this time of year. There’s five pounds of rhubarb in my fridge, ready to be diced and frozen for pies later this summer. I have nettles on a drying rack in my apartment to add to tea blends once I’ve harvested other herbs later in the season. And I’m preserving ramps in one of my favorite foods: butter.
This compound butter is super simple to make, so it’s easy to fit it into a busy schedule. It’s got a long shelf life in the freezer and myriad uses once you thaw it out, too.
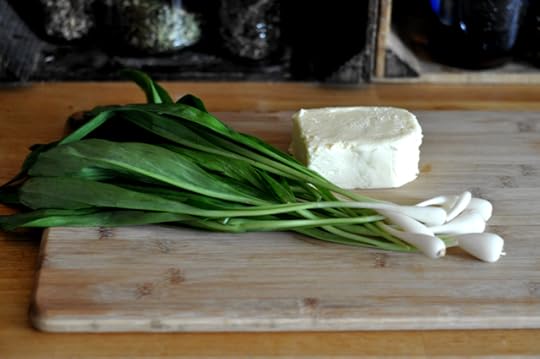
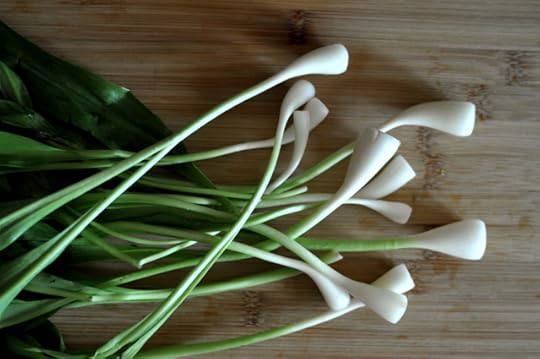
This batch is scaled for just one bunch — about four ounces — of ramps, which also makes it budget-friendly, as these rare alliums can be pricey at the farmers’ market. Of course, if you forage them yourself, you can easily multiply it if you come across a trove in your woodland wanderings.
A note about sustainably harvesting ramps: if you’re foraging for ramps yourself, harvest no more than ten percent of the ramps you see growing in a given area. An even more sustainable way to enjoy ramps is to simply snip off the green leaf that grows aboveground and leave the white bulbs behind — because if you pull the whole plant, it won’t grow back next year. (The forager I got these from pulled their ramps out; hopefully, they only harvested a little bit and left the rest so as not to diminish the supply year over year.)
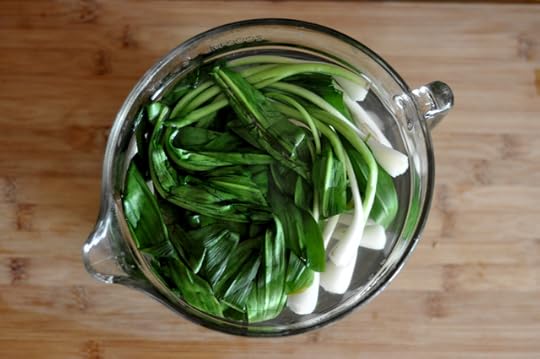
To make ramp butter, wash your ramps well — they grow on the forest floor, after all — and trim off any roots. Next, give the ramps a 30-second blanch in boiling water, followed by a dip on cold water to stop the cooking. I do this the lazy way by filling and heating my electric kettle to boiling, then pouring the water over the ramps in a heat-proof bowl.
After you’ve cooled down your ramps, ball them up in your hand and give them several strong squeezes to get out as much water as possible — you may want to bundle them into a clean dish towel or a few paper towels to help get more of the moisture out.
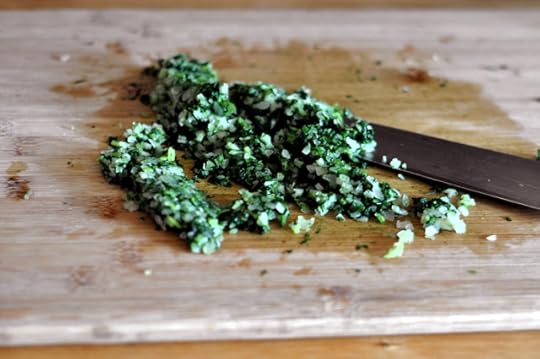
Now it’s time to mince. You can do this by hand (like I did), which takes extra time and effort, or you can feel free to chop them small in your food processor. Once your ramps are minced finely, it’s time to combine them with your softened butter.
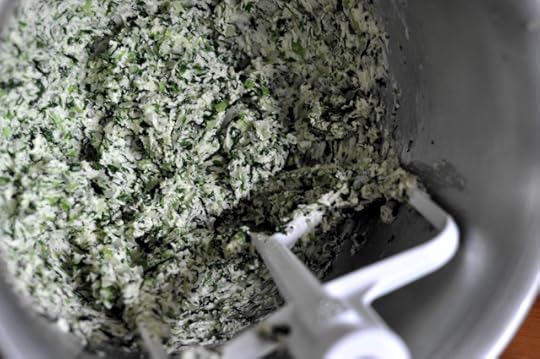
Combine the butter and ramps in a bowl and use a silicone spatula or wide wooden spoon to mix them well; you can also do this with a stand mixer fitted with the paddle attachment. I used a cultured, lightly salted butter, so I waited to finish the recipe to add salt to taste — but if you’re using unsalted, I’d add at least one big pinch along with the ramps.
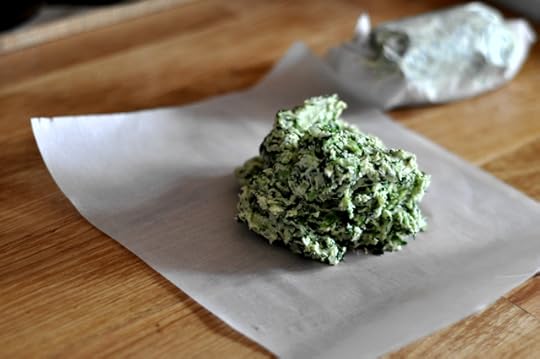
Next, you can store your ramp butter in a resealable plastic tub, or, my preferred method, shape it into a roll using parchment paper. Just roll it up, fold down the sides, and stash in a labeled zip-top bag to store in the freezer for up to six months. You can also chill the roll in the fridge and then cut the butter into single-serving slices for melting over a rare steak, schmearing onto crusty bread or dabbing onto fried eggs.
Print
How to Make Ramp Butter
Ingredients
4 ounces ramp (leaves only or leaves and bulbs will work)
8 ounces grassfed butter, softened (sweet cream or cultured butter will both work, as will salted and unsalted)
Salt to taste
Instructions
Wash the ramps well and trim off any roots or bruised leaves. Blanch ramps in boiling water for 30 seconds, then drain and shock with cold water to stop the cooking. Drain ramps again and squeeze out as much liquid as possible. It may help to bundle the ramps in a dish towel or paper towels to help absorb more liquid.
Finely mince your ramps using a sharp knife or food processor fitted with the chopping blade. Combine with softened butter and a big pinch of salt (if using unsalted butter). Mix well using a silicone spatula or wooden spoon, or combine the ingredients in the bowl of your stand mixer and mix using the paddle attachment until well blended.
Taste the mixture and add more salt if necessary. Portion your ramp butter into airtight reusable containers or roll and wrap it into logs with parchment paper and then store in a sealed zip-top bag. Ramp butter will last in the fridge for a few weeks or the freezer for up to six months.
4.26
http://foodinjars.com/2018/05/how-to-make-ramp-butter/
Related Posts:
How to Make Homemade Grassfed Ghee
How to Make Paneer Cheese
How to Make Fromage Fort
May 14, 2018
Comestible: A Print Journal About Food
Years ago now, on a visit to Western Mass, a friend and I sat around her dining room table and dreamed of creating a scrappy journal dedicated to home cooking and eating. It was going to be in the spirit of the zines of our youth, would be published a few times a year, and would strive to build community and pay its writers.
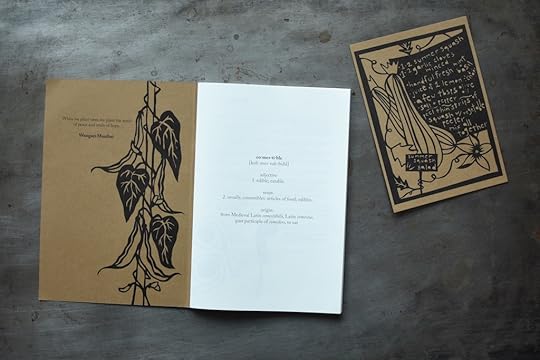
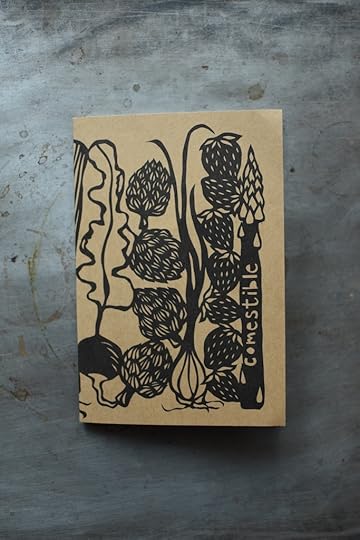
As you might guess, we never managed to pull this concept from dreamspace into reality. However, fellow food writer Anna Brones imagined a publication along similar lines and has brought hers into being. Called Comestible and launched in 2016, it is a 100% reader supported publication, with no advertisements. Printed twice a year, each issue is 64 pages, 5.25 x 7.75 inches and printed on recycled, FSC-certified paper in the Pacific Northwest.
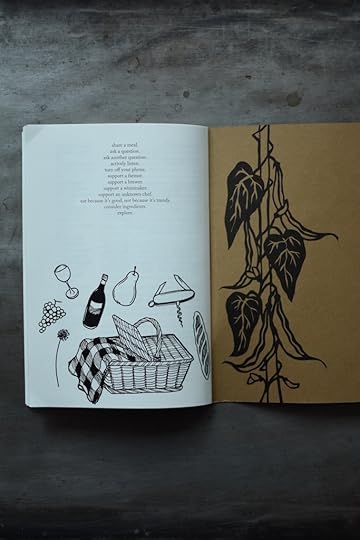
Each issue includes original stories, artwork, and recipes. The spring/summer issue that’s currently available (and is pictured throughout this blog post), features work along the theme of reclaiming and includes stories by Andrea Bemis, Sara Bir, and many others.
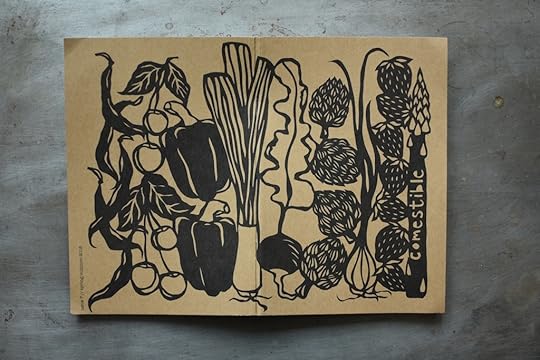
You can order the current issue, buy back copies, and pick up prints of Anna’s paper cut art work here.
You should also head over to my Instagram account, because this week I’m giving away a 2018 subscription to Comestible. The winner will get the issue featured here, as well as the fall/winter edition (it will arrive in October).
Related Posts:
Cookbooks: Fika
May 9, 2018
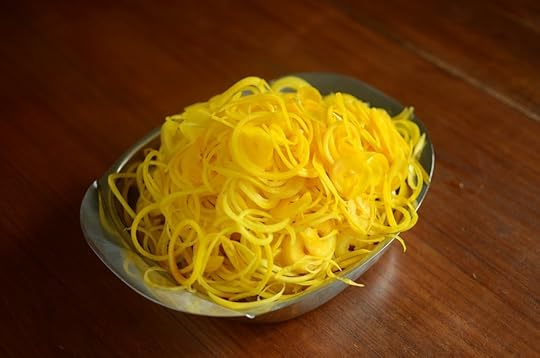
Spiralized Pickled Golden Beets with Ginger
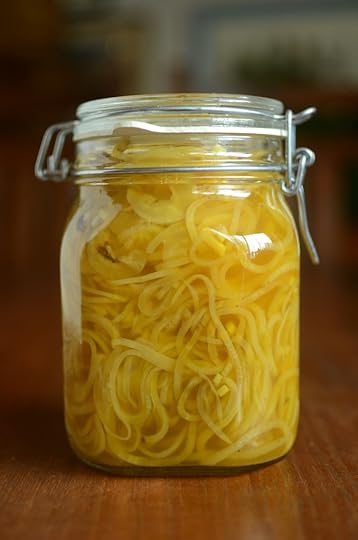
I bought a spiralizer three years ago and while I enjoy the novelty of vegetables cut into shapes other than that which I can achieve with a knife, I can’t quite convince myself that long strands of zucchini or eggplant are actually noodles. Still, I find that it has a place in my overstuffed kitchen, if for no other reason that it is fun (and sometimes that is enough).
I first made these spiralized pickled golden beets a little over a year ago and they are one of my favorite things to add to soba noodle salads or heap on top of an Ak-Mak cracker spread with fresh ricotta cheese (I realize that’s an oddly specific application, but darn if it isn’t delicious).
You can certainly make these pickles without having a spiralizer at your disposal, but it does lend a bouncy, curly-fry spring to the finished pickle, which I enjoy. Without a spiralizer, you’d just cut the raw beets into thin slices and then cut those slices into narrow matchsticks (a mandolin would help with this, though I find that they are a little iffy with dense vegetables like raw beets).
The most important thing when making these pickles is to strive for thin cuts. The only cooking that the beets receive is a short simmer in the brine, so in order to keep them from being aggressively crunchy, you need to aim for narrow matchsticks or curls.
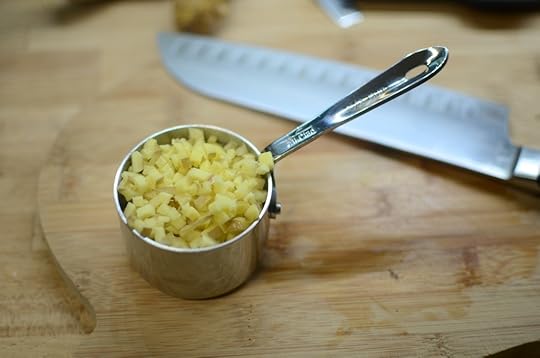
I make these pickles with an assertive volume of ginger, which I find both boosts and balances the earthiness of the beets. I tried spiralizing the ginger for one batch, and found that it didn’t go a good enough job of distributing the ginger throughout the jar of pickled beets. Instead, every so often, I’d take a bit expecting beet and get a mouth full of *ginger* instead. While not exactly unpleasant, it wasn’t what I was aiming for. A fine dice works better.
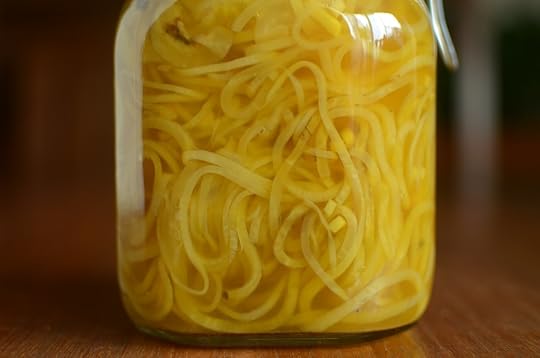
I make these pickles to keep in the fridge, because I find that I like the texture best, and it also means that I don’t have to use quite as much vinegar, rendering them a bit more mellow. They do fade over time, so if you can’t abide still delicious, but slightly grey pickles, make them in smaller batches or eat them quickly.
I’m curious if you guys are using spiralizers to prep vegetables for pickling. Any experiences you’d like to share?
Print
Spiralized Pickled Golden Beets with Ginger
Ingredients
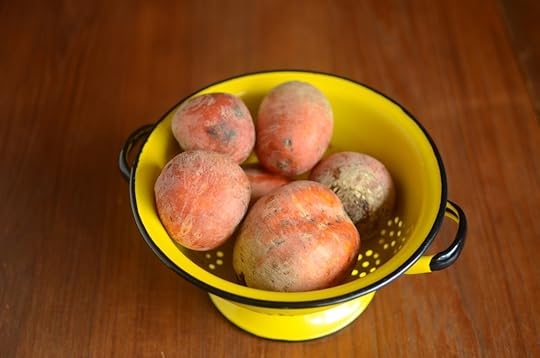
2 pounds golden beets
1 1/2 cups rice wine vinegar
1 cup water
1/2 cup peeled and minced ginger
1/4 cup granulated sugar
1 tablespoon salt
Instructions
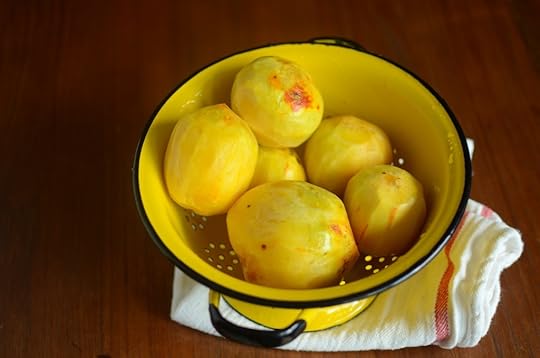
Peel the beets and either spiralize them or cut them into narrow matchsticks.
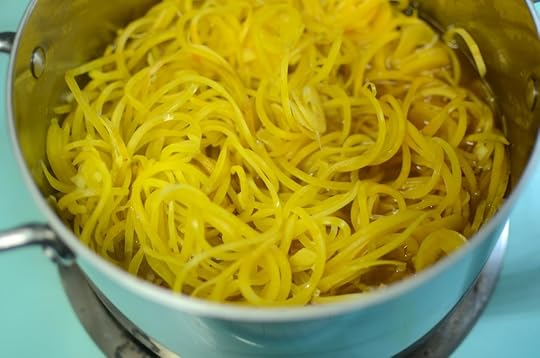
In a 4 quart or larger saucepan, combine the vinegar, water, ginger, sugar, and salt. Bring it to a boil.
Drop the prepared beets into the pan with the brine and bring the liquid back to a simmer. At first it will look like a ridiculously small volume of liquid for the amount of vegetable matter, but the beets will start to relax into the brine.
Simmer for 2 to 3 minutes, until the beet strands have lost a bit of their bite.
Remove the pan from the heat. Funnel the beet strands into a quart jar and top with the brine.
Let them cool and then refrigerate. These pickles will keep for at least three months in the fridge.
4.26
http://foodinjars.com/2018/05/spiralized-pickled-golden-beets-with-ginger/
Related Posts:
Guest Post: Pickled Beets with Honey from Camille Storch
Preserves in Action: Baby Arugula with Pickled Beets


