
Andrew Skurka's Blog, page 45
August 27, 2017
Training program for UTMB, my 2017 apex race || Interview with David Roche
How have I trained for Ultra Trail du Mont Blanc (UTMB), the world’s premier ultra marathon? As part of an ongoing series, I interviewed again my coach, David Roche, transcript below.
But to fully understand the context of this training, it may be necessary to read similar interviews prior to my two other big races this year:
Boston Marathon || From ultra(slow) runner to 2:3X marathoner
Bighorn 100 || Strength AND speed: 100-mile ultra training philosophy
Boston and Bighorn were worthy in their own right, but they were critical stepping stones to UTMB. My training for Boston resulted in a dramatically better running economy, or the effort involved in running at various paces. And during Bighorn training I saw a huge increase in my vamAT, or the amount of vertical climbing I could do (per time) at my aerobic threshold.
If I stuck to my old ultra training program (“volume, volume, volume”), I would finish UTMB, but would run/hike slower at every energy output level.
Q | We divided the 11 weeks between Bighorn 100 and UTMB into several shorter training phases. What were these phases and what was the objective in each?
After Bighorn, we had more time to do a deliberate build for a mountain ultra than we did between Boston and Bighorn. There were three special considerations in the training strategy. You:
Carried your best climbing fitness into Bighorn, and that fitness didn’t need to be rebuilt.
Recovered relatively quickly from Bighorn because of the sh*t-soup trail conditions in the second half. And,
Had scheduled the Pfiffner Traverse Yo-yo, a 160-mile 9-day backpacking trip during the peak of the build phase for UTMB.
In terms of timing, we had a few weeks, then the Pfiffner, then a few weeks, then taper, providing a natural dividing line for the phases.
After a week of recovery, we did a brief running economy rebuild, providing a neuromuscular stimulus to lay the groundwork for efficient mountain running. This consisted of strides and short intervals with equal to double rest. You responded better than expected, even running some blazing fast 200s. Your vVO2 was comparable to pre-Boston.
Usually, when short-distance running economy is looking that good, we’d jump into a lactate threshold or hill phase, like before Boston and Bighorn. For example, I’d have you do 5 x 3-minute hill repeats.
But given your hill fitness and the upcoming Pfiffner, we blended the LT/hill/ultra phases beginning a week before the Pfiffner. The hill efforts within longer runs reinforced your vamLT and vamAT, which was already where it needed to be for UTMB.
The traverse provided a big aerobic stimulus, which is going to be important during the 106-mile adventure in the Alps. So then we jumped into the true bread-and-butter of ultra performance: the pure ultra phase. Three times a week we’d go into the mountains, with varying focuses each day, designed to make a training lasagna. First layer was the meat: 100 mile effort, honing the aerobic system. Second layer was the pasta: mixed effort runs focused on uphill or downhills, dialing in vamAT and resilience. The final layer was the delicious cheese: moderate or hard efforts that bring it all together, culminating with the Pawnee Buchanan FKT.
Now, it’s taper, then some lasagna feasting next week!
Q | The Pfiffner Traverse Yo-Yo was a 9-day 160-mile backpacking trip with 60k vertical feet of climbing at elevations of 10,000-12,000 feet. Was it helpful to my UTMB training, or would I have gained more by a more usual training program? If a runner wanted to do something similar, do have any recommendations on how or when to integrate it?
Hearing the details of that traverse again makes me want to take a sympathy nap.
Given your unique background, it was helpful. It reinforces three things that will be key on race day:
Physical resilience to all-day pounding,
Hiking ability, and
Mental toughness.
On the flip side, it temporarily reduces running economy and for most people, that particular adventure would come at too great a recovery cost.
Most athletes planning a 100-mile race could benefit from long backpacks so long as they manage the downsides. Just like a 50-mile or 100-KM race is optimal 5 to 10 weeks before a 100-miler, this type of adventure could replace a long ultra (or supplement a 50k) in this time frame. But you must approach the adventure as if it’s a race, i.e. physically recovered beforehand and physically recovered afterwards before an economy rebuild.

On average, the Pfiffner Traverse climbs or descends 800 vertical feet per mile. One day, I climbed 6,000 vertical feet in just 13 miles, an average of 925 vertical feet per mile.
Q | Let’s return to the phases. What’s a normal recovery period after a 100-miler, assuming a well-trained athlete and a max effort? And, if you start the next training cycle before a sufficient recovery, what would you expect to observe?
Here is where the ultra version of the dose-response curve comes in. Stress and recovery are non-linear, depending on a multitude of individual factors. But for the purposes of simplifying, a full-throttle 100 takes around a full month to recover from for most athletes, generally segmented as:
Week of rest,
Week of slow running,
Week of slow running plus a couple short hills, and finally a
Week of easy running.
Only after this full recovery is the athlete is ready to ease back to somewhat normal training. For example, after winning Western States on June 24, SWAP athlete Cat Bradley didn’t do her first higher heart rate run until the beginning of August.
This is not an idle question — the stakes are high in 100 recovery. When an athlete returns too soon, it can manifest similarly to overtraining syndrome. You’ll see a week or two of solid running, followed by increased lethargy, decreased performance, and sometimes illness (like a persistent cough, or even mononucleosis-like symptoms). It’s especially risky for athletes doing their first 100. Meanwhile, for someone as experienced as you, we can go a lot more on feel and trust.
Only then is the athlete is ready to ease back to somewhat normal training, with full fitness and recovery around 2 months.
Q | We addressed running economy extensively in our first interview, and I don’t feel like we need to go there again. If a reader is not familiar with the concept, I would strongly encourage them to read that interview. My performance gains this year are probably due more to my massively improved running economy than to any other factor. David, anything to add to that?
Running economy is a catch-all term that incorporates lots of factors, from biomechanical (i.e. muscle tension) to neuromuscular (form efficiency) to cardiovascular (cardiac stroke output). By improving your economy early on and then re-introducing economy phases throughout the year, every run is just a bit better, allowing us to more effectively target the energy systems that count on race day (here, LT and aerobic threshold).
Essentially, a rising running economy tide raises all fitness ships, whether an athlete is racing a road marathon or trail ultra (or even doing something seemingly distant from our emphases, like fast-packs).
Q | During the 3-week “pure ultra phase,” most long runs had a specific emphasis, beyond just volume. Examples: a hard 25-minute uphill effort near the start of the run, or 8 x 3-min VO2 hills at the end, or a UTMB effort from start to finish (low-130’s average HR), or a FKT attempt. How valuable was this specificity, relative to pure vanilla long runs?
Vanilla is a great way to describe long runs without specific emphases. It’ll probably get the job done, but double chocolate chunk is way better.
It gets back to the component parts of reaching your potential at ultras. General aerobic fitness and resilience are two main components, and the vanilla long run works those elements well. But add in some spice, and we can additionally target other components, like vamLT (hill climb at start) or vamAT (FKT attempt) or metabolic efficiency (UTMB effort). Then the components all build upon each other over the course of a training cycle.
It’s as if you’re trying to build a stool to reach an apple that is just out of reach. You could just get a bunch of wood, then throw it on the ground, and you’ll probably get there. But if you carefully stack the wood, it’ll be more stable, and you probably will need less wood in the first place.
Q | Finally, the taper. My last long run was two weeks prior, and otherwise it’s all easy runs with single-digit or low-teens mileage. Why don’t these days include “sharpening” workouts, like they did prior to Boston?
It’s the old inverted pyramind of training — start more general, get specific as we go. We’re now at the pointy end of the pyramid, the sharpening phase. For the marathon, being sharp means optimizing your velocity at Lactate Threshold (vLT), with some velocity at aerobic threshold (vAT) mixed in.
For UTMB, where you’ll be on-course for about 24 hours, specific training means low-level aerobic efficiency, working on slow twitch muscle fiber recruitment and metabolic efficiency.
Most of the runs are more relaxed because we want all of your body’s energy channeled into the systems it will use on race day. And they are shorter to avoid flooding your body with stress hormones prior to a stressful travel-and-race environment.
If you were doing an ultra like Western States, which would be far faster and slightly more intense, we’d be doing some hill climb tempo work. If UTMB were in the Front Range of CO where you live, we’d be doing a few extra miles due to diminished stress. But given the unique demands of the race and the location, the pointy end of this inverted pyramid means that sharpening is dull: lots of easy, efficient runs.
Q | Let’s finish with a few questions about race day. What’s the optimal pacing for a hard course like UTMB? Is it realistic to run even splits with an increasing effort, as I did at the Boston Marathon? Or should I hope to simply slow down less than everyone else?
Negative splitting UTMB would be witchcrat, or would at least require us to throw you in the river to see if you float . In a mountain 100 like UTMB, effort can’t be viewed in a linear way. Down periods are impossible to avoid completely, and power at aerobic efforts will decrease by 10-20 percent for most top athletes even assuming perfect pacing. With that in mind, the goal is to manage the down periods and the inevitable fade in power at aerobic effort.
We can manage that by imposing a strict cap on heart rate 5 beats below aerobic threshold on the uphills, which will ensure that we don’t bankrupt your legs prematurely by making a LT withdrawl.
On the downhills, in the first half, we just focus on relaxed, short strides, and not braking (but not pushing either), which will be lower heart rate still. In the 2nd half, the same HR cap rule applies on uphills, which will make them a bit slower. But on downhills, you can open it up a bit more. So our version of even-splits is slightly stronger downs to counteract slightly weaker ups.
Q | Final thing: Help me set expectations. Where should I expect to be in the field at Mi 25, Mi 50, Mi 75, and of the course the finish?
I am guessing you don’t want the answer: “purposefully smiling, purposefully smiling, reluctantly smiling, smiling as it rains confetti and the national anthem plays?”
This is the most stacked field in the history of ultrarunning. So a lot of what happens depends on factors outside of your control. But, assuming people run mostly in line with past races and you race to my expectations, you’ll be anywhere from:
30 to 60 at mile 25,
20 to 50 at mile 50,
8 to 25 at mile 75, and
4 to 15 at the finish.
I said when we first met that I expected top-5, and you did everything to make that possible. However, I didn’t account for the competition being so astounding, so if race day doesn’t go according to plan, it is my fault, not yours.
Unlike before Boston or Bighorn, I will actually make a prediction this time: 5th, moving up from the field and closing fast. But, in a truly touchy feely coach/friend sentiment, I am just proud of you for everything you have done over the last nine months. Whether you finish 5th or 50th or DNF, I’ll always look back on that time as a period when I grew as a coach and person because I got to be a small part of your life.

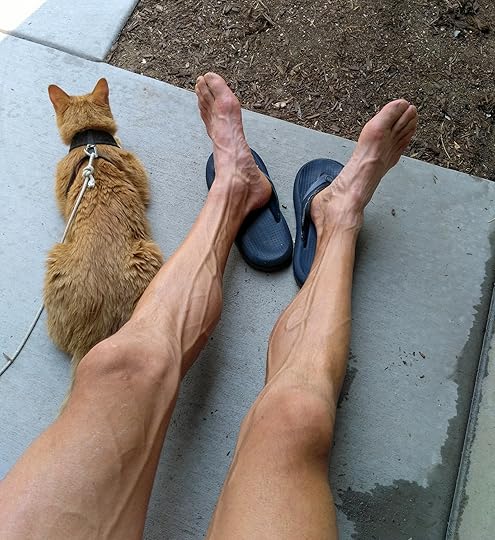
Hanging out with BFF Oden after yet another long run. My legs tell the story of the day and the season.
The post Training program for UTMB, my 2017 apex race || Interview with David Roche appeared first on Andrew Skurka.


August 23, 2017
Recommended clothing systems: Backpacking in the Mountain West

What clothing is necessary for backpacking in the Mountain West in 3-season conditions? Let’s discuss.
I define the Mountain West as the semi-arid ranges of the Sierra Nevada, Intermountain West, and Rockies. Examples:
Pacific Crest Trail in California and southern Oregon
High Sierra, including the John Muir Trail and multiple high routes, e.g. Sierra High Route, Kings Canyon High Basin Route
Colorado Trail and Pfiffner Traverse
Northern Rockies: Wind River Range, Yellowstone, Bob Marshall Wilderness, and Glacier National Park
High Uintas and Wasatch
Sky Islands in Arizona and New Mexico
From the Core 13 Clothing Collection, I recommend just ten items for the Mountain West. Mix-and-match them to create appropriate clothing systems for each season. Watch the video above for a general explanation, and review the lists below for specific recommendations.
Spring
Early-Summer
Late-Summer through early-Fall
The post Recommended clothing systems: Backpacking in the Mountain West appeared first on Andrew Skurka.
August 22, 2017
Help me decide: Hoka Speedgoat 2 or Salomon Sense Ultra for UTMB?


The Speedgoat 2 and Salomon Sense Ultra, and BFF Oden. They are entirely different shoes, but worthy in their own right. The plush Speedgoat barrels over trails, whereas the Sense Ultra dances through them.
On Friday I leave for France and UTMB, so much of this week is dedicated to race preparation. One decision with which I’m struggling is my footwear. I have narrowed it to:
Hoka One One Speedgoat 2 (read my review; buy now), and
Salomon Sense Ultra (read my review; buy now).
Ultimately, I may be obsessing over a detail that matters little. Other factors (e.g. training, race strategy, nutrition/hydration) will play a much greater role in my performance. But, still, if one shoe will be a few minutes faster than the other, I’ll gladly take that advantage.
My current plan is to fly over with both pairs, and make a last-minute decision based on course reconnaissance. But I’m sharing this internal debate in the hopes of hearing your thoughts and insights.
Hoka One One Speedgoat 2 v. Salomon Sense Ultra
The Speedgoat 2 and Sense Ultra differ primarily in their cushion and stability, or lack thereof.
The Speedgoat is classic Hoka, with a generous 32/27.5-mm stack height (heel/toe). On technically easy and moderate trails, I can barrel forward with near reckless abandon. But they’re inherently top-heavy, and are therefore clumsy when the footing is loose, off-camber, or talus-y.
The Sense Ultra is lower to the ground (26/18 mm heel/toe), so it’s more stable and agile. On technically moderate and difficult trails, I can nimbly dance through. But they’re much less forgiving on, say, gravel beds or pounding downhills.
I have run fast and far in both shoes. I wore the Sense Ultra for Bighorn 100, and was on course record pace until the trail degraded into a slip-and-slide. More recently, I wore the Speedgoat 2 on a new FKT for the 27-mile Pawnee-Buchanan Loop.
Fit, traction, and durability are generally equal, at least within the context of a 100-mile race and within their much larger differences. Both weigh 11.0 oz in my size 11.5.

The Hoka One One Speedgoat 2, developed with superstar Karl Meltzler, is classic Hoka: it’s lightweight and generously cushioned, and offers a smooth ride. For its height, it’s remarkably stable.

The Salomon S-Lab Sense Ultra is a form-fitting all-purpose trail shoe, with precision fit, reliable outsole grip, and a happy-medium balance between cushioning and feel.
Have thoughts or insights on what shoe would be best for UTMB? Please leave a comment.
Disclosure. This website is supported mostly through affiliate marketing, whereby for referral traffic I receive a small commission from select vendors, at no cost to the reader. This post contains affiliate links. Thanks for your support.
The post Help me decide: Hoka Speedgoat 2 or Salomon Sense Ultra for UTMB? appeared first on Andrew Skurka.
August 16, 2017
New FKT: Pawnee-Buchanan Loop || Take note, UTMB


Pawnee Lake and Pawnee Pass (low spot on left skyline), as seen from Paiute Pass, at the head of Thunderbolt Creek.
The Pawnee-Buchanan Loop has become a classic among ultra runners and backpackers. It’s about 27 miles long, includes two 12,000-foot passes over the Continental Divide, and the starting trailhead is a 60-minute drive from my front door.
(Side note: To spice up this loop, use the Pfiffner Traverse to connect Buchanan and Cascade Creeks, rather than the all-trail route around the west side of Thunderbolt Peak. Read my route description.)
Yesterday I set a new FKT for the Pawnee-Buchanan Loop, in 4:46:32. The time is barely faster than Anton Krupicka’s 4:50 from 2010, but I’m delighted to be even in his zip code. He was running very well that summer, with a second-place finish at Western States (in the legendary showdown with Kilian and Geoff Roes) and later a CR at White River. He could have run faster that day, I’m sure. Even so, his time has stood for seven years.
My 4:46 will absolutely not stand the test of time. I could drop another 15-20 minutes by being fresh (not fatigued from two 50k’s in the preceding five days), by giving it more than just a “moderate” effort, or by avoiding a soaking rain squall on the west side of Pawnee Pass. And someone with more talent (e.g. Sage) could drive up tomorrow and handily set a new standard.
Big picture, I’m not excited about this FKT because it’s a FKT. Rather, it’s a confidence-boosting data point for my current fitness, three weeks out from UTMB. In the Alps, I’m predicting a RRR100 or Boston Marathon type of performance, where I wildly outperform my seed placement and surprise just about everyone (except David Roche).
The post New FKT: Pawnee-Buchanan Loop || Take note, UTMB appeared first on Andrew Skurka.
August 15, 2017
Video || Core 13 Backpacking Clothing: Streamline & simplify your systems

Two years ago I posted a series on Core 13 Clothing, and many have found it useful as a framework for assembling their clothing systems for 3-season backpacking trips. It helps in:
Preparing properly for the conditions,
Eliminating redundancies within your kit, and
Minimizing costs by maximizing the versatility of each clothing item.
I can’t think of a single trip on which all thirteen items would be required, and if you backpack in a narrow range of conditions (e.g. only in Colorado) you don’t need to even own all thirteen. Six to ten items per trip is probably more normal, with drier, warmer, and bug-free trips requiring the low end of the range.
For a full explanation of Core 13 Clothing, read the complete series online or in The Ultimate Hiker’s Gear Guide (more updated). For a relatively quick explanation of the specific thirteen items, watch the video below, which I filmed with Sierra Designs in June.
The post Video || Core 13 Backpacking Clothing: Streamline & simplify your systems appeared first on Andrew Skurka.
August 14, 2017
Review: Hoka One One Speedgoat 2 || Light, plush, grippy & surprisingly stable


The Hoka One One Speedgoat 2, developed with superstar Karl Meltzler, is classic Hoka: light, cushy, and smooth-riding. It’s also grippy, and remarkably stable for its height.
On my first three outings with the second-generation Hoka One One Speedgoat 2, I took it out for 13-, 11-, and 25-mile trail runs with nearly 10,000 vertical feet in cumulative climbing. That’s rare for a shoe with which I had no prior history — normally, I start off slowly, with short and low-risk runs until the shoe is more proven. But this particular pair inspired confidence within minutes of slipping them on.
Review: Hoka One One Speedgoat 2
The Speedgoat 2 is a capable and forgiving trail shoe that excels on maintained trails with flat footing (e.g. benched side-hills, constructed staircases, and straightaways). It’s:
Lightweight, at 9.8 oz for men’s size 9 US;
Generously cushioned, with a stack height of 32 and 27.5 mm at the heel and forefoot, respectively;
Grippy, thanks to a Vibram MegaGrip outsole with 5 mm lugs; and,
Shockingly stable for its height, due to the reinforced upper, cradled foot bed, wide last (relative to the original model), and outsole.
I find the Speedgoat 2 best for easy and moderate efforts on trails. They’re not built for road-running, but a few miles of pavement mixed into trail runs are acceptable. They are dreamy for long runs, and a welcome break from thinner and more agile models like the Salomon Sense Ultra (my review) that are harder on my body but that ultimately I prefer for tough trails and fast efforts. For some runners and courses, the Speedgoat 2 could absolutely serve as an ultra trail marathon racing shoe.

The Speedgoat 2 and Salomon Sense Ultra, and BFF Oden. They are entirely different shoes, but currently two of my favorites. One goes fast but is hard on the body. The other is slower but more comfortable.
The Speedgoat 2 is discouraged for runners who:
Have wide and high-volume feet, or perhaps even average width and average-volume feet; and/or,
Prioritize ground feel, responsiveness, and low center of gravity over cushioning.
For instance, the Speedgoat 2 is not a good alternate for the Altra Lone Peak (my review) or La Sportiva Bushido (my review).
Hiking & backpacking
While it’s intended as a trail running shoe, I think the Speedgoat 2 will perform equally well for on-trail day-hikes and backpacking trips. I wouldn’t use them for a high route — they are too top-heavy and squishy for uneven footing, scrambles, and talus-hopping.
Caveat: I cannot yet attest to its long-term durability. I’m being purely speculative, but the outsole is my primary concern — it is wonderfully grippy, but a normal hiking shoe outsole has twice as much lug volume.
Please support this review by buying the Speedgoat 2 or other products from the vendors below.
Product specs
Weight: 9.80 oz (277 g) M’s 9 US, 11.0 oz (312 g) M’s 11.5 US
Stack height: 32 mm heel, 27.5 mm forefoot
Drop: 4.5 mm
Upper: Breathable mesh with TPU overlays
Midsole: Compression molded EVA
Outsole: Vibram MegaGrip with 5 mm lugs
Support: Moderate
More product specs
The Speedgoat 2 retails for $140.
Versus the original Speedgoat
The Speedgoat is new to me, so I don’t have the personal context to compare the original Speedgoat with v2. From what I understand, the most significant differences with the Speedgoat 2 are its wider last and more voluminous upper, which has resulted in improved stability and fit (for most feet, at least).
Otherwise, most elements remain the same: a breathable mesh upper reinforced with TPU, Vibram outsole, and thick midsole (v1 was 33 mm and 28 mm, with 5 mm drop).
Sizing
The Speedgoat 2 fits true to size. My review pair is size 11.5. I also wear 11.5 in Altra, Merrell, Salewa, and Salomon; I wear 45.5 in La Sportiva.
Fit
I have a narrow and small-volume foot, and the Speedgoat 2 fits me precisely, especially now that they have packed out some.
If you have wide and high-volume feet, forget about it.
If your feet are of average width and volume, give it a shot. The limiting factor will most likely be the toebox, which seems proportionally small relative to the midfoot and heel. Try a half-size larger, or a lacing method that allows you to tighten the midfoot independently of the forefoot.
Note that reviewers on the Hoka website consistently state that the Speedgoat 2 is too tight/narrow.
Ride
The Speedgoat 2 is classic Hoka. The marshmallowy midsole absorbs shock and small rocks. The rockered shape results in a smooth transition from impact zone to toe-off. And the deep-seated foot cradle helps offset the inherent instability of a 32-mm heel height. These diagrams accurately illustrate the Speedgoat 2 experience.
There are some tradeoffs to these features, however: it is relatively squishy and top-heavy. When I want a fast shoe, I reach for something more responsive and stable. It’s not that the Speedgoat can’t be fast — for instance, yesterday I set a PR on the descent of Bear Canyon (nearly 31 min). But the Speedgoat 2 struggles when it’s put on edge by twisty trails, side-hills, washed-out rock fields, and talus.

The Speedgoat 2 has a rockered outsole for smoother impact to toe-off transitions. It’s not a gimmick — it helps.
Upper
The upper is made of breathable mesh and features a TPU exoskeleton and toecap, which improves foot stability and resistance to abrasion, tears, and impact. I’m skeptical of any trail running shoe without an exoskeleton.
I’m not a fan of the elasticized linguine-shaped laces. They’re more difficult to tie than rounder laces, and the elastic is already failing to rebound fully.
When Hoka reexamines its laces, maybe it could consider an elasticized mid-foot yoke or tongue, too. This would partially decouple midfoot control and the tightness of the laces. Currently, when I crank on the laces to tighten the midfoot, it also tightens the toebox, which is tight enough already.
I haven’t worn them long enough to comment on durability. The uppers on my Clifton 2’s are perfectly intact after 550+ miles, and I’m hoping that Hoka used a similar formula for the Speedgoat.

The mesh upper is overlaid extensively with TPU panels and stripes for improved control, durability, and protection.
Outsole
This summer I’ve been impressed by three outsole rubbers: Salomon’s Premium Wet Traction Contragrip, La Sportiva’s FriXion, and now Vibram MegaGrip, which is spec’d on the Speedgoat 2.
The Speedgoat sticks reliably to rocks (even wet ones) in Boulder’s foothills, and it gets decent bite into hard-packed surfaces covered in ball bearing-like mineral sand. When on pavement, I can feel the lugs grip. Normally, grippiness and durability are inversely related, but I’ll have to post back on this one.

The Vibram MegaGrip outsole with 5 mm lugs is exceptionally grippy and helps to offset the inherent instability of a 31-mm tall shoe.
Buy now: Hoka One One Speedgoat 2
Have questions about or an experience with the Speedgoat 2? Please leave a comment.
Disclosure. This website is supported mostly through affiliate marketing, whereby for referral traffic I receive a small commission from select vendors, at no cost to the reader. This post contains affiliate links. Thanks for your support.
I was provided a pair of Speedgoat 2 for review my Hoka One One.
The post Review: Hoka One One Speedgoat 2 || Light, plush, grippy & surprisingly stable appeared first on Andrew Skurka.
Preview: Ultimate Direction Deluge || Waterproof/NON-breathable jacket & pants


A close-up of the 5.5-oz Ultimate Direction Deluge Jacket, which features 20d waterproof/NON-breathable fabric and taped seams.
The Ultimate Direction Deluge Jacket and Deluge Pants — which will be released in Spring 2018 — are awesomely light, at 5.5 oz and 2.3 oz for men’s Large. But I’m more excited about the fabric.
No, they’re not made of the latest-and-greatest membrane that is more waterproof and more breathable than anything the world has ever seen. Instead, they’re made of a fabric that is most often used for tent canopies, tarps, and tent floors: 20d nylon that is coated with polyurethane (PU) on one side and silicone on the other. Hydrostatic head is rated to 1500 mm. Seams will be factory-taped.
The Deluge suit is waterproof but not breathable, which makes it different than traditional rain gear made of waterproof/breathable fabric like Gore-Tex, H2No, or Precip. I welcome this: WP/B fabrics fail (read this, this, or this for in-depth explanations) and I’d rather get damp from trapped perspiration than soaking wet from rain, especially in the Mountain West where rain events are often accompanied by plunging temperatures.

The new UD Deluge Jacket and Pants
The Deluge Jacket is modeled after its waterproof/breathable cousin, the Ultra Jacket, with a similar silhouette, hood, and flip mitts. A horizontal vent has been added to its back panel, to increase airflow. I would have liked to see zippered torso or arm vents, too, but UD opted to keep low the weight and price. It will retail for $100.
The Deluge Pants have articulated knees and knee pleats, for a less restricted range of motion. Unfortunately, they feature no air vents and no ankle zips. The lack of ventilation will reduce comfort, especially during prolonged wear. And the lack of ankle zips will slow pants-on/pants-off transitions, an undesirable quality in a race environment. MSRP is $85.
Updated Ultra Jacket & new Ultra Pants
The Ultra Jacket, the first generation of which is available now, is being updated for Spring 2018. The features will remain mostly the same, but the fabric is being changed to a 2.5-layer waterproof/breathable laminate with a 10d nylon face fabric, PTFE membrane, and dot-laminated interior. In the lab it tests to 29k hydrostatic head and 33k MVTR. That’s nice, but I’d await some field use before getting excited.
The fabric substitution has driven up the price, to $190 from the current $170. The weight is about the same, at 6.1 oz.
The matching Ultra Pants will be new for Spring 2018. They’ll retail for $120 and weigh 3.5 oz. Unlike the Deluge Pants, they will have a 12-inch ankle zip for faster on/off transitions.

The second-generation Ultra Jacket and new matching Ultra Pants are made with an improved waterproof/breathable fabric.
Disclosure. This website is supported mostly through affiliate marketing, whereby for referral traffic I receive a small commission from select vendors, at no cost to the reader. This post contains affiliate links. Thanks for your support.
The post Preview: Ultimate Direction Deluge || Waterproof/NON-breathable jacket & pants appeared first on Andrew Skurka.
August 13, 2017
Review: Hoka One One Speedgoat 2 || Light, plush, grippy & surprisingly stable

The Hoka One One Speedgoat 2, developed with superstar Karl Meltzler, is classic Hoka: light, cushy, and smooth-riding. It’s also grippy, and remarkably stable for its height.
On my first three outings with the second-generation Hoka One One Speedgoat 2, I took it out for 13-, 11-, and 25-mile trail runs with nearly 10,000 vertical feet in cumulative climbing. That’s rare for a shoe with which I had no prior history — normally, I start off slowly, with short and low-risk easy runs until the shoe is more proven. But this particular pair inspired confidence within minutes of slipping them on.
Review: Hoka One One Speedgoat 2
The Speedgoat 2 is a capable and forgiving trail shoe that excels on unpaved surfaces with flat footing (e.g. benched trails, constructed staircases, and straightaways). It’s:
Lightweight, at 9.8 oz for men’s size 9 US;
Generously cushioned, with a stack height of 32 and 27.5 mm at the heel and forefoot, respectively;
Grippy, thanks to a Vibram MegaGrip outsole with 5 mm lugs; and,
Shockingly stable for its height, due to the reinforced upper, cradled foot bed, wide last (relative to the original model), and outsole.
I find the Speedgoat 2 best for easy and moderate efforts on trails. They’re not built for road-running, but a few miles of pavement mixed into trail runs are acceptable. They are dreamy for long runs, and a welcome break from thinner and more agile models like the Salomon Sense Ultra (my review) that are harder on my body but that ultimately I prefer for tough trails and hard efforts. For some runners and courses, the Speedgoat 2 could absolutely serve as an ultra trail marathon racing shoe.
The Speedgoat 2 and Salomon Sense Ultra, and BFF Oden. They are entirely different shoes, but currently two of my favorites. One goes fast but is hard on the body. The other is slower but more comfortable.
The Speedgoat 2 is discouraged for runners who:
Have wide and high-volume feet, or perhaps even average width and average-volume feet; and/or,
Prioritize ground feel, responsiveness, and low center of gravity over cushioning.
For instance, the Speedgoat 2 is not a substitute for the Altra Lone Peak (my review) or La Sportiva Bushido (my review).
Hiking & backpacking
While it’s intended as a trail running shoe, I think the Speedgoat 2 will perform equally well for on-trail day-hikes and backpacking trips. I wouldn’t use them for a high route — they are too top-heavy and squishy for uneven footing, scrambles, and talus-hopping.
Caveat: I cannot yet attest to the long-term durability of the Speedgoat 2. I’m being purely speculative, but the outsole is my primary concern for this application — it is wonderfully grippy, but a normal hiking shoe outsole has twice as much lug volume.
Please support this review by buying the Speedgoat 2 or other products from the vendors below, or from Amazon.
Product specs
Weight: 9.80 oz (277 g) M’s 9 US, 11.0 oz (312 g) M’s 11.5 US
Stack height: 32 mm heel, 27.5 mm forefoot
Drop: 4.5 mm
Upper: Breathable mesh with TPU overlays
Midsole: Compression molded EVA
Outsole: Vibram MegaGrip with 5 mm lugs
Support: Moderate
More product specs
The Speedgoat 2 retails for $140.
Versus the original Speedgoat
The Speedgoat is new to me, so I don’t have the personal context to compare the original Speedgoat with v2. From what I understand, the most significant differences with the Speedgoat 2 are its wider last and more voluminous upper, which has resulted in improved stability and fit (for most feet, at least).
Otherwise, most elements remain the same: a breathable mesh upper reinforced with TPU, Vibram outsole, and thick midsole (v1 was 33 mm and 28 mm, with 5 mm drop).
Sizing
The Speedgoat 2 fits true to size. My review pair is size 11.5. I also wear size 11.5 in Altra, Merrell, Salewa, and Salomon; I wear 45.5 in La Sportiva.
Fit
I have a narrow and small-volume foot, and would say that the Speedgoat 2 fits me precisely, especially now that they have packed out some.
If you have wide and high-volume feet, forget about it.
If your feet are of average width and volume, give it a shot. The limiting factor will most likely be the toebox, which seems proportionally small relative to the midfoot and heel. Try a half-size larger, or a lacing method that allows you to tighten the midfoot independently of the forefoot.
Note that reviewers on the Hoka website consistently state that the Speedgoat 2 is too tight/narrow.
Ride
The Speedgoat 2 is classic Hoka. The marshmallowy midsole absorbs shock and small rocks. The rockered shape results in a smooth transition from impact zone to toe-off. And the deep-seated foot cradle helps offset the inherent instability of a 32-mm heel height. These diagrams accurately illustrate the Speedgoat 2 experience.
There are some tradeoffs to these features, however: it is relatively squishy and top-heavy. When I want a fast shoe, I reach for something more responsive and stable. It’s not that the Speedgoat can’t be fast — for instance, yesterday I set a PR on the descent of Bear Canyon (nearly 31 min). But the Speedgoat struggles when it’s put on edge by twisty trails, side-hills, natural/unmaintained rock fields, etc.

The Speedgoat 2 has a rockered outsole for smoother impact to toe-off transitions. It’s not a gimmick — it helps.
Upper
The upper is made of breathable mesh and features a TPU exoskeleton and toecap, which improves foot stability and resistance to abrasion, tears, and impact. I’m skeptical of any trail running shoe without an exoskeleton.
I’m not a fan of the elasticized linguine-shaped laces. They’re more difficult to tie than rounder laces, and the elastic is already failing to rebound fully.
When Hoka reexamines its laces, maybe it could consider an elasticized mid-foot yoke or tongue, too. This would partially decouple midfoot control and the tightness of the laces. Currently, when I crank on the laces to tighten the midfoot, it also tightens the toebox, which is tight enough.
I haven’t worn them long enough to comment on durability. The uppers on my Clifton 2’s are perfectly intact after 550+ miles, and I’m hoping that Hoka used a similar formula for the Speedgoat.

The mesh upper is overlaid extensively with TPU panels and stripes for improved control, durability, and protection.
Outsole
This summer I’ve been impressed by three outsole rubbers: Salomon’s Premium Wet Traction Contragrip, La Sportiva’s FriXion, and now Vibram MegaGrip, which is spec’d on the Speedgoat 2.
The Speedgoat sticks reliably to rocks (even wet ones) in Boulder’s foothills, and it gets decent bite into hard-packed surfaces covered in ball bearing-like mineral sand. When on pavement, I can feel the lugs grip. Normally, grippiness and durability are inversely related, but I’ll have to post back on this one, along with a few others.

The Vibram MegaGrip outsole with 5 mm lugs is exceptionally grippy and helps to offset the inherent instability of a 31-mm tall shoe.
Buy now: Hoka One One Speedgoat 2
Have questions about or an experience with the Speedgoat 2? Please leave a comment.
Disclosure. This website is supported mostly through affiliate marketing, whereby for referral traffic I receive a small commission from select vendors, at no cost to the reader. This post contains affiliate links. Thanks for your support.
I was provided a pair of Speedgoat 2 for review my Hoka One One.
The post Review: Hoka One One Speedgoat 2 || Light, plush, grippy & surprisingly stable appeared first on Andrew Skurka.
August 12, 2017
Preview: Ultimate Direction FK Poles || 4-oz fixed-length carbon
All things being equal, fixed-length trekking poles will be lighter, stronger, and less expensive than telescoping or foldable models like the Cascade Mountain Tech Quick Lock Poles or Black Diamond Distance Carbon Z Poles.
Yet there is currently only one off-the-shelf fixed-length pole that is suitable for backpacking: the Black Diamond Vapor Carbon 1 Pole. For a pole to be “suitable,” I would insist that it have carbon fiber or aluminum shafts, cork or foam grips with extensions, and a high-quality replaceable carbide tip.
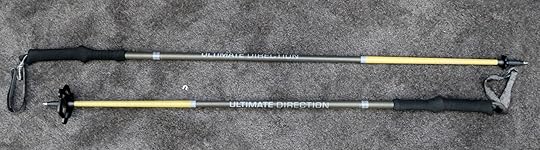
In spring 2018, Ultimate Direction will enter this market niche as well, with the new FK Pole. It will retail for $125 and weigh a feathery 4 oz (for 115 cm). Seven sizes will be available, in 5-cm increments between 100 and 130 cm.

The Ultimate Direction FK Poles: fixed-length carbon fiber shafts with extended foam grips and replaceable carbide tips.
The carbon fiber shaft is 20 mm in diameter at its top, compared to 15.4 mm for the Carbon 1 and 13 mm for the Carbon Z. As a result, the FK Pole is exceptionally strong and stiff. The lower 30 cm are wrapped with Aramid fabric (i.e. unbranded Kevlar) for abrasion-resistance.
The one-piece foam grip includes a lower extension, which I consider a must-have. When hiking on steep trails with big steps and when off-trail, I frequently choke down on the pole shafts. The straps can be removed and reinstalled, though not quickly.
Mud baskets and snow baskets will be included.
The only part of the FK Pole that I question is the tip. It’s replaceable and made of carbide, but until field use proves otherwise I’m skeptical of non-Black Diamond or non-Leki tips after my CMT tips eroded to useless nubs after less than two-hundred miles.
The post Preview: Ultimate Direction FK Poles || 4-oz fixed-length carbon appeared first on Andrew Skurka.
August 10, 2017
Reader Q || Do I need a footprint for the High Route Tent?

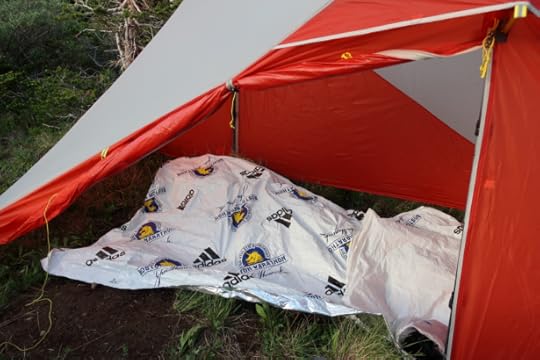
I don’t recommend using a footprint with the High Route. When I leave the inner tent at home, I use a mylar blanket as a groundsheet.
A question from reader Caspar R:
I just bought your High Route Tent. Do you recommend using a footprint with it? If so, which one?
I generally do not recommend using a footprint with the Sierra Designs High Route Tent 1Fl. A custom-sized footprint for it is intentionally not available, and there are no plans to offer one.
The inner tent of the High Route features a waterproof floor made of medium-duty 30d nylon coated with silicone on one side and polyurethane (PU) on the other. It is rated to 3,000 mm hydrostatic head, which is nearly as waterproof as Cuben Fiber or premium sil/sil nylons used by cottage manufacturers like MLD. It should withstand extensive use before its loss of waterproofness becomes noticeable or problematic.
If you manage to wear out the floor, you have two options. (1) You can send it back to Sierra Designs for repair or replacement. (2) Or, you can supplement its waterproofness with an ultralight groundsheet made of mylar or polycryo (i.e. window shrink wrap).
When using the High Route Tent without its inner — which is my go-to configuration in Colorado for nearly the entire year — I carry a mylar blanket to protect my gear from groundwater, keep my gear out of the dirt, and help prevent air pad punctures. This summer I’ve been using the post-race blanket that was distributed to runners at the Boston Marathon in April. Mylar blankets are not created equal. If you go this route, purchase a blanket that is marketed as being more durable (e.g. thicker, double-sided) than a standard blanket, which will tear easily.
Disclosure. This website is supported mostly through affiliate marketing, whereby for referral traffic I receive a small commission from select vendors, at no cost to the reader. This post contains affiliate links. Thanks for your support.
The post Reader Q || Do I need a footprint for the High Route Tent? appeared first on Andrew Skurka.


