
Andrew Skurka's Blog, page 48
June 14, 2017
Pace Chart Tutorial || Step 1: Landmarks & course data

This is part of a multi-post tutorial on creating a pace chart for an ultra marathon. Start with the Introduction, or skip to a specific section:
Introduction
Step 1: Course data
Step 2: Goal-setting
Step 3: Split data
Optional: Crew chart
Case study: Bighorn 100
Unless you have created a pace chart for an ultra marathon before or found a template online, the process begins with a blank spreadsheet. Personally, I use Google Sheets, a free platform that is easily shareable and that I can access from all of my devices (e.g. desktop, Chromebook, smartphone).
Critical data
I start by importing data about the course, specifically at least:
Important landmarks;
Cumulative distance for each landmark; and,
Split distances between each landmark.
In a normal ultra, which is heavily supported, my list consists exclusively of aid stations. In a less supported race, I might also include geographic features like stream crossings or passes in order to create more regular checkpoints.
Data sources
Most race organizations will post a list of aid stations and cumulative distances. If it’s shared as a spreadsheet or a table, the data can be easily copied and pasted into the spreadsheet, and then formatted to your liking. If not, it must be tediously entered manually.
Split distances are usually not included with the official information. It’s not a big deal: they can be easily calculated with a formula using the cumulative distances. Actually, I would recommend doing this anyway — I’ve found errors in official split distances before.

Screenshot of aid station list for Silverheels. Split distances between stations is not provided, but can be easily calculated using the cumulative data.
Secondary data
I import other aid station information, too, like:
Available supplies and services,
Crew access points,
Drop bag locations, and
Pacer pickup opportunities.
Some of this information may not be relevant in every race or to me. For example, at Bighorn this weekend I don’t have a crew and I’m not using a pacer. But I’d rather collect the data now and choose not to use it later.
Finally, consider adding the elevation of each landmark. This bit of data may provide an estimate of the vertical change between two landmarks, so long as the course is consistently up, down, or flat, not undulating. More reliably, it helps hone your expectations — by looking at your altimeter, you’ll know if the aid station might be right around the corner, or if you still need to climb another 400 vertical feet.

At the end of Step 1, your pace chart should look something like this. Key landmarks with cumulative and split distances, plus perhaps other information like elevation and services.
Data accuracy
I’m generally skeptical of the accuracy of official course information. How many race organizations have walked every step of their course with a commercial-grade GPS, ideally as many times necessary until they have produced two identical readings for each segment of the course?
In more cases, I think the official race data is based on less accurate consumer-grade GPS units, GPS sport watches, bike odometers, and even car odometers; or they rely on measurements made in a mapping program (e.g. Caltopo) or on data in the public domain (e.g. trail forums and databases).
Even if the course data were precise, it is unlikely to match the data displayed by your GPS sport watch, e.g. Suunto Ambit or Garmin Fenix 5. Some models are better than others, but all of them will come up short or long relative to the true distances (which means that pacing data will be off, too).
You might think that you could eliminate one source of data inaccuracy by using course data recorded by the exact same watch that you have. Two identical watches will measure the course identically, right? Not necessarily. In fact, I’ve seen the same watch record differently the same trail on the same run when the runner traced back their route.

This track of the Bighorn 100 course (and out-and-back) was recorded by the same GPS watch. If the watch recorded the course reliably, only one line would be visible, not two. Be aware that the pace chart will be somewhat inaccurate, due to inaccurate course data and inaccurate GPS sport watches.
As an analytical person, I have a natural preference to be exact with everything. But due to the limitations of the source data and my GPS watch, I have learned to accept functional accuracy when developing a pace chart. It’s an extraordinarily useful guide during a race, but I also expect to find some degree of imprecision.
The post Pace Chart Tutorial || Step 1: Landmarks & course data appeared first on Andrew Skurka.


June 13, 2017
Tutorial: Create a pace chart for an ultra marathon

During every ultra marathon, I carry with me a homemade pace chart that looks something like this:

My pace chart, so that I know how far it is to future landmarks and how long it should take. I based my splits on last year’s winner, plus 5 percent after factoring in course changes.
My process and end-result continually evolve, due to past learnings and to the particularities of the next race. But I feel confident now in sharing a framework for creating a pace chart for an ultra marathon. I will do this over a series of digestible-length posts:
Introduction
Step 1: Course data
Step 2: Goal-setting
Step 3: Split data
Optional: Crew chart
Case study: Bighorn 100
Ultras versus road & track
In a traditional race on the road or a track (e.g. mile, 10k, marathon), normally there is little variability in pace, because the terrain, footing, weather, daylight, and elevation remain relatively constant. As an example, in April at the Boston Marathon, my fastest mile was 5:26 minutes/mile and slowest was 6:11, with an average of 5:48.
Moreover, traditional road races have predictable split locations, e.g. every 400 meters, or every mile.
In contrast, most ultra marathon courses have extreme variability: pavement, gravel, singletrack, and cross-country; dry, muddy, and river crossings; daylight and darkness; and flats, moderate grades, and heartbreaking steeps.
In addition to the variability in the course, another factor has a dramatic effect on pace: fatigue. With few exceptions, ultra runners lack sufficient endurance to maintain a consistent pace throughout the race. Instead, the winner is the speediest runner who slows down the least.
Due to the course variability and fatigue factor, paces vary wildly throughout an ultra. Last year at the San Juan Solstice 50M, for example, my fastest mile was 7:20 minutes/mile and slowest was 20:23, with an average of 11:20.
The mile-by-mile uniqueness of each ultra course makes impossible any reliable apples-to-apples comparisons between two races. For every race, a unique pace chart is needed.
Benefits of a pace chart
Creating a pace chart takes some time. But I think it’s worthwhile for anyone who wishes to maximize their performance, whether you’re at the front or the back.
1. Pacing
Most ultra runners start too fast and hemorrhage time later in the race. A pace chart acts as a governor in the early miles, which improves your odds of a strong finish, or perhaps just a finish.
A pace chart gives you the confidence to run your own pace without feeling pressured by the momentum of the field. Essentially, your pace chart will say, “You don’t suck. Everyone else is just too excited and running too fast. You’ll catch many of them later.”
2. Resupplying
A good pace chart will show the distance and estimated time to the next aid station, and the cumulative time to get to each major landmark on the course. This data informs decisions about how much food and water to leave with, and where to pick up new equipment like a headlamp, extra clothing, or fresh pair of shoes. By carrying a pace chart print-out, you don’t have to remember these numbers or rely on course signage.
3. Crewing
A pace chart can easily be adapted into a Crew Chart, which might look like this:

Crew chart from Run Rabbit Run, which was a huge help to Amanda.
It helps the crew determine when and where they should expect to meet their runner(s), and decide how much time they have between points if they are contemplating a middle-of-the-night snooze or a challenging drive between two points.
4. Familiarity
Even if I didn’t carry the pace chart with me, I feel that the process helps me to prepare for the race. It forces me to study the maps and course profile, consider the weather at various points along the trail, and identify prospective spots to make a move and pull away from the competition. Due to the pace chart, I am a more informed and confident racer.
Equipment
To maximize the value of a pace chart in an ultra marathon, I highly recommend a GPS sport watch like the Suunto Ambit3 Peak. A simple watch is usable, but a GPS watch will display current and average pace, lap and cumulative distances, elevation, vertical gain and loss, and current and average heart rate. This data is immensely beneficial.
Wearing the watch is not quite enough, though. Make sure to change your display settings so that relevant data is shown.
A framework, not step-by-step instructions
Creating a pace chart for an ultra marathon requires at least moderate analytical skills and spreadsheet know-how. I wish that I could offer a pace chart template that could be adapted to each race, but the uniqueness of each race and the limited availability of data are challenging obstacles.
If you undertake this process, please recognize this tutorial for what it is — a framework, not step-by-step instructions — and prepare to be creative with your approach. At the end of the day, you only need something that is functionally accurate. Ultimately, you will run your own race.
The post Tutorial: Create a pace chart for an ultra marathon appeared first on Andrew Skurka.
June 10, 2017
Strength AND speed: 100-mile ultra training philosophy || Interview with David Roche


Finding my climbing legs near Glencoe, Scotland, on an early-morning “run” of Sgor Nam Fiannaidh
On Friday I toe the line for my second race of the year, the Bighorn 100 in Wyoming’s Bighorn Mountains. Like the Boston Marathon, Bighorn is an endurance running event. But the races are different animals in nearly all other respects.
Most notably, Bighorn has 100 miles of singletrack and jeep roads, features 20,000 vertical feet of climbing, and reaches a high point of 9,000 feet above sea level. In comparison, Boston is 26.2 road miles, climbs a mere 650 vertical feet, and finishes at sea level.
To better explain the underlying philosophy of my Bighorn training, with the context of a recent spring marathon, I interviewed again my coach, David Roche*. Transcript below. To read the two other interviews with David, go here and here.
By this time next week, we’ll know if the increased focus on speed — in addition to my historic focus on strength, i.e. volume, volume, volume — produced better results. I’m optimistic.
* David is deeply engaged with and wildly supportive of his runners, but he’s also a badass in his own right. Yesterday he represented the USA at the World Trail Championships in Italy!
Q | Boston was a peak race for me, and I ran it hard. Physically, my legs felt fatigued for at least a week afterwards. Mentally, several weeks passed before I fully embraced Bighorn training. Was my recovery experience normal?
Your recovery was a bit quicker than expected. A marathon is always physiologically hard, but having a breakthrough marathon effort — which Boston was for you — is almost incomprehensibly stressful on the body.
Looking at your data, you ran at a higher percentage of lactate threshold than you ever had, for longer than you ever had, at a faster pace than you ever had, all in scorching heat. That type of stress causes breakdown at the cellular and systemic levels. I’m sure that post-race bloodwork would have shown off-the-charts creatinine and cortisol, which are indicative of muscular breakdown and an extreme stress response.
That type of physiological breakthrough also comes with psychological costs. Like King Henry asking his soldiers to plug a broken line, starting a new training cycle is essentially asking your body to go “once more into the breach.” Getting the drive back takes time — some of that is pure physical healing, and some is a psychological reset.
Normally, I would prefer a month of easy running after that type of breakthrough. But we had just a few training weeks to prepare for Bighorn, so we had to jump back into the breach sooner.
Q | What fitness components (e.g. VO2 max, running economy) from road marathons are most useful for mountain ultras?
It’s helpful to break goal events down into their component parts. The marathon rests largely on your velocity at lactate threshold (vLT; 1-hour pace) mixed with aerobic efficiency.
vLT comes from a base of optimized running economy and vVO2.
Aerobic efficiency comes from a healthy dose of easy miles and enough aerobic threshold work to make you efficient burning fat at faster paces.
A 100-miler, meanwhile, rests largely on velocity at aerobic threshold (vAT), low-level aerobic efficiency, and a new component — resilience. vAT can utilize your vLT base from the marathon, so we didn’t have to do a full rebuild of your running economy from the ground up (with strides and short intervals). Instead, we did short reintroduction phases of just a few days to get a quick neuro-muscular stimulus before launching into ultra training.
The complication with vAT for mountain ultras is that we aren’t just concerned with horizontal velocity, like in the marathon or a flat ultra. Now, there is a significant vertical component as well. Hill workouts and other efforts are designed to improve vAT as well as ascent velocity at aerobic threshold (vamAT). vam is a cycling metric that we have adopted for SWAP athletes.
The other components of ultra training are more straightforward. Low-level aerobic efficiency and resilience involve using long runs to prepare your body to improve “all-day” pace. Meanwhile, we rely on faster workout paces to ensure that the “all day pace” does not cause breakdown.
Q | Overall, would you say that a winter of Boston training was a productive base for the ultra season, or would I have been better served by a tighter ultra focus?
Speed wins no matter what the distance or terrain, so long as the athlete is strong enough to reach the finish.
The marathon training was not only valuable, it was indispensable. That speed (which at your vLT is about 30 seconds faster per mile) and improved running economy (probably 10+% better), raises your performance ceiling almost immeasurably.
Now, all we need to do is get strong enough to use that speed in a 100-mile ultra. This is actually the easy part.
As a side note, many ultra runners — even pros — fall into a rut because they focus too much on volume and not enough on speed. The farther away you get from your fastest, the stronger you need to be to compensate, and that strength cup can only get so full before performance starts to stagnate and regress.
In a perfect world, we’d have 6 weeks to build for Bighorn (instead of just a few), so the long-term plan is to consider it a big training day for UTMB. Your big training day now is better than your hardest race effort before the Boston build, so I’ll take an abbreviated ultra training cycle after speed development over a massive ultra cycle with minimal speed development every single time.
Q | Is that 100-mile strength delivered primarily by high-volume efforts and high-volume weeks, often with long consecutive days? Are there any less time-intensive tricks to achieve it?
Almost everyone is underprepared for running 100 miles in the mountains. The training goal is to limit that lack of preparation to the bare minimum, allowing an underprepared athlete (i.e. everyone) to finish strong.
Jim Walmsley at Western States in 2016 might be the best (and possibly first) example of someone truly racing a 100 from start to finish (or at least mile 93), in attack mode all day. So his training is an instructive upper bound. Prior to that race, he was putting in 140-mile weeks with runs regularly over 30 miles, often on tough trails in the Grand Canyon.
For the purposes of simplification, that is “max strength.” Most people would break under that type of load. For the rest of us, it’s about finding the balance between that max strength level of training and what we can achieve healthily (which varies based on genetics and background). Unfortunately, that means there are no shortcuts at the 100-mile distance.
What is required: lots of miles, lots of long runs, and comfort with the extremes of human exertion.
Through periodization, shorter intervals, doubles (runs in the AM and PM), cross training, nutrition hacks (limited carbs between some key efforts), back-to-back long runs, and leg strength work, we can reduce the pure mileage needed to get close to max potential. Each of those elements varies in importance based on everything from a person’s gender to their bone density to their job. But, at the end of race day, miles make the woman or man.
Q | About ten weeks separate Bighorn and UTMB, versus eight weeks between Boston and Bighorn (and, realistically, only seven due to personal commitments). Will you add new components for UTMB training, or simply address each component more fully?
Ten weeks in Skurka-time is an eternity! Your talents are like animals on Noah’s ark, with two of the menagerie of gifts being resilience and recovery. So we can pack a lot into short periods of time now that we’ve had six months together.
With a 10-week cycle, we’ll have three deliberate phases: recovery, economy, and mixed hill/ultra.
2-3 weeks of easy running, after nearly a week off
2 weeks of an economy phase very similar to when we started together in December
2 week vVO2 phase with reintroduction of long runs
3 weeks of massive training in a hill/ultra phase, before finishing with a taper.
The training will culminate with those three big training weeks. We will combine your current fitness with a high-volume stress that will ensure that you aren’t under-prepared in Chamonix.
Questions for David or for me? Leave a comment.
The post Strength AND speed: 100-mile ultra training philosophy || Interview with David Roche appeared first on Andrew Skurka.
June 8, 2017
Mailbox: My impact on crap
Recently, I received an email from Luke G., who had attended a gear & skills clinic at the flagship REI in Denver. It’s worth sharing:

I field many emails from readers, most hoping to get some additional information, some expressing thanks for something that I had shared or done. But Felix’s story is one of my favorites.
If you’re unfamiliar with the referenced video on how to poop in the outdoors, I’ve embedded it below. You should also read the multi-part written tutorial, which goes into more depth and nuance than I was able to provide in the video.
Poop on.
The post Mailbox: My impact on crap appeared first on Andrew Skurka.
June 6, 2017
Review: Salomon S-Lab Sense Ultra || All-purpose trail running shoe


The Salomon S-Lab Sense Ultra is a form-fitting all-purpose trail shoe, with precision fit, reliable outsole grip, and a happy-medium balance between cushioning and feel.
Last month Amanda and I took a “normal person vacation” to Scotland. In my luggage I had room for just one pair of running shoes, and therefore needed a well-rounded model that would be comfortable for a week straight and that would perform well wherever and whenever I could get out for a run, whether that meant pavement, hiking trails, or sheep trails, or dry, wet, or muddy.
I considered the original Salomon Sense Pro (my long-term review), which for several years has been my favorite all-around running shoe, but instead went with the new Salomon S-Lab Sense Ultra, which fit similarly and have an equally wide range, albeit more trail-centered. Plus, I’d been sent them for review by Salomon, and Scotland would be a convenient testing opportunity.
Review: Salomon S-Lab Sense Ultra
The Salomon S-Lab Sense Ultra is ideal for mid-length and long outings with varied trail surfaces. They will best fit feet of average and below-average width and volume. Expect precision handling, reliable outsole grip, and a happy-medium balance between cushioning and ground feel.
My most recent run in the Sense Ultra is indicative of this shoe’s range. It was a 34-mile 5.5-hour long run in Boulder with nearly 7,000 vertical feet of climbing. The route included a bit of everything:
Paved roads and bike trails to reach and return from the trails,
Dry rolling dirt singletrack,
Steep, off-angle, rock-strewn trail with wet surfaces after an early-morning thunderstorm,
Fine gravel bike path and jeep road, and,
Rocky, washed-out, and loose peak trails that maintain 25-30 percent grades (e.g. 1,900 vertical feet in 0.8 miles).
Due to its versatility and long-term comfort, later this month I plan to wear the Sense Ultra in the Bighorn 100 in Wyoming. I’ve logged 120 miles in them, and have put them aside until race day.
Key specs
Unisex
9.7 oz (M’s 9), 11.0 oz (M’s 11.5)
Breathable mesh upper with reinforcing exoskeleton
Bump- and abrasion-resistant toe guard
Quicklaces
Premium Wet Traction Contragrip
Stack height: 26mm/18mm
Drop: 8mm
$180 MSRP
The S-Lab Sense Ultra fits true to size. I’m a consistent 11.5 in other Salomon shoes, plus models from Altra, Hoka, La Sportiva, Merrell, and Salewa.
Comparisons
How does the S-Lab Sense Ultra compare to other shoes from Salomon?
S-Lab Sense Ultra vs S-Lab Sense 6 and 6 SG
The naming sequence suggests that the S-Lab Sense Ultra is most akin to the S-Lab Sense 6 and Sense 6 SG. But I don’t feel this is the case. These models are considerably:
Lighter (7.8 and 7.9 oz vs. 9.7 oz, or 20 and 18 percent lighter), and
Thinner underfoot (heel/foot of 18/14 mm and 20/16 vs. 26/18, a reduction of 27 and 18 percent).
The agile Sense 6 and 6 SG are minimalist racers. But unless you’re built like Kilian, you’ll probably find the added cushioning of the Sense Ultra to be more welcoming on longer outings. The Salewa Lite Train (my review) are Sense 6-like, and personally I max out in them after 2 hours.
S-Lab Sense Ultra vs. Sense Pro
I think a better comparison to the S-Lab Sense Ultra is the original Sense Pro, which has been a longtime favorite of mine. The Sense Pro specs at 9.2 oz and 23/17 mm heel/forefoot, and is similarly versatile — you might recall that I chose it for the Colorado Marathon and for trail races like the San Juan Solstice 50 and Run Rabbit Run 100.
The S-Lab Sense Ultra has a grippier and more aggressive outsole, which alone makes the Sense Ultra more trail-worthy than the Sense Pro. While the Sense Ultra can be used on roads, but I wouldn’t do a road race or road workout in them. In exchange, however, the Sense Ultra is more masterful on challenging trails.

The S-Lab Sense Ultra and original Sense Pro feel the most similar. But the Sense Ultra is a more capable trail shoe, due mostly to its more aggressive outsole. The Sense Pro is less capable on trails, but transitions better to roads.
S-Lab Sense Ultra vs. Sense Pro 2
In respect to its trail-worthiness, the Sense Ultra is more like the second-generation Sense Pro 2, which has a more aggressive outsole than the original Pro. But the Sense Ultra is less stiff, making it more comfortable on relaxed trails. The Sense Ultra also fits me better, more like the original Pro.

The S-Lab Sense Ultra (left) and Sense Pro (right) are closely related, sharing a similar upper, outsole, and fit. The Sense Pro 2 has a stiffer midsole, which increases underfoot protection but reduces feel, and only 6 mm of drop (vs 8 for the Sense Ultra).
Aesthetics
Salomon has muted its colors across its entire line. Gone are the highlighted accent colors. The Sense Ultra is a simple red and black. Amanda said they were reminiscent of Air Jordans.
Fit
The S-Lab Sense Ultra is form-fitting, and will feel familiar if you’ve worn other premium Salomon running shoes. The Endofit yoke cradles the mid-foot. The toebox is sized for small- or average-sized feet, but it’s optimized for precision handling, not toe splay or roominess. And the Quick Laces apply even pressure throughout the system.
In short, the glove-like fit is exactly what I want in a trail shoe.
Ride
I assumed that the S-Lab Sense Ultra would have 4 or 6 mm of drop, on par with the Sense Ultra 6/6 SG and Sense Pro models. In fact, it has 8. I was surprised by this, since the heel/toe transition is fairly smooth and natural-feeling. I’d prefer less, but it’s not the deal-breaker that I thought it would be.
When pushed laterally, the Sense Ultra does not allow for sliding inside the shoe, and its outsole provides reliable traction.
The 26/18 stack height is about the minimum I can handle for long training runs and ultras. It’s certainly not as plush as an ordinary pair of Hokas or Altras, but the tradeoff with those models is reduced sensitivity. The Sense Ultra is not mutually exclusive with these more cushioned models: for hard days in the mountains, I grab the Sense Ultra; for easier days on flatter terrain, I grab the foot pillows.
Outsole
I’ve been very impressed by the grippiness of the outsole, which is made of Premium Wet Traction Contragrip. Even on wet, angled, muddy, and ball bearing-covered rocks, I seem to get great purchase. Frankly, I’m still discovering the limits of this rubber — it seems that other shoes have trained me to run too conservatively.
The outsole is moderately lugged, striking a balance between grip, rolling resistance, and weight. It wouldn’t be my first pick for a muddy obstacle course or for a road race, but it performs well on most surfaces in between.
After 120 miles on varied surfaces, the outsole shows some signs of wear, about as much as I would expect.

I’m still learning the limits of this outsole. It grips rock, even if it’s wet or dirty; and it bites into both soft surfaces and hard surfaces covered with “ball bearing” gravel and sand.
Upper
The upper is classic Salomon: breathable mesh overlaid with a more durable exoskeleton. If it works, why change it.
The rubber outsole wraps nicely around the toebox, providing noteworthy resistance to impact and abrasion.
The tongue is thicker and more elasticized than other models. I am generally wary of elastic, which is heavy and which retains water, but I have not yet discovered first-hand a downside to this design.

The design and materials in the upper is time-tested, used on multiple other models from Salomon. If it works, why change it.
Price
Ouch, $180. The Sense Ultra is a great shoe, but at this price it’s probably a “special occasions” treat and not a daily trainer.
Buy now & support this review: Salomon S-Lab Sense Ultra
Questions about the S-Lab Sense Ultra, or have an experience with them that you’d like to share? Leave a comment.
Disclosure. This website is supported mostly through affiliate marketing, whereby for referral traffic I receive a small commission from select vendors, at no cost to the reader. This post contains affiliate links. Thanks for your support.
The post Review: Salomon S-Lab Sense Ultra || All-purpose trail running shoe appeared first on Andrew Skurka.
May 31, 2017
Six lessons learned on my first high route || Wind River High Route, Loop 4

After taking Andrew’s Backpacking Fundamentals course in 2015, I decided to test my new skills on Loop 4 of the Wind River High Route. Prior to it, I had completed several trips on the Appalachian Trail and on the Florida Trail. The Wind River High Route promised adventure, but also freedom from fixed itineraries, designated campsites, and complex permitting schemes.
1. This is THE stuff, and off-trail is where it’s at
For this Easterner, even the on-trail portions of the Loop 4 section-hike were amazing. It was hard not to be smitten with the Wyoming backcountry immediately beyond Elkhart Park Trailhead. I moved quickly, only stopping at Photographers Point for a quick lunch and to dust off my map-and-compass skills by identifying peaks towering over Titcomb Basin, my intended exit path later in the week.

The view from Photographers Point
Many miles later on the outskirts of Bald Mountain Basin, my trip really started. I felt close to something I’d been looking for during all my time outdoors — a sense of freedom, adventure, and natural autonomy. I was heading into the wilderness alone, with no boundaries, no fences, and (mostly) no trails. When I left the Fremont Trail, I crossed a threshold for unmarked land with no fixed course. I was thrilled.
2. Trust the guide
Initially I was worried that Andrew’s detailed Wind River High Route Guide would take away some of the magic. I didn’t want to spoil the sense of adventure. But those worries were unfounded. One of my goals for this trip was to practice my route-finding and map-and-compass skills. Andrew’s maps included helpful notes but left plenty of opportunity to make my own decisions (and mistakes).
I bumped a pair of mule deer as I moved through Bald Mountain Basin, and then watched them bounce off into one of the many invisible folds of terrain that would later perplex me. With a full view of Angel Pass, I had plenty of time to consider the path ahead. Without a guide, it would never occur to me to try traveling over Angel Pass. Distance flattens the terrain, making steep slopes appear vertical. But Angel Pass hardly warrants even a mention in Andrew’s guide, so I took it on faith that it would go.
3. Map and compass is not route-finding
And go it did. This was my first significant route-finding challenge. In my mind, I had two main options. First, I could take a literal reading of the guide and walk down into the bottom of the basin and march straight up the pass. Or I could stay high and avoid elevation loss by following a slightly longer route north around the basin and hope to connect to a long, grassy bench beneath Angel Peak.
I learned fast that you can only see so much from one position. Without walking all over, you have to make a decision with limited information. Knowing how to read a map, find and transfer compass bearings, or operate a GPS doesn’t necessarily translate into effective route-finding. For that, more field experience seems necessary.

Angel Pass, the left low spot on the ridge, from Bald Mountain Basin. The guide recommended going to the base of the pass and grinding upwards. But from this vantage point it looked more promising to loop right/north to gain elevation and contour into the pass.
When evaluating an off-trail trip, you have to account for route-finding issues. Andrew provides a “Skurka Time” spreadsheet with his guide, but don’t let that fool you into thinking that hiking time is simply about fitness. It doesn’t matter if you can grind uphill as quickly as Andrew if you cannot find the optimal route up. I learned this lesson over and over. If this is your first off-trail experience, do not be optimistic with your schedule.

Wildflowers on a grassy slope below Angel Pass
4. This country is big, real big
Cresting the top of Angel Pass was one of the best experiences of my life. The sense of accomplishment was unforgettable, and the views were worth every step. Looking east beyond the Continental Divide and west across the front country I’d just crossed, I was engulfed in endless miles of mountain country.
But the excitement and wonder of my ascent slid into feelings of isolation and vulnerability. Frankly, it was intimidating, especially since the east side of Angel Pass appeared to be a heinous boulder field.
It took me hours to get down. Having to be that “on” for so many hours, knowing that with any step I could fall, sprain an ankle, turn a rock and be pinned there for hours or days, is something to be reckoned with. Descending took every bit of my focus, and it wasn’t until I bottomed out that I could begin to process and think about what lay ahead.

Extensive talus below Angel Pass, on its east side
The next few hours were classic high quality Wind River backcountry walking, and this helped me to refresh and recharge — just cycle in the ebb and flow of my mood on longer backcountry trips.
It was at this point when I realized that I did not bring enough sunscreen. A stupid mistake, a tiny little blemish in an otherwise extremely well-executed gear plan. But that wasn’t the only thing sowing doubt in my mind. Angel Pass wasn’t physically difficult or logistically challenging, but it did wear on me. And it readjusted my perception of the higher and more difficult passes to come. After hours of rock-hopping down Angel Pass, I was not ready to consider Alpine Lakes in my near future. By the time I made it down to camp at Golden Trout Lakes, I’d made up my mind that I was going to bail out.

Above Golden Trout Lakes, after a long descent from Angel Pass
5. Be prepared to fail
It was tough to make a decision that felt like failure. But by that point, the nagging doubts in my mind were piling up: the extreme remoteness, the lack of sunscreen under a relentless sun, the nagging pain from a rolled ankle. When I picked this trip, I didn’t have a realistic idea of what tackling this high route would be like. But I did prepare for that eventuality, and changing my plans mid-trip was easy.
It was extremely satisfying to pull out my overview map and chart a course south down through a valley to which I had never been, never planned to go, and that was not my guide book. I marveled that at one point I had considered leaving the overview map at home.

I may have “failed” on the WRHR, but I still had the trip of my life.
6. Going alone is hard
Other than a couple camped at Golden Trout Lakes, I had the backcountry all to myself. Although I would have preferred to hike with a partner, there’s much to enjoy about hiking alone. Decision making is easy and efficient, for better or worse. You can go where and when you want, without concern for anyone else’s goals, physical ability, or safety.
Still, I think going alone was the key factor in not finishing the route as planned. Going alone meant being more conservative with my decision making, and it was easier for me to quit without someone there to psych me up for another pass. If completing a trip as planned is important to you, bring partners who share your abilities and goals. If you are forced to go alone, it can be done — but don’t underestimate the mental challenges you’ll face in addition to the physical ones.
I hope my story encourages some first-timers to get out there this summer and try something that really challenges them. If I can be of any help, feel free to drop me a line. david@sparkfire.net.
And a big thanks again to Andrew for putting together such a thoughtfully designed guide, and for generously taking the time to answer all of my questions prior to my trip.
The post Six lessons learned on my first high route || Wind River High Route, Loop 4 appeared first on Andrew Skurka.
Why & when: Removal of trekking pole straps & baskets


I keep the straps and baskets on my ski poles (top), but remove them on the models I use for backpacking in 3-season conditions.
Trekking poles like the Black Diamond Alpine Carbon Cork (long-term review) and Cascade Mountain Tech Quick Lock Poles (long-term review) come stock with nylon hand straps and plastic trekking baskets. But on 3-season backpacking trips, I leave the trailhead with both features removed.
Purpose
The hand straps are rooted in Nordic skiing. By looping one’s hands through the straps in such a way that the strap runs between the thumb and index finger, it eliminates the need to tightly hold the grip, which is difficult to do with gloves and which can strain the wrist. Instead, the strap transfers energy from the lower arm and allows for powerful push-off, which is a vital technique when skiing.

By using the strap like this, you reduce the stress on your wrist and need not hold the grip tightly.
Trekking baskets are the warm-weather offshoot of snow baskets, which give the pole floatation in winter snowpack. Without snow baskets, the narrow shaft would sink deeply into unconsolidated snow and create no firm backstop against which to push off. I’m less certain about the purpose of trekking baskets, but suppose they might prevent the poles from sinking into soft 3-season surfaces or jamming deeply into a small crack between two rocks.

Left to right: Trekking or mud baskets, snow baskets, powder snow baskets
The case for removing straps
When using Nordic skis or skinning with my alpine touring skis, I prefer that my poles have straps, for the aforementioned reasons. For all 3-season backpacking trips, however, I remove them. Specifically, I cut them off with scissors, or I remove the metal pin with a finishing nail and hammer. Why:
1. Not useful as intended.
Snow-covered terrain is a relatively flat surface, and is more conducive to exactly repetitive movements. In contrast, snow-free ground is littered with rocks, roots, overgrowth, log steps, blowdowns, and minor slope undulations.
My pole swing and tip placements reflect this variability. While I try to keep them behind me so that I can push off on them, I regularly must plant them directly to my right or left, or in front of me; I also must steer them around obstacles and keep them out of vegetation. Finally, while descending I often keep the poles in front of me, to assist with breaking. When planting poles in these alternative locations, my push-off ability is compromised and therefore the straps are much less useful.

Steve and Landon grind steeply towards Paiute Pass on the Pfiffner Traverse. Notice how both have choked up on their grips, and how Sam is leaning on his poles in front of him. In instances like this, straps simply get in the way.
2. Agility and futz
Even on well groomed trails, I regularly take my hands off the pole grips. For example, to:
Take a photo,
Retrieve my water bottle,
Open a food wrapper or storage bag,
Look at my map,
Operate a compass or GPS, and
Urinate.
On more challenging trails, or when off-trail, I take my hands off the grips even more often. For example:
While climbing or traversing steep slopes, I move one or both hands to the lower extension grips;
On talus, I carry both poles in one hand, so that I can grab rocks for balance or more quickly put a hand down if I fall; and,
While bushwhacking, I hold the poles near their middle and use them as brush guards.
Without straps, I am a more agile hiker, and I avoid the minor futz involved in pulling my hands out of the straps or inserting my hands back into them multiple times each hour

Alan bushwhacks through Alaskan alder, holding both poles in one hand.
3. Torque trap
I have broken several poles, both carbon fiber and aluminum models. In every case, the pole was subjected to excessive lateral force. For example, as I was slipping and falling down a creek embankment, the pole tip became wedged in an exposed root and was then levered until it broke; or, I stumbled on talus and landed on the pole.
Removing the straps is not a surefire way to prevent pole breakage. But without straps, you can more quickly let go of the pole if it gets caught.
The case for removing baskets
I use snow baskets in the wintertime on ungroomed and untracked surfaces. Usually, Colorado’s snowpack calls for wider powder baskets. But for 3-season backpacking I remove the baskets. Why:
1. Entanglement
In wet environments, on low-traffic trails, and when off-trail, trailside vegetation can be thick, especially late in the season after growing all summer. Baskets cause the poles to become more ensnared in the brush, limiting their usability.

Typical trailside vegetation in Glacier National Park. Baskets cause more pole entanglement and limit their usability.
2. Surface testing
In early-season conditions, poles can be used to test the depth and strength of snow bridges. Without a basket, the pole can more easily punch through the consolidated snow, allowing for good evaluation.
It’s a similar story in areas where I may encounter deep mud or quicksand. A basket limits my ability to probe the surface tension and depth.
3. Weight
A trekking pole is like a pendulum, and more energy is required to move weight at its tip than the same amount of weight at its grip or in another static spot like inside your backpack.
A 0.5-oz basket at the tip of each pole is probably equivalent to adding a few ounces of weight elsewhere, in terms of energy expenditure. More significantly, the extra weight slows swing speed.
4. Drag
During creek fords, baskets add drag, making the pole more difficult to control and plant exactly where you want.
5. Unnecessary
I’ve never missed having baskets on my poles in 3-season conditions, making me question their entire purpose. It’s as if they solve a “problem” that does not exist. Without baskets, I’ve never become annoyed at how deeply my tip sinks into the ground, and it’s extremely rare that the tip becomes caught in a small crack between rocks. What am I missing?
Your turn: Do you remove the straps and baskets from your trekking poles, or leave them on? Why?
The post Why & when: Removal of trekking pole straps & baskets appeared first on Andrew Skurka.
May 28, 2017
Reader question: Wireless service on the Wind River High Route

Melissa, who is undertaking the Wind River High Route this August, asks:
What kind of cell service did you have along the route? We are planning on doing the end-to-end thru hike, and my hiking partner needs occasional wireless service for work.
Wireless coverage along the Wind River High Route — and in the Wind River Range, more generally — is poor but possible. Your odds are best from high vantage points with unobstructed views to the high plains east or west. I’m thinking of specific spots like Wind River Peak, Raid Peak Pass, Europe Peak, and the Continental Divide between Pedestal Peak and Downs Mountain. Conversely, I wouldn’t expect coverage in deeper canyons or watersheds like East Fork or Bull Lake Creek.
As you might expect, Verizon will offer the most robust coverage from inside the range.
Cell service is insufficiently reliable for an emergency situation. For that purpose, I would recommend a PLB, satellite messenger, or satellite phone.
If you would like a more granular answer, consult the wireless coverage maps from your provider. I’ve dropped screenshots below.
Verizon

AT&T

Sprint

The post Reader question: Wireless service on the Wind River High Route appeared first on Andrew Skurka.
May 23, 2017
Who is racing Bighorn 2017? Help with crowdsourced entry list.

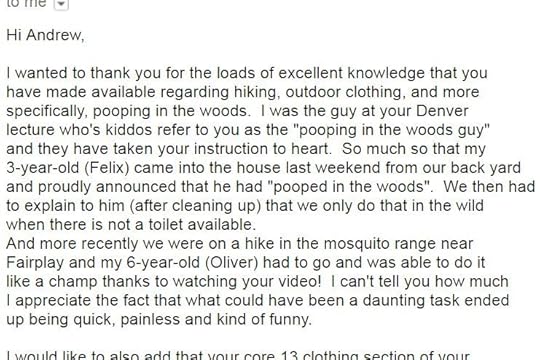
West side of the Bighorns
We’re less than a month out from the Bighorn Trail Run — which includes a 100-, 50-, 32-, and 18-miler — and I’ve been unable to find an entry list. One has not been made available on the race website or by Its Your Race, the event management platform. And an email inquiry in March to the RD for a list has not received a response.
So I thought maybe we could crowdsource one. Personally, I’d appreciate knowing beforehand the (friendly) competition, as well as if others from Boulder will be there, which might lead to a group run or travel-sharing.
Add a name to the entry list
Use this Google Form to add an entrant.
Before adding friends or running partners, please ask their permission.
List of crowdsourced entries
This list is updated in real-time. Entries will be independently verified, but not in real-time.
The post Who is racing Bighorn 2017? Help with crowdsourced entry list. appeared first on Andrew Skurka.
May 22, 2017
Grab one: Fourteen spots remaining on 2017 guided trips

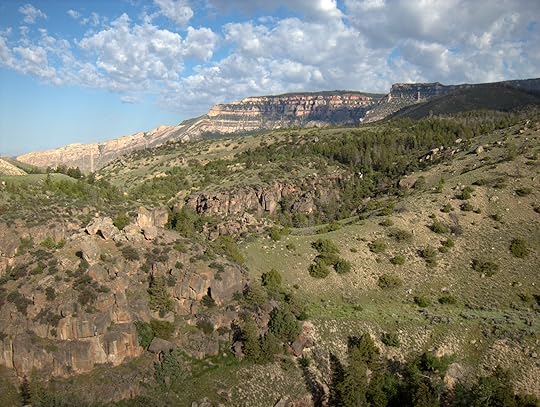
The view north from Tablelands. The South Fork of the Kings River runs right to left through the center of the photo, out of view deep in a canyon. On the skyline can be seen the Palisades (right side) and Black Divide (left side).
“Wait a minute? You’re offering guided trips this year?”
Indeed, earlier this spring I decided to offer trips again in 2017. My original thought was to open them only to alumni, some of whom have be waiting a few years to take a longer trip with me, and then launch a broader program in 2018.
But the alumni interest was so strong that to make room for everyone I decided to double capacity. Of the six sessions, five still have some space on them, and these spots are up for grabs. I am accepting applications immediately.
Each session will have two guides and up to eight clients. I am guiding half of the sessions. My assistant, or the guides leading the sister session, will be the all-star crew of Alan Dixon, Mike Clelland, and Brian Robinson. Refer to the schedule below for guide assignments, if you have a preference. Honestly, you can’t go wrong.
The trips will take place in late-September in Sequoia-Kings Canyon National Park, the southern bookend of California’s High Sierra. The primary goal is adventure — we will travel extensively off-trail and camp in seldom visited areas of the park. Early-winter weather could add some spice, too.
But the trips will also be learning-intensive. Ultimately, my goal is for clients to feel as if they could undertake a similarly ambitious trip on their own, such as when Rud, Krishna, and Nathan completed Loop 8 of the Wind River High Route and when David, Paul, and Chris did Loop 1 of the Kings Canyon High Basin Route.
Speaking of, some of our routes will follow segments of the KCHBR. We will also be visiting the Mineral King area, which has been on my list for years for but which hasn’t happened until now.
I have partnered with Southern Yosemite Mountain Guides to make these trips possible. This allows me to focus on guiding, while SYMG manages the related admin.
Here is the schedule:
Interested? Quick links:
Guided Trips page
About High Sierra Adventure trips
Planning map with trailheads, approximate routes, and nearby travel hubs
Apply now
Prices
Testimonials
Questions? Leave a comment, or contact me privately.
The post Grab one: Fourteen spots remaining on 2017 guided trips appeared first on Andrew Skurka.


