
Andrew Skurka's Blog, page 46
August 6, 2017
Review: La Sportiva Bushido || A perfect “high route shoe,” if it fits
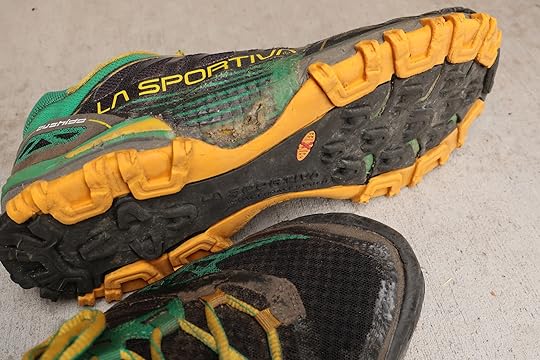

The La Sportiva Bushido, a 10.5-oz trail runner that is the most perfect “high route shoe” that I have found. But it will only work for those with small-volume and narrow feet.
Last summer on the Glacier Divide Route, Dave raved about the La Sportiva Bushido. I made a mental note, and as I geared up for my yo-yo of the 77-mile Pfiffner Traverse last month, I bought a pair.
In fact, I picked up two. The other I purchased during the post-trip drive home — when you find a winner, stock up, especially when the current colorway is on closeout.
For narrow and small-volume feet, the La Sportiva Bushido is the most perfect “high route shoe” that I have found. It offers:
A form-fitting upper,
Superb traction,
Low center of gravity,
Underfoot stiffness,
Excellent durability, and
Light weight.
With these features and characteristics, the Bushido excels on terrain typical of high routes, which is notably different than what is encountered on a conventional backpacking trip. High routes frequently have:
Climbs up, descents down, and side-hills across very steep slopes that can be wet and loose;
Bushwhacks through dense brush and understory;
Scrambles on talus and slabs, and grinds through scree; and,
Travel on lingering snow, with occasional pitches that demand an ice axe and/or crampons.
Please support this review by using one of the vendors below, or Amazon.com.
Non-high route applications
For trail running — which is the intended purpose of the Bushido — I would use it on trails that are exclusively technical and muddy. But for the conditions I normally encounter (i.e. technical but dry trails, with several miles of pavement at the beginning and end of most runs), I prefer a more agile model like the Salomon S/Lab Sense Ultra (my review) or a more cushioned generalist like the Hoka One One Speedgoat 2 (review forthcoming).
And for conventional backpacking trips, which involve more (or exclusively) trail miles and linear travel, I like a more cushioned midsole and a more voluminous upper, as with the Salomon Odyssey Pro (review also forthcoming) or aforementioned Speedgoat.

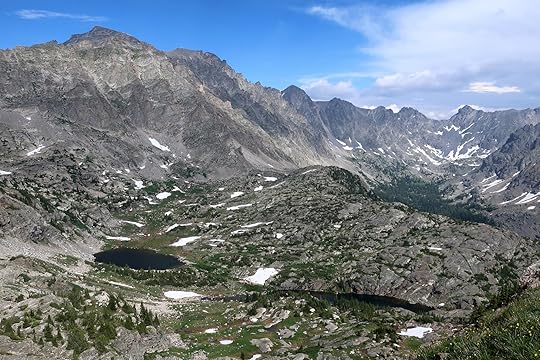
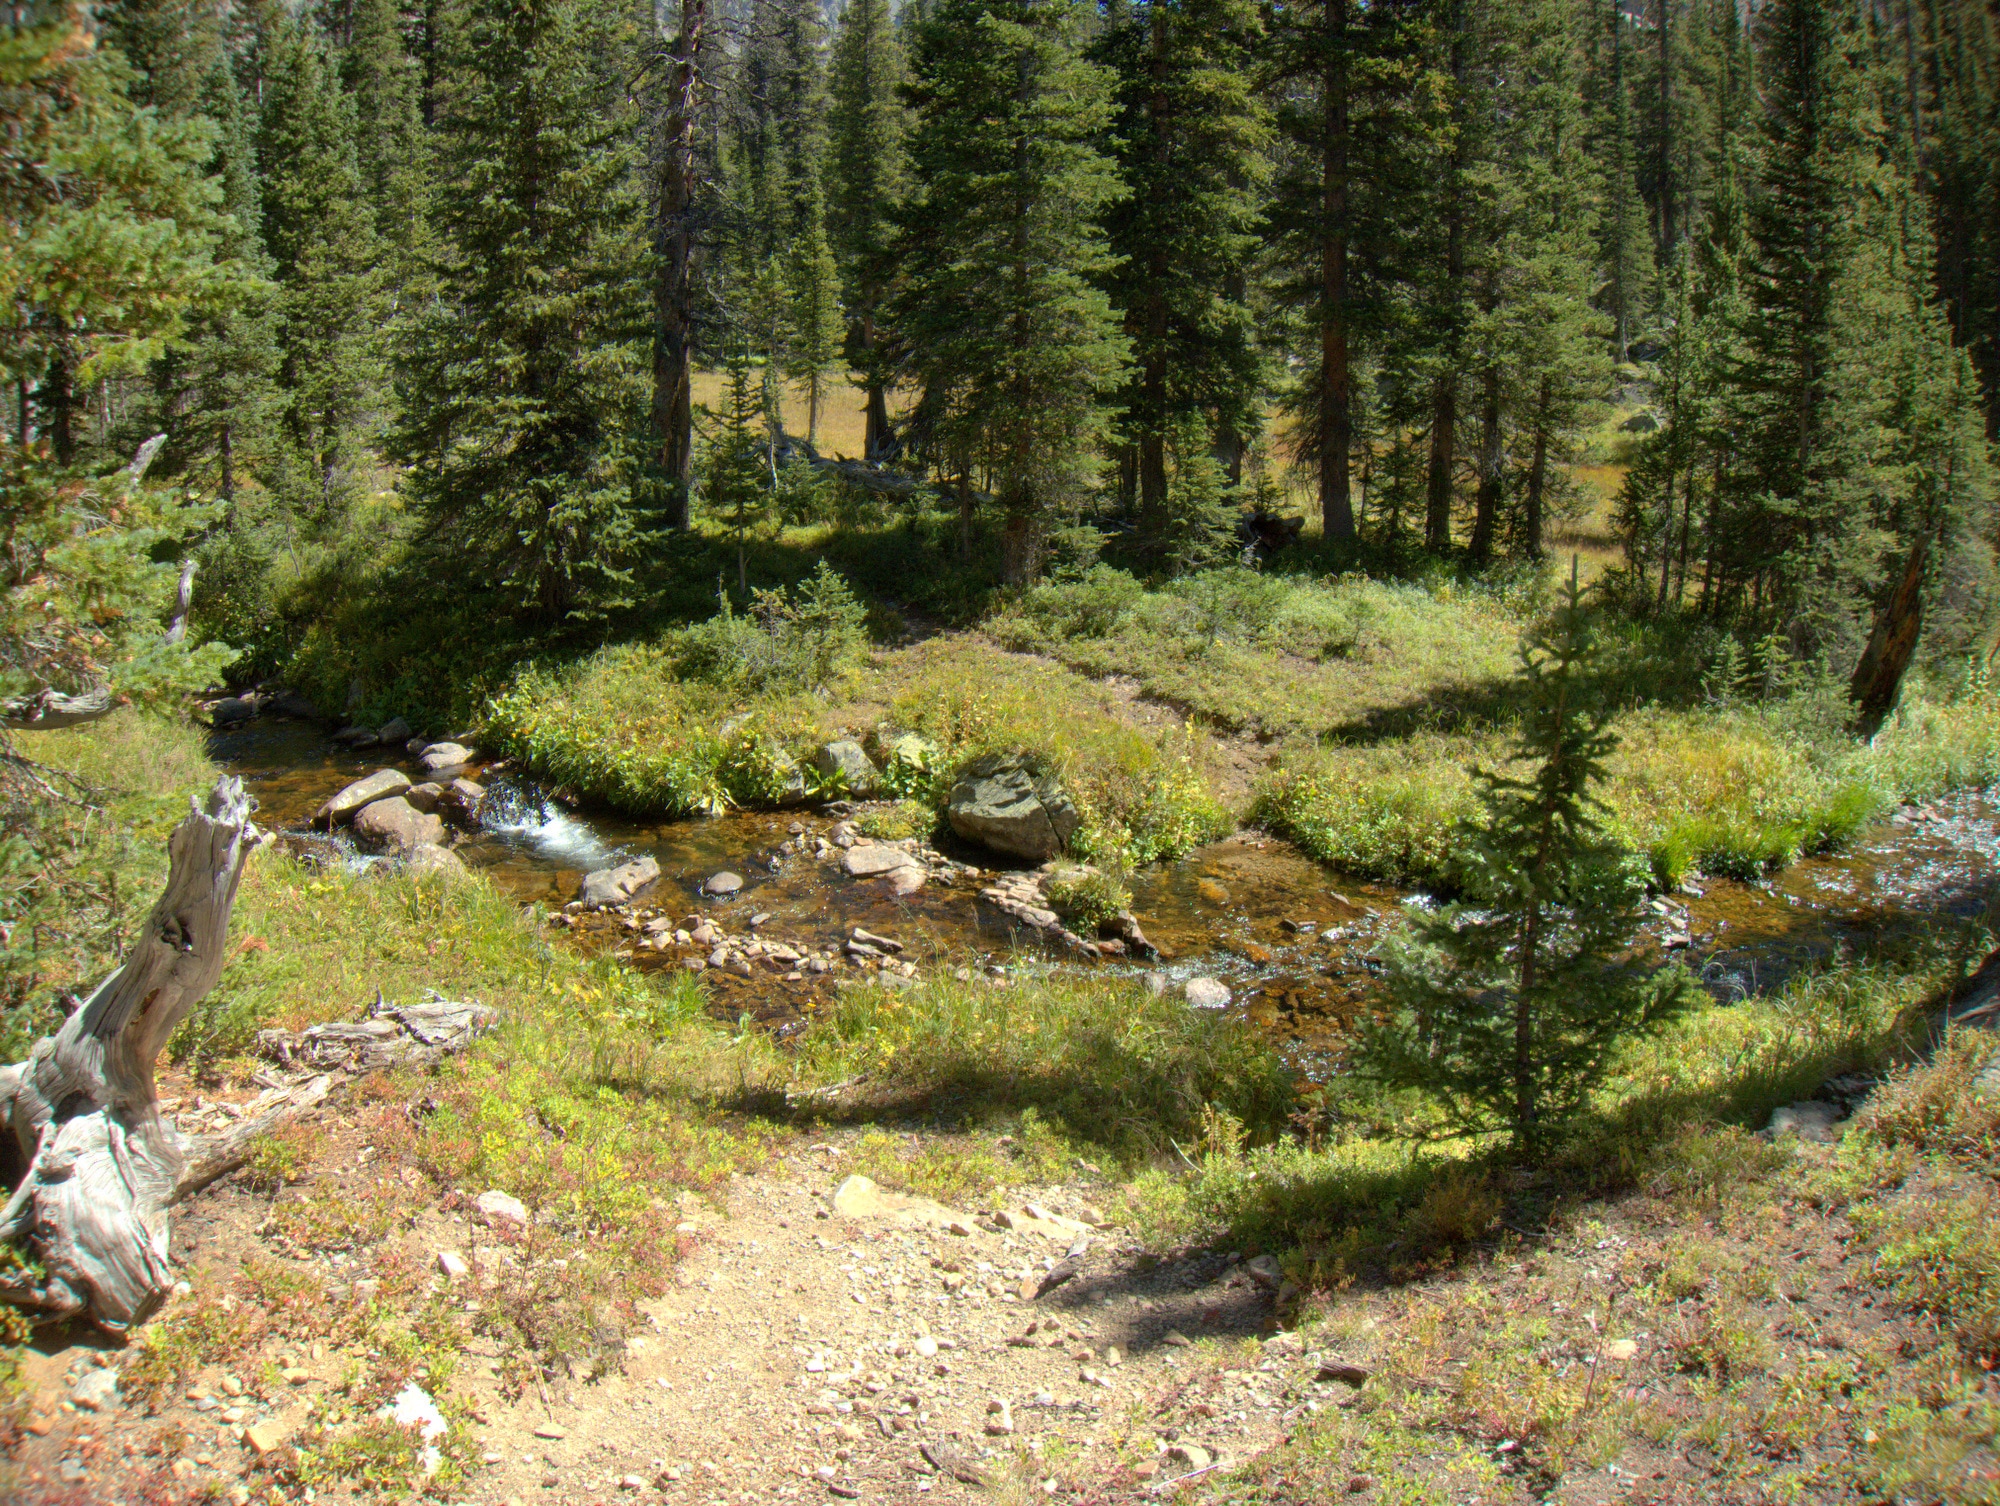
High routes place different demands on footwear than traditional backpacking trips. Travel is a mix of lovely tundra, tedious talus, lingering snow, and wet meadows — and the footing is constantly off-camber and steep. Photo: Pfiffner Travese below Andrews Peak, Rocky Mountain National Park.
Shoe specs
Weight: 10.5 oz (298g) for M9, 11.9 oz (337 g) for M45.5
Upper: Ripstop mesh, adhesive microfiber, and TPU exoskeleton
Midsole: Compression molded EVA with TPU shank and compressed EVA forefoot rock plate
Outsole: Proprietary FriXion rubber with substantial U-shaped lugs
Stack height: 25 mm heel, 19 mm forefoot
Drop: 6mm
$130 MSRP
European sizing
La Sportiva makes European half-sizes, which are on a different scale than US half-sizes. Use this conversion chart to determine your equivalent size.
Personal side note: I’ve always been a 45.5 in La Sportiva shoes, and size 11.5 in US (for Altra, Hoka, Merrell, Salewa, Salomon, Vasque), even though the 45.5 converts to size 12.
Fit
I have narrow and small-volume feet. With normal-sized shoes, I need to crank on the lacing to get them secure. With roomy Altra-style lasts and uppers, I’m limited to flat and linear multi-use trails — my foot swims in the shoe too much to tackle more difficult trails.
When I first slipped on the Bushido, they seemed small even for me, most notably with a low footbox. An hour-long run felt reasonable, but I wasn’t sure if I could hike in them all day. Thankfully, they pack out, and after a few miles they were wonderfully form-fitting, on par with the sock-like fits of the Hoka Clifton 2, Salewa Lite Train, Salomon Sense Pro and Pro 2, and Salomon Sense Ultra.
If you are skeptical of the Bushido’s fit, consider the Salewa Ultra Train (my review) or the La Sportiva Mutant, which are similar to the Bushido in their intended uses but which have wider lasts.
Upper
The upper consists of ripstop mesh, laminated microfiber, and a TPU exoskeleton. It strikes a good balance of breathability, drainage, and durability. For improved durability, I recommend applying Aquaseal to the seams, as Dave explains.
The Bushido doesn’t dry as quickly as I would like, but I haven’t yet found a shoe that does. It’s better than most, mostly because its upper is simple and minimally padded.

The upper combines ripstop mesh (black), adhesive microfiber (dusty gray), and a TPU exoskeleton (clear film strips at the midfoot). Before the trip, I protected the seams with Aquaseal for improved durability.
The toebox is wrapped with a TPU cap, for improved resistance to abrasion and impact, like accidentally kicking rocks or snagging toes on talus. The cap was especially helpful when I had to punch steps on steep snow on Paiute Pass and the Northeast Gully.
The most significant sign of wear on the upper is the seal between the toebox mesh and TPU cap — it has started to peel. I think a bead of Aquaseal should fix it, and an application of Aquaseal to new shoes in this area may prevent it entirely.
The nicely padded tongue is anchored internally on both sides of the foot, keeping it in place.

Besides the outsole, there are two other visible signs of wear: the toecap is delaminating from the toebox mesh, and fabric overlaying the TPU shank has been abraded off.
Outsole
The Bushido features an aggressively lugged outsole made of a proprietary premium rubber, FriXion. It stuck reliably to bare rock, and it bit well into vegetated slopes. Honestly, it’d be greedy to ask for better performance.
After 160 hard miles, the lugs show signs of wear, but so far the stickiness and traction is unaffected. 300-400 “high route miles” is probably a reasonable expectation. That may sound low if you are accustomed to thru-hikes on manicured trails, but it’s actually very good.

After 160 hard miles, the Bushido’s aggressive and grippy outsole is showing wear relative to a fresh pair, but still mostly intact.
Midsole
Performance on uneven terrain is not solely a function of the outsole design and materials. The midsole and aforementioned upper also have pivotal roles.
The Bushido has a thin midsole: its stack height is 25 mm and 19 mm at the heel and toe, respectively, and these measurements include substantial outsole lugs. This gives the Bushido a low center of gravity, reducing its inclination to roll on off-camber surfaces.
The forefoot includes a compressed EVA rock plate and the midfoot has a TPU shank. These features:
Achieve underfoot protection without a generously cushioned midsole that is top-heavy; and,
Add torsional stiffness, which reduces the strain on foot muscles when edging.
I’m happy to have a rock plate, but I’m dubious of the EVA. It will probably break down prematurely relative to other parts of the shoe. Perhaps the inherent stiffness of the shank and outsole rubber will help offset its deterioration.
What’s been your experience with the Bushido? Or, what questions do you have about them? Leave a comment.
Buy now & support this review: La Sportiva Bushido
Disclosure. This website is supported mostly through affiliate marketing, whereby for referral traffic I receive a small commission from select vendors, at no cost to the reader. This post contains affiliate links. Thanks for your support.
The post Review: La Sportiva Bushido || A perfect “high route shoe,” if it fits appeared first on Andrew Skurka.


August 5, 2017
John Muir Trail early-season 2017: What was it like? || Part 3: River fords
In March I was contacted by Sam and Steven Chaneles, a Miami-based father-son team who were planning to thru-hike the John Muir Trail in 2017. Due to permit availability and personal schedules, their dates were June 17 through July 9. They’d been watching the record-setting snowpack plots and were increasingly concerned about the feasibility of their plans given their thin backpacking resumes.
I was able to help them pare down their kits, talk through anxieties, and set their expectations — and then they did all the hard work (and had all the fun, and a heck of a father-son trip) in the High Sierra. After they returned, Sam wrote me and included a few photos and anecdotes. It sounded truly epic, and I thought their story was worth sharing — partly for the entertainment value, but also to help others better understand the challenges and hazards of early-season backpacking in the High Sierra, especially after an exceptionally wet winter. Sam posted a more general trip report on his website, Engineered for Adventure.
In this four-part interview, Sam and I discuss:
Snow coverage, navigation, traction & snowshoes
Passes, axes, and crampons
River fords
Mosquitoes & final thoughts
Q | What techniques and equipment did you use in safely getting across?
Our general protocol for creek crossings was:
a) Look for a log or a rock to hop across to avoid getting our feet wet. Often times this method worked for smaller creek crossings, yet for the bigger fords it almost always failed. During the early-season the creeks were flooded out of their normal banks and overflowing, so water volume was a serious concern.
b) Now that I know I need to get my feet wet, does this crossing look manageable? This answer to this question will vary from person-to-person depending on the level of risk you are willing to take. For the few more difficult crossings (Evolution, Tyndall) we encountered, we did not consider the normal “trail” crossing a viable option, as the combination of strong current and deep water was beyond our comfort level.
c) If it does look manageable, time to get into “fording mode.” We would take off our boots, socks, and pants, and put on our Crocs at this point. If the current was strong enough we would ford in tandem, using each other as support against the current. Only for a few wades where current was not an issue did we ford alone.
d) If it does not look manageable, look for alternatives. A great general protocol to have is to hike upstream (or possibly downstream) and look for where the creek may fork into smaller tributaries. This can convert the single, difficult crossing into numerous smaller, easier crossings.
The mindset we had going into creek crossings was be patient and wait until we find something we like. We always tried to avoid strainers (downed logs, debris, etc.) and whitewater, and instead looked for slower moving current, if possible. Never assume that the “trail” crossing is the best place to cross, because it may not be.
Some other tips we found useful about creek crossings:
In terms of technique, when fording in tandem we had our hands on each other shoulders, leaning for support.
When fording alone I faced slightly upstream, using poles for support.
ALWAYS remember to unclip all buckles from your pack, making it easy to ditch in case you fall in.
Shuffle your feet slowly across the bottom and avoid taking large steps, as your balance can be faulty in the strong current and cold water.
Remember to keep moving as well, especially in the cold water. Creek crossings can take a lot of energy out of you.
I always tried to eat a snack before a creek crossing to ensure I would have energy when I needed it. Longer crossings like Evolution Meadow were exhausting enough (more from the cold than the physical effort of the crossing) that I had to take a break after to regain my strength.
Try to pick a line that is a bit higher than the place you are trying to reach. Often times due to the current you will drift a bit downstream.
Leaning into the current slightly provides a good brace against the force of the flow, especially if the water level is higher than knee high.
Q | Which crossings were most dangerous for you? Would they have been as dangerous under different conditions, like if you had arrived at it in the morning versus 5pm?
Much to our surprise, the water crossings were not as intimidating or as difficult as we expected given the record snow conditions and water content of the snowpack. That may likely be due to our timing, as snow bridges still existed for many crossings.
At the beginning of our trip we were able to cross nearly all creeks on snow bridges, as significant snowpack was still present. Before crossing on a snow bridge we would use our poles to probe the bridge, trying to make sure it would not collapse under our weight. Be extremely careful when crossing on snow bridges, especially as they begin to thaw out.
As we made it deeper and deeper into our trip, and as snow bridges continued to melt, we were forced to ford numerous times.
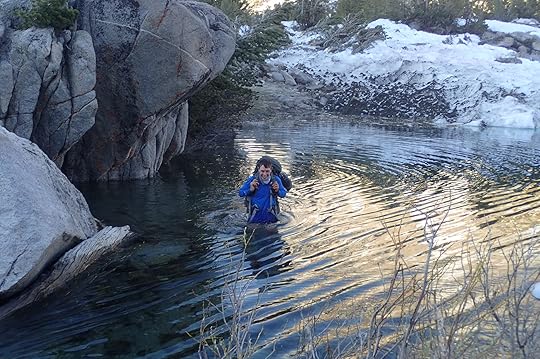
Our first “major” ford came with the crossing of Evolution Creek. Upon reaching the normal trail crossing we quickly decided to try the alternate crossing in the calmer, yet deeper Evolution Meadow upstream, as the swift current of the normal creek crossing was not passable, in my opinion. Evolution Meadow is a very common alternate for PCT hikers, and is famous for the deep wade across its waters. We crossed in the early morning (around 8 AM), which meant that the water levels were lower, yet the air temperature was much colder than later in the day. The main wade took me around 30-45 seconds to cross, and reached just below my sternum at the deepest point (for reference I am 6’2”). The cold water forced me to take a few minutes to rewarm, as my feet had gone numb.

The sign gives good advice. Like many other PCT hikers, we opted to cross in Evolution Meadow, which was a deep wade.
The next major crossing we faced was the South Fork of the Kings River, which we encountered after coming down from Mather Pass. We found out that we did NOT need to actually cross the South Fork of the Kings River, which at the time was a raging monster. By staying high and east of the river and crossing it at its headwaters just below Mather (which still had snow bridges), we were able to avoid this intimidating crossing. The PCT/JMT redundantly crosses over the river twice, so by staying high and east of the river we stayed dry.
The next, and nastiest, crossing we faced was the White Fork crossing, which we faced after coming down from Pinchot Pass. A seasonal stream that many later season hikers have never even heard of, the crossing was a raging current of whitewater when we first walked up to its banks. We had heard from numerous PCT hikers that there were no good alternative crossings for the creek, and after some hiking up and down stream I agreed. The main trail crossing is short, only about 8 paces for me, yet the current was raging when we came across it, even around 10 AM when we came to it, and came up above my knee (I lost a Croc fording due to the current).
The stretch between Pinchot and Glen Pass was the wettest for us, in terms of stream crossings. Just a few miles after White Fork we came upon Baxter Creek, another tricky early season ford. Longer than White Fork, Baxter Creek also does not have any good alternate crossings up or downstream. Fording in tandem, there were a few points when I needed to lean on my dad for support, and a few times when he needed me to regain his balance. Crossing in the early-to-mid afternoon, the water came up to my mid-thigh at the deepest.
After Baxter the next crossing we came across was the ford across the inlet of Arrowhead Lake. As previously mentioned, the outlet of Arrowhead Lake was too deep to ford when we came through, over 8 feet deep according to the ranger. Fording the inlet, however, came up to around my hip, with minimal current. This was one of the few crossings we did solo and not in tandem, as the current was easily manageable.
The final and fourth crossing of that particular day was of the Rae Lakes at the Sixty Lakes junction. In the later season this will not be a major crossing, yet due to the snowmelt, and the lakes overflowing their banks, this crossing was up near my chest at points. We forded near 7 PM, so water levels were larger than they would have been in the morning, yet the water was so cold I feared hypothermia would have been a significant risk if we had forded early in the morning when the air temperature was much lower. The ford took me just under a minute, and similar to Evolution Meadow my feet were numb upon completion, forcing me to take a few minutes to rewarm.

A chilly ford late in the day across the Sixty Lakes Outlet.
Between Glen and Forester Pass we did not encounter any major stream crossings, with our next ford coming with Tyndall Creek. When we came upon the normal Tyndall crossing we immediately concluded that we should search for an alternate, and actually found that downstream, around 100 yards or so where the creek forks, there was a good spot to cross. The two smaller crossings came up just above my knee, and in tandem the current was not a problem.
After Tyndall Creek the only remaining crossings we faced were of Wright Creek and of Wallace Creek, both of which were little trouble. Neither crossing appeared to have good alternates up or downstream, so we took the main crossing for both. The crossing of Wright Creek had a little bit of current to deal with, yet Wallace was simply a wade.
In terms of fording in the morning versus later in the day, we always tried to hit the major crossings in the morning, as water levels would be lower than later in the day when snow had a chance to melt. This, however, meant colder air temperature, and at times required us to take a break to rewarm ourselves.
The post John Muir Trail early-season 2017: What was it like? || Part 3: River fords appeared first on Andrew Skurka.
August 3, 2017
John Muir Trail early-season 2017: What was it like? || Part 2: Passes, axes & crampons
In March I was contacted by Sam and Steven Chaneles, a Miami-based father-son team who were planning to thru-hike the John Muir Trail in 2017. Due to permit availability and personal schedules, their dates were June 17 through July 9. They’d been watching the record-setting snowpack plots and were increasingly concerned about the feasibility of their plans given their thin backpacking resumes.
I was able to help them pare down their kits, talk through anxieties, and set their expectations — and then they did all the hard work (and had all the fun, and a heck of a father-son trip) in the High Sierra. After they returned, Sam wrote me and included a few photos and anecdotes. It sounded truly epic, and I thought their story was worth sharing — partly for the entertainment value, but also to help others better understand the challenges and hazards of early-season backpacking in the High Sierra, especially after an exceptionally wet winter. Sam posted a more general trip report on his website, Engineered for Adventure.
In this four-part interview, Sam and I discuss:
Snow coverage, navigation, traction & snowshoes
Passes
River fords
Mosquitoes & final thoughts
Q | Did you carry an axe or crampons? Did you use them? Would you recommend them?
We both had Hillsound Trail PRO Crampons and a Black Diamond Raven Pro Ice Axe, and we did use them in the mornings when conditions were suitable. Most mornings we were on the trail by 5:30 a.m.to take advantage of the frozen snowpack. In the mornings, the combination of crusty snow and crampons allowed us to travel at a decent pace, even over suncups.
Nearly all of the PCT hikers we encountered used Kahtoola Microspikes instead of full-fledged hiking crampons. Personally, I felt like our hiking crampons allowed us more sure footing when we ventured off of the snow tracks, as well as traversing some of the steeper passes (Mather, Glen).
On steep traverses, the ice axes were useful for self-belaying, as well as keeping balance when at rest. I only had to self-arrest once (just a minor slip), and the axe worked perfectly when I needed it most. The ice axes also proved useful for the two times we were able to glissade, notably down the Whitney Chute, which not only saved us timed descending but was a load of fun!

A deep glissade track down Whitney Chute. With snow walls over 4 feet tall, the chute felt more like a bobsled track.
I personally would recommend carrying at least an ice axe. In the event you need to self-arrest, your trekking poles are really not up to the task. Many PCT hikers had the lighter Camp Corsa Axe, which would be a good option if you are looking to minimize your weight.
Q | What passes felt the most sketchy?
The most difficult passes for us were Mather Pass and Glen Pass, mostly due to the presence of rock scramble. For us the descent down from Mather Pass was particularly steep, and in places required scrambling down loose scree rock. Very good tracks, from PCT hikers, were present, yet we had to take carefully calculated steps at times going down Mather.

Northbound PCT hikers make their way up Mather Pass’ southern slope.
Glen Pass was another difficult pass for us, yet reflecting on it now I can say it was definitely my favorite pass. Glen is steep on both sides, so the experience will be similar no matter if you are going southbound or northbound. For us, ascending required a few sections of rock scramble, which could be considered “sketchy.” The final traverse up to the pass was steep, yet well tracked. Coming down from Glen Pass required similar maneuvering as coming down from Mather. There were steep sections where rock scramble was required, which were a bit dicey. Very good tracks existed on the descent down from Glen Pass for us, yet we still felt it was necessary to take slow and calculated steps.

Climbing up Glen Pass. Glen was an interesting mix of rock scramble and snow travel.
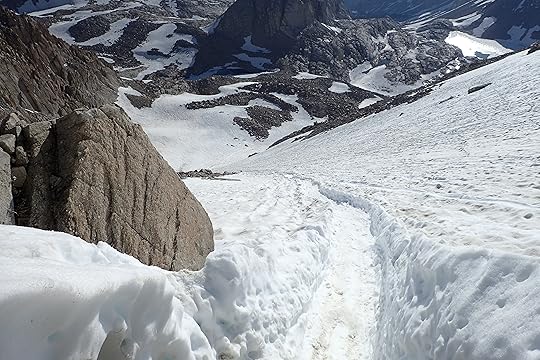
Q | Was there a reliable boot track up to and down from each pass?
With the exception of Cathedral and Island Pass, nearly every pass had very good tracks up to and down from the top, put in by PCT hikers. Cathedral and Island didn’t have tracks because those are off the PCT, and were one of the first — if not the first — groups through.

We had nice, deep tracks like these around the major passes.
Disclosure. This website is supported mostly through affiliate marketing, whereby for referral traffic I receive a small commission from select vendors, at no cost to the reader. This post contains affiliate links. Thanks for your support.
The post John Muir Trail early-season 2017: What was it like? || Part 2: Passes, axes & crampons appeared first on Andrew Skurka.
John Muir Trail early-season 2017: What was it like? || Part 1: Snow coverage, navigation & snowshoes

In March I was contacted by Sam and Steven Chaneles, a Miami-based father-son team who were planning to thru-hike the John Muir Trail in 2017. Due to permit availability and personal schedules, their dates were June 17 through July 9. They’d been watching the record-setting snowpack plots and were increasingly concerned about the feasibility of their plans given their thin backpacking resumes.
I was able to help them pare down their kits, talk through anxieties, and set their expectations — and then they did all the hard work (and had all the fun, and a heck of a father-son trip) in the High Sierra. After they returned, Sam wrote me and included a few photos and anecdotes. It sounded truly epic, and I thought their story was worth sharing — partly for the entertainment value, but also to help others better understand the challenges and hazards of early-season backpacking in the High Sierra, especially after an exceptionally wet winter. Sam posted a more general trip report on his website, Engineered for Adventure.
In this four-part interview, Sam and I discuss:
Snow coverage, navigation, traction & snowshoes
Passes
River fords
Mosquitoes & final thoughts

The southern terminus of our trip, Mt. Whitney (14,508′)
Q | Describe your your prior backpacking experience — generally, in the High Sierra, and in early-season conditions.
A | Since I was young, family vacations have revolved around outdoor activities (hiking, skiing, fishing, etc.). My true “backpacking” experience began in the summer of 2016 when I went on an 11-day expedition to Alaska as an incoming freshman. The trip introduced me to Outdoor Recreation Georgia Tech (ORGT), one of the largest college outdoor recreation programs in the country.
From day one on campus I dove headfirst into every opportunity I could to get outside. I have since gained backpacking experience in the Southeast region (North Georgia, Tennessee, North Carolina) as a backpacking instructor with ORGT, leading overnight and multi-day trips, as well as receiving certification as a Wilderness First Responder. The experience and knowledge I gained over the past 12 months gave me the opportunity to return to Alaska this summer, this time as a co-leader of the 11-day expedition that started it all.
In terms of the High Sierra, before this trip I had NO experience. I had never been to the Sierra Nevada range, so humility and extensive pre-planning were critical. Additionally, I had extremely limited experience in the early season traveling on snowpack. It would be fair to say that this trip was a big leap forward, yet thankfully I was able to make the jump.

Q| What were your trip dates?
A | My father and I started out of Happy Isles on June 18 (coincidentally, Fathers’ Day), reaching the 14,508’ summit of Mt. Whitney on the night of July 6 (19 trail days). We passed the following landmarks on the following dates (to give a time frame reference for trail conditions):
Cathedral Pass – June 20
Donohue Pass – June 21
Island Pass – June 21
Mammoth Pass – June 23
Silver Pass – June 24/25
Muir Pass – June 28
Mather Pass – June 30
Pinchot Pass – July 1
Glen Pass – July 2
Kearsarge Pass – July 2, 3
Forester Pass – July 4
Mt. Whitney – July 6, 7

Happy to be holding my golden ticket to the JMT!
Q | How much of the trail was covered by snow? How much of your time did you spend on snow? How often did you have to camp on snow?
For us, snow began around 8400’ just past Cloud’s Rest Junction (7.1 SoBo) on our climb out of Yosemite Valley towards Sunrise High Sierra Camp (10.0 SoBo). For this stretch snow lasted well into Tuolumne Meadows (22.3 SoBo), until around mile 26.0 SoBo (even in Tuolumne Meadows there were LARGE snow drifts lingering). Since no JMTers had come through this region yet, and PCT hikers were not coming down into Yosemite Valley, tracks were nonexistent during this stretch.

A large snow drift in Mammoth Lakes. For reference I stand 6’2”.
For the most part, Lyell Canyon was snow-free, with occasional snow drifts here and there. Snowpack resumed at the beginning of the ascent towards Donohue Pass (37.0 SoBo), right around mile 33 SoBo. From this point onward, snow lasted into Red’s Meadow (61.2 SoBo). The entire region between Donohue Pass and Red’s was COMPLETELY snow covered. Thousand Island Lake (43.6 SoBo), Ruby Lake (44.8 SoBo), Emerald Lake, Garnet Lake (46.2 SoBo), and Shadow Lake (49.9 SoBo) were ALL frozen-over. The ascent up to and down from Donohue Pass had been decently tracked by northbound PCT hikers, yet once past Thousand Island Lake (where the PCT diverges from the JMT) the tracks stopped, as few, if any, JMT hikers had been through the region at that point. Throughout the snow covered trail we encountered extensive suncups ranging from shallow to deep, which slowed our pace significantly.
At the time Red’s Meadow was closed to resupply, so we had to hike out to Mammoth Lakes. Mammoth Pass (64.2 SoBo) was almost completely snow-covered, yet since so many PCT hikers were coming in-and-out for resupply there were decent tracks to follow. Once down from Mammoth Pass snow was patchy, lingering on northward facing slopes (for us, uphills) and non-existent on southward facing slopes (for us, downhills). The climb up from Duck Pass Junction (72.5 SoBo) was a large snowfield, yet the descent down to Purple Lake (74.7 SoBo) was snow-free. The climb up from Purple Lake to Lake Virginia (76.7 SoBo) was almost completely snow-covered, as well as the traverse around Lake Virginia. The switchbacks down to Tully Hole (79 SoBo) were dry, yet snowpack resumed once we began climbing up towards Silver Pass.

Christmas in June! I hold our resupply buckets in the Mammoth Lakes Post Office. At the time Red’s Meadow was closed for resupply.
The ascent towards Silver Pass (80 SoBo) was completely snow-covered, with good tracks from PCT hikers remaining. At the time many PCT hikers had been coming up through Goodale Pass instead of Silver Pass because of a difficult crossing of the North Fork of the Mono River. Because of this, once past the Goodale Pass Junction (82.5 SoBo) on the way up to Silver Pass tracks stopped abruptly, as few PCT hikers had been tracking up through Silver Pass. Dry trail began again once past the crossing of the North Fork of the Mono River (87 SoBo) and continued down to Lake Edison.
We bypassed the Bear Creek section of the trail because at the time the crossing was considered impassable at the normal crossing, requiring alternative crossing several miles upstream, which turned one crossing into several, difficult crossings. At the time what seemed like the overwhelming majority of northbound PCT hikers opted to bypass the Bear Creek section (from Muir Trail Ranch junction to Lake Edison junction), choosing to hike out to Florence Lake via the Florence Lake Trail and then hike up to Vermillion Valley Resort. Frankly, the Florence Lake Trail was scenic and enjoyable, and for us, a safer option than attempting Bear Creek.
Once back on the trail, snowpack began again at the outlet of Evolution Lake (124.2 SoBo), continuing for the entire ascent up to Muir Pass (130 SoBo) and lingering for nearly 4-5 miles after Muir Pass (dry trail began again around 135 SoBo).

A snowy Muir Pass. Good tracks are visible.
The Golden Staircase was snow-free, yet beginning at the outlet of Lower Palisade Lake (147.6 SoBo) snowpack began again, continuing the entire way up to Mather Pass (151.5 SoBo) and lasting until Sawmill Pass Junction (165 SoBo). Between Mather Pass and Pinchot Pass (161.3 SoBo) large snowfields with decent tracks were present. Both the ascent and descent of Mather Pass were very well tracked from northbound PCT hikers. Once down from Mather Pass, however, tracks stopped, as hikers were taking many different routes to avoid crossing the South Fork of the Kings River (157.1 SoBo). Decent tracks began back up again once past Taboose Pass Junction (158.3 SoBo), and continued all the way up to Pinchot Pass. Coming down from Pinchot Pass was well tracked from PCT hikers, yet tracks ended once the treeline began again, around mile 163 SoBo.
Snowpack resumed once past the Baxter Creek crossing (171.4 SoBo), continuing until 1-2 miles after Glen Pass (177.4 SoBo). The JMT crossing of the Arrowhead Lake Outlet was at the time too deep to ford (a ranger estimated the water to be over 8 feet deep), so we chose to cross at the inlet of Arrowhead Lake, which turned out to be thigh deep at most. The trail around the Rae Lakes was still snow covered at the time, yet melting fast. The ford between the Rae Lakes (175.6 SoBo) was nearly chest high when we crossed at around 7 in the evening (and very cold!).
The climb up to and descent down from Glen Pass was completely snow-covered, yet very well tracked (the snowline stopped around 1-2 miles past Glen Pass). The hike out Kearsarge Pass (179.5 SoBo) was mostly snow-free, with occasional patches of snow here and there.
Snow began again around mile 187 SoBo on the ascent up to Forester Pass. For the first mile or so through the snow, tracks were non-existent, yet good tracks were present on the final ascent towards the pass. The top of Forester Pass (189.5 SoBo) was actually snow-free, as were the switchbacks on the descent down from the pass. The infamous “ice chute” had nearly melted out at that point; instead of having to traverse across snow there were steps on scree rock.

Our first sight of Forester Pass.
Large patches of snow were present on the plateau after Forester Pass, continuing until around 1 mile before the trail crossing of Tyndall Creek (190.4 SoBo). From this point onward the trail was mostly snow-free, with occasional patches of snow around Guitar Lake (205.6 SoBo). The switchbacks up to Whitney were completely dry, as was the final ascent up to the summit. The final 500 vertical feet up to Whitney summit were snow-covered, yet alternate routes through dry rock scramble were marked by cairns.

A much needed break on top of the continental U.S.
The descent from the Whitney Trail Crest was completely snow-covered, yet very good glissade marks were present (it almost looked like a bobsled track). Snow continued for around 2-3 miles of the descent down from Whitney summit towards Whitney Portal.
When traveling through snow-covered regions we usually were able to find a level rock on which to make camp. Only once did we have to camp on snow, right before Silver Pass above Chief Lake.
Q | How did you navigate when the trail was snow-covered?
When the trail is completely snow-covered it is CRITICAL to utilize off-trail navigation techniques. We utilized tracks from PCT hikers when they were present, saving us the energy of slogging through miles of suncups, periodically confirming our direction with our GPS device to avoid blindly following the tracks of others. Yet when tracks were not present we utilized off-trail techniques, using line of sight navigation, taking bearings when necessary, and picking a “line of travel” and sticking to it.
When the trail is under snow there is NO need to follow it exactly. Stopping and looking at your GPS every five feet or so to make sure that you are on top of the trail is useless. Instead, utilize the snow to your advantage when there are no tracks and forge your own path. Understand where you are trying to end up, analyze the obstacles in between you and your target, and pick a “line of travel.” Snow allows you to travel in straight lines, which can be much more efficient than trying to zig-zag with the trail when it is 5 feet beneath your feet.
Q | How did you mitigate the reflectivity of the surface and the extreme radiation?
When traveling on snow the sun will bake you alive if you are not careful. When traveling on snow I was covered nearly head-to-toe with SPF clothing. My protection was as follows:
Arc’teryx Cormac long-sleeve shirt with SPF 50 protection
Prana Zion Convertible Pants for my legs
UV Protection Buff for my neck and lower faceOutdoor Research Active Ice Cap for my neck and face
Dragon Alliance MountaineerX polarized sunglasses with “glacier” glass attachments to protect peripheral vision
Outdoor Research Active Ice Sun Gloves*
Dermatone SPF 23 for my lips and face to prevent chapping*

My outfit for snow travel. I did my best to cover myself from head-to-toe. Normally by Buff would be covering my face as well.
*At the beginning of the trips I did not have these items. Before my dad recommended we purchase sun gloves in Mammoth Lakes my hands were literally cooked from travel on the snow, to the point that they were bleeding in places. My lips too fell victim to the vicious glare from the snow, blackening in places due to sunburn. I had thought that simply applying sunscreen to my hands would protect them from the sun. Unless you reapply sunscreen every 30 minutes or so the sun will bake your hands alive. I can honestly say that the purchase of sun/glacier gloves was the BEST purchase I made on trail, as the condition of my hands significantly improved from that point onward. I would INSIST that early season hikers consider them an essential part of their clothing system.
We did encounter quite a few PCT hikers who did not have the same mindset about sun protection as we did. They looked as if they had been sitting on the beach for a week without sunscreen, as their legs and arms looked more like a rotisserie chicken than human skin.
Q | Did you carry snowshoes or skis? If so, how often did you wear them? If not, how much postholing did you do? What was the relationship between postholing and time of day, elevation, slope aspect, and snow depth?
We did not carry snowshoes or skis, as the snow was compacted to the point that these items would be of little benefit. Once the soft, powdery spring snow undergoes a cycle of thawing and refreezing (this usually occurs in mid-to-late May) the benefits of snowshoes or skis diminish significantly.
Throughout our entire trip I believe I only postholed (meaning fell-through the snowpack) 3 times, and my dad 3 as well. In the morning the snow is a crusty, concrete-like surface after having re-frozen overnight. Once the sun begins to bake it again, by early afternoon the snow has become a slushy mess, in which traction devices (such as crampons) are useless.
Postholing was more of a concern in the afternoon. By avoiding traveling near rocks (to avoid “elephant traps”) and other buried debris, you can avoid postholing nearly altogether.
The more challenging snow conditions were the suncups on which it is easy to turn an ankle or torque a knee if not careful. The art of gliding across suncups is one that many attempt and few master. As a skier, I can say that moving across suncups can be a bit like skiing a mogul field. One can look ahead and pick a line across perhaps a shallower area or natural tracks created from runoff from melting snow.
The post John Muir Trail early-season 2017: What was it like? || Part 1: Snow coverage, navigation & snowshoes appeared first on Andrew Skurka.
August 1, 2017
Route beta || Pfiffner Traverse: Thunderbolt Creek & Paiute Pass


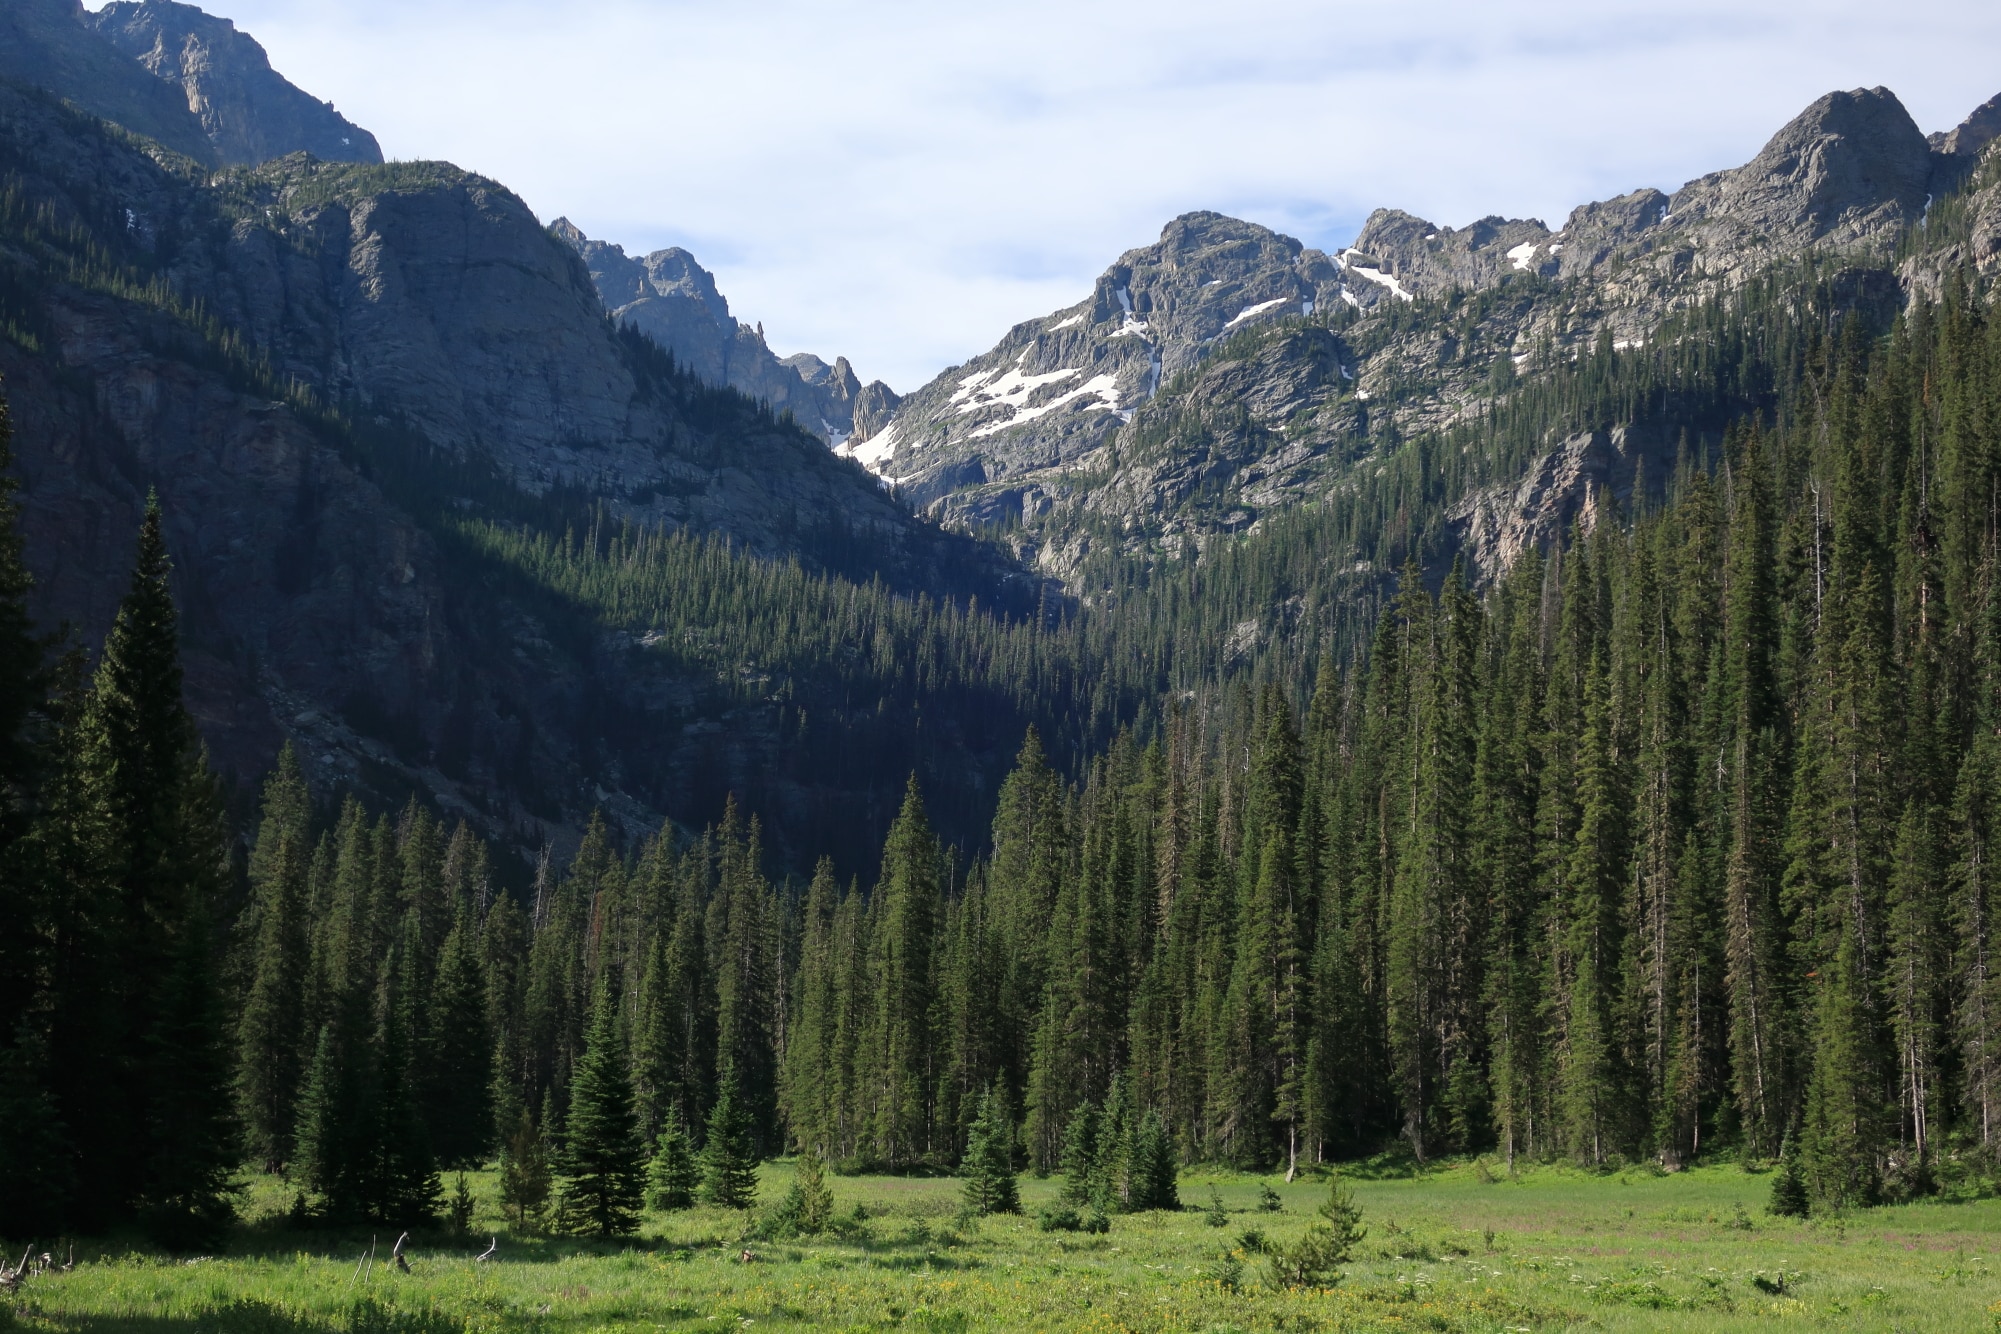
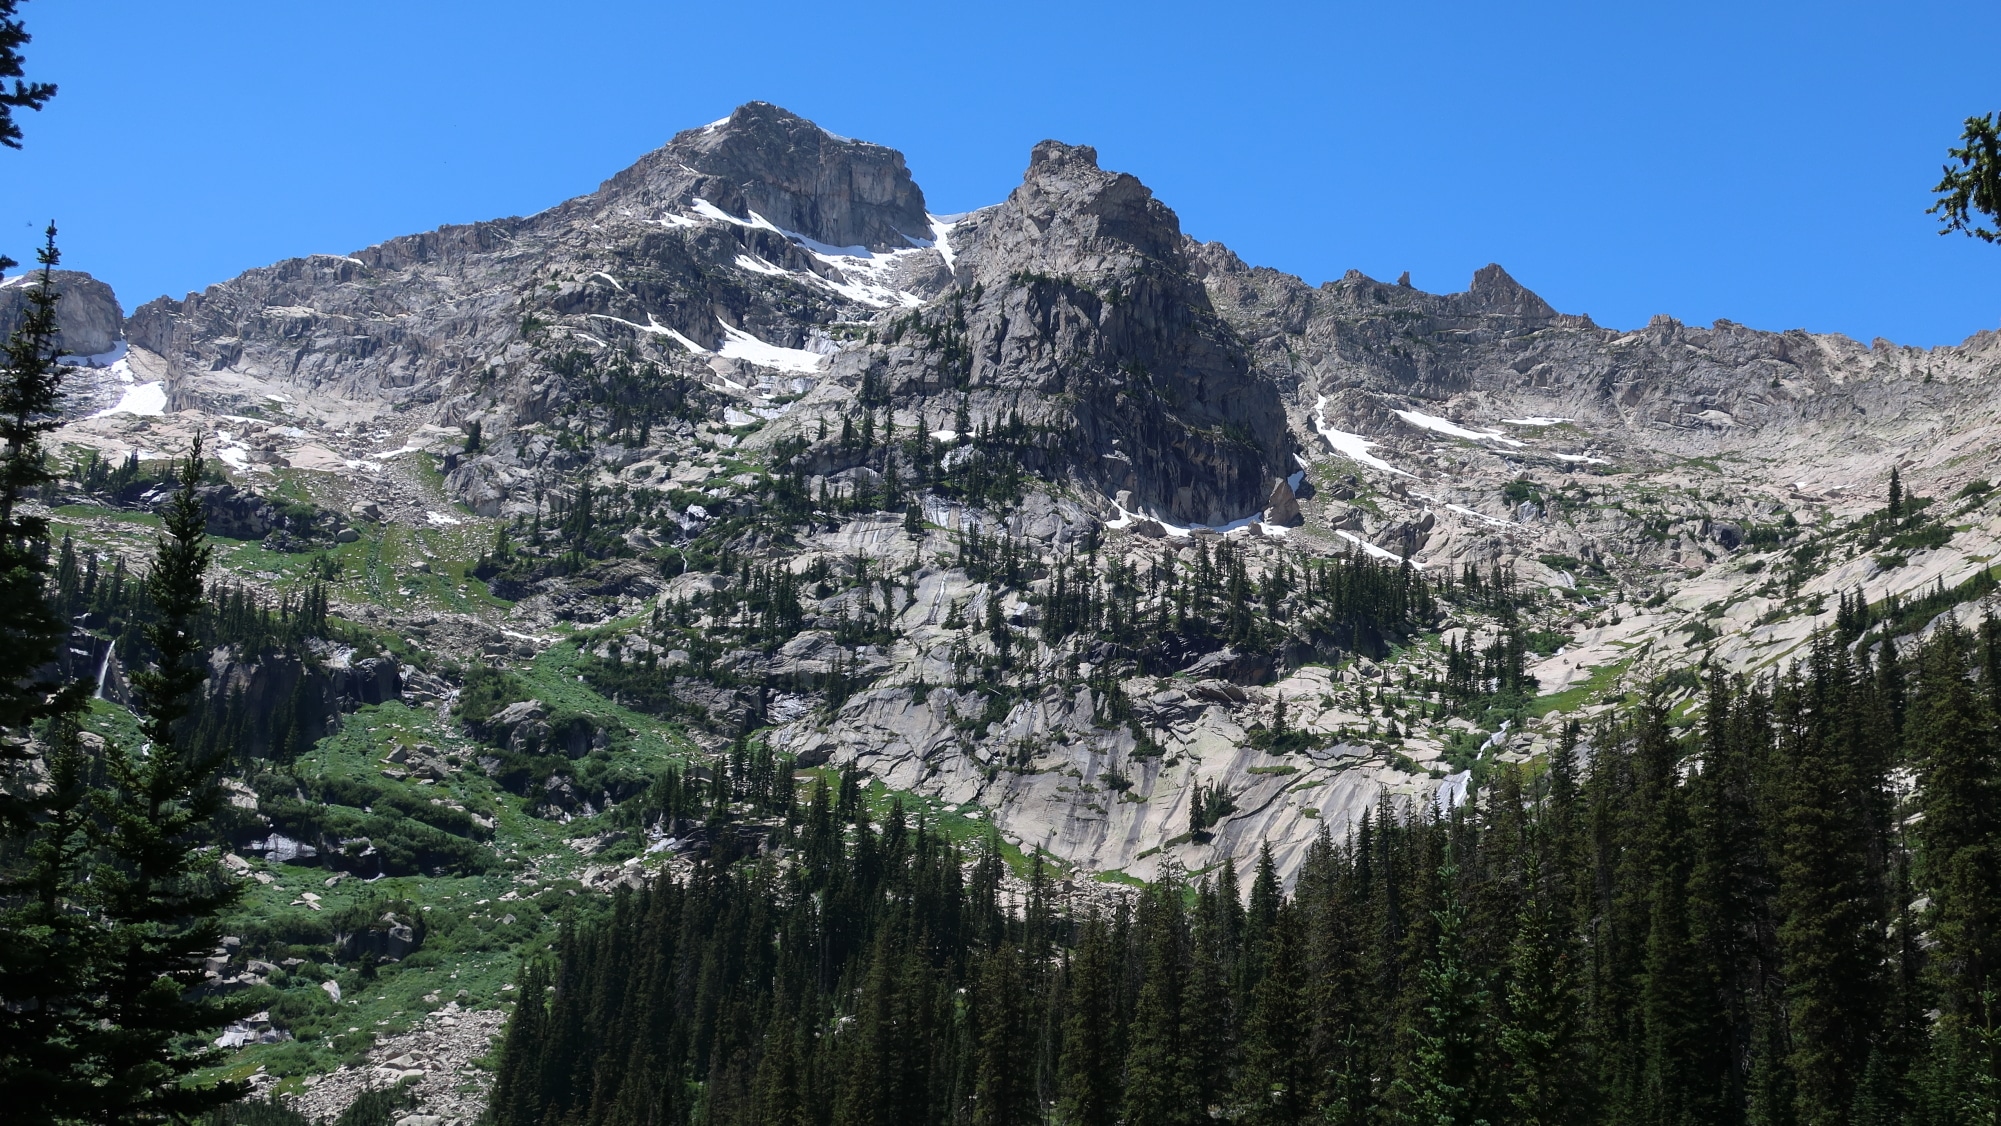
Pawnee Lake (and Apache Peak, on the far skyline), as seen from Paiute Pass at the head of Thunderbolt Creek. The Pawnee Pass Trail crosses the Continental Divide in the upper-left corner of the image.
To connect Buchanan Creek with Cascade Creek in Colorado’s Indian Peaks Wilderness, the Pfiffner Traverse ascends a knife-edge pass at the head of trail-less Thunderbolt Creek that offers sweeping views of the Pawnee Lake basin and the Continental Divide. The alternative is an ordinary and relatively view-less all-trail route around the west side of Thunderbolt Peak that exits the high country.
In addition to being a highlight of the Pfiffner Traverse, this route can be used by backpackers on the Pawnee-Buchanan Loop who have the prerequisite skills and who wish to inject more adventure into a classic itinerary.
As I did with the Northeast Gully, which is the crux feature on a route between the Lone Eagle Cirque (Crater Lake) with Lost Tribe Lakes and upper Arapaho Creek, I have decided to share a route description and topographic map for this section of the Pfiffner Traverse. If you have experience with or questions about this route, please leave a comment. I’m hoping that public discussion will help improve expectations and decision-making.
Field resources
This page includes an in-depth route description. You can: print it, using the print button on the left-side of your screen; or reformat it, by copying & pasting it into a new document. Distribution is permitted for non-commercial use only, and credit is requested.
To download the topographic map for this route, click here. The map has been annotated with my route notes, and will have a scale of 1:24,000 when printed on standard 8.5 x 11 letter paper. As an overview map for this area, consult the National Geographic Trails Illustrated #102 for the Indian Peaks and Gold Hill.
Intentionally, I am not offering a GPX file, because I don’t want to directly enable hiking from waypoint to waypoint. The route demands more backcountry skills than that.
If you benefit from these free resources and wish to do more of the Pfiffner Traverse — either as a thru-hike or in sections — then consider purchasing the Pfiffner Traverse Guide. It includes route descriptions, datasheets, and topographic maps for the entire 77-mile Primary Route, multiple alternate routes, and recommended section-hikes.
Thunderbolt Meadow
The Pfiffner Traverse Guide assumes a southbound itinerary, from Milner Pass to Berthoud Pass. This route description is consistent with that direction.
The route starts on the Buchanan Pass Trail, immediately east of the confluence of Buchanan Creek and Thunderbolt Creek. The exact spot is three-fourths of a mile east of the junction between Buchanan Pass Trail and Gourd Lake Trail, and just downstream of the switchbacks between Fox Park and the Buchanan/Thunderbolt confluence, shortly after the trail fords to the north side of Buchanan Creek.
Here, an unmarked side trail departs southward, crosses Buchanan Creek (which may have multiple shallow braids during periods of higher runoff), and enters Thunderbolt Meadow, the edge of which hosts several established campsites. The view up-valley is grand but not instructive: Paiute Pass can be seen at the head of this U-shaped valley, but the route to it is not obvious.
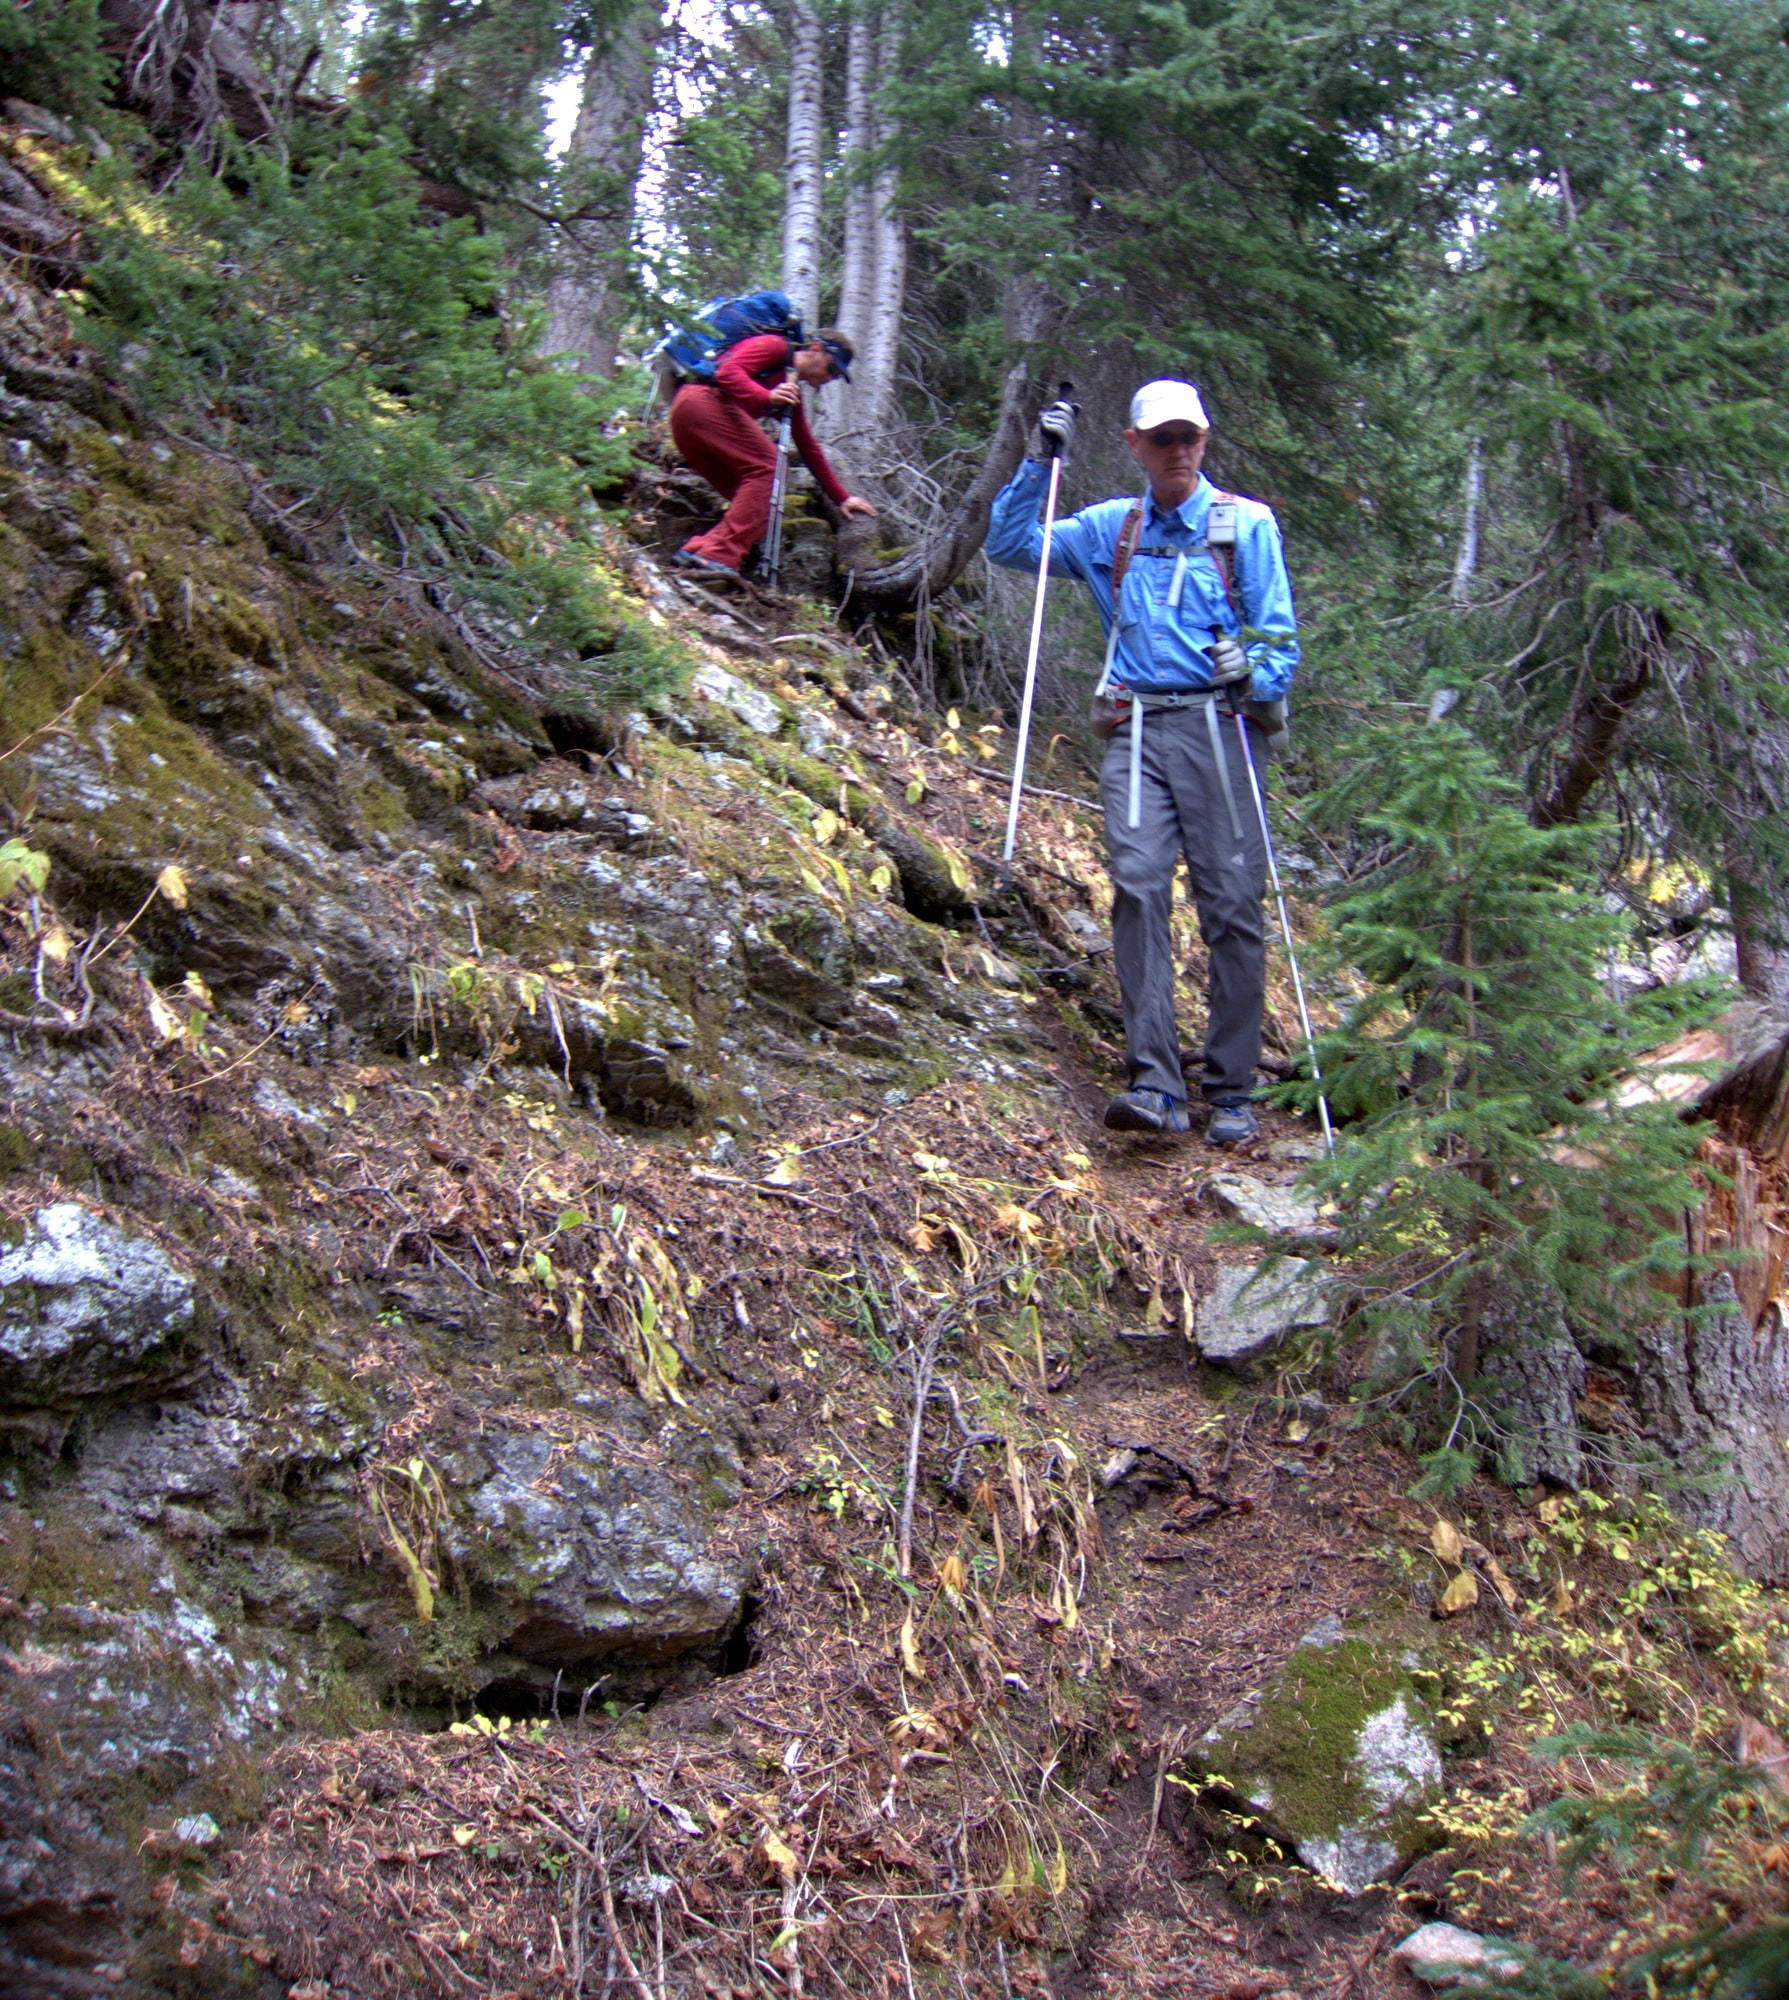
Follow the eastern edge of the meadow, hopping into the woods when necessary to avoid standing water (assuming your shoes aren’t soaked already from dew or precip). Travel in the timber is hindered by blowdowns. From the meadow’s southeastern edge, follow a faint trail through the forest for several minutes, until arriving at the first avalanche runout zone, which originates on the east wall.
Thunderbolt Meadows, just south of the Buchanan Pass Trail. Paiute Pass is 2,000 vertical feet away. It’s just above the snow patch near the low spot on the skyline, to the right of the outcrop.
Runouts and bluffs
The trail steps over a log that has an upstream arrow engraved on it, and veers towards the creek. After stumbling across the toe of a scree field, the trail disappears in riparian vegetation that will be waist-high in July and frost-killed by mid-September. Follow the seams through the flood zone, watching out for rocks and avy debris lurking below the surface, and then in plain sight during the final stretch across the runout zone.
Aim for the treeline about 50 yards east/left of the waterfall, at the base of a ledgy cliff system. A faint game trail enters the timber, scrambles through the first cliff band, and climbs diagonally towards the creek. Ascend through another cliff band, and perhaps one more, always jogging towards the creek between breaks. It’s Class 2 terrain with light bushwhacking.
The trail pulls next to the creek at the base of a 20-foot waterfall, which roars with spring runoff, before climbing through one more notable cliff band next to the falls. Above it, parallel the creek until reaching another avalanche runout zone.
Following the elk trail between the first and second runout zones. It’s Class 2 scrambling with light bushwhacking.
This next section is cleaner and less particular than the last — there is less vegetation and more route options. After pushing through the meadow, zig-zag up grassy ramps, granite slabs, and benches — still on the east side of Thunderbolt Creek, though not necessarily as close to it — until arriving at Paiute Lake, a mid-route highlight. The lake’s outlet area has sufficient room for a shelter or two, but please find another spot further from the shore.

Paiute Lake in upper Thunderbolt Creek
Side-hill around the eastern edge of Paiute Lake, and leave it after a one-move Class 3 scramble on a short ledge. A pack-lift might be helpful for some. Climb south-ish — mostly on tundra and slabs — to a small flat at treeline, which would make for a comfortable high camp. Follow the main creek to the base of Paiute Pass.
Paiute Pass
There are at least two proven routes to Paiute Pass. The direct route aims for the true pass. Later in the season, it entails a moderate slope of mostly stable scree and talus that funnels into a steeper talus-filled gully. But the route is more difficult in early-season conditions: the base is snow-covered, and the gully holds a snow tongue with a maximum angle of about 35 degrees.
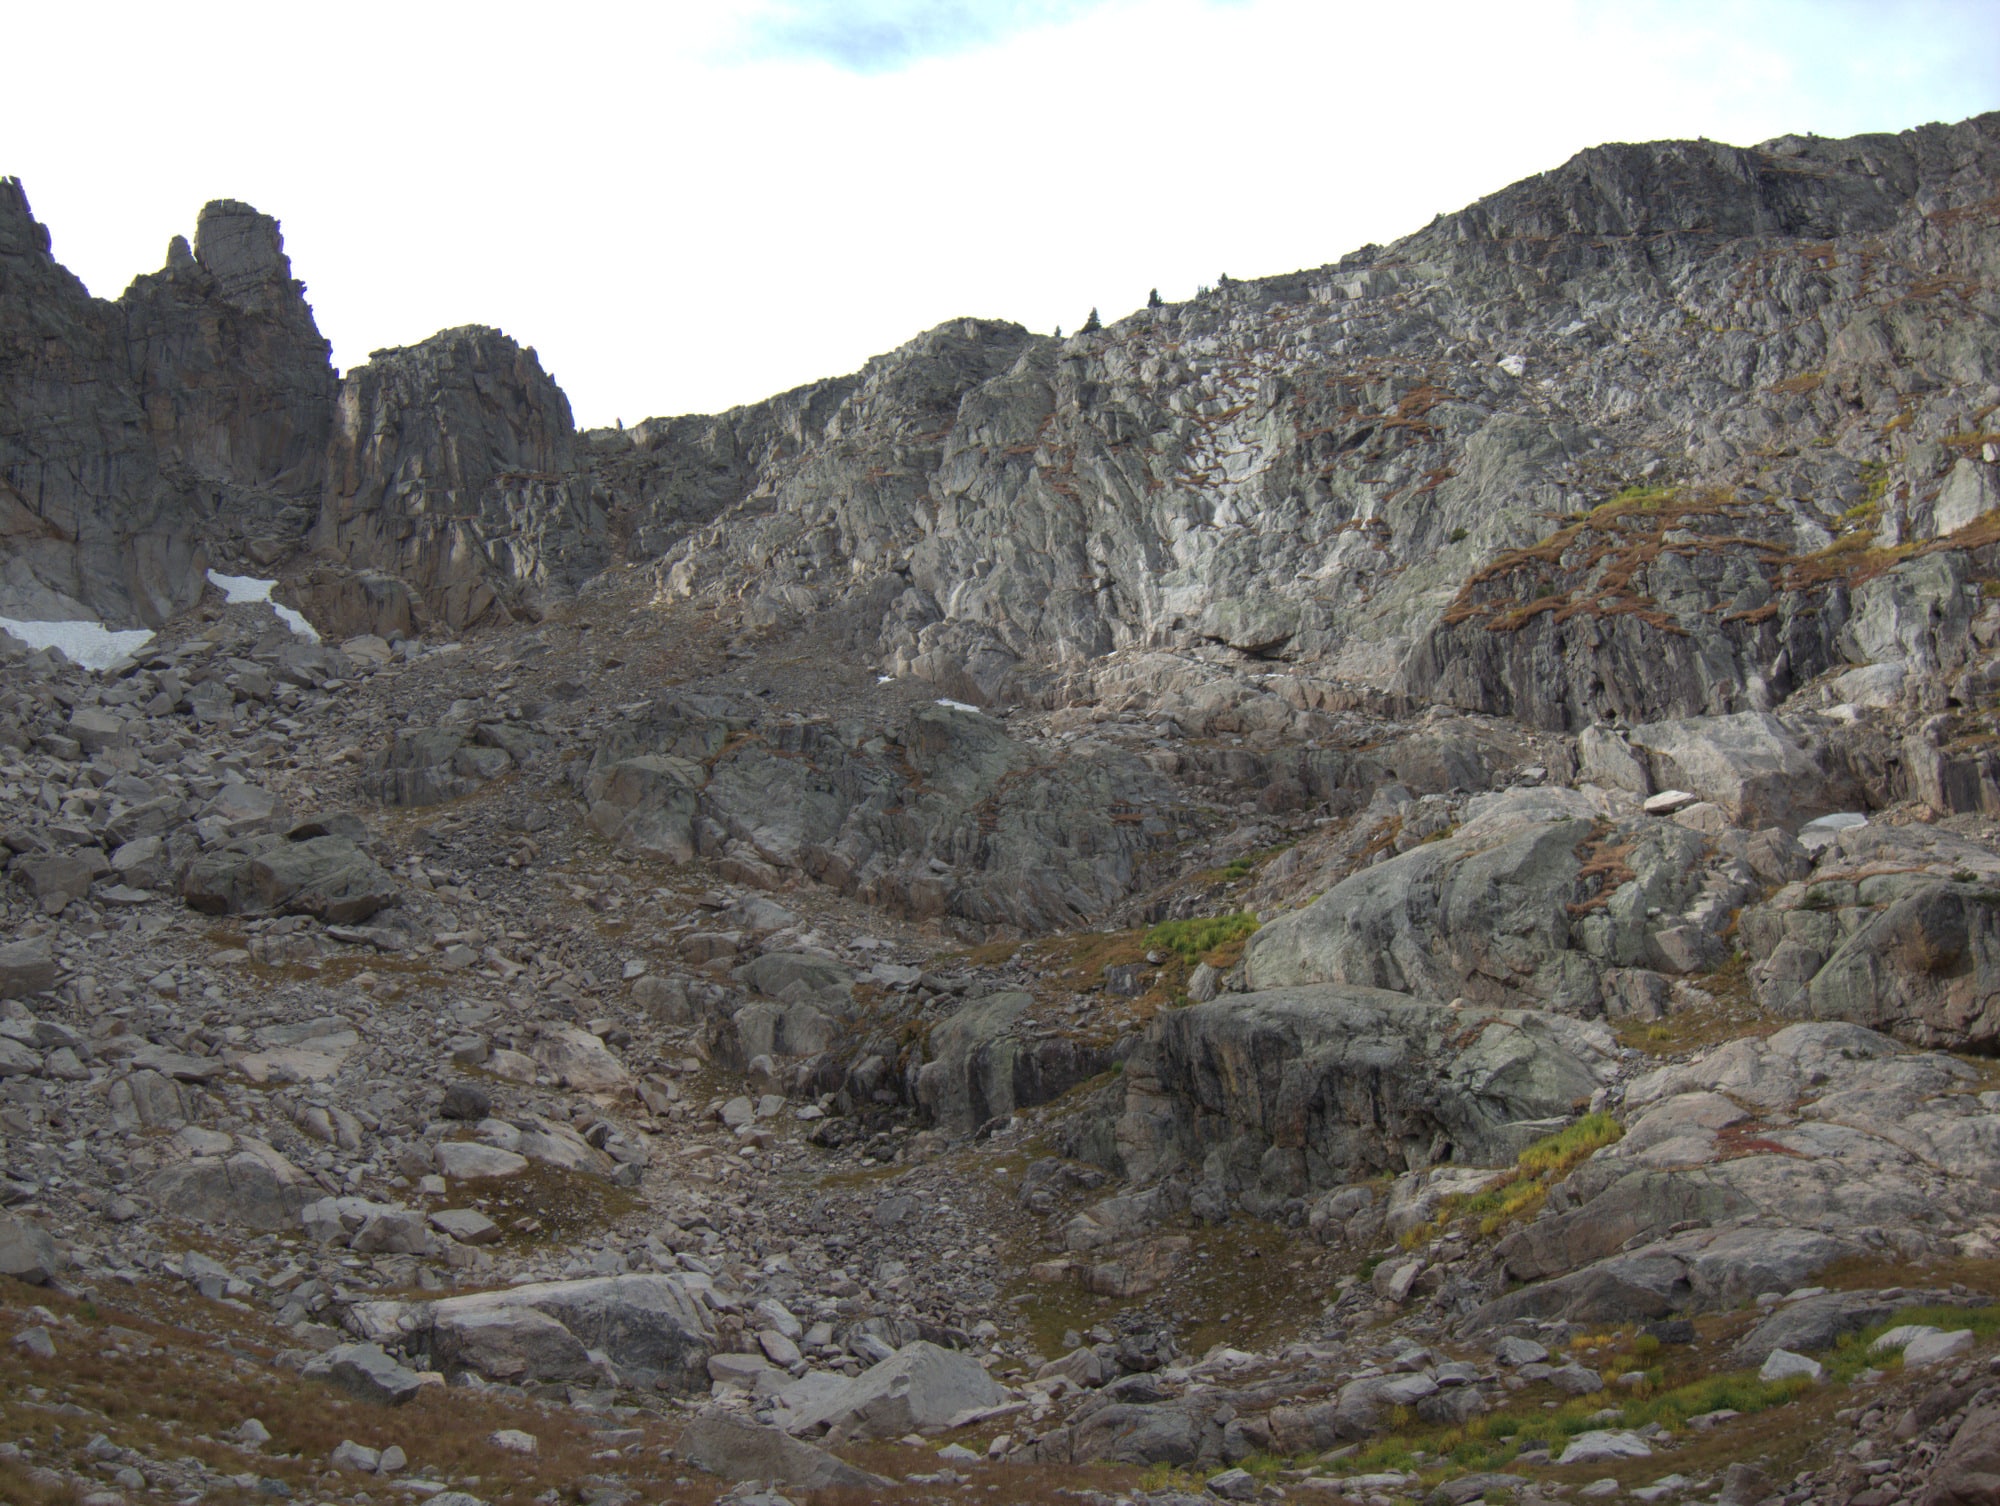
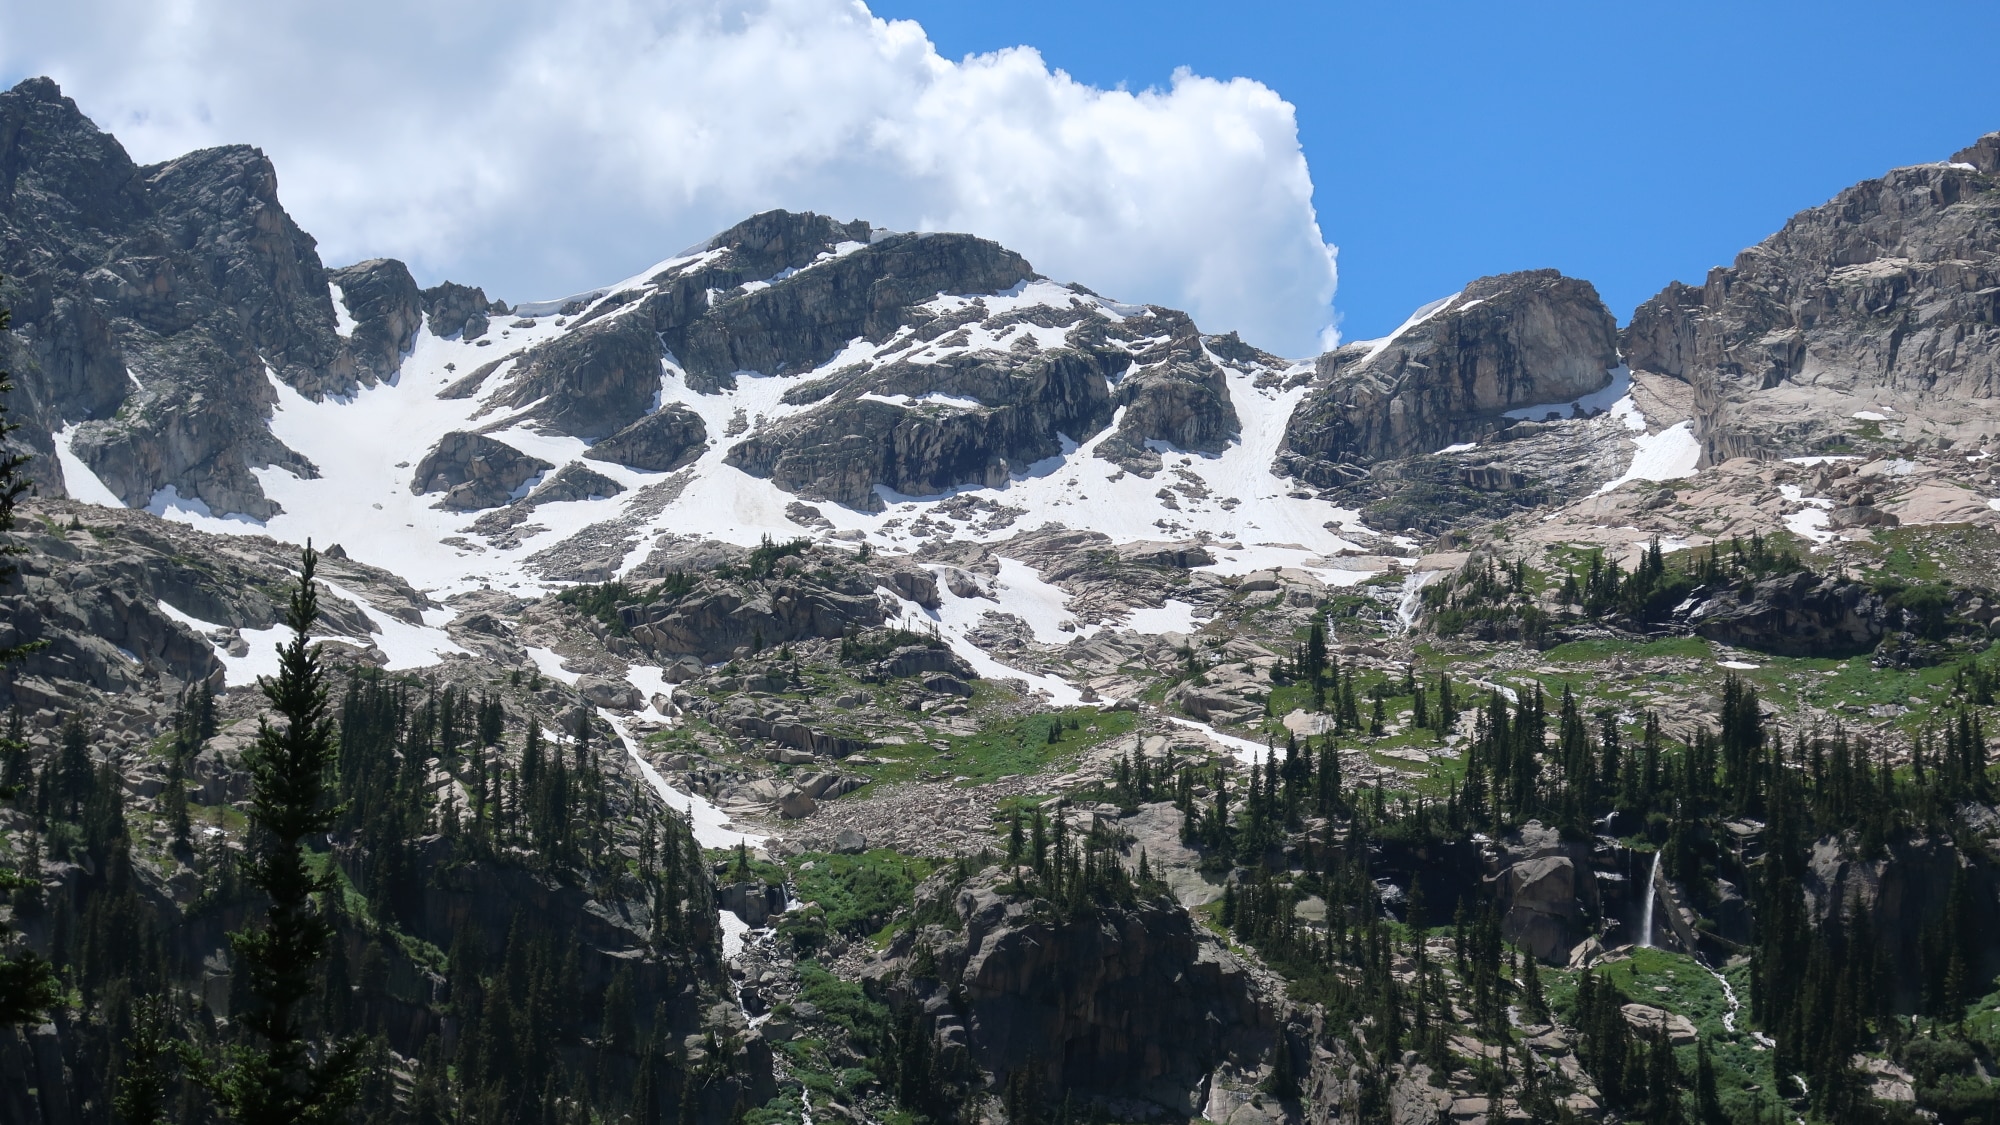
The north side of Paiute Pass in September. The direct route ascends a moderate slope of mostly stable talus, scree, and tundra that funnels into a talus-filled gully. Arrive at the low spot on the ridge.
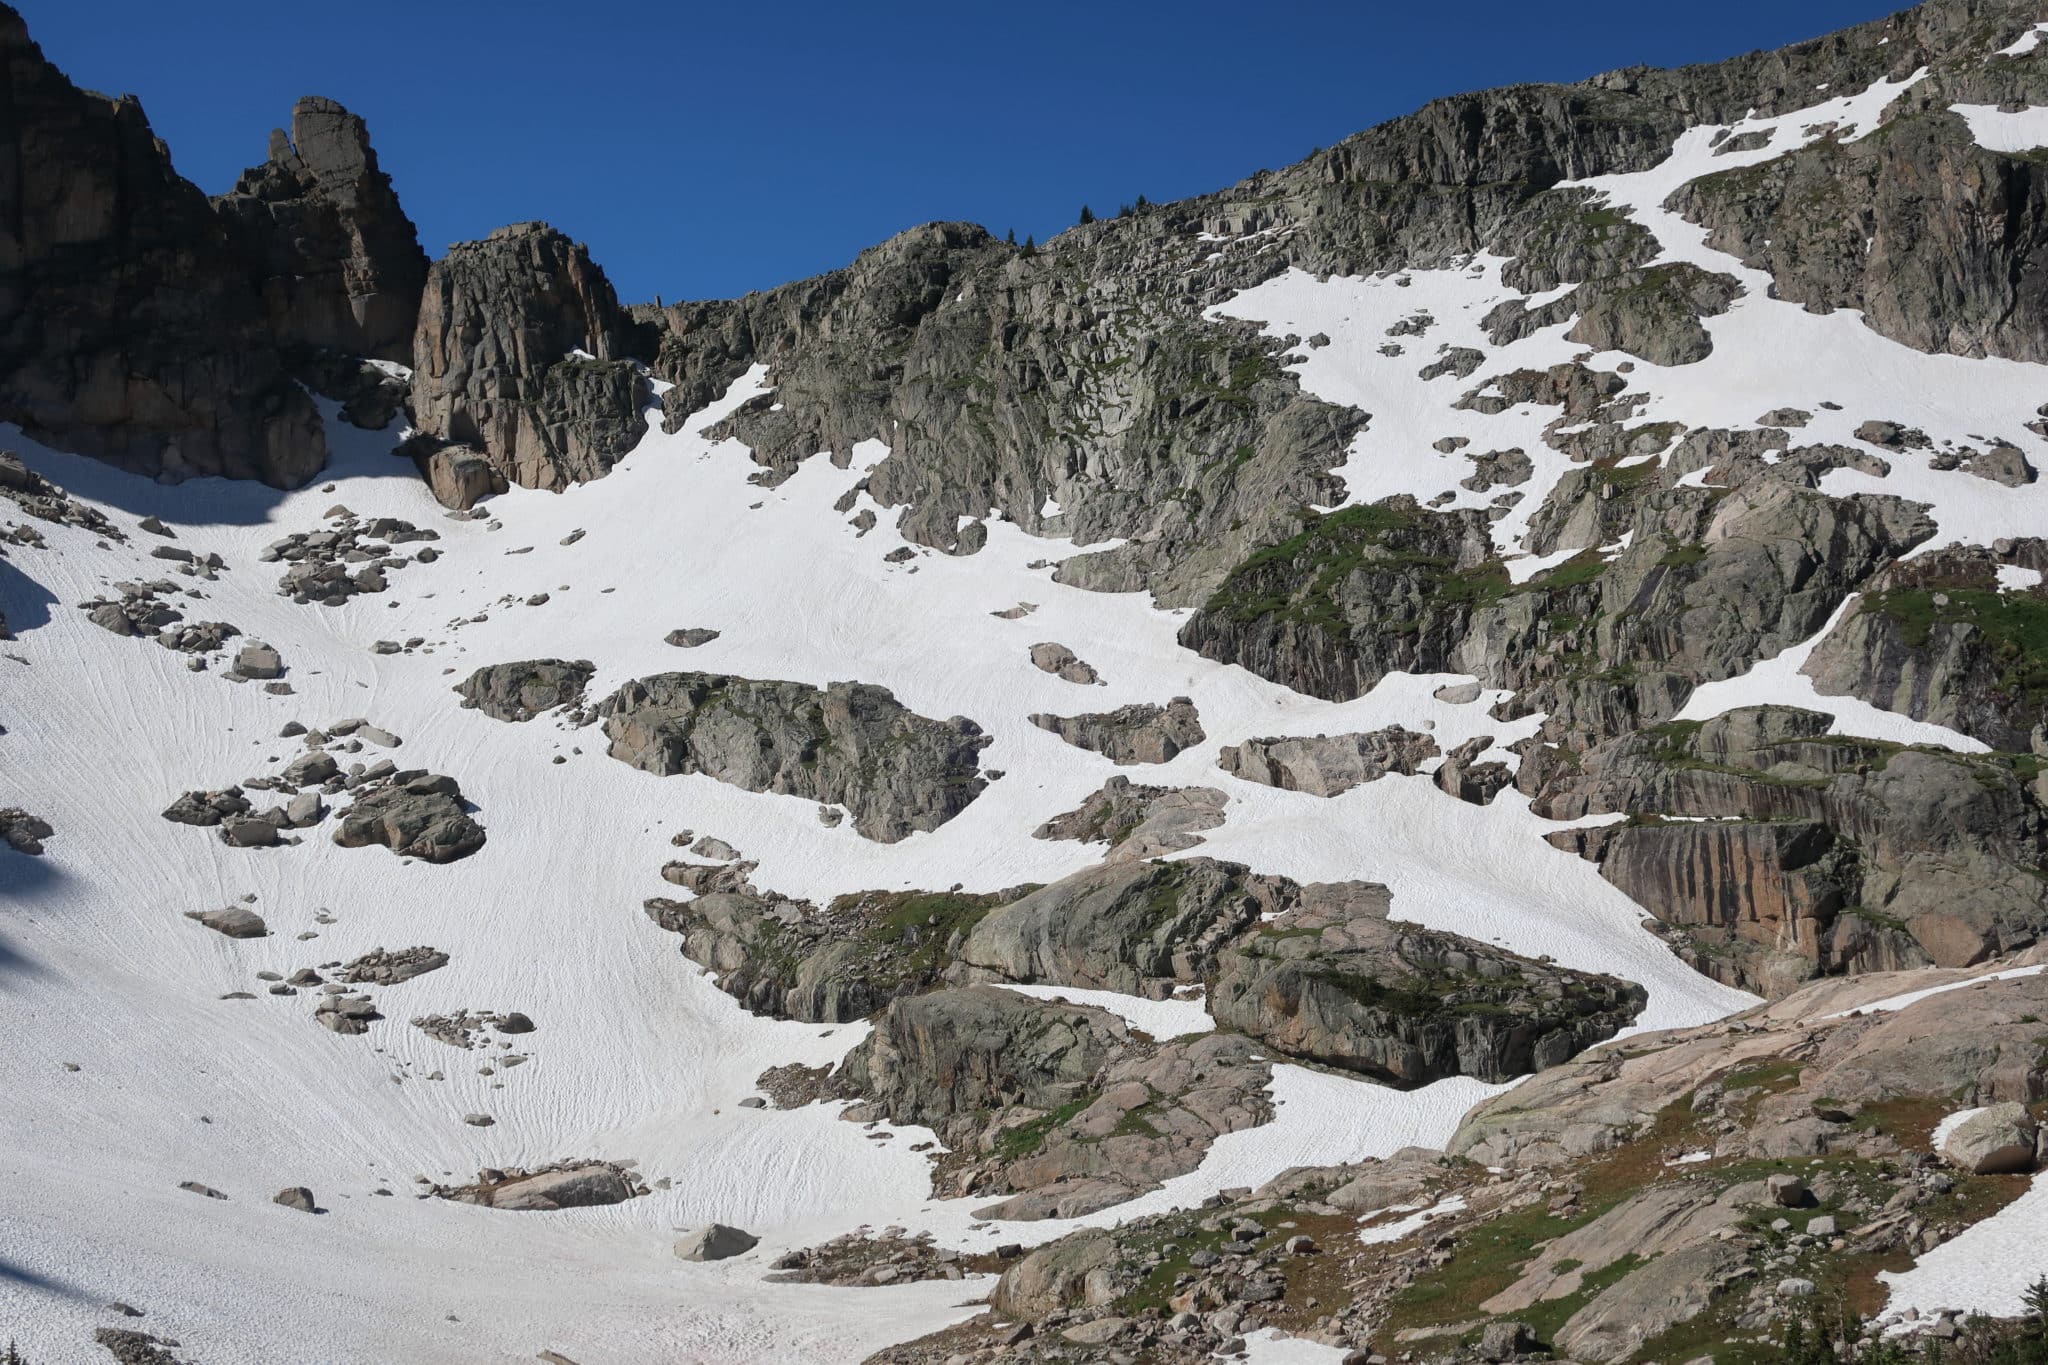
Early-season conditions, specifically mid-July after a wet winter. Notice the snow tongue that extends up into the gulley. The more promising early-season route is to the right/west. Zig-zag and scramble up slabs and gullies to gain the snow-covered slope above the near-vertical cliff. Reach the ridge above the true pass.
From the bowl below the pass, the alternative route scrambles to the right/southwest, in order to get above a cliff. Then, it zig-zags on tundra and granite ledges to the ridge, arriving about 25 yards west of the true pass.
The alternate route melts out before the direct route — it holds less snow and receives more sunshine. But when snow-covered it’s the more hazardous of the two routes, due to the relatively worse consequences of a fall.
In a normal year, the direct route will hold snow through June and be effectively melted out by August. The alternate route is about two weeks ahead. This timeline could shift by up to a month after extremely dry or wet winters, and after extremely cool or warm springs.
Recommended gear
If the direct or alternate route to Paiute Pass is holding snow, an ice axe and crampons are strongly advised. The axe is useful for self-arrest and self-belay, and for cutting steps or blocks.
If the snow is firm, crampons will be essential. If it’s soft — which is more likely — they will improve comfort, confidence, and efficiency. I have done Paiute Pass in both directions on soft snow — an ascent of the direct route with Vargo Pocket Cleats, and a descent of the alternate without traction, although I was mostly able to avoid steeping onto the snowfields. (I had an ice axe on both occasions.)
Some may be comfortable with my equipment list. But most will want crampons with frontal spikes, such as the Kahtoola K-10 Crampons or Hillsound Trail Pro Crampon.
South side
While at the pass, be sure to locate the west ridge of the Lone Eagle Cirque and the Northeast Gully. For south-bounders on the Pfiffner Traverse, that feature (along with its approach) represents the next significant challenge. The route will look impossibly steep, which it’s not; from here, the more important takeaway is the amount of snow still lingering in the gully.
(I have heard that the south side of Paiute Pass can be descended from the true pass, but I have not done it myself. Instead, I will provide directions for a route that I have done several times.)
If the direct route was taken to the pass, head west on the ridge for about 25 yards, contouring around an outcrop and passing by a bold ridgetop campsite along the way. Stop where krumholtz spruce grow up to the ridge. If the alternate route was taken to the pass, descend to the krumholtz spruce.
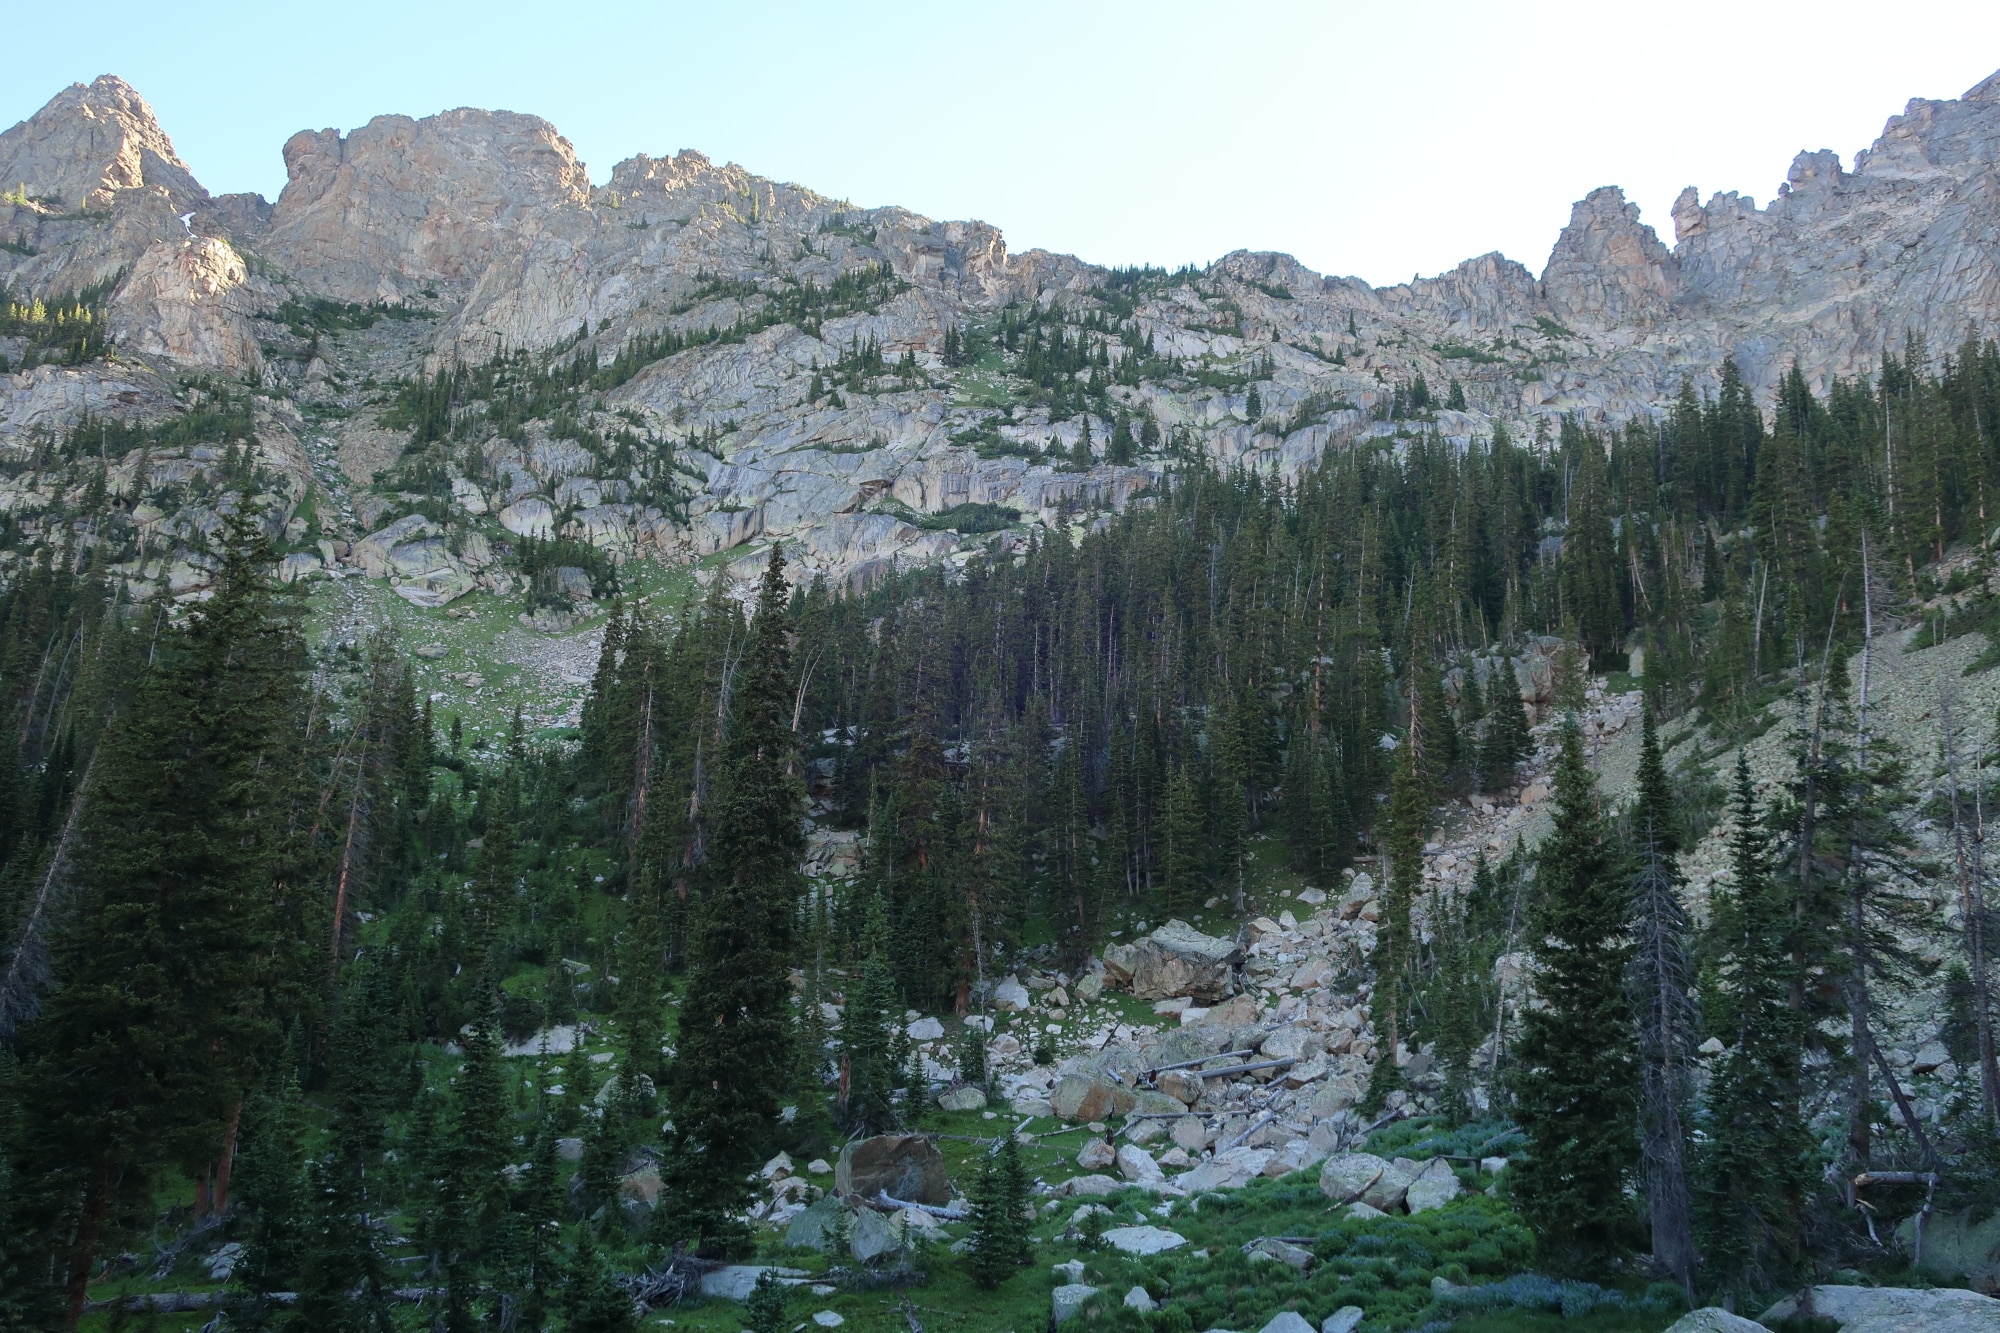
When viewed from the meadow below, the south side of Paiute Pass appears impossibly steep. The recommended route starts near the low spot on the ridge, where krumholtz grow up to the ridge. It descends the avy chute nearby (not the big one on the left side of the image), then cuts right/east out of view down a tundra-filled crack system.
Drop south off the pass, veering right/west down craggy ledges, until reaching a tundra-covered avalanche chute. Descend it for about 200 vertical feet. If you reach the point at which the chute plummets over cliffs, halt.
Turn left/east through krumholtz, find a tundra-filled crack system on a 175-degree bearing, and drop down it until below the lowest cliff band. To reach the Pawnee Pass Trail, hike south-southwest through timber and then a meadow. The trail is on the south side of the meadow.
Have experience with this route? Please share. Have questions? Please ask.
Disclosure. This website is supported mostly through affiliate marketing, whereby for referral traffic I receive a small commission from select vendors, at no cost to the reader. This post contains affiliate links. Thanks for your support.
The post Route beta || Pfiffner Traverse: Thunderbolt Creek & Paiute Pass appeared first on Andrew Skurka.
July 30, 2017
Preview: Sierra Designs 2018 sleeping bags || Highlight: “Zipperless mummy”
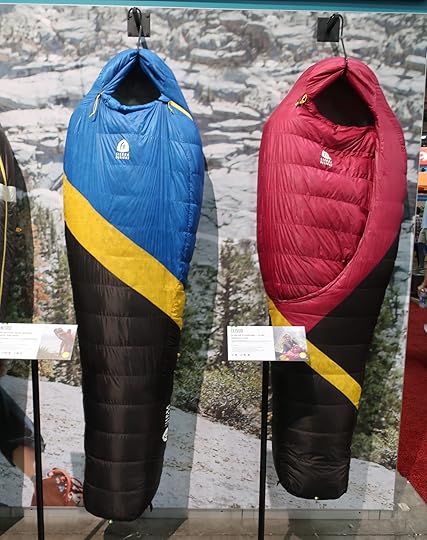

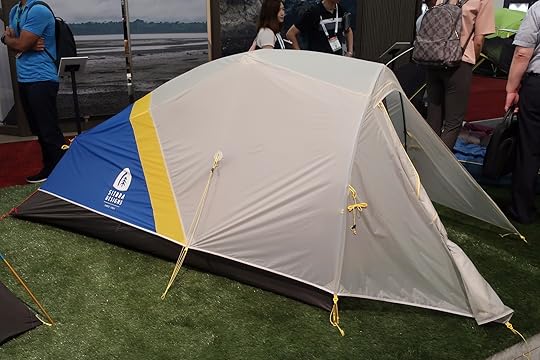
The mens Nitro (left) and womens zipperless Cloud (right), SD’s new premium mummy bags.
The Sierra Designs 2018 sleeping bag program includes four distinct models, each with several temperature rating options and in a male and female version: an updated Backcountry Bed and Zissou mummy, and an entirely new Nitro and Cloud, which are an ultralight mummy and “zipperless mummy,” respectively.
The Backcountry Bed and Nitro will be available on September 1, exclusively from Backcountry.com, Backcountry Edge, Campsaver, and Moosejaw, as well as SierraDesigns.com. The other models will arrive for Spring 2018.
An overarching theme for Sierra Designs in 2018 is the return to well designed and built gear at attainable prices. This goal was perhaps fulfilled best by its sleeping bag line-up — it will be difficult to find bags of this quality at better prices.
Nitro
The new Nitro is a straight-up mummy made with premium materials like 800-fill PFC-free DriDown and 15d shell and liner fabrics. It includes several nice design features, like a zipperless foot vent, 5-inch baffles (not 6-in) for better down control, and a unique “draft dodger” draft collar in the 20- and 0-degree versions.
It will be available in three temperature ratings:
35-deg ($299, 1 lb 6 oz),
20-deg ($329, 1 lb 12 oz), and
0-deg ($379, 2 lb 8 oz)
These low weights were not achieved by giving the bags slim-fit dimensions. Shoulder girth is a standard 62 inches.
Cloud
The more innovative of SD’s two new models is the Cloud, which is a “zipperless mummy” made with the same premium materials as the Nitro. Earlier this month I used the 35-deg version on an 8-night trip, and feel that its recognition at Outdoor Retailer by passer-bys and by Gear Institute (“Best New Gear”) will be validated once it’s taken into the field.
The 35- and 20-degree Cloud bags are less expensive but marginally heavier than their Nitro counterparts.
35-deg ($270, 1 lb 7 oz)
20-deg ($300, 1 lb 13 oz)
Weight was dropped by removing the zipper, but added back with a pad sleeve and due to overlapping materials in the opening. The sleeve keeps the bag on the pad and tensions open the hole. The overlapping materials were a function of the design, but also happen to give the Cloud a variable girth of several inches. This useful if you plan to sometimes wear your insulated clothing to bed, and the lack of it is a limitation for conventional mummy bags.
I plan to write a more in-depth review about the Cloud, but for now I will say that its performance is about what you might expect: between a mummy and a quilt. It can be sealed up like a mummy, thanks to a thoughtful comforter design. But its simplicity and versatility is more quilt-like.

The comforter is designed such that it gently wraps around the user’s shoulder, helping to seal up the bag. #photobomb by my BFF Oden.
Backcountry Bed
With the introduction of the Cloud, the innovative Backcountry Bed could be moved to its rightful place: a very comfortable but relatively heavy sleeping bag with a budget-friendly price that will be of greatest interest to backcountry campers, not gram-weenies. There is simply too much build in the BCB to achieve weights competitive with a simpler mummy or quilt.
The new BCB has PFC-free 700-fill DriDown, 20d fabrics, and 5-inch baffles. It will be available in two temperature ratings:
35-deg ($249, 1 lb 15 oz)
20-deg ($289)
In comparison to the current Backcountry Bed, the 2018 model has undergone several revisions:
The hood is more contoured (less boxy), to improve thermal efficiency.
The hole opening is one baffle longer, making for easier entry and exit. And,
The hood was made larger, so that there is room for a pillow.
A post shared by Sierra Designs | Think Outside (@sierradesigns) on Jul 25, 2017 at 5:36pm PDT
Zissou
This mummy seeks a similar balance of comfort, weight, and price as the new Backcountry Bed — but in a traditional design. (Well, not entirely traditional — it has a second zipper so that it can be opened like a comforter if so desired.) Specs include PFC-free 650-fill DriDown, 20d fabrics, generous dimensions, and competitive prices $199, $239, and $279 for the 35-, 20-, and 0-degree versions.
A post shared by Sierra Designs | Think Outside (@sierradesigns) on Jul 26, 2017 at 8:26am PDT
The post Preview: Sierra Designs 2018 sleeping bags || Highlight: “Zipperless mummy” appeared first on Andrew Skurka.
July 29, 2017
Route beta || Pfiffner Traverse: Northeast Gully, Lone Eagle Cirque & Lost Tribe Lakes

In mid-July after a very wet spring, the Northeast Gully was still loaded with snow. An ice axe was mandatory, and crampons are highly recommended.
The Northeast Gully is the most difficult feature on the Pfiffner Traverse: it’s filled with snow through mid-summer, covered with talus and loose scree in late-summer, and always steep. Unfortunately, it’s also a critical connector between Lone Eagle Cirque, Lost Tribe Lakes, and upper Arapaho Creek, all in Colorado’s Indian Peaks Wilderness.
An easy all-trail detour does exist, but it’s decidedly inferior. It entails exiting the high country, by descending nearly to Monarch Lake; and it bypasses two of the top destinations on the Pfiffner Traverse — the Lone Eagle Cirque and the Lost Tribe Lakes basin.
Because of its importance and difficulty, I have decided to post the route description and topographic map for this section of the Pfiffner Traverse. If you have experience with or questions about this route, please chime in. My hope is that this page will help in setting realistic expectations and making good decisions.
Roach’s description
The definitive guidebook for this area is Colorado’s Indian Peaks: Classic Hikes & Climbs, by Gerry Roach. His description for the Northeast Gully is accurate and minimally sufficient:
“The route ascends a northeast-facing gully to Achonne’s south ridge. Hike around the west side of Crater Lake and scramble southwest up a long, grassy ramp under the cliffs on the east side of “Achonee Tower.” Continue south into the upper basin between Achonee and “Hopi.” Climb southwest to the base of the gully at 12,000 feet and ascend it to Achonee’s south ridge at 12,480 feet. The gully has moderate snow in June and scree in August.”
But if you want more details — and perhaps less adventure and fewer surprises, too — then read on.
Field resources
This page includes an in-depth route description. You can: print it, using the print button on the left-side of your screen; or reformat it, by copying & pasting it into a new document.
To download the topographic map for this route, click here. The map has been annotated with my route notes, and will have a scale of 1:24,000 when printed on standard 8.5 x 11 letter paper. As an overview map for this area, consult the National Geographic Trails Illustrated #102 for the Indian Peaks and Gold Hill.
Finally, I am intentionally not offering a GPX file for the route. You can easily create one if you’d like one. But I don’t want to directly enable hiking from waypoint to waypoint — the route demands more backcountry skills than that.
If you benefit from these free resources and wish to do more of the Pfiffner Traverse — either as a thru-hike or section-hikes — then consider purchasing the Pfiffner Traverse Guide. It includes route descriptions, datasheets, and topographic maps for the entire 77-mile Primary Route, multiple alternate routes, and recommended section-hikes.
Orientation
The Pfiffner Traverse Guide assumes a southbound itinerary, from Milner Pass to Berthoud Pass. This route description follows that pattern.
To reach the Lone Eagle Cirque, follow the Cascade Creek Trail south from its junction with the Pawnee Pass Trail. This rugged trail will pass by:
Mirror Lake, which affords a spectacular view of Lone Eagle;
Crater Lake, from where the Northeast Gully and its approach route can be seen; and,
Multiple designated campsites, permits for which are available from Arapaho-Roosevelt National Forest.
Lone Eagle towers above Mirror Lake
To the wall
The Northeast Gully and its approach can be divided into three parts. The first starts at campsite #12, where there is a century-old and roofless log cabin perched on a granite bluff above Crater Lake. From here, your goal is to reach the base of Mt. Achonee, along which there is a steep vegetated ramp that can be followed to the bowl below the Northeast Gully. This route is hardly a breeze, but it at least avoids the impassable cliff bands to the west/southwest of Crater Lake.
A use trail departs from the back of campsite #12. Follow it for a few minutes, until it drops towards Crater Lake. It terminates shortly beyond, when thick brush and short cliffs block travel along the shoreline.
Climb up a moderately angled slope (relatively speaking) to the base of the wall. The route is messy, but at least it’s short. Meadows are often wet, and brush and overgrowth hide rocks and deadfall. Timber has blowdowns. And granite slabs can be steep and ledgy.
West-southwest of Crater Lake, there is a small basin that is rimmed by Point 12130 and Point 12155. Strive to reach the wall near its outlet stream. If this drainage is dry, which may be the case later in the season, look for the varnish stain on the wall’s lower slabs.
Typical travel between campsite #12 and the base of the wall: timber, slabs, and open meadows. It’s a messy route with limited visibility.
Up the ramp
The second segment is more straightforward. Grind steeply upwards along the base of the wall on firm tundra, talus, and one rocky riparian section. When the grade begins to mellow after about 800 vertical feet, leave the base of the wall and aim towards the base of the Northeast Gully, mostly on slabs with some tundra; talus can be mostly avoided by staying downhill of it.
Once it reaches the granite wall at the base of Achonee and Achonee Tower (the two skyline summits), the route follows the vegetated ramp on a diagonal to the left.
Northeast Gully
The Northeast Gully is not the narrow slot that tops out at the low spot on the ridge between Achonee and Hopi. It’s also not the wide slope at the base of Hopi. Instead, it’s the medium-sized chute between them. The maximum slope angle is about 40 degrees — it’s steep.
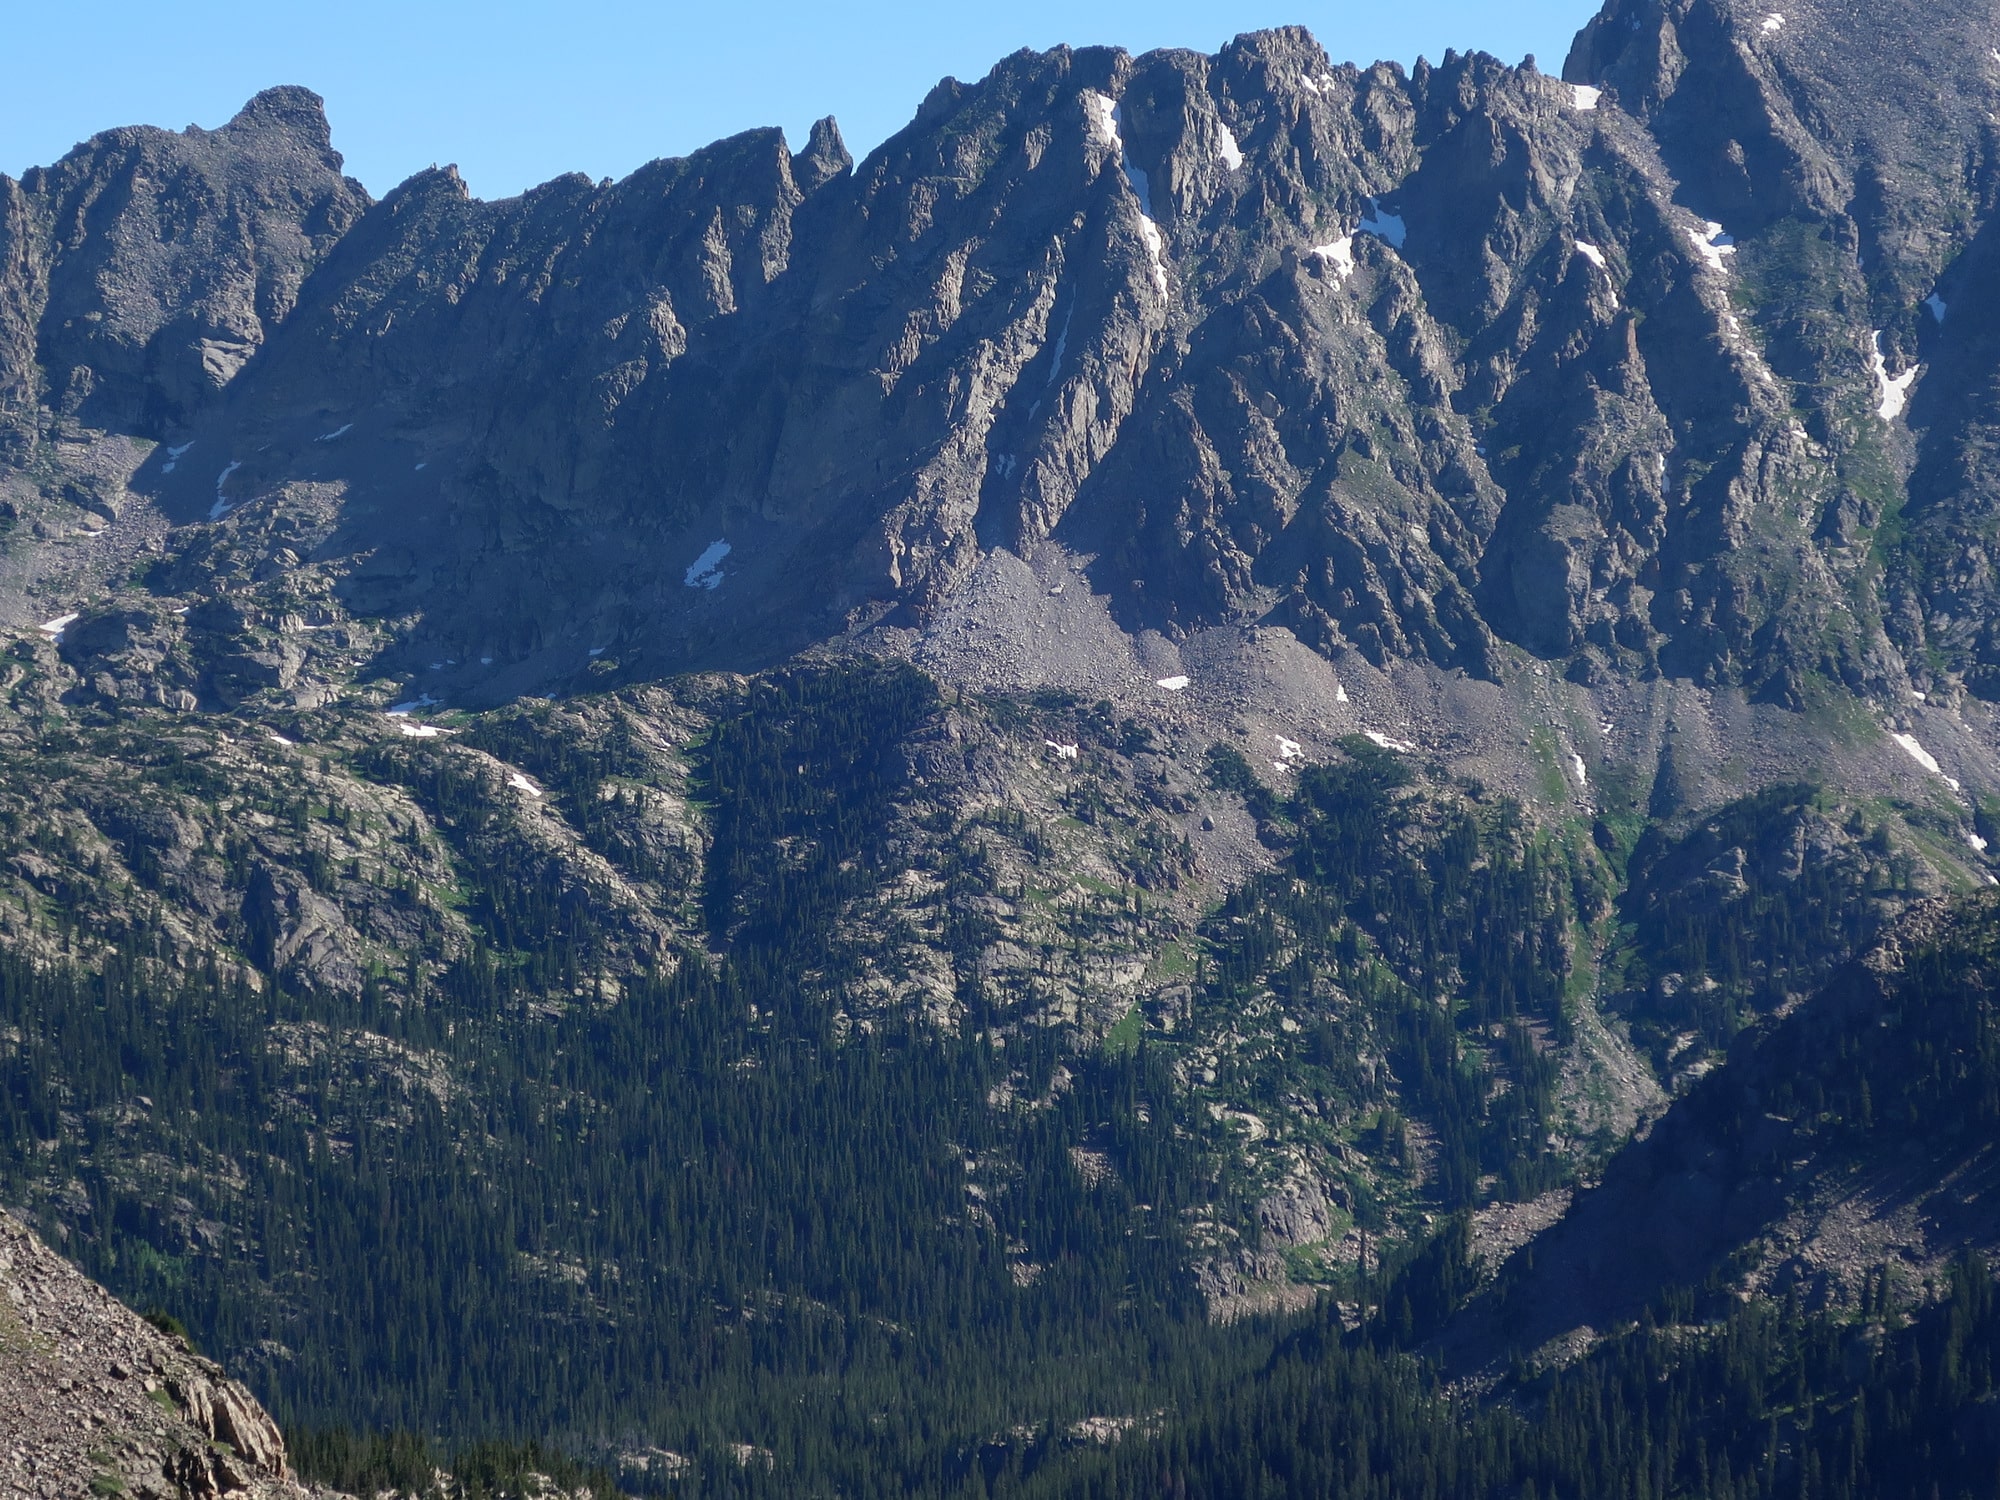
View of the Northeast Gully from Crater Lake. It’s the middle snow-filled chute. The left route is the Hopi Glacier Route; and the right is an unnamed slot.
After a normal winter, the Northeast Gully will remain snow-filled through June. Rocks begin to show in July. And it’s a pure rock scramble by August. Depending on the winter snowfall and spring temperatures, this timeline may shift by up to a month.
Based on first-hand experience with this route and others, I expect that the scree and talus becomes generally less stable towards the top of the chute, where the slope angle is increasingly greater than the angle of repose. The rocks are free to move for 2-3 months per year; otherwise, they are locked in unstable positions by snow and ice.
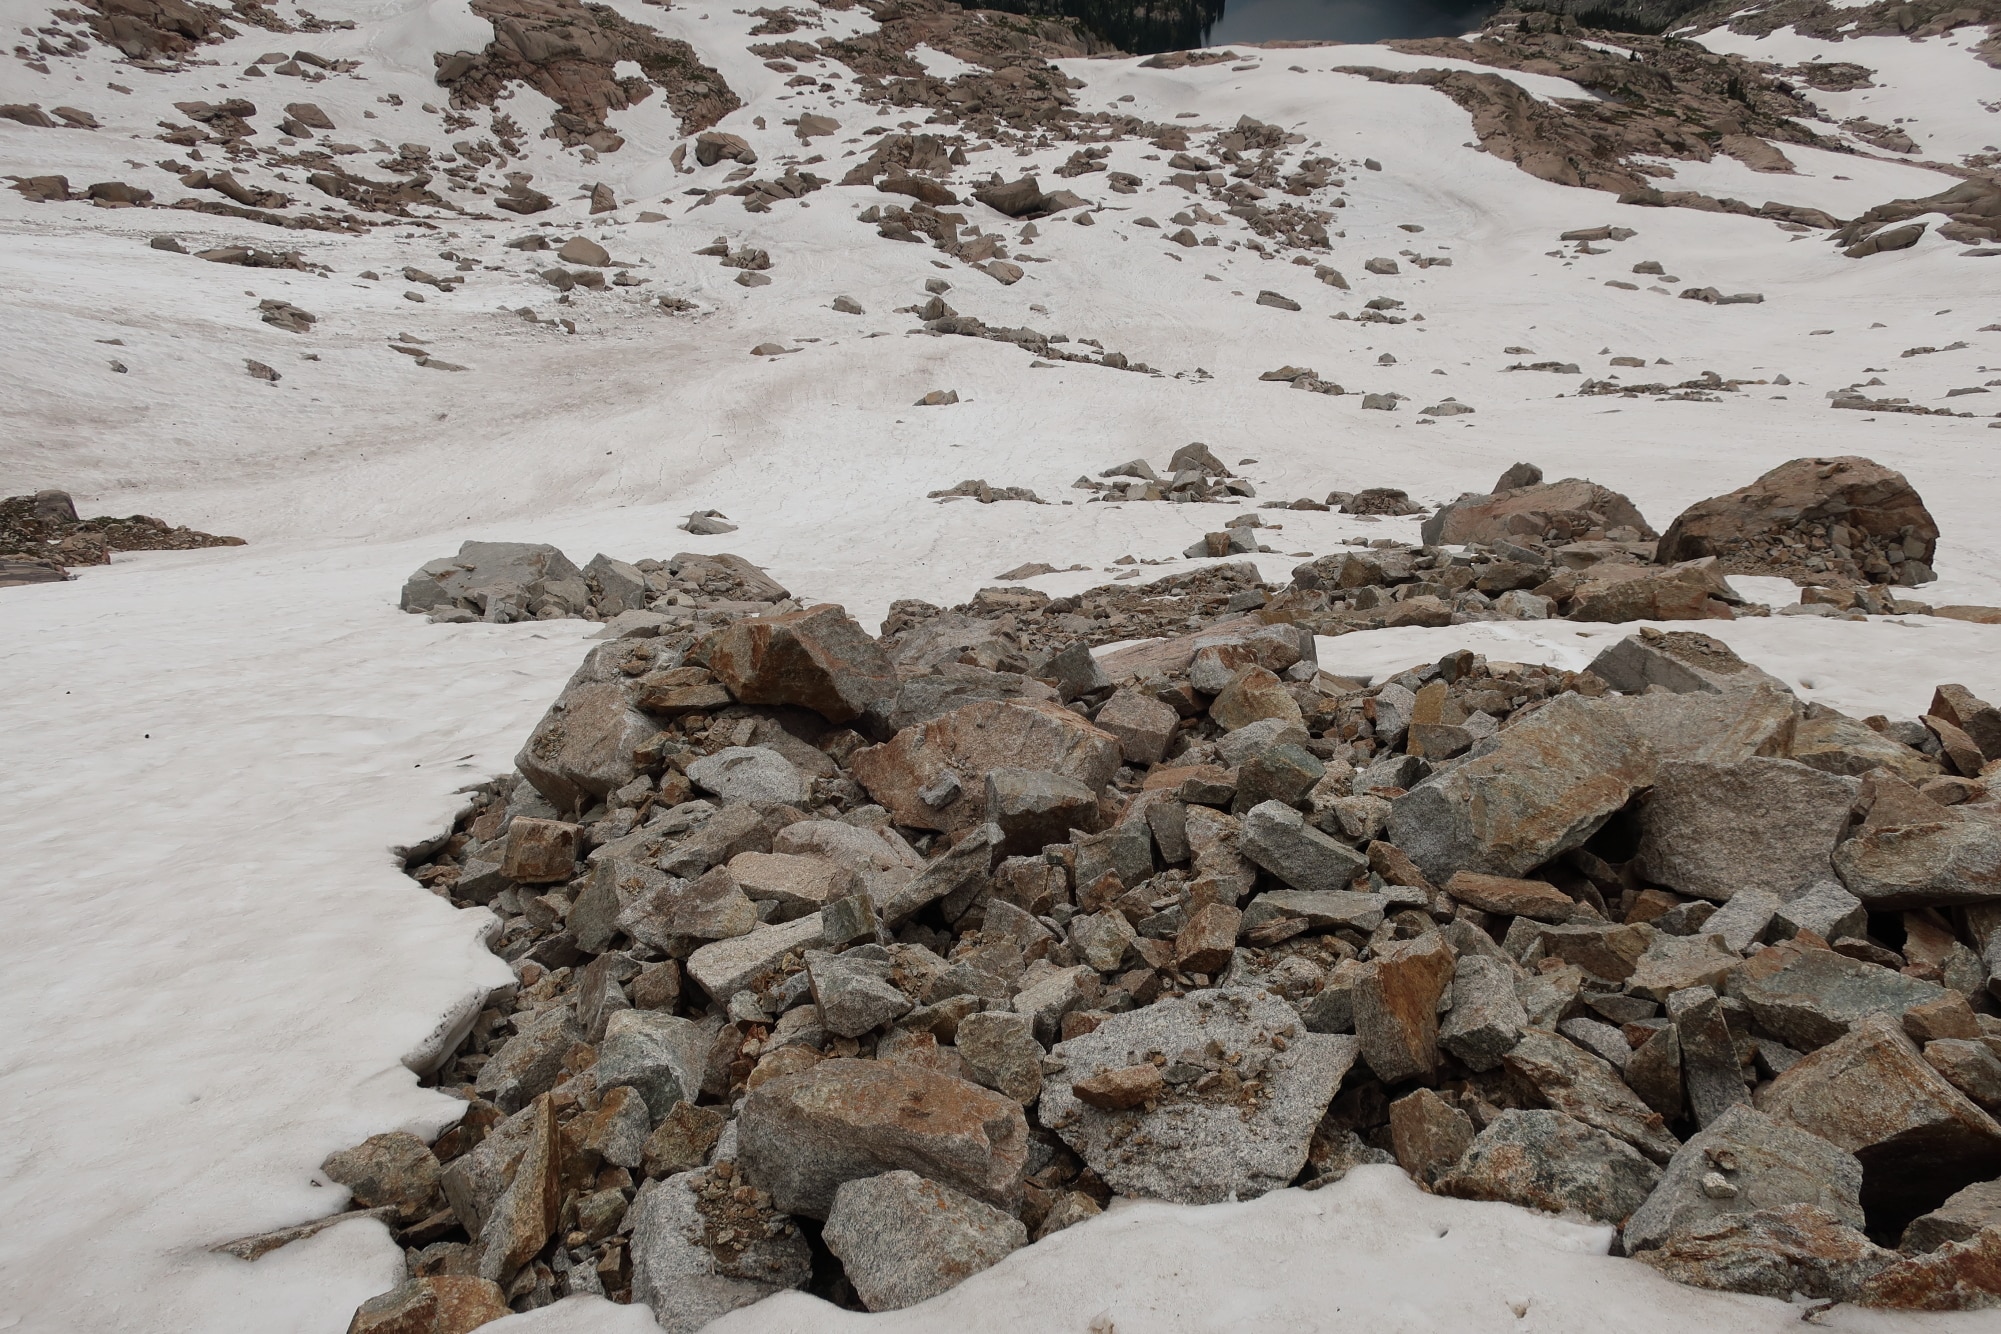
Melted-out scree and talus in the Northeast Gully, looking downhill towards Crater Lake.
Recommended equipment
When snow-filled, an ice axe and crampons are strongly advised. The axe is useful for self-arrest and self-belay; and for cutting steps or blocks, especially at the top, where the steepest pitches (and possibly a cornice or rock moat) will be encountered.
If the snow in the gully is firm, crampons will be essential. If it’s soft, they will improve comfort, confidence, and efficiency. I have done the Northeast Gully in both directions on soft snow — a descent without traction, and an ascent with Vargo Pocket Cleats. (I had an ice axe on both occasions.)
Some may be comfortable with my equipment list. But most will want crampons with frontal spikes, such as the Kahtoola K-10 Crampons or Hillsound Trail Pro Crampon.
Achonee-Hopi ridge
After reaching the top of the Northeast Gully, turn left/south and scramble atop the ridgeline towards Hopi on lichen-covered talus that is slick when wet. At the subtle low spot between Point 12707 and Hopi, descend southwest down a narrow tundra corridor. This extra climbing avoids a tedious and lengthy contour across endless talus.
At around 12,200 feet, transition to windswept tundra, and begin to hug the western lip of the Lost Tribe Lakes basin to scout a route down. (It’s also a good vantage point from which to identify some of the route between Lost Tribe Lakes and Wheeler Basin, described below.) A corniced snowfield builds below this ridgeline, which limits descent options early in the season.
Follow an elk trail that drops off the ridge and hooks left/north around the edge and bottom of the snowfield (or would-be snowfield). You have missed the trail if you reach a large boulder on the ridgeline. At the bottom of the descent, turn right/south and follow it across and through scree and small talus. Beyond, the trail continues to the head of the lower Lost Tribe Lake and to the outlet of the upper lake, although on the tundra it’s more faint and less crucial.
Given the difficulties in reaching Lost Tribe Lakes — which sit at treeline and which are surrounded by imposing cliffs below Hopi, Point 12799, Mt George, and Apache Peak — it’s likely to be unoccupied. Enjoy your stay.

The Lost Tribe Lakes basin, as seen from its western edge at the top of the elk trail.
Descent into Wheeler Basin
The optimal route between Lost Tribe Lakes and Wheeler Basin, a hanging valley above Arapaho Creek, is still a mystery to me, even after four attempts at finding one.
From the outlet of the upper Lost Tribe Lake, hike east, gaining some elevation to avoid the wet southeast shoreline of the upper Lost Tribe Lake. After a few minutes, turn southeast and aim for the saddle at the base of Mt George; the knob on the saddle’s southwest side is just 80 feet higher.
One proven descent route uses the second avalanche chute southeast of the saddle. The upper portion is steep but mostly tundra-covered; the bottom is mellower but rockier. Below the normal run-out zone, aim for healthy timber, not the thickets of mangled spruce. However you get down, enter the lush meadow at the bottom of Wheeler Basin and arrive at the creek-side campsite that is marked on the topo map.
I’m hopeful that there is a cleaner route to the west of this avalanche chute, but I’m not certain there is. Try dropping into the first avalanche chute beyond the saddle, and then working right/southwest through breaks in the ledges. This route may be easier to find in the reverse direction: Slightly downstream of the campsite there is a well established elk trail that climbs up along the left side of the wall. Start there, and then work right/notheast through the ledges.
The view of viable descent routes between Lost Tribe Lakes and Wheeler Basin, as seen from near Arapaho Pass. On the right far is the proven avy chute; its base is partially obscured. I think a better route may be just to its left/west.
Wheeler Basin
From the campsite, follow a use trail to Coyote Park in upper Arapaho Creek. It starts on the south side of Wheeler Creek, crosses to the north side further downstream, and then fords again near the mouth of this hanging valley. It is generally easy to follow to this point.
The upper ford of Wheeler Creek along the use trail.
Below the final ford, the trail becomes more obscure, due to a thicker understory and multiple blowdowns. But stay on the trail — it’s still faster than descending to Arapaho Creek and climbing the opposite slope to gain the Arapaho Pass Trail. After dropping to a low elevation of 10,040 feet, it climbs gradually, parallel to the creek about 100 yards away.
Upon reaching an unmapped avalanche run-out zone, the use trail becomes extremely difficult to find or follow. Do your best, and push through to the timber on the other side.
Soon the use trail arrives at the edge of another run-out zone, at the northern end of Coyote Park. Depart the “trail” and descend to the creek, which can be crossed on a logjam, or boulder-hopped later in the season. Hike uphill away from the creek until intersecting the Arapaho Pass Trail, within about 25 or 50 yards. The trail is inaccurately mapped — it is closer to the creek here.
Have questions about or experience with the route? Please leave a comment.
Disclosure. This website is supported mostly through affiliate marketing, whereby for referral traffic I receive a small commission from select vendors, at no cost to the reader. This post contains affiliate links. Thanks for your support.
The post Route beta || Pfiffner Traverse: Northeast Gully, Lone Eagle Cirque & Lost Tribe Lakes appeared first on Andrew Skurka.
July 28, 2017
Preview: Vargo Pocket Cleats v3 || Sub-3 oz traction for early-season backpacking


The Pocket Cleats v3 look very different than v1 and v2.
The third-generation Pocket Cleats from Vargo have undergone significant revisions since v2, which was tweaked from v1. They will be available in October or November in stainless steel ($40, 2.9 oz) and titanium ($60, 2.1 oz), each in just one size that will fit most running shoes, hiking shoes, and hiking boots.
Problems with v1 and v2
The first two generations of Pocket Cleats had a major problem: they did not reliably stay put. For example, while climbing low-angle (about 15 degrees) glacial ice in Wyoming’s Wind River Range, the arms on my Pocket Cleats rotated out of place, so that they were no longer underfoot.
This “swinging” problem wasn’t guaranteed to occur, but the possibility of it was unnerving in high-stakes situations. For example, recently I used the Pocket Cleats to climb the Northeast Gully, a 40-degree chute in Colorado’s Indian Peaks that was holding more snow in mid-July than I expected. The Pocket Cleats performed as intended (although I wasn’t confident that they would).
The squirelly fit was especially bad for shoes with thick outsoles (e.g. Hokas) or non-hourglass shapes (e.g. Altras), and during extended wear, due to stretching, slipping, and moving of the webbing straps.

The first- and second-generation Pocket Cleats were V-shaped and were insufficiently reliable — the arms had a tendency to swing outwards, out from underneath the shoe.
New design
Pocket Cleats v3 is no longer V-shaped, but a band of three square cleat pods that are centered under the shoe. The pods are connected with a heavy-duty rubberized nylon strap (i.e. Hypalon), and they can be shifted along the strap to concentrate or disperse the traction. Each pod has four triangular points, and its outsole-facing side features shorter tabs that will lock loosely into the shoe’s tread pattern.

Side profile of v3
Thin 2mm cord wraps over the top of the shoe to keep the pods in place. The front cord is tightened and secured with a cord lock. (It better be a damn good cord lock.) The rear loop must be tied, and for extra security the cord can be run through the shoelace eyelets. Relative to v1 and v2, which used side-release buckles, installing and removing v3 will be slower and require more dexterity.

The new lacing system. The front is secured with cord and a cord lock; the rear must be tied, and can be looped through the shoelace eyelets.
This new center-track design should stay put roughly in the center of the shoe. But, unlike the first two generations, it won’t provide any traction along the sides of the forefoot.
Targeted users
Vargo hopes that the Pocket Cleats will gain traction (pun intended) with early-season backpackers in the High Sierra, Pacific Northwest, and Rocky Mountains who want additional traction for snowbound passes, as a matter of safety or efficiency. It’s also hoping to penetrate the running community, although its sales and marketing strategy sounded less developed.

The packed size is very impressive. And the weight, at 2.1 or 2.9 oz, is excellent.
Vargo clarified that the Pocket Cleats v3 are not substitutes for crampons, and are not appropriate for mountaineering. What is the difference between early-season backpacking and mountaineering? Sometimes, very little. Personally, I would discourage Pocket Cleats when ropes, belays, and ice axes are required, recommended, or reasonable. In those situations, the extra weight of more capable traction devices — such as the Kahoola K-10 or Hillsound Trail Pro — is a wise investment.
Disclosure. This website is supported mostly through affiliate marketing, whereby for referral traffic I receive a small commission from select vendors, at no cost to the reader. This post contains affiliate links. Thanks for your support.
What was your experience with v1 or v2? Care to speculate on the performance of v3?
The post Preview: Vargo Pocket Cleats v3 || Sub-3 oz traction for early-season backpacking appeared first on Andrew Skurka.
July 27, 2017
Preview: Sierra Designs 2018 tents || High Side, Studio, Sweet Suite & Meteor
My coverage of Outdoor Retailer starts at the Sierra Designs booth (naturally, since they’re paying for me to be here). For 2018 SD has largely revamped its shelter line-up. Only three current models are being carried forward — the Summer Moon, Clip Flashlight, and my High Route. The remainder will be discontinued and closed out.
Driving philosophy
The new models are less innovative and radical than the old line-up, but ultimately we believe they offer a more compelling package. They have double-wall construction and vestibules, more familiar architectures, and more intuitive setups. To help differentiate them in the marketplace, Sierra Designs emphasized livable space and has priced them more competitively.
With its new models, SD was not striving to break records. Instead, it’s offering a quality and functional product at a good price. For decades this was a winning formula for SD, and under the leadership of Stephen Barnes the brand is trying to get back to that.
High Side
Of the four new models, the High Side is the most interesting to med. It’s a double-wall non-freestanding hoop tent with side entry. The pole set is not symmetrically horseshoe-shaped, but rather skewed to be more vertical on the door-side.

The High Side will appeal to those who prioritize weight and packability over livable space.
At 1 lb 14 oz, it will appeal to weight-conscious backpackers (or bikepackers) who don’t use trekking poles or who appreciate the convenience of a dedicated pole set. It’s also more packable than the average tent, since SD used 12.5-inch pole segments instead of the more traditional 14- or 16-inch lengths.
Of course, the low weight has a cost, in this case less liveable space: the peak height is just 32 inches and the interior floor is space is 18.5 square feet. Thankfully, the side awning can be porched for additional room and ventilation, above the beyond the 8.8-square foot vestibule.
The fly, floor, and mesh fabrics are 20d, 30d, and 15d mesh, respectively, which provides a good blend of weight, durability, and cost. The Studio and Sweet Suite share this same fabric combination.
MSRP is $279.

The High Side’s pole set is not symetrically horseshoe-shaped, but skewed to be more vertical on the doorway side.
Studio 2 and Studio 3
The story about SD’s balancing of weight, space, and price is better told by by the Studio and Sweet Suite models, both of which are available in 2- and 3-person sizes. The semi-freestanding Studio 2 and Studio 3 have one door and one vestibule. They are lighter and less expensive than the Sweet Suites.

The 1-door, 1-vestibule Studio 2. A 3-person version will also be available. To improve liveable space, SD added two horizontal cathedral poles at head and foot, rather than use the more common “fin” architecture.
The Studio 2 will retail for $350 and has a minimum weight of 2 lbs 11 oz. The Studio 3 will retail for $420 and has a minimum weight of 3 lbs 8 oz.
Sierra Designs worked the architecture to maximize liveable space relative other lightweight/ultralight 2- and 3-person tents. Rather than a fin-style roofline, SD added horizontal cathedral poles at head and foot to increase real estate for head and shoulders. The doorway and footbox are also aggressively angled, nearly vertical.

Notice the aggressive, nearly vertical doorway pole, which helps to increase interior volume.
Sweet Suite 2 and Sweet Suite 3
These two promising models will be available September 1 — rather than spring 2018 — through four exclusively retailers: Backcountry.com, Backcountry Edge, Campsaver, and Moosejaw, as well as SierraDesigns.com.
The semi-freestanding Sweet Suites have two doors and two vestibules. Fabrics are the same as the High Side and Studio models (20d, 30d, and 15d mesh). Weights and prices are understandably higher than for the Studios. The 2-person will retail for $370 and specs at 3 lbs 1 oz; the 3-person will retail for $460 and specs at 3 lbs 11 oz.

The inner (without fly) of the Sweet Suite 2. Again, notice the verticality of the interior, due to the cathedral pole and to the aggressively angled head and foot panels.
Meteor 2 and 3
These “standard build” models will appeal to those on tighter budgets and with lower standards for weight and performance. Like the Sweet Suites, they will be available on September 1 from the aforementioned online dealers.
The post Preview: Sierra Designs 2018 tents || High Side, Studio, Sweet Suite & Meteor appeared first on Andrew Skurka.
Preview || Sierra Designs 2018 tents: High Side, Studio, Sweet Suite & Meteor
My coverage of Outdoor Retailer starts at the Sierra Designs booth (naturally, since they’re paying for me to be here). For 2018 SD has largely revamped its shelter line-up. Only three current models are being carried forward — the Summer Moon, Clip Flashlight, and my High Route. The remainder will be discontinued and closed out.
Driving philosophy
The new models are less innovative and radical than the old line-up, but ultimately we believe they offer a more compelling package. They have double-wall construction and vestibules, more familiar architectures, and more intuitive setups. To help differentiate them in the marketplace, Sierra Designs emphasized livable space and has priced them more competitively.
With its new models, SD was not striving to break records. Instead, it’s offering a quality and functional product at a good price. For decades this was a winning formula for SD, and under the leadership of Stephen Barnes the brand is trying to get back to that.
High Side
Of the four new models, the High Side is the most interesting to med. It’s a double-wall non-freestanding hoop tent with side entry. The pole set is not symmetrically horseshoe-shaped, but rather skewed to be more vertical on the door-side.
The High Side will appeal to those who prioritize weight and packability over livable space.
At 1 lb 14 oz, it will appeal to weight-conscious backpackers (or bikepackers) who don’t use trekking poles or who appreciate the convenience of a dedicated pole set. It’s also more packable than the average tent, since SD used 12.5-inch pole segments instead of the more traditional 14- or 16-inch lengths.
Of course, the low weight has a cost, in this case less liveable space: the peak height is just 32 inches and the interior floor is space is 18.5 square feet. Thankfully, the side awning can be porched for additional room and ventilation, above the beyond the 8.8-square foot vestibule.
The fly, floor, and mesh fabrics are 20d, 30d, and 15d mesh, respectively, which provides a good blend of weight, durability, and cost. The Studio and Sweet Suite share this same fabric combination.
MSRP is $279.
The High Side’s pole set is not symetrically horseshoe-shaped, but skewed to be more vertical on the doorway side.
Studio 2 and Studio 3
The story about SD’s balancing of weight, space, and price is better told by by the Studio and Sweet Suite models, both of which are available in 2- and 3-person sizes. The semi-freestanding Studio 2 and Studio 3 have one door and one vestibule. They are lighter and less expensive than the Sweet Suites.
The 1-door, 1-vestibule Studio 2. A 3-person version will also be available. To improve liveable space, SD added two horizontal cathedral poles at head and foot, rather than use the more common “fin” architecture.
The Studio 2 will retail for $369 and has a minimum weight of 2 lbs 11 oz. The Studio 3 will retail for $429 and has a minimum weight of 3 lbs 8 oz.
Sierra Designs worked the architecture to maximize liveable space relative other lightweight/ultralight 2- and 3-person tents. Rather than a fin-style roofline, SD added horizontal cathedral poles at head and foot to increase real estate for head and shoulders. The doorway and footbox are also aggressively angled, nearly vertical.
Notice the aggressive, nearly vertical doorway pole, which helps to increase interior volume.
Sweet Suite 2 and Sweet Suite 3
These two promising models will be available September 1 — rather than spring 2018 — through four exclusively retailers: Backcountry.com, Backcountry Edge, Campsaver, and Moosejaw, as well as SierraDesigns.com.
The semi-freestanding Sweet Suites have two doors and two vestibules. Fabrics are the same as the High Side and Studio models (20d, 30d, and 15d mesh). Weights and prices are understandably higher than for the Studios. The 2-person will retail for $399 and specs at 3 lbs 1 oz; the 3-person will retail for $469 and specs at 3 lbs 11 oz.
The inner (without fly) of the Sweet Suite 2. Again, notice the verticality of the interior, due to the cathedral pole and to the aggressively angled head and foot panels.
Meteor 2 and 3
These “standard build” models will appeal to those on tighter budgets and with lower standards for weight and performance. Like the Sweet Suites, they will be available on September 1 from the aforementioned online dealers.
The post Preview || Sierra Designs 2018 tents: High Side, Studio, Sweet Suite & Meteor appeared first on Andrew Skurka.


