
Andrew Skurka's Blog, page 50
April 10, 2017
In Worcester & Framingham this week: Alaska-Yukon slideshow and Gear & Skills Clinic

While I’m in the Bay State this weekend to visit family and to binge on post-marathon pastries from Mike’s Pastry, I’ll also be making presentations in Worcester and Framingham. Details:
Boy Scouts of America & Doherty HS Outdoor Club
Thursday, April 13
7:00 PM
Doherty Memorial High School
299 Highland Street
Worcester, MA
$8.50 in advance, $10 at the door
Buy tickets now
REI – Framingham
Friday, April 14
6:30 PM
375 Cochituate Rd, Framingham, MA 01701
Free, but limited spots. Reserve now.
I will have copies of the Second Edition of The Ultimate Hiker’s Gear Guide available for purchase. If you already own a copy of the First or Second Edition, bring it along if you’d like it signed and personalized. I love seeing heavily used copies full of dog-eared pages and highlighting.
Hope to see you there!

An extra incentive for coming out: a generous coupon from SD for everyone in attendance.
The post In Worcester & Framingham this week: Alaska-Yukon slideshow and Gear & Skills Clinic appeared first on Andrew Skurka.


April 9, 2017
Fastest I’ve been in 16 years || Boston Marathon: One week out
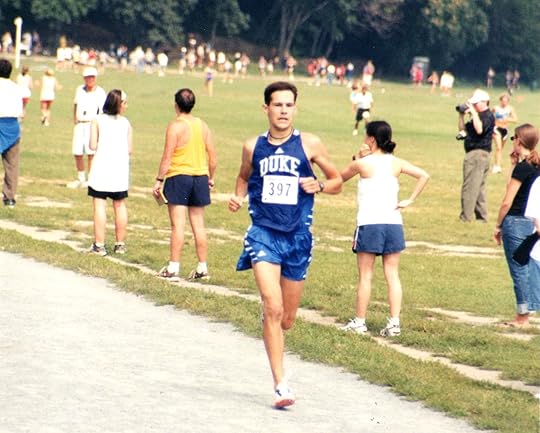

Van Cortland Park, September 2000. Right now I think I could run stride-for-stride with this 20-year-old.
The 121st Boston Marathon is now just a week out, on #MarathonMonday, April 17!
Live tracking
The Elite Men and Wave One (mine) start at 10 AM. You won’t see me on TV in Galen Rupp’s slipstream, but if you want to track my progress you can sign up for text or email updates. I’m bib #703.
Expectations
When I began Boston-specific training five months ago, during November’s dark days, I was thinking sub-2:36:53, or 6:00 minute/mile pace. It’s a clean number, and it would have represented a significant drop from my 2:44:42 qualifying time at the Colorado Marathon last spring.
But then David Roche happened.
At 36-years-old I’m nearing the end of my physical prime. So I hired David in mid-December to coach me, to avoid squandering the few years left in which I can set worthy lifetime bests.
Quickly I began to see steady and dramatic drops in my times. Of course, it wasn’t all David: I had to do the work. But I’ve endured similar (and even greater) loads before, and my pre-Roche results don’t measure up. Great coaching + dedication = peak performance.
So long as race day conditions are favorable (e.g. average weather, and continued good health), I’m confident that I can break 2:30, or 5:43 per mile pace.
If this were not my first marathon with post-Roche fitness, I suspect I’d be looking even lower. But I’d rather run an even or negative split, feel great about my finish, and have a little bit left in the tank, than to overestimate my fitness, get out over my skis, and hemorrhage minutes of time between Heartbreak Hill and Copley Square.
That said, if I reach the 13.1-mile marker comfortably in 1:14:00 or 1:14:30, I’m not going to panic.
Faster than I’ve been in 16 years
Last week David scheduled a 10k tempo, intended to be run at 10-mile race pace. I ran a 33:23 (5:23 pace) on a loop course at 5300 feet with 100 vertical feet of gain. Per Jack Daniels’ Running Calculator, the sea level conversion is 32:12, or 5:11 pace; and an equivalent 5K is 15:30, or 4:59 pace.
These conversions are within striking distance of my collegiate PR’s from spring 2001. I ran 31:45 in the 10K at the ACC Outdoor T&F Championships, and 15:01 a few weeks earlier at the Duke Invite. Between injuries and a time-consuming side interest (hiking), I never regained this level of running form until now, sixteen years later.
Yeah, I know that 30 seconds in a 10k or 5k is huge. But that gap can be easily explained away by the circumstances: sub-max workout vs peak race, solo effort vs competition, and 100 ft of climbing vs a flat track.
I also realize that it was just one workout. But I’ve done others that I think would have been a challenge for my 20-year-old self, like the 25-miler in mid-March with 16 miles at 5:49 pace (5:37 sea level conversion).
Faster but not fitter
Interestingly, I don’t think I’m necessarily “fitter” than I have been at any point in the last 16 years. At the end of the 6,875-mile Great Western Loop, during which I averaged 33 miles per day for 208 days, I must have been crazy fit. More recently, I followed the classic but misguided ultrarunner training regimen of huge volume, thinking that consecutive weeks of 100+ miles and 20k vertical feet of climbing was the ticket.
But “fit” does not mean “fast.” During the aforementioned periods, I was extremely fit, but had poor running economy:
I had to work excessively hard to run at various paces, and
I could not maintain those paces for long, because I was working so hard.
A good analogy is a hypothetical running race between Michael Phelps and Galen Rupp. Both are extremely fit, with off-the-charts VO2 scores. But Rupp would run circles around Phelps because of vastly superior running economy, due to intense running-specific training. In my old state, I was Michael Phelps. Now, I’m Galen Rupp.
Or, next Monday I’m at least going to try to be.
The post Fastest I’ve been in 16 years || Boston Marathon: One week out appeared first on Andrew Skurka.
No longer #snowpocalypse: Just an “average big winter” for the High Sierra

Through the beginning of March, California was having an extraordinary winter. Snowpack in the High Sierra was keeping pace with the wettest winter on record, 1982-83.
If the trend had continued, conditions would have been very challenging for aspiring Pacific Crest and John Muir Trail hikers, due to extensive lingering snowpack and high run-off, probably until August. The High Sierra would not have been “impassable” in June or July, but early-season gear and skills would have had premium value.

Current snowpack versus the all-time record of 1982-83, and the historical average, which peaks on April 1.
Coming up short
Early-season travel in the High Sierra will still be challenging in 2017, but probably less so than previously feared. The 2016-17 winter is no longer a #snowpocalpyse. Rather, it’s just an average big winter, about on par with 1997-98, 2004-05, 2005-06, and 2010-11.
During these seasons, many hikers successfully pushed through the High Sierra early in the season. They didn’t quit, change their itineraries, or wait at Kennedy Meadows for the snow to melt. Read up, gear up, and go.

Current snowpack versus other “big winters” from the past 20 years, as recently as 2010-11.
Disclaimer
Now, it is only April 10, and things can still change — but probably not dramatically, if at all. In the charts above, you’ll notice that the snowpack rarely grows at this time of year. The days are too long, the sun is too high in the sky, and the temperatures are too warm for snowfall to regularly exceed snow melt.
At best, these “average big winters” seems to flat-line until mid- or late-April, before spring/summer conditions finally prevail. In an average winter, the snowpack peaks on April 1.
Recommendation
If I were planning an early-season High Sierra trip right now, I would be expecting extensive lingering snow and high run-off, but not of never-seen-before proportions. Early-season gear & skills will most definitely still be a value-added.
And I would continue to check the CDEC snowpack plots weekly. An exceptionally wet-and-cold or dry-and-hot spring will delay or accelerate the great spring melt.
The post No longer #snowpocalypse: Just an “average big winter” for the High Sierra appeared first on Andrew Skurka.
April 8, 2017
A 526-word summary: The complete training cycle for road, trail & ultra running

Recently I have posted two excellent interviews with running coach David Roche:
From Ultra(slow) to 2:3X Marathoner, and
Dialing it in: Taper training for the Boston Marathon
They’re long and rich, but not quick reads. To maximize their value, you might actually have to read them more than once.
So for those just wanting an executive summary, I asked David this question:
In the two interviews we addressed most aspects of the physical training cycle. The goal of the entire process is to prepare your body to perform its best on race day. Could you concisely describe what that entails, by essentially summarizing the distinct elements of the training cycle and what each contributes to peak performance?
The personal factor
Oh man a concise unified theory of training! First, let me get ready…
David puts on his glasses, goes to the whiteboard, and draws a big smiley face.
At its core, any endurance activity requires long-term consistency — at least 10 years to reach full potential for many people. That duration likely has to do with aerobic development and muscle fiber conversion, among other things.
The only way to have the requisite consistency is to love the process. This is the overarching requirement. As a coach, my main goal is to support a love of life and the role that training has in it. Without a long-term commitment, the minutiae of training philosophy is meaningless.
Now, with my usual touchy-feely BS out of the way, onto the minutiae.
Objective & context
Running relies heavily on biomechanical movement patterns that determine running economy, or the energy needed to maintain a given pace. In that way, it is like swimming — cardiovascular ability is meaningless without a musculo-skeletal and neurological system that can use it. Those movement patterns are so important in swimming that almost all swim training starts as sprints, like the classic 100 meter repeats, which reinforce good form.
With running, you can’t train with similar levels of intensity due to the impact forces. (For readers who really want to dig deep, search Igloi training for a philosophy from the 1950s that created Olympic champs using a swimming-like training philosophy.)
Meanwhile, in bike training, movement patterns (i.e. pedal stroke) are less important. Power output is really what matters. Power is determined by cardiovascular ability mixed with specific strength. So bike training involves long, grinding intervals year-round, like 2 x 20 minutes with 5 minutes recovery. Again, most runners can’t train like that due to impact forces. (Although, some coaches have had success with resilient athletes by bringing bike-style workouts to trails.)
The million-dollar question at the root of my training philosophy is this:
How can we reinforce the biomechanical and neurological factors that allow a runner to go fast at different levels of exertion, like VO2 max, lactate threshold, and aerobic threshold, and
How can we make that speed sustainable for the race distance?
Block 1
We do that by first improving running economy and aerobic base through:
Fast strides, and
As many miles as an athlete can sustain healthily.
Typical strider workout:
Weekly mileage from February, below. So far in 2017 I have averaged 81 miles per week, or about 11.5 miles per day.

High volume weeks in February, to build a base of endurance.
Block 2
Then, using this enhanced economy, we incorporate short intervals to go faster at VO2 (9-15 minute pace) and Critical Velocity (35-40 minute pace), along with focused long runs to begin preparing for event-specific demands.
Blended VO2 and CV workout:
Early long run with short marathon-specific effort:
Block 3
Finally, we cap it off with some lactate threshold work (60 minute pace) and increased emphasis on the long run, which is the most specific training session for events over half marathon.
Lactate threshold work:
Hard long run:
The taper
In the final weeks before race day, or the biggest race of the season, we fine-tune and freshen up.
Big picture
There is blending along the way, and it varies for each individual.
The core theme of the training cycle is to learn to run faster, and then learn to run faster for longer. In ultras, there is an added step: learning to run faster for a really, really long way.
Rinse, repeat, improve each cycle, and a person can start as a relatively unremarkable runner, and become something extraordinary. The end goal is to work smart enough and happy enough for a long enough time for people to say that your well-earned breakthroughs are just talent.
The post A 526-word summary: The complete training cycle for road, trail & ultra running appeared first on Andrew Skurka.
April 7, 2017
Dialing it in: Taper training for the Boston Marathon || Interview with David Roche
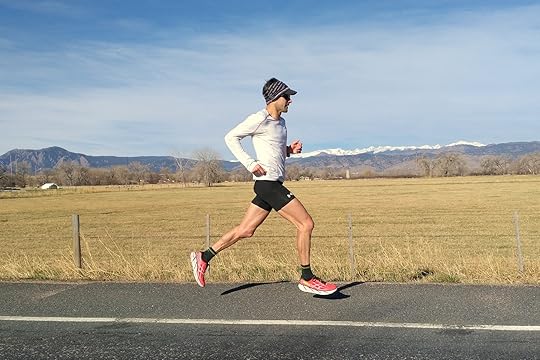

Cruising country roads in Boulder County, with views of the Flatirons and snow-capped Indian Peaks.
Last month I posted a comprehensive interview with running coach extraordinaire David Roche. If you have not read it already, you should — it is valuable context for this interview, in addition to having standalone value.
Days after publishing it, I entered the last stage of my training for the Boston Marathon, which is April 17, a week from Monday. This is the infamous taper period, a delicate balancing act that hopefully leads to peak performance on race day.
To compliment the first interview, which focused mostly on the earlier training blocks, David agreed to a second interview focused on the taper.
Q || Four weeks prior to Boston, you scheduled the “KEY RUN OF THE WHOLE CYCLE” (all-caps included). It was 24 miles, with 16 at marathon pace. Why was this workout so important, and what was the reason for its timing?
I don’t give that workout to many runners. It gets back to the two most difficult elements of a road marathon for highly trained runners:
Absorbing sustained impact at high speeds for more than 2 hours; and,
Efficiently burning fat at fast paces.
Many bonks by elite runners can be attributed to either musculo-skeletal fatigue/breakdown or to depleted glycogen. This type of massive workout pushes back the bonk on race day. With a month between the key training run and the marathon, we have enough time to recover and fine-tune, instead of jumping right into the taper.
I was willing to give you this daunting workout because of your unique background: many miles on the legs over many years, with much faster runs in this training cycle than any other. So you are pushing your body in new ways related to speed over distance, but not intensity over distance.
Q || For a runner with less fitness or ability, would you still give them a similar workout (but shorter or slower, or both) at this point in the calendar?
This type of workout is a big risk if an athlete is doing lower mileage, since the overall stress will likely be too high relative to total training stress over the cycle. Instead, I like to focus most athletes on the main element that ruins marathons: the distance itself.
Marathon pace will usually feel pretty easy. In fact, it often feels easier for lower-volume runners that might be operating at a lower percent of lactate threshold. But eventually, around mile 16 or 18, that easy pace gets hard when their endurance runs out.
So I like most runners to complete a 24 miler, but at a relatively relaxed, easy/moderate pace. That provides a dose of mental confidence and physical resilience that could be what makes or breaks their race when they come up to the 10k-to-go wall. We get the intensity element through shorter, safer workouts.
Q || After that workout, my weekly mileage stayed about the same for two weeks, about 80 MPW. Only the last two weeks of the taper are lower, about 60 and 40, respectively, which is less of a reduction than I would have thought. You mentioned in a private exchange that, “The science of big cuts in mileage is really, really bad. We don’t need a new you on race day. We just need a fresh you.” Can you elaborate on that science, and explain what happens when runners cut back too much during their taper?
There are three component to a taper: feel, flow, and fitness.
Feel is what Steve Magness calls “muscle tension,” a concept describing tightness of muscle spindles. Too little tension from over-resting, and an athlete feels flat as a pancake, which is why you’ll often feel like shit the day after a rest day. Too tight from over-training, and an athlete won’t have as much energy return.
Maintaining adequate muscle tension is part of the reason why it’s important to keep general routines, including moderate mileage and solid workouts, even during race week.
Flow describes the mental state of feeling race-ready. That varies for different athletes — some need more rest to be mentally ready, some need less to avoid feeling unprepared. For an athlete like you (given your high-mileage training), a few miles do not tire you out, but failing to do them could make you have a self-doubt spiral on race week.
The final element is fitness, which considers all the other little things we are looking for in a taper, like muscle recovery and glycogen storage. There are some fascinating studies on tapering that paint an unclear picture. For example, rest may cause changes to the muscle fibers, and fast-twitch fibers can experience hypertrophy, among other things.
Stronger fast-twitch fibers are great for a speed athlete, like a swimmer in the Olympics doing a sharp taper. But for a marathon runner, that could be bad, and is likely one of a few reasons why elite endurance runners shouldn’t mimic tapers from more fast-twitch heavy sports.
On race day you need to be rested, but without having messed up the close-to-perfect balance you have earned during the training cycle. That is why I said in my initial email that we aren’t looking to create a new you on race day, just a recovered and ready you.
Q || I want to shift focus to workouts. The distance of the weekly long run and its marathon-pace component has decreased: from 24/16 (“the key workout”) to 16/0, 20/10, and 14/4. Meanwhile, the duration of the mid-week efforts has increased. Formerly, we did fartlek workouts (e.g. 20 x 2 min with 1 min easy in between). Now, the efforts are longer: this week, for example, I did a 10k at 10-mile race pace. Essentially, both weekly workouts are converging at 30-60 minutes. What does this accomplish in the final weeks before race day?
At the end of the training cycle, the time at marathon pace is mostly related to feel and musculo-skeletal adaptations. We want you to be cool as a cucumber at race effort and to burn a higher percentage of fat, which will be more sustainable on race day.
The workouts are transitioning from economy-oriented intervals that blend VO2 max (9-15 min pace) and Critical Velocity (35-40 min pace) to more pure lactate threshold (1 hour pace) tempos. In the first three months we taught your body to run fast. Now, your body must learn how to sustain fast paces.
The reason we are focusing on LT specifically (rather than faster 10k-pace tempos or slower marathon-pace tempos) is that marathon fitness is largely determined by the percent of lactate threshold you can maintain on race day. We have set that percentage with long, marathon-paced efforts during long runs. Now, we are trying to raise the denominator by getting just a bit speedier at LT.
In other words, the goal is to fine-tune your physiology. If the race itself is like a carnival game involving the physiological attributes we have honed in training, I want it to end with a big bell ringing and them giving you an oversized stuffed animal.
Q || You just partially answered this question, but I’d like it fully addressed. In the three weeks before race day, why did you not include any striders, which seemed so important in learning to “run fast” earlier in the training cycle?
The science on tapers in elite athletes is sparse, but some of the most interesting concepts stem from Magness again. Basically, it would take many pages to summarize the conflicting views, but one of the final elements in race performance is muscle-fiber recruitment, and the optimal recruitment pattern varies on the event.
For a marathon or ultra, we want to recruit slow-twitch, in order to maximize aerobic output for 2+ hours. By removing striders, we reinforce muscle-fiber recruitment patterns (and energy systems) we want to use on race day.
So for 3 or 4 months, the goal was to make fast feel slow. Now, the goal is to teach you to hold that slow-feeling fast for 150 minutes.
Q || Finally, how would you handle race day morning at a big race like Boston, when runners must be near the starting area well in advance? With that much butt-picking time, it seems like you could overdo stretching and warm-up drills, or mentally exhaust yourself with anxiety.
My advice is to stay warm and be chill. Bring more clothes than you think you’d ever need — it’s important to not let a single shiver into your spine to avoid wasting energy. If that means you’re shedding layers 3 hours before the race, that’s fine.
Otherwise, just get where you need to be, find a spot, and sit/lie down. Get up and walk a bit, but don’t run until 40 minutes before the race, when you just do 5-10 minutes of easy running before stripping off your clothes and doing a few strides (plus pooping one last time!).
Before the Olympic finals, Usain Bolt would famously nap in the locker room. Be like the Bolt — be chill, limit movement to walking around for a few minutes every half hour, and save your mental and physical energy for when it counts.
Take your running to the next level with David? It has worked for me!
The post Dialing it in: Taper training for the Boston Marathon || Interview with David Roche appeared first on Andrew Skurka.
April 5, 2017
Review: UA HeatGear Armour Compression Shorts || More realistically, “fitted underwear”
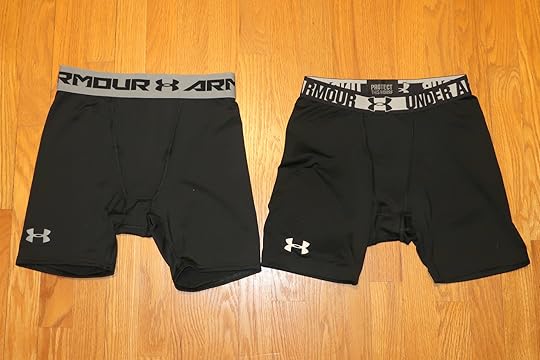

The UA HeatGear Armour Compression Shorts (left) look very similar to my trusted UA Sonic Shorts (right), but they are NOT a worthy substitute.
For several years my go-to short for long runs and cool temperatures as been the Under Armour HeatGear Sonic Compression Short. Read my long-term review.
Unfortunately, the Sonic Short was discontinued a few years back, and leftover inventory is just about gone. I was hopeful that a similarly spec’d model, the Under Armour HeatGear Armour Compression Short — which also features a 6-inch inseam, simple design, and 84/16 polyester/spandex fabric — would be a one-to-one replacement.
It’s not. It’s not even close.
The Armour Compression Short is not worthy of the name. It offers no compression or support, and the fabric is too sheer and revealing for a standalone short. Let’s be honest about what they are: fitted underwear.
Sadly, they’re not very good underwear either. The Jockey Men’s Sport Mesh Midway Brief are $5-10 less and more supportive, and have high-airflow panels in the most sweat-prone areas. And the Saxx Mens Kinetic Boxer Briefs cost a bit more, but redefine “support.”
Bottom line: Avoid the Armour Shorts.
Oh, and avoid the Nike Hypercool Compression Short, too, for many of the same reasons. If you have a pair of beloved running tight shorts, please share — I’m getting desperate.
Disclosure. This website is supported mostly through affiliate marketing, whereby for referral traffic I receive a small commission from select vendors, at no cost to the reader. This post contains affiliate links. Thanks for your support.
The post Review: UA HeatGear Armour Compression Shorts || More realistically, “fitted underwear” appeared first on Andrew Skurka.
April 3, 2017
Review: Salomon Sonic Pro 2 || Lightweight & responsive road-running shoe
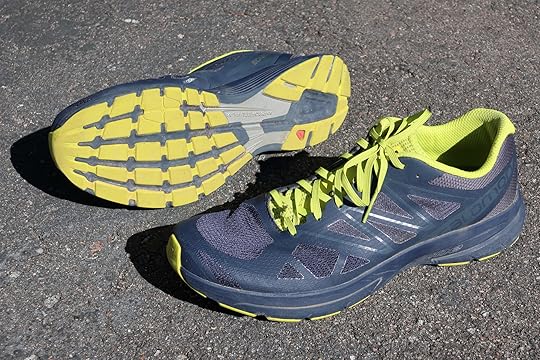

The Salomon Sonic Pro 2, a lightweight & responsive trainer for road-running.
Since early last month I have run 125 miles in the Salomon Sonic Pro 2, including all of my long runs and hard workouts. This includes distances up to 25 miles, and 1-mile efforts at 5-min pace. I may wear them later this month at the Boston Marathon. (Follow me on Strava.)
Review: Salomon Sonic Pro 2
The Sonic Pro 2 is a lightweight and responsive trainer with racing potential, and it will best fit neutral runners with narrow- to medium-sized feet.
The Sonic Pro 2 wants to go fast. Its firm ride efficiently transfers energy, but it’s not the type of shoe I prefer for long slow cruises on pavement.
Wait, Salomon does road shoes?
To be clear: the Sonic Pro 2 is a road-running shoe. Its bite-less outsole and its thin cushioning are sub-optimal for trails. In comparison, it has less crossover potential than the original Salomon Sense Pro (long-term review), with which I have run road marathons and 100-mile mountain ultra trail races.
The Sonic Pro 2 is the second-generation model of Salomon’s small road-running collection:
S/Lab Sonic 2 ($180, 7.6 oz): A race-worthy featherlight
Sonic Pro 2 ($140, 8.4 oz): A lightweight trainer with racing potential
Sonic ($130, 9.8 oz): A heavier, more supportive & cushioned, and more durable trainer
Personally, I’m excited to see Salomon enter the road-running market. It’s crowded, but Salomon could grab some share applying what it’s learned from trail-running about fit, upper materials, and outsoles, and by offering a good road-running product to loyal Salomon trail runners.
Specs
8.4 oz (M’s 9), 6.4 oz (W’s 9), 9.2 oz (M’s 11.5)
Neutral pronation
24/16 heel/toe stack height
8 mm drop
Endofit, an elasticized yoke that cradles the midfoot
Durable wet traction Contagrip
Vibe Technology, which improves rebound and reduces vibrations
The Sonic Pro 2 fits true to size. My size 11.5 has been perfect. I’m also an 11.5 in other Salomon shoes, Hoka, La Sportiva, Merrell, and Altra.
Fit
The Sonic Pro 2 will best fit a medium-width and medium-volume foot. It’s wider in the forefoot than the Sense Pro or Sense Pro 2. With my small-volume feet, the Sonic Pro 2 feels more squirrelly than those models, but the extra volume is perhaps preferable for long runs in straight lines.
Like many other Salomon models, the Sonic Pro 2 features Endofit, which is an elasticized cuff that wonderfully cradles the foot. This puts much less emphasis on the lacing, since the shoe fits moderately well before the laces are even tightened.

The Endofit feature is an elasticized yoke that cradles the mid-foot. It’s common on many Salomon shoes.
Upper
The seamless upper is made of fine mesh with a supple exoskeleton for improved durability and control. Airflow/breathability is excellent, and it dries quickly after getting wet.
The upper looks like it was copied exactly from the Sense line. Hey, if something works…
Laces
For this second-generation model, Salomon dropped its Quick Laces, which can slowly loosen. I prefer traditional laces for this type of shoe, but I’m not a fan of Sonic Pro 2’s linguine-shaped laces — they are slippery and difficult to tie.
I did not find the last set of holes necessary, which left me with several inches of extra lace. I tied an overhand knot and cut off the slack.
The lacing system has many tie-outs, which helps to distribute pressure across the shoe. This is particularly important with a thin uncushioned tongue, as Salomon has used here.

I’m not a fan of the thin linguine-shaped laces. They are difficult to handle and tie.
Ride & cushioning
The Sonic Pro 2 and the last shoe I reviewed, the Hoka One One Clifton 2, have much in common: lightweight road-running shoes for small- and medium-sized feet. Their respective rides are entirely different, however, and therefore so too are their optimal uses.
The Sonic Pro 2 is firm, or “responsive” as the industry likes to say. In contrast, the Clifton 2 is similar to underinflated bike tires — plush but energy-sapping, best for long cruises on hard surfaces. I think the Sonic Pro 2 feels even less cushioned than the Sense Pro, which has a similar stack height (23/17 vs 24/16).
The Sonic Pro 2 also feels slappy, especially at slower speeds and on downhills; it’s less (or not) noticeable at faster speeds. The heel/toe transition seems abrupt, not smooth. My experience seems inconsistent with Salomon’s product marketing and its “Geometric Decoupling” claims. I wonder if the shoe’s 8-mm drop is partially responsible for my observation — my gait feels more natural with a lower drop shoe, closer to the 4-mm range.
The midsole features some high-tech materials and technologies (e.g. EnergyCell+, Opal, 3D Profeel Film), but it’s difficult for me to say how the shoe performs differently because of them without wearing the same shoes with a conventional midsole. I think my results and personal experience with these shoes say what you need to know: they like to go fast; they give a firm ride; and they are a bit slappy.

The low-profile outsole shows almost no signs of wear after 125 miles. It is decidedly a road-running outsole.
Outsole
More than any other feature, the Wet Traction Contagrip outsole makes this a road-only shoe. It has minimal edges perpendicular to the direction of travel, and even on dirt roads and wet paint lines I can feel some slippage.
After 125 miles of use it shows only some slight signs of use at the toes.
Disclosure. This website is supported mostly through affiliate marketing, whereby for referral traffic I receive a small commission from select vendors, at no cost to the reader. This post contains affiliate links. Thanks for your support.
Salomon provided me with the Sonic Pro 2 for review.
The post Review: Salomon Sonic Pro 2 || Lightweight & responsive road-running shoe appeared first on Andrew Skurka.
The trail is just a tool: Navigation skills, resources & gear for early-season backpacking

This multi-post series discusses recommended gear, supplies, and skills for backpacking in the Mountain West in early-season conditions. These normally prevail in May/June, and in July after exceptionally snowy winters.
Introduction
Clothing
Footwear
Creek fords
Skis, snowshoes, crampons, and axes
Navigation

In early-season conditions, the trail is just a tool. If it’s there, great. If not, oh well, you can manage without it.
Even if your itinerary is entirely on-trail, you should expect an occasional off-trail experience when backpacking in the Mountain West in early-season conditions.
On trade routes like the John Muir Trail, a continuous boot-track across lingering snow will develop by July, especially where the terrain funnels the foot traffic (e.g. at a pass). In less popular areas and earlier in the season — when there is less foot traffic and more extensive snow coverage — navigation will be wholly your responsibility: no other hikers may have passed through yet, or their tracks may have melted away to the point of being unrecognizable.

A solid boot-track below Selden Pass in the High Sierra, late-June 2006. The track became less concentrated further down, when the terrain no longer funneled the traffic.
Even when there are some tracks around, be distrustful. You have no guarantee that they are going where you are going, or that they aren’t “Star Trekking,” or going where no man has ever gone before.
Skills
In the early-season you will encounter three types of trail conditions.
1. No snow coverage
When the trail is completely snow-free, follow the trail, of course. Lower elevations and sunny aspects will melt out first.
2. Complete snow coverage
When the trail is completely snow-covered, abandon the trail and take the path of least resistance to the next landmark, like a pass or a lake outlet. Continue to hike landmark-to-landmark until you can consistently follow the trail.
Snow will linger longest in the higher elevations, on north-facing aspects, and on leeward slopes.
Congratulations, you have just become an off-trail backpacker. Some dislike it, but others embrace the new challenge and skill set.

On Bighorn Flats in Rocky Mountain National Park, the CDT was completely snowbound for miles. This forced us to navigate as if we were off-trail, by hiking landmark-to-landmark.
3. Intermittent coverage
When snow coverage is intermittent, loosely follow the trail. Especially in the alpine and in open woodlands, snow-covered trails can be difficult to follow. Be a detective and look for signs:
An unnaturally open corridor,
Chopped/sawed trees that had fallen across the trail;
Cut lower branches on one side of the tree only,
Old tree blazes;
Rock work, and
Man-made cuts across a slope.

If you look carefully, you can see a small section of trail in the distance, where the slope has melted out enough to reveal a trail cut. Without that clue, it would be difficult to follow the trail here.
Even if you’re “on” the trail, always know (1) where you are and (2) where you are ultimately going, so that you can continue to make progress even if you completely lose the trail. This happens easily, like if the trail enters a meadow or flips to the snowy north side of a ridge.
You will lose the trail, even with attentive detective work. When I’m unsure where the trail goes (e.g. Direction A or Direction B), I follow the most promising direction, say Direction A. If it peters out, I cut over to Direction B. If Direction B fails, too, I’ll circle back to where I was last on the trail, and start over. Or, I just carry on my way to a distinct landmark where I can pick it up again.
Resources & gear
In addition to navigation skills, you will want good topographic maps, specifically:
Detailed topo maps
Overview maps
Digital maps stored on a GPS
For an in-depth description of my map system, read this. Here, I will just review, and provide some trail/route-specific info.
I would also recommend having a magnetic compass and an altimeter watch — and the know-how to use both!
Detailed topographic maps
The gold standard are the USGS 7.5-minute quads, the native scale of which is 1:24,000 (1 inch on the map = about 0.4 miles). I create my maps in CalTopo, export them as multi-page PDF’s, and print them at my local FedEx Office. View my preferred exporting & printing specs, e.g. paper size, scale, shaded relief, paper weight, single- or double-sided.
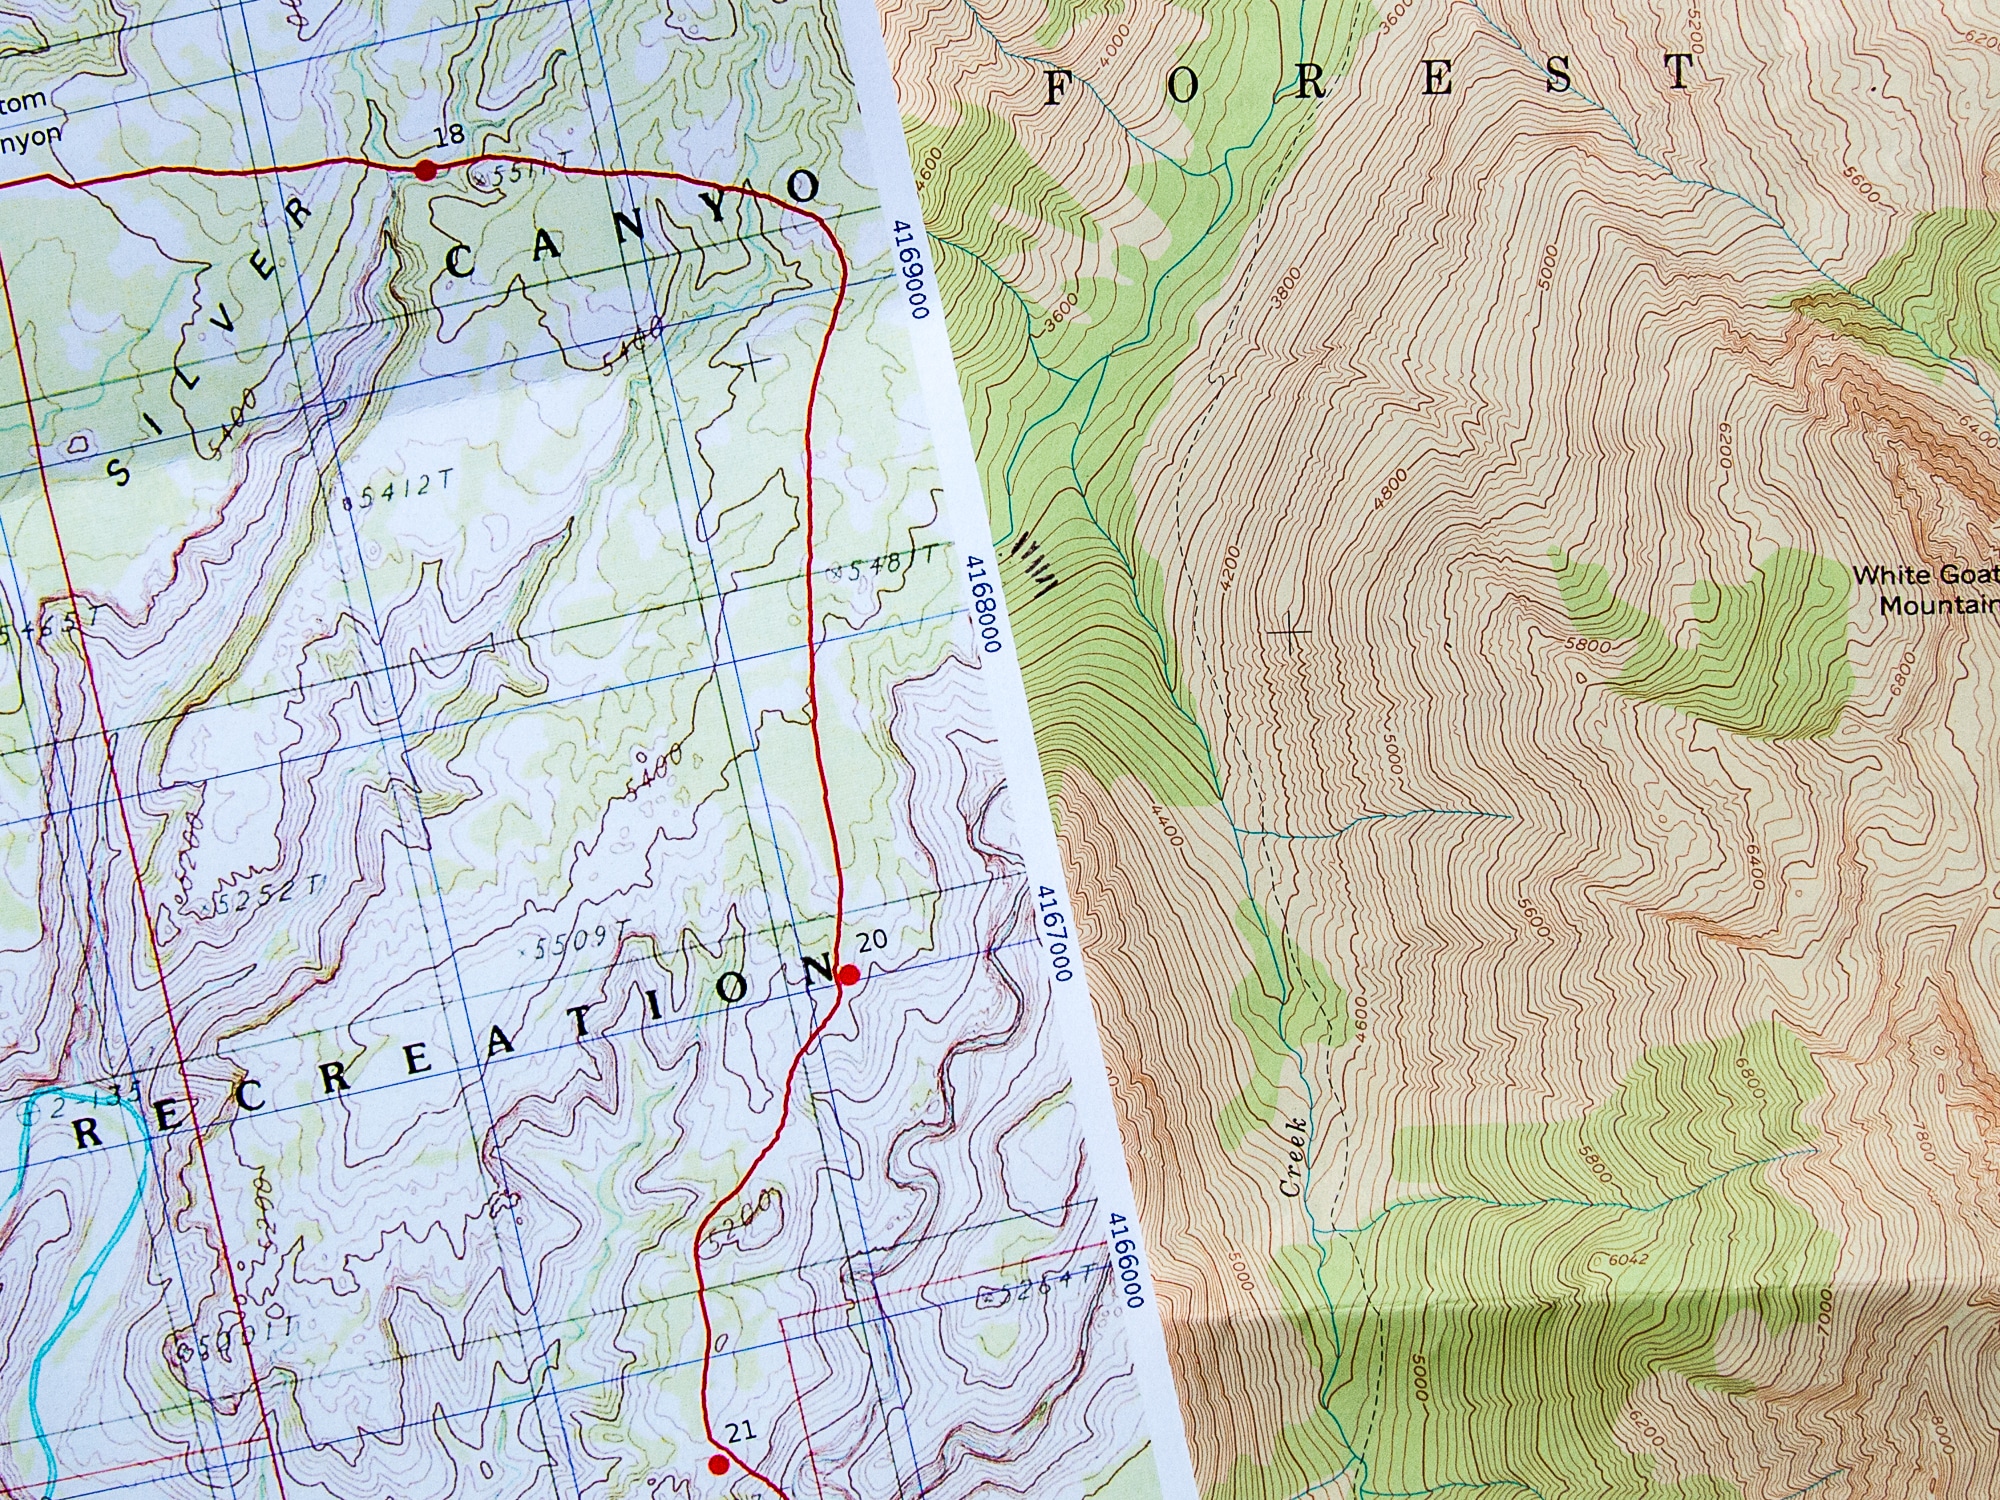
The natural scale of 7.5-min quads is 1:24,000, so topographic detail is much clearer. This series is the gold standard for topographic maps in the US, and ideal for precise navigating.
For the PCT, Halfmile’s Maps should be okay for early-season. They use the 7.5-min maps as base data, but then compress the image by 32 percent, to a scale of 1:31,680 scale (1 inch on map = .5 miles). If you are visually impaired, keep your reading glasses nearby for the extra-small print.
Unfortunately, the readability is made even worse by the print quality: the maps are made using discontinued National Geographic TOPO desktop software, which has relatively low-quality map scans and which loses image clarity due to JPG export.
To be clear: Halfmile’s Maps are a huge asset to the community and represent a huge amount of work.

A screenshot of Halfmile’s PCT Maps (left) versus the Caltopo scan. Both maps are at a scale of 1:31,680 and are zoomed 400%. Caltopo’s image quality is notably better.
For the JMT, both the Tom Harrison JMT Map Pack and the Trails Illustrated JMT Topographic Map Guide are at a scale of 1:63,360 (1 inch = 1 mile). For hiking well maintained trails, this scale is adequate for the High Sierra. But for navigation in the early-season, the scale has insufficient detail.
Furthermore, both maps have shaded relief, which makes them difficult to read from any direction besides south.

On a computer screen, the map with shaded relief (left) is easier to read.

But in the field, when I often want to view the map at an angle different than south-to-north, the shaded relief (left) inverts the topographical features.
Overview maps
A small-scale overview map is useful for at-home route-planning and in-the-field improvisation, like if you need to bail out or circumvent trail closures. These maps are also sufficient for snow-free trails that are well maintained and signed.
For this purpose I like the Trails Illustrated maps or similar. At about $10 each, the cost adds up, but they’ve proven their value time and again for me.
Digital maps on GPS
The ultimate navigation tool is a GPS unit. It will tell you exactly where you are (within a few feet of accuracy) and the distance and direction to your next landmark.
The drawbacks: they are expensive and need batteries, and they can’t tell you the best way to travel from A to B. They will tell you the distance and direction, but not the path of least resistance — that, my friends, is an art that must be learned.
Personally, I use my GPS as a backup only. I’m very skilled with map and compass, and I like that it’s fast, unbreakable, and battery-free.
You have a few GPS options:
Traditional handheld GPS, like the Garmin eTrex 20x
Satellite communicator with GPS functionality, like the Garmin inReach SE+ and Explorer+
Smartphone with a GPS app, like GaiaGPS or Backcountry Navigator
Of these, the inReach and GPS app are the most practical, because you are carrying an inReach or smartphone anyway for their other functions, e.g. satellite communication, telephone, email, entertainment.

With some additional software, a smartphone makes a superb GPS unit. Here, it helped to explain why we were confused about our location: according to the map, we should been standing on hundreds of feet of glacier ice, but instead the glacier appeared to be another mile or two upstream. When we looked at the Landsat imagery, which had been downloaded before we left, it showed how outdated our maps had become in the last 40 years.
Magnetic compass
I really like the Suunto M3-G Global. Read my long-term review. At a minimum, have a compass with which you can roughly find north, like the Silva Starter.
Don’t know how to use a compass? Watch these videos:
Part 1: Adjust for declination & orient the map
Part 2: Find & transfer bearings in the field & on a map
Altimeter watch
With a correctly calibrated altimeter watch, you know your altitude, and can therefore limit your possible locations.
For example, if I’m standing by a lake and my altimeter reads 11,000 feet, I can be certain that I’m not at the 11,500-foot lake that the trail also passes.
While descending out of the snow, the altimeter becomes useful for re-finding the trail. For example, if the map shows the trail crossing the creek at 10,800 feet, I can loosely follow the creek downhill, and start looking for it as I approach 10,800 feet.
I believe that the altimeter watch has be made obsolete by the GPS sport watch. Read why. For backpacking and ultra running I recommend the Suunto Ambit3 Peak.

Have questions or additional tips about navigating in early-season conditions? Please share.
Disclosure. This website is supported mostly through affiliate marketing, whereby for referral traffic I receive a small commission from select vendors, at no cost to the reader. This post contains affiliate links. Thanks for your support.
The post The trail is just a tool: Navigation skills, resources & gear for early-season backpacking appeared first on Andrew Skurka.
March 30, 2017
Early-season backpacking || Merits of skis, snowshoes, crampons & axes
The early-season is a messy inbetween — it’s no longer winter, but not yet summer, either. Snowpack and cornices still linger in the higher elevations and on shady and leeward aspects, while snow-free trails are found lower down and on sun-blasted slopes higher up.
This inconsistency presents backcountry travelers with a dilemma:
What will be more efficient and enjoyable?
Stay afloat on lingering snow with skis or snowshoes, but carry that extra weight across snow-free terrain? Or,
Risk extensive postholing in unsupportive snow, but enjoy simpler logistics and a lighter pack?

Carrying my skis across a bare patch of alpine tundra in the Alaska Range. Thankfully, these sections were few and far between, because the ground was still mostly snow-covered.
And what will be safer and more efficient?
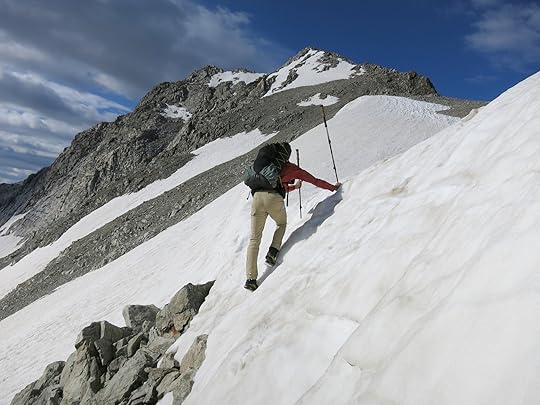
Carry crampons or spikes, and/or an ice axe, to travel more quickly and more confidently on firm and slick snow, and to self-arrest a fall on a steep slope? Or,
Leave that weight at home, and rely instead on rubber lugs, trekking poles, and good footwork?

Descending a steep snowfield in Colorado’s Gore Range in late-June. We regretted our decision to leave behind our axes and especially our crampons — the added safety and speed with which we could have descended would have made their weight worthwhile, even for just this short section of snow.
The answers, which are rarely obvious, are further muddied by:
Planning for a trip weeks or months in advance, without knowing how springtime weather will affect the conditions;
Weekly, daily, and even hourly changes in the conditions;
Condition reports that can quickly become irrelevant due to the constant variability;
Unequal levels of personal comfort, skill, and fitness.
Bottom line: The need for skis, snowshoes, crampons, and an ice axe is a bit of a crapshoot. But let’s discuss the merits anyway, as it will at least help you narrow down your options. At the last minute, make a final decision based on the latest information or your gut instinct.
Floatation
The value of early-season floatation — in the form of skis, snowshoes, or a ski/snowshoe hybrid like Altai Skis — depends on several factors. I’ve described them in detail below to help you make an informed and nuanced decision, but here are my general recommendations after a normal winter:
May: Recommended
June: Maybe
July: No
Elevation
I will make an assumption about reader interests, and focus on high-elevation trade routes (e.g. JMT, PCT, and CDT) and off-trail routes (e.g. SHR, WRHR, and Pfiffner Traverse). Low-elevation routes melt out earlier, due to less snowpack and warmer average temperatures.
Time of day
Early-season snowpack normally firms up overnight, due to sub-freezing temperatures. On warmer nights, the snowpack can still freeze over due to radiant heat loss, especially in open meadows and alpine zones.
The morning crust will often support the weight of a floatation-less backpacker. It begins to weaken after sunrise, with lower elevations and east/southeast/south-facing slopes being the first to go. Heavier backpackers (or backpackers with heavy packs) are the first to notice the change.

Walking on concrete-hard snow below Muir Pass in mid-May, early in the morning. A few hours later in this same spot, I would have been postholing up to my waist.
Winter snowpack
After a normal winter, the upper elevations are extensively snowbound through May. The month of June is a mixed bag: snow will surround the passes and stick on north-facing and leeward slopes, but elsewhere it will be snow-free or variable. Summertime conditions finally prevail in July.
An abnormally dry or wet winter affects this timeline. This year in the High Sierra, for example, the passes will be preceded and followed by several miles of snow through the end of June, maybe even mid-July.
The general rules do not apply to all locations either. For example, Wyoming’s Wind River Range is exceptionally high and snowy, while Washington’s Pasayten Wilderness is unexpectedly dry because it is in the rainshadow of the Cascades.

High in the Wind River Range in late-July after an exceptionally wet winter. I should have brought my skis — it was not hiking season yet.
Snowpack composition
In April, stepping off groomed or high-use trails is utterly impractical. You will sink to your crotch, if not deeper, in the relatively light and fluffy snow.
But by July, any lingering snow is consolidated, and will support body weight even without skis or snowshoes. Late in the day it will be punchy and slushy, but you generally won’t posthole unless you hit a weak pocket, like a “rock moat” or a thin snowbridge.
May and June are periods of transition, and conditions will be variable. The snow will be supportive at some elevations, slope aspects, and times of day; and elsewhere it will be rotten.
In general, snowpack that falls deep and dense (e.g. “Cascade concrete”) will be more reliably supportive than thinner and fluffier snowpack (e.g. Colorado’s “champagne powder”). And snow in the alpine, where it has been tortured by strong winds and intense sun, will be denser and more supportive than snow in the trees.
Be aware that spring snow is not always easily ski-able or snowshoe-able. It tends to get badly sun-cupped or dimpled, which makes for uneven footing and traction.

Unpredictable postholing in the Colorado Rockies in late-June. By this time of year in the High Sierra or Cascades, you can have a dance party on the snow. But Colorado’s snowpack is thinner and less dense, and therefore does not consolidate as well in the spring.
Skis vs snowshoes
When there is extensive snow coverage, I would much prefer to be on skis than snowshoes, or, should I say, slowshoes. Skis are faster and a gazillion times more fun.
But they are also imperfect. They are difficult to ship, if you can’t drive with them to the trailhead. They’re expensive, if you don’t already own the right setup. And the learning curve is steeper than the “Ten-step Program to Snowshoe Mastery,” which involves simply taking ten steps in snowshoes. Yes, they are that easy.
Unless I were a diehard skier, I would probably not futz with skis in June, especially if I were thru-hiking. In addition to the aforementioned drawbacks, a ski setup is also heavy, and in a normal June it will need to be carried often. In contrast, snowshoes are relatively light, inexpensive, and easy to ship.

Atop Colorado’s Continental Divide in late-May. Snowshoes were the best pick for for this trip: I didn’t yet know how to ski, and the lower elevations were snow-free.
Traction & self-arrest
The value of crampons/spikes and an ice axe is a function of:
Your comfort on steep snow;
The hardness of the snow, which varies with the weather and time of day; and,
The presence of steep snow on your route.
I don’t know another way to say this: Your mileage may vary.
For some backpackers and some routes and some times of the day, it may be worth having a Petzl Glacier Ice Axe and either Kahtoola K10 Crampons or lighter but less capable Kahtoola Microspikes, for peace of mind if nothing else. For other backpackers, routes, and times of the day, it will be dead weight.
On the PCT/JMT in mid-May 2007 I carried crampons and an ice axe, and never needed either. I didn’t carry them in late-June 2006, and never felt like I wanted one. If I were planning an early-season trip on the Sierra High Route or Kings Canyon High Basin Route, which are generally steeper and higher, I would more strongly consider both.
An ice axe has several functions:
Balance, if you don’t use trekking poles;
Brake during a glissade;
Chop steps across steep slopes; and,
Self-arrest, if you were to fall on a steep slope.
Spikes seem more useful to me, and I’d carry a pair before I carried an axe, if I didn’t want to carry both. Crampons and microspikes lower the risk of a fall by providing excellent purchase on snow, whether it’s frozen, firm, or soft. They may reduce fatigue, too, by improving control across long sun-cupped sections.
The weight of spikes can be quickly offset by improved efficiency. Rather than waiting for a pass to soften up, you can get on it early. And, even when the snow is softer, you can climb or descend more quickly and with greater confidence.
Your turn: What are your thoughts on skis, snowshoes, crampons, and axes in early-season conditions?
Not sure what you need? To a large degree, it depends on you and your trip. Leave a comment with the details, and we’ll try to help you out.
Disclosure. This website is supported mostly through affiliate marketing, whereby for referral traffic I receive a small commission from select vendors, at no cost to the reader. This post contains affiliate links. Thanks for your support.
The post Early-season backpacking || Merits of skis, snowshoes, crampons & axes appeared first on Andrew Skurka.
March 20, 2017
Giveaway || Start your week right: Win a Hydro Flask Water Bottle & Food Flask
Ugh, Monday.
This week I relate more than I normally do: three flights in five days, and three full days without my BFF, who makes everyday better around here.

BFF Oden
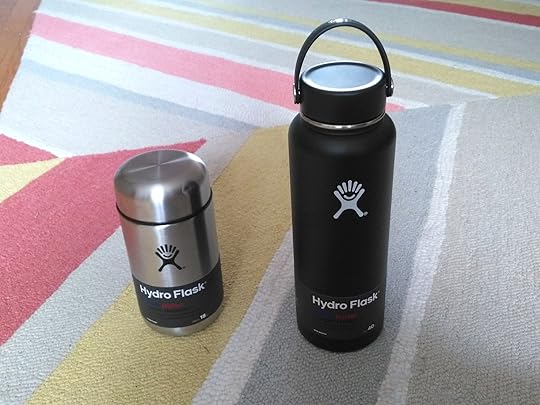
Okay, onto the reason you are really here — a free giveaway of a new:
40-oz Hydro Flask Water Bottle
18-oz Hydro Flask Food Flask
These vacuum-insulated containers are a treat on trips where convenience and luxury trump weight, like done-in-a-day ski trips and cold-weather hikes. The Food Flask is office-approved, too — I have sent Amanda off to work multiple times with ours full of homemade elk chili.

How to enter
Complete the form below. I will end the giveaway on Wednesday morning when I sit down at my computer, probably 8 AM EST. The winner will be notified via email and posted here.
Loading…
Disclosure. This website is supported mostly through affiliate marketing, whereby for referral traffic I receive a small commission from select vendors, at no cost to the reader. This post contains affiliate links. Thanks for your support.
The post Giveaway || Start your week right: Win a Hydro Flask Water Bottle & Food Flask appeared first on Andrew Skurka.


