
Andrew Skurka's Blog, page 43
November 29, 2017
Giveaway: Sierra Designs Tioga & Sierra Insulated Jackets
Recently Sierra Designs released four new insulated jackets: the Tuolumne, Tioga, Sierra, and Whitney. They are nicely designed and featured, and priced very competitively (starting at $100). Read my full review.
This FREE giveaway will be for the two jackets used for the review:
Tioga Hoodie: men’s Medium, synthetic insulation, hood, red
Sierra Jacket: men’s Medium, 800-fill DriDown, hood-less, yellow
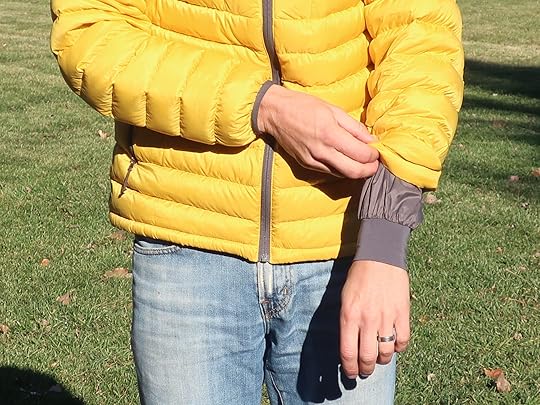
The jackets are lightly used. The Tioga is like new. The Sierra has several faint blood stains in inconspicuous places (near the wrist cuffs and bottom hem), all smaller than a pencil eraser. They’re not smelly or dirty, and neither jacket has been washed.
Giveaway rules
Submit your information through the form below.
Items will be shipped only to a continental US address.
No exchanges.
Each entry will be assigned a number, in the order of submission. Two numbers will be selected randomly using the number generator at random.org.
I will notify the winners via email. The first winner to reply back gets to choose the jacket that they want; the other winner will receive the other jacket.
Enter the giveaway
Loading…
The post Giveaway: Sierra Designs Tioga & Sierra Insulated Jackets appeared first on Andrew Skurka.


November 27, 2017
Reader Q: Do I need an ice axe or crampons on the Pfiffner Traverse?


The north side of Haynach Pass in late-June after a wet winter. Notice the cornice. An axe may be useful for chopping steps over it, if a break cannot be found through the rocks.
A question from reader Stan P. of Alexandria, Virginia:
I am planning to attempt the Rocky Mountain West section-hike of the Pfiffner Traverse in mid-July with a friend. Every summer we do a trip out West, so our gear is mostly dialed already. But we’re uncertain if we’ll need axes and crampons. Thoughts?
This is a great question, because the answer is both nuanced and consequential. A multitude of factors are at play, and you want to be right — or else you’ll be carrying several pounds of unnecessary equipment, bailing off your intended route, or exposing yourself to excessive risk. This exact conversation is had each spring for other high routes and for standard thru-hikes, especially after heavy winters when early-season conditions will extend into the normal backpacking months.

Looking down the Northeast Gully towards Crater Lake, 2000 vertical feet below. Snow lingers in the gully longer into the summer than anywhere else on the Pfiffner Traverse. If it’s snow-filled and you don’t have an ice axe and crampons, I would advise taking the all-trail bypass around it. This photo was taken in mid-July after a wet winter.
Let me start with some background for other readers. The Pfiffner Traverse is a 77-mile high route in Colorado’s Front Range, encompassed within Rocky Mountain National Park, Indian Peaks Wilderness, and James Peak Wilderness. It can be completed in its entirety as an end-to-end thru-hike (budget 7-10 days), or in sections using the nine recommended loop itineraries, the shortest of which can be completed in a weekend (or in a day by a very strong hiker/runner).
The Rocky Mountain West is the longest recommended section-hike, at 42 miles. It starts near Grand Lake, Colo., joins the Pfiffner Traverse a few miles south of Trail Ridge Road in Rocky Mountain National Park, and follows the Continental Divide (directly atop it, or on a pass-and-valley route to the west of the crest) to East Inlet, where it peels off the Pfiffner Traverse to return to Grand Lake.
Stan: Note that mid-July is a very popular season in the park for backpacking, so backcountry campsite reservations are strongly advised. The reservation system opens on the first Saturday in March; in 2018, that’s March 1. If you wait for a day-of permit, you’ll have to pick among leftover sites or recent cancellations; no permits are held for walk-ups.

The switchbacks in upper Hallet Creek, above July camp — look for the cuts across the slope, mostly in the trees on the upper left. Notice the large avalanche path on the right side of the image, which indicates slope angles at least in the low-30’s. This photo was taken in late-June after a wet winter.
Variables
Do you need an ice axe or crampons on the Pfiffner Traverse. The short answer is, “It depends.” Some considerations:
1. Current conditions
Ideally, you would see a report from another Pfiffner Traverse hiker immediately before you go, like in a backpacking forum, on a social media platform (try #PfiffnerTraverse), or on this website. But I wouldn’t count on it: hiker traffic is not yet heavy or steady, and only a fraction might post a report afterwards. Observations from even two weeks ago are of dubious value, especially when the snowpack is rapidly changing in June and July.
2. Time of day
Throughout the spring and summer, the snowpack is in a general state of melt. This trend is interrupted most nights, however, when radiant heat loss and colder ambient air temperatures cause the snow to firm up or crust over. When hard, even low-angle snow can be problematic or impassable without traction. By noon, these same sections will be unremarkable.

The south side of Cooper Peak Pass, in mid-July after a wet winter. It isn’t steep (about 30 degrees), but it could be problematic in the morning if it’s firm or crusty.
3. Winter snowpack and spring melt
About three-fourths of the annual precipitation in the Front Range falls as snow, mostly in the six months between November and April. The greater the snowfall, the longer it will linger into the summer. It sticks most persistently on high and shaded (i.e. north-facing) slopes, and on leeward slopes where it piles up. In the Front Range, windblown snow collects deepest on the eastern side of ridges.
Use SNOTEL data to determine whether it’s an average winter, or drier or wetter than normal. After extremely dry or wet winters, “normal” conditions may arrive or be delayed by several weeks.
Summer conditions are further affected by spring temperatures and weather, too. For example, a wet and cold spring can rescue a below-average winter, putting conditions on a more normal timeline.
4. Individual comfort and skills
If you have prior early-season backpacking or mountaineering experience, you may need less equipment or less robust equipment than conventional wisdom would suggest. For example, on steep but soft snow, you may feel comfortable with just an axe, using it to self-belay while kicking steps.
5. Route
What sections of the Pfiffner Traverse (or its alternates or section-hikes) are most likely to be problematic? There are no glaciers or permanent snowfields on the route, and most of it is snow-free by early- or mid-June. In only a few spots will snow linger into July or August after a normal winter:
Product recommendations
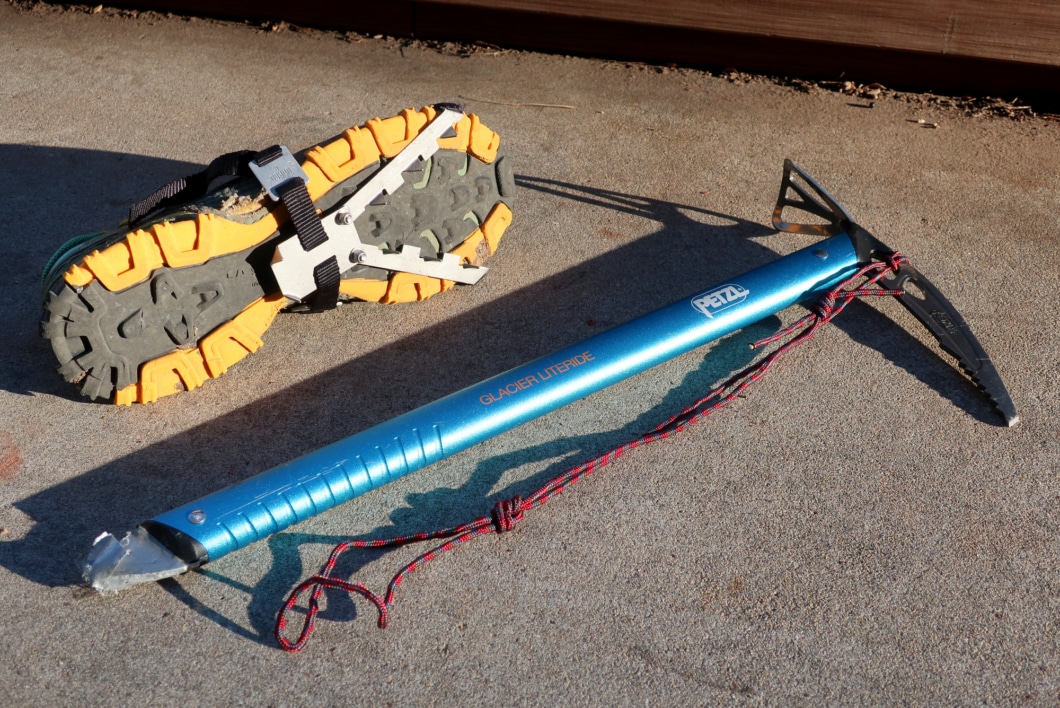
An ice axe can be used for self-arrest and self-belay, and for cutting steps. For the Pfiffner Traverse, a simple lightweight axe like the Petzl Glacier Literide ($100, 11 oz) or CAMP Corsa Nanotech ($160, 9 oz) will suffice. Additional weight can be saved with the Sukluk 46 Ice Tool (4.5 oz, $175), but the product disclaimer concerns me. This guy had a good experience with it, but otherwise reviews are hard to find.
My system for a mid-July thru-hike after a wet winter. On the steepest pitches, I self-belayed up or down with the axe, with the Pocket Cleats giving me a little bit of extra assurance on my foot placements. I think most backpackers would have wanted full crampons.
Crampons improve foot purchase, especially on firmer and steeper snow. For the most aggressive hiking crampon, go with the Kahtoola K-10 Crampon ($100, 22 oz) or Hillsound Trail Pro Crampon ($80, 24 oz). As a just-in-case option, consider the Vargo Pocket Cleats.
Several traction devices occupy the space in between: lighter but less capable than the K-10 and Trail Pro, and heavier but more trustworthy than the Pocket Cleats. Example: Hillsound Trail Crampon ($65, 16 oz). They perform best on crusty or packed snow, but they’re not meant for steep slopes and they don’t bite well into softer snow.

The relationship between traction and weight is inverse: the heavier the device, the better the purchase (with a rate of diminishing returns). Left to right: Pocket Cleats, Micro Spikes, and the original aluminum-spiked Kahtoola KTS crampon.
Disclosure. This website is supported mostly through affiliate marketing, whereby for referral traffic I receive a small commission from select vendors, at no cost to the reader. This post contains affiliate links. Thanks for your support.
The post Reader Q: Do I need an ice axe or crampons on the Pfiffner Traverse? appeared first on Andrew Skurka.
November 20, 2017
Five strategies for hunting elk & mule deer in Colorado

Where are they?
You can’t shoot an elk or mule deer until you find one. Duh.
And for a beginner DIY hunter, learning to find one is probably the biggest challenge — at least, that was my experience. Where will the big game be, given the location, season, current and recent conditions, and time of day?
Otherwise, hunting is pretty easy:
To obtain a hunting license, take a Hunter Education Course and read the state hunting regulations.
To gear up, adapt an existing hunting gear list for your budget and hunting style.
To improve your shot accuracy, read up on long-range shooting and practice at a range. And,
To field dress an elk or deer, watch a few online instructional videos.
Five years ago I started hunting as a 30-something, and every season I still learn new things. But where, when, and how I have found elk and deer in the Colorado Rockies has become consistent. I’ve shared my observations below. They are skewed towards elk and the rifle seasons, since they have been my focus.
If you’re a beginner hunter with questions, or a long-time hunter who can add to or clarify my remarks, please leave a comment.
Universal considerations
Regardless of the strategy, this advice may be useful:
1. Hunting area selection
Find an area that offers diverse hunting options, so that you can can adjust for seasonal weather and the weather forecast. This year, for example, October was mild and dry, which allowed the game to remain in their summer range. However, a significant storm was forecasted for the first weekend of Third Rifle, with 10-20 inches of snowfall.
Before these circumstances were known, my hunting partner Steve and I had identified a handful of promising locations in the Flattops (GMU 12). Last-minute, we ruled out the low-elevation options, because we didn’t think the game would have migrated down yet; as well as the high-elevation options, because hunting at or above treeline in whiteout conditions is uncomfortable and, more importantly, generally impractical.
2. Seasonal behavior
In Colorado I don’t schedule any A-list high country projects beyond the end of September. Favorable conditions can continue into October, but I don’t count on it — the risk of winter storms is greater, and it’s more likely that early snowfall will stick at high elevations and on shady aspects. Also, the shorter and sub-freezing nights are more trying.
Elk and deer, meanwhile, seem completely unfazed by the arrival of fall and winter-like conditions. Until their food sources are thoroughly buried in snow, they will stay high, in their summer range, where they can eat and hide from hunters.
1. Work the rut
The mating season for elk peaks around the first day of fall, which coincides with the archery and muzzle-loading seasons. However, seasonal conditions can alter the timing, as happened in 2016 and 2017 — unseasonably warm temperatures delayed the onset. The peak rut for mule deer is later, in mid-November.
During the rut, bulls are vocal (making them easy to find) and they can be called in to close range by pretending to be a cow in heat or a competitive bull. To learn about this skill set, consult a bowhunter.
Some elk chatter may be heard during the First Rifle in mid-October. After that, they’re quiet — the rut is over, and they’ve been pressured by hunters. A cow call like the Primos Hoochie Mama can still be useful after the rut, however, like to calm suspicious cows or a shot bull.
What’s it like to hunt the rut? Watch the video below; a good but short snippet starts around 14:30.
2. Spot them in the open
Elk and deer are most active in the morning and evening, and may be seen grazing in open meadows and alpine during this time. Before these periods, find a spot with a commanding view (the larger the area the better), put on your patience hat, and start glassing.
In later seasons, this strategy may become less effective. Because of the hunting pressure, the game will become more active at night and will find browse where they are less vulnerable (i.e. less open spaces).

Two elk (and more out of view) graze in the alpine at 11,000 feet around sunrise. This is typical behavior, but less reliable in later seasons.
3. Stalk the timber
When they’re not grazing, the elk and deer bed down, usually among sub-alpine firs and Engleman spruce, aka “the dark timber.” This vegetation zone is found above the lodgepole pines and aspens, and below the alpine; as well as on shady north-facing slopes.
The dark timber is a natural bedding location: in warmer seasons, it remains cooler; when it’s cold or snowy, it provides thermal cover; and during hunting season, it’s tough for hunters to get within range without giving themselves away (e.g. noise, scent, or sight). Also, if some sunlight is getting through the canopy, it may be possible to graze without leaving this protected space.
For an excellent in-depth tutorial on hunting big game in the timber, read Elk Hunting: The Lost Art of the Timber Sneak, by Brody Henderson from MeatEater. In general, I consider it daytime entertainment — it gives me something to do between the morning/evening grazing periods, but it’s a low-odds strategy.

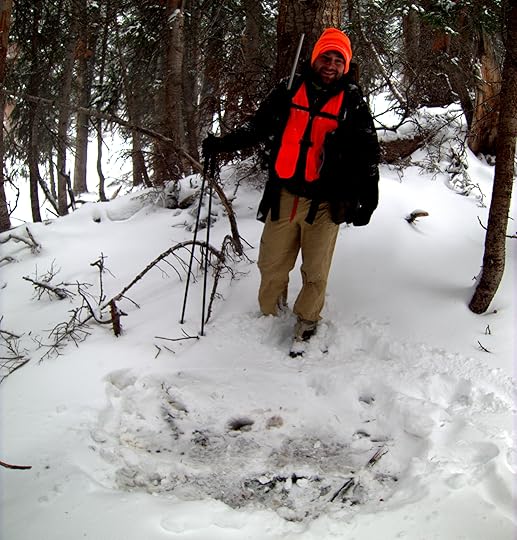
Fresh bedding area in thick timber, formerly occupied by a bull elk that Rob and I bumped in the middle of the day.
4. Track them
The snowpack in Colorado usually builds slowly, starting in October. A storm will roll through, drop a few inches, and move on. At the higher elevations and on shady aspects, this snow can stick for the rest of the winter; but at the lower elevations and on sunny south-facing aspects, it often melts off completely. It can snow in September, too, but it’s less common and it won’t last.
On average, the later rifle seasons are more likely to experience snowfall and to have greater snow coverage (i.e. deeper and more extensive). Tracking elk and deer is extremely easy if there’s snow on the ground, and sometimes below the snowline too — elk are heavy animals and leave obvious tracks in soft dirt that has recently melted out. If you’re fit, you can cover significant distances looking for tracks, in order to rule out areas (no fresh tracks = no game) or to hone in your hunt.
Snowpack is not a pure advantage, however. Old snow that has repeatedly melted and re-frozen is crunchy — and thus loud. Fresh snow is quieter, but “snowball snow” will makes a whomp-like sound when it’s stepped on.

Fresh tracks in fresh snow left by a small elk herd
5. Catch the migration
As conditions deteriorate in their summer range, the elk and deer herd up and begin to migrate towards their winter concentration areas. I’ve yet to observe the annual migration (it was delayed by warm fall weather in 2016 and 2017), but I think it’s normally a Fourth Rifle (mid-November) or Late season (through mid-January) affair.
The migration is a risky voyage: it puts the game closer to trailheads and roads (and hunters), and they are more easily seen at lower elevations, which are more open and less forested. However, their wintering grounds are not necessarily a free-for-all: there’s a lot of private land, and hunting is not permitted on all public lands (e.g. Boulder Open Space and Mountain Parks). Know the boundary lines and regulations.
The Colorado Hunting Atlas identifies known migration routes or zones. They are guidelines only.

Elk migration patterns in the Green Mountain Reservoir area, GMU’s 37 and 371.
The post Five strategies for hunting elk & mule deer in Colorado appeared first on Andrew Skurka.
November 14, 2017
Notes for next elk hunt: Tips on strategy, location, shooting & dressing

I hunt just a few days each year, and don’t invest significant time or thought during the long period in between. Among a few smaller things, here are some takeaways and learned lessons that I want to incorporate into our 2018 plans:
Hunting
The best advice we received on hunting strategy was from a Craig local at the Subway: “Find the nastiest, darkest shit that no one else wants to go into. The game will be in there.” This succinctly describes our experiences from years past — for much of the day, elk take refuge in these shady spruce-covered areas. Whenever we entered the dark timber we always got into game.
Hunting the timber is limited only by the limitations of your patience. How slow can you hunt? How invisible can you be (e.g. no swishy clothing, no breaking branches, no winding). Remind yourself that you’re not hiking — you’re hunting.

A fresh (but quickly filling in) bedding area left by a lone bull elk, in thick timber.
The winds were fierce on Friday night, and it snowed for most of Saturday and Sunday morning. Yet, the game seemed to continue to move, during the storms and perhaps more actively when it was calmer. During a lull on Saturday afternoon, we encountered fresh tracks at over 10,000 feet made by two does, and then saw two cows about 300 vertical feet below a ridge, near their bedding areas. On Sunday morning we intersected the filled-in tracks of a small herd (probably cows) that had moved overnight. When the storm started to clear on Sunday, we saw two does grazing in the open and then our two bull on the move.
This year the conditions were not sufficiently severe to push the elk to the lower elevations. When we drove over Rabbit Ears Pass, there was thin snow lingering on north-facing slopes in the shade. But other aspects were snow-free, and same for lower elevations. The grazing at 10,000 feet in Colorado in early-November isn’t great, but they can make it work and it’s better than being shot.
Morapos Trailhead
There was good mix of habitat and terrain: open meadows, aspen stands, and dark timber; below the trailhead (to the west on public land and downstream on private land), there is scrub oak, pinyon/juniper, and sage.
It’s pretty, but lacks the dramatic topographic relief found, say, further south in the range. But this was an advantage: Steve and I could quickly and easily cover distance and pack out an animal.

Typical terrain in upper Morapos Creek: open meadows, aspen stands, dark timber, and scrub oak.
A handful of base camps occupied the trailhead, but it seemed relatively low pressure. We never saw hunters further out than one mile from the trailhead, and conversations suggested that 1-2 miles was the max for most of them.
Hunting pressure seems to have a logarithmic pattern: the further you get from population centers, the less pressure you encounter. To get away from other hunters, drive to remote GMU’s with limited motorized access, find unfriendly trailhead roads, and hike several miles into the backcountry (preferably uphill). Hunters on horseback can get even further into the backcountry, but thankfully there aren’t lots of them.
In the parking lot, other hunters reported seeing “herds” move through the area in previous years during Third Season. And they relayed general frustration among trailhead-based hunters about the lack of activity during the first few days of the season. They were all hoping for bad weather, to push the game down.
Shooting
A single trekking pole is too wobbly for faraway shots. It’s better than standing, but using two crossed trekking poles or a backpack would be more stable.
In the hunt report I already talked about our one awful mistake: not giving our bull enough time to die after he’d been shot. Instead, we approached him too quickly, and he ran another mile.

About 350 yards after being shot, the bull laid down here and probably would have died here, if we had given him more time before tracking him.
Create a post-shot ritual that distracts you from your impatience. Make coffee, hike back to the truck, take a cat nap. Only in some extenuating circumstances should you push it, like if a blizzard is covering up tracks and the blood trail. Darkness is not a valid reason to push — the trail will remain hot overnight, and you can recover the animal in the morning.
When approaching a down elk, be prepared for it to jump. Have a round in the chamber. Have a cow call ready. Start watching it from a distance, and don’t get any closer if there are signs of movement.
Gut shots are not quickly fatal. Our bull went 400 yards before bedding down, then three-fourths of a mile after being spooked. It was not a positive experience for either party.
Field dressing
If dressing an elk is not yet natural, freshen up with a YouTube video before you leaave. I like this gutless method with Fred Eichler. While he pulls all the required meat off a cow in 10 minutes, expect it to take longer — you’re probably not a pro, and you’ll want to get cleaner cuts than he does in the video. Also, communicate beforehand with your hunting partners what method you will use, so that everyone knows how it will be done in the field.
Alaska Game Bags are heavy, but otherwise they are excellent: they’re durable, breathable, and non-absorbent. Afterwards, throw them in the wash (hot cycle) and reuse them.

We cooled down the meat quickly by hanging it in camp. It wasn’t necessary, but we protected the meat from wet snow using a poncho.
We both used razor blade knives and loved them. It ensures that you always have a sharp blade, and it saves time. I went through three replacement blades, but could have used just two. My Outdoor Edge Razor-Lite was the preferred size, over the Havalon Piranta.
Pack two pairs of surgical gloves per person per animal. You may only need one pair, but are easily cut and can get messy; and they weigh nothing.
A handful of 6- or 8-foot long cords were very useful in cooling down the meat overnight. With them, we were able to hand the Alaska Game Bags from limbs.
Flagging tape was unnecessary for us, but it easily could have been helpful, like if it’d been snowing hard or if a shot animal dropped below the snowline.
For other details about my field dressing kit, refer to my gear list, After the Shot.
On our 4-point bull, each hind quarter weighed 45 pounds with bone-in. A front shoulder weighed 23 pounds with bone-in. Then we had three bags of assorted meat (e.g. prime cuts, rib and neck meat, and a deboned shoulder) that weighed 58 pounds total. A total of 172 pounds including three bones.
Packing out
An initial short leg through nasty terrain (e.g. uphill, off-trail, blowdowns) or to a nearby camp provides the opportunity to judge the number of trips necessary to pack out the entire animal. It may also be safer than over-loading at the start.
My pack was 65 pounds on the first trip and 67 pounds on the second. I’m not sure what Steve’s loads weighed, but they should have been similar.

Steve tiptoes across a shallow stream while carrying about 65 pounds of weight.
Our Nissan Rogue was tight on space with one animal plus personal gear. Two animals would be a stretch, but probably doable.
A utility sled could have tremendous value on a big bull or with multiple animals. Leave it in the car, and bring it out for the second round-trip (and third and fourth, if you’ve done really well). Dragging meat and gear on a slippery sled is easier and saver than carrying it out, especially with a net downhill.
The post Notes for next elk hunt: Tips on strategy, location, shooting & dressing appeared first on Andrew Skurka.
November 13, 2017
Reviews: Sierra Designs F17 Puffies || Well designed & priced, but heavy

Testing grounds for the new Sierra Designs insulated jackets: an elk hunt in November in the Colorado Rockies, at elevations of 8k-10k, temperatures in the 20’s and 30’s, and snowy and humid conditions.
On our recent elk hunt in the Colorado Rockies, Steve and I wore two new Fall 2017 puffies from Sierra Designs, the Tioga Hoodie and Sierra Jacket. These two pieces share nearly identical features with the Tuolumne Jacket and Whitney Hoodie, so I will dare to extrapolate our experiences and include them in this review as well.
The complete collection consists of four puffies: two with synthetic insulation (one hood-less, one hooded), and two with down insulation (again, one hood-less, one hooded). The men’s and women’s versions have different silhouettes and colors, but otherwise are the same; they are not unisex.
Review: Sierra Designs Tuolumne, Tioga, Sierra, and Whitney Jackets & Hoodies
Overall, these jackets are:
Excellently priced for the quality, starting at $100 and topping out at $170;
Thoughtfully designed, with convenient hand pockets, functional interior pockets, and draft-reducing double wrist collars; and,
Relatively heavy and bulky compared to simpler and higher-end insulated jackets.
The Tuolumne, Tioga, Sierra, and Whitney are suitable for general outdoor use, not gram-conscious backpackers. They occupy the space — in terms of both performance and price — between premium products like the Western Mountaineering Hooded Flash Jacket ($375, 10 oz) and Patagonia Micro Puff Hoody ($300, 9 oz), and what is available from Uniqlo or your local Costco.
Collection overview & product specs
A closer look at these four jackets:
Insulations
Jackets and hoodies insulated with high-loft synthetic and down insulation are designed to keep you warm when you’re stopped, like at a mid-day rest break, in camp, or at a high school football game on a brisk fall day. For maximum performance, take precautions to keep them dry.
Fireball
The less expensive Tuolumne and Tioga are insulated with Fireball, a proprietary synthetic insulation that mimics the structure of down: individual clusters of wispy fibers. It looks similar to Thermoball, a Primaloft insulation that is used exclusively by The North Face. Versus a jacket insulated with a traditional continuous filament or short-staple synthetic insulation like Primaloft Gold or Climashield Apex, the Fireball jackets seems more supple.
Like other brands with synthetic-insulated garments and sleeping bags, Sierra Designs overstates the performance of Fireball in wet conditions, claiming that it, “insulates even when wet.” This claim is slightly less inaccurate than the oft-used, “warm when wet,” but it’s still more optimistic-sounding than it should be.
Fireball may be warmer than down if it gets soaked (unlikely with proper layering) or if you’re in a damp environment (much more likely), but it does not offer peak warmth in either situation. I experienced this first-hand: after hiking in the clouds and through heavy snowfall on opening day morning, the Tioga was not as warm as it was when dry.
Fireball is new to Sierra Designs and I’m not intimately familiar with it. Given the price, I suspect it’s a run-of-the-mill insulation: its thermal efficiency is probably comparable to a mid-grade down (i.e. no better than 600-fill), and it will probably will not retain its insulating abilities as well as down — due to repeated compressions, Fireball will flatten out and lose some of its warmth.

Fireball is a synthetic insulation that mimics down: individual clusters of wispy fibers. A Fireball jacket must be baffled the same way as a down jacket.

In comparison, these baffles are filled with real down, 800-fill DriDown.
DriDown
The Sierra Jacket and Whitney Hoodie are insulated with 800-fill power DriDown, which is more thermally efficient and more compressible than Fireball. This water-resistant down is not warm when wet either, but it seems to dry more quickly and to hold up better in damp environments than untreated down. I saw this in action during our hunt: for extra warmth on this November trip, I brought along a beautiful PHD Yukon Down Pullover ($400, 12 oz, untreated 950-fill down), and its loft collapsed badly in the high humidity.
I own and have used extensively several jackets and sleeping bags insulated with DriDown, and am pleased with its long-term performance. If you can afford down and if you’re not going to be in extremely humid conditions, the DriDown jackets will have a longer lifespan for heavy users.
Warmth
Compared to his usual insulated jacket — the Mountain Hardwear Hooded Ghost Whisperer ($350, 8 oz), which has 79g of 800-fill water-resistant down — Steve felt that the Sierra Jacket was a notch warmer.
Compared to my usual insulated jacket — the Sierra Designs Elite DriDown Hoodie ($250, 12 oz), which has 100g of 800-fill DriDown — I thought the Tioga Jacket was subtly warmer.
In both cases, the boost in warmth is partially explained by the additional mass of these jackets (e.g. heavier 40d fabrics, overlapping pocket fabrics, and double wrist cuffs), not just an increase in the amount of insulation.
Specs and features
A quick and dirty recap of the smaller details:
Exterior pockets
The unlined hand pockets are convenient when standing around, but inaccessible while wearing a backpack. The Sierra and Whitney also have an exterior chest pocket that can accommodate a 6-inch smartphone or smaller items.
Interior pockets
In these generously sized drop pockets, I put things like my fuel canister (before meals to improve its pressure), glove liners (to keep them warm), and a 1L bottle of coffee (to keep me warm). The Fireball jackets have two interior pockets; the DriDown jackets have only the mesh pocket.

The interior pockets are useful for storing items that you want to keep warm (e.g. fuel canister, as in right pocket) or that you want to warm you (e.g. 1L hot drink bottle, as in left pocket).
Collar and hood
The neck and head are insulted comfortably, but not snugly, which results in some drafts. The hood cuff is elasticized, but otherwise has no adjustments.

Sorry, I didn’t mean to look unhappy, guess I’d rather be out running this morning than typing up this review. The collar and hood fit comfortably but not snugly. The hood cuff is elasticized but has no adjustments.
Shell fabrics
The 40d fabrics are softer (less crinkly) and perhaps more durable than thinner 10d and 20d versions. The breathability seemed good, but water-resistance to wet snow seemed lacking for a new jacket, although long-term that’s irrelevant — I don’t trust any “water-resistant” fabric to keep me dry.
Double wrist cuffs
As someone who struggles with thin extremities and cold hands, I may appreciate this feature more than most, as it helps to seal off drafts better than a conventional wrist cuff.
If you’re baffled by why the down jackets are heavier than the Fireball jackets, look no further than this feature — 3-inch elasticized cuffs are heavy.

The double wrist cuff helps to reduce drafts, keeping arms (and thus fingers) warmer.
Questions about any of these jackets? Please leave a comment.
Disclosure. This website is supported mostly through affiliate marketing, whereby for referral traffic I receive a small commission from select vendors, at no cost to the reader. This post contains affiliate links. Thanks for your support.
Also, I work with Sierra Designs as as product and marketing consultant, although I had no involvement in the design or marketing of these jackets. SD provided me with the jackets for review.
The post Reviews: Sierra Designs F17 Puffies || Well designed & priced, but heavy appeared first on Andrew Skurka.
November 11, 2017
Elk Hunt Report: Filling my freezer & ending the era of cluelessness

There’s little joy in killing a magnificent animal, but I appreciate knowing the source of my meat and owning the process.
This was my fifth year of elk hunting, and finally I may be getting the hang of it. While I’m pleased that my chest freezer is full again (thanks to a four-point bull that mistakenly skylined himself at 2:30 in the afternoon, more details below), I’m perhaps happier with other things that went right.
Specifically, my hunting partner Steve and I chose a productive hunting unit, and found a low-pressure trailhead with good access to seasonal habitat. We saw and bumped multiple animals, suggesting we knew where they would likely be (i.e. elevation and terrain), given the time of day and the weather conditions. And we patiently stalked two bulls until we could take a kill shot.
Most definitely, I’m still a beginner and have a lot to learn. But the era of cluelessness seems to be in my rear view mirror.
Morapos Creek
In five seasons I have hunted four locations: the Gore Range (2x, GMU 371), Indian Peaks Wilderness (GMU 29), Raggeds Wilderness (GMU 521), and now the northern Flattops (GMU 12). The Flattops — which also include GMU’s 23, 231, 24, 25, 26, 33, and 34) host the largest migratory elk herd in the world, about 40,000 animals.
Despite proportionally intense hunting pressure, we opted for the Flattops anyway. We (rightfully, in hindsight) thought that we could comfortably hunt a few miles further out than other hunters would wander. And we felt that with so many animals around, our respective orbits would be more likely to intersect than in a less densely inhabited GMU like the Indian Peaks, where finding a needle in the haystack seems to require more luck.

The Flattops are home to the largest migratory elk herd in the world. We hunted GMU 12, in the northern end of the range near Sleepy Cat Peak.
To avoid a repeat of last year in the Raggeds, when Steve and I got within 250 yards of a 15-head herd but couldn’t get a shot on a bull (for which we had a tag) without spooking the cows (for which we did not), and also saw a handful of mule deer (for which we didn’t have tags either), this year we had a bull tag, two cow tags, and two buck tags.
We agreed to let the day and the circumstances dictate our choices. For example, if we could take simultaneous shots on two cows, we would, but one-elk-and-home would be acceptable. Mule deer were off-limits until at least Sunday, because they provide less meat.
We departed Craig, Colo., the closest big town to Morapos Trailhead, at 5 pm, and were particularly encouraged by the final 30 minutes of the drive. Small herds of does grazed in each hay field that we passed, with a few bucks mixed in. We didn’t see any elk, which confirmed our suspicions: given the relatively warm and dry weather, both recently and throughout October, they were still up high, with no incentive yet to migrate down.
The upper and lower Morapos Trailheads were about one-fourth full, which made Steve giddy. He had scouted Marvine Creek — an easily accessible trailhead east of Meeker — during the first weekend of Second Rife season, and reported few positives: he struggled to find a parking spot, and bumped other hunters everywhere he went.
As Steve and I loaded up our backpacking shelters and beans & rice dinners in our 2.5-lb backpacks, prepared to spend up to four days in the backcountry before needing to return to the car, we looked enviously at the handful of wall tents with wood stoves that other hunting parties had, especially given the forecast: 10-20 inches of snow through Tuesday, the first major storm of the winter.
Towards the end of civil twilight, an enormous full moon rose out of the east, allowing Steve and I to keep our headlamps off as we hiked comfortably 3.5 miles through open meadows and aspen stands. We pitched camp under some protective spruce near a flowing creek, ready for a pre-dawn start on opening day.
Day 1: In the ballpark
The wind picked up overnight, with regular 30 or 40 mph gusts that sounded like approaching freight trains. Steve and I both struggled to sleep, with Steve later describing his night as, “a series of short naps.”
We packed up and climbed 700 vertical feet by headlamp to the top of Baldy Mountain, which overlooked a shallow meadow-streaked basin sandwiched by Horse Ridge and the divide north of Sleepy Cat Peak. If not for the blasting wind in our face, it was a perfect lookout.

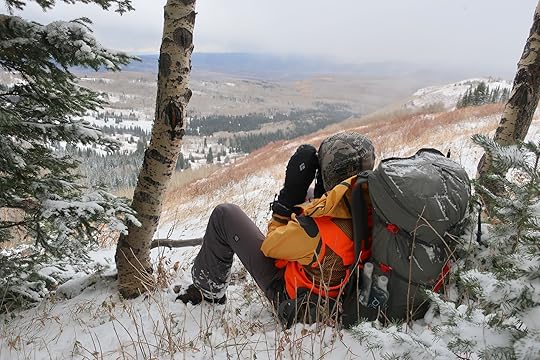
Glassing from Baldy Mountain, purposely tucked into the trees for some defense against a blustery southwest wind.
The vantage point also allowed us to watch the storm front incoming from the southwest. Within in an hour, Baldy Mountain was enveloped by a blizzard, forcing us to descend.
At the Subway in Craig, a local — who, like us, was grabbing a last-minute meal before driving to his hunting spot in the upper Yampa watershed — had offered advice that succinctly summarized our observations from past years. “Find the nastiest, darkest shit that no one else wants to go into. The game will be in there.”
When Steve and I looked at the map, we thought the ravines north of Baldy Mountain would offer that kind of terrain: thick spruce groves, steep aspects, and blowdowns, with open meadows and aspen stands nearby for hearty grazing in the morning, evening, and dark.
Sure enough, within a half-hour of dropping off Baldy Mountain we bumped a small cow herd, with only Steve seeing the rear-end of the group’s slowest member. We followed their footprints in the fresh snow, probably foolishly: in the time that we crawled a quarter-mile, they could already in the next county.
The experience was a good reminder that, when hunting dark timber, there’s no such thing as hiking too slow — assume that elk are bedding behind every tree, or long before you spot them they will have heard or spotted you, and be gone. Also, hunt into or perpendicular to the wind.
Upon reaching the Wymore Lake Trail, we took refuge from the wet snowfall under thick spruce. It was an emotional low point for both of us: we were sleep-deprived and uncomfortably damp, and questioning the viability of hunting in these conditions.
But after cat naps and hot drinks, we decided to hike back up to Baldy and hunt another of its north ravines. By following the trail, we could quickly cover miles and perhaps crisscross fresh tracks.

Wet, sleep-deprived, and intimidated by a snowy forecast, Steve takes a refreshing mid-day cat nap.
The snow depth at 10,000+ feet was significantly greater than at our break spot, now in excess of 6 inches since that morning. Thankfully, it had stopped snowing, and a friendlier-looking southwest sky suggested these drier conditions would hold for at least a few hours. We intersected the tracks of two mule deer, and followed them until we saw two does (for which we did not have tags).
We returned to Baldy Mountain by 4:30 PM, glassed for as long as we could withstand the howling wind, and hiked towards the northwest end of its ridgeline. Just before we planned to begin our second descent, I spotted two cow elk immediately below us, grazing in open timber. I quickly dropped my pack onto the snow to use as a rest, chambered a round, and opened my scope caps. Unfortunately, as soon as I had brown in my crosshairs, they bolted — we were directly upwind of them, and I assume they caught a whiff.
Upon reaching their tracks, we first followed them backwards, to see where they would lead. Within one-hundred yards, we found their daytime bedding areas, which we thought might be the case: they were hungry after hunkering down all day, and (as if on cue) they had just started moving.
Then we began to follow their tracks steeply downhill and into, of course, the dark timber. We tracked them for a while but eventually gave up — we weren’t getting closer to them, and it was nearly nightfall. A four-hundred foot descent got us to the valley bottom, where we found water and a spruce-protected campsite. The timing was ideal: just after washing out my dinner pot, it began to snow again.
Day 2
It snowed most of the night, transforming the northern Flattops into a winter wonderland. We slept in, lacking enthusiasm to face the conditions, and made breakfast in camp. If the conditions did not relent, we agreed that we would finish the day at the car, which we could use to access lower, drier, and warmer terrain, or to simply go home.

Overnight the Flattops had turned into a winter wonderland.
Based on our opening day experience, we decided to hunt Baldy’s north ravines again. The more conventional morning strategy — to glass from a high vantage point — was impractical: between the snowfall and the low clouds, visibility was too limited.
Six-hundred yards out of camp, we picked up hours-old tracks of a small elk herd. We followed them backwards into one of the north ravines, which made us think it could have been the same herd we bumped the morning before.
We continued uphill: hike, stop, scan, and repeat. It was snowing heavily so we didn’t bother with our binoculars — they would have become useless within a few minutes.
A half-mile uphill we found the bedding area of a lone bull elk, with fresh tracks leading away from it. He wasn’t running, which made us think that he wasn’t overly concerned about us (perhaps our smell or sounds were still far off) or that the timing of his departure was merely coincidental. It became clear that it was the former: he took us on a heinous contour across snow-covered 30-degree slopes and into Pick Up Sticks-like blowdowns. We tracked him for three hours, covering a mere mile. Steve and I both ran for Duke and are training for a sub-2:30 marathon in Houston in January, if that tells you anything about the topography.

Side-hilling across snow-covered 30-degree slopes littered with blowdowns.
Around 2:30 PM the bull’s tracks pulled out onto Baldy Mountain’s open west face. I saw two does in the meadow below, happily grazing under clearing skies after a snowy night and morning. And then I saw an even better sight: two skylined elk, hiking right-to-left, about one mile away. In my low quality 9-power binoculars, they appeared to be cows.
Steve and I decided to abandon the lone bull elk, who we felt was simply screwing with us, and take chase.
The final hunt
We intersected the duo’s tracks in a shallow draw and followed them into an open aspen forest. This was our best chance so far, so we were extra careful in our stalk: scan the forest with our binoculars, hike, stop, scan again. Tracking them was exceptionally easy in the new snowfall. The wind direction was ideal: in our face.
Steve spotted the elk first, and whispered at me to stop and get down. To our surprise, we realized that they were bulls, not cows, which meant that I would be taking the shot since I had the only bull tag.
We estimated the distance at about 200 yards, which is within my shooting comfort zone. I would have preferred to use my pack as a rest, but I needed more height to get above the undergrowth, so instead I used a lone trekking pole. There was no time to fashion DIY shooting sticks with the Voile strap and cord that I was carrying for this purpose — the elk were looking back at us, suspecting something was up but not yet sure of it.
One of the bulls turned broadside to me, looking right, giving me a clear view of its vitals. I took a few a few steadying breaths, and took aim.
Boom.
They book took off, out of view over a small rise. One was clearly stumbling, but we didn’t see it drop. It was 3:20 PM.
And this is when we made our biggest mistake of the trip. We took a few minutes to put on clothing layers and get some food, but we didn’t wait nearly long enough. We should have found something to do — take a nap, make coffee, write in a journal, climb a nearby peak. Anything to pass time and give the bull a chance to lay under a spruce and die peacefully on its own time.
In 2015 my cow elk fell 30 yards from where I shot her, and didn’t make an effort to get up. Even so, I walked a mile round-trip at 11,000 feet to fetch my backpack before I approached her. This time, however, after about 10 minutes Steve and I began to follow its tracks. Hike, stop, scan, repeat, with rifles loaded and prepared for a second shot.
After 225 yards we reached the point at which the bull had been shot, and then followed easily the blood trail from there. Interestingly, the uninjured bull seemed to be staying with the injured one.
Again, Steve was the first to see the injured bull, laying under a spruce at the edge of a meadow, about 350 yards from where it’d been shot. Unfortunately, we were only 20-30 yards out when we saw it, well within earshot and easily visible. I aimed my rifle at it again, looking for movement, but I only had a good shot on its head, due to the way in which it was lying down.
When Steve took another step forward, the elk looked up, mustered all of its energy to get on its feet, and bounded away like it’d never been shot. Neither Steve nor I managed to get off a second shot on the moving target. Clearly, it had not been shot in the vitals. (It turned out to be a gut shot, about 6 inches off. I’m not sure if I jerked during the shot, or if the bullet grazed an aspen shoot.)
We looked at each in disbelief, feeling utterly stupid for just having committed this rookie mistake, and for having extended this painful process for the bull.
About 350 yards after being shot, the bull laid down here and probably would have died here, if we had given him more time before tracking him.
Not wanting to make the same mistake twice, Steve and I decided to give the bull more time. We sat down, sent out a message via inReach, and hiked back to the shot location to retrieve a glove liner that I had accidentally dropped. After an hour, we thought it was time to try again.
We tracked the bull across a meadow, through aspens, and even a spruce forest. This made me nervous, as I fully expected the bull to lay down in the thick timber. Instead, it had passed right through the area. When we reached the edge of a wetland, we spotted the bull across the way, moving very slowly. We saw it drop, then stand back up and walk a few more feet before it dropped again. It was tough to watch, and we wanted it over with.
We crept into the meadow to get within shooting position. I shot it once in the neck, and it was over.
Dress, pack out, and process
Field dressing the bull took longer than we would have liked — about three hours for four quarters, two backstraps, and two tenderloins, plus some rib and neck meat. Steve had never dressed an elk before; it was only my second time; and we were doing it by headlamp. Temperatures were in the high-20’s, but the rigorous work kept us warm. If our hands got cold, there was an easy solution: warm them up on the carcass, which retained its warmth through the end.

Including the bone, each hind quarter weighed about 45 pounds. It produces a few nice roasts and a lot of burger.
Once we were done, I scouted for a campsite, and found a nice horse camp 200 yards away, by the creek and under some spruce. We transported our gear, the meat, and the head in five total round-trips (two for Steve, three for me), and based on that experience we figured we could pack everything out in two round-trips each in the morning. To cool the meat overnight, we hung the game bags from a blowdown and on some tree limbs.

To cool the meat, we hung it in camp overnight. Some of the meat bags were protected from precip by the spruce branches; the others we protected with a poncho, left.
On Monday morning, we had breakfast and double-shots of coffee before shouldering our massive loads. My pack weighed 65 pounds on the first trip out, and 67 pounds on the second. Thankfully, it was a relatively short and easy hike out — both round-trips totaled 5+ miles with 700 vertical feet of gain and 1000 vertical feet of loss. We were done in four hours, breaks included. The meat weighed 172 pounds, including two hind-quarter bones and one shoulder bone; we de-boned the other shoulder because half of it was too bloodshot to carry out of the field.
We pulled into Boulder around 5 PM and split the meat in half. I returned home and got to work. My tenderloin and backstrap steaks were in the freezer before bed. Most of the roasts and burger were in the freezer by Tuesday afternoon, with some lingering work through Wednesday morning.
The post Elk Hunt Report: Filling my freezer & ending the era of cluelessness appeared first on Andrew Skurka.
November 7, 2017
Stay warm when it’s wet: How to protect down insulation from moisture
When shopping for a sleeping bag, insulated jacket, or insulated pants, you will have a choice of insulations:
Down, which is a commodity product measured by fill power, e.g. 800-fill; or,
Synthetic, which is normally made of interwoven plastic fibers and which may be marketed as Primaloft, Climashield, or a proprietary version like TNF Thermoball.
Given current technologies, I believe that down is still the superior choice for performance. It’s warmer for its weight and more compressible, and has a much longer lifespan, making it a better long-term investment. Premium sleeping bags, in particular, can nearly be family heirlooms.
Synthetic insulations have one decided advantage: they are less expensive. They also retain more warmth when wet, on a relative basis. However, when the thermal superiority of down insulation is accounted for, synthetic’s wet weather advantage may be a wash — a damp down sleeping bag can be just as warm as a perfectly dry synthetic bag of the same weight, because it’s original warmth was so much better.
While synthetic insulations are frequently marketed as being “warm when wet,” this claim defies the laws of physics. If your synthetic sleeping bag or puffy layers are wet, the thermal mass of that wetness will steal your body heat. Period.
Down insulation can get wet from both precipitation and ambient humidity. Here are four techniques to mitigate these factors:
1. Water-resistant down
Down can be treated to be made more water-resistant. The process adds little cost to the down, and actually improves loft. Water-resistant down — which may be branded as DriDown, DownTek, or others — will not be warm when wet, but I find that it holds up better in humid conditions and that it dries faster than traditional down.
2. Pack liner
I protect my sleeping bag and puffy layers using a Brute Super Tuff 20-gallon Trash Compactor Bag made of 2-mm plastic. Scented bags can be aired out, if it bothers or concerns you.
In very wet environments, I may use two bags: one to protect everything that I will not need until camp (e.g. sleeping bag, sleeping clothes, pad, stove, food for the rest of the trip) and a second bag for things I may need throughout the day (e.g. today’s food, puffy jacket, rain gear). If my shelter is wet, I keep it inside the backpack but outside the pack liner.
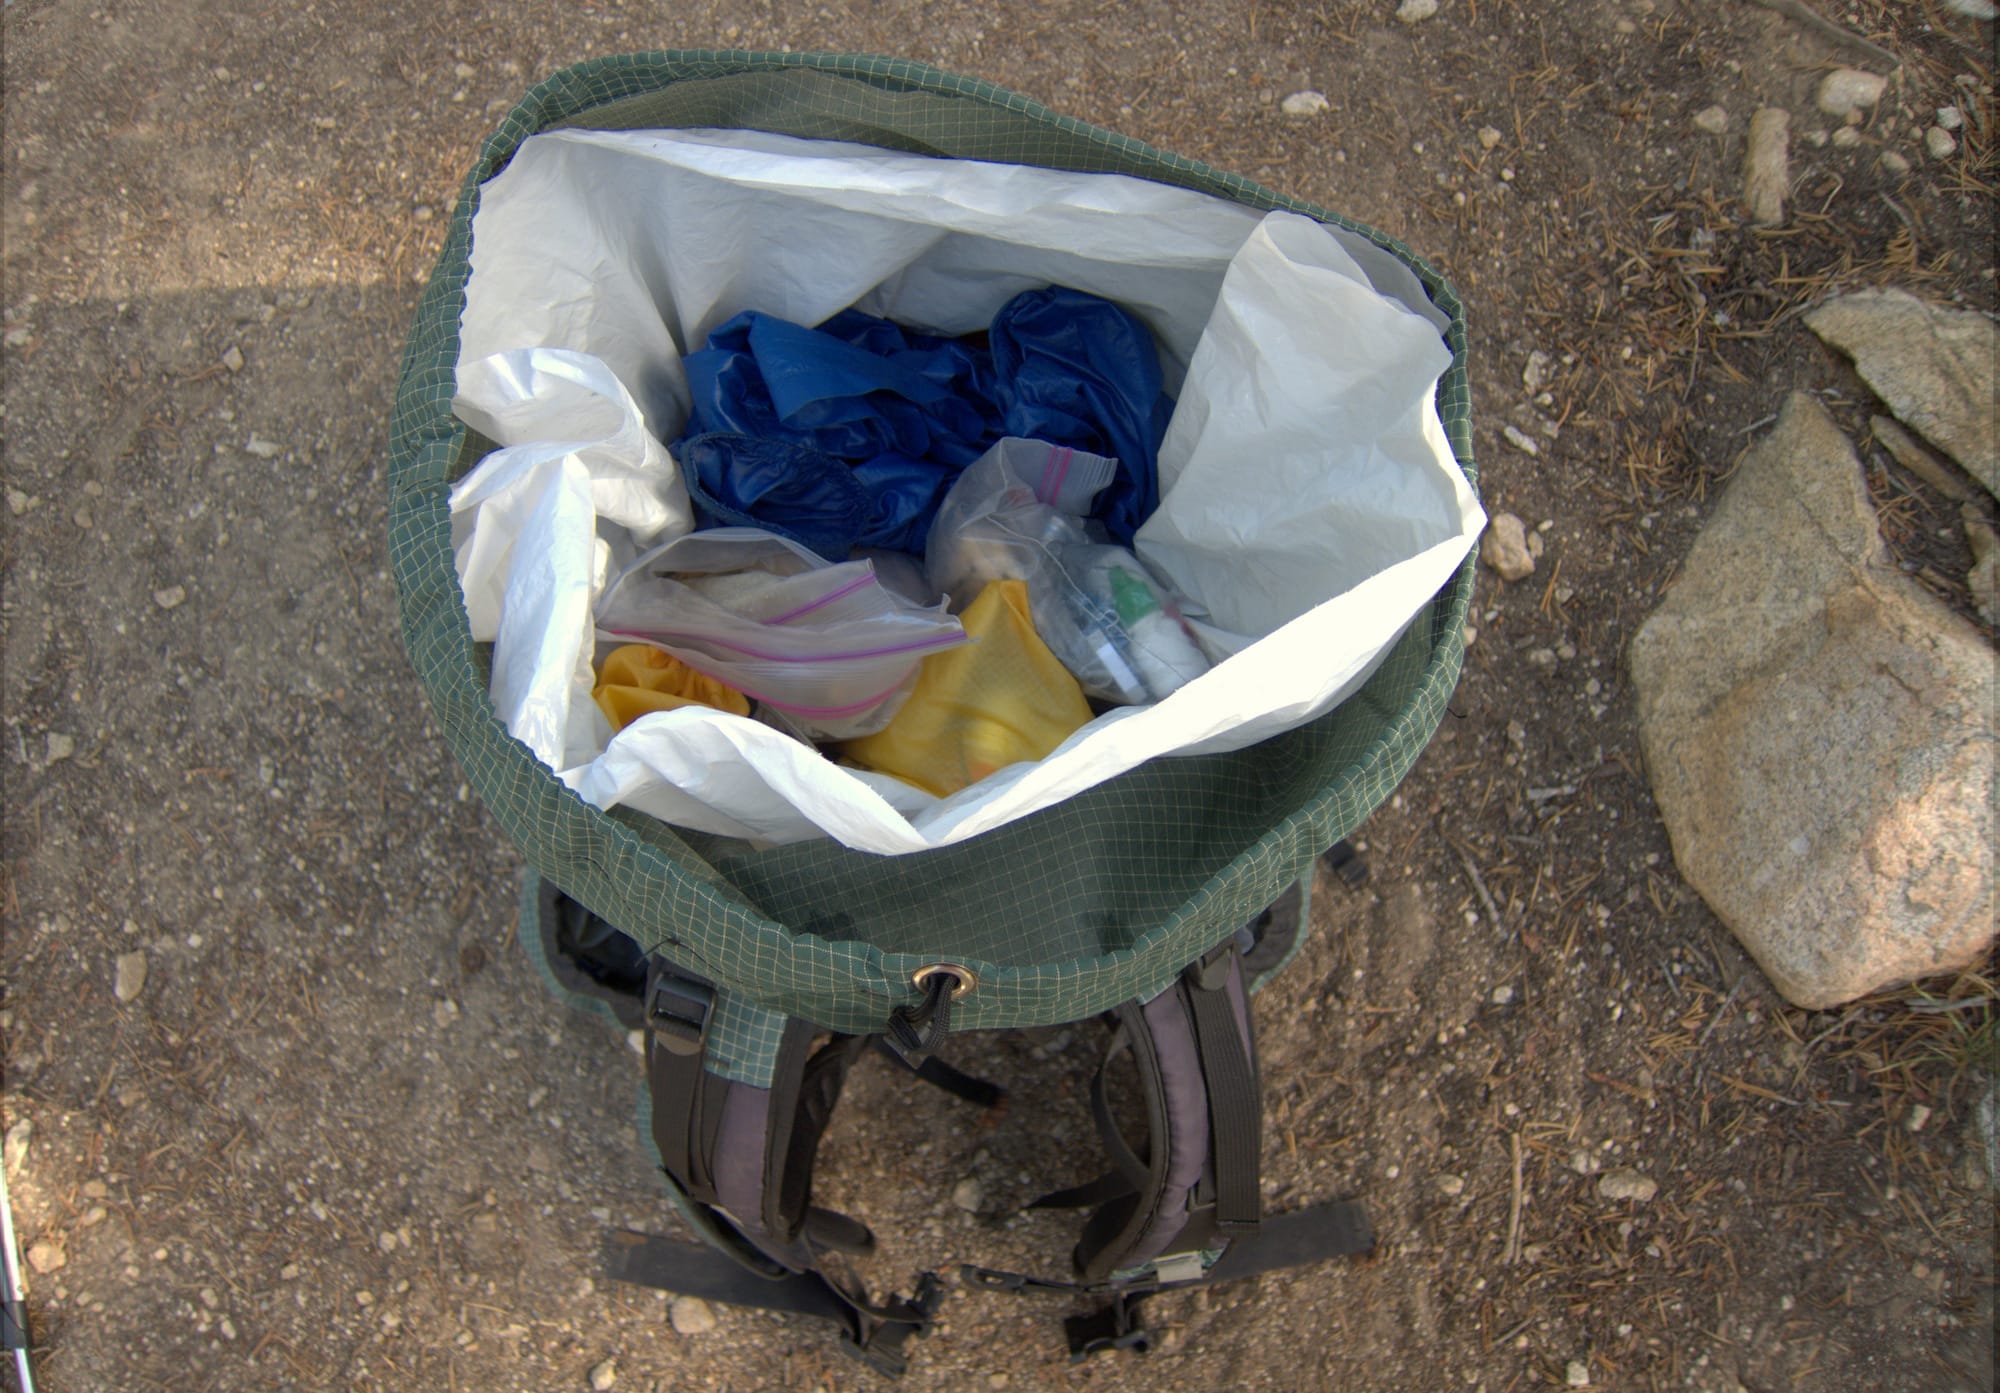
To waterproof my gear, I line my pack with a 20-gallon trash compactor bag. A wet shelter or raingear can be stored outside the pack liner but still inside the main compartment.
3. Mid-layers and sleeping clothes
On rainy trips, I will bring a mid-layer fleece like the REI Quarter-zip Fleece Pullover plus low-performance sleeping clothes made of polyester, wool, or fleece.
The mid-layer is worn between my hiking shirt and rain shell in cool-and-wet or cold-and-wet conditions, which preserves my down jacket for rest stops and camp. The fleece dries quickly and buffers moisture more effectively than a down- or synthetic-insulated garment.
The sleeping clothes guarantee me nighttime comfort, and prevent me from having to sleeping in my wet hiking clothes, which would then wet my sleeping bag.
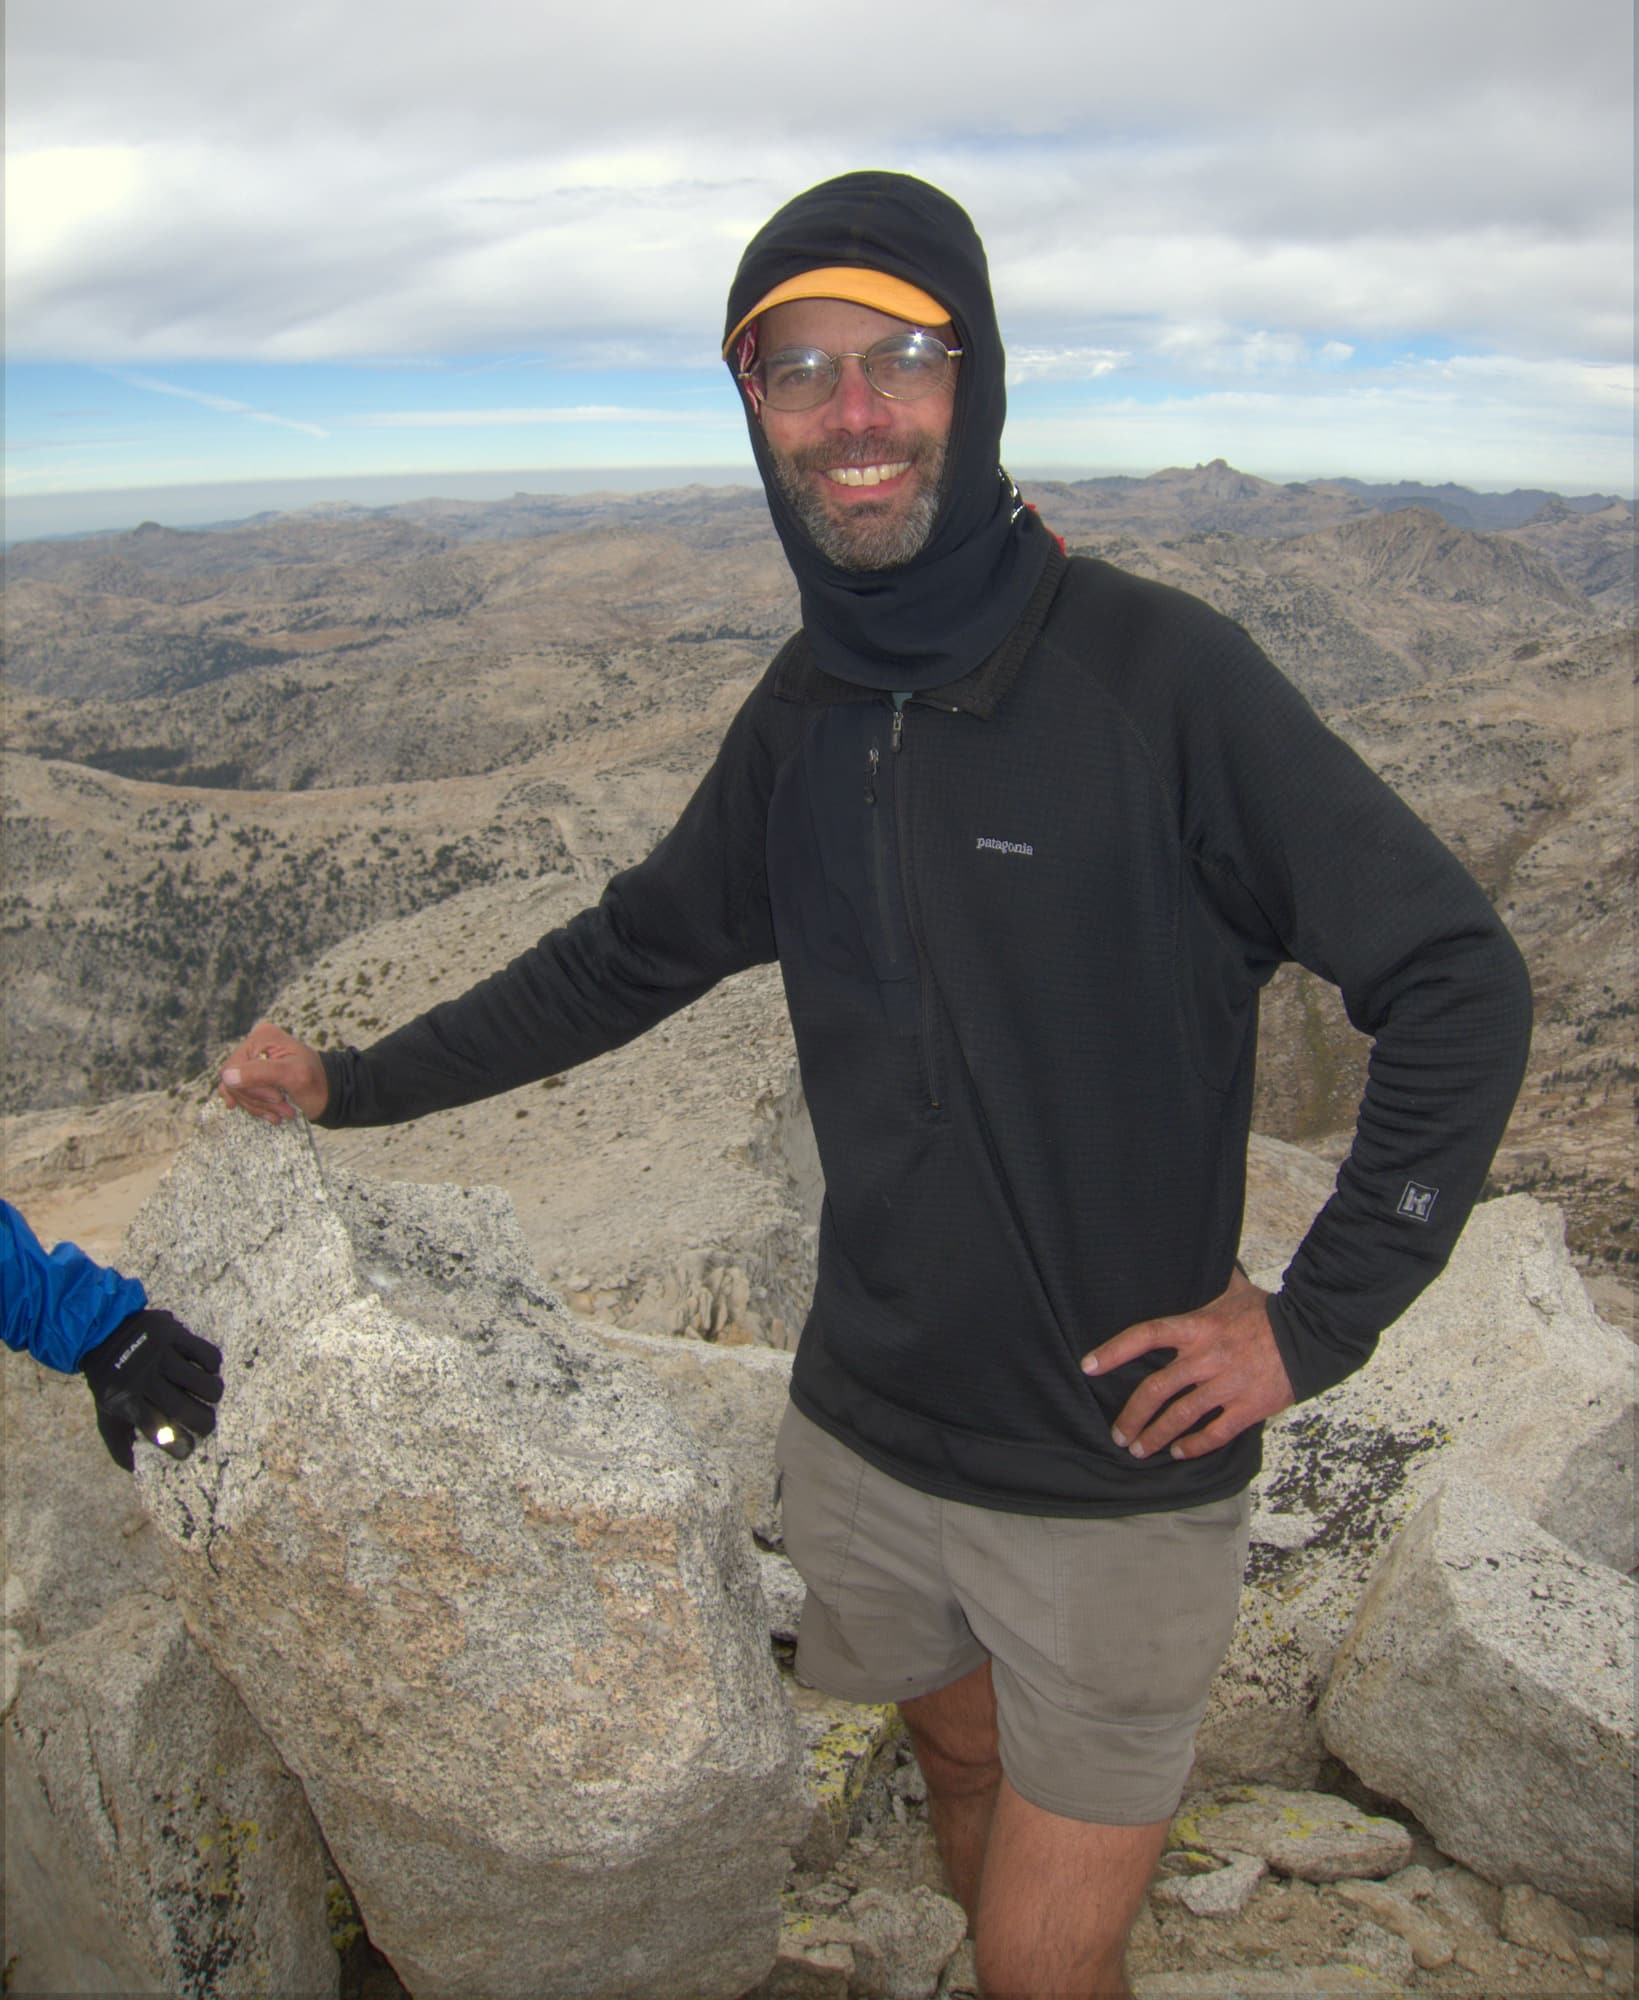
Flyin’ Brian Robinson atop Yosemite’s Mt Whorl (12,033 ft) in late-September, wearing a 100-weight Patagonia R1 fleece top
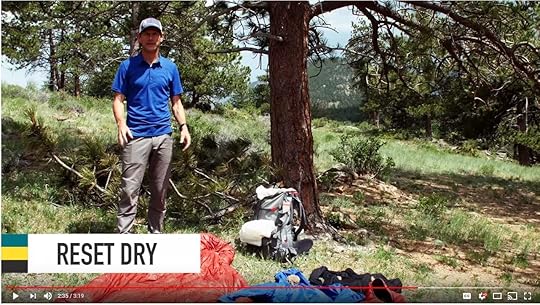
4. The reset dry
This technique is my favorite and the most effective. If I get whacked with wet weather and become either uncomfortable or near the safety limits of my systems, I will take the first opportunity I have to dry out. Depending on the location and time of year, the time necessary for a reset dry will vary. On a sunny, warm, and arid late-morning in the Mountain West, it can be done very quickly. If you’re hiking the Appalachian Trail in February, you may need a motel room.
The reset dry is easy: expose ALL of your stuff to the sun, breeze, and dry air. Hang it in the trees, lay it on the grass, drape it over a boulder, pitch it haphazardly, etc. When things look and feel dry, pack it all up and keep moving.

A “reset dry” in the Alaska Range
Disclosure. This website is supported mostly through affiliate marketing, whereby for referral traffic I receive a small commission from select vendors, at no cost to the reader. This post contains affiliate links. Thanks for your support.
The post Stay warm when it’s wet: How to protect down insulation from moisture appeared first on Andrew Skurka.
October 30, 2017
Review: Showa 282 Gloves || Preferred cold & wet solution, but imperfect
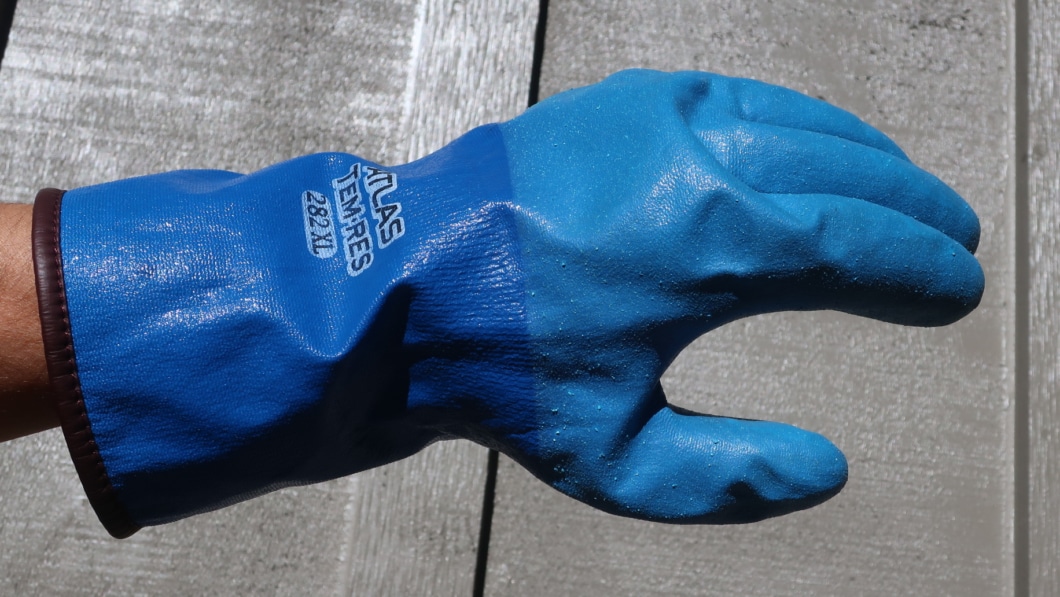
The Showa 282 Gloves, which feature a textured and abrasion-resistant waterproof/breathable shell, with an insulating acrylic liner. They’re the best option I’ve found for hiking and running in cold-and-wet conditions, but they’re still imperfect.
When hiking or running in cold and wet conditions, keeping my hands comfortable has been a chronic challenge. On multiple occasions I’ve pulled into a campsite, trailhead, aid station, or my house with inoperable and painful fingers.
To minimize (or perhaps even, to end) this suffering, this summer I looked beyond conventional rain mitts like the REI Minimalist Waterproof Mittens and Outdoor Research Revel Mitts, which are fundamentally flawed, especially for long-term use, for reasons I explained at the start of my search.
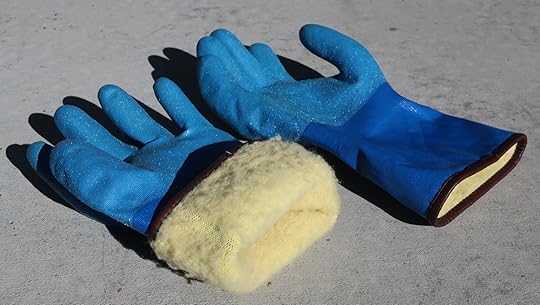
In July on the Pfiffner Traverse Yo-yo, I carried Grease Monkey Neoprene Long Cuff Gloves, which I found at the local Home Depot for $5 and which weigh 3.0 oz in size Extra Large. They kept my hands dry, but I kept looking for a better option: they were smelly, cold to the touch, and annoyingly grabby (and thus fussy to put on or take off, especially if my hand was damp).

These $5 latex gloves kept my hands dry, but they were smelly, cold to the touch, and grabby.
Review: Showa 282 Temres Gloves
The better option proved to be the Showa 282 Gloves, which were recommended to me by Jakuchu Ito, a reader from Japan, where the 282 gloves are reportedly popular with hikers and backcountry skiers, as well as “people in the fishing industry etc. that have to deal with ice and cold water a lot.”
I used the 282 gloves during Ultra Trail du Mont Blanc (UTMB) and while guiding trips in the High Sierra. Conditions in both locations were conducive to testing. During UTMB I faced intermittent rain throughout the race, plus wet snow and near-freezing temperatures on some of the high passes. And in the High Sierra, morning low temperatures were regularly in the 20’s, and one day we had accumulating snow that transitioned into cold rain.

Sporting the 282 gloves on a crisp September morning in the High Sierra at 11,000 feet, with temperatures still in the 30’s.
The Showa 282 gloves have a waterproof/breathable polyurethane shell and an insulating acrylic liner. I have found them to be reliably waterproof, moderately warm, and sufficiently durable. They’re also cheap, at just $20 including shipping. Among the options I have tried, these are the most effective solution yet for keeping hands comfortable while hiking or running in cold rain.
However, if the goal is to make perfect rain handwear, the 282 gloves have room for improvement, specifically with the liner and design.
Key specs
Weight: 3.5 oz (size L), 4.2 oz (size XL)
Textured waterproof/breathable polyurethane shell
Articulated fingers
Seamless knit acrylic liner
10.6-11.0 inches long (270-280 mm) when flat, from tip to cuff
$20 on Amazon with Prime shipping

Shell
In a Showa brochure, the waterproof/breathable shell (branded as Temres) is described as “micro-ventilated polyurethane.” But I’ve been unable to find specs for hydrostatic head or MVTR, or more information about its construction.
Based on my field use, I would describe the shell as reliably waterproof and marginally breathable. I’d prefer this combination (over, say, temporarily waterproof and reasonably breathable) because there is an easy solution for overheating hands: take your gloves off. The material reminds me of Columbia’s Outdry Extreme, which does not rely on a fragile DWR finish to remain waterproof.
The shell is textured, for improved grip on items like trekking poles, zipper pulls, and shelter guylines. However, the 282 does not have sufficient dexterity to, say, tie a shoelace. The material is somewhat rigid, and the shell was molded in a natural hand shape, with articulated fingers and thumb.

The shell has a micro texture for improved grip.
For backpacking, the shell seems amply durable. My pair shows no signs of use after a few weeks in the field, despite abrading them against trekking poles, grabbing granite talus, and snapping fire wood. In the EN 388 test for industrial gloves, it scores 4/4 for abrasion-resistance and 2/4 for tear-resistance; its puncture- and cut-resistance is marginal, at 1/4, with a score of 0 being the worst.
Liner
The seamless knit acrylic liner serves two functions.
Insulates the hand from cold ambient temperatures; and,
Buffers the hand from moisture inside the glove, e.g. accumulated perspiration.
Unfortunately, it’s the least durable component of the 282 gloves. My liner is badly pilling (though it’s not shedding). More problematic is that it’s detaching from the shell, which can result in misalignment between the fingers/thumb of the liner with the fingers/thumb of the shell.

The liner adds warmth and buffers the hand from moisture, but its durability is questionable. Notice the extensive pilling after just a few weeks of use.
Showa also makes a liner-less version of the 282, the Showa 281 Gloves, which I haven’t tried but would like to. They could be worn barehanded in mild-and-wet conditions, or paired with a lightweight liner glove like the DeFeet Duraglove Wool (my favorite) for cooler temperatures. They will not be as warm as the 282 gloves when paired with a liner glove, as I needed to do when temperatures were in the 20’s and 30’s.
Fit
A local retailer is unlikely to stock the Showa gloves, so they’ll probably need to be purchased online without trying them on. I’ll share my sizing experience, to help you.
My hand size:
Length: 8.25 inches from wrist to tip of middle finger, + 0.125 inches for glove liner;
Width: 8.25 inches around the palm, + 0.25 inches for glove liner; and,
Middle finger: 3.375 inches (3 3/8) from base to tip.
I purchased the 282 in two sizes:
Large fits very well when worn barehanded, although I’d like the fingers to be a smidge longer. When paired with the Duraglove liner, the Large is too restrictive.
X-Large is a bit clumsy when worn barehanded, but doable. When worn with the Duraglove liner, the fit is excellent.
The acrylic liner packs out after some use. If a size feels slightly tight when brand new, it’s probably the right one for you.
Design
If Showa was interested in making handwear that was optimized for backpacking and hiking in cold rain, it would make two changes to the 281/282.
First, it would offer a mitt, which is inherently warmer (and lighter and easier to manufacture). Gloves have more dexterity, but that’s rarely called for — and, on those occasions, it’s easy to take off a mitt and then put it back on.
Second, the cuff must be narrower, or have an adjustment (e.g. webbing with ladder-lock buckle). The width and length of the 281/282 cuff makes it difficult to shingle underneath the wrist cuffs of a waterproof/breathable jacket. When not shingled properly, rain water can run down the arms and into the gloves. For a better design, reference the aforementioned REI and OR rain mitts.
Disclosure. This website is supported mostly through affiliate marketing, whereby for referral traffic I receive a small commission from select vendors, at no cost to the reader. This post contains affiliate links. Thanks for your support.
The post Review: Showa 282 Gloves || Preferred cold & wet solution, but imperfect appeared first on Andrew Skurka.
October 18, 2017
Review: Sierra Designs Nitro 800 mummy || Great price, ordinary design


Cowboy camping in Tablelands at 11,000 feet in September, using the new 20-degree Nitro 800 mummy bag from Sierra Designs
The Sierra Designs spring 2018 line-up has two themes: (1) back to basics, and (2) better pricing. Innovation is not entirely lacking, evidenced by the “zipperless mummy” Cloud series (my review) and the High Side Tent (my review), but the “better and different” mantra was no longer a requirement of new products.
Review: Sierra Designs Nitro 800 mummy bag
These two themes are both embodied in the new Nitro 800 bags: the designs are solid and well executed, but relatively ordinary; and the prices are very competitive.
I slept in the 20-degree Nitro 800 for two consecutive weeks last month while guiding trips in Sequoia-Kings Canyon National Park. Nighttime low temperatures were normally in the high-20’s, except for a few nights after a cold front moved through — a nearby monitoring station recorded 13 degrees, although our deliberately selected campsite was probably five degrees warmer. Some nights I slept inside a full-sided tent, but most others I slept my favorite way: cowboy camping under the stars.
In sub-freezing conditions, I abandon my summer quilt in favor of a mummy bag — quilts are too drafty and they leave my head too exposed. Yes, I could carry an insulated balaclava, but a hooded mummy bag is simpler, lighter, more thermally efficient, and less expensive all things being equal.
Based on these two weeks of use, I found the Nitro 800 to be:
Lightweight and compressible, for its warmth;
Comfortably sized, with room for me (6′ and 160 lbs) while wearing hiking clothes, mid-layer fleece top, puffy jacket, puffy pants, and booties;
Thoughtfully designed, e.g. functional hood adjustment, sufficiently long side-zipper, effective anti-snag zipper guard, and simple draft collar.
I will not offer a personal testament as to the Nitro’s temperature rating. The bags were EN tested, and these results are much more reliable when comparing the relative warmth of sleeping bags.
In terms of performance, the Nitro bags are unexceptional: the mummy market is crowded with high-quality bags, and most brands use the exact same materials, construction techniques, and Asian factories. Some brands differentiate their products with premium materials and Made in USA manufacturing (e.g. Western Mountaineering), but for the others it’s a war of weight, warmth, and price point. In this regard, the Nitro 800 generally outperforms the competition.

Another cowboy camp in sub-alpine at around 10,000 feet
Line review & specs
There are five Nitro models:
Nitro 800 / 35-deg ($280, 1 lb 6 oz)
Nitro 800 / 20-deg ($330, 1 lb 12 oz)
Nitro 800 / 0-deg ($380, 2 lb 8 oz)
Women’s Nitro 800 / 20-deg ($330, 1 lb 11 oz)
Women’s Nitro 800 / 0-deg 9$380, 2 lb 7 oz)
The men’s/unisex models are available in sizes Regular (up to 6′) and Long (up to 6’6″; +2-4 oz vs Regular lengths).
The temperature ratings on the women’s bags are conservative. These models are shorter and narrower (i.e. less surface area), yet contain the same amount of 800-fill down insulation as the men’s bags. As a cost-savings measure, the women’s bags were not EN-tested separately, so the published EN ratings are the same as the men’s models.

The Nitro 800 bags have a 40-inch side zipper. It was sufficient for comfortably getting into and out of the bag, while saving weight over a full-length option (at the expense of versatility).
Materials and construction are consistent across the line:
800 fill-power PFC-free water-resistant DriDown
15-denier shell and liner fabrics
5-inch baffles, which reduces down shifting better than standard 6-inch
40-inch zipper with anti-snag track
Cord tension system on the hood
Shingled foot vent for lower extremity venting
Contoured draft collar on 20- and 0-deg models
To learn more about the Nitro 800 series, watch this video with the Product Manager, Casey Sumnicht.

The 5-inch-wide draft dodger collar runs seam-to-seam and stays in place using the tension of the bag, not a cord tensioner. It’s a feature on the 0- and 20-degree models, not the 35 deg.
Product comps
How does the Nitro 800 compare to existing products? In the chart below I’ve tallied specs of popular mummy bags that are similar to the 35-degree model. Overall, the Nitro 800 35-degree hits a good combination of weight, warmth, and price. There are lighter 35-degree bags and there are less expensive 35-degree bags, but as far as I know there are currently no 35-degree bags that are both lighter and less expensive than the Nitro 800.
Questions or comments about the Nitro 800 series? Post it below.
Disclosure. This website is supported mostly through affiliate marketing, whereby for referral traffic I receive a small commission from select vendors, at no cost to the reader. This post contains affiliate links. Thanks for your support.
Also, I am a product and marketing consultant for Sierra Designs. But I had zero involvement in the development of this bag.
The post Review: Sierra Designs Nitro 800 mummy || Great price, ordinary design appeared first on Andrew Skurka.
October 16, 2017
Review: Salomon Odyssey Pro || Hiking shoe with strong running pedigree

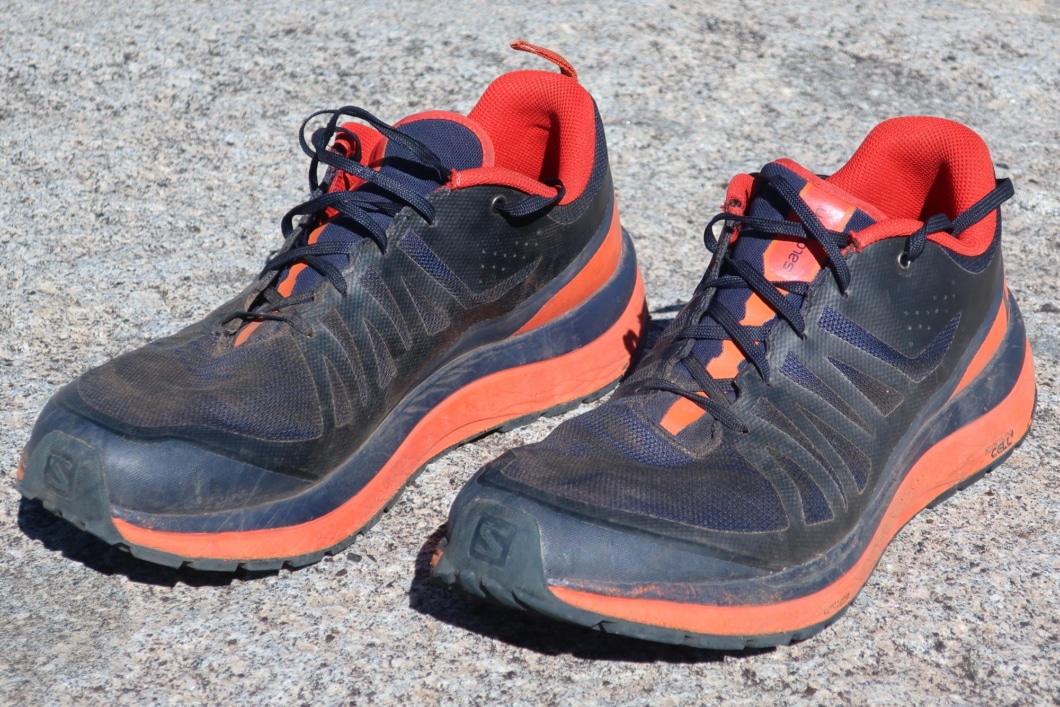
The Salomon Odyssey Pro looks and feels like a running shoe, but its voluminous outsole should greatly extend its lifespan when used for hiking.
The Salomon Odyssey Pro was introduced to me at Outdoor Retailer as “a thru-hiking shoe with running shoe design cues.” That sounded interesting and right up my alley, so I asked for a review pair to test while leading trips this summer in the Indian Peaks Wilderness and Sequoia-Kings Canyon National Park. Our routes were a mix of on- and off-trail, and included portions of both the Pfiffner Traverse and Kings Canyon High Basin Route.
Review: Salomon Odyssey Pro Hiking Shoes
The Odyssey Pro is ideal for hikers and backpackers that want a lightweight, comfortable, and quick-drying shoe combined with a robust outsole. It is more suitable for on-trail than off-trail hiking, and it will best fit average/large foot widths and average/large foot volumes.
The Odyssey Pro looks and feels more like a Salomon running shoe than a Salomon hiking shoe. It’s lightweight, at just 11.1 oz (men’s size 9), which is only 1.3 and 1.4 oz heavier than my current favorite trail running shoes, the Salomon Sense Ultra and Hoka One One Speedgoat 2.
Its upper consists of airy and supple mesh with TPU overlays and a reinforced toe bumper; and its midsole touts Vibe Technlogy, Energy Cell + EVA foam, and Opal Technology. These materials, construction techniques, and features are found throughout Salomon’s running shoes, but not in its hiking shoes.
The feature that most distinguishes the Odyssey Pro as a hiking-specific shoe is its outsole. The volume of high quality Contrgrip rubber seems like it should endure a 1,000-mile summer, not the usual 300-500 miles that I expect of more thinly endowed trail running shoes.
Please support this review by buying the Odyssey Pro or other products from the vendors below.
History
This is not Salomon’s first attempt at a “hiking shoe” with a running pedigree. In 2012 Salomon released the Synapse, which it had developed with former Appalachian Trail speed-record holder Jennifer Pharr Davis.
I wore the Synapse extensively while scouting the Kings Canyon High Basin Route and guiding off-trail trips in Sequoia-Kings Canyon National Park and Grand Staircase-Escalante National Monument. The first generation needed a few tweaks (e.g. more airflow, substitution of the Quick Laces for conventional laces, and improved outsole manufacturing to prevent peeling lugs) but it was generally an excellent shoe.
Yet the Synapse struggled to gain traction, and it was dropped. I suspect one challenge — perhaps the main one — was at the retail level: Should the Synapse be grouped with other hiking shoes, with which it has little in common; or with running shoes, where hikers can’t find it?
Before rolling out the Odyssey Pro, I wonder if Salomon first learned to crack this nut.
Odyssey Pro specs
Weight: 11.1 oz (316 g) in US 9M, 13.1 oz (371 g) in US 11.5M
Upper: Breathable mesh with TPU exoskeleton and reinforced toe bumper
Outsole: Significant volume of High Traction Contragrip, waffle iron pattern
Stack height: 31 mm heel, 21 mm forefoot
Drop: 10 mm
Midsole: Energy Cell + EVA foam, Vibe Technology, Opal Technology
MSRP: $140
More information
Fit
My narrow and small-volume feet were an immediate mismatch for the Odyssey Pro, which has a wide last and generous toebox. To get a secure hold on my mid-foot, I had to take nearly all of the slack out of the laces.
If the Sense Ultra, Hoka Speedgoat 2, or La Sportiva Bushido fit you like a glove, you should pass on the Odyssey Pro. Whereas if you have a positive history with the Salomon XA Pro, Altra Lone Peak 3.5, and Merrell Moab 2, the Odyssey Pro is a promising prospect for you.
To their credit, the Odyssey Pro is not offensively sloppy for smaller feet. I have reviewed other oversized models (e.g. Altra Lone Peak 3.0) that feel too squirrely for anything beyond pavement or gravel bike trails. Whereas with the Odyssey Pro, I felt reasonably sure-footed on steep granite slabs and Class 3 passes (although not as secure as I would have with the Bushidos).

Testing grounds for the Odyssey Pro: A loose Class 3 gully below Paiute Pass, at the head of Thunderbolt Creek on the Pfiffner Traverse.
Uppers
The mesh + TPU exoskeleton has proven a winner on Salomon running shoes. It’s light, airy, quick drying, and supple; and it’s capable of contouring around the foot perfectly. When I have retired Salomon running shoes, the killer has been the outsole (which becomes bald) or midsole (which flattens out). The uppers are still in great shape after 500 miles — Salomon seems to have the materials and construction dialed.
However, in a hiking application, I doubt these lightweight uppers will fair as well, because the shoe will be subject to more abrasion and it will be soaking wet more often. In addition, the toebox is only moderately protected, using some stiffer TPU. I’d be willing to kick steps across snow and scramble up short pitches in the Odyssey Pro, but I wouldn’t want to do it everyday or on very high-stakes terrain.
Bottom line: the Odyssey Pro is most well suited for on-trail hiking, not off-trail routes and/or borderline mountaineering in early-season conditions. For hiking the AT, PCT, CDT, etc., this seems like a good candidate.

The uppers are made of breathable mesh and TPU reinforcements, which has been a winning construction for Salomon running shoes. The toebox is moderately reinforced.

The mesh is very airy, making them ideal for warm temperatures and wet conditions (when quick-dry is key). In sandy environments like Escalante, the porosity will be a liability.
Lacing
The Odyssey Pro features conventional laces, not the Quick Laces that are a hallmark of Salomon running shoes. This is a positive: the Quick Laces tend to fail if exposed long-term to sand, dust, or mud, because the grit abrades the lacing sheath. Of course, hiking shoes are constantly exposed to these elements.
Unfortunately, Salomon chose a linguini-shaped lace that is floppy and difficult to tie. I would happily accept a thicker lace that that is more hand-friendly, even if it absorbs more water.
Midsole
The Odyssey Pro midsole features a lot of fancy-sounding technologies, e.g. Vibe, Opal, and Energy Cell +. I generally understand them, but I think the gains can probably only be measured in a lab. In the field, the sensation is within the range of normal, and I don’t think a 15-mile-per-day hiker will suddenly be keeping pace with Joe (“Stringbean”) McConaughy.
It’s a well-balanced midsole, and overall very comfortable. The Odyssey Pro is lightly cushioned: not marshmellowy like a classic Hoka, or stiff like the Bushido. With a stack height of 31/21 mm (heel/toe), there is enough foam to absorb impact, but it’s not top-heavy. For comparison, the Bushido is 25/19 mm; Lone Peak 3.5 is 25/25 mm; and Speedgoat 2 is 32/27.5 mm.
Insole
A perpetual complaint I have with Salomon shoes is the insole. A branded insole, Ortholite, is often used, and bizarrely they are often made of open-cell foam. Yes, they are soft and comfortable. But they absorb an unacceptable amount of water, and when wet they lose structural rigidity and sometimes “accordion” under the toes.
It’s a small detail, but it needs to be done better.
Outsole
Many backpackers prefer trail running shoes instead of conventional hiking shoes or boots. Count me among them: trail running shoes are lighter, more comfortable, more breathable, faster drying, etc.
But trail running shoes are not optimized for hiking. In particular, the outsoles usually wear out too quickly.
With the Odyssey Pro, Salomon applied a hiking-worthy outsole to what is otherwise a trail running shoe. It has a considerable amount of rubber that should last closer to 1,000 miles than the normal 500. The square lugs with 90-degree edges bite well into all surfaces.

Unlike conventional trail running shoes, the Odyssey Pro features a voluminous outsole of high quality rubber that will endure considerable mileage.
Have questions about or an experience with the Odyssey Pro? Please leave a comment.
Disclosure. This website is supported mostly through affiliate marketing, whereby for referral traffic I receive a small commission from select vendors, at no cost to the reader. This post contains affiliate links. Thanks for your support.
The post Review: Salomon Odyssey Pro || Hiking shoe with strong running pedigree appeared first on Andrew Skurka.


