
Andrew Skurka's Blog, page 38
April 2, 2018
Are Garmin’s inReach Units Accidentally Calling SAR?

By applying normal pressure to the SOS button on my inReach, I can initiate a SOS message despite the lock switch being properly engaged. Can you?
The post Are Garmin’s inReach Units Accidentally Calling SAR? appeared first on Andrew Skurka.


March 29, 2018
Buyers guide: Bear canisters || Comparison of volume per weight & cost

For years I have been using the BearVault BV500. Among reasonably priced models, it offers the greatest volume for its weight.
During the day, properly protecting food is as simple as not leaving it (or a backpack full of it) unattended.
The conversation about overnight food protection is longer and more nuanced. Multiple techniques can be used; regulations vary by location; and misinformation and poor practices are abundant.
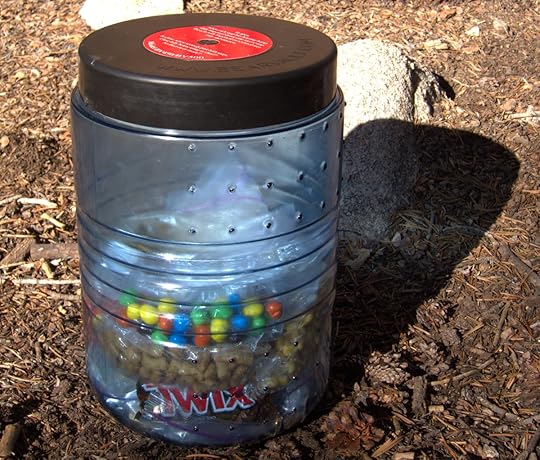
In this post I will focus on one specific food protection technique: hard- and soft-sided canisters and sacks that are resistant to bears and/or “mini-bears,” a term that I believe originated at Philmont Scout Ranch and that refers to the mice, rats, squirrels, rabbits, marmots, pikas, racoons, porcupines, gray jays and other small animals that seem to take up residence in popular frontcountry and backcountry campsites.
Hard-sided canisters vs. soft-sided sacks
Hard-sided canisters like the BearVault BV500 are heavy and cumbersome. But they have proven to be the most effective protection technique against both bears and mini-bears.
I carry a hard-sided canister when I am required to. I don’t enjoy it, but do I appreciate the peace of mind that it affords. It also doubles as a decent camp chair.
Canisters are not immune from human error, however. Bears have been “rewarded” by:
Finding canisters that were accidentally left unlocked;
Breaking open canisters by rolling them off cliffs; and,
Walking into camp during dinnertime, hoping that everyone runs away and leaves behind unlocked canisters.
Go ahead, laugh — it wasn’t your canister. But don’t repeat these mistakes.
When camping in areas with a bear/mini-bear risk but without canister regulations, I often carry a wildlife-resistant food sack like the Ursack Major (formerly S.29 AllWhite). This form factor is much lighter and comfortable than hard-sided canisters.
Sadly, Ursacks are generally not accepted as an approved food storage technique, even though the Major has passed the gold-standard Interagency Grizzly Bear Committee test. Read this interview with the CEO of Ursack for additional performance and regulatory insight.
Where are canisters required?
Hard-sided canisters are increasingly the go-to solution for land managers who want to reduce wildlife/food conflicts. They are now required throughout or in specific parts of:
Adirondack High Peaks;
Canyonlands National Park;
Inyo National Forest;
John Muir Trail;
Maroon Bells-Snowmass Wilderness in Colorado;
North Cascades National Park;
Olympic National Park;
Pisgah National Forest;
Rocky Mountain National Park;
Sequoia-Kings Canyon National Park;
Sierra National Forest; and,
Yosememite National Park.
This list may not be exhaustive. Check local regulations before you go.
Purchase or rent?
Canisters and sacks can be purchased online and at local outdoor retail stores. Most cost $50-$80, although carbon fiber models will run $255 to $350.
Canisters can also be rented. At Yosemite National Park, for example, they cost $5 per week, though you’ll be stuck with one of the clumsiest canisters on the market. The aforementioned pricey carbon fiber canisters can be rented from Wild Ideas for $5-6 per day plus round-trip shipping.
If you regularly backpack in an area where canisters are required, owning a canister is probably more cost-effective in the long run. And it’s certainly more convenient — you can arrive at the trailhead with your canister packed and ready to go.
Renting may be more economical if you rarely backpack in areas where canisters are required. The break-even points given the rental prices cited above are 98 days (at $5/week for a $70 canister) and 51 days (at $5/day for a $255 canister), not including shipping or taxes.
Canister and sack comparison
If you are in the market for a wildlife-resistant storage container, this section will be very helpful. I have collected the key specifications for each canister and sack currently available (i.e. no discontinued models) and compared their performance stats.
There are two useful calculations in comparing canisters:
Volume per weight, and
Volume per price
If you are debating between two models that have comparable specs, consider the ease of opening, commercial availability, and opaqueness.
The options
By my count, there are 19 hard-sided canisters and soft-sided sacks currently available. Sorted by brand and then volume, they are:
Comparison: Volume per weight
In the table below, I have sorted the canisters and sacks by their volume-per-weight calculation (specifically, cubic inches divided by ounces). A high number is more desirable than a low number.
By this metric, the Ursacks are the hands-down winners. They provide up to 122 cubic inches per ounce, which is nearly five times better than the top-rated hard-sided canister.
Among hard-sided canisters, the Bearikade models — which are made of carbon fiber — have more storage volume for their weight than other models. For example, the Weekender is 22 percent larger for its weight than the BV500, which is made of transparent polycarbonate.
Notice that larger canisters and sacks perform better than smaller ones. This is due to the relationship of surface area and volume: a doubling of surface area triples the volume. For example, the Bear Vault BV500 offers 30 percent more volume per ounce than the smaller Bear Vault BV450, even though they are identical construction and materials.
The Lighter1 models may be unfairly represented in this chart, because the 6-oz lid and 1-oz handle can double in a kitchen set, saving the weight of a pot and pot grip. Adjusting for this use, the volume-to-weight ratio of the Lil’ Sami and Big Daddy are 14.3 and 18.1, respectively. This puts the Big Daddy ahead of the BearVault 500. In actuality, they are probably about even, since a conventional pot and pot grip weigh less than 7 oz.
Comparison: Volume per price
In the table below, I have sorted the approved canisters by their volume-per-price calculation (specifically, cubic inches divided by $USD). A higher ratio is better.
Here, we can see the cost of the Bearikades — $1 buys only 2.0 to 2.6 cubic inches, making them about four times more expensive per volume as, say, the BearVault BV500.
Buying advice
Purchase a carbon fiber Bearikade model if you:
Have a generous budget;
Obsess over every ounce in your pack; and/or,
Backpack regularly in areas that require hard-sided canisters.
Purchase a BearVault or Lighter1 model if you:
Have a smaller budget; and/or,
Are willing to carry about 10 extra ounces to save about $200.
Finally, purchase an Ursack if hard-sided canisters are not required where you backpack regularly.
Personally, I own a BearVault BV500 and Ursack Major. I use the BV500 when it’s required, and the Ursack Major in areas with bears and/or mini-bears but without canister regulations.
Disclosure. This website is supported mostly through affiliate marketing, whereby for referral traffic I receive a small commission from select vendors, at no cost to the reader. This post contains affiliate links. Thanks for your support.
The post Buyers guide: Bear canisters || Comparison of volume per weight & cost appeared first on Andrew Skurka.
March 28, 2018
Garmin inReach deep dive: Default & downloadable maps & imagery
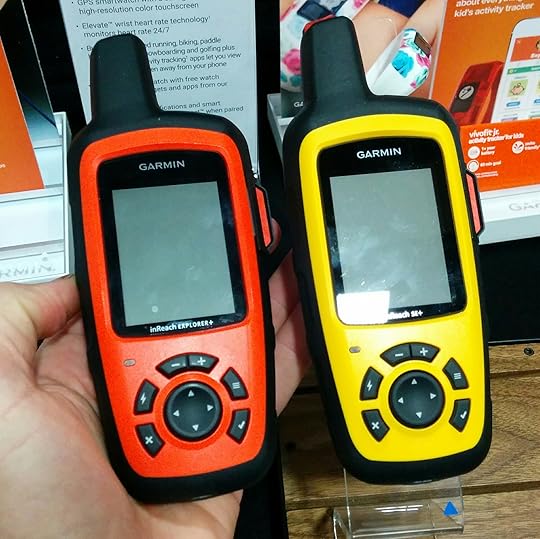

The new Garmin inReach SE+ (yellow) and Explorer+ (orange) are best described as conventional handheld GPS units with satellite text messaging.
Overnight I received this question from reader Bob B.:
Can other topo maps be downloaded onto the Garmin inReach Explorer+?
This question — and just about any other that you can imagine — has been answered previously in my previous posts about the Garmin inReach SE+ and Explorer+:
Preview: New Garmin inReach SE+ and Explorer+
12 FAQ’s: inReach SE+ & Explorer+ || Incl, Will old devices be serviced?
But I sympathize for any reader looking for the answers, because there are a dizzying number of informative comments — 240 total and counting. So I have decided to aggregate map-related information into this single post, to make for easier finding.
inReach SE+ vs. Explorer+
In 2016 Garmin bought DeLorme, which released the original inReach SE and Explorer models in 2014. In 2017 Garmin released two new inReach models:
Garmin inReach SE+ ($400)
Garmin inReach Explorer+ ($450)
The primary difference between the devices is that the Explorer+ is pre-loaded with topographic maps while the SE+ has only a simple grid map (i.e. no features or contour lines, just its location plus any imported or created routes, waypoints, and breadcrumbs).
Deeper dive: inReach Explorer+
Pre-loaded data
When purchased in North America, the Explorer+ is preloaded with the following maps:
Topo 24K for the US and Canada (Made by DeLorme)
Topo 125K for Mexico (Made by DeLorme)
World Wide BaseMap (Made by DeLorme)
These maps have not been updated since the 2017 product release, and they will not be updated by Garmin.
Downloadable data
The Earthmate has 2 GB of internal storage for additional data.
The following maps can be added to the device:
OpenStreetMaps, which covers the world and offers road detail, and light topographic detail. Sometimes they include trails. These maps are just like Garmin’s Cycling maps, and receive updates.
Earthmate Hunt Edition costs $35 per year and includes GMU boundaries, land ownership, and public land survey maps for all 50 states. It can be viewed directly on the inReach Explorer+ after being synced with the Earthmate app.
What’s not pre-loaded or downloadable
The Explorer+ (nor the SE+) have SD or micro-SD slots, so data that is stored in this format (e.g. Onxmaps Hunt Chip) cannot be loaded.
The devices are not compatible with Garmin Base Camp, so you cannot load the data onto the device from there. Instead, you must use the Explore portal, which was carried over from DeLorme. I would expect the second-gen Garmin inReach units to be better intergrated into Garmin’s systems.
None of the preloaded or downloadable maps offer automatic routing. This is different from Garmin City Navigator and Garmin Topo 24K maps, which will give turn-by-turn directions between two points using roads or trails.
Earthmate app
The Earthmate app is included with purchase of an inReach SE+ or Explorer+, and it can be purchased separately. In addition to the aforementioned OSM and Hunting Edition maps, additional data can be downloaded to Earthmate:
NOAA Nautical Charts
Aerial Imagery
USGS 7.5-minute quads
Canadian quads
These tiles cannot be viewed directly in the inReach devices. However, the inReach GPS can be used to identify its location on the phone screen, rather than using the phone GPS.
Functionality with and without a subscription
To use the inReach as a two-way satellite messenger, a service plan is required.
To use the inReach as a GPS, the device must be activated but does not need a valid service plan. This currently costs $25 per year.
Additional questions about the maps and imagery on the inReach+ units and Earthmate? Leave a comment.
The post Garmin inReach deep dive: Default & downloadable maps & imagery appeared first on Andrew Skurka.
March 27, 2018
Tutorial: Methods to purify backcountry water || Pros, cons & my picks


There was little doubt if I needed to purify the water from this stock tank on Arizona’s Coconino Plateau.
Earlier this month there was a healthy online debate over the true risk of drinking water from backcountry sources without purifying it first. I appreciate that Ethan Linck brought up the topic and agree that many sources are safe to drink without treatment.
But I agree more with Wes Siler and Christie Wilcox:
It’s difficult to be certain of the contamination risk, and
Waterborne cooties can be uncomfortable (understatement).
So, as a general rule of thumb, just purify it.
Missing from their debate, however, was any instructional knowledge, specifically:
How to effectively purify water sources in the backcountry; and,
How to assess water quality and risk in the field.
I’m generally competent in explaining the how’s of backpacking, so in this two-part series I will try to fill this gap.
If you’ve read The Ultimate Hiker’s Gear Guide, some of this text may sound familiar — it’s from the chapter on Water, which also includes discussion of contaminants and water storage. (A clause in my contract allows me to share short sections of the book.) If you haven’t read the Gear Guide, you should consider it: it’s filled with trail-tested advice, and almost certain to save you time and money.

A decomposing cow or steer in Harris Wash, Grand Staircase-Escalante National Monument. I had filled up my bottles below here and had purified the water, but thankfully didn’t drink any before encountering this.
How to purify water from backcountry sources
There are four basic techniques for treating water:
Boiling
Filtration
Chemicals
Ultraviolet light
Boiling is time-tested, but impractical as a regular treatment: it consumes time and fuel, and hot water is normally unsatisfying to drink. I rely on this method only when I’m heating up water anyway for meals or coffee.
The three remaining methods are available in a variety of form factors, and are better for routine treatment. There is not a single “best” water treatment method, even though some of my online peers will lure you with click-bait headlines that say so. Your specific preference will likely be a function of:
Group size,
Frequency and quality of water sources, and
Importance of time, long-term reliability, and cost.
Some treatment methods are labeled as a “purifier,” a distinction reserved for those that extract or kill all pathogens (i.e. protozoa, bacteria, and viruses). The same effect can sometimes be achieved by combining two non-purifiers. For example, filter and then chemically treat the water.
At a glance
This chart highlights and pros and cons of the various treatment options. Keep scrolling for a more in-depth discussion.
Filtration
At a minimum, filters will strain out larger-bodied pathogens like protozoa and bacteria, as well as sediment, larvae, and other floaties. This should be sufficient for most backcountry watersheds, where viruses are rare.
Some filters go above and beyond, by removing chemicals and improving water taste. The MSR Guardian Purifier does all of the above, and even removes viruses. But its exceptional performance comes at a high price — it’s $350 and 17 oz.
Filters have other trade-offs, too:
They leak retained water.
Their flow rates are slow to begin with, and get worse until the filter is backwashed, scrubbed, or replaced. And,
Most cannot be operated on the move.
Specific filter types have additional considerations:
Pump filters
Pump filters like the Guardian are my least preferred treatment technique. In addition to being the heaviest option, their operation involves considerable effort. Pumping large volumes of water is downright tiresome — imagine treating a few liters of water for you and several partners, at a typical flow rate of about one quart per minute.
Gravity-fed filters
Gravity-fed filters like the Platypus GravityWorks 4.0 ($120, 11 oz) are ideal for groups and extended camps. Simply suspend a reservoir of untreated water above an empty reservoir — using a branch, boulder, or steep slope — and return a few minutes later to a full reservoir of filtered water that can then be decanted into individual bottles.

A gravity-fed system, using the CNOC bladder and a Sawyer Mini. This system is ideal for groups and long camps. Simply suspend the dirty bladder on a tree branch or rock, and then decant the filtered water into individual bottles.
Inline filters
Inline filters like the Sawyer Squeeze ($40, 3 oz) share the same filter technology with gravity-fed filters, but rely on a manual force like suction or squeezing. With some inline filters, you can drink directly from creeks, pools, or bottles by using it as a straw. But it’s much easier to squeeze untreated water through it from a collapsible bottle.

Left to right: the original Sawyer Squeeze, Sawyer Mini attached to a 16-oz bottle, and the backflush plunger.
Chemicals
There are three chemical options, only one of which I would recommend. Note: If you expect floaties in your water, it is advised to bring a bandana or coffee filter in order to strain out large particles before treatment.
Iodine
Iodline-based treatments like the classic Potable Aqua tablets ($7, 1 oz) are lightweight, inexpensive, and widely available, but they are not effective against Cryptosporidium and their overall
effectiveness is impaired by cold and turbidity. Your water will also taste like a medicine cabinet.
Bleach
Household liquid bleach (sodium hypochlorite) would be a better home remedy than iodine. However, it degrades with age and it’s still slow against Cryptosporidium. Plus, it’s like drinking pool water.
Chlorine dioxide
Chlorine dioxide been used by municipal water treatment plants since the late 1940’s and is the superior chemical treatment. The tablet and droplet forms share identical technology, but only tablets like those from Aquamira ($10 for a 20-pack, 1 oz) have been approved by the Environmental Protection Agency as a “purifier.” The marketing copy for the liquid drops claims only that they “kill odor-causing bacteria and enhance the taste of potable water.”
Fear not. A proper dose of chlorine dioxide (in tablet or droplet form) will kill most pathogens within 15 minutes, or within 30 minutes for very silty and contaminated (“worst-case”) water. Cryptosporidium is more resilient, however: The recommended dwell time is four hours. Unlike iodine and bleach, chlorine dioxide has minimal chemical aftertaste, if any.
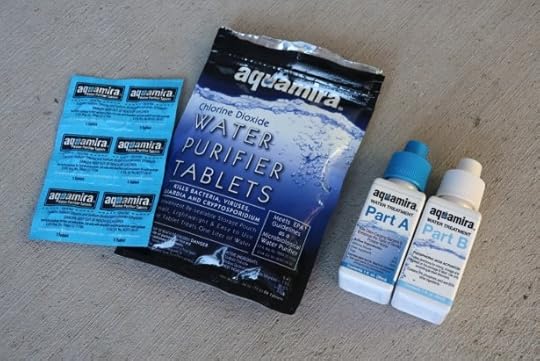
Aquamira tablets (left) and drops (right)
Ultraviolet light
UV treatments like the SteriPEN Ultra ($100, 5 oz) and similar products prevent all pathogen types from reproducing by scrambling their DNA. You still ingest the pathogen, but without offspring there should be no effect. Its speed — at about 90 seconds per quart — is attractive, but the technology has problems:
The cost and weight of replacement batteries adds up.
Narrow-mouth bottles like the Platyplus SoftBottle and smartwater 1L bottle cannot be used, because the light cannot be submerged to the required depth.
Its effectiveness decreases in turbid water (although it must be good enough to have earned the “purifier” label). And,
There are too many possible points of failure. The unit can break if dropped, stepped on, or stored poorly. The batteries die, and the battery compartment is not necessarily waterproof. And the electronics can be fickle.
For such a critical item, its reliability is discomfiting. If you go this direction, I recommend having a backup system.
My picks
For about 15 years my go-to water treatment method has been chlorine dioxide. It is the standard technique on my guided trips, too. The results have been excellent, and now statistically significant given the number of clients that have gone through my program — if it wasn’t effective enough, we’d have noticed by now.
I prefer Aquamira drops ($15, 3 oz), but in temperatures below about 15°F I swap to tablets because they don’t freeze. Versus tablets, droplets are more economical (at about 50 cents per gallon) and flexible, since I can easily modify dosages with proportional changes to dwell times. Especially when decanted into smaller dropper bottles, the weight is negligible.
Chlorine dioxide is transported as a two-part solution and must be mixed for five minutes before it can be dispensed into water. By storing premix in an airtight and opaque dropper bottle, this wait time can be eliminated. McNett, the manufacturer of Aquamira, discourages premixing due to potency concerns, but the practice seems to be safe with some degree of user education.

My go-to water purification treatment is Aquamira, in drop form. I bring a small “pre-mix” bottle that holds about of a day of treatment.
In recent years I have also warmed to the Sawyer Squeeze, which has the advantage of instant potable water. It’s ideal for wet environments and for backpackers who always purify. I recommend the original Squeeze over the smaller Mini, because its weighs marginally more but has a reliably better flow rate.
In group settings, the Platypus GravityWorks is worth mentioning. It’s effective, hassle-free, and very fast. The Squeeze can function the same way, when packaged in the Sawyer Gravity System.
The combination of chlorine dioxide and the Squeeze or GravityWorks may make the ultimate purifier combination. Use the filter to quickly filter small amounts, and the Aquamira to purify large quantities that will sit overnight or in your pack for several hours. For highly suspect water, use both methods.
How do you purify water, and why is that you go-to approach? Any tips or shortcomings to share? Leave a comment.
Disclosure. This website is supported mostly through affiliate marketing, whereby for referral traffic I receive a small commission from select vendors, at no cost to the reader. This post contains affiliate links. Thanks for your support.
The post Tutorial: Methods to purify backcountry water || Pros, cons & my picks appeared first on Andrew Skurka.
March 16, 2018
Heart rate monitor troubleshooting: Suunto Smart Sensor & Ambit3 Peak

Last November my heart rate monitor was not working properly. Readings were regularly inconsistent and inaccurate during training runs. I use the Suunto Smart Sensor and Suunto Ambit3 Peak (long-term review), which I purchased together in August and used together without incident for the first 150 hours.
Here is an example of its behavior:

Screenshot from Movescount
The readings are sometimes accurate, like between 8 and 25 minutes, when my HR was in the 130’s during a warm-up.
But more often the readings are not correct. My max HR is about 178, so readings in excess of that threshold (like 200+ bpm for the first 8 minutes and again around 55 minutes) are simply wrong. I’m also skeptical my HR was in the 130’s between 30 and 42 minutes, which were the first 12 minutes of a 30-minute tempo at 5:38 minute/mile pace. More likely, it was in the 150’s or 160’s.
Erratic readings are unacceptable. I need my HRM to be always accurate, so that I know my effort:
At the moment, and whether I should change my pace; and,
Over a given distance or time, i.e. average, so that I can compare workouts from different days, weeks, and years.
Troubleshooting: Suunto Sensor
I tried to reestablish correct readings a multitude of ways until one of them worked. For years I have successfully used a HRM, so it was more than simple user error, such as not:
Pairing it correctly to the watch (refer to this video),
Wearing it correctly around my chest, at the base of my pectoral muscles,
Wetting the electrodes thoroughly before use, or
Cleaning it regularly with warm soapy water. (I wash mine daily during my post-run shower.)
1. Battery replacement
The Smart Sensor needs one CR20125 coin cell battery. A weak battery may not reliably receive readings from the electrodes or transmit the data to the watch. This didn’t solve my issue.
2. Leave my phone at home
My problem seemed to arise around the same time that I began to regularly listen to music during my runs using my phone. But on runs without my phone, the problem remained.
3. Re-pair
Wet the HRM, put it on, and re-pair the HRM to the watch.
4. Reset the module
This can be done with the Duel Comfort Belt, but not the Smart Sensor.
Remove the battery. Put it back in, inverted, for 10 seconds. Remove the battery again, and put it back correctly.
The module will need to be re-paired with the watch, per #3.
5. Reset the watch
Before attempting this, download all log data to Movescount. If you reset the watch without downloading the data first, it will be gone forever.
To reset the watch, hold all five buttons (for about 12 seconds) until it resets.
The watch can be partially reset in two ways:
1. Enter the Service menu, by holding the two top buttons (Back Lap and Start/Stop) for 12 seconds. Select “Action” and then “Power Off.” To turn the watch back on, hook it to its USB charger.
2. In your Movescount account, go to “Watches.” Select the option, “Restore default values.”
After resetting the watch, it will need to be re-paired with the Smart Sensor.
6. Contact Suunto customer service
On the Suunto website, there are hundreds of Product FAQ’s. If you can’t find information that solves your problem, call them toll-free at 855-258-0900 (USA).
7. Replace the module or belt
Ultimately, I had to replace the belt.
An entirely new Smart Sensor Belt retails for $80. But a replacement belt costs less, about $30. If your current belt’s electrodes or sensor connectors are damaged, this should solve the problem.
Alternatively, you may have to replace the module, which is more expensive on is own. If your Smart Sensor is not pairing to your watch or if the watch regularly loses the signal, it probably is the module, not the belt.
If your Smart Sensor was purchased from an authorized dealer, it is warrantied for a year. Customer Service should take care of you.
Disclosure. This website is supported mostly through affiliate marketing, whereby for referral traffic I receive a small commission from select vendors, at no cost to the reader. This post contains affiliate links. Thanks for your support.
The post Heart rate monitor troubleshooting: Suunto Smart Sensor & Ambit3 Peak appeared first on Andrew Skurka.
March 14, 2018
Review: Sierra Designs Animas Pillow || Comfortable 2.1-oz inflatable for $25


A protoype of the Sierra Designs Animas Pillow, which nests nicely in the hood of a mummy bag.
Last summer I used a prototype of the new Sierra Designs Animas Pillow ($25, 2.1 oz) for about 30 nights. It was a similar experience to when I first used a Therm-a-Rest NeoAir XLite (instead of foam): it’s hard to imagine reverting back to my old approach, which included sleeping on my:
Soft-sided water bottles (full or inflated) and spare clothing, inside of a stuff sack;
Shelter, when cowboy camping; and,
Food sack, in areas where I deemed it safe, YMMV.
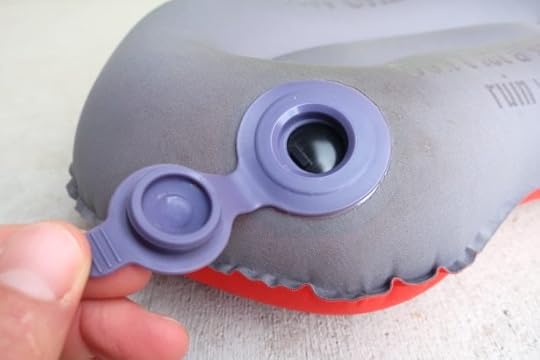
A wide, fast, and easy to use inflation/deflation valve
Review: Sierra Designs Animas Pillow
My sole criticism of the Animal Pillow is its $25 price. That seems expensive to me, although it turns out that REI doesn’t sell a single pillow for less than this amount. Otherwise, I thought the Animas was just about perfect:
1. Texture
The 20d polyester face fabric is brushed and slightly stretchy, making it comfortably soft. It’s not quite silky, but it’s far from being stiff and plastic-feeling. It’s comfortable next-to-skin, and I never hesitated to sleep directly on it.
Equally important, it’s not slippery, so it tends to stay in place. The underside has silicone branding to help with that.
2. Easy inflate and deflate
With the wide pressure-sealed valve, the Animas can be inflated with two breaths and deflated in seconds by puncturing the seal with a finger.
In 30 nights of use, I never had a leak or hole.
3. Lightweight
The Animas specs at 2.1 oz, which I think is a good balance of weight, performance, and value. It could be lighter, but it’d have to be smaller or it’d have to made of lighter fabrics that are less comfortable, more expensive, and less durable.
4. Sized right
Depending on the topography of my campsite and my sleeping bag, I tried placing the Animas between my bag and pad, under my pad, and inside the hood of my bag (as seen in the first photo). I preferred this last setup most, because the curvature of the hood kept it in place best. Thankfully, the Animas is narrow enough (15 inches wide) that it nestled well into this spot.
Prototype vs production
Only minor changes were made to my prototype Animas before it went into production. The production colors are blue/gray, rather than red/purple-ish gray. And they changed the branding, thankfully with no spelling errors. Mine reads, “Don’t let a soar neck ruin your fun.” Oh, the joys of working with Asia.

Oden interrupts my photo-taking on the front porch, because apparently cats are too entitled to lay on concrete or door mats.
Questions about the Animas? Leave a comment.
Buy now: Sierra Designs Animas Pillow
Disclosure. This website is supported mostly through affiliate marketing, whereby for referral traffic I receive a small commission from select vendors, at no cost to the reader. This post contains affiliate links. Thanks for your support.
Additional disclosure. I formerly worked with Sierra Designs as a product consultant and brand ambassador, but was not involved in the development of this product.
The post Review: Sierra Designs Animas Pillow || Comfortable 2.1-oz inflatable for $25 appeared first on Andrew Skurka.
PSA: Secure your permit now for Pfiffner Traverse

If you have not already, you should apply for your backcountry permit for Rocky Mountain National Park if you plan to attempt the Pfiffner Traverse this summer.
The permit system in Rocky Mountain is similar to Glacier and Yellowstone: camping is permitted only in specific backcountry sites and a few at-large zones. All campsites can be reserved beforehand; none are held for walk-up applicants or thru-hikers.
Hence the crowds at the Wilderness Office on opening day. If you wait to apply, you’re less likely to get the exact permit you want. For organizations like mine that guide trips in the park, securing permits also means securing your mortgage payments for the year.

The Wilderness Office on opening day
For permit details and to make an online permit request, visit the Wilderness Camping section of the park website.
The Pfiffner Traverse Guide contains a lengthier discussion of the permit systems in Rocky Mountain and the Indian Peaks Wilderness Area (which is to the south and where permits are more flexible), as well as a cheat sheet of the most desirable campsite locations:

Campsite cheat sheet
The post PSA: Secure your permit now for Pfiffner Traverse appeared first on Andrew Skurka.
March 12, 2018
It’s the vertical, stupid: How many days should I budget for a high route?


In just 2.3 miles, the Pfiffner Traverse climbs Thunderbolt Creek, tops out at Paiute Pass, and drops steeply on the other side to Pawnee Pass Trail. It averages 1,350 vertical feet of change per mile through this section.
Last week on r/Ultralight, member u/TeddyBallgame1999 asked multiple questions about the Wind River High Route, including:
What is a reasonable time estimate for two fit 18-year-olds to complete the route? (I know this is hard to figure out.)
The essence of this question — “How long will it take me?” — has been posed before, in the context of the WRHR and similar routes like the Kings Canyon High Basin Route, Pfiffner Traverse, Glacier Divide Route, and Sierra High Route. I’ve tried to answer it when I see it, but I’m going to finally give this topic a full treatment.
Framework
Backpackers are correct in thinking that a high route will be slower than a conventional itinerary. There are two explanations — on a high route, backpackers will:
Hike at a slower speed (“rate,” e.g. MPH) and
Hike for fewer hours each day (“time,” e.g. hours).
If we momentarily return to high school physics, you may recall that Distance = Rate * Time. So if Rate and/or Time decrease, Distance will as well. In this particular conversation, Distance = Miles per day.
Explanation
Why do backpackers hike slower and hike for fewer hours each day while on a high route? Again, two reasons:
1. Off-trail travel
High routes go where they should go, not necessarily where there are trails. For example, two-thirds of the Wind River High Route and Kings Canyon High Basin Route, and forty percent of the Pfiffner Traverse, is off-trail.
The effect of off-travel travel can be relatively small on backpackers who are exceptionally strong and agile, and/or who are expert navigators. But most hikers will be slower, because they are unable to:
Maintain their on-trail walking speed in the face of uneven surfaces and dense vegetation; and/or,
Route-find flawlessly (i.e. finding the path of least resistance) without slowing down or stopping to examine closely their topographic map, double-check their compass or GPS, or consult with their hiking partners.
Because most backpackers move more slowly and stop more often (and, sometimes, choose poor routes that are even slower than they should be), their daily mileage drops.

Crawling over car-sized High Sierra talus is slow, although not as slow as you’d think for backpackers who are exceptionally strong and agile.

Navigation breaks eat up time, especially for less competent and confident navigators.
2. Vertical change per distance
The off-trail travel partly explains why high routes are slower. But I believe that another factor has a much greater effect: the exceptional vertical gyrations that are typical of high routes.
By most accounts, the John Muir Trail and Appalachian Trail are arduous undertakings. They seem to be always climbing or descending — on average, about 425 vertical feet per mile, according to a few reasonable-sounding estimates.
In comparison, high routes climb and descend up to 80 percent more over the same horizontal distance. For example:
Pfiffner Traverse: 770 vertical feet of change per mile
Kings Canyon High Basin Route: 725 vertical feet per mile
Wind River High Route: 620 vertical feet per mile
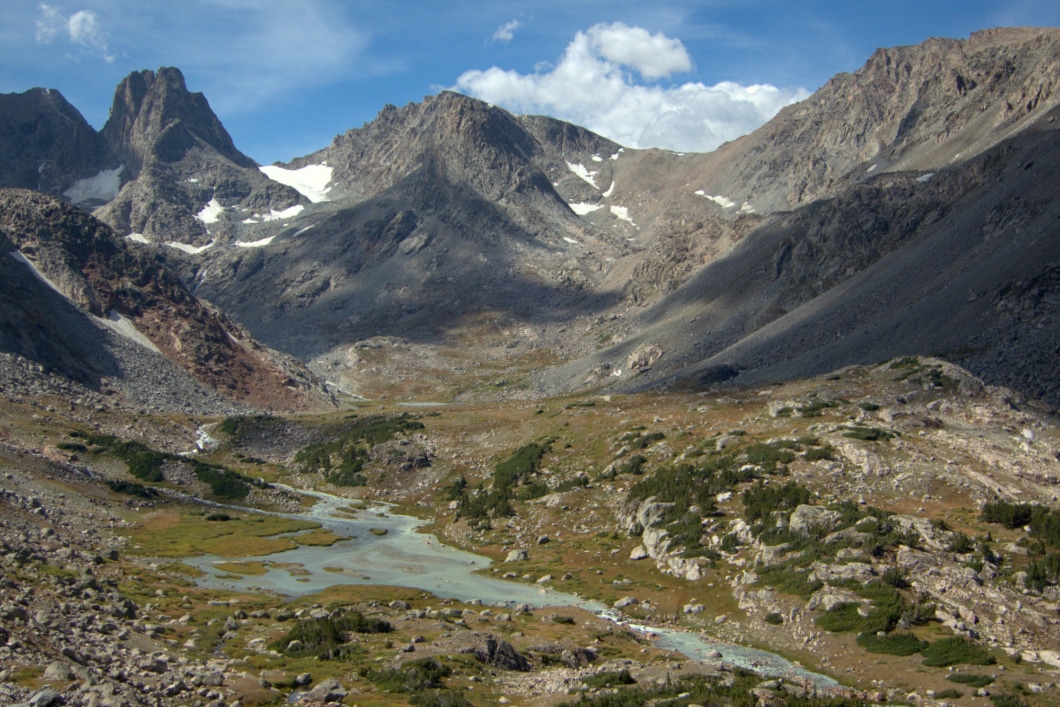
In 2.5 miles, the Wind River High Route climbs 2,000 vertical feet over Blaurock Pass (the low spot on the right skyline) and then drops 2,000 vertical feet to the Glacier Trail and Dinwoody Creek, an average of 1,600 vertical feet of change per mile.
In such mountainous topography, the “physical governor” is not horizontal distance. Instead, the limit is the endurable volume of daily vertical gain and loss. This number varies with individual fitness and trip objectives, i.e. How hard do you want it to be?
Based on data from past trips, I know that my sweet spot when backpacking solo is 7,000 vertical feet of climbing per day (plus 7k vertical feet of loss on average, so 14,000 vertical feet total.). If I pull up for the day having done less than 6k, I still have gas in the tank; and I hold off on doing 8k+ until near the end, because it’s an unsustainable effort.
On the John Muir or Appalachian Trails, I would typically reach this vertical threshold between 30 and 35 miles. But on a high route, my days are over after about 20 miles — or sometimes just 12, if it’s an exceptionally difficult section. Once I hit that 7k number, it’s lights out, however far I’ve gone.
Case studies
Pfiffner Traverse
Last summer I yo-yo’d the Pfiffner Traverse (trip report), which for 75 miles parallels the Continental Divide in Colorado’s Front Range through Rocky Mountain National Park, Indian Peaks Wilderness, and James Peak Wilderness. It took me 8.5 days, finishing in early-afternoon on Day 9 . Each day I hiked to near exhaustion, and each night I camped around where I reached that point.
I recorded my track each day with my Suunto Ambit GPS watch (long-term review). When I plot my horizontal mileage, it’s difficult to see a pattern:
My shortest day was 13.5 miles; my longest was 25.0, or 85 percent longer. My daily average was 19.
When I plot my vertical gain each day, however, the numbers are much more consistent:
My lightest day had 5,500 vertical feet of gain, biggest day had 7,775 (only 40 percent more), and the average was 6,410. My longest day was one climb longer than I would have liked, but necessary so that I could exit the park and camp on National Forest land.
Glacier Divide Route
Dave Chenault and I teamed up in July 2016 to attempt the Glacier Divide Route (trip report). The first three days went well, but Dave bailed at Logan Pass after a very short Day 4 due to an injury.
Our mileage was inconsistent: Days 1 and 3 (which had a large amount of on-trail hiking) were 22 and 23 miles, respectively. But on Day 2, which was entirely off-trail, we covered just 12, or barely more than half of our longest effort.
But our vertical was very stable: 5,400 feet of gain, 5,700 feet, and 6,200 feet.
So, How long will a high route take you?
To predict the number of days necessary to complete a high route, use data from past trips. Consult your GPX tracks, or plot old routes in Caltopo (which can generate a vertical profile).
Then, compare your data against the total amount of vertical of the route. For example, if I can sustain 7k of climbing per day and the Pfiffner Traverse has 29k vertical feet of gain, it’s probably a 4+ day trip for me, or 4 full days if I dig deep and everything goes perfectly (which it rarely does).
When calculating the days you will need, be sure to adjust for:
Altitude: High in the Mountain West, there is less oxygen to power muscles and to assist in recovery. And,
Off-trail travel: If you’re not a strong and agile hiker, or an expert navigator, give yourself extra cushion.
I can’t provide specific numbers for these adjustments, sorry. Thin air in my normal, and I don’t have good data from ten years ago when I could barely navigate out of a cardboard box. Maybe readers can chime in.
Also, add an extra half- of full-day, to accommodate for uncooperative weather. High routes are, well, high — it’s difficult, unsafe, or impossible to push through some conditions, even in the summer.
Guidelines
Based on what I have observed on my guided trips — on which we often follow high routes or high route-like routes — I will reluctantly offer general guidelines for male backpackers between the ages of 20 and 40. These apply to high routes at altitude. If you are female and/or 40+, subtract by 500 to 1,000 vertical feet.
Average fitness: 3,000 vertical feet of gain per day
Above-average, recreational fitness: 4,000 vertical feet of gain per day
Endurance athlete: 5,000 vertical feet of gain per day
Elite endurance athlete: 7,000+ vertical feet of gain per day
Readers: Are these guidelines consistent with your experience? Please leave a comment below. I would appreciate some tweaking and/or validation.
Still not sure? Do a section-hike.
If you have never done a high route before and/or if your schedule is restrictive (e.g. a limited number of vacation days, must catch a Sunday flight for a big Monday meeting, etc), my recommendation is to attempt a section of a high route, starting and finishing at the same trailhead. If the experience was enjoyable, apply the data and your newfound skills to a point-to-point thru-hike the following summer.
Section-hikes have many advantages over thru-hikes. They:
Can be completed in less time, because they are shorter and usually easier.
Can be short-cutted or extended, if your actual progress is slower or faster than expected.
Are logistically simpler: drive a car to the trailhead, do a loop, and drive back. No costly or time-consuming shuttles.
The insistence on completing high routes in their entirety is lost on me. High routes are big step-up for most backpackers, and a section-hike is a more conservative and measured approach until they feel like second nature.
Readers: Please comment! How did you create a timeline for your high route, and how accurate was it?
The post It’s the vertical, stupid: How many days should I budget for a high route? appeared first on Andrew Skurka.
March 7, 2018
Ultralight Jerk: “Gift of laughter to a boring, anal retentive, and obsessive hobby”

Last October I was tagged on Instagram in the post below, by a handle I didn’t recognize, Ultralight Jerk. Despite being the punchline, I thought it was funny and creative, as were the other dozen posts that were live at that time. Ultralight Jerk has continued to plug away, and now has nearly 3,000 followers. I interviewed the hiker(s?) behind it to get a fuller story.
A post shared by ULTRALIGHT JERK (@ultralightjerk) on Oct 25, 2017 at 1:16am PDT
 Hair Goals
Q | What was the impetus for Ultralight Jerk, and has your motivation evolved since the start?
A | I don’t know what impetus means but it started because r/ultralight_jerk sucked and I knew it would do better on Instagram. We started out wanting to roast ‘celeb’ hikers, but it turns out that most people don’t know who Andrew Skurka is and that REI memes get mad likes.
Q | Oh, it’s “we”? How many are behind the curtain, and how do you guys collaborate?
A | Yes, the Ultralight Jerk is a brain trust of experienced and accomplished backpackers from across the U.S who met as a part of the first trial group for Ray Jardine’s blood cleanser. We do your finances, convince you to buy cars, take care of your pets, defend you from enemies abroad, ensure your food supply and run an unsuccessful hot dog cart in Des Moines, Iowa. The only thing we don’t do is hike….like, ever…
A post shared by ULTRALIGHT JERK (@ultralightjerk) on Jan 14, 2018 at 5:13am PST
Q | Why “contribute” in this way, rather than, say, share what you’ve learned, like so many others do?
A | Ultralight Jerk contributes the gift of laughter to what is otherwise the boring, anal retentive, and obsessive hobby of gram counting and internet debating. While Ultralight Jerk publishes to their own blogs, websites, and instagrams and enjoys the discussions around UL, it just gets so stale sometimes. ULJ is just injecting some fun into this snoozefest after enduring years of boredom at the hands of BPL. We are the new breed…of the 1″ inseam.
Q | Have you received much push back, or have you been wholly greeted as a breath of fresh air?
A | The response from the community has been largely positive, but there are some bad apples out there that think this platform is here entirely to make fun of certain hikers. We get a lot of requests to ‘burn’ so-and-so or to roast a certain well known hiker in very derogatory ways. There are also some people who seem sour that there is some kind of “ULJ insiders club” when really it’s just me trying to make people laugh.
A post shared by ULTRALIGHT JERK (@ultralightjerk) on Oct 18, 2017 at 11:21am PDT
Q | That implies you have some limits in the type of humor or subject matter. What would you consider “going too far”?
A | Ultralight Jerk is satire. It has limits and those limits have made a couple people go off and do their own distasteful ultralight meme pages where they had no limits (they all failed). We pick up on all the same things our readers and their friends joke about in their group chats, we just make it public. There are no limits on Buschcrafters. I’d like to publicly thank them for providing so many free laughs.
Q | Is UL jerk some part of your “adventurepreneurial” aspirations and you’ll monetize it someday, or are you committed to forever poking fun of those who have?
A | It really all depends on how the hot dog cart pans out….Des Moines is fickle about their encased meats. If that doesn’t work out I will turn to gear companies and become a paid shill i guess, seems to work well for the famous ones. As for continuing to poke fun of those who have? As long as people keep showing their impetus, we will be there to burn them. I seek no fame or pennies from this. As I write this, there’s plans to get UL Jerk themed slogan stickers made and all of the funds from them will be donated to a trail organization. We are clothed in the richest cuben fibers, what more could we want in life?
A post shared by ULTRALIGHT JERK (@ultralightjerk) on Dec 19, 2017 at 3:29am PST
The post Ultralight Jerk: “Gift of laughter to a boring, anal retentive, and obsessive hobby” appeared first on Andrew Skurka.
February 28, 2018
Review: Hoka One One Challenger ATR 4 || Easy singletrack + mixed runs


Hoka Challenger ATR 4
My shoe-de-jour changes with the season and the training cycle. Last summer while training for 100-mile mountain ultras and undertaking high routes I was most excited about the Salomon S/Lab Sense Ultra (my review) and La Sportiva Bushido (my review). In the lead-up to the Houston Marathon in January, I put hundreds of miles on the Hoka One One Cavu (my reivew). And, most recently, while recovering from Houston and building my base for 2018, I’ve been running several times per week in the Hoka One One Challenger ATR 4, in which I just surpassed the 300-mile mark.
Review: Hoka One One Challenger ATR 4
The fourth-generation Challenger ATR is consistent with the vision for the previous three: a well cushioned and versatile running shoe that is designed for trails but that can also successfully take to the roads.
With a romy toebox, breathable mesh upper, and generous underfoot cushioning, the ATR 4 could be an excellent hiking/backpacking shoe, too, although I did not test it for that.
Many of the old previous ATR specs apply to the ATR 4, too: breathable mesh upper, 31/26 mm stack height with 5 mm drop, mixed rubber/foam outsole with 4 mm lugs, and $130 price point. However, Hoka is learning as it goes, and with the ATR 4 it tried to remedy known fit and durability issues.
I have found the Challenger ATR 4 to be most at home on easy rolling singletrack. For the Boulder locals, I’m thinking of Mesa Trail, Betasso Preserve, Marshall Mesa, and the Reservoir. Because of its 4 mm lugs, it’s also become my go-to for bike lanes, pea gravel trails, and dirt roads that are muddy and/or snow-covered.
The Challenger is capable on gnarly trails, but there are better shoes for that application — its center-of-gravity is too high, its midsole is too insensitive, and rubber covers only half of its outsole. Similarly, the Challenger performs well on dry pavement, but its overkill due to the luggy outsole and structured upper. In between these extremes, or on runs that span the spectrum, it excels.
Its toebox is roomy but not clown shoe-like, and its midfoot overlays keep the foot comfortably secured. The midsole foam has a better balance of cushion and responsiveness than the classic Hoka marshmallow midsole.

On easy rolling singletrack like Marshall Mesa and on runs with equal parts road and hard trails, the Challenger ATR 4 excels.
Key product specs
Breathable double-layer mesh upper
Neutral support
Weight: 9.0 oz (M’s 9), 10.2 oz (M’s 11.5, verified)
31/26 mm EVA midsole
5 mm drop
MSRP: $130
More info/Buy now
Comparisons
The ATR 4 is the first Challenger that I have worn, so I can’t comment with first-hand experience on the iterative changes from the earlier generations.
Challenger ATR 4 vs Clifton 4
A better place to start is with the Clifton 4 (my review), since Hoka describes the Challenger as, “a Clifton for the trails.” The two shoes have identical lasts; their midsoles have similar consistency; and both are rockered.
But the ATR 4 is not just a Clifton with a trail-worthy outsole. The upper is fundamentally different, with less padding in the heel cup and tongue, a more robust toe cap, and more secure midfoot overlays. It fits differently — in the Clifton I ride over the inside edge, whereas with the ATR 4 I’m perfectly centered. Finally, in my size M’s 11.5 the ATR 4 is 1.1 oz lighter.
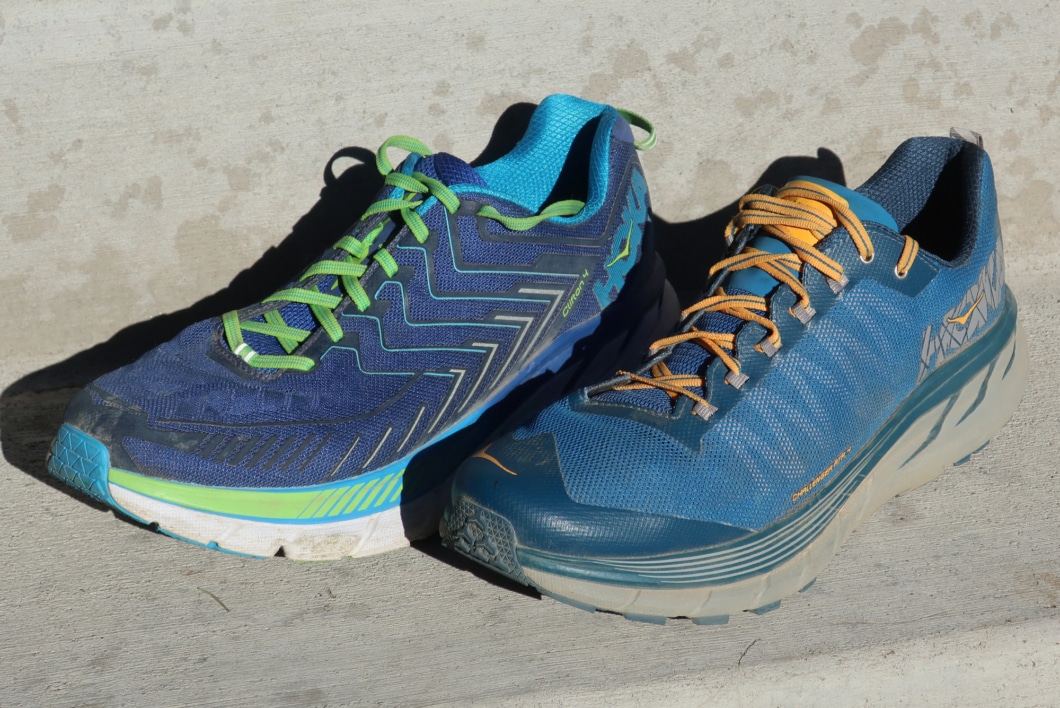
The Challenger ATR 4 (right) and Clifton 4 (left) share the same last and a similar midsole and rocker, but are otherwise very different shoes.
Challener ATR 4 vs Speedgoat 2
Despite its high stack height, I consider the Speedgoat 2 (my review) a full-on trail shoe. The Challenger ATR 4 is for a different application, with much better performance on roads and easy trails. It has a much roomier toebox, firmer midsole, and less sticky and aggressive outsole.
Fit
In my size 11.5, the Challenger ATR 4 is true to size. I am also an 11.5 in other Hoka shoes (including Clifton 2, Clifton 4, Speedgoat 2, and Cavu) and in models from Altra, Merrell, Salewa, and Salomon. In La Sportiva, I’m 45.5.
I have a narrow and small-volume foot, and feel that I’m at the lower end of the fit range in the Challenger ATR 4. The toebox is roomy, but not scarily loose fitting. And my midfoot is mostly secure when the laces are tight, although I will slide forward slightly on extended downhills.
Midsole
The first two Hoka models that I wore were the Clifton 2 and Speedgoat 2, both of which have very soft and forgiving EVA foam midsoles. It was classic Hoka, and what originally set them apart from other brands.
The three models I have tested most recently, however — the Clifton 4, Cavu, and Challenger ATR 4 — are notably firmer and more responsive. They’re not “thin,” however — they still have 30-ish mm of foam underfoot, more than enough to swallow gravel or to reduce the pounding on long road runs.
Overall, I prefer the “new Hoka.” The firmer foam feels less energy-sapping when I’m trying to run fast and more stable when I’m on uneven terrain.

The ATR 4’s midsole is firmer than previous Hoka models, but with a stack height of 31/26 mm from heel toe toe it is still generously cushioned.
Outsole
After 300 miles of wear, the 4-mm lugs have at least half their rubber left (except for at my landing and push-off zones, where they’re more worn), and no lugs have been ripped off. Frankly, the durability has surprised me, since the cumulative lug volume is unremarkable and the rubber is not branded.
The purchase on mud, consolidated snow, wet leaves, and ball bearing sand is decent, and more than adequate on rolling or flat terrain. On paved surfaces, the rubber is not annoyingly sticky, as in the case with the Vibram Megagrip on the Speedgoats, which sound as if they have dozens of little suction cups underfoot.

This photo was taken after about 150 miles. After 300, the 4 mm lugs have at least half their rubber left.
Upper
The double-layer mesh upper is moderately breathable, and so far shows no signs of abrasion or fraying. It is reinforced with more durable TPU around the toebox, which offers some bump-resistance as well.
Hidden between the mesh layers are midfoot overlays, which help to secure the foot. Without these, the shoe would probably allow for more lateral movement.

The breathable mesh upper and thinnly padded heel cup and tongue make for an airy and quick-drying shoe.
Aestheics
What the hell is happening at Hoka? No more marshmellow midsoles or obnoxiously loud colorways?
My review pair was a plesant blue and gray, with a dull orange accent used for graphics and the laces. I don’t feel like I need to run fast to wear this shoe, which can be comforting.
Room for improvement
Overall, I have really enjoyed using the Challenger ATR 4, and think that I will exhaust its usable lifespan. But for the Challenger ATR 5, I’d like to see two small tweaks:
1. The TPU pattern on the toebox should wrap cleanly around the perimeter of the toes. The “point” that extends over the ATR 4 toebox is stiff/boardy and interferes with the natural crease line. If it has a purpose besides aesthetics, I haven’t figured it out.
2. Replace the laces. The current linguine-shaped laces more difficult to tie than conventional laces and they are very susceptible to becoming twisted.

The TPU “point” on the toebox serves no purpose (as far as I can tell) but interfees with the natural crease of the shoe.
Questions about the Challenger ATR 4? Own them and wish to share your experience? Leave a comment.
Disclosure. This website is supported mostly through affiliate marketing, whereby for referral traffic I receive a small commission from select vendors, at no cost to the reader. This post contains affiliate links. Thanks for your support.
Additional disclosure: Hoka provided me with a review pair of ATR 4. If they sucked, I would have said so or told them privately, and would not have run 300 miles in them.
The post Review: Hoka One One Challenger ATR 4 || Easy singletrack + mixed runs appeared first on Andrew Skurka.


