
Andrew Skurka's Blog, page 36
June 21, 2018
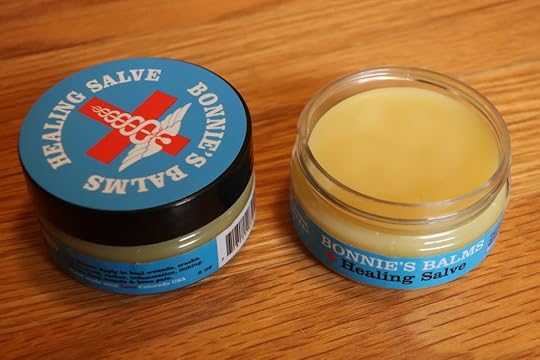
Bad business: Avoid Bonnie’s Balm
For a very long time I have argued that wearing so-called waterproof footwear is an ineffective solution when backpacking in wet conditions. Much better results can be had by minimizing the effects and aftermath of wet feet, instead.
Among my recommended strategies, I have advocated for the application of an oil- and wax-based balm to reduce maceration and to moisturize skin. For the past six years I specifically promoted Bonnie’s Balm Healing Salve, which worked well for feet and for other applications like chafing and dry, cracked hands. To improve distribution I sold it through my online store, and was happy to support another Colorado small business.
Sadly, due to recent events I no longer recommend Bonnie’s Balm, and I will no longer sell its products.
Alternatives
If you are seeking a Healing Salve-like product, my recommendation is to look elsewhere. Consider:
Joshua Tree Skin Care Climbing Salve or
Badger Foot Balm
Both of these products share similar ingredients and consistency with Healing Salve. If you have found other good options for treating wet feet, please leave a comment.
Explanation
Bonnie’s Balm produces good product. Unfortunately, the business is not reliable or trustworthy.
The company first went quiet in June 2017. My orders were not filled, and my emails and phone calls were not responded to. Bonnie’s voicemail was full. The website went down, because the domain name was not renewed and a squatter jumped on it. I thought it was weird that Bonnie’s would go out of business without informing its bigger accounts (I ordered about $2k of product each year), but it happens.
Surprisingly, Bonnie contacted me in April, explaining that she had health serious health issues after two black widow spider bites and informing me that she was up and running again. I decided to give her a second chance, and began to carry her product again.
Recently, Bonnie’s Balm has gone quiet again, however. My last communication with Bonnie was on May 30, when she informed me that an order (paid for with my business credit card) would “ship out tomorrow.” The product has not arrived. My emails to her on June 11 and June 14 have not been responded to, nor has the phone call I placed on June 19. Yesterday I called Chase to officially dispute the charge.
For her sake, I hope that Bonnie is not having recurring health issues. But that does not excuse the lack of communication from her (or about her, via an employee, family member, or friend). So I have decided that Bonnie’s Balm is not a company with which I care to do business, and recommend that you take your business elsewhere as well.
Do you know of a good substitute for Bonnie’s Balm Healing Salve? Leave a comment.
Disclosure. This website is supported mostly through affiliate marketing, whereby for referral traffic I receive a small commission from select vendors, at no cost to the reader. This post contains affiliate links. Thanks for your support.
The post Bad business: Avoid Bonnie’s Balm appeared first on Andrew Skurka.


June 12, 2018
Done! Pfiffner Traverse Guide


I spent most of last weekend at the dining table, making final edits to the Guide.
This morning I put the final touches on the First Edition of the Pfiffner Traverse Guide. It was a monstrous project and I’m thrilled to finally have it out there. The Guidebook alone is 23,000 words; the package also includes Mapsets and Datasheets for the Primary Route and for seven Section-hikes. Thankfully I enjoy the work, because on a per-hour basis it’s one of the most foolish undertakings in recent memory, not even accounting for the hundreds of miles of “research” that I had to do.
The Pfiffner Traverse Guide is available for immediate download. Those who purchased it earlier have been sent new download instructions.
The Pfiffner Traverse is a 76-mile high route that follows the Continental Divide and the crest of Colorado’s Front Range between Trail Ridge Road and Berthoud Pass, passing through Rocky Mountain National Park, and the Indian Peaks and James Peak Wilderness Areas. Forty percent of its length is off-trail, up to Class 3 in difficulty. The route drops below 10,000 feet only twice, and it climbs five 13,000-foot peaks.
It will take most hikers 6 to 10 days to thru-hike it; the seven recommended section-hikes range from 17 to 42 miles, suitable for long weekends, quick overnights, and adventurous trail runs. Continental Divide Trail thru-hikers can easily link up with it, as can be done further north with the Wind River High Route and the Glacier Divide Route. Bypasses and “extra credit” routes can be used to alter its difficulty and risk, and to reduce exposure to inclement weather.
Questions about the route? Please ask.

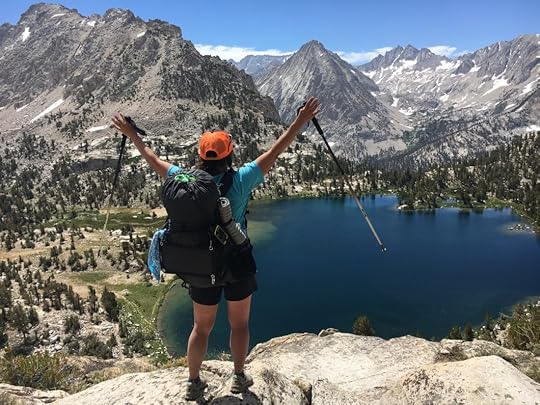
A lush wildflower-filled meadow in upper East Inlet.
The post Done! Pfiffner Traverse Guide appeared first on Andrew Skurka.
June 6, 2018
Preview: SPOT X || 2-way messenger with physical keyboard
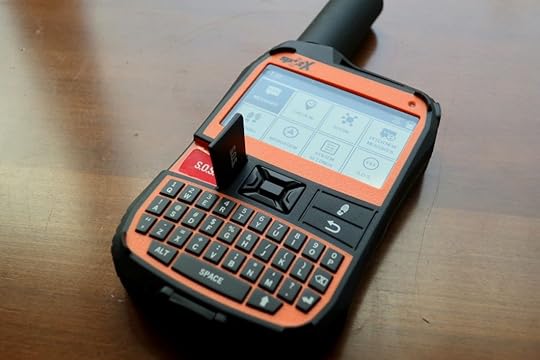

The new SPOT X is the first two-way messaging device from SPOT. It retails for $250 and weighs 7 oz.
SPOT revolutionized backcountry communication in the late-2000’s with its original device, the SPOT Personal Tracker (my review), which retailed for $170 (plus an annual service plan) and which could send three one-way messages: Okay, Help, and SOS.
The Tracker was less expensive to own and operate than a satellite phone. It was more functional than a PLB. And it worked deep in the backcountry, beyond the reliable range of cell phones. To this day, it remains the only piece of outdoor gear that my mother has encouraged me to purchase.
The Tracker was followed up in short order with the:
Satellite GPS Messenger, which was essentially a Gen2;
Connect, which could send 40-character messages when connected to a smartphone; and, finally,
Gen3 Satellite GPS Messenger, which was released in 2013.
But since SPOT’s last product release five years ago, Garmin entered the market and grabbed significant market share with its inReach devices (the SE+ and Explorer+, and the Mini), which provide an enormously valuable service that the Gen3 and earlier iterations did not: two-way messaging.
With SPOT’s one-way communication, you could only hope that your messages were transmitted properly to family, friends, or an emergency response team. With the inReach’s two-way service, receipt of messages is confirmed, and messages can be sent back to you in the field.
Preview: SPOT X
Last month SPOT finally released a product that competes directly with the inReach. The SPOT X is a two-way text messenger that retails for $250, weighs 7 oz, and features a 2.7-inch dot matrix screen and physical QWERTY keyboard. It looks like an orange Blackberry with an oversized antenna.
I have been given a SPOT X to use on trips later this month and in July, and will post a more in-depth review afterwards.

The SOS button is well protected with a cover.
Service plans
Like all SPOT and inReach products, the SPOT X requires a service plan. SPOT offers two levels:
Weekender ($20 per month, or $200 annually), with 25 free messages per month (or 300 total per year) and unlimited tracking; and,
Adventurer ($30 per month, or $300 annually), with unlimited messaging and tracking.
Both plans incur a $20 activation fee.
Unlike Garmin, SPOT does not offer a month-to-month plan, i.e. activate your service only for the months when you’ll use the device. For owners that need service for only a few months per year, the long-term cost of an inReach will probably be less.

The SPOT X is wider but thinner than the original DeLorme inReach SE/Explorer and the SPOT Global Phone. At 7 oz, it’s slightly lighter than the newer SE+/Explorer+, but twice the weight as the inReach Mini.
Pros and cons of the SPOT X
With the disclaimer that I have played with it for only a few minutes, there are a few things that I find immediately attractive about the SPOT X:
$250 MSRP, making it $100 to $200 less than the inReach devices;
Efficient text messaging as a standalone device; and,
A dedicated US phone number, allowing for easy messaging from any cell phone.
But I don’t think it’s necessarily a clear winner over the inReach devices:
Similar weight as a standalone inReach SE+/Explorer+, and twice the weight of the Mini;
Similar navigation functionality as a standalone Mini, but no on-board mapping like with the SE+/Explorer+;
Does not include a powerful mapping app like Earthmate;
No month-to-month service plans; and,
No weather forecasting, although I wonder if someone will soon launch a WX2InReach-like service.
With more certainty, I can say that the SPOX gives consumers another option, and that is an inherently good thing.
Questions about the SPOT X? Leave a comment. I’ll answer it here, or include it in my review.
Disclosure. This website is supported mostly through affiliate marketing, whereby for referral traffic I receive a small commission from select vendors, at no cost to the reader. This post contains affiliate links. Thanks for your support.
The post Preview: SPOT X || 2-way messenger with physical keyboard appeared first on Andrew Skurka.
June 5, 2018
Book review: Pursuit of Endurance, by Jennifer Pharr-Davis
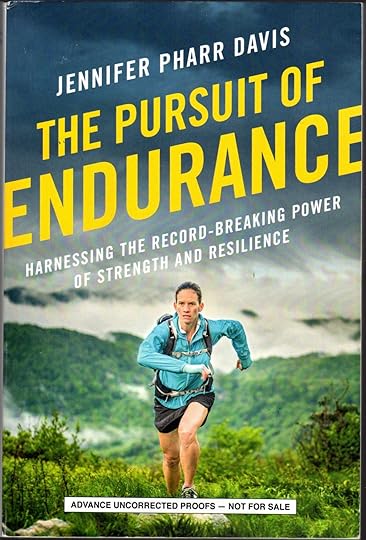

Cover of media copy
I assumed The Pursuit of Endurance: Harnessing the Record-Breaking Power of Strength and Resilience, by Jennifer Pharr Davis, would be about her record-breaking hike of the Appalachian Trail in 2011, when she (with the help of her committed husband, Brew) finished the route in a mind-blowing 46.5 days, an average of about 47 miles per day. It’s the obvious story to tell, and the description by publisher Penguin Random House seemed to support my expectation:

Screenshot from the publisher Penguin Random House
Review: Pursuit of Endurance
In reality, some of Pursuit is about Jennifer and her feat, but most of it’s not.
For those wanting a play-by-play of her epic, Pursuit will leave you wanting more. It’s written in the first-person and infused with personal anecdotes, but Jennifer dedicates only one chapter (out of eleven) exclusively to experience, and those pages are shared with biographical context that offer a “why” and “how” for the “what.”
In Pursuit, Jennifer mostly writes as an insightful journalist, not the stellar athlete that she is. It may have been more aptly titled, Profiles of Endurance, as she flies around the country to interview and share the stories of a dozen long-distance superstars with ties to the Appalachian Trail.
The who’s-who list includes Warren Doyle, David Horton, Scott Williamson, Andrew Thompson, Heather Anderson, and finally Scott Jurek, who broke Jennifer’s fastest known time (FKT) in 2015 and who released his own book about it in April, North: Finding My Way While Running the Appalachian Trail. Each of these individuals get their own chapter.
The three remaining chapters are dedicated to the history of speed records generally and on the Appalachian Trail, the psychology and science of endurance (which rely on interviews with her former professor, Dr. Czech, and of Shawn Bearden of Science of Ultra), and the future of FKT’s.
At the end of the first chapter, Jennifer more accurately describes the thrust of her book:

Scan from chapter 1
While it was not the approach that I expected, I bet it probably worked better for Jennifer. I imagine that retelling her AT FKT proved difficult: within a few months of her finishing, many of the details that make for a rich read were probably foggy or forgotten entirely, and sadly they were not captured at the time by a chronicler or camera crew. I also wonder if her head and heart were no longer into it — she and Brew were probably ready to define themselves in another way.
Her approach probably worked better for Pursuit, too. By returning to FKT’s foremost as a researcher and writer, Jennifer was able to produce a personable, colorful, interesting, and sometimes funny read, rather than a tediously boring and shallow trip report. It turns out that Jennifer is a skilled story-teller, and she’s able to get at the heart of what drives her subjects and to effectively share their stories. Perhaps ironically, Pursuit will remain relevant far longer than most speed records.
Meet Jennifer at Neptune Mountaineering, June 10
Jennifer will be speaking at Neptune Mountaineering in Boulder on Sunday, June 10 at 5pm. Event details.
Brew and their two children will be there as well, and afterwards Amanda and I will likely to be heading next door to Southern Sun or Under the Sun for dinner and a beer. Please join us.
Disclosure. This website is supported mostly through affiliate marketing, whereby for referral traffic I receive a small commission from select vendors, at no cost to the reader. This post contains affiliate links. Thanks for your support.
The post Book review: Pursuit of Endurance, by Jennifer Pharr-Davis appeared first on Andrew Skurka.
FAQ for female backpackers: Menstruation, #1 & #2, group dynamics, and clothing & gear

Credit: Mary Cochenour
Jessica Winters and Mary Cochenour, who will be helping Alan Dixon and me guide trips next month in Rocky Mountain National Park, recently fielded questions from our clients about a few female-specific topics, including menstruation, #1 and #2, group dynamics, and clothing. Rather than share the answers only with our groups, I thought they’d have greater value if shared here. Reader beware: the text is not as heavily edited as most other posts; and some answers include responses from both Jessica and Mary, which explains the change in writing style and/or advice.
Menstruation
Q | How should I keep a menstrual cup sanitary while backpacking. Also, should I dig a cathole and bury the blood?
A small cat hole to dump the menstrual cup is good. Clean and rinse with water. Make sure your hands are clean when using menstrual cup to not cause infection.
Q | I’m really new to backpacking, and I’m a little nervous about the whole thing. But most especially, what’s the best way to handle if it you’re on your period during the trip?
So glad you asked that question; it’s one I get often!
There are generally two ways to deal with your period in the backcountry:
menstrual cup or
tampons
1. The menstrual cup is not something I can give personal advice on because I haven’t taken the time to test it out yet. But what I am hearing is that it can be great if you find one that FITS you perfectly. They make different sizes etc, depending on your flow, birth history, etc. Take this menstrual cup quiz to help you determine which brand and size might work for you. The positive feedback I am hearing is that there is no waste to carry out and you can leave the cup in for up to 12 hours. To clean it out, simply dig a cat hole and dump the waste there. Then you rinse it with water or wipe it out and reinsert it (some people have not liked the cleaning process). The important thing to know about the cup is that you ought to try it out for several cycles before you take it on a backpacking trip, so you can guarantee that it works for you, that you got the right fit, and that you like it.
2.Tampons. I am still old-school, cardboard-applicator Tampon user. They are bulky to carry (unless you take tampons without applicator) and you HAVE TO carry out the waste. For a waste bag, I get a dark-colored dog poop bag from the local dog park and use that as my waste bag to carry out used tampons. I wrap my used tampons in toilet paper and put it inside the dark colored dog poop bag and then shove that in the bottom of whatever garbage bag I have going, usually another ziplock. Some people sprinkle a little baking soda in the waste bag, however, I never bother with that. Another option for waste, is to use a zip lock and wrap the the outside in duct tape so you can’t see what’s inside. Some women also prepare their ziplocs with a little bit of salt to carry their waste tampons in too.
I use a small light weight zip repac bag. I stash my tampons in there and carry another ziploc in it to put the used tampons in. I will keep them in the same repac bag throughout the day until I have access to my larger ziploc garbage and then throw them in there for a fresh garbage ziploc for the afternoon or next day.
Last year on the John Muir Trail, one woman in my group continued on her active birth controls pills with the hopes of skipping her cycle, but it didn’t work entirely, she still had some spotting.
Hope this helps and if you need more details on any of the above just ask! Also, if anyone else has anything to add or personal insight on the menstrual cups, please chime in!
Outs
Q | What are the best materials for pee rags?
A cotton bandana is nice for a pee rag. It pulls moisture off the sensitive area and rinses out easily.
A pee rag works great, you hang it back on the pack, the sun really does help killing any odors and then rinse out at the next water. I know it sounds kind of weird and maybe gross, but it’s really not bad at all. I find this method waaaaayyyy better than drip dry so my clothes don’t smell like urine and the crotch is dry. Way easier to wash a bandana than your shorts everyday.
I agree, the pee rag is the way to go if you want to keep your shorts from smelling like you peed in your pants.. And for sure hang it off the pack. It never smells. At least I don’t think it does. Pick a darker color so you don’t see any pee stains. I you’re hiking a specific trail, you might check the corresponding facebook group and see what color bandana the women use. For example, dId you know that on the John Muir Trail, women fly a teal pee rag bandana off their pack? On the Colorado Trail, you can use a green bandana. This simply lets other women hikers know that your are part of the women’s hiking community for that trail, and it’s a conversation piece to make it easy to introduce yourself to other women hikers..

Credit: Mary Cochenour
Q | Are there quick/easy ways to wee (I think there are some devices to wee without taking your trousers down etc). Drink less (also not great). Anything else? Also, any ideas for going to wee in the middle of the night – when you might not want to leave the tent???
Drinking lots of water is essential. Peeing just is par for the course. There are lots of female pee devices such as She Wee and Go Girl to name a couple. You can bring a wide mouth pee bottle into your tent with you to pee in through your device.
Drinking less water is not an option. You have to stay hydrated especially at elevation. I am with you though, drinking water makes me pee a ton. It’s annoying. Try to find some shorts that are stretchy enough that you can just pull the crotch over to the side so you don’t have to pull them down around your ankles when you pee.
A gallon sized ziplock bag can also be used to pee into in the middle of the night in your tent. The advantage is that the opening is wide and it is flexible to pack and weighs almost nothing. The disadvantage of the gallon zip lock is that it is flexible and you could make a mistake and spill. If you use a ziplock, you would leave it outside your tent after you pee in it. Whatever device you choose to bring, practice in the shower with it a couple of times so that you are good at it when it comes time to use it in the tent.
I just bought a p-style device. I’ll use and get back to you. I don’t like the idea of carrying it, and that’s why I’ve never had one, But I thought I’d try it this year since I get asked about it so much.
Q | Skurka’s gear list template recommends two squares a day for toilet paper? WHAAAAT?!?!?
First, peeing. Using a pee rag is great for taking care of wiping after peeing (see above answer on cotton bandana)
Second, pooping. Maybe you’ll use a bidet and won’t use any toilet paper at all! For a bidet, you can use a plastic salad dressing bottle, or a medical bottle that is used to flush out wounds. Something that has a small opening and that is squeezable that you could build up some water pressure to spray yourself with.
Maybe you’ll find that 2 squares and natural materials are enough to wipe up with. Or, maybe you’ll need to use a little more toilet paper than the 2 squares. Maybe you’ll want a wet wipe to finish it off, and THAT IS OK!!!
Do whatever you feel necessary to avoid a yeast infection or UTI, etc. Toilet paper can be bulky, but it really doesn’t weigh much. So if you are uncertain about your usage of TP, I’d suggest bringing a partial role of TP on the trip, bring a bidet bottle if you want to try that out, bring a few dried-out wipes that you can rehydrate when you need them.
I’d encourage you to experiment with Andrew’s 2-squares method — practice it on the trip. But until you get your TP system dialed in, bring enough toilet paper to make yourself feel at ease about it.
Just make sure to pack out the used paper (I bring a dark-colored dog poop bag from the dog park to haul out my used TP).
Clothing & gear
Q | What’s the best underwear for backpacking?
I don’t wear underwear if my shorts have a lining. But if you really need a pair, soft, synthetic boxer briefs are nice because they don’t ride up as easy.
I like to wear underwear, they save my shorts from getting too funky. You can buy expensive outdoor underwear (patagonia, etc.), but I swear by $5 Fruit of the Loom seamless, tagless microfiber panties from Target. I like a bikini cut but I don’t have issues with underwear riding up. You could chose a boy cut brief if you think they might ride up. I’d try them out in town before the trip though to make sure they are comfortable.
Q | I am having trouble finding a sports bra in my size that does not have a clasp in the back. Is a clasp irritating when you have your backpack on?
I cannot give you first-hand information on this as I wear sports bras without a clasp. However, I did reach out to an all women backpacking forum and there were NO responses saying that a sports bra with a clasp was irritating while wearing a backpack. Several responded that it was not a problem at all.
Athleta and lululemon have a HUGE variety of athletic sports bars that hold everything in place without clasps.
Q | What are your favorite lightweight clothing brands for women? It seems like slim pickings.
A: Patagonia. Icebreaker Merino Wool base layers. Smartwool. Outdoor Research, lululemon swiftly tech line is great. Montbell, Marmot, Oiselle running shorts because they come in different length inseam and that is such a personal preference. Sierra Designs. My Trail Company.

Credit: Mary Cochenour
Relationships & group dynamics
Q | Apart from divorce, what to do about a wife who believes she requires a toilet and shower?
Start with a single over nighter that’s not too hard. That way on day 2 you can hike out and a daily shower hasn’t been missed. Good food and beverages help set the mood from a stunning campsite. Make it super beautiful, fun, or romantic even. Find a place to go that has a privy or dig a nice hole behind a downed tree to sit and hang your bum off one end that makes it easy to go #2 in somewhat comfort!
Bring wet wipes, so she can clean up at night before going to bed. You can wipe your entire body down with a wet wipe or two and feel pretty clean. Plan hikes with an abundance of lakes so that she can swim every day, swimming basically feels like you took a shower..
Scrap your UL plans and carry more clean clothes that she can change into after a swim. A fresh pair of underwear every day goes a long way for people who don’t want to be dirty. Absolutely.. Do not hesitate to bring comfort items!
I’ve got a nephew who believes the same thing, so this is certainly not gender specific! The simple truth is not everyone likes to camp and backpack. I think you have to decide if you think it’s possible to change her mind, or like in my nephew’s case, just accept that she does not enjoy backpacking without a shower and toilet. Let me give you an example. I cannot stand sewing, etc. Literally, there is NOTHING anyone can do to make me like sewing. I would be pretty annoyed if my spouse kept trying different things to make me like sewing. You have to assess the situation and see if you think you can help her like it or if it’s just something she does not want to do.
So as an alternative, how about you meet her halfway and do hut-to-hut trips..
In America: High Sierra Trail, Presidential Range New Hampshire, Colorado hut system, Rogue River Trail lodge to lodge.
Abroad: Tour Mont Blanc, Nepal — three passes loop, Torres Del Paine, Machu Pichu, Peru, Milford Trek New Zealand. Iceland.
Q | What can guys do to make women feel safer on organized trips where the party members are most likely strangers and can be mostly male? What are the primary sources of apprehension? What can the trip organizer do to make every gender feel safer?
If possible, organize a meet and greet before your trip. If not possible, start a facebook page or event just for your group to post bios so people can get to know each other beforehand.
Another consideration could be cultural advantages and disadvantages. Learn about the people that will be on your trips. And really try to understand your own biases.
Having been the only woman on several trips, the major apprehension is that I won’t be able to fit in, that I’ll be left out, no one will take me seriously. Including women in group decision making and conversation would go along way in making a woman feel comfortable in an all male group setting.
Assume she can do whatever the men in the group can do.
Don’t underestimate her knowledge and experience.
Don’t judge her for doing something a little differently than the males on the trip, there’s probably a good reason for it.
Ask her if she needs help before stepping in and helping her out, sometimes I find I have to rely on finesse to get something done and it takes just a bit longer than muscling through it. I’ve had situations where men, trying to be kind and thoughtful, jump in and help when I really just want to work through it on my own and I need a second longer to get it done.
If other participants are being derogatory toward the female(s) on the trip, it’s your job as trip leader to ask them to stop. If you hear other participants using the C word, or calling someone a pussy, just ask them to use some other word. Also if someone is talking about women like objects, talking about women’s bodies for example, take them aside and tell them to stop.
Don’t talk about her body or sex.
Give her some space, physical space, so she can use the bathroom, change her shirt, take a dip in a creek, washout her clothes with some sense of privacy.
Plan to take a little longer bathroom breaks if there are females on your trip. Don’t make a comment about it. Pick a stop that has trees or some rocks to hide behind so she have some privacy when going to the bathroom.
If there is actually fear for safety while in the field, understanding fear and where it comes from literally in our nervous system to protect us and releases chemicals for fight or flight. When there is no real danger, however, those chemicals inhibit our ability to respond effectively and think rationally. So by understanding that it’s possible to actually talk yourself out of being afraid and bypass the nervous system can provide a sense of safety and well being. This is not necessarily an easy concept to do and can take practice. Talk about what fears might be regarding safety beforehand that could come up in the field. Wildlife, weather, etc.
Q | As a female, how do you deal with discrimination in regards to gender and/ or age?
It’s still definitely a male dominated pass time but more and more women are getting outside and we are equally as tough if not more… I think many women with a passion in the outdoors have felt discriminated against at one point or another. Myself included. I continue to advocate, learn and teach!!!
I join a lot of female only facebook groups to converse with women about backpacking.
Ladies of the JMT
Women of the Colorado Trail
All Women All Trails
Women of the PCT
Pacific Northwest Outdoor Women (pending where you are located)
I also follow awesome female role models on Instagram. Famous and non-famous people.
It’s comforting to ask questions in an all female discussion group. It also helps you realize that more and more women are out there participating in the outdoors, so it gives a sense of belonging to talk to and learn from other women. I also do a lot of women only trips.
I guess by surrounding myself with other women in the outdoors I’ve been able to minimize my exposure to any gender discrimination in the backcountry.
I have been harassed on the trail, including having a male stalk me in the backcountry for an entire summer. It was scary, unnerving. I dealt with it, but I am still not sure how I managed that situation entirely. Wish I had more insight to share.
Other
Q | How to best do cleanup/keep everything hygienic when having sex on a trip?
SEX. Most people are worried about getting a UTI after having sex on trail. You and your partner could wash up BEFORE you have sex. Wash your genitals and your hands BEFORE having sex. I know, not very spontaneous. You could also ask your partner (if he is a male) to wear a condom (nobody likes that answer). After sex, clean up with wipes, go pee and then find a nice lake to swim in. You can also add cranberry pills to your daily routine.
Have more questions for Jessica and Mary? Leave a comment.
The post FAQ for female backpackers: Menstruation, #1 & #2, group dynamics, and clothing & gear appeared first on Andrew Skurka.
June 3, 2018
Tutorial: How to predict backcountry weather conditions || Methods & sources for short & long trips


Lost Tribe Lakes in Colorado’s Indian Peaks Wilderness after a violent afternoon monsoon storm
I have said this before, and continue stand by it: there is a right way to backpack: equip yourself with the gear, supplies, and skills that are appropriate for the conditions and your trip objective.
Among the conditions that I consider (there are about 10; view the full list), the weather — specifically temperatures, precipitation, humidity, and wind — has an outsized role on my preparations, because it:
Affects several major systems, including my clothing, shelter, and sleep; and,
Undergoes monthly, weekly, daily, and sometimes hourly variations.
By comparison, other environmental and route conditions have a narrower impact and/or are more predictable. For example, the presence of problem bears affects only one item — my method of food protection; and throughout the summer I expect heavy tree cover on the Appalachian Trail, and intense sun exposure above treeline in the Rockies and High Sierra.
How do I familiarize myself with the weather conditions that I will likely encounter on a backcountry trip? In this post I’ll share my methods and sources.
Challenges
It’s easy to find the weather forecast, seasonal averages, and daily records for population centers. The information is available from multiple sources, including the National Weather Service, The Weather Channel, and local news stations.
Accurate data for backcountry locations is more scarce, because:
Fewer weather stations have been installed in remote locations; and,
Mountains make their own weather, causing conditions to vary significantly with elevation and geography.
For example, it’s considerably warmer and drier in the town of Nederland, Colo., than atop Arapaho Peak, which is just 8 miles to the west-northwest but 5,000 vertical feet higher and atop the Continental Divide, which catches storms that push west through Colorado. Nederland is also drier than Winter Park, which sits at a similar elevation but which is on the wetter west side of the Divide.
Weather that matters
When I look at weather data, I’m interested mostly in temperature and precipitation. More specifically:
Temperatures: Average high and low, and extreme highs and lows; and,
Precipitation: Frequency, amounts, and patterns.
Humidity and wind are also important, but it’s more difficult to find this data outside of a short-term forecast. So I run with some assumptions:
Locations east of the 100th Meridian and coastal areas in the Pacific Northwest and Alaska are humid.
Locations west of the 100th Meridian are dry, except when storms roll off the Pacific (mostly between November and April).
The plains are the windiest region in the country. Ridgetops and peaks are wind-prone, too, especially when storms are passing through or when weather systems are changing.
If I can find a protected campsite (among natural wind breaks like trees or canyon walls), wind is usually not a significant factor at night.
Considerations for trip length
For shorter trips, I base my planning around weather averages and normal extremes, and then tweak my selections last-minute based on an actual forecast. Conditions are most likely to be average, but I need to be prepared for abnormal weather, too.
On longer trips, I expect average conditions overall, but more extremes. For example, on a three-month thru-hike, I might experience 8 weeks of average conditions, two weeks of abnormally wet and cold conditions, and two weeks of abnormally warm and dry conditions. Overall, the conditions were average, but I saw more variability than I would have on a shorter trip.
How do I define trip length? A “short” trip is anything less than about 5 days, which is the normal outer limit of my trust in weather forecasts. Between 5 and 10 days, forecasts can be suggestive (e.g. a storm front will arrive in about a week) but I take them with a grain of salt. A “long” trip is anything beyond 10 days, when the weather becomes anybody’s guess.
Short-term planning
The night before I depart for the backcountry (and sometimes even the morning of) I always get a weather forecast. Knowing the weather will not change the weather, but it may change my decisions, like where I camp and the boldness of my route.
My preferred source of information is the National Weather Service. Yes, I still believe in our institutions.
The forecast for the town closest to my route will not necessarily be relevant, so instead I get a “point forecast” by clicking on a more specific location on the embedded map. Depending on the route, I may grab several forecasts, like for high and low points, and for opposite sides of a weather-making divide.
As of the afternoon of June 1, here’s the forecast for Grand Lake, Colo, the gateway town to Rocky Mountain National Park on the west side:

But along the Continental Divide Loop at 12,000 feet, where I’d rather be hiking, the forecast is more severe. The daytime highs will be 15 degrees cooler, and this weekend there is a higher chance of rain and even snow:

To better understand the timing and severity of inclement weather, I may look at the Hourly Weather Forecast, listed under “Additional Resources.” I find this graph to be more useful than vague descriptions like “chance of rain showers, mixing with snow after 9 pm.” I sometimes will also read the Forecast Discussion, which gives more color and macro context to the data.

In addition to NWS, several other resources are worth mentioning. Some are relevant only for particular seasons or locations.
mountain-forecast.com
OpenSnow
Avalanche information centers, e.g. CAIC
Summit stations, e.g. Mt. Washington Observatory
Long-term planning
My experience is that short-term forecasts are not always spot on, but that they’re usually accurate enough to assemble a proper kit and to set trip expectations. For example, the forecast may underestimate the amount of rainfall, but it was still predicting rain, and so I would have taken my rain gear and an appropriate shelter.
But normally I can’t wait until the last-minute to gear up. For example, if I plan to leave after work on Friday, I’ll want to pack earlier in the week. And if I were thru-hiking the Pacific Crest Trail, I couldn’t wait until the day before to purchase my gear, especially since some cottage companies have wait times of several months.
Where exactly do I find seasonal averages?
National Center for Environmental Information (NCEI)
For most of the country, I start with the National Centers for Environmental Information (NCEI), a division of the National Oceanic And Atmospheric Administration (NOAA). More specifically, I dig into the monthly climate normals for its COOP stations from 1981 to 2010, using its:
Search tool, or
Mapping tool.

The intuitiveness of both tools needs improvement, but they’re generally an improvement over what was provided by the Regional Climate Centers before the information was consolidated under NCEI a few years ago. For example, the Western Regional Climate Center’s search tool had not been fundamentally updated since the early-2000’s.
To retrieve the desired data from NCEI, you may have to play around with its tools for a while. Hint: Find a relevant COOP station, add the data to your cart, and “checkout.” It’s free, and you’ll receive an email with a download link. The CSV or PDF file will contain data like this:

SNOTEL
The Natural Resources Conservation Service (NRCS), a division of the Department of Agriculture, operates over 800 automated data collection sites, primarily in the western US and Alaska. Data from the Snow Telemetry (SNOTEL) Network is used for water supply forecasting, maps, and reports.
To find SNOTEL sites, use CalTopo and turn on the “SnoTel Sites” layer. Then find one (or a few) close to your route.
SNOTEL stations record and monitor temperature, precipitation, and snowpack. To retrieve temperature and precipitation data, I like to use its Report Generator 2.0.
California
The state of California has its own monitoring system for weather, snowpack, and river and reservoir levels, managed by the Department of Water Resources. Some states may have a similar program, but I think it’s probably unique — it’s expensive to install and operate. Start with the station locator map, and work with the tools provided to get useful data.

Data adjustments
Temperature and precipitation normals that are retrieved from NCEI, SNOTEL, and California are station-specific. If these stations are close but not on your route, adjust the data to make it more relevant.
Temperature. For every 1,000 vertical feet of elevation change, adjust 3 to 5 degrees F — 3 degrees for humid climates, 4 degrees for semi-arid, and 5 degrees for arid.
Precipitation. Rainfall and especially snowfall increase exponentially with changes in elevation and geography. Locations that are higher and that are on the “wet” side of a major divide will receive significantly more rainfall and snowfall than lower locations in the rainshadow of that divide.
Questions about my methods and sources? Do you rely on different ones? Leave a comment.
The post Tutorial: How to predict backcountry weather conditions || Methods & sources for short & long trips appeared first on Andrew Skurka.
May 31, 2018
Race report: BolderBoulder 10K || 33:47, 27th place
BolderBoulder
Official results
My data: official splits, Movescount, Strava
Intro
Being a professional runner sounds dreamy, but one advantage of being merely a recreational runner is that you can define your running, instead of running defining you.
For the past four months I took full advantage of this liberty by finding a new approach that allowed me to continue training everyday and occasionally satisfying my competitive fix, but without needing to run 80 to 100 miles per week or to set aside two to four weeks for recovery after each race, which had been my MO since late-2014.
It may seem out of character that my spring season climaxed with a 10K road race that finished just two miles from my front door, but it worked: I’m more enthused about running than I’ve been since last summer. It has no sense of work — it’s been all play.
BolderBoulder
To describe the BolderBoulder as a local 10K doesn’t quite do it justice. With 50,000 participants it’s one of the largest races and largest Memorial Day events in the country. It attracts top national and international talent for both its Citizen and Pro races. And it’s hosted in Boulder, a small city with a rich running history that looks its best at this time of year — it’s so damn green, and the weather is usually ideal.

Getaneh Tamire of Ethiopia (left) leads the men’s field at Mile 4. He ran the next two miles at 4:20 pace and finished in a remarkable 28:18.
Rust busters
This training cycle began in late-February, five weeks after the Houston Marathon. It was enough time to recover fully, enjoy a few weeks of light running, and craft a new plan with David Roche, who has been coaching me since December 2016 and who I adore as both a coach and person.
We decided that BolderBoulder would be the peak race of the cycle, figuring that:
It was a sufficiently worthy objective;
Training properly for it would be both feasible and manageable — it was 3 months out, and wouldn’t require more than about 60 miles per week; and
My fitness could be leveraged into a more ambitious undertaking in late-summer if I had renewed interest.
I had not raced a 10K in seventeen years, when I finished 7th in 31:45 at the 2001 ACC Track & Field Championships. And I had not raced anything shorter than a marathon since 2008, when I ran an after-hours 5K at the Duke Invitational in an unofficial 16:08.
So we added two shorter races to help break the rust: Dash & Dine, a local after-work 5K on a slow course; and a 3K at the inaugural Frank Shorter Track Classic. It proved wise: hard solo workouts cannot replicate the hurt of a true race. If it’s been a while since you body went “there,” it can be a shock to the system.
I ran 16:27 at Dash & Dine (5:17 pace) and 9:14 at Frank Shorter (4:57 pace), which at sea level would convert to 15:53 and 8:55, respectively. Both performances were consistent with my training at the time, and boosted my confidence going into the main event.
The 3K was the more notable of the two rust-busters. I closed in 64 seconds for the final 400 meters, holding onto third. Trail Runner Magazine was there to witness it, and to record a #proudcoach afterwards retelling the homestretch sprint (scroll to the fourth screen in the embed).
A post shared by Trail Runner Magazine (@trailrunnermag) on May 21, 2018 at 7:22am PDT
Predictions
In a tutorial last year on creating a pace chart for an ultra marathon, I discuss several methods for honing in on a goal time. But even with good data, the projections will always have a large plus/minus element, in the range of several hours for a 100-miler.
By comparison, establishing goal times for road and track races is simple and exact. The night before BolderBoulder, I predicted a finishing time between 33:30 and 34:00.
A post shared by Andrew Skurka (@andrewskurka) on May 27, 2018 at 7:32pm PDT
I finished in 33:47. Talk about knowing yourself.
To make this prediction I relied heavily on Jack Daniels VDOT Running Calculator, which generates “equivalent” times based on a race result, factoring for temperature and elevation if you wish. The equivalent times are no gimme — they just indicate what’s physically realistic if your head is into it.
In my situation, Jack was saying that my:
2:28:24 at the Houston Marathon would convert to 33:13 in Boulder on a comparably flat course;
16:27 at Dash & Dine 5K would convert to a 34:08, if my fitness hadn’t improved in the final 3 weeks of the training cycle; and,
9:14 at the Frank Shorter 3K would convert to a 33:16 on the track.
The BolderBoulder course has 272 vertical feet of climbing and finishes 80 vertical feet higher than it starts, which I figured would cost me about 30 seconds total, or 33:46. Subtract 15 seconds for a “good day” and add 15 seconds for a “slow” day, and I got a range of 33:30 to 34:00.

The race
Wow, we’re 800 words in already and the gun has not even fired yet.
I left the house at 6 AM and arrived at the starting area at 30th and Walnut about 20 minutes later. I had more than enough time to stretch out, stride out, and empty the GI one final time before finding a spot a few rows back from the start line, strategically to the left of four frat boys in costumes.
Settling in
Among other A-wavers I recognized Clint Wells, who was a standout runner in the mid-1990’s at CU and who remains competitive today, but no one else, and I therefore thought the race would be a solitary affair. Thankfully, that turned out not to be the case, because around the 1-mile mark I packed up with David Glennon, a local 37-year-old with similar times to me, most recently a 2:26 at California International Marathon in December.
A 10K is not a long race, but it still requires patience and prudence. I settled into a natural pace within a city block, and sat on the shoulders of other runners whenever possible, letting them deflect the morning breeze. I knew that the race wouldn’t really begin for another 15 or 20 minutes.
BolderBoulder is slow and difficult for two reasons: its elevation, at one mile above sea level; and its vertical profile. It subtly climbs 100 vertical feet in the first 2.5 miles and then rolls for another 1.5 miles, hitting its high point just after the 4-mile mark. Miles 5 and 6 are fast, but you can’t wait that long to push — you’ll never make up the time lost in the first four miles.
As a result, it seems that you’re hurting badly for more of BolderBoulder than other 10k races. For example, just 12 minutes into the race my heart rate was already at 95 percent of its maximum (172 bpm out of 180), and it remained at or above that level for the next 21 minutes, except for a 3-minute break during a half-mile downhill when it bottomed out at 93 percent (167 bpm).
I thought the course had just been rough on me, but when Steve and I watched the Pro Race from the top of Casey Hill later in the day, we were both surprised by how rough the pros looked at the 4-mile mark. Some seemed to be hurting even worse than I was at that point.
Neighborhoods
When we finished the first climb and turned south off Vista Drive onto 19th Street, I was grateful for the break. The pace seemed unsustainable and I was starting to doubt myself. The climb resumed at the corner of 19th and Balsam, but I found this pitch more tolerable: a few people were starting to come back, and I knew that an extended downhill was in my near future.
David and I stayed together, yo-yo’ing in response to each other and to the course. It wasn’t deliberate, but I found strength and comfort in being near him, and I bet the feelings were mutual. It was unchartered territory for both of us, and being near a similarly capable runner helped to affirm our pace and strategy.
Downtown
My Suunto Ambit3 Peak was reporting an average pace of 5:28 when I crested the high point near Casey Middle School, which put me on pace for a 34:00 finish, the upper bound of my goal time. That gave me hope: with two downhill miles ahead of me, I was certain that I could at least maintain this pace, if not pick it up.
And pick it up we did. David and I ripped into downtown, averaging 5:19 for mile 5. And we carried the momentum back towards Folsom Street, slowing slightly to 5:24 pace on the flatter gradient east of downtown.
Folsom Field
As I crossed under the 9k banners I decided to start letting it out. Only 2.5 laps around the track, that’s it. I passed David for the final time; he would finish 4 seconds behind me.
Immediately after crossing Boulder Creek and just before turning onto Stadium Drive, I vaguely recall a trim male in a black singlet passing me on the left. The move was too strong for me to cover, and I remember thinking that he clearly had too much left in the tank. I would learn at the finish line that this was Galen Burrell, occasional training partner and son of famed Buzz Burrell. Apparently he had stayed within 10 or 15 yards of David and me the entire time, then out-kicked us both. Classy.
Folsom Field is a fantastic finish line location, but the scene was subdued for us. It was 7:30 AM and the stadium was mostly empty. I know it’s entirely differently for the Pro race, and I’d like to be in there one year for the elite finish and the noon flyover.
My finishing kick was unexceptional but I held my own. If I’d known that Galen was just up ahead or that I was in the money, maybe it would have been different. Otherwise, though, I was more than happy to take my 33:47 and stop the hurt.

When I returned to the house at 8 AM, Amanda was still drinking coffee and Oden was just about to lay down for his morning nap.
Notes for next time
I don’t know when the stars will align again for BolderBoulder, but here are a few thoughts:
Logistics
5AM wake-up, one cup of coffee, 16 oz of water, one protein bar, and an extra “cup” of coffee (100 mg) at 6:30.
A 6:55 race start is early for someone who is self-employed and who usually runs at 8:30 or 9 AM. Smooth Move was an effective method (again) of purging completely the GI before I even left the house.
Arriving 30 minutes before the race, at 6:25 AM, would have been adequate. A 6:15 arrival was a few minutes premature. The starting area is not chaotic at that hour: the 50k participants are staggered over the next 2.5 hours.
It worked perfectly to run to the start line as a warm-up, and run home from Folsom as a cool down.
If the weather is less favorable, bring extra clothes and drop them in the charity carts before the gun.
Line up on the left side of the start line, in preparation for the first two left-hand turns. The field is already spread out enough by that point that getting pinched shouldn’t be a concern.
Strategy
It will start hurting during the third mile, sorry.
Use the short downhill on 19th to regain some momentum and recover before the final push to Casey MS. But don’t surge — you’ll need some legs for the final climb.
Your average pace at the 4-mile mark probably projects to your “worst case” time. More than likely, you will gain time back in the final two miles of the race.
Don’t slow down on Folsom Street or the final pitch into the stadium. You’re more likely to pass people outside the stadium. Once inside, the course makes a tight right-hand loop to the finish and the homestretch is very short. Plastic boards have been placed on the infield to protect the surface, and they’re slippery and unstable.
The post Race report: BolderBoulder 10K || 33:47, 27th place appeared first on Andrew Skurka.
May 22, 2018
Five spots (and $200 travel offsets) available for learning-intensive trips in Colorado

A lush wildflower-filled meadow in upper East Inlet.
In late-June and July we are running ten 3- and 5-day guided backpacking trips in Colorado. These are learning-intensive experiences, with the ultimate goal of giving you the knowledge and skills to undertake trips of your own with confidence and competence. Learn more.
Of the 88 total spots, five are currently open, on these sessions:
Colorado Adventure 1A: June 25-29, with Mike Clelland and Paul Magnanti;
Colorado Fundamentals 1B: June 30-July 2, with Andrew Skurka and David Eitemiller;
Colorado Fundamentals 2A: July 13-16, with Alan Dixon and Jessica Winters;
Colorado Adventure 2A: July 16-20, with Alan Dixon and Jessica Winters; and,
Colorado Adventure 3A: July 21-25, with Alan Dixon and Mary Cochenour.
For more details and up-to-the-minute availability, consult the trip schedule.
The Fundamentals course will be held in Wild Basin in the shadow of Longs Peak. The Adventure trips will follow segments of the Pfiffner Traverse on the west side of the park. Yes, you will be walking right through the meadow in East Inlet where I took the lead photo.
To help offset higher travel expenses and having missed out on most of the Planning Curriculum, I am offering a $200 per person discount on all open Colorado sessions.
If you’re interested in joining us, apply now or contact me with questions.
The post Five spots (and $200 travel offsets) available for learning-intensive trips in Colorado appeared first on Andrew Skurka.
May 17, 2018
Saturday night lights: First track race in 10 years


Zipping around the track, 1999
If there is such a thing, last year I may have run too much: 4,029 miles and 456,000 vertical feet of climbing, with two road marathons and two 100-mile trail ultras — Boston, Bighorn, UTMB, and Houston. That’s an average of 11 miles and 1,250 vertical feet of climbing per day. While I’m not as prolific as Walmsley, Krupicka, and a few dozen (hundred?) others, it was more running in a year than I’d ever done.
But the volume and intensity wore me out, mostly mentally. And running was increasingly feeling like work, not play. After I PR’d in Houston in 2:28:24, I felt like I could close the chapter and change course. I wasn’t ready to retire, or even to stop racing. But I was ready to no longer spend 15 hours per week on the roads and trails of Boulder.
Still under the oversight of my fantastic coach, David Roche, we reduced the training load to a more sustainable and enjoyable level — 50 to 60 miles per week — and we scheduled a few races that would be novel and unexpected.
Last week was the rust-buster, Dash & Dine, an after-work 5K at the Boulder Reservoir with a great community feel to it. I finished in 16:27 (5:17 minutes/mile pace), and set a new maximum heart rate record in my 37th year, 180 beats per minute. I last ran a 5K ten years ago, in a Duke alumni track race. My 16:08 converts to a 16:42 at a mile above sea level, not even accounting for the two miles of gravel, the 180-degree turnaround at the out-and-back, or the 50 vertical feet of rollers.
This Saturday is the first real effort: the inaugural Frank Shorter Classic, an open track meet at Boulder’s Fairview High School that is being organized by Olympian Lee Troop. Most races are a 1-mile, with separate heats for kindergartners through septuagenarians. There is also an elite 800m, mile, and 3000m (my race, at 8:10 pm).
If you would like to participate, registration closes tonight/Wednesday at midnight. If you would like to spectate, entry is free.
To prepare for the Classic I’ve been getting on the track twice per week, remembering every time how much fun it is to drop 30-second 200’s to finish a workout. I’m predicting a 9:10 to 9:20 finish (4:55 to 5:00 pace). The 9:10 would be only about 2 seconds off my 2-mile high school PR of 9:31, after adjusting for altitude.
Next up will be BolderBoulder, on Memorial Day. It’s one of the largest races in the country (50,000 runners!) and the starting line is 2 miles from my house, yet I’ve never done it. So this is the year. Due to the altitude and elevation gain, it’s a slow course, so I’m thinking mid- or high-33 minutes (34-flat is 5:28 pace). If I’m up for it, I was thinking I might take a second lap with a later and more fun wave.
So right now I’m fit and getting fitter, and more importantly having fun again.
The post Saturday night lights: First track race in 10 years appeared first on Andrew Skurka.
May 14, 2018
Review: Big Agnes Tiger Wall UL2 & UL3 || A “couples trip” tent

The Big Agnes Tiger Wall UL is the lightest and roomiest two-door/two-vestibule semi-freestanding tent available for $400 or less.
The Big Agnes Tiger Wall UL is new for spring 2018. REI has been the exclusive distributor so far, but more retailers will have it starting next month. It’s available in two sizes:
Tiger Wall UL 2 ($400, 2 lbs 8 oz)
Tiger Wall UL 3 ($450, 2 lbs 15 oz)
With its semi-freestanding pitch, crossover roof pole, and two-door/two-vestibule configuration, the Tiger Wall UL sits functionally between BA’s popular Fly Creek and Copper Spur models, and competes most directly with the MSR FreeLite, Nemo Blaze, Nemo Hornet, and Sierra Designs Sweet Suite.
I wrote a preview of the Tiger Wall UL as part of my Outdoor Retailer coverage in January, and used a production version in Utah’s Grand Gulch in April on a trip with my wife Amanda.
Review: Big Agnes Tiger Wall UL2 and UL3
The Tiger Wall UL was not designed to break records. Instead, it tries to do more while keeping in check its weight and price, and remaining very easy to use. I don’t believe there is a 2- or 3-person semi-freestanding double-wall tent that weighs 2.5 or 3.0 pounds (or less), that retails for $400 or $450 (or less), and that matches or surpasses the Tiger Wall’s interior verticality, two side-entry doors, and two vestibules.
But the Tiger Wall UL is not without compromise. To achieve its low weight, Big Agnes used thin fabrics and light-duty #3 zippers, provided the bare minimum of interior floor space, and was stingy on guyline tensioners and door openings.
I found the Tiger Wall UL to be an ideal “couples trip” tent — it’s the first shelter that Amanda has genuinely liked. She thought it was comfortable and secure, appreciated having her own door and interior pockets, and was able to pitch it without knowing any knots or reading the instructions. Meanwhile, it was acceptably lightweight for me.
Targeted users
You might consider the Tiger Wall UL2 or UL3 if you want a 2- or 3-person shelter that:
Weighs less than 2.5 or 3.0 pounds for fly, inner, poles, stakes, and stuff sacks;
Features two side-entry doors and two vestibules;
Costs $400 or $450, or less if you can wait for a major holiday sale;
Has a double-wall construction, with the ability to use the fly, inner, and footprint independently or together as a system;
Includes a dedicated pole set, perhaps because you don’t use trekking poles;
Has an intuitive, foolproof pitch;
Can be inspected first-hand prior to purchase, and returned painlessly if you change your mind; and/or
Comes with a reasonable warranty.
I would not recommend the Tiger Wall UL for regular use in snowstorms, high winds, or sandy environments. For very extensive use, I would at least plan on buying the accessory footprint, and I probably would look for something less delicate. For ounce-counters, you may be willing to spend more, endure more fuss, and/or be less comfortable to get something lighter.
Key product specs
How much does the Tiger Wall UL weigh?
My Tiger Wall UL3 was about 1 oz (2.7 percent) heavier than its spec weight, which is within a reasonable margin of error.
The “Packed Weight” is closest to what the UL2 and UL3 will weigh on an actual trip when pitched in its default configuration (fly + inner, stock pole set, no footprint). At best, 2.3 oz can be shed: take four stakes (-1.4 oz) for just the vestibules and rear corners, and leave behind the two largest stuff sacks (-0.9 oz).
In marketing material, the Tiger Wall’s “Trail weight” will often be referenced. But this is not a practical weight, since since its performance is greatly diminished if the rear corners and vestibules are not tensioned.
Pitch
As you would expect of a semi-freestanding tent, the Tiger Wall UL has a nearly foolproof pitch that is convenient and fast. However, it’s almost too easy — unlike a perfectly pitched tarp or mid, it provides no sense of satisfaction.
It is easiest to pitch the inner first, and then the fly. If you have the accessory footprint, it’d be possible (but awkward) to pitch the fly first, like in the event it were raining.
The single-pole is clumsily long, but that seems preferable to a more manageable multi-piece pole set that must be assembled on-site and that is at greater risk of losing pieces.
The rear corners and vestibules must be tensioned to maximize interior volume, vestibule volume, and weather-resistance. I strongly recommend attaching adjustable guylines to these tie-outs, in the event that a rock or root is in the way. No tension system is included, which helps to keep spec weight low but which compromises its functionality.

The rear corners of the inner and fly must be staked out in order to maximize interior space and weather-resistance. The stock system offers no tension adjustment or adaptability (if, say, a rock or root prevents stake placement). I strongly recommend replacing it with a better system.
Interior space
The Tiger Wall UL2 and UL3 provide the bare minimum floor space for a 2- and 3-person tent. The UL2 is 52 inches wide at the head, 42 inches at the foot; the UL3, 66 inches at the head, 60 inches at the foot.
With two 20-inch pads inside the UL2, there is just 1 to 6 inches of leftover space on each side. With three 20-inch pads inside the UL3, there is even less leftover space — 0 to 3 inches on each side. If an occupant has a wider 25-inch pad, the Tiger Wall will only fit one or two people.
Amanda and I found the UL3 amply comfortable. But we agreed that we would not want to share it with another adult, especially in inclement weather, and especially for a weight penalty of only 4 oz. A child or small dog would be okay, although I’d have to protect the floor from sharp paws.

The Tiger Wall UL3 is comfortable for two, but I question its practicality for three (especially 3 adults in crappy weather). The floor is 66 inches wide at the head and 60 inches at the foot, so three 20-inch pads would cover nearly the entire floor.
The crossover roof pole helps to maximize the interior volume potential of the footprint. The side walls are near vertical, which allows all occupants to sit up comfortably without needing to lean towards the center as required in fin-style geometries like the Fly Creek and Nemo Hornet.

The 42-inch peak height provided ample head space, especially with the crossover roof pole — it makes the side walls more vertical and creates more interior room.
Double doors
The two side-entry doors and two vestibules offer multiple advantages over a single front-entry door. Entry and exit is physically easier, requiring less contorting. Each user gets their own vestibule, so there is no battle over space, access, or organization. And it allows for cross-ventilation, which helps to minimize condensation in humid conditions and to improve comfort in warm temperatures.
The user-friendliness of the double doors is partially compromised by the door size on the Tiger Wall’s fly. Another 12 inches of zipper (at the cost of about 2 oz) would help here. Big Agnes describes this as a feature (“Low Vent”), explaining that it keeps the vestibule protected while still allowing for air flow.

I admire BA’s vigilance in stripping every extraneous ounce from the Tiger Wall, but question some of the results. The fly door, for example, is unnecessarily small and low, because a more generous opening would have required a longer zipper (for an extra 1 to 2 oz total).
The cost of ultralight
While inspecting the Tiger Wall closely and using it for several days in the field, I began to admire BA’s vigilance in reducing its weight. I don’t necessarily agree with all their decisions and I detest the rationale (to win the “spec war,” which sadly is a big driver for the sales of tents and other outdoor gear), but I can at least admire the effort. My specific concerns:
The weight of a tent is largely a function of its fabrics. And one way that BA achieves very low weights is by using very lightweight fabrics. In the Tiger Wall, BA used 15d coated nylon for the fly and 20d coated nylon for the floor, both rated to 1200 mm hydrostatic head. BA uses the same fabrics in their Fly Creek, and they are serviceable for multiple seasons or a long thru-hike. But they’re not as reliably waterproof or as tear- and puncture-resistant as the 30d nylons or Dyneema Composite Fabric (Cuben) used by cottage companies, which would add weight and cost, respectively.
The #3 zippers on the fly and inner are lighter but less reliable than #5. Treat them with care: keep them clean and don’t tug hard on them. If you camp frequently in southern Utah or other environments with extremely fine sand, I’d probably look for a different shelter.

The #3 zippers on the fly and inner are lighter but less reliable than #5.
The stingy tie-outs and small entryway also fall into this topic, but they’ve been mentioned elsewhere.
Room for improvement
How could Big Agnes improve the Tiger Wall UL, without fundamentally changing it (e.g. using heavier fabrics and #5 zippers, increasing its dimensions, etc)?
1. Adjustable tie-outs. The pole set creates acceptable tension at three points: the two front corners, and the rear center. Stakes are helpful in these locations, but not critical. Four other locations need to be tied down, however: the two rear corners, and the two vestibules. And I think it’s unreasonable to assume a tent can always be staked out in the field like it can be in a showroom floor — rocks and roots have a tendency to get in the way.
2. Pole set length. The compressed length of the pole set is 19 inches, which is longer than the width of nearly all backpacks. So the Tiger Wall (or at least its poleset) must be carried vertically. A shorter pole set that could be oriented horizontally would be preferred, if the weight trade-off was not significant.
3. Burrito-style stuff sack. The stock stuff sack for the Tiger Wall is a conventional tube. I have found top-loading stuff sacks like the MSR Tent Compression Sack to be much more user-friendly. Sierra Designs switched to this style last year, too.
4. Stakes. J stakes from DAC are strong and light, but I don’t care for them. They must be oriented such that the point of the “V” is directed squarely at the shelter; the cord notches are also shallow. I would much prefer Y-shaped stakes like this one:

My preferred setup: conventional 2- or 3-mm reflective cord with a .5-oz aluminum Y-stake
Traditional comparisons
Lets quickly compare the Tiger Wall UL to tents from BA and other wholesale manufacturers.
Tiger Wall vs. Fly Creek
The Fly Creek HV UL2 is 3 oz lighter and $50 less, but has only one front-entry door and a fin-shaped architecture that is less roomy.
The Fly Creek HV UL3 is heavier by 6 oz, but still has only one door. And it’s only $30 less.
Without question, I would prefer the two-door/two-vestibule configuration of the Tiger Wall.
Tiger Wall vs Copper Spur
The Big Agnes Copper Spur HV UL2 and Copper Spur HV UL3 match the Tiger Wall’s dimensions and duel side-entry doors. However, they are 9 to 15 oz heavier and $50 more, which seems like big penalty for one marginal benefit, the Copper Spur’s free-standing design.
The Copper Spur Platinum series is more weight-competitive with the Tiger Wall, but has a $200 or $250 premium. For those prices, I’d be looking at shelters made of DCF.
Tiger Wall vs MSR Freelite
The MSR Freelite 2 and Freelite 3 share a similar architecture as the Tiger Wall UL2 and UL3 — both are semi-freestanding with three points, have duel side-entry doors and the crossover roof pole. Their dimensions are a wash: MSR is a bit wider, BA is a bit taller.
The biggest difference is in weight and cost. The Freelites are about half-pound heavier (despite using thinner 10d and 15d fabrics), and retail for $40 or $50 more. In addition, availability is currently limited.
Tiger Wall vs. Nemo Hornet
The Nemo Hornet 2P is 3 oz lighter than the Tiger Wall UL2 and $30 less expensive. But it uses even thinner (and less durable) fabrics, and it has a fin-style architecture (no crossover roof pole) that creates less interior volume. A 3-person version of the Hornet is not available.
TW for the win, again.
Tiger Wall vs Nemo Blaze
The Nemo Blaze 2P is 1 oz lighter than the Tiger Wall UL2. Its interior volume is comparable. But it uses more delicate fabrics (10d fly and floor), and it’s pitch is non-freestanding and less storm-resistant.
Tiger Wall vs Sierra Designs Sweet Suite
The Sierra Designs Sweet Suite 2 and Sweet Suite 3 are also new for spring 2018. They are roomier (in peak height, and width at the floor and shoulders) and use heavier-duty fabrics (20d and 30d for the fly and floor, respectively), but notably heavier, by about a pound. The SS2 is $30 less than the TWUL2, but the SS3 is $10 more than the TWUL3.
More competitive comparisions
To find something better (i.e. lighter, less expensive, or higher performance) than the Big Agnes Tiger Wall UL3, you need to look at the cottage industry and to move away from semi-freestanding double-wall tents. It’s more difficult to claim that one shelter is “best” here, because they cater to different types of users.
Tiger Wall vs Zpacks Duplex and Triplex
The Zpacks Duplex and Triplex are substantially lighter and stronger, because they are made with DCF/Cuben. But it’ll cost you: the 22-oz Duplex sells for $200 more than the Tiger Wall UL2; the Triplex, $250 more than the UL3. In addition, the ZPacks shelters are single-wall, not modular; so the fly and inner cannot be used independently.
Tiger Wall vs Mountain Laurel Designs DuoMid
The Mountain Laurel Designs DuoMid + InnerNet is lighter (28 oz equivalent trail weight), stronger (30d sil-nylon), and more storm-resistant. But it’s not as easy to use; you can’t inspect it before you buy it; it’s marginally more expensive, and never on sale; and it’s sloping walls feel less roomy.
Tiger Wall vs Tarptent
Tarptent has a few models that are competitive with the Tiger Wall, notably the Bowfin, Double Rainbow, and Saddle 2. In general, the Tiger Wall will be easier to use and lighter, while the Tarptents will be more durable and less expensive.
Questions about the Big Agnes Tiger Wall UL3? Leave a comment
Disclosure. This website is supported mostly through affiliate marketing, whereby for referral traffic I receive a small commission from select vendors, at no cost to the reader. This post contains affiliate links. Thanks for your support.
The post Review: Big Agnes Tiger Wall UL2 & UL3 || A “couples trip” tent appeared first on Andrew Skurka.


