
Andrew Skurka's Blog, page 32
December 17, 2018
Spiderwoman’s Tips: Kings Canyon High Basin Route || Intro
Spiderwoman thru-hiked the Kings Canyon High Basin Route in 2017 with her partner, The Brawn. These are her “tips” about the route, a term that does not do justice to their comprehensiveness and detail. The information has been split into seven posts to improve readability:
Introduction
Section 1: Tablelands
Section 2: Great Western Divide
Section 3
Section 4
Section 5
Section 6
She has shared all of her photos from her trip, available here.
The following document was created in early-2018 to serve as tips for future adventurers on the Kings Canyon High Basin Route. I’ve written these Tips because while backpacking fulfills me, it also makes me angsty. If I’m out there adventuring and the only person the experience is serving is me, I get discontent and start grasping for some kind of meaning. It’s unfortunate that being out there communing with wild places isn’t enough; that it’s actually kinda painful in a restless kind of way. It’s only enough and enlivening when I know I’m going to share it with the intention of helping others on their life-affirming paths. So helping YOU, by way of you taking something useful away from these Tips and our story, helps me stay happy and fulfilled and out there. Help me help you!

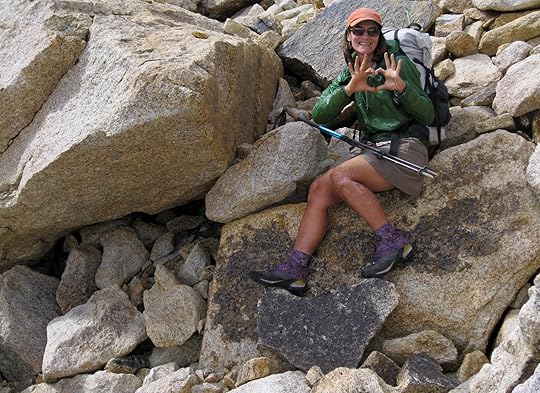
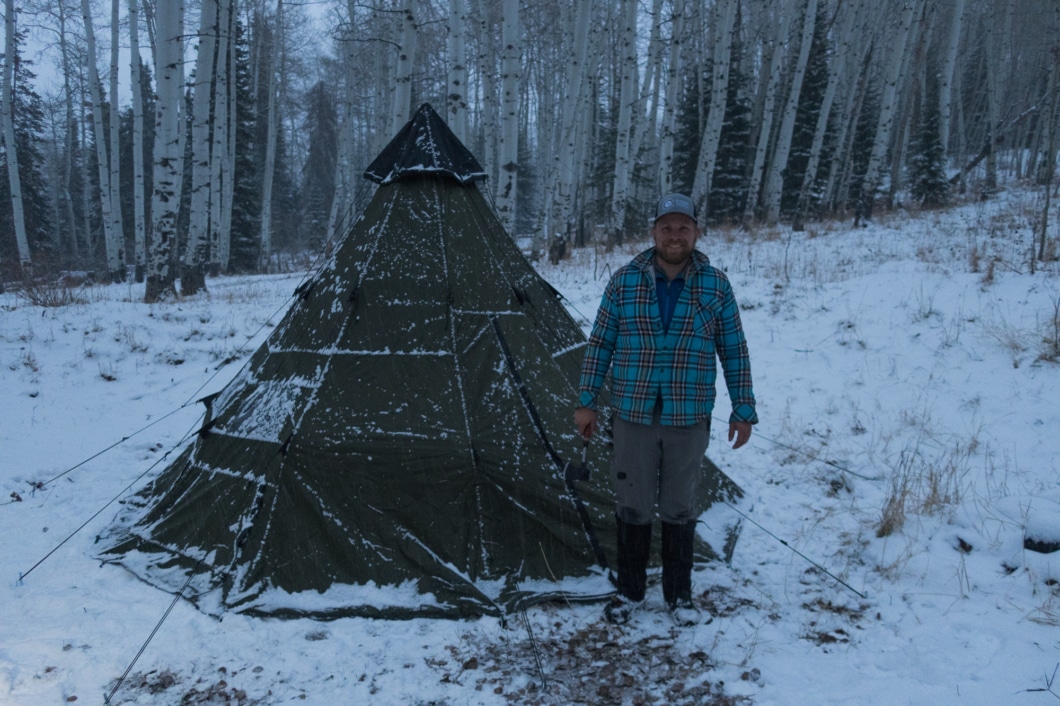
Home for the next couple weeks
I truly hope these Tips dose you with the confidence to take on this challenge…or bump you with that extra nudge to make solid plans…or offer that timely 2nd opinion while you walk and navigate…or substitute for the hug I would totally give you when things get rough.

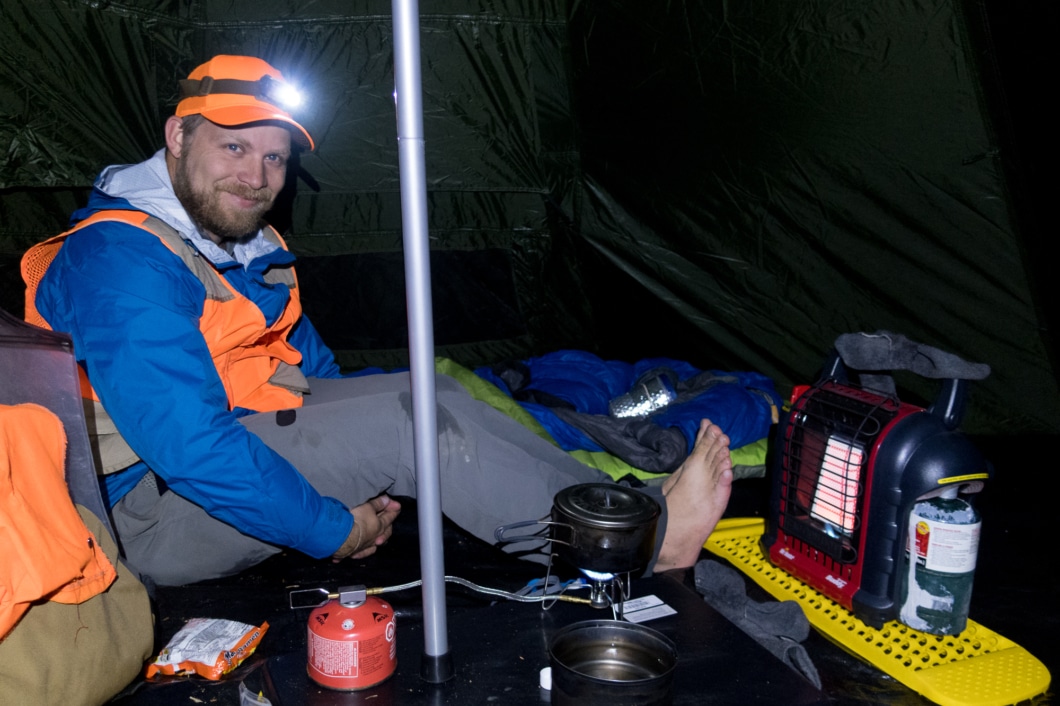
Teamwork in a moment o’ sketch
Before incorporating others’ stories or advice into our own tool kits, I think there’s value in seeing how we do or don’t relate to each other’s style, fitness, and experience. To do that, you can check out my Hayduke Trail Tips and Wind River High Route Tips.
History

Bert from Belgium and Spiderwoman dressed against the first hint an approaching cold snap. We were warned.
My first trip on KCHBR was in the fall of 2016. Bert From Belgium (we met on the PCT ’09) and I started at Lodgepole and intended to thru-hike it with a finish at Cedar Grove. Conditions were idyllic – sunny, crisp, and calm. Conversations were the sprawling sort as is customary, and so special, between thru-hikers. I was stoked to be bonding with another like-minded person in such a beautiful, rugged setting. But I only made it 4 nights.
From the Colby Lake area, we exited via Avalanche Pass Trail. Bert From Belgium walked on over to the east side and enjoyed a L2H hike while I drove home to Eastern WA and got treated for giardia. But I knew I’d be back. The awe-inspiring vistas of high Sierra divides (notably from Tablelands), and scouring glacial memories made tangible (Horn Peak’s artistic upsway) had me making definite plans for 2017.

Horn Peak 2016. “From December 2011 to March 2017, the state of California experienced one of the worst droughts to occur in the region on record (Wikipedia).”

Horn Peak 2017. What a difference a higher snowpack makes.
My second trip on KCHBR was in the summer of 2017. Bert From Belgium was busy with another consecutive year of multinational backpacking (this dude gets around). But luckily my sweetheart and best friend, The Brawn, the person with whom life both makes serene sense and pops into luminous 3D, let me help him make sure his work schedule allowed him to come this time.

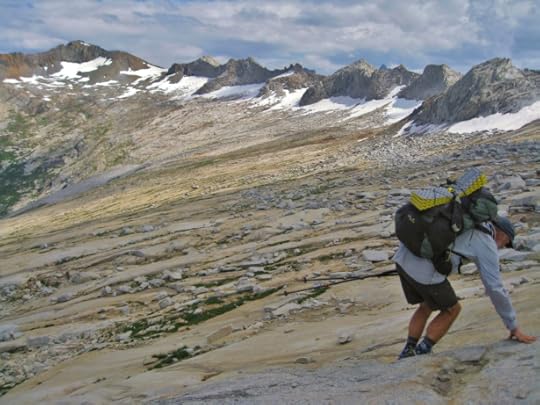
Encouragement while The Brawn uses map & compass to figure out feature-lacking Tablelands
The team
Because planning was so far in advance, my dental surgeon with whom I’d always had neat conversations about the outdoors was able to join us. Kelby’s an accomplished alpine rock climber. He’s working his way through Fifty Classic Climbs and even climbed a feature KCHBR passes beneath (Charlotte Dome).

Dinner under the Dome. Five star ambiance.
Pre-trip, I imagined scenarios where the 3 of us would be confronted with tricky terrain. Like, I anticipated watching as Kelby would mentally flip through his repertoire of fancy moves and then pull something off that’s beyond gnarly for the typical thru-hiker. I was stoked to have a front-row seat to watch Kelby, the dexterous alpinist, and The Brawn, the fearless route scrambler, lean into each other’s strengths. I was even more stoked to be a part of ruining a responsible, mortgage-paying, business-owning professional toward needing to take 3, 4, 5 months off work to get his thru-hiking fix! Just doing my part.
Itinerary
My plan was to do a counterclockwise loop with a start and finish at Onion Valley TH (~200 miles). We’d walk out Bishop Pass Trail to South Lake TH for our 1st resupply at Parchers Resort. This is also where we’d part ways with Kelby so he could get back to work. Then we’d descend Copper Creek Trail to pick up our next resupply at Cedar Grove. We’d walk from Cedar Grove using trails and back roads to reconnect, a couple trail miles shy of Lodgepole, with the route. Then we’d finish up back at Onion Valley TH.
This was The Brawn’s first time anywhere near the Sierra. And except for hearing superlative-driven descriptions of my time in the high Sierra (which probably ended up sounding a lot like this one time at band camp), he didn’t know anything about them. They’re my favorite, so I had long been excited to watch him discover their majesty and wild variety for himself. Pre-trip, he kept getting confused about place names, east side vs west side, how everything connected, so I’m including this little key in case it can help someone else new to the area:
Eastern Sierra = Independence, CA = Onion Valley TH = Kearsarge Pass Trail
Eastern Sierra = Bishop, CA = South Lake TH = Parchers Resort = Bishop Pass Trail
Western Sierra = Cedar Grove = Roads End = Copper Creek Trail
Western Sierra = Lodgepole = Twin Lakes Trail
The Brawn and I drove from home and met Kelby, who flew into Reno and rented a car, at South Lake TH. We dropped our resupplies at Parchers instead of storing them in Kelby’s rental car because a Parchers employee said a bear damaged vehicles in that area a couple years ago. That piece of mind was worth the $25 holding fee they charge. Then I drove us all over to Onion Valley TH where we scored a non-reservation campsite. Spending a night up in that pretty, mellow campground provided a nice opportunity to start acclimatizing to elevation.
Long term parking (and bear lockers for these vehicles) is provided at South Lake TH, Onion Valley TH, and Roads End (I don’t know about Lodgepole’s setup). Open spots for parking were almost nonexistent at South Lake TH. We got there late morning, zipped into the last open spot, and saved it for Kelby. Parking at Onion Valley TH was also packed. A long term spot opened up after dark so we moved into it before going to sleep (and already had stored anything with a scent in the bear lockers). A sign atop the bear lockers asks you to write your identifying info and return eta on your stored items so they’re not discarded.

Here’s to peace, love, and kick-ass routes!
A hope dear to my heart is that more and more people choose to spend chunks of their lifetime walking through our natural world with their house on their back, home under their feet. For the education. The beauty. The small carbon footprint. The personal growth. The instant trust and fellowship within the community. The quality of interpersonal relating. The falling head over heels in love with our Earth and its web of life. For the Earth-honoring choices they make once back in society. May these Tips help in that effort.
Hugging Kings-Kaweah Divide with our next pass-project in sight
The post Spiderwoman’s Tips: Kings Canyon High Basin Route || Intro appeared first on Andrew Skurka.


December 13, 2018
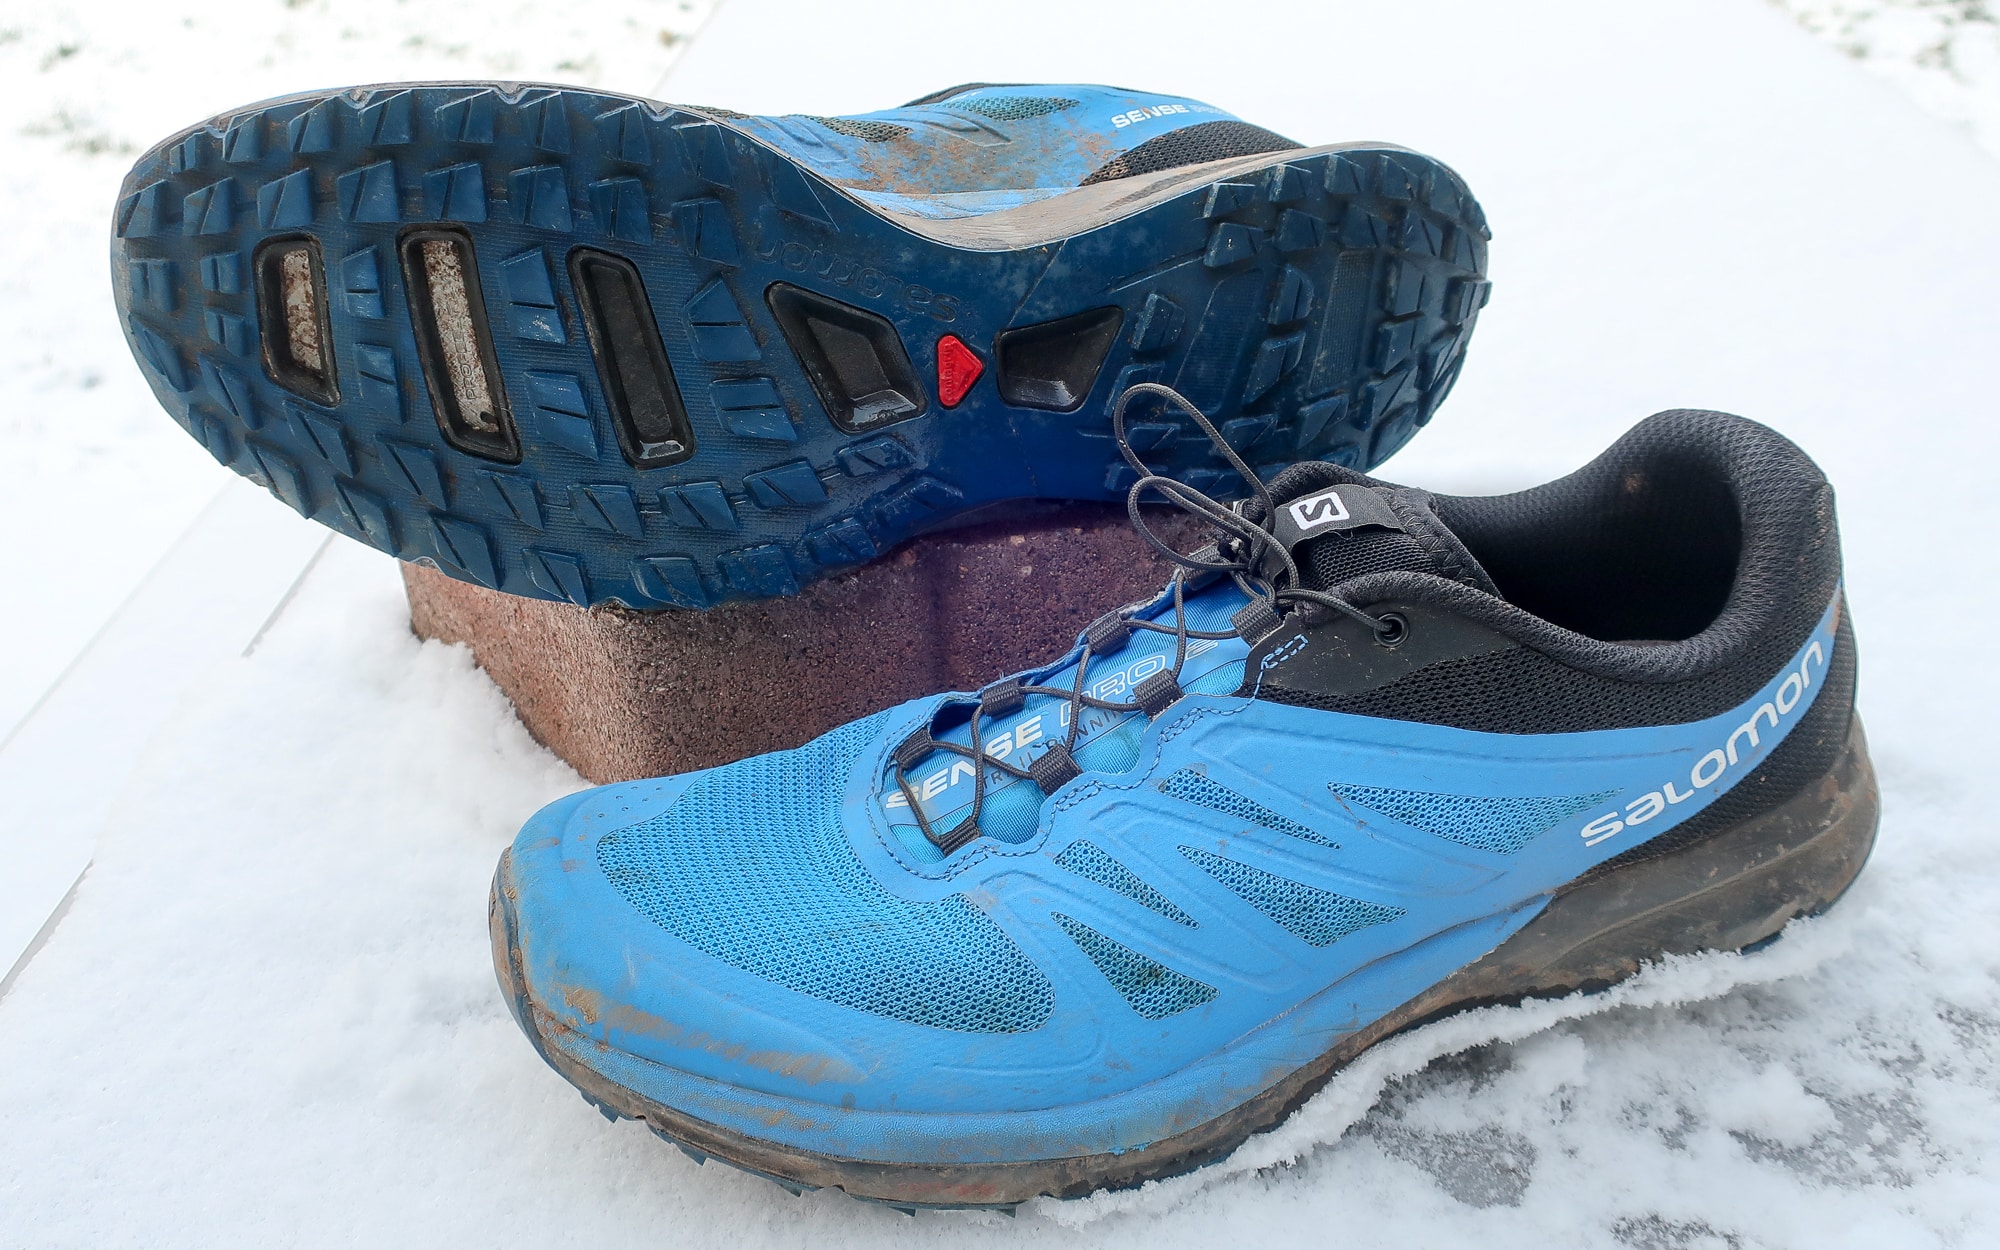
Review: Salomon Sense Pro 3 || Smooth speedster for soft ground


On the right surfaces, the Sense Pro 3 is very fun and very fast. It’s light, smooth, and responsive; the upper fits precisely; and the traction is very reliable.
The Salomon Sense Pro 3 is a fast, smooth, and aggressively lugged trail running shoe that is best for narrow/low-volume feet and soft or loose surfaces.
Even though the Sense Pro 3 will replace the Sense Pro 2 and shares nomenclature with the Sense Pro 1, it most strongly resembles the S/Lab Sense 6 SG, which was the “soft ground” version of Salomon’s sixth-generation flagship trail racing shoe.
Review: Salomon Sense Pro 3
The Sense Pro 3 has some similarities to its predecessors, including its snug fit, mesh/TPU upper, thin midsole cushioning, and low drop. But its outsole is a dramatic departure from the norm, and so it excels under entirely different circumstances.
The Sense Pro 1 (my long-term review) was best for smooth singletrack, but could handle roads and tougher terrain as well. The Sense Pro 2 (my long-term review) was a more capable trail shoe, and remains a favorite for Boulder’s steepest and rockiest trails. The Sense Pro 3 also needs to be on trails, but its tall lugs get maximum grip only on unconsolidated dirt, cinder, snow, fallen leaves, mud, sand, and other loose and soft terrain; the shoe does not inspire similar confidence on talus, rock staircases, large cobbles, or sun-baked dirt.

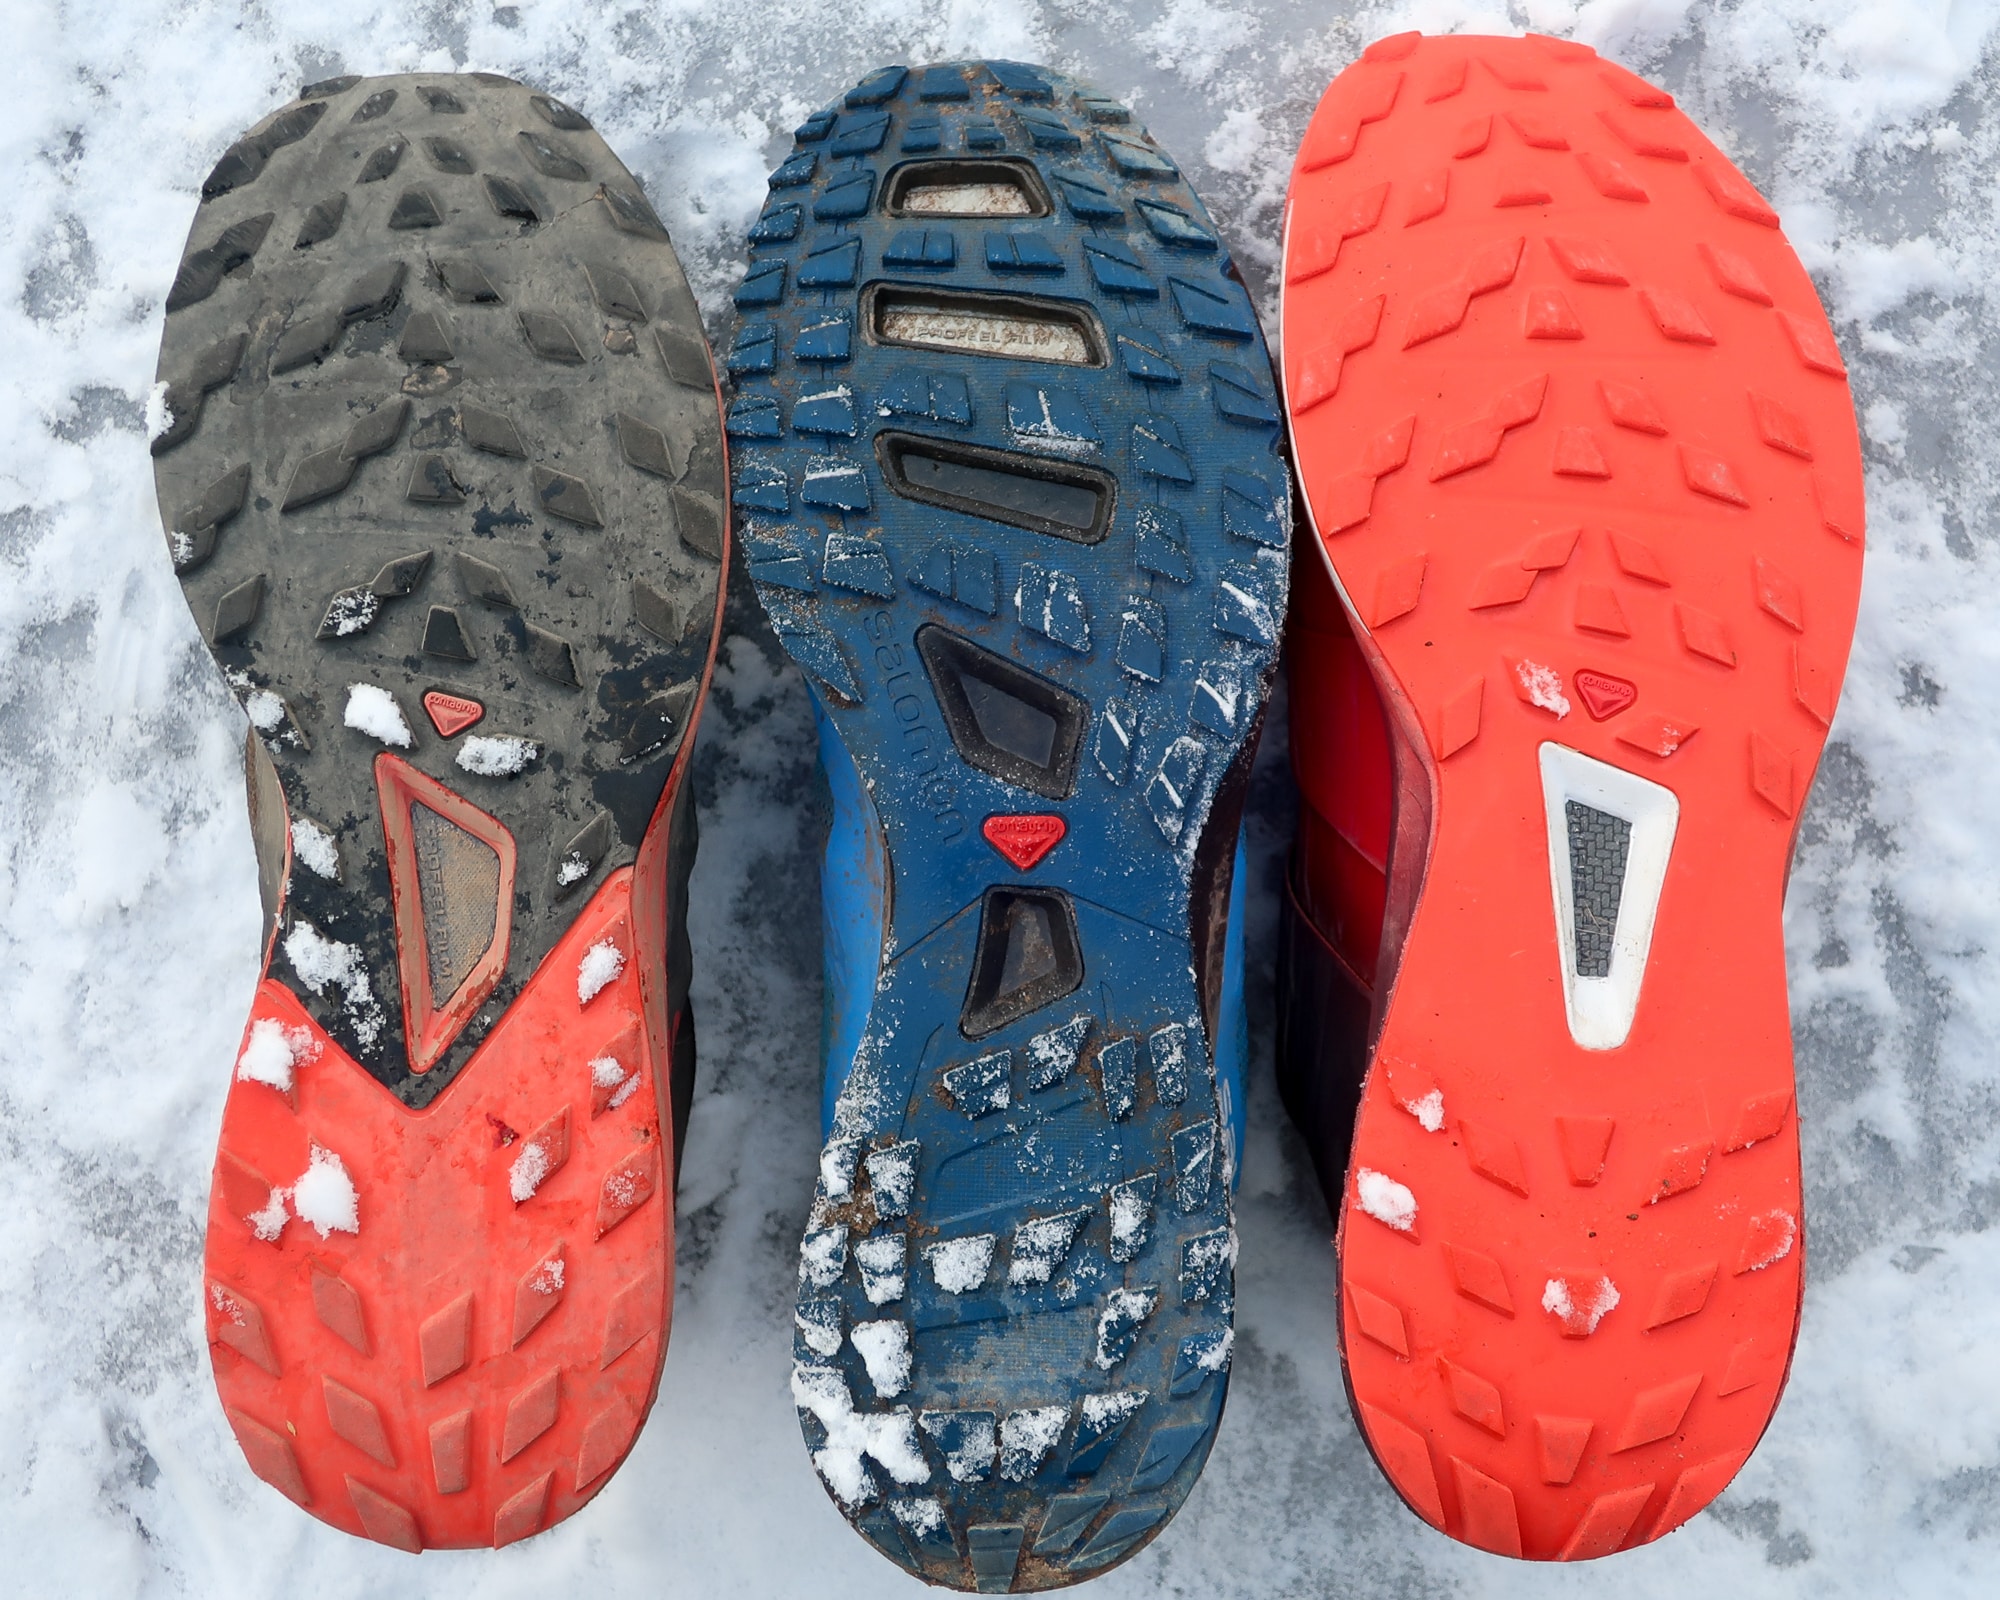
The outsole of each Sense Pro (original on left; Pro 2 in middle; Pro 3 on right) has given each shoe a unique performance story.
When put on the right surfaces, the Sense Pro 3 is very fun and very fast. It weighs just 9.0 oz (255 g; for Men’s 9). It has a smooth transition from landing to pushoff. The midsole is responsive and sensitive, yet still reasonably protective. Its upper fits precisely. And its traction is very reliable.
Key product specs
Neutral, with natural landing-to-pushoff transition
Breathable mesh upper with TPU overlays for control and abrasion-resistance
9.0 oz M’s size 9 (255 g); 8.1 oz W’s size 7 (230 g); 10.4 oz M’s size 11.5
18mm and 14mm stack heights at heel and forefoot, respectively
4mm drop
Quick Laces
Outsole: Premium Wet Traction Contagrip with 6 mm lugs
Midsole: EnergyPlus+ compound and Profeel Film
$130 MSRP
More information
Fits true to size.
Product history
The flagship Salomon S/LAB Sense is intended to be a technologically advanced and minimalist trail racing shoe, and to work best for featherweight runners with perfect biomechanics. The consensus at Salomon was that the S/Lab Sense 6 strayed too far from its roots as “the Kilian shoe” — it too overbuilt and too heavy. The redesigned S/Lab Sense 7 gets back to basics.
The Sense Pro, meanwhile, is intended to be the friendlier first-in-line descendant of the S/Lab Sense, with more cushioning, greater durability, perhaps a more accommodating fit, less cutting-edge technology, and a lower price tag.
Rather than design a new Sense Pro based on the S/Lab Sense 7, Salomon decided to refine the S/Lab Sense 6 SG and to relabel it as the Sense Pro 3. The mesh/TPU upper, lugged outsole, and 4-mm drop are identical. The Sense 6 SG is supposedly an ounce lighter (225 g vs 255 g), and its stack heights are 2 mm taller (20/16 mm vs 18/14 mm), but without first-hand experience with the Sense 6 SG I can’t validate these differences, identify their sources, or explain the impact.
Fit
Historically, the Sense line has fit narrow and low-volume feet, and the Sense Pro 3 is no exception. In the Pro 3, my heel feels very secure, my mid-foot is comfortably wrapped by the elasticized Endofit yoke, and my toes have just the right amount of wiggle room. There is no uncomfortable pinching or pressure points.
If you liked the Sense Pro 1, Sense Pro 2, S/Lab Sense Ultra, S/Lab Ultra, and/or La Sportiva Bushido, you’ll probably like the Sense Pro 3 as well. These models all fit me like a glove, with subtle differences.
Upper
Like other Sense models, the Sense Pro 3’s upper consists of breathable mesh with TPU overlays. The TPU is more expansive than normal, which adds structure and abrasion-resistance but adversely affects breathaiblity and dry times.
My media pair (right shoe only; the left shoe is fine) had some lamination issues, and I would assume this has been fixed for production. This is not a new technology or process for Salomon, and the durability of their uppers is generally excellent.
Outsole
The outsole is made of Premium Wet Traction Contagrip, which along with Vibram MegaGrip and La Sportiva FriXion is one of my preferred rubber compounds. It’s grip is reliable and its lifespan is acceptable.
Its 6-mm lugs get great purchase on soft surfaces like loose dirt, cinder, mud, snow, and fallen leaves and needles. If I lived in the Appalachians or Pacific Northwest, or wetter and less rocky parts of Colorado, this type of outsole would be ideal.

The Sense Pro 3 has large lugs the bite well into softer surfaces but are less sure-footed in rocky or hard-packed terrain.
The Sense Pro 3 may struggle on the east side of the Colorado Rockies, however. Here, the trails tend to be sun-baked, heavily used, and rocky for most of the year. Relatively little rubber connects with these hard surfaces, and the lugs flex slightly when torqued, so the Sense Pro 3 is less surefooted than other models.
That said, recently I’ve been getting more use out of Pro 3, because our trails are wet, soft, and snow/slush-covered at this time of year. For example, I wore them on Saturday for a 20-miler on soft trails, and on Tuesday for a 5 x 3-minute hill workout on consolidated snow.
Comparisons
Sense Pro 3 vs. Sense Pro 2
The Sense Pro 3 is better suited for soft ground, and is not my top pick for technical trails. The landing-to-pushoff is smoother, but less springy. It locks down the heel more securely, and has more breathing room in the forefoot.
Sense Pro 3 vs. Sense Pro 1
The Pro 3 and Pro 1 run similarly, but the outsole changes everything. Whereas the Pro 1 was best for smooth trails and mixed trails/roads, the Pro 3 is a true trail shoe.

The uppers of the Sense Pro 1, Pro 2, and Pro 3 are fairly similar.
Sense Pro 3 vs. S/Lab Sense Ultra
It’s a similar story between these two shoes. They run similarly, but the S/Lab Sense Ultra (my review) was a more all-purpose trail runner, whereas the Sense Pro 3 will excel more on soft ground.
Sense Pro 3 vs. S/Lab Ultra
The Sense Pro 3 is lighter, more sensitive underfoot, slightly more snug fitting, and has a much more aggressive outsole than the S/Lab Ultra (my preview). The uppers are radically different: the Sense Pro 3 has the normal mesh/TPU, whereas the Ultra uses some kind of hydrophobic pliable plastic.

The Sense Pro 3 (left) and SLAB Sense ultra (middle) have similar uppers, but the SLAB Ultra (right) does something different.

Left to right: Sense Pro 3, SLAB Sense Ultra, SLAB Ultra. The Sense Ultra and Ultra are more versatile than the Sense Pro 3 — I’ll take them on any trail, and even mixed road/trail runs. The Pro 3 really needs to be on soft ground.
Questions about the Salomon Sense Pro 3? Leave a comment.
Disclosure. This website is supported mostly through affiliate marketing, whereby for referral traffic I receive a small commission from select vendors, at no cost to the reader. This post contains affiliate links. Thanks for your support.
The post Review: Salomon Sense Pro 3 || Smooth speedster for soft ground appeared first on Andrew Skurka.
December 6, 2018
Long-term review: Salomon Sense Pro 2 || Nimble & capable trail shoe

The second-generation Salomon Sense Pro 2 is a lightweight, neutral, and capable trail runner that excels on steep, obstacle-filled trails.
The original Salomon Sense Pro (long-term review) is still one of my all-time favorite shoes. It fit me perfectly and was extremely versatile — in it, I ran a road marathon, a 50-miler on smooth singletrack and jeep roads, and a 100-miler on tough mountain trails, among other races and training runs, and never felt like I was at a disadvantage.
The second-generation Salomon Sense Pro 2 retains some features and specs of the original Pro, but overall is a truer trail shoe. It was released about three years ago, and is now being replaced by the Sense Pro 3, which again is a substantial revision (not necessarily better, but definitely different). Current prices of the Sense Pro 2 reflect the third-generations’s arrival.
Long-term review: Salomon Sense Pro 2
When I purchased the Sense Pro 2, I thought it would substitute for the Sense Pro 1, of which I owned multiple worn-put pairs. But the Pro 2 was not a mere update — it is basically a different shoe, with subtle or wholesale changes to its outsole and ride.
To date I’ve run about 400 miles in one pair of Sense Pro 2’s, and I’m approaching 100 miles in a second pair that I purchased a few months ago. I expect to use both pairs until the uppers are falling apart, the midsoles are flat, and/or the outsoles are bare, which I expect to happen between 500 and 600 miles.
The Sense Pro 2 is a lightweight, neutral, and capable trail running shoe that excels on steeper and more technical trails. It’s less well suited for roads and buttery trails (which was the sweet spot for the Pro 1), or for soft and muddy surfaces (on which the Pro 3 does best), but it covers this range better than its predecessor or its successor. It’s become a favorite of mine for short- and mid-length outings on hard mountain trails.
Like most Sense shoes, the Sense Pro 2 best fits narrow and low-volume feet.

My original pair of Sense Pro 2’s. They’re showing 400 miles of wear, but still have a couple hundred miles left in them.
Key specs
Seamless breathable mesh upper with TPU overlays
Elasticized Endofit wrap over midfoot
EVA midsole with Profeel Film and OS Tendon
Contragrip rubber outsole
23mm/17mm stack heights
6mm drop
9.3 oz (265 g) for M’s 9 (11.0 oz for M’s 11.5, verified)
Fits true to size
$130 MSRP
More information
Break in
In its first 50 miles, the Sense Pro 2 did not win me over. Not only was I expecting something different, but it’s landing-to-pushoff transition is a bit slappy (due to its stiff midsole) and my heel was lifting slightly out of the shoe, forcing me to tighten the laces more than I’d like.
Since those early miles, however, I really took to the Sense Pro 2. As the midsole and cushioning softened up and packed out, its ride got smoother and my heel stayed locked. I reach for the Sense Pro 2 as often as I do for the Salomon S/LAB Sense Ultra (review) and Salomon S/LAB Ultra (preview).
Outsole
The most obvious change in the Sense Pro 2 is its outsole, which has larger and deeper lugs than than on the Pro 1. The effect is predictable: better traction on trails, and better durability.
This may be my most favorite Salomon outsole. It has more lug rubber than the SLAB Sense Ultra and SLAB Ultra, so it lasts longer. And its lugs are stout, so they don’t buckle under pressure like cleat-style lugs on the Sense Pro 3 or Fellraiser.

The outsole is made with the excellent Contragrip rubber, and has many square-shaped 3- or 4-mm lugs.
Ride
Overall, the Sense Pro 2 is firm and responsive, reasonably protective, and slightly stiff. A number of factors are responsible for this. It’s a tough shoe for road or flat miles, but it does really well on any kind of inclined trail.
Embedded in the EVA midsole is Profeel Film, a TPU film-on-mesh that provides some forefoot protection without huge sacrifices to ground feel. I think it achieves a good balance: the film blunts pressure from pointy objects (e.g. gravel) and hard landings, but the forefoot is still flexible and sensitive.
The midsole also includes two semi-stiff TPU rails (“OS Tendon”) that run the length of the shoe. The Sense Pro 2 feels decidedly springier than the Pro 1, and I feel more toe-off propulsion than in the Sense Pro 3.
The midsole foam is not generous: with stack heights of 23mm/17mm, there’s not much of it; and the foam itself skews towards firm, not plush.
Finally, there is that thicker-lugged outsole, which adds rigidity to the system.
Upper & fit
If you have worn other Salomon trail running shoes from its Sense or Ultra lines, the upper and fit on the Sense Pro 2 will be familiar.
The upper is made of seamless breathable mesh that is wrapped with TPU for additional durability and foot control. The elasticized Endofit bootie wraps the midsole for additional security. And everything gets locked in evenly with Quick Laces. Honestly, it’s wonderful — Salomon masters their uppers more consistently than any other trail shoe brand.
The heel cup has slightly more padding than the Sense Pro 1 and Sense Pro 3. As mentioned before, I experienced some heel lift in the Pro 2 until the padding, insole, and midsole had packed out some. I think the relatively short and soft tongue plays a role, too — if it came up higher on the ankle and/or had more structure, it would cradle the foot better.
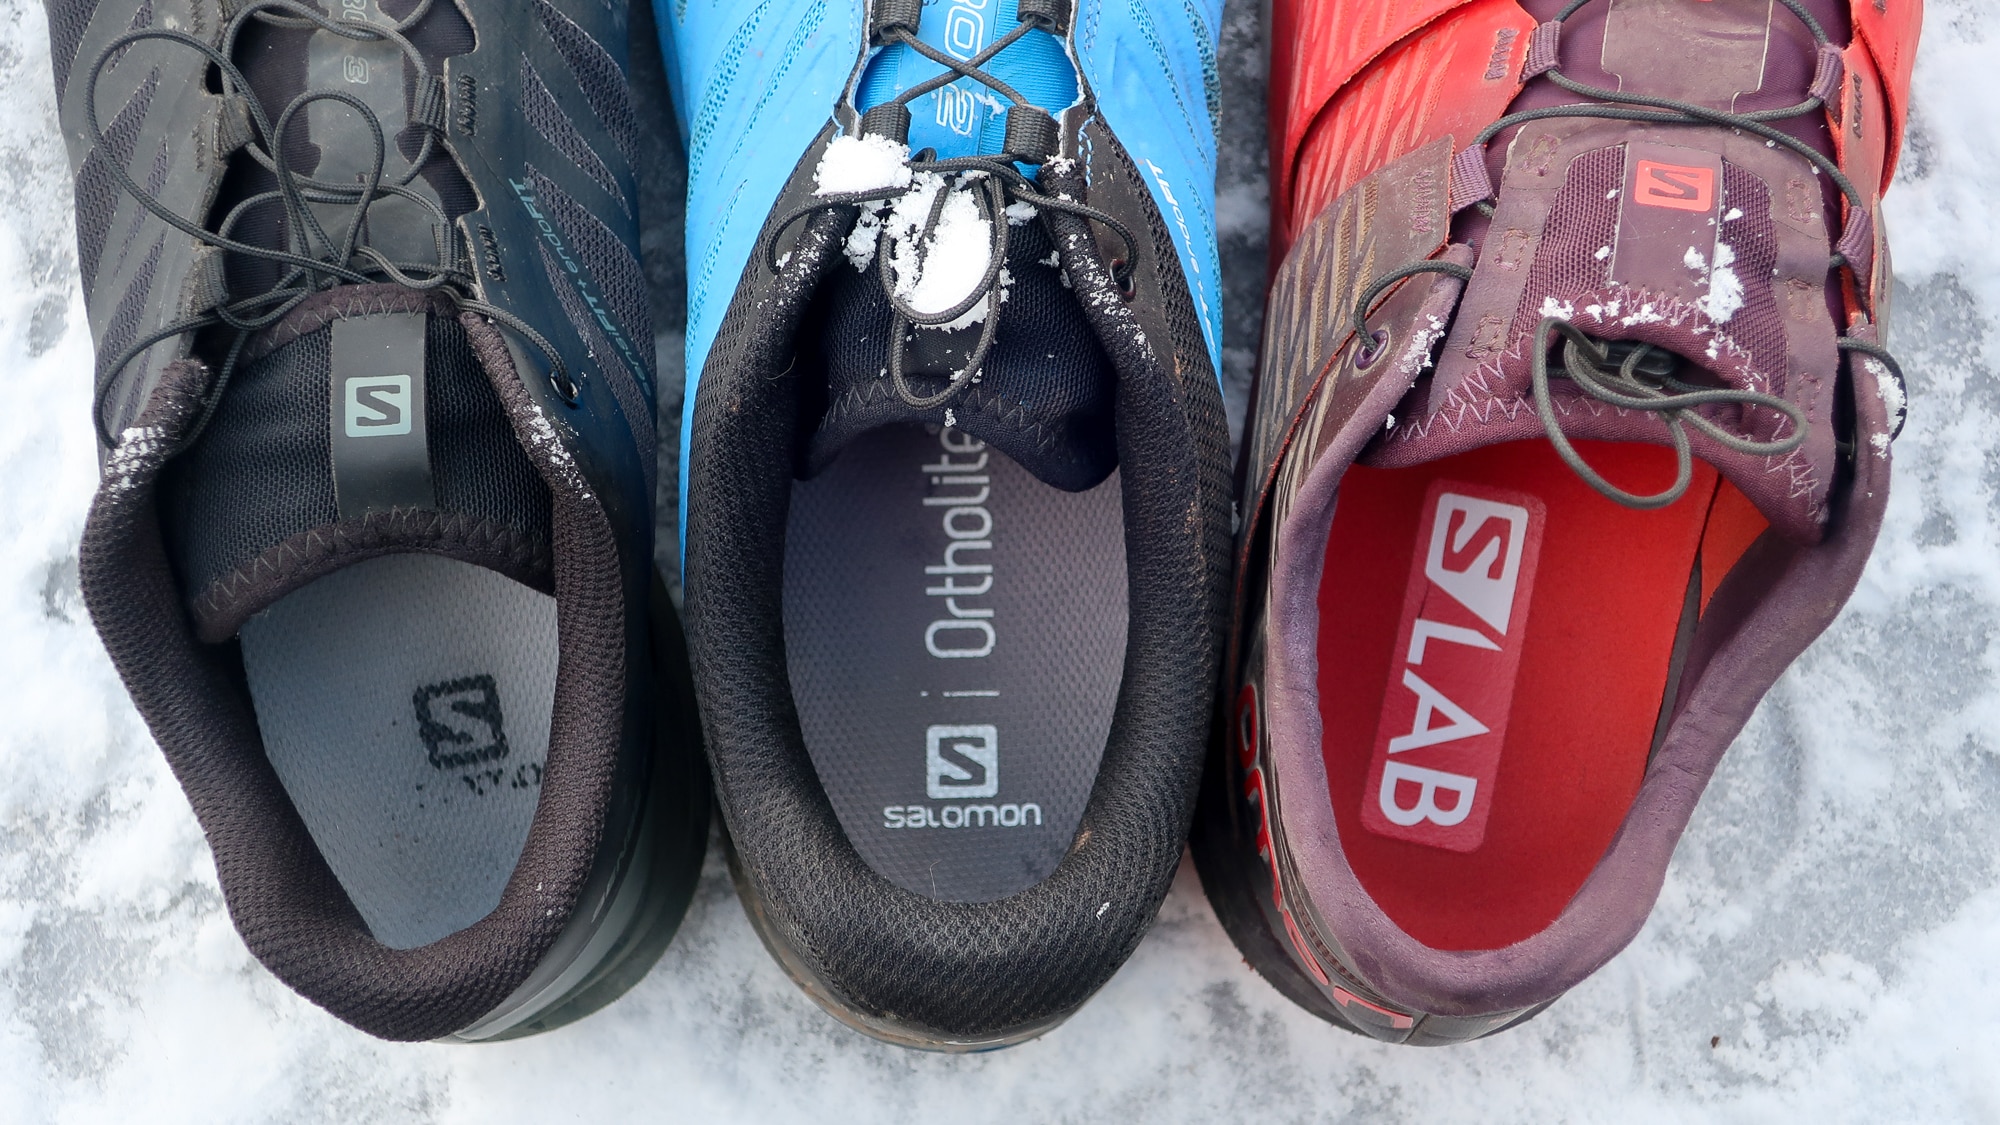
The heel cup of the Sense Pro 2 is more generously cushioned than on the Sense Pro 3 (left) or SLAB Ultra (right).
Per usual, the Sense 2 will best fit narrow and low-volume feet. If you like Altra shoes, forget about this one. If you like the La Sportiva Bushido, you’re in business.
Comparisons
How does the Sense Pro 2 compare with more current models?
Sense Pro 2 vs. Sense Pro 1
The Sense Pro 2 is more capable on trails. It has a more protective forefoot and more aggressive outsole. The Sense Pro 1 is better for smoother trails and mixed road/trail runs.
Sense Pro 2 vs. Sense Pro 3
The Sense Pro 2 is better for drier conditions and rougher trails. The Sense Pro 3 has aggressive lugs that bite into softer ground but that are less stable when torqued on hard ground. The Sense 2 is stiffer and springier, while the Sense Pro 3 is smoother from landing to push-off.
The uppers of the Sense Pro 1, Pro 2, and Pro 3 are fairly similar.
The outsoles have changed significantly, though. Each generation has gotten more aggressive, gaining some capabilities but losing others.
Sense Pro 2 vs. S/Lab Sense Ultra
The Sense Pro 2 fits more snugly, but is more protective underfoot, perhaps making it better for faster and shorter runs. The larger toebox of the Sense Ultra is more comfortable for long days, but its forefoot feels thin on long days, especially as the shoe ages.
Sense Pro 2 vs. S/Lab Ultra
The Sense Pro 2 is lighter and more nimble than the S/Lab Ultra, and about equally protective. But the S/Lab Ultra is better for the long haul: it has a roomier toebox, and its heel is extremely secure even without cranking on the laces.

The Salomon SLAB Sense Ultra (left) and Sense Pro 2 (middle) have very similar uppers, but the SLAB Ultra is quite different.
Interestingly, the Sense Pro 2 (middle) has more outsole rubber than than either the SLAB Sense Ultra or SLAB Ultra.
Buy now: Salomon Sense Pro 2
Questions about the Sense Pro 2 or have an experience with it? Leave a comment.
Disclosure. This website is supported mostly through affiliate marketing, whereby for referral traffic I receive a small commission from select vendors, at no cost to the reader. This post contains affiliate links. Thanks for your support.
The post Long-term review: Salomon Sense Pro 2 || Nimble & capable trail shoe appeared first on Andrew Skurka.
December 3, 2018
Mix it up: How JMT, PCT, and SHR hikers can get on the Yosemite High Route

Thru- and section-hikers on the John Muir Trail, Pacific Crest Trail, and Sierra High Route can hop onto the Yosemite High Route in six places to extend their itinerary, change course, or inject their trip with more adventure and challenge.
The post Mix it up: How JMT, PCT, and SHR hikers can get on the Yosemite High Route appeared first on Andrew Skurka.
December 1, 2018
Do you have 2 days or 2 weeks? Yosemite High Route thru- & section-hikes

For the fullest experience, the Yosemite High Route is best completed as an end-to-end thru-hike.
For most backpackers, however, it will be more practical to undertake the route in more bite-sized pieces. These section-hikes are:
More compatible with family and work commitments;
Loops, and therefore logistically simpler than point-to-point itineraries; and,
Less physically difficult, due to relatively short durations and lighter food loads.
The post Do you have 2 days or 2 weeks? Yosemite High Route thru- & section-hikes appeared first on Andrew Skurka.
November 29, 2018
Long-term review: Suunto 9 Baro || Legit flagship watch, needs firmware fix

The Suunto 9 Baro is the nicest GPS watch I’ve used yet, and would be even better with a simple firmware fix.
For five months I’ve been using the Suunto 9 Baro GPS Sport Watch on a near daily basis, mostly while trail and road running, and occasionally backpacking. With few exceptions, it has supplanted my trusted Suunto Ambit3 Peak (long-term review). It’s the nicest Suunto watch that I’ve used yet, but has one significant blemish that I hope will be rectified in a future firmware update.
Long-term review: Suunto 9 Baro GPS Sport Watch
Suunto launched its fifth-generation GPS watch series with the Suunto 9 in June 2016. It expanded the family in September with the Suunto 9 Baro, which was sent to me for review several months before its release.
The Suunto 9 retails for $500; the Suunto 9 Baro, for $600. Nearly everything I say about the Suunto 9 Baro will apply to the Suunto 9 as well.
The Suunto 9 Baro is a legitimate flagship product — it either improves upon or rivals the performance and features of previous generations like the Ambit3 and Spartan. (As you might expect, it has taken over Suunto’s flagship price point, too.) It’s the most accurate and richly featured watch in Suunto’s line, while also being the nicest to look at, wear, and use.
Key product specs
Sapphire crystal glass, titanium bezel, and glass fiber polyamide case
Interchangeable silicone strap
Touchscreen color display with 320 x 300 pixels and LED backlight
FusedTrack (more info)
Optical heart rate sensor
Bluetooth connectivity
Built-in barometer
Battery life: 25, 50, and 120 hours at 1-, 60-, and 120-second intervals
Intelligent battery technology (more info)
$600 MSRP
More info
Form factor
The Suunto 9 looks nearly identical to a Suunto Spartan, sharing the same:
Easy-to-ready screen that can display up to seven data fields (although my 20/20 eyes will tolerate only five);
Three right-side buttons, which are smooth and responsive;
Integrated GPS antenna, so there is no awkward “hump” like on the Ambit2 and Ambit3 Peak;
Vibration alarm;
Magnetic charging/download cable, which secures quickly and precisely to the watch; and,
Optical heart rate monitor from Vallencel.
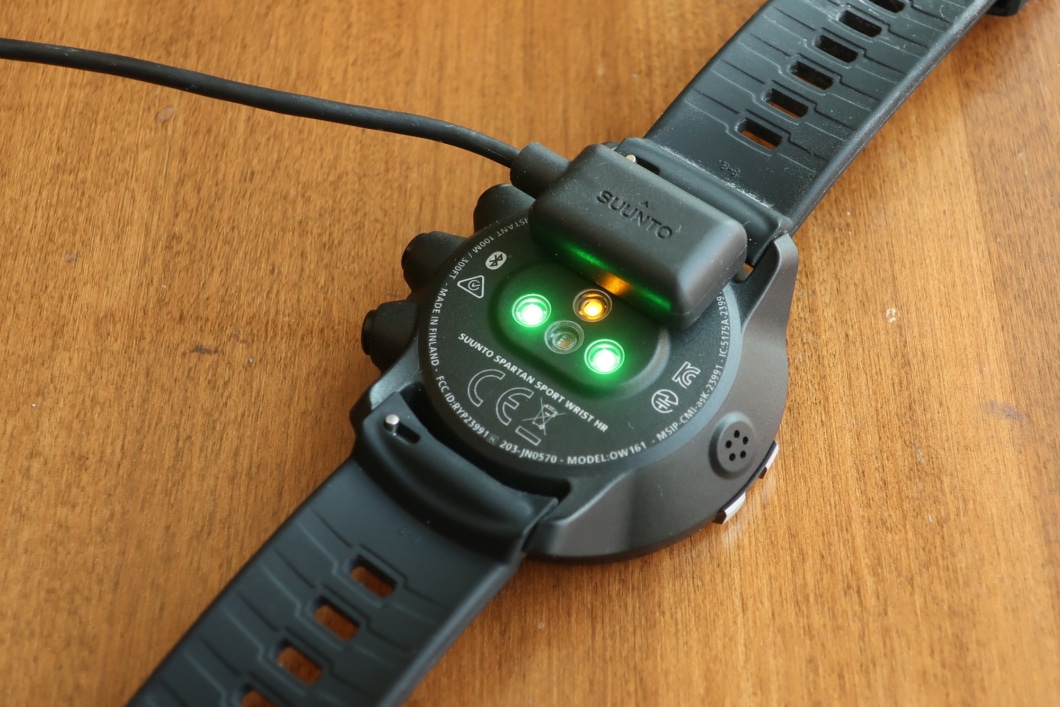
The Suunto 9 shares the same charging/data cord as the Spartan. It reliably locks into place with a magnet.
Thankfully, Suunto made one physical change to the Suunto 9: its silicone band. The band on the Spartan Sport Wrist HR (my review) was grabby and excessively pliable, causing it to catch clothing (and, worse, arm hair) and to collect lint; it also would not slide easily through its retention loops.
The band on the Suunto 9 does none of those things, and is notably more comfortable than the stiffer Ambit3 band. I’d like to see its “top” section perforated to improve airflow and evaporation, however.
The new band is also easily changeable, and can be swapped with third-party options to dress it up or give it more style.

The comfortable silicone band is easily detachable, so it can be swapped with infinite third-party options.
Battery life
The Suunto 9 is rated to 25, 40, and 120 hours when the GPS reading interval is set to 1, 60, and 120 seconds (described by Suunto as Best, Good, and Okay), respectively. This is substantially better than optical HR-equipped Spartan watches (e.g. Sport HR, Sport HR Baro), which were rated to 10, 20, and 40 hours. And at the 1-second interval, it’s even better than the Ambit3 Peak, which is rated to 20, 30, and 200 hours at 1-, 5-, and 60-second intervals.
Does five extra hours of battery life matter? Interestingly, for me it would make a big difference: I’ve completed five 100-mile ultras since 2015, and my finish times have all been between 20:12 and 24:44. With my Ambit3 Peak, I’ve had to set the GPS interval to 5 seconds. But with the Suunto 9, I could run it at 1-second intervals, which would be slightly more accurate.
Intelligent battery modes
Suunto has always allowed users to extend the battery life by adjusting the GPS ping interval. But it had to be done at the Movescount website or through the Movescount app, and it required a sync afterwards; the setting was also specific to a sport mode.
With the Suunto 9, the ping interval can be adjusted online or through its smartphone app, but also directly in the watch before the start of an activity. The ping interval is part of a “basket” of battery-saving adjustments, along with screen colors, screen brightness, touchscreen on/off, display auto-shutoff, Bluetooth on/off, and vibration alarms on/off. Suunto describes these grouped settings as:
Performance (1-second interval (“Best”), and most features are turned on or up)
Endurance (60-second interval (“Good”))
Ultra (120-second interval (“Okay”) and most things are turned off or down)
This on-watch adjustment is convenient, and could save the day if you forget to update your settings or charge your watch prior to an activity.

The battery settings can be changed directly on the Suunto 9 immediately before starting an activity, rather than going through the Suunto app or Movescount.
Accuracy
From what I can tell, the Suunto 9 is at least as accurate as the Ambit3 Peak when its GPS ping interval is set to 1 second. During track workouts, it has seemed spot on, and recorded distances for my most established runs are about the same. I have yet to complete a marked course with the Suunto 9.

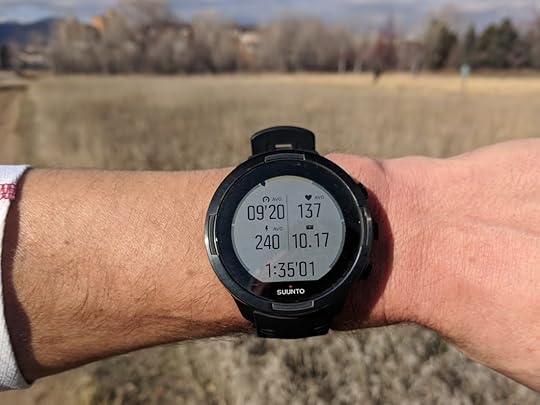
GPS track recorded by the Suunto 9 in Best mode while running the switchbacks in lower Skunk Canyon. The track is never off by more than a yard or two.
FusedTrack
The most exciting technology in the Suunto 9 is FusedTrack, which activates in the Endurance or Ultra battery mode (or when the GPS ping interval is set to Good or Okay through the website or app). It combines data from the built-in accelerometer, gyroscope, and compass to “fill in” location data between GPS pings. The resulting data is not as accurate as a 1-second track, or a 5-second track recorded by an Ambit3 Peak. But the Suunto 9 does not cut corners as badly as the Ambit3 Peak in 60-second mode.

A satellite view of a recent run that I recorded with the Suunto 9 (blue, set to 60-sec pings) and Ambit3 Peak (red, set to 5-sec pings). The Ambit3 records a more accurate track, but the Suunto 9 is never too far off, despite grabbing its GPS location only about four times in this image.
Optical heart rate
Wrist-based heart rate technology is not yet as accurate as chest straps. So for serious heart rate training, you’ll need the Suunto Smart Sensor or another Bluetooth-compatible device. (Note: I’ve been frustrated with the Smart Sensor’s long-term performance, but it sounds like competing straps have their own issues.)
The Suunto 9’s optical heart rate sensor should be sufficient for more casual activities and users. Based on reviews, it sounds like that’s generally the case.

The optical heart rate monitor seems to work for most, but unfortunately not for me.
But that has not been my experience. The heart rate readings seem accurate when my arm is mostly still, like when I’m sleeping or when I’m waiting for the watch to connect with GPS satellites immediately before a run. During a run, however, the HR readings are rarely accurate, and thus largely worthless.
I don’t have an explanation for this, and I have not found a solution (besides wearing my chest strap when I want HR data). I suspect it may relate to the size of my wrist (6.75 inches/17 mm in circumference) and/or how I position or tighten the watch.

November 13. The HR reading was roughly accurate from 15-30 minutes, and maybe 35-45, although I think it was probably reading 5-10 bpm high.

November 23. Sustained readings at around 180 bpm, which is approximately my cadence and about 5 bpm higher than my max HR.

November 28. Accurate HR readings from 10 to 35 minutes, and maybe from 55 to the finish.
Smartwatch and activity tracking
The Suunto 9 offers basic smartwatch and activity tracking features. Specifically:
Several watch face options,
Push notifications from a smartphone,
Step and calorie counting, and
Sleep tracking.
In this area, the Suunto 9 falls short of the Garmin Fenix 5. Some users might care, but I don’t. It’s not important to me that I can control my music selection through my watch, that I know how many flights of stairs I’ve climbed in a day, or that I can download new watch faces in an online store.
Like its predecessors, the Suunto 9 is best considered a piece of equipment, like running shoes or a running vest. I put it on before an activity, and take it off afterwards. For the remainder of the day, I wear a Bertucci A-2T Super Classic or a dressy Citizen. Even with a nice leather strap, a clunky GPS sport watch will still look like a, well, clunky GPS sport watch.
Firmware fix request: Custom sport modes
Pre-installed on the Suunto 9 are 80 “sport modes.” Each mode displays data that Suunto thought would be relevant for an activity. For example, one pre-installed running mode is described as “Interval,” and its description says, “Designed for interval running. Use the lap table view to compare intervals with duration, average heart rate and max heart rate. This mode stores the run with the Move type ‘interval’ so you can follow your progress over time.”
These modes may be helpful for someone unwilling to dig into the functionality of the Suunto 9. (Dare I ask: If you spend $500+ on a watch, why aren’t you digging into its functionality?”)
But I’m not one of those customers, and none of the pre-installed modes are set up the way I want them. For example, my go-to settings for backpacking, for road marathons, and for mountain ultra trail marathons look nothing like the pre-installed modes.
Unfortunately, the pre-installed modes cannot be modified.
Custom sport modes would seem to be a workaround. However, these modes are limited to just four display screens, one of which must be dedicated to a breadcrumb navigation track. That screen is useless to me, so essentially Suunto has given me only three screens to display all the data that I want.

Why did Suunto limit the number of custom sport mode screens to four, especially when its pre-installed modes have up to six and when the Ambit3 Peak allows up to eight? And who at Suunto thought three screens was enough?
Suunto, please address this. It’s the most significant flaw of the Suunto 9 Baro, and it seems entirely fixable.
Suunto 9 vs. the competition
How does the Suunto 9 compare to other popular GPS sport watches?
Suunto 9 vs. Suunto 9 Baro
The Suunto 9 and Suunto 9 Baro differ in just one respect: the 9 Baro has a built-in sensor to measure barometric pressure and to help generate altitude readings. The original Suunto 9 cannot display barometric pressure and relies solely on GPS to calculate its altitude, which will be less accurate if GPS strength is low (e.g. when running under heavy tree cover).
The barometer becomes helpful in two situations:
When the 9 Baro is not tracking an activity, it still tracks trends in barometric pressure, which can forecast changes in the weather; and,
When the GPS ping interval is set to 60 or 120 seconds (“Good” and “Okay” in Suunto speak), the 9 Baro will more accurately record vertical gain and loss.
If these situations don’t sound relevant to you, stick with the Suunto 9 and save $100.
For a more in-depth explanation of baro vs. non-baro watches, read this.
Suunto 9 vs. Suunto Ambit3
The Ambit3 was Suunto’s third-generation GPS watch series. The “newest” Ambit3 product was released in early-2016, and the last firmware update was December 2016. Suunto still produces the Ambit3 Peak and Ambit3 Vertical, but has discontinued the Ambit3 Sport and Ambit3 Run (although it’s still liquidating inventory).
Between the Ambit3 Peak and Ambit3 Vertical, I preferred the Peak. (Read my long-term review.) Its battery was longer-lasting and its GPS accuracy was better. The Vertical was more svelte and had vibration alarms.
Versus the Suunto 9, the Ambit3 Peak has three advantages:
Price. The Ambit3 Peak retailed for $500, but is now regularly available for less than $300 on Amazon.
Battery life. When backpacking, I set the GPS ping interval to 60 seconds, which gives the Ambit3 Peak a 200-hour lifespan. The 9 Baro lasts 50 hours at this setting and 120 hours when set to a 120-second interval, although its accuracy will be better because of FusedTrack.
Sport modes. Within each sport mode, the Ambit3 Peak allows up to 8 display screens. The Suunto 9 only allows three, plus a required breadcrumb track screen.
Otherwise the Suunto 9 is a better watch.
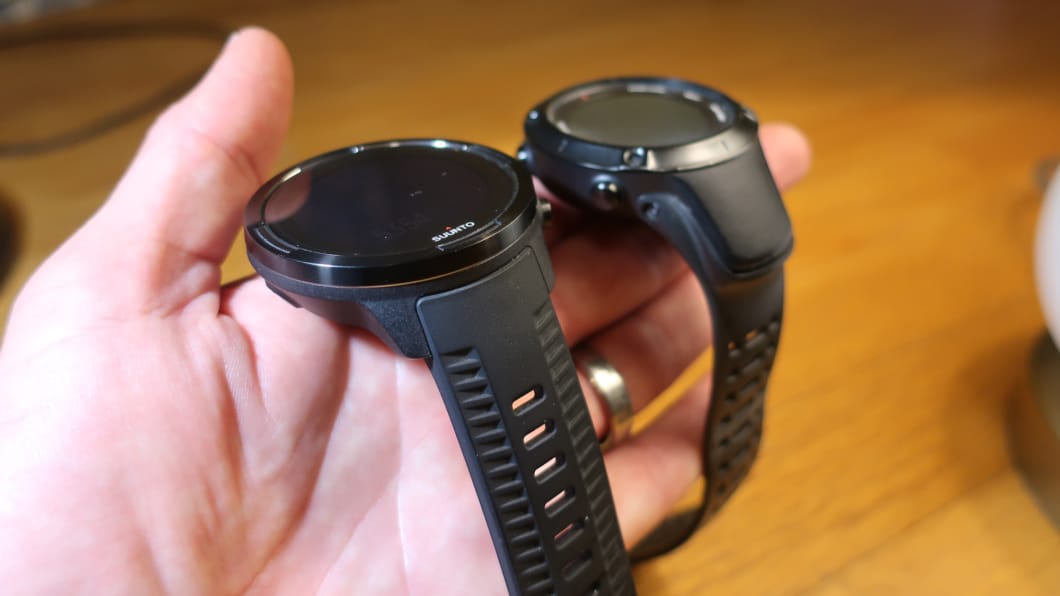
Suunto 9 Baro (left) and Suunto Ambit3 Peak (right)
Suunto 9 vs. Suunto Spartan
The Spartan was Suunto’s fourth-generation GPS watch series, and was last expanded in September 2017 with the Spartan Sport Wrist HR Baro (my review). In almost all respects, the Suunto 9 matches or exceeds the Spartan watches. The major exception is price — Suunto currently lists the Spartan Sport HR Baro for $440, and I’m sure it’s available for less elsewhere.
Questions about the Suunto 9 Baro, or have an experience with it? Leave a comment.
Disclosure. This website is supported mostly through affiliate marketing, whereby for referral traffic I receive a small commission from select vendors, at no cost to the reader. This post contains affiliate links. Thanks for your support.
The post Long-term review: Suunto 9 Baro || Legit flagship watch, needs firmware fix appeared first on Andrew Skurka.
November 28, 2018
Long-term review: Garmin inReach Explorer+ || Sat comm + GPS unit 2-in-1


The author at the last trail junction before Milner Pass, the northern terminus of the Pfiffner Traverse, with trusted inReach Explorer+ at the ready.
For different trips, I often wear and carry different gear. But some items are so vital that they end up on every trip — and my Garmin inReach Explorer+ is one of them.
Since its release in early-2017, I have used my inReach Explorer+ on many trips around the globe, including on the southern Appalachian Trail, John Muir Trail, Fiordland National Park in New Zealand, and Kilimanjaro. In most photos from these trips, the inReach is reliably attached to my shoulder strap.
Review: Garmin inReach Explorer+
The Garmin inReach Explorer+ is a significant investment: it’s $450 for the device, and service and insurance coverage cost more. But what’s the price of safety and peace of mind? If I got into trouble, the inReach might help me get out. And for my parents, the ability to communicate with me while I’m out on a trip is invaluable.
You might consider the inReach if you:
Travel in regions with unreliable cell phone service;
Stay connected with with family and loved ones during trips;
Can handle the cost to own and operate the device;
Utilize electronic navigational resources, such as GPX exports from Caltopo, Gaia, AllTrails, etc.;
Regularly need such a device, so that the cost can be justified with high use; and/or,
Are responsible for others during backcountry trips, such as guides or expedition leaders.
I purchased the inReach Explorer+ as I was preparing to thru-hike the John Muir Trail with my father. The Explorer+ was unique in the marketplace for offering both:
Two-way satellite messaging, and
Full GPS functionality.
The more economical inReach SE+ does not display topo maps; the SPOT Gen3 is only a one-way device; and PLB’s do not offer non-emergency messaging.
As a trip leader for Outdoor Recreation Georgia Tech, I lead groups into the backcountry nearly every weekend during the school semester. During the summers and school breaks, I always try to find a way to get out on trips as well. So for me, I knew that I would get a lot of use out of the device.
After using the inReach for almost a year and a half now, it is only showing minor signs of wear and tear. Only a few surface scratches on the display, and only a marginal decline in battery life. The messaging, navigation, and tracking features still work like a charm.
The three main selling points for me were:
(a) The ability to communicate back and forth with loved ones and family.
As a college student, my parents still are getting used to the “emptier nest” (as my brother is still at home). Additionally, the two-way communication eased my parents nerves about my venturing off into the wilderness. And, perhaps most significantly for me, my parents insist on it and pay for the subscription.
(b) The ability to upload routes and waypoints.
Topographical maps and a compass are invaluable tools for navigation. But in a modern age of technology, having GPS capabilities makes navigating in the backcountry much easier. Much, much easier. I knew I wanted a GPS device of some kind, as opposed to a smartphone app, as I try to minimize the risk and exposure to my cell phone during trips. The rugged build of the inReach, with its waterproof housing and drop resistance was exactly what I was looking for. Something I could bump and bruise around and not have to worry about.
(c) The ability to initiate SOS.
Safety comes first for me. No ifs, ands, or buts about it. And the same for my parents. I am much more comfortable on backcountry trips knowing that if there is a serious emergency, and I am either by myself or in dire need of assistance, I have the ability to call for it. I know it is not a guarantee of a swift and comfortable rescue, but I at least have the ability to reach someone who can begin to mobilize support.
Key specs
Weight: 7.5 oz (confirmed, including the carabiner attachment)
Battery Type: Rechargeable Lithium Ion
Claimed Battery Life: 100 hours at 10-minute tracking intervals
Claimed Location Accuracy: 5 meters
Altimeter: Pressure Based
More info
Battery
The rechargeable lithium ion battery uses a micro USB cable port, the same as many smartphones and other devices, allowing you to minimize the number of cables you pack.
At 10 minute tracking intervals, I find that it lasts for about five days on a single charge, at 10 hours per day.
I keep the device in my sleeping bag at night to minimize battery loss due to cold, but have found that this is not really necessary in relatively moderate temperatures, due to the device’s robust design. Once the battery percentage gets below 25%, it warns you about saving reserve power for SOS.

Location
The location accuracy of the device depends on cloud cover and other variables, but I have found it to be accurate to within about 25-50 yards, not quite the 5 meter limit as specified by Garmin. I will admit, I have not gone out with a tape measure and measured the disparity to a known landmark, but am speaking from my general experience through thousands of miles of use.
Altimeter
The altimeter readings are surprisingly accurate, I have found to within 50 vertical feet. On top of Kilimanjaro, which stands 19,341’, I had a reading of 19,328’, which is accurate enough.
Functionality: What does the inReach Explorer+ do?
I’ll divide the functionality of the Explorer+ into three categories:
1. Messaging / Social
The Garmin inReach Explorer+ affords backcountry adventurers the ability to stay in touch with loved ones, friends, and even social media. It’s truly revolutionary, as no other product on the market has yet offered this much functionality.
As a two-way satellite messenger, the Garmin inReach Explorer+ allows users to send AND receive text messages to and from:
Worldwide phone numbers,
Email addresses,
Other inReach devices.
Outgoing messages are limited to 160 characters per message (this limit can change depending on the number of recipients in the message; the more recipients, the less characters you get).
Messages can be sent from the Explorer+ in two ways:
1. Through the device
To be perfectly honest, sending messages from the Garmin inReach Explorer+ device is a time consuming process. First, select pre-loaded contacts or enter a phone number / email address.
Next, begin to type your message. Slowly . . . very slowly, using the arrows on the keypad to tick over to desired characters. There is an autocorrect menu which will save commonly used words (only a small convenience). You will notice as you type that there is a character counter in the bottom left corner that will notify you how many characters (of the max 160) you have left.
Finally, send it! You will be notified that your message was sent by either (or both) a sound and a crossed icon that will appear next to the message (if the message is in the progress of sending you will see a spinwheel).

The “virtual keyboard” on the inReach device is tedious. Thankfully, messages can be sent more efficiently through the Earthmate app.
2. Through the Earthmate app
Garmin has developed a smartphone compatible app interface called Garmin EarthMate, which makes sending messages through the inReach Explorer+ MUCH easier than the traditional method, to say the least. The app connects to the device using Bluetooth, which limits the battery life of your phone and the inReach Explorer+ slightly (more on this later).
First, you must turn on the inReach Explorer+ ‘s bluetooth compatibility, which is accessed through the “Settings” menu.
Next, you must connect your phone to the inReach Explorer+ by pairing them through Bluetooth (similar to many wireless devices and multimedia systems in modern cars).
Once connected, the EarthMate app wields its powers, allowing users to send messages through the device, analyze tracking statistics (if the Tracking function has been turned on), and other functions.
To send a message through the EarthMate app, click on the “Message” icon and then on the notepad icon in the top right corner. The menu that follows will look similar to the interface for sending a text message from your phone. You can then type in a number manually, or select from your contacts list on your phone.
The greatest benefit to the EarthMate app is the ease in typing a message from your phone keyboard, as opposed to the painfully slow process of ticking off characters using the keypad on the Garmin inReach Explorer+ . Since the connectivity is Bluetooth, your phone and the inReach Explorer+ have a range of around 25-50 feet (which I can attest to, it may be larger than this).

Screenshot of of the Earthmate app.
Receiving Messages on the inReach Explorer+
As the title “two-way” satellite messenger implies, the Garmin inReach Explorer+ also affords users the ability to receive messages from worldwide phone numbers and email addresses. Incoming messages are limited to the same 160 character. Longer messages come through in separate segments. NOTE: I have noticed sometimes that the messages can come in out of order.
Users can customize the tone that is played by the device when a message is received. Users can also opt to mute the sounds completely, or choose the option of “Ring Until Read,” which will send the device into a loud panic until the user reads the message.
A fun note on messages: if you receive a message from another Garmin inReach device, you can see the location from where that message was sent.
What does it look like on the “other side”?
You’ve now seen what messages look like from the device, but what do your loved ones and friends see when THEY receive messages from you?
Messages can be received by text message, as the photo above displays, or by email, as the photo below displays.
Recipients can respond to text messages from the inReach just like a normal phone conversation, simply replying to the number as normal. To reply to an email message from the inReach, recipients must follow the link appended in the email to respond.
You can choose if you want your latitude and longitude coordinates to be embedded in the messages you send out in the Garmin Portal.

Garmin MapShare
By registering your Garmin inReach Explorer+ device, you receive the option of creating a Garmin MapShare page. This page allows others to view your location, track your progress, and send messages to your device.
As an example, see my Garmin MapShare page.
When uploading waypoints, routes, and sending messages, you will be given the option of having them appear on the MapShare page. For messages, you will need to click on the capital M icon on the sidebar of the message screen; for waypoints and routes, you will need to click on the same capital M icon in the Garmin portal.
You can also customize the text that appears at the top of the MapShare page, as I have on my page.
The MapShare page is a fun and interactive way for loved ones to keep up with your adventures. The page will update your location as frequently as you set the tracking points to be sent, which can range from “Continuous” to “2 hours.” I know for a fact that my mother has spent countless clicks on my MapShare page, refreshing and refreshing as I made my way across various terrain.
Social Media Connectivity
You can even post to your own Facebook and Twitter page through the Garmin inReach Explorer+ (I will admit I have not used this function). In the Garmin portal there is an option for you to connect your Facebook and Twitter pages. Once connected, when sending messages you can select the Facebook or Twitter icon on the sidebar for the messages to post to your page.
Service Plans
Just like your regular cell or home phone, the Garmin inReach Explorer+ requires a service plan to send/receive messages. You can add this cost to the pricetag of the device itself. Rather than me explain the different plans, view them at Garmin’s website.
Navigation
When in the field, I use the inReach Explorer+ as a navigational tool, capitalizing on its GPS features.
The inReach will display your location as a triangular cursor. As you turn the device, the cursor’s pointer will move in concert with the antenna, allowing you to take rough line of sight bearings towards landmarks.
You will notice in the bottom left hand of the screen there is a map scale. At intervals lesser than or equal to 0.2 miles, the topographic layer will display forested areas with a green color, and areas without tree cover with a gray background. Imported GPX courses, routes, and waypoints will be displayed on the map screen as well, allowing you to evaluate your position in relation to your pre-selected landmarks.
You can estimate distance to certain landmarks on the screen by moving the mouse cursor using the keypad. In the top right corner the display will read the straight line distance to the location. You can also view the elevation of the specified location by clicking on the check button on the device.
I do not advocate for the inReach Explorer+ to replace a printed topographical map and a compass as a navigational tool. I feel that understanding how to navigate using non-electronics is a survival skill, if nothing else. But I will admit, the Garmin inReach Explorer+ interface does make it very easy to navigate through terrain. I have found myself needing to dig into my backpack less and less for maps as I become more and more comfortable using its navigational interface.
Uploading Routes and Waypoints
The Garmin inReach Explorer+ has 2 GB of internal memory dedicated for uploading routes and waypoints as GPX files. I normally create my routes and waypoints in Caltopo, and then export them as GPX files.
The Garmin portal allows you to upload GPX files in two different data types: (1) as “Tracks” and (2) as “Routes.” Tracks allow you a greater degree of accuracy, as they can “preserve up to 10,000 data points from the line.” Routes, on the other hand, “will be reduced to 200 data points, which may result in a line that is more coarse than the original.”
I personally upload my GPX files as Routes, and accept the coarser detail, only because uploading the GPX file as a Track will not distinguish it from the tracking points you have created in the field. I like to be able to see the difference between the route I planned and the route I actually tracked afterwards.
Map Layers
The Garmin inReach Explorer+ comes pre-loaded with a 1:24,000 scale topographic layer of North America (formerly known as DeLorme TOPO). However, you can get access to more layers and maps through the Garmin Portal.
Your subscription to the inReach service plan will gain you access to all the topographic layers. If you wish to have hunting layers (for which I cannot claim any experience), you must pay for an additional subscription to Garmin Earthmate Hunt for $39.95/year.
International layers include OpenStreetMap and Digital Atlas of the Earth. Unfortunately, you are not able to upload your own layers to the inReach, nor are you able to purchase additional layers through the inReach portal.
SOS / Emergency
I get asked the question all the time: “So. . . what happens when you press THE button??”
One of the cornerstone features of the Garmin inReach Explorer+ is the SOS capabilities it facilitates initiating rescue. Unfortunately, I have had the experience of initiating a helicopter rescue for someone using the inReach, but I am pleased to be able to say that having the inReach Explorer+ made for a swift and safe evacuation.
The Mystery Behind the Button
There are actually two ways of initiating rescue using the Garmin inReach Explorer+ : one, of course, is by pressing the SOS button. The second is by selecting the SOS icon on the home screen display.
The “button” is actually housed under the SOS flap, so as to prevent accidental pressing. Once the button is pressed, a 5 second countdown will begin, during which you can cancel the SOS call if accidental.
Once the SOS has been initiated, a signal (with your GPS location) will be sent to Garmin’s emergency center: the GEOS Emergency Rescue Coordination Center. An operator will send you a message asking for a response as to your condition. If you do not respond, the operator will then contact your listed emergency contacts on your inReach account.
The back and forth communication ability with the GEOS Alliance operator is critical in an emergency situation, in my opinion. When my group had to initiate a helicopter rescue, we were able to communicate the condition of our injured expedition member with the operator, who was then able to properly allocate rescue resources.
An Important Question: Am I Covered?
“So. . . how much does pressing the SOS button cost?” Well, that depends, on a lot of factors.
Factor #1: Your insurance coverage through GEOS Alliance. When you register your inReach device, you will notice that you have ranging options of search and rescue insurance coverage. They are arranged through the GEOS Alliance, and range in price point.
For more information on various insurance plans, see GEOS Alliance’s description.
Factor #2: Your location in the world. Some countries have government funded search and rescue, such as New Zealand. It is very useful to research regulations on search and rescue before you travel abroad, so you can understand the financial implications of initiating a rescue, should it become necessary.
Front Panel Display
You can have the front panel of the inReach display important emergency information, such as an emergency contact phone number or known allergy, similar to a RoadID.

The original DeLorme inReach SE, newer inReach Explorer+, newest inReach Mini, and the SPOT X.
Alternatives: The Competition
There are some alternative options to the inReach Explorer+ on the market now. I will only briefly mention them, as I do not have experience using them, but feel it is useful to know that they are out there.
Garmin inReach Explorer+ vs Garmin inReach Mini
The inReach Mini has been out for a full summer season now, and there is understandable excitement about its smaller size and lighter weight. But it’s still pricey, at $350 MSRP. And still requires the same subscription fees through Garmin that the normal inReach Explorer+ does.
Garmin inReach Explorer+ vs SpotX
The inReach stole significant market share from the SPOT Gen3, which was a one-way satellite messenger. In May SPOT released the SPOT X, a two-way satellite messenger that appears to be a direct competitor to the inReach Explorer+. At $250 MSRP, it’s sticker price is less than that of the Garmin inReach Explorer+. Similar to the Garmin inReach Explorer+ , the SPOT X requires a subscription fee, which can vary, just like with the inReach service plans.
Questions about the inReach Explorer+ or have an experience with it? Please leave a comment.
Disclosure. This website is supported mostly through affiliate marketing, whereby for referral traffic I receive a small commission from select vendors, at no cost to the reader. This post contains affiliate links. Thanks for your support.
The post Long-term review: Garmin inReach Explorer+ || Sat comm + GPS unit 2-in-1 appeared first on Andrew Skurka.
November 27, 2018
Comparison: Nolan’s 14 vs. Pfiffner Traverse || Wilderness, difficulty, and flow

As part of a 650-mile, 39-day self-supported hike along Colorado’s Continental Divide last summer, Sam Chaneles completed both Nolan’s 14 and the Pfiffner Traverse.

Vast views are non-stop along Colorado’s Continental Divide, especially when on Nolan’s 14 or the Pfiffner Traverse. Here, Mt Ida, in Rocky Mountain National Park.
Nolan’s 14 and the Pfiffner Traverse are both high routes in the Colorado Rockies, suitable for advanced backpackers and adventurous ultra runners. While they both feature lengthy off-trail sections and alpine ridges and summits, these routes are considerably different, and I thought it would be useful to directly compare them, in terms of their wilderness, difficulty, and flow.
Background information
Nolan’s 14
Outside describes Nolan’s 14 as the “Mount Everest of Ultrarunning.” Created by Fred Vance and Jim Nolan, and documented best by Matt Mahoney, the 100-mile route through the Sawatch Range crests fourteen of Colorado’s 14,000’ peaks.
The route is rugged: long scrambles over scree and talus are common, and bushwhacking is required to approach some peaks. Ultramarathoners will look to complete the route in less than 60 hours, some choosing to forego sleep. I opted to backpack it in 9 days at a more sustainable clip.

Looking towards Mt. Princeton from the summit of Mt. Antero. It’s dramatic country.
Pfiffner Traverse
Inspired by Carl Pfiffner, first proposed by Gerry Roche, and developed by Andrew Skurka, the Pfiffner Traverse is a 77-mile high route through Colorado’s Front Range. The route includes a ridgewalk across the expansive James Peak Skyline” before taking on a pass and valley pattern through the Indian Peaks Wilderness and Rocky Mountain National Park. The Pfiffner has numerous variations and alternates, but when followed closely it will entail steep vertical gain and loss, scrambles across talus and scree, and probably some sock-soaking bushwhacks.

A big horn sheep in Rocky Mountain National Park. I also saw moose, mule deer, and herds of elk.
Wilderness
The starkest distinction between Nolan’s 14 and the Pfiffner Traverse was the sense of true wilderness.
Nolan’s 14
In linking together Colorado 14’ers like a Connect the Dots puzzle, Nolan’s crosses numerous roads and follows many high-use routes. On summits like Mt. Princeton, Mt. Yale, and Mt. Elbert, I found myself surrounded by Boy Scout troops and Denver-based day-hikers. On more remote peaks, like Huron Peak and Mt. Harvard, I had the summit to myself.

The goal of Nolan’s is to link fourteen 14,000-foot peaks in the most practical way possible, which often means following popular day-hiking routes and old mining tracks. It’s not necessarily intended to be a wilderness experience.
Pfiffner Traverse
In contrast, the Pfiffner Traverse was much more of a wilderness experience. With the exception of the “James Peak Skyline,” which can be easily accessed by car from Berthoud Pass or gravel Rollins Pass, the Pfiffner accessed some of Colorado’s most pristine backcountry. I had plenty of room for myself throughout the Indian Peaks Wilderness, in which the Pfiffner Traverse only rarely follows established trails.
In Rocky Mountain National, the sense of wilderness dials back because of designated campsite regulations. However, the route still has off-trail stretches that made me feel like an early pioneer venturing across Colorado’s expansive alpine. Wildlife was abundant, with elk, moose, deer, countless marmots, and bighorn sheep peppering my camera roll.

The Pfiffner Traverse feels wild more often than Nolan’s 14. Paradise Park is the least visited spot on the route. It’s in the midst of an 8-mile stretch of continuous off-trail travel.
Difficulty & skills
Both routes are hard, plain and simple. They have extensive cross-country sections, extraordinary vertical change, and many scrambles on scree and talus. They are also very exposed to the elements.
Nolan’s 14
Nolan’s has a consistent pattern. Nearly all ascents begin around 9,000 feet at a 4WD road, trailhead, or creek basin. It then climbs steeply to a 14’er. And then descends all the way back down. In some cases, several peaks are clustered on the same ridgeline, so you can tag more than one before repeating the process.
Water is sparse throughout the route. It’s only reliably accessible in the valleys or creek basins from which the ascents begin. Nearly all of the route is above treeline, and is therefore highly exposed to storms and the elements.
None of the peaks on the Nolan’s 14 route exceed Class 3, although some are harder than others. The descent down Tabeguache Peak, which consists of a long stretch across loose scree, ripped the sole off one of my shoes. The route up to Mt. Princeton, as well as the descent down the other side, do not follow established trails, and feature steep scrambles across talus and scree. Also, the final ascent up to Huron Peak (from the south side) climbs through a steep gully filled with scree.

A scree slope on the way up to Mt. Columbia
Pfiffner Traverse
The Pfiffner has its share of challenging sections as well, especially when off-trail in the Indian Peaks Wilderness. As an early-season northbound hiker, the descents of the Northeast Gully and Paiute Pass were particularly difficult. Both are steep, nearly 40 degrees at some points, and both were completely snow-filled. I glissaded down both passes without an ice axe or microspikes, using my trekking poles as a brake. I have previous experience on snow, so I was comfortable in my ability to self-arrest with my poles and on a snow slope, but for those without any previous self-arrest experience these descents would have been difficult.
Route finding on the Pfiffner was mostly straightforward. I had a printed set of topographical maps, and reviewed the Pfiffner Traverse Guide each night, which I had downloaded to my phone. The expansive views allowed me to easily navigate by line of sight. The most challenging navigation came along Thunderbolt Creek, when I was unable to locate elk trails that led down the valley, which left me with numerous miles of bushwhacking.

The view from the top of the Northeast Gully, which is the most technical feature on the Pfiffner Traverse. In early-season conditions, entering the gully is complicated by a large cornice.
Route flow
Like their respective senses of wilderness, Nolan’s and the Pfiffner also differ in their flow. Both routes have have unique sections and get an interesting variety of terrain, but overall the Pfiffner provides a more consistent experience.
Nolan’s 14
As a connecting route between many of Colorado’s highest points, Nolan’s can feel fragmented — it’s broken up by road crossings, frontcountry campsites, and fourteen mini-goals. On Nolan’s, morning climbs will begin below the treeline, reaching the airy alpine by mid-morning all the way up to the summit.

Looking out across a summit ridge.
Pfiffner Traverse
The Pfiffner can be more cleanly broken into sections. The first 20+ miles are atop the Continental Divide and completely exposed. In the Indian Peaks, it follows a pass-and-valley pattern through remote areas. The final section through Rocky Mountain feels like a victory lap — it maintains the pass-and-valley pattern, but it feels safer due to the easier topography, high quality trails, and greater backcountry traffic.
Last word
Looking back now, both Nolan’s 14 and the Pfiffner Traverse were incredible journeys of their own kind. Both are incredible challenges to take on, and both have reward in their own unique way. Nolan’s 14 is a great project for those looking to add Colorado 14’ers to their resume, with high-profile peaks like Mt. Elbert and Mt. Massive in the lineup.
Whereas if you’re less interested in peak bagging and more interested in a genuine “high route” with sections of off-trail, go for the Pfiffner. It will reward you with a great sense of “exploration” through some of Colorado’s true “wild country.”
With either route, you can’t go wrong.
Have questions about either Nolan’s 14 or the Pfiffner Traverse, or how they compare? Leave a comment.
The post Comparison: Nolan’s 14 vs. Pfiffner Traverse || Wilderness, difficulty, and flow appeared first on Andrew Skurka.
November 26, 2018
Backpack hunting: My evolving approach

Originally I thought that hunting would be an extension of the backpacking season. Like in the summer but now with a rifle in hand and in the pursuit of elk and deer, I wanted to roam deep in world-class wilderness areas and to camp in different spots each night.
But I’ve learned that this approach is perhaps more romantic than practical, because the ingredients of a great backpacking trip are often at odds with those of a great hunting trip. And so to improve my odds at filling my chest freezer, I’ve made multiple compromises to the backpacking experience.
1. Aesthetics
The Gore Range and Indian Peaks are dramatic, with 13,000-foot peaks and deep glacier-carved valleys. But they’re hard to hunt, and three years ago we abandoned them for aesthetically subdued Morapos Creek, where the elk herd is bigger, where harvest rates are higher, and where the topography is less of a hindrance.

Red Mountain, a 13’er, which hovers above South Willow Creek in Colorado’s Gore Range, GMU 371

GMU 12 is relatively unspectacular. But there are more elk here.
2. Consecutive days out
I used to leave the trailhead with enough food for the entire hunt. But at two pounds of food per day (on top of 35 pounds of hiking gear, hunting equipment, and water), my pack became annoying cumbersome, especially when hiking at altitude, uphill, off-trail, or in snow.
Now, I carry just two or three days of food, and restock at my vehicle when it’s convenient or when my food bag is empty.

Food for a 5-day hunt weighs about 10 pounds. By circling back to the car halfway into the hunt, I lighten my pack by five pounds, which is noticeable.
3. Remoteness
Areas that are difficult to access — due to distance, vertical change, vegetation, or lack of trails — are more likely to hold game. And I’m more capable than most in getting to these places.
Even so, I try to hunt relatively close to the trailhead (within about 5 miles and/or 2,000 vertical feet of gain, depending on the conditions), because hauling meat from such areas would be epically long and hard, to the point of being impractical (at least without a horse and/or a lot of vacation time).

To haul out a cow elk in 2015 that I shot just 4 miles from the trailhead, Noel and I both had to hike 12 miles, climb 3,200 vertical feet, and descend 4,400 vertical feet. Two-thirds of this distance and vertical was while carrying packs that weighed 60 to 70 pounds.
4. Base camp
By carrying my camp on my back, I’m more flexible and efficient than hunters who sleep in a base camp. I can hunt where the game or my gut take me, and sleep nearby when it gets dark. And I wake up and go to bed where the action is (or where I think it is), and avoid tiring hikes from or back to a fixed camp each morning and night.
But the conditions in the Colorado Rockies in October and November can easily overwhelm a backpacking hunt setup. In most years, temperatures fluctuate around freezing, high and shady slopes are already snow-covered, and storms temporarily suspend hunting and blanket the area in snow. Every year, the nights are long. Within a few days, we have damp clothing, damp boots, and damp sleeping bags.
This year I found the solution, courtesy of Noel: a supplemental base camp. This allows us to “reset” both physically and mentally, by drying our gear and getting out of the weather for a while.
Conditions in October and November can overwhelm a lightweight backpack hunt kit. Reset physically and emotionally at a supplemental base camp.
Gear list: Supplemental base camp
If I’ve been sleeping in a small, damp, and unheated tent for several nights, a basic base camp is a treat. Noel’s consists of:
Guide Gear Teepee Tent – 14′ x 14′, which is shockingly large and well designed for its $120 MSRP. It can fit three people plus gear comfortably, or four plus gear snugly.
For even more space, there is an 18′ x 18′ model.
Noel didn’t like the included pegs, so he swapped them out for Coghlan’s 12-inch Steel Stakes.
Mr. Heater MH18B Portable Propane Heater ($135), which seemed to be a good size for the tent and which was more user-friendly than a portable wood stove.
The cure for damp feet and boots: a portable propane heater.
Dust pan and brush, to sweep up snow and dirt that gets tracked into the tent.
Boot mat ($20), which served double-duty: to better distribute the pressure under the center pole, and to collect melted snow off our boots.
Make sure the base camp is also stocked with:
Clean water, which may have to be insulated in a cooler on colder trips;
Extra stove fuel, to avoid tapping into your backcountry supply; and,
Portable battery packs, to recharge smartphone, inReach, GPS, etc.
How have you evolved as a backpack hunter? What other items are critical in a hunting base camp? Leave a comment.
Disclosure. This website is supported mostly through affiliate marketing, whereby for referral traffic I receive a small commission from select vendors, at no cost to the reader. This post contains affiliate links. Thanks for your support.
The post Backpack hunting: My evolving approach appeared first on Andrew Skurka.
November 24, 2018
Assessment: Morapos Trailhead, Colorado GMU 12 || Elk & deer hunting


I haven’t yet seen a trophy bull in Morapos Creek, but the area is nonetheless productive: more elk are harvested in GMU 12 than any other unit in the state.
Morapos Creek is a popular and productive hunting area for big game, notably elk and deer. It’s located in northwestern Colorado and encompassed by GMU 12. To the south of Morapos Creek is Milk Creek; to its north, Deer Creek; and to its east, the South Fork of the Williams Fork of the Yampa River.
Morapos Creek flows into the main Williams Fork about 15 minutes south-southeast of Craig, Colo., the nearest full-service city. Its upper watershed is 8,000 to 10,000 feet above sea level, and managed by White River National Forest as public land; privately owned ranches surround its lower reaches.
For topographic maps of Morapos, I use Caltopo and GaiaGPS.
Personal experience
For two consecutive Third Seasons, my friends and I have backpack hunted in upper Morapos Creek. We were successful in 2017, but came up short this year. The information provided here is based on these experiences, plus additional insights gleaned from other hunters.
Several outfitters operate in the area, and some private parties have been hunting there for many years. Without question, they know more about Morapos than I do. But let me know if you find one willing to divulge their honey holes. I won’t divulge everything I know either, but I’ll try to at least give you a sense for the place.
Glassing north into upper Morapos Creek and towards Baldy Mountain. Notice the mix of vegetation: meadows, waist-high brush and scrub oak, open aspens, and dark spruce.
Wildlife numbers and behavior
The estimated population of the White River elk herd is 42,000 (making it the largest elk herd in the world, BTW). Morapos Creek is the northern edge of its summer range, which extends south into the Flattops Wilderness. For population numbers and habitat maps, consult the CPW Northwest Hunt Guide and the Colorado Hunting Atlas,
Morapos hosts both local and migratory elk. The local herd is punished during First Season (during which the success rate is 30+ percent), and by later seasons seems to have taken refuge in less accessible zones or downhill on private land. I have not personally witnessed migrating elk in Morapos, which could be explained by the relatively warm and dry conditions in recent years — they won’t start moving until their food is covered in heavy snow.
Mule deer seem scattered throughout upper Morapos Creek, and are in exceptional numbers on the private ranch lands at lower elevations. Does greatly outnumber bucks.

Mule deer concentrate on the private ranch lands in lower Morapos Creek. Each time that I have driven to or from Morapos Trailhead, I have seen hundreds of deer.
Pressure
For at least three consecutive years — 2015 through 2017 — GMU 12 has been the most productive elk unit in the state, with an average gross harvest of about 1,500 animals per year across all seasons.
But it also attracts the most hunters, normally exceeding 5,000 in number. In 2017, we felt like there were few other hunters around, at least more than about a mile from the trailhead. But in 2018, we felt like we were bumping (and being bumped) at every turn.
I’m uncertain how the pressure in Morapos compares with other parts of GMU 12, about half of which is public land.
With a horse or exceptional fitness, it’s possible to find low-pressure or no-pressure zones out of Morapos. They’ll be at least three or four miles from the trailhead (plus/minus depending on the weather and snow cover) in a northeast through southwest clockwise direction.
Hunting zones
Good game habitat is found throughout Morapos. At lower elevations, it’s open ranch land, or sagebrush and scrub oak. At higher elevations, it’s mostly open aspen groves and meadows, with scrub oak on some south-facing aspects and thick spruce on high and shaded slopes.
From the upper and lower trailheads, four general hunting areas can be accessed. In general, it’s best to stay inside the Morapos Creek watershed. If you start hunting in Routt National Forest or in Milk Creek, immediately it becomes a bigger effort to haul anything out.
1. Wilson Mesa is the the least accessible zone — hunting does not start until after hiking at least three miles and climbing 1,500 vertical feet. If I were an elk, I would hide out in the drainages to the east and north of the mesa. It’s a big effort to get up here, but the rewards are likely bigger, too.
2. Uppermost Morapos Creek is fed by small draws that flow from Wilson Mesa and Baldy Mountain, none of which are easily accessible. The dark timber north of Baldy seems to hold small groups. If you’re feeling ambitious, upper Pine Creek is within reach via the Wymore Lake Trail.
3. The basin between Baldy Mountain and Horse Ridge can be effectively glassed from atop Baldy Mountain — it’s a mix of open meadows, open aspens, and thick timber. Steve and I shot our 4-point in this area, but it was the only time I’ve seen elk in it. I bet it’s more fruitful in earlier seasons.
4. Iles Mountain and Konopik Reservoir is the westernmost area that is best accessed from Morapos Trailhead. It’s an easy walk from the trailhead and seems to get an according amount of pressure. In 2018 hunters were reporting very little activity during Third Season in this area.

Glassing from Baldy Mountain, purposely tucked into the trees for some defense against a blustery southwest wind.
Trails, conditions, and weather
By Third Season, the trails are muddy and (especially near the trailheads) badly rutted by horses. The ruts probably get worse with each hunting season. The mud probably starts after cold and wet weather arrives.
Off-trail travel is generally easy, except on slopes covered in scrub oak.
In 2017 and 2018, snow was already covering north-facing aspects and higher elevations at the start of Third Season. Lower and open slopes were snow-free. In both years it snowed on opening weekend at all elevations.
The dirt road leading to Morapos Trailhead can become very slick after heavy snowstorms, specifically the pitch between Pt 7778 and 8113 — it’s aggressively angled and slow to melt out (because it’s north-facing and shaded. 4WD with good tires, or 2WD with chains can become necessary.

Many of the trails are old ranching roads or stock trails. They are wide, but unsigned and unmaintained. In later seasons they become very muddy and rutted.
Questions about or have an experience with Morapos Creek? Leave a comment.
The post Assessment: Morapos Trailhead, Colorado GMU 12 || Elk & deer hunting appeared first on Andrew Skurka.


