
Andrew Skurka's Blog, page 34
October 23, 2018
Review: SPOT X Satellite Messenger || I’ll keep my inReach, thanks


The SPOT X retails for $250, weighs 6.7 oz, and features a 2.7-inch dot matrix illuminated screen and physical QWERTY keyboard. It looks like an orange Blackberry with an over-sized antenna.
Exactly one week after Garmin announced the inReach Mini in May, SPOT released its first new device in five years and its first device with two-way satellite messaging.
The SPOT X retails for $250, weighs 6.7 oz, and features a 2.7-inch dot matrix illuminated screen and physical QWERTY keyboard. It looks like an orange Blackberry with an over-sized antenna.
I used the SPOT X for over a month this summer while guiding trips in the Colorado Rockies and High Sierra. The unit was loaned to me by Backbone Media, the professionalism and helpfulness of which was greatly appreciated but (unfortunately, for them and SPOT) did not affect my overall conclusion.
Review: SPOT X
To break into the two-way messaging market, the SPOT X needed to be somehow better than the category leading inReach units. In some respects, it is:
It’s simpler, designed to be fully functional as a standalone device.
Each unit has a dedicated mobile U.S. phone number, which makes sending messages to it easier from standard mobile phones or other two-way satellite messengers.
It has twice the battery life of the inReach SE+ and Explorer+, at least when in 10-minute tracking mode. And,
It’s less expensive to own and operate, costing less for the unit and for comparable service plans.
Since it’s initial launch, SPOT has released several firmware updates to eliminate coding bugs and improve the user-interface. SPOT is listening to customers and seems to be invested in the X.
But currently the SPOT X still falls short:
The keyboard and control pad generally suck, lacking touch-sensitivity and responsiveness.
It’s twice as heavy as the inReach Mini.
No smartphone connectivity, which could allow allow sharing of contacts, wireless setting syncs, and use of the phone’s keyboard and touchscreen.
Navigation features are minimal, and it has no weather reporting. And,
The online portal needs to be aesthetically refreshed and more user-friendly.
Barring significant improvements to the SPOT X and its platform, the two-way satellite messenger that I recommend for most users remains the Garmin inReach Mini, which is slightly more expensive but which is more pleasant to use, more featured, and lighter weight. That said, I can think of two scenarios in which the SPOT X would be the better device:
If your budget does not include an extra $50 to buy the Mini; or,
If you don’t have a smartphone or don’t carry one into the backcountry, in which case messages can be more efficiently sent with the SPOT X.

The SPOT X (right) competes directly with Garmin inReach devices like the (left to right) SE, Explorer+, and Mini.
Key product specs
6.7 oz (verified)
2.7-inch dot matrix display
Integrated physical QWERTY keyboard
Optional illumination of the display and keyboard
Non-replaceable lithium battery, chargeable via USB
Resistant to impact, dust, and water (IP67)
$250 MSRP
More information

The screen and keyboard can be illuminated, for easy nighttime use.
The damn keyboard
The SPOT X has a major, perhaps irrecoverable, flaw: its physical keyboard. Even if the SPOT X was perfect in every other way, the keyboard makes me not want to use it.
In fairness, the “virtual keyboards” on the inReach units are annoyingly tedious. But at least there’s a workaround: using the Earthmate app on my smartphone.
The keyboard has three problems:
The keys are small and flat-topped, so it’s difficult to feel individual keys and to press a single key without also pressing adjacent keys.
The lowermost three keys — ALT, SPACE, and uppercase — do not work properly, requiring excessive force and/or crackling when pressed. And,
The Select button should be taller than the surrounding directional keys so that it’s easier to press.

The physical keyboard has problems. The keys are small and flat-topped, and the lowest column of keys are not responsive or smooth.
If you can get beyond the keyboard, here’s the rest of what you need to know…
What does the SPOT X do?
The SPOT X has four capabilities:
1. Messaging
The SPOT X can both send and receive text messages and short emails. This makes it fundamentally different than other SPOT devices like the Gen3, which can only send messages. Messages can be predefined, custom, or posted to social media (Facebook, Twitter, or both).
Each SPOT X has a personal U.S. mobile number, which makes sending messages to the device much easier. The process of sending messages to an inReach device is less straightforward.
2. Tracking
The SPOT X can broadcast its location at 2.5-, 5-, 10-, 30-, and 60-minute intervals. The more basic service plans do not include the 2.5- and/or 5-minute intervals.
3. Emergency
If life or limb are in danger, the SPOT X can send an S.O.S message directly to the GEOS International Emergency Response Coordination Center (IERCC), which will notify the appropriate emergency responders. More info.
4. Navigation
The SPOT X has a digital compass; and can create and go-to waypoints. (Waypoints can be created more efficiently in the online portal, but still only one at a time.) It does not support maps, neither a simple grid map nor image-based maps (e.g. USGS 7.5-minute tiles, or proprietary data).
The navigation capabilities of the SPOT X are comparable to those of a standalone inReach Mini. However, the Mini is designed to be paired with Earthmate, a navigation app that gives a smartphone similar (or even greater) functionality to a conventional handheld GPS unit.
The SPOX X has rudiumentary navigation capabilities. It has a digital compass, and can create and go-to waypoints.
What does the SPOT X not do?
Compared to existing two-way messaging devices, what functionality and features are lacking in the SPOT X?
1. Phone connectivity
The SPOX is a standalone unit, and cannot be connected with or controlled by a phone. This would be useful:
Contacts could be shared with the SPOT X, instead of needing to enter them beforehand in the online portal.
The phone’s touchscreen could be used to navigate the user-interface and to type messages, which would be preferable to the crappy keyboard on the SPOT X.
Settings on the SPOT X (e.g. recipient list for check-in and predefined messages, predefined message text, social media passwords, etc.) could be updated without a hard-wire sync to a computer with the SPOT X Device Updater software.
2. Weather
Before I leave for a trip, I always check the backcountry weather forecast. But on longer trips, receiving an updated forecast can be extremely helpful. Unlike the inReach, the SPOT X cannot pull down a forecast for a current or user-specified location.
Cost of ownership
The long-term cost of a SPOT X has two components: its initial purchase price, and its service plan.
Initial purchase
The SPOT X retails for $250, which is $50 to $100 less than competing units.
Service
In addition to the initial purchase price, a service plan is required to use the SPOT X. Initially, SPOT offered only two annual plans, but they subsequently created a third tier, and made each plan available as an annual or month-to-month subscription.
Basic ($12/$15 per month)
Advanced ($20/$30 per month)
Unlimited ($30/$40 per month)
The annual plans are charged a one-time $20 activation fee. The month-to-month plans are charged $25 annually.
The plans all provide unlimited check-in and SOS messages, but vary in the included number of included custom messages and frequency of the shortest tracking intervals (10, 5, or 2.5 minutes).
SPOT vs Garmin subscription costs
The service plans for the SPOT X and the inReach devices do not match up perfectly. But overall SPOT charges less for service. For example:
For $15 per month, SPOT includes 20 custom messages, while Garmin’s plan includes only 10.
For $30 per month, SPOT includes 100 custom messages, while Garmin charges $35 for only 40.
SPOT charges $.25 per overage, whereas Garmin charges $1.00.
Due to the lower retail price and the lower subscription plans, the SPOT X should be more attractive to those who are on a tight budget and willing to overlook its other shortcomings.
Have questions about the SPOT X, or an experience with it? Leave a comment.
Disclosure. This website is supported mostly through affiliate marketing, whereby for referral traffic I receive a small commission from select vendors, at no cost to the reader. This post contains affiliate links. Thanks for your support.
The post Review: SPOT X Satellite Messenger || I’ll keep my inReach, thanks appeared first on Andrew Skurka.


October 22, 2018
Review: Ultimate Direction FK Trekking Poles || Dreamy performance but inherent limitations

It had to be the poles. Buzz Burrell of Ultimate Direction guides a group of men half his age towards Boulder-Grand Pass in Rocky Mountain National Park.
For two weeks last summer I used the Ultimate Direction FK Trekking Poles while guiding trips on the Pfiffner Traverse in Rocky Mountain National Park. The FK Poles were new for spring 2018 and are part of an adventure-oriented collection that also includes the FK Tarp, FK Bivy, and FK Gaiters. FK is short for “fastest known,” as in “fastest known time,” which is suggestive of the design ethos — an emphasis on performance and weight, not necessarily comfort or convenience.
The poles were given to me by Ultimate Direction, which was not expecting (but which will be thankful for) a review. As a longtime friend of the UD brand manager, Buzz Burrell, I end up with a lot of UD production and media samples, only some of which gets mentioned here.
Review: Ultimate Direction FK Trekking Poles
The Ultimate Direction FK Trekking Poles feature a single-piece shaft, foam grips (with extensions), woven nylon wrist straps, and carbide tips. Their length cannot be adjusted, and they do not collapse.
The FK Poles are stronger and stiffer than any trekking or ski pole that I have ever used, while also being among the lightest — just 3.7 oz (105 g) in my size 115 cm without straps or baskets. They are an absolute joy to use.
However, because they cannot be adjusted or collapsed, the FK Poles have limitations. They are best for local trips without extensive scrambling, because they don’t fly or stow away well; and they are not compatible with many trekking pole-supported shelters without additional pole jacks.
I found just one flaw with the FK Poles. The tips are cheap and quickly wear out, requiring premature replacement.
Product specs
4.0 oz (per pole, 115 cm)
Single-piece fixed-length carbon fiber shaft
Lower shaft wrapped in aramid (generic Kevlar) for abrasion-resistance
EVA foam grip with extensions
Woven nylon wrist strap
Available in lengths 110 cm through 135 cm, in 5-cm increments
$150
More information

The FK Poles weigh a dreamy 3.7 oz (in size 115 cm without straps or baskets). The lower shaft is wrapped with amamid for abrasion-resistance.
Strength and stiffness
All things being equal:
Carbon fiber shafts are stronger and stiffer than aluminum shafts; and,
One-piece shafts are stronger and stiffer than multi-piece shafts.
So in terms of strength and stiffness, the FK Poles already have two things going for them: they’re made of carbon fiber, and they’re one-piece.
But with the FK Poles, there’s a third ingredient at play, too: the shafts are over-sized. The maximum diameter of the FK Poles (at the top of the shaft) is 20 mm, which is an:
11 percent increase versus standard 18-mm shafts, like on the Black Diamond Alpine Carbon Cork ($170, 7.5 oz) and Cascade Mountain Tech Quick Lock ($30, 7 oz); and,
48 percent increase versus 13.5-mm shafts, like on the Black Diamond Distance Carbon Z Poles ($170, 5 oz for 120 cm).
By increasing the shaft diameter, pole strength and stiffness both increase exponentially. If you’re a physicist or engineer, please chime in on the accuracy of UD’s claim: “Increasing the diameter doesn’t just increase the strength proportionally, it squares the strength, and cubes the increase in stiffness!”
The FK Pole is so strong and stiff that it almost feels like another material. I’ve been using carbon fiber poles for 15 years, and these feel utterly different.

The maximum diameter of the FK Poles is 20 mm. Most poles are 18 mm, and some just 13.5 mm.
Competition
If you build it, will they come? In the case of one-piece fixed-length poles, few manufacturers have been willing to find out. There are only a few other models in this space:
Black Diamond Vapor Carbon 1 ($150, 5.5 oz for 115 cm), is the most similar, with long foam grips and carbide tips, but narrower shafts;
Black Diamond Expedition 1 ($60, 6.6 oz for 115 cm), which are identical to the Carbon 1 but have aluminum shafts;
Gossamer Gear LT3 C (3.1 oz for 115 cm) are very light, but thin-shafted and relatively wobbly;
Komperdell Carbon Trail Ultralight ($150), for which the weight is unknown; and,
Leki Vertical K ($160, 5.0 oz for 120 cm) have Nordic-style grips and 16-mm shafts.
Inherent limitations
Adjustable poles out-sell fixed-length poles by multiples. If you buy the FK Poles, you’ll learn why. They:
Don’t travel well (or for free, unless you’re on Southwest or have baggage perks);
Stick about two feet above the backpack when stowed, making them unwieldy when scrambling or bushwhacking;
Are incompatible with many many trekking pole-supported shelters;
Break catastrophically, with no opportunity to repair them completely by simply replacing a broken segment; and,
Cannot be adjusted for different terrain types (e.g. extended steep downhills), outdoor activities (e.g. trekking and alpine touring), or users (e.g. you and your SO).
Only one of these issues can be easily addressed. If your shelter has a fixed height (e.g. if it’s not at 125 cm, it’s floppy), you can bring pole jacks/extensions made of aluminum or carbon fiber tubing.
Room for improvement
I found only one flaw with the FK Poles: its carbide tips. Specifically:
The carbide pieces unscrewed with use, putting them at risk of falling out completely. My solution was to super-glue them in place permanently.
The tips wore down quickly, requiring premature replacement.

The FK Pole tips are cheap and will need be replaced prematurely. This wear is only from two weeks of use.
For instructions on how to replace trekking pole tips, refer to this tutorial. Use the Leki Universal Carbide Flextip because they will have little effect on the height of the FK Poles. Normally I recommend the Black Diamond Flex Tips because they are less expensive and because the resulting change in pole height can be negated with an adjustable-length pole.
Questions about the FK Poles, or have an experience with them? Leave a comment.
Buy now: Ultimate Direction FK Trekking Poles
Disclosure. This website is supported mostly through affiliate marketing, whereby for referral traffic I receive a small commission from select vendors, at no cost to the reader. This post contains affiliate links. Thanks for your support.
The post Review: Ultimate Direction FK Trekking Poles || Dreamy performance but inherent limitations appeared first on Andrew Skurka.
October 20, 2018
Review: Big Agnes Insulated AXL Pad || Very light & comfy, not very warm

My cowboy camp in upper Conness Creek on the Yosemite High Route in August. (My quilt was air-drying in a nearby bush.) Nighttime temps were normally in the high-30’s/low-40’s, and I found the Insulated AXL to be sufficiently warm.
Until last spring, Big Agnes had no sleeping pads in its line that interested me. The pads looked comfortable, but they were considerably heavier than my time-tested Therm-A-Rest NeoAir XLite ($170, 12 oz).
But with the AXL sleeping pad, Big Agnes caught my attention — its weight and thickness looked promising. The AXL comes in two flavors:
AXL Air ($140, 9.6 oz), for mild temperatures; and,
Insulated AXL Air ($180, 10.6 oz), for 3-season conditions.
The listed prices and weights above are for the 20″ x 72″ mummy version. Both pads are also available in rectangular shapes: a wide AXL (25 x 72); and petite, regular, regular-wide, and long-wide Insulated AXL (20 x 66, 20 x 72, 25 x 72, and 25 x 78).
This year I have slept on the Insulated AXL (as a normal ground pad and as under-insulation in a hammock) for about 30 nights in southern Utah, the Colorado Rockies, and High Sierra. Big Agnes sent me two pads, and I loaned out the other to my wife and to guided clients for additional feedback.

Two thumbs up, Paul reports after a night on the Insulated AXL in Sequoia-Kings Canyon National Park in late-September, which is about its seasonal limit in the Mountain West.
Review: Big Agnes Insulated AXL Sleeping Pad
The Big Agnes Insulated AXL Air is a very lightweight and comfortable sleeping pad, and is best suited for weight-conscious backpackers who want quality sleep in the backcountry.
The 20″ x 72″ rectangular Insulated AXL specs at just 11.9 oz (although mine weighs 12.6 oz, or 12.9 oz with the included stuff sack). In its factory packaging, it’s about the size of a 1-liter bottle — although, it’s difficult (and not worth the time, IMO) to pack it that tightly again. I roll mine full-width, fold it in half, and keep it in a larger stuff sack.

When rolled tightly, the Insulated AXL is about he size of a 1-liter bottle.
Of the pads that compete with the Insulated AXL’s size and weight, none match its thickness (3.25 to 3.75 inches) or have over-sized outer tubes that help to cradle the sleeper — it’s a subtle feature, but helpful.
The Insulated AXL is reasonably quiet, avoiding the “potato chip bag” sensation of other leading pads. On my first trip out with it, on which I also used a new tent, it produced a sound similar to rubbing balloons together. But I have not noticed it since, leading me to think that it was the new pad, the new tent floor, or the combination of the two materials.
The Insulated AXL is appropriate for 3-season conditions, but not for shoulder seasons and definitely not for winter. Personally, I found the Insulated AXL to be amply warm in temperatures of 40+ (4+ C) and to be acceptable in temperatures of 30+ (0+ C) so long as I took other measures to maximize my nighttime warmth (e.g. bring a warm sleeping bag, pick a soft campsite, sleep in my insulated clothing, and eat and hydrate well before bed).
His and her pads inside a Big Agnes Tiger Wall 3. The Insulated AXL is normally quiet, but not on this trip in southern Utah — it sounded like two balloons being rubbed together. I’m uncertain the cause: new pads, a new tent, or a combination of the two.
Key specs
Rated to 32 degrees
3.75-inch thick outer tubes, 3.25-inch inner
20d high-tenacity rip-stop nylon top and bottom shell
Primaloft Silver synthetic insulation laminated to a Mylar sheet
Five SKU’s, varying with shape, length, and width
10.6 to 15.9 oz, depending on the size
$160 to $250, depending on the size

My 20 x 72 Insulated AXL came in at 12.6 oz (+0.3 oz for the stuff sack), over its spec weight by 0.7 oz.
The competition
For those who prioritize pack weight and volume, the Insulated AXL is one of two 3-season pads that I can personally recommend, along with the aforementioned XLite.
On paper, other contenders include the:
Exped SynMat UL ($170, 13 oz), which is the most comparable to the AXL and XLite, and which is reportedly comfortable, warm, and quiet;
Klymit Insulated Static V Ultralight SL ($120, 16 oz), which is a few ounces heavier but a good value;
NEMO Tensor Insulated Ultralight ($160, 15 oz), which has been updated for 2019, possibly causing closeouts of the current model; and,
Sea-to-Summit Insulated Ultralight ($140, 17 oz), which is heavy but has proven reliable.
Big Agnes Insulated AXL vs Therm-A-Rest NeoAir XLite
The Insulated AXL is more comfortable than the XLite. It’s thicker and has oversized outside tubes, and it’s quieter.
But the XLite is warmer. I do not hesitate in using the XLite on elk hunting trips in the Colorado Rockies in November, or even on winter trips when I must sleep on snow. I would not use the Insulated AXL beyond 3-season conditions.
If your backpacking season extends into colder months, the XLite may cover you completely. Whereas if you were to purchase the Insulated AXL, you’d need an additional cold-weather pad.
Warmth
When the Insulated AXL was first released, Big Agnes recommended a usable range of 15 to 35 degrees F (-9 to 2 C) on its website and product packaging. Based on my experience I believe these guidelines were generous, and unfortunately REI — which was the exclusive distributor of the AXL and Insulated AXL when it was first released — hyped expectations even more by advertising it simply as a 15-degree pad.
Customers were not pleased, and revenged their sleepless nights by giving the Insulated AXL many 1-star reviews.
Per the manufacturer website, currently the Insulated AXL is “rated to 32 degrees.” There is no discussion of how Big Agnes arrived at this number, or exactly what it means — i.e. Is 32 degrees a comfort limit, or a lower bound? And under what conditions (e.g. sleeping bag temperature rating, shelter type, ground surface composition) would this rating apply?
What is the R-value of the Insulated AXL?
Big Agnes does not publish (and, from what I can tell, does not test in-house) R-values, which is a precise measure of a pad’s resistance to conductive heat transfer. These values are useful in comparing the absolute and relative warmth of a sleeping pad.
Why? Len Zanni, a co-owner of Big Agnes, explained to me in an email that, “We believe [R-values] are still not consistent. Different brands use different testing methods. Until there is a standard (we’re involved in industry efforts here) we’re trying to guide users into the right pads using recommended season and a season spectrum guide (on product packaging).”
Why is the Insulated AXL not very warm?
To understand why the Insulated AXL is less warm than other pads, it’s useful to understand its construction. The pad is kind of built like a sandwich:
The bread: 20d high-tenacity rip-stop nylon; and,
The meat (or the vegies, for my Boulder readers): Primaloft Silver synthetic insulation laminated to a Mylar sheet.
Primaloft Silver is available in different weights (e.g. 30, 60, maybe 100 grams per square meter). Big Agnes will not share the insulation weight used in the Insulated AXL, which it considers proprietary information. But based on what I can feel and see, I suspect that the lightest version of Primaloft Silver was used. It could be quickly confirmed, using basic geometry formulas and knowing that there is a 1.0-ounce difference between the 20″ x 72″ mummy AXL and Insulated AXL (which are otherwise exactly the same).
Not only did it use a very lightweight insulation, but Big Agnes also had to:
Cut holes in the insulation, so that the bottom and top sheets could be quilted together; and,
Cut the insulation in two (one half insulates the upper body; the other half, the lower body), creating a gap between these sheets.
Big Agnes was also unable to attach the insulation to the edges of the pad, leaving an insulation-less gap around its perimeter.
With all of these holes and gaps, body-warmed air and ground-cooled air can circulate too easily, especially with active sleepers. Warmer pads more effectively trap air.
If Big Agnes could have produced a warmer pad without affecting the weight or price of the Insulated AXL, I’m sure that it would have. This is simply the cost of a 12-oz pad that is nearly four inches thick.

The Insulated AXL is widely reported to offer limited warmth. I speculate that there are two reasons: the use of a very lightweight/thin version of Primaloft Silver insulation (which is laminated to a Mylar sheet), and multiple holes in the insulation and Mylar that allow circulation within the pad of body-warmed and ground-cooled air.
Durability
My Insulated AXL has not yet sprung a leak. But I’m careful with it. YMMV.
A client managed to break the valve on one of my pads. I didn’t hear an explanation, but I bet it happened while rolling it up — if the valve flap is not in a “closed” position, it could get caught between the sheets and be torn off.
Thankfully, the damaged pad is still usable: I blow it up completely and cap it as quickly as I can. About 25 percent of the air is lost, but that’s still plenty — and, in fact, that level of inflation is just about perfect.

I did not get an explanation, but a client broke the valve on the left pad. Notice that the valve flap (it’s violet) is missing.
Inflation and deflation
It’s a chore to blow up the Insulated AXL, requiring about 20 strong exhales. That’s only a few breaths more than the XLite but it seems worse, because the valve allows for unrestricted inflation. The reducer on the XLite slows the process, helping to avoid light-headedness.
If you think backpacking is hard enough already, consider the Big Agnes PumpHouse Ultra ($35, 3 oz), which doubles as a stuff sack.
Deflation of the Insulated AXL is fast and easy: open the cap and press the valve flap. I do it while laying on the pad before I get up — the body weight helps to expel most of the air.
Buy now: Big Agnes Insulated AXL Sleeping Pad
Questions about the Insulated AXL, or have an experience to share? Please comment.
Disclosure. This website is supported mostly through affiliate marketing, whereby for referral traffic I receive a small commission from select vendors, at no cost to the reader. This post contains affiliate links. Thanks for your support.
The post Review: Big Agnes Insulated AXL Pad || Very light & comfy, not very warm appeared first on Andrew Skurka.
October 18, 2018
Review: The Packa, hybrid jacket/poncho || A for innovation

When I wrote the Core 13 Clothing series, I was frustrated with the existing rain gear options. Manufacturers were (and still are, three years later) unquestioning of waterproof/breathable fabrics, which fall short of their hyperbolic claims; and there was little innovation in format, with everyone stuck on traditional jackets and pants.
Subsequently I was contacted by Edward Hinnant (“Cedar Tree”), who thought that I might be interested in the Packa — a hybrid rain jacket and poncho with an integrated pack cover — that he designed and distributes. I was game, of course, and he sent one over.
Since I backpack mostly in semi-arid and arid locations in the West, testing rain gear can be a challenge. But after using the Packa for three seasons — specifically, to yo-yo the Pfiffner Traverse, guide trips in California’s High Sierra, and hunt elk in Colorado — I think I can speak fairly to it.

Maybe you had to be there. I’m hunkered down at the top of Northeast Gully, the crux feature on the Pfiffner Traverse. An out-of-view thunderstorm hit me when I reached the top, forcing me to hunker down between boulders at 12,000 feet and drape my shelter over me.
Review: The Packa
I grade the Packa as follows:
For innovation, A;
For execution, C (at least for my version from late-2015, since which time it’s been improved);
For overall performance, B.
The Packa successfully protected me (and my pack) from precip and expelled trapped heat and moisture with its generous ventilation. But I struggled with its fit and sizing, and was annoyed by some unrefined trims and details.
I found that the Packa excels most when hiking on-trail in calm weather, and in cool to warm temperatures. It seems tailor-made for conditions on the Appalachian Trail (or similar).
But when using the Packa off-trail or in high-winds, I longed for a more athletic garment that didn’t snag, flap, or drape. When it was cold and snowing, I would have preferred the warmth of a traditional shell. And in hot conditions, I believe that the only rain gear with adequate ventilation is an umbrella like the My Trail Company Chrome.
Furthermore, the Packa cannot be worn as intended (i.e. over the backpack and backpack straps) if sharp or oversized objects are attached to the exterior of the backpack, such as a trekking pole, ice axe, or snowshoes. Similarly, it cannot be worn as intended while wearing a hunting safety vest, which doesn’t have the girth to wrap around a body and backpack. In these situations, my solution was to wear the Packa under my backpack, compromising its ventilation.

The Packa cannot be worn as intended (over the backpack and backpack straps) if anything sharp or long is attached to the backpack. It is also not compatible with a hunting safety vest.
Specs
My Packa is a size Medium and is made of 20d waterproof nylon. It weighs 10.0 ounces (283 g), which was consistent with the advertised weight. The seams are taped.
This fabric is no longer available. Currently, the Packa comes in two fabrics:
30d silicone/PU nylon (15-16 oz, $100); and,
eVent (18-22 oz, $170).
A 15d sil-nylon version will be available around January 2019 and cost about $130, according to Hinnant. The estimated weight (9.0 oz for size Small) is attractive, but I’m unexcited about its seams, which are not taped — DIY seam-sealing is messy and time-consuming.

My Packa is size Medium and made with 20d nylon weighs 10 ounces.
Which fabric?
The 30d nylon is coated with silicone on one side and polyurethane on the other. A two-sided silicone coating would be stronger and more waterproof, but it’d be more expensive and the seams could not be taped. This 30d fabric is commonly used for tent flies and floors.
I’m generally skeptical of waterproof-breathable fabrics like eVent. Its waterproofness is compromised by abrasion, dirt, and body oils. And while its breathability is measurable, it’s insufficient to keep up with normal rates of perspiration.
I chose the waterproof/non-breathable option, for its more reliable long-term performance. It was also a rare opportunity to experiment with non-breathable rain gear.
When the Packa is closed up (i.e. zipped fully, closed pit zips, and cinched bottom hem), the build-up of perspiration inside is noticeable. In fact, it’s actually visible, due to the transparency of the fabric. My hunting partner, Steve, said that he felt clammy just looking at me, although I was more comfortable than I appeared: my fleece mid-layer buffered the moisture that had built-up.
To be fair, clamminess is a common compliant among WP/B rain jackets, too. It’s just not visible, because WP/B fabrics are opaque.

Due to the transparency of the fabric, moisture build-up can be seen inside the jacket. Uncomfortable claminess can be mitigated with a next-to-skin layer, like a long-sleeve shirt or mid-layer fleece.
The moisture build-up was solved, however, as soon as I opened up the jacket. With help from the billowy cut, the Packa’s vents allowed relatively dry outside air to exchange with the relatively humid air inside. My damp layers even seemed to dry out with the resulting airflow — except for my lower arms, which are trapped in an un-vented zone.
Sizing
The Packa is available in three sizes:
Small (5’7″ and shorter);
Medium (5’8″ to 6′); and,
Large (6′ and taller).
In addition, the Medium and Large are available with extra large pack cover volume (for packs that are 65 liters or more), referred to as Medium-X and Large-X.
This 65-liter cut-off is consistent with my experience. When I used my Packa with a fully loaded Osprey Aether Pro 70, the pack cover seam was scarily tensioned. Also, the pack messed with the fit, making it impossible for me to get my arms out of the sleeves without assistance.
Comparisons
How does the Packa compare to more traditional options?
Versus a rain jacket
The Packa expels internal heat and moisture much better than a conventional rain jacket. Its secret is ventilation. The Packa:
Creates an air channel between it and the user, because the Packa is worn over the backpack and backpack straps (like a poncho);
Has an over-sized silhouette that billows with movement or wind; and,
Features huge pit zips and an open bottom.
In this respect, the Packa is head-and-shoulders better than any jacket, even fully featured models like the Outdoor Research Foray with pit zips, side zips, and/or two-way zippers. Without an air channel between the user and the jacket, the value of these vents is limited. And “breathable” fabrics are not good enough to offset the difference.
But the Packa is unwiedly and cumbersome. The preponderance of loose, draping fabric is a liability in high winds and when off-trail, and makes it impractical for any athletic activity like running or scrambling. I often felt “lost” in the Packa, like when trying to find its arms and hood so that I could put it on, or when I wanted to adjust my pit zips or hood cinch. Product familiarity will reduce this sensation, but it will always feel more poncho-like than jacket-like.
Versus a poncho
The Packa rivals a poncho in its ventilation, but sacrifices the expected low cost and simplicity for enhanced user-friendliness, weather-resistance, and features. Unlike a poncho, the Packa has a:
Full-length front zipper, for easy on/off;
Full-length arm sleeves with wrist cuffs, for enhanced protection; and,
Stiffened hood with a cinch cord.
In addition, the Packa stores more easily when not being used. Instead of taking it off entirely, it can be hung over the pack, where it’s easily accessible for rapid deployment. This is very convenient during on-and-off rain showers.

During on-and-off rain, the Packa can be kept ready for rapid deployment by taking it off the body but keeping it as a pack cover. Photo: Justin Simoni
Execution and room for improvement
First, I would like to applaud Hinnant for designing an innovative option for hiking in the rain that remedies some problems of traditional waterproof/breathable jackets and pants.
But the Packa has issues of its own, some inherent to the design (mostly already discussed) and others related to the execution of it. To improve the Packa, I would recommend consideration of the changes described below. These generally are aimed at improving its finish, which currently feels cottage- or garage-level.
I have added Hinnant’s responses in italics. Some of my suggestions have been addressed over the last two years.
1. Replace the current front zipper with a shorter, smooth-sliding watertight #5 model with an easy-to-grab pull that would reduce a potential water-entry point and that would allow the user to:
Reach the zipper without leaning over; and,
Operate it while wearing gloves.
To retain the option of sealing flush the bottom hem, install a plastic snap.
I looked at some waterproof zippers and could not find any that were dual separating. To me dual separating is key for the front zipper. The front zipper flap now has Velcro closures to keep the flap closed.
2. Increase the height of the hood, to improve mobility and to reduce tension on the hood when the Packa is worn under a backpack. Be careful, though: more slack may cause water to pool between the shoulders and backpack.
The hood has been completely redesigned. The length has been increased and there is an adjustment added to the back of the head.
3. Reduce the size of the cord locks and the diameter of the shock cord in the hood closure, bottom hem, and pack cover. Move the bottom hem cord lock to the side, where it won’t interfere with the user’s stride.
Most of the shockcord and toggles have been reduced in size. I did leave the packcover cord and toggle big so it is easier to manage behind your head.
4. Move up the bottom hem cinch, to the base of the butt. Here, it will not restrict knee-lift. Below this higher cinch point, let the Packa drape naturally.
Interesting
5. Replace the non-anchored wrist cuff cord locks with Velcro closures, which can be adjusted with one-hand and which distribute pressure more evenly than draw cords.
For about the first 7 or 8 years I used Velcro for the sleeve closures. I didn’t really like them, and they were heavy. I’ve been selling Packas 18 years now. The thought behind the shockcord closure is they allow for more air flow when opened.

The shock cords and cord locks on the hood, bottom hem, and pack cover cinch are all excessively large and heavy. The wrist cuff adjustment should use Velcro.
6. Reinforce with heavier fabric the parts of the Packa that touch the ground when the backpack is taken off. I fear that a 20d fabric will not withstand long-term abrasion from sharp rocks and sticks if it has a 30-pound pack atop it.
I used a heavier fabric for the bottom of the packcover when I used to make Packas myself. I don’t let my Packa ever touch the ground. I take it off the pack before setting my pack down. But, point noted.
7. Move the pocket higher, so that it is more easily accessible and so that it flops less.
Questions about the Packa or have an experience to share? Please leave a comment.
Disclosure. This website is supported mostly through affiliate marketing, whereby for referral traffic I receive a small commission from select vendors, at no cost to the reader. This post contains affiliate links. Thanks for your support.
The post Review: The Packa, hybrid jacket/poncho || A for innovation appeared first on Andrew Skurka.
October 16, 2018
Hunting binocular shopping: More personal than I thought it’d be


To find the best binoculars for you, shop local so that you can test drive a dozen pairs. It’s a more personal decision than I thought it’d be.
During recent hunting seasons, I’ve been very satisfied with my backpack hunt gear list save for one item: my Pentax DCF LV 9×28 binoculars. They’re compact and light (just 12.9 oz), and they were reasonably priced ($225 MSRP), but they proved ill-suited for big game hunting in Colorado, lacking satisfactory:
Low light performance;
Field of view (only 5.6*), eye relief distance, and eyepiece lens diameter;
Grip with gloved and/or cold hands; and,
Optical clarity (e.g. annoying chromatic aberrations).
Last Saturday I had an unplanned opportunity to upgrade. While Amanda visited with a friend at The Shops of Northfield Stapleton — an overwhelmingly large and disappointingly characterless complex on Denver’s eastern outskirts — I wandered over to the flagship Bass Pro Shop.
Before investing several hundred dollars on any piece of outdoor gear, normally I would spend an hour (or six) researching online, and normally I would buy it online for the convenience and cost-savings, too. In this case, however, I feel like I got the best result, and saved money and time, by shopping local.

The Pentax DCF are small and light, but stupidly so. The Nikon Monarch 5 will justify their extra heft with their superior performance.
The upgrade
I went in open-minded, and exited with the Nikon Monarch 5 8×42.
Bass Pro had a half-dozen other models from Luepold, Vortex, and Steiner that were similarly priced and featured, and I chose the Monarch 5 for reasons that can’t be conveyed by an online review or spec chart.
I found the Monarch 5 to be the most comfortable and pleasant to use, in terms of its eyepiece fit, viewing stability, body texture and grip, and smoothness when adjusting the focus and interpupillary distance. Also, I could discern its performance benefits (and justify its extra cost) over less expensive models like the Monarch 3, but couldn’t do the same for more expensive series like the Monarch 7 and Vortex Viper.
I had previously thought that binocular shopping would be spec-driven. But, in fact, it’s very personal, more like test-driving a car or shouldering a loaded backpack. To find the best binoculars for me, I was well served by shopping local so that I could quickly try out and compare a dozen models. Handle them, hold them up to my eyes, and peer through them both out the window and into the darkest corners of the store.
Now I own exactly what I wanted — and I didn’t overspend for quality or features, and I didn’t have to ship back multiple pairs of binoculars that didn’t make the cut.
The magnification question
Once I had settled on the Monarch 5, the only other question was whether I should get the 8x or 10x magnification, or the 42 mm or 56 mm objective lens.
The 42 mm lens was an easy choice: the 8×56 model is about twice the weight as the 8×42.
And Bass Pro made the magnification decision easy as well: the 10×42 was out of stock, and the 8×42 was on sale for $245 (18 percent off its $300 retail price).
I think the 8×42 is the right choice for me anyway. Colorado has some expansive topography that warrants a 10x, but the wider viewing angle will be better for hunting dark timber (where the elk like to hide during hunting season) and is more consistent with the shot distance with which I’m currently comfortable (within about 200 yards).
Thoughts on binocular shopping? Leave a comment.
Disclosure. This website is supported mostly through affiliate marketing, whereby for referral traffic I receive a small commission from select vendors, at no cost to the reader. This post contains affiliate links. Thanks for your support.
The post Hunting binocular shopping: More personal than I thought it’d be appeared first on Andrew Skurka.
October 15, 2018
Run Rabbit Run 100: Accurate course map, mileages, GPX, and pace chart

It always looks better on paper.
The Run Rabbit Run 100 course was changed significantly in 2018. To assist future participants with race planning, at least until information from race organizers is more complete and accurate, I am sharing several resources:
Interactive course map
Course GPX
Mileage chart
Pace/split chart
Interactive course map
A topographic map of the course is available. However, it’s a static JPG image, and the course overlaid onto it is not always precise.
I recorded the entire 100-mile course with a Suunto Ambit3 Peak GPS watch, with its GPS ping frequency set to 5 seconds (“Good”). I was also wearing a Stryd foot pod, which is more accurate than the watch on its own.
The resulting track is fairly accurate; to get something better, a commercial-grade GPS unit would have to be used. Depending on your watch and your watch settings, the distances recorded by your watch may be shorter or longer than those recorded by mine, either consistently or inconsistently.
To create this interactive map, I:
Downloaded my race as a GPX file in Movescount.
Imported the file to CalTopo, my go-to mapping platform.
Added markers for the aid stations.
This map can be viewed with multiple map and imagery layers, including FSTopo 2016 (my pick), USGS 7.5-minute, Google Terrain, and Landsat.
View the map here, https://caltopo.com/m/F810.
Course GPX
If you would like a GPX or KML file of the course, export it from CalTopo at the link above. Depending on your intended use, you may want to only export limited data from my interactive map.
Mileage chart
Like the course map, an official mileage chart was available for the 2018 race, but it was a static file (in this case, a PDF) and it was not always accurate. For example, the official distances between aid stations were, on average, 0.42 miles (or 7 percent) off, and in one case listed a distance that was 1.3 miles short of the actual distance.
Using the GPX track recorded by my Ambit, I created a new mileage chart, below.
View this chart in a new window.
To download it as an Excel file or , go here and look under File > Download as.
To create your own copy in Google Sheets, log into your Google account (if you are not already), go here, and then look under File > Make a copy.
=
Pace/split chart
Last year I posted in in-depth tutorial on creating pace charts for ultramarathons. I won’t repeat the process here.
As the “model race,” I used splits from the 2018 winner, Jason Schlarb, who seemed to run a more even race than other elites like Jeff Browning, Seth Swanson, and Kyle Pietari (who all had rough patches), or myself and Jeff Colt (who started too aggressively and faded later).
View this chart in a new window.
To download it as an Excel file or , go here and look under File > Download as or
To create your own copy in Google Sheets, log into your Google account (if you are not already), go here, and then look under File > Make a copy.
Questions about the course or how to edit this data? Leave a comment.
The post Run Rabbit Run 100: Accurate course map, mileages, GPX, and pace chart appeared first on Andrew Skurka.
October 12, 2018
Words of caution: FKT’ing or “running” the Pfiffner Traverse


Looking down the steep Northeast Gully, the most technical section of the Pfiffner Traverse. Snow lingers until August in a normal year, and is better than what’s underneath: loose rock and dirt.
In a recent photo essay in Trail Runner, Sunny Stroeer gave a hearty endorsement of the Pfiffner Traverse, for which she set a 55-hour fastest known time (FKT) last summer:
“The Pfiffner Traverse is a mountain runner’s dream: miles of smooth, gentle singletrack that flow through high mountain meadows and across infrequently traveled passes along the Continental Divide’s alpine beauty. Stretches of exposed, soft alpine tundra switch off with fragrant forest and lush wetlands defined by sparkling streams and colorful explosions of wildflowers. During the height of summer, majestic elk graze peacefully above treeline here. Crystal-clear alpine lakes, waterfalls, views for days and solitude: this run has it all.”
I’m flattered by her description of the route, which is more lyrical and poetic than anything I’ve written about it, but I’m nervous that her article oversells it to Trail Runner’s audience. Sunny writes, “I am convinced that this crown jewel of the Colorado Rockies has the potential of being ultra running’s next great test piece, nestled in difficulty squarely between the Grand Canyon’s marquee Rim-to-Rim-to-Rim and the superhuman peak bagger’s linkup that is Nolan’s 14.”
I’m not as convinced.
Yes, the Pfiffner Traverse is squarely in the wheelhouse of a short list of mountain endurance athletes like Jared Campbell, Joe Grant, Heather Anderson, and obviously Sunny. But for trail and ultra runners with less robust skill sets (i.e. most of them), it’d be an ill-suited undertaking. It’s nothing like Rim to Rim or a conventional ultra marathon course.
As a baseline, let’s compare the difficulty of the Pfiffner Traverse with one of the most difficult ultra marathons in the US, the Hardrock 100. Both routes:
Are very high, with elevations usually between 10,000 to 13,000 feet above sea level;
Have extreme vertical change per distance — 660 feet per mile on Hardrock, and 750 vertical feet per mile on the Pfiffner; and,
Subject to violent thunderstorms, unreliable cell service, and run-ins with antlered wildlife.
But the Pfiffner is grades harder than Hardrock. In some respects, it’s also more difficult than Nolan’s 14:
1. Route access
Milner Pass and Berthoud Pass serve as the northern and southern termini of the Pfiffner, and both are crossed by paved highways. But in between there is only one vehicle-accessible spot, 16 miles from the southern terminus via a gravel road.
Otherwise, the route can only be accessed on foot or stock (no bicycles), usually by hiking in about 8 miles and up 2,500 vertical feet. Even with a multi-person and multi-vehicle support crew, the Pfiffner demands self-reliance.
2. Off-trail
Forty percent (31 miles) of the 76-mile Pfiffner is off-trail. To successfully and safely navigate these sections, you must be able to expertly read a map, use a compass, utilize your altimeter, operate a GPS, and identify the line of least resistance between two points — not just run between course markings, or take out your map only at trail junctions.
3. Technical difficulty
When it’s not off-trail, the Pfiffner is almost always on singletrack — once, it follows a jeep road for a mere quarter-mile. As a result, almost every mile is hard-won — there are only a few stretches where you can disengage and auto-pilot.
And some sections are particularly difficult, on par with the worst of Nolan’s. They involve tedious travel through blowdown-filled spruce/fir forests; risky rock-hopping across talus, rockfall, craggy ridgelines, and blockfield; and scrambling up steep snowfields (up to 40 degrees) or slabs. It’s a no-fall zone, and bailouts and rescues will not be fast.
A more reasonable approach
Not entirely deterred? If you’re a trail or ultra runner who would like to take on the Pffifner, my recommendation is to:
1. Backpack it — or, if it will make you feel better about yourself, say that you’re “fastpacking” it. Carry overnight gear, maintain a sustainable pace, and budget 7 to 10 days.
2. Take on just a section of it. The Pfiffner Traverse Guide includes maps, a route description, and mileage chart for seven recommended loops.
The post Words of caution: FKT’ing or “running” the Pfiffner Traverse appeared first on Andrew Skurka.
October 10, 2018
Where should the Yosemite High Route start and finish?
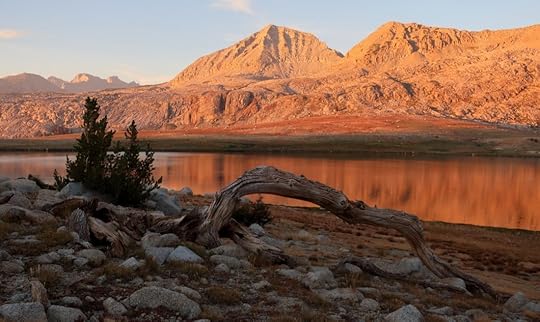

Harriet Lake alpenglow
As a distraction from more time-sensitive and critical work, recently I began drafting the Yosemite High Route Guide, which I’m planning to release in late-winter. This first edition will be about 90 percent right; it will need a revision after double- or triple- checking my work and field-researching some minor areas of interest in summer 2019.
As a numbers guy, I naturally start most projects with numbers. In this case, I created a best-guess primary route and multiple alternate routes in CalTopo, and then compiled distance and vertical data (e.g. on-trail, off-trail, and cumulative mileage; vertical gain, loss, and change per mile) into a spreadsheet. The resulting stats help in, for example, comparing the merits of two competing segments, and in creating recommended section-hikes that will be suitable for backpackers with different time frames, skill sets, and fitness levels.
Now with accurate data, I can confidently make final route decisions and proceed with other sections of the Guide, like the narrative description. With other high routes that I have developed, at this point any lingering decisions were pretty obvious.
But I’m still pondering fundamental aspects of the Yosemite High Route, and hoping that public feedback can help steer me.
Context
The “good stuff” on the Yosemite High Route lies between Grace Meadow in upper Falls Creek (just south of Dorothy Lake Pass, where the PCT exits the park) and Quartzite Peak (at the northern end of the Clark Range). This stretch is world-class and on par with the best sections of any other high route. It’s 112 miles (with 55 percent of it off-trail, and with up to 12 miles of continuous off-trail travel), and climbs or descends 585 vertical feet per mile. It emerges from wilderness only briefly, to cross Tioga Road at Tuolumne Pass.

The good stuff, in red
The debate is how to best access these two points, i.e. Where should the route start and finish? There are a half-dozen options, all with merits, none without flaws, and not one that is clearly best.
I suppose that the Yosemite High Route could “officially unofficially” start and end at Grace Meadow and Quartzite Peak. All the reasonable ways to reach these points could then be neutrally presented.
But I think the Guide will be more useful if it:
Recommends a specific and complete route. Most people will follow the Guide exactly, so this route should be the generally best option.
Provides information about alternatives, for those wanting to choose their own adventure or to tweak the route to fit their situation.
So let’s talk about these termini.
South terminus
I think the rightful southern terminus is fairly clear. But you tell me.
To reach Quartzite Peak, there are three potential routes:
From Yosemite Valley, via the John Muir Trail and Merced Lake Trail (13 miles).
From Tuolumne Meadows, via Echo Creek (17 miles); or,
From Tuolumne Meadows, via Rafferty Creek and Tuolumne Pass (21 miles).

The southern good stuff, in red, with three options termini options: two out of Tuolumne Meadows, and one out of Yosemite Valley.
Echo Creek would be my first pick, since it’s the most high route-like (i.e. largely off-trail, very low use, alpine terrain) and since it creates a loop, which is much more logistically convenient than a point-to-point itinerary (especially in this case, because you can “resupply” at Tuolumne Meadows by leaving food in a bear locker). However, the lower section of Echo Creek is impractical until mid-summer due to water levels (copious runoff in a tight canyon with a slab floor = major hazard), and NPS has asked specifically that I not promote it.
So that leaves the Tuolumne Pass and Yosemite Valley routes.
While the Yosemite Valley option is shorter, I’m inclined to go with Tuolumne Pass. First, it’s more high route-like, featuring several gorgeous lakes (e.g. Emeric), some alpine terrain, and big views of the Clark Range. Second, like Echo, it also creates a loop. Yosemite Valley is a tough sell for me: the culture shock and permit competition are huge turn-offs.

From the Tuolumne Pass Trail, looking south towards the Clark Range
North terminus
I’m more torn about this one.
To reach Grace Meadow, there are six options:
From Sonora Pass (Highway 108), via the Pacific Crest Trail (20 miles);
From Twin Lakes (outside Bridgeport, CA), via low-use trails (21 miles);
From Hetch Hetchy Reservoir, via low-use trails (23 miles);
From White Wolf Campground (Tioga Road), via the Grand Canyon of the Tuolumne (40 miles); or,
From Tuolumne Meadows (Tioga Road), via the Pacific Crest Trail (48 miles) or Grand Canyon of the Tuolumne (50 miles).

The northern good stuff, in red, with six termini options.
The primary conflict is: quality vs. convenience.
In terms of quality, Sonora is the best mile-for-mile option: it’s twenty miles atop the Sierra Crest on grade-A trail through the Emigrant Wilderness. But it’s the least logistically convenient (no public transit, difficult hitch, and 1:45 to Tuolumne Meadows by car). And it seems inconsistent with the Yosemite High Route.
Twin Lakes and Hetch Hetchy are logistically easier than Sonora (still no public transit, but easier and shorter hitches). However, these low-land routes are unexceptional. Hetch Hetchy at least has thematic appeal: it’s the collection point for all the tributaries explored by the Yosemite High Route, and could be one end (along with Yosemite Valley) of a valley-to-valley adventure.
White Wolf is shorter than the routes out of Tuolumne Meadows, but it misses out on the Tuolumne’s breathtaking waterfalls, and does not have the same logistical conveniences, which I think are worth another 10 miles of hiking.

Waterwheel Falls. The Grand Canyon of the Tuolumne has countless slides, drops, and pools, and more swimming holes than there are summer days.
That leaves the two TM routes: the PCT and Grand Canyon. I’m leaning towards the latter, but not without reservation. I think that many backpackers who undertake the Yosemite High Route will have already done the Pacific Crest Trail through northern Yosemite, whereas they probably have not hiked down the Grand Canyon. But the Grand Canyon bottoms out at 4,300 feet among black oaks and ponderosa pines, which is far below normal “high route” life zones.
Whatever way, you can see these routes are all imperfect.
Your thoughts?
Remember, I’m looking to identify a single route with specific termini that will be best overall for most backpackers. Information about other routes will still be presented.
If you have questions about any of the possibilities that will help to inform your thoughts, ask. I don’t expect everyone to be as intimately familiar with Yosemite.
The post Where should the Yosemite High Route start and finish? appeared first on Andrew Skurka.
September 13, 2018
Live tracking: Run Rabbit Run 100 || Starts Friday at noon MDT

Tomorrow I toe the line for my first and only ultra marathon of 2018, Run Rabbit Run 100 in Steamboat. Three years ago I ran exceptionally well here, on account of both my time and pace (20:12, 3rd overall) and the seven-year gap from my previous 100-miler, Leadville in 2008.
Training data would suggest that I’m in better shape this year, much thanks to the coaching of David Roche, so I’m optimistic that I can run at least as well as I did in 2015. It’s a stronger field this year, however, so an equal or faster time will not necessarily translate into the same place.
Amanda and my parents will be crewing me, and possibly posting some photos on my Instagram feed. You can also track the race live at UltraSignup. The race starts at 12 pm MDT. My bib number is #83.

The 2015 finish
The post Live tracking: Run Rabbit Run 100 || Starts Friday at noon MDT appeared first on Andrew Skurka.
September 5, 2018
Gear List: Yosemite High Route || High Sierra in August


Fireweed in upper Stubblefield Canyon
Last month I went on a 9-day/8-night backpacking trip in Yosemite National Park. My route was more ambitious than the norm: I was scouting the Yosemite High Route, which has monstrous vertical change and extensive off-trail and alpine travel. I tried to avoid popular trails like the John Muir Trail/Pacific Crest Trail and the High Sierra Camp Loop, but using or crossing those paths is almost inevitable.
Overall, I felt my gear list was spot-on, and I would make few changes if I repeated this trip exactly. For a more casual or trail-based itinerary, however, some changes would be in order to reflect the differences in style and demands, i.e. greater emphasis on comfort in camp, conditions that are less abusive on gear.
Conditions
Below are the most notable conditions that I encountered. In general, they were very favorable, as you would expect in late-August in the High Sierra.
Daytime highs in the 70’s at Tuolumne Meadows (8,500 feet) and in the 60’s on 12,000-foot passes;
Nighttime lows in the 40’s at camps between 8,500 and 10,000 feet, though I deliberately select my campsites — meadows in deep valleys and alpine areas were frosted most mornings.
No mosquitoes, which is normally the case for late-August. The mosquito season ended prematurely this year due to a dry winter — the ground dried up earlier than normal.
No precipitation, and few clouds. Believe it or not, this is the norm in the High Sierra in the summer. The region can be hit with violent monsoon thunderstorms, but they’re less common than in the Rockies.
Intense sunshine in sub-alpine and alpine areas. Even without lingering snow, the granite is extremely reflective.
The terrain was a mix of high- and low-use trails, and off-trail. The off-trail portions were primarily granite slabs and tundra, with some brush and talus.
Water availability was okay, but only mapped creeks and lakes were reliable. After a more normal winter, unmapped sources are still running in August.
I encountered one bear, but none while camping. Yosemite requires that all food and food-like items (e.g. sunscreen, lip balm) be stored in hard-sided canisters.

A typical camp: cowboy camping (no shelter), tucked in among trees for wind protection and thermal cover.
Gear List: Yosemite High Route in August
Summary
A line-by-line gear list is further down this page. Here’s a big-picture look:
List vs reality
The spreadsheet weights match my field observations almost exactly. I weighed my pack with all of its contents (“base weight”) at the end of the trip, and got 14.1 pounds without my 8-oz camera. That would bring the total base weight to 14.6 pounds, or just 0.1 pounds lighter than my spreadsheet weight.
The MSRP calculation is wildly off. First, for very few items would I ever have to pay full retail. For example, I bought my $130 shoes for $60 and my $45 fleece for $22, both on clearance. And many items I can buy at 20 or 25 percent off by waiting for sales around Christmas, Memorial Day, and Labor Day. Second, I own some expensive gear that isn’t critical. For example, I could get by with a $170 altimeter watch rather than a $300 GPS sport watch, a $255 shelter made of sil-nylon instead of the $430 DCF version, and my smartphone rather than a $400 compact camera.
Full list
To make this list more viewing-friendly, open it in new window.
If you like the look and organization of my gear list, consider using my 3-season gear list template.

At the end of the trip, I weighed my pack with all of its contents, minus my 8-oz camera. The weight was only 0.1 pounds off from my spreadsheet weight.
Disclosure. This website is supported mostly through affiliate marketing, whereby for referral traffic I receive a small commission from select vendors, at no cost to the reader. This post contains affiliate links. Thanks for your support.
Questions about my gear list? Leave a comment.
The post Gear List: Yosemite High Route || High Sierra in August appeared first on Andrew Skurka.


