
Andrew Skurka's Blog, page 30
January 15, 2019
Reader Q: Where should I put my bear canister or Ursack at night?

Dave Chenault making dinner at an at-large campsite in Glacier National Park, where Ursacks are allowed. After dinner we would anchor our Ursacks at shoulder-height to a robust tree.
In a comment to my recent post about the ineffectiveness of bear bags and recommended alternatives, reader Jim N. asked,
Where is the recommended place to store a BV450 bear canister overnight in black bear country?
I received a similar question via email from David N., so a standalone post on the issue seems warranted. But to give a more comprehensive answer, I’ll broaden the question to:
Where and how should bear canisters and Ursacks be stored overnight?
Official recommendations
Let’s first look at what the land agencies and manufacturers suggest:
Hard-sided canisters
1. Put them a “safe” distance away from camp. Yosemite National Park recommends a distance or 25 to 50 yards. I have not found a specific recommended distance for grizzly habitat.
2. Avoid any location where they can be rolled away.
3. Do not attach anything to the canister (e.g. a rope or handle) that would make it easier to carry away.
For a few other tips, go here and here.
Ursacks
1. Seal the Ursack with a double overhand knot.
2. Anchor it to an unbreakable tree or branch, as high as you can reach, using a figure-8 knot, which is easy to tie and which resists cinching. Do not anchor it low to the ground, which will make it easier for a bear to smash and get leverage.
3. If you have more than one Ursack, spread them apart by about 25 yards.
For additional recommendations, go here.

My recommendations
The official recommendations mostly sound reasonable. I would add only a few things:
1. Distance from camp
In black bear habitat, usually I keep my canister or Ursack closer to my camp, probably more like 10 to 20 yards. It’s far enough away that a bear shouldn’t step on me or confuse me with my food, but it’s close enough that I can hear a bear messing with it. It’s also close enough to deter most bears, which generally are uncomfortable entering an occupied camp.
In grizzly habitat, I’m less bold. A 25-yard minimum sounds about right.
2. Surroundings
When using a canister, I try to find a spot where it will be difficult to roll far or to roll out of view. Look for a talus field or rock garden, a shallow but steep-sided depression, thick brush, or a flat open meadow.
Be particularly careful of nearby creeks and cliffs. Famously, a bear in Yosemite learned that canisters would explode if she rolled them off a cliff near Snow Creek.
3. Alarm bells
Often I will put my clean cook pot on top of my canister or Ursack, so that it makes noise if a bear (or maybe a large rodent) begins to investigate my food. If I’m sleeping soundly and wrapped in a noise-muffling mummy bag, hopefully I’ll wake up.
4. Ursacks above treeline
It’s best to secure an Ursack to an unbreakable tree or limb. If you’re above treeline or in the Arctic, use the next best thing available. For example, tie it around the base of a boulder, or around a boulder that’s wedged in a talus field. Make it difficult for a bear to carry it away.
Have additional questions or tips? Leave a comment.
The post Reader Q: Where should I put my bear canister or Ursack at night? appeared first on Andrew Skurka.


January 14, 2019
Video: Adventure trip with Clelland & Magnanti in the Colorado Rockies

Last year Chris G. and his brother Phil joined one of our Adventure trips in Rocky Mountain National Park. The 5-day session was guided by Mike Clelland and Paul Magnanti, and included parts of the Pfiffner Traverse and the Continental Divide Trail Loop. For those interested in one of our 2019 trips, it will give you some sense for the experience.
The post Video: Adventure trip with Clelland & Magnanti in the Colorado Rockies appeared first on Andrew Skurka.
January 10, 2019
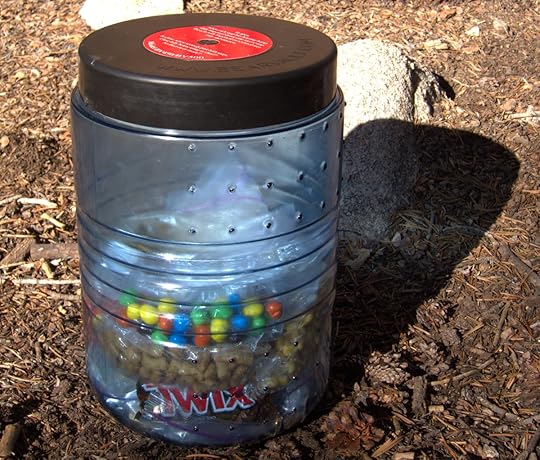
Ineffective & outdated: Six reasons to not hang a bear bag

Bear bags are a stubborn fixture of the backpacking world. Hanging is recommended, taught, and practiced by influential organizations and individuals even though it is less effective, less foolproof, less reliable, less efficient, and less safe than other modern options.
I have not hung a bear bag in at least a decade, and I no longer include a bear hanging module in the curriculum for my guided trips. It’s an outdated and ineffective method of food storage.
What is a bear hang?
A bear hang is an improvised system of cord, sacks or bags, and sometimes carabiners and pulleys used to suspend food in a tree, primarily to protect it from black bears, as well as from rodents (especially in high-use campsites) and grizzly bears (in select areas only).
There are a few popular hang configurations, such as the simple tie-off, PCT method, and counter-balance. In a perfect world, the end result is this:

NOLS Cookery (National Outdoor Leadership School) (NOLS Library) Kindle Edition by Claudia Pearson (Author, Editor), Mike Clelland (Illustrator), Stackpole Books; 5 Revised edition (January 1, 2004)
Recommended alternatives
Last month I gave in-depth explanations of my preferred food storage methods. But briefly:
If permanent infrastructure is available (e.g. lockers, cable systems), use it.
In areas where hard-sided canisters are required and where bears regularly steal food, carry a hard-sided canister like the Bearvault BV450.
If bears are known to inhabit the area but hard-sided canisters are not required and there few or no reports of bears stealing food, use an Ursack Major. And,
When using high-use campsites in bear-free habitats, rodent hang your food.
Depending on your risk tolerance, you may also consider sleeping with your food. This is widely practiced, but few are willing to talk about it.

Two recommended food storage options: hard-sided canisters like the BV500 (left) and soft-sided bear-resistant sacks like the Ursack Major (right).
Bear hangs versus rodent hangs
The concept of a so-called rodent hang is the same as a bear hang: suspend it in the air, out of reach. But it’s simpler and less robust: it can be kept in camp, and it needs to protect only against mice, squirrels, rabbits, raccoons, and maybe an occasional fox.
Unlike bear hangs, I advocate rodent hangs. They’re perfect for bear-free areas, like most of the desert Southwest.
Reasons not to hang a bear bag
I no longer hang bear bags, and never recommend it. The technique is plagued with problems:
1. You probably suck at it.
Like other outdoor skills, learning to properly hang a bear bag takes time and repetition. And because most backpackers don’t backpack often enough to get the requisite practice, most bear bags are hung really poorly. Like, they’re laughable, and a simple caloric gift to the Yogi that walks by.
But unlike other outdoor skills, the consequences of a poor hang are immediate and widespread. If you fumble with map and compass or struggle to find 5-star campsites, it impacts only you, and you can do it better next time. But a failed hang becomes a problem for the bear, for the land agency that may need to relocate or kill the bear, and for the next backpacker(s) who stay in or near your campsite.
If you plan to hang your food in bear habitat, you need to have mastered this skill already by practicing dozens of times in bear-free areas like your backyard or a neighborhood park. If you’re not willing to do that, you shouldn’t even consider hanging your food.

A sub-par bear bag belonging to a commercial group in Rocky Mountain National Park. The park now requires hard-sided canisters.
2. It’s often impossible.
The effectiveness of a hang depends largely on the tree(s) in which the bear bag is suspended. It’s recommended that the bag is positioned about twelve feet off the ground, five feet away from the trunk, and about five feet below the closest limb.
Unfortunately, it’s often impossible to find a tree in which these thresholds can be met or exceeded. Above treeline and in arid areas, no trees are available. Near treeline, the trees are too stunted. In some regions the dominant tree species are ill suited, like the spindly lodgepole pines, Engelmann spruce, and sub-alpine firs found throughout the Mountain West. And other forests have been ravaged by wildfire, mountain pine beetles, spruce bark beetles, and ash borer.

Near treeline on the Aspen Four Pass Loop, it’s just about impossible to hang food properly in the spindly and stunted spruce and fir. As a result, sub-par hangs abound.
3. It’s time-consuming
In a best case scenario (i.e. skilled hanger, light food load, favorable trees nearby, and no mistakes), hanging a bear bag takes about 15 minutes. But it rarely works out that way:
Most backpackers have limited hanging skills and experience, and are therefore inefficient.
Heavy food bags require more hangs and/or more complicated systems.
Perfect trees can be hard to find, resulting in a long walks from camp. And,
Mistakes are commonplace, e.g. the throw-rock slips out of the knot, the throw misses its target limb, the rope gets stuck, the limb breaks, etc.
For soloists, I’d recommend budgeting 30 minutes; for groups, an hour. A bear hang kit weighs less than a hard-sided canister or Ursack, but the savings is entirely negated by its inefficiency.
4. It can cause injury or death.
During a wilderness first aid or first responder course, a common role-playing scenario involves a backpacker with a severe contusion on their forehead when their throw-rock snapped backwards. Oops, they had accidentally stepped on their line during the throw. It sounds funny — until you make this same mistake (which I have).
Deaths are uncommon, but needless and much more tragic. Several years ago, the news of this fatality in the northern Rockies spread through the outfitter-guide community.
View this post on Instagram
A post shared by Sarah Ortegon (@nonookeiht_bee3eisei) on Jan 9, 2019 at 4:42pm PST
5. It’s rarely effective against a determined bear.
To put this point in context, let’s watch some videos. Black bears are extraordinary climbers!
Grizzly bears have less Spiderman-esque talent, but they shouldn’t be discounted:
Unless your hang is textbook perfect, a determined black or grizzly bear will probably get your food. No hang method is immune — bears can:
Chew through your cord.
Lunge from the trunk, and either grab or cut open your bag while they’re falling.
Break the limb, or push down the entire tree. And,
Send their cubs out on the limb to chew the cord.
I have met only one person who could truly bear-proof his hangs. Kevin Sawchuk learned his craft in the 1970’s, when hangs were still permitted in the High Sierra. Unfortunately, not everyone read Kevin’s tutorial or could replicate him, and land managers decided that hard-sided canisters were the most effective strategy against their wily black bears.
6. More user-friendly options exist for less audacious bears.
Thankfully, the High Sierra is the exception, not the norm. In most other areas, the black bear population isn’t as healthy and the bears don’t nonchalantly walk into occupied camps.
In these types of areas, bear bags are a widely accepted food storage technique, and are believed to be “effective.” But very few hangs are probably ever tested. It’s like wearing a garlic rope around your neck to keep away vampires — it must be effective if the vampires don’t get you, right?
A better option in these types of areas is the Ursack Major. This bear-resistant bag weighs and costs marginally more than a commercial bear bag kit ($80 and 8 oz, versus $50 and 4 oz), packs easily into a backpack, has been certified by the Interagency Grizzly Bear Committee (IGBC), and can be quickly and easily anchored to a tree. I don’t trust an Ursack as much as a hard-sided canister, but I think it’s acceptable in low-risk areas where it’s unlikely to be rigorously tested.
In the unlikely chance that I wake up to a bear chewing on my Ursack, I can probably scare it off by making lots of noise or throwing, um, pine cones at it or around it. I don’t think that I would have been any better off with a hang — if the bear was willing to approach my camp for an Ursack, it would have been willing to go after my bear bag, too.
What’s been your experience with bear bags? Do you agree or disagree with me? Leave a comment!
Disclosure. This website is supported mostly through affiliate marketing, whereby for referral traffic I receive a small commission from select vendors, at no cost to the reader. This post contains affiliate links. Thanks for your support.
The post Ineffective & outdated: Six reasons to not hang a bear bag appeared first on Andrew Skurka.
January 7, 2019
Now accepting applications for 2019 guided trips!


Back to the Brooks Range!Yesterday afternoon I began accepting applications for my 2019 guided trips. Through January 20, it’s an open application period — if you get your application in by then, I’ll consider it equally with all of the others, though I do give first priority to alumni and to applicants who were waitlisted in previous years.
Learn more about my trips, or:
Apply now!
Based on the applications so far, there seems to be a LOT of interest in the four one-week Alaska trips in late-June. This includes many alumni, which I expected, but also many new applicants.
If you are interested in going to Alaska with us, you should apply. But I would encourage you to also indicate interest in another trip location — specifically, California or Colorado — if it appeals to you at all, especially if you have only taken a Fundamentals trip with us, if you have never taken a trip with us, or if you’re backpacking experience is unexceptional.
My plan is to take the 32 most qualified applicants to Alaska. If you don’t make the cut this time, you’ll be in a better position next time if you’ve gotten out with us and/or undertaken noteworthy trips on your own.
It’s almost unfortunate that Alaska is overshadowing the other locations. When did Yosemite National Park and Rocky Mountain Park become chopped liver?
All applicants will be contacted by Friday, January 25, though I hope to be in touch earlier than that.
The post Now accepting applications for 2019 guided trips! appeared first on Andrew Skurka.
January 5, 2019
Long-term review: LOKSAK OPSAK || Food storage enhancer


Sunset in the Yukon Arctic. My food was stored in the clear OPSAK at the front of the shelter.
LOKSAK OPSAK bags are made of heavy-duty plastic and have a hermetic seal. When closed, the bag is airtight, waterproof, and odor-proof (the “OP” in OPSAK).
On some trips, I use the 12″ x 20″ size ($6, 1.5 oz) as a lone food sack or as a liner inside a wildlife-resistant Ursack. I also like the 9″ x 10″ size, which holds my daytime snacks and which I keep near the top of my pack.

The larger 12″ x 20″ size is ideal for storing multiple days of food. The smaller 10″ x 9″ is useful for daytime snacks, kept near the top of the pack.
Review: LOKSAK OPSAK
LOKSAK OPSAK bags are tough, lightweight, and reasonably priced. Inside the 12” x 20” size, I can fit about five days of food. Less ravenous hikers can probably fit six.
The rectangular shape packs efficiently inside my pack, and its width fits perfectly a snack/sandwich bag, candy bar, and most energy bars. Because it is made of transparent film, the contents can be easily seen. The seal seems to blow out after 4-6 weeks, but I continue to use them for many months afterwards.
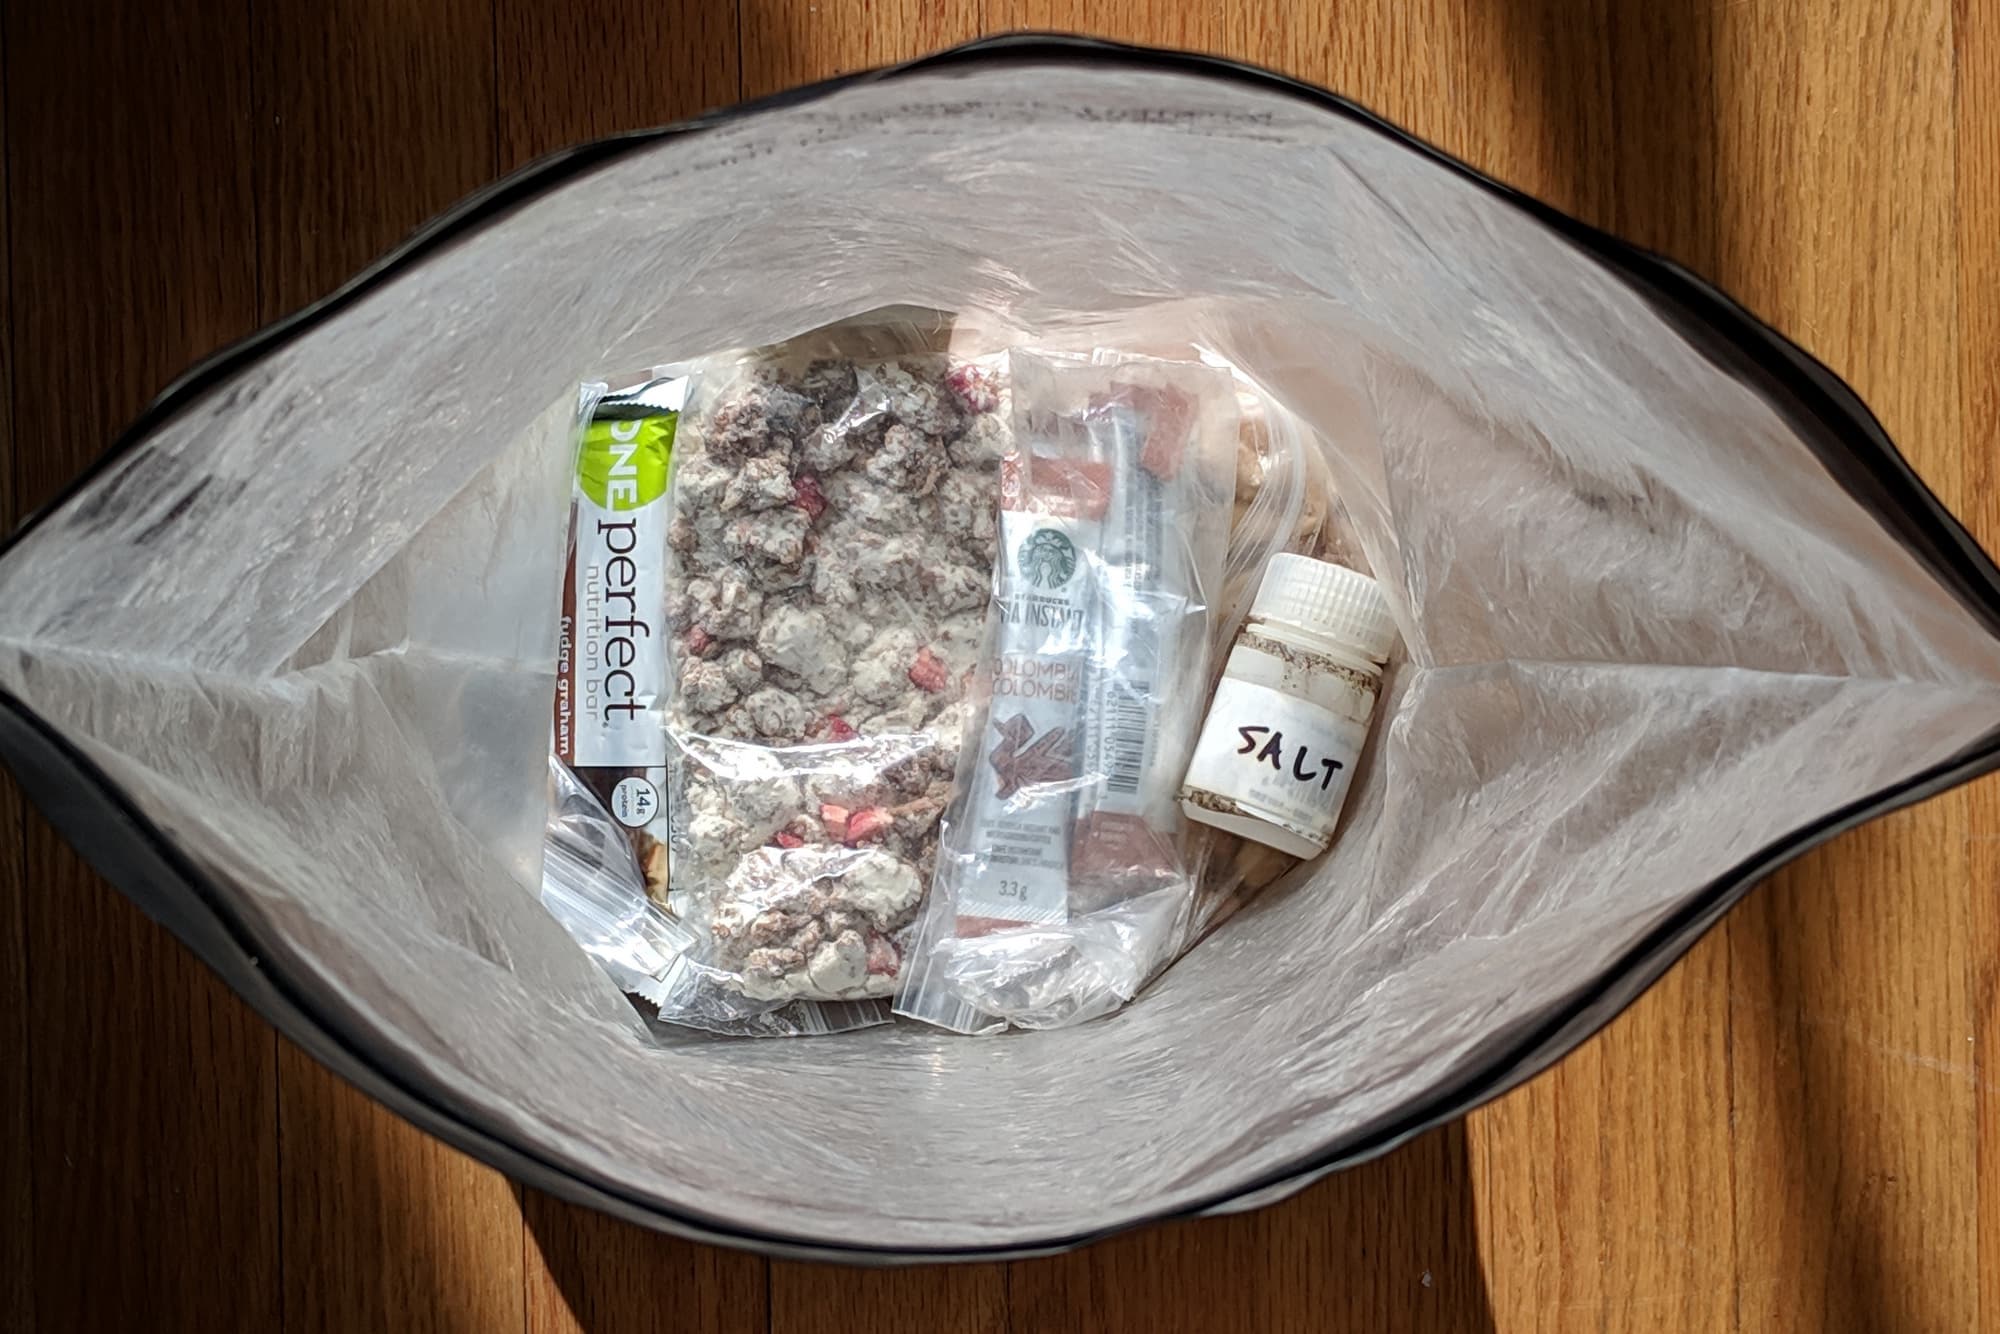
The width of the 12″ x 20″ Opsak is about the same as most candy/energy bars and snack/sandwich bags.
Recommended uses
On its own, an OPSAK is an inadequate method of overnight food protection. It’s best considered an enhancement to a more reliable method, by reducing food odors.
Most specifically, an OPSAK can be used to line an Ursack Major or Ursack Minor to make it less detectable or less interesting to a bear or rodent. Maybe that black bear two miles away won’t smell it, or maybe it’ll decide to visit a different campsite that is giving off stronger food odors.

My packed food prior to a trip in Glacier National Park, where Ursacks are allowed. My note says that I had 5 days of food in the Opsak and that it was “almost full.” I used the smaller 6″ x 9″ size for my daytime food.
If I’m using a hard-sided canister, I do not use an OPSAK as well. Canisters are not entirely bear- or idiot-proof, but I’m very confident in them as a standalone food storage method.
I never hang my food from bears, because I think other methods are more effective (e.g. canisters), or at least equally effective and easier (e.g. the Ursack Major). If you do hang your food, an OPSAK could add value to the system.
I will use an OPSAK on its own only if there is low risk (or, ideally, no risk) of bear or rodent activity at my campsites. And I will sleep with it — on it or immediately next to it, or keep it inside my shelter. I wouldn’t leave an OPSAK unattended even at “safe” campsites.
Is an OPSAK really odorproof?
Fresh out of its packaging, an OPSAK is both odor-proof and odor-free. After a few days of use, the OPSAK is probably still odor-proof (i.e. food smells do not permeate outside the bag), but I suspect its exterior becomes contaminated with food smells due to normal handling.
Bears have an extraordinary sense of smell — seven times better than that of a bloodhound, according to Yosemite — and I would imagine that this contamination puts the OPSAK on a bear’s radar. However, the food smell is probably no stronger than the food smell on your clothes or your shelter, and that level of food smell is generally not considered to reach the threshold for action. (Philmont would be a notable exception.)
To reduce food odor contamination, an OPSAK could be washed between uses with soap and water.

One 12″ x 20″ bag weighs 1.5 oz and holds about 5 days of food.
Durability
The transparent body material is heavy-duty and will withstand months of use. On my 6-month Alaska-Yukon Expedition, on which I used the OPSAK exclusively for food storage, I replaced them only twice (so two months per bag) and got several more months out of each bag on subsequent trips. Rips or tears in the body can be easily fixed with duct tape or Tenacious Tape.
The airtight seal has proven less durable, with an average lifespan of four to six weeks. After the seal blows out, I just close it up like a potato chip bag. I think this is “good enough” — if I thought that leaking food odors could make the difference, I should be using a more guaranteed food storage method anyway, e.g. hard-sided canister.

Holes in the bag body can be easily repaired with duct tape or Tenacious Tape. There is no fix for the seal, which I find blows out after about 4 to 6 weeks of daily use.
Do you have questions about or an experience with OPSAK bags? Leave a comment.
Buy now: LOKSAK OPSAK 12″ x 20″ Bag
Disclosure. This website is supported mostly through affiliate marketing, whereby for referral traffic I receive a small commission from select vendors, at no cost to the reader. This post contains affiliate links. Thanks for your support.
The post Long-term review: LOKSAK OPSAK || Food storage enhancer appeared first on Andrew Skurka.
January 4, 2019
Dear Senator Gardner: Support Colorado business by re-opening the government


Dear Senator Gardner —
I own a Boulder-based guided backpacking company, the lifeblood of which are commercial permits on public lands. Without them, I cannot legally operate in lands managed by the National Park Service, US Forest Service, and Bureau of Land Management.
Due to the current shutdown, my permits to run trips in 2019 in places like Rocky Mountain National Park, Yosemite National Park, Gates of the Arctic National Park, and Monongahela National Forest are not being reviewed (or approved), like they normally would be at this time of year.
If I do not obtain these permits soon and am unable to run trips, my family will suffer financially, reducing our income by about 50 percent. You can expect a proportional decrease in amounts collected from me by the Colorado Department of Revenue in 2019.
Business owners in gateway towns like Estes Park and Grand Lake will also suffer, losing tens of thousands of dollars in revenue that my clients would have spent on lodging, transportation, and food. There will also be a lot of disappointed clients — for many, my trips are one of the highlights of their year.
I know that legislating is a complicated task, and that you are one of one-hundred US senators. But I would ask you to strongly support efforts to re-open our government — specifically the Department of Interior and the Department of Agriculture — to eliminate this risk to my livelihood. This shutdown is no longer political brinkmanship — it will soon have very real consequences for me, like it’s already having for the hundreds of thousands of furloughed government employees.
I’m aware that you are up for re-election in 2020. You can be assured that your actions during this shutdown will affect my vote, contributions, and activism during that campaign.
Sincerely,
Andrew Skurka (and my wife Amanda)
The post Dear Senator Gardner: Support Colorado business by re-opening the government appeared first on Andrew Skurka.
January 2, 2019
Women-only guided trips in Colorado in September

In 2019 we are offering two women-only sessions. Both are scheduled for early-September in Rocky Mountain National Park during peak fall foliage.
The post Women-only guided trips in Colorado in September appeared first on Andrew Skurka.
For the girls: Women-only guided trips in Colorado in September
In 2019 we are offering two women-only sessions. Both are scheduled for early-September in Rocky Mountain National Park during peak fall foliage.
The post For the girls: Women-only guided trips in Colorado in September appeared first on Andrew Skurka.
New hires! Anish and Stringbean to guide in WV and CO

This winter I’ve hired two more guides, cementing the roster as the most accomplished and knowledgeable team of backpacking guides on the planet. Yes, I’m boasting. No, I don’t think I’m exaggerating.
Joe McConaughy (“Stringbean”) will be helping Alan Dixon (“Adventure Alan”) and me guide in West Virginia in early-May. And Heather Anderson (“Anish”) will be joining us in the Colorado Rockies in September.
Consult the trip schedule for details. If you’d like to learn from and adventure with Joe and Heather, submit an application.
Among long-distance backpackers, Joe and Heather might be considered legends. Joe set fastest-known times (FKT) on the Pacific Crest Trail in 2016 and the Appalachian Trail in 2017, smashing older records set by famed ultra runners like Scott Jurek, Karl Metzler, and David Horton. He lives in Boston with his new fiancee, and last year “run commuted” over 2,000 miles to his full-time job.

In 2018 Heather became the sixth person (and the first woman!) to finish the Calendar Triple Crown, by thru-hiking the Appalachian Trail, Pacific Crest Trail, and Continental Divide Trail in a single calendar year. Near the finish, she was met by Flyin’ Brian Robinson, who has been guiding with me since 2011 and who in 2001 became the first person to complete the Calendar Triple Crown. This undertaking was not Heather’s first rodeo — she’s a hiking machine, and you should check out her full resume.

Photo: Arlette Laan
Joe and Heather are exactly the type of hires that I like: they both have exceptional outdoor experiences, and are both very personable. Essentially, they are raw talents — backpacking is one skill, but guiding is another. With days in the field, good mentorship, and a few medical certificates, they’ll become huge assets to the program.
The post New hires! Anish and Stringbean to guide in WV and CO appeared first on Andrew Skurka.
December 29, 2018
Spiderwoman’s KCHBR Tips || Reflections, conditions, comparisons

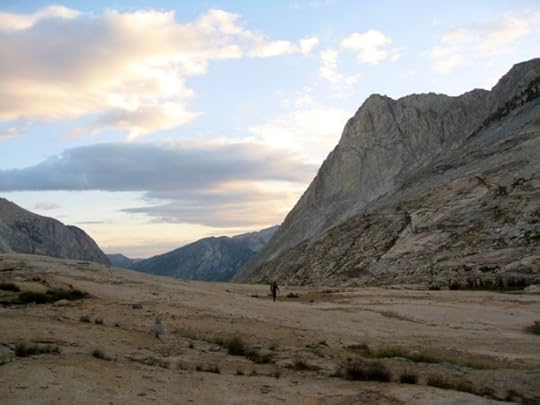
Spiderwoman thru-hiked the Kings Canyon High Basin Route in 2017 with her partner, The Brawn. These are her “tips” about the route, a term that does not do justice to their comprehensiveness and detail. The information has been split into eight posts to improve readability:
Introduction
Section 1: Tablelands
Section 2: Great Western Divide
Section 3: South Fork Basins
Section 4: Cartridge Basins
Section 5: Ionian Basin
Section 6: Monarch Divide
Reflections, campsites, conditions, and comparisons
She has shared all of her photos from her trip, available here.

With throaty thunder as our backdrop, we settle in for the evening on a high grassy bench
Where We Camped, Approximate Daily Mileage 2016
1. Tarn below Mt Silliman. 5m
2. Lonely Lake. 12.5m
3. Just shy of Colby Lake, just past “PR-15”. 10m
4. Avalanche Pass area

The Brawn channeling Slim Pickens’ Major Kong
Where We Camped, Approximate Daily Mileage 2017
1. Creek just before Gardiner Pass. 11m
2. Between “PR-31” and “PR-32”. 5m
3. Lake below King Col Central. 2.5m (not including mistake)
4. Along Woods Creek Trail just west of JMT junction and “PR-35”. 5m
5. Halfway between “PR-39” and “PR-40”, next to swampy lake. 8m
6. Lake below/before Dumbbell Pass. 7m
7. “A-AMP-02 good campsite”. 5.5m
8. First lake below north side Bishop Pass. 17.5m
9. Brown’s Town Campground Bishop. 5m
10. Brown’s Town Campground Bishop.
11. Dusy Basin. 9m
12. Just shy of Simpson Meadow. 16m
13. Lake just east of “PR-62”. 8.5m
14. Along Copper Creek Trail ~7940’. Bear locker and stream. 10m
15. Junction of Don Cecil Trail and Rd 14S11. 9m
16. Junction with Twin Lakes Trail. 20m
17. Tarn 10410, west/below “PR-07”. 8m
18. “PR-13”. 11m
19. “PR-17”. 7m
20. Half-way down Lake Reflection. 7m
21. Brown’s Town Campground Bishop. 14.5m

The first leg of our morning commute down into town
Camping
As our ’16 WRHR trip came to a close we decided to upgrade from a shared double tent to individual tents (due to challenges finding camping spots for a double tent). We made the switch over the winter, tested our choices out in spring ’17 on the southern Arizona Trail, loved the change, and appreciated their flexibility even more once out on KCHBR.
Other perks: Improved sleep/don’t inadvertently wake each other up. Easier to manage the uncomfortable stuff like mosquitoes and wet gear and dirty gear and irritable moods and things that annoy. You’ll have a shelter if you accidentally get separated. If you want to catch a sunrise, you can pack up your entire kit and get a head start on the day’s walk. Air quality isn’t fouled. Basically, relationship bliss goes up when the need to compromise goes down.

Power campspot. A rarity along this canyon wall and tailor-made for two.
Crowded or Empty? People We Saw in 2016
1. No one once we started up Twin Lakes Trail from Lodgepole
2. No one
3. Two guys in Cloud Canyon returning to their basecamp from a climb. They were irritated because their packer took off on them because of the weather rolling in and they thought he could have waited and saved them the hike out
4. A couple of backpackers on Avalanche Pass Trail, then plenty of people on Bubbs Creek Trail the closer we got to Roads End
Summary: Two people while traveling x-country

Bert from Belgium cautiously scrambling in hand-me-down, too small, worn out, gripless shoes…and still smiling
Crowded or Empty? People We Saw in 2017
1. Tons of folks around Kearsarge Pass and on the JMT, then Bird and Bill heading out to Gardiner Pass
2. No one
3. No one
4. No one until we stepped onto Woods Creek Trail, then a bunch of backpackers
5. A bunch of backpackers on Woods Creek and John Muir Trails, then no one after stepping off the trail at White Fork Creek
6. A solo backpacker descending Cartridge Pass Trail
7. No one
8. No one until we crossed Palisade Creek and stepped onto the JMT, then the kayakers and a bunch of backpackers. Dusy Basin was full of tents. Search and Rescue
9. A bunch of early birds on Bishop Pass Trail, trail runners and backpacking groups heading up
10. Zero in Bishop
11. Lots of day hikers heading back to the parking lot. Fewer tents in Dusy Basin
12. Lots of backpackers on the JMT. Several trail crew folks hiking up Middle Fork Trail
13. No one
14. Heard in the distance a group camped at another of the State Lakes as we walked past in the morning. Emily the packer. Several groups camped at Grouse Lake. Several backpacking groups ascending Copper Creek Trail
15. Early bird backpackers and day hikers ascending Copper Creek Trail. Lots of folks at Roads End Permit Station. I sat at a nearby picnic table for over an hour waiting for The Brawn to catch up and overheard lots of exchanges. One ranger in particular provided extremely warm, engaged, helpful customer service. A couple groups of day hikers descending the last ¼ mile of the Don Cecil Trail
16. A couple guys in a pickup just after we started walking. A large group RV camping at the corner of 14S11 and 13S12. Close to a dozen vehicles on 13S12. Several groups of dayhikers and backpackers on the trails over Marvin and JO passes
17. A climbing party breaking down their basecamp after summiting Silliman the day before just a short way up the use trail
18. No one
19. A backpacking couple on Colby Pass Trail
20. Solo man chatting in Russian
21. Campers at Lake Reflection’s outlet and East Lake. A couple backpacking groups ascending the trail to East Lake. Lots of backpacking groups on Bubbs Creek Trail and around Kearsarge Pass
Summary: Crowded main trails. Less than a dozen folks on use trails. One person while traveling x-country

All alone in the alpine sublime…not even an hour after stepping off the highly-utilized JMT
Weather 2016 (Late Sept into Early Oct)
1. Sunny
2. Sunny. Cold and windy as day progressed
3. Sunny. Weathercarrot kept us apprised of the weather change that was coming (snow and very cold, like a drop of over 20 degrees or something). We could see the clouds off in the distance that early evening (I included a photo). It froze hard overnight. Water that was flowing near where we camped was frozen solid in the morning, as was the ground in general. No precipitation where we were though
4. Sunny and cold

A family of autumn peaks. Diversity as bold and raw and beautiful.
Weather 2017 (1/3 Aug and 2/3 Sept)
1. Sunny with puffy clouds. Drizzle and thunder in the afternoon
2. Sunny, puffy clouds forming
3. High overcast, very cold during the solar eclipse. Sunny warm evening
4. Sunny, puffy clouds forming
5. Sunny, then puffy clouds with afternoon thunder and rain cells in the near distance
6. Sunny, then puffy clouds with afternoon thunder and rain cells in the near distance
7. Sunny, puffy clouds forming
8. Sunny, puffy clouds forming
9. Sunny and hot in Bishop
10. Sunny and hot in Bishop
11. Puffy clouds, then rain and bright flashes of lightning closely followed by cracking thunder, it started in the middle of the night and continued, keeping us awake for the rest of the night
12. Puffy clouds
13. Sunny, puffy clouds forming, smoke out to the west
14. Sunny, puffy clouds forming, smoke out to the west
15. Sunny, hot in Cedar Grove
16. Woke up to smoky smell and haze in camp. Sunny, puffy clouds. Sprinkling in evening
17. Rain and wind in the morning. Clouds breaking up by late morning. Smoke out to the west
18. Sunny, puffy clouds forming. New clouds forming quickly around Copper Mine Peak. Smoke out to the west
19. Sunny, then rapid change to dark skies, thunder, and intermittent bursts of heavy rain. Smoke out to the west
20. Very calm, clear, sunny morning. Puffy clouds forming. Thunder. Smoke out to the west
21. Sunny, then thunder clouds forming
Flowers

Albeit in patches, there were profusions of flowers for the entire span of our 2017 hike
Animals
Pika, marmot, mule deer, coyote, raptors, fish, squirrels, chipmunks, bees, grouse, frogs, mosquitoes, burrowing black flies

Preparing a winter cache
Buggy
Patchy. Never lasted all day. The swarms got pretty uncomfortable a few times.
Fords
Crossings that got our attention: Bubbs Creek was fast and knee high but no problem. Gardiner Creek was fast pounding whitewater where you intersect it initially. We quickly found something to cross on. Woods Creek was swift, wide, and deep. We weren’t willing to step into it and got lucky by quickly finding a log to cross on. We would have walked the bank for as long as needed (or possible) to find a safe crossing. Palisade Creek (close to where it empties into the Middle Fork) was too swift and deep to ford where the Middle Fork Trail crosses it, so we explored a bit upstream and found a log to cross on near an old stone foundation I assume was part of a long forgotten bridge.

Thank you to every single person who has plucked me off the side of the road over the years. I was a stranger to you but an irreplaceable daughter, partner, and dog mom to my family. You delivered me safely and I remember you all. It’s a fact that the vast majority of people are GOOD. Spread the word!!!
Worries
Thanks to Weathercarrot’s expertise and care for our safety, we had a head’s up in 2016 that a weather event would roll in soon after we got out there (sharp drop in temp and precipitation in places). I made the prudent decision to bag the hike when my GI issues devolved. I knew I couldn’t be in a weakened state and safely negotiate a snow event and tricky cross country travel at the same time.
In 2017, the major worry was whether or not Should-Go Canyon was going to ‘go’. Pretrip, I worried about the Middle Fork River ford, but it became a nonissue after we ended up taking an alternate.
I Learned…
This trip cemented for me that providing leadership and experienced companionship to a kindred spirit(s) while backpacking cross country deeply fulfills me. A major life goal of mine is to do more of that in the future, especially with women.

The Sierra’s classic treatment of light and shadow
I Wouldn’t Do This Particular Route Without My…
Being okay with altering our itinerary on the fly to a less aggressive path due to less than ideal (safety-wise) conditions. I was glad I could let a goal go and embrace what our alternate had to offer (rather than focusing on what we were missing).

Gratitude is good
Skurka’s KCHBR – To Thru-Hike Or Not
This is a great route to thru-hike. If immersing yourself in a physically and mentally stimulating backcountry experience turns you on…if you are already head over heels for the Sierra or are new to it completely…if you find the continuity of a loop hike elegant…if you want to call this small portion of the Sierra home for a couple/few weeks while you tour its various pockets and infrequently visited gems…if you want a complement to Roper’s SHR…if you want to do your part by giving the ecosystems around the crowded corridor trails some breathing room…then my vote is definitely GO FOR IT!!!

Crystalline silence and morning’s first golden rays
KCHBR and SHR Compared
1. KCHBR has fords. SHR (with the exception of crossing Twin Lake’s outlet) has none.
2. KCHBR map/compass navigation was tricky in a couple wooded stretches. I was glad I wasn’t navigating solo through those sections. SHR map/compass navigation presents no similar challenges; it is straightforward for the entire route.
3. KCHBR passes through more wooded areas. Comparatively, the SHR stays truer to high, open terrain.
4. KCHBR tours a small section of the Sierra. The SHR spans their entire length, so the landscape you move through is much more varied.
5. KCHBR struck me as having more vertical change per mile than the SHR.
6. KCHBR was similar to the SHR in the overall level of scrambling difficulty. As a total newbie, descending the north side of Snow Tongue Pass was the sketchiest challenge for me on the SHR. With the exception of descending Should Go Canyon, nothing on KCHBR exceeded Snow Tongue.
7. KCHBR potentially has easier transportation logistics.

We do it because we’re curious…

Because we like hard things…
Because we honor our Earth’s unfathomably delicate, infinitely interconnected ecosystem…

Because we’re better, in all the ways, when we come back
The post Spiderwoman’s KCHBR Tips || Reflections, conditions, comparisons appeared first on Andrew Skurka.


