
Bakerella's Blog, page 10
April 29, 2018
Make these cookies!
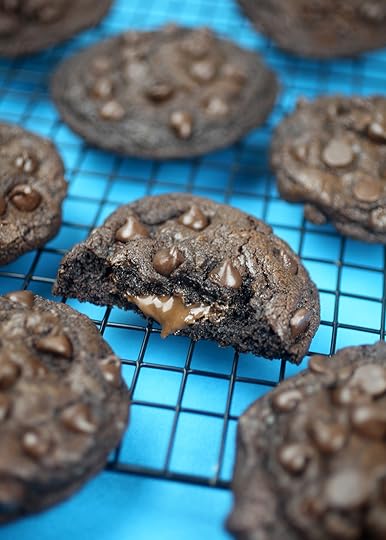
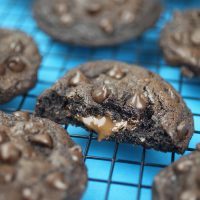
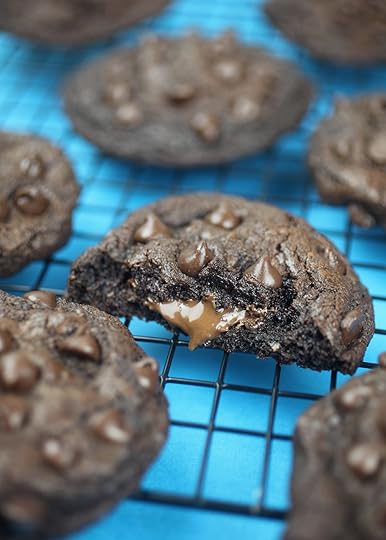
I could not stop eating these soft chocolatey cookies filled with pockets of Nutella right in the middle. Oh my gosh. So good!
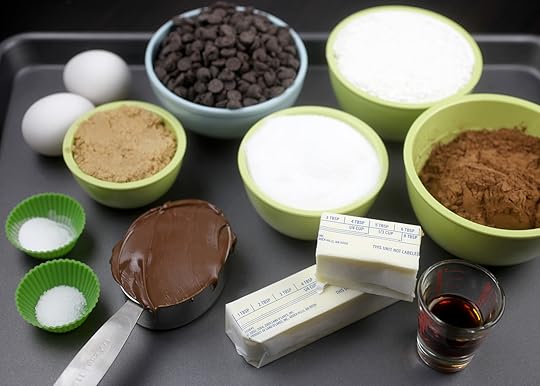
Ingredients are straight up basic but these cookies are bursting with chocolate flavor.
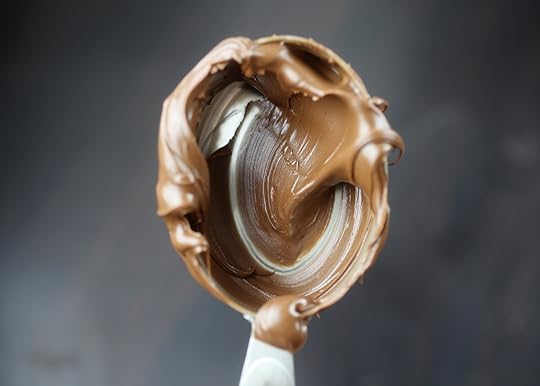
Dreamy!
And a delicious addition mixed in the batter.
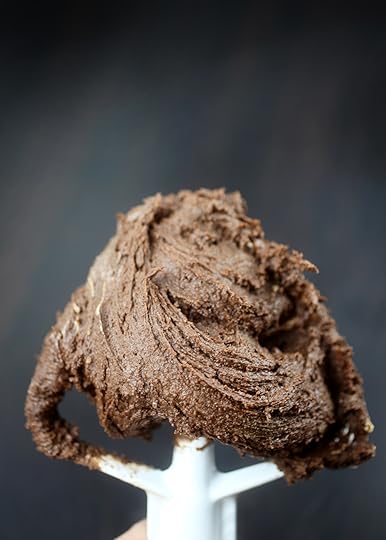
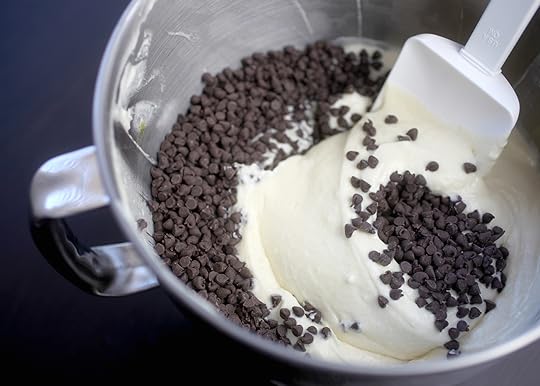
Now let’s double the fun with chocolate morsels.
Chill the dough and prepare more Nutella to stuff inside.
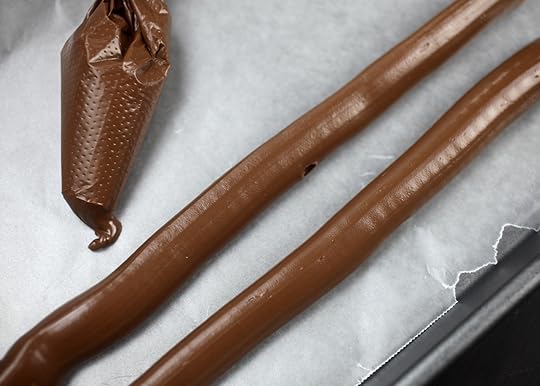
Pipe very thick lines on wax paper using remaining Nutella (that you didn’t already eat by the spoonful) and freeze for about 30 minutes.
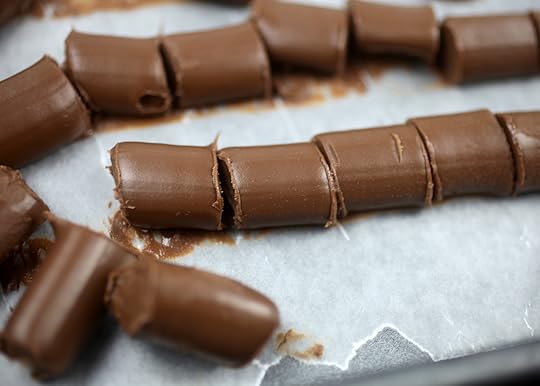
When firm, slice into roughly 1-inch sections.
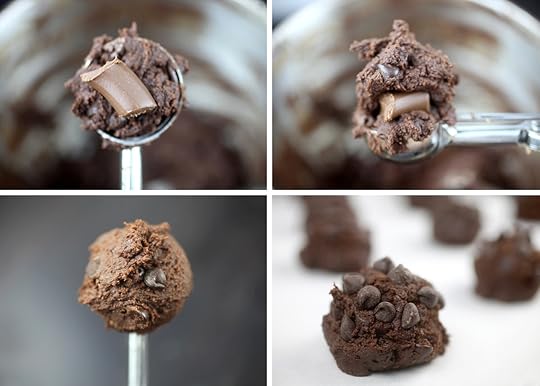
Scoop up some dough, place a nutella piece on top and then spoon more cookie dough on top. Shape and seal the edges and then place on a wax paper covered baking sheet.
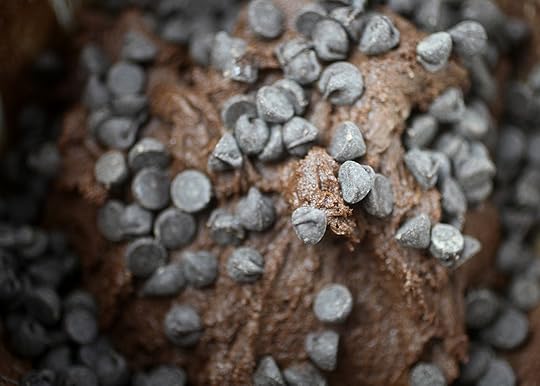
Finally press more morsels on the top and sides and bake.
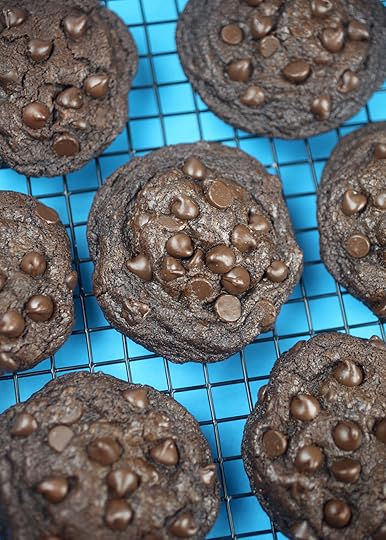
Pressing morsels on top before baking helps them look much more glamourous.
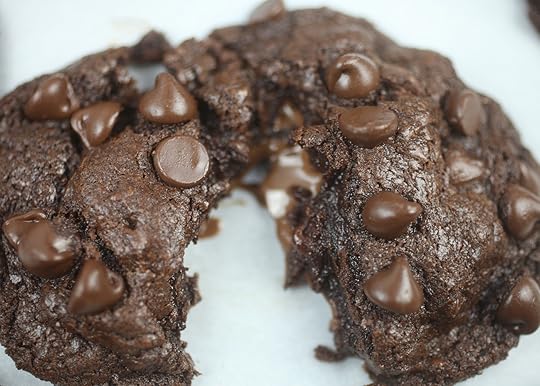
Make sure to eat some while still warm to get all that melt-in-your-mouth that gooey goodness.
Print Recipe
Yield: 18 large cookies
Double Chocolate Nutella Cookies
Ingredients:
1-1/2 cups all purpose flour
3/4 cup natural unsweetened cocoa
1/2 teaspoon baking powder
3/4 teaspoon baking soda
1/2 teaspoon salt
1-1/2 sticks unsalted butter, room temperature
1/2 cup Nutella or chocolate hazelnut spread
1 cup sugar
1/2 cup packed light brown sugar
2 eggs
2 teaspoons vanilla
2 cups semisweet chocolate morsels
Nutella
Directions:
Sift flour, cocoa, baking powder, baking soda and salt together in a medium bowl and set aside.
In a stand mixer, cream butter, Nutella and both sugars until light and fluffy.
Add eggs and vanilla to butter mixture and mix until incorporated.
Slowly add flour mixture, mixing each until combined. Scrape down sides of bowl and mix again just until incorporated.
Stir in 1 cup of the chocolate morsels, reserving the rest and place dough in the fridge to chill for about 30 minutes.
Spoon leftover Nutella into a large resealable plastic bag and snip off a corner of one end. Pipe thick lines of Nutella on a wax paper covered baking sheet and place in the freezer for 30 minutes while the cookie dough chills. When very firm, slice into 1-inch sections.
Preheat oven to 350 degrees Fahrenheit and line baking sheet with parchment paper.
When dough is chilled, scoop dough using a 1-1/2 inch scoop and place a chilled piece of Nutella in the center. Spoon more dough and place on top. Shape into a ball and seal edges. Place on baking sheet 2-3 inches apart.
When done, press remaining morsels on the tops and sides of cookie dough balls and bake for 12-14 minutes. Cool for about 10 minutes.
Enjoy!


April 16, 2018
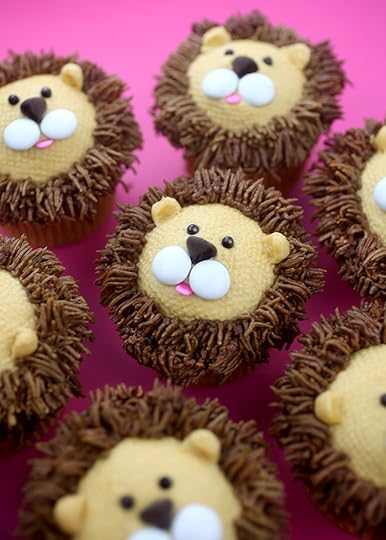
Royally Cute Lion Cupcakes
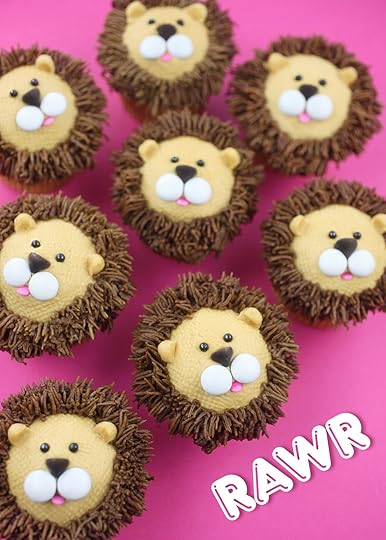
Rawr! These little guys are so cute. I wish I had a safari party to bring them to. But alas… They’ll just have to hang out in my kitchen. Or maybe the den (wink wink) until I devour their furry faces.
So grab some cupcakes and buttercream frosting and let the decorating begin.
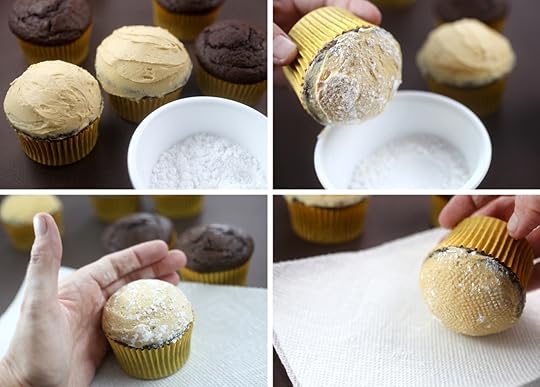
Frost cupcakes with buttercream tinted light brown. I used a couple of drops of brown and yellow gel icing color for the lion’s fur.
Gently tap the frosted cupcake on all sides in a small dish filled with powdered sugar.
Then shape the frosting into a nice little dome using the palm of your hand if needed. The thin coating of powdered sugar will keep frosting from sticking to your hands.
Finally, gently roll the frosted cupcake on a paper towel. This will remove most of the sugar and create a tiny textured pattern at the same time.
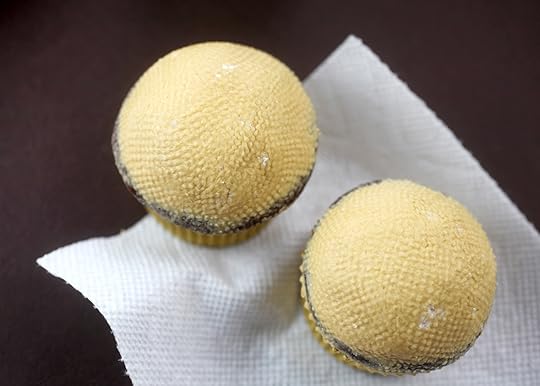
Looks kind of like short fur. : ) That was the intention anyway.
And, don’t worry about any last remaining flecks of sugar. They will eventually disappear from the moisture in the frosting.
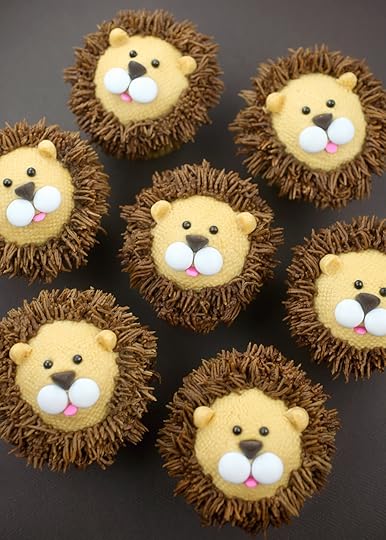
Okay, now let’s put their faces on! It’s easy.
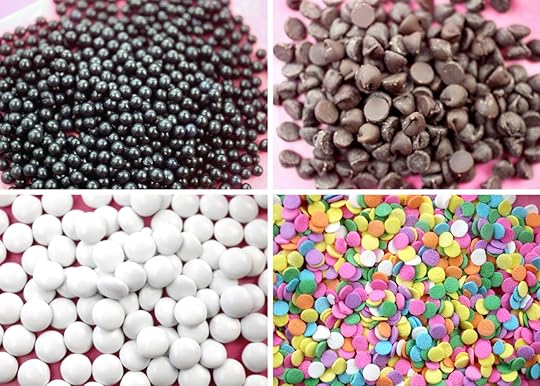
Eyes = Black sugar pearls
Noses = Chocolate morsels
Mouth = White M&M’s or chocolate gems
Tongues = Pink confetti sprinkles
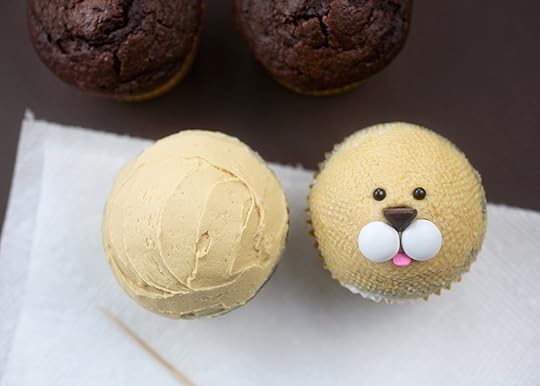
Start with the noses and then add the other details. You just need to gently press each piece into the frosting. I decorated each face as I went to make sure the frosting was still sticky enough to allow the pieces to stay in place.
Sidenote: You can totally decorate these lions by just frosting the faces and skipping the whole powdered sugar and pattern method. I just like to start with smooth frosting when making animal faces. Like I did with these chicks using sanding sugar instead of powdered sugar. Sugar crystals work too. And cocoa powder on chocolate frosting also does the trick.
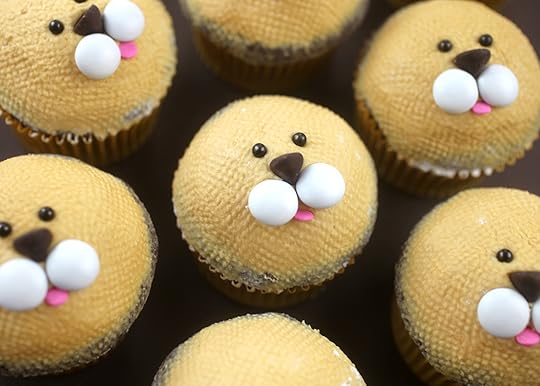
Ferociously cute faces!
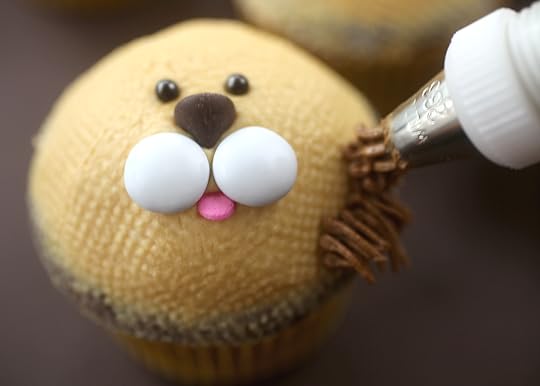
Now for the “mane” attraction. Tint buttercream a darker brown and use a #233 grass decorating tip to pipe around the perimeter of the cupcake.
Pipe around at least twice and fill in where necessary for a full head of hair.
Tip: If your heat from your hands starts to make the frosting too soft creating droopy hair, then place the piping bag in the freezer for just a couple of minutes to firm it back up again.
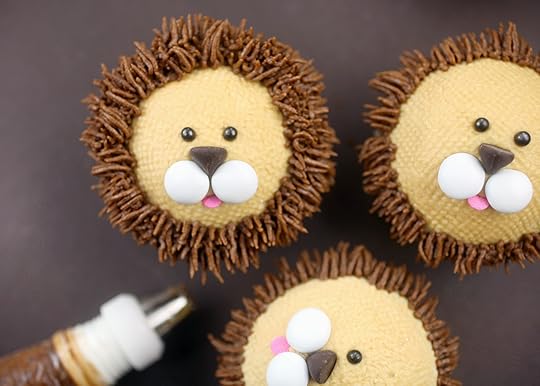
Adorable. And oh yeah, the ears… I reserved some of the light brown frosting to pipe two small dollops of frosting on each cupcake and then used a toothpick to scrape down and carefully remove half of it so they would look flat on the front side and round on the back. Sorry I forgot to photograph that step. : )
I love them just like this, but …
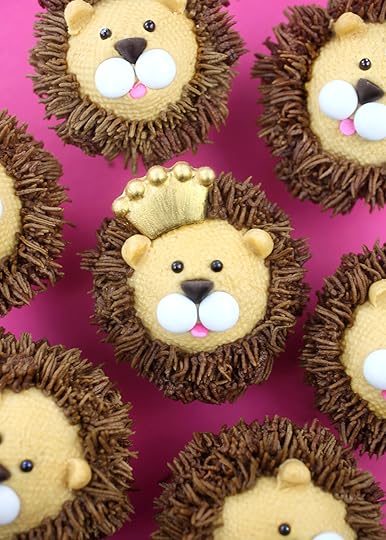
You can also make them feel like a king. I used one of my Bakerella for Make’n Mold candy molds (discontinued now) but google crown candy molds and you can find something similar. Then just fill the candy mold with melted candy coating. Let dry and use gold luster dust mixed with clear vanilla extract to paint right on top of the candy.
Royally cute! Hope you enjoy them.

March 30, 2018
Bunny Bark
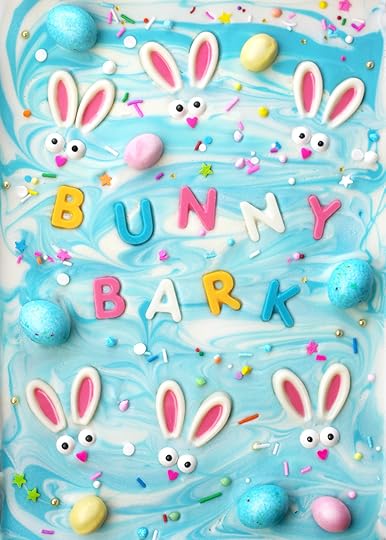
Here’s a last minute easy Easter treat. All you really need to pull it together are some candy wafers in spring colors (or even just chocolate and vanilla). And don’t forget some fun Easter candy. Eggs, pastel candy corn, miniature chocolate bunnies, peeps, M&M’s. Customize the colors and candies and get creative.
P.S. Here’s another version without bunnies but still cute.
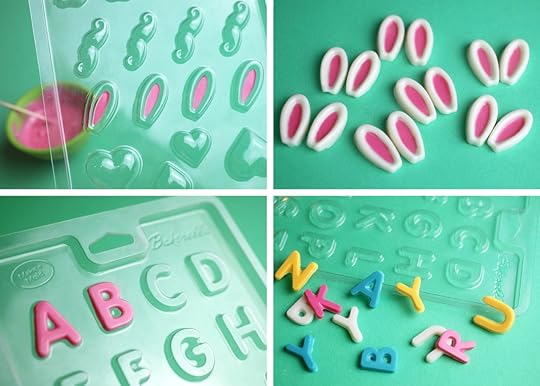
I decided to use a couple of my candy molds to make bunny ears and little letters. Fill the mold cavities with melted candy coating, place in the freezer to set and then gently pop them out until ready to decorate. The cool part about using molds and candy is that you can totally make the decorative pieces in advance to use them when you need them.
My molds are sold out, but you can find other letter molds online, and if you want cute bunny ears, you can substitute jordan almonds, pastel candy corn, or even pipe your own ears shapes on wax paper using melted candy coating.

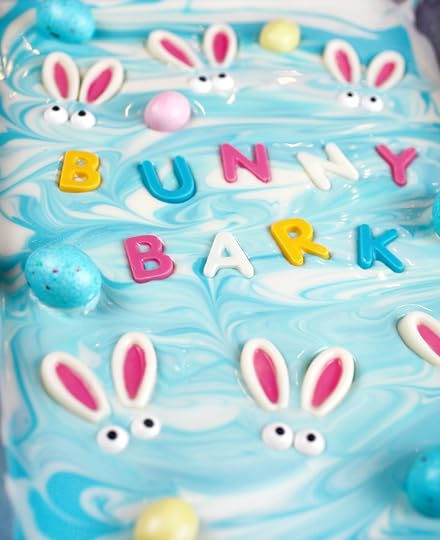
Okay, so I spelled out the obvious… but duh… now I wish I had spelled out something like Hoppy Easter…… next time.
Assembling your bark:
Have all your add-ons or decorative pieces organized and ready to go.
Melt your candy coating until it’s nice and fluid.
Spread out into a 9 X 12-inch sheet pan covered with wax paper and work FAST so you can add all your goodies before the coating sets.
I started with letters first. Then bunny ears and candy eyes. Next, candy Easter eggs making sure to evenly space out all the pastel colors.
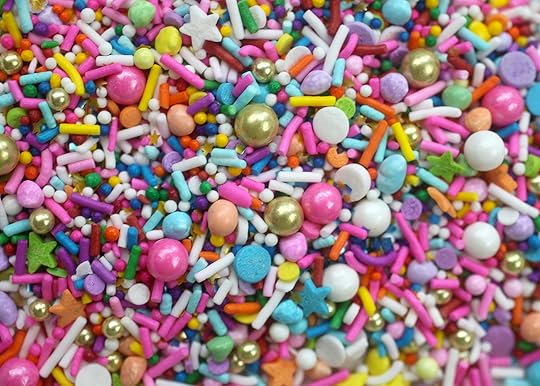
Then add sprinkles in lots of pretty colors and let the bark set. You can also place in the freezer to speed up the process.
FYI … These are one of Sweetapolita’s beautiful sprinkle medleys. Check her out for tons more color combos to swoon over.
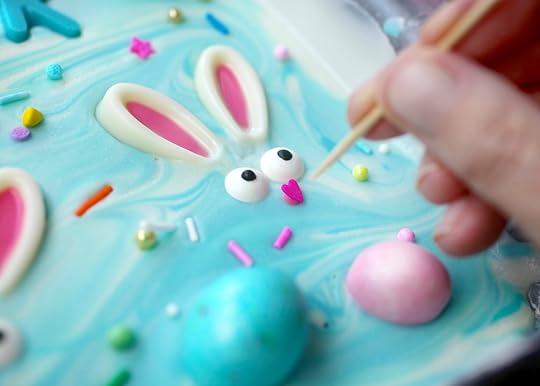
For the final touch, use a dot of melted candy coating to attach small pink heart sprinkles in positions for noses. I decided to do this after the bark had set because they were so small and took the most precision.
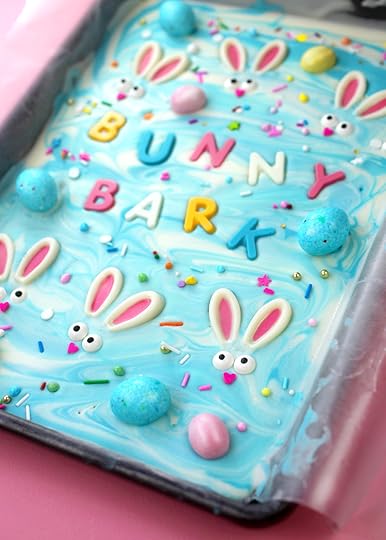
Bunnies! When dry, use a knife to make cuts on the bark, scoring it to make it easier to break apart. Then lift the bark from the pan by the wax paper and break into pretty pastel pieces.
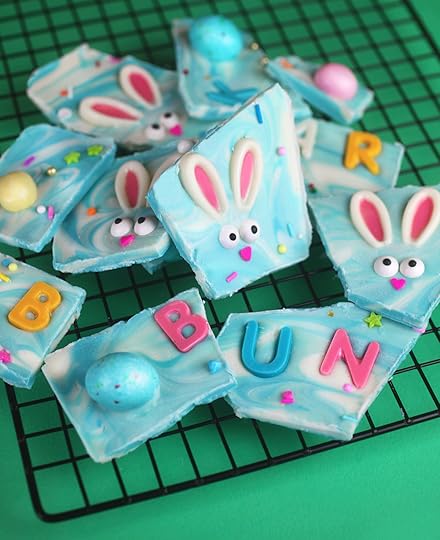
Enjoy and … Hoppy Easter!

March 20, 2018
Eggstremely Cute Chicks
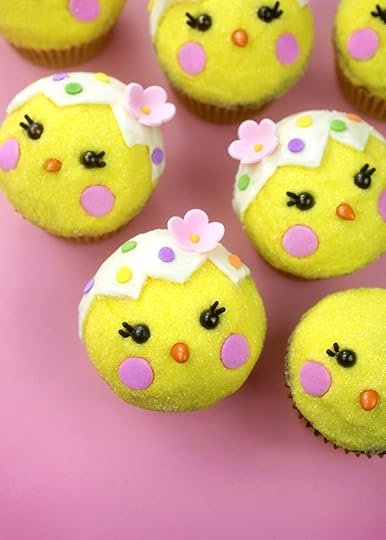
Check out these super cute chick cupcakes all dressed up for Easter wearing adorable eggshell caps. Cute on cute.
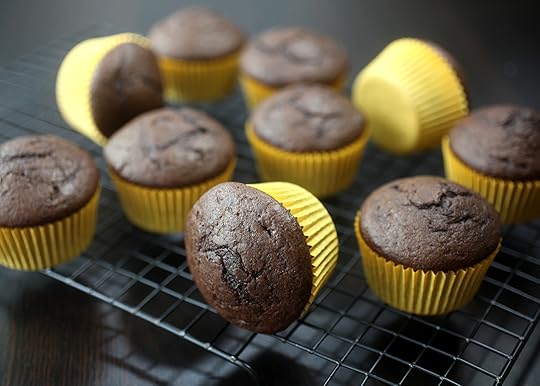
And they’re easy to decorate, too! You just need some cupcakes to get going.
I used this recipe for cupcakes because the tops mound nicely. BUT instead of baking them as mini cupcakes, I used the batter for 16 regular size cupcakes and baked them for about 16-18 minutes. And, here’s the basic buttercream recipe I used, too.
Of course, feel free to use your favorite flavor combo.
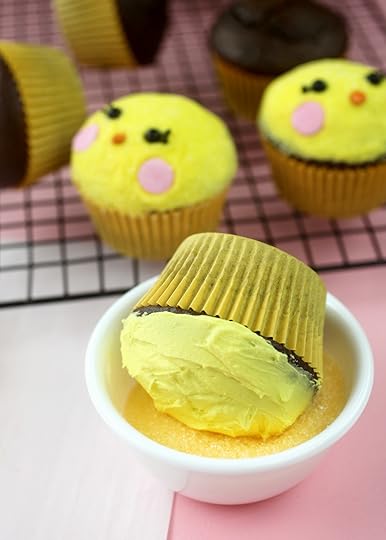
For the chicks, I tinted buttercream frosting a pretty yellow and then dipped the tops in a bowl of light yellow sanding sugar to smooth out the frosting. I like this technique because I have a hard time frosting my cupcakes without them looking all lumpy and once. Then, once they are coated with sanding sugar you can gently mold them into shape with your fingers if something is still off slightly.
After you top each cupcake with sanding sugar go ahead and add details for the faces. They will attach easier if you decorate the tops as you go and before the frosting sets or starts to stiffen.
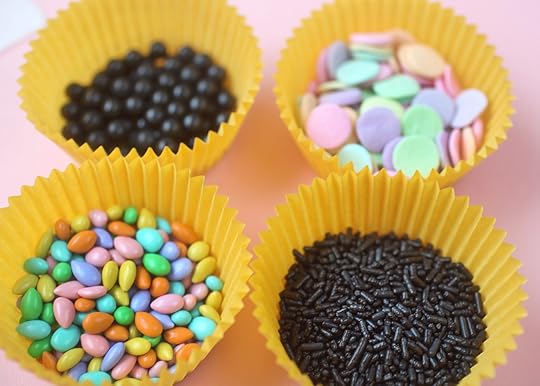
Okay, details. Here we go. Black candy beads for eyes, black jimmies for eyelashes, orange coated sunflower seeds for beaks and jumbo pastel pink confetti sprinkles for sweet little cheeks.
For size reference, candy beads are bigger than a sugar pearl but smaller than a sixlet. : )

Gently press each piece in position until you feel safe they won’t fall off.
Here they are super simple with just eyes and a beak and you could totally stop here. (I do think that if you only wanted them decorated to this stage that they might be even cuter as mini cupcakes.)
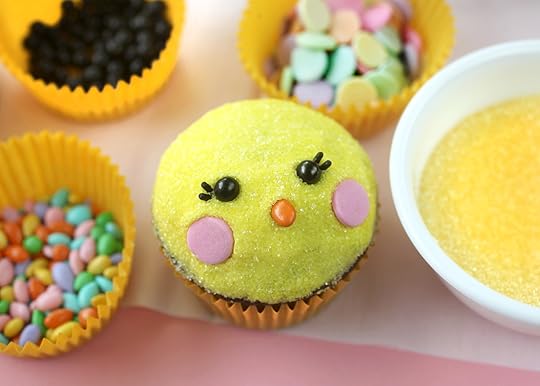
Now with lashes and blushing cheeks.
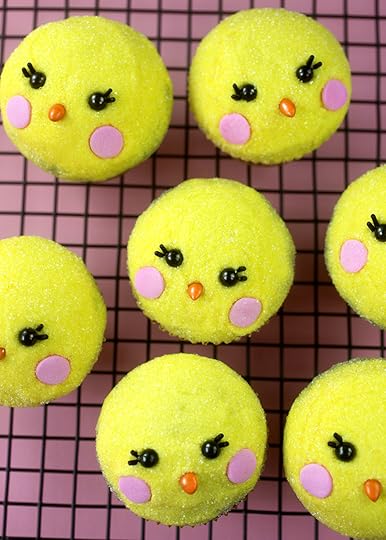
So sweet!
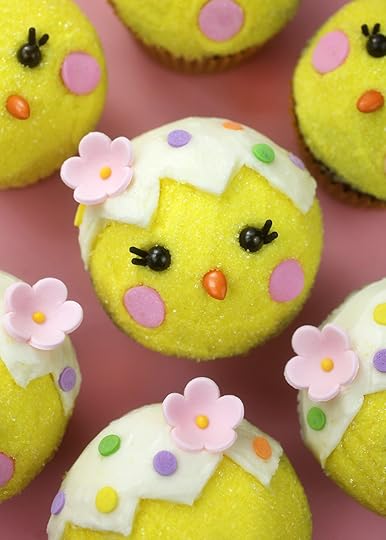
Okay, now they’re really dressed for the occasion with their eggshell buttercream bonnets.

To continue decorating, chill the cupcakes in the fridge until the frosting is firm. Then use a toothpick to draw the cracked egg shape in the frosted cupcake.
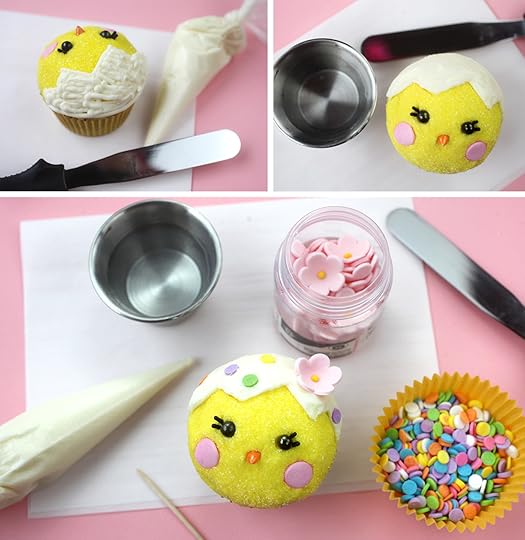
Pipe the outline and fill in the shape of the eggshell with vanilla buttercream. This will be the toughest part, but it’s not too bad. Since the cupcakes will be chilled at this point, you can more easily frost over the yellow without disturbing it. Use an offset spatula dipped in a little warm water and gently pull the spatula across the piped vanilla frosting to smooth it out. Don’t press too hard or it will separate from the chilled yellow frosting that is underneath. Do one cupcake at a time so you can work with the frosting before it stiffens any.
Once you have smoothed out the eggshell, place a sugar flower decoration to one side and decorate the shell by pressing pastel confetti sprinkles on top.
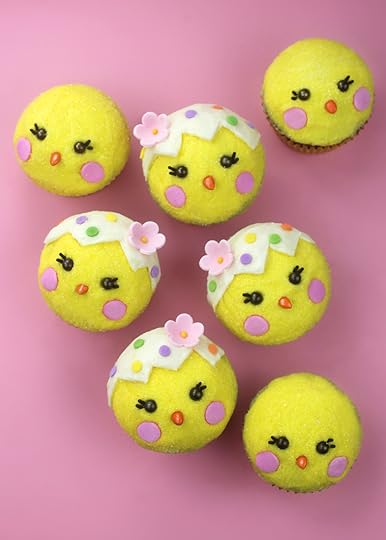
The cutest little Easter chick cupcakes.
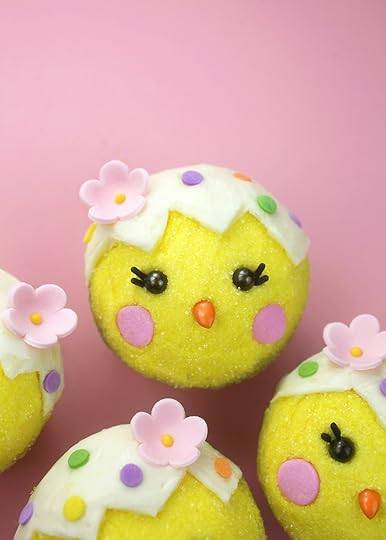
So tweet!

March 4, 2018
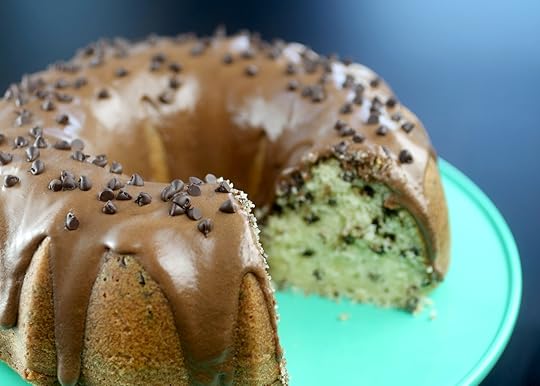
Baking it Easy
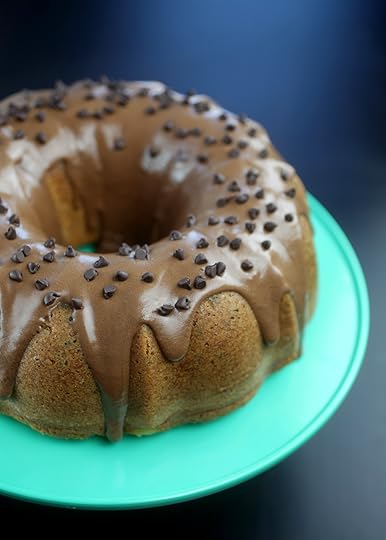
It’s been a lazy day Sunday and I just wanted something simple to satisfy my sweet tooth. No frills or flowers or fluff needed. A simple slice of cake always wins with me.
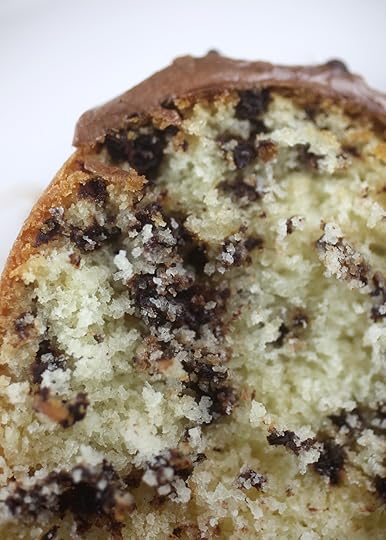
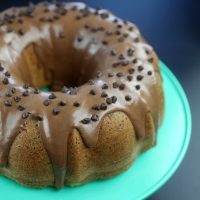
And look at that slice … freckled with miniature chocolate chips equals perfection.
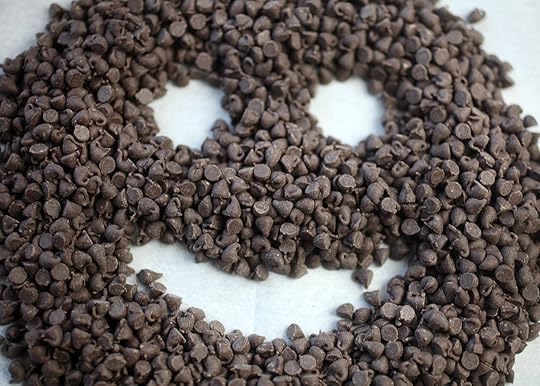
Chocolate chips just kind of make people happy. They tend to cheer me up anyway. I’ll take them in cake or cookies and of course, by the handful :)
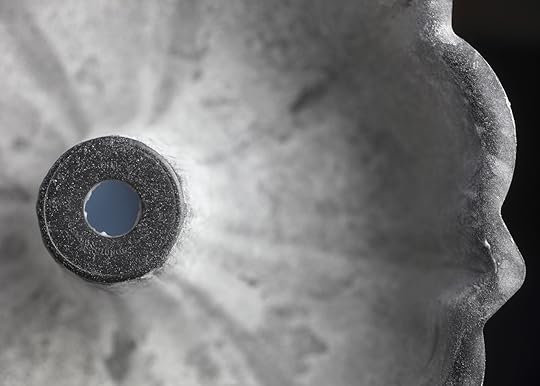
Curious… do you guys generally grease and flour your cake pans or use a non-stick cooking spray. I like to go for the flour method. It’s comforting.
Print Recipe
Chocolate Chip Bundt Cake
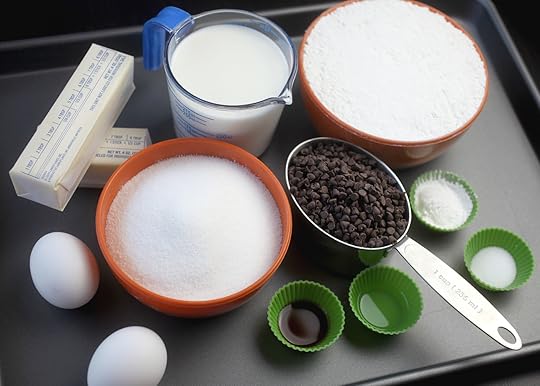
Ingredients:
1 3/4 cups sugar
2/3 cup butter, softened
2 eggs
1 1/2 teaspoons vanilla
1/2 teaspoon almond extract
3 cups all purpose flour
1 tablespoon baking powder
3/4 teaspoon salt
1 1/3 cups milk
1 1/4 cups miniature semisweet chocolate chips
____ for the glaze
2 cups sifted powdered sugar
2 tablespoons unsweetened cocoa
2 tablespoons butter, softened
1/2 teaspoon vanilla
4 tablespoons milk
Directions:
Heat oven to 325 degrees Fahrenheit. Grease and flour a 12 cup Bundt pan.
In a large mixing bowl, mix sugar and butter until light and fluffy. Add eggs, vanilla and almond extract and continue mixing until combined.
Whisk flour, baking powder and salt together and then add to wet ingredients in three additions, alternating with milk in between. Mix until combined and then stir in mini chocolate chips.
Spoon batter into prepared pan.
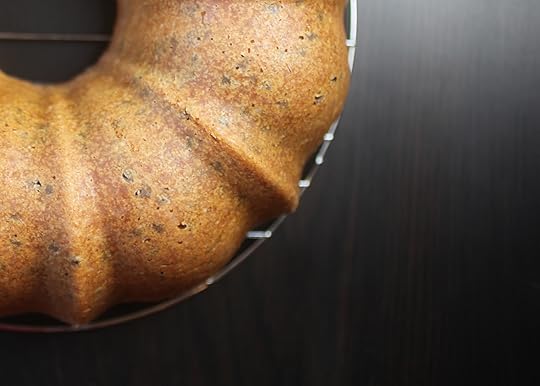
Bake at 325 degrees for 55-60 minutes or until a toothpick inserted comes out clean. Cool for ten minutes and then remove cake from pan to cool completely. Dust top with powdered sugar or pour on chocolate glaze.
To make glaze: mix sugar, cocoa and butter together on medium until combined. Add vanilla. Gradually add milk until desired consistency and mix until smooth.
Adapted from the book, Bundt Classics.
Enjoy a slice!

February 9, 2018
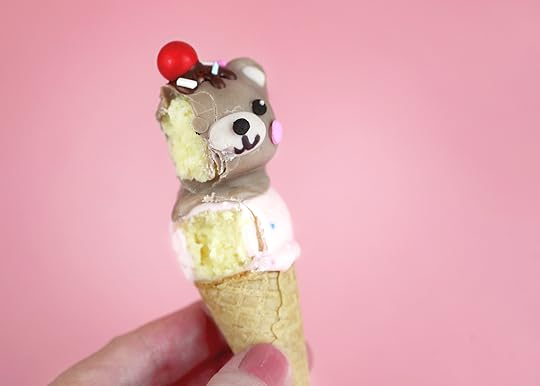
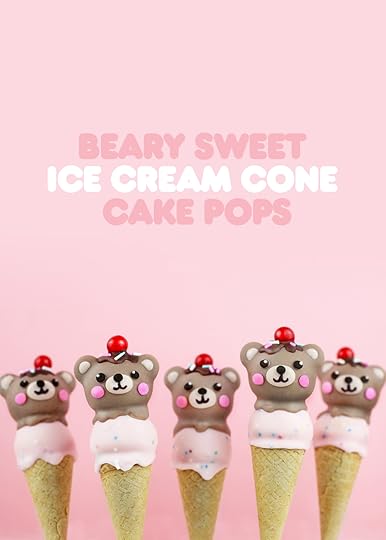
Beary Sweet Ice Cream Cones
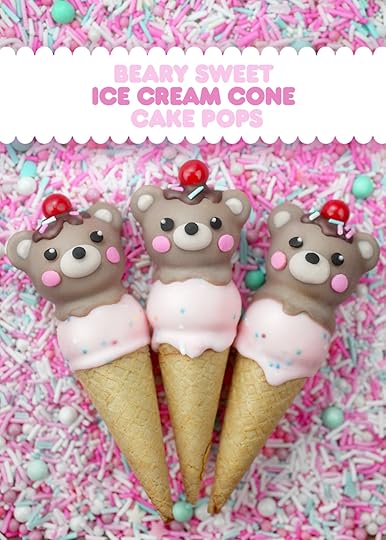
It’s the sweetest time of the year. And these adorable ice cream cone bears will surely brighten your Valentine’s Day.
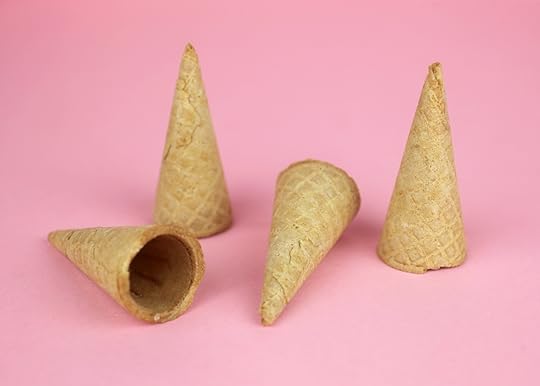
I love these tiny cones! They make ice cream cake pops a lot easier. I usually just saw the ends of regular size ice cream cones off with a knife to get them small enough for pops. Like I did here. But no need with these. They are the perfect size. My friend Cupcake Julie found them in California at a store called Cake Box on Main.
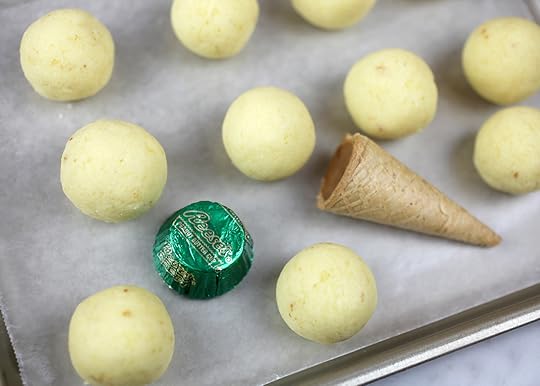
Speaking of size. Here’s a visual to give you an idea how small they really are.
When rolling your crumbled cake and frosting together to make pops, the balls should only be around 1 inch in diameter to fit the nicely on the cones.
Here are my basic cake pop instructions if you need them. And instead of dipping with a lollipop stick, you can follow the instructions below.
Let’s go.
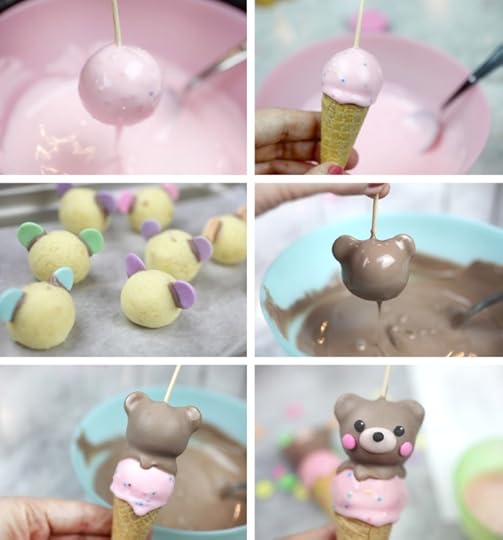
First, prepare a styrofoam block to use as a stand for the cones so they can dry. You can use a lollipop stick to make a hole for them to fit into. Just stick into the styrofoam and rotate it in a circular motion to form an upside down cone shape for the cones to rest in.
For the first scoop, I used melted pink candy coating mixed with multi-colored nonpareils – but you can keep them solid pink, too. Also, for a lighter shade, I melted white candy wafers with the pink and mixed together.
Use a toothpick inserted into the ball to dip into the melted coating. Allow most of the excess to drip off and then place on top of the ice cream cone to dry in the prepared styrofoam block. When dry, gently remove the toothpick by twisting it out.
For the second scoop, insert jumbo confetti sprinkles into melted chocolate coating (I made a lighter shade here as well by mixing in white candy wafers with regular chocolate wafers) and place them into the top and side of the rolled balls for ears. Let dry.
Dip the second scoop into melted lighter color chocolate coating using a toothpick. Shake off the excess and place on top of the first scoop. Let dry completely and remove the toothpick.
When dry, use a toothpick to draw on an even lighter chocolate shade of melted candy coating for a nose and let dry. You can also fill in the ears with the same shade.
For the faces, attach black confetti sprinkles for eyes and pink confetti sprinkles for cheeks using a toothpick dipped in melted candy coating.
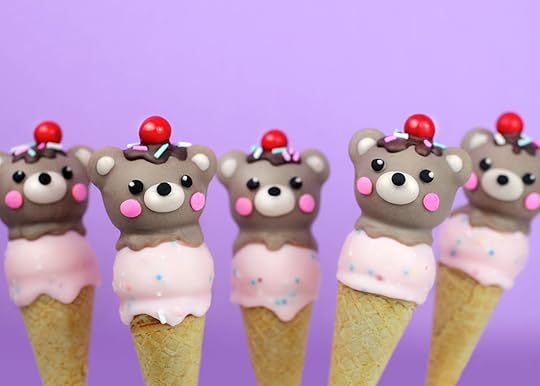
Finishing touches. Dot the eyes with the lightest chocolate coating used for the nose and ears. Use regular chocolate coating to add drips to the very top and cover up the toothpick hole. While the coating is wet, attach red sixlets for cherries and sprinkles for well, sprinkles. : ) You can draw on mouths with a black edible ink writing pen.
They’ll be beary cute! But now to figure out how to gift them to your sweetie.
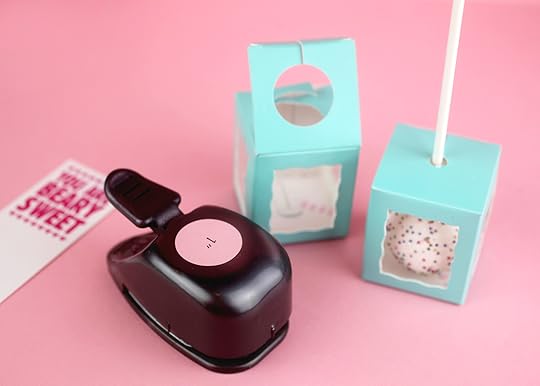
I had these tiny cake pop boxes meant for displaying upside down. They are from BRPBoxShop and they’re so freaking cute. They seemed like a perfect way to display individual ice cream cones. Just use a 1-inch punch to remove circles from the top of the box so you can rest the cones inside.
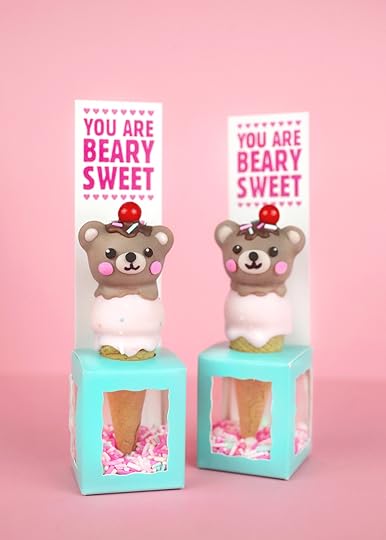
Then fill the bottom with more sprinkles and insert a tall rectangular card into the box with your Valentine message. Beary cute! Beary Sweet! I like … or love you beary much! They all work. I just printed the messages on card stock or smooth bristol board and cut out the tall skinny rectangles (1 5/8 inch X 6.5 inch) with an x-acto blade.
Keep in mind the two scoops are a little top heavy so be careful transporting. Or simply make single scoop bears. They’ll still be un-bear-ably cute!!!
And tasty too. I used the same cake and frosting mixture for these as I did for my recent birthday cake pops. But… if you decide to make some, you should totally use chocolate cake for the top scoop and strawberry cake for the bottom for maximum effect.
Hope you enjoy and have a Beary Sweet Valentine’s Day! xoxo

January 31, 2018
Happy Birthday, Cake Pops!
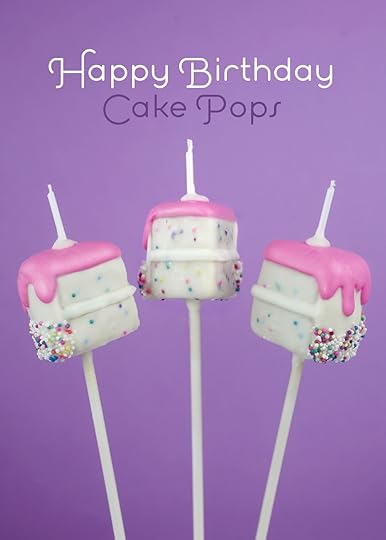
Cake Pops turned 10 years old this week (can you believe it?) and today is also National Cake Pops Day! YAY!!! So, to celebrate I decided to make what else but little birthday cake shaped pops.
On January 28, 2008 I posted my first round cake pops here on the blog and then a few days later on February 1 of that year, I posted the first shaped cake pops. These cute cupcakes! They’re the ones that started the cake pop craze and inspired me to teach others how to make them, launching a decade of these diminutive desserts popping up all over the world … at parties, in homes, bakeries, coffee shops, restaurants, churches, schools and more. They’ve been responsible for creating a lifetime of unexpected and wonderful memories for me and I hope they’ve brought you guys some extra happiness along the way, too!
Below is a quick little video with a bunch of the pops I’ve made over the past ten years. Soooo much dipping and decorating… it kinda makes my head hurt thinking about all the hours I’ve spent consumed by these tiny treats. Hope you like this little walk down cake pop lane and if you have a fave, let me know in the comments below. It makes me smile to hear which ones made you smile.
Cake Pops – Ten Years of Tiny Treats from bakerella on Vimeo.
Okay, now let’s make some itty-bitty birthday cakes.
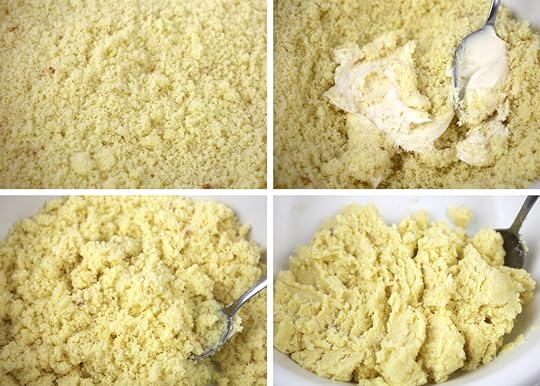
Cake poppers, you know the drill. Cake crumbs. Frosting. And mix. And if you’ve never made pops before, here are the full instructions for my basic cake pops. Follow the directions and then, just shape and decorate them into cakes using the instructions below.
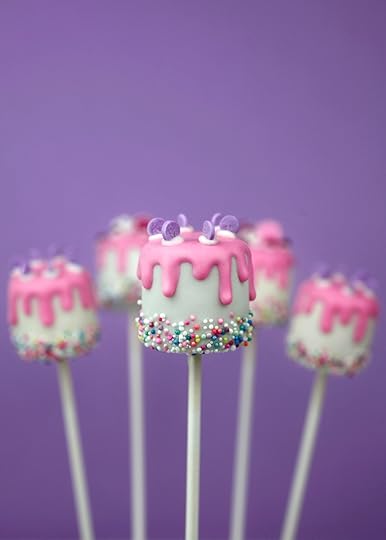
Okay, first up are these little layer cakes. Oh my gosh. Adorable.
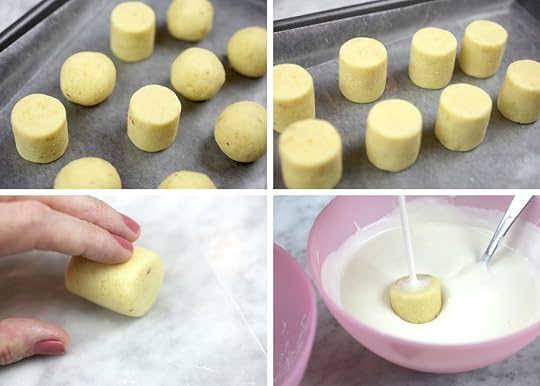
Shape cake balls into short cylinders. Roll, rotate, slide and shape them on a piece of wax paper to help get smooth and sharp edges.
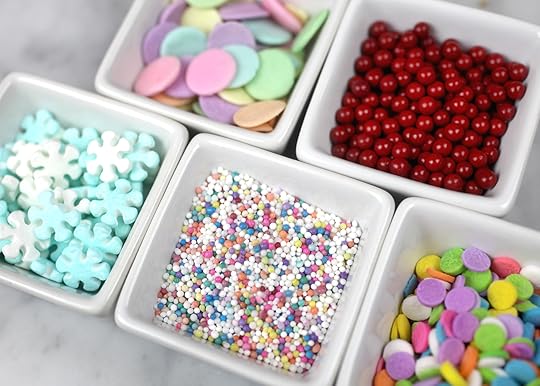
Use an assortment of sprinkles to decorate your cakes.
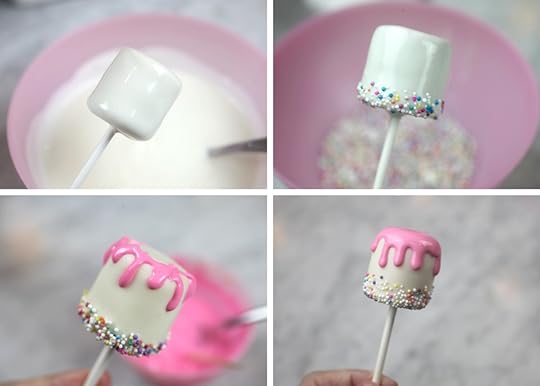
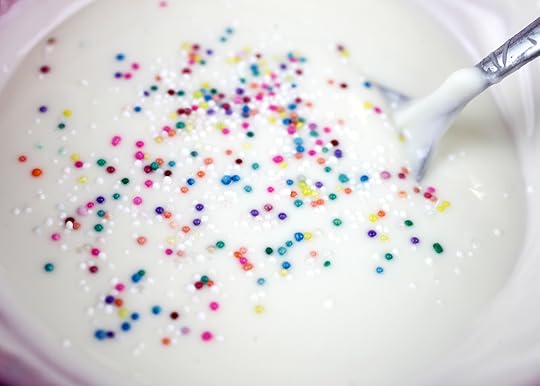
Dip the pops into melted candy coating. (So white, totally makes them look like marshmallows. In hindsight, I might have switched the colors.)
To add confetti, carefully sprinkle tiny nonpareils on the bottom of the pop and over a bowl to catch any that fall off. Let dry.
Now add drips of melted pink candy coating around the top edge of the pop using a toothpick. Then while still wet, dip the very top of the pop in pink coating to create a seamless look between the two areas.
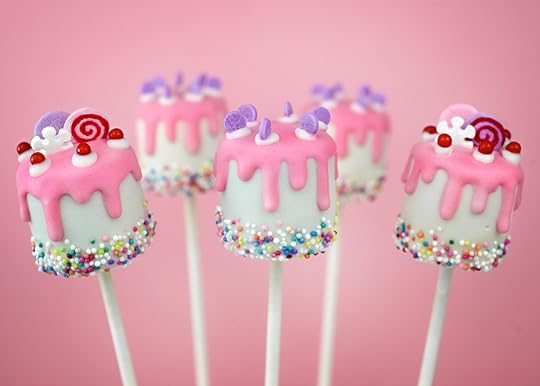
So cute. To add decorations, you can place confetti sprinkles on top using candy coating as glue or insert larger sprinkles into the top of the pop before the pink coating is completely dry.
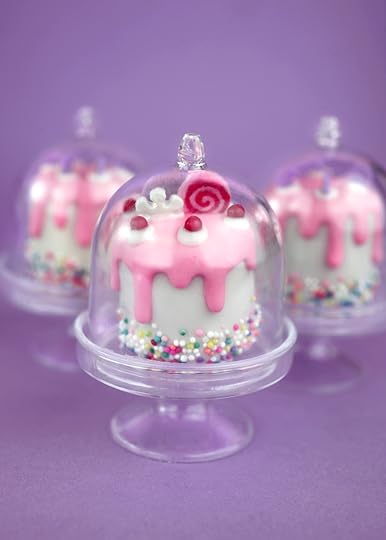
Okay now for some cute overload. Check out these super tiny cake domes. I can’t stand it. These came from a store called the Cake Box on Main in California and are all of 3 inches tall.
Okay, cake slices are up next.
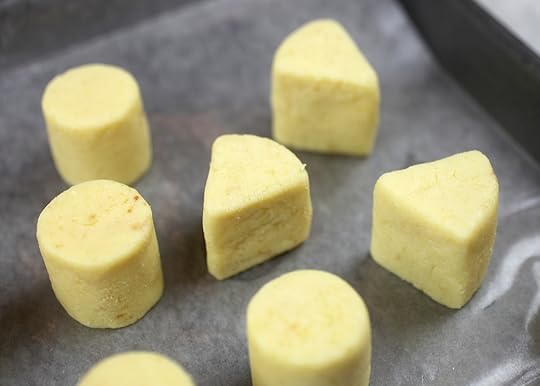
Shape balls into wedges for dipping.
I added the same tiny nonpareils into the candy coating to simulate confetti cake on the inside as well.

To decorate, dip the pops and let them dry.
When dry, dip the back and top of the cake slice in more melted white candy coating to create a distinguishable second layer for the frosting. Use the tip of a toothpick to clean up any wonky edges.
Add nonpareils onto the bottom and back side of the cake slice.
Then draw a line down the middle of each side of the slice to create the look of layers using a toothpick dipped in the melted white candy coating.
For the tops draw drips using a toothpick dipped in melted pink candy coating and then dip the tops while the drips are still wet to create a seamless look for the icing.

A piece of cake! I also cut slender candles into 1-inch sections and attached them to the tops with melted candy coating to help finish off the look.
Enjoy and Happy Cake Pops Day!

January 21, 2018
Crunchy French Toast Sticks
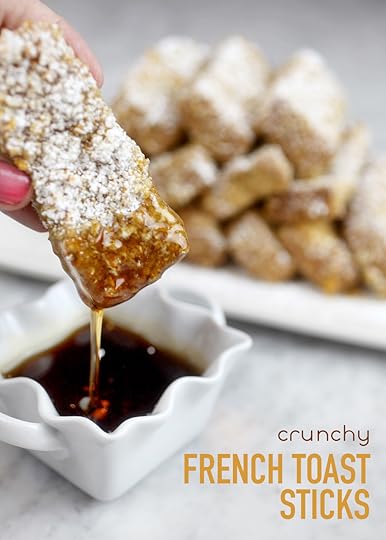
Fun and freezer friendly! These crunchy french toast sticks from my sweet friend, the Pioneer Woman’s latest cookbook, Come and Get It are a perfect easy morning snack. And pretty delicious, too! Make and freeze a batch ahead of time and then just grab a few to pop in the oven whenever the mood strikes. I’d say breakfast, but these make a sweet late night treat, too.
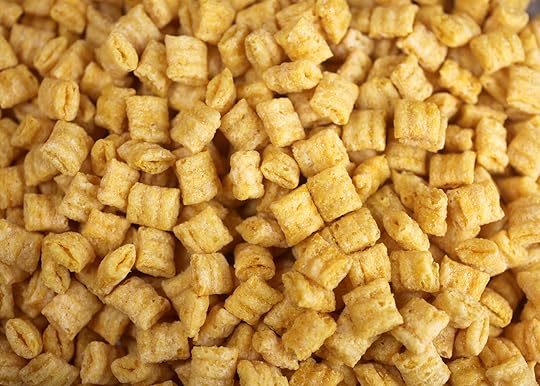
Crunchy! That’s what we’re going for. So grab a box of Cap’n Crunch cereal. Crumble it up and use it to help coat these french toast sticks. That’s right… we’re breading some bread with cereal … oh and bread crumbs, too.
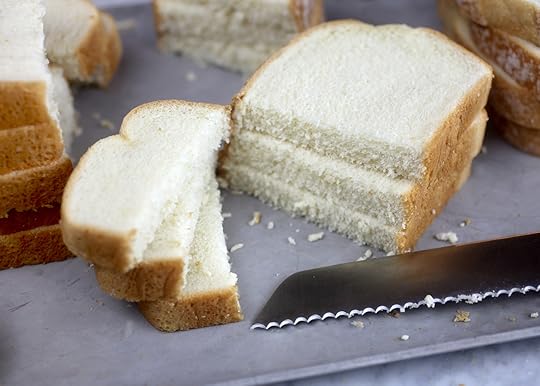
So, I’ve been buying this thick Sara Lee Artesan bread lately. I don’t really use it for sandwiches, but for buttered toast it’s awesome and I thought it would work great for these french toast sticks, too. Use a serrated knife to gently saw through the bread. If you slice and press down with your knife, the bread will kind of cinch together along the cuts and lose their squared off edges. This is purely aesthetic, though.
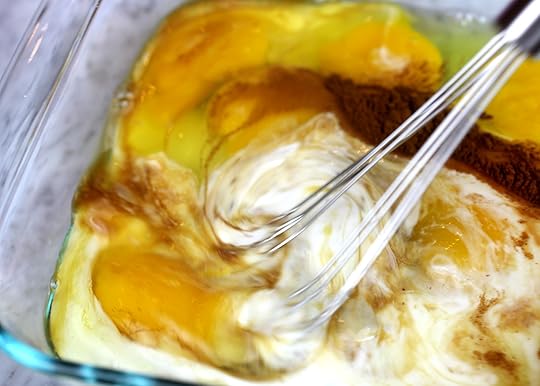
Okay, let’s get going. In a shallow dish, whisk together eggs, half and half, sugar, cinnamon and vanilla.
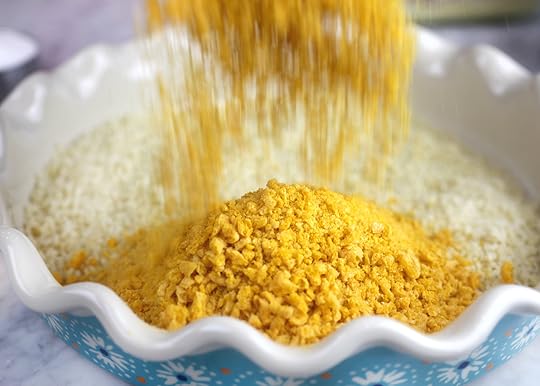
And in a second dish (I’m using one of Pioneer Woman’s pretty little pie plates here btw), add cereal crumbs and panko bread crumbs. That’s right! Double crunch.
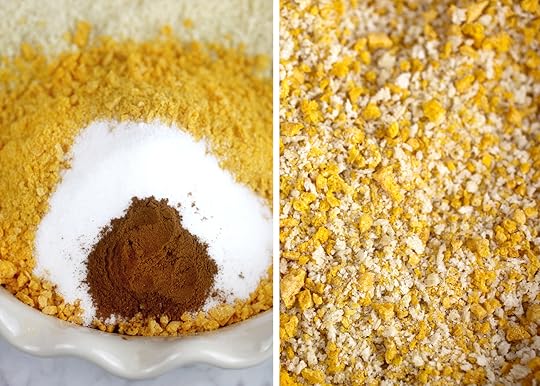
Then add more sugar and cinnamon and mix it all together.
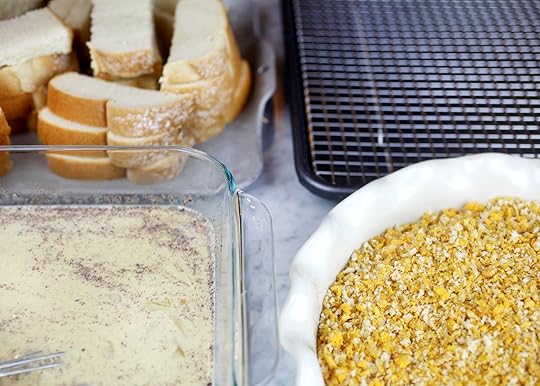
Now, get your work area set up. Bread, check! Egg mixture, got it! Crunchy coating, okay! And have a rack ready on a baking sheet. Now this would have been a lot less messy with a helper on hand. Get one if you can so one person can dip and the other can coat.
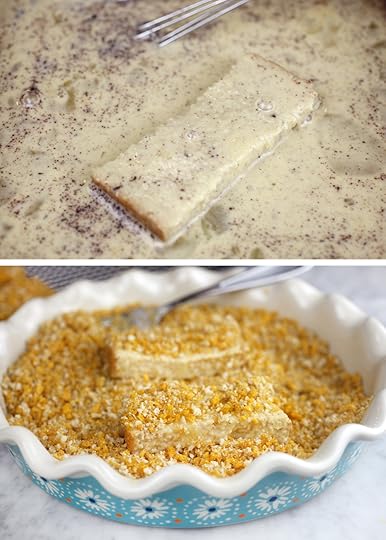
Dunk and coat with on all sides with egg mixture and then with crumb coating.
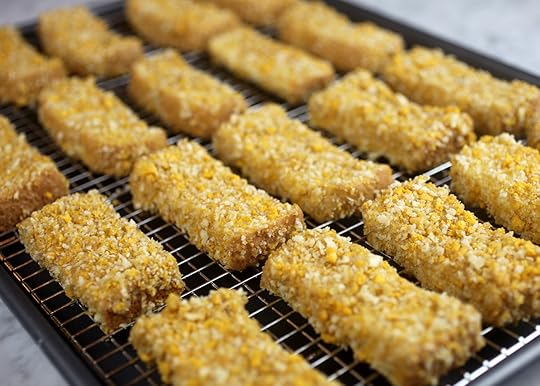
Place sticks on a rack set in a baking sheet. This recipe makes 36 sticks … which is a lot for one sitting. So unless you’re feeding a big group, go ahead and place them in freezer bags for a perfect easy-going breakfast.
Or bake a few right away like I did.
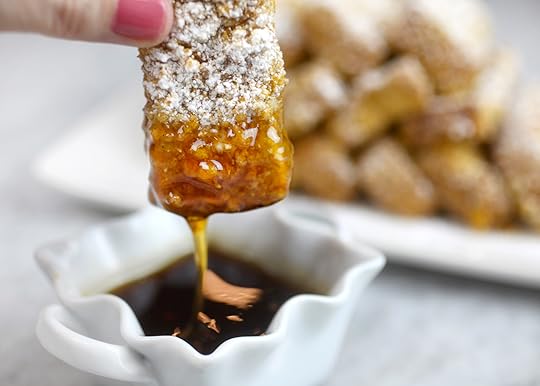
Yes and yum yum yum!!! Sprinkle them with powdered sugar and dip them in maple syrup.
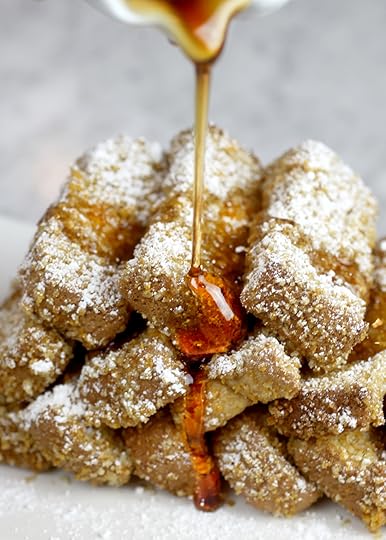
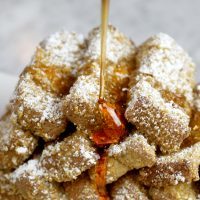
Or just stack up some sticks and pour the syrup on top. Either way, you’ll enjoy these sweet sticks!
Print Recipe
Yield: 36 french toast sticks
The Pioneer Woman's Crunchy French Toast Sticks
Ingredients:
12 slices Texas toast or thick sliced bread
6 large eggs
1/2 cup half-and-half
1/2 cup sugar
1 tablespoon vanilla extract
1 teaspoon ground cinnamon
1 1/2 cups panko bread crumbs
1 1/2 cups Cap’n Crunch cereal, crushed into fine crumbs
4 tablespoons butter, melted
powdered sugar and maple syrup for serving
Directions:
Cut bread into three strips each.
Crack eggs into a pie plate or similar size dish. Add the half-and-half, vanilla, 1/4 cup of the sugar and 1/2 teaspoon of the cinnamon. Whisk until combined and set aside.
In a separate pie plate, stir the breadcrumbs, crushed cereal, remaining 1/4 cup sugar and 1/2 teaspoon cinnamon until combined. Using a fork, stir in the melted butter until the crumbs are slightly moist.
One by one, quickly and gently dunk the bread strips in the egg mixture, turning to coat on all sides. Then lay them in the dish with crumbs turning and pressing to completely coat on all sides.
Place the sticks on a rack set inside a baking sheet and flash freeze for 30 minutes to allow the coated surface to set. The transfer them to freezer storage bags in groups and place back in the freezer.
To bake the frozen sticks, preheat oven to 425 degrees F and place sticks on rack set over a baking sheet. Bake for about 15 - 18 minutes or until the edges are golden brown. Sprinkle with powdered sugar and serve with warm maple syrup. (NOTE: the sticks baked at 425 were crunchier than I like, so for slightly softer sticks, bake at 375 degrees F for 18-20 minutes.
Also, if you want to bake them right away without the freezing step, you can bake them at 375 degrees for 18-20 minutes.
© The Pioneer Woman Cooks: Come and Get It! by Ree Drummond, 2017
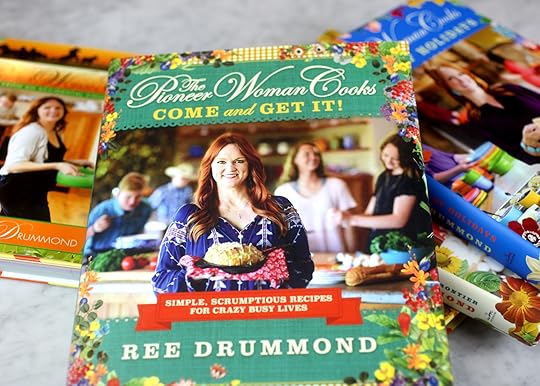
And don’t forget to check out Ree’s new book, The Pioneer Woman Cooks: Come and Get It! for more easy-to make meals.
Enjoy!

January 15, 2018
Snow Many Sweets
Who’s ready for this cold weather to go away? Me. Me. Me! I need warmth and sunshine and sandals. I could definitely be a warm weather girl all year long … But since we still have many more weeks of frosty temperatures before spring is here I thought I’d share some of my favorite snowy themed sweets. Check out these snow cute cookies, cupcakes and cake pops … they might even make you feel all warm and happy inside.
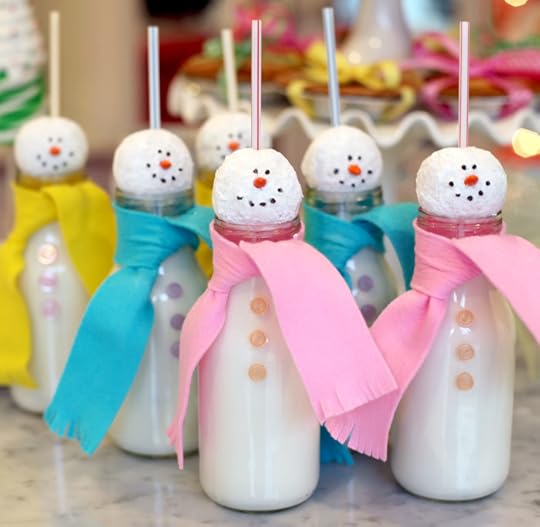
Drinks that are all dressed up. Check out these chill milk jar snowmen.
I made these snow globe cupcakes way back when using round plastic bottles. To help with the snowy effect, I coated the inside with a little sugar water spray and then sprinkled them with granulated sugar to help make it stick.
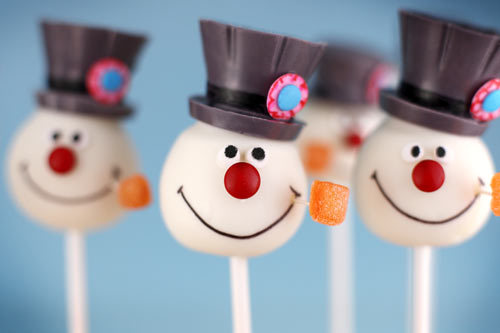
Here’s a friendly face from one of my favorite holiday shows. Frosty the Snowman Cake Pops!
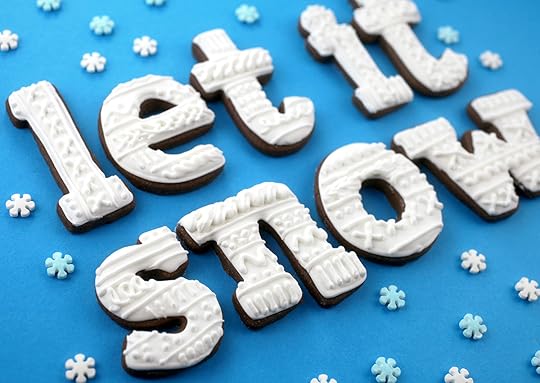
Want to keep warm? Cuddle up with these cute sweater weather sugar cookies.
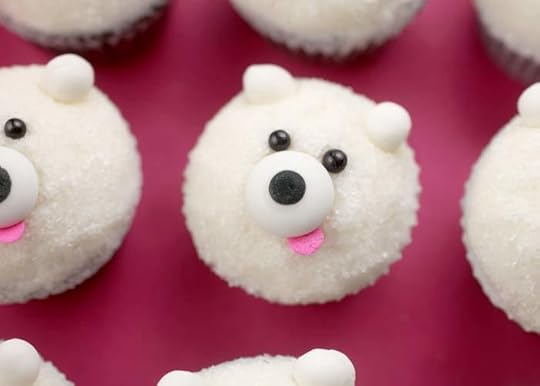
I want to squeeze the cheeks on these petite polar bear cupcakes. (Wait. That might not be a good idea.) They’re super easy to decorate and I’m pretty sure they’ll warm someone’s cold heart with their sweet little faces.
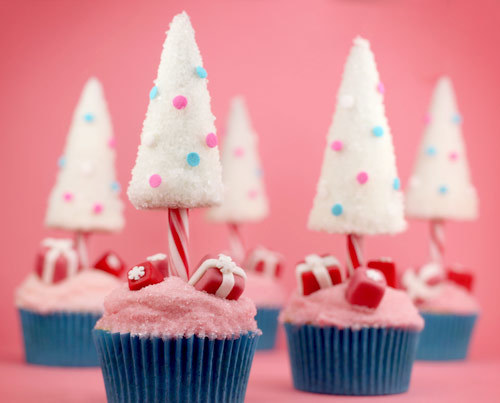
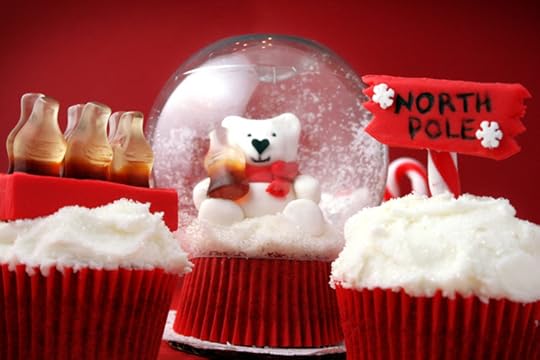
I made these candy cane tree cupcakes for the holidays several years back. They are kind of Christmas-y, but tweak them a little and they would go perfectly with a winter wonderland theme.
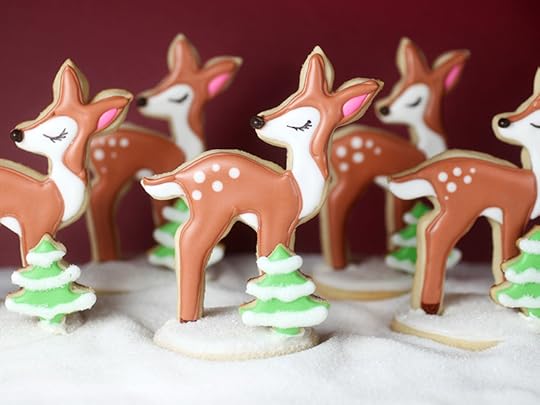
Oh deer! How cute are these sugar cookie stands complete with a “snowy” base.
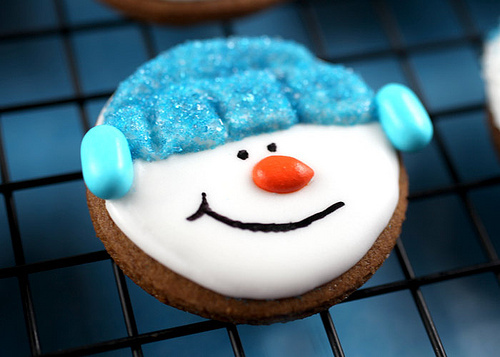
You can use a circle shaped cookie cutter to decorate some of the sweetest snowmen cookies.
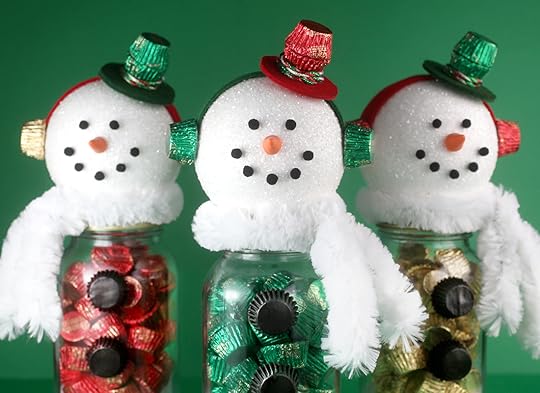
These snowman candy jars are on the crafty side. Fill them with a sweet treat for a frosty fun project.
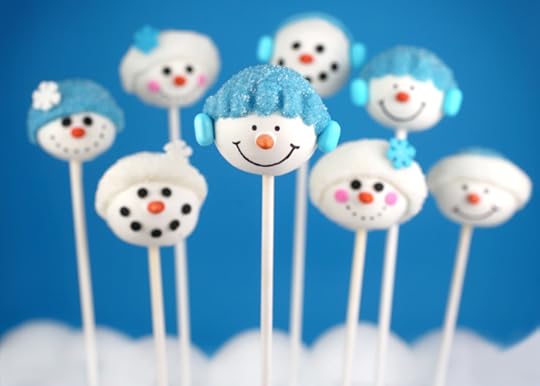
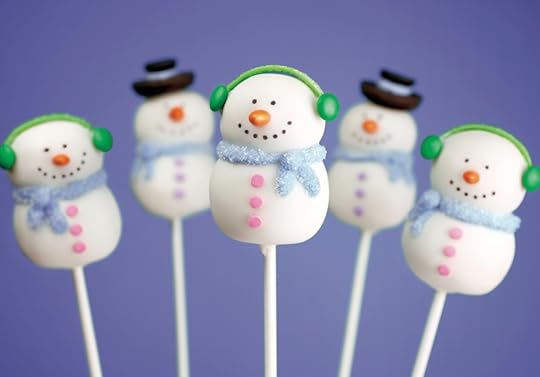
Look familiar? These smiling snowman cake pops are capped off with sugar crystal coated winter hats and were inspired by the sugar cookies above.
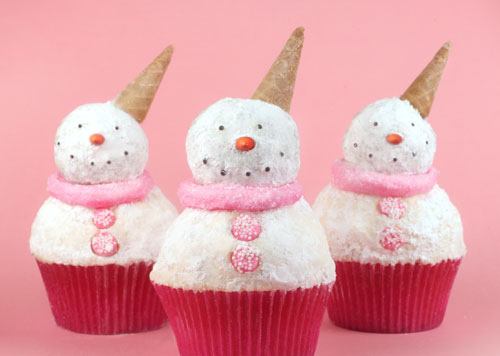
Ice cream cone inspired snowman cupcakes. You can use a bunch of frosting and top them off with donut holes to build their bodies.
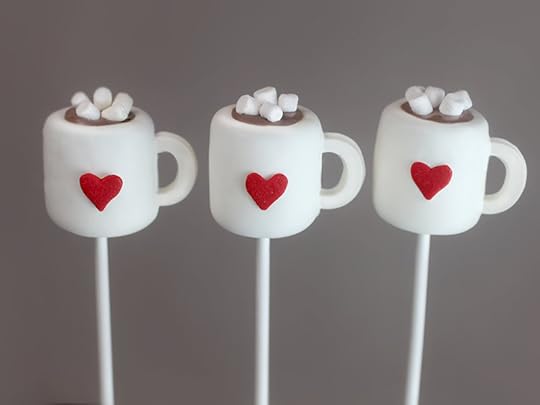
Hot cocoa cake pops. These aren’t snowy, but they sure fit the cold weather theme.
Bonus full-body pops. There really are snow many ways to decorate cake pops. These aren’t on the blog, but you can find them in my holidays book along with some more cold weather cuties.

January 7, 2018
Dawg Treats!
The College Football Playoff National Championship is Monday night right here in Atlanta and the Georgia Bulldogs are playing!!! YAY! Go Dawgs! It’s been like 37 years since Georgia has claimed a National Championship title, so needless to say, folks around here are pretty freaking excited about the game. Atlanta businesses are even shutting down early to make way for all the traffic and craziness to come. Now, I’m not really a big football follower, but I have a ton of friends that went to the University of Georgia and even more that are super fans, so I was excited to make these dawg treats to celebrate making it to the Championship game.
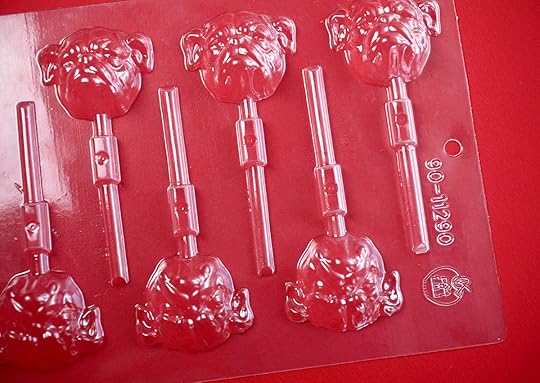
They start with this bulldog candy mold. I think I’ve had this thing for at least eight years and never used it until today. But oh what a good reason.
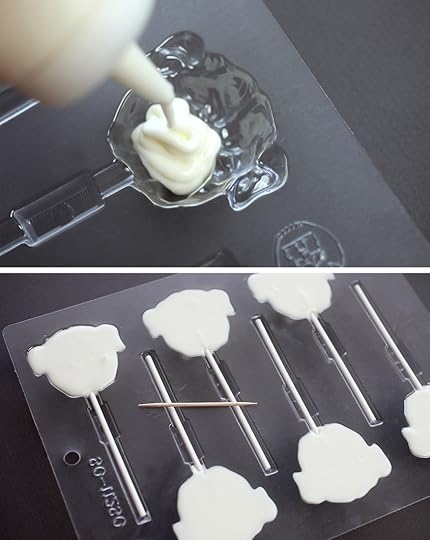
The mold is super easy to use, especially if you are just filling it with melted candy coating. You can use a squeeze bottle to fill the cavities and a toothpick to coerce the coating into tighter areas like the ears. Once filled, tap or wiggle the mold gently on the counter and then place a lollipop stick in position. Place the mold in the freezer to set and when dry, gently lift them out by the lollipop sticks.
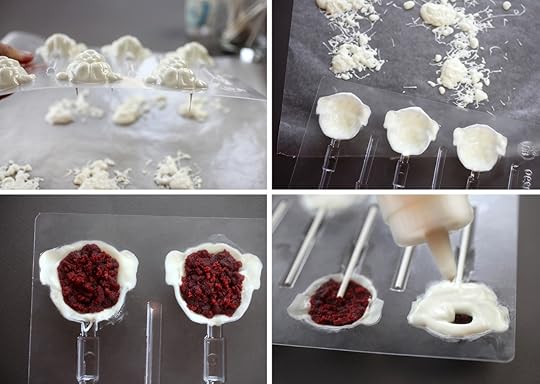
You can also turn these into cake pops with a little more effort. They say bulldog fans bleed red and black, but in this case red velvet will have to do. Fill the cavities completely with melted coating and then turn the mold upside down and let all the excess coating fall out onto some wax paper. Shift and tilt the remaining coating to generously coat the inside of the mold cavity and let dry. Then fill the area that’s hollow with cake pop mixture. (I didn’t need much so I just used a couple of bakery red velvet cupcakes with a little bit of their frosting to mix together and press into the heads.) Once the cavities are almost full, press in a lollipop stick and then fill the remaining area with more melted white coating, making sure to cover the lollipop stick. Place in the freezer to set and that’s it.
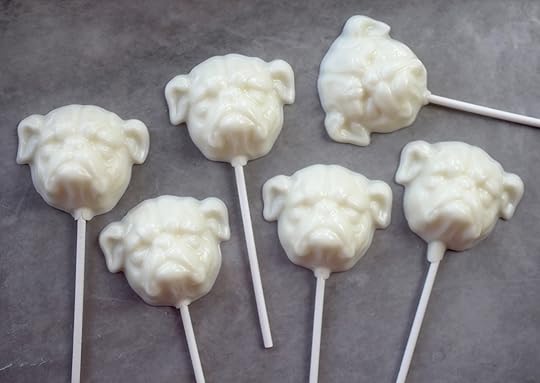
When dry, they’ll easily pop out and look like this. Okay, let’s be real – these don’t look much like Georgia Bulldogs yet but, keep reading to see how they come together.
Sidenote: Really talented candy makers and candy mold users would probably treat these differently, but I’m not that good. Typically, you would paint the inside of the candy mold with other colors of coating before filling with the base color. For instance, paint or dot on the eyes and nose, let them dry and then fill the rest of the cavity with white. I knew I couldn’t get in those tight spaces or even see them that well, so I took a different route.
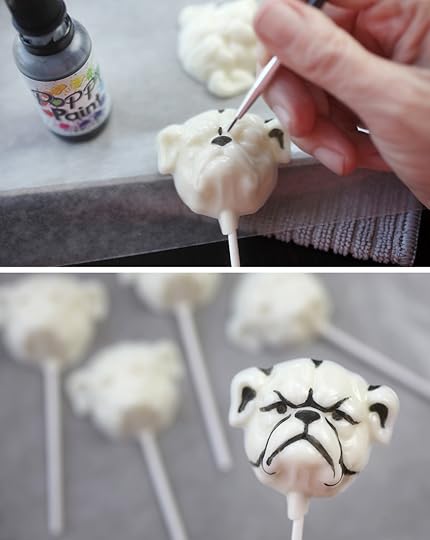
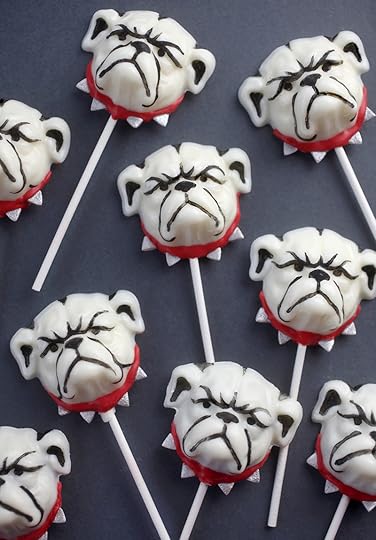
I painted on top of them with a very thin brush and black edible food paint to try to capture the very graphic look of the Dawgs mascot logo. Much much better than all white! logo
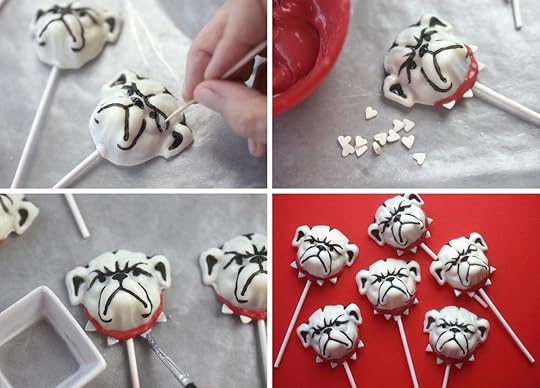
The paint dries quickly and if you mess up, now worries. You can easily remove or straighten lines by gently scraping off the black with a toothpick. To finish the team mascot look, use a toothpick to apply a “collar” of red candy coating around the bottom half of the head. Then for spikes, place tiny heart sprinkles upside down into the red coating. If you want them to look metallic, paint the tops with a light coating of silver luster dust.

Bulldog Nation – what do you think?!
You’re right. They need some dawg tags!
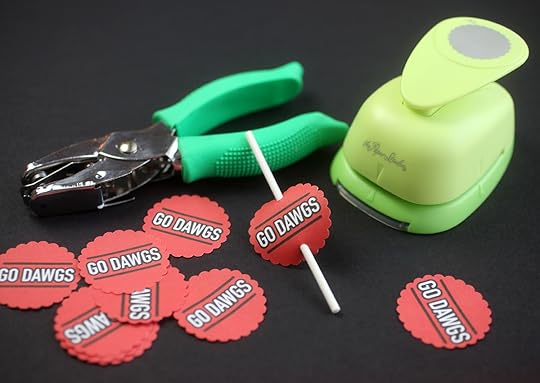
A 1/5 inch paper punch, small hole punch and these downloadable tags. And Done!
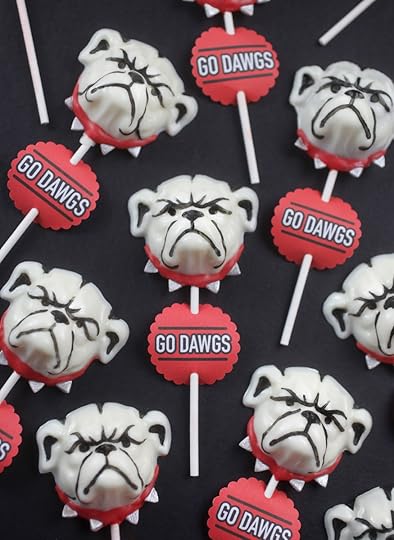
And one more time……… Go Dawgs!!!

P.S. Here’s some footballs for the win.

Bakerella's Blog

- Bakerella's profile
- 9 followers

