
Bakerella's Blog, page 8
April 3, 2019
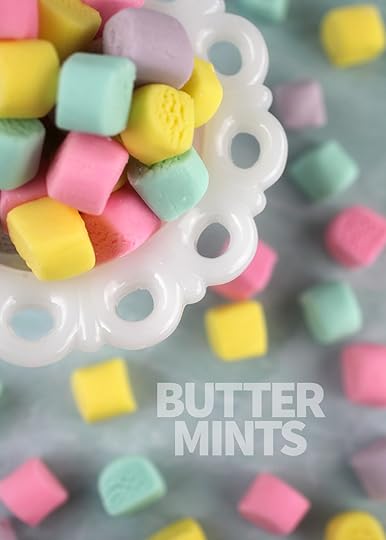
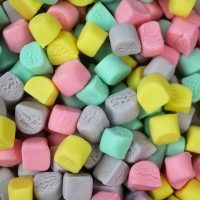
Homemade Butter Mints
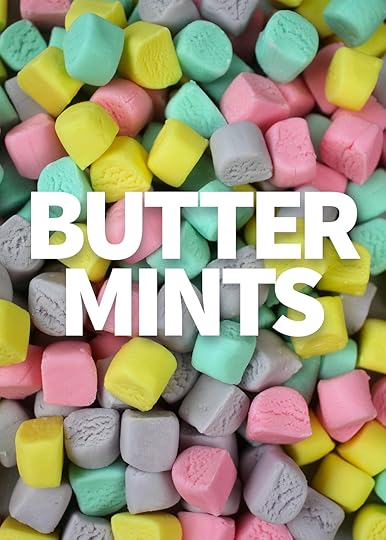
I’ve got a really easy springy treat to share with you guys today. I was flipping through one of my cookbooks by Back in the Day Bakery last weekend and landed on a recipe for Butter Mints. But it was the picture inside of cute little cubes of color that grabbed my attention. And I knew I had to make them right away.
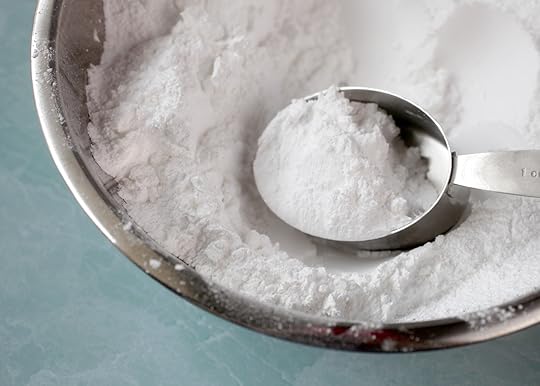
You only need a few ingredients. Confectioners’ sugar, butter, salt, sweetened condensed milk, peppermint extract and food coloring to jump all over these.
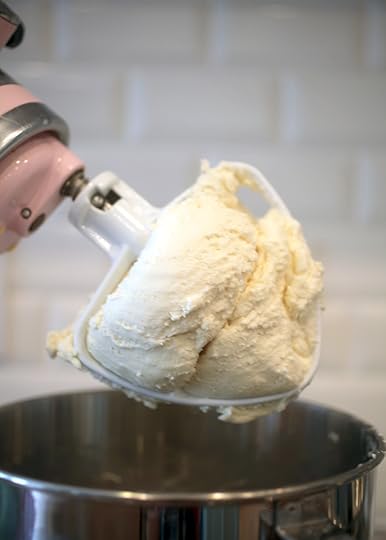
Once you mix all the ingredients together minus the coloring, the dough will form a ball shape in the mixer and pull away from the bowl.
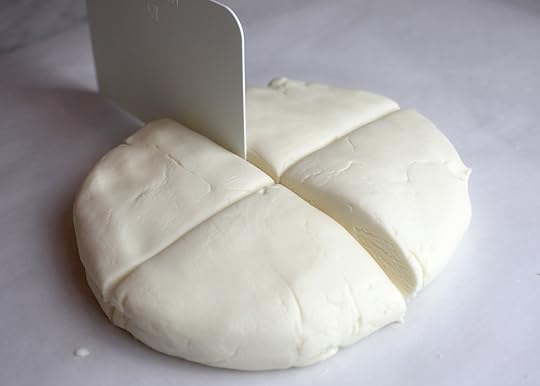
Turn the dough out onto some parchment paper lightly dusted with confectiones’ sugar and shape into a large disc that you can then divide into four equal portions. Or divide into however many colors of mints you want to make.
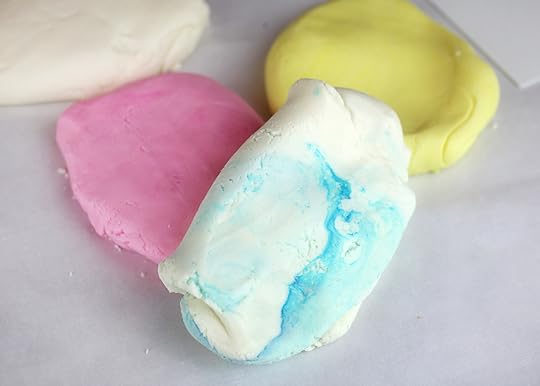
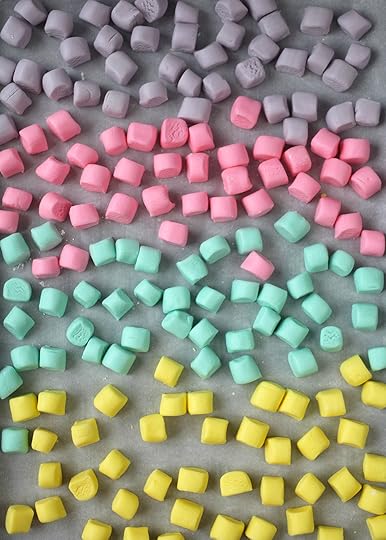
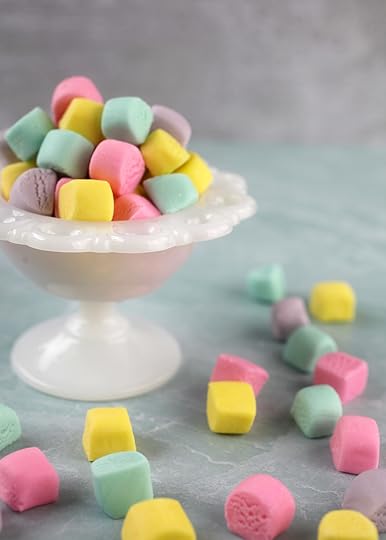
You just need 1-2 drops of gel food color to tint the dough a pretty pastel color.
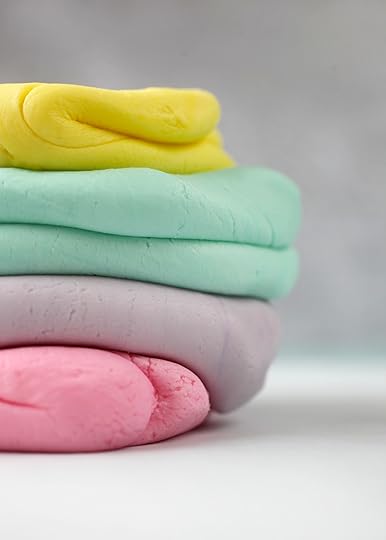
I went with yellow, blue, purple and pink. So pretty! And I’ve got to tell you … right about here I was really wishing I had some Play-doh toys in the house to try the dough out on. I think I could make some super cute shapes.
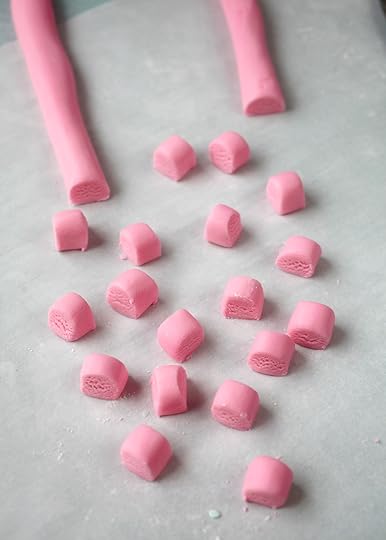
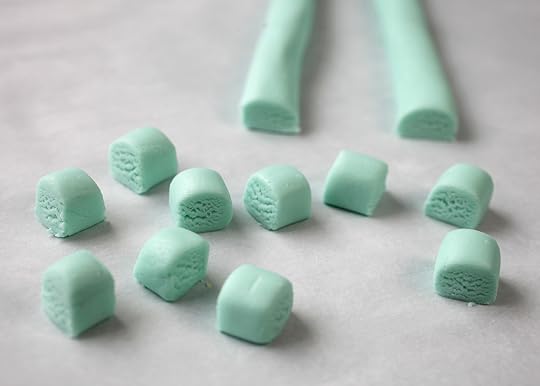
But alas, I just went with these charming little rounded cubes. All you have to do is roll the dough into a long rope shape about 1/2 inch to 3/4 inch in diameter and then cut the rope into 1/2 inch sections.
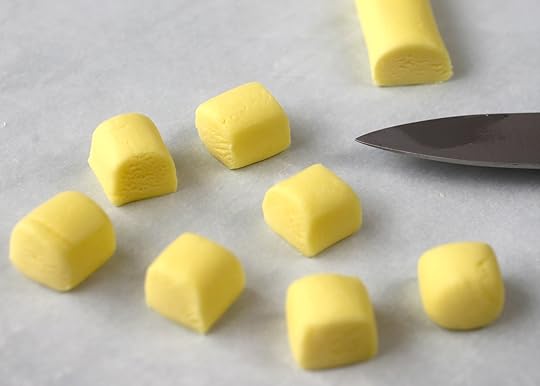
The dough is soft before it goes in the fridge to chill out, so the cylinder shape starts to flatten a little bit making them look like rounded cubes.
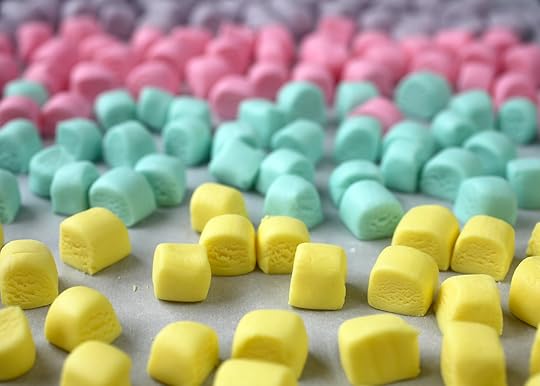
Repeat with all your colored dough and transfer the individual pieces onto a large cookie sheet lined with parchment paper.
Now just cover them in plastic wrap and chill in the fridge for about four hours to firm up nicely.
I definitely nibbled on a few right away. So soft and sweet. So perfect for Spring!
Print Recipe
Yield: 8 dozen mints
Back in the Day Bakery’s Butter Mints
Ingredients:
1 stick (8 tablespoons) unsalted butter, room temperature
1 teaspoon fine sea salt
7 cups confectioners' sugar, sifted, plus more for dusting
2/3 cup sweetened condensed milk
1 tablespoon peppermint extract
Liquid gel food coloring, four colors
Directions:
Line a 9 X 13 inch baking pan with parchment.
Using a stand mixer, cream the butter and salt together on medium speed for two minutes. Slowly add the confectioners' sugar, sweetened condensed milk and peppermint extract and mix on low until the mixture gathers into a ball.
Remove mixture from the bowl, place on parchment paper and shape into a disc. Divide the disc into four equal portions. To color the mixture, add 1-2 drops of food coloring to one portion and knead until fully incorporated. Add more coloring as needed to darken the shade. Repeat with remaining three portions.
Working with one portion at a time, lay on a clean parchment paper-covered work surface that is lightly dusted with confectioners' sugar. Divide the portion in half and roll each half by hand into 3/4 inch ropes. Using a paring knife, cut into 3/4 inch pieces. Gently shape as you cut if needed and place on the prepared baking sheet.
Cover the mints with plastic wrap and refrigerate for at least 4 hours. The mints will keep refrigerated in an airtight container for up to 1 week.
Back in the Day Bakery by Cheryl Day and Griffith Day, 2012
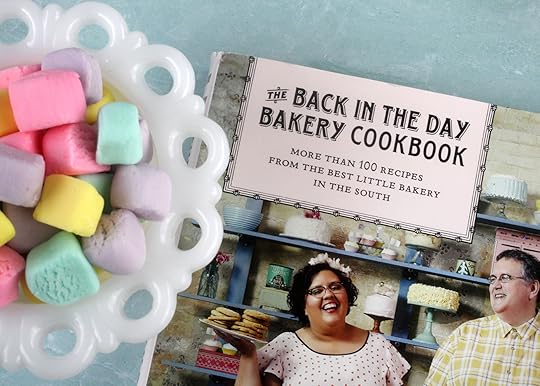
P.S. I love this cookbook. So many great recipes. Here’s a link on amazon to their book. Go grab a copy.
I’ve also made their Coca-Cola Sheet Cake (See it here) and it was delicious.
Or just make some butter mints to enjoy!


March 26, 2019
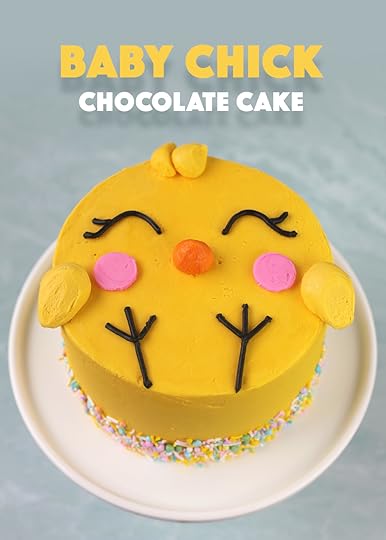
Baby Chick Chocolate Cake
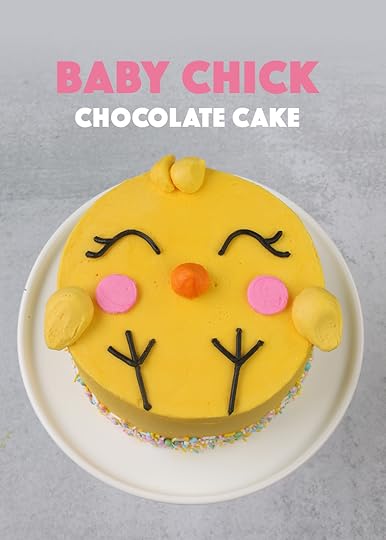
I finally decorated a cake. It’s been forever and I don’t really know why other than I enjoy decorating little treats. I guess I feel pressure to get a design right and with a cake you only have the one shot, but with mini treats, I can make lots of mistakes. But not today. Not with this cake. I’m really happy with how cute this little yellow chick chocolate cake turned out.
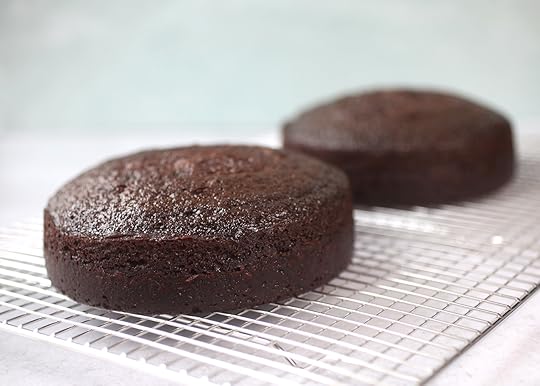
I used this chocolate recipe and baked it in two 6-inch cake pans instead of the 9-inch that the recipe calls for. The recipe yields enough batter for a 6-inch 2-layer cake with enough batter for six regular cupcakes left over. I also made two batches of the frosting to make sure I had enough for decorating.
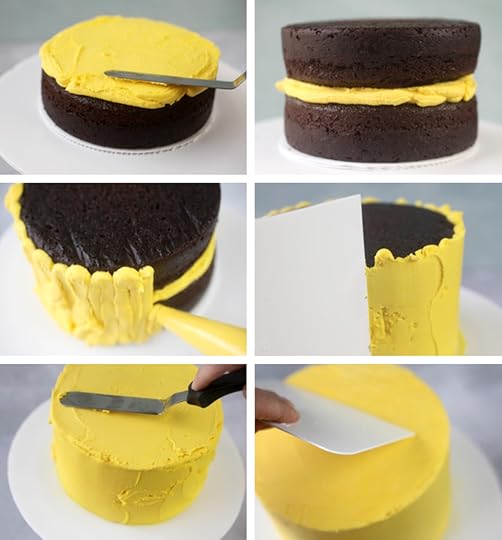
I tinted the buttercream yellow with the consistency somewhat thick and piped frosting on the bottom layer first and then the sides before smoothing it out with a cake scraper and offset spatula. I did it this way to eliminate the need for a crumb coat. By piping on a thick layer first and then leveling it out smooth, I was able to avoid getting crumbs in the outside layer of frosting.
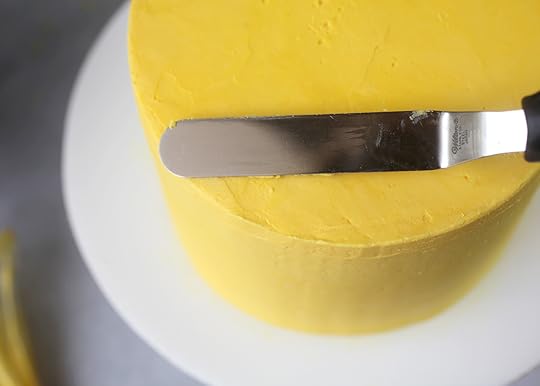
It took me a little while since I’ve been out of practice, but I finally got it all smooth.
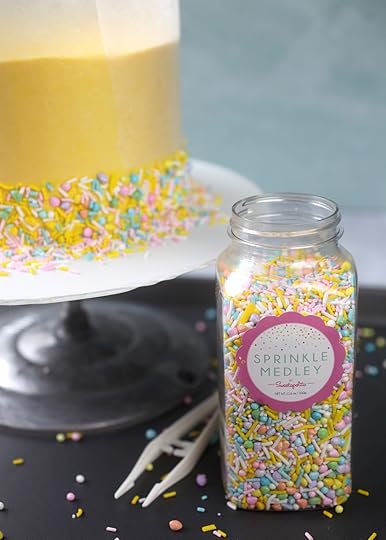
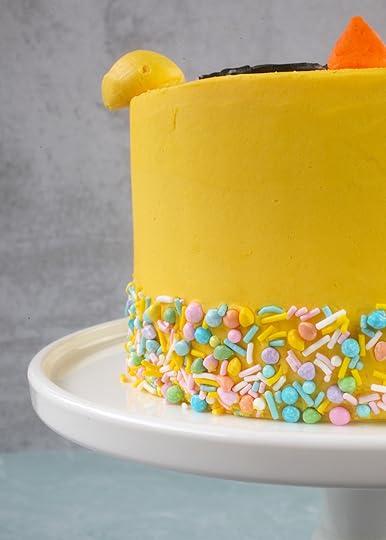
At this point I thought the chick was going to be cute, but I also wanted to up the springy-ness, so I broke out some of my spring sprinkle medleys from Sweetapolita to decorate a band around the bottom of the cake.
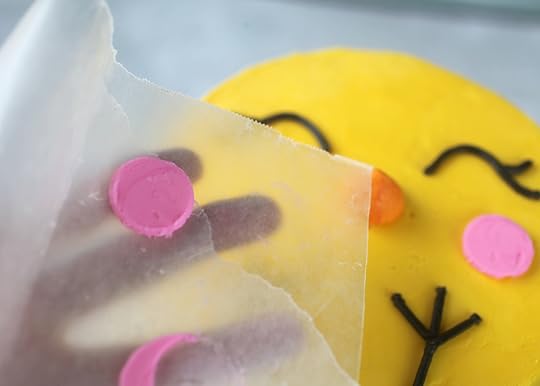
First I chilled the cake in the freezer for a few minutes to avoid messing up my smooth frosting. Then I wrapped a piece of wax paper around the cake and taped it so it would be secure. Since the cake was chilled and firm on the outside, the wax paper wouldn’t mess it up.
Then I gently pressed the sprinkles into the frosting over a cookie sheet pan so it would catch any stray sprinkles that fell off.
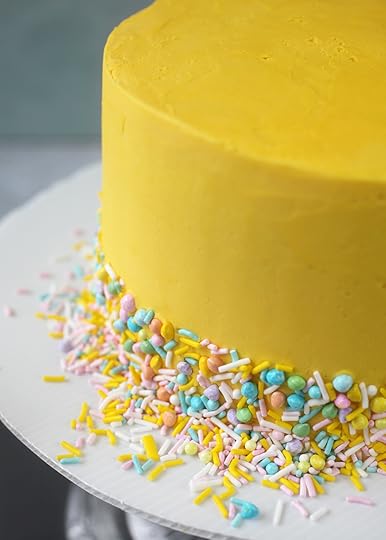
When you’re done. Gently remove the wax paper.
So pretty! Sweetapolita has the cutest color combinations.

Okay, now that that’s done, it’s time to decorate. Before tinting my buttercream frosting yellow. I reserved some to color orange for the beak, pink for the cheeks and black for the eyes and feet. And I also made sure to save some of the yellow frosting to use for wings.
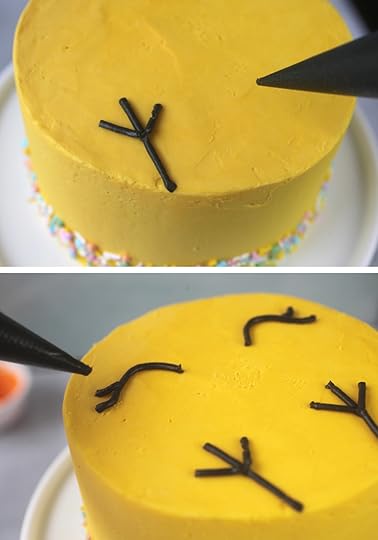
I started with the eyes and feet first. Just pipe black frosting on top of the cake. If you want to be really exact, try using a toothpick to gently make marks in the frosting for starting and stopping points.
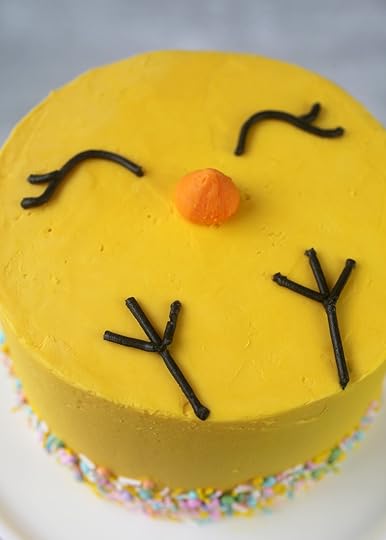
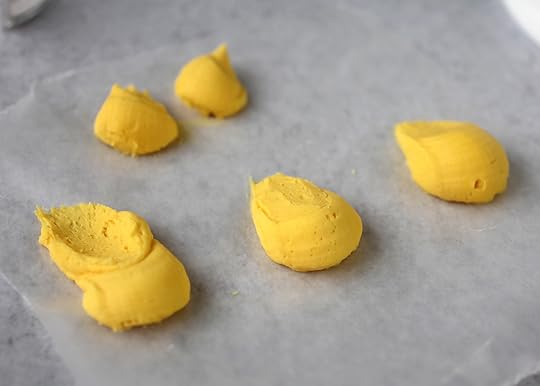
Next… the beak. I piped orange dollops on a piece of wax paper and placed in the freezer for a few minutes to firm up so I could shape it. Sorry, forgot to take a photo, but here is the finished beak in place.
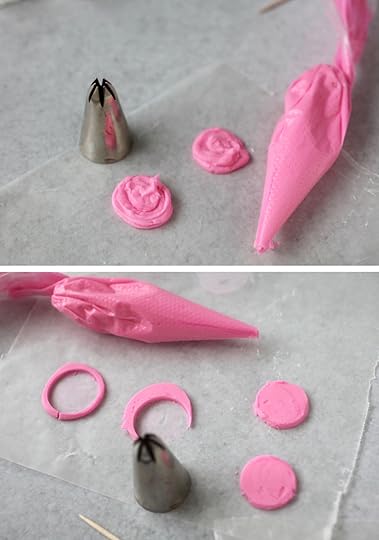
I also piped pink frosting on wax paper for cheeks. I knew I wouldn’t be able to pipe nice circles, so I folded the wax paper over the piped circles and pressed it down so the frosting was even and flat. Then I placed them in the freezer for a few minutes to firm up and used a large decorating tip to cut out perfect flat little circles for the cheeks.
Chill them again if necessary before removing from wax paper and then simply lift them off and place in position.
Wings! Again, I piped frosting on wax paper and chilled it so I could reshape the frosting slightly into two pretty similarly shaped wings.
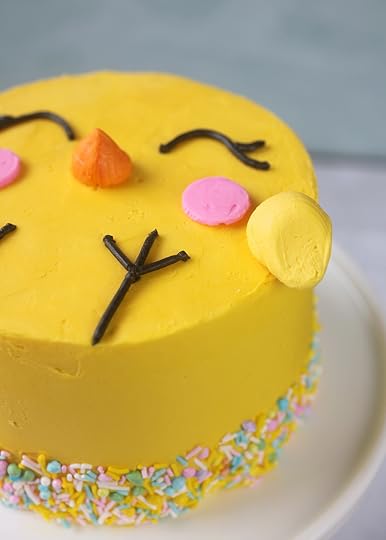
Gently attach to the cake to see the whole look come together.
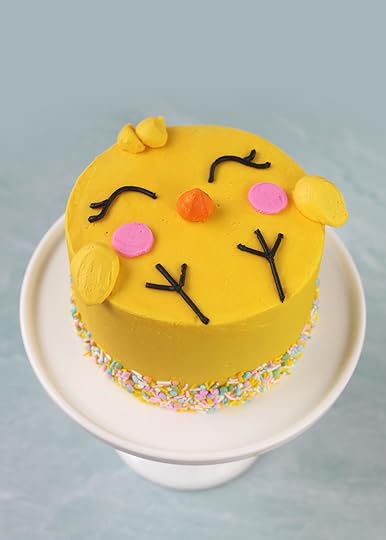
You can even add a few dollops for feathers sticking up on top of this sweet little chick’s head.
Look at those sprinkles. I guess it’s time to cut it open.
But I can’t! It’s too cute.
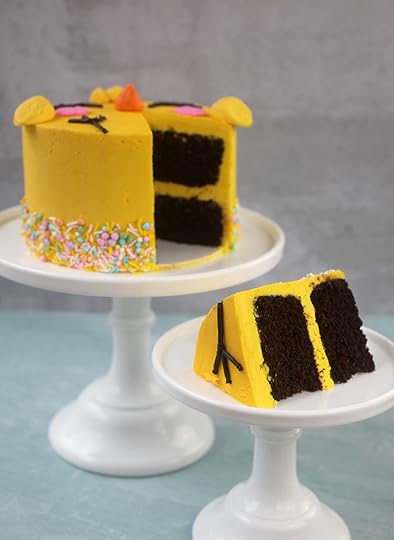
But I did! And it was really, really good.
Hope you enjoy! Chirp!

February 27, 2019
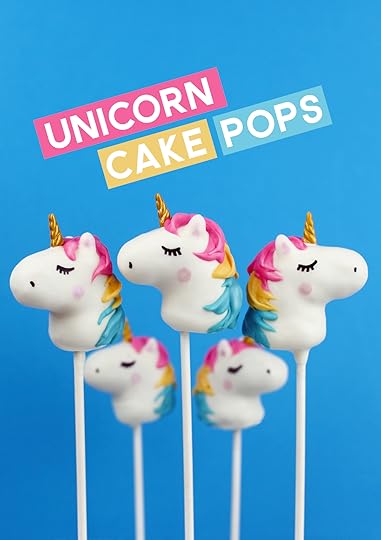
Unicorn Cake Pops
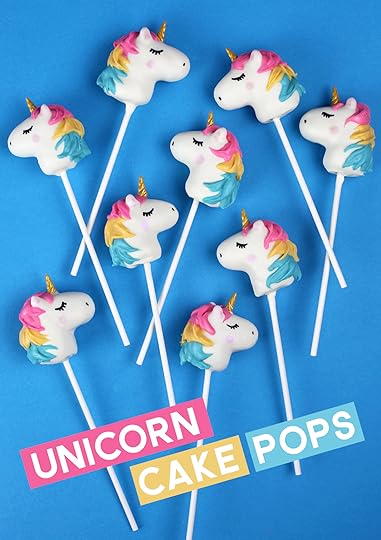
I’ve been horsing around in the kitchen making these colorful cuties!
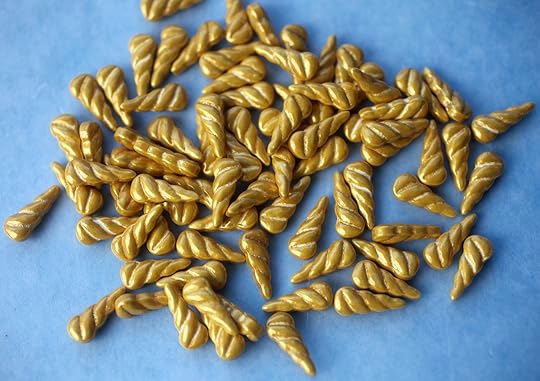
They were inspired by …What?!?!? … UNICORN HORN gold sprinkles that Sweet Sugarbelle sent me. OMG! So, so cute! And obviously when I saw these I knew I had to make cake pops with them!
Need some basic cake pop instructions? No problem. Get the how-to here.
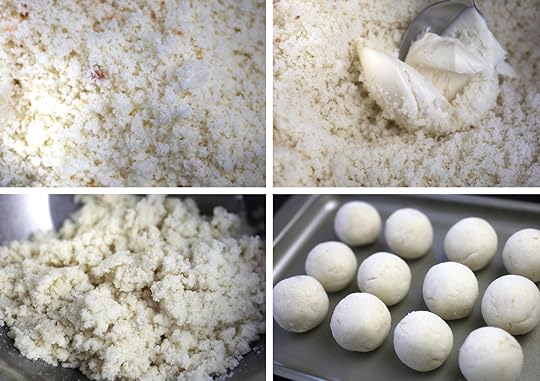
Then, once you’ve rolled your cake and frosting into balls, follow the instructions below to make Unicorns.
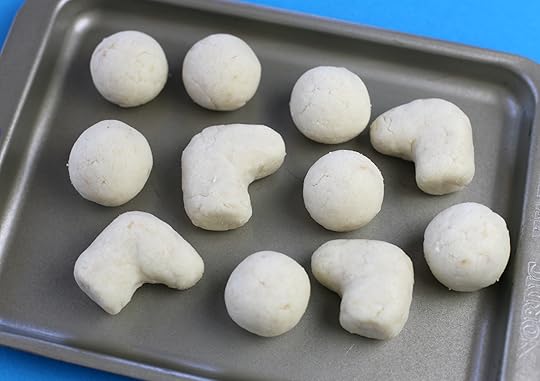
Shape the rolled balls into horse heads. You can use wax paper to smooth the sides and help you shape them. Basically, I rolled into a long cylinder first, then bent it and reshaped the base to be thicker and the nose to be a little narrower.
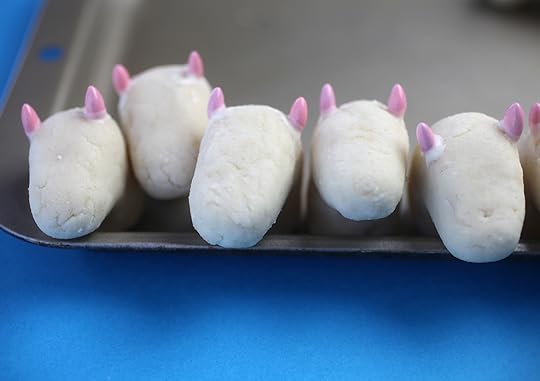
To finish the horse head shape, dip some white or light-colored coated sunflower seeds in melted candy coating and then place them in position for ears. Let them dry completely and then place the heads in the freezer for about 10-15 minutes to firm up. Once firm, transfer them to the fridge to remain chilled, but not frozen.
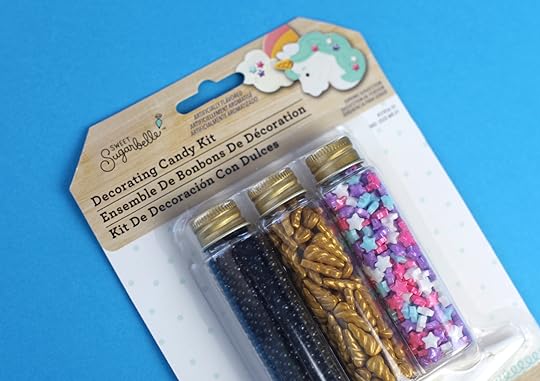
Now, breakout the cutest sprinkles ever from Sweet Sugarbelle so you have them handy when dipping your pops. Alternatively, you can make your own unicorn horns by shaping fondant into tapered thin cylinders and then twisting them together.
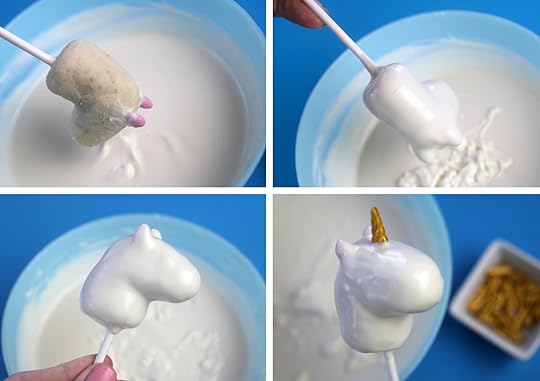
Okay, let’s get to dipping. Remove 1-2 shaped cake pops at a time from the fridge. Carefully submerge the pop into a small, deep bowl of melted and fluid white candy coating. Remove and gently tap off any excess. And then before the coating dries, insert a unicorn sprinkle in position for the horn.

Let them dry completely before continuing to decorate.
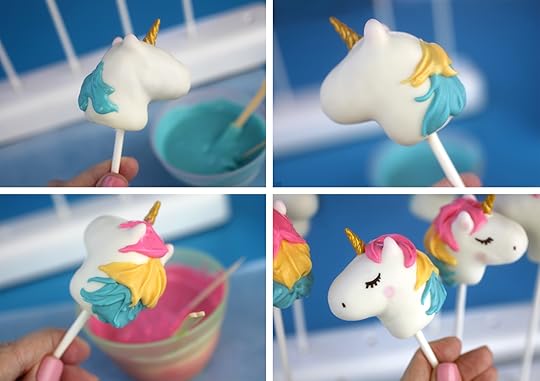
I used three colors of melted candy coating for the mane, but one color would be just as cute.
Start at the bottom and work in sections to apply candy coating so it looks like the unicorn mane falls on top of itself. Use a toothpick to apply the coating and layer as you go. It helps to let the coating cool and thicken slightly to hold it’s shape. Apply all the blue to the pops first and let dry. Then apply the yellow, and then the pink. Go back and tweak with more and varying thicknesses of coating if needed.

So these are mane-ly adorable!
To finish the faces, draw on eyelashes and nostrils with an Americolor black edible-ink writing pen. Use a thin paint brush to draw on pink luster dust.
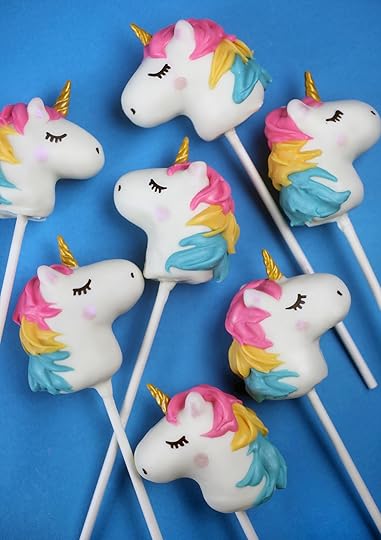
Love them!!!
Hope you enjoy them, too!

February 11, 2019
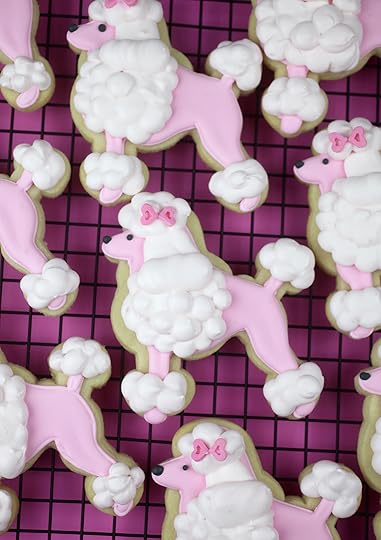
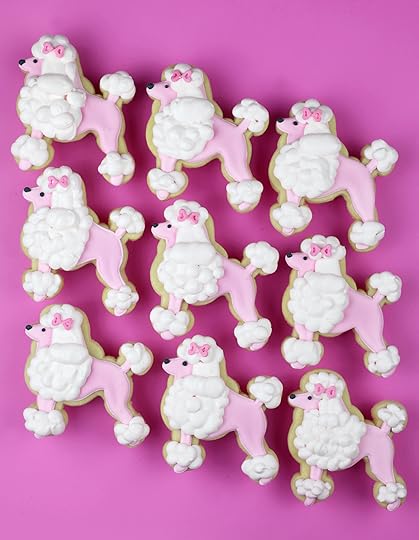
Oodles of Cute Poodles
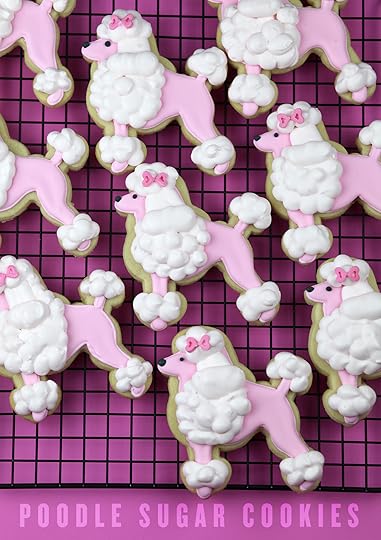
Oodles of cute! That’s what these sugar cookie poodles are with their puffy, fluffy looking fur made of royal icing.
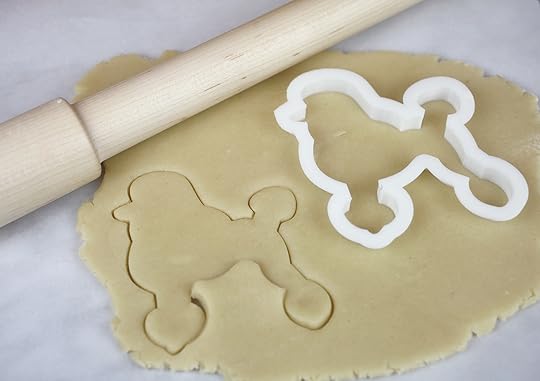
I bought this cookie cutter a while ago from a 3-D printing cutter shop. It’s been so long though I can’t remember the name. Here’s one similar you can try however. And you can order it in a bunch of different sizes, too!
And here’s the sugar cookie and royal icing recipe I like to use.
I enjoyed decorating these pups because they didn’t have to be perfect.
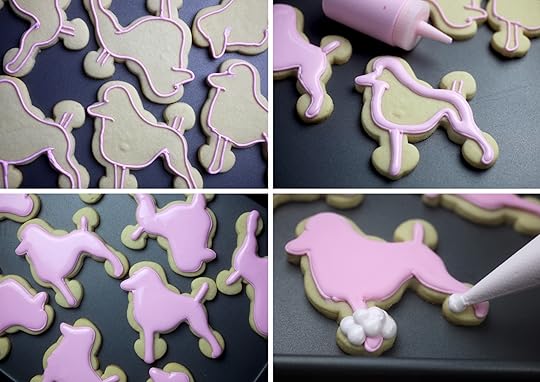
Pipe the outline of your poodle first with royal icing. Then fill the shape with flood consistency icing and let dry completely. You don’t need to be super worried with piping smooth lines because most of the poodle will be covered in “fur.” : )
To pipe the fur, I used a tipless decorating bag with the tip cut off large enough to produce a decent little dollop of icing. This icing should be in between piping and flood consistency if you want it to look thick and dimensional.
Keep in mind, you can always add a little bit of water to thin your icing or powdered sugar to thicken the consistency. Just remember to start small when adding either.
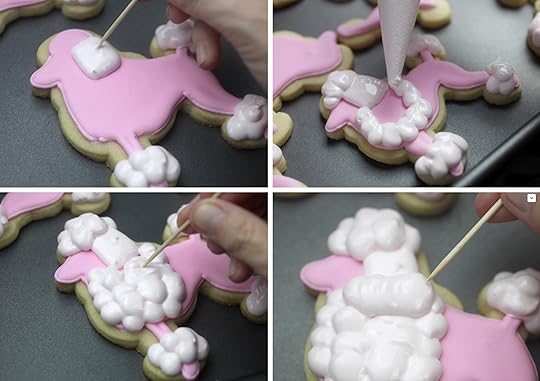
Pipe several small dollops of frosting around each ankle. Then pipe the tail.
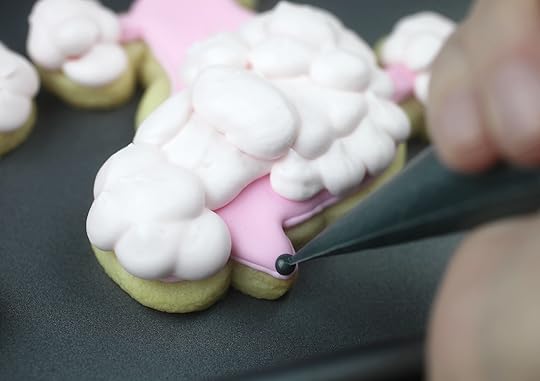
For the ears, pipe a flat hanging ear first. Then pipe dollops on top of the head and around the chest.
Finally add a big fluffy finish to the bottom of the ear so it looks like it’s overlapping the rest.
When piping each section, the icing may form peaks. To fix, just use a toothpick and quickly smooth the area down so it looks round.
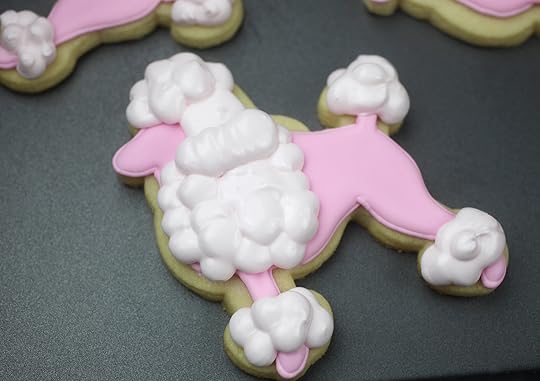
Cute. Now, let the doggies dry.
Then mix some dark brown or black icing to dot on noses and eyes. You could also use a black edible ink writing pen to draw them on.
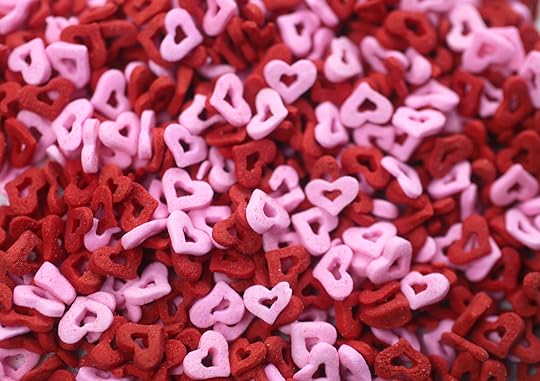
You can use sprinkles for bows to dress your poodles up a little. I had these cute open heart sprinkles in pink and red.

Just apply a little royal icing to one side of each sprinkle and place end to end to form a quick little bow. When the icing dries, it will be lightly glued in position …
And it will be pretty darn cute, too!
Enjoy!

January 6, 2019
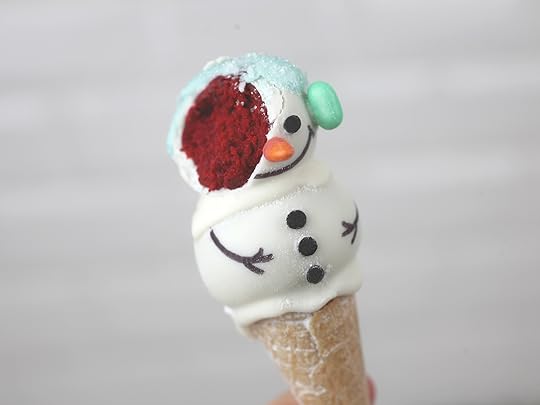
Snowy Cones
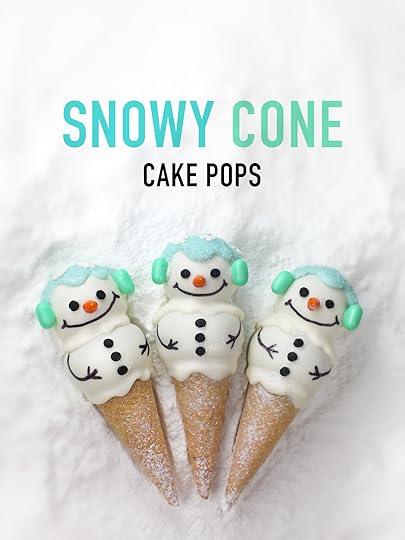
I’m kicking off 2019 with some snowy cake pops that serve up a double scoop of cute.
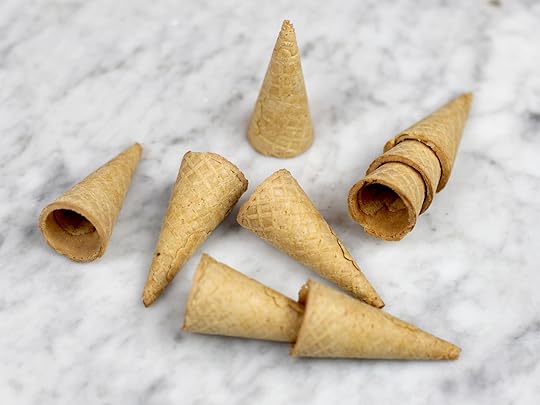
And they sit on top of these super tiny ice cream cones that are all of about 2.5 inches tall. These were from Cake Box on Main.
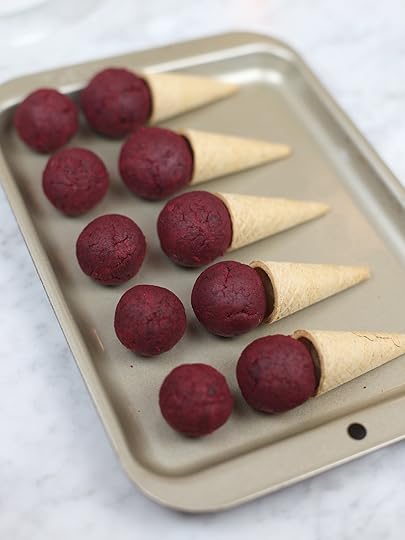
Use my basic cake pop instructions to make cake balls for decorating. Here I’ve rolled them in two sizes. The larger ball goes right on top of the cone, followed by the smaller one.
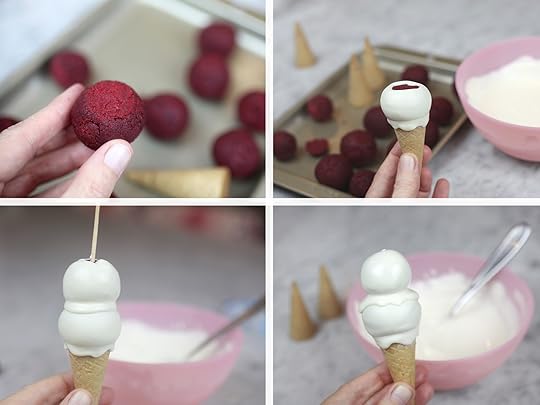
Chill the balls for dipping and when they are firm, use a sharp knife to cut a sliver of the cake ball off. After dipping, place the cut side facing up on top of the cone. This will allow the top cake ball to rest nicely and look more natural when the coating drips.
Dip the first scoop: insert a toothpick into the cut side of the ball and dip into melted and fluid vanilla candy coating. Remove and place on top of the ice cream cone. Some of the coating will naturally dip down. Gently twist the toothpick to remove and let dry.
Dip the second scoop: insert a toothpick into a smaller, firm cake ball and dip into the coating. Remove from the coating using the toothpick and place on top of the first scoop. You can use another clean toothpick to coerce the coating to look more drip-like. Gently twist the toothpick to remove and let dry.
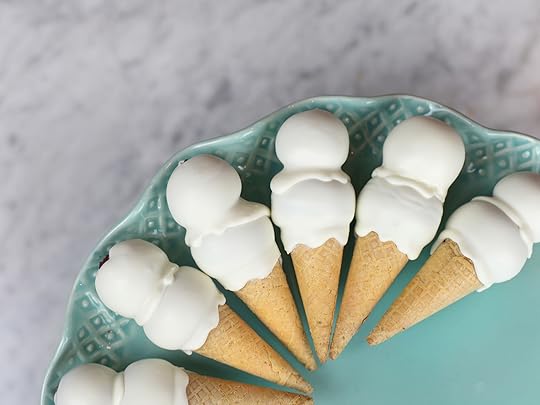
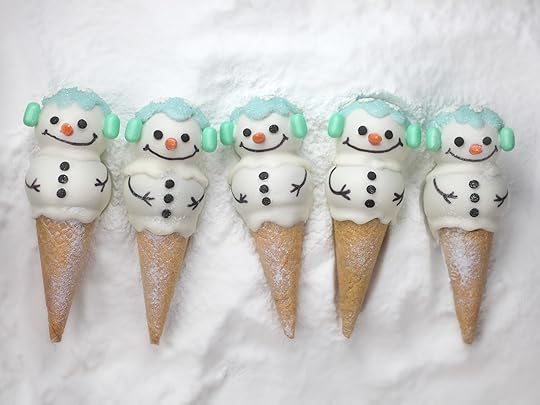
Double scoops of cute!
But now, let’s take them to the next level!
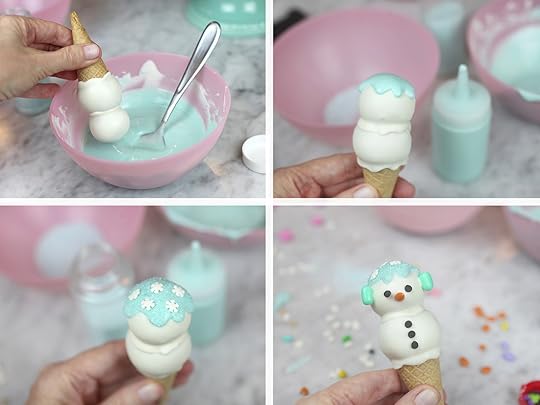
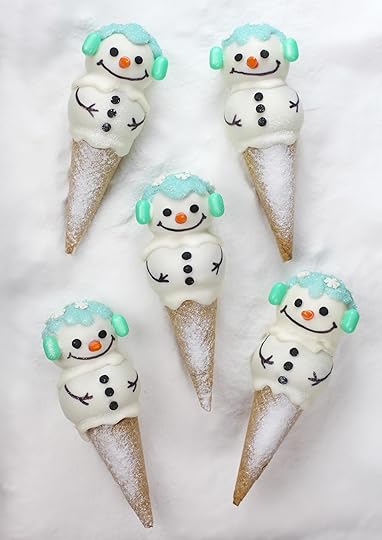
Dip the tops or use a squeeze bottle filled with melted light blue candy coating to make some fun and frosted little hats.
While the coating is still wet, sprinkle the tops with sanding sugar and decorate them with snowflake sprinkles.
Use tic tacs for ear muffs and attach them using melted candy coating. Do the same for the eyes and buttons using black confetti sprinkles… And the noses, using orange coated sunflower seeds.
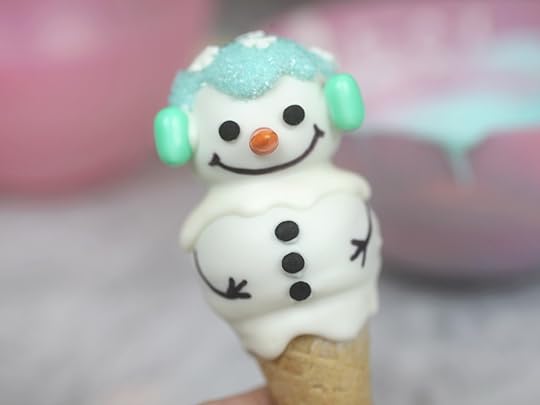
Finish the faces by drawing a big smile with a black edible-ink writing pen. Don’t forget the arms to hug his little belly.
Snow adorable!
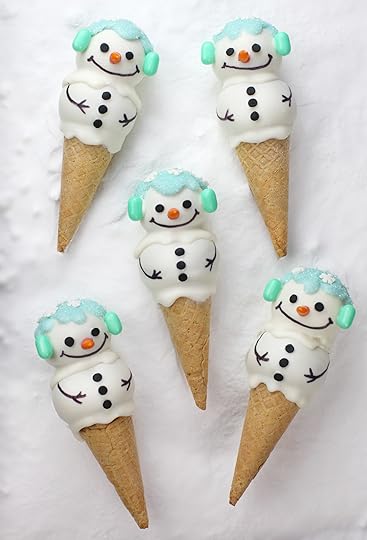
Enjoy every bite!

December 16, 2018
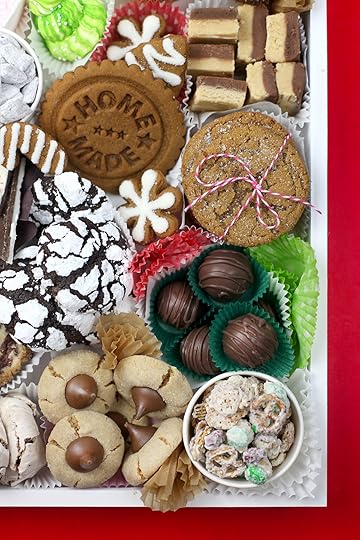
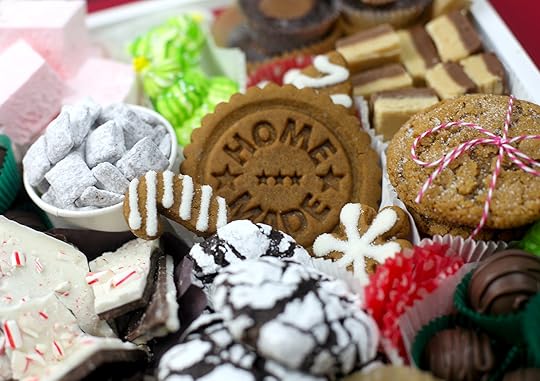
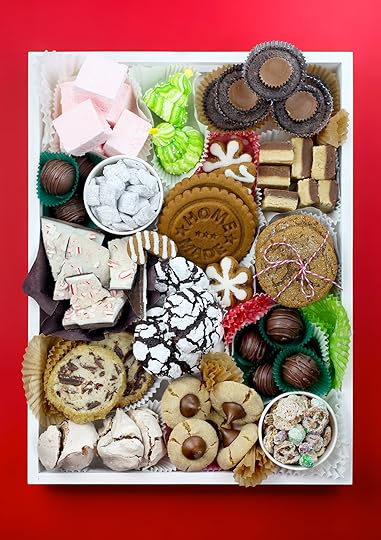
Merry Christmas Cookie Boxes
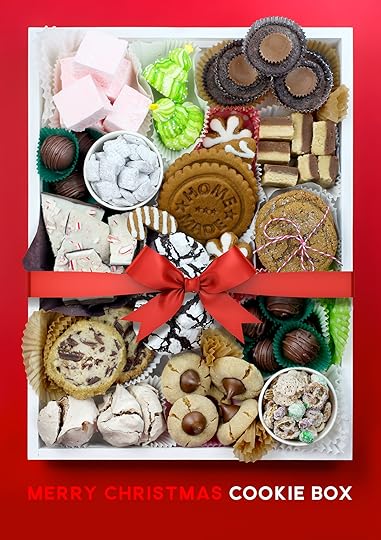
It’s that time of year! Cookies and goodies and sweets and treats! And I’ve got a little bit of everything in this sugar-filled Christmas Cookie Box to satisfy even the biggest sweet tooth. I spent the better part of three, no almost four days baking and playing in the kitchen to make enough to share with friends and family. And when I was done, I said I will never bake again. But we know that’s not true. But OMG was I tired.
I’ll give you a couple of planning tips at the end if you want.
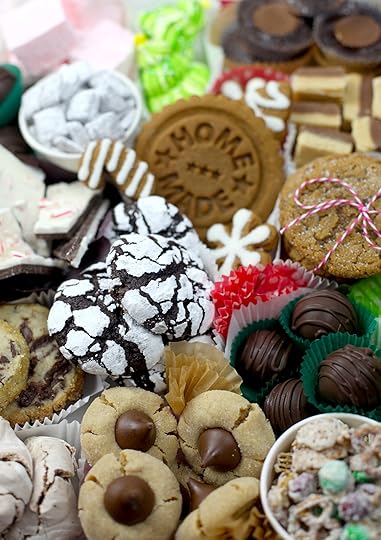
Now, let’s see what these big, beautiful boxes are stuffed with. Links to each holiday treat are included below.
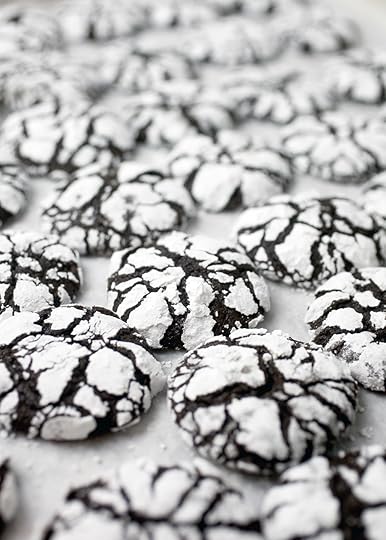
First up, CHOCOLATE CRACKLES. I love them! These chocolatey cookies are a fave and always so festive for the holidays. It’s super satisfying to watch them bake and go from a ball, completely covered in powdered sugar to a crackled surface revealing the dark chocolate cookie underneath.
I mean look how pretty they are and how much they stand out against all the other sweets they’re sitting next to.
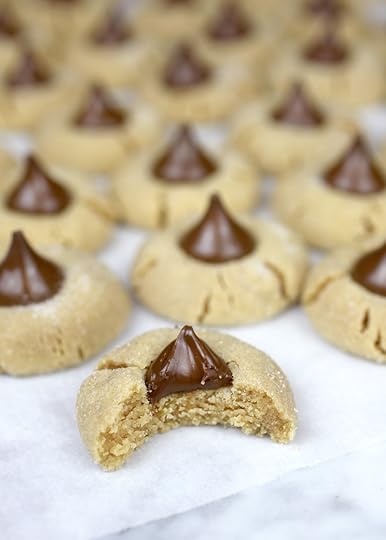
Oh yes! PEANUT BUTTER BLOSSOMS. Always and forever. These puffy peanut butter cookies are pressed with Hershey Kisses right out of the oven. Chocolate and peanut butter. One of my all-time favorite combos.
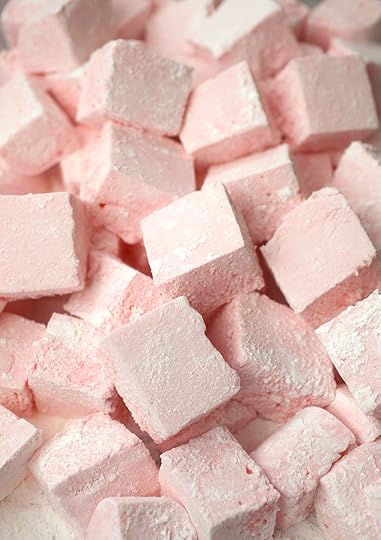
HOMEMADE MARSHMALLOWS. Please, please try making these one day if you’ve never attempted them before. There’s something about them that makes you feel magical when it all comes together. And they taste amazing! Use the linked recipe, but just pour the marshmallow in one 13 X 9 glass baking dish for super thick squares.
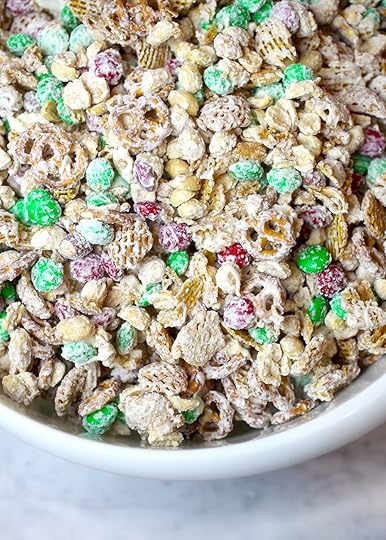
Okay, let’s talk about this CHRISTMAS CRUNCH. Or what it’s usually referred to as … Christmas Crack. I’ve just always felt weird promoting it like that. But, I guess it got that name for a reason. It IS very addictive. Also, if you don’t like baking, it’s one of the easiest things you can make. It’s basically, just salted peanuts, rice or corn cereal, M&M’s, pretzels and melted white chocolate. The recipe makes a ton. So, even though you’ll want to eat it all yourself, you’ll have plenty to share.
When I packaged them in the cookie box, I placed them in small white ice cream cups with plastic domed lids so the pieces wouldn’t accidentally spill out. You can also use plastic treat bags.
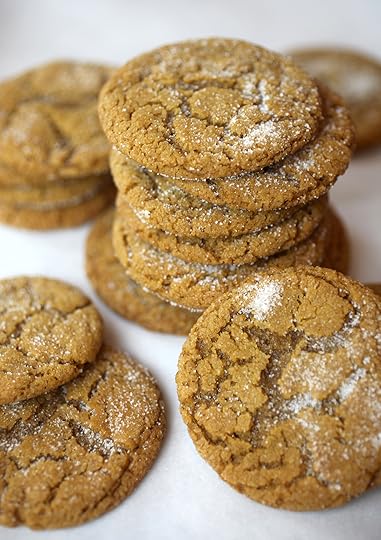
Here we have some MERRY GOOD MOLASSES COOKIES. They are a crowd pleaser and will probably be one of the first things to disappear on your cookie tray.
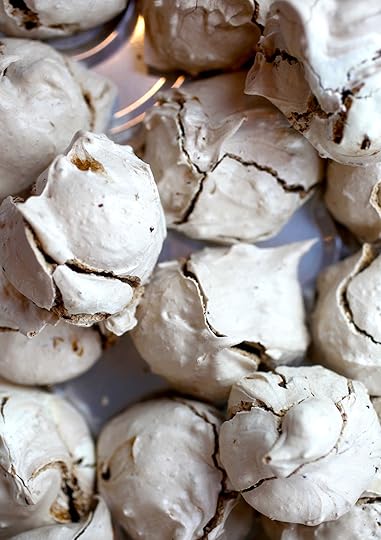
CHEWY CHOCOLATE MERINGUES. These are an unexpected favorite. Crunchy, chewy and chocolatey. What they lack in looks, they make up for in taste. Oh, so good.
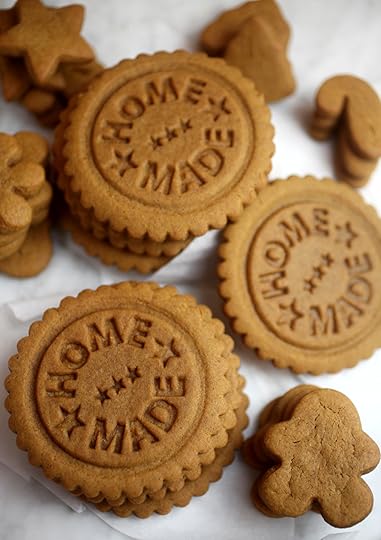
GINGERBREAD COOKIES. A staple during the holidays. This recipe is easy to whip up and enjoy as is. For a more dramatic look, you can pipe and outline them with royal icing or even melted white chocolate. Sprinkle with sanding sugar while still wet and then let dry for a snowy look.
I used a cookie stamp and fluted round cookie cutters to “decorate” them. Just a little reminder that everything inside the cookie box is made from the home and heart.
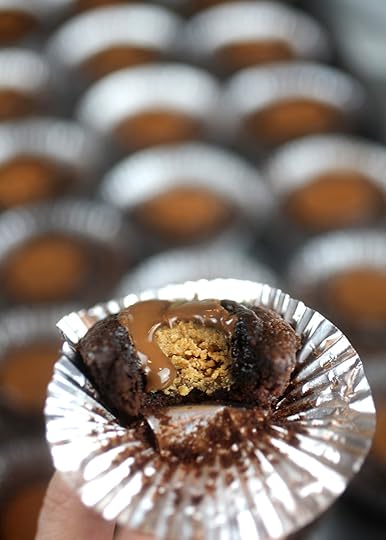
Oh gosh! I have too many favorites. These BROWNIE CANDY CUPS are little bites of heaven. Again peanut butter and chocolate, but I don’t care. Bake these in 2-inch foil Reynolds baking cups for a two bite-treat … that is if you can find them. I always have a tough time so I just recently bought a box set of them off Amazon. That’s enough for 1,152 treats, so I think I’m set for a few awhile. The foil cups are bigger than a mini cupcake liner, but smaller than a regular cupcake liner. But still make them even if you have to use a larger size. Just bake them a few minutes longer if needed.
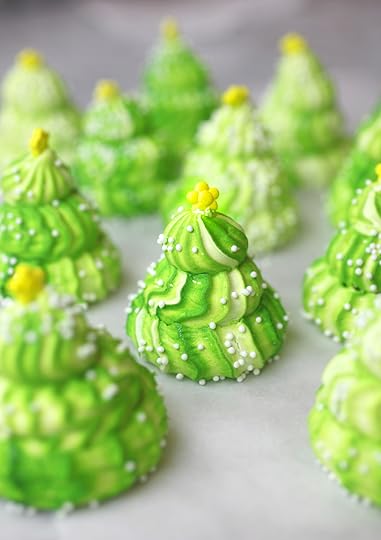
CHRISTMAS TREE MERINGUES. These are super festive and fun. I tinted the meringue a light green and then piped them using an Ateco #864 decorating tip and a piping bag lined with green icing color for darker streaks. Pipe large rounds of meringue, followed by a slightly smaller dollop in the middle and an even smaller dollop on the very top. To decorate, I sprinkled with white non-pareils and topped them off with a tiny yellow sugar star. You can use the linked recipe and just swap out the decorating part.
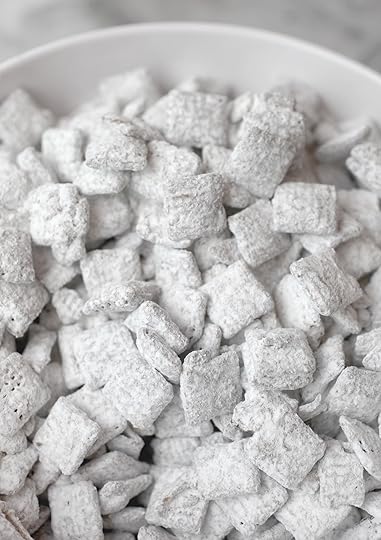
REINDEER CHOW! Or puppy chow as it’s known the rest of the year. This is another no-bake treat and yields an extremely high satisfaction rate based on the effort needed to make. It’s takes around five minutes and uses only four ingredients. Rice or corn cereal, peanut butter, chocolate and powdered sugar. Go make some right now, you won’t regret it.
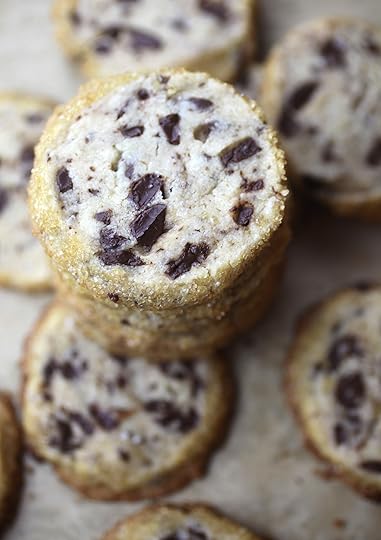
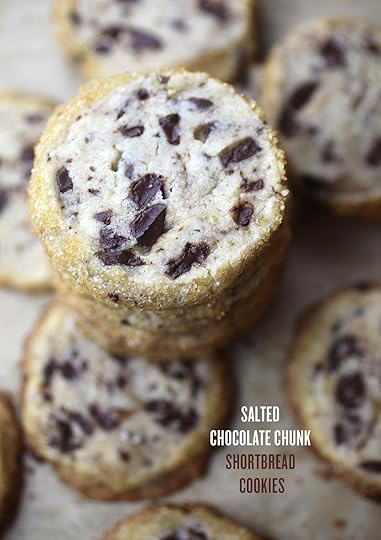
SALTED CHOCOLATE CHUNK SHORTBREAD COOKIES. An upscale version of a chocolate chip cookie that seemed perfect for Christmas. They’re sliced cookies, packed with chunks of bittersweet or semisweet chocolate and then rolled in demerara sugar and sprinkled with sea salt. So much goodness!
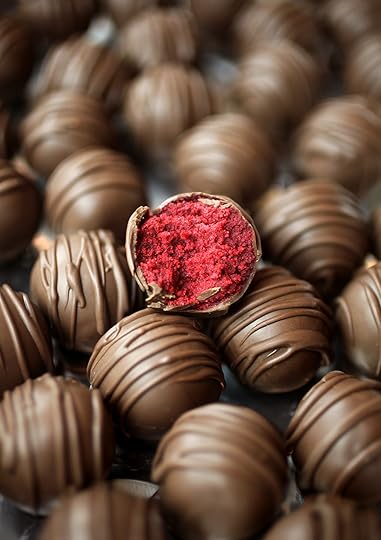
You know these had to make an appearance. RED VELVET CAKE BALLS. So pretty, so festive, and so good. I’ve been making these for over ten years now and they are still one of my all-time favorites, any time of the year.
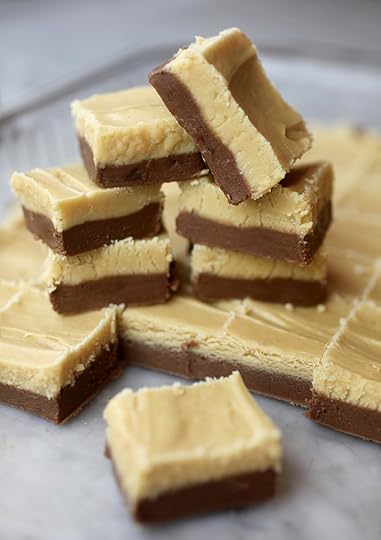
PEANUT BUTTER FUDGE. Umm yes, with chocolate, too. This is the creamiest, sweetest, most decadent fudge you can sink your teeth into. I have been making it every single year for gosh, maybe twenty years now. It’s always expected at any holiday get together.
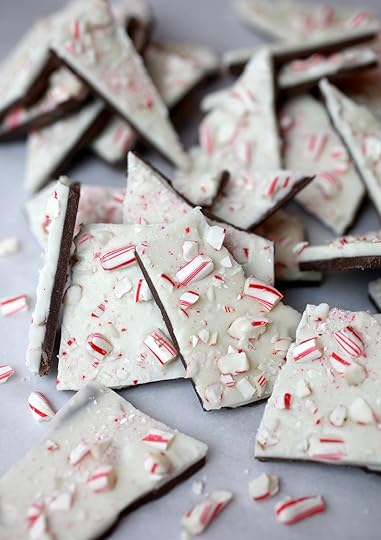
And finally, another staple. PEPPERMINT BARK and it’s really easy. Line a pan with wax paper, pour melted chocolate candy coating on top and smooth out to dry. Next pour vanilla candy coating on top of the chocolate and sprinkle with crushed candy canes. Let dry completely and then break into small pieces. Easy peasy. The link above is to an Easter version for step-by-step pics.
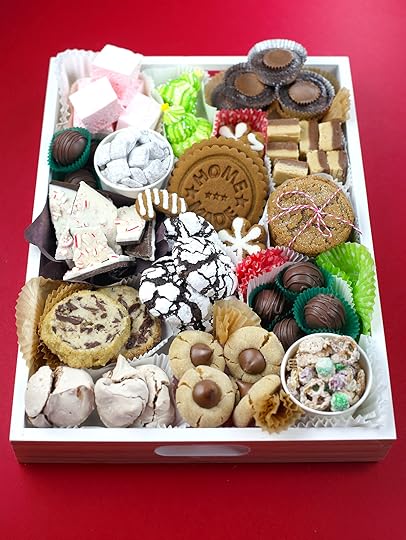
When you have everything made, assemble in a cookie box or tray and gift to friends. I used a random assortment of paper baking cups in different sizes and colors to organize everything. But feel free to get creative with different ribbons, twine, boxes, and cardboard cutouts for dividers.
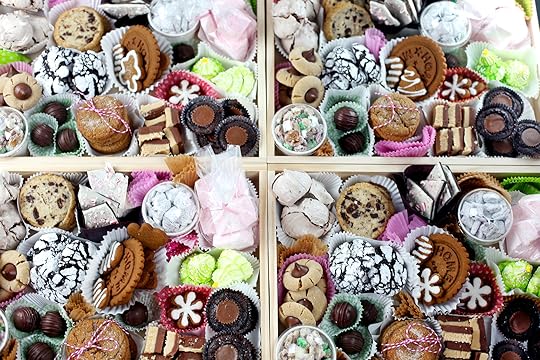
The fourteen, yes 14!!! treats I made were enough to fill up 7 of these 16 X 12 X 2 wooden boxes I found at Target. This was a lot even for one gift, so smaller boxes or containers would still be great and of course yield more gifts.
Here’s the order I made things for maximum freshness if you’re curious
Day 1:
Made the following sweets first since they have a longer shelf-life:
Reindeer Chow
Christmas Crunch
Peanut Butter Fudge
Peppermint Bark
Baked cake ahead of time for cake balls
Day 2:
Prepared cookie doughs and chilled them in the fridge:
Molasses Cookies
Gingerbread Cookies
Chocolate Crackles
Chocolate Chunk Shortbread Cookies
Day 3:
Chocolate Meringues
Christmas Tree Meringues
Marshmallows
Red Velvet Cake Balls
Cutout and baked the Gingerbread cookies
Day 4:
Baked the rest of the cookies saving them for last to be as fresh as possible:
Molasses Cookies
Chocolate Crackles
Chocolate Chunk Shortbread
Made and baked Peanut Butter Blossoms
Made and baked Brownie Candy Cups
Then I packaged everything up and delivered to friends and family the next day.
Here’s the wooden box I found at Target for $6.99.
Also, if you want to make treats, but don’t like to bake, the following are all no-bake sweets:
Marshmallows
Reindeer Chow
Christmas Crunch
Peanut Butter Fudge
Peppermint Bark
I hope you enjoy these cookies and have a Merry Sweet Christmas!!!!

December 15, 2018
Salted Chocolate Chunk Shortbread Cookies
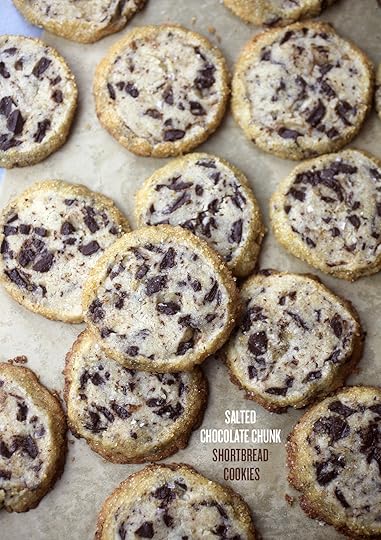
Better late than never. I finally made my way to baking these little gems. You may have seem them all over instagram the past many months from a recipe by Alison Roman. (Linked below) And now I know why. These Salted Chocolate Chunk Shortbread Cookies are special.
I decided to give them a try to add to a Christmas Cookie Box (I’ll be posting soon) and I thought they’d make a more upscale version of a chocolate chip cookie to add to the holiday mix. And I love how they turned out.
I hope you make them and enjoy them as much as I did.
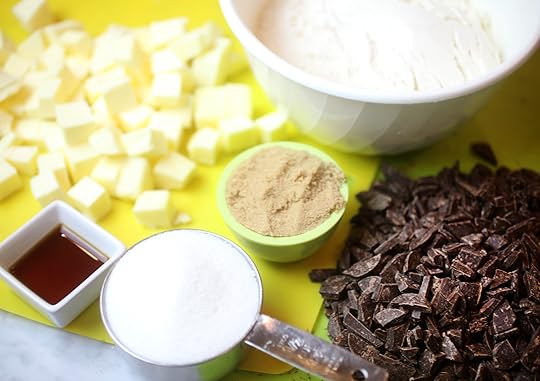
The recipe ingredients are simple. Butter, flour, brown sugar, granulated sugar, vanilla and chunks of chocolate (semisweet or bittersweet). I used semisweet since I had those on hand, but I think I’d love them even more with bittersweet chocolate.
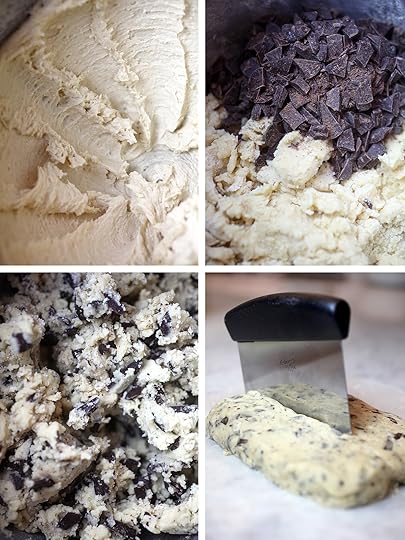
Mix up the cookie dough batter and divide it into two equal parts.
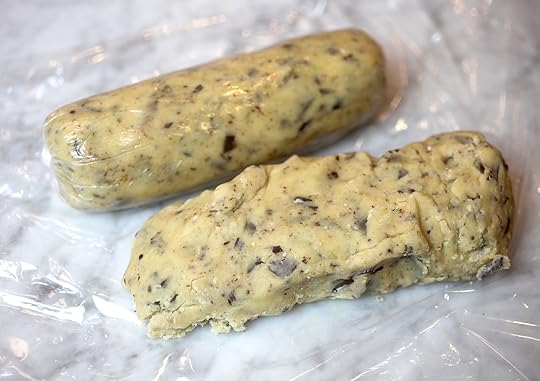
Roll them up into two cylinder shapes and make sure the dough is compact as possible.
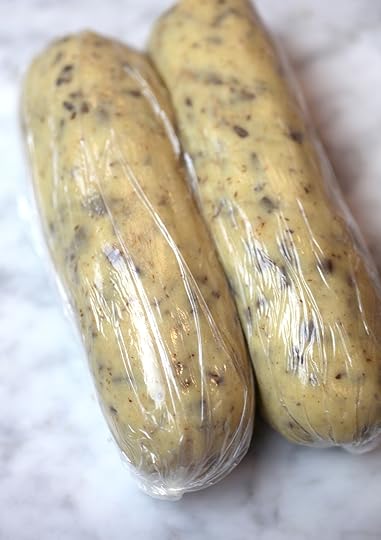
Wrap them in plastic wrap and then chill the dough for at least two hours or until the dough is totally firm. You can also make this dough in advance and chill for several days before baking or freeze it for up to 1 month.
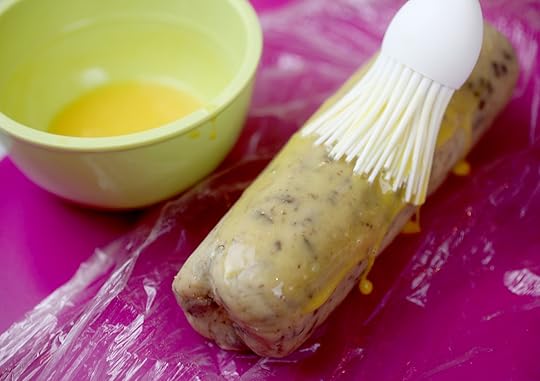
When ready to bake, remove the dough from the fridge and brush with a beaten egg.
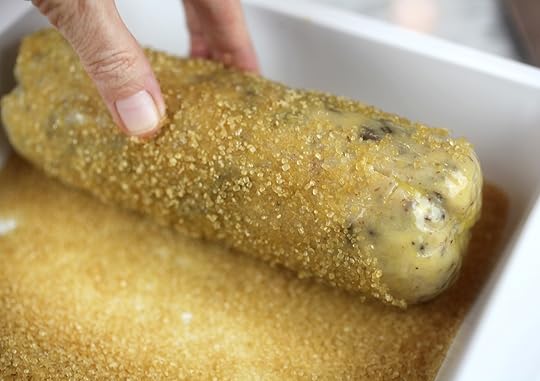
Then roll in demerara sugar.
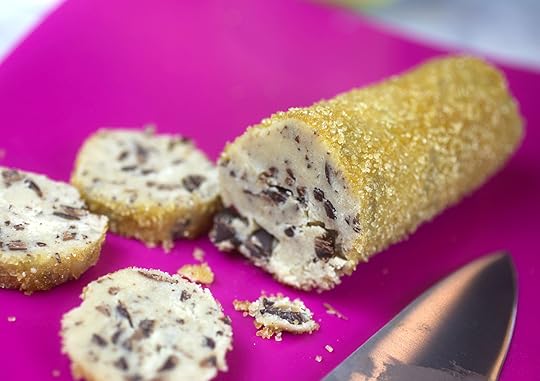
Cut each cylinder shape into 1/2 inch slices. You should end up with 12 slices for each. If the dough separated any, don’t worry. Just press it back together to reshape.
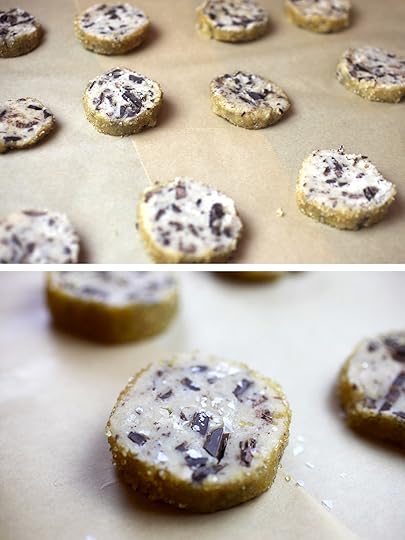
Place on a cookie sheet lined with parchment paper and sprinkle with flaky sea salt. Bake at 350 for 12-15 minutes. Let cool on the cookie sheet after baking and enjoy.
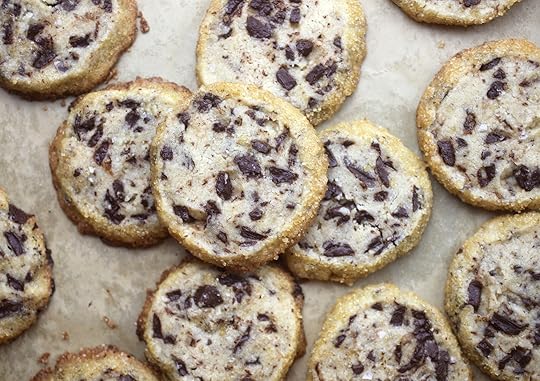
Here’s Alison’s Salted Chocolate Chunk Shortbread Cookie Recipe on the Bon Appetit’s site with full instructions.
Enjoy!!!

December 3, 2018
Easy Raspberry Oatmeal Bars
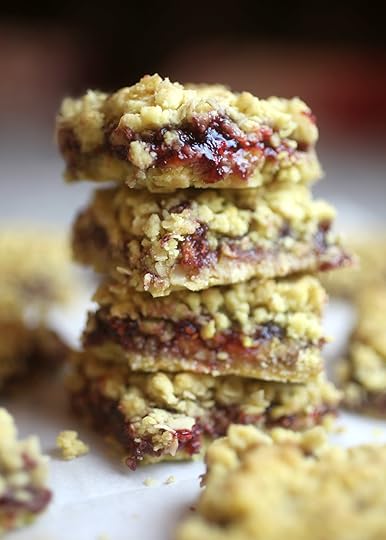
I mades this recipe like a hundred years ago around the holidays and remember really enjoying them even though there’s no chocolate in sight. Ha! Anyway, I had the urge to make them again this weekend and YAY had everything I needed in the pantry. And when I say everything, It’s like four ingredients which is awesome when you’re in the mood for a last minute, late night treat.
It seems almost silly to show you the steps because this is so easy, but I will anyway.
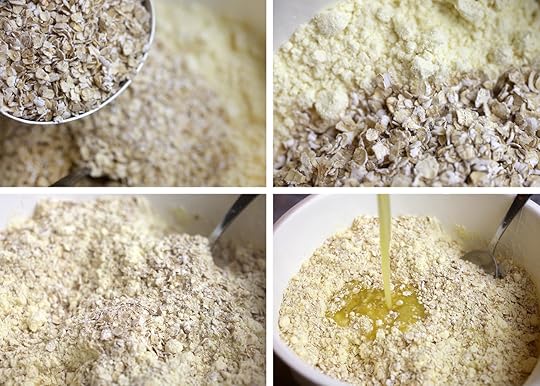
Stir together a yellow cake mix, some quick cooking oats and melted butter.

Mix together until the ingredients are crumbly and moist like this.
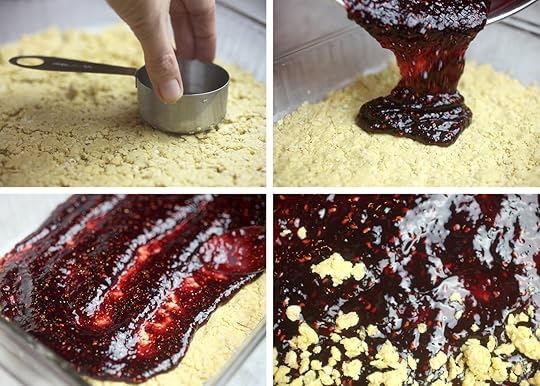
Then, just press half of the mixture into a 13 X 9 inch pan, spread some raspberry preserves (or other favorite fruit flavor) on top and cover with the remaining crumb mixture.
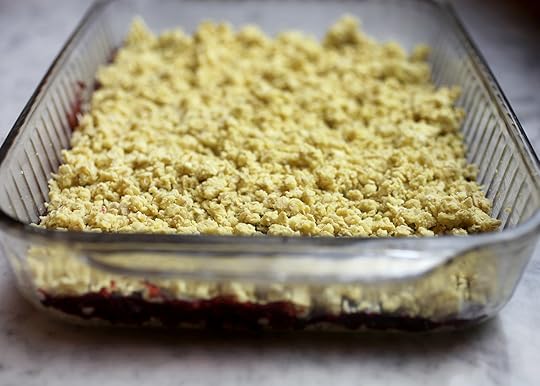
Press the top layer gently on top and bake away.
Voila! You’ll love these quick and easy fruit-filled bars!
Print Recipe
Easy Raspberry Oatmeal Bars
Ingredients:
2-1/2 cups quick cooking oats
1 box yellow cake mix
1-1/2 sticks or 3/4 cup melted butter
12-16 oz raspberry preserves
1 tablespoon water
Directions:
Preheat oven to 375 degrees Fahrenheit and grease a 9 X 13 inch baking pan.
In a large bowl, stir oats and cake mix together. Add melted butter and mix with a spoon until combined and crumbly.
Divide the crumb mixture in half and press half into the bottom of the pan.
Stir preserves with water and spread evenly on top.
Sprinkle remaining crumb mixture on top of preserves and gently press together until even.
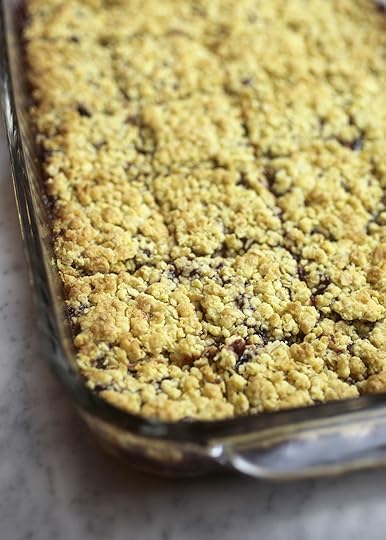
Bake for 18-20 minutes or until crumb mixture on top is lightly browned.
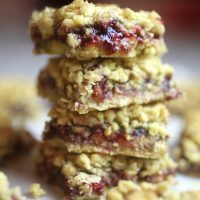
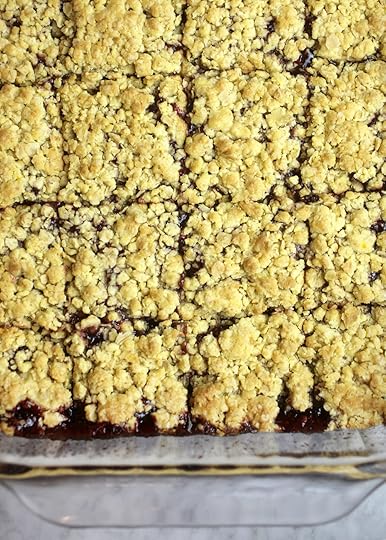
Cool and cut into 24 bars. Store in an airtight container.
Enjoy!

November 18, 2018
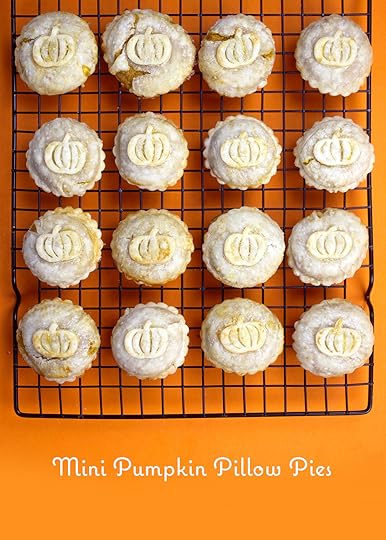
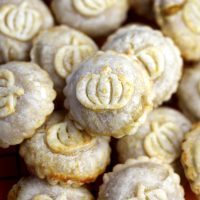
Mini Pumpkin Pillow Pies
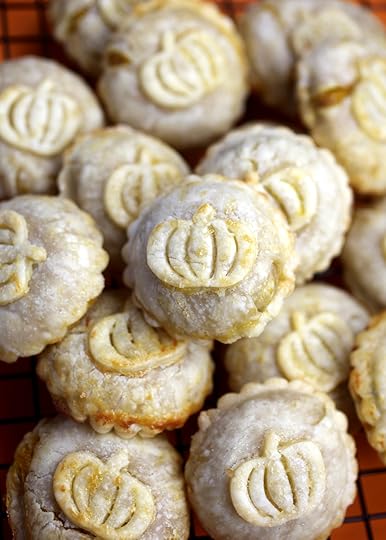
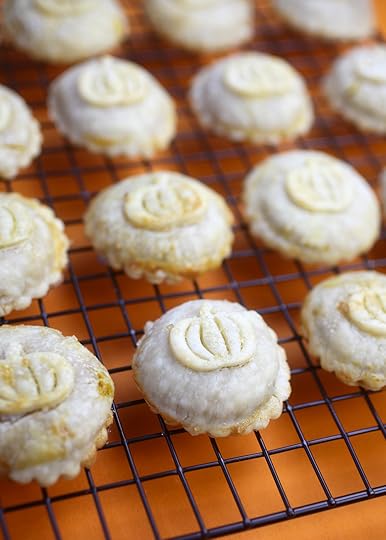
So these little pies are really good! They’re puffy, packed with pumpkin, and the perfect two-bite size to pop in your mouth.
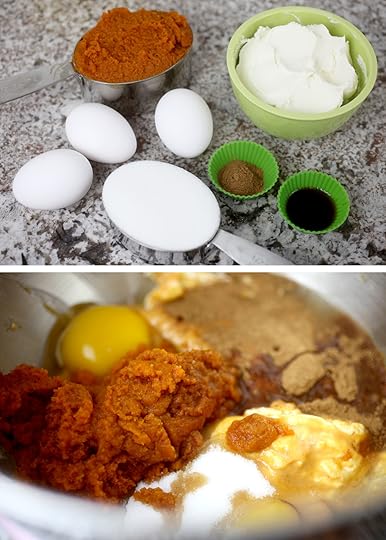
The ingredients are simple, too. Just mix everything together in one bowl and you are ready to go.
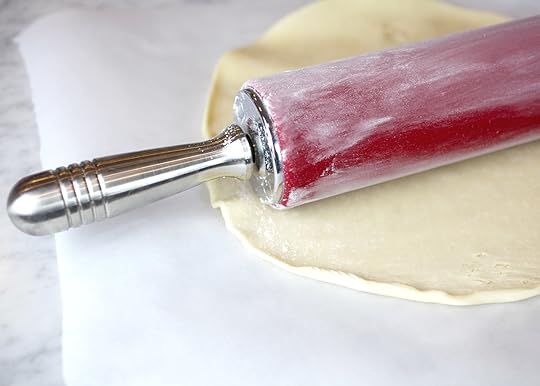
To keep the pies on the simple side, I used refrigerated ready to roll pie dough. And then just rolled it a bit thinner before starting.
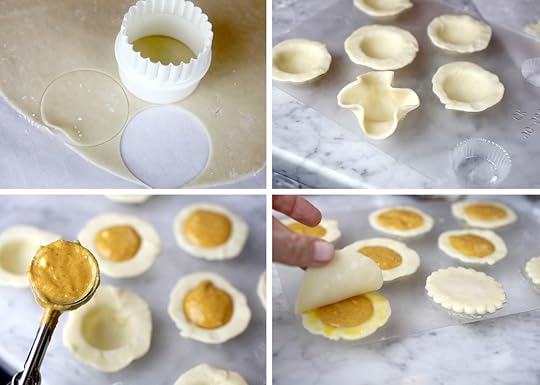
To prepare the pies, you’ll need some kind of mold to form them and a couple of round cutters.
I used this candy mold because it created the perfect size without the pies getting too big after baking. I also thought it would be easier to remove the pies from a flexible plastic mold than a metal pan. The mold cavities are 1-1/2 inches wide and slightly smaller than a mini cupcake baking pan for reference.
Cut out circles of dough with a round cutter about 2 1/2 inches wide. You want it to be big enough so you can press the dough into the mold cavity while still having some of the dough overlap the top of the mold. Gently stretch the pie dough circles if needed.
Fill each cavity with the pumpkin mixture using a 1-1/2 inch cookie scoop and then brush the rim of the overlapped dough with an egg wash and lay another pie circle cut out on top. (again, stretch the dough gently if needed to cover the dough on the candy mold and then press the edges together to seal.
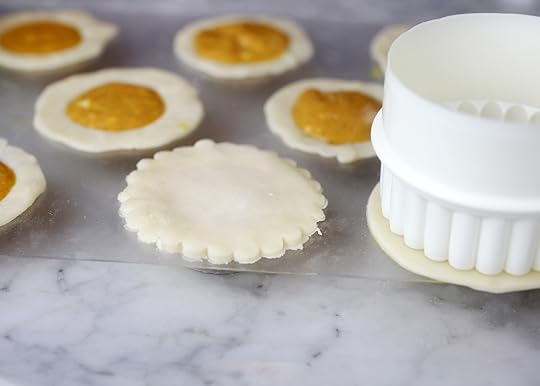
Finish the look using a scalloped cutter and just trim off any excess pie dough. I used one that was slightly smaller than the circle cutter … about 2 inches in diameter.
Here are the double-sided cutters I used. Here’s another one as an alternative and another.
Very, very gently remove the pies from the mold and place, flat side down on a parchment-lined baking sheet. Press the edges together again if necessary to seal them.
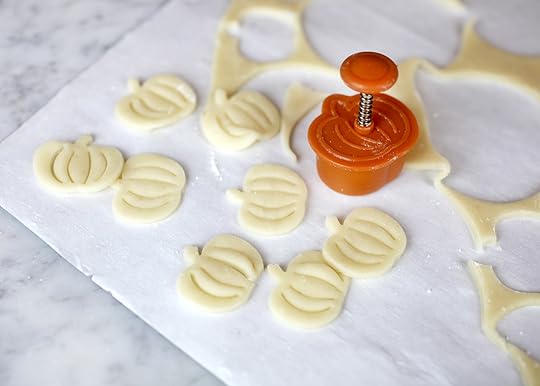
I also had this little pie cutter press, so I used the excess pie dough to cut out some tiny little pumpkins to place on top of the pies. I bought mine a long time ago from Williams-Sonoma, but here is one similar.
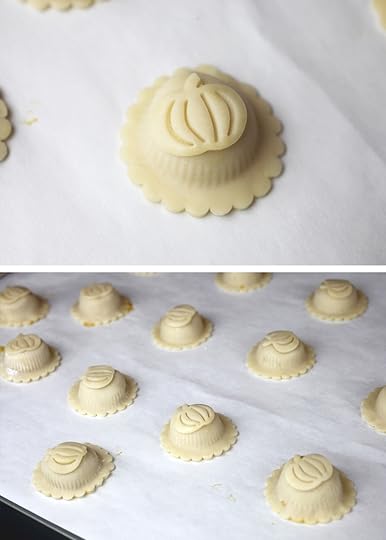
So cute. Use an egg wash again to attach the pumpkin cutout to the pie underneath. Then, brush the entire pie with an egg wash, sprinkle the tops with sugar and they’re ready to bake.
Print Recipe
Yield: 32 mini pies
Mini Pumpkin Pillow Pies
Ingredients:
2 packages refrigerated ready-to roll pie crusts
8 oz. cream cheese, room temperature
1/2 cup sugar
3 tablespoons self-rising flour
1 cup canned pumpkin
3 eggs
1 teaspoon vanilla
1 teaspoon pumpkin pie spice
______
an extra egg or melted butter to brush on the pies and sugar to sprinkle on top
Directions:
Preheat oven to 375 degrees fahrenheit.
Thaw and roll the refrigerated pie dough out on a lightly floured piece of parchment paper a little thinner than it comes out of the package.
Use a cookie cutter to cut 8 2-1/2 inch circles from each pie crust (to press into the candy mold cavities). Use a 2-1/4 inch cutter to cut out 8 more circles (to press on top). Use the scraps to cut out tiny pumpkin shapes with a pie crust cutter.
Mix cream cheese, sugar, self-rising flour, pumpkin, eggs, vanilla and pumpkin pie spice together until thoroughly combined.
Press the larger pie circle cutouts into the mold cavity while pressing the overlapping excess dough down on the top of the mold. Fill mold cavities with pumpkin mixture using a 1-1/2 inch scoop. Brush the overlapping edges with an egg wash and place a smaller pie circle cutout on top. Press the edges together to seal. Use another circle cutter or scalloped cutter that is slightly smaller in size (about 2 inches) to trim off any excess dough. You can gently stretch the pie dough shapes when preparing, if you need them to be larger. (Note: These sizes are all based on the size of the mold I used with 1 1-2 inch mold cavities. If using a different size mold, you would need to adjust the cutout sizes to accommodate.)
Gently remove the pies from the mold and place flat side down on a parchment paper-lined baking sheet. Press the edges again to seal if needed. Use an egg wash to attach pumpkin cutouts to the tops of the pies and then brush the entire pie top with an egg wash or melted butter and sprinkle with sugar.
Bake for 12-15 minutes.
Repeat process with remaining pie crusts and pie mixture.
Cool, eat and enjoy. Then refrigerate any remaining mini pies.
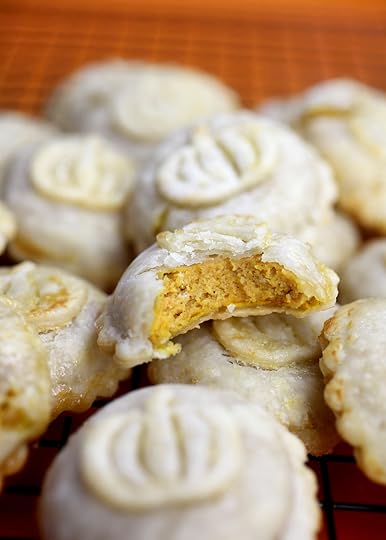
Sink your teeth in and enjoy!

November 11, 2018
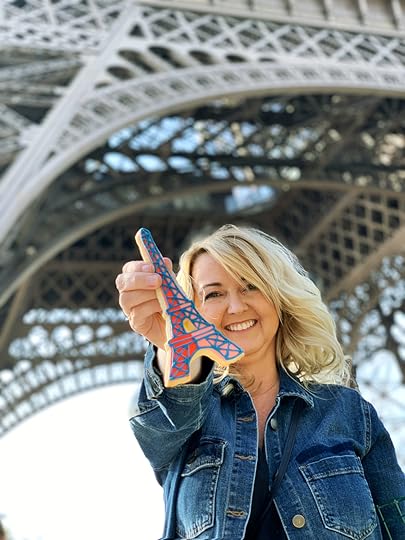
Eiffel Tower Sugar Cookies
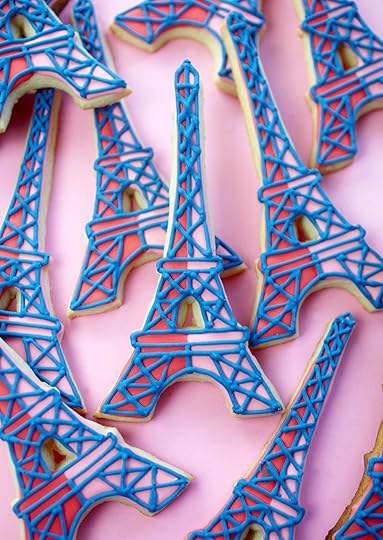
I traveled to Paris a couple of weeks ago for the first time (it was magnifique) and before I left, I made these sweet Eiffel Tower Cookies out of excitement for the trip.
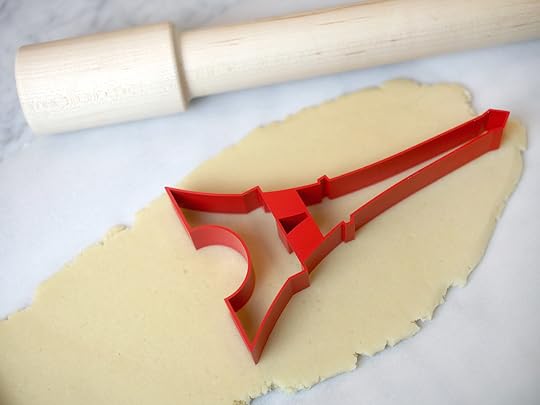
But also because I’ve had this cookie cutter for like at least eight years and never used it before. A trip to Paris seemed like the right reason.
Here’s the sugar cookie and royal icing recipe I love and used for these.
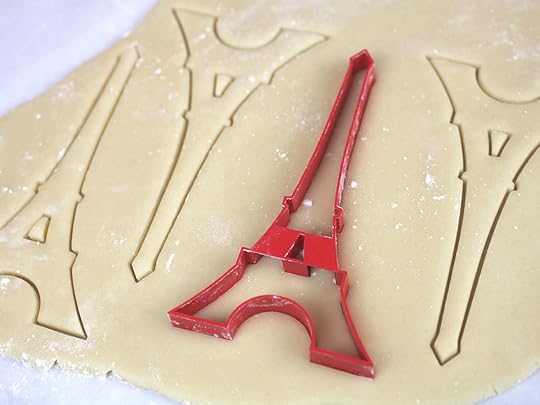
I like that the center of the tower was cut out as opposed to be a solid shaped cookie.
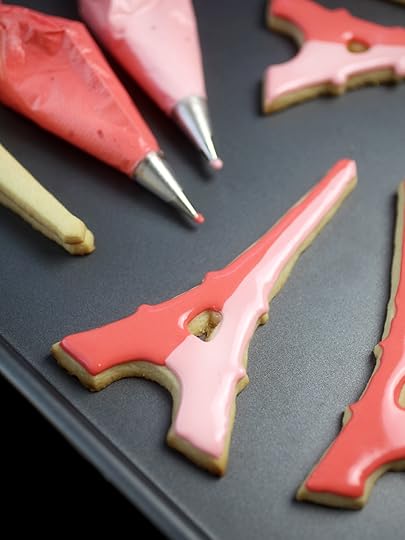
To decorate, I piped half the tower in royal icing that I tinted pink with just a couple of dots of red icing color. The other half I added more icing color to deepen the shade.
Pipe one color on the cookie and then the second color immediately and the colors will meet together in the middle with a seamless look. I used more of a flood consistency that was still thick enough to pipe with and fill the center without the icing running. You can always add a tiny bit of water to thin your icing or if needed, add a little powdered sugar to thicken it back up a bit.
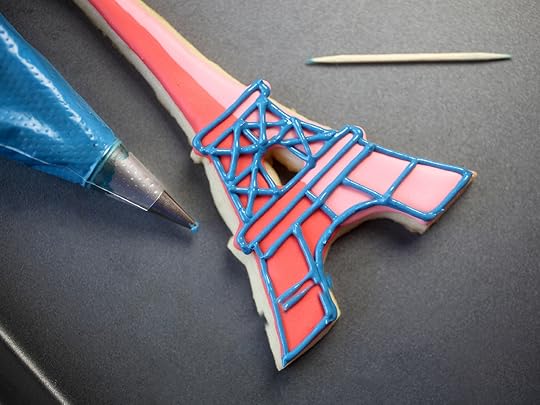
I tinted royal icing blue in a stiffer consistency for piping and outlining the lines on the tower. I really like the two-toned look for the base of the cookies. It gives it a little more dimension and makes those blue piped lines pop.
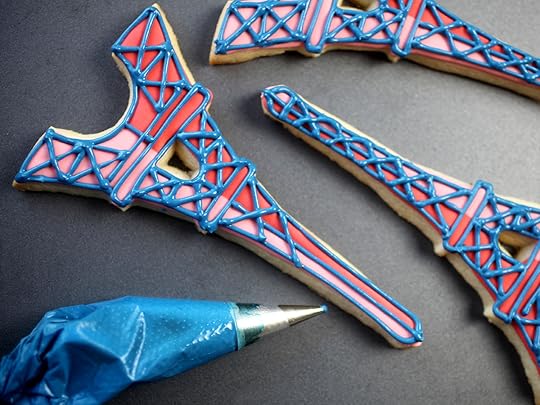
Start piping in sections with the horizontal lines first. Then the exterior lines and pipe the criss-cross lines last. I ended up piping the middle section, then the bottom section and then the top section of the tower last.
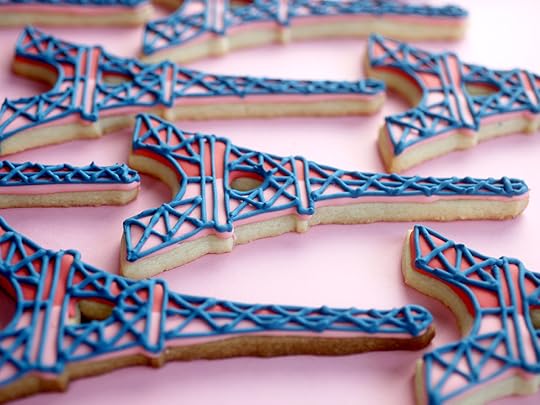
I’m still trying to improve my piping skills, but I’m pretty happy with how they turned out. I think the wonkiness of the lines actually gets downplayed a little because of how many lines are actually piped on each cookie.

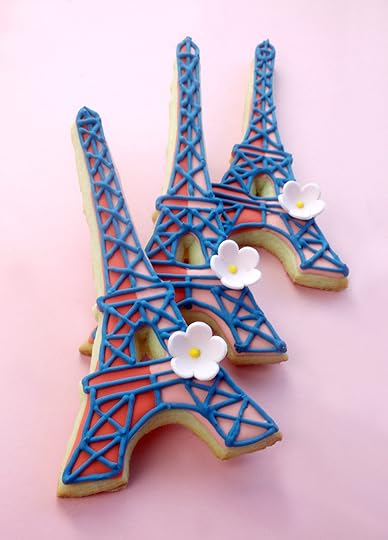
And then I added a little sugar flower detail to pretty them up a bit more.


Hope you enjoy these cookies and if you want to see pics from my trip to Paris and some of the amazing parisian treats, too – then check out the saved stories on my Instagram account.

Bakerella's Blog

- Bakerella's profile
- 9 followers

