
Bakerella's Blog, page 5
July 19, 2020
Lemonade Cupcakes
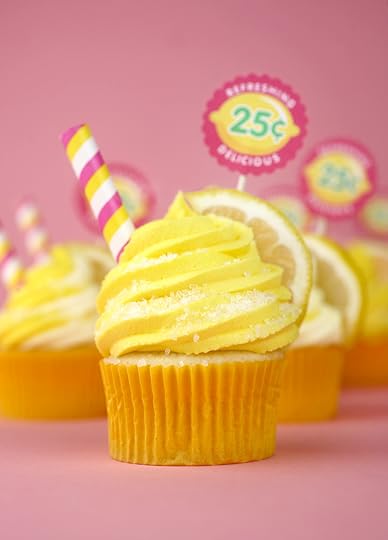
Take a big bite of sunshine! These lemon cupcakes are a fun take on your favorite summertime drink.
And they are super easy to make and decorate … which I love.
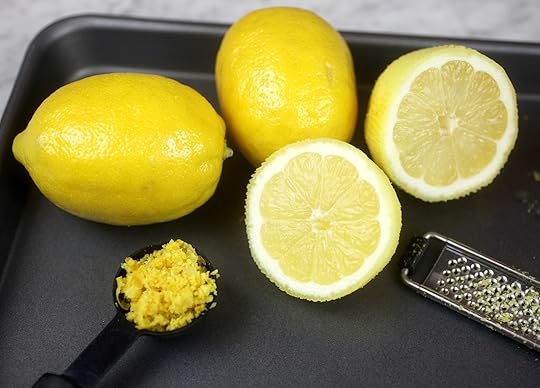
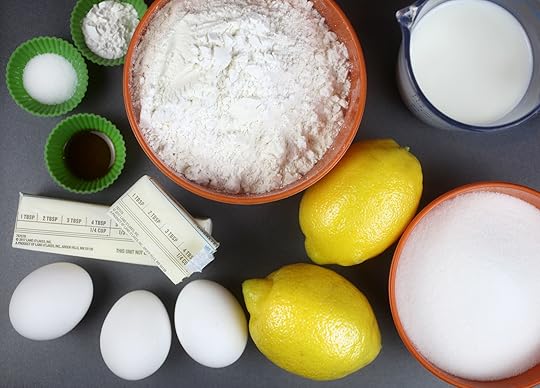
Obviously, lemons are the star of this sweet treat. A combination of lemon juice and lemon zest add all the flavor you need to feel like you’re enjoying a tangy drink … just a little fluffy instead of fluid. One large lemon = up to 4 tablespoons lemon juice and 1 tablespoon lemon zest.
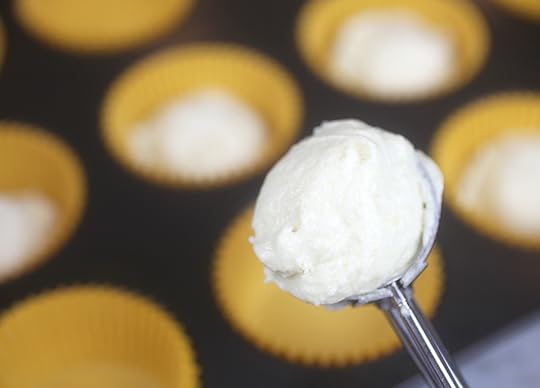
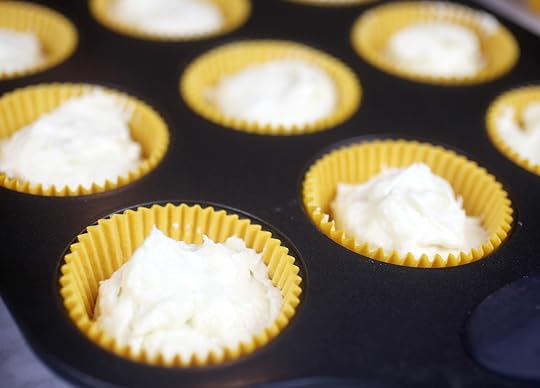
Scoop the batter evenly into 18 baking cups. I recommend going with yellow cupcake liners to really finish off the look. But a light pink color would look good, too.
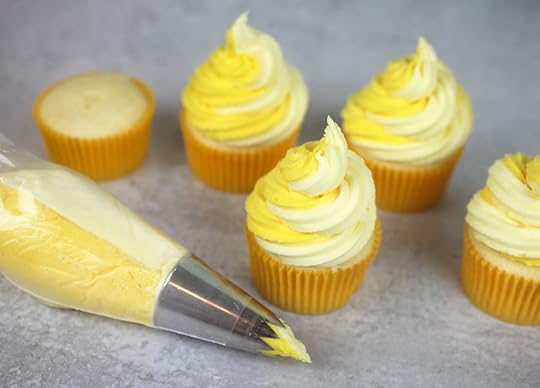
Once the cupcakes are baked and cool, pipe yellow-tinted buttercream frosting right on top. You can also create a two tone look with a light and darker shade of yellow. Fill two separate decorating bags with two shades of frosting. Snip off the tips. Then place the two icing bags into one larger icing bag fitted with your favorite tip. I used an Ateco #827 tip to pipe tall swirls of buttercream.
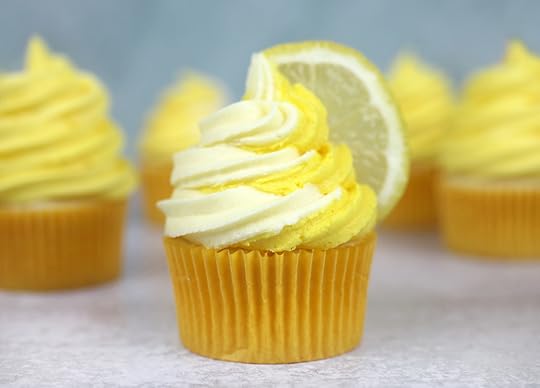
Place a thin slice of lemon right into the side of your buttercream frosting.
You could stop right here and have cute little lemonade cupcakes. But let’s make them even cuter.
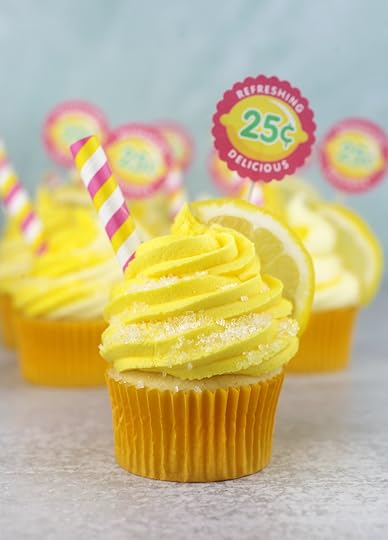
Yes! I like it. Lemons, striped straws, and adorable little price tags for effect. But you could totally change the price if you wanted to actually sell your cupcakes.


July 5, 2020
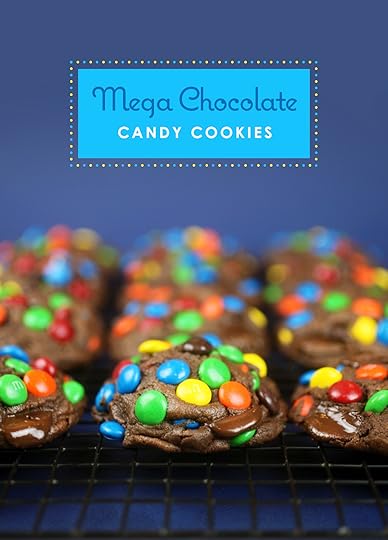
Mega Chocolate Candy Cookies
As an Amazon Associate I earn commissions from qualifying purchases made through links in this post.
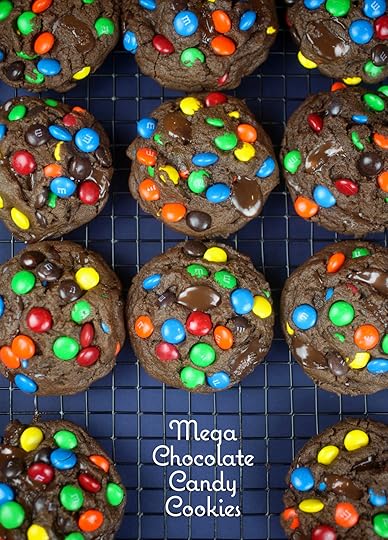
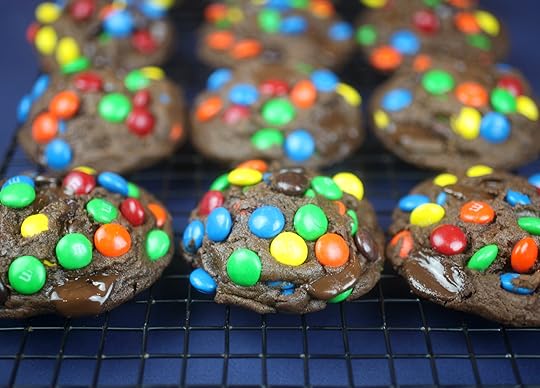
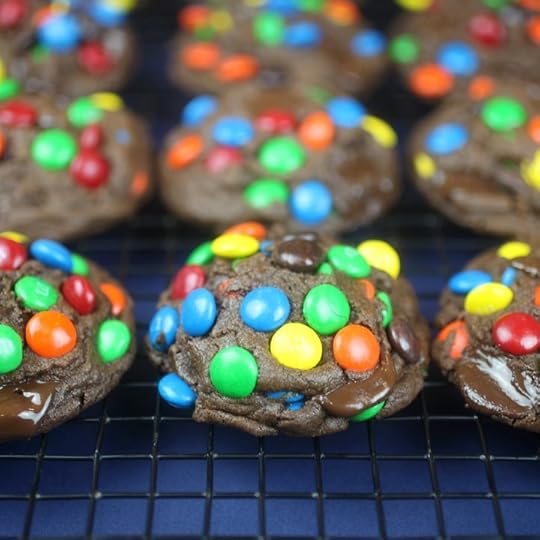
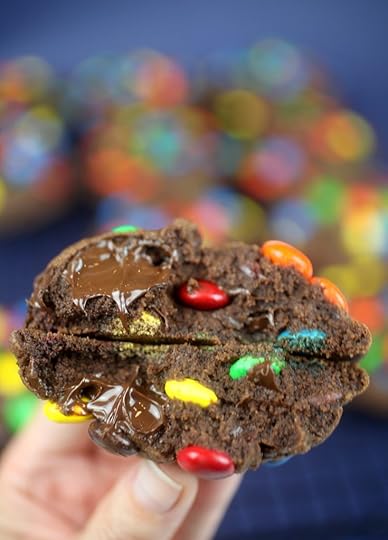
These are the kind of cookies that just make you smile when you see them. Simple and sweet, full of chocolate, and stuffed with so many bright and happy candy-colored gems. They’ll make you want to take a great big satisfying bite.
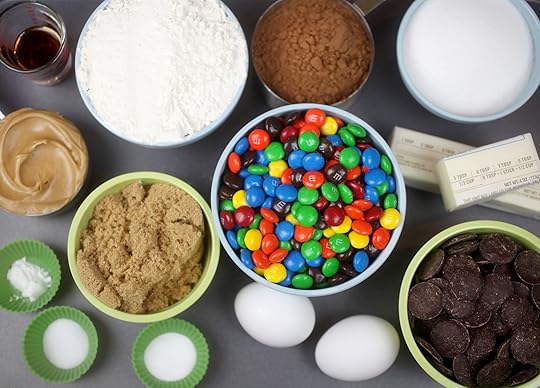
Most of the ingredients you need are probably in your pantry right now if you bake often. I did opt for some Guittard 60% semisweet chocolate wafers instead of chocolate morsels, though. Oh and there’s a little peanut butter mixed in for even more yum.
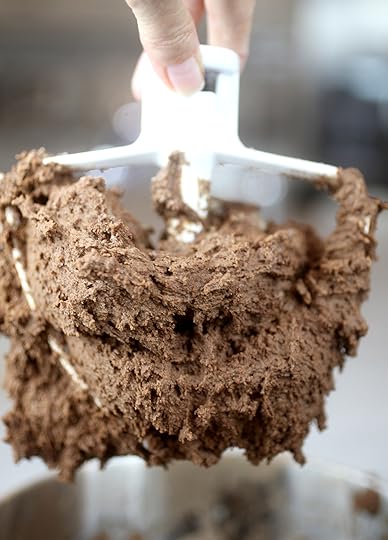
Look at that cookie dough batter. So thick. So dreamy.
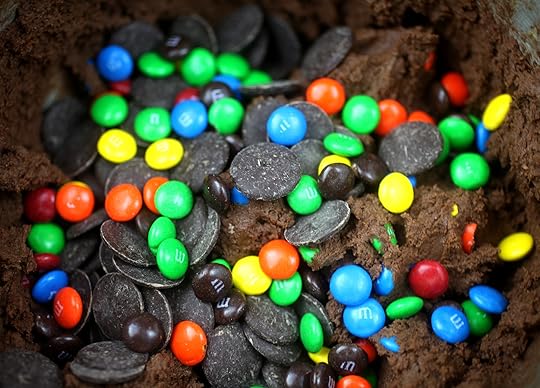
Add the M&M’s and chocolate wafers to the dough and mix it all together with a large spoon.
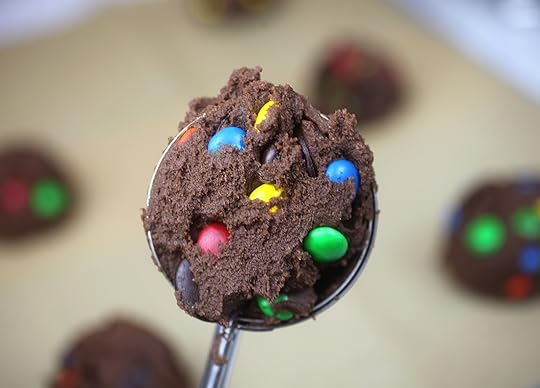
Then use a large 2-1/2 inch scoop for jumbo-sized cookies.
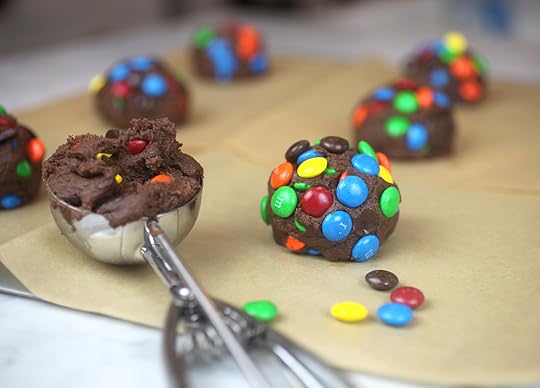
Place the giant cookie dough balls a few inches apart on a parchment paper covered baking sheet. You’ll want to press more M&M’s candies on top so when they bake, the exterior is dotted with lots of color.
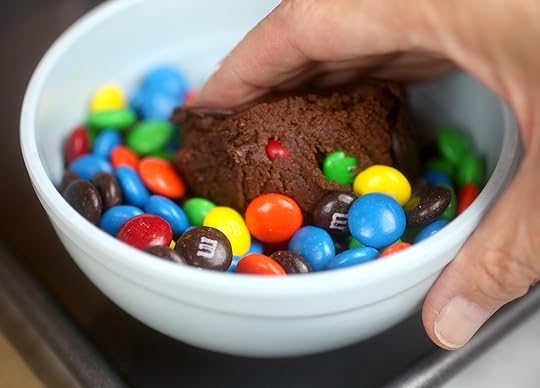
You can also place the candies in a bowl and gently press each scoop of dough into the bowl for candies to attach. Just make sure they are pressed in enough to stay secure when baking.
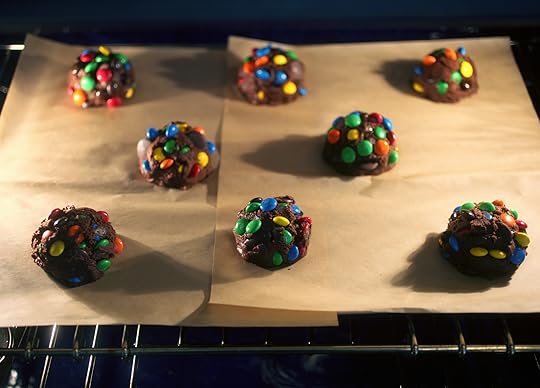
These cookies are big, so place them a few inches apart on a baking sheet.
Bake these beauties for about 9-11 minutes. If they are staying too domed when baking, take them out at about 9 minutes, drop the baking sheet on the counter 1-2 times and then place back in the oven for another minute or so.

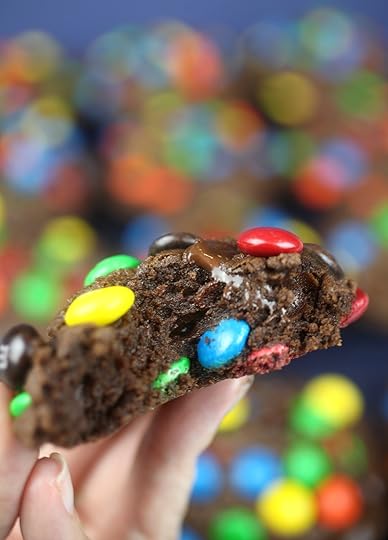
And of course you have to eat one while they are still warm right out of the oven. It’s a rule. Place on a cooling rack to cool completely… if you can wait that long.
But you probably won’t be able to stop there.
Have another bite, I won’t tell.

Okay, maybe one more.
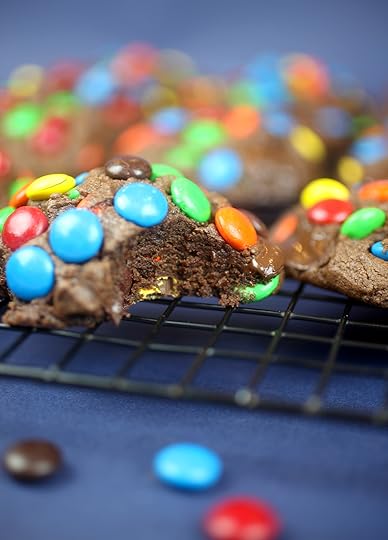
These are so good and kind of remind me of biting into a brownie.
Print
Yield: 14 jumbo cookies
Mega Chocolate Candy Cookies
Prep Time
15 minutes
Cook Time
9 minutes
Total Time
24 minutes
Super chocolaty cookies – with colorful M&M's candies, semisweet chocolate wafers and creamy peanut butter baked inside.
Ingredients
1-1/2 cups all purpose flour
3/4 cup natural unsweetened cocoa
1/2 teaspoon baking powder
3/4 teaspoon baking soda
1/2 teaspoon salt
1-1/2 sticks (3/4 cup) unsalted butter, room temperature
1/2 cup peanut butter
3/4 cup granulated sugar
2/3 cup light brown sugar, packed
2 eggs
2 teaspoons vanilla
2 cups M&M’s candies
1 cup chocolate wafers (I used Guittard 66% cacao semisweet)
Instructions
Line a large baking sheet with parchment paper and preheat your oven to 350 degrees fahrenheit.In a medium bowl, sift flour, cocoa, baking powder, baking soda and salt together using a wire whisk. Set aside.Using a mixer cream butter, peanut butter and both sugars for about two minutes until light and fluffy.Add eggs, one at a time and mix until combined. Add the vanilla.Slowly add in the flour mixture and mix until just combined. Scrape down the sides of the bowl to incorporate completely.Add the chocolate wafers and about 2/3 of the M&M’s candies to the batter. Stir until incorporated.Use a 2-1/2 inch scoop to place the dough on the prepared baking sheet about 3 inches apart. You’ll want to bake the cookies in two batches.Use the remaining 1/3 M&M’s candies to place on the top of each cookie dough ball for pretty tops.Bake for about 9-11 minutes. If it looks like your cookies are retaining too much of a domed shape, you can remove them at about 9 minutes and slam the baking sheet on the counter to flatten them slightly. Then just place them back in the oven for another minute. Don’t over bake.
© Bakerella
Category: Cookies
Enjoy! Hope your day is as happy as these cookies.

June 21, 2020
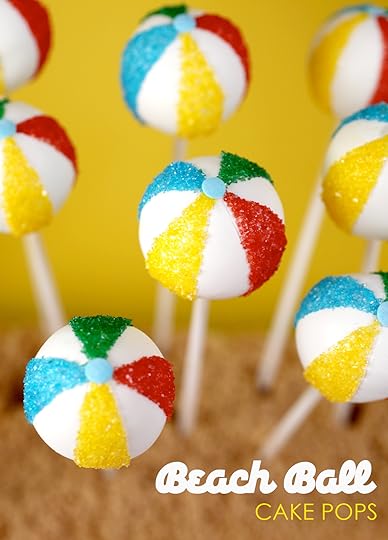
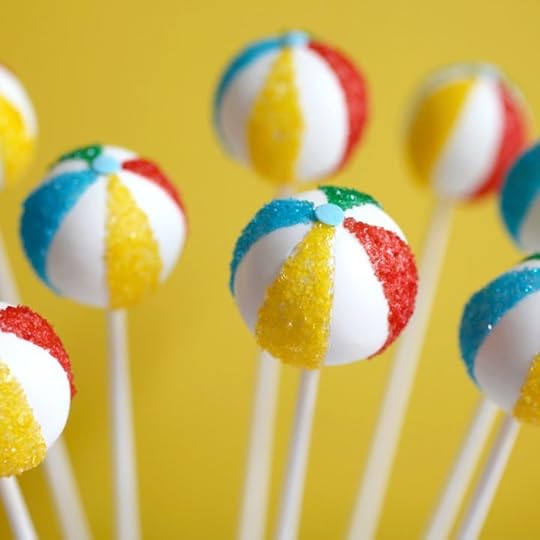
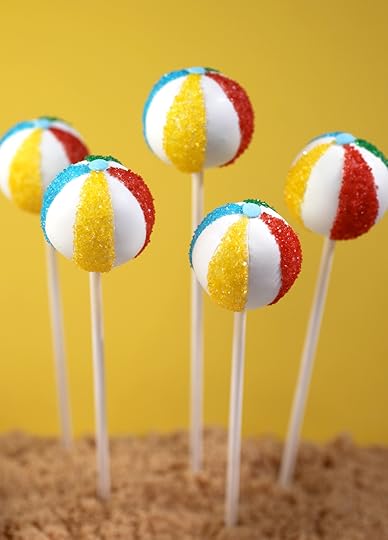
Beach Ball Cake Pops
Summer is officially here and I hope you guys will have the chance to do something fun, fun, fun!
These beach ball cake pops are a great way to get in the right mindset. I made them a while ago for Target’s blog (A Bullseye View) at the time, but it appears the instructions have since been removed in their site reorganization. So I thought I would update this post I made back then to include the complete how-to instructions. Now they‘ll be handy here if you want to give these cute pops a go.
They are so sweet and simple, and have such strong and graphic visual appeal. They just sing summer. And sunshine. And they make me smile. And they make me wish I was at the pool right now. P.S., if you love summer, you might like these Sunshine Cake Pops, too.
Now, let’s make some beach balls. The full instructions are at the end of this post, but first, here’s a photo play-by-play.
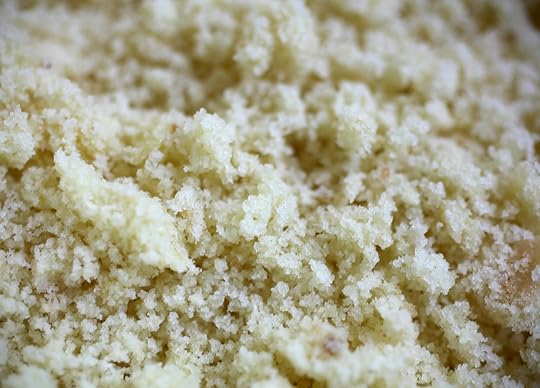
To make cake pops, start with crumbled cake and then mix it with frosting. Easy and so tasty.
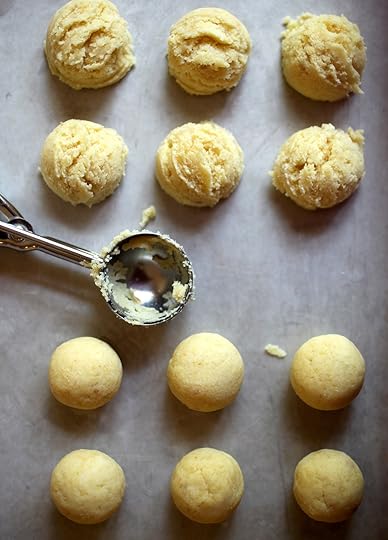
The texture will be something like this. You can scoop amounts of the the cake and frosting mixture for even size balls.
And then just roll them by hand. If your cake crumbs are fine, you’ll get rounder, smoother balls which will make for smoother pops when dipped.
This is a good consistency of cake to frosting. The mixture should be moist but shouldn’t feel wet. Once they are scooped you can easily roll them into a smooth ball.

Speaking of consistency, you want your candy coating to be fluid and smooth so that it pours off the spoon instead of plopping. : ) I know. Nice visual, but this is what you want. Not too thick and perfect for dipping.

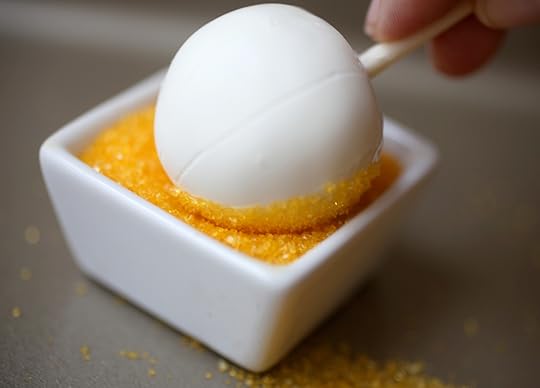
Once rolled, chill them and then dip them in white candy coating.
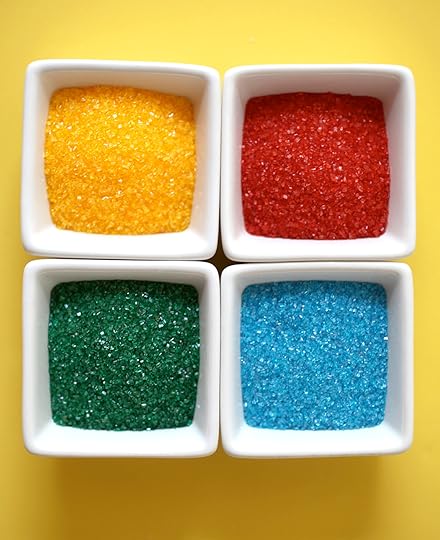
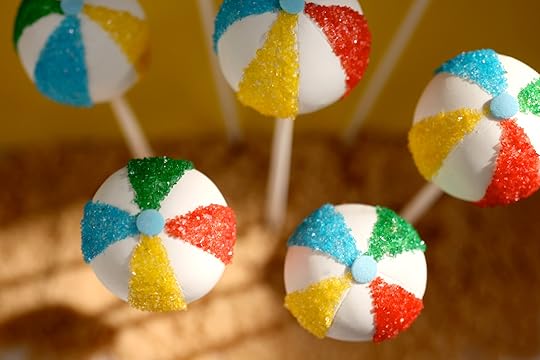
To decorate you’ll need some colorful sanding sugar in bright happy colors.
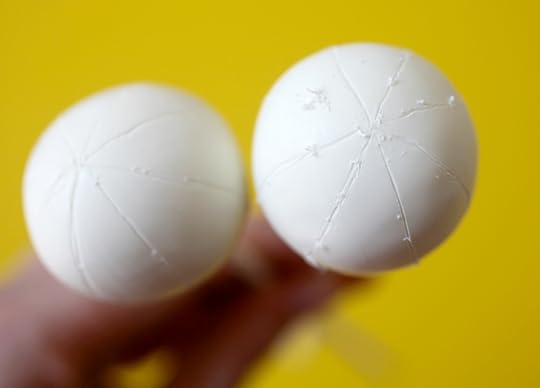
A helpful way to divide the pops into eight equal sections is to use a toothpick to draw or “etch” lines right on the surface.
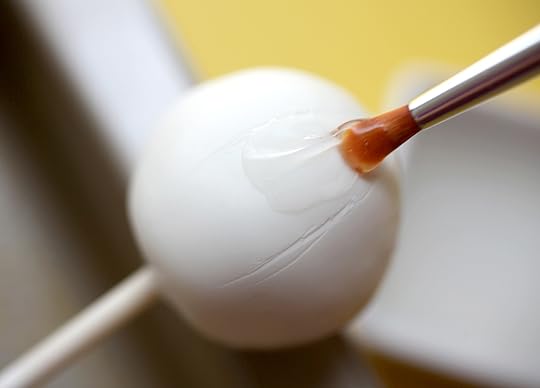
Use a small brush to apply a thin layer of corn syrup to one of the sections.
Then dip that section in one of the sanding sugar colors.
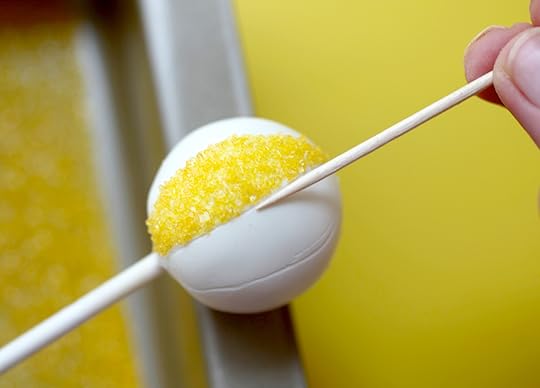
Use a toothpick to clean up any edges for a more finished look.
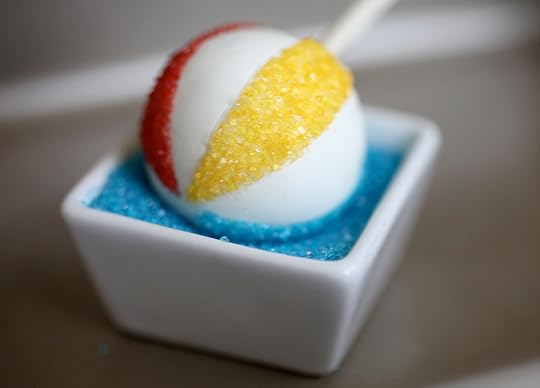
Repeat, with each color of sanding sugar.
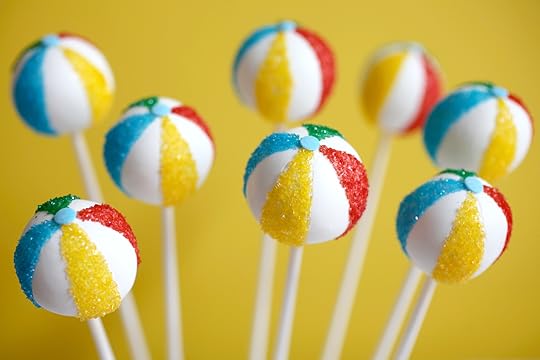
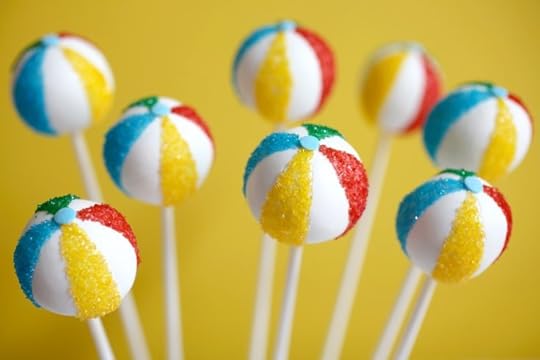
Add a blue confetti sprinkle to the top and voila – Beach Balls!
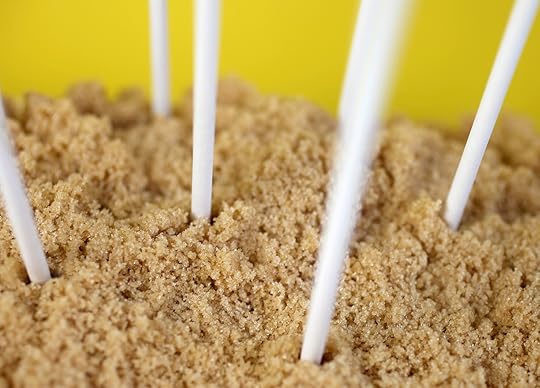
You can even display them in a dish filled with light brown sugar or cookie crumbs for sand.
So super cute for a party presentation.
Print
Yield: 36 Cake Pops
Beach Ball Cake Pops
Prep Time
1 hour
Cook Time
45 minutes
Additional Time
2 hours
Total Time
3 hours 45 minutes
Have a ball this summer and enjoy the perfect bite-size treat.
Ingredients
1 box cake mix (bake as directed)
1 18 oz can of frosting
Wax paper
Baking sheet
White candy wafers
Lollipop sticks
Heatproof plastic bowl
Toothpicks
Corn syrup
Small brush
Yellow, red, green and blue sanding sugar
Blue confetti sprinkles
Styrofoam block
Instructions
Bake cake as directed on box for a 9 X 13 cake. Cool completely and crumble into a large bowl.Mix 1/2 to 3/4 of a can of frosting into the cake crumbs using a large spoon. You won’t need the rest.Roll mixture into 1.25 inch balls and place on a wax paper covered baking sheet. You can also use an ice cream scoop and then roll the balls. Let rest for about 30 minutes.Place cake balls in the freezer for about 15 minutes so they will firm up. Then transfer them to the refrigerator to remain chilled and avoid freezing.Melt white candy wafers in a heatproof plastic bowl so that the coating is at least three to four inches deep for easier dipping. Melt in the microwave in 30-second intervals on low, stirring in between. Repeat until melted and smooth.Dip the tip of a lollipop stick into the melted white candy coating and insert stick into the cake ball. Dip the entire cake pop into the bowl of melted candy coating. Dip and remove in one motion without stirring. Make sure the entire cake ball is covered. If your coating is too thick, you can add a little vegetable oil to help thin it and make it easier to work with.Remove and gently tap to allow any excess coating to fall off the pop and back in the bowl. Place in a Styrofoam block to dry.When dry, use a toothpick to draw or lightly etch two perpendicular lines starting at the top of the cake pop. Draw the lines straight down the sides. Then draw two more perpendicular lines, so that you have eight equal sections. Brush off any white chocolate shavings.Use a small kitchen brush to apply a thin layer of corn syrup to one section of the cake pop and dip in yellow sanding sugar. Repeat so all of the pops have yellow sections. Use a toothpick to clean up any edges and brush off any sanding sugar that gets on the exposed white sections of the pop. Repeat with the red, green and blue sections of the beach ball.Use a toothpick to dot white candy coating on top of the pop and place a blue confetti sprinkle to finish off the Beach Ball look.Let dry completely and enjoy!
© Bakerella
Category: Cake Pops
What are you doing fun this summer? I’d love to know what you guys are looking forward to in your summer plans because I haven’t done anything fun yet. I’m longing for the pool and rest and adventure and rest and rest. What to do and where to go?
Hope you have a ball this summer!
A version of this post was originally posted on July 9, 2012.

June 9, 2020
Cinnamon Roll Pound Cake
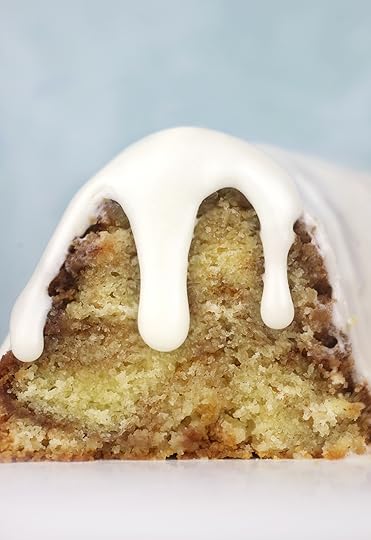
Excuse me while I stuff my face with cake. I baked this beauty last weekend and I’ve been enjoying it every day since. Oh my… every time I take a bite I say “Dang that’s so good!!” And then I take another bite. And another. I should have just left it in the Bundt pan like a bowl and used a fork. Yum-mmm!
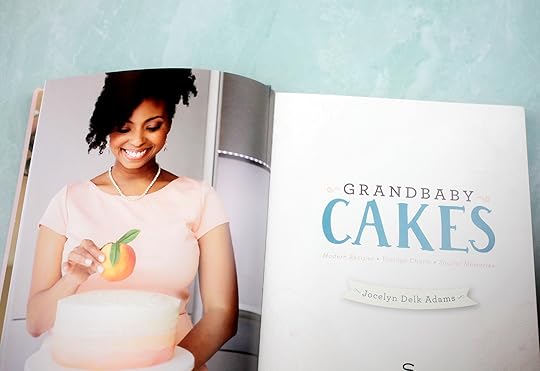
The recipe is from my blogging friend Jocelyn’s book, Grandbaby Cakes and it is definitely a keeper.
If you don’t know Jocelyn already, check her blog and instagram. You may have also already seen her on your TV. She makes appearances on Good Morning America, The Today Show and more … sharing recipes and joy along the way.
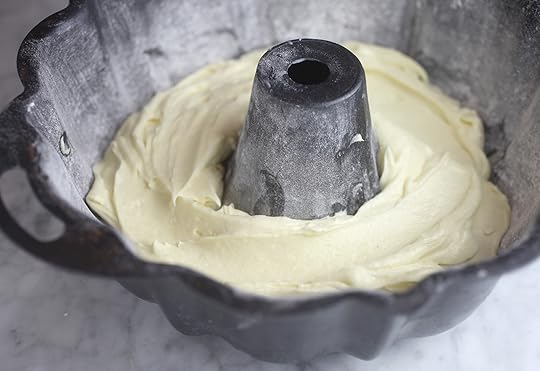
To make her cake, you’ll mix up the batter (recipe below) and layer it into a 12-cup Bundt cake pan.
First layer: cake batter
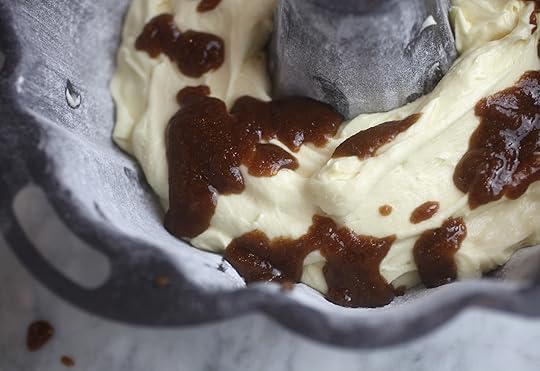
Second layer: dreamy, buttery, cinnamon-y goodness.
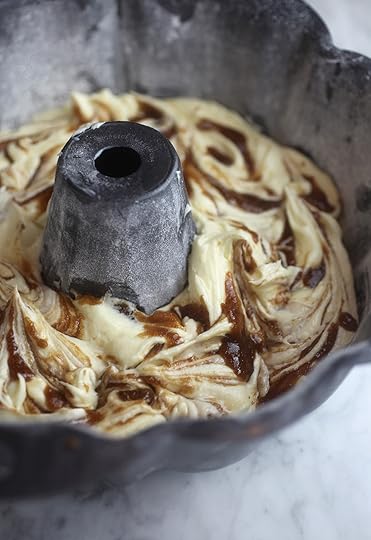
Swirl it into the cake batter.
Third layer: more cake batter
Fourth layer: add more cinnamon goodness to swirl.
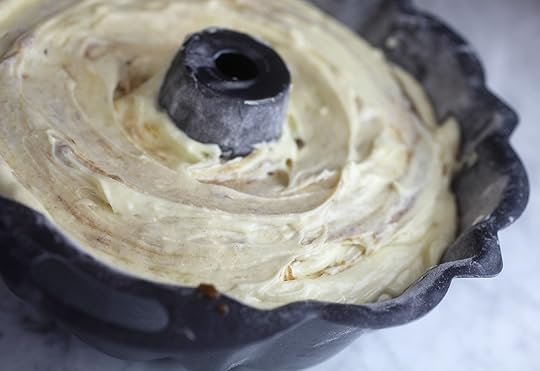
And finish off the last layer with the remaining cake batter.
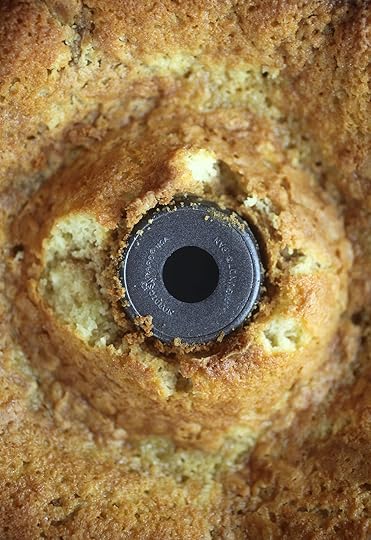
Bake it up into a big, beautiful, Bundt.
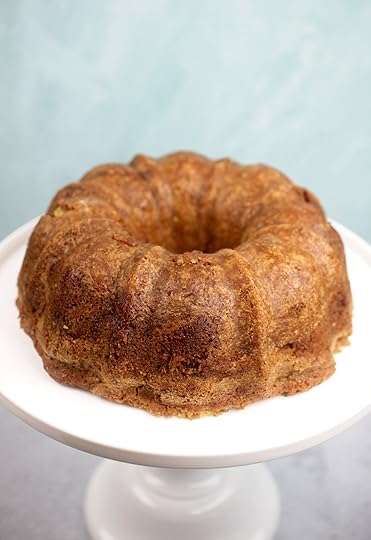
I always get anxious when removing a Bundt cake from it’s pan, but this one came out like a dream.
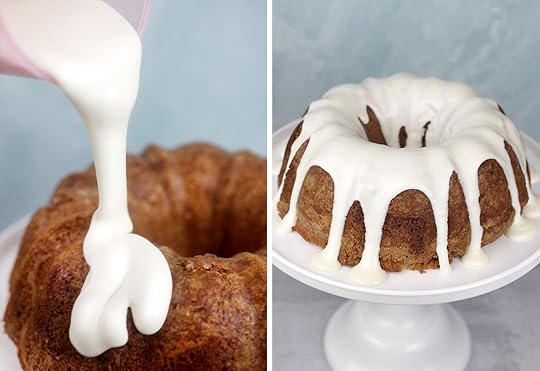
Once it’s cooled, pour a gorgeous cream cheese icing on top of the cake and let the icing linger lovingly down the sides.

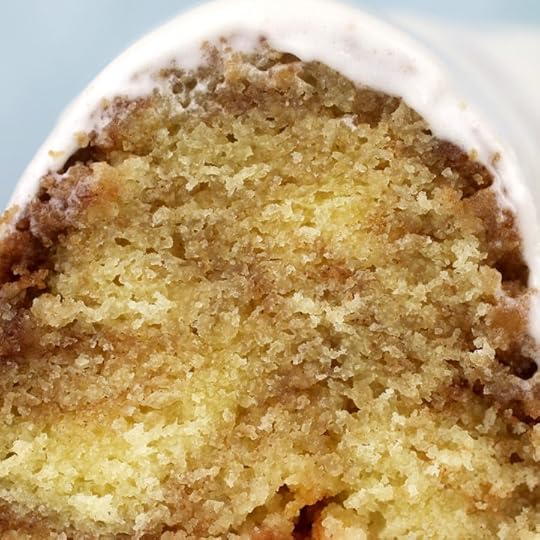
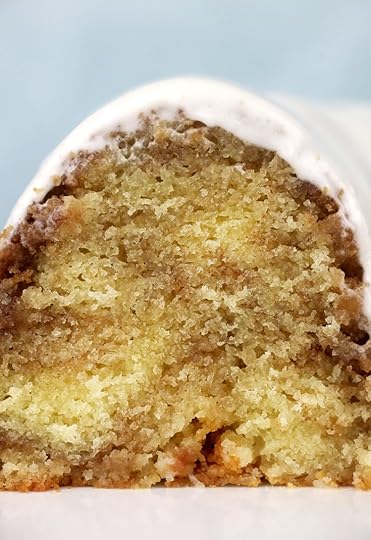
Then slice it up to see all those whispers of cinnamon waiting for you inside.
This cake is so delicious, you’ll love every bite.
Have you preheated your oven yet? I hope so because here’s the recipe.
Print
Yield: One 12-cup Bundt Cake
Grandbaby Cake's Cinnamon Roll Pound Cake
Prep Time
20 minutes
Cook Time
1 hour 15 minutes
Additional Time
10 minutes
Total Time
1 hour 45 minutes
A delicious, moist pound cake swirled with cinnamon and covered with cream cheese icing.
Ingredients
CAKE
1-1/2 cups (3 sticks) unsalted butter, room temperature
2-1/2 cups granulated sugar
6 large eggs, room temperature
3 cups sifted cake flour
1 teaspoon salt
1/2 teaspoon baking soda
1 cup sour cream, room temperature
2 tablespoons vegetable oil
1 tablespoon vanilla extract
CINNAMON SWIRL
1/3 cup (5 tablespoons, plus 1 teaspoon) unsalted butter, melted
2/3 cup packed light brown sugar
1 tablespoon all-purpose flour
1 1/2 teaspoons ground cinnamon
1 teaspoon vanilla extract
ICING
2 ounces cream cheese, room temperature
2 tablespoons unsalted butter, room temperature
1 1/2 cups confectioners’ sugar, sifted
1/4 cup milk
1 teaspoon vanilla extract
Instructions
For the cakePreheat oven to 325 degrees fahrenheit. Liberally prepare a 12-cup Bundt pan with the nonstick method of your choice. I greased with shortening and dusted with flour to coat.In the bowl of your stand mixer, fitted with the paddle attachment, beat the butter for 1 minute on high speed. Slowly add the granulated sugar. Cream together for an additional 5 minutes, until very pale and fluffy. Add the eggs one at a time, combining well after each addition and scraping down the sides and bottom of the bowl as needed.Turn your mixer down to its lowest speed and slowly add the flour in two batches. Add the salt and baking soda. Be careful not to overbeat. Add the sour cream, oil and vanilla. Scrape down the sides and bottom of the bowl and mix the batter until just combined. Be careful not to overmix. Set batter aside.For the Cinnamon SwirlIn a small bowl, whisk together all the ingredients until well combined. Set aside.BakePour 1/3 of the batter into the prepared Bundt pan.Drizzle 1/2 of the cinnamon swirl over the batter. Using a butter knife or skewer, swivel the mixture though the cake batter, creating a flourish pattern.Repeat with another third of the cake batter and rest of the cinnamon swirl. Top with the remaining batter.Bake for 75-85 minutes, or until a toothpick inserted in the center comes out mostly clean.Let the cake cool in the pan on a wire rack for 10 minutes, then carefully invert onto a serving plate. Let cool to room temperature. Lightly cover the cake with foil or plastic wrap so it does not dry out.For the icingClean your stand mixer and paddle attachment. Beat the cream cheese and butter for 2 minutes on medium-high speed.Reduce mixer speed and carefully add the confectioners’ sugar in two batches, scraping down the sides and bottom of the bowl as needed. Once the sugar is fully incorporated, turn the mixer back up to medium-high speed. Add the milk and vanilla and beat until the icing is smooth and pourable. (note: to make thicker, add more confectioners’ sugar and to make thinner, add more milk.)Drizzle the icing over the cooled pound cake. Serve at room temperature.
© Bakerella
Category: Cakes
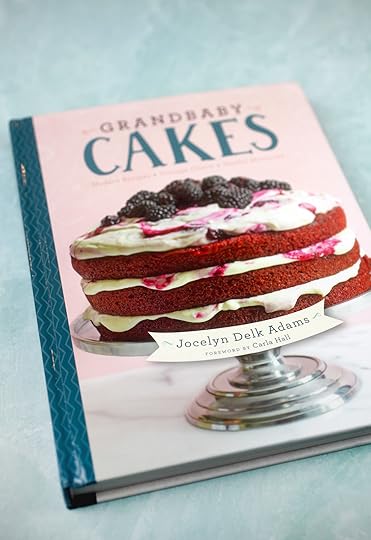
You can order Jocelyn’s book from her publisher OR from amazon when it is back in stock.
Here’s a peek inside for all my cake-loving friends.
And if you’re a fan of fruit, I think you’ll love this book. Jocelyn has many recipes featuring strawberry, lemon, peach, raspberry, pineapple, lemon and more in her cakes.

… and then there’s this Mississippi Mud cake!!!!!!
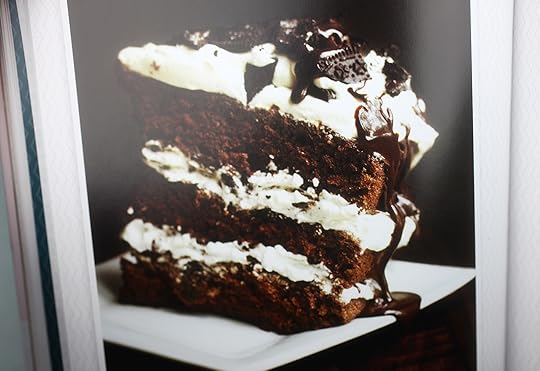
You guys know me, so you know I would totally want to make this one first, unfortunately I did not have any Kahlua on hand or I would have. I’ll just have to enjoy it another day.
In the meantime, I have more cinnamon roll cake to eat… and ENJOY!

May 25, 2020
Cute Cookie Tees
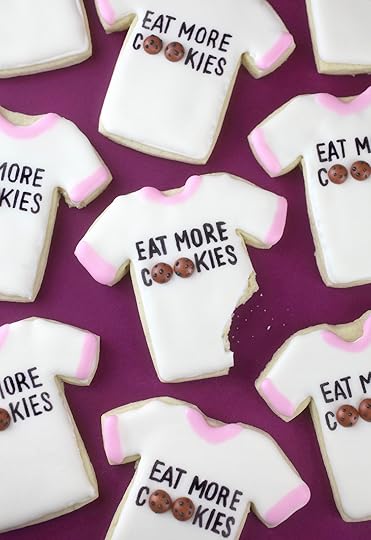
These sugar cookies say it all! Plus they’re super cu-tees ; ) … and surprisingly easy to decorate, even if your handwriting isn’t the best. Keep reading and I’ll show you a helpful little trick.
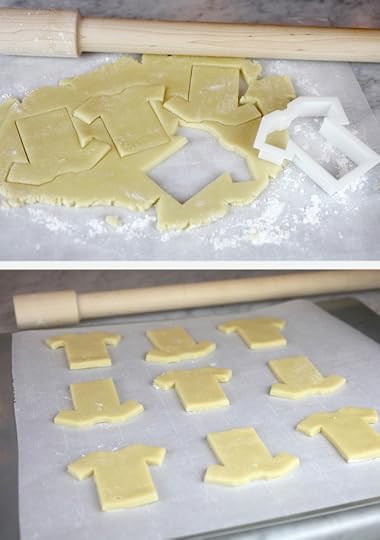
But before we decorate, we’re going to need some sugar cookies.
Use the sugar cookie and royal icing recipe on this post and the template below to use for the shirt cookie cutter.
If you buy a shirt cutter, you can print the template out at different percentages to match. I don’t remember where I bought mine, but here’s some other shirt cutters.

Sugar cookies are like little blank canvases. You can have so much fun decorating them with endless possibilities. I don’t know how I ended up on this design, but it was probably after seeing so many “eat more cake” phrases on things. So why not put an eat more cookies phrase … on a cookie. Feels right! Tastes sweeter.
When your cookies are baked, you’re ready to decorate with royal icing.
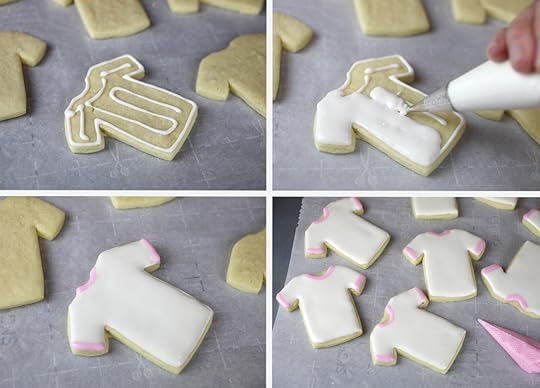
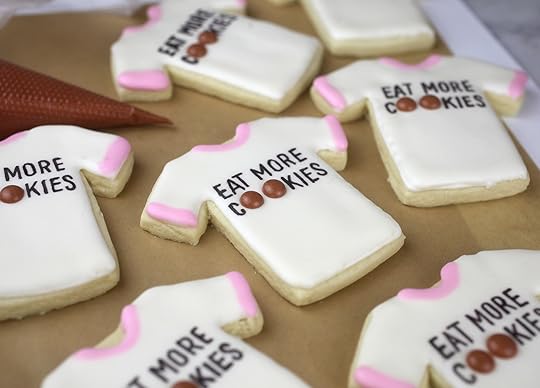
For a ringer style tee like these, you’ll need three colors of royal icing. I left almost all of the royal icing white and then just tinted a very small amount of the icing a light pink for the shirt detailing and another small amount brown for the cookies.
Fit one decorator bag with a number 2 Wilton tip and fill with white icing.
Fill two more bags with the light pink and brown tinted icing. Snip off the very end of the pink so you have a tiny opening. Save and reserve the brown icing for the next day or at least several hours later.
Pipe and outline the shirt with white icing. I used the same consistency for both … fluid enough to fill and stiff enough to hold the outline. Immediately after the shirt is covered in white icing, go ahead and pipe the pink details on sleeve and collar right on top of the white. The two colors will settle together if both icings are still wet and similar consistencies.
Let them dry completely before adding any phrases. I let them dry overnight to be sure and left my brown icing saved in an airtight container.
For the sweet sayings, I had to come up with a way to guide my writing, because left to my own devices, my sayings would have looked way way too sloppy and lopsided.
You can use the template below for the shirt shape and the sayings:
Eat More Cookies T-shirt Template
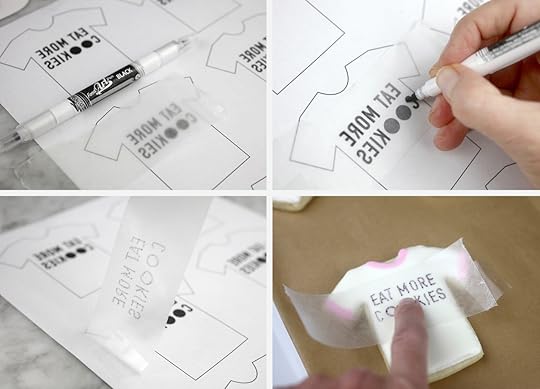
Cut out small strips of wax paper and tape one side down over the template.
Use this black edible-ink writing pen and trace over the letters.
Remove the wax paper, turn it over and carefully press in place on the cookie without moving.
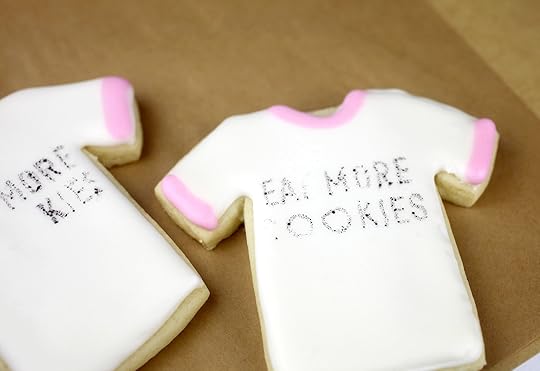
When you lift off the wax paper, you’ll be left with a light impression of the ink on the cookie.
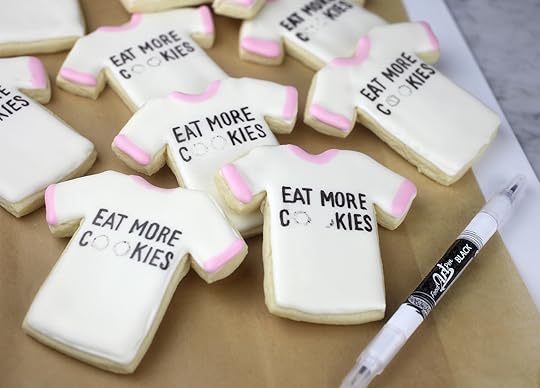
Then use the pen to write directly on the cookie, tracing over the letters. You can leave the spaces for the tiny cookies alone.

But what about the cookies?!?
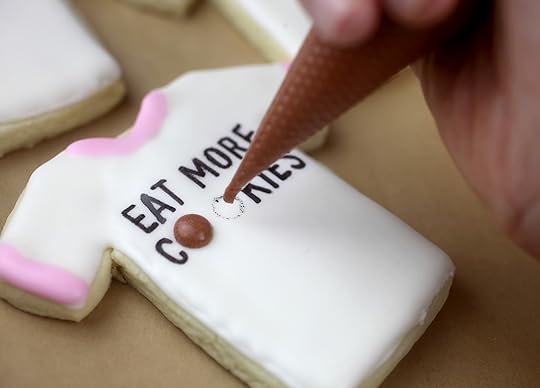
Use the reserved brown tinted icing to pipe dots in position for the cookies.
Note: I wish I had made my brown a lighter shade.
Let the cookies (on the cookies) dry.
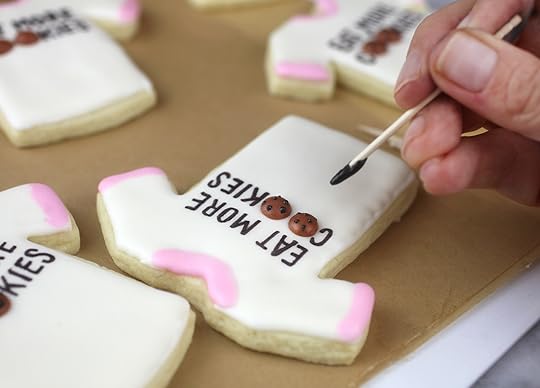
Tint the remaining brown royal icing a darker shade of brown or black. Use a toothpick to dot tiny chips on top of the cookies.
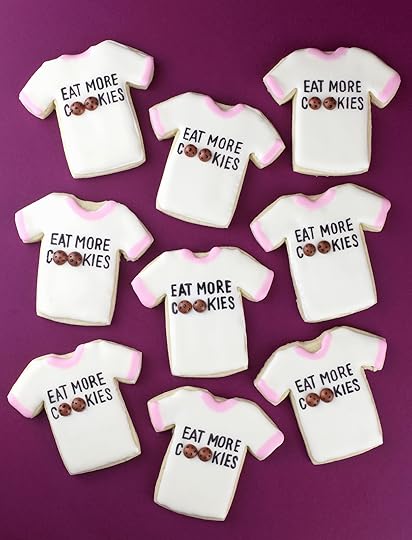
Hope you eat more cookies and enjoy!

May 4, 2020
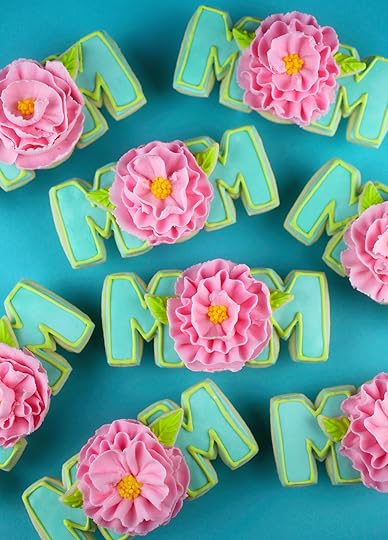
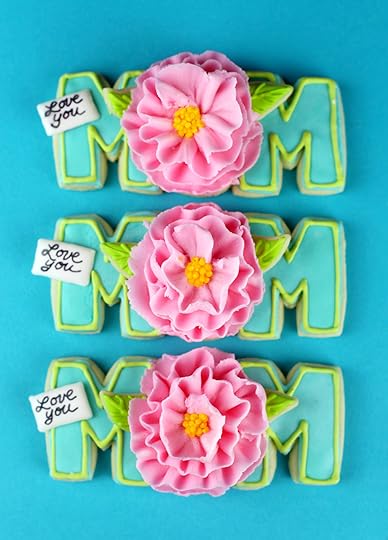
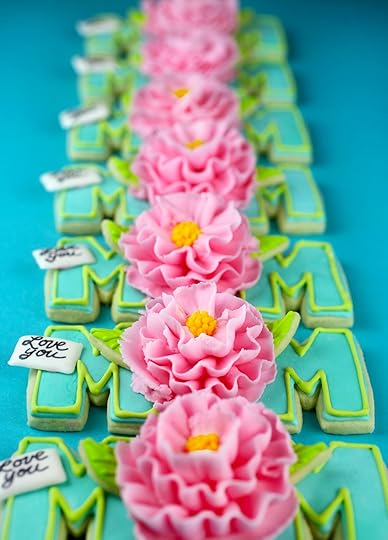
Mother’s Day Cookie Cards
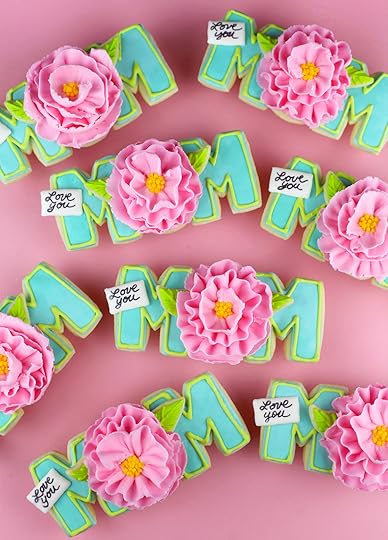
Cookies made for Mom! These pretties serve up the best of both worlds when it comes to decorated sugar cookies… letters layered in royal icing and flowers made of blossoming buttercream. I am thrilled with how they turned out and I think my mom will love them, too.
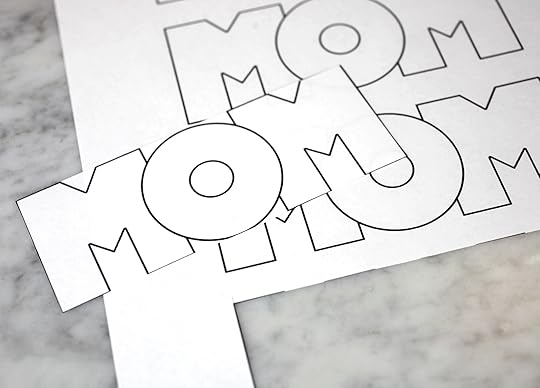
I do have individual letter cookie cutters, but they were really too big for what I wanted to do. So, I made my own template for “MOM,” making sure the letters stayed in a workable and compact rectangular shape with the “O” overlapping the two “M”s.
Here is a pdf if you would like to make these cookies, too.
For the sugar cookies and royal icing, I used this recipe by my friend Bridget of Bake at 350. It’s my go to sugar cookie recipe for decorating and I love it.
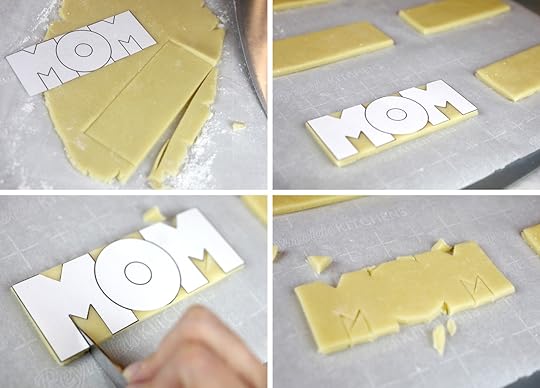
Make the dough, and roll it so it’s about 1/4 inch thick.
Print and cut out the basic rectangular shape of the “MOM” from the pdf template.
Use a large non-serrated knife to cut the rectangular shape out of cookie dough.
Once the dough rectangles are cut out, use scissors to cut out the letters from the paper template.
Then use a non-serrated knife to remove cookie dough from the rectangles to match the template.
If you are going to add buttercream flowers, do not cut out the center of the O.
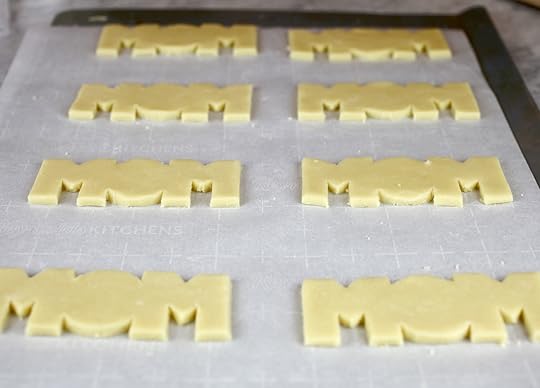
Place the rectangles several inches apart on a parchment paper-covered cookie sheet when cutting so you have enough room between shapes that you don’t mess up the other shapes.
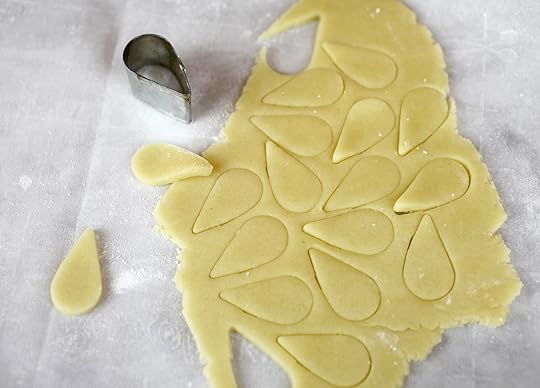
Use leftover cookie dough to cut out two leaves for each cookie. I had this small teardrop cutter, but you can also just hand cut out small triangles. you won’t really see the wide part so it’s not crucial that the bottoms are rounded. You will also want the leaves to be thinner than the words, so roll the dough out about 1/8 inch thick for the leaves.
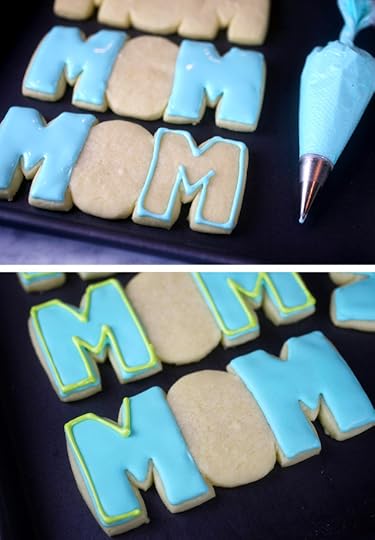
When the cookies are baked and cooled, pipe the Ms with royal icing. I used a consistency in between outline and flood to pipe the letters for a smooth finish.
My Ms were kind of wonky, so I also piped the letters with outline consistency royal icing in a second contrasting color to camouflage them with straight lines. Or as straight as I could make them with a #2 Wilton decorating tip.
SIDENOTE: If I did these again, I would also pipe the O with royal icing for more stability. Once the buttercream goes on, the cookies can absorb some of the moisture from the frosting, causing them to lose a little bit of strength if you were to pick them up by one of the Ms. So either pipe a thin layer of royal icing or transfer them using a spatula instead of picking them up by one of the sides. Hope that makes sense.
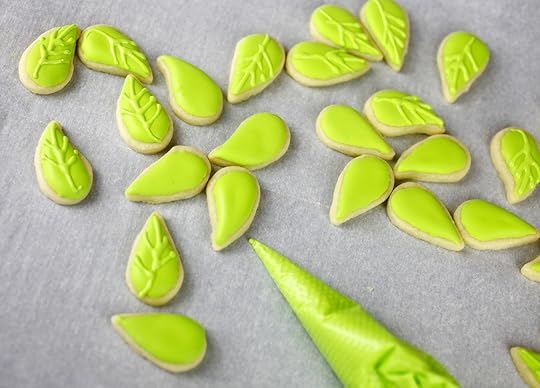
I used a light green tinted royal icing that I also used to pipe the leaves with.
Once the royal icing on the cookies is completely dry. (I would let them dry overnight.) It’s time to bring on the buttercream. You can use this basic buttercream recipe. It will be enough for about 10 cookie flowers.
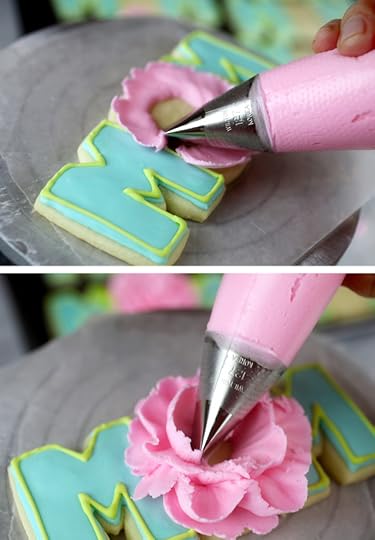
Using a #127 Wilton Tip with the wide part positioned at the bottom, pipe a circular shape on the cookie. Then continue piping in a circular shape making small waves for ruffles as you pipe towards the center of the circle, overlapping the layers as you go.
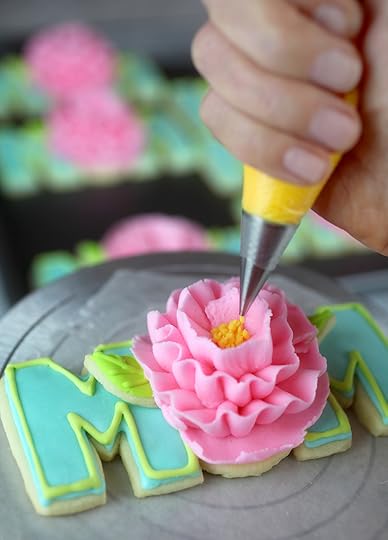
When you get to the center, pipe small dots of buttercream in yellow to finish off your floral look.
Gently insert the leaf cookies on either side of the flower. You can gently lift some of the frosting petals up using a toothpick to insert them. You can also break off the bottoms and gently press them into the flower to attach.
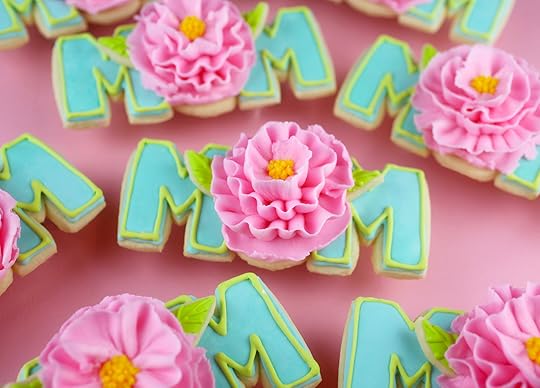
So lovely.
In my original concept for these cookies, I had wanted to pipe sweet sayings on the “M”. I quickly ditched that idea, because I felt pretty confident I would completely ruin my cookies. I’m really not great at piping so I try to work to my advantage when I can.
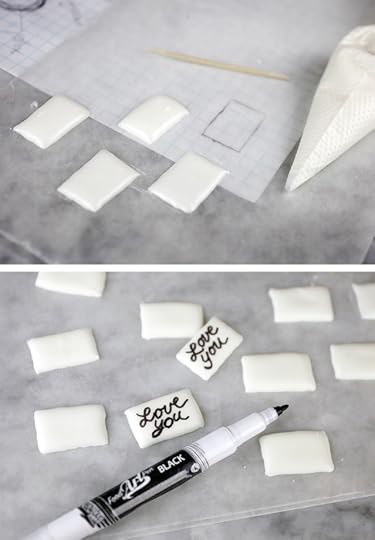
Instead, the night before, I also piped tiny rectangles of white royal icing on wax paper, using a drawing underneath as a guide. The great thing about this approach is I can mess up a message without messing up my cookies. Then when the flowers are finished, you can attach them to the cookies with leftover royal icing or even buttercream.
Let’s have a super quick recap.
Print out and use the template.
Bake and decorate delicious cookies with royal icing on day one.
You’ll want to divide and tint the icing into three colors. One for the letters, one for the outline and leaves and one for the little notes.
Save any leftover royal icing. You can use it to glue the cards on the second day.
Day two, when everything is dry, make the buttercream and tint the majority of it for petals and the rest for the centers.
Write sweet notes on the cards using a black edible ink writing pen and attach them to the cookies with royal icing.
You can also change up the messages.
You Rock MOM, You’re the best MOM. You’re a Hot MOM. Etc.
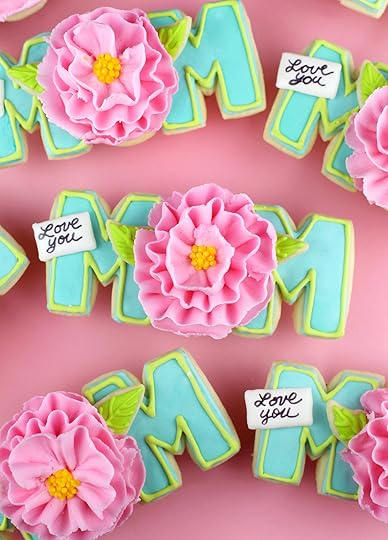
I just stuck with… Love You Mom!
Cause I do. So much.
Hope you enjoy!

April 5, 2020
Darling Duckling Sugar Cookies
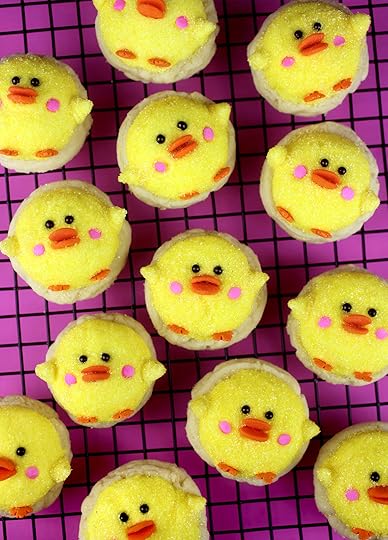
I knew the first time I tried this sugar cookie recipe back in January, that I would most definitely be making them again and again and again. And with Easter around the corner, I just had to give them a sweet spring-themed twist.
Originally I was thinking, little chicks, but I’m going with ducklings based on the large orange confetti sprinkles that I had on hand for beaks.
Okay, let me be blunt. Make. These. Cookies!
You don’t even need to decorate them. They are absolutely perfect plain. I know because I made several batches and I cannot stop eating them even without the frosting.

In my previous post about these, I mentioned that I baked one batch with White Lily flour, (a softer flour on the left above) and another batch with King Arthur Flour (on the right).
If you want to decorate these soft sugar cookies following the directions below, I would use King Arthur Flour because it yields cookies that were slightly thicker and smaller in diameter. You can see the difference in the pics above. Therefore, they offered more support for the frosting and the proportions for decorating were better, too.
If you use White Lily and still want to frost them, then spread the frosting instead of scooping it on top, so that the weight of the frosting isn’t too much for these so soft cookies.
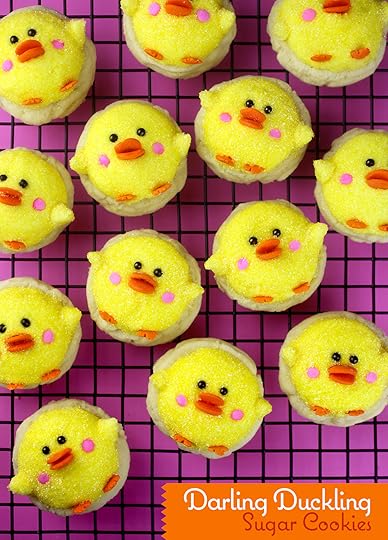
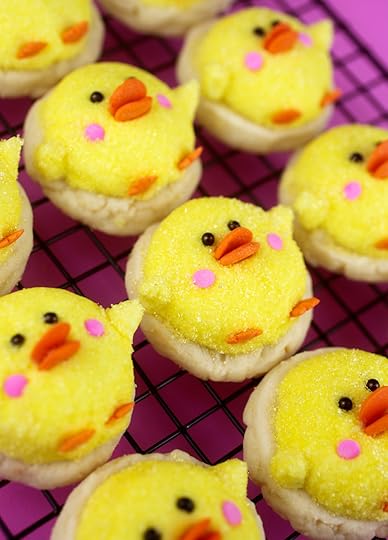
Oh my… I can’t stand the cuteness.
Here’s the recipe I used from Maria of Two Peas and Their Pod.
Follow the recipe instructions and then read below to see how to decorate them as ducklings:
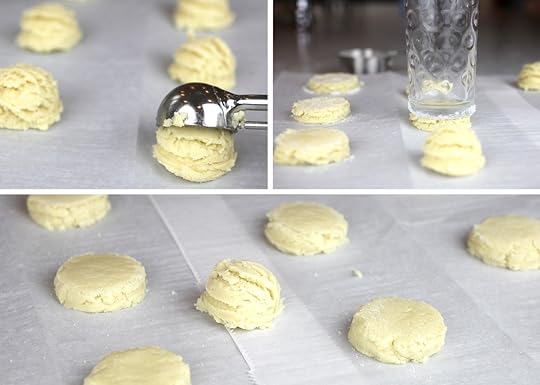
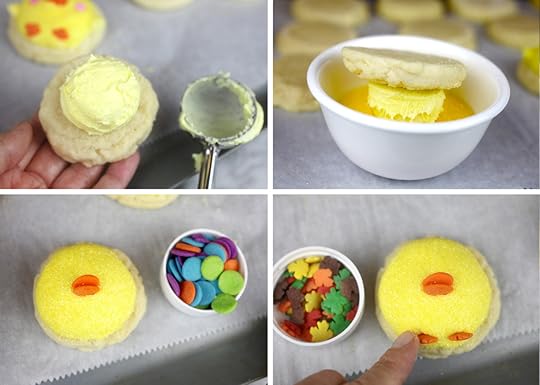
Use a 1-1/2 inch scoop to place tinted yellow buttercream frosting on top of a cookie.
Gently press the cookie into a small bowl filled with yellow sanding sugar. Rock slightly to coat and press the frosting into a pretty little mound. Use your hand to reshape if needed.
Place two jumbo orange confetti sprinkles in position and open slightly for beaks.
Press two orange sprinkles in position for feet. I used Autumn Leaf Confetti Sprinkles, but you could also leave this step out.
Note: Decorate one cookie at a time because once the frosting sits for a bit, it will be hard to get the sprinkles to attach through the sanding sugar barrier. It’s best to do it all at one time and then move on to the next cookie.
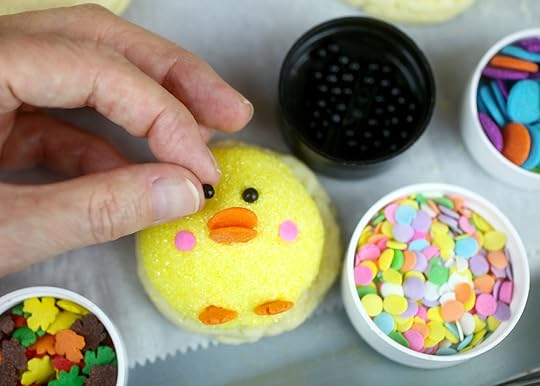
Place two black sugar pearls in position for eyes and two pink confetti sprinkles in position for cheeks.
That’s really it. You can totally stop here or if you want to give them sweet little wings, keep going.
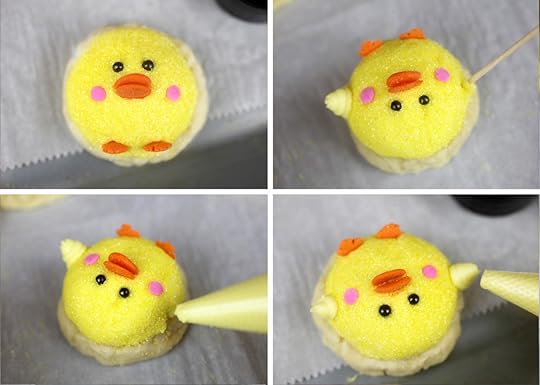
The frosting will not stick easily to the surface of the sanding sugar. So… To pipe the wings and allow the butter cream to attach, use a toothpick to remove some of the sanding sugar frosting barrier.
Once removed, the frosting can be piped to the exposed frosting on the cookie and the wings will attach. Then gently sprinkle more sanding sugar over the wings to finish.
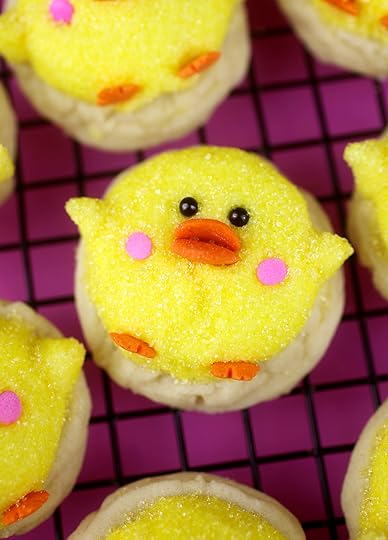
Look how cute and cuddly.
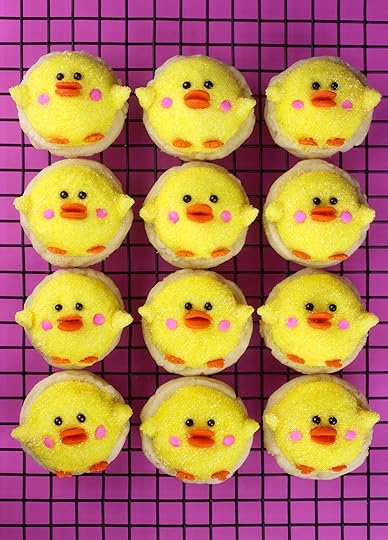
Now, that I have all my ducks in a row, it’s time to take a bite.
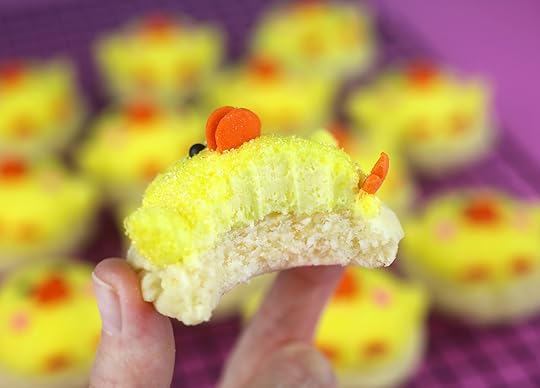
Yep. Delicious!
Hope you get a chance to make these sometime soon and have a Happy Easter!

March 24, 2020
Stay Safe & Soapy
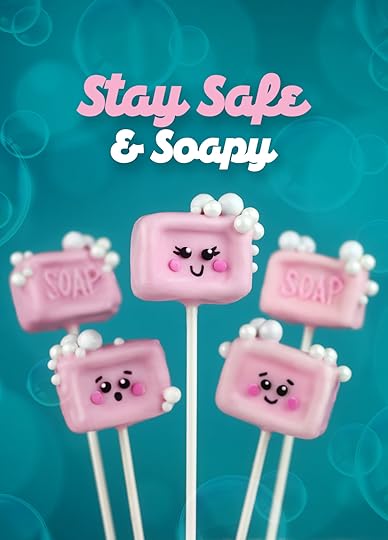
How are you guys doing during this crazy time? I’m trying my best to stay safe over here and that includes lots of hand washing to try to avoid getting this virus that’s affecting people and places all over the world. It’s definitely not a fun time right now, and I decided I needed to add some cute to my self-imposed quarantine. I’m a big worrier by nature, so I can’t seem to relax lately. But making cake pops always seems to help.
If you’ve ever made them before, then you know how therapeutic they can be. It’s usually a time I set aside and spend in total focus trying to make something super cute, and usually when I do, all my other thoughts wash away. So these sweet soapy cake pops seemed like the right thing to make. Plus, little bars are a lot cuter than a soapy pump dispenser don’t you think.

To make them, you can follow my basic cake pops instructions here and then follow the directions below to shape, dip and decorate. I just made a few of these with some leftover cake I had in the freezer, but if I had baked a cake for this, I think I would have gone with strawberry for the color.
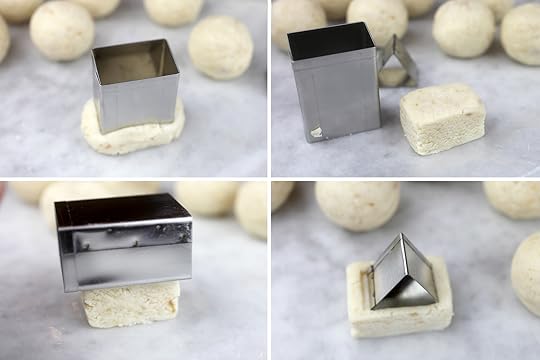
Okay, you should have some rolled cake balls on wax paper ready to go.
You can use a rectangular cutter to easily shape these little soap bars. Here’s the cutter set on amazon that I have.
Flatten the ball slightly to make sure it will fill the shape and then cut it out.
After that, flatten it even more if needed by pressing the side of your cutter against it. Don’t flatten too much though because you need to leave enough space for your lollipop stick to be inserted.
Then use a smaller cutter with a flat side to press and make an obvious indent in the middle.
Note: If you don’t have cutters like these, you can shape the rectangles by hand. Flatten and slide the balls against the wax paper for a flat surface, then repeat and rotate several times on each side to achieve sharp edges. Using wax paper like this really helps to make smooth surfaces. Then for the indentation, get creative with a small flat kitchen utensil that would be smaller than the shape of the rectangular.
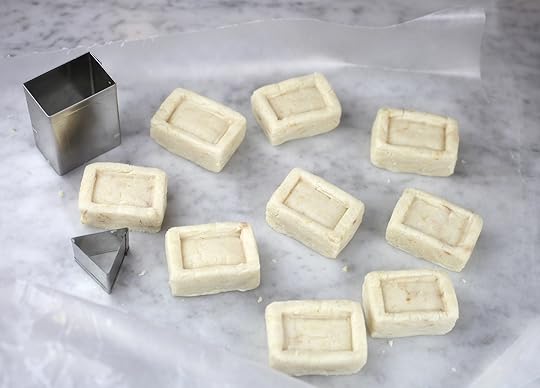
Okay, here we go.
It’s important to mention again, that you don’t want to flatten these too much. There needs to be enough room in between the indented area and back of the cake pop to insert a lollipop stick that also allows enough cake pop mixture for support… otherwise it will fall right off when you dip it.
But the nice thing about these cake pops is you only need one color of candy coating to decorate them.
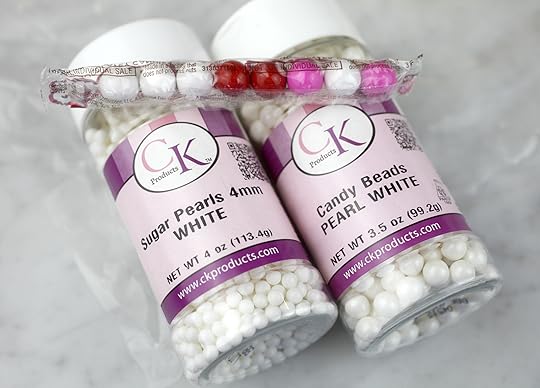
And if you want to add bubbles, then look for sugar pearls in different sizes. The large ones in the individual package on top are sixlets.
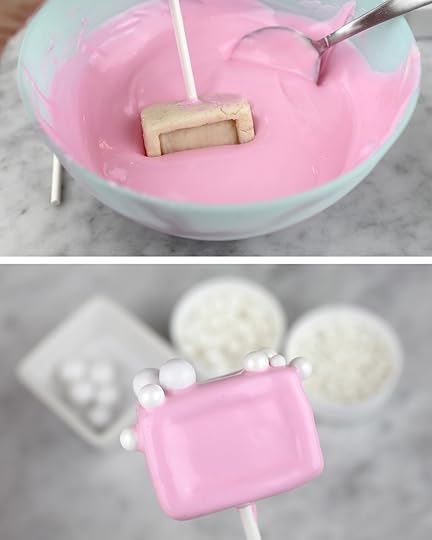
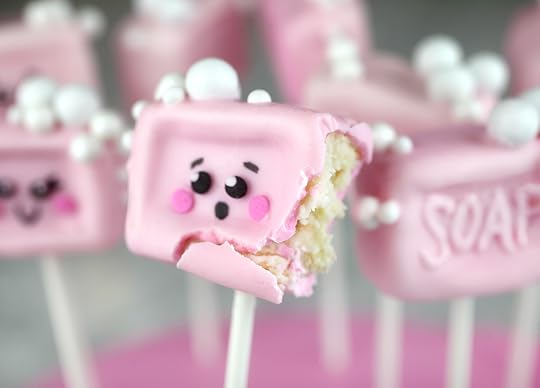
Insert the tip of a lollipop stick into candy coating and then into thickest part of the flat bottom of the cake pop. The layer of coating will reduce the size of the indentation so it is more subtle.
While the coating is still wet, go ahead and attach the white candies and sugar pearls in random positions to represent the soapy bubbles. Then let dry completely.
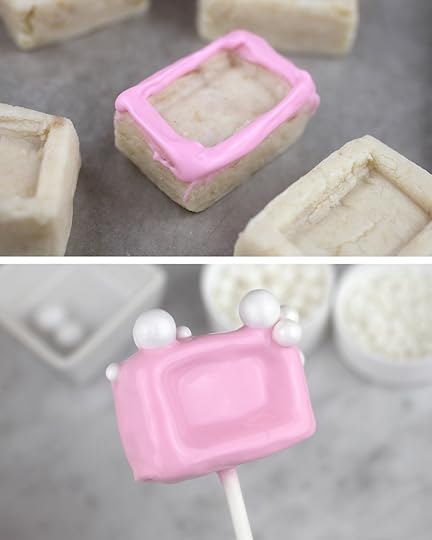
For a more pronounced indentation, you can apply candy coating around the edge using a toothpick and let it dry before dipping. Here you can see that there is more of a difference in depth.

For faces, I just used confetti sprinkles for eyes and cheeks and a black edible ink writing pen for smiles and expressions. Then I dotted the eyes with coating. Usually I use white, but I didn’t feel like melting a second color and the light pink totally works.
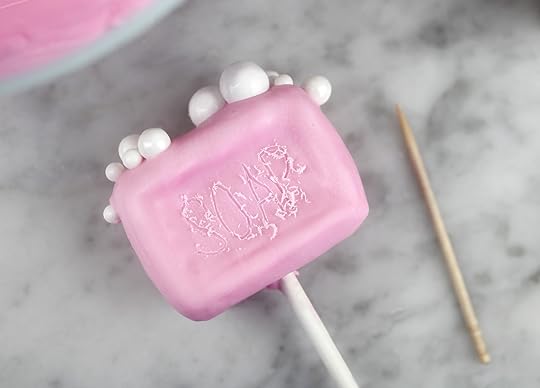
You can also spell out soap on the front of your bars. Go ahead and use a toothpick to etch letters into the candy coating to use as a guide. Wipe off the candy coating shavings. Then dip your toothpick into melted and fluid candy coating and use it to draw carefully on the surface. You can also try using a squeeze bottle, but I felt like I had more control with the toothpick.
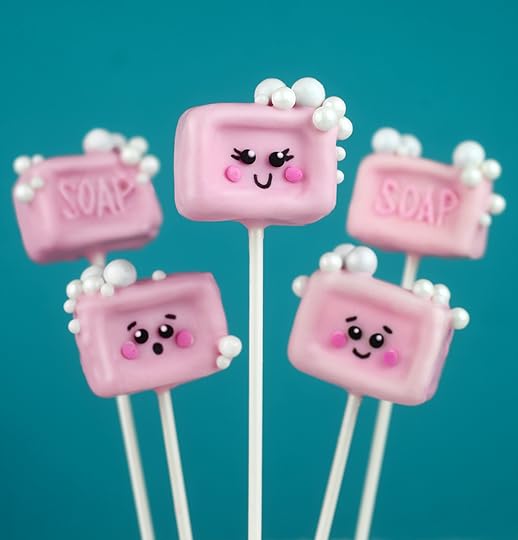
Voila … So Soooo-apy cute!
And the only time I wouldn’t mind having soap in my mouth. : )

Hope these brought a little smile and brightened your day.

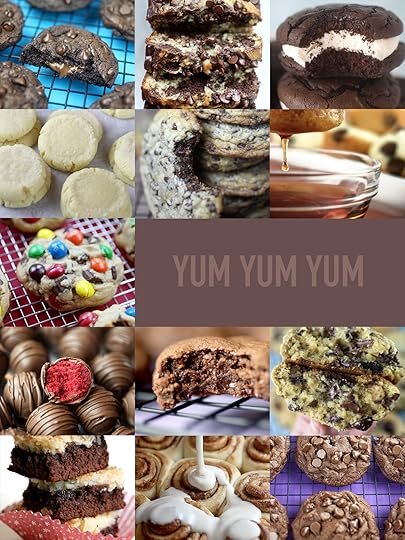
March 22, 2020
Things that make me go yum!
Are you guys doing all right? I hope so. I’m self isolating at home and trying to be as safe as I can. This is definitely a crazy time. The news and events around this Coronavirus are stressful, unnerving, scary, anxiety-inducing and all I want to do lately is curl up and enjoy something sweet and comforting. Yesterday, I made a batch of some of my favorite sugar cookies and placed half of them in the freezer to have some to enjoy again later.
They were so quick and easy to make and definitely made me feel little bit better. Anyway, I thought I would put together a list of some of my must-make bakes … the ones that are pretty easy and have relatively everyday ingredients … in case you want to bake some of your stress away, too.
Most of these are going to be cookies and mostly chocolate, but that’s not surprising. Okay, here goes a list of some things that make me go yummm!
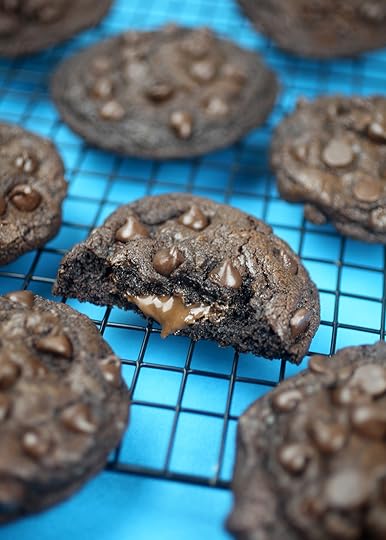
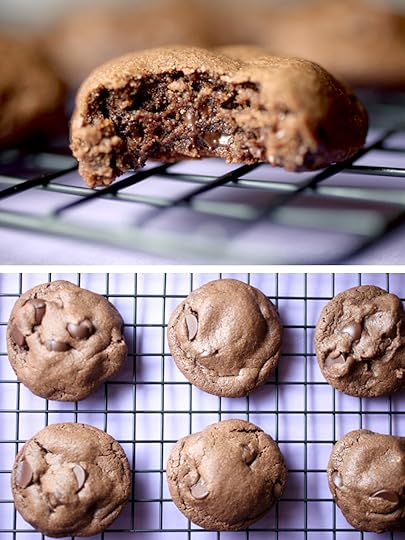
Double Chocolate Nutella Cookies
If you keep Nutella in your pantry as a staple, then these soft, chocolatey cookies want you to make them right away.
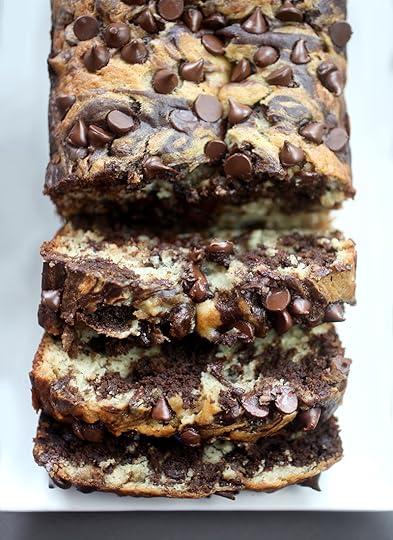
Chocolate Marbled Banana Bread
I love a loaf cake and this chocolate and banana combo is sure to satisfy your sweet tooth. Whether enjoyed for breakfast or dessert, don’t let those bananas go to waste.
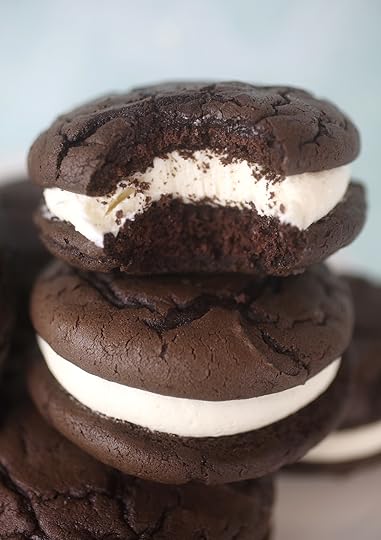
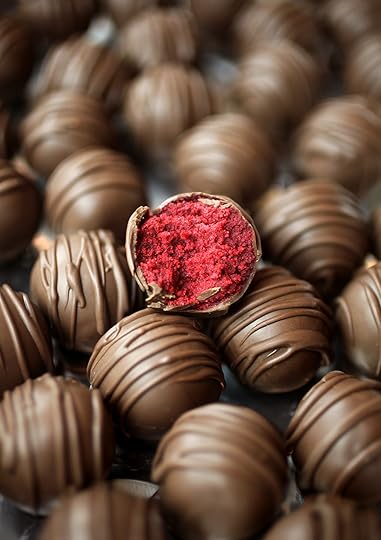
I made these recently and they are a FAVE. I love them. The frosting is made with marshmallow fluff, but feel free to substitute regular buttercream if you don’t have any on hand.
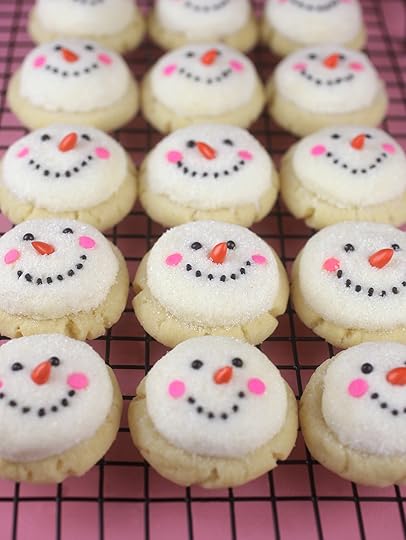
These are the sugar cookies I mentioned above. The recipe is from Two Peas and Their Pod and they are now on my forever baking list. So delicious! And don’t think you have to decorate or even make the frosting either. The cookies are true stars all in their own right.
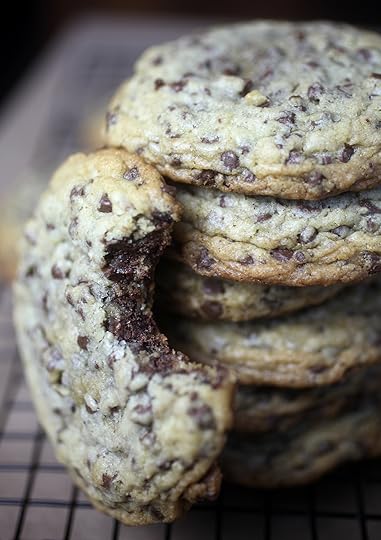
These take two whole bags of semisweet mini chips. If you have extra bags in your pantry, you won’t be disappointed.
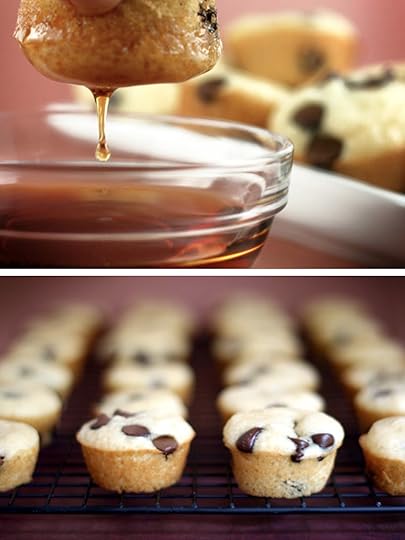
This recipe always gets rave-reviews. Instead of making pancakes, bake them in a mini muffin tin. Their petite size makes them super handy for dipping in maple syrup. Plus, you can freeze them and pop a few at a time in the microwave to enjoy as you crave them. Actually, I need to make these myself this week, too.
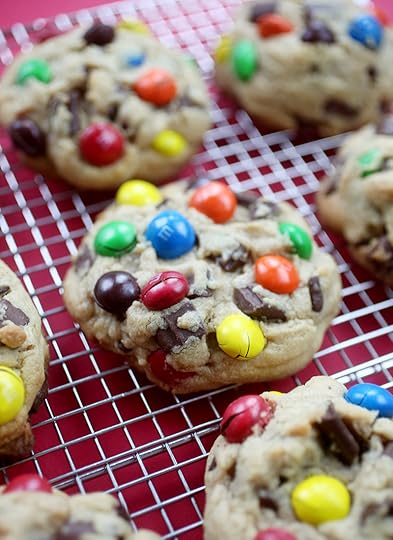
Did you buy a giant bag of M&M’s to snack on like I did?! If so, these are bright and will hopefully make you happy. The recipe uses peanut butter M&M’s, but you can swap them for regular ones, too.
Of course, I had to include these. An all-time favorite and they’re great to have around the house to enjoy over several days. Make them with your favorite flavor of cake and frosting combo.
Cookies always make me feel better and the title of these are a good sign. Chocolate and a little peanut butter go a long way in making things alright.
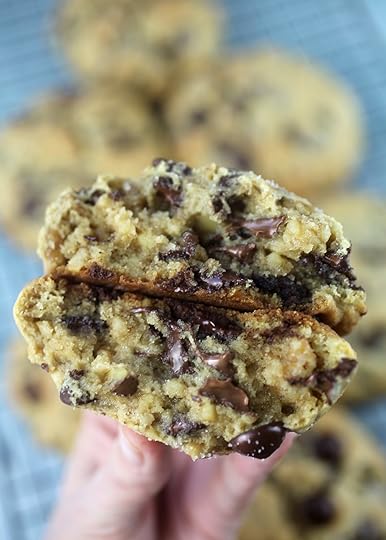
Super Thick Chocolate Chip Cookies
These are really thick and really good chocolate chip cookies. Feel free to leave out the walnuts and nutmeg if you don’t have any on hand.
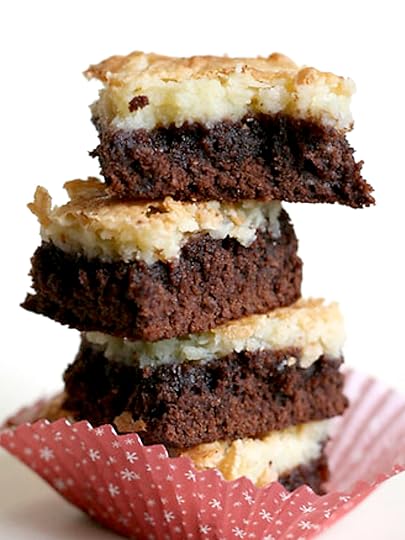
These are super easy, super sweet and something I make every year at Christmas. These bake in a 9 X13 pan, are stored in the fridge and can be enjoyed over several days. They are pretty decadent, so cut into smaller squares.
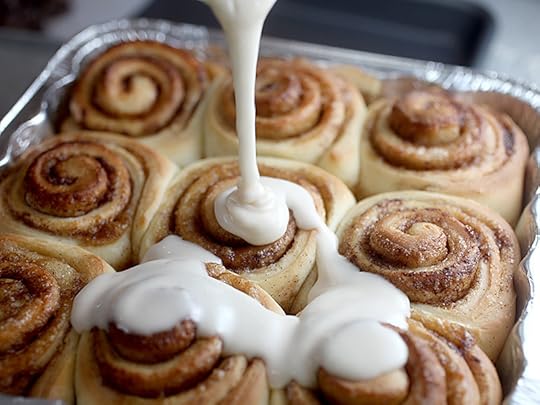
It’s a fact, cinnamon rolls are a true feel good food. If you happen to have active dry yeast on hand, you are already on your way to a better day.
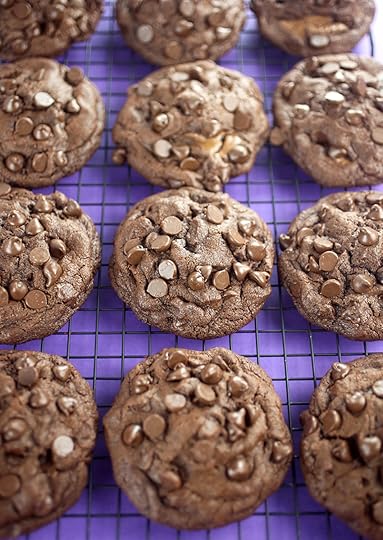
Peanut Butter Cup Chocolate Cookies
Thsee are similar to the first cookies above, but for peanut butter cup lovers. You can use miniatures or seasonal shaped Reese’s candies, too.
Hope you get a chance to enjoy one of these sweet treats.

March 5, 2020
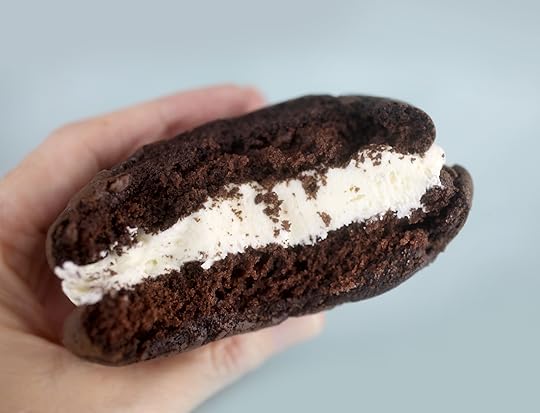
Cakewiches
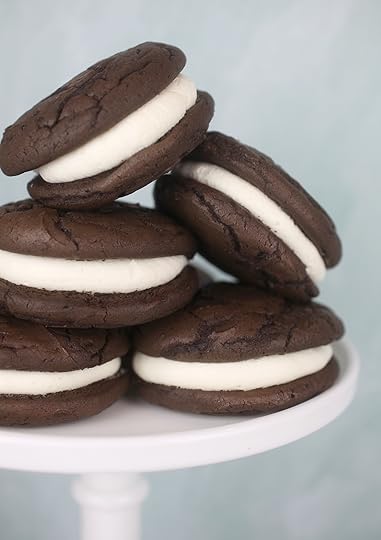
Sweet sandwiches anyone? Well, these delicious chocolate cakes with marshmallow filling will certainly satisfy your cravings. They did mine.
When I whipped them up, my intention was to make whoopie pies which are a huge fave of mine. Technically I guess these could still be called whoopie pies, but I couldn’t bring myself to name them that since the tops of my cakes weren’t smooth like the ones I associate with whoopie pies or “gobs” like they’re also called in some states.
Anyway, short story shorter… I’m going with cakewiches. Chocolate cakewiches because smooth or not, these were so good I had to share.
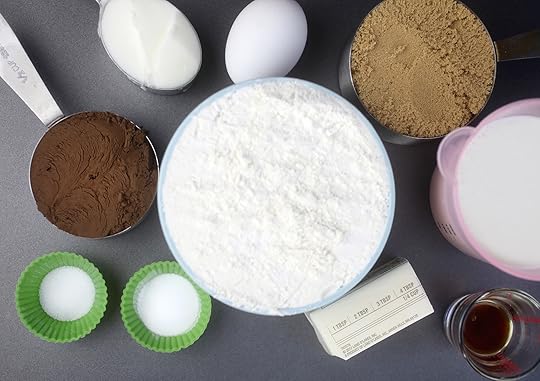
Start out with simple ingredients to make your batter.
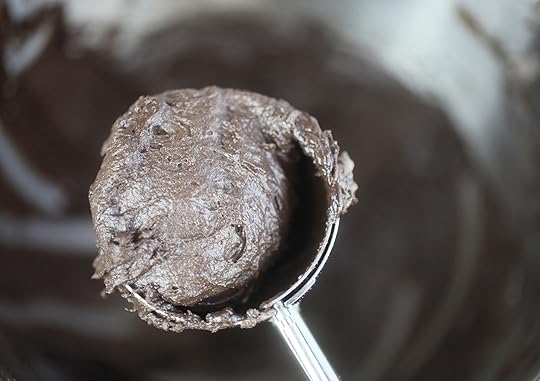
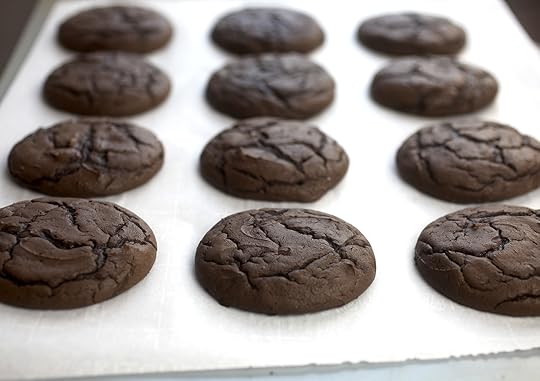
Then use a 2 to 2-1/2 inch scoop for equally sized cakes. Mine was 2-1/4 inches wide.
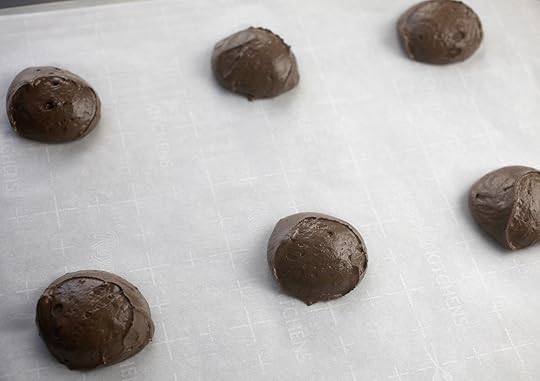
The batter will spread so give them plenty of room. I’d go with about 3 inches in between to be on the safe side. Just bake them in multiple batches.
You’ll end up with 12-14 cakes that are about 3-1/2 inches in diameter.
You can also use a smaller scoop and end up with more, but I like a big handheld size cakewich.
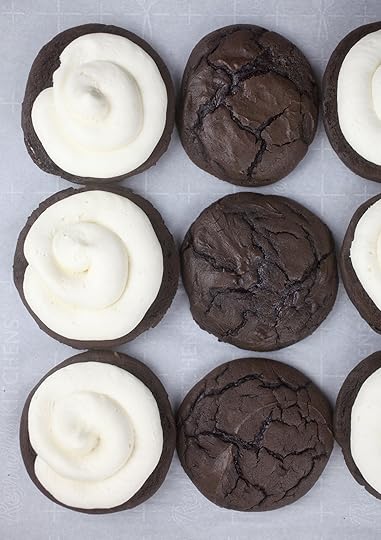
Once baked and cooled, transfer them all to a large baking sheet to assemble.

Make the marshmallow filling and pipe on a thick layer using an Ateco #807 decorating tip.
Yum-o-rama!
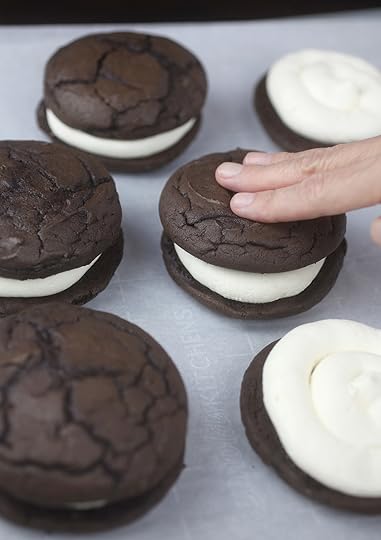
Sandwich those babies together. Just be gentle when pressing so you don’t break the cakes. They are delish, but also delicate.
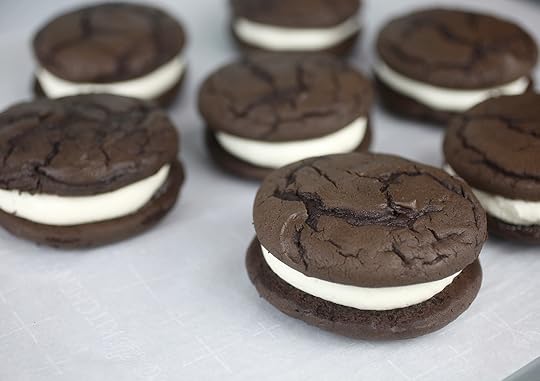
I wish (whoopie pies) or cakewiches like these, were sold in more bakeries. I would absolutely buy them whenever I came across them.
Buy them or bake them, I dream of sinking my teeth into them. Just. Like. This. OMG! so good.

Print Recipe
Yield: 6-7 cakewiches
Chocolate Cakewiches
Ingredients:
Chocolate Cakewiches
2 cups all purpose flour
1/2 cup special dark cocoa
1-1/4 teaspoons baking soda
1/2 teaspoon salt
1/4 cup vegetable shortening
1/4 cup unsalted butter, room temperature
1 cup light brown sugar, packed
1 egg
1-1/2 teaspoons vanilla
1 cup whole milk
Marshmallow Filling
1 cup unsalted butter, room temperature
1-1/2 cups confectioners’ sugar
1 teaspoon vanilla
pinch of salt
7 oz. jar marshmallow fluff
Directions:
Preheat oven to 350 degrees Fahrenheit and line a large baking sheet with parchment paper.
In a medium bowl, sift together flour, cocoa, baking soda and salt and set aside.
In a stand mixer, cream butter, shortening and brown sugar together until light and fluffy. About three to four minutes.
Add egg and vanilla and mix until combined.
Add the flour mixture to the creamed butter and sugar in three additions, alternating with the milk in two additions. Scrape down the sides in between additions to make sure everything is incorporated.
Scoop dough using a 2 to 2-1/2 inch scoop onto the prepared baking sheet about three inches apart and bake for about 10 minutes. Bake in multiple batches.
Remove from oven, gently slide parchment off baking sheet and onto the counter to cool the cakes.
For the filling: In a stand mixer, cream the butter. Add confectioners’ sugar in several additions, mixing on low until incorporated. Add vanilla and salt and mix until combined. Mix in marshmallow fluff until incorporated.
Pipe a thick layer of frosting on half of the cakes and sandwich together gently with the remaining cakes.
Share and enjoy right away or store up to three days with parchment paper separating cakes.
Enjoy every big bite!

Bakerella's Blog

- Bakerella's profile
- 9 followers

