
K.M. Weiland's Blog, page 53
November 28, 2016
How to Write a Scene Outline You Can Use (How to Outline for NaNoWriMo, Pt. 9)
 When most people ask “how to outline a novel,” what they’re really asking is “how to write a scene outline.” But here’s the thing: writing a good scene outline should be the last thing you do in your outlining process—which brings us to the ninth and final part in our two-month exploration of how to outline for NaNoWriMo (or any month) in a fun, fulfilling, and profitable way.
Although every writer’s outlining process should be uniquely optimized to suit personal needs and inclinations, I hope you’ve seen by this point in the series how a good outline is far more about brainstorming your story than it is simply listing possible scenes.
That’s why I’ve saved the scene outline for last. This isn’t because the scene outline is least important; rather, it’s because once you’ve done all your groundwork in discovering plot, theme, and characters, your scene outline will practically write itself.
Still, there are several tricks you can use to get the most out of this final crucial step in your outline. You’ve been waiting for it a long time, and now here it is: how to write a scene outline!
How to Write a Scene Outline: 6 Steps
 Figuring out how to write a scene outline is one of the most intuitive parts of the process. Unlike the freethinking non-chronology of the General Sketches, the scene outline will be mostly linear. You’ll start with Scene 1 and work your way through the story to the final scene.
How in-depth your scene outline should be depends entirely on your needs. You may feel you now know enough about your story to simply jot off a quick one-line summary for each scene. If you’re like me, you’ll go a little deeper. I view my outlining process as a progression from big picture down to the finest details. Even though I already know my general plot by the end of the General Sketches, I now want to use the scene outline to discover the blow-by-blow of each scene.
 I tend to view my scene outline as almost a first draft in itself. It doesn’t contain dialogue or narrative-worthy prose. But it explores the progression and structure of each scene in as much detail as possible—which then allows me the freedom in the real first draft to focus on crafting the narrative itself and bringing the story and characters to life.
Obviously, I do all this work in the scene outline because I feel it’s helpful (irreplaceably so for me), but you shouldn’t feel you have to dig this deep. Many authors prefer to dive right into crafting the narrative and then figure out the nitty-gritty of their scenes while actually writing them.
And now, here are six steps for how to write a scene outline that will help you write your best first draft.
Step 1: Figure Out How Many Scenes Should Be in Your Story
In discussions of story structure, I’m often asked: “How do you figure out the timing of the structural points if you don’t yet know how long the book will be?”
Good question. There is no hard and fast answer, since the truth is you don’t know how long the book will be. Most of the time, once the first draft is finished, you’ll need to go back and tweak the fat and lean sections to find the optimal pacing. However, you can anticipate the proper timing to a large degree, simply by determining how many scenes you’d like the book to end up being.
The actual number of scenes will depend on your genre, your target word count, and your tendency to write short or long scenes. My books always end up longer than my target goal, so I estimate on the short side.

If you’re shooting for scenes/chapters of around 2,500 words in length and books of around 100,000, that means you’ll need to include around 40 scenes. From there, divide your number of scenes by 8 to calculate how many scenes will exist between each of your major structural moments (Inciting Event, First Plot Point, First Pinch Point, Midpoint, Second Pinch Point, Third Plot Point, Climax).
If you are indeed shooting for 40 total scenes, you’ll end up with 5 scenes per structural section. From there, you can start calculating how best to include, combine, expand, and portray the events that need to happen in each section of your story—including the structural beats themselves. You can use this as a guide to figure out how to write a scene outline that is optimally structured.
Step 2: Use These Important Labels for Each Scene
Make things easy for yourself. Include as many pertinent labels for each scene in your outline as possible. As you dig deeper into the scene outline, and later as you use it to write your first draft, you’ll find it’s easy to get lost in all the information. Give yourself road marks.
At the beginning of each scene in your outline, make note of the following:
The number of the scene within the overall outline.
The name and/or brief summary of the scene.
The date of the scene within the story.
The character whose POV (point of view) will be used.
The setting(s) in which the scene will take place.
I take this a little further and save images of costumes, settings, and props to the story’s image folder on my computer, so I won’t have to go digging for inspiration in the midst of the actual draft.
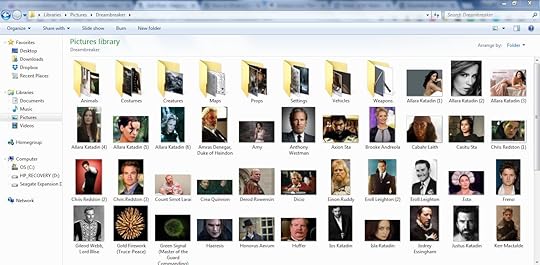
I collect all the pertinent images I think I’ll need during the scene outline, so I don’t have to go looking when writing the first draft.
As of my current outline for Dreambreaker, I’m using Perry Elisabeth Design’s wonderful WriteMind planner, which offers extremely handy “Scene” inserts that help me record all this info at the beginning of each scene in my outline.
Part of figuring out how to write a scene outline is having the right organizational tools. Scene dividers are useful, even if you just write them out by hand.
Step 3: Outline the Scene
Now you’re ready to write this puppy! Although you will already have a general idea of what will happen in each scene, you still have the actual machinery of the scene to work out. For example, let’s say you know your character is going to be mugged in your opening scene. You’re going to need to ask yourself the following questions:
How is he mugged?
Where does it happen?
Why does it happen?
Why was he in that back alley in the first place?
What scene goal led him there?
How will the obstacles of the scene directly impact his scene goal?
How will he react?
How will the events of these scene lead him into the following scene?
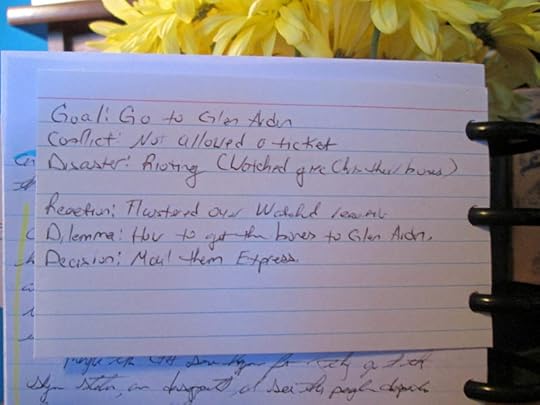
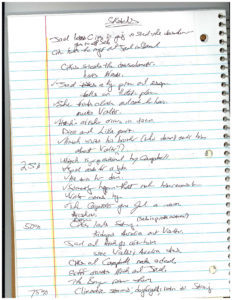
 As for how you should write your scene outline, I recommend continuing with the same conversational style you used throughout the previous sections of the outline. For example, here’s a snippet from my scene outline for my dieselpunk-adventure Storming (which was just named a Finalist in the Best Book Awards—woot!):
The story opens with Jael’s fall from the sky.
Hitch is flying along, when—whammo!—his plane gets smacked by a woman.
So first question—what’s he doing out there?
The troupe is going to need two planes to transport everybody, and I want Hitch to be alone in the scene, so they’ve presumably already arrived in Scottsbluff.
It’s nighttime. Hitch is off for a solo flight (with his dog). He’s doing it partially for enjoyment, partially to scout out likely areas for the show, but mostly to reacquaint himself with his home area. He flies over the Hitchcock farm, etc.
But all that can be told briefly, just enough to present his mindset and offer a little hook regarding his rocky return.
I think we’ll start the very first sentence with Jael’s dropping in.
He’s shocked, of course, but also reactive.
She needs to catch fire somehow—without the engines being endangered…

Don’t forget you can download the complete transcript of one my outlines, for more examples.
Step 4: Figure Out the Scene’s Structure
You should be thinking about your scene’s structure throughout the previous step. Whenever you find yourself at a loss for what your character should be doing or why, focus on his scene goal. What does he want in this scene? Why is he pursuing it and how?
Then examine the obstacles getting in his way and preventing him from just waltzing over there and grabbing his goal, no problemo. This is where you find your scene conflict.
How will that conflict be resolved? What will be the outcome of this little episode within the overall story? Scenes should always end with consequential loose ends. Even if the scene doesn’t end in outright disaster with the character’s scene goal being thwarted, it should still end with a “yes, but…” Perhaps he gained what he wanted in this scene, but now what? What unforeseen negative or complicating consequences are going to arise that will carry him into the next scene?
You must then consider the character’s reaction to the complications of the conflict’s outcome. What does he feel in response to what’s just happened?
What does he rationally think about the new dilemma that has been introduced into his life?
What decision will he reach about that dilemma that will lead him right into the next scene’s goal?
You can see how all six of these elements of good scene structure are integrally connecting. None are random. They all roll one right into the other.
After you’ve worked through all six parts of your scene, grab a note card and write them all down, both to make sure you’ve checked all six off your list and to give yourself a handy guide for referencing them later.
What’s the most important part of figuring out how to write your scene outline? I vote for the scene-structure card.
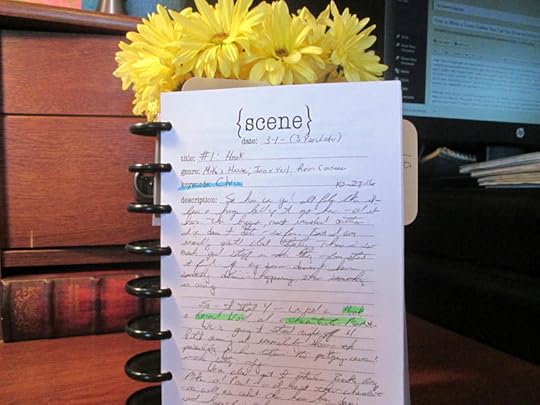
Step 5: Implement a Highlighting System
As with every part of the outlining process, the scene outline is going to have you doing a lot of thinking out loud on the page (whether in a notebook or on the computer). Although all of those thoughts are necessary, not all of them are pertinent enough to be recorded in your “official” outline. You don’t want to have to wade through all your “what-iffings” in order to reference the actual decisions you’ve made about a scene.
To help you track what’s what in your outline, you can implement a simple color-coding system using highlighters. For example:
If an idea is a “keeper,” highlight it in blue.
If an idea is unfinished or raises a question you need to work through later, highlight it in green.
If an idea isn’t necessarily pertinent to the current scene, but will be important as you outline later scenes, highlight it in yellow.
If an idea isn’t necessarily pertinent to the current scene, but is just general information you need to save, highlight it in orange.
If an idea ends up being in the wrong place in your outline (e.g., you added something to an earlier scene), highlight it in pink and use directional arrows to indicate whether it needs to be moved earlier or later in the outline.
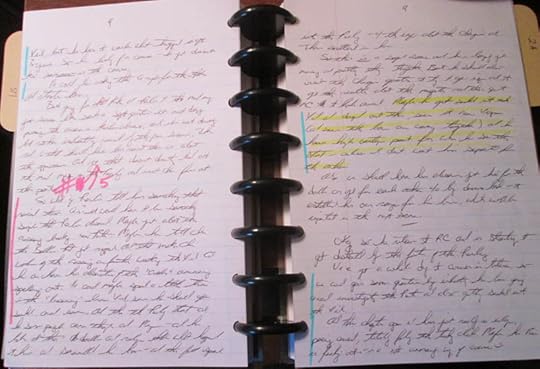
Figure out a color-coded highlighting system that will help you organize your notes for easy reference.
At the end of each day’s outlining session, take a few minutes to go back over your notes while they’re fresh in your mind, so you can highlight them appropriately for future reference. If you’re writing in a notebook, you can use the color-coding to guide you when you transcribe your notes onto the computer (into Scrivener, if you’re like me).
Go Forth and Outline!
How do you know when you’ve reached the end of your scene outline? Easy! You add that last scene and write THE END—and then you get ready to start that amazing first draft.
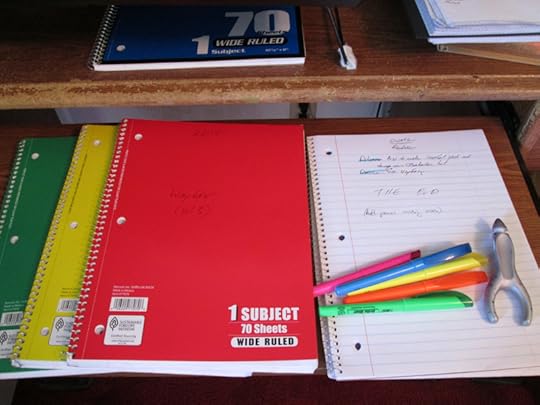
The End! This is my completed scene outline from my historical superhero WIP Wayfarer.
My outlining process is very much about identifying a story’s big picture, then digging down to figure out how to best put the pieces together to achieve the desired effect. It’s a process of discovery. It’s a no-pressure process—you get to play in your story with no worries about getting your prose right or making sure the protagonist is coming across as likable. It’s a process that will build you a solid foundation for when you’re ready to start adding the paint and furniture of the narrative, so you can then invite your readers in to sit down and enjoy the finished product.
Like all of writing, outlining is work. It requires discipline, focus, and clear goals. It also requires you to pay attention to your own creative needs—what works for you and what doesn’t. Concentrate on finding and refining the process that works best for you and that gives you the best shot at your best story. That’s the power of the outline. Now, go forth and outline!
Previously in This Series:
Should You Outline Your Novel?
Start Your Outline With These 4 Questions
3 Steps to Find the Heart of Your Story
How to Find and Fill All Your Plot Holes
4 Ways to Write Backstory That Matters
3 Tips for Weaving Together Your Story’s Pieces
How to Structure Your Story’s Outline
Making the Most of Character Interviews
Wordplayers, tell me your opinion! Have you ever struggled with how to write a scene outline? What is your preferred approach? Tell me in the comments!
http://www.podtrac.com/pts/redirect.mp3/kmweiland.com/podcast/how-to-write-a-scene-outline-how-to-outline-for-nanowrimo-pt-9.mp3
Click the “Play” button to Listen to Audio Version (or subscribe to the Helping Writers Become Authors podcast in iTunes).
The post How to Write a Scene Outline You Can Use (How to Outline for NaNoWriMo, Pt. 9) appeared first on Helping Writers Become Authors.


November 25, 2016
How to Identify Your Story’s Premise–and Its Most Important Part
 A high-concept premise can make or break your book—but not in the way you might think. It’s not enough just to come up with a cool idea for your book. You also have to make it work on every single page. Otherwise, no matter how cool it is, it quickly becomes the wrong premise. The key to solving this problem before it even gets started is learning how to identify your story’s premise—and more specifically the most important aspect of that premise—right out of the gates.
Take a look at your premise. Do you know what it is? Is it present right from the first page?
Good. That’s half the battle.
But what about the rest of the book? Is your premise driving your plot on every page? Does it matter on every page? Or did it introduce itself in a flash of look-at-me coolness, only to realize a few chapters in, it really had nothing to do, and now it stands around twiddling while the characters pursue their adventures elsewhere?
If so, the story is not only missing out on the better half of its possibilities, it also risks betraying readers’ trust. If they picked up the book because the premise sounded cool—only to discover the premise was never suitably developed—they’re likely to be disappointed.
What Happens When You Choose the Wrong Premise?
Your story’s premise is its central idea. This is the concept that created the unique situation upon which your conflict is founded. Consider the following:
A genius child is tricked into massacring an alien army, thinking he’s playing only a game. ( Ender’s Game )

A naval officer and a surgeon-cum-spy pursue friendship and adventure during the Napoleonic wars. ( Master and Commander )

Two teenage cancer patients fall in love and seek the meaning of life by pursuing their favorite author. ( The Fault in Our Stars )

For the sake of example, let’s say we just read a book with the following premise:
An outcast girl in post-apocalyptic Siberia discovers local wolves manifesting strange abilities—sometimes grotesque, sometimes miraculous.
Now, I just made that up off the top of my head, but I actually think it sounds pretty cool. If I read the blurb on Amazon, I’d take a second look. But if in reading that book, I discovered the mysterious mutant wolves only made random appearances throughout the plot and didn’t actually matter to the outcome of the climax, I’d be pretty disappointed.
The problem might not be that the book is a bad read. The problem is that the author chose the wrong premise.
Best case scenario is that the “accidental” premise that surfaced in the main conflict isn’t a bad read in its own right even though it has a scattered focus since it started out trying to be something it’s not.
Worst case scenario is that the “accidental” premise is watered-down and boring because it took so much attention away from what could have and should have been the best part of the book.
Not exactly what you’re hoping for in your story? Me neither.
How to Identify Your Story’s Premise—the Right One
Ask yourself the following two questions to make sure your story has a cohesive premise—and that it’s the right premise.
1. What Idea Inspired This Story?
Usually, although certainly not always, the idea that first sparked your imagination’s curiosity is going to be your primary premise. For example, all my stories have started with the same simple concepts that carried them through to completion:
A disgraced knight falls in love with a fellow captive during the Third Crusade. ( Behold the Dawn )
A man learns he has the ability to cross into a parallel fantasy world known to most people only through dreams. ( Dreamlander )
A woman who lives in the sky falls onto a barnstorming pilot’s biplane. ( Storming )
A poor boy in Georgian England is endowed with superpowers. ( Wayfarer )

Consider your own first spark of inspiration. Is that original idea still present in your existing story? Is it still prominent in your story? Is it still powering your story?
If so, cool beans.
If not, you might want to consider what is the controlling idea.
2. What Idea Is Powering the Conflict?
Doesn’t matter what cool idea you initially came up with. Your story’s true premise will always be at the heart of the main conflict—the plot. What does your character want? What’s getting in his way? How is he overcoming the conflict to eventually reach his story goal? What’s at stake if he does or doesn’t reach it?
Usually, you won’t be able to sum up these ideas in the same words as you would your initial idea (above), but even if they’re not exactly the same, the one must grow out of the other.
To return to our original example of the outcast girl and the mutant wolves, if her main conflict ended up being about learning how to be a nun in a convent, with only a few glimpses of the wolves out her window, then the original premise and the actual plot do not align—and the story doesn’t work.
What’s powering your main conflict? Is it your original premise idea?
If so, cool beans!
If not, how has your story evolved away from the original idea? Can you reincorporate it into the main conflict? Or do you need to scrap the original premise altogether so you can strengthen the emergent one?
A solid narrative begins and ends with a cohesive focus on your story’s premise. To find that focus, you first have to learn how to identify your story’s premise. Use these two questions to refine your understanding of your story and come up with a high-concept premise that wows readers all the way through to the end.
Wordplayers, tell me your opinion! How did you figure out how to identify your story’s premise? What is it? Tell me in the comments!
The post How to Identify Your Story’s Premise–and Its Most Important Part appeared first on Helping Writers Become Authors.
November 23, 2016
Today, I’m Thankful for… YOU!
 Happy Thanksgiving , Wordplayers!
I hope you’re gearing up for a wonderful day of family, friends, football, good food, and maybe some good shopping deals. I’m considering doing my first-ever Black Friday shopping trip, so wish me luck!
As always this year, I am overwhelmed with things to be thankful for. It’s been a challenging year for me to some degree, due to some unexpected developments in my personal life, but I feel it has been a year in which God has used those same challenges to bless me in ways I wouldn’t even have been able to imagine.
One blessing is simply the amazing Indian Summer that continues to make this the warmest fall on record. As I take my coffee, my notebook, and my iPad outside to my writing table every morning, I feel incredibly thankful to be able to immerse myself in the beautiful struggles of imagination and creation.

And I am just as thankful to get to share the beauty and the struggle of the artistic life with all of you!
As always, I’d like to take this opportunity to shout out a very small number of you:
Writer buds: Linda Yezak, Steve Mathisen, Lorna Poston, Liberty Speidel, Johne Cook, Garrett Amerson, London Crockett, Braden Russell.
Super commenters: R Billing, Andrewiswriting, Jason Bougger, Rick Presley, Joe Long, Ken Hughes, Megan Brummer, Beks, Marissa John, Ben Stoddard, Benjamin Thomas, Hannah Killian, 80smetalman, Aly—and so many more of you!
People who make me smile: Ingrid Bøuldin, Karen Townsend Magro, Susan Brannock, Adrienne Nesiba, Charvella Campbell, Usvaldo de Leon, Jr., Brad Dennison, Sabrina, Kami Boley, Marcus José Pinto, and Jonathan R. Allen.
Fellow bloggers: Joe Bunting, Angela Ackerman, Becca Puglisi, James Scott Bell, C.S. Lakin, Ali Luke, Joanna Penn, Janice Hardy, Bryan Hutchinson, Jennifer Blanchard, and MJ Rose.
Professional team: Amy Ramer, CathiLyn Dyck, Damonza, Varick Design, Joanna Marie, Sonja Field.
Happy Thanksgiving, all!
Wordplayers, tell me your opinion? What writing-related blessing are you especially thankful for this year? Tell me in the comments!
The post Today, I’m Thankful for… YOU! appeared first on Helping Writers Become Authors.
November 21, 2016
Making the Most of Character Interviews (How to Outline for NaNoWriMo, Pt. 8)
 Plot and character aren’t so different after all. In fact, in many ways, they’re the same thing. Over the course of the last seven posts, as you’ve focused on outlining your plot, you’ve also been outlining your characters, perhaps without even knowing it. But now it’s finally time to focus exclusively on character interviews.
By this point in your outline, you’ve already figured out the inherent factors of character arc that will drive your story’s plot and theme. You know your characters’ Lies and Truths, Wants and Needs, and backstory Ghosts and motivations.
You know about the Normal World in which your protagonist will start the story, and you know how he will change and where he will end up by the story’s end.
You also have a firm grip on your supporting cast and their respective desires and (where appropriate) arcs.
These are the most important aspects of your characters and if you’re so inclined, you can take off and write them into the first draft right now. However, there’s one extra step I always take in my outline—character interviews.
Why Bother With Character Interviews?
As you’ll see in a second, I use an extensive list of questions to help me understand my characters inside-out—everything from their deepest fears to their favorite foods. Some of the answers will show up in the story; many won’t. Character interviews require a decent outlay of time: I generally spend upwards of six hours on each interview.
So why bother? When you already know all the “important” thematic stuff about your characters, why do you need to bother with this trivial stuff? Can’t you discover everything you need as you write the first draft? Certainly, you can. And, inevitably, there will always be important aspects of your characters you won’t learn until you actually start writing them.
But I’ve discovered character interviews can make all the difference in both the ease of writing a new character and his success in driving the plot. In the past, when I’ve chosen to skip an interview, the character too often fails to be as realized as those I did interview. Even though I do discover my characters as I write about them, I never understand them as fully as should if I don’t interview them beforehand.
Depending on how many of your characters you decide to interview (more on that in a bit), character interviews can be a lengthy part of the outline. But they’re always worth it. And, in my experience, they are often one of the easiest and most enjoyable parts of the outline!
Master List of Character Interview Questions
With each new novel I write, I’m always adding new questions to my character interviews. My list started out with the basics, but the questions I look for these days are the ones that will help me dig down into the heart of the characters to find interesting motivations and contradictions.
The list now includes over 120 questions, curated from multiple sources over the years (if you see a question you originated, thank you!). I’ve offered my interview list before, in several different resources, including the Outlining Your Novel Workbook, but since I’m always updating it, I’ll include the latest version here.
Character Interview Questions
Name:
Background:
Birthday:
Place of birth:
Parents:
Siblings:
Economic/social status growing up:
Ethnic background:
Places lived:
Education:
Preexisting unique skills he will use to solve plot problems:
Jobs:
Salary:
If he could do anything other than what he does, what would it be:
Travel:
Friends:
How people view this character:
Lives with:
Fights with:
Spends time with:
Wishes to spend time with:
People who depend on him and why:
People he most admires:
Enemies:
Dating, marriage:
Children:
Relationship with God:
Outlook on life:
Opinion of himself:
What, if anything, he would like to change about his life:
Personal demons:
Lying to self about:
Optimistic or pessimistic:
Real or feigned:
Morality level:
Confidence level:
Self-control and self-discipline level:
Typical Day:
Physical appearance:
Physical build:
Posture:
Head shape:
Eyes:
Nose:
Mouth:
Hair
Skin:
Tattoos/piercings/scars:
Voice:
What people notice first:
Clothing:
How he sees himself:
Five words he would use to describe himself:
Five words best friend would use use to describe him:
Identities of this character (mother, lover, soldier, etc.) in order of priority to this person:
Degree of self-awareness:
Greatest joy (thing that’s keeping him alive):
Greatest pain:
Health/disabilities/handicaps:
Characteristics:
Personality type:
Love language:
Strongest/weakest character traits:
Three rules he lives by:
Public identity:
Does that ironically contrast with a hidden interior self?
Default personality trait:
Default argument tactic:
Physical vulnerabilities:
Emotional vulnerabilities:
Things that make him irrationally angry:
Things that make him cry:
Fears:
Talents:
What people like best about him:
Interests and favorites:
Political leaning:
Collections:
Food, drink:
Music:
Books:
Movies:
Sports, recreation:
Color:
Best way to spend a weekend:
Great gift for this person:
Pets:
Vehicles:
Typical expressions:
When happy:
When angry:
When frustrated:
When sad:
When afraid:
Idiosyncrasies:
Laughs or jeers at:
Ways to cheer up this person:
Ways to annoy this person:
Hopes and dreams:
Plan to accomplish these dreams:
Worst thing he’s ever done:
Greatest success:
Biggest trauma:
Greatest embarrassment:
He is the kind of person who:
What you love most about this character:
Why readers will sympathize with this person right away:
Voice on the page:
Core Need:
Corresponding psychological maneuver (delusions, obsessions, compulsions, addictions, denial, hysterical ailments, hypochondria, illnesses, behaviors harming the self, behavior harming others, manias, and phobias):
Anecdote (Defining Moment):

Featured in the Outlining Your Novel Workbook.
How to Use the Interview
Implementing the character interview is easy—just sit down and start answering! This is perhaps the most guided part of my outlining process, since it is, in essence, a fill-in-the-blanks exercise. However, as with any part of a successful outline, your answers to the character interview should not be random.
Don’t Create the Character, Uncover Him
Writers sometimes ask how they’re supposed to come up with answers to the questions. Are you supposed to just sit down and start writing down any ol’ answer that comes to mind? Definitely not.
There’s a reason we’ve waited until almost the very end of the outlining process to work on character interviews. By this point, you will have discovered your characters. By now, they will be real people living within a real plot. Their shape and essence should be very clear to you. If you’re like me, you may even have “cast” your characters, using actors and other real-life personalities to provide distinct faces and physiques that anchor your characters in your mind.
In filling out the character interviews, you will inevitably run up against a few questions for which you don’t know the answers, and you’ll have to brainstorm something on the spot. But most of the answers should be evident from what you already know about your characters and plot.
For example, as I was interviewing Thorne—a new Cherazim character for my portal fantasy sequel Dreambreaker—I didn’t have to make something up in answering the question, “If he could do anything other than what he does, what would it be?” The answer came easily. It was a discovery more than an on-the-spot creation. It was a soldifying of what I already understood about the character’s essence:
If he could he do anything he wanted—honestly he’d probably still be a gambler, but with credibility. He sometimes dreams of owning his own gambling establishment, but, in truth, the responsibility would kill him. As it is, he lives life on his own terms and he likes it that way—if only he were not constantly derided for it. He feels like, if only the world accepted him and gave him his due, he would be happy and whole.
Take as Many Words as Necessary to Answer the Questions
How should you answer the questions? Short answer is “any way you want to.” If you want to literally interview the character and have him respond in his own words, go for it. If you will be best served by short one-word answers, that works too.
However, I recommend continuing with the same conversational style you used in the previous sections of the General Sketches. Muse aloud on the page, writing whatever comes to mind about the character. Most of my answers are at least a couple of sentences and often a paragraph or two.
Some of the questions will be irrelevant to your character and you can skip them outright.
How to Use Your Character Interviews Throughout Your Writing Process
The interviews will provide their greatest benefit simply in helping you solidify your characters into fully rounded, nuanced human beings in your own mind. They will have fulfilled their greatest value simply in being written down. However, unlike much of the General Sketches, character interviews supply information in a format you can use throughout the drafting process.
Once you have them written down, they provide the further benefit of being a handy resource for referencing facts about your characters throughout the writing process. I collect all my interviews in folders in Scrivener and refer to them frequently, whenever I have a continuity question about eye color or birth date—or when I need inspiration for how a character might react when he’s angry or frustrated in a particular scene.

How I set up character interviews for my historical superhero work-in-progress Wayfarer in Scrivener.
The interviews are easily searchable and save time in the long run when you’re stalled on a character detail that would otherwise need to be brainstormed on the spot, bringing your current scene to a screeching halt.
Which Characters Should You Interview?
Obviously, you’re probably not going to want to interview every single one of your characters, especially if you have a large cast. So how do you triage your cast to determine which get full-fledged interviews and which do not?
Ultimately, this will be a personal decision. Which characters are integral to your story? Which characters do you feel you don’t fully understand yet?
My own rule of thumb is that all POV characters get interviews and all antagonists get interviews. If I’m going to be in a character’s head, I need to fully understand how he thinks and what made him the way he is.
As for antagonists, I admit it: I used to skimp on their interviews. The other thing I admit is that antagonists have always been a weakness in my writing. So, finally, on the last two outlines, I put two and two together and realized that maybe, just maybe, the reason my antagonists were challenging me in the first draft was because I wasn’t taking the time to fully understand them and their motivations in the outline. I started doing complete interviews for them, and boom! my antagonists immediately improved.
Start with your protagonist and work your way through your important characters until you have a fat dossier full of everything you’ll need to create these characters from the ground up and power them through your plot.
And have fun! This section of the outline is a no-pressure way to get to spend time with some of the most fascinating people you’ll ever meet.
Stay Tuned: Next week, we’re going to talk about the final step in the outlining process: the scene outline.
Previously in This Series:
Should You Outline Your Novel?
Start Your Outline With These 4 Questions
3 Steps to Find the Heart of Your Story
How to Find and Fill All Your Plot Holes
4 Ways to Write Backstory That Matters
3 Tips for Weaving Together Your Story’s Pieces
How to Structure Your Story’s Outline
Wordplayers, tell me your opinion! Do you find character interviews useful? Why or why not? Tell me in the comments!
http://www.podtrac.com/pts/redirect.mp3/kmweiland.com/podcast/how-to-make-the-most-of-character-interviews-how-to-outline-for-nanowrimo.mp3
Click the “Play” button to Listen to Audio Version (or subscribe to the Helping Writers Become Authors podcast in iTunes).
The post Making the Most of Character Interviews (How to Outline for NaNoWriMo, Pt. 8) appeared first on Helping Writers Become Authors.
November 18, 2016
How to Write Unexpected Story Events
 Stories are all pretty much the same. Something happens that inspires something else to happen that inspires a resolution of some sort. With all the billions of stories out there, it’s no surprise we see the same plot elements recycled frequently. But don’t let the frequency of blasé, expected plot events become an excuse. Instead, focus on how to write unexpected story events.
How do you do that? There are two keys.
1. You must be aware of what is expected by readers.
2. You must look for the unexpected in the heart of your characters’ motivations.
Sounds easy, right? And yet when you sit down to make it happen in your own story, it’s surprising how often and how easy it is to cop to the same old formulae.
How to Write Unexpected Story Events? First, Write Unexpected Characters
If your characters are doing and saying the same ol’ thing in every scene, it’s probably not because you’re a bad or unimaginative writer. It’s probably because the character himself is the same ol’ thing. You can’t milk unusual or electrifying events from a character who is always true to type.
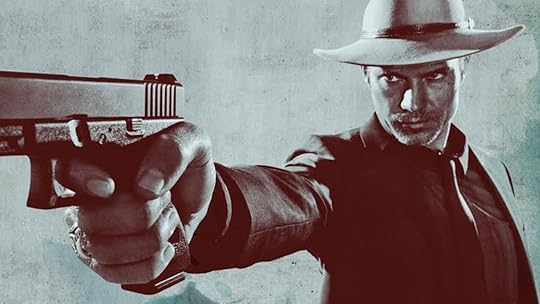
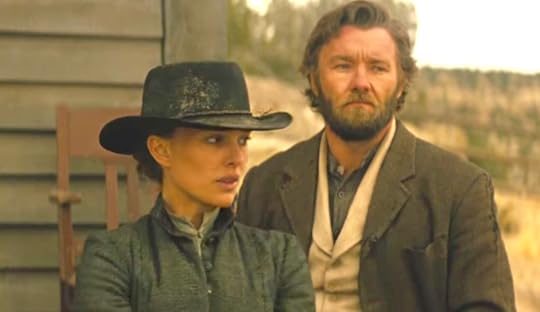
Unexpected story events arise from the heart of characters who have complicated motivations and unique methods. Justified consistently offers exceptionally smart writing and unexpected events for the simple reason that its characters—especially rogue Deputy Marshal Raylan Givens—don’t play by the standard rules of the genre.
Raylan is the story’s hero, the “good” guy, and yet he breaks the rules by consistently taking the law into his own hands. This in itself isn’t necessarily unexpected. Rogue lawmen who circumvent bureaucracy to do the right thing are as old as the classic western. But Raylan consistently pushes the envelope in ways that (up through Season 2, at any rate) subvert expectations without forcing him into a position that makes him either unduly “bad” or unduly stupid.

Raylan Givens plays the game by his own rules—which means people come to expect the unexpected. And his unexpected actions still conform to the consistency of character motivations.
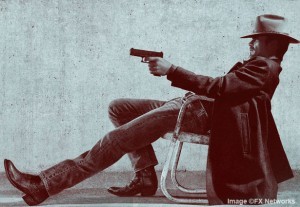
For example, consider the storyline in which he discovers his ex-wife’s ex-husband—the idiotic, corrupt, but usually well-meaning Gary—has sunk himself in deep with the mobster Duffy in an attempt to whack Raylan. Raylan loads Gary and Duffy’s spy into the car and takes them all out to confront Duffy.
What’s he going to do? Raylan is ever unpredictable—bouncing between reckless but decisive action and lawful restraint. Under the circumstances, it isn’t too unexpected when he responds to Gary’s query (about why he doesn’t call in in his fellow marshals as backup) by saying calmly: “Oh, they’ll just arrest him.”
Gary, who continues to believe himself a law-abiding citizen, is, of course, shocked. Viewers who have seen Raylan get away with executing deserving bad guys before aren’t too surprised.
Then comes the unexpected—not once, but twice.
Characters with complicated motivations and a strong conflict between outer Want and inner Need can provide plausible story events that are unexpected, simply because the story could reasonably go in either direction.
Once they arrive at Duffy’s, Raylan not only reveals he never intended to shoot the deserving Duffy, but he then pulls a “double switcheroo.” Viewers may initially be surprised Raylan would hand Duffy over to a law system that would inevitably release him, but they’re even more surprised when Raylan then uses the ploy of leaving a vengeful Duffy alive in order to force Gary on the run “never to return.”
Didn’t see that one coming? (And you gotta know there will be consequences.)
3 Ways to Seek Out Unexpected Story Events
Although unexpected events will often occur to you in the spur of the moment when writing a scene, they are never born of that scene. They are always the result of how you have set up your readers’ expectations in all the scenes leading up to this one.
If you lead readers to expect your rogue-but-usually-lawful lawman may occasionally shoot the deserving bad guy, you have created for yourself the opportunity to surprise them when you then give that character a good reason to behave in exactly the opposite way.
To make this work, you must first:
1. Set reader expectations in previous scenes.
Use both foreshadowing (Raylan is a loose cannon) and misdirection (Raylan’s outright indication he’s going to kill Duffy and thereby save Gary).
Write unexpected story events by creating a foundation of inner conflict within your character, right from the start.
2. Create complicated motivations and realistically flawed morals for your characters.
Let their Wants and Needs pull them in opposite directions and force them into lose-lose decisions, no matter what they choose.
3. Build scenes in which it makes sense for the character to play against type and do the unexpected.
You can’t have the character do what’s unexpected simply because it’s unexpected. Even when the outcome is a gamble and even when the character faces long-term consequences, he must have a sensible motivation in the moment and reasonable cause to believe he’s making the better choice.
Figuring out how to write unexpected story events can be a turning point in the “smartness” and originality of your fiction. Fortunately, as with so much of fiction, it’s all about getting your foundation right: write solid and complex characters, and the unexpected story events will practically create themselves.
Wordplayers, tell me your opinion! What were the last unexpected story events in your work-in-progress? Tell me in the comments!
The post How to Write Unexpected Story Events appeared first on Helping Writers Become Authors.
November 15, 2016
It’s Here! My Brand-New Writing Book: Creating Character Arcs!
 If you’re writing tight plots, beautiful prose, and engaging characters—and yet your stories still don’t feel as if they’re gelling, you may yet be missing what is arguably the single most important piece of your storytelling puzzle.
Maybe your characters aren’t engaging, despite your best efforts. Or maybe they’re following transformative personal journeys, but those journeys always end up feeling out of sync with the plot. Or maybe your stories turn out well in the end, after many a round of revision, but you’re finding the process exhausting because you never know quite how you got there or how to do it again the next time.
If so, I have a simple two-word answer for you: character arcs.
Regular readers of this site will find it no surprise when I tell you character arcs are the key to uniting character, plot, and theme in a powerhouse combo that creates solid and potent stories every time. An understanding of the theory and practice of character arcs will open up vast vistas of possibility within your pursuit of storytelling mastery.
Introducing Creating Character Arcs: The Masterful Author’s Guide to Uniting Story Structure, Plot, and Character Development
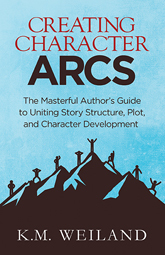 For all these reasons and more, I’m thrilled to announce the release of my latest writing-craft book Creating Character Arcs. Way back when I released Structuring Your Novel, I talked about how I felt my original understanding of story structure had changed my life. I think I can safely say mastering character arcs has done that again twice over.
What are character arcs?
Character arcs are the structured progression of a character’s personal transformation over the course of the story. The protagonist will either:
Move from a bad place to a good place (a Positive Change Arc).
Move from a good place to a bad place (a Negative Change Arc).
Inspire the world and characters around him to move from a bad place to a good place (a Flat Arc).
These transformations are deeply rooted in the psychological changes that occur, on stages large and small, in our own lives every single day. When executed successfully, beat by beat, these character arcs inject vivid color into your themes and resonant purpose into your plots. A excellent character arc has the ability to raise even the simplest story into an intellectually and emotionally pertinent journey for readers.
When you mate an understanding of story structure with the universally applicable journey of transformative character arcs, you will have rounded out your understanding of storytelling as a whole. You will be able to grasp the big picture of the stories you are trying to tell and to understand how to present all their facets in the most cohesive and emotional way.
Even better, if you’re like me, you’ll find that this psychological understanding of character change in fiction will provide boundless insights into the psychological underpinnings of the struggles, failures, and victories in your own personal journey.
Character arcs aren’t just about stories; they’re about life.
Learn How Powerful Character Arcs Create Powerful Stories
By applying the foundation of the Three-Act Story Structure and then delving even deeper into the psychology of realistic and dynamic human change, Creating Character Arcs offers a beat-by-beat checklist of character arc guidelines that flexes to fit any type of story.
Learn:
How to determine which arc—Positive, Negative, or Flat—is right for your character.
Why you should NEVER pit plot against character. Instead, learn how to blend story structure and character development.
How to recognize and avoid the worst pitfalls of writing novels without character arcs.
How to hack the secret to using overarching character arcs to create amazing trilogies and series.
And much more!
Gaining an understanding of how to write character arcs is a game-changing moment in any author’s pursuit of the craft. Bring your characters to unforgettable and realistic life—and take your stories from good to great!

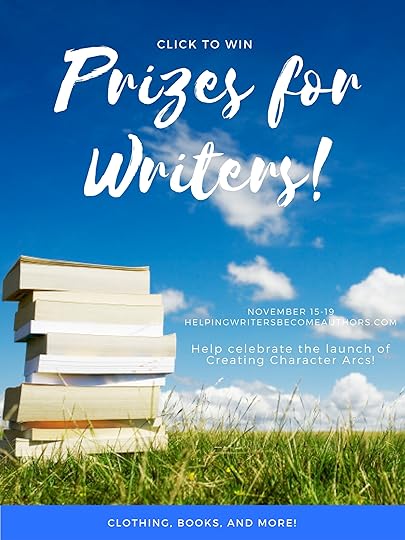
Help Me Celebrate the Book’s Launch: Win Prizes!
Is it even possible for a book launch to feel like a launch without prizes? Of course not! For the rest of the week, you have the opportunity to win one of three prizes:
Grand Prize Winner: Literary Book Scarf featuring text and original illustration inspired by Dante’s Divine Comedy.
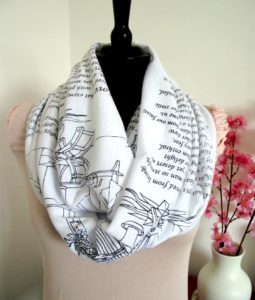

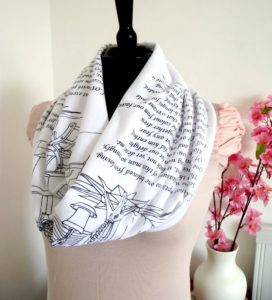
This gorgeous scarf is from LiteraryArtPrints, a handmade Jewelry and Gift brand that carries an exclusive selection of beautiful gifts for book and art lovers, including literary scarves, pendant necklaces (one of which I own and love), bracelets, laptop sleeves, and much more. Each item is fully handmade and inspired by great works of Literature and Art.
The scarf is professionally hand-printed using exclusive Italian cotton jersey. Can be open or infinity scarf style.
Second Place Winner: Bundle of all my previous print writing-craft books: Outlining Your Novel, Structuring Your Novel, Outlining Your Novel Workbook, Structuring Your Novel Workbook, and Jane Eyre: Writer’s Digest Annotated Classic.

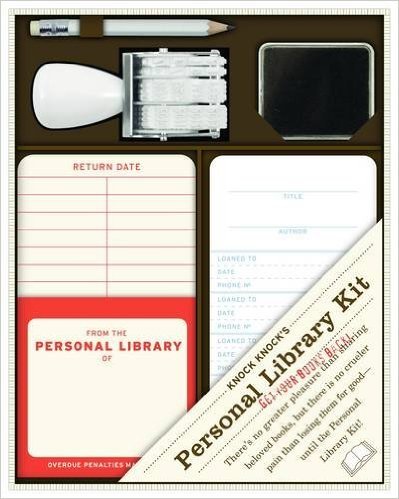
Third Place Winner: Personal Library Kit. Includes: 20 self-adhesive pockets and checkout cards, date stamp, inkpad, and pencil.
Bonus—Hourly Prize Today Only: Conquering Writer’s Block and Summoning Inspiration E-Book (mobi or epub).
From 6 AM to 11 PM, I’ll be drawing a winner from the overall pool of contestants every hour for the digital version of my writing-craft book Conquering Writer’s Block Winning this prize does not exclude you from the Grand Prize drawing on Saturday, but the sooner you enter this one, the better your chances of winning! Check back throughout the day to discover hourly winners, listed below:
6 AM: Trisha Schmidt
7 AM: Alicia Wilkerson
8 AM: Brian Gardner
9 AM: Cheryl H.
10 AM: Darian Chavez
11 AM: Connie Rossini
12 PM: Mari
1 PM: Samantha Sessoms
2 PM: Megan
3 PM: Terri Coleman
4 PM: Ed Richbourg
5 PM: Jennifer Weiner
6 PM: Adora Istrate
7 PM: Josiah DeGraaf
8 PM: Stephanie Hynds
9 PM: KM
10 PM: Aline
11 PM: Loraine N.
 To Enter
The contest will run through Saturday, November 19th. You can do several things throughout the week to earn contest points and increase your chances of winning. For every contest point earned, your name will be entered once more into the pool (e.g., if you’ve earned 18 points, you have 18 chances of winning). (Note: no purchase is necessary to enter.)
Good luck to everyone in the drawing, have fun, and thank you for helping me celebrate the launch of Creating Character Arcs! Here’s to many wonderful character journeys!
The post It’s Here! My Brand-New Writing Book: Creating Character Arcs! appeared first on Helping Writers Become Authors.
November 14, 2016
How to Structure Your Story’s Outline (How to Outline for NaNoWriMo, Pt. 7)
 Story outline and story structure—are they different terms describing the same thing? This is a question I frequently receive, and the answer is, “No, they’re completely different concepts and tools.” But learning how to structure your story’s outline is a crucial part of the preparation process.
So what’s the difference between outlining and structuring?
Outlining is a process, in which you brainstorm your entire story.
Structuring is a technique, by which you employ accepted theories of storytelling to give your story its best shape and form.
To return to one of my favorite analogies, we might say outlining is creative while structuring is logical.
This is why the outline is the perfect place to structure your story. When you use both together, they balance each other with their blend of strengths.
When to Structure Your Story’s Outline
If structure is one of the most important factors in the success of a story, you’d think it would make sense to start your outline by figuring out the structure of your Three Acts. But, as you can see, I’ve waited until deep into the outlining process—seven posts into our series, almost the very end—before bringing in structure.
Why?
Because you can’t find the right structure for your story until you actually know your story. Outlining is about so much more than just structure. Outlining is about brainstorming multiple possibilities, getting to know your characters, and harmonizing your plot, character, and theme lines. You can’t choose the right plot points and pinch points for your story until you can see the overall shape of your story’s iceberg rising from the sea.
As you work through your outline’s General Sketches (which is the section of the outline we’ve dissected in the previous six posts in this series), you should certainly be aware of your story’s possible structure. You should be on the watch for the major plot points and developments that arise as you learn about your story’s exciting moments. But don’t try to impose a structure on your plot yet.
To force structure on a story at too early a stage is inevitably to force the story itself. This tendency is the chief reason some authors feel story structure (and outlines) create passionless, cookie-cutter stories. You don’t want to impose structure on your story; you want to allow the story to find its own structure, so you can then strengthen it.
This is why I never consciously write out my story’s structure until about halfway through the General Sketches. At that point, I know enough about the story to identify at least half its major structural beats. From there, I’ll spend the rest of the General Sketches filling in the blanks and searching for the rest of the missing beats. The farther I get into the outline, the more structured it becomes.
How to Structure Your Main Plot in the Outline
First, the basics. We could spend years discussing the finer points of story theory and structure (and, indeed, I’ve already written several books on the subject, including Structuring Your Novel). But the foundational structural elements you’ll want to be aware of in outlining your novel are as follows.
The Most Important Elements of Story Structure
The First Act: which spans from the 1% mark to the 25% mark and presents the foundational period of setup for the story to follow.
The Hook: the opening moment that grabs reader curiosity.
The Inciting Event: which officially kicks off the plot and usually begins halfway through the First Act at the 12% mark.
The Key Event: which officially engages the protagonist in the events of the plot and which usually occurs at the First Plot Point.
The First Plot Point: which marks the end of the First Act and the end of the story’s setup in the character’s “Normal World.” It occurs around the 25% mark.
The First Half of the Second Act: which spans from the 25% mark to the 50% mark. This notes a period of reaction for the protagonist, in which he tries to cope with the events of the First Plot Point.
The First Pinch Point: which occurs at the 37% mark and is a reminder of the antagonistic force’s power and a setup for the Midpoint.
The Midpoint: which occurs at the 50% mark and is a moment of revelation for the protagonist as he comes into a clearer understanding of the true nature of the conflict.
The Second Half of the Second Act : which spans from the 50% to the 75% marks. This is a period of action for the protagonist. Armed with his new understanding, found at the Midpoint, he can now take the action right to the antagonistic force.
The Second Pinch Point: which occurs at the 62% mark, halfway through the Second Half of the Second Act. Like the First Pinch Point, it is an emphasis or reminder of the antagonistic force and a set up for the Third Plot Point.
The Third Plot Point: which is a moment of seeming defeat for the protagonist and takes place around the 75% mark.
The Third Act: which is the final quarter of the book, spanning from the 75% mark to the end, and in which the conflict is finally resolved, one way or another.
The Climax : which starts halfway through the Third Act, around the 88% mark and is heralded by a final turning point that pits the protagonist against the antagonistic force in the final battle.
The Climactic Moment: which occurs at the end of the Climax and is the true ending of the story, the moment when the conflict is finally resolved.
The Resolution: which ends the story with a final scene or two to tie up the loose ends.
(For myriad examples of how all these elements play out in popular books and movies, check out the Story Structure Database.)

3 Steps to Identifying Your Story’s Structure
Once you’re deep enough into your brainstorming to have a general idea of your plot, you can use the following three steps to bring your story’s structure into focus.
1. Examine the Existing Story for Obvious Beats
Take a look at what you already know about your story. By now, you should already have a good grasp of the skeleton of your plot, the heart of your character arcs and themes, as well as your backstory and potential plot holes. You know a lot about this story. You know where your characters start out and where they end up.
So how do they get there? How do they move from Point A to Point Z?
Start by identifying the “big” scenes. Which scenes offer the trademark set-piece action for your story, the moments readers will remember most vividly after they close the book? Even more importantly, which scenes offer events that turn the plot in dramatic ways?
Start by looking for your major plot points:
1. The First Plot Point: a point of no return in which the protagonist engages irrevocably with the main conflict.
2. The Midpoint: the centerpiece of your entire story, which must feature a revelation that gives your protagonist new insight into the plot and allows him to shift from the reaction of the first half of the story and into action in the second half.
3. The Third Plot Point: the low moment of the entire story, in which your protagonist faces down death (literally, figuratively, or both).
These three are your most important scenes. Your entire story pivots around them. Once you have these cornerstone posts in place, it becomes comparatively easy to discover the rest of your story’s structure by implication.
Usually, you won’t have to look very hard for these scenes. They should pop right out at you. They’re big, they’re game-changing, and usually they’ll be the scenes you’re most excited about writing. If you can’t yet find these major structural posts, then it’s likely you don’t yet know enough about your story to focus on completing the rest of its structure.
If you’re having trouble finding any of these plot points, ask yourself:
1. What forces your protagonist to leave his Normal World and fully engage with the conflict?
2. At what point, in the middle of the story, does your character begin shifting into a place of empowerment in both his inner and outer journeys?
3. What scene completely knocks your protagonist’s feet out from under him and makes him wonder if he has the strength to go on?
And while you’re at it, also ask yourself:
4. Can you make any of these bigger, more interesting, and with higher stakes?
These plot points define your story. If they’re not big and impressive, your story won’t be either.
2. Write a List and Make Note of the Missing Pieces
As you start discovering the specific pieces of your story’s structure, make a list. List all your major structural beats on the left side of a piece of paper, then fill out the right side with the scenes you feel meet the respective requirements.

 The blanks will pop out. You may be able to fill in some of them right away. Others you can make a guess at for now. And still others will provide you the next round of questions you need to ask to start connecting the dots between your major plot points, so that you can create a seamless plot.
3. Brainstorm Answers to Fill in the Gaps
Just as you did in the earlier sections of the General Sketches, you’ll now return to the technique of asking yourself lots of questions on the page. What needs to happen to fill in the blanks between your known plot points?
For example:
How will your protagonist first brush the main conflict at the Inciting Event? How will he (or a proxy) initially reject the Call to Adventure?
How will your protagonist react to the events of the First Plot Point?
What pinches from the antagonistic force will provide new clues and turn the conflict on either side of the Midpoint?
What seeming victory will occur right before the low moment of the Third Plot Point?
How will the character react to the tragedy of the Third Plot Point?
What will turn the plot into the final Climactic encounter between the protagonist and the antagonistic force?
Always keep in mind that none of these structural beats exists in isolation. One must always build off those that preceded it and into those that follow. Always ask yourself: How does this plot beat affect the next one?
Keep asking and answering until you completely fill out your structural checklist.
How to Structure Your Character Arcs
As you know by now, structure and character arcs are integrally linked (which I talk about in my new book Creating Character Arcs). Your character’s inner conflict will mirror the structure of the plot’s outer conflict—and, indeed, be integrally related to and affected by it. As you’re mapping out the plot’s structure, you also want to be thinking about your characters’ arcs.
When you identify an important beat in your plot, ask yourself: How does this fulfill the requirements of the character arc? How do the inner and outer conflicts affect each other to create this beat?
For example, at the Midpoint, the character will experience a plot-based revelation that gives him insight into the antagonistic force and allows him to start taking control of the conflict. But he must also experience a personal Moment of Truth, within his character arc, that shows him the power of the Truth he’s been avoiding up to this point. Sometimes these two will require separate beats, or sometimes one revelation will lead into the other. But you always want them to be two sides of the same coin. Optimally, the character shouldn’t be able to have one revelation without the other.
Follow this same pattern as you outline all your structural moments. How is the outer conflict driving the character’s inner journey—and vice versa? As you’re listing your structural beats, note the character arcs beats right alongside them.
How to Structure Subplots
What about subplots? Should you also structure them in the outline?
Definitely.
We can loosely define subplots as the independent journeys of secondary characters, in which the protagonist may or may not be deeply involved. They should exist in a story only to drive the main plot and/or provide contrast and complexity to the main theme. This means they must be integral to the main structure.
Fortunately, they’re easy to outline. Identify any major characters or plotlines who follow a slightly different course from the protagonist. For example, in my portal fantasy sequel work-in-progress Dreambreaker, I’m featuring three POV characters—the protagonist, Chris; the female lead, Allara; and a sidekick character, a Cherazim named Thorne. Each of these characters will be following their own arcs and thus have their own subplots within the story. This means they each need to have their journeys appropriately influenced by the main structural beats.
Once you’ve identified your subplots/characters, take a look at their roles within the main structural beats. If they are present or involved in these moments in the story, how will their character arcs will be appropriately affected by them? How will the protagonist’s arc affect the minor characters’ arcs at these points?
If the subplot characters are not involved in the main structural beats, you’ll have to create independent beats for them. But these beats must be either influencers of or influenced by the main beats. Otherwise, you have to ask yourself if the subplot is, in fact, pertinent to the story.
Figuring out how to structure your story’s outline is perhaps the single biggest step in the entire outlining process. This is why you’ll spend a good chunk of time building up to this step, so you can make the most educated decisions possible about your story. Once you’ve completed your structure, you will have gained a complete big-picture view of your story. You will have completed the General Sketches. From here, you’re almost ready to start constructing your scene outline!
Stay Tuned: Next week, we’re going to talk about the last step before your scene outline: character sketches.
Previously in This Series:
Should You Outline Your Novel?
Start Your Outline With These 4 Questions
3 Steps to Find the Heart of Your Story
How to Find and Fill All Your Plot Holes
4 Ways to Write Backstory That Matters
3 Tips for Weaving Together Your Story’s Pieces
Wordplayers, tell me your opinion! What is your process for figuring out how to structure your story’s outline? Tell me in the comments!
http://www.podtrac.com/pts/redirect.mp3/kmweiland.com/podcast/how-to-structure-your-storys-outline-how-to-outline-for-nanowrimo.mp3
Click the “Play” button to Listen to Audio Version (or subscribe to the Helping Writers Become Authors podcast in iTunes).
The post How to Structure Your Story’s Outline (How to Outline for NaNoWriMo, Pt. 7) appeared first on Helping Writers Become Authors.
November 11, 2016
A Surefire Way to Raise the Stakes in Your Story
 Characters are people to whom bad things happen. This is a good definition as far as it goes, but if this is as far as you take it, you will fail to properly raise the stakes in your story, and the entire reading experience will suffer as a result.
Sure, bad things happen to characters. They find themselves in the midst of conflict, after all. But you don’t want these things to merely happen to your characters. The events of your plot should not be random calamities that happened to strike your brave and stalwart protagonist just so you can show how admirable he is.
This construction inevitably leads to shallow stories. You miss out on the power of cause and effect, the opportunity to deepen your themes, and, most importantly, the ability to explore your characters.
Characters should not be simply people to whom bad things happen. Instead characters should be people who caused bad things to happen to themselves.
Victim or Catalyst? How to Tell if Your Character Is Moving Your Plot
You don’t want your character to simply be someone who gets run over by the plot. Rather, you want your character to be someone who hijacks the bus and drives the plot—even when it’s to her detriment.
The secret to dynamic characters is involving them in the events of the plot. Even better, make them responsible for the events of the plot, to at least some degree. Not only does this prevent the plot events from seeming like random catastrophes, it also deepens your ability to explore your characters’ motivations and reactions.
If the character’s own decisions are at least partially responsible for the fix in which he finds himself, he will be forced to look deeper into his own soul. Instead of being able to cast full blame on the nasty antagonist, he must instead search his own heart for answers to the story’s plot and theme questions.
When you fail to make your character responsible for the story’s consequences, he becomes little more than a bland victim, and you fail to raise the stakes in your story. Consider, one last time, Gavin O’Connor’s problematic western Jane Got a Gun, in which plucky Jane recruits her ex-fiancé Dan to help fight off the outlaws who shot her husband Ham.
The story revolves around Jane and Dan’s pained relationship. Why didn’t she marry him? Why did he abandon her? Why did Ham marry her? Why is the antagonist Bishop after all of them?
Turns out the answer to every one of these questions is pretty incidental:
Jane made the arguably wrong choice of marrying Ham instead of Dan, her first love. But was she responsible for this decision? Nope. She thought Dan died in the Civil War. How much more interesting had she knowingly chosen Ham over Dan—and then had to live with the consequences?
How to raise the stakes in your story? Make your character responsible for decisions that turn out to be wrong choices.
Dan never returned from the war to marry Jane—for which she blamed him. But was he responsible for this decision? Nope. He was a prisoner of war, unable to get word to her to wait for him. How much more interesting had he chosen not to return to her—and then had to live with the consequences?

How to raise the stakes in your story? Try to avoid leaving your characters so helpless they can’t contribute to creating their own challenging situations.
Ham worked for the Bishop gang who abducted Jane, supposedly killed her daughter, and attempted to force her into prostitution. But was he responsible for playing a part in what happened to her before he fell in love with her and rescued her? Nope (or at least, we never know for certain). He appeared to be a good guy (with bad judgment) from start to finish. How much more interesting had he knowingly participated in Bishop’s dark deeds—and then had to live with the consequences?
How to raise the stakes in your story? Let your characters make morally ambiguous decisions—and have to face the fallout.
So many juicy possibilities to explore! And yet, as it stands, nobody in this story is responsible for anything. They’re all just nice, bland people who were victims of incomplete information and to whom bad things happened through no real fault of their own.
How to Make Your Characters Responsible for Their Actions
It’s extremely easy to look at plot as merely a series of external events to which characters must react. But if that’s all that’s happening, you’re missing a wealth of opportunities.
Take a look at all the major turning points in your story. What consequences must your characters endure? Now ask yourself: are they personally responsible for these consequences in some way? How could you raise the stakes in your story?
Consider Uncle Ben’s death in the Spider-Man stories. Peter Parker certainly didn’t fire the gun that killed his uncle; he certainly didn’t want his uncle to be killed. And yet, he is still responsible for this terrible event through his own choice not to prevent the robbery in which the killer took part.
How much more interesting is Peter Parker’s story because it is founded upon the consequences of his own poor decision?
This decision fuels the entirety of Peter’s story. How much less interesting would his character development have been had he been merely a helpless, innocent bystander to the death of his beloved father figure? How much more interesting is the story because he was partially culpable?
Don’t play nice with your characters. It’s not enough to simply allow bad things to happen to them. Raise the stakes in your story by laying the burden of responsibility upon your characters for the tragedies that befall them.
Wordplayers, tell me your opinion! How could you raise the stakes in your story by making your characters responsible for some of the mishaps that befall them? Tell me in the comments!
The post A Surefire Way to Raise the Stakes in Your Story appeared first on Helping Writers Become Authors.
November 7, 2016
3 Tips for Weaving Together Your Story’s Pieces (How to Outline for NaNoWriMo, Pt. 6)
 Figuring out how to outline a novel is not a linear process. Particularly in the early brainstorming stages, outlining is not a simple progression from Step A to Step B.
Your brain is going to be bouncing all over the place: Step A makes you realize something about Step Z, which makes you realize something about Steps D, M, and U. Only then can you return to thinking about Step B.
The novel itself, however, is linear. When you start writing Scene A in the first draft, you kinda need to follow it up with Scene B. Scene Z’s just gotta wait until you get there.
This is yet another reason I find the outlining process so creatively liberating. To write a controlled and optimized version of your narrative, you must be able to first step back and look at the big picture. You must see everything there is to see about your story and realize how each piece affects all the other pieces.
Your outline is the perfect place to accomplish this.
How to Outline Successfully: Learn to Execute the All-Important “Bob and Weave”
As we’ve talked about in previous articles in this series, stories begin as a random conglomeration of ideas.
From there, you must brainstorm your way to finding the story’s skeleton—the basic shape of its plot.
That, in turn, allows you to begin understanding the story’s heart—its theme and the character arcs that drive it.
That’s when your “bob and weave” act begins in earnest: when you start identifying and filling your story’s plot holes.
Then, finally, you dig down to discover the context of your characters’ backstory.
And now… you’re done with your General Sketches!
However, the one thing we’ve yet to cover is perhaps the most important of all outlining skills: the bob-and-weave. This isn’t a properly defined “step” within the outline. Rather, it’s a technique you’ll need to use throughout every single one of the previous stages.
(And, yes, I realize we’re now a full week into National Novel Writing Month, and if you’re competing, you should hopefully be done figuring out how to outline your novel and have written a good 11,000 words toward your goal. But what can I say? This is what I get for not starting this series in September!)
Once you realize outlining is not linear, it frees you from the constraints of thinking of each of the above “steps” as if they lived in isolation. Although writers may often segregate various aspects of story (such as plot, theme, and character arc) in order to better get our heads around them, we must always remember none of them functions alone. Plot depends on character, just as character depends on theme.
This, of course, means it’s impossible to figure out how to outline any one aspect in isolation. Instead, you have to “bob and weave” from one to the next. As you’re figuring out your story’s plot, many of the questions you’ll be raising will inevitably depend on answers of character and theme—and the same is true in reverse.
A plot question may lead you down a lengthy rabbit trail about your character’s motivations, which will inevitably be informed by his character arc, which will prompt further questions about where he finds himself at the end of the plot.
Be patient with the process. Take each question as it comes naturally. Don’t try to fit the aspects of your story into rigid compartments within your outlining process. But whenever you follow a rabbit trail into one aspect of your story, always bring it full circle to return and answer your original question.
How to Outline These 3 Vital Parts of Your Story
Although the bob-and-weave is a technique you’ll use, in small ways and large, throughout nearly every aspect of your outline, there are three particular areas in which you’ll want to consciously put it to use.
1. Weaving Your Plot, Characters, and Theme
Plot, characters, and theme are the foundational cornerstones of your story. All three are important, and all three must be woven into the other two if they’re to create a cohesive and powerful story.
It is, however, difficult to work on all three at the same time. Only once you’ve worked a little on plot will you understand enough to work a little on character—which, in turn, allows you enough knowledge to start comprehending your theme. And so it goes, piece by piece, throughout the outline. (And, note: you can start with any of the three; it doesn’t have to be plot.)
When you work on your character’s external goal (a plot question), you must also consider how it is influenced by the Thing He Wants (a character arc question), which is, in turn, is influenced by the Lie the Character Believes , which stands in opposition to a Truth (a thematic question).
When you work on your story’s external conflict between protagonist and antagonist (a plot question), you must also consider how this conflict is driven by and/or representing the character’s concurrent inner conflict (a character and theme question).
When you work on how your character will demonstrate his changing attitudes over the course of the story (a character arc question), you must also consider how this will, in turn, change his outer goals and his responses to the external antagonistic force (a plot question).

And on and on… Every time you find yourself asking a plot question, you must follow that up with related character and theme questions (and vice versa). If you aren’t working on all three of these crucial story elements in concert, one or more of them will fall out of sync. The result is inevitably a story that lacks thematic cohesion.
2. Weaving Your Protagonist’s Goals and Your Antagonist’s Goals
Even in situations in which the protagonist and the antagonist are physically separated for much of the story, they cannot be considered in isolation. Together, their mutually exclusive goals create the conflict, which, in turn, creates the plot.
Think of your protagonist and antagonist as lumberjacks on either side of a two-man crosscut saw. They must be pulling on the same saw—back and forth, back and forth. If either one ceases to pull on that saw in his turn, the saw ceases to move, and the tree ain’t gonna fall.
Plot is like a two-man crosscut saw: the protagonist and antagonist must pull in harmony. (Incidentally, the two-man saw was known as the “misery whip”—kinda appropriate for a plot analogy, eh?)
This means the characters’ respective plot goals must evolve in harmony with each other.
When you work on your protagonist’s overall plot goal, you must then consider how this will be blocked by your antagonist’s overall plot goal.
When you work on your protagonist’s scene goal, you must consider how it will block the antagonist’s goals—and, in turn, inspire a defensive or offensive response in the form of a new scene goal for the antagonist.
When your protagonist is off by himself, making plans, you must also be aware of the plans your antagonist is, in turn, making off by himself.
It’s far too easy to come up with a cool battle, in which your hero is doing awesome things—and then fail to tie it soundly into the plot by connecting it with the cause and effect of the antagonist’s previous and subsequent goals and actions. A good generalization of plot is that it is the “give and take between the protagonist and the antagonist.” This means you must plan their moves in harmony every step of the way through your outline.
3. Weaving Your POVs/Timelines/Plot Points
Once you have successfully woven together all your story’s foundational elements, you will also want to consider narrative choices that ride a little closer to the surface. These are slightly more “cosmetic” choices. They do not affect the core of your story; they are, however, the vehicle that carries your story, and, as such, are just as integral to its successful presentation.
These elements include such choices as:
Which POV (Point of View) will you use to tell each scene?
If your story includes multiple plotlines or timelines , how will you order their scenes within the story?
If your story includes multiple plotlines or character arcs, how will you harmonize their respective plot points?

Click for a larger view of how to outline according to story structure. Contributed by Peter von Stackelberg
Not all of these questions must be answered in the outline. But when you begin your scene outline (which we will discuss in the final installment in this series, in a few weeks), all of these choices will influence the order of your scenes, the focus of your scenes, and ultimately the entire flow and force of your narrative.
Making these choices requires a big-picture view of your story.
When you choose to use a supporting character’s POV in one scene, what will this add or take away from your main character’s POV in subsequent scenes?
When you are using multiple plot- or timelines, how can you order their scenes to maintain the best flow of tension and interest? How can you order the scenes to best contrast or mirror the events and themes in the alternate plotline?
When you are creating character arcs for multiple characters, how can you harmonize their important moments of evolution around the main structural plot points? How will these choices affect which POVs you must choose?
Shaping a story is always an exercise in making optimal decisions. There are rarely perfect decisions. But when you consider all of your story’s pieces as players on a chessboard, you are better able to understand which pieces must be moved, protected, or sacrificed to create the most pleasing overall effect.
A firm understanding of story theory—of plot, character, and theme—will provide you the awareness to perform the bob and weave of outlining and to move your story pieces with confidence and precision. That is the true goal in figuring out how to outline a novel—not simply to pile one scene on another until you reach the end, but to craft a storyform that is as solid and powerful as possible.
Stay Tuned: Next week, we’re going to talk about how to properly structure your story while outlining.
Previously in This Series:
Should You Outline Your Novel?
Start Your Outline With These 4 Questions
3 Steps to Find the Heart of Your Story
How to Find and Fill All Your Plot Holes
4 Ways to Write Backstory That Matters
Wordplayers, tell me your opinion! In figuring out how to outline your novel, what is your biggest challenge in seeing your story’s big picture? Tell me in the comments!
http://www.podtrac.com/pts/redirect.mp3/kmweiland.com/podcast/3-tips-for-weaving-together-your-storys-pieces-how-to-outline-for-nanowrimo.mp3
Click the “Play” button to Listen to Audio Version (or subscribe to the Helping Writers Become Authors podcast in iTunes).
The post 3 Tips for Weaving Together Your Story’s Pieces (How to Outline for NaNoWriMo, Pt. 6) appeared first on Helping Writers Become Authors.
November 4, 2016
The Only Reason Your Story Should Have Flashbacks
 Writers love their flashbacks. And with good reason. Flashbacks are a multi-functional technique for stepping outside your story’s timeline and sharing interesting and informative nuggets about your characters’ pasts. But just as they can be used to strengthen your story, they can even more easily cripple it.
First things first: what is a flashback?
A flashback is basically a memory. It can take several forms:
A character within the main story actively remembering something. (For example, amnesiac Jason Bourne regains snippets of memory and remember his girlfriend Marie in quick flashbacks.)

You can convey flashbacks as quick snippets of memory that do not slow the main narrative.
A omniscient narrator stepping back from the main conflict in order to recount something that previously happened to one of the characters. (For example, Markus Zusak’s World War II novel The Book Thief is essentially one long flashback—one long memory from its narrator Death.)
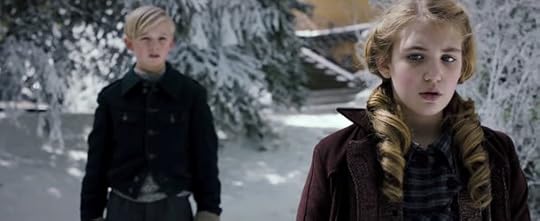
You can convey flashbacks as dramatized scenes, told from the perspective of a distant narrator.
A simply interjection of a scene from a previous timeline into the main story. (For example, Brent Weeks’s The Broken Eye includes several dramatized scenes from the protagonist Gavin Guile’s childhood.)
You can tell flashbacks as dramatized scenes interjected into the main narrative.
The flashback can be shared in one of three ways:
Briefly, in summary (or “telling“), in which the event’s pertinent details are referred to without dramatizing them. (For example: “Christmas Eve, two years ago. That’s when Ellie had received word of her daughter’s death.”)
Lengthily, in a fleshed-out, dramatized scene of its own, which recounts the memory blow for blow. (“The police officer had accidentally knocked the wreath off the door when he rang the doorbell. He looked far too apologetic when he held it out. ‘I’m sorry, ma’am…'”)
In dialogue, in which the character verbally shares the memory with another character. (“‘I don’t drive anymore,’ Ellie told Allen. ‘Or celebrate Christmas.'”)
All of these are legitimate approaches. But just because you can use them in your story doesn’t mean you should.
2 Qualifying Factors of Necessary Flashbacks
There are only two reasons you should ever include a flashback in your story. The first one is (or should be) pretty obvious…
1. The Character Has an Interesting Backstory
If nothing interesting happened to your character before the main story, well then… please don’t go out of your way to tell readers that, much less dramatize it for them.
2. The Backstory Moves the Plot
The second qualifier for necessary flashbacks is that your character’s interesting backstory not only matters to your main plot, but moves the plot.
But even that’s not enough. For a flashback to be worthwhile, it isn’t enough for its information to simply be important. Beyond that, the very act of the character’s remembering must be a plot catalyst.
When you screech your story to a halt just so your character can reminisce, you better be getting something big in exchange for the interruption to your narrative flow. You better be getting a plot revelation that jumps your conflict and your character’s arc into higher gear that ever before.
How Failed Flashbacks Cripple Your Story
Flashbacks were another area in which Gavin O’Connor’s besieged western Jane Got a Gun struggled. Fully half the story is made up of flashbacks that dramatize the erstwhile romance between Jane and her one-time fiancé Dan Frost, who has now reluctantly come to her and her dying husband’s aid.
This backstory is crucial to the entire story. Jane and Dan’s troubled relationship—and the reasons it initially failed—are at the heart of both the story’s inner and outer conflicts. You’d think, therefore, that flashbacks would be the perfect choice for this story. But not so.
Why?
3 Ways Your Flashbacks Might Be Taking More Than They’re Giving
Jane Got a Gun shows us three excellent reasons to reconsider employing flashbacks:
1. The Flashbacks Don’t Offer Enough New Info
Flashbacks—especially dramatized flashbacks—take up an inordinate amount of time and space. This signals to readers that the information they offer is important. What that means to you as the author is that you must weigh the plot-moving information your flashbacks are providing against the amount of space they require.
For Example: In Jane Got a Gun, the flashbacks take up nearly half the running time—and yet, they convey only one single solitary bit of new information (SPOILER That, unbeknownst to Dan, he had a daughter with Jane, who was supposedly murdered by the antagonist. /SPOILER)
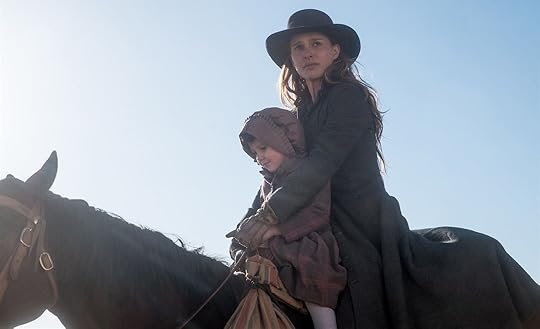
Rule of thumb: don’t create flashbacks that are “bigger” than the amount of information they convey.
2. The Flashbacks Destroy Subtext
The bulk of your story’s subtext will be provided by your character’s backstories. The moment you bring that backstory into the clear light of dramatized narrative, it ceases to be subtext. It becomes obvious, blatant, even on-the-nose. It loses more than half its power. Sometimes this trade-off is acceptable (especially late in the story), but always ask yourself whether the fun of dramatizing the backstory is worth the subtlety and mystery you lose in the main story.
For Example: Jane and Dan’s relationship would have been far more powerful and intriguing had it not be outright explained to viewers through the unnecessary flashbacks. Especially when we realize this desire to explain was the only reason these flashbacks were included in the first place, it’s a shame the relationship couldn’t have been conveyed with more subtlety and drama.
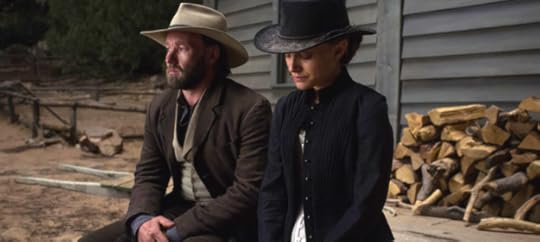
Always ask yourself if the subtextual power you’re losing is worth the exchange of blatant flashbacks.
3. The Flashbacks Shift the Emphasis From Where It Belongs
Flashbacks are, by their very nature, a little obtrusive and blatant. The more lengthy a dramatized flashback, the more it will, in essence, jump up and down and shout, “Look at me!” This means it pulls emphasis away from what really matters: the main plot.
Except for those rare instances in which your backstory actually is more important that your character’s current struggles (in which case, you might want to consider why you aren’t writing the backstory saga instead), be wary of stopping your narrative, stuffing it with flashbacks, and losing the ability to focus emphasis where it counts.
For Example: Because Jane and Dan’s flashbacks took up so much space and explained away so many past hurts, their relationship in the main story ended up having little to do and little time in which to do it anyway. The main story was sacrificed to a needless exploration of a backstory that could have been revealed with more power and precision without the flashbacks.
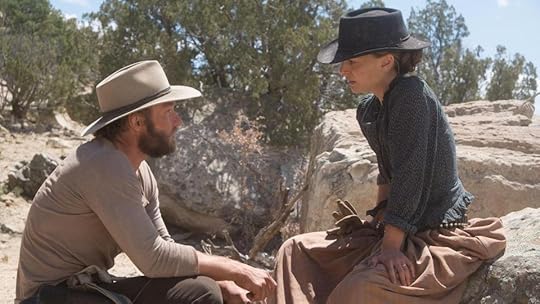
Don’t let unnecessary flashbacks take over and rob the forward momentum from your story’s main conflict.
Consider your main narrative and your backstory. Nine times out of ten, flashbacks will not be the best choice for either. But if you find yourself wondering whether a flashback or two might be just the trick for your characters’ tale, stop and objectively examine whether this blatant exploration of backstory is more likely to add or take away from what you’re trying to accomplish.
Wordplayers, tell me your opinion! Have you used flashbacks in your work-in-progress? Why or why not? Tell me in the comments!
The post The Only Reason Your Story Should Have Flashbacks appeared first on Helping Writers Become Authors.


