
How to Write a Scene Outline You Can Use (How to Outline for NaNoWriMo, Pt. 9)
 When most people ask “how to outline a novel,” what they’re really asking is “how to write a scene outline.” But here’s the thing: writing a good scene outline should be the last thing you do in your outlining process—which brings us to the ninth and final part in our two-month exploration of how to outline for NaNoWriMo (or any month) in a fun, fulfilling, and profitable way.
Although every writer’s outlining process should be uniquely optimized to suit personal needs and inclinations, I hope you’ve seen by this point in the series how a good outline is far more about brainstorming your story than it is simply listing possible scenes.
That’s why I’ve saved the scene outline for last. This isn’t because the scene outline is least important; rather, it’s because once you’ve done all your groundwork in discovering plot, theme, and characters, your scene outline will practically write itself.
Still, there are several tricks you can use to get the most out of this final crucial step in your outline. You’ve been waiting for it a long time, and now here it is: how to write a scene outline!
How to Write a Scene Outline: 6 Steps
 Figuring out how to write a scene outline is one of the most intuitive parts of the process. Unlike the freethinking non-chronology of the General Sketches, the scene outline will be mostly linear. You’ll start with Scene 1 and work your way through the story to the final scene.
How in-depth your scene outline should be depends entirely on your needs. You may feel you now know enough about your story to simply jot off a quick one-line summary for each scene. If you’re like me, you’ll go a little deeper. I view my outlining process as a progression from big picture down to the finest details. Even though I already know my general plot by the end of the General Sketches, I now want to use the scene outline to discover the blow-by-blow of each scene.
 I tend to view my scene outline as almost a first draft in itself. It doesn’t contain dialogue or narrative-worthy prose. But it explores the progression and structure of each scene in as much detail as possible—which then allows me the freedom in the real first draft to focus on crafting the narrative itself and bringing the story and characters to life.
Obviously, I do all this work in the scene outline because I feel it’s helpful (irreplaceably so for me), but you shouldn’t feel you have to dig this deep. Many authors prefer to dive right into crafting the narrative and then figure out the nitty-gritty of their scenes while actually writing them.
And now, here are six steps for how to write a scene outline that will help you write your best first draft.
Step 1: Figure Out How Many Scenes Should Be in Your Story
In discussions of story structure, I’m often asked: “How do you figure out the timing of the structural points if you don’t yet know how long the book will be?”
Good question. There is no hard and fast answer, since the truth is you don’t know how long the book will be. Most of the time, once the first draft is finished, you’ll need to go back and tweak the fat and lean sections to find the optimal pacing. However, you can anticipate the proper timing to a large degree, simply by determining how many scenes you’d like the book to end up being.
The actual number of scenes will depend on your genre, your target word count, and your tendency to write short or long scenes. My books always end up longer than my target goal, so I estimate on the short side.

If you’re shooting for scenes/chapters of around 2,500 words in length and books of around 100,000, that means you’ll need to include around 40 scenes. From there, divide your number of scenes by 8 to calculate how many scenes will exist between each of your major structural moments (Inciting Event, First Plot Point, First Pinch Point, Midpoint, Second Pinch Point, Third Plot Point, Climax).
If you are indeed shooting for 40 total scenes, you’ll end up with 5 scenes per structural section. From there, you can start calculating how best to include, combine, expand, and portray the events that need to happen in each section of your story—including the structural beats themselves. You can use this as a guide to figure out how to write a scene outline that is optimally structured.
Step 2: Use These Important Labels for Each Scene
Make things easy for yourself. Include as many pertinent labels for each scene in your outline as possible. As you dig deeper into the scene outline, and later as you use it to write your first draft, you’ll find it’s easy to get lost in all the information. Give yourself road marks.
At the beginning of each scene in your outline, make note of the following:
The number of the scene within the overall outline.
The name and/or brief summary of the scene.
The date of the scene within the story.
The character whose POV (point of view) will be used.
The setting(s) in which the scene will take place.
I take this a little further and save images of costumes, settings, and props to the story’s image folder on my computer, so I won’t have to go digging for inspiration in the midst of the actual draft.
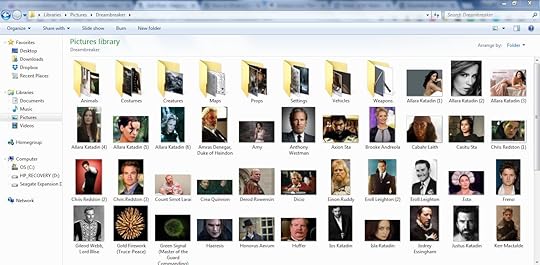
I collect all the pertinent images I think I’ll need during the scene outline, so I don’t have to go looking when writing the first draft.
As of my current outline for Dreambreaker, I’m using Perry Elisabeth Design’s wonderful WriteMind planner, which offers extremely handy “Scene” inserts that help me record all this info at the beginning of each scene in my outline.
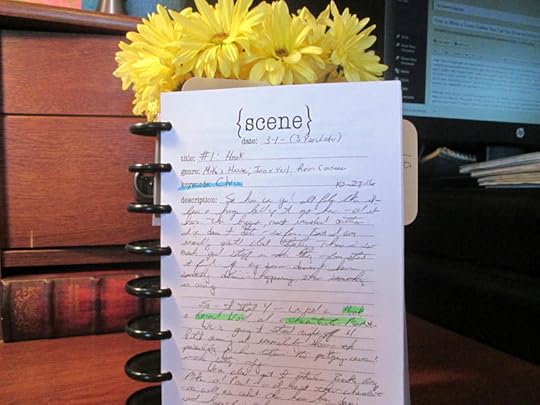
Part of figuring out how to write a scene outline is having the right organizational tools. Scene dividers are useful, even if you just write them out by hand.
Step 3: Outline the Scene
Now you’re ready to write this puppy! Although you will already have a general idea of what will happen in each scene, you still have the actual machinery of the scene to work out. For example, let’s say you know your character is going to be mugged in your opening scene. You’re going to need to ask yourself the following questions:
How is he mugged?
Where does it happen?
Why does it happen?
Why was he in that back alley in the first place?
What scene goal led him there?
How will the obstacles of the scene directly impact his scene goal?
How will he react?
How will the events of these scene lead him into the following scene?
 As for how you should write your scene outline, I recommend continuing with the same conversational style you used throughout the previous sections of the outline. For example, here’s a snippet from my scene outline for my dieselpunk-adventure Storming (which was just named a Finalist in the Best Book Awards—woot!):
The story opens with Jael’s fall from the sky.
Hitch is flying along, when—whammo!—his plane gets smacked by a woman.
So first question—what’s he doing out there?
The troupe is going to need two planes to transport everybody, and I want Hitch to be alone in the scene, so they’ve presumably already arrived in Scottsbluff.
It’s nighttime. Hitch is off for a solo flight (with his dog). He’s doing it partially for enjoyment, partially to scout out likely areas for the show, but mostly to reacquaint himself with his home area. He flies over the Hitchcock farm, etc.
But all that can be told briefly, just enough to present his mindset and offer a little hook regarding his rocky return.
I think we’ll start the very first sentence with Jael’s dropping in.
He’s shocked, of course, but also reactive.
She needs to catch fire somehow—without the engines being endangered…

Don’t forget you can download the complete transcript of one my outlines, for more examples.
Step 4: Figure Out the Scene’s Structure
You should be thinking about your scene’s structure throughout the previous step. Whenever you find yourself at a loss for what your character should be doing or why, focus on his scene goal. What does he want in this scene? Why is he pursuing it and how?
Then examine the obstacles getting in his way and preventing him from just waltzing over there and grabbing his goal, no problemo. This is where you find your scene conflict.
How will that conflict be resolved? What will be the outcome of this little episode within the overall story? Scenes should always end with consequential loose ends. Even if the scene doesn’t end in outright disaster with the character’s scene goal being thwarted, it should still end with a “yes, but…” Perhaps he gained what he wanted in this scene, but now what? What unforeseen negative or complicating consequences are going to arise that will carry him into the next scene?
You must then consider the character’s reaction to the complications of the conflict’s outcome. What does he feel in response to what’s just happened?
What does he rationally think about the new dilemma that has been introduced into his life?
What decision will he reach about that dilemma that will lead him right into the next scene’s goal?
You can see how all six of these elements of good scene structure are integrally connecting. None are random. They all roll one right into the other.
After you’ve worked through all six parts of your scene, grab a note card and write them all down, both to make sure you’ve checked all six off your list and to give yourself a handy guide for referencing them later.
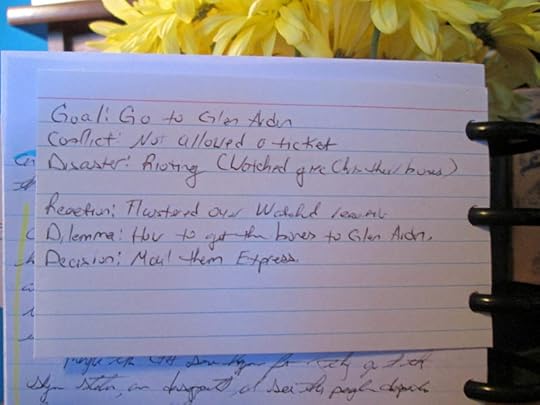
What’s the most important part of figuring out how to write your scene outline? I vote for the scene-structure card.
Step 5: Implement a Highlighting System
As with every part of the outlining process, the scene outline is going to have you doing a lot of thinking out loud on the page (whether in a notebook or on the computer). Although all of those thoughts are necessary, not all of them are pertinent enough to be recorded in your “official” outline. You don’t want to have to wade through all your “what-iffings” in order to reference the actual decisions you’ve made about a scene.
To help you track what’s what in your outline, you can implement a simple color-coding system using highlighters. For example:
If an idea is a “keeper,” highlight it in blue.
If an idea is unfinished or raises a question you need to work through later, highlight it in green.
If an idea isn’t necessarily pertinent to the current scene, but will be important as you outline later scenes, highlight it in yellow.
If an idea isn’t necessarily pertinent to the current scene, but is just general information you need to save, highlight it in orange.
If an idea ends up being in the wrong place in your outline (e.g., you added something to an earlier scene), highlight it in pink and use directional arrows to indicate whether it needs to be moved earlier or later in the outline.
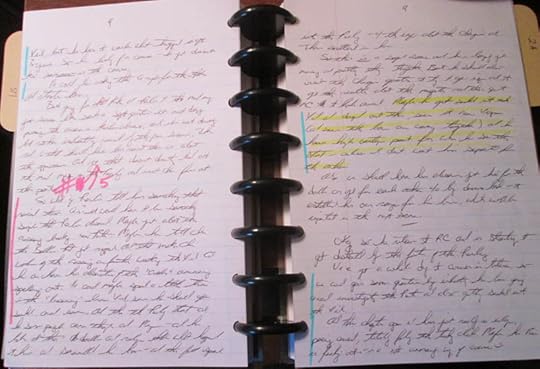
Figure out a color-coded highlighting system that will help you organize your notes for easy reference.
At the end of each day’s outlining session, take a few minutes to go back over your notes while they’re fresh in your mind, so you can highlight them appropriately for future reference. If you’re writing in a notebook, you can use the color-coding to guide you when you transcribe your notes onto the computer (into Scrivener, if you’re like me).
Go Forth and Outline!
How do you know when you’ve reached the end of your scene outline? Easy! You add that last scene and write THE END—and then you get ready to start that amazing first draft.
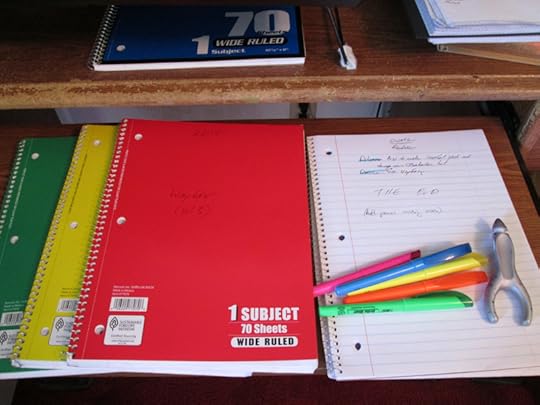
The End! This is my completed scene outline from my historical superhero WIP Wayfarer.
My outlining process is very much about identifying a story’s big picture, then digging down to figure out how to best put the pieces together to achieve the desired effect. It’s a process of discovery. It’s a no-pressure process—you get to play in your story with no worries about getting your prose right or making sure the protagonist is coming across as likable. It’s a process that will build you a solid foundation for when you’re ready to start adding the paint and furniture of the narrative, so you can then invite your readers in to sit down and enjoy the finished product.
Like all of writing, outlining is work. It requires discipline, focus, and clear goals. It also requires you to pay attention to your own creative needs—what works for you and what doesn’t. Concentrate on finding and refining the process that works best for you and that gives you the best shot at your best story. That’s the power of the outline. Now, go forth and outline!
Previously in This Series:
Should You Outline Your Novel?
Start Your Outline With These 4 Questions
3 Steps to Find the Heart of Your Story
How to Find and Fill All Your Plot Holes
4 Ways to Write Backstory That Matters
3 Tips for Weaving Together Your Story’s Pieces
How to Structure Your Story’s Outline
Making the Most of Character Interviews
Wordplayers, tell me your opinion! Have you ever struggled with how to write a scene outline? What is your preferred approach? Tell me in the comments!
http://www.podtrac.com/pts/redirect.mp3/kmweiland.com/podcast/how-to-write-a-scene-outline-how-to-outline-for-nanowrimo-pt-9.mp3
Click the “Play” button to Listen to Audio Version (or subscribe to the Helping Writers Become Authors podcast in iTunes).
The post How to Write a Scene Outline You Can Use (How to Outline for NaNoWriMo, Pt. 9) appeared first on Helping Writers Become Authors.


