Stuart Ellis-Gorman's Blog, page 14
December 5, 2022
First Impressions: Napoleon 1806 by Denis Sauvage
I’m low-key obsessed with block games - there’s something that’s just so appealing to me about pushing blocks around. Maybe it’s somehow related to all those years I spent playing miniatures wargames. Block games also tend to be operational scale and card driven which are two things I really like, plus they’re usually relatively simple and easy to play. All of those are positives, but I think there’s something about the tactile nature of the blocks and the simple fog of war that just really works for me. While I have very much enjoyed my time with the Columbia block games I have played, I am also always on the lookout for new and interesting takes on things I enjoy. This meant I was immediately intrigued when I first saw the Conqueror’s Series from Shakos Games. These games, all about Napoleon so far, promised a familiar yet distinct variation on the block games I was used to. However, I held off on buying one for the simple reason that I have had to impose a limit on myself on the number of unplayed block games that I own. The issue is that while I love block games, they are not very solitaire friendly and they also lose a lot of their appeal when you play online. Since I have very limited face to face gaming time this means that I don’t play as many block games as I would like. I got lucky, though, and Napoleon 1806, the first game in the Conqueror’s series, was picked to be the game of the month for November by the Homo Ludens discord and so I made sure to carve out some time to play it.
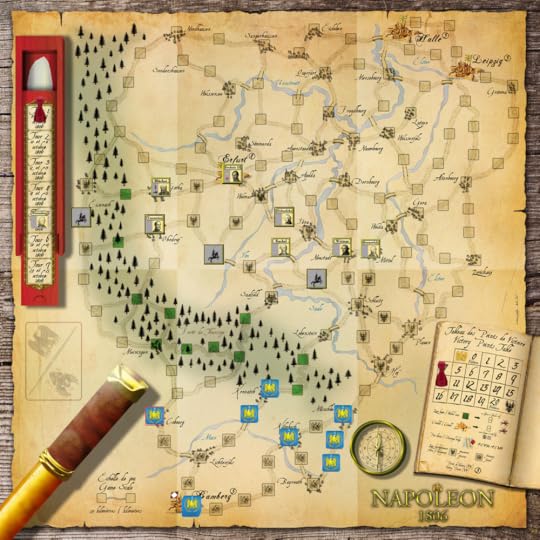
Initial set up for Game 2. I’m the Prussians this time since I had one game under my belt and it was my opponent’s first. The black horse and rider blocks are “dummies” that are immediately eliminated if they contact an enemy block. I need to survive seven rounds to win - or get to 20 VPs but that’s not going to happen. If Napoleon can drag the VPs down to 0 he wins.
Unfortunately, while I was able to play two games of Napoleon 1806 last month neither one of them was in person. While the Vassal module for Napoleon 1806 is pretty good and I had a relatively easy time using it, playing block games on Vassal or Tabletop Simulator always leaves something to be desired - Rally The Troops is better but has a more limited selection. That tactile nature of pushing the blocks around is so satisfying and I miss it every time. There are also elements of the interface that would be easier in person but are rendered clunky online. For example, Napoleon 1806 has a separate board for tracking unit strength and frequently has you flipping cards from the top of your deck to determine a number of effects. Both of these would be easy to manage in person, but as your unit board, the main board, and the card decks are all in separate menus on Vassal this can make for a mildly tedious play experience. That all said, being able to actually play these games, no matter the slightly clunky interface, is vastly preferable to not getting to play them at all. I do wish all digital block implementations were as good as those on Rally the Troops though.
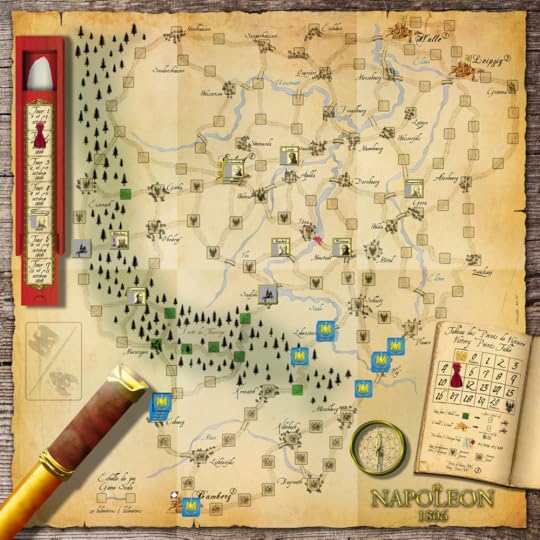
End of Turn 1. I’m attempting a threatening flank on the left and bluffing in the middle while Napoleon makes a big push on the right. I gain a VP each turn that I control three of the citadels and Napoleon will gain a chunk of VPs if he can take Erfurt, Leipzig, or Halle from me so I need to protect him. The red cube is a bridge I’ve elected to destroy, increasing the cost of moving that way substantially.
Napoleon 1806 makes some really interesting tweaks to the classic Columbia block game format that I’m used to. I think the two most interesting are how it handles unit strength and movement. There are other interesting minor differences but the only one that I found myself routinely reminding people of in my two games was that blocks from both sides can cohabitate in a space, there is no mandatory combat when both sides arrive at the same location. This makes for some interesting decisions as you suffer a combat penalty if you fight on the same turn you move, but if you don’t initiate combat your opponent could simply walk away on their turn. However, it’s really how the system overall handles movement and combat in general that is what really sets these games apart in my mind.
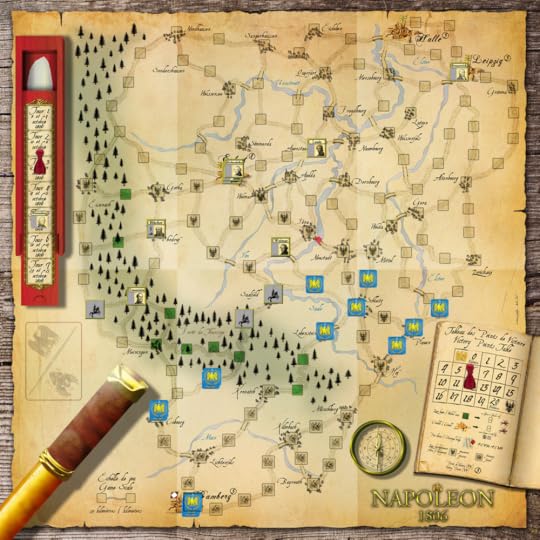
End of Turn 2 - I continue by bluff in the centre and push a bit further on the left, also bluffing some. Napoleon pushes up the right but I’ve managed to get a block into Leipzig so I’m feeling a little safe on that front. My goal is mostly to delay him. Thankfully this past turn we also had the Rain event, so that slowed the Napoleonic advance.
First, let’s talk about movement. In Napoleon 1806 on your turn you can choose to activate a number of “Corps”, the term for blocks that represent armies as opposed to the blocks that represent leaders, in one location. Once you have chosen how many you wish to activate, you flip the top card of your deck (each player has their own unique decks) and you use the value in the top right corner as your Movement Points for that turn. A number of potential elements can add or subtract from this number. Some commanders and Corps have abilities that increase movement, some events decrease movement, and for every Corps after the first that you chose to activate you suffer minus one movement point. This can mean that in certain conditions, such as activating multiple Corps on a turn when the Rain event has triggered, you may not be able to move at all. Not knowing how far you can move in a turn makes it challenging to plan your strategy but does reflect the difficulties that commanders at the time would have had moving these large armies across sometimes difficult terrain. The games somewhat subtle asymmetry also appears here as the Prussian side has a deck with much lower values than the French, meaning that in general they are not able to move nearly as far.
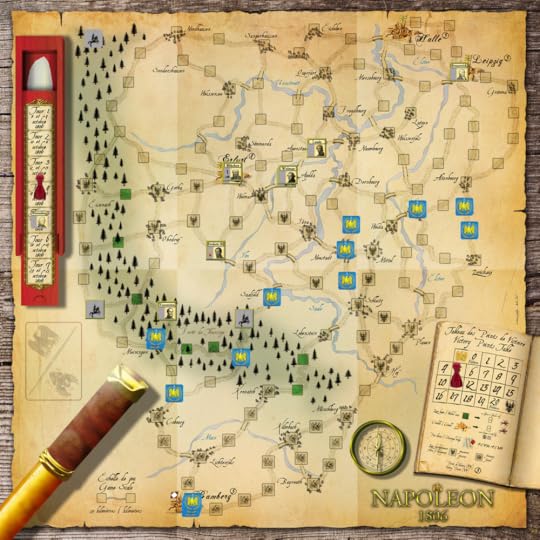
End of Turn 3. We had our first fight on the left which revealed that Napoleon himself was there! Things went very badly for the lone Prussian commander who is also now entirely devoid of meaningful support. Meanwhile my bluffs are slowly crumbling but are at least distracting Napoleon’s Corps some. Napoleon has also repaired the broken bridge and is splitting his forces between Erfurt and Leipzig.
Napoleon 1806’s other significant feature, and the one that attracted me the most, is how it handles block strength. Instead of strength being printed on the blocks, there is a separate board for each side that includes a line for each Corps. The strength of your Corps is tracked on this board but a player screen hides it from your opponent. Each Corps has two key stats to track: strength and fatigue. Strength is represented by cubes with the number of cubes each Corps has determining how many cards it can contribute to a combat. This is tracked in thresholds, i.e. if you have five or more cubes you draw two cards for combat, four or less and you only draw one. Each cube is also worth a victory point for your opponent if it is eliminated.
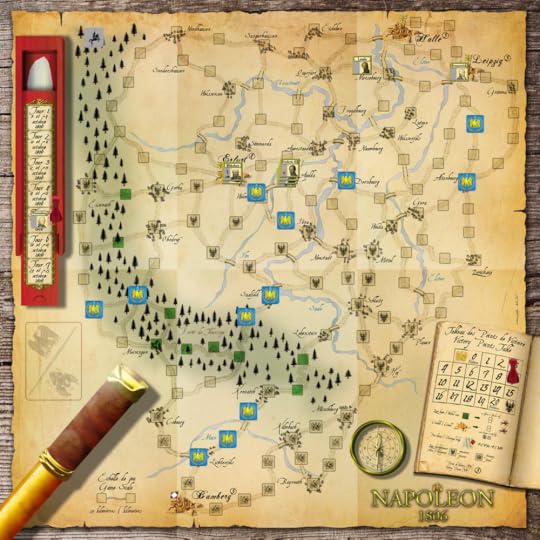
End of Turn 4. Left and centre positions have crumbled and Napoleon is at the gates of Erfurt. However, the VP position could be worse and we’re now more than halfway through the game. I just need to hold out for three more turns, and I’m about to get some reinforcements in the north!
Fatigue is represented by cylinders that are added to the the Corps on a track just beneath the strength track. Fatigue can be gained by marching more than three spaces in a given turn, arriving at or leaving a space with an enemy block, a number of event cards, or as a combat result. Having more than five fatigue costs you one card in combat and will cause the Corps to suffer a casualty at the end of a round and having eight fatigue triggers the immediate elimination of the Corps regardless of strength remaining. Managing your fatigue levels is essential to good play in Napoleon 1806.
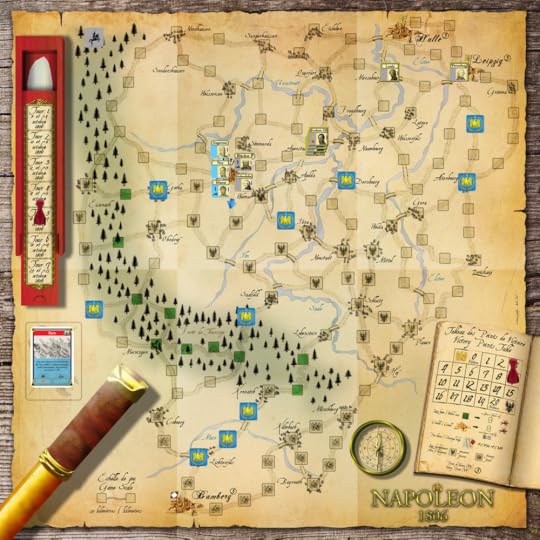
On Turn 5 the French launch a major assault on Erfurt. Due to the rain Napoleon III was unable to reach the city in time to provide support. However, some truly stunning card draws on the part of the Prussians saw both sides suffer heavy fatigue but ultimately resulted in a stalemate so both sides continued to contest the space.
One final mechanism to note since I’ve hinted at it a few times already: combat resolution. Like with movement, combat is resolved by flipping the top card(s) of your deck but instead of the number in the upper right you are using symbols in the bottom left. Orange symbols inflict fatigue, symbols of your opponent’s unit colour inflict casualties. The number of cards drawn is based on the Corps present and their strength, plus event cards played from your hand and/or commander abilities. Once again the decks are asymmetrical, so the French have consistently better combat results than the Prussians.
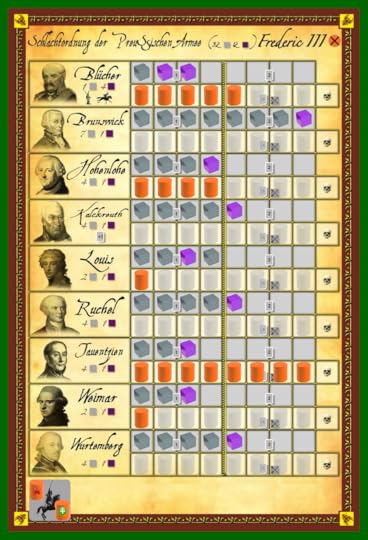
The state of the Prussian forces at this stage in the game. The grey cubes are infantry, purple are cavalry, and orange cylinders are fatigue. We’ve taken some serious abuse but we’re still holding strong!
I will say that I don’t think the Napoleon 1806 rulebook does a great job at explaining all of these differences to you. I am reliably informed that this is primarily a problem with the English translation of the rules, and that the French original is much better. I will say that I played my first game pretty incorrectly and would have really appreciated a more detailed breakdown of what the Operations Phase of the game entailed. There are great examples explaining the Draw Phase and things like Combat but I found the Operations Phase, which is the bulk of the game as it is when you’ll be activating Corps and moving them around, could have benefited from greater clarity.
In my first game we managed to completely misunderstand how movement worked and played it like a traditional CDG block game - playing cards from our hand for their number values to move Corps around. This made for a very quick game as we were only activating about three Corps each turn, leaving most of the units largely unused. This was obviously the incorrect way to play and with some help from a French speaking player I managed to correct these errors, but I will say that to some degree I preferred this mistake.

The start of Turn 6 - Erfurt remains contested but Napoleon is approaching from the left. Can Napoleon III reinforce the city in time? Should he? On the top right, the French have arrived at Leipzig but elected not to fight until they can bring in more reinforcements for a general assault.
I don’t know that I particularly like the system of flipping your top card to see how far you move - or maybe instead what I don’t really like is how you can activate every Corps every turn. There are incentives to not activate them all, if you don’t activate a Corps it recovers all its Fatigue at the end of the turn, but I did find the game took a little long for my taste with every unit activating ever turn in my second game. This was particularly exacerbated by the fact that in my second game I played the Prussians who just need to survive the game’s seven rounds to secure a victory. This meant that I would do a little movement, set up some defensive positions, and then sit as the Napoleon player activated the rest of their enormous army. I felt like I played around 30% less of the game than my opponent did. I expect that at a higher level of play the Prussian player probably does more, but I also don’t know that I enjoyed the experience enough to play it enough times to get to that level. It all just felt a little too long for my taste. That’s not to say that Napoleon 1806 was a very long game, certainly not on the scale of other wargames, but my free time is limited and it just felt long for what it was.
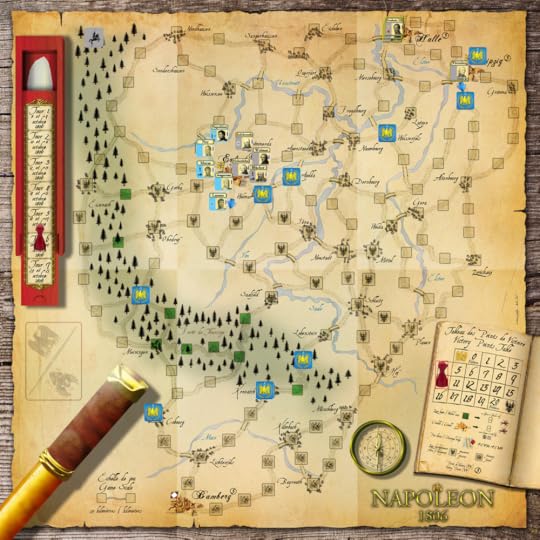
Middle of turn 6: another big battle in Erfurt, this time featuring l’Empereur himself. However, some stunning draws meant that the Prussians inflict one more casualty on the French than they receive, driving the French from Erfurt even as one Prussian Corps is eliminated by fatigue and the rest severely crippled. Frederick III’s decision to reinforce the city is validated!
What I did really like about Napoleon 1806 was the combat and the ways of tracking battle damage. The fatigue system in particular is amazing and the fact that you can’t see just how badly beat up your opponent’s Corps are makes for some really tense game moments. I had times in my second game where I was convinced that my opponent was going to march in and obliterate a few Corps that I had which had been badly mauled in two previous fights. However, my opponent’s Corps were so badly fatigued that he couldn’t really afford to push them forward to attack, or if he did they were so penalised that they had barely any impact. Two armies that in a previous round had been drawing 7 and 9 cards respectively, two turns later were drunkenly punching each other with 2 and 3 cards. It elegantly represents how these armies would get run down, not only in terms of men wounded or killed but also just the bone tiredness that would set in after days of constant campaigning. I love these systems.
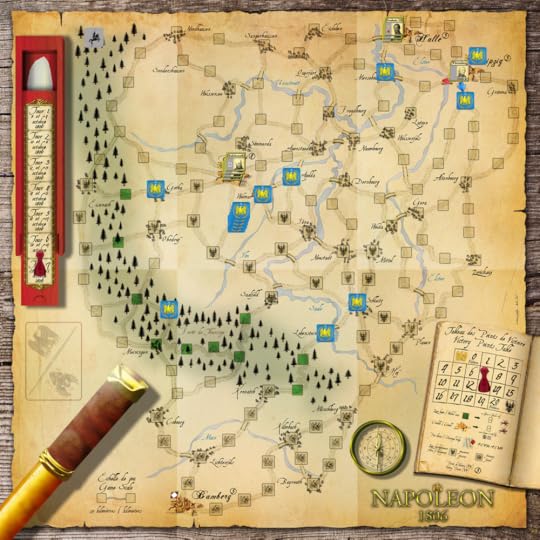
Start of the final turn and things are looking pretty good for the Prussians. That said, the Corps in Erfurt are in very poor shape and if Napoleon can eliminate them and seize the city he can still win! Alternatively, if he can drive them out and get lucky in Leipzig he could potentially secure a victory.
I should also briefly mention the two ways that the game can be played. In my first game we used the standard rules where the blocks are placed face up on the map and deployment of them is strictly defined by their historical positions. This allows you to see what Corps is where but you still can’t know the exact strength of any of them. In our second game, at the insistence of our French observer, we played using the “Grognard” rules which switch the game to a more classic hidden block set up, where your blocks are only visible to you and your opponent just sees a generic back. It also introduces three “dummy” blocks for each player, these can be moved like normal Corps but if they are ever in the same space as an enemy block they are automatically eliminated. These rules also allow for a certain amount of free deployment of your blocks. It seems weird to me that these rules are labeled “Grognard” as all but the free deployment are pretty straightforward, especially if you’ve played any block games before (and block games are far from the complex end of wargaming). I would probably recommend the Grognard variant for anyone trying the game out, although maybe use the historical set up for a first game instead of the free deployment.
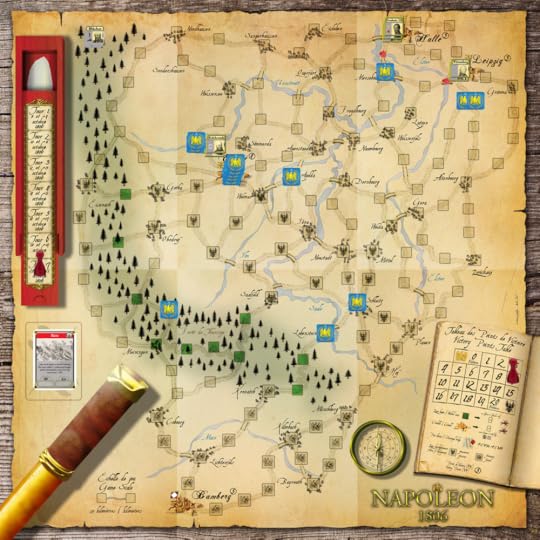
Game end. Napoleon succeeded in seizing Erfurt but ran out of steam before he could eliminate the final Prussian Corps in the region. Meanwhile the French attack in Leipzig was unsuccessful. The Prussians survive and claim victory!
Overall, I enjoyed playing Napoleon 1806 but I don’t think I will be seeking out more games of it in the immediate future. I am, however, very interested in trying more games in the series. My main objection to Napoleon 1806 is the asymmetry of the game. The Prussians are much weaker than the French and are largely playing a game of delay and harass rather that meeting the French on equal terms in the battlefield. In a big punch up fight, more often than not the French will win. I don’t think this is a flaw in the game and in fact from my limited understanding of the Napoleonic Wars this feels like a good representation of the history. I just didn’t find the Prussians to be very fun to play - and that is entirely down to what I like to get out of my gaming experience. My favourite of the Columbia Block games I’ve played is Richard III which is arguably the one closest to a big dumb fight where you smash your armies together in horrifically bloody outcomes. The delaying tactics of the Prussians while interesting where not the kind of experience I want out of my block games. This is compounded by the knowledge that if I kept playing it every time I taught someone Napoleon 1806 I would have to play the Prussians because with a new player the chances of me just crushing them as Napoleon and giving them a bad impression of the game are far too high. I think when you learn the game Napoleon is highly favoured to win, but as you play more I suspect the balance evens out considerably. I know that there are people out there who really enjoy playing the Prussians in this game so for lots of people the asymmetry will absolutely work but for matters entirely relating to personal taste I don’t think it’s for me. I am interested in trying Napoleon 1807, though, as I do like most of the features of this system and I suspect it could produce a game I truly love.
November 28, 2022
Men of Iron: Nájera 1367
The Battle of Nájera, fought on the 3rd of April 1367, was the last great battle in the prestigious career of Edward, the Black Prince. While not his final campaign, that dubious honour belongs to the siege and sack of the city of Limoges in 1370, it was his final field battle and great victory. While the battle itself was a resounding success for Edward, the 1367 campaign and its aftermath was overall a complete disaster, which achieved little in the long term and likely lead to the Black Prince’s death and the resumption of the Hundred Years War during a period of marked French ascendancy. Because of this contrast between the success on the day and the disaster over the longer term I think the Battle of Nájera is an interesting lens through which we can explore how medieval warfare is often represented in wargaming and how that perspective can unintentionally distort our understanding of the past.
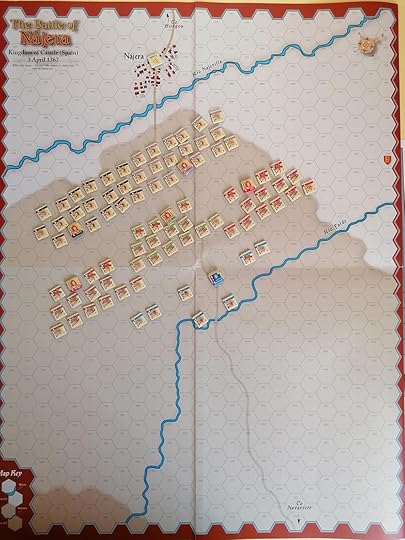
Initial deployment - the Franco-Castilian forces have been deployed in an orderly fashion. Tragically for them, the English will be arriving from the right and not the bottom of the map.
Nájera is also the largest scenario in the original Men of Iron, with an estimated play time of three hours, and includes the largest single army in the series’ first entry. This scenario was also one of the more flawed representations of medieval history I’ve encountered in my time with the Men of Iron series. I am particularly dubious about Berg’s interpretation of the history of Castile and its relationship with the tactics of the rest of western Europe. Flawed does not mean uninteresting, though, and there is a lot to both Nájera, the battle, and Nájera, the Men of Iron scenario, to talk about!
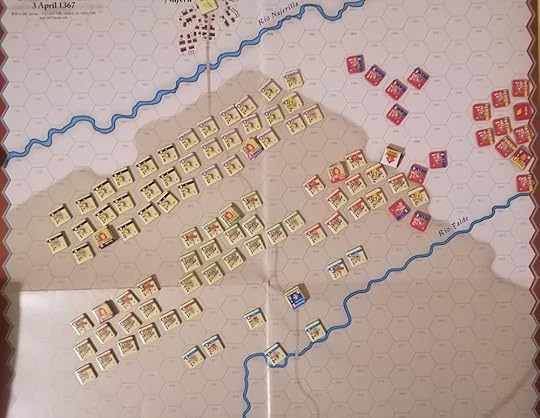
The English begin arriving and the vanguard immediately makes a dent in the Franco-Castilian flank. Being attacked from the side is not a good time in Men of Iron.
Before analysing the tactical elements of Nájera, and how Richard Berg has chosen to represent them in Men of Iron, it is worth considering Nájera in its wider context. The Battle of Nájera was a result of one of the Hundred Years War’s many proxy wars which took place in territories bordering France. The most famous of these is probably the extensive civil war fought on the peninsula of Brittany throughout much of fourteenth century, but comparably important was the fight over control of the Kingdom of Castile in northern Iberia. For much of the Hundred Years War Castile had been a staunch French ally, providing naval support and occasionally, as in the Battle of Winchelsea in 1350, engaging in naval clashes with the English. However, when King Peter II, known as “The Cruel”, came to his majority in the 1350s he showed himself to be receptive to English overtures of a potential alliance. Castile was strategically important as it bordered the English held Duchy of Aquitaine on the south and was key to control of the Bay of Biscay off the western coast of France. With much of Aquitaine’s wealth coming from the wine trade with England, all of which passed through the Bay, securing control of this area was of great potential value to the English. A friendly Castile could also pose a risk to French control in the south of the kingdom.
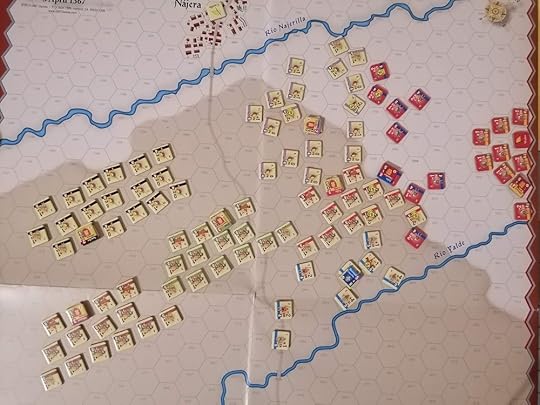
I decided that the genitors might be something of a lost cause and chose to move the pikemen first to make a front to oppose the English. Du Guesclin’s Battle has also pivoted. New battle lines have been drawn, even if they still leave a lot to be desired for the Franco-Castilians.
Unfortunately for the English, Peter was not a very good king. From the mid-1350s and through most of the 1360s he fought an extensive war with the neighbouring Kingdom of Aragon, during which he proved to be a remarkably incompetent commander. Finally, in 1366 the Castilian nobility decided they were tired of his wars and his cruelty and deposed him in favour of his illegitimate half-brother Henry of Trastámera. Peter fled north to Aquitaine where he was accepted into the court of The Black Prince, who was Duke of Aquitaine and ruled the region largely independent of his father King Edward III. Peter convinced the prince that if he invaded Castile and put Peter back on his throne the Castilian king would cover all the costs of the expedition.
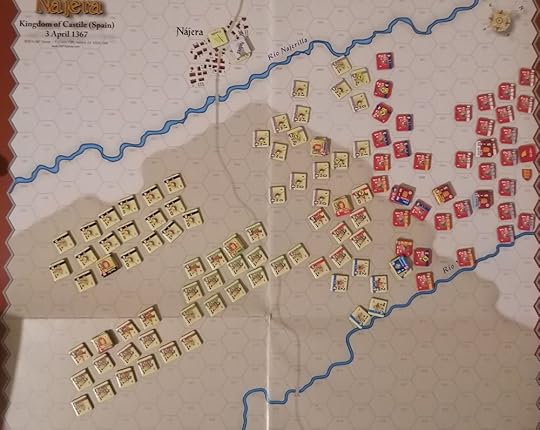
The main host of the English army has now arrived and some holes are beginning to appear in the Franco-Castilian lines.
Some context on the broader Hundred Years War is useful here. The decisive English victory of Poitiers in 1356, at which the French king Jean II was captured, had lead to the signing of the Treaty of Brétigny in 1360. This treaty ceded large parts of south-west France to the English king in exchange for Edward III renouncing his claim to the title King of France. It also forced the French king to pay an enormous ransom for his freedom. This was probably the closest the Hundred Years War came to a peaceful conclusion and it also means that in 1366 the French and English were technically at peace. This uneasy peace made it possible for the Black Prince to travel south from his Duchy and campaign in Iberia without risking a French invasion. Meanwhile, while the French could not send an army directly to oppose Edward without risking breaking the treaty, they supplied French mercenary companies for Henry of Trastámera to hire and the noted captain and later Constable of France Bertrand du Guesclin traveled to Castile to support the usurper king.
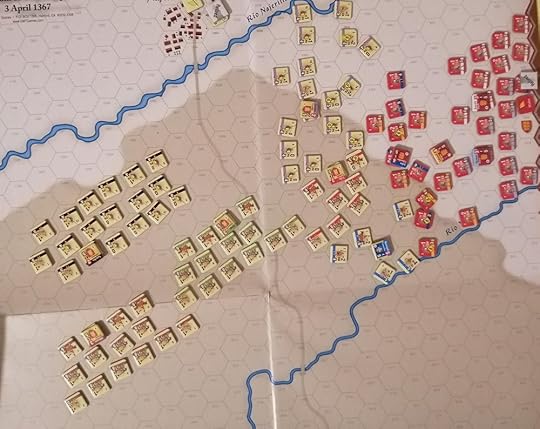
The Franco-Castilians strike back, beginning to turn the English right flank but du Guesclin’s attack has stalled out into something of a brutal slog.
On the 3rd of April 1367 the Black Prince delivered a decisive defeat to the Franco-Castilian army. He captured Bertrand du Guesclin but Henry of Trastámera escaped and fled to the court of the French King Charles V, son of the king who had been captured at Poitiers. On its face this was a significant victory for the Black Prince, another in the string of victories that marked his military career. That is often how it is represented, particularly in English language historiography. However, the bigger picture is much less flattering. Firstly, Peter II refused to pay Edward back for his expenses - whether he even could afford to is a topic of some debate - and the prince was forced to raise taxation on his duchy to cover the costs. These high taxes to cover the debt would cause unrest in the duchy which would eventually give Charles V the pretense he needed to reopen the Hundred Years War with a once again free Bertrand du Guesclin leading the French to a string of dramatic victories which reclaimed much of the territory lost as part of the Treaty of Brétigny. Secondly, it was probably on this campaign that the Black Prince caught whatever wasting disease that would eventually kill him. While he would not die for another decade, he was so ill that he had to give up on military campaigning after 1370 and even by then he was often carried on a litter rather than riding his horse. Lastly, Nájera didn’t even bring much long term benefit to Anglo-Castilian relations. Bertrand du Guesclin would lead an invasion of Castile with Henry of Trastámera in 1369 and would defeat Peter II at The Battle of Montiel. While Peter would escape, later that year he would be murdered by Henry and Trastámera would secure the throne for himself.
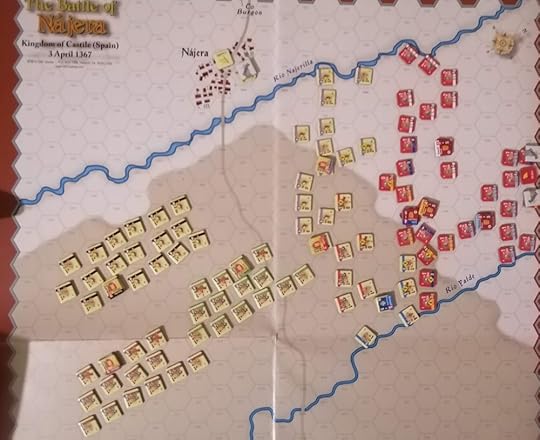
The English bring up another Battle to shore up their right flank and punch a substantial dent in the middle of the Franco-Castilian lines.
While I generally enjoy hex and counter wargaming and have obviously spent a considerable amount of time with Men of Iron specifically, I think this tactical level focus can obscure the actual history of the period. When we examine Nájera within the context of the scenarios included in Men of Iron it is just yet another English victory, showing off their superior tactics and commanders. It isn’t possible to include the elements that made the Nájera campaign an utter disaster for the English in a game of this scale. The disproportionate number of tactical games about medieval warfare creates a narrow lens through which the period is viewed and I think the flaws are most apparent when it comes to battles like Nájera, where the final result of the conflict clashes so dramatically with what happened in April 1367. One possible way to try and counteract this would have been to include a scenario of the Battle of Montiel - while not covering all of the reasons why Nájera ended up being a disaster, at least by showing that two years later Peter was ousted by Henry and du Guesclin it could give players more context. It would also have the advantage of making use of the Castilian counters again - it does feel a little weird that there’s a ton of counters that are just used for this one battle and no others.
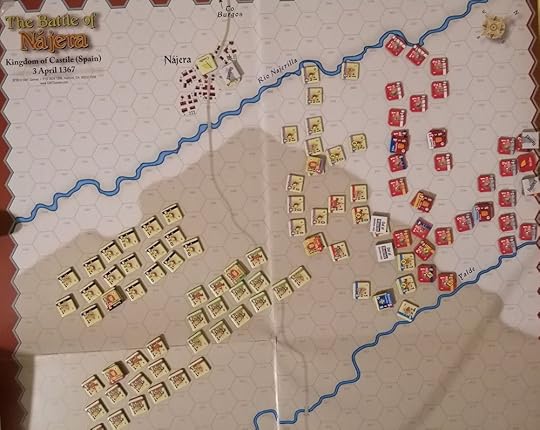
The genitors finally get involved to underwhelming results. You may also notice at this point that the three Franco-Castilian battles in the left have not activated at all, which is pretty classic Men of Iron for scenarios with this many Battles.
But enough about the history, what do I think of the scenario itself? To cut a long story short, I’m not really a fan of the Nájera scenario in Men of Iron but I also didn’t exactly dislike it. My main issues with Nájera relate to its length, balance, and several historical interpretations Berg has chosen to make for this scenario.
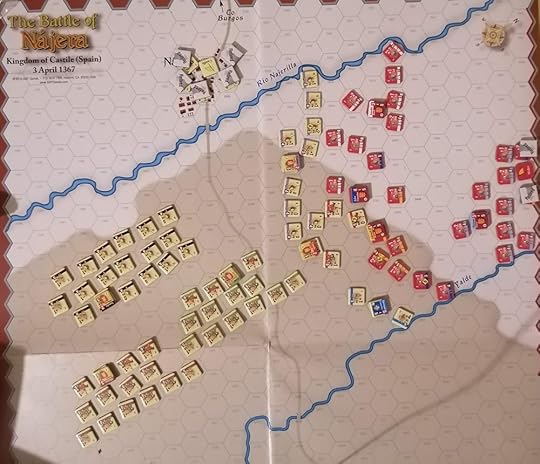
The English continue to push forward. While the Franco-Castilians have managed to inflict some casualties they are badly outmatched.
Let’s start with length and balance, because that’s a nice simple opener and they’re closely intertwined. Nájera is the longest battle in the initial Men of Iron game with an estimated play time of around three hours. That’s not unreasonable for a wargame, but by most metrics that’s a pretty long chunk of time to spend on something (especially if, like me, you have a small child you have to look after). That’s not totally off putting, I’m excited to try longer scenarios in Arquebus for example, but the default scenario of Nájera also lacks even the barest shred of balance. That’s pretty classic Berg, aiming for historical reality rather than balance and Nájera was a major victory for the English, but as the Castilian player spending three hours losing a scenario quite badly isn’t very appealing. As a solitaire experience it is less frustrating, but with how one-sided the scenario is I kind of would have preferred it to be smaller and shorter. Something more on the scale of the Agincourt scenario, for example. It’s not like the forces at Nájera were all that big, so it’s kind of weird that this and not Falkirk or Crécy is the big scenario in the box. I would say that if you are playing Nájera with a friend, switch straight to one of the alternative set ups that helps the Castilians and makes it more of a game - don’t play the default scenario unless one of you is prepared to just be ground under an Anglo-Gascon bootheel.
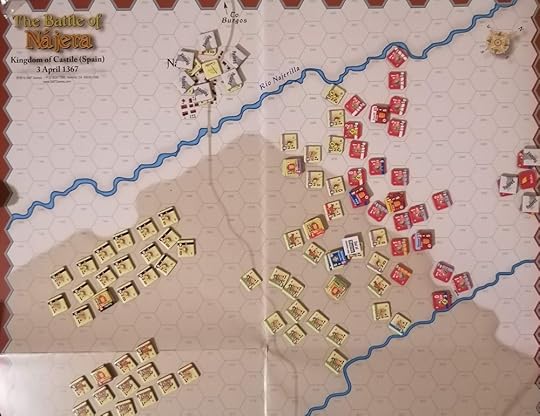
Henry of Trastámera finally gets involved in the battle, but his contribution is minimal and things have already turned decisively against him.
My other main issue with Nájera comes down to Berg’s view of the history of the battle and how its applied in the game. These are two similar but subtly distinct objections - one is just in how Berg represents the battle and the other is ignoring my own feelings about that interpretation, did I think it was fun?
I think my core objection to Berg’s interpretation is in how he portrays Castile as a kingdom completely divorced from the military practices of France and England. I’m not entirely sure where he got this idea, but it’s quite an old fashioned representation of Iberian warfare. In particular he highlights the idea that since the Castilians had been actively pursuing the Reconquista against the Moors that they would be used to fighting an entirely different kind of enemy and weren’t used to the practices that were standard elsewhere. While differences in geography, politics, economy and any number of other factors would make Iberian warfare distinct from French warfare, which in turn was distinct from Central European warfare, Iberia was far from cut off from the rest of Europe. The whole point of the Nájera campaign was a competition between France and England for Castilian support in the Hundred Years War. Crusaders frequently crossed the Pyrenees to join in the fighting in Iberia. This is before we even address the issue that a significant portion of the Castilian army was probably drawn from Free Company mercenaries who until the Treaty of Bretigny in 1360 had been fighting in France. Also for the decade preceding Nájera the Castilians had been mostly fighting their fellow Christians the Aragonese, not the Muslims in the south of the peninsula. The level of asymmetry in the types of troops used by the two sides as presented in Nájera is extreme and I don’t think warranted by the history.
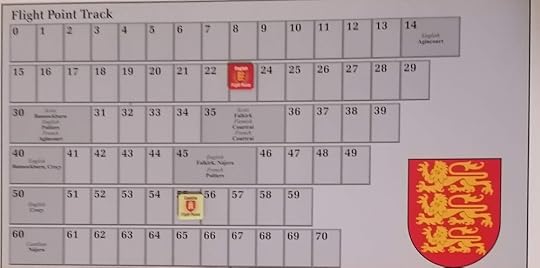
The flight track disparity is brutal - the Castilians were pushed over the limit by the dice roll but there was no coming back even if they had been luckier.
Historical quibbles aside, did I enjoy playing Berg’s alternative interpretation? If I’m honest, not really, and it all comes down to one unit: genitors (alternatively known as jinetes). The genitors are a form of light cavalry armed with a javelin and the Castilians have piles of them in this scenario. I already kind of struggle with managing the large numbers of light cavalry Infidel sometimes throws at me and this was so much worse for a few reasons. Firstly, the genitors only get one shot before they have to retreat and “reload”, and if they are attacked while out of ammunition they give their opponent a +2 DRM to their combat. This adds so much extra rules bloat and book-keeping to the scenario and all for the benefit of a frankly pretty terrible unit. The map is also quite cramped, so you get none of the benefit of that light cavalry movement, and it all just meant that I did my best to ignore the genitors and relied more on other units. However, ignoring a huge portion of the Castilian army doesn’t really make for a very fun experience.
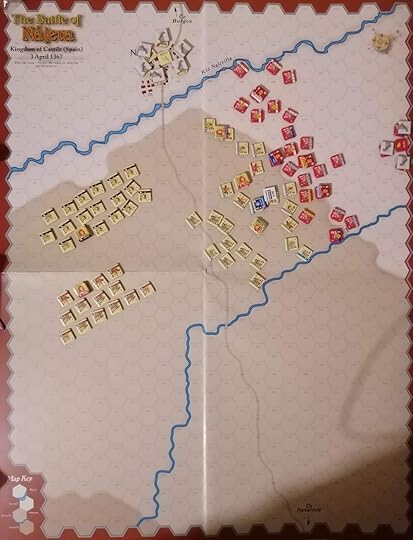
The final game state when the Castilians fled the field, losing the battle but ultimately winning the war.
Overall, while I didn’t particularly enjoy playing Nájera I can’t say that I hated my time with it either. I think if it was a smaller scenario that played faster I would be more inclined to revisit and try one of the alternative set ups, but given how much of Men of Iron I have still haven’t played I don’t necessarily see myself setting up Nájera again anytime soon. That’s a bit of a shame, because I suspect the alternative deployment rules make for a much more interesting and engaging battle. However, my dislike for the genitors and my interest in playing more Blood and Roses and Arquebus mean that I’ll probably leave it up to others to determine what the best way to play Nájera is!
November 24, 2022
Siege Warfare During the Hundred Years War by Peter Hoskins
It’s a point of general agreement among medieval military historians that it was sieges and not battles that were the dominant form of warfare. This is generally contrary to the popular depiction of the period, where battles draw far more attention than sieges. Arguably no historical topic has been as dominated by narratives of great victories in the field of battle as the Hundred Years War. The stories of Crécy, Poitiers, and Agincourt overshadow the sieges of Calais, Harfleur, or Orleans, among others. I am definitely in the camp who believe that sieges have often been neglected in favour of the dramatic battles so I was very excited to pick up a copy of Peter Hoskin’s book which examines the Hundred Years War through its sieges rather than its battles.
This is unsurprisingly a purely military history - you will not get much on dynastic politics and nothing on culture or religion during this period. What Hoskins does is craft a narrative of the Hundred Years War but framed through its many sieges rather than its set piece battles. Agincourt recieves but a scant few lines while Harfleur is a multi-page event, which I’m fully in favour of honestly. Not every siege is included, that would make for a monumental and probably unreadable book, but a sufficient sample is here that all the famous ones are included as well as several less famous but still interesting examples.
Each siege has its own little section which almost makes the book into a series of vignettes covering dozens of individual sieges, but Hoskins also does a good job linking the narratives into a coherent whole. This creates a nice balance where each siege is given its own attention but they are also placed within their broader context. It also means that you don’t need significant pre--existing knowledge of the Hundred Years War to follow the narrative as Hoskins presents it. I would probably still recommend a more general history of the Hundred Years War as your first book on the subject, something like David Green’s The Hundred Years War: A People’s History, because it is such a pure military history so you are missing out on a lot of the key dynamics underpinning the conflict if you just read Hoskins. That said, for people looking for a more military history of the conflict, Hoskins’ book is a great place to start.
The book doesn’t go into very great detail about the general practice of sieges at the time. Instead it focuses more on the specific narratives of the many different sieges that took place over the century long conflict. People interested in more discussion of medieval siege tactics will probably be happier with the books by Peter Purton, which are a more academic treatment of medieval siege warfare as a whole. That said, I think there’s a lot to recommend taking a more focused and specific look at the development of the sieges at the time. Each siege is a distinct event with its own factors to consider beyond just the general tactics of the era. By spending so long on individual sieges rather than picking a few as representative of the whole era Hoskins highlights the differences that made each siege unique but also manages to show the similarities as well. That said, if what you want is a detailed examination of how mining worked during medieval sieges you would be better off with Peter Purton’s The Medieval Siege Engineer.
If I had a problem with Hoskins’ work it would be with the referencing. I think Hoskins has done his research and the bibliography includes some great information, but there are no notes of any kind and often references to chroniclers do not name which chronicler is being referenced. This means that as a starting point for future research the book is not particularly useful. I understand that there is a perception that foot/endnotes are off putting to general readers but I find it very frustrating when I come across an interesting anecdote but have no recourse to finding out more about it! I really wish there were even basic notes included.
I think the thing I liked most about Siege Warfare During the Hundred Years War was the emphasis put on the periods of French dominance. Far too often in English the narrative of the Hundred Years War focuses on the periods of great English victories, mostly during the reigns of Edward III and Henry V, and covers the other periods only in brief. Hoskins doesn’t do this and instead we get some great information on the careers of Bertrand du Guesclin and Jean de Dunois specifically. This creates a much more holistic view of the conflict which is something of an antidote to most popular narratives of the conflict.
Overall, I really enjoyed Peter Hoskins Siege Warfare During the Hundred Years War and I think its an excellent addition to the military history of the Hundred Years War.
November 21, 2022
Review: Almoravid by Volko Ruhnke
For me anyway, Volko Ruhnke’s Levy and Campaign series is probably the most interesting thing happening in wargaming right now. Most medieval wargames have focused on specific battles, usually as hex and counter games, and while my posts on Men of Iron should be evidence enough that I enjoy these games, my historical interests tend more operational and strategic rather than tactical. There are exceptions, such as the Columbia block games, but even these only capture a fragment of what makes medieval conflict so fascinating to me. Many great medieval victories (and defeats) are as much the result of the weeks and months that lead up to them as they are the prowess of the fighters on the day. That is what makes Levy and Campaign so exciting to me - it makes those weeks and months the centre of the gaming experience. The games include battles, of course, but the more you play the fewer battles you are likely to risk while the challenge of moving and supplying your armies remains constant!
I enjoyed my initial explorations of Nevsky and I was excited to receive Almoravid due to the promise that the Taifa politics would add more of a political dimension to the system. It also features the famous El Cid and captures a major shift in Iberian history with the arrival of the Almoravid dynasty from Morocco - so basically catnip to a medieval obsessive like myself. Almoravid promised to be more of a game system I already enjoyed but with new features to add new interesting decisions and elements to the game, how could I not be excited? Also, thanks to an online tournament organised by fans of the game, I was finally able to play Levy and Campaign multiplayer getting several games of Almoravid with human opponents under my belt - an experience which definitely improved my enjoyment of the series and also proved that I’m quite bad at Levy and Campaign.
For those who may not be familiar, Levy and Campaign is the latest system from Volko Ruhnke, the designer behind the COIN series. In L&C he has moved his attention from modern counterinsurgency to medieval logistics and operational warfare. The core features of L&C are a focus on logistics - being able to reliably feed your army is at least as important as whether you can win a battle - as well as how the system is structured and how it handles player activation. The game is split into two phases called, you guessed it, the Levy and Campaign phases. In the Levy phase you will do all the preparation you require for the upcoming campaign. You will add modes of transport to your Lords’ individual mats which will help you transport food and supplies more efficiently. You will also decide whether to recruit more Lords. Since lords only serve for a limited amount of time, which is tracked on the game calendar, you will probably need to recruit more from your available pool. However, recruitment’s success is determined by a the roll of a die so you have to choose whether to add more Lords (who you may not even be able to activate) or whether to bolster the group you already have. You can also add Capabilities, special abilities printed on cards that will help you specialise your Lords, possibly making them better at siege warfare or raiding, for example.
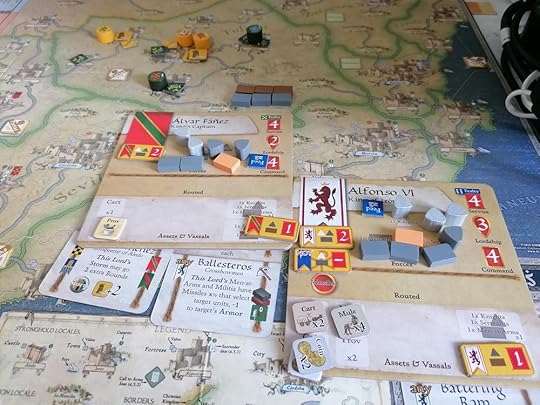
Here are two Christian lord mats with their wooden units, and tokens representing transport, coin, and provender. They also have Capabilities tucked in under their mats. In the distance you can see their cylinders on the map - in this case they are besieging the city of Toledo whose garrison is represented by the lone wooden pieces on the map.
At the end of the Levy phase you make a plan for your campaign by constructing a deck, the size of which is dictated by the season that turn is taking place in. Each Lord has a set of cards and you assemble the deck from cards representing the Lords you have on the map right now. Then during the campaign phase you take it in turns to draw the top card of your deck and activate that Lord, taking a number of actions based on their Command value. Actions include, but are not limited to, moving around the map, acquiring supplies, ravaging territory for supplies and victory points, prosecuting sieges, or raising funds via taxation. Once both player’s decks have run out you move the turn track forward and begin again with the Levy phase.
Almoravid abandons some of the logistical complexity of Nevsky - the types of transport are reduced from four (Carts, Sleds, Boats, Ships) to just two (Carts, Mules) and there is far less seasonal variation - but in exchange it adds an extra layer of politics to consider. Eleventh Century Iberia was a region of significant political diversity. In the north of the peninsula were the Christian kingdoms of Léon-Castile, Aragon, and Navarre but most of Iberia was made up of Muslim lordships of varying sizes and importance. These are broadly known as the Taifa Lordships, or sometimes Taifa Kingdoms. They were fractured and often in disagreement with each other as much as with their Christian neighbours to the north. During the period of Almoravid it was common practice for Taifa lords to pay a tribute, called Parias, to the Christians in order to maintain peace. It is maybe worth noting that the practice of paying someone to not invade you was pretty common in the Middle Ages.
The game of Almoravid covers a specific series of campaigns where the Christians led by King Alfonso VI of León-Castile successfully conquered Toledo in central Iberia. In response the Taifa lords invited the Almoravid dynasty from Morocco to Iberia. The Almoravids would eventually conquer the remaining Taifa and establish a more unified political opposition to the Christians for the next generation before fading away themselves in the mid-eleventh century. Since the Taifa are so central to this period’s history, it makes sense that Almoravid (the game) devotes extra rules to their fractious rule. In Almoravid a Muslim region can be in one of three states: Independent, Parias, or Reconquista. A Parias region is neutral to both sides and largely inactive from play. A region is Independent when its Lord is on the map, i.e. he has been levied by the Muslim player., and Independent Taifa are friendly to the Muslim player. If the Christians take the capital of a region it becomes Reconquista - making it friendly to the Christians and giving a large helping of victory points. Further rules track what happens when a region transitions between these three states.
I think the Taifa politics systems are really interesting and while they add an extra layer of complexity, the player aids are very good and you pick it up pretty quickly. If I had one problem with it it would be that changes don’t happen as much over the course of a game as I would like. In particular I think it would be more interesting if regions switched between Parias and Independent more, but the penalty to the Muslim side for a region switching to Parias can be so punishing that if it happens several times in one game it can render the situation almost unwinnable for the Muslim player. I wouldn’t call this a flaw in the game, and arguably it reflects the history where there’s only so many changes in political allegiance one could expect in what is essentially a two year period. I just think that this system is really interesting and I didn’t feel like I got to interact with it quite as much in a single game as I personally would have liked. Maybe I just wish there were more games that included Taifa politics to scratch that itch for me!

Almoravid fully laid out - it’s a beautiful thing to behold but the board is larger than Nevsky’s and fitting everything together can get very cramped very quickly.
The aesthetics of Almoravid are amazing - the map in particular is gorgeous. While I would gripe that it is a bit too big in my opinion, at least from a practical perspective as it doesn’t fit on my table, it is a lovely thing to have in front of you and I found the layout of the various routes to be very engaging. It struck a good balance between offering me many options to choose from when taking my turns while also having me tearing my hair out when I realised that there is no direct route between Point A and Point B and now I need to go the long way around to counter an unexpected move from my opponent. I think game maps should provide both choice and a little frustration and Almoravid’s definitely succeeds at that. It also ensured that my individual games felt quite different - we weren’t repeating the same campaigns every session but rather trying different avenues of attack and defence. There are a lot of possible ways a game of Almoravid can develop and that can be attributed at least in part to the map. The art for the rest of the game is also gorgeous, from the cards to the lords mats and wooden pieces.
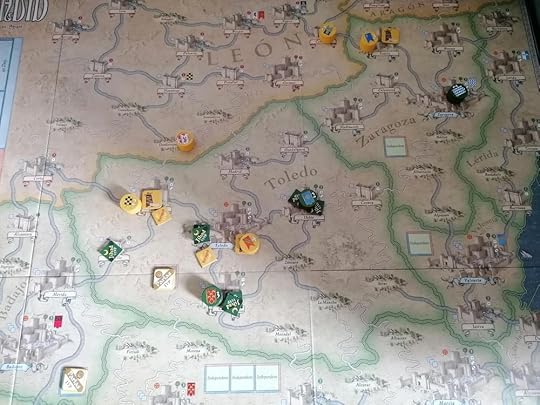
But while I can complain about the practicality of the board as much as I want, there’s no denying that it’s an amazing thing to behold.
Almoravid also contains all the elements of Levy and Campaign that I already enjoyed and which I continued to enjoy as I play it more. I like the scale of the conflict, focusing on just a few years in particular detail. I also really like how chaotic and unreliable the battles can be which pushes you to avoid them for the most part. In Almoravid in particular the Muslims tend to be far weaker, with the individual lords struggling to muster large armies to directly oppose the Christians. Instead you are more interested in bogging them down in sieges or finding other means to limit their effectiveness. Then when the titular Almoravids arrive things are very different. Their armies are huge and an immediate threat to anyone who gets in their way. This also gives the game one of its most interesting decisions - as the Muslim player when do you call for help from Africa? The Almoravids are extremely powerful, but they will eventually run out of steam because they can’t afford to keep that army in the field forever. Call them too early and the Christians may survive to continue causing you trouble but wait too long and it may be too late.
As the second entry in the Levy and Campaign series I was naturally curious about the complexity of learning it when I already knew Nevsky. I actually put off playing it for weeks because I was intimidated by the prospect of learning a whole new L&C game, but it turns out that was foolish. The rulebook helpfully highlights the differences from Nevsky and I was able to basically just skim the rules in about ten minutes and be ready to play. It took me longer than that to fully internalise all of its systems, but for me the biggest hurdle is getting to the point where I can actually be playing. I’m happy to be playing poorly so long as I’m actually playing!
Almoravid offers enough differences from Nevsky to feel distinct but has enough similarity to make it easier to learn, which I think is an ideal balance for games in a shared system like this. I could see some people not being interested enough in owning both, but that comes down mostly to personal taste and interest. I’m obsessed with operational medieval warfare so I am very excited to have played Almoravid and even more excited for all the L&C games currently in development. At the same time, the only WWII game I own is Memoir ‘44 and I’m not very interested in buying more, so I can appreciate for people who are less interested in medieval conflict one L&C game is probably enough.
Before we get on to my few dislikes, I want to talk a bit about my experience playing Almoravid. I think I made a small error playing through the scenarios mostly in order - jumping into the grand campaign after an initial learning scenario feels like it might be the right thing to do. The full campaign feels like the purest form of these games, even if it is also the biggest time commitment. Particularly in Almoravid where the question of when to bring the titular Almoravids onto the map is crucial, it felt like a lot was missing in shorter scenarios. You either have to bring them on immediately, because it takes two turns to bring both lords and you want to take some time prepping them to be effective, or else the scenario has literally already made the decision for you. This isn’t strictly a bad thing, but I think contrary to what you might expect these smaller scenarios offer more to people who are already familiar with the game and looking for a specific experience. In my opinion, playing (and messing up) in the grand campaign is a better starting option. Remember, you don’t have to play all the way to the end - if it is clearly unwinnable halfway, just stop and start again. There’s no medal for playing a game after it stops being fun.
Almoravid was the first time I played Levy and Campaign against a human opponent and the experience was a significant improvement upon the solitaire game. Don’t get me wrong, I still like Levy and Campaign solitaire but I think I will only be playing solo as a way to learn the game or to explore certain scenarios or familiarise myself with some of the systems. As a game I enjoyed the two player experience significantly more for two reasons. The first is fairly obvious - in a two player game my opponent makes decisions during the Campaign phase that I cannot predict. This allows for more interesting game outcomes as my play style and priorities clash with theirs. The other big advantage of two player L&C is that it helps to share the mental load. The Levy phase in particular can be quite the brain burner and only have to do one of those in a turn was a huge relief. When I do play solitaire I generally leave the game set up and take turns slowly over the course of days, spreading out the mental exhaustion as much as possible.
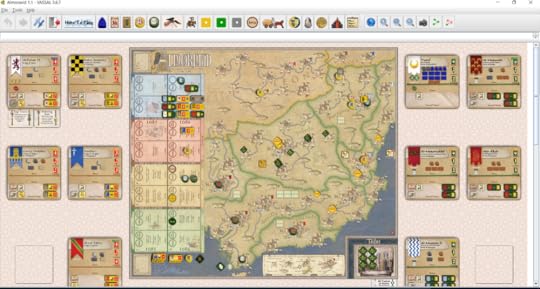
Much of my time playing Almoravid was using the excellent Vassal module - a much more manageable way to play but you are missing out on something not having the physical components. I have to say the system works really well as play by email.
I also played with the optional Hidden Mats and Advanced Vassals rules for the first time. In Hidden Mats you can’t see what your opponent has on each of their Lords’ mats, so you don’t know how big their armies are or what Capabilities they may have until you fight a battle with that Lord. The Advanced Vassals rules means that whenever you Levy a Vassal instead of just adding units to your Lords mat you also add a tracker to the calendar and when the turn tracker advances to that point the vassal takes its units and goes home.
I didn’t find the Hidden Mats very interesting if I’m honest. In L&C you’re often trying to avoid battle and the Hidden Mats felt like it leaned even harder into that. It wasn’t bad, but it didn’t add enough to my experience that I intend to be playing with it regularly. I understand that some people really like it and I’m happy for them, but I don’t think it’s for me.
In contrast, I really liked the advanced Vassals rules. Partly this is because I’m obviously a huge medieval history nerd so more tracking of things like feudal relationships and service limits appeals to me. I found it made the decision of when to Levy vassals more interesting, and I’m always up for more interesting decisions in a game. I can’t say that I’ll be playing with Advanced Vassals every game but it is definitely a rule I aim to use more going forward.
Hopefully by now it is clear that I really enjoy Levy and Campaign in general and Almoravid in particular but I would be remiss if I didn’t note some of the things I didn’t particularly like. The most significant issue I had with Almoravid arises from the logical decision to reduce the types of transportation. The fact that there are fewer transport options has a significant impact on the decisions made during the Levy phase of each turn. In Almoravid, a lot more time is spent levying Capabiilities rather than transport. This is further enhanced by the greater difficulty in undertaking sieges in Almoravid. Eleventh century Iberia had far more impressive fortresses than the Baltic in the thirteenth century and this is reflected in the increased challenge in prosecuting a siege in Almoravid. To effectively take a fortress you will need more than just a few Lords and a big army, you need Capabilities to bring things like siege engines to bear on the fortress. Alternatively, if you want to have an effective raiding force or to make the most out of characters like El Cid or the Almoravids you will need to equip the right capabilities to those Lords.
This means that you will spend more time flicking through the Arts of War deck and I must confess that this is my least favourite aspect of the series. I spent far too long trying to learn the different Capabilities and keep them in mind when planning my strategies and I found this really quite challenging. It wasn’t just that I felt this was necessary for optimal or highly competitive play but to even be moderately effective in Almoravid it felt like you needed to have a good understanding of the capabilities in your Arts of War deck - or else be prepared to spend a long time flicking through it every Levy to remind yourself what is in it. I found this really slowed down the Levy phase of each turn and wasn’t something I enjoyed as much as just levying maybe one or two capabilities and then mostly adding transport and troops.
Almoravid also felt like it had a lot more Coins dispersed among its many lords. The Lords on average show up with much more Coin when Levied so even without Taxing you can have quite a lot of money in circulation. There were also more rules to increase available coin, such as how the Christians receive a pile of Coin whenever a Taifa switches to Parias. This makes it far more feasible to run armies off of Coin rather than food - especially since one Coin can be equal in value to any amount of provender when it comes to managing service limits. From a historical point of view I have no problem with this and in the specific case of the Almoravid armies I think it’s really interesting. Feeding the huge African armies is hardly feasible so you kind of have to build up a big war chest to make the most out of them. However, as both sides can effectively do this and you can do it for more than just the Africans it can feel like it further de-emphasised what I like most about the game - the logistics. Why bother wracking your brain over how to get enough transport and provender to feed all these soldiers when one Coin will do the trick?
I do want to make it clear that transport is not useless in Almoravid! On a few occasions I had opponents create long supply lines which they used to create stashes of Provender. Then another Lord could march there and feed. This required planning ahead, a classic Levy and Campaign requirement, but it felt different than I was used to in Nevsky. That said, the Supply rules changed in Almoravid and the change will eventually be implemented backwards into Nevsky so it will be interesting to see how that changes the Nevsky experience. Also, I may just not be very good at Nevsky! Overall, though, Almoravid felt like it had less of an emphasis on how you are going to move provender with your army across the difficult landscape and instead transport is key to maintaining supply lines and when in doubt just use money instead. I don’t think this is strictly a bad change, it helps to differentiate Almoravid from Nevsky and I suspect that for some people Nevsky’s large number of transport types was off-putting, but I miss my two kinds of boats..
I don’t think any of the above represents bad history, in fact the changes seem to be primarily derived from the difference in Almoravid’s setting from Nevsky’s. It wouldn’t make sense to require players to get sleds or boats to travel around eleventh-century Iberia. There were Roman roads to use! Iberia was also much wealthier so it makes sense that there is more Coin going around between the Lords and the fortresses were better so taking one was a more involved process. It’s just that these elements push the game more in a direction I enjoy less. I still enjoyed Almoravid, but it did leave me missing some of Nevsky’s more prominent features.
In the end I have decided not to keep Almoravid in my wargame collection. It’s not because I don’t like it - I have had a lot of fun playing it - but it leans into elements of the Levy and Campaign system that don’t appeal to me as much. Also, and this is key, there are so many new Levy and Campaign designs coming out in the next few years that I want to make room to try new things. If the whole system was just these two games I would absolutely keep both of them, but with Inferno: Guelphs and Ghibellines Vie for Tuscany, 1259-1261 possibly shipping before the end of this year, I need to make room for some campaigning in Italy! In the meantime I intend to get Nevsky out and to once again struggle to transport enough food for my knights to feed in the frozen Russian winter (or worse, the muddy spring).
November 14, 2022
Early Impressions - Pax Viking by Jon Manker
The Pax series is an interesting beast. First created by, let’s say “controversial”, designer Phil Eklund the series’ games differ significantly on topic, mechanics, and many specifics but generally share a distinct perspective in how they represent history. I’ve never been completely in love with Pax games on the few occasions when I’ve tried them but I was still intrigued by Pax Viking despite some of my misgivings about the series. Pax Viking’s emphasis on the Viking trade networks, not just the raiding, and its focus on the eastward expansion of Viking influence through eastern Europe and down to the Mediterranean made it stand out amidst the many board games with Vikings as a theme.
I’ve actually been lucky enough to play Pax Viking twice now, once online and once in person. You can watch my first time playing the game on the Homo Ludens Youtube Channel, including much more informative discussions about Viking history from the other guest on the stream. More recently I acquired a physical copy of the game in a local Math Trade and got it to the table with some friends at one of Ireland’s largest board game conventions. The digital implementation is quite impressive but nothing beats moving around physical card board for me. The only thing I missed when playing physically was that it was much easier to check the victory conditions in the digital version - but I suspect as I become more familiar with them that will be less of a problem!
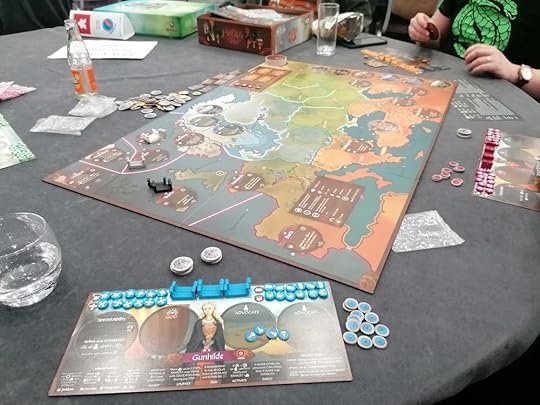
I was so anxious about teaching Pax Viking that this was the only photo of my game that I remembered to take - and it’s just the initial set up! It didn’t even occur to me until I was getting into bed that evening! Maybe I’ll try and do an AAR for my next game.
Unlike many Pax games where the board is either nonexistent or largely abstracted, Pax Viking makes its board and its version of European geography a central feature of the game. It more closely resembles a traditional board game as you move your longships across between areas to reach locations where you can activate cards and establish trade connections or alliances. The board contains a few initial locations that represent potential powerful friends or significant trade partners such as Byzantium, the Frankish monarchs, or even a trade route to China. It also contains many empty locations that players will fill over the course of the game as they buy cards (technically they are discs but in the game they function identically to cards) and play them on locations.
Learning any Pax game is a bit of a challenge as they tend to deviate substantially from more what you may be used to. Pax Viking alleviates some of this challenge by having a board - fully grasping the abstract nature of other Pax games is part of the learning challenge - but it can still take a few turns for the available actions to click in your head and form a coherent understanding of how the game is played. In my first game I only found I understood what was happening or what to do by around turn two or three and in my second game it seemed like the other players had a similar experience. Once things click, though, Pax Viking is simple enough. You have a pool of available actions and on your turn you will spend four tokens to take actions from that pool. They are relatively intuitive but Pax Viking’s very specific terminology can make learning them a little harder. Thankfully the game comes with ample copies of the Rosetta Stone which defines what all these terms mean in more detail so you can pass them around to the players for easy reference. I was a little intimidated by the prospect of teaching Pax Viking but in the end I found it to be easier than I had expected.
An interesting knock on effect of the slow(ish) process of learning what to do in Pax Viking is that the first game feels like it takes significantly longer. This is largely down to how a game of Pax Viking is won. There are no victory points in Pax Viking nor is there a set turn limit. Instead, there are four potential victory conditions and the first one to secure any of them and play an Event card (which triggers a victory check) wins the game. There are several categories of victory condition which differ by their complexity. In my first game, each victory condition was drawn from a different difficulty level. For my second game I chose three Standard and one Advanced because I thought it would be easier to teach but actually I think that was the wrong decision. The Standard Victory Conditions I drew all felt a little too similar where progressing towards one would also nudge you towards the others. This also meant it was easier for players to stop any one player from winning without really thinking about it. Next time I would make sure that the victory options were more diverse - the difference between the three Standard and one Advanced was the most interesting of the available options. The game automatically ends if the card supply runs out and when we finished there were only three or four cards left, which meant that the game felt a little long.
The reason that the victory conditions make for a longer learning game is that in your initial turns when you’re learning how the action economy works you aren’t really making any deliberate progress towards winning the game. Unlike games with a fixed end point, such as a Eurogame where you always play five rounds no matter what, during these early turns you might barely be advancing the end game clock. I found in my second game that we were all so focused on getting our little engines going, settling territories and spreading our influence, that we kind of forgot about how to win. This meant that we all naturally funneled into the victory condition that focused on pure expansion and neglected ones that emphasised control over multiple regions of the board or control within specific locations. I think in future games where players know to plan a victory strategy from turn one things will go much faster, which is good because while not the longest game I did feel like the final turns were dragging a bit.
I should also add that while the game is technically playable as a solitaire experience I cannot imagine doing so. Without the chaos of the other players disrupting your plans and potentially expanding the playable spaces on the board I’m not sure the game offers enough to be an exciting experience. I may try at some point just to see but I played my games at three and four players and to me that felt like a sweet spot. The box also says it is playable up to six, but I think that would be too many. I’m also hate waiting for my turn in a big game so unless an experience has to be that large (like Here I Stand) or allows simultaneous actions (like most drafting games) I try to avoid player counts above five.
As a representation of history Pax Viking is interesting. It is ostensibly set in 950 AD but includes events ranging from both the eight and eleventh centuries. You are given a player board with a specific character on it (with their own special power) which is fun but the game also ranges beyond the scope of one human life. It embraces a slightly fluid grasp of historical chronology to give a broader impression of what the late-Viking era was like. The designer has said that the idea of the game was more to capture the vibe of the Sagas, semi-mythic stories with a mixed to downright nonexistent grasp of historical accuracy, than pure history. Essentially you are crafting your own Saga narrative for your character. This is a cool idea and when engaged with on this level I really like it.
That said, some of the historical motives of the game have the potential to clash. While I like the idea of crafting a saga and engaging in a deliberately semi-fictional account of Viking settlement and trade, the game also has you playing a real person ostensibly competing to see who can be the next ruler of Sweden. I think the specificity of this victory clashes a little with the broader depiction of history in the game. That said, while I never really felt like I was particularly competing to become king (or queen in my character’s case) that also didn’t really interfere with my enjoyment of the game. It’s ability to wrap me up in the notion of competing narratives where each of us was trying to have our story be the most impressive pretty effectively overrode the idea of just becoming the next monarch of one small region on the game’s board.
I also appreciated Pax Vikings perspective, especially the focus on eastern and southern Europe, which stood out among the sea of available Viking games. The game is set is after the famous Great Heathen Army of 878, arguably the peak of Viking military raids in the British Isles, and in fact Britain only acts as a starting point for one of the potential player characters - it has no other role in the game. Most of the western half of the board is already populated with locations meaning that while there is potential for interesting actions there for the players there are limited options for changing the landscape to suit your strategy. Much discussion of the Vikings, especially in English, focuses more on their raids in the British Isles and Northern France but in Pax Viking we see the other side - the expansion eastward from Sweden. The settling of Rus and establishment of trade links beyond just western and central Europe. This also makes Pax Viking a great companion to a book like River Kings by Cat Jarman, which offers a similar alternative perspective. That I really enjoyed that book definitely set me up for having a good time with Pax Viking!
I’ve been a little mixed on my experiences with the Pax games. I admire their design but sometimes the abstracted elements are a little too much for me - I must confess that I love a good physical board. Pax Viking does a lot to address the elements of Pax games that I don’t like as much and provides a fresh perspective on an eternally popular topic in board gaming to boot. It would be a stretch to say that I adored my game of Pax Viking. Certainly my second game felt like it dragged on a little longer than I would like and the balance of victory conditions felt a bit boring. That said, it was a very intriguing game and I think several of my problems would go away as I play more - and I do intend to play it more! This is not my final expedition, I can promise that.
November 10, 2022
Charles VII by M.G.A. Vale
I was a little shocked when I found out that the most recent English language scholarly biography of King Charles VII of France was published in the 1970s. Charles’ long reign had a notoriously tumultuous start as King Henry V of England (about whom many biographies are available) arranged to have him disinherited in hopes of passing the claim to the English line. Henry died before the reigning French monarch, Charles VII’s father Charles VI, which meant that the dispute over who was truly king of France passed to his infant son, Henry VI, who also happened to be Charles VII’s nephew. Henry V’s brothers, acting as regent, would fight for control of France on behalf of their nephew against his other uncle, but it was Charles who would ultimately emerge triumphant. This is a critical period in Anglo-French history and Charles VII one of the central protagonists so it seems very odd that he has received only a fraction of the attention of his English counterparts - in English anyway, the French have understandably paid him a little more attention.
I was very interested to read Vale’s biography for a number of reasons. I was aware of but not familiar with M.G.A. Vale’s scholarship. He is a major figure in mid-20th, century English scholarship of the end of the Hundred Years War, which given how little has been done since makes him a major scholar in the field as a whole. Tragically, few of his books have remained in print. I was able to acquire a secondhand copy of Charles VII for a reasonable price, but I have struggled to acquire his other books on related topics such as English administration in Gascony in the fifteenth century.
The structure of Vale’s biography is interesting. Charles VII’s relatively long life - he lived to be 58 - includes periods about which we have plenty of evidence and periods where we know very little. A notoriously private individual he would spend long periods of time sealed away in relatively minor castles outside the major metropolitan regions of France. Vale approaches this problem of uneven source material by leaning in to it. Instead of a book that starts with Charles’ birth and follows a mostly linear path, Vale presents something closer to a series of vignettes focusing on key points within the life of the monarch. For example, large sections are devoted to Joan of Arc, her burning for heresy, and her posthumous re-trial that annulled the original verdict. Vale explores Charles relationship to Joan and her impact on his reputation, tackling questions like why it took so long for her initial condemnation to be annulled and whether she really had as big an impact on Charles as popular imagination depicts. Similarly, Vale gives plenty of detail about the 1440 revolt against Charles known as the Praguerie and later fallout with various lords whose relationship with him was spoiled by revolt and similar tensions.
Charles VII’s relationships with his court and especially his frequent clashes with eldest son, the future Louis XI, are a major focus of the book. Vale gives a very detailed picture of how Charles managed the people around him. This includes a detailed discussion of how Charles was able to survive through the difficult time when much of his kingdom was under English rule and then, once he had retaken it, how he managed a kingdom essentially recovering from a civil war. This makes for a very literal political history - it is a history of Charles VII as a political actor. Very little information is provided on Charles’ religious beliefs, the military history of his reign, or his impact on contemporary culture beyond a discussion of changes to how French royalty was presented and the political ramifications of those changes. I don’t mean that to criticise Vale. The focus he has chosen is completely understandable and for a biography that’s less than 300 pages it covers a lot. It only stands out because there are no other English language accounts of Charles to fill the gaps that Vale has passed over.
I found Vale’s account of Charles surprisingly refreshing given its age. I would almost believe it had been written in the past decade. Vale challenges many of the myths around Charles VII, which made the book feel very relevant but also was a slightly sad indicator of how these myths have survived despite Vale’s book being available for so long. Rather than the popular depiction of a weak monarch who was eventually forced to find his place by Joan of Arc, Vale shows a consistency in Charles’ behavior throughout his reign. A master of manipulating the people around him, Charles was a natural survivor whose early reign was focused on simply enduring rather than expanding. The shift towards a more active monarch aligns with his greater power as well as the greater security offered by his eventual marriage and heirs to continue his dynasty should anything happen to him. Vale’s version of Charles VII is very convincing and stands in sharp contrast with the popular depiction - one that can still be found in many histories of the end of the Hundred Years War. I really appreciated how Vale challenged my understanding of this monarch and gave me new insights not just into his reign but also into the political climate of France in the mid-fifteenth century.
Vale achieves what every good biography does: he gives a clear impression of the kind of person his subject was. There are places where I would have liked a little more detail and I found the writing dragged a little bit towards the end, but overall for an academic biography I found it very engaging and informative. I would definitely recommend it to anyone interested in the topic! I would just note that this is very much a specialist book and it assumes a certain base level knowledge of the Hundred Years War, which makes it great for people who are already familiar with the topic but a very poor introduction for anyone who may be new to the Hundred Years War.
November 7, 2022
First Impressions: Imperial Struggle by Jason Matthews and Ananda Gupta
Imperial Struggle is a behemoth of a game. It’s sprawling board dominates the table but it still overflows onto to two individual player mats and a separate board for each of the game’s four wars - only one of which will be in play at a time thankfully. It is also a game that takes many hours to play - I played it by email using the game’s Vassal module (no table I own is large enough to fit the whole game in physical space) and let’s just say that we were playing for a while. In person I would expect a game to be a full day affair. This scale is more understandable given that the game covers nearly a century of Anglo-French rivalry and conflict, from 1697 to 1789. Beyond its sheer scope, it is both one of the most interesting and frustrating games I have played so far this year. Sometimes I think I love it while other times I’m so annoyed I swear I won’t take another turn. Still, inexorably, I was dragged through the full game despite my periodic protests. I’m going to try and put my conflicted thoughts down and hopefully that will exorcise me of their constant hassling in my head.
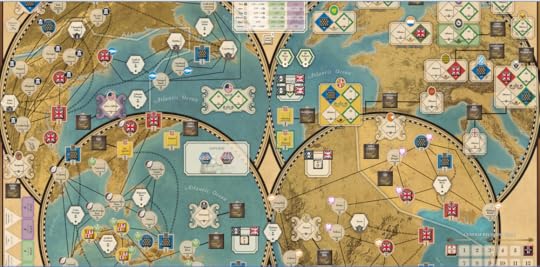
Even on my desktop I can’t fit the entire play area on one monitor. This is as much of the initial map as I could reliably manage. Look at all that possibility space!
It is hard to talk about Imperial Struggle without briefly mentioning Twilight Struggle, the previous game by designers Jason Matthews and Ananda Gupta which for many years was the number one ranked game on boardgame database BoardGameGeek.com. The thing is that besides sharing designers and a naming scheme the two games have very little in common. Twilight Struggle is one of the archetypical card driven wargames - a genre invented by Mark Herman in his game We the People in which players have a hand of cards that they play either for events written on the card or to take actions using points provided by the card. Imperial Struggle has cards, but it’s not a card driven game let alone one as typical, and refined, as Twilight Struggle. You could extract all the cards from Imperial Struggle and, while it would make the game worse, it would still function as a playable game. The same can not be said about Twilight Struggle or any classic CDG - the cards are essential to those games. I don’t raise this as a criticism of Imperial Struggle, I think making the game its own distinct thing was the right decision rather than trying to make a seventeenth century Twilight Struggle clone. However, fans of Twilight Struggle may not find Imperial Struggle to their taste. The one thing that arguably the games do share is the scope, both cover long periods of history, and the abstracted nature of control and influence they use to represent political (and military) power by historical empires. They share a historic vision if not the mechanics that underpin that vision.
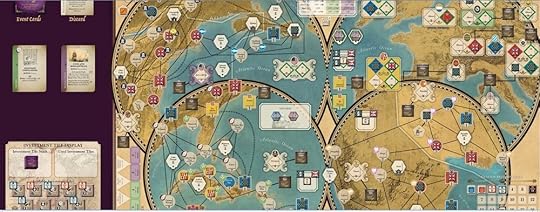
End of the first Peace Turn. Positions have shifted, stakes have been made, but this was early stages. Trends would become more apparent later.
In Imperial Struggle players take control of either Britain or France - representing broadly the kingdoms’ respective political, economic, and military interests rather than being any one individual monarch or other individual. Play takes place across a gorgeous map representing North America, the Caribbean, Europe, and the Indian subcontinent, as well as a side board representing the next war on the turn track. Play is divided into two types of turn: Peace and War. During a Peace turn players take turns selecting an Investment Tile which will given them points to spend on a Major action and a smaller number of points for a Minor Action. There are three kinds of actions: Economic, Political, and Military, each of which comes with their own symbol on the tile. Depending on what type of Action is depicted on the tile players will be able to do a number of things including (but not limited to) taking control of spaces on the main board, removing an opponent’s control, deploying naval squadrons, and adding more military assets to the next war. Minor Actions are similar to Major ones except that they can only be used to achieve one task and some options are not available for Minor Actions.
Depending on what spaces a player controls on the map they may have Advantage Tiles which can be activated once a round for a special ability such as placing Conflict Markers or reducing the cost of an Action. Players can also accumulate Debt to add points to their actions, up to a limit that increases over the course of the game. Certain Investment Tiles will also allow players to use a card from their hand for its Event.
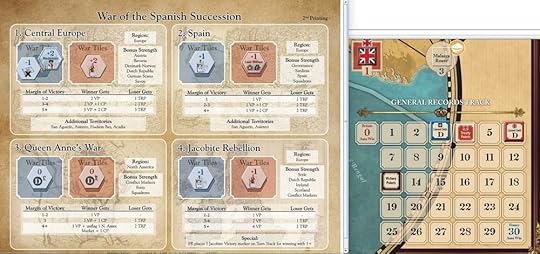
The first war - this gives you the idea of what the war board looks like. The tiles are randomly drawn and then you add one for each listed region in each of the theatres. At this stage I was lagging in VPs, a gap I would later make up but at the cost of focusing on the more military side of this conflict.
War turns have far fewer decisions for players to make. Each war has its own side board which is divided into a number of theaters. Tiles are drawn randomly to each theater and placed face down so players have a starting strength that is known only to them. Players can enhance their chances of winning a war during the preceding peace turns by adding more tiles to the theater, upgrading their tile at that location, or by controlling spaces on the main map that contribute to the war effort. During a War turn the relative strengths are summed up and the victor receives spoils based on their margin of victory, few decisions are made until the spoils are being assigned. While on the one hand I appreciate the simplicity of this mechanism, I found it kind of underwhelming as an experience. You complete a bunch of basic math and assign the spoils. It’s not very exciting.
Victory points are won in both Peace and War turns. During War points are received as part of spoils by the winners. In Peace Turns points can be won by controlling a majority of locations in a given region. The exact number of points varies between rounds, which means you can’t just routinely go all in on one region but need to spread your influence around. Players also compete for control of three randomly drawn trade goods which will give rewards at the end of the turn.
Points are absolute, so when the French player gains points they are taken from the British - a lower score is better for the French. In addition, there are several conditions that can trigger an earlier end of the game. If one player reaches their end of the victory track, they immediately win. Alternatively, if one player wins every theatre in a war by the maximum margin they automatically win the game. As a game these victory conditions are interesting but I did struggle to understand what they would actually represent. What does a French victory look like as opposed to a British one? The lesson from the game seems to be that while each side suffers periodic setbacks the struggle between these two powers continues for many decades so it is hard to view victory or defeat as nothing but a temporary setback. This was something that didn’t really bother me as I was playing the game, but after I finished it kind of felt like the narrative of the game had been artificially interrupted by its sudden ending.
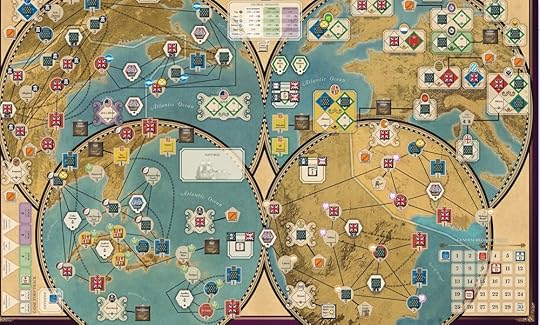
Right before the next war - this time we had two Peace Turns to prepare. At this stage I was feeling pretty good about India and Europe but I could feel North America slipping away. I definitely didn’t invest enough in my navies, which would cause the wars to slowly snowball against me.
As you might be able to tell, this is a game with a lot of moving parts. I am not even going into Ministry Cards, the differences in the game’s three Eras, Protected/Isolated spaces, how presence is used to determine which spaces you can act on, or the additional cost for some (but not all) actions if you take them across multiple regions in the main map. There is just a lot going on and I played my entire game with the rulebook open in another tab. We’ll come back to this later.
Imperial Struggle feels like it takes a lot of cues from Eurogame design. The selection of the Investment Tile and the ability to take a slightly weaker space to play a card in your hand for some kind of bonus feels reminiscent of the worker placement mechanic popular in may Eurogames. I mean this as a good thing, I think the Investment Tile selection may be my favourite part of the game. Each tile is slightly different and a random assortment are drawn each round- but they only reshuffle when all of them have been used so you will see all the tiles multiple times over the course of a game. You also leave one tile unused every round, which seems like a small thing but adds an element of the unknown I really like - you can’t just calculate which tiles will be played each round. Selecting an Investment Tile is tense and far more engaging than most worker placement games I’ve played. It’s excellent.
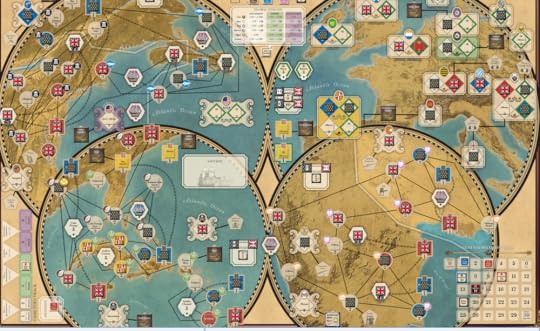
The war’s aftermath. I’m still feeling good about victory points - I secured a lead that I would not lose. However, my military failures had cost me some key forts in India and North America which would cause problems further down the line. There are apparently other ways to take forts but in our game they only seemed to switch as a spoil of war.
The main map is also gorgeous and beautifully done. While it is initially completely overwhelming with so many options for actions to take, once the game gets going it narrows down into a series of very intense conflicts over certain spaces and regions. You never feel like you have enough actions to do everything you want and every region can feel tense. The fact that there are four theaters also makes for great situations where you can largely cede control of one to go all in on another. In my game, as the French I ended up completely giving up on India but had an iron grip on Europe for most of the game. This strategy can be very risky because you don’t know what the value of each region will be over the course of the game, but it can also be effective and creates a great narrative.
I also mostly enjoy the little bit of spice that the Advantage Tiles add to the game, pushing you to control certain areas and rewarding you if you do but in some cases further urging you to keep acting in that one region when maybe you should be shoring up your position in a different one. Choosing what to do during the Peace Turns often felt very tense and kept me very engaged throughout. I could definitely see it being exhausting if I were playing the game all in one sitting, though.
Which gets to my biggest problem with Imperial Struggle: it’s too big. For my taste there is probably around 30% more game here than there needs to be. The game is long for one thing, I think potentially too long especially without any obvious shorter scenarios, but I also understand that it’s trying to cover a huge amount of history. Instead my problem lies more with the many little specific rules that you have to keep track of. There are multiple minor systems that you have to understand to be able to play the game but which can be very difficult to learn and hard to remember. Things like how a Minor Action can’t be used to un-flag one of your opponents space, or how you have to flip your Ministry Cards to use them - but if you deliberately choose not to then you can change them between turns of the same Era (they are automatically reset between Eras), or tracking protected versus isolated spaces, or the special rules for taking control of Forts - which I’m still not sure I fully understand.
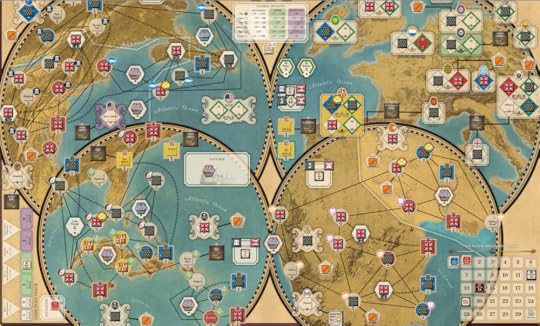
Right before the outbreak of the Seven Years War. I was barely holding on in India and North America and had decided to focus my attention more on the Caribbean and Europe - a decision that seemed like a good idea at the time..
It’s overwhelming and especially early on I resented how fiddly the game felt. My opponent and I replayed our first three turns multiple times because we kept finding errors (sometimes with the assistance of someone more experienced than we were) and that was not a fun experience. I admit this is partially the result of how we played - play by email is more open to correction than playing live where we would have just moved on. However, had we played in person and not caught these mistakes we may have failed to actually learn the correct way to play the game. Even late in the game we were discovering rules we had missed or forgotten - such as you can only use one Advantage Tile per region and not more than two in a single action. I expect some people really enjoy all of this nuance and that it probably has a noticeable impact on the game’s balance, especially at high levels of play, but as someone approaching it casually I found it very off-putting. Given the game’s length and complexity it is not something I will be playing very often which means that while I would probably play it again I’ll inevitably have to relearn all these minor rules which I’m not looking forward to. I bet its very rewarding if you and a friend are determined to play it consistently over a span of a few weeks, but I know that won’t be me and as a game I would play only rarely I think the fiddly nature of its complexity is off putting.
Imperial Struggle’s topic is also briefly worth some reflection. This is a game that is very explicitly about Empire - its protagonists are two imperial powers battling for global supremacy and much of the board is represented by colonies. During a period when we are increasingly reexamining board games’ fascination with imperialism with a more critical eye Imperial Struggle occupies an interesting space. It is not exactly an advocate for Empire but it’s arguably not explicitly anti-imperial. At the games’ zoomed out perspective there is little room for personal struggles and the atrocities of colonialism, but I do think it does a decent job of covering how Imperialism was viewed by the European powers responsible for it and in abstracting their motives. Much like how Twilight Struggle deliberately distorted reality to present it as it was viewed by the protagonists of the time, Imperial Struggle gives insight into how these two European powers would have viewed the rest of the world. That said, I could easily see people being uncomfortable with its depiction of imperial conquest and rule. I’m prepared to give Imperial Struggle some benefit of the doubt in that it is offering a more nuanced depiction of how European empire and colonialism came to be than most games on the topic, but it is still a game about empire with a very Europe-centric view which doesn’t do very much to radically alter our understanding of the impact of colonialism on the rest of the world.
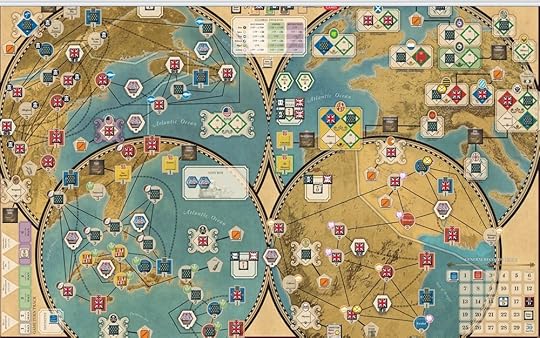
Right before the final round of wars. I felt pretty good going into this on victory points. I had completely lost control of India and North America but the Caribbean was very competitive and I had a pretty strong grip on Europe. From a victory points position things could be a lot worse.
One thing I did feel was missing from the game was Africa. With its focus on geographical control and conflict it kind of makes sense that Africa would not feature - direct colonial rule in Africa came in a later period than this game covers - but at the same time the absence of the slave trade is glaring. The period between 1700 and 1800 was the height of the international slave trade with over six million Africans transported across the Atlantic - nearly half of the total over the entire period of American chattel slavery. The game includes markets for Tobacco and Sugar Cane but no Slavery - the means by which those industries were made to function. I appreciate that including slavery in a game like this would probably make a lot of players very uncomfortable, but it is the truth of the history and if there’s any element of Imperial Struggle’s representation of history that makes me uncomfortable it is the absence of this important part of history. I don’t have an easy solution for how you incorporate something horrible like the international slave trade in a game that’s meant to be fun, but it also doesn’t feel like something that can be ignored or potentially left to just a few event cards. And that’s just the slave trade, there was more to European and African relations than just the trade in humans so while they may not have been strictly colonies it is impossible to ignore the specter of colonial control in Africa during this period. It just feels like a major part of the story of early modern European expansion is missing from the game with the exclusion of Africa, which is compounded by the fact that Africa is often left out of these stories.
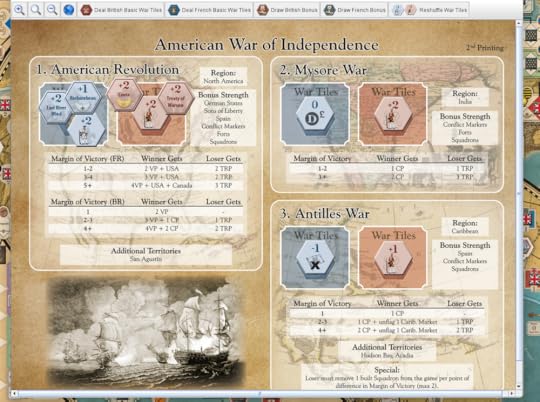
This is where it all went wrong - I tried to stem the bleeding in North America, accepting the other two as likely not going very well for me, but a final push that cost me Spain resulted in me losing all of these wars by the maximum margin. That triggered an automatic defeat. Had I known the game better and studied the wars further in advance I might have been able to avoid this, but with all the information I was already taking on board that was never practical. In the end my opponent’s earlier war successes helped build to this crushing defeat that neither of us had actually seen coming! Honestly, it felt a little anti-climactic…
On the whole I wasn’t particularly enamoured with Imperial Struggle as a means to engage with the history of this period. I don’t feel like I’m much more informed about the history than I was before. I think if people already know history very well then they will enjoy recognising the cards they draw or characters on Ministry cards, but I didn’t particularly feel like I was engaging with it as a relative neophyte to this particular topic. Whether this will bother people will depend on the way they want their games to engage with historical topics. I don’t think Imperial Struggle fails, but I also didn’t feel like it drew me in as much as I would like. It seemed to me like it was a game first and about the history second, and that’s not necessarily a bad thing. After all, it would probably be less interesting if it were more of a simulation than a game, but I just found the balance wasn’t quite to my taste.
Overall, I found Imperial Struggle to be a fascinating piece of game design on an interesting, if actually quite grim, period of history. The ambition of its scope is impressive and it largely succeeds at delivering a game that feels like you are playing out a century long rivalry between two major European powers. That said, it is also a game that is more complex, and fiddly, than suits my taste and it will not be making a regular appearance in my gaming. I have actually since passed on my physical copy because I cannot imagine myself ever getting it to the table (if I ever even got a table large enough to accommodate it!) Still, while I am not entirely enamoured with it if you told me this was your favourite game of all time I easily could understand that perspective even if I don’t share it.
October 31, 2022
First Impression: The Flowers of the Forest by Charles Vasey
I was captivated when I first saw an image of The Flowers of the Forest in the Homo Ludens backer’s Discord. It was unlike anything I’d ever seen before and I was desperate to try it. Sadly, while the game, originally published in 1995, was reprinted in Battles Magazine in 2013 it is very hard to come by and the cost of a secondhand copy can be very high. In a stroke of unexpected luck, however, another member of the Homo Ludens community offered to send me a copy of Battles Magazine #9, game included, for the cost of shipping - an act of extreme generosity. As soon as it arrived I set about learning it with the intention of playing it sometime in the near future, but I quickly found that I couldn’t fully grasp the rules without a proper visual reference so I ended up setting up the game on my coffee table (the map was too long for my usual table). This was a slippery slope that resulted in me inevitably just playing the game that afternoon and I’m glad I did. The Flowers of Forest is one of the most interesing gaming experiences I’ve had all year, although it did give me kind of a headache.

Initial set up - much of the deployment is player’s choice. The English start off map and will have to advance on. Non-artillery units cannot be adjacent unless in combat which creates further positioning challenges. Also apologies in advance for the weird lighting - this game map is too long and I ended up playing it on my coffee table.
The Flowers of the Forest is about the Battle of Flodden, a disastrous defeat for King James IV of Scotland during his 1513 invasion of England - one in a long line of disastrous Scottish invasions. It’s a battle that sits on the cusp of medieval and early modern - while during the gunpowder era it was primarily defined by polearms, the Scottish pikes versus the English bills. It’s an interesting battle that contains both elements of fifteenth and sixteenth century warfare and I think shows some of the complex interaction between new technology and military history - it’s not all linear progress like you would see in a Civilization game. While arguably a disastrous defeat for pike tactics, Flodden would do nothing to dissuade their mass adoption and pikes would be successful in many other battles - in no small part thanks to the fact that the Scottish failure cannot be blamed on their weapon alone. That said, playing The Flowers of the Forest you may find yourself blaming those stupid pikes and their poor CRT when confronted with English bills!

The positioning after the second turn - England brings on reinforcements but they are behind the marsh and will take some time to be relevant. Meanwhile the Scots are wheeling into position to face the advancing English army on the western flank. So far it almost looks like I know what I’m doing.

A sample image of the game’s Order Logs - a helpful way to track what orders you have given your units. It also includes the chances of each Leader having their own orders be implemented should you try and change them without using your overall commander.
My printer is still in storage so I couldn’t make a copy of the Order form - instead I did my own in a notebook. The dividing line shows the orders I gave before play began and arrows indicate when I allowed the unit to just keep following the order it already had.
It’s not the weaponry of the era that The Flowers of the Forest is interested in, although they do play a key part in the game’s balance, but rather the means by which leaders could (or could not) control their armies. While the most visually stunning element of the game must be the long counters, the most distinct feature of its design is how you move those across the map. Orders are pre-planned, you write down what you want your units to do out of a menu of Orders in advance of taking your turn. You can, if you want, write down your Orders for all 8 turns at the start of the game, but you don’t have to. If a unit doesn’t have an Order on its turn it will continue to do whatever the last Order it had was - so if it was Stand it will remain stationary or if it was Advance it will keep moving forward. If you want to change your Orders you have two options - you can send them new orders from your overall Commander or you can try and have their Leader change their orders. For the latter you have very limited options and must roll on the Leaders table, which will usually just make them stop moving but may be the change you desire or a third, possibly undesired, result.
To issue a new Order from your overall commander you calculate the total number of hexes between the Commander and the unit you want to issue a new order to. You then have to roll over that number on a d10, if you come up short there’s a Herald chit that goes on the map and will slowly make progress toward that Unit on subsequent turns. Once it arrives will update that unit’s orders (whether you want it to or not at that point).
There are a few other quirks, most notably that if you want your units to pivot on their axis (and you definitely will) then their leader has to roll successfully on their individual chart that determines whether they succeed in what was actually quite a complex maneuver. This roll is made much easier if your Commander has successfully Ordered them to Pivot. Failing the roll causes your unit to stop dead in their tracks, which could be fine but more often is the worst outcome you could imagine (at least in my limited experience). This whole system makes maneuvering your units very stressful but also absolutely fascinating. Figuring out how far in advance to program your moves at the start of the game (or every time you send new Orders from your Commander) is also kind of a head wrecker. There are optional rules in the game that make the command closer to a more traditional wargame, but I must confess I didn’t even read them because to me the frustrating and weird Order systems are the game’s most interesting feature!
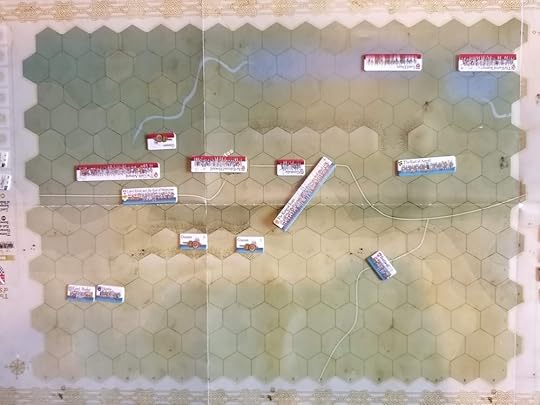
Things go very wrong for the English early on - I foolishly advance my smallest unit right into the jaws of James IV of Scotland’s main force. Being flanked in this game is not good.
That’s not to say that it doesn’t have other things going for it. I’m also very enamoured with how it represents unit integrity. On the main map you have the gorgeous long counters, but actual unit structure and strength is tracked on the sides of the map. Each unit has its own section with a number of columns equal to the number of hexes it’s main counter takes up on the map. At the start of the game you arrange troops in these columns as you see fit from a pool that the scenario gives you - another great series of decisions you will inevitably come to regret several turns later. When combat happens you fight column to column based on which ends of the counters have come into contact on the main map. It’s really interesting and creates some great moments during the game. Much like the orders system I’ve never played anything quite like this and I love it.

James IV decisively sees off his opposition and advances on the flanks of the English wester forces. Meanwhile, English reinforcements enter from the East and things are not looking good for that Scottish flank if we’re honest. This is the kind of thing that happens if you read the reinforcements table as you play. We have also wracked up our first leader casualties - combat is lethal for all involved in this system.

How can you not be excited when reading this?
Speaking of things to love, I think this game won my heart when I was reading the manual and I discovered that the scenarios are based on the interpretations of two classic histories of the battle: Oman and Mackenzie. I love to see historiography represented explicitly in the game’s representation of the battle and even if these aren’t exactly the cutting edge of interpretations of Flodden it is absolutely something I wish more games did! I ended up playing the Mackenzie interpretation, largely because it is by far the simpler of the two. It removes all the cavalry and Scottish highlanders (technically they are still present, but Mackenzie argued they were equipped in a manner indistinguishable from the other pikemen) and drastically reduces the scale of the conflict. This made for an easier learning experience in a game that was a challenge to get my head around. I am very interested in trying the Oman version with those added unit types, it looks like it could really change the experience! I for one am very excited to do something cool with my cavalry and then immediately regret it as they get in the way of all my other troops somehow.
It’s not that The Flowers of the Forest is particularly complex. It’s not simple but the rulebook is short and clearly written. In theory it’s no more complicated than something like Men of Iron. However, it is so unlike anything I’ve played before that I felt like I had to unlearn several lessons I’d picked up in my early explorations of Hex and Counter gaming and learn multiple new gaming concepts, not just rules. I definitely got rules wrong in my initial play but that’s pretty normal for wargaming and the game is short enough that I don’t feel bad about just pushing through and finishing despite my errors - I can always set it up and play it again.
The one fault I would have with its complexity is that the manual, while well laid out for learning the game, could really use an index or other means of quickly referencing some of the more niche rules. There are also a few areas that could have used a bit more clarity, particularly around rules it exempts from the manual and just puts on the Player Aid. Most of these are pretty intuitive but with a game that deviates from what I’m used to in so many places it’s nice to have the assurance that these rules work as I expect!
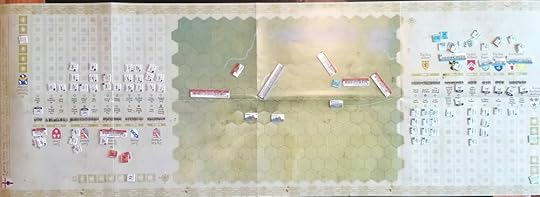
The Scottish position crumbles in the face of the English bills. James IV marches on like a juggernaut, crushing the English western position beneath his boots - but will it be enough?
It is also worth having a moment to consider balance, or the lack thereof. The Flowers of the Forest is proudly imbalanced - the Scots are almost certainly not going to win this game. The Pike Fright rules give them an advantage upon the initial clash of arms, but once the melee ensues the English bills are far more effective and will absolutely ruin the Scot’s day unless they can achieve a flanking attack (which is a challenge with the difficulty in maneuvering your units). The designer’s advice is that you should just play the game twice, once with each side, and determine a winner based on who loses better with the Scots (he doesn’t put it that explicitly, but that’s the vibe). The fact that the game is relatively short (for a wargame, each game will still probably take you 1-2 hours, longer if you’re learning it) makes this far more feasible than some other games I’ve played. You could probably play two games of The Flowers of the Forest in the time it would take you to play the longer scenarios in Men of Iron.
I played my first game solitaire and as a solitaire experience The Flowers of the Forest is both amazing and completely horrific. The bad side of it is that as I’ve mentioned this game carries a pretty significant mental load and when you’re playing solitaire you bear all of that. Coming up with an Orders plan for one side is exhausting enough, doing it for both is brain annihilating. You also lose some of the secret information around not knowing your opponent’s deployment of troops across their units before you set up your own or the lack of certainty around what orders your opponent has picked.

The final game state - James IV decisively wins the western flank but is outnumbered in terms or surviving units. Technically there were two turns to go, but I decided to spare myself two turns of mismanaged manoeuvring. The English are declared technically victorious, but I doubt anyone is going to be particularly happy with how today went.
That said, it also has a lot to offer as a solitaire game. I was recently replaying Great Heathen Army by Amabel Holland and while it’s a game I really enjoy, I don’t like it as much as a solitaire experience compared with Men of Iron. I think part of this is that one of the things I really like in a solitaire game is feeling like I’m not entirely in control. In Men of Iron I usually only feel like I’m 70% in control at any given time, while in Great Heathen Army I feel like I’m totally in control the whole time. If I’m fully in control then I’m more aware that I’m playing myself rather than playing against the game.
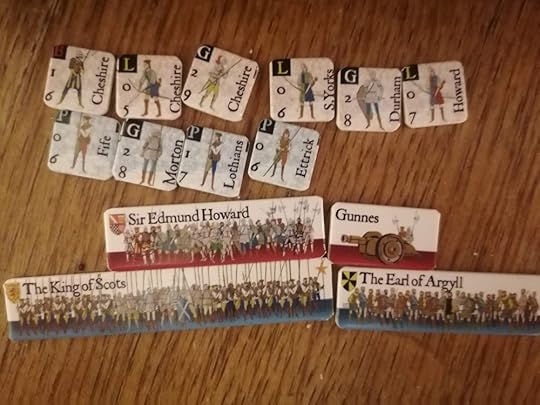
The hand drawn counters are also gorgeous and my limited photography fails to really do them justice!
The Flowers of the Forest regularly has the sensation of feeling like I’ve completely lost control of the game and it’s just running on its own while I desperately try and patch mistakes some idiot (me) made several turns ago. Because you could in theory plan out most of the game before it even begins it has amazing potential as a solitaire experience where you make a plan and then see how things unfold. Although be warned, if you are anything like me the experience may leave you with one hell of a headache.
Sadly there doesn’t seem to be any digital implementation of The Flowers of the Forest that I could find and the game is tragically out of print, but I am very much looking forward to playing it again and would love to play it against a human opponent. It’s just so good. If somehow you can get your hands on a copy, or if it has been sitting on your shelf of shame since 2013, you should definitely play it. I guarantee that you will have a memorable time!
October 27, 2022
A Fistful of Shells by Toby Green
All too often African history is treated as a topic either entirely divorced from the rest of global history or one that is entirely determined by forces beyond the continent. Older scholarship notoriously labeled Africa a continent “without history” and even more recent studies have at times viewed it entirely through the lens of colonialism and the slave trade - not allowing for any agency on the part of Africans themselves. Obviously this is a very limited way of viewing an entire continent’s history - lots happened in Africa before the arrival of Europeans and plenty happened there besides exploitative actions taken by those Europeans once they arrived. I found Toby Green’s book an engaging antidote to old fashioned views of African history that still persist in popular understanding of the continent.
A Fistful of Shells is primarily an economic history of West Africa from c.1450 until c.1800. It covers a period dominated by the Trans-Atlantic Slave Trade but does not limit itself just to discussions of that topic. Instead the book takes an African-centric perspective, examining how African powers and individuals were instrumental in shaping the political and economic changes that West Africa experienced during this period. Green’s primary argument is that far from being passive victims of European exploitation, Africans were instrumental in shaping their own environment.
Effectively making this argument requires Green to thread a delicate needle. Pushing it too far would risk arguing that African’s were primarily responsible for the slave trade and later colonial exploitation, absolving the Europeans of responsibility for their actions. Thankfully, I think Green does an excellent job at showing how Africans were actors in their own history, not strictly victims, but not freeing the Europeans for their exploitation of the continent. I think a key part of this is the level of detail Green engages with, showing that West Africa was a complex place with many individual actors some of whom benefited from trade with Europeans, including most notoriously the trade in humans, while others were victims. A more class based perspective allows Green to show how African rulers in particular participated in exploitation along with the Europeans while many other people suffered. He also discusses the differences between African states that participated in the slave trade and those that, even if only for a time, refused to sell slaves to outsiders. Green also makes the decision to not go into great detail about the horrors of the slave trade or what happened to African slaves once they reached America - he is content that we understand the horrors of this practice and chooses to focus on Africa and the people who remained on the continent for the most part. That is not to say that the enslaved experience is absent, just that if you are looking for a detailed study of Trans-Atlantic Slavery this is not that book.
Green’s interest range much further and in many ways it was his handling of other trades, such as in gold or cloth, that I found even more interesting. This is because while I was obviously aware of the slave trade and the greater nuance that Green provided was interesting, I was almost entirely ignorant of these other trades. A key theme of Green’s book is how the trade with West Africa was primarily extractive - it removed resources of long term value such as gold or humans from the continent in exchange for resources that had shorter value, such as cloth or other materials that would decay. This line of argument while interesting is harder to follow I think and is one of Green’s weaker points. I’m far from a specialist and wouldn’t be comfortable critiquing the overall argument, but I just found it hard to fully understand the details.
This argument is interconnected with broader points about how in West Africa multiple types of currency were often in use simultaneously. Green uses this argument to show the economic complexity of the region and to push back against older histories that saw Africa as a “barter economy” without real understanding of money. Green provides very valuable nuance to our understanding of the complex economics of West African trade, but I think it also complicates his other argument about the role of extractive trade imbalance between Africa and the rest of the world. It doesn’t undermine it so much as make it harder to follow and after finishing I felt that there was much greater depth to this line of thinking that I just didn’t fully grasp.
Instead, what I found most revelatory about A Fistful of Shells was how it showed the interconnectedness of West Africa, Europe, and North America in this period. Green shows how material trade was an important linking factor, but he doesn’t limit himself to just that. Instead he covers the transmission of ideas, perhaps most intriguingly in how the Haitian Revolution potentially inspired popular revolts in West Africa against an increasingly unpopular aristocracy made wealthy off the slave trade, and the sustained diplomatic connections between West African political entities and European powers. The role of African embassies to Europe and Brazil are particularly interesting and show a very different perspective on African-European relations than we usually see in popular discussions of this period.
Far from being isolated from the rest of the world, Green shows that Africa was deeply connected to European and North American trends - and not just as a receiver but also as an influencer. As a result I think A Fistful of Shells shows the flaws in approaching a history of Europe during this period without considering the role Africa and African powers played in culture and trade. It was African gold that sustained many European monarchies and wars, for example. History books often emphasise the establishing of trade links to India by the Portuguese and the American colonies of the Spanish, but the African trade which was significantly enhanced during this period feels equally important and was integrated with the two, for example Indian cotton was a common trade good in West Africa.
While I found Green’s book to be a little long and in places a bit slow, the content within was absolutely fascinating and did a lot to change my perspective on African history and my broader understanding of global history. I think even just reading part of it could do a lot to expand anyone’s understanding of the development of global trade in the early modern period and I would definitely recommend it as an introduction to the subject.
October 24, 2022
First Impressions: Supply Lines of the American Revolution: The Northern Theater, 1775-1777
It definitely says something about me that I got very excited the first time I heard the title “Supply Lines of the American Revolution”. Growing up in Central Virginia, within spitting distance of the houses of many Founding Fathers and ex-Presidents, the history of the American Revolution played a central role in my early education and as someone interested in history it was impossible not to absorb some of the mythmaking that went with that education. Separately, as a military historian I’m always interested in the logistical challenges of warfare and the lengths commanders (and the institutions that backed them) went to wage effective war. A game that combines both of these interests was bound to be get me excited. It actually genuinely didn’t occur to me that the title might come across as painfully dorky until I showed it to my partner. Let’s be honest, though, if you’re reading this then you are probably of a similar persuasion to myself and the idea of pushing cubes of supplies around a map of the American Colonies fills you with excitement! So, what did I think of my first experience playing Supply Lines of the American Revolution: The Northern Theater, 1775-1777?

The initial deployment of Supply Lines with the first Supply Phase completed. While it may not look like much, I found the open-ness of the first turn quite overwhelming.
The core of Supply Lines of the American Revolution is the two types of resources that you have to manage: Food and Military Supplies. Food is necessary to move any of your armies. For every group of up to 4 units you wish to activate you must spend 1 food supply. That means you spend 1 Food for 1-4 units, 2 Food for 4-8, etc. Military Supplies become necessary whenever you want to fight - you must spend them to generate dice in combat (or, if you’re the British, to bombard port locations) which are necessary if you’re going to attack anyone or if you want to inflict any damage on someone who is attacking you.
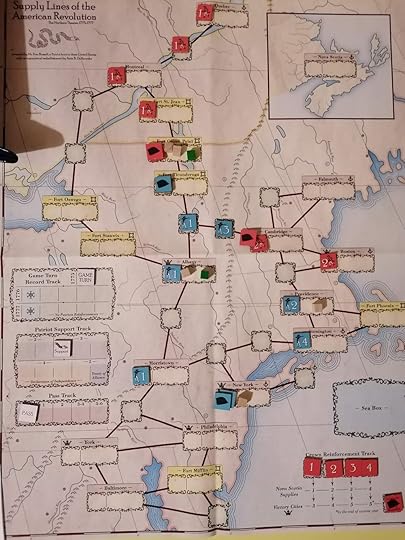
End of Turn 1 - Revolutionaries begin establishing some initial supply lines and the crown seizes Cambridge and advances toward Albany. I was not fully prepared for how annoying maintaining the supply line down from Quebec would be.
On initial impression this isn’t too complicated - you need to spend cubes to do stuff. So far so Eurogame. However, things get thornier pretty quickly. For one thing supplies are only generated in cities that you have troops in (and that aren’t completely surrounded by enemy armies), but you need to get the supplies from the city that generates them to the front lines where you’ll be spending them. In the initial Supply Phase, when supply cubes are generated, you can move supplies across adjacent locations (up to a point) as long as you have armies at each of them. This gives you some ability to move supplies around and get them where they need to be, but the layout of the map and the distances involved can make this very challenging to manage. This is to say nothing of the challenge of assembling an army of any reasonable size when your troops are spread out over a great distance so that you can hopefully use all those supplies you’re generating at one end of the map.
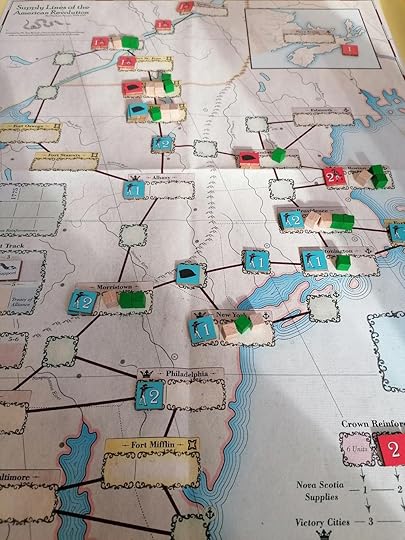
Start of the first Winter Turn, the Revolutionaries have expanded out significantly but will soon face a severe reduction in troops as the Continental Army will disband. Meanwhile the British have called for more soldiers who will arrive with the spring.
One other interesting wrinkle in the system is that you can only attack if your army has a Leader with it and both sides only have at most three Leaders, so your ability to launch offensives is quite constrained. This creates a really interesting logistical puzzle because not only are you trying to get supplies from your cities to the front lines - you also need to get them to whichever armies have Leaders because only they can attack and push your opponent back. You also need to make sure that your leaders have a large enough army to still be effective - especially if you’re the Revolutionaries. The Revolutionaries win by generating support for their cause and bringing the French into the war. They do this by winning battles where a Leader is involved, but they can lose it every time one of their Leaders is defeated. I quite like when games do this - they give you an incentive to put key pieces on the offensive but also punish you if they are defeated. It makes for tense gaming experiences and encourages risky plays!
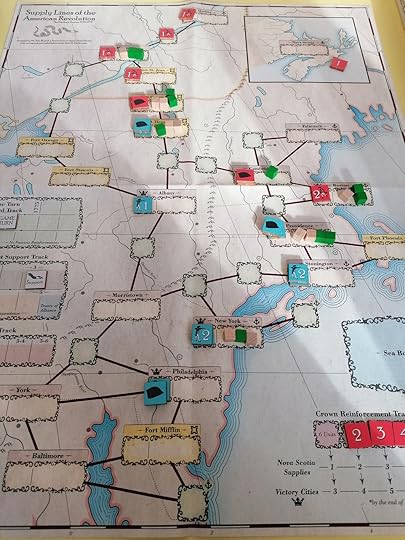
After the first Winter turn, the Continental Army disbanded but they receive extra reinforcements to make up for that, leaving them in a reasonably strong position thanks to some lucky draws. The revolutionaries also receive their third Leader. Meanwhile six British troops will soon be arriving in Nova Scotia. The war escalates.
Winning a battle is determined by the size of your army, not how much damage you inflict in combat, so attacking a small force with a huge army is almost always guaranteed to generate a victory. However, whether the defeated army retreats is based on a Morale roll, which introduces an element of randomness into attempts to seize territory. Larger armies also take more Supply to move and limit your ability to spread out across the map. This makes for a lot of tactical challenges and factors to consider as you play.
Things are looking up for the Revolutionaries. A few successful attacks fail to oust the British from Cambridge and Boston but they push the support track past the Declaration of Independence threshold. The British fail to capitalise on their new forces but are amassing for an attack on Ticonderoga in the north.
As should be apparent by now, I had a really interesting time playing Supply Lines of the American Revolution. It is a engaging puzzle and while it isn’t too complicated the punishment for messing up can be pretty brutal. In my game I screwed up the supply lines for the British pretty badly and they were never really able to recover. While it contains significant elements of randomness, from combat to the supply of new Revolutionary troops, the core of the game is the supply and I got the impression that the game is pretty balanced overall (if that’s something you care about, I’m not sure that I do).
The Revolutionaries succeed in taking Boston and attempt a flanking manoeuvre via the Great Lakes to reach Quebec. The British succeed in taking Ticonderoga but the supply line stalls out there and they must call in more reinforcements.
While it’s not exactly a criticism, Supply Lines is a game concerned entirely with the logistics of the war and so doesn’t really include much of anything about the political side of the American Revolution. Where a game like We the People tried to introduce more of a political dimension to gaming the American Revolution, Supply Lines eschews much of that to focus more narrowly on just this one aspect of the conflict. I think this is a reasonable choice, it’s a more interesting game in doing this one thing well rather than trying to do too many things and potentially becoming a bit of a bloated mess. Still, I think it is worth mentioning because this is very much a game that does what the title implies - it’s about supply lines - and people who prefer their wargames to be more about politics or diplomacy will not find what they want here. I enjoy games that include a strong political element but I also admire Supply Lines for just doing what it sets out to do. This also helps keep the game relatively short and simple (at least as far as wargames go).
The British succeed at retaking Boston but the Revolutionaries successfully encircle them to the north, isolating that Leader and making a push on Quebec possible. They are also just one victory away from the Treaty of Alliance which would bring the French into the war and marks a Revolutionary victory in this game.
A potential other criticism is that the game can feel quite abstract. I’ve used the word puzzle to describe it many times in this post and with it abstracting away all the politics there is a degree to which this game could just be an abstract game. I think the game map is doing a lot of the heavy lifting in terms of the theme, but at the same time I’m not sure how it could be any other way. After all, with a game where managing supply lines is the core mechanic, the layout of the lines is an essential part of the game. By having it be a map of the northern colonies during the American Revolution it puts an engaging theme on a game that could otherwise be much more abstract. I certainly felt like I was playing a game about the American Revolution in my one session of it, but at the same time I didn’t feel as drawn in as I have been with other games. The Leaders are nameless and the game isn’t structured to follow the historical narrative - you won’t be crossing the Delaware at the end of the game’s second year for example.
I think with both the abstract elements of the game and the lack of a political element these are things that would bother me a lot more if this were the only game on the American Revolution. It isn’t though, not by a long shot, and so I’m happy enough with it really only focusing on this one aspect of warfare in this period and discarding everything else to give a narrow but interesting experience. That said, it very much won’t be for everyone and that’s something to bear in mind if you’re thinking of buying it. At least the title very helpfully flags exactly what kind of experience this will be!
A successful Revolutionary attack on Boston gives them victory!
My initial play of the game was solitaire and I found that to be a good way to learn the game. While the rules are relatively straightforward there are enough little quirks and exceptions to track that it is more complex than would appear at first blush. Overall, though, I didn’t find it to be a great solitaire experience. As a game it works perfectly fine solitaire - there’s no hidden information or any of the other things that make games solitaire-unfriendly. That said, I found wracking my brain over the game’s logistical puzzle all on my own to be a bit exhausting and lacking some of the thrill I expect the game offers as a competitive experience. I think one could play this game solitaire and have a perfectly enjoyable experience, but for me I think I will prefer to play it two player whenever I can. It didn’t have the kind of narrative I want from a solitaire experience, unless me screwing up my supply lines counts as a narrative..
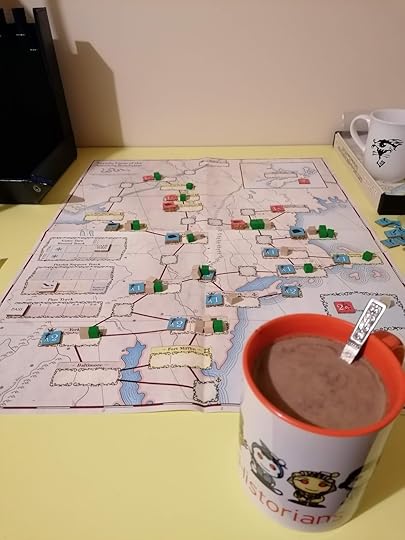
Not strictly relevant to the game, but I also found it pairs nicely with hot chocolate.
The series of games that it reminded me the most of was Volko Ruhnke’s Levy and Campaign games. Those are operational medieval wargames that focus on the logistics and supply of armies, although in significantly more detail and complexity than Supply Lines. While the theme is very different I think fans of one series should probably try the other - there is enough in common in the core experience of playing both of them to appeal to anyone who likes seeing their armies starve and fall apart because of mismanaged supply.


