Stuart Ellis-Gorman's Blog, page 20
March 24, 2022
The Agincourt Campaign of 1415: The Retinues of the Dukes of Clarence and Gloucester by Michael P. Warner (Boydell, 2021).
The research on the prosopography of English armies during the fourteenth and fifteenth centuries is easily one of the most fascinating and rewarding bodies of historical research of the last twenty years. Pioneered by scholars like Andrew Ayton, Adrian Bell, and Anne Curry, this work has now been taken up by many more researchers and expanded beyond what the three of them could have managed on their own. Michael P. Warner’s book examines the Agincourt campaign through the lens of the retinues of King Henry V’s younger brothers. This is very much a work of academic scholarship that is in conversation with a wider pool of research, not an introductory book. That said, it is also remarkably approachable for a book of this kind and while an awareness of the work of Ayton, Bell, and Curry will assist anyone who wishes to read it, having actually read everything that came before is not a requirement.
For those unfamiliar with the concept, prosopography is the collective study of the lives of a group of people whose individual biographies are insufficiently attested in surviving evidence to be able to study them on their own. In the specific case of these projects, it is taking the available evidence about who participated in English wars during the Hundred Years War and trying to generate an overall picture of what it meant to be a semi-professional soldier during that time. Arguably the most impressive project to come out of this work, and the foundation of much of what has come after, is the Medieval Soldier Database (https://www.medievalsoldier.org/) which compiles vast lists of names of individuals known to have served in English armies from 1369 until 1453. It’s a hugely impressive piece of work, and freely available for anyone with an interest in doing some digging.
Two major threads have emerged as a result of these prosopographical studies. The first is a greater insight into the lives of individuals who served in the Hundred Years War – linking their wartime lives to when they may have appeared in court cases or other documents of medieval English bureaucracy. The other fruitful area of study has been in gaining a greater understanding of how English armies were recruited during this time. By tracking which names appear in the retinues of captains and sub-captains it is possible to see patterns on how often soldiers served together, how stable retinues were during different periods, and generally to gain greater insight into how medieval armies were assembled. These studies bring us much closer to answering the question of how someone like King Henry V would actually find people to bring with him on his invasion of France – convincing his nobles is one thing but getting the archers to show up is another!
Michael P. Warner’s books is a great addition to this field of study, taking full advantage of the Medieval Soldier Database and the research that has come before to create a much more in-depth picture of two of the largest English retinues sent to France in 1415 than anything that has come before. The Dukes of Clarence and Gloucester are a well-chosen pair for this study. Both were younger brothers of Henry V, and thus the premier retinues to serve in after the king’s own, but they had very different levels of military experience. Clarence was a hardened veteran of several campaigns – arguably more experienced even than his elder brother – and Warner shows how he already had a well-established network of associated he could recruit his retinue from. In contrast, Gloucester was untested in war and had to assemble his retinue from scratch – relying more on retainers who had long established links with the House of Lancaster generally rather than with Gloucester as a whole. Gloucester’s retinue also included many individuals who had no previous military experience while Clarence was better able to recruit hardened veterans, once again reflecting their own previous experience.
The book is not solely concerned with the 1415 campaign. Clarence’s pre-1415 military experience is explored in detail as well as his campaigns after 1415 up until his early death at the Battle of Baugé in 1421. The surviving muster evidence is thin in places due to a low survival rate for Clarence’s non-1415 documents, but Warner does an admirable job of piecing together what evidence he does have. Gloucester lived a much longer, and at time more controversial, life that included some more military service but also a prominent role in English governance. This allows Warner to trace members of Glouceser’s retinue not just into his later campaigns, but also through his role in administering his estates back in England and to his time in royal government during the minority of his nephew, King Henry VI. Warner even manages to link Gloucester’s likely assassination in 1447 to having at least involved, if not been directly caused by, someone who had served in his retinue all the way back in 1415.
This is a dense academic work, there’s no getting past that, so I probably wouldn’t recommend it for general readers. For a general history of the Battle of Agincourt, then either Great Battles: Agincourt or Agincourt: A New History, both by Anne Curry, would be better places to start. If this is your first dive into late medieval military prosopography, then The Soldier Experience in the Fourteenth Century edited by Adrian Bell and Anne Curry is probably the better starting point. However, if you have already dipped a toe into this area then Michael P. Warner’s book has a lot to offer, and you will not be disappointed by it!


March 21, 2022
Learning My First COIN: Pendragon from GMT Games
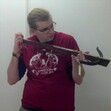
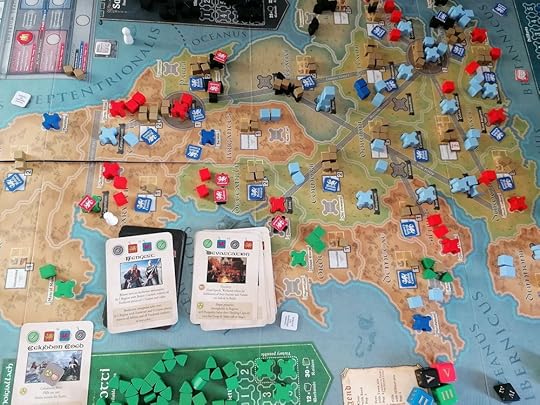
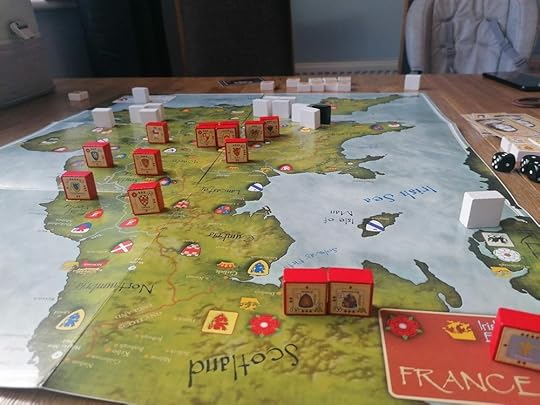
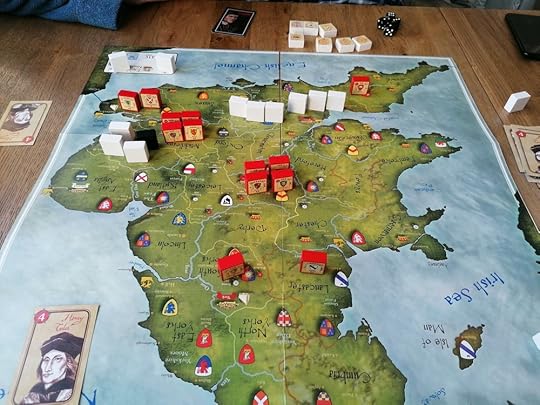
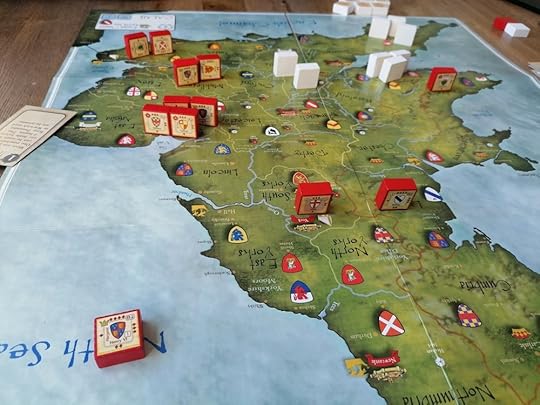
I spread Pendragon’s massive board over my tiny corner of counter space I’ve set aside for wargaming and was relieved to see that it just about fit. There was no extra space, so the deck and any extra tokens would have to live on the board, but there was space in the various sea locations to make that an acceptable compromise. Pendragon’s board is gorgeous, and the components deeply satisfying to place and push around. That said, it’s also a bit of a bear to set up – there are so many bits of wood to put down to mark the status of Britain before the Roman collapse. I left the game up over the weekend, playing turns whenever I could grab a few minutes, which was definitely better than trying to set it up and learn it all in one go. After having spent a good few hours with it over several days I can confidently say that I know how to take actions in Pendragon: The Fall of Roman Britain, whether I actually know how to play the game is another matter entirely!
The game a few turns in - normally I try to give a blow by blow of the game but there’s so much happening and I was struggling to keep up with it! Also apologies of components move around or are in the wrong place - I made some mistakes!
The title of this post is a little misleading – this is not actually the first time I’ve tried to learn a COIN game. Some years ago, I bought a copy of Falling Sky in the hopes of finally experiencing one of these games I’d been hearing so much about. I sat down and read through the rules, and at the end of that process I knew how all the individual bits worked but had no idea what the game looked like in aggregate. Any wargamer with experience with the series, or many other complex wargames, will have groaned at reading that sentence – obviously this was not how I was supposed to learn the game. My background was in miniatures wargaming, so I arrogantly thought I was ready for a complicated rulebook with lots of edge cases. What I wasn’t prepared for was for a game series that so fundamentally deviated from how I expected play to work that I didn’t even really understand how to take an action after reading through quite a few pages of rules.
This time I set out to do the sensible thing and learn via the very helpful Playbook which walked me turn by turn through an entire Epoch of the game. I also set up a second Epoch so that after having my hand held for several turns, I could journey out on my own and see if I’d actually learned how to play. Spoilers, the answer is kind of.
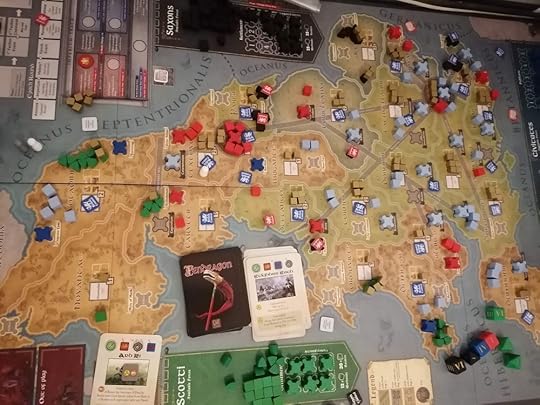
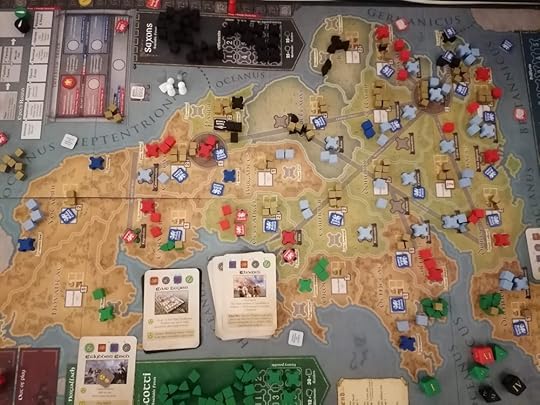
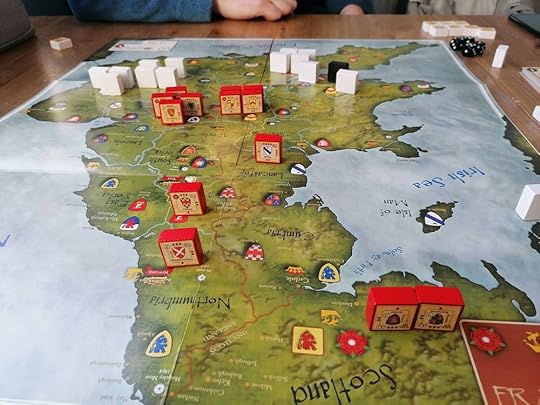
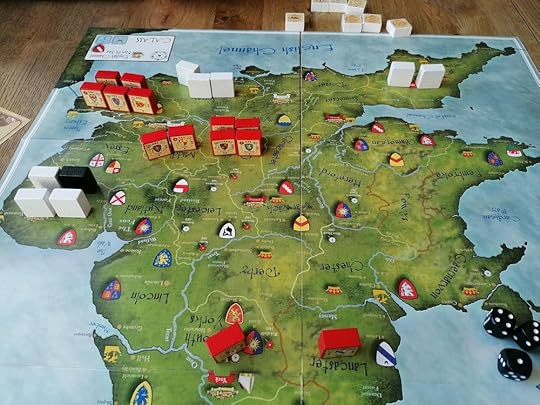
The board before resolving the First Epoch - this marks the end of my hand holding at the point from which I must start off on my own!
I know that Pendragon is not supposed to be the easiest COIN to learn as a starting point since it has quite a lot of extra bits of complexity – like the rules for plunder – that aren’t in other games in the series. However, as my previously unsuccessful experience with Falling Sky may indicate the historical settings of ancient Rome or late antique / early medieval appeal to me more. Sadly, I never got Falling Sky to the table and eventually sold it off to a new home – something I slightly regret now, but so it goes. Pendragon was the nearest thing to a medieval COIN, and so I was determined that I would learn it. I say nearest thing, because we could spend hours debating whether this counts as Late Antiquity or the Early Middle Ages, with the cold hard truth being that they’re just terms for different perspectives on the same thing. Also, in Pendragon you can play Irish barbarians raiding Britain, which, as someone who’s lived in Ireland for nearly 15 years, I found quite satisfying.
My first two turns of Pendragon took ages, I was so slow as I tried to figure out what the action sheets were telling me or where to place pieces. This was partly my own fault. For reasons that made total sense at the time, I laid out my board with the southern end of England pushed into the corner – I theorized, correctly, that I would need more ready access to the numbered track at the top of the board than I would the Civitates’ reserve units and settlements. The problem was that as a result I spent a lot of the game looking south from Scotland – which meant I was trying to read all the names of the province’s upside down. I’m not particularly familiar with the Roman names for regions of Britain to begin with, so trying to read them upside down with their complicated (but very pretty) font was a real challenge. This is largely ceased to be a problem once I started playing on my own, since unless a specific Event called for me to locate a region, I was happy to just mentally refer to them by their medieval names.
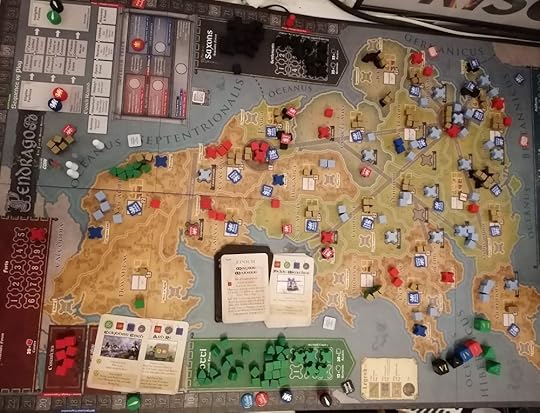
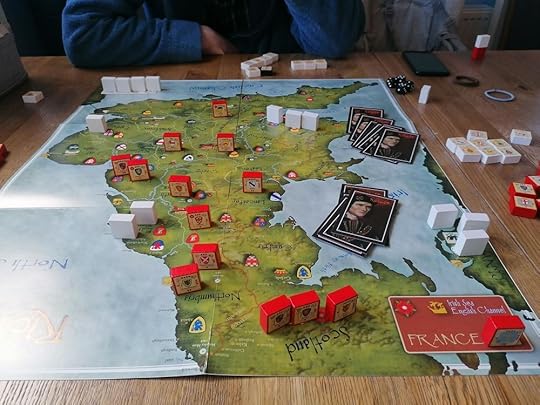
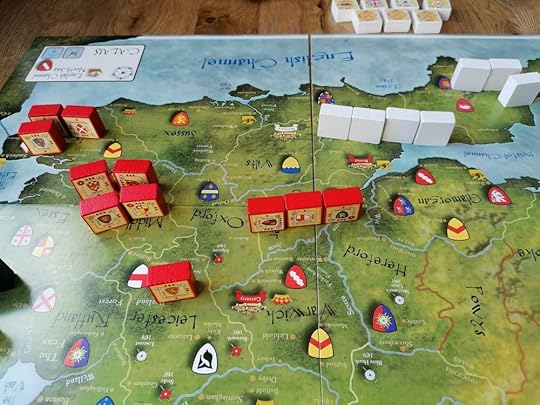
I waited until a new day had dawned before tackling Pendragon on my own. An early event let the Scotti build a settlement in north Wales while the Saxons are raiding in the east of England.
I think it was around turn 4 or 5 that I felt I was beginning to understand how the game actually played. I understood how actions were selected, what playing an Event entailed, who got priority in what turn. It felt like a switch flicked in my brain and I (kind of) understood. A few seconds later I realised that while I understood how to pick an action, I had no concept of what action I should actually be picking.
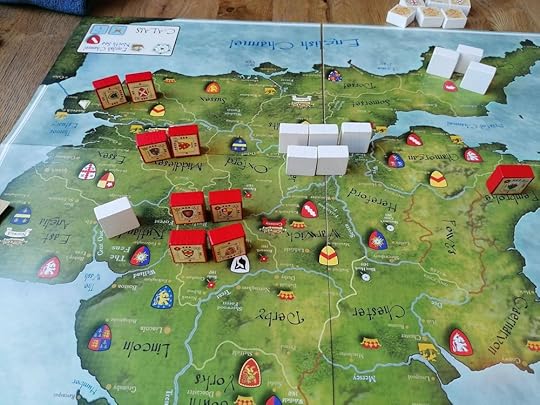
Scotti set up another settlement in the north while the Saxons push deeper into the midlands, destroying a Dux fort thanks to an Event. Despite their incursions the Dux position remains strong. Not shown: the Dux have spent most of the Roman resources, depriving the Civitates of a lot of their actions.
By the end of my time with my first attempt at Pendragon I think I have a decent grasp of how to play the Saxons and Scotti barbarian factions (for those not in the know, Scotti is the Latin name for Ireland, and not, as you would assume, Scotland). I’m not saying I have even the slightest hope of actually successfully launching an effective strategy with them, but I understood the interplay of launching raids, pillaging regions, and occasionally building settlements. I could choose something to do as a Scotti player and then execute that action. This is in sharp contrast to the paralytic fear that clenched my heart every time I had to figure out what it was the Dux should be doing. Ironically, at the end of my game the Dux won based pretty much solely on the inertia of their strong opening position and me not really understanding the Victory Conditions until after it was all over.
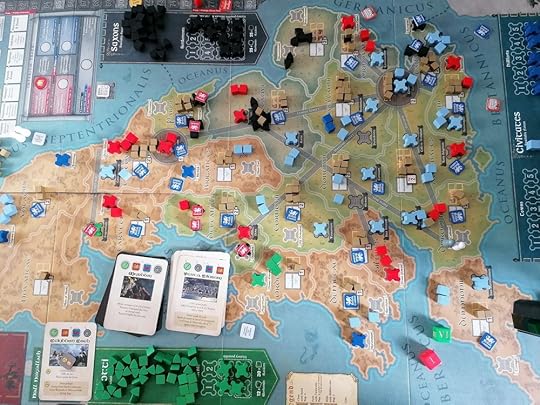
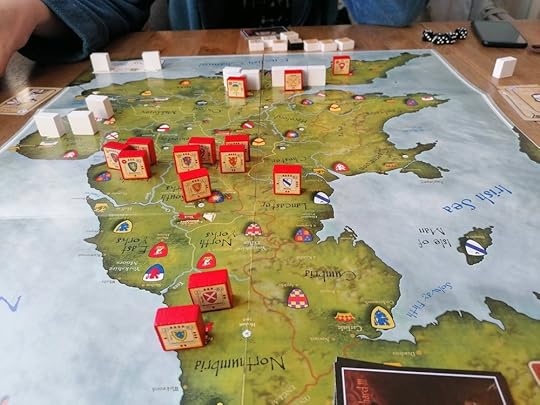
Barbarian incursions continue in force - Scotti have made an incursion into Cornwall and the Saxons have claimed some territory.
I definitely feel like I understand COIN games a lot better after my time with Pendragon than I did when I started. Learning the whole game solo was a challenge. The information load was a lot, but there’s also plenty of bookkeeping to do in Pendragon and it was hard to keep up with that. I suspect distributed across 4 players, many of whom are very invested in it being very accurate for their own victory conditions, would make it a lot manageable but it was a struggle for me on my own. I think I noticed on turn 6 that I’d completely forgotten to place a Hill Fort during set up and just hadn’t noticed. That didn’t really have any effect on gameplay, but it’s stuff like that presented a real challenge for me.
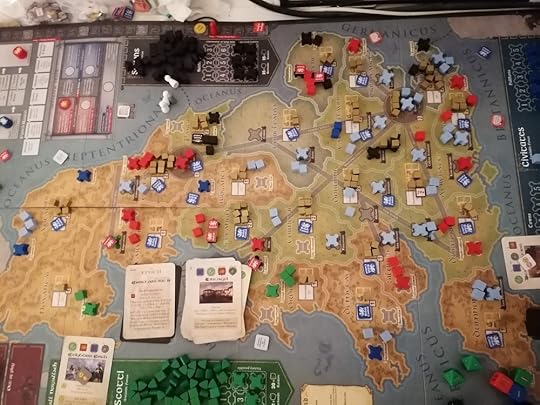
End of the second Epoch. Both Scotti and Saxons have made initial settlements on the island, but there is sufficient untouched prosperity to deliver a Dux victory since this is the final Epoch of my learning game.
All of that having been said – Pendragon is a fascinating game and I’m very much looking forward to actually playing it for real. For this first time, I played every faction myself to try and get some grasp on their respective actions and playstyles, but in future I’m looking forward to trying the solo bots and then, eventually, sitting down with some friends to play it for real. Teaching the game is definitely going to be a challenge, but one I intend to do my best to prepare myself for. In the meantime, I think I’m finally ready to actually sit down and read the rule book – and inevitably see all the things I got wrong!
March 17, 2022
Murder During the Hundred Years' War: The Curious Case of Sir William Cantilupe by Dr. Melissa Julian-Jones (Pen and Sword, 2020)
At first glance, the murder of William Cantilupe by what appears to be his entire household in 1375 feels like something straight out of Agatha Christie. His body was discovered by the side of a road, but upon initial inspection the coroner determined that he had been positioned there so as to appear as if he was murdered by highwaymen – his clothes were undamaged despite him having been stabbed multiple times in the torso. An initial visit to his nearby residence found it entirely empty – his wife and staff all having relocated very soon after his last reported sighting. Suspicions and accusations abound, and eventually two servants would be executed for the crime and several others declared outlaws for failing to turn up to court. His wife was eventually acquitted of the murder – history, however, has been less kind to her. The dominant narrative of William Cantilupe’s death has long been a salacious story of an adulteress wife having an affair with the local sheriff using her position of security to off her husband and marry her lover. Dr. Melissa Julian-Jones book discusses the Christie-esque aspects of the story, but also picks apart that traditional narrative to explore alternative explanations, and in the process reveals a fascinating story of elite and common society in late fourteenth-century England.
In places Murder in the Hundred Years War reads like a classic murder mystery, while other times it’s more of a True Crime documentary. The Agatha Christie element always looms in the background, the historiography of the subject makes that inevitable, but Julian-Jones also digs into the evidence, picking apart what may have happened like she was digging through cold case files. The evidence available is sparse, medieval trials didn’t really bother recording things like testimony or hard evidence, so even though we know quite a lot about the trial what we know is far outweighed by what we don’t. Julian-Jones does an admirable job at digging into the limited evidence and revealing well rounded historical characters from a handful of disconnected life events where these individuals broke into the historical record. She also makes great use of comparison, drawing on similar cases elsewhere in England, to show what we know about people in a given profession or how households were managed at the time.
Fans of microhistories will find a lot to love in this book – although I would warn any potential reader that they would benefit from having a good mind for tracking large numbers of characters with frustratingly similar names. Julian-Jones does an excellent job at distinguishing people, helpfully adding numbers to cases where multiple generations of a single family all had the same name, but it is still a lot to keep track of – particularly for someone like me who primarily studies the history of inanimate objects!
While the murder and its subsequent investigation and trial obviously take centre stage in the book’s narrative, a lot of the actual focus is on examining late medieval English society on a granular level. The social connections between elite families at the time, how households were managed, what life was like for servants, expected gender roles, and even domestic abuse all feature prominently in the story that Julian-Jones illuminates. You might come for the salacious murder story, but you’ll leave with a new understanding of the struggles of medieval women or the sense of solidarity many medieval servants developed while working in a lord’s manor, and it’s all fascinating.
I have to say that Murder in the Hundred Years War wasn’t exactly what I expected it would be, but I’m much happier with what I actually got. This is a fascinating window into late medieval England and one well worth a read for fans of murder mysteries as well those interested in a more bottom-up history of medieval society.
March 14, 2022
First Impressions: Richard III by Columbia Games
I don’t remember when I first became obsessed with playing a Columbia Games block wargame, but I would guess it was some time between ten and fifteen years ago. That game was Hammer of the Scots, and I still haven’t played it. Something about it captured my imagination, but it cost at least seventy euro, I was a broke student, and I already had several underplayed two player games so I couldn’t really justify the expense. Still, the idea of playing Hammer of the Scots lingered on and every time it got a reprint or showed up in stock somewhere I would think “maybe this time”.
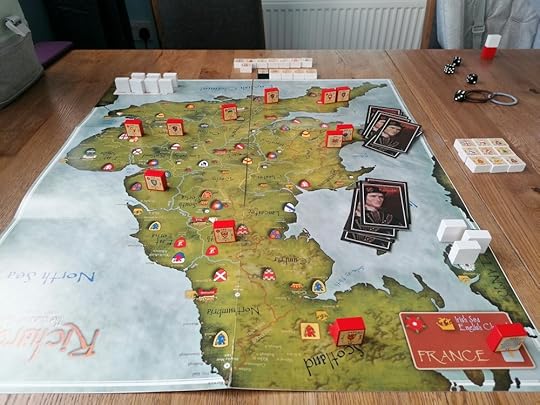
A peaceful and lovely England with no strife to be seen, sure would be a shame for a royal pretender to come along and mess things up.
Starting this blog finally gave me the impetus to buy a block wargame and see if it lived up to the expectations of my imagination. Astute readers will notice that this is not a report on my experience playing Hammer of the Scots – and that’s because Richard III was significantly cheaper. I may have really wanted to crush the Scots as Edward I, but I wanted to keep that €40 more. I almost bought Hammer of the Scots anyway, since I never much cared about Richard III, but the title of the game is a little misleading. This game is not about Richard III – in fact in our game he didn’t even show up. This is a full retelling of the War of the Roses in block game form – and as such I’m much more interested in it. While I’ve never much cared for Richard III, his brother Edward IV is another matter.
The Yorkist invasion begins, delivering some swift victories to the Pretender. Two heirs from House Lancaster flee to Scotland by sea after having been severely injured in the initial fighting.
I think block wargames appealed to me because I have a much more extensive background in miniatures wargaming and moving the blocks around the map has a very tactile element that appeals to that same part of my brain. I also really like the simple fog of war that is created by you only being able to see your side of the blocks – you know where your opponent is mustering their armies but not who is actually in that army until you fight. The classic line of block wargames put out by Columbia Games, which includes Richard III, Hammer of the Scots, and Crusader Rex, are all very easy to learn which is another appealing aspect. Don’t get me wrong, I love a big, complicated game, but sometimes you just need something nice and simple.
The Lancasters consolidate their forces, surrendering the south of England to the Yorkist invaders.
The game only has 25 cards and each round you’ll play 14 of them, seven each. Most of the cards have a number on them which indicates how many armies you can move and/or how many troops you can muster. There are also a few special events to spice things up. Players pick a card simultaneously and whoever has the higher number goes second, with the current king winning ties. Going second is basically always better, which gives a nice little advantage to the current monarch.
Opening of the second Campaign, despite a strong initial Yorkist attack Henry VI remains king. The Yorkist pretenders had to return to exile, but several nobles loyal to them remained at their home provinces in England.
The full game is played over three rounds, called Campaigns, with a check for who is the king after each one. Kingship is determined by how many nobles the player has in England and Wales, troops in exile in Scotland, Ireland, France, or Calais don’t count. We only played two Campaigns due to limited time, but I thought that was a really good amount of game. I don’t know if I’d be interested in just playing one Campaign – I like how the board resets between Campaigns and it makes the second very distinct from the first, but two is an excellent amount of game.
A second Yorkist invasion leads to a swift and crushing defeat for the few forces defending the southern coast. Lancaster consolidates its forces in the midlands.
One of the strongest endorsements I can give the game’s design is that my opponent and I naturally found ourselves replicating the power bases of the two historic factions – my Lancastrians retreated to the north of England while his Yorkists controlled London and the south. This is partly the result of how recruitment works – you can only bring new blocks onto the board in one of their home regions – but I think it is also subtly the result of where you sit when you play, I sat at Scotland looking across the board at the south of England. The naval movement rules also help prevent one side from just bottling up on one end of the board. They allow you to encircle your opponent, but they also allow you to retreat key units after a risky attack which makes it more tempting to launch one in the first place.
The House of Lancaster will not let this invasion stand and moves its armies south to confront the York invaders.
There are two ways to win Richard III, you can either be crowned king at the end of the final Campaign or you can kill every one of your opponents five heirs. The former seems like it will almost always be the means of victory. In our game we only successfully killed one royal – a very unfortunate King Henry VI. Battles can be pretty lethal, but you will rarely find yourself wiped out in one round and the retreat rules are reasonably generous – you only have to stick around for one of the possible four rounds of a fight. It’s also blessedly simple: all blocks have a letter and number rating and then a strength value which also acts as their health. In combat, earlier letters act first – all the defender’s A’s go then all the attacker’s, then the Bs and so on – when attacking a block rolls dice equal to its current strength and hits on results that are lower than its strength number, e.g. a B3 hits on 1s, 2s, and 3s. There are a few more modifiers to keep track of it, but that’s it. It’s easy to teach but also very tense and exciting during play. Importantly combat is not simultaneous, so the defender always has a chance to soften up the other side’s blocks before they attack.
Aftermath of the first battle, Lancaster seizes the south east but York forces are still in the region in strength.
If there is one aspect of Richard III, I would criticise it’s the treachery mechanic. The King, the Pretender (the chief heir of whichever side is not currently king), and Earl Warwick ‘The Kingmaker’ can all forego their attack in combat to make a treachery role instead. There is also one event card that allows you to make treachery roles. The thing is, many of your best units are immune to treachery – and giving up an attack is a pretty steep cost. You also don’t know when you’ll be facing enemy units that can be urged to betray their faction because of the game’s fog of war. It’s not a bad mechanic, but it also isn’t one that we really used.
York has relocated to the south west, and their newly consolidated army delivers a crushing defeat to Henry VI and his forces. Now the king is on very precarious footing and quite close to a hostile York army..
It tries to replicate the shifting loyalties of the War of the Roses but in practice no more than a handful of nobles are likely to defect in a single game unless you make an effort to use it as a core strategy. It’s also exceedingly difficult to make ‘The Kingmaker’ defect, which feels a bit like a mistake. I would have liked it if Warwick started loyal to the Yorkists but upon them first seizing the throne they have to give up something – maybe a kind of bad card replaces one of the cards in their hand to represent having to reward him – and if they refuse, he defects to the Lancastrians. The game is not worse for having this mechanic, but it also feels like with some more work or a different angle it could have been much more exciting than it is.
The Yorkists have killed the king! Henry VI is no more! In better news for the House of Lancaster, Yorkist power in eastern England has crumbled in the face of their onslaught.
Overall, I had a great time playing Richard III and I’m very excited to play it again. Unfortunately, block wargames like this are not really suitable for solo play because so much of the game is in the hidden information. That said, it’s relatively quick to play, our first game was probably around 90 minutes, and we were playing while also looking after a pair of toddlers. Without distractions and once you’re familiar with the game it would play much faster. It’s been said to death about this line of Columbia Games, but Richard III really is an excellent introductory wargame if you’re thinking of dipping a toe into the hobby. Next time I have access to a willing opponent Richard III will be high on my list of games to play!
Despite killing the king the House of York is unable to claim a majority of the barons of the realm - the House of Lancaster retains the throne. All hail King Edward IV of Lancaster!
Further Reading:
The War of the Roses by Anthony Goodman
The Castle in the War of the Roses by Dan Spencer
March 11, 2022
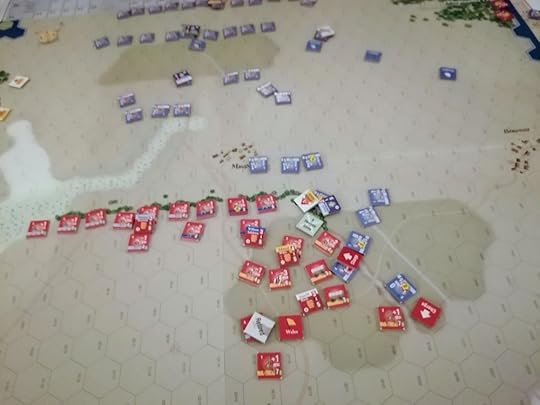
Men of Iron pt. 3: The Battle of Poitiers, 1356
After playing two highly defensive battles with minimal manoeuvring I acted upon the advice of a more experienced player given via Discord and picked Poitiers as my next battle. I’m glad I took that person’s advice, at Poitiers the French let me try my hand at some dynamic movements and a dramatic flanking attack – even if the English still ended up being reactionary and defensive for the most part.
Poitiers has long fascinated me. A triumphant victory for the Black Prince (I’ll just note here that he was not known by that name during his lifetime) and the capture of King Jean II of France. Jean II joined his Scottish ally King David II, who had been captured at Neville’s Cross in 1346, at the English court. The ransom for Jean II significantly enriched the English crown’s coffers and allowed them to negotiate the very favourable Treaty of Brétigny in 1360 – a treaty in which Edward III exchanged his claim to the French throne for more French territory than its own king had. If the Hundred Years War had ended there it would be remembered as an English triumph – but of course it didn’t, and all those gains would be gone within a century.
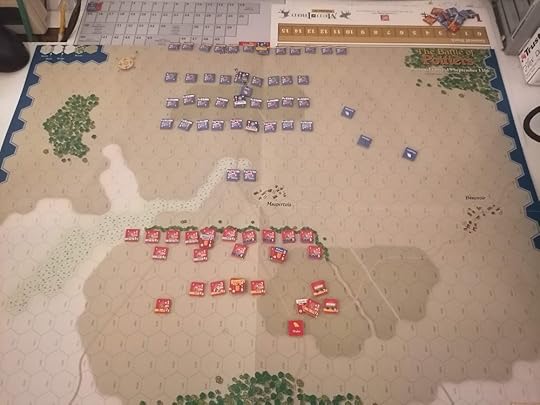
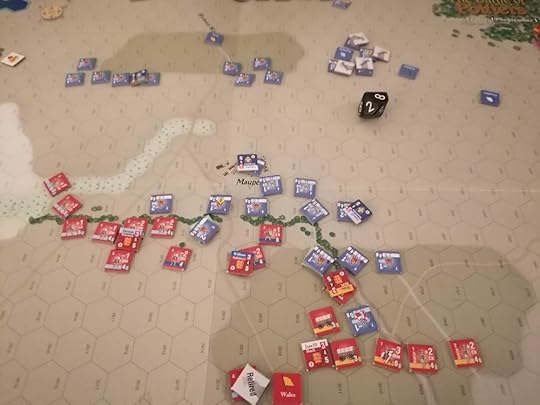
Peace negotiations have failed, the armies have lined up for battle.
My recreation of the Battle of Poitiers didn’t exactly match the historic outcome – the French initiated a flanking attack that slowly eroded the English position, eventually forcing them to flee the field while Jean II watched the whole thing from a safe distance. My experience left me with a few thoughts about the battle specifically and Men of Iron as a game. Please bear with me, this one gets a little long.
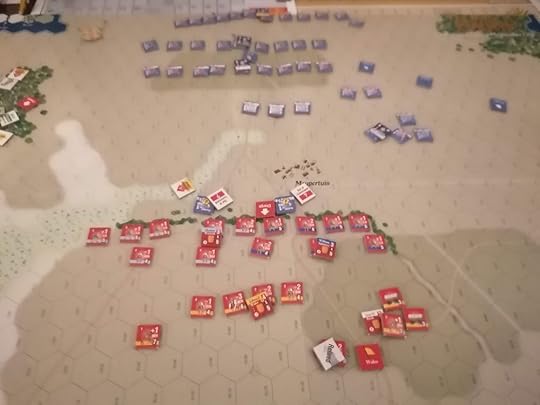
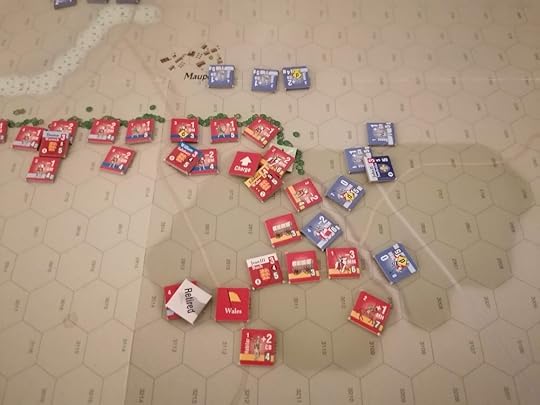
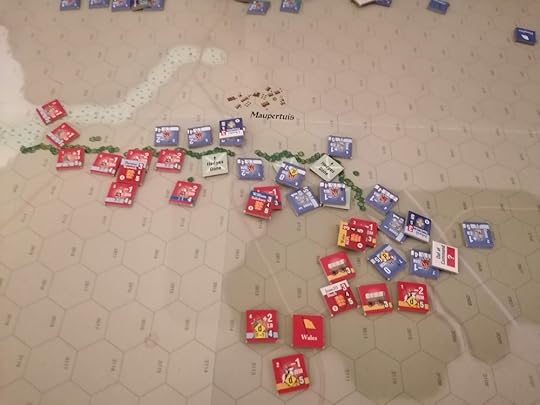
Audrehem and Clermont’s units lead a surprisingly effective reckless charge into the English lines while the rest of their Battle moves towards a flanking attack on the English right.
Jean II’s lack of involvement in the battle reflects one of my issues with some of the scenarios in Men of Iron. In Poitiers and Agincourt, the back ranks of the French armies really didn’t get involved at all – the entire conflict was fought and decided by the first two Battles. At Agincourt there was at least an opportunity for the third Battle to get involved but I chose another strategy, while at Poitiers I ignored the third Battle, commanded by Orleans, because of the special rule that they would break and flee the battle once the casualties started mounting. That rule is interesting in principle and reflects the fact that the commander was a novice, but in practice it means that I activated the Battle only to get them out of the way in case Jean II needed to advance. I know it would have deviated from history, but had they been the front Battle and thus already engaged then the decision about whether to activate them or not would have been a tense game decision, but in practice I activated them once and then pretended they weren’t there.
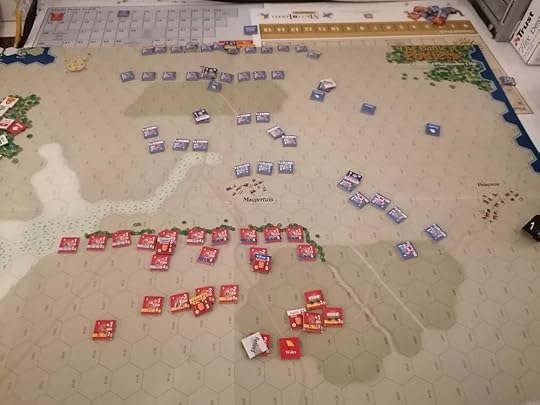
Audrehem and Clermont’s initial success is fleeting - one is killed the other retires to the standard and the English close their lines again. Meanwhile the French vanguard continues to move to the English right flank. Unlike their historical counterparts, they did not dismount making the movement much faster.
This issue with the rear Battles also reflects a slight issue with the history of Poitiers. Poitiers was a long battle, so long that by some accounts they took breaks, and the English archers actually went out and retrieved arrows they had already shot because ammunition was running so low. In my game, Poitiers was relatively quick and since the rear Battles never got involved it felt like it was probably a conflict decided in the opening couple of hours. It was an interesting way in which the timescale the game attempts to portray doesn’t always line up with the feel of the game as it is played.
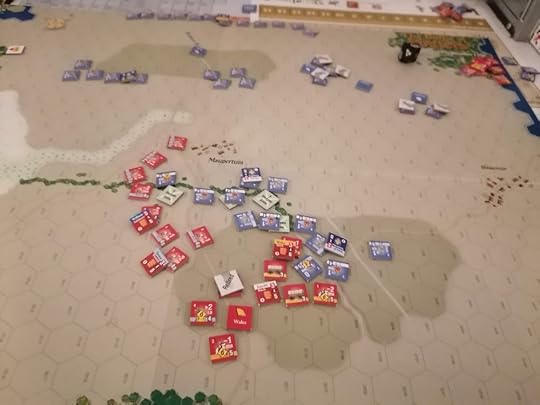
The French flanking attack begins with remarkable success thanks to some effective crossbow fire and lucky charge attack rolls. Several French Men-At-Arms are disorganised as a result of the attack, but they have crossed the hedges and ditch in several places.
There’s a tension of sorts in wargame design around how desirable it is that they reliably produce the historical outcome, and it’s something I have thought about a lot in my time with Men of Iron. In two-thirds of my games so far history has changed. The French have triumphed in two battles they famously lost, while being completely crushed in another. What I’ve been thinking about specifically is not whether or not my game results reflect Men of Iron as a simulation of history, but rather how our perception of these battles is formed. Poitiers and Agincourt are famous English victories, triumphs against larger armies by scrappy English commanders on foreign soil. The legend around them, along with similar battles like Crécy or Bannockburn, have become so large that it can be easy to assume their result was inevitable and overlook how close some of these battles were.
The Black Prince leads a successful counter charge, pushing the French back and forcing several men-at-arms to retire to their standard.
Part of this is down to an aspect of medieval warfare that not everyone is aware of. Casualties in battle were actually fairly uncommon – relatively few soldiers and very few nobles were actually killed during the main fighting. In Men of Iron, the frequency with which you get Retired results, where units retreat to their standard and count as eliminated for victory purposes until a player spends an entire activation rallying them, kind of reflects how soldiers were difficult to actually kill, but I’m not convinced it’s a great model for history either. Most casualties in a medieval battle happened in the pursuit, the bit that followed the total breakdown in morale on one side of the conflict. The victorious army would ride out hacking down their enemies as they fled. This is the reason why reported casualties for medieval battles are often very one sided – with the winner suffering few losses. I think this can mislead people into believing that there was no other option than that the winner would emerge triumphant. Your instinct is to expect that in a close battle casualties would be comparably even, not completely one sided.
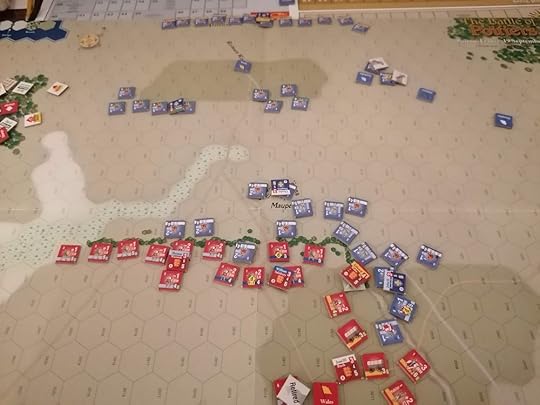
France’s second Battle, lead by the Dauphin, engages with the English line with some effect. Meanwhile the crossbowmen on the right flank pepper the English with shots and force several of them back. At the very back, some lucky Continuation rolls let Orleans’ Battle move forward and out of the way in case Jean II needs to get involved.
I think some parts of Men of Iron do a decent job of capturing this aspect of warfare or attempting to. The fact that victory is determined by flight points, and that Retired units count towards flight points, does reflect that you generally won by your enemy fleeing the field. The special rules for Courtrai that mean that Mounted Men-At-Arms run the risk of dying outright if they retreat from the ditches and across the river was inspired by the fact that at the real battle many of the French knights drowned in their armour while attempting to retreat. Overall, I think a full discussion of the accuracy of a game like Men of Iron in replicating the historic results of these battles must also involve a more in-depth discussion in how likely the historical outcome was in the first place – after all if the English victory at a certain battle was a fluke or lucky result, then shouldn’t a truly accurate historical game deliver a French victory more often than not? I don’t have the answers to these questions now, but they’ve been bouncing around in my head all week, so I thought I’d try inflicting them on you too!
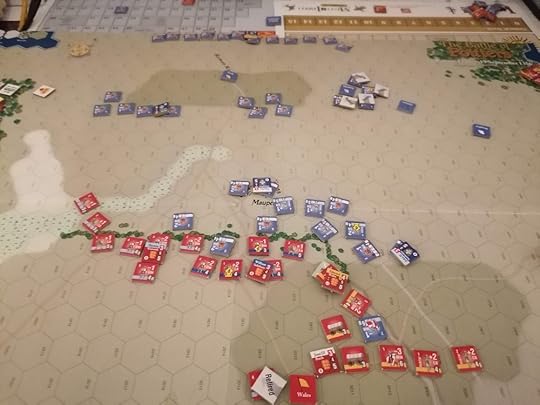
The Dauphin’s attack falters in the center but he consolidates his position along what was the right end of the English lines. English longbowmen begin to encircle the French position on the left while dismounted Hobilars bring their crossbows to bear on the French right flank. The number of Retired French units around the standards grows.
All that having been said, I do want to do a little nit-picking if you’ll forgive me. I think missile troops in Men of Iron are too powerful. At Both Agincourt and Poitiers, they were one of the key factors in the French victory, and they were still pretty consequential in Courtrai despite their small number. As a historian of medieval archery, I obviously have a lot of thoughts about how the game models it.
I want to start with what I really like. The initial table for archery attacks is great – on a 0-4 you do nothing and on a 5-9 you flip the unit over to their Disordered side, making them more vulnerable to future attacks. I think this is a great model for how medieval archery, especially the longbow, was used. It was a weapon of disruption first and killing second. Pre-gunpowder missile weapons were not great at penetrating medieval armour. This was especially true after the widespread adoption of plate armour over the fourteenth century but even before then there are numerous accounts of soldiers surviving multiple arrow shots thanks to their armour. That’s not to say that bows and crossbows were never fatal, they absolutely delivered lethal results, but it is also worth remembering that many famous warriors were wounded by a bow or crossbow but survived. Henry V took an arrow to the face at Shrewsbury in 1403 and Joan of Arc was wounded twice in her short career - once besieging Orleans and more severely at the Siege of Paris. Richard I was famously killed by a crossbow, but he had actually been wounded by one during the Third Crusade and recovered, and even for his death it was the infection rather the bolt itself that killed him. This is not to say that bows and crossbows were ineffective, but they also had their limitations. Also relevant to this discussion is the scale of Men of Iron - each chit is meant to represent a large number of soldiers, so even if occasional individuals were killed by archery it would be very rare for an entire unit to be wiped out.
The French redouble their attack in the centre, eliminating several English archers in the process and making significant gains.
With that in mind, I have issues with what happens when missile troops shoot at already disordered units. They are lethally effective, meaning that barrages of missiles are a super effective way to pick off heavily armoured and otherwise tough to kill soldiers. Exactly the kind of troops that you would historically have needed to smash repeatedly in melee are most vulnerable to arrows and bolts in Men of Iron. Given my own tendencies, I would probably have preferred it if archers in Men of Iron were incapable of delivering lethal results to heavily armoured soldiers but that may be taking things too far the other way.
I also think it misses the other key role of medieval missile fire – forcing your enemy to attack you. Barrages of missiles may not have been consistently lethal, but they could maim and at minimum they were extremely unpleasant and irritating. Even when they didn’t penetrate armour, the impact of a longbow or crossbow on plate could easily leave bruises. There was only so long that a medieval soldier would stand and take that before trying to do something about it – either moving out of range or moving forward to deal with the problem. Obviously, their commander usually preferred the latter. This was a key element that allowed the English to force the French to attack them so often, letting the English make the most of their defensive positions.
The French begin pushing through the centre and manage to turn the right flank. The English archers continue to envelope the French left flank. The hedges are now thoroughly trampled along the centre of the battle. The English are forced to Rally their few Retired units.
Men of Iron puts a clock on the French to try and force them to attack the English defensive position even though tactically it obviously is not a good decision. Imagine if instead the English longbows were able to force the French player to act. I would be very interested in seeing a game where instead of forcing units to retreat you could use longbows to force them to advance. If you could make them Disordered and then advance, isolating them from their companions and leaving them open to attack, I think that would both be very interesting and better capture how these medieval battles worked.
The English archers have now fully encircled the Dauphin’s left flank but the French attack in the centre continues unabated. The attack on the right has stalled somewhat but the French have numerical superiority.
Men of Iron already has something like this – it is generally not optional to advance into the space left by a retreating enemy unit, and the highest results on the combat table can force you to keep attacking as you follow. This can result in units advance out of their command range and almost always in my games resulted in the loss of a much more advantageous position due to the recklessness of my successful melee troops. I think this system is brilliant and I wish the archery was similarly good at capturing the chaos and uncontrollable nature of medieval troops. To be fair, there is a system for mounted units to counter charge when under attack by missile fire, but with very few mounted troops available in the battles I played – and in the one that did there were few archers and terrain that stopped charges – this hasn’t really come up. A cursory glance suggests that it is a rule that plays an important factor in the battles of Infidel, which will be interesting to explore in the future.

A final French push in the centre and on the right flank causes several more English units to Retire, resulting in the English breaking and fleeing the field. Victory of France, victory for Jean le Bon and the Dauphin!
This post went a little longer than expected and didn’t really say very much about Poitiers specifically, sorry about that! Despite my comments, Poitiers was probably the most fun I’ve had with Men of Iron yet. Being able to attempt a completely different method of attack for the French army was great and the game felt a lot more dynamic with interesting manoeuvring options. That said, I think after three games in pretty rapid sequence I need a bit of a break from Men of Iron, so I’m going to shelve it for the next little while and try something new! I’ve always wanted to play a block wargame…
Further Reading:
The Great Warbow by Matthew Strickland and Robert Hardy
The Hundred Years War: A People’s History by David Green
The Battle of Poitiers 1356 by David Green
The Knight and the Blast Furnace by Alan Williams
Kelly Devries, “Catapults Are Not Atomic Bombs: Towards a Redefinition of 'Effectiveness' in Premodern Military Technology”, War in History vol. 4 (1997). 454-470
March 10, 2022
When Montezuma Met Cortés: The True Story of the Meeting that Changed History by Matthew Restall (HarperCollins, 2018)
I only very recently began improving my knowledge of the history of Spanish colonisation of the Caribbean and Mexico and must confess to still being quite the novice on the subject. My interest was spurred by intermittent brief references to the use of crossbows by Spanish conquistadors. I was intrigued and wanted to learn more, but I also knew that I couldn’t just dip a toe into the subject. The colonisation of Central and South America is a heavy subject and includes some of the worst genocides in human history. Even if what I was interested in was some niche facts about an old weapon, I couldn’t completely ignore that side of the history.
Matthew Restall has published many books on the Spanish in sixteenth-century America. I had previously read his Seven Myths of the Spanish Conquest, which is a great introduction to the subject of Spanish colonialism, and I would recommend it to anyone. That was a large part of why I was inclined to pick up When Montezuma Met Cortés, that and a Google Books search indicated that he at least mentioned crossbows a few times so I could be killing two birds with one stone.
When Montezuma Met Cortés builds on decades of previous (mostly non-European) scholarship to dramatically re-frame Cortés’ famous expedition to Tenochtitlan and his meeting with Emperor Montezuma. Rather than a crafty and ruthless Cortés outwitting a cowardly and weak Montezuma, Restall paints a picture of a group of Spaniards who are far out of their depth and an amused emperor turning them to his own devices where possible. Restall frequently reminds readers that the Aztec Empire was not brought down by a small but hardy band of Spaniards, but rather a massive army composed primarily of Mexican natives supported by a steady flow of new Spaniards. Many of Cortés’ initially companions to Tenochtitlan did not survive the year but they were soon replaced, and later narratives were more than happy to elide over the many dead Spaniards who first landed on Mexico’s shores.
When Montezuma Met Cortés is definitely a book that non-specialists can read, but it is also a book that navigates very complex terrain, so it is not always the easiest read. I definitely felt that I benefited from having read Seven Myths first, that gave me some grounding in the major players and events that would unfold. Still, if you are prepared to re-read the occasional section and have a knack for keeping a lot of information in your head you could jump into this book without any prior knowledge, and I would recommend that people should read it! This is a great book for really fundamentally changing your perspective on a historical period that is badly misrepresented in popular imagination (in the English speaking world at least).
The story of scrappy Cortés and his band of marauders endures even though it has been shown time and time again to have been self-aggrandising mythmaking started by the man himself and taken up by many other Spaniards in his wake. When Montezuma Met Cortés is another very impressive teardown of the conquistador and a fascinating reconstruction of what is more likely to have happened. You should definitely read it, but if it sounds too complicated you should at least try Seven Myths of the Spanish Conquest instead.