
Amy Tangerine's Blog, page 28
July 18, 2017
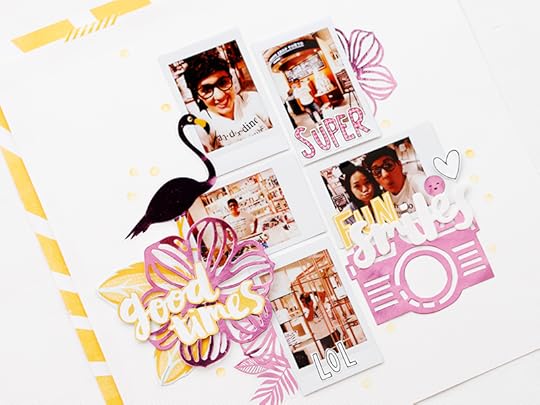
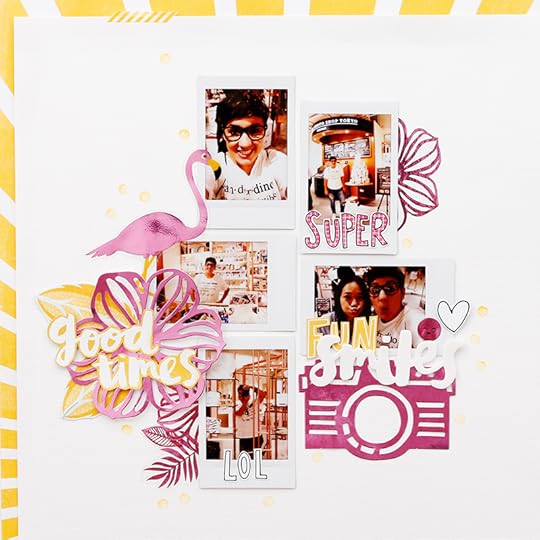
Violeta's Smiles Layout
Hello everyone, my name is Violeta Scrap and I am so excited to share this layout with you using Amy Tangerine´s collections.
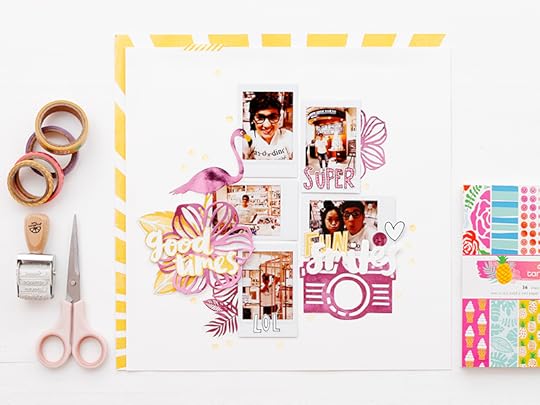
This layout is about my travel to Malaysia. As you can see I used so many flowers as embellishments which match perfectly with the colors, patterns and icons on this collection. They are so fresh and lovely!
This time I wanted to create a pink and yellow layout, which make the perfect combination for me.
I had so much fun with this page and was surprised at how quickly it came together. I started out with a white sheet of cardstock and I decided to add some color using yellow ink. And since the white cardstock I used was textured, it just added more dimension.
Whimsical and colorful, that's what I think when I see “Oh happy life” collection. The icons and color palette are versatile for telling any kind of story.
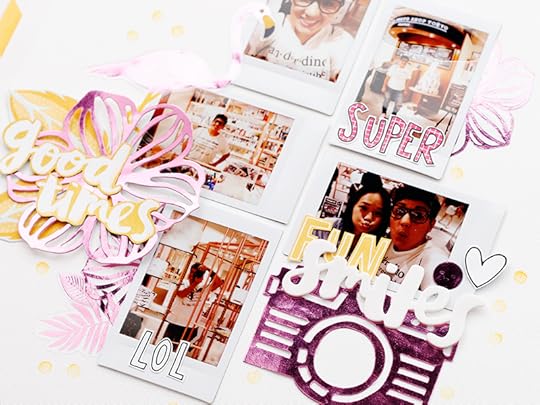
I put some flowers that you can find in the “Oh happy life” collection. I included in the layout clear stickers, Thickers, washi tape, and ephemera. I cuted some words from one of apart sheets and used them in the page as ephemera.
My title “smiles” was also made using Thickers from “On a whim” collection.
I liked the page as it was but I thought I could make it look a little bit more interesting. So I cut a half inch from one side of the cardstock, then I adhered it to this great white and yellow patterned paper from the “Oh happy life” collection. I love how it turned out!
This bright and fresh little collection really made my photos shine and I know it will do the same for yours. Next time you're stuck on what to scrapbook next, take a look at your products and see what stories you mind conjures up!
Violeta Scrap
Blog | Instagram | Twitter | Facebook | YouTube
Supplies: Oh happy life - Double Sided Paper - Hello sunshine (376217), Oh happy life - Double Sided Paper - A great day (376213), Oh happy life - Double Sided Paper - All smiles (376205), On a whim - 12x12 Double Sided Paper - All the feels (378728), Oh happy life Collection - Thickers - Wild (376223), Oh happy life Collection - Washi Tape Pack (376226), On a whim Collection - Sticker Book (378748), On a whim Collection - Clear Stickers, On a whim Collection - Die-cut shapes (378750)
Thanks so much for sharing, Violeta! Other Design Team member posts can be found here. Shop ON A WHIM now! Check your local retailer and online at Simon Says Stamp and Scrapbook.com
Disclosure: Some of the links above are affiliate links. I receive a small percentage of sales at no cost to you. My creative partners and I really appreciate your continued support and every little bit helps me to bring you consistent content!


July 17, 2017
This flamingo wants to know...
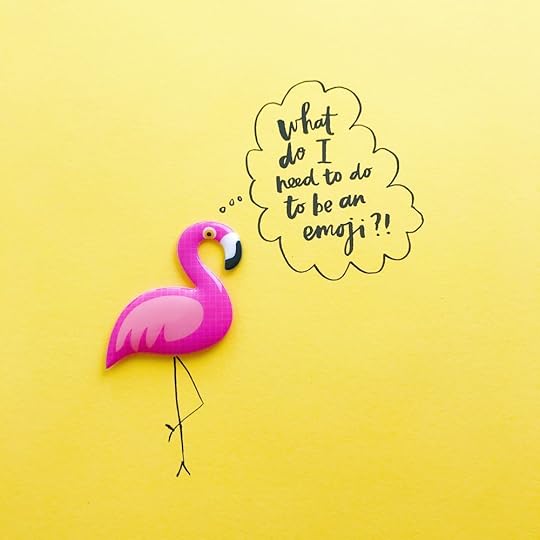
I mean seriously, right? Happy World Emoji Day!
Had some yellow paper on my desk leftover from a shoot and had to use my favorite new Tombow brush pens and the flamingo from this pack of inflated ephemera to draw this up.
On a Whim Watercolor Cards by Carson Riutta | Design Team
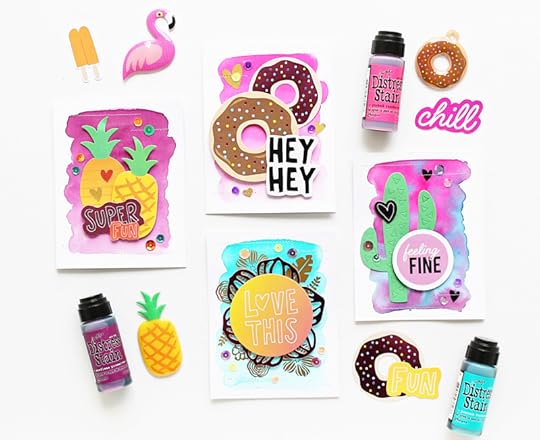
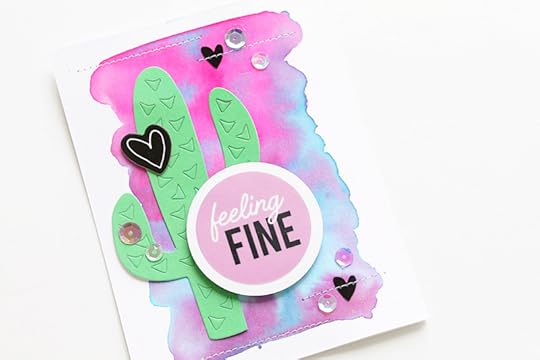
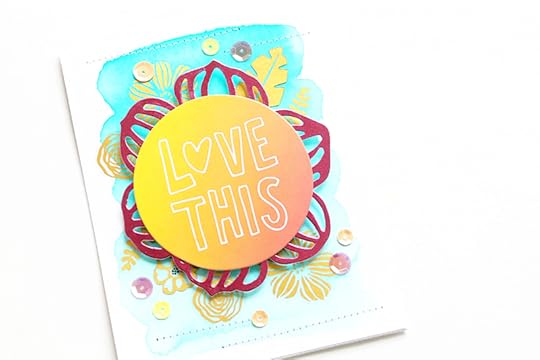
I’m going to take a wild guess here and assume that you probably have a thing for watercolor. I certainly do, and sometimes I want to play with paints but I just don’t know what to create. I’ve found that just sitting down and creating gradient washes on a card base can satisfy my watercolor urge and lay the groundwork for some pretty stunning greeting cards.

I did just that for this set of fun and graphic cards using Amy’s On a Whim Collection. When I’m looking for a vibrant wash of color I often grab my Tim Holtz Distress Stains. They are very pigmented, translucent watercolors that always give striking results. I simply dab a small bit of stain on a stamping block, spritz with a little water and begin painting on some watercolor paper cut to size. To achieve the gradient you want to start the paint at one end of the paper and work your way toward the other end adding water to assure a lighter gradient as you work down the page.
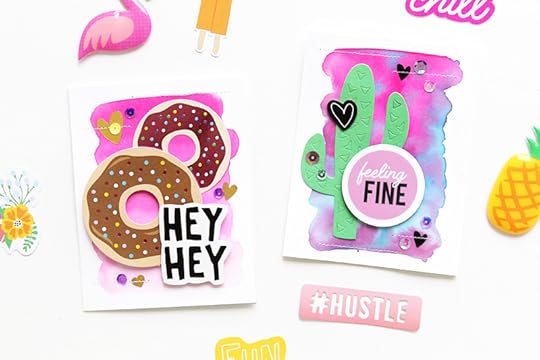
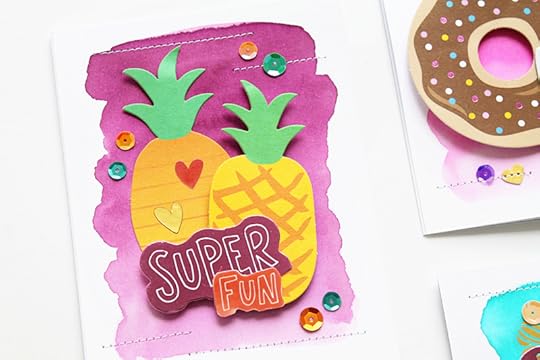
Once your watercolor is dry you can add foil die-cuts, translucent stickers, fabulous chipboard phrases and a whole bunch of colorful sequins to make your cards as playful and eye-catching as possible. I love the way all the fun and candy colored elements from the On A Whim Collection really pop off the vibrant watercolor backgrounds.
Getting watercolor paper to lay flat on a card front can sometimes be a challenge, especially if you didn’t take the time to stretch the paper before painting. I’m an impatient crafter and rarely take such precautions, so I chose to stich the cards onto a false front before adhering them permanently to my card base. The stitching simply helps to keep everything flat and in place as well as adds a wonderful bit of texture to the design.
If you’re new to watercolor or simply looking for a quick and easy fix, I hope you’ll try painting a few gradient backgrounds for your own greeting card projects. Amy’s designs always go so well with watercolor, it’s almost as if she designs it that way :)
Happy crafting friends!
Carson
Pine and Plum Blog | Instagram | Twitter | Facebook
Supplies: On A Whim Collection - Cardstock Sticker Book with Foil Accents (378748), On A Whim Collection - Cardstock Stickers with Foil Accents - Accents and Phrases (378749), On A Whim Collection - Ephemera with Foil Accents (378750), On A Whim Collection - Thickers – Phrases (378746)
Thanks so much for sharing, Carson! Other Design Team member posts can be found here. Shop ON A WHIM now! Check your local retailer and online at Simon Says Stamp and Scrapbook.com
Disclosure: Some of the links above are affiliate links. I receive a small percentage of sales at no cost to you. My creative partners and I really appreciate your continued support and every little bit helps me to bring you consistent content!
July 14, 2017
Colorful Featured Fangerines! (#amytangerine)
I'm back with another bunch of Featured Fangerines from #amytangerine on Instagram! Here's a group of some standouts from my Instagram tag that made some really lovely spreads using my products.
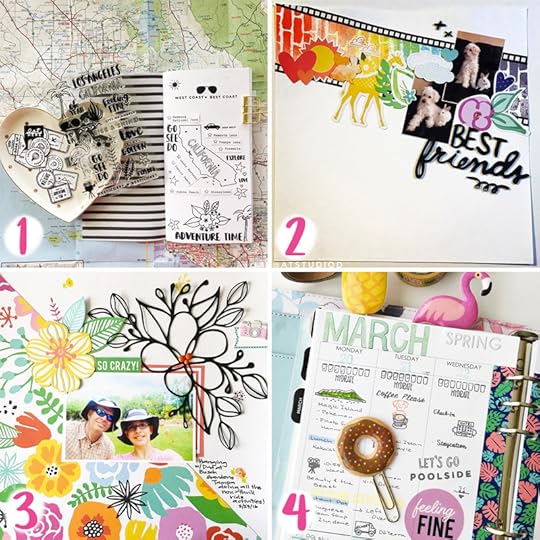
1 // @melissamorrelli posted this lovely California page and the stamps she used.
2 // I love this adorable “Best Friends” layout by @atstudiod!
3 // These intricate floral cutouts by @suzlee72 are so beautiful.
4 // Such a cute planner spread by @kymkt!
And over on YouTube, I wanted to share this creative Traveler's Notebook journaling session by MyGreenCow that features some of my products as well!
If you use anything I’ve designed, definitely tag it with #amytangerine so I can see what you made! You can buy my latest collection, On a Whim, at Scrapbook.com and Simon Says Stamp.
Some of the links in this post are affiliate links. I receive a small percentage of sales at no cost to you! Every little bit helps me to bring you consistent content.
July 13, 2017
Rabbit Ladders
One of the cutest kids' stores opened in our neighborhood! Rabbit Ladders is now my go-to spot for getting unique gifts for kids and items for Jack. It's very difficult to walk out empty handed as they have awesome products that are hard to find. One of his favorite items is a flashlight slideshow thing (I don't even know the proper name for it) from France. It's so fun. The store is curated in such a beautiful way and the owners are so nice and welcoming. Jack has loved going to the events we have been in town to attend. He got a Yoga glitter tattoo there once that lasted well over a week.
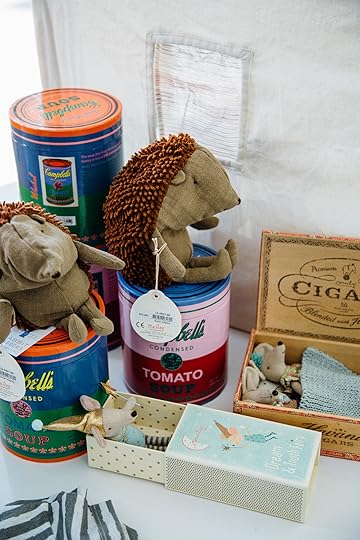
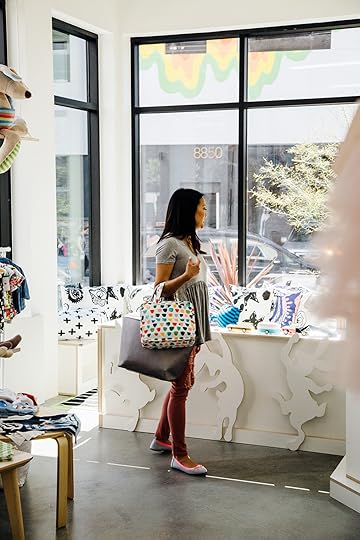
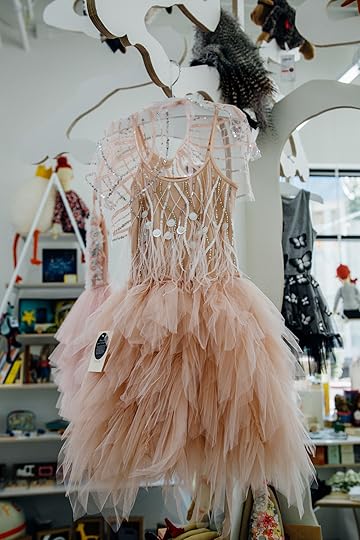
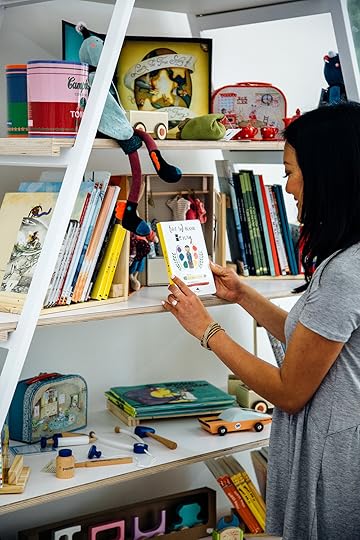
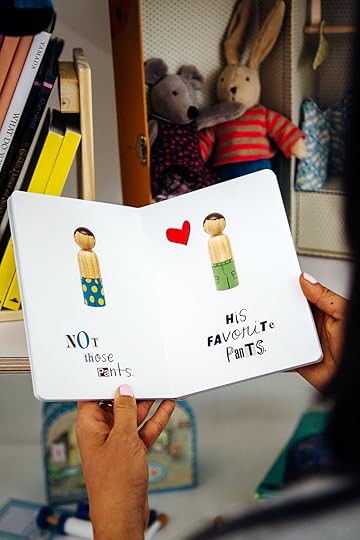
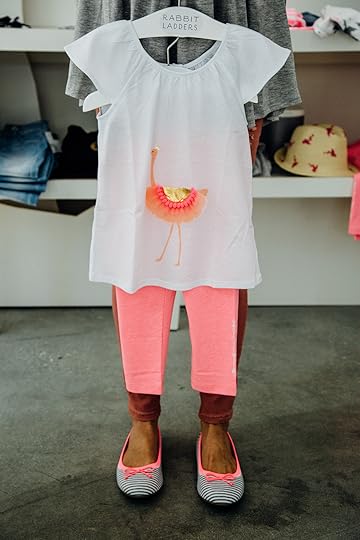
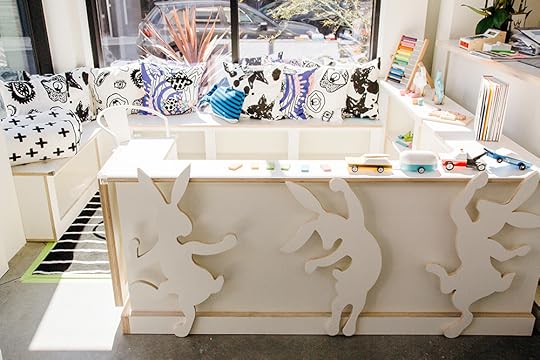
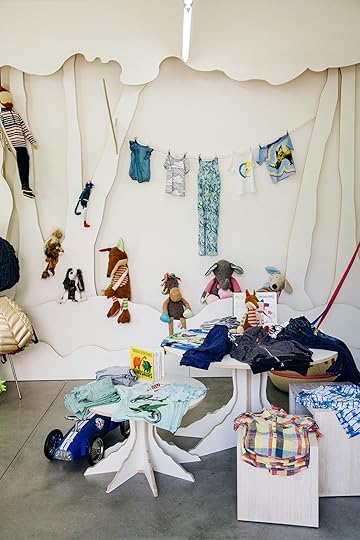

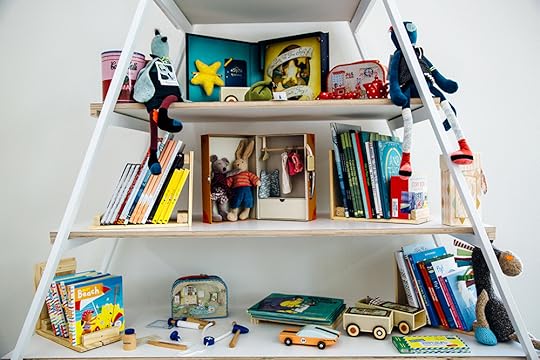
If you're in Culver City, be sure to stop at Rabbit Ladders at Platform LA and tell them I said hi!
July 12, 2017
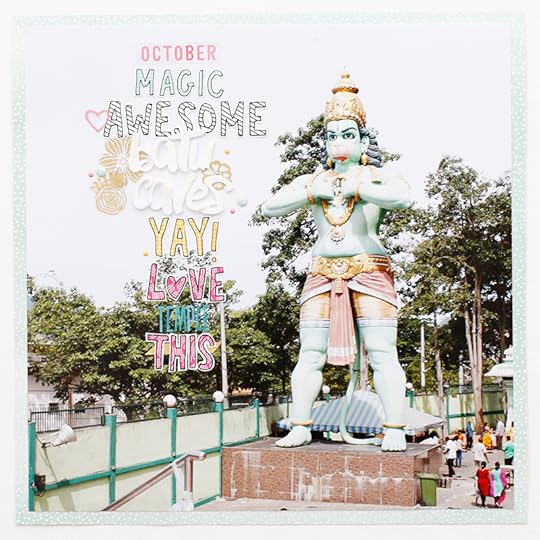
Violeta's Batu Caves Layout
Hello everyone! My name is Violeta Scrap and I am really thrilled and honored to join the Amy Tangerine Design Team and to share my work with you.
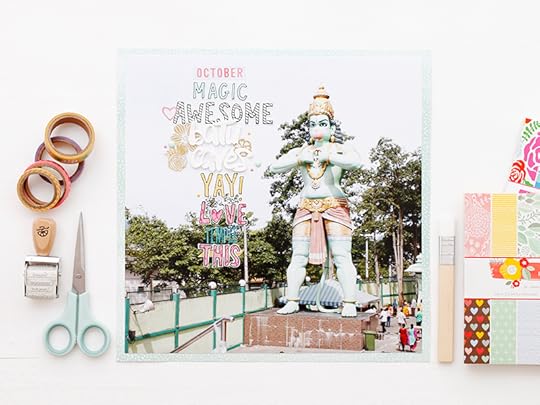
I LOVE to document all types of moments, events or memories. For example, today I wanted to document my first visit to Batu Caves in Malaysia.
This layout I’m gonna share with you today is really simple and fun. I used a mix of elements from the recent “On a whim” collection that Amy designed. I love the mix of different colors of “On a whim” collection, they are perfect for my pictures of Malaysia.
Then, for creating this page, I used a big picture. I picked a paper from “Oh happy life” and I started building the final page. The first thing I did, was to cut some words from one of the papers from “On a whim” and use them in the page as ephemera.
I really love playing with this collection, it´s so full of amazing products. This collection is absolutely amazing!
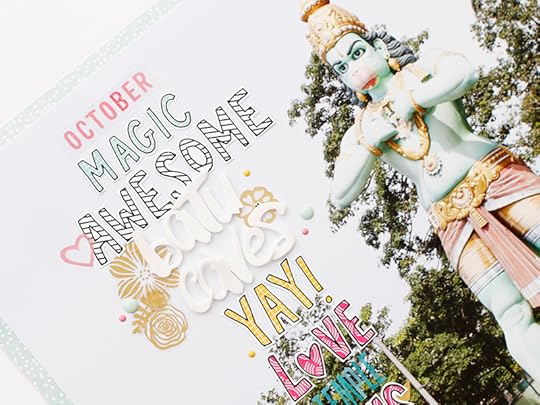
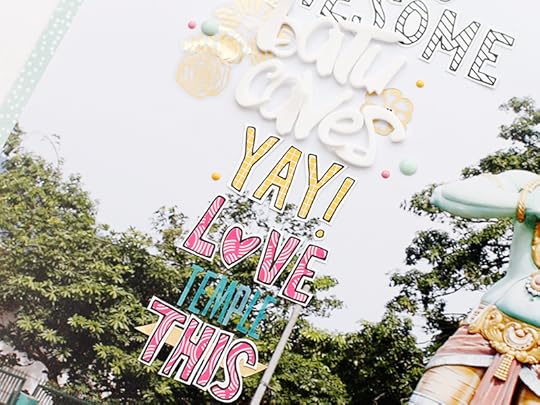
Some of my top favorite elements in this collection are the golden floral designs. I really love how these words from the papers look on my photo with the Thickers, so I decided to keep it there and use it as my title.
I enjoy mixing different materials so I included Thickers, clear stickers and enamel dots. I decided not to add anything else to the layout because I wanted the focus to be on the big picture of the layout.
I really like how this page turned out. I love using a big picture to document my life. I hope you enjoyed this layout and you get inspired by it to create something beautiful using the Amy Tangerine “On a whim” collection.
Also, if there's something specific that you are struggling with, or if you have any doubt about scrapbooking, let me know in the comments and I'll try to help you.
Violeta Scrap
Blog | Instagram | Twitter | Facebook | YouTube
Supplies: On a whim - 12x12 Double Sided Paper - All the feels (378728), Oh happy life - Double Sided Paper - Happy (376208), On a whim Collection - Washi Tape Pack with Foil Accents (378747), On a whim Collection - Sticker Book (378748), Oh happy life Collection - Sticker Book (376233), Plus one Collection - Thickers - Kal Barteski White (366831), Daydreamer Collection - Dear Lizzy - Enamel Dots (366785)
Thanks so much for sharing, Violeta! Other Design Team member posts can be found here. Shop ON A WHIM now! Check your local retailer and online at Simon Says Stamp and Scrapbook.com
Disclosure: Some of the links above are affiliate links. I receive a small percentage of sales at no cost to you. My creative partners and I really appreciate your continued support and every little bit helps me to bring you consistent content!
July 11, 2017
Testing Markers for Brush Lettering
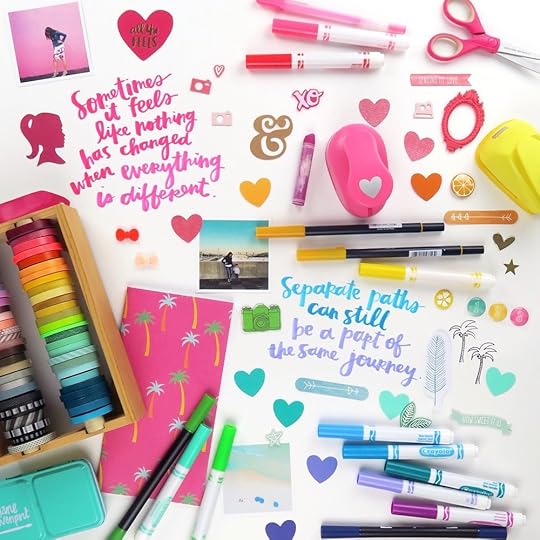
Lately, I’ve been really enjoying brush lettering with markers so I wanted to try out a few different brands to compare them.
To test out these different markers and how they work with brush lettering, I made a video writing out example lettering swatches using each color that I can use as a reference later. For each one, I cut out a piece of American Crafts cardstock to size and taped it to the back of each package of markers. I find this super helpful when I’m looking for a specific color because it’s more true to how it will actually look than the color on the caps.
Watch this video to see how each of the markers writes and to hear my extended thoughts on working with them!
Crayola markers
I’ve seen lots of photos on instagram and pinterest of people using these classic Crayola markers from my childhood to create lovely brush lettering designs, so I wanted to try it out! It does take a bit of getting used to even though the basic principles are the same, but this is a pretty good, inexpensive option that you can find almost anywhere.
Yoobi brush pensThese Yoobi double-sided markers are fairly new to me. They’re at what I think is a pretty reasonable price point and you can buy them at Target, so that’s awesome. The colors are very vibrant and bold and the tips feel slightly stiffer than the Tombows.
Tombow dual brush pensThese are the markers I’ve been using most often lately and I have the 96 pack - there are so many colors available!
For those of you who have been wanting to start brush lettering, don’t get discouraged if you don’t like your results right away! If you spend just 15 minutes a day practicing your brush lettering with your favorite tools, you’ll be surprised by how much you’ll improve after only a few weeks. Gaining confidence with a skill like this takes practice and trying new types of markers will take some getting used to.
If you have any favorite markers that you love to use, tell me about them in the comments below! I'd love to hear from you.
Disclosure: Some of the links above are affiliate links. I receive a small percentage of sales at no cost to you. My creative partners and I really appreciate your continued support and every little bit helps me to bring you consistent content!
July 3, 2017
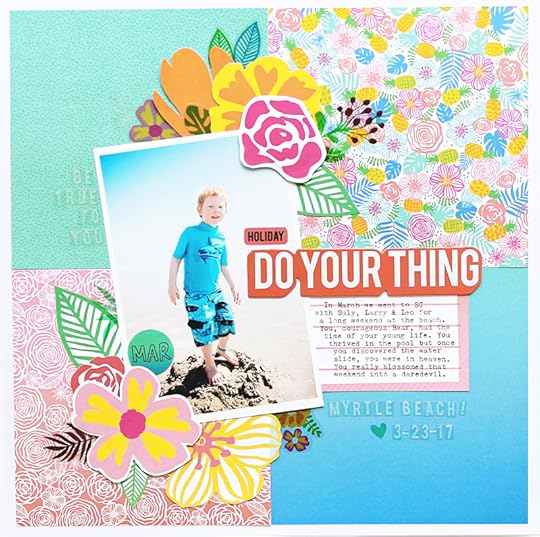
Carson's Do Your Thing Layout
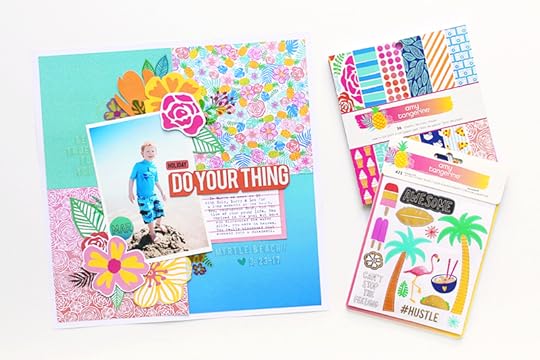
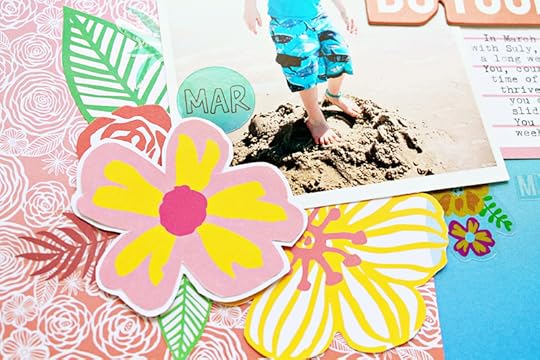
Hello again friends! As you know, I’m a card maker as well as a scrapbooker and for that reason I have a ton of 6x6 paper pads hanging around my space. I’m always trying to find ways to use these smaller prints and papers, and today I’m here to show you just how great the On A Whim 6x6 inch paper pad is for incorporating into your larger layouts.
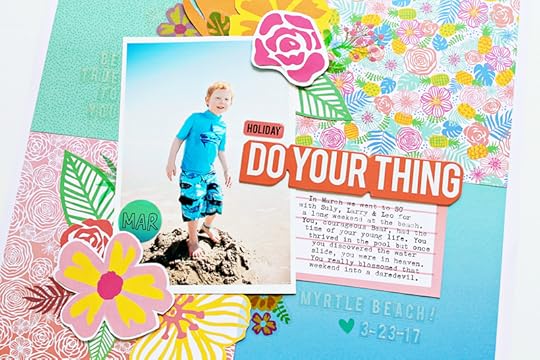
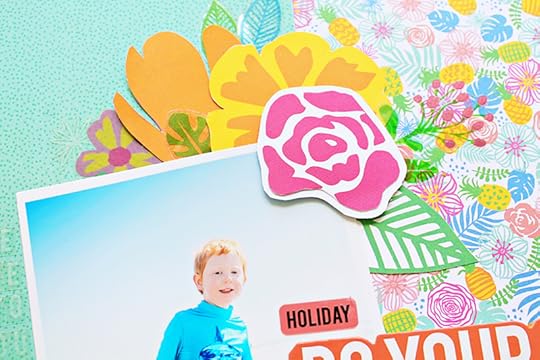
The great thing about a 6x6 inch paper pad, is that you get all the beautiful prints and designs from the 12x12 inch paper pad but on a much smaller scale. Having a smaller version of your On A Whim papers, lets you really layer your prints and patterns while you create. If I had used the larger versions of the floral patterns on this layout, I would have had way too much large pattern competing for my attention and the large cut-out florals would have gotten lost in the background. By choosing two small scale floral patterns, I was able to tie all the florals together, but really allow the larger florals to shine.
I also love how easy it is to get a fun geometric look for your background using a 6x6 paper pad. I kept it simple by creating a grid with only four coordinating papers, but with a few easy cuts, you can create a much more intricate quilted look on your page. For example, you could cut each paper diagonally down the middle and create a triangle background; as well you could simply cut each paper into quarters and create a smaller 3x3 grid pattern. The sky is the limit, and you don’t have to fret about cutting into your gorgeous large pieces of 12x12 paper to accomplish your desired look.
So next time you’re scrapping with your On A Whim collection, don’t forget to incorporate those 6x6 papers into your page and create more interest with those smaller patterns and designs. You won’t regret it!
Happy crafting fellow Fangerines!
Carson
Pine and Plum Blog | Instagram | Twitter | Facebook
Supplies: On A Whim Collection - 6 x 6 Paper Pad (378744), On A Whim Collection - Cardstock Sticker Book with Foil Accents (378748), On A Whim Collection - Cardstock Stickers with Foil Accents - Accents and Phrases (378749), On A Whim Collection - Thickers – Phrases (378746), On A Whim Collection - 12 x 12 Double Sided Paper - Full Bloom (378718), On A Whim Collection - 12 x 12 Double Sided Paper – Seriously (378720).
Thanks so much for sharing, Carson! Other Design Team member posts can be found here. Shop ON A WHIM now! Check your local retailer and online at Simon Says Stamp and Scrapbook.com
July 2, 2017
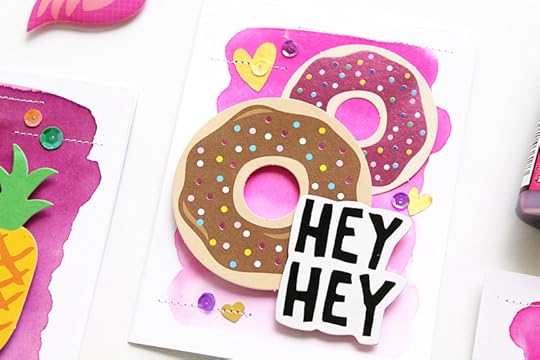
Zinia's Melting Donut Thickers Layout
Hello everyone, it’s Zinia (aka Abstract Inspiration) and today I’d like to share with you a really fun mixed media layout I created using Amy’s On a Whim collection.
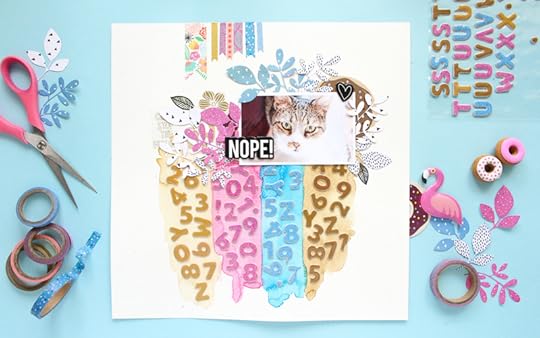
I am completely obsessed with the donut thickers that come in this collection since the very first time I saw them. They are such a genius idea, especially the bitten ones. So I wanted to create a page and use a lot of them.
What I decided to do is to use my watercolors and paint four strips with colors that coordinated with the donut thickers. I tested my mixes on a scrap piece of paper until I was happy with the shades and then I loosely added some color on the page. To help my watercolors flow better, I brushed the area with some clean water before I go in with the colors.
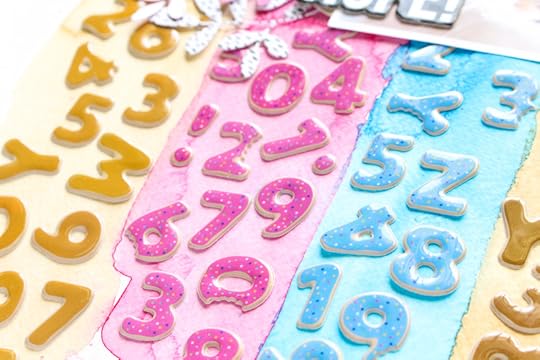
Once everything was dry, I used the thickers and scattered a bunch of them over the colored areas. I mostly used the numbers that came in the pack cause I didn’t want to run out of any letters. This technique can be a great way to use up your leftover thickers once you finish your vowels and can’t make more words.
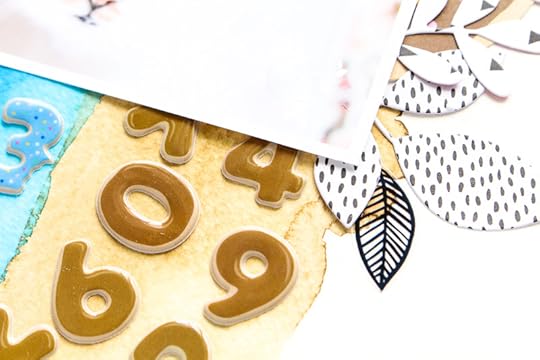
To embellish the page I kept everything as color coordinated as possible. I picked some blue and pink patterns that matched the colors of the thickers but since I couldn’t find a lot of brown elements, I mixed in some black and white designs to act as neutrals.
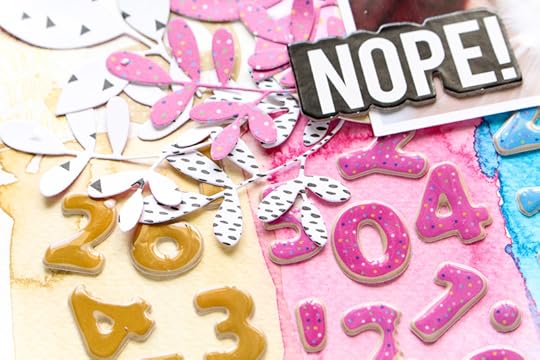
I used a few ephemera pieces and stickers to fill in some gaps and make my cluster look interesting.
To balance the design, I added some strips of washi tape at the top again trying to keep everything in the same color pallete and order.

This is a great technique to use if you are a beginner in mixed media or you just want to have some fun with your paints. You can actually use any type of paint you want like acrylic paints, crayons, even colored pencils.
I really hope you enjoyed it and got inspired to create something beautiful.
Zinia
Abstract Inspiration Blog | Instagram | Twitter | Facebook
Thanks so much for sharing this clever and colorful layout, Zinia! Other Design Team member posts can be found here. Shop ON A WHIM now! Check your local retailer and online at Simon Says Stamp and Scrapbook.com
Here is a list of products used in this layout:
378725 On a Whim 12x12 Pattern Paper - Tropical Paradise | 378724 On a Whim 12x12 Pattern Paper - Friends | 378729 On a Whim 12x12 Pattern Paper - Let’s Dance | 378738 On a Whim 12x12 Pattern Paper - Paradise | 378744 ON A WHIM 6x6 PAD | 378745 On a Whim THICKERS Donut Worry | 378746 On a Whim THICKERS LOL | 378749 On a Whim ACCENT & PHRASE STICKERS | 378748 On a Whim STICKER BOOK | 378747 On a Whim WASHI TAPE PACK | 378750 On a Whim EPHEMERA | 376226 Oh Happy Life MINI WASHI TAPE | Better Together WASHI TAPE PACK
Jane Davenport Watercolors – Brights | Jane Davenport Watercolors - Neutrals
June 30, 2017
On Creative Living

Photo by Alisha | Lish Creative taken at Paul Smith on Melrose | Full of Gratitude Tee | Yellow Tieks
I had the pleasure of talking to the brilliant Elise Blaha Cripe about creative living on her podcast, Elise Gets Crafty. Though we've known each other for about 10 years, I shared some things she didn't know about me and my struggles, how I choose projects and my mission to encourage people to craft a life they love. Hope you enjoy listening!
Amy Tangerine's Blog

- Amy Tangerine's profile
- 62 followers

