
Amy Tangerine's Blog, page 31
April 21, 2017
April Bullet Journal Q&A
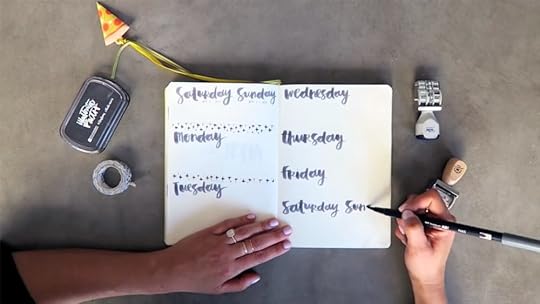
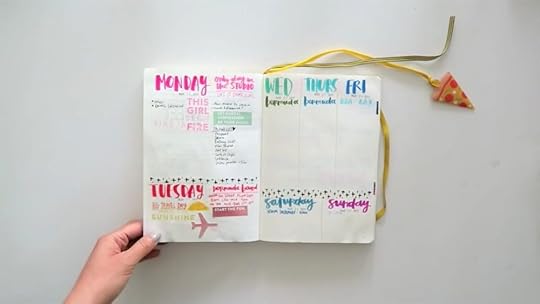
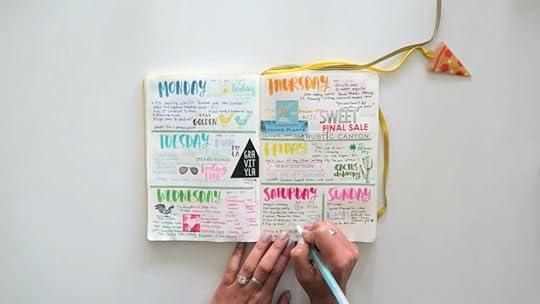
Over on my Instagram account, I asked if you had any Bullet Journal-related questions and a bunch of people sent these in! (If you’re not already following along there, I’m @amytangerine. I would love to see you there too!) For my full answers and a look at how I set up my April bullet journal spreads, watch my latest Plan With Me video.
@meandmybutton asked: What are your thoughts on planning ahead? How many days and weeks do you prepare in advance?Well, quite honestly, because I use my Google Calendar for set deadlines and meetings, I really only plan one or two weeks out in advance in my bullet journal. I like that I can always reference my google calendar on my laptop, my computer, or my phone so that reduces how much I need to write in my planner. I’ve found that combining analog with digital and using each for different kinds of tasks and plans works well for me and makes planning ahead less overwhelming.
@letteringbyusha asked: I would love to know where you get your inspiration from and what supplies you’ve been loving!
My inspiration really just comes from my mood at the time when I’m setting up these weekly spreads! As I’m working in my bullet journal, I go with what feels right and what I decide to do in the moment. I find that it helps to remind myself that I don’t have to decorate every page if I’m not feeling inspired as I’m working on it.
Here are the supplies I’ve been using in my bullet journal recently that are still available!
Yellow Journal | Pilot G2 Pens | Tombow Brush 96 Pens Set | Tombow Glue and Adhesive | On A Whim products | All The Things pouch | Craft Tote Illustrated Faith | Illustrated Faith Black Ink | Washi Tape Illustrated Faith | My Brush Letter Alphabet stamps | Washi Tape | Roller Date Stamp | Acrylic Blocks | Sweet Stamp Shop
Another thing that’s really great about the bullet journal system is that you can make it whatever you want it to be and use whatever you have on hand. For that reason, I actually used a bunch of old supplies that aren’t available anymore when I was working on this month’s spreads!
@rrrrachely asked: “What do you recommend when you have a full to-do list and you are not sure where to begin?”To be honest with you, productivity has been something that I have had to keep at the forefront of my mind because I’ve had my own business since I graduated from college. I’ve tried many different systems that have worked for me throughout that time, but one of my favorites was the Get To Work Book. That particular system was really good for me because it provides room for three to-do list items that are the most important.
What I learned through using that system is that even if you dread those three important things, tackling them first thing helps you to get that out of the way so that you can do more fun stuff. For that reason, I really try to prioritize those three tasks.
Sometimes, I also set up little reward systems to encourage myself to finish my work! If I get those hard things done, then I’ll allow myself a little reward and do something that’s just for me. Whatever that thing that you love doing is, you can use it to reward yourself. You could get a manicure or a massage, go for a walk, or even create some art for no reason at all. I found that the system of incentivizing the tougher tasks really works for me.
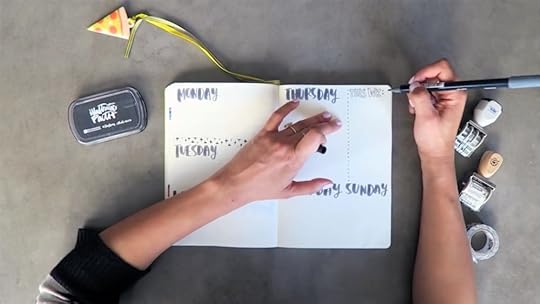
@milafeijoo asked: “How do you figure out the spacing of your days ahead of time?”Monday and Tuesday are usually my busiest days, so I’ve learned to leave the most space in the beginning of the week.
Sometimes, I add a section on my weekly spread that I title, “This Week”. That gives me a place where I can really highlight the priorities that stand out for the week and I can make sure there’s space to write those important tasks because they aren’t divided up by day. Then, I can write the smaller tasks and to-dos on each individual day. Because that extra section takes most of the weight, I usually don’t have to worry that I’ll fill up a day and run out of space for more tasks.
This works better for me because sometimes, things carry over for multiple days. If I am really doing it the “bullet journal way” where I’m constantly migrating the same task over and over again, I find that I prefer to keep that task in one spot for the whole week.
This is a good time to mention that there are really no set rules with this system. I like that when something in the basic system doesn’t work for me, I can adjust it! That’s just one example of how I’ve changed the system to make more sense for my working style.
@cindykwaldron asked: “Do you use one planner for all aspects of your life or do you use a couple different planners for family, business, personal, etc?”I only use this one planner for all areas of my life. I’m personally just better at keeping everything in one place where I can pay the most attention to it and keep it up to date.
That’s it for today’s answers! If you have any more questions about bullet journaling that you’d like to hear me answer in a future Plan With Me video, leave them in the comments below!
Here is the full video where you can see how I’ve been filling out my bullet journal and hear more about my creative process.
Disclosure: Some of the links above are affiliate links. I receive a small percentage of sales at no cost to you. My creative partners and I really appreciate your continued support and every little bit helps me to bring you consistent content!


April 19, 2017
DIY Happy Spring Card - Easy Watercolor Resist Technique
I know it's been Spring for some time now, but I couldn't resist showing you how to make a pretty watercolor greeting card that uses a super easy technique. You can use it to write anything you’d like, but mine is going to say, “Happy Spring!”.
Watch this tutorial video to see how I made this lovely springtime card using a easy resist technique!
SUPPLIES:
Tim Holtz Watercolor Cardstock | Pebeo Drawing Gum | Brush | Koi Watercolor Set 30 Colors or 24 Colors | Square Rubber Eraser | Ranger Craft Sheet
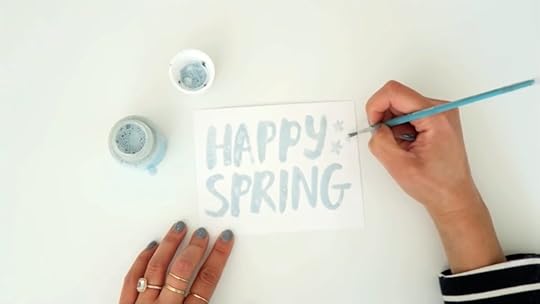
1. Paint your message onto the card using Pebeo Drawing Gum, which is a masking fluid.
Whatever you paint with this will stay white as long as you make sure that you have enough coverage. Feel free to add any other little details as well - I painted some little flowers to fill in some of the blank space!
2. Let it dry.I let mine sit for about 20 minutes until the drawing gum was dry to the touch.
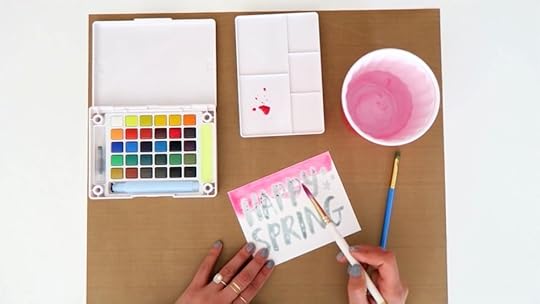
3. Paint over the whole card.
I used horizontal strokes and an ombre effect by blending the colors together, but you can do this any way you want. As long as you’ve covered the whole design from earlier and choose colors that aren’t too close to white, your message should be readable. I mostly just played with the paints until I liked the way it looked!
4. Once the paint has dried, remove the Pebeo Drawing Gum with an eraser.Gently rub the eraser on your design so the masking fluid comes off. Take your time peeling it off if you’re a perfectionist; mine stuck to the paper in a few places whenever I rushed too much.
My favorite part is getting to see the resist effect taking shape as you remove the drawing gum. It’s kind of therapeutic! And once you’ve finished, you’ll be left with a lovely watercolor resist card.
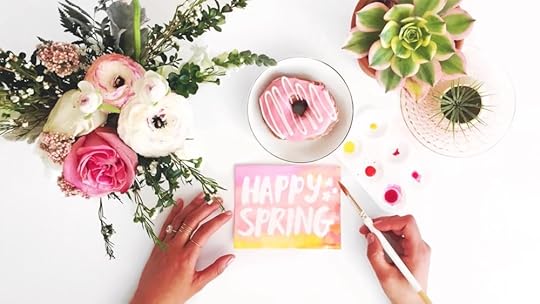
What I love about this project is that it’s so simple, you can really just have fun and enjoy the process! I hope that you do too. If you’re inspired to make a card using this technique, be sure to tag it #amytangerine on Instagram. I’ll choose some of my favorites to feature in a future blog post!
Shop ON A WHIM now! Check your local retailer and online: Simon Says Stamp | Scrapbook.com
Disclosure: Some of the links above are affiliate links. I receive a small percentage of sales at no cost to you. My creative partners and I really appreciate your continued support and every little bit helps me to bring you consistent content!
April 17, 2017
Zinia's Ice Cream Layout
Hello everyone! My name is Zinia Amoiridou from Abstract Inspiration and I’m really thrilled to be here and share with you fun creations using Amy’s gorgeous designs.
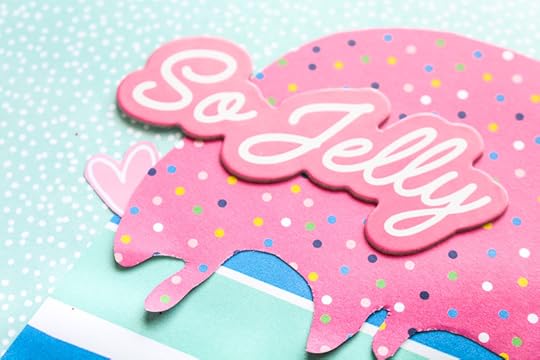
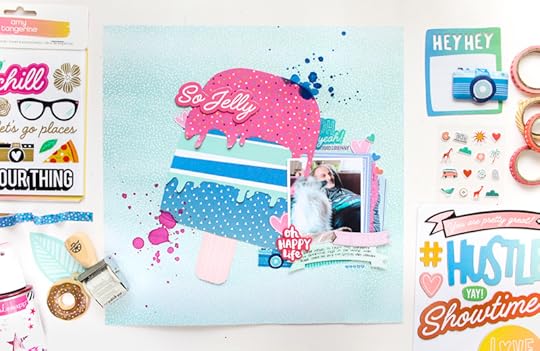
The layout I’m gonna share with you today is really sweet and whimsical. I used a mix of the two most recent collections Amy designed “Oh happy day” and “Oh a whim”. On a first glance, you may think that these collections don’t work well together but if you isolate the colors a little bit, they complement each other beautifully.
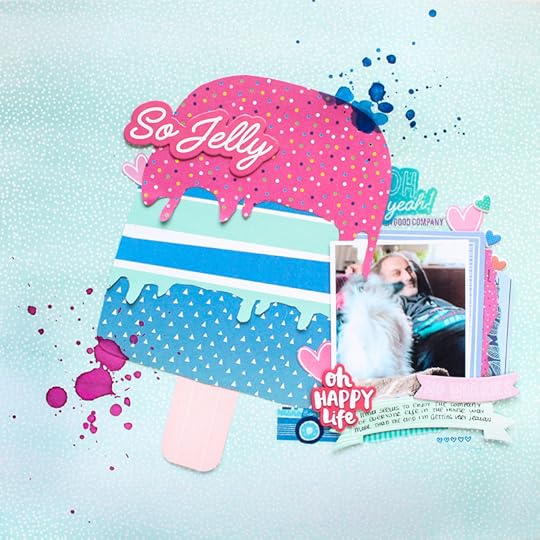
So to create this page, I used a few of my favorite papers from “On a whim” to create an ice cream on a stick. Instead of using my Silhouette, I decided to free hand the design and make it look a bit more playful. I drew the ice cream on a scrap piece of printer paper, cut it down to pieces and used it as a template to cut my paper. As I was cutting the pieces I decided to do some decorative drips. After I put the pieces together, I cut off any excess from the sides and rounded the bottom corners.
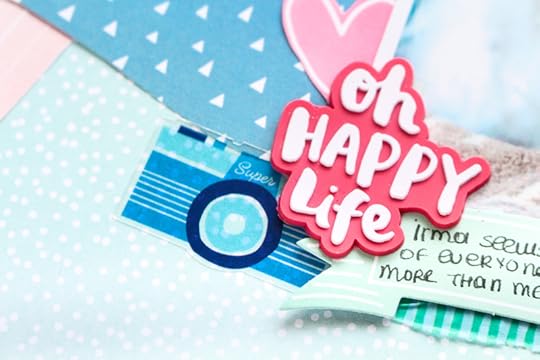
For my background, I picked a paper from “Oh happy life” and I started building the final page. I placed the ice cream around the middle and created a small cluster to help my photo pop. I used a couple of ephemera pieces and paper scraps to layer behind the picture and embellished around with products from both collections.
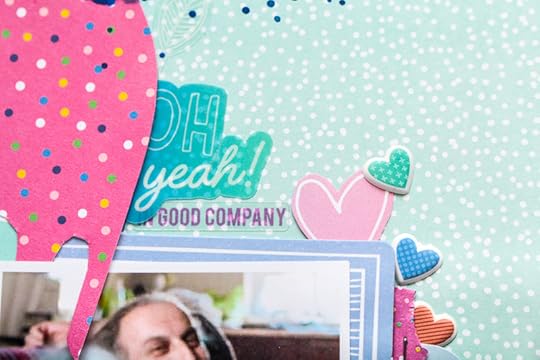
I really love mixing different materials so I included clear stickers, puffy stickers, chipboard, washi tape, rubber shapes and even a little bit of stamping. I also fussy cut some hearts from one of the cut apart sheets and used them around the page as ephemera.

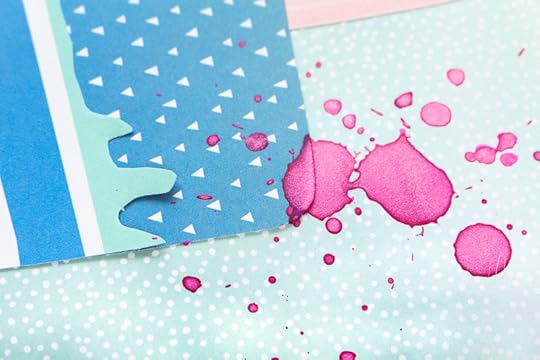
As a final touch, I added some big splatters around the ice cream. I used hot pink next to the blue and blue next to hot pink to keep the colors balanced across the page.

I love how this page turned out. Both collection scream summer and fun and this design really captures that vibe. I hope you will give it a go.
Zinia Abstract Inspiration Blog | Instagram | Twitter | Facebook
Thanks so much for sharing this sweet layout, Zinia! Other Design Team member posts can be found here. Shop ON A WHIM now! Check your local retailer and online at Simon Says Stamp and Scrapbook.com
Disclosure: Some of the links above are affiliate links. I receive a small percentage of sales at no cost to you. My creative partners and I really appreciate your continued support and every little bit helps me to bring you consistent content!
April 16, 2017
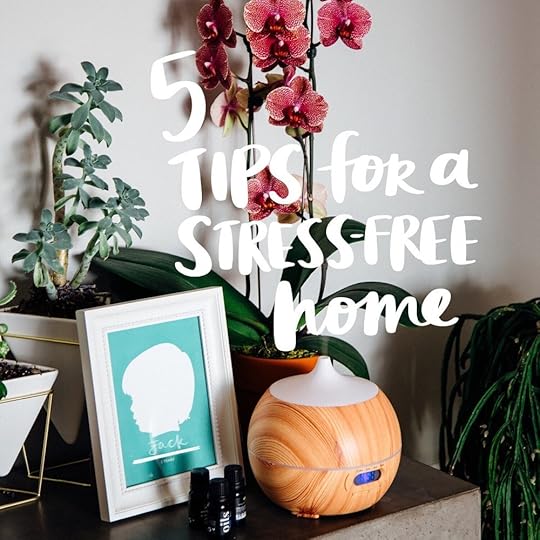
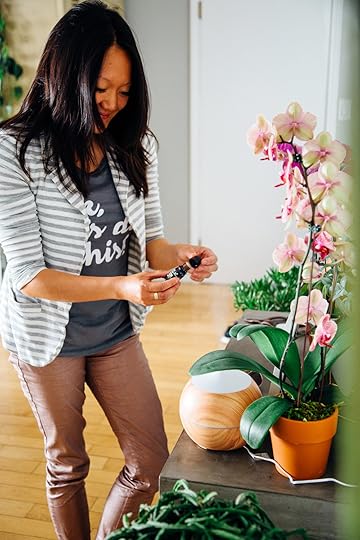
Five Tips for Creating a Stress-Free Home | Art Naturals
I may come across as put-together, but trust me, all you have to do is feel my tense shoulders to know that a very different story is going on in my body. I am constantly stressed and anxious about everything from work and finances to whether or not I'm doing all that I can to create a happy life for my family.
One thing I've learned is that no matter how busy I am or how long my to-do list is, I am much more productive when I make a conscious effort to de-stress. For me, the best place to start is my house! I've found that surrounding myself with things that give me an opportunity to breathe and ground myself helps me to maintain my stress level. I highly recommend creating a calming space that encourages you to relax and remember what's important in life!
Do you notice a difference in the quality of your work when the sheer quantity of it has started to get to you? I know that I'm not alone in my stress level, and Art Naturals has asked me to share some tactics that have helped me.
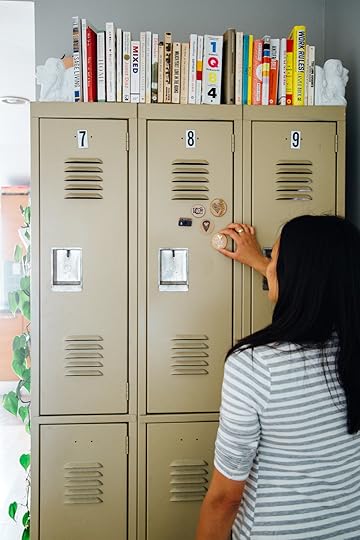
Here are my top five tips for creating a stress-free home:1. Everything in its place. After 30+ years of never having proper homes for all of my belongings, I had had enough of the guilt and frustration that comes from searching endlessly for an elusive item only to end up repurchasing it. I finally realized that I am heavily influenced by my surroundings and when my living space is in disarray, my mind is in disarray. Now I consider myself to be an aspiring minimalist so I try my hardest to keep clutter to a minimum and only bring in pieces that I absolutely love. I am a work in progress and always striving to improve myself, so when I slip up, I let it go and start fresh the next day. I hope to instill this quality in Jack so that he learns the value of being organized from a very early age.
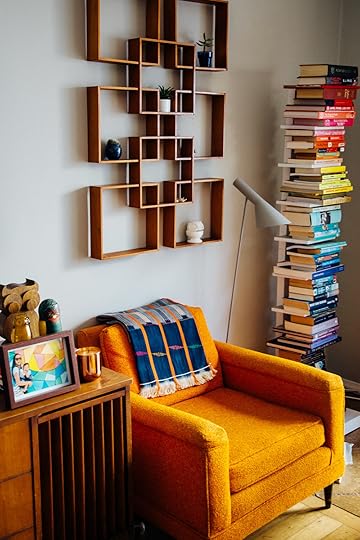
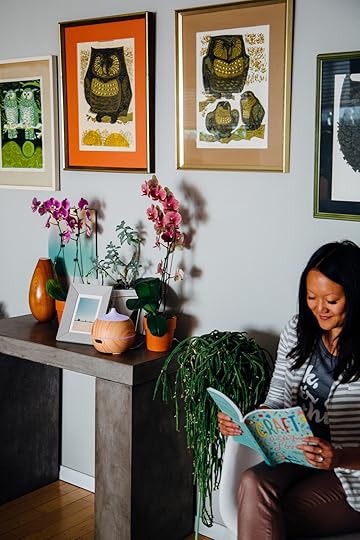
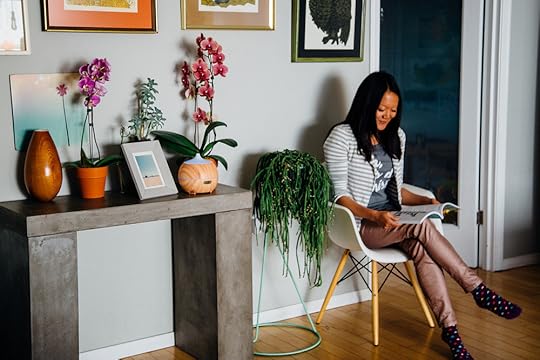
2. Create a cozy space for relaxation and reading. If you're like me, you're probably never further than a stone's throw away from your phone. As much as I love Instagram, I know that I can get easily pulled in and suddenly realize that I spent the last hour or so scrolling mindlessly through my feed instead of paying attention to what was happening in front of me. At night I make a conscious habit of putting down my phone and picking up a book instead. The act of reading instantly relaxes me plus there's nothing better than getting lost in a good story.
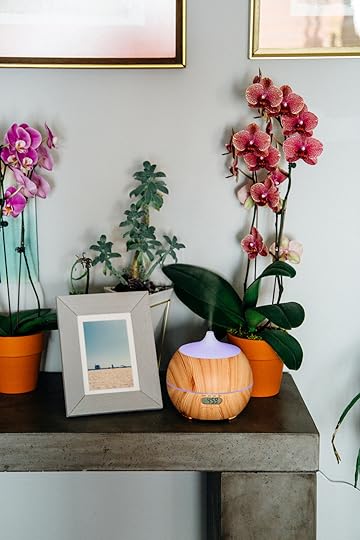
3. Choose your favorite photos that remind you of happy times and display them. We have framed images of Jack as a baby on the wall, photo booth strips of me and JC tacked to the fridge, and a handful of other small family pictures on the dressers in our bedrooms. The nice thing about having these photos in frames is that you can easily move them around too. Create little vignettes of happy in various spots. I love when in the midst of a busy day, one of my treasured images will stop me in my tracks and allow me to relive that special moment all over again.
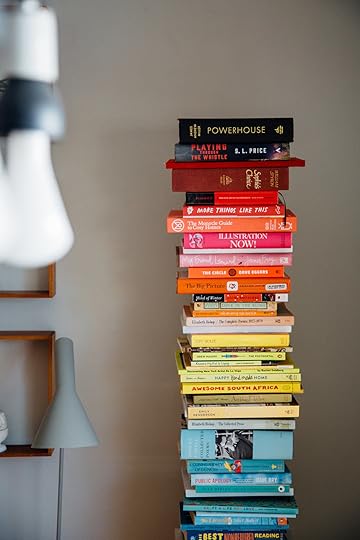
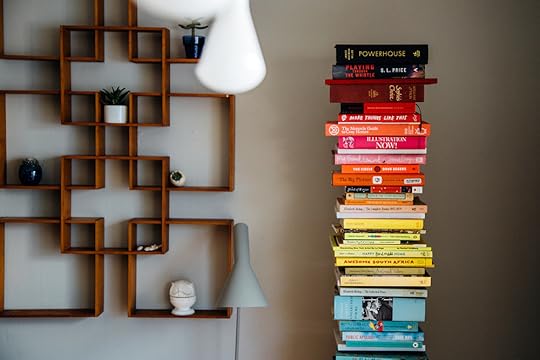
4. Invite only what you love. We enjoy entertaining and try to make our home as comfortable as possible for family and friends to drop by and share a meal with us. One of my favorite ways to foster community within our home is to have unique conversation pieces that cause others to take note and start a discussion. Since we decided when we bought our house in 2013 that we would only bring in the things we love, our home is full of the things that bring us joy. We have a bookshelf in our main living space that holds some of our favorite books in rainbow order and nearly every person that enters our house makes a comment about it. We also have an owl collection throughout our home that also makes for interesting conversation.
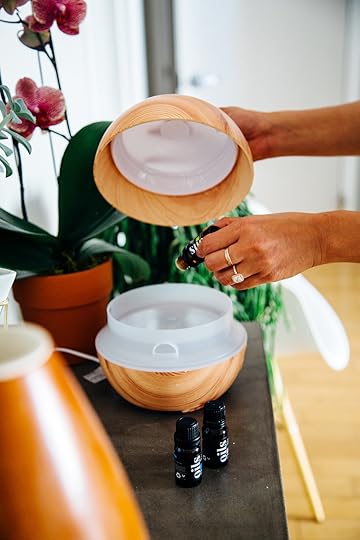
5. Think about all five senses. Not only is important for your surroundings to appeal to you visually, but they should also bring comfort to your other senses as well. I love having soft textiles underfoot, calm or upbeat music (depending on my mood) playing on our speakers, lots of healthy foods in the kitchen, and soothing fragrances permeating throughout our home. One of my favorite ways to achieve the latter is by diffusing essential oils in this Art Naturals Blue Tooth Oil Diffuser. My go-to essential oil mix is 1-2 drops of tea tree oil, 1-2 drops of eucalyptus, and 3 drops of lavender essential oil. Talk about instant relaxation!
If you're feeling overwhelmed by the notion of overhauling your home into a spa-like experience, don't panic. My advice would be to be to START SMALL. Choose one area in your living space that already makes you the happiest -- perhaps the room with the best light or the one that is used for savoring your morning coffee -- and tackle that room first. If a room is too large and intimidating, simply start with a smaller spot like an entry way table. Then you can move onto a different area. Once you have created a calming environment in one room, use that momentum to propel you to the next room until you have worked your way through your entire house.
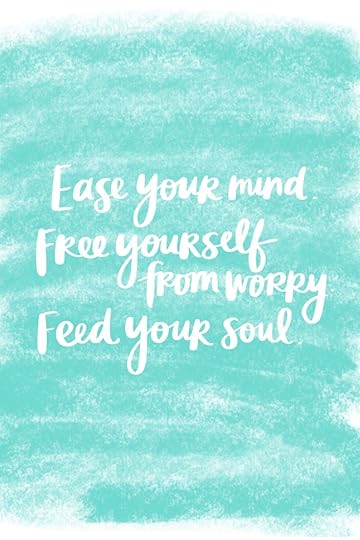
And if it would make more sense for you to wait until your schedule calms down before you tackle anything on this list, I made a little piece of art that will keep you from forgetting about it. Pin this graphic on Pinterest to remind yourself to take the time to de-stress when you have a chance to!
Now, I'm going to turn it over to you! How do you de-stress when the weight on your shoulders is getting to you? And what are some ways that you're hoping to make your home more relaxing?
FOR 10% off at ART NATURALS, USE CODE: Diffuser10
Disclosure: This post was sponsored by Art Naturals but all opinions and experiences I mentioned are my own. My creative partners and I really appreciate your continued support!
April 14, 2017
As Seen on Babble
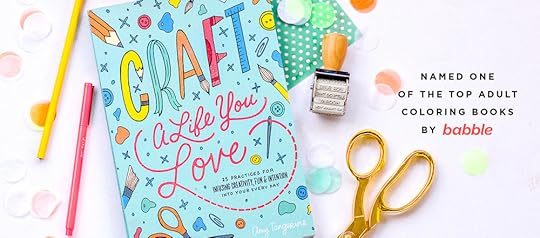
I have to say, there's something really wonderful about sharing your message with the world. When I committed to writing Craft A Life You Love, I knew I had to write from the heart and I had to share my most authentic self in order to really convey my story. That sounds easy enough in theory but it also can make you feel vulnerable. I mean, what if no one read my book? What if they didn't agree with my message? Those were things I had to get over and I am so glad I did. The response to my book has been overwhelmingly positive and better than I could have ever imagined.
I found out that Babble chose Craft A Life You Love as one of their top picks for adult coloring books! Needless to say, I was so excited! I'm thrilled that others are making good use of their books and using them not only as a source of inspiration but also as a place to express their creativity.
Also, we have some VERY exciting news about the book that we can't wait to share with you soon!
April 12, 2017
Celebrating Mamas at Aulani for Mahalo Mama Month!
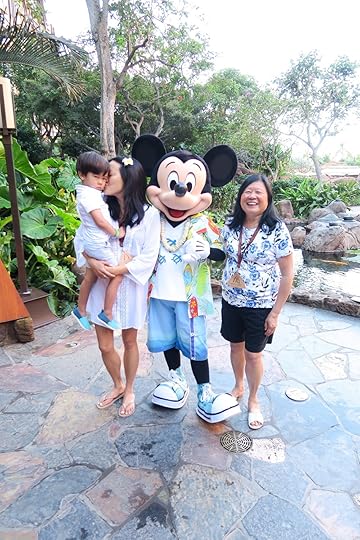
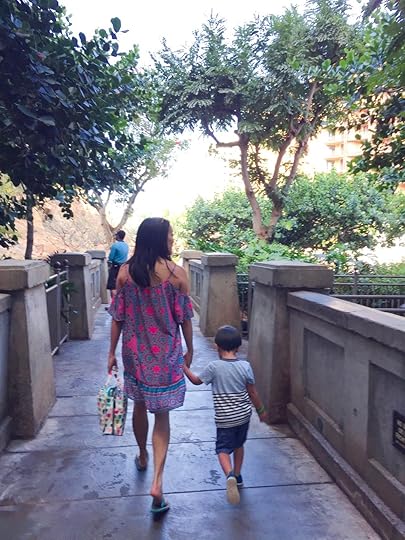
Last month, we had the pleasure of going to Aulani, the Disney Resort and Spa in Hawaii! It was such an honor to be invited to visit this magical place that I had on my bucket list. Though we go to Oahu about twice a year, I had never been to this side of the island. I took Jack (of course) and my mom, as JC had to work. We got to preview a few of the special activities Aulani has planned for Mahalo Mama Month! During the whole month of May, the resort will be celebrating moms to thank them for everything they do.
Of course, I brought my camera and took plenty of video footage compiled into a 22-minute vlog so you could tag along on our little trip to paradise (and so I could relive it anytime I need a happy dose of aloha)! We stayed in a 1-bedroom villa, and it was bliss.
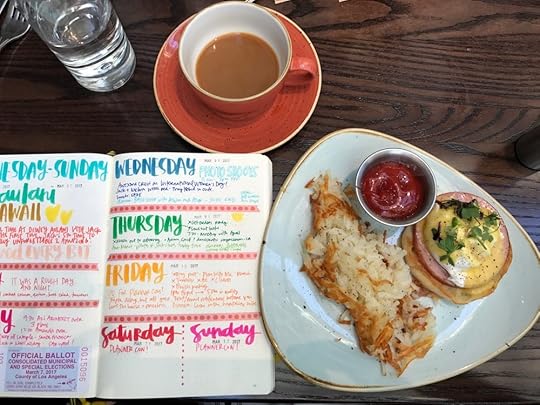
Our first morning at Aulani started with a delicious room service breakfast! Their chefs whipped up some Hawaiian-style french toast stuffed with chocolate and strawberries, delivered right to my bedside. I considered eating breakfast in bed as they’d intended, but enjoying it at the table was way easier. What can I say?
We toured the amazing resort and learned so much about the property. In true Disney spirit, there are stories and opportunities for wonder around every corner. it was spa time. I chose the special Mahalo Mama spa package at Aulani’s Laniwai Spa, which includes a 25 minute massage, 25 minute facial, and a 50 minute organic pedicure. The spa itself was gorgeous and they even had pineapple water! Honestly though, 25 minutes felt like such a tease! I wish the massage and facial had been longer. I could have stayed there for hours, but was excited to feel rejuvenated knowing that my mom and Jack were having plenty of fun without me.
You know how I feel about arts and crafts, so I was excited to check out the Pau Hana Room. It’s a great place where your kids can make photo frames and other keepsakes to take home. Another amazing place is Aunty's Beach House. Jack was super excited about what we called his "power band" that he wore around his wrist the whole time. It's an amazing kids club that is complimentary. There are plenty of fun activities of all sorts in the 5200 square foot space. It's open for a family hour in the morning, so if your children need it (like Jack did) you can even enjoy it with them. That way, you can help them get acclimated so they’ll be more comfortable if you decide to drop them off later.
One of my favorite things about going to a resort is that they take care of your room for you! I love coming back to a hotel room where everything is back to being perfect. The bed’s made, the bathroom’s clean, and my family and I can just focus on enjoying our trip. It’s so nice!
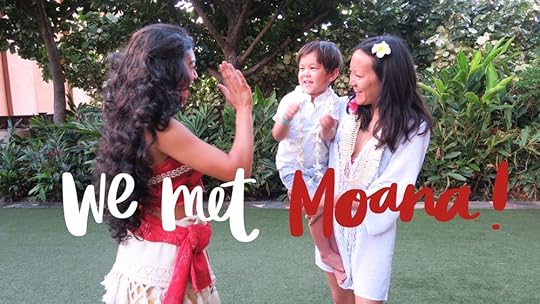
Aulani hosts a beautiful lei ceremony and while we were there, we found a wonderful surprise - Moana! She took photos with all of the kids.
One of the nights, Jack completely passed out 6:30pm and I was so happy about it! He ended up just sleeping in my bed with me later that night. Isn’t it amazing how someone so little can take up the whole bed?
We also got to check out one of the three bedroom villas you can stay in and it had an amazing view. This option would be wonderful for multiple families traveling together. I envision taking a trip with JC's siblings and kids and we can all stay in one of these! While we were there, Jack learned how to make a lei! During every Sunday in May, the Aulani staff will be teaching kids and moms how to make a Lei Po’o (a head lei) if you’d like to try it out too!
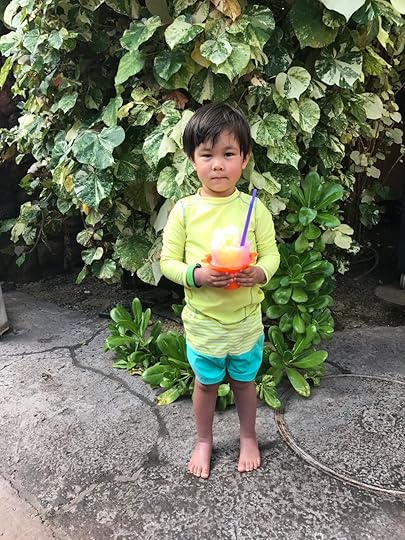

By the time the end of our trip rolled around, we were sad to leave paradise and our daily shave ice! This place had been amazing for all of us. My mom said she couldn't remember the last time she felt so relaxed! People of all ages can really enjoy Aulani since the resort offers so many options. There really is something for everyone. I just kept seeing so many happy little kids running around and honestly, happy adults too. I think that’s the true key to a really great vacation - if mama is happy, the whole family ends up happy too!
This May, Aulani is also offering several special deals as part of Mahalo Mama Month, such as 10% off access to the amazing Rainbow Reef (their private snorkel lagoon) and 15% off family portrait sessions with Disney PhotoPass! We had such a wonderful time on our trip and I know you will too. For more information on Mahalo Mama Month at Aulani, click here. Hope JC is reading this so we can all go back together next May! Have you been? Let me know if you have any insider tips!
April 11, 2017
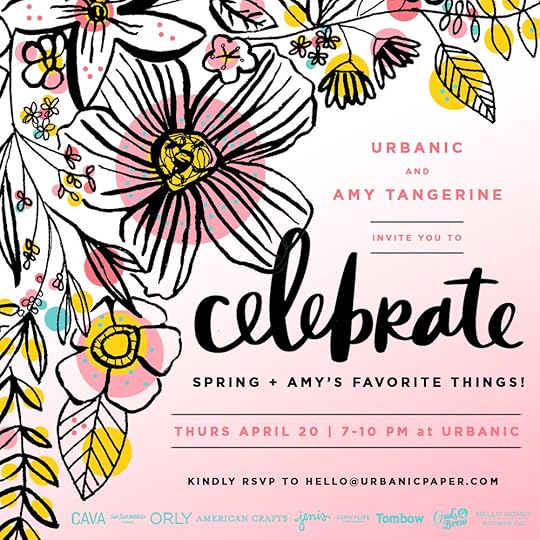
Hey LA - I'm throwing a little party!
Hope you can make it to Urbanic to help celebrate all kinds of fun things! There will be food, drinks and DIY's along with live lettering! Be sure to RSVP to hello@urbanicpaper.com
April 10, 2017
March Favorites
I really wanted to get Favorites videos to you all every month this year, but I'm starting with March (or really, April). I hope you enjoy my latest video about the random assortment of products and other things I have been loving!
Here is a list of everything I mentioned in the video and where you can go to find them.
Pixi Glow Tonic - I love the way my skin feels when I use this product! It feels so tight and clean and this is working really well for me.
Schmidt's Deoderant Stick - I’ve seen and tried natural deodorants before, but I haven’t found one that does its job until now. This is the winner! So far, it’s been great. And from the comments on the video, it appears those of you who have tried it really like it too!
Derma E - This is an activated charcoal cleanser and my skin feels amazing after I use it. I try to use it once a day!
ORLY Breathable Nail Treatment + Color - I got a manicure and they put this nail polish on me. It stayed for eight days without chipping, so I knew I had to try it at home too. The first color I got is a light gray called ‘Power Packed’. I’ve also been loving the color ‘Pamper Me’ which is a baby pink color. I think it’s perfect for spring and summer! I would like this pink even more if it were slightly more white, but it’s great and kind of fun!
LipSense - The color I got was Napa and I tried it for the first time in this video so you can see how it goes on. It survived the kiss test without leaving a mark! To get it with a special 10% off discount through Friday 4/14, email Claudette at ClaudiesLastingLippies@gmail.com and tell her I sent you! Mention the code Amy10.
Essentialism by Greg McKeown - I’m obsessed with the theories that he shares. There’s so much in life that we try to cram in but it’s really important to focus on the things that make our lives better. Totally recommended read!
Jack's car bed - We got this bed for him a few months ago and he’s obsessed with it. This bed is currently on sale as well, if you were considering buying one! Check out the blog post I wrote about it right here.
Jack's Kitchen Helper - We love using this because Jack enjoys helping us in the kitchen while we’re cooking. It’s sturdy and he can get up and back down by himself!
Minions Perler Beads - I love that my son enjoys doing crafts of all kinds. His focus and concentration lasted through to the finish. Although he wanted to keep it like it was instead of me ironing it for him, so I didn't get that part on video. This project reminded me of when I was younger and we had such a good time working on it together!
Yoobi products - We got Jack the Yoobi colored pencils, a watercolor paper pad, and an activity book. He loves them!
Jonathan Adler coaster set - I just love how beautiful and functional these coasters are! They come in a set of four and I kind of wish I’d bought two of these boxes.
Paul Smith Sock Subscription - JC has always loved fun socks and Paul Smith has a monthly service that I paid a year in advance for and it is quite pricey, but the fact that he gets really cool socks every month makes for a fun little surprise every month.
Christine Herrin Everyday Explorers - I met her in person at Adobe Max last year! We had so much fun talking about our shared love for paper. These are adorable cards and this whole kit is something that you can take with you. It’s so well-designed and awesome!
Bullet Journaling - My bullet journal obsession continues! I’ve been loving this system so much. I can add color and do grayscale. If you want to know more about it, watch my playlist of bullet journaling videos.
California Dreaming Mural - If you’re in LA, check out this new wall mural by It's A Living in Culver City at the Chinese Laundry Headquarters! It's right next to the See's Candies and it is gorgeous. I’d recommend going late afternoon on the weekends - I got this weird shadow when I visited in the morning. Here's a photoshoot I did there!
Let me know if you use any of this stuff too or if you want to share your current faves with me! Thanks for stopping by, fangerines. You're the best!
Disclosure: Some of the links above are affiliate links. I receive a small percentage of sales at no cost to you. My creative partners and I really appreciate your continued support and every little bit helps me to bring you consistent content!
April 6, 2017
Creative Community at PlannerCon2017
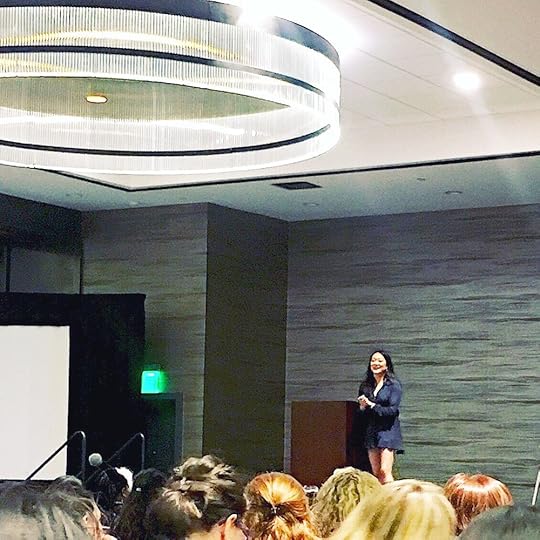
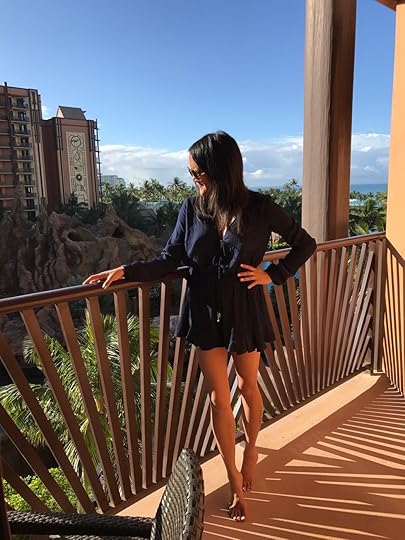
Last month, I had the exciting opportunity to speak and sell my products at the very first PlannerCon in San Francisco! By far, my favorite part was getting to interact with the creative community of planners who attended. Check out my vlog from the trip to see how much fun we had!
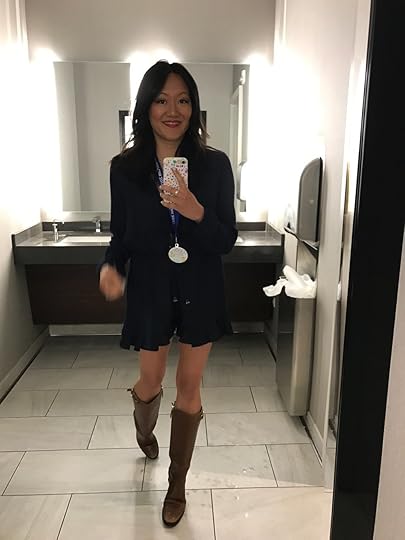
By the way, this romper is SO comfy and fun and I borrowed it from this amazing new company that a friend of a friend started - Haute & Borrowed - use code AMY for $50 off your first month!
[image error]
We put together a table selling Traveler’s Notebooks, stickers, and other products from my On A Whim line and it was super busy the whole time. One of the best things about running our own little popup shop is that we were right in the middle of the action.
During the conference, I got to meet so many Fangerines and fellow planner enthusiasts! People traveled from all over the world to be there. Thank you to everyone who came up and said hello! I had a wonderful time meeting all of you and seeing how you’ve colored in the pages of my book.
There’s something really invigorating about being surrounded by so many creatives. It’s not just every day that I can talk to any random stranger about washi tape and Traveler’s Notebooks, and as someone who gets particularly excited about those things, I absolutely loved being at PlannerCon.
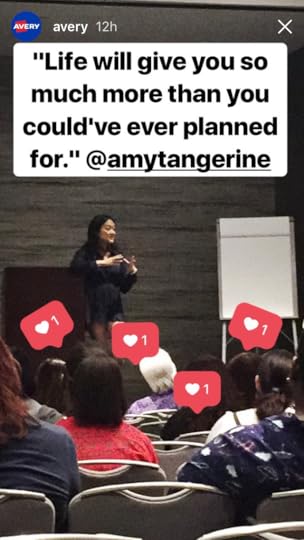
I grabbed this shot from Avery's Instagram story. Basically my message was that even if you're struggling, even if things don't seem to be going as you had thought they would... if you're kind, and doing the best that you can, life will give you more than you ever could've planned.
So many of you have asked when the next one will be and you can find more info on PlannerCon 2018 on the Facebook page and you can get your tickets here before they sell out.
Are any of you as obsessed with planners as I am? Which system is your favorite - are you into bullet journaling, Traveler’s Notebook, Hobonichi, or something else? Tell me all about it in the comments below!
Shop ON A WHIM now! Check your local retailer and online: Simon Says Stamp | Scrapbook.com
Disclosure: Some of the links above are affiliate links. I receive a small percentage of sales at no cost to you. My creative partners and I really appreciate your continued support and every little bit helps me to bring you consistent content!
April 3, 2017
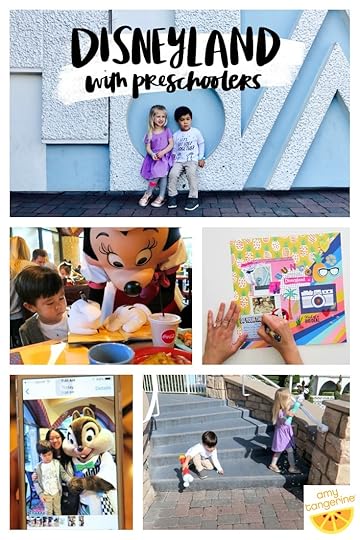
Going to Disneyland with Preschoolers
Taking your preschoolers to Disneyland can seem like a pretty daunting task, but since there are so many wonderful things to do there, I think it’s totally worth the work involved! Plus, with the Southern California special they have going on, now is the perfect time for any SoCal locals to plan a day (or three, actually!) at Disney with little ones.
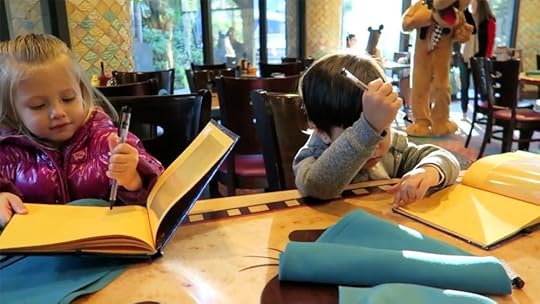
I was invited to Disneyland for a preschooler event and of course I took Jack (and mommy). For my latest video, I thought it would be fun for you to see the day unfold with us and also see how I documented it in a scrapbook page. We packed up the car at 6am and headed out bright and early (so early, in fact, that Jack thought it was still night time).
1. Take it easy (and pack snacks).
Because we live just over an hour away, we like to not jam too much into our day at Disneyland. It can definitely be tempting to go on as many rides and see as many shows as you can, but it’s much easier to get through a full day if you occasionally give yourself (and your kids!) a chance to relax. I recommend planning on doing no more than 5 things, and considering the others a bonus if you get to it. We always bring Jack's waterbottle and refill it at either drinking fountains or restaurants. You can also bring things to snack on, which is a great way to spend your time in line.
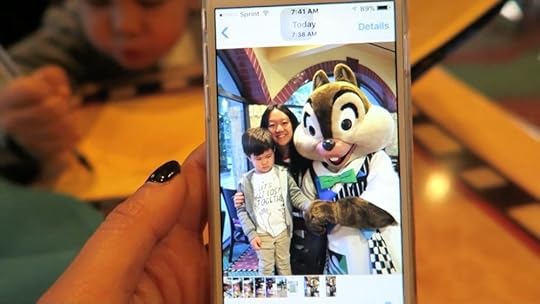
2. Character dining!These meals give your family a great opportunity to interact with your favorite Disney characters without having to wait in line! They come up to the table and can take the time for autographs and photos. This time around, we went to Goofy’s Kitchen. On our first trip to Disneyland with Jack last year, we went to Disney's PCH Grill. The buffets are great and full of wonderful options. You can check out a full list of restaurants here. Make reservations ahead of time to make sure you can get in. And maybe brush up on the difference between Pluto and Goofy before you go. ;)
3. Visit the Baby Center.
This is an amazing resource for mamas with even younger kids in the park! They have everything you need to feed and change your baby on the go. It's located near the front of the park. If you're in the potty training phase or just prefer it, this place has the lower toilets. They have anything you might need for your little ones and they even have a dedicated private space for nursing moms.
4. It’s A Small World AFTER ALL.This was my favorite ride when I was little. I also loved 20,000 Leagues Under the Sea - does anyone remember that ride? Well now it's Finding Dory, and Jack has been on it only once as the line was quite long, but we loved it just the same. We stopped at It's a Small World first at the request of Jack and Harper! We always do the ride at least once as it's Jack's favorite. In fact he got to go on it four times this particular day. Mommy took him for the third and fourth time while I got to take a little ride break and catch up on some emails.
5. Take plenty of pictures!After we ride It’s A Small World, we like to have a mini photo shoot in front of this wall. This time, we were even joined by a pair of ducks! There's also a large restroom that we like to stop in as it never seems to be crowded.

6. Two words. Bubble. Wand.
These Disney bubble wands are our favorite thing. Jack had two of them (though the first one saw a lot of action and broke after countless hours of play). They are a complete life-saver when it comes to keeping kids entertained on long lines or wherever you are in the park. You may remember Jack outside of The Little Mermaid in California Adventure with his very first bubble wand in this video. Bring a small bottle of bubble solution from home with you because inevitably, they want to use the bubble wand ALL THE TIME. Instead of asking them to constantly turn it off, and risking a flood of tears, extra bubble solution (and maybe even some extra batteries) would come in handy!
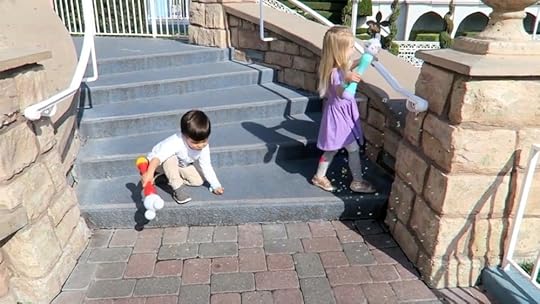
I also always ask the kiosk person to set up the bubble wand for us since they have the proper tools and can do it quickly and efficiently.
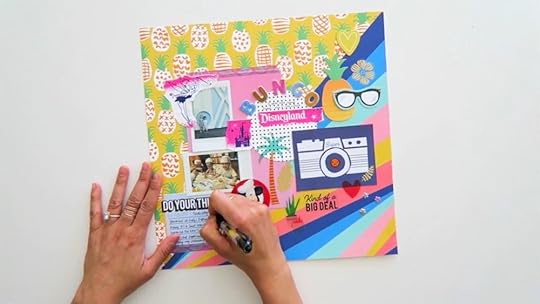
Next, here are some of my tips for making sure you have a great way to look back at your special day!Disneyland is one of the best places to make memories with your kids, so of course, I wanted to document the day when I got back home. I think you can easily use the supplies you have on hand instead of feeling like you need to purchase themed papers or stickers. Anything that makes you happy should be good enough for using for these special memories. I decided to use my latest collection with American Crafts, On A Whim.
1. Add your favorite photos from the day to a “To Print” folder on your phone!That way, it’s easier to find the best pictures when it’s time to print them. For this spread, I used the Instax Share SP-2 printer (the newest one) to print out cute instant photos right from my iPhone. Once you’ve printed them, you can just remove the photos from that folder so you’ll be ready for the next round of memories!
2. Harness your creative energy, even if it happens before the trip.Sometimes you get creative before you’re able to take the photos! Some of my best work has come out of my anticipation of an upcoming vacation. Cut out small pieces of paper the size of your photos and use those templates to plan out your page. Then, you can add the photos later and you’ll have exactly the right amount space for them!
3. PUT little pieces of memorabilia TO USE.I think this adds so much. For my spread, I decided to carefully tear the pieces apart instead of cutting them. The torn edge adds a bit of texture and personality!

4. Work quickly and impulsively.
Sometimes, it's just easier to stick something down rather than deliberating for too long. I like the idea of just going with it because so many times, we intend to scrapbook and document our memories, but life gets in the way. I would rather just commit and make adjustments later if necessary.
So Cal residents, don't forget to check out the Southern California special they have going on that is valid through May 25! Maybe Jack and I will even see you there soon!
What are your favorite tips for taking your preschoolers to Disneyland (or any other theme park)? And how do you document your Disney trip when you get home? Leave your best advice in the comments below!
Amy Tangerine's Blog

- Amy Tangerine's profile
- 62 followers

