Kasey Bell's Blog, page 46
February 17, 2020
FREE Tech Coach Resources
The post FREE Tech Coach Resources appeared first on Shake Up Learning.
Are you an instructional coach, tech coach, or in another instructional leadership role? This page is loaded with FREE resources to help you and your teachers make an impact!
© Shake Up Learning 2020. Unauthorized use and/or duplication of this material without express and written permission from this blog’s author and/or owner is strictly prohibited. Excerpts and links may be used, provided that full and clear credit is given to Kasey Bell and Shake Up Learning with appropriate and specific direction to the original content on ShakeUpLearning.com. See: Copyright Policy.
The post FREE Tech Coach Resources appeared first on Shake Up Learning.


February 13, 2020
How to Easily Assess Student Writing in Google Docs
The post How to Easily Assess Student Writing in Google Docs appeared first on Shake Up Learning.
 Assess Student Writing in Google Docs with WriQ
WriQ is a FREE tool that helps teachers easily assess writing in Google Docs.
This Google Chrome extension helps teachers not only assess writing, including grammar, punctuation, spelling and more but also helps teachers track progress over time.
Below is a guest post outlining the features and recent updates.
Please note, this is a guest post, not sponsored.
How to Easily Assess Student Writing in Google Docs
Click To Tweet
How to Easily Assess Student Writing in Google Docs
This is a guest post by Mark Schwartz from Texthelp.
All teachers can agree that assessing student writing is a tedious and time-consuming process. Plus, monitoring student progress and analyzing their growth over the course of the year can be even more difficult. At Texthelp, we’ve spent the last several years coming up with a solution to give teachers some of their precious time back without diminishing the value of their feedback or the instruction to their students. And that solution is WriQ®.
WriQ, a Chrome Extension for Google Docs, is a writing achievement and assessment tool that supports both teachers and students in the writing process. For the teacher, WriQ saves time by auto-marking spelling, grammar, and punctuation errors, as well as seamlessly integrating rubrics for delivering qualitative feedback. For the student, it uses a combination of gamification, nudge theory, and research around writing bursts, to motivate them to work on improving their writing.
Step 1: Assessing a Paper
(If you’d prefer to see WriQ in action, you can view this short video).
Using WriQ to assess student work is easy. After installing the extension from the Chrome Store, open a student’s writing in a Google Doc and click on the caret to show the sidebar. (Note that the first time you use WriQ, you will have to identify yourself as a teacher, and will have to register to save a score and access other features).
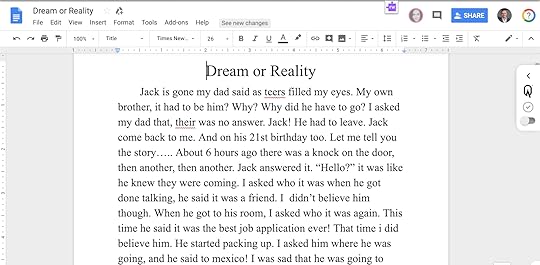
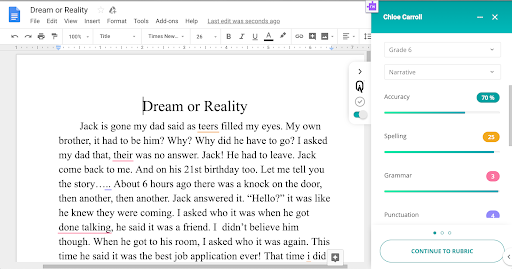
Once the sidebar is open, you will see the auto-scoring features of WriQ:
Accuracy percentage (based on correct word sequences)
Spelling, grammar, and punctuation errors
Word count
Vocabulary maturity (based on age of acquisition)
Time on task (time spent actually writing or editing)
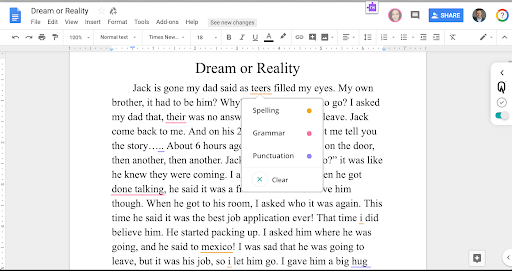
You’ll also see that any errors that WriQ found are now underlined within the student’s document. It is important that you check through the document to change or add any errors that WriQ may have missed or got wrong. If you do see any missed or mismarked errors, simply click where the error occurred, and change (or ignore) it.
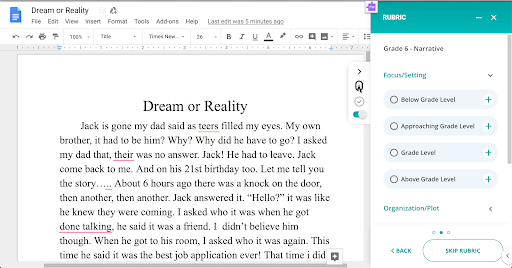
Once you’ve completed the quantitative assessment of your student’s writing, you can move on to the qualitative assessment through the use of WriQ’s built-in rubrics that are specific to the grade and genre chosen at the start of the grading process. That’s right, no more manually marking a printed chart. Instead, simply choose the correct criterion level that best matches the student’s writing for each assessment area. WriQ will automatically do the calculations and the rubric visualizations for you.
Note that teachers can create custom rubrics if their students have a premium license of WriQ. For more information on how to set up and use custom rubrics, see the related blog post.
Once you’ve completed all your grading, WriQ generates an image with an overview of your assessment, which can be inserted directly into the student’s paper for real-time feedback. The image includes your written feedback to the student, the metrics generated from WriQ’s auto-marking, a helpful visualization of the rubric, and a WriQ Score.
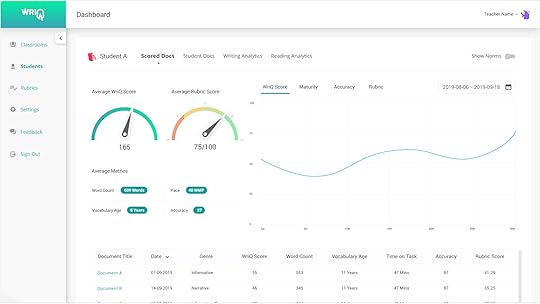
Step 2: Tracking Progress
(If you’d prefer to see the WriQ dashboard in action, you can view this short video).
After a student’s paper has been graded, the information will be entered into the teacher’s dashboard, which contains data for each student and all of their documents that have been scored with WriQ. This will allow educators to track individual student growth, while also enabling them to compare their students’ results to local and national norms.
Step 3: The Student Experience
(If you’d prefer to see the WriQ student experience in action, you can view this short video).
The student experience in WriQ focuses on student motivation, using a combination of gamification, nudge theory, and research around writing bursts.
After getting the extension installed, students will see the WriQ icon in their Chrome Extensions bar. When they open a Google Doc and select the WriQ Chrome Extension, a small box will appear in the bottom, right-hand corner of their Doc. (Note: If it’s their first time accessing WriQ, they’ll have to go through a quick tutorial before getting started.)
This small box is the “WriQMeter”, which tracks Writing Bursts. Writing Burst length is a measure of writing fluency – the longer the burst, the higher the fluency. By enabling students to track their own bursts, they can see their progress over time and get the internal motivation they need to keep improving.
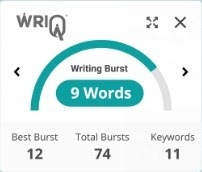
All students will be able to track their best and total bursts for that day, while premium licensed students will be able to see their progress weekly, monthly, and annually. This encourages students to spend more time writing, to write more words, and to write across different subject areas.
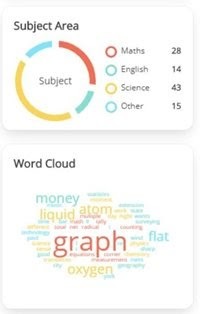
Bursts, however, are not the only thing that WriQ measures. Word clouds and subject keywords from the Academic Word List provide insight into how much writing a student is doing in different subject areas, and which words students are using the most.
In future releases, badges and other rewards will offer additional motivation to continue encouraging students to achieve in writing.
Have you had a chance to try WriQ yet? If not, install it today to see how it can revolutionize how you assess writing. And, if you’d like to try WriQ for free with your students, please fill out our WriQ Pilot Request Form, and someone will be in touch shortly!
Want more?
Check out these releated posts:
9 Ways to Improve Student Writing with Google Docs
How to Cite Sources in Google Docs
© Shake Up Learning 2020. Unauthorized use and/or duplication of this material without express and written permission from this blog’s author and/or owner is strictly prohibited. Excerpts and links may be used, provided that full and clear credit is given to Kasey Bell and Shake Up Learning with appropriate and specific direction to the original content on ShakeUpLearning.com. See: Copyright Policy.
The post How to Easily Assess Student Writing in Google Docs appeared first on Shake Up Learning.
February 11, 2020
Google Accessibility Tools to Reach ALL Learners – SULS049
The post Google Accessibility Tools to Reach ALL Learners – SULS049 appeared first on Shake Up Learning.
Accessibility is and should be a huge topic of discussion across multiple industries but especially in learning.
 I’m going to give you tips, tricks, and resources to help use Google accessibility tools to reach all learners.
Google tools are loaded with features that help us differentiate and support ALL learners in our classrooms.
In this article and podcast episode, we are going to take a deep dive into tools and strategies that you may not know about.
Let’s get shakin’ y’all.
Shoutout
Sarah Kiefer recently wrote a wonderful review of the Dynamic Learning with Google podcast series. (Episodes 44-47 – You can find them here!)
I appreciate the review so much. Go check out her blog, My Brain Can’t Hold It All.
Ever wondered how you can use Chrome, Chromebooks, and Docs to create a more accessible classroom? Reach all learners with Google’s accessibility tools on ep. 49 of the #ShakeUpLearning podcast.
Click To Tweet
Listen to this article:
 .
. ..
..
Do you have a question or idea to share on the podcast? Leave me a message here.
Quick Tip of the Week
In any Google Doc, use the keyboard shortcut, Control + Shift + 8 (Command + Shift + 8 on a Mac), to add a bullet to your document. This keyboard shortcut is amazing if you need to add bullet points quickly to a doc.
Accessibility Tools with Google
I did a ton of research before deciding to chat about this topic today because I wanted to put together the best resources for you.
Check out Google’s Accessibility page here for a very comprehensive list of features broken down by application. Also, keep in mind that Android devices have built-in accessibility features as well.
Chrome Keyboard Shortcuts
Keyboard shortcuts are not just time savers; they are also accessibility features for students and teachers. If any of your students are unable to use a mouse, then these are imperative.
CTRL + T will open a new tab in your browser
CTRL + (1-8) will toggle to that corresponding tab within your browser. For instance, if you have 8 tabs open, CTRL + 6 will go to the 6th tab.
CTRL + 9 will take you to the last tab that you have open.
CTRL + Shift + T will reopen a closed tab.
CTRL + W will close a tab.
ALT + F + X will completely close Google Chrome. (Cmd + Q on a Mac)
CTRL + +/- will zoom in and out on your browser.
(Use CMD instead of CTRL on a Mac)
Check out a full list of Chrome keyboard shortcuts here! For all the shortcuts you can use to zoom in and out and change text, image, and video sizes, use this resource.
Why You May Need High Contrast Colors
Some students may benefit from high-contrast colors rather than the regular settings we get with every browser.
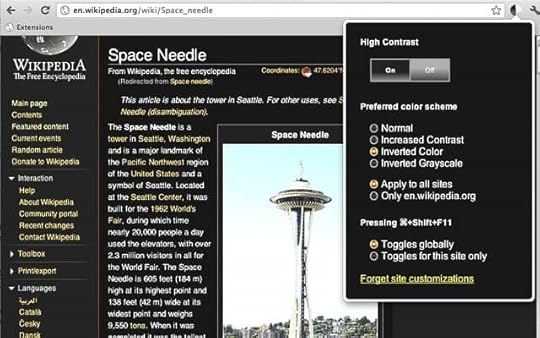
Some students can focus more easily when the background is black with white text rather than vice versa. Darker backgrounds are also easier on the eyes for everyone.
There’s a Chrome extension you can use to change the color schemes for all webpages. You can find the extension here, but be sure to follow your school policies regarding installing extensions.
Text to Speech (Reading with Your Ears)
Some of the most useful extensions will read the text on the screen out loud to your students. These extensions help younger students learn how to read, but is also helpful for students who have dyslexia or other learning difficulties.
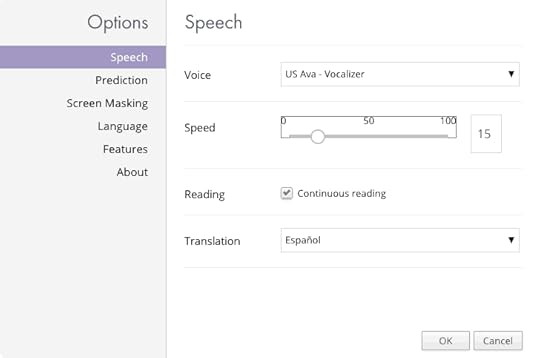
One of my favorite Chrome extensions is Read & Write for Google Chrome. I shared a post on this extension a while back that you can read here, but essentially you install a toolbar, and then any webpage you visit can be read out loud to you.

This tool is a fabulous accessibility feature to help all types of readers.
You can change the voice, the speed, and it has a translation feature as well.
Two more Chrome extensions that will read text from the screen are Speak It and Announcify. I shared these in a previous post about supporting struggling readers.
With Speak It, you highlight what you want to hear, and it will read that section out loud with just a couple of clicks.
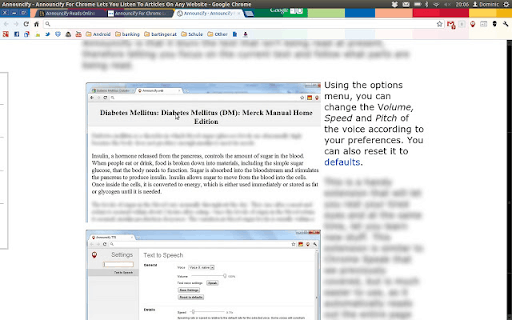
Another favorite is Announcify because it does more than just read what is on the screen. It will open in a new page, and then it will blur out anything that is not being read. This is great for limiting distractions.
Speech to Text (Dictation)
Essentially speech to text is considered dictation, but this feature is so helpful to many different types of learners. Many apps and devices now have voice recognition built into their interfaces, making dictation much more accurate than it has been in the past.
Even if you don’t need speech to text for an accommodation, many of us talk faster than we type, so this can be a huge time saver.
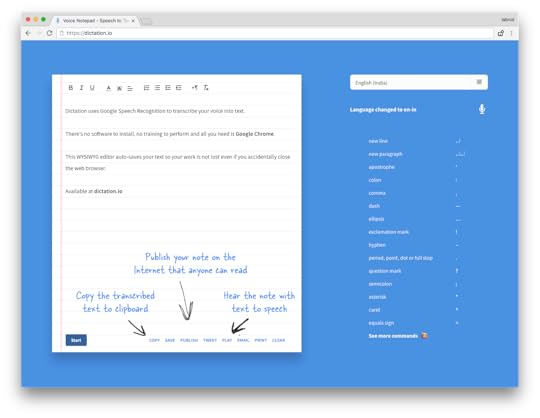
The first resource I want to talk about is dictation.io. This is not an extension but instead a Chrome app. You click on the microphone and start speaking, and your words are shown on the notepad.
The Voice Note II Chrome extension is another fantastic tool that opens a new clean window with a microphone in the top right. You click the microphone and start talking, and when you stop, your words are there.
Both of these tools allow you to then copy, paste, tweet, email, message, etc. the words that you’ve spoken.
If you’d like additional Chrome extensions and tools along with explanations of them, check out my Chrome Database.
You can also watch this video playlist that has additional information on Chrome and Chrome OS Accessibility.
Chrome OS & Chromebooks
The Chrome OS on Chromebook has several accessibility features built into the device so that you won’t need additional tools. I’ve listed a few resources below to help you familiarize yourself with the built-in tools.
Chromebook accessibility help
ChromeVox – Built-in screen reader
On-screen keyboard (with microphone option)
Chromebook keyboard shortcuts
Accessibility Tools in Google Docs
First off, I cannot say enough for having a full understanding of keyboard shortcuts. You can find a list of shortcuts specific to Docs here, but understanding these shortcuts and being able to share them with your students is unbelievably helpful.
Google Docs also has built-in voice typing. You can find it under Tools > Voice Typing. It works very similarly to the apps and extensions mentioned above, but it allows you to talk your work directly into your document. You can also dictate your formatting options as well, like bold, italicize, etc. Here are 7 reasons you need to try voice typing in Google Docs.
There is also an entire suite of accessibility settings directly within Docs. If you want to see the comprehensive list, go here. But this is where you turn on things for screen reader support, collaborator announcements, a screen magnifier, and others. You can find these options and settings in Tools as well.
Final Thoughts
When you’re creating a visual for a website or page, don’t forget to create pertinent alt-text. The alt-text allows you to put in a title and description. Most of the alt-text that you see on websites is the random name someone used to name the picture for their computer. Take the time to create meaningful titles for those students who aren’t able to process busy webpages.
Insert your image, right-click, and select alt-text to update it. This will also give a screen reader a way to describe the image in text to speech tools.
Another way to make your documents more accessible is to use the commenting and suggestions function. Screen readers can jump specifically to those comments rather than jumbling up the text on the page.
One last thought about formatting. Screen readers do not acknowledge bold, italicized, and underlined words. Instead, if something is important, type “important” before the upcoming sentence. Additionally, use numbered lists instead of bullet points to better distinguish the order of importance in your documents. Also, start using headings rather than simply increasing your font size.
Use your tools! Accessibility should be a consideration for all students. Kasey shares some of the best tools and resources to create a more tech accessible classroom with Google Chrome, Docs, and Chromebook. #ShakeUpLearning
Click To Tweet
Podcast Question of the Week
How can accessibility tools help you reach the learners in your classroom?
Post your answers in the Shake Up Learning community or on your favorite social platform.
Join our FREE Shake Up Learning Facebook group.
Post your answer to your favorite social media platform using the hashtag #ShakeUpLearning, or share it in the Shake Up Learning Community on Facebook!
The Shake Up Learning Book Study
Don’t miss our next book study! It’s completely FREE, and it’s all available online!
© Shake Up Learning 2020. Unauthorized use and/or duplication of this material without express and written permission from this blog’s author and/or owner is strictly prohibited. Excerpts and links may be used, provided that full and clear credit is given to Kasey Bell and Shake Up Learning with appropriate and specific direction to the original content on ShakeUpLearning.com. See: Copyright Policy.
The post Google Accessibility Tools to Reach ALL Learners – SULS049 appeared first on Shake Up Learning.
February 10, 2020
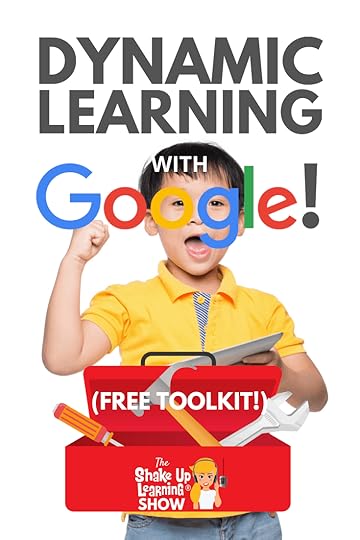
(FREE) Dynamic Learning with Google Toolkit © by Kasey Bell
The post (FREE) Dynamic Learning with Google Toolkit © by Kasey Bell appeared first on Shake Up Learning.
Get the FREE Dynamic Learning with Google Toolkit ©
This awesome freebie is a companion to my podcast series, “It’s NOT About Google!”
In this 4-part series, I will show you how you can use my Dynamic Learning Framework and Google tools to create awesome learning experiences for your students.
Technology presents us with a unique opportunity in education, an opportunity to create more dynamic learning experiences for our students. We have to start thinking differently about our assignments. One-and-done doesn’t cut it anymore. The learning needs to live, grow, connect, and go beyond traditional ideas. We need Dynamic Learning!
This series is NOT about Google or G Suite, but how to use these tools to support dynamic LEARNING in the classroom.
Dynamic Learning is at the heart of my book, Shake Up Learning: Practical Ideas to Move Learning From Static to Dynamic. It’s my passion. It’s my blood, my sweat, and frankly, a lot of tears! I want to help teachers like you to Shake Up Learning.
Don’t miss out on the FREE download for this series! The Dynamic Learning with Google Toolkit is an alignment document, a spreadsheet that shows you how the Dynamic Learning characteristics align with classroom strategies and which Google tools to use in your classroom!
Below is a video overview of the toolkit.
Fill out the form below to get access to the toolkit designed to go with this podcast series. In this Google Sheet, you will see how the Dynamic Learning characteristics align with classroom strategies and a list of recommended Google tools to help you do it!
© Shake Up Learning 2020. Unauthorized use and/or duplication of this material without express and written permission from this blog’s author and/or owner is strictly prohibited. Excerpts and links may be used, provided that full and clear credit is given to Kasey Bell and Shake Up Learning with appropriate and specific direction to the original content on ShakeUpLearning.com. See: Copyright Policy.
The post (FREE) Dynamic Learning with Google Toolkit © by Kasey Bell appeared first on Shake Up Learning.
February 9, 2020
9 TCEA Presentations You Need to See!
The post 9 TCEA Presentations You Need to See! appeared first on Shake Up Learning.
9 TCEA Presentations You Need to See!
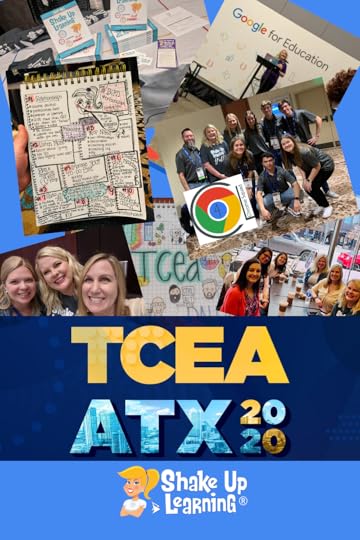 I have nine TCEA Presentations that I want to share with you this week! Yes, I said NINE!
I’m not sure how it happened, or how I made it through all of them, but it was a fantastic week of learning that I want to share with the Shake Up Learning readers.
If you aren’t familiar with TCEA, it is the Texas Computer Educators Association and an ISTE affiliate. In fact, TCEA is the second-largest edtech conference in the U.S. with more than 1,000 sessions and over 8,000 attendees!
My presentations are loaded with ideas, tips, tricks, freebies and more! I am linking each of the slide decks below.
There’s a little something in here for everyone.
Stranger Google: Crazy Tools From the Upside Down (Part 2)
Dynamic Learning with G Suite
How to Become a Google Certified Trainer
The Teacher’s Guide to Podcasting
The Learning Mixologist (with Holly Clark)
10 Google Classroom Tips You Didn’t Know
Top 10 Secrets of an Awesome Tech Coach
Digital Differentiation with Choice Boards
Top 20 Tech Tips for Teachers
I know it is not quite the same as being there in person, but I try to make my slides so that anyone can get the gist and grab a few ideas.
Don’t miss out on all the other TCEA resources and ideas shared. Check out the #TCEA hashtag for more! Sharing is caring, y’all!
9 #TCEA Presentations You Need to See! #googleedu #edtech #TCEA #gsuiteedu
Click To Tweet
Join the Shake Up Learning Book Study!
 YOU are invited to join the Shake Up Learning Book Study! I am #superexcited to launch another book study of my book, Shake Up Learning: Practical Ideas to Move Learning From Static to Dynamic.
The Shake Up Learning book was designed for book studies! I couldn’t just write a paper book. I had to make it an interactive experience and give you extra resources to go deeper and make reading the book a dynamic learning experience.
It starts on Feb. 13th! Learn more here.

Bring the Power of Shake Up Learning and Kasey Bell to Your School, District, or Event!
Ready to shake up learning in your school or at your event?
Submit this Speaking Request Form to bring Shake Up Learning to your event.
With more than fifteen years experience as a speaker, presenter, and professional learning facilitator, and fifteen years experience as an educator, Kasey brings her unique brand of practical teaching ideas, inspiration, bold personality and southern charm to every engagement. She has traveled the world delivering inspirational keynotes, workshops, and interactive conference presentations at world-renown conferences, school districts, private schools, and even hosting her own events. Kasey has spoken at ISTE, TCEA, FETC, MACUL, iPadpalooza, Google Summits, and is regularly invited by Google to present to educators around the globe.
Host of The Shake Up Learning Show
Co-host of The Google Teacher Tribe Podcast
Author of Shake Up Learning and The Teacher’s Guide to Google Classroom
Google Certified Innovator
Google Certified Trainer
ISTE Featured Voice
Edtech Influencer
Digital Innovation in Learning Award Winner in “Sharing is Caring”
Must Read EdTech Blog
Edublog Awards Finalist
Connect with Shake Up Learning


© Shake Up Learning 2020. Unauthorized use and/or duplication of this material without express and written permission from this blog’s author and/or owner is strictly prohibited. Excerpts and links may be used, provided that full and clear credit is given to Kasey Bell and Shake Up Learning with appropriate and specific direction to the original content on ShakeUpLearning.com. See: Copyright Policy.
The post 9 TCEA Presentations You Need to See! appeared first on Shake Up Learning.
February 5, 2020
The Dustin Thompson Memorial Scholarship Fund
The post The Dustin Thompson Memorial Scholarship Fund appeared first on Shake Up Learning.
It is with a heavy heart that I share this.

Dustin Thompson, Laura Thompson, and Kasey Bell
My best friend and colleague, Laura Thompson, lost her sweet husband, Dustin, on January 25, 2020. He was only 41.
Those who know Laura know she has been a dedicated teacher for over 20 years.
Dustin often told Laura, “I wish I had a teacher like you when I was in school. Someone who cared about me the way you do about your kids.”
Laura can’t think of a better way to honor Dustin’s memory than to fund a scholarship for students where she teaches, Weiss High School in Pflugerville, Texas.
Laura’s goal is to ease the financial burden of as many students as possible as they leave high school and begin their journey in trade schools or colleges.
She has requested that in lieu of flowers and other remembrances for Dustin that donations are made to help the students she cares about so much. Dustin was so proud of the work Laura did and supported her dedication to her students.
Dustin was giving, kind, authentic, and dependable. There is no better way to continue to honor him than to help a student go out into the world to make it a better place just like Dustin did.
The outpouring of love and support for Laura is a testament to the love she has for her students.
If you would like to contribute to this scholarship fund, the details are below. Thank you for all you do!
© Shake Up Learning 2020. Unauthorized use and/or duplication of this material without express and written permission from this blog’s author and/or owner is strictly prohibited. Excerpts and links may be used, provided that full and clear credit is given to Kasey Bell and Shake Up Learning with appropriate and specific direction to the original content on ShakeUpLearning.com. See: Copyright Policy.
The post The Dustin Thompson Memorial Scholarship Fund appeared first on Shake Up Learning.
February 4, 2020
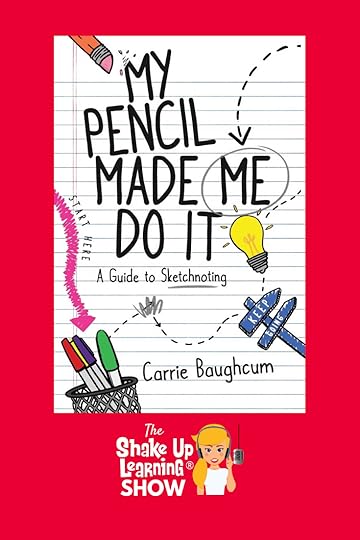
My Pencil Made Me Do It! – SULS048
The post My Pencil Made Me Do It! – SULS048 appeared first on Shake Up Learning.
It’s the first interview episode of the year y’all, and I have an amazing guest to share with you.
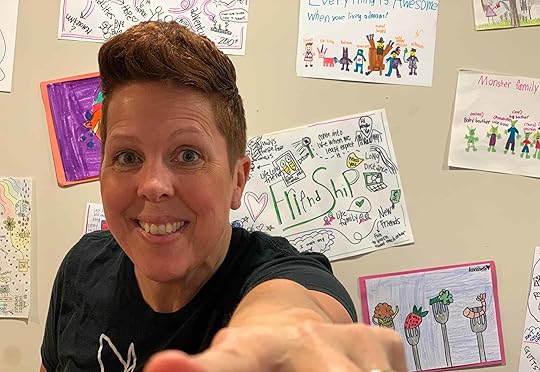
 Meet Carrie Baughcum, a special education teacher and author with a creative teaching style.
Carrie is one of the most creative teachers I know!
I would love to be in her classroom!
Learn how Carrie has used sketchnoting in her classroom, simple strategies for any teacher and teaching style, and how to spark creativity and originality in your students.
Your students will stop saying their dog ate their homework and start saying, “My Pencil Made Me Do It!”
#MyPencilMadeMeDoIt – Sketchnoting and micro-summarizing with @HeckAwesome on Episode 48 of the #ShakeUpLearning podcast!
Click To Tweet
...
Shoutout
But first, I’d like to give a Shout Out to Svitlata Hom for her super sweet and supportive email. She’s one of our Google Certification students and has been learning so many tips, tricks, and ideas for her classroom. Learn more about the Google Certification courses here.
Do you have a question or idea to share on the podcast? Leave me a message here.
Quick Tip of the Week
In your browser, use Control + F (Command + F on a Mac) to find words and phrases on any webpage. This keyboard shortcut is unbelievably helpful when you’re scrolling through really long pages of information, particularly in Google Classroom.
My Pencil Made Me Do It!
Carrie has been a special education teacher in Arlington Heights, IL, for over 20 years. She strives to integrate technology, creative thinking, a fearless attitude, the power of gamification, and endless doodles into her classroom.
Each of her students has their own strengths, weaknesses, and styles of learning, and she’s that through technology and gamification, she can engage her students in new ways.
Her path to sketchnoting started with her own children. They used to sit in the kitchen, doodling on sketchpads while Carrie made dinner and cleaned dishes. She realized that if she wanted to spend more quality time with her kids, then she needed to start sketching.
She quickly found that sketching made her heart and brain happy and incorporated her sketches into her blog posts.
Carrie also started incorporating sketching and sketchnoting into her curriculum with her students and noticed vast improvements in their behavior and retention.
After doing a ton of research on cognitive science and visual learning, and it’s relation to handwriting and drawing, she decided to put her findings and strategies into a book.
Carrie recently finished writing the book, My Pencil Made Me Do It: A Guide to Sketchnoting, which covers many of the ways teachers can and should incorporate sketchnoting into different areas of the curriculum.
She gives actionable tips on how to ask questions that elicit visual responses from students that they can then doodle or draw on their sketchpads. By having students visualize responses and then draw those visualizations, we boost brain function and retention.
Sketchnoting in the Classroom
Carrie says we should ask questions that challenge students to visualize information.
“Sketchnoting is NOT about creating something pretty and artistic. It’s about tapping into the power of the mind and connecting the mind with our hand to draw and amplify learning!”
When we doodle our learning, we are connecting both sides of the brain, the visual side and the textual side, which improves retention and recall.
Drawing can also have a very calming effect–just an added bonus for teachers and students!
Carrie suggests that teachers think of their favorite lesson, and brainstorm one or two questions to add to that would help students visualize their thinking.
The first time Carrie had an Aha! moment in her classroom was when she did a visualization exercise with her students. At first, students were reluctant to create an original response. But after questioning a student about his response and encouraging him to share with the class, other students began to share too.
She learned a valuable lesson at that moment about not underestimating her students. She shifted her mindset and gave them the opportunity to express themselves, and that shift allowed her students to bloom.
When students and teachers learn how to take risks, be vulnerable with each other, and create imperfect sketches, it creates a new culture in our classrooms. It’s this new, growth mindset that helped Carrie make a huge shift in her teaching.
@HeckAwesome joins Kasey on Episode 48 of the #ShakeUpLearning podcast to chat all things Sketchnoting. Listen in to learn how sketching connects with increased focus and learning.
Click To Tweet
Micro-Summarizing
Another concept Carrie shares in her book is an idea she calls micro-summarizing. The process of taking big concepts and having her students condense them into one or two sentences.
Sketchnoting helps us break information into important concepts and big ideas.
Rather than having our students copy notes down word for word, she promotes summarization for concept retention.
Try this: Take your traditional typed notes and cut them into strips (or write on post-it notes). Students can revise the notes and choose 1-2 sentences to create the summary.
Carrie suggests that you jump in with just one idea. Explain your understanding of sketchnoting and share with your students.
Be sure you grab a copy of Carrie’s book to learn all of her best ideas.
Check out Carrie’s YouTube channel for some great ideas on how to implement sketchnoting and micro-summarizing in your classroom.
You don’t have to have any fancy tools to start implementing sketchnoting in your classroom. A piece of paper or sketchpad and pencils, crayons, markers, any writing utensil is all you need to get your students sketching. If you have access to tablets or iPads, then there are several apps you can start your students on, but they aren’t necessary.
Carrie recommends Explain Everything and Procreate for digital sketchnotes.
Quick Note: Don’t miss the AMAZING lesson that Carrie contributed to the Shake Up Learning book!
Check back for a guest post coming soon from Carrie about why she created a learning mascot, and how she has teachers implementing them in their classrooms.
 About Carrie Baughcum
Website: carriebaughcum.com
School: Arlington Heights School District #25
Bio: Carrie Baughcum is a mother, wife, mismatch sock wearer, a self-described inspiration junkie, learning enthusiast, and most of all a passionate believer that all children can learn, we just need to find out how. As a special education teacher of 20+ years, she integrates technology, creative thinking, a fearless attitude, the power of gamification and endless doodles into her classroom. She strives every day to enhance her students’ learning while empowering them to achieve things they never knew they could do or be a part of. She is also the mother to two children, 12 and 14 years old. At home, she encourages her children to explore, learn, and try anything their imaginations can think up. Together they create and get involved in activities and experiences with exploration, creativity, problem-solving and making. Carrie shares her experiences from her classroom, her adventures, reflections on her time with her husband, children, and students by speaking and connecting with others at conferences and sharing on youtube.com/carriebaughcum and at carriebaughcum.com.
Carrie on Twitter – @HeckAwesome
Carrie on Facebook
Carrie on Pinterest
Carrie Baughcum Website
Carrie’s YouTube Channel
My Pencil Made Me Do It: A Guide to Sketchnoting by Carrie Baughcum
Podcast Question of the Week
What’s one way you could try sketchnoting in your classroom or professional life?
Post your answers in the Shake Up Learning community or on your favorite social platform.
Join our FREE Shake Up Learning Facebook group.
Post your answer to your favorite social media platform using the hashtag #ShakeUpLearning, or share it in the Shake Up Learning Community on Facebook!
© Shake Up Learning 2020. Unauthorized use and/or duplication of this material without express and written permission from this blog’s author and/or owner is strictly prohibited. Excerpts and links may be used, provided that full and clear credit is given to Kasey Bell and Shake Up Learning with appropriate and specific direction to the original content on ShakeUpLearning.com. See: Copyright Policy.
The post My Pencil Made Me Do It! – SULS048 appeared first on Shake Up Learning.
January 30, 2020
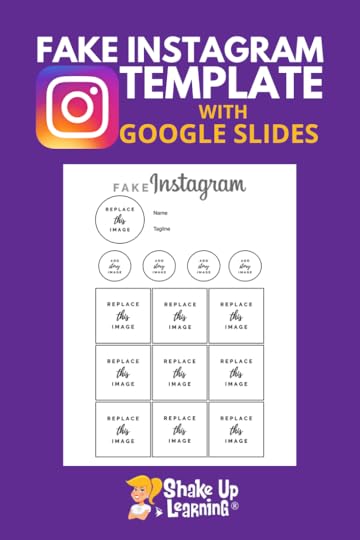
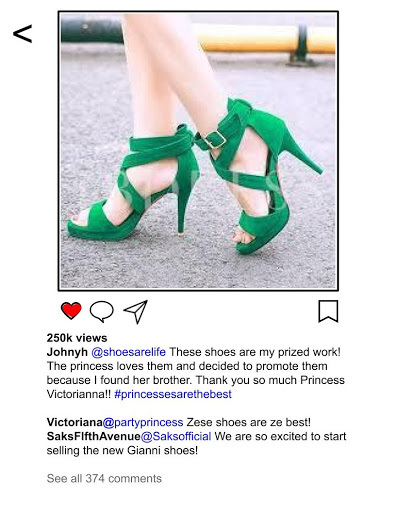
Fake Instagram Template with Google Slides (FREE)
The post Fake Instagram Template with Google Slides (FREE) appeared first on Shake Up Learning.
Engage your students with this awesome Fake Instagram Template in Google Slides from Carly Black.
 Back in episode 32 of the Shake Up Learning Show, I interviewed Lisa Johnson. Lisa shared a fake Instagram template she created in Keynote.
I knew one of our Google-loving listeners would create one for Google Slides.
Carly Black to the rescue!! Carly not only created the template, but she has also implemented it in her classroom and shares her story in the guest post below.
Carly was also featured in an “On-Air” Coaching episode of the Shake Up Learning Show. It’s my favorite coaching episode!
Fake Instagram Template with Google Slides (FREE) by @TeachMomRepeat
Click To Tweet
Guest Post by Carly Black
Fake Instagram Template with Google Slides (FREE)
Leveraging social media to teach students has been a huge win for me in the classroom. Several teachers recently reported overhearing my morning students sharing with afternoon students, “Mrs. Black let us use Snapchat today! Seriously! Our assignment was on Snapchat!” Of course, they are referring to the day I taught them how to create booksnaps. I’m forever grateful that Tara Martin taught us all how to annotate text through social media.
Imagine your mini-lesson on text annotation: you share a slide presentation walking students through the steps and examples. There are a few handouts and some notes to take. Students watch you annotate over the document camera then try it on their own in a printed story with highlighters and some color pens.
Does this sound familiar? Sure it’s a visually appealing slide show, and maybe the passages are funny, but imagine telling the kids they need cell phones today. Then add they are going to use Snapchat. It brings a whole new dynamic! They sit up and listen.
Finding ways to bring their world into the classroom for the sneaky purposes of learning will get you to that end goal every time. Of course, there was that one activity, a fake Facebook profile of a book character, that fell flat. Upon receiving the handout, a student quickly shared that they didn’t know what Facebook looked like because it was “for old people.” While I didn’t feel that old, I also realized that my lesson needed an upgrade.
This experience also made me jump into more of what the “kids are doing these days.” I had been hesitant to join social media beyond Facebook at the time. But once I joined Twitter and Instagram, a world of collaboration with teachers around the world came into view. I had no idea teachers were sharing and collaborating over social media.
I was completely blind to the Professional Learning Networks that were available to me. This is where I found Kasey and the Google Teacher Podcast. This PLN of active and engaging educators has been one of the most inspirational places for me to gain knowledge and ideas to hone my craft as an educator. Kasey’s episode 32 of the Shake Up Learning Podcast with Lisa Johnson introduced me to the amazing materials and ideas shared on her website, Tech Chef 4 U.
Lisa talked about a fake Instagram template she had created in Keynote but hadn’t figured out how to make it in Google Slides. The timing was perfect; I had been mulling over this exact idea for an upcoming class project that students could create in order to share their independent reading. After taking a look at Lisa’s example, it gave me the idea I needed to make it happen.
Storytelling with Fake Instagram
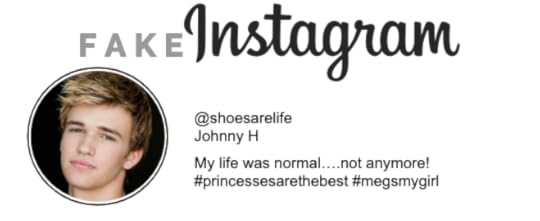
Instagram is all about telling stories. I wanted to leverage this purpose and show students how they could share their independent reading through an Instagram account. Students start by choosing the protagonist or antagonist. Inventing a profile for this character requires thinking about what that character might have to say about themself. Finish it off with a convincing profile photo, write an on-brand tagline, add a few hashtags, and include the character’s name with a handle.
When looking at an Instagram profile, there are story circles and then squares of images that represent a reverse-chronological timeline. The profile page is the first page of the fake Instagram slide deck. It includes biographical information and nine squares to represent nine of the most important events.
As guidelines for the nine images, I thought it would help students to think through the plotline. Include two from the exposition; this should show who the characters are and the setting of their story. The next four should include the inciting incident, which introduces the conflict and then three of the most important scenes from the rising action. Identify the climax and one event, each from falling action and the resolution.
Once students have mapped out their stories based on these key points, they choose images to represent them. With the built-in Unsplash add-on, inserting photos is super easy. Students can also stage their own photos if they want a specific look.
Images are only one part of this project. Students also need to write captions and relevant comments. They create handles for other characters and comment with the character’s voice demonstrating further analysis of the story. Don’t forget the hashtags! These are another thoughtful way to incorporate story elements.
This project was a big hit! The kids enjoyed the social media aspect and being creative with the handles and hashtags. The laughter was at high volume the day we worked on these in class. Even though it was an independent project, many asked neighbors or shared their creative, funny comments.
Get the Fake Instagram Template for Google Slides
Make a Copy | Use Template Link
Fake Instagram Activity in Other Subjects
This activity isn’t just for language arts.
I could see math teachers using this for specific concepts like order of operations. Each step could be represented by an image, and the caption with comments could address the math personified.
Science teachers could use a fake Instagram account to show the stages or steps in an experiment.
Both subjects, or any subject really, could ask students to research a famous person within their field. The fake Instagram account could share their accomplishments and contributions to the field of study.
If this sounds like a project you’d like to try out in your classroom, make a copy of your own fake Instagram template and give it a go. We would love to see what your students create or hear how the project worked for you. You can find me on Twitter and Instagram at TeachMomRepeat.
About Carly Black
 Twitter: @teachmomrepeat
Website: https://teachmomrepeat.com
Carly’s class blog
Location: Ashland, Ohio, USA
Title: ELA teacher
School District/Campus (or Employer): Northwestern High School
Bio: Carly Black spends her days encouraging tenth-graders in Ashland, Ohio to believe reading and writing is totally cool. At night she chases toddlers with her teacher husband and in the morning repeats the process all over again. Find the lessons and ideas she uses to encourage her students and tame her toddlers on the blog www.TeachMomRepeat.com.
Join the Google SLIDES Master Class Online Course
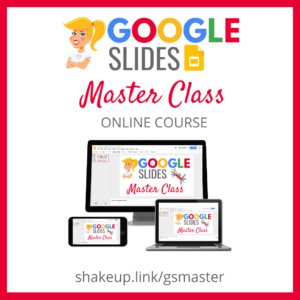
I frequently refer to Google Slides as the Swiss Army Knife of the G Suite tools because it is capable of being so much more than a presentation tool. In this course, you will learn how to use Slides in new and unexpected ways in your classroom that will engage your students and make learning more dynamic!
K-12 teachers are going to LOVE THIS COURSE!
This class is perfect for beginner to intermediate users to take their skills to the next level and become a Google Slides Master!
(Prerequisite: basic knowledge of slides, how to access and create new slides.)
Click here to learn more and to ENROLL TODAY!
Learn All About the Course
What’s Included?
Self-paced
Video-based lessons
3 BONUS Lessons!!!
Bonus 1: Stop-Motion Animation
Bonus 2: How to Create Magnetic Poetry with Slides and Drawings
Bonus 3: 50 Google Slides Lesson and Project Ideas
Supporting Resources
Best Practices and Tips
6 hours of professional learning credit
Purchase orders are accepted (Just email Kasey[at]ShakeUpLearning.com (replace [at] with @.)
Bulk license discounts
Get your whole team, campus, or district on board
Click here to learn more and to ENROLL TODAY!
Check out all of my Google Slides Resources here!
© Shake Up Learning 2020. Unauthorized use and/or duplication of this material without express and written permission from this blog’s author and/or owner is strictly prohibited. Excerpts and links may be used, provided that full and clear credit is given to Kasey Bell and Shake Up Learning with appropriate and specific direction to the original content on ShakeUpLearning.com. See: Copyright Policy.
The post Fake Instagram Template with Google Slides (FREE) appeared first on Shake Up Learning.
January 28, 2020
It’s Not About Google (Part 4: BEYOND the Walls and Due Date) – SULS047
The post It’s Not About Google (Part 4: BEYOND the Walls and Due Date) – SULS047 appeared first on Shake Up Learning.
Part 4 is finally here! Even when we love technology and Google tools, we have to remember that it’s NOT about Google.
 Our bottom line as educators is always about the learning and doing what’s best for students.
In this 4-part podcast series on Dynamic Learning with Google, Kasey shares all her favorite lesson ideas!
In part four, Kasey explains how we can go BEYOND the walls of our classrooms, and how to go BEYOND the due date and encourage students to continue learning about the things that interest them.
BONUS: Get the Dynamic Learning with Google Toolkit to help you find the best tool to support Dynamic Learning in your classroom.
Did you miss parts 1, 2, or 3?
Listen to part 1 (e44), part 2 (e45), and part 3 (e46) so you don’t miss a thing! The entire series is also available here.
Learn how you can go BEYOND the walls of your classroom with #GSuiteEdu tools in part 4 of this EPIC series!
Click To Tweet
Listen to this article:
...
Shoutout
Shoutout to Elizabeth Ledkins from our Facebook community for sharing her 60-second PD idea, a one-minute screencast tutorial. She records with Screencastify and uploads it to YouTube. Then she embeds the video in an email to teachers.
Do you have a question or idea to share on the podcast? Leave me a message here.
Quick Tip of the Week
In Google Chrome, use Incognito mode to check that your public links are accessible and shared correctly. Incognito is a unique browser window that will not automatically log you into any accounts.
In Chrome, click on the 3 dots > select New Incognito Window. (Also works on mobile.)
Or use the keyboard shortcut:
Control + Shift + N (PC and Chromebook)
Command + Shift + N (Mac)
I use this trick to check my links to Google files, Google Sites, and other links I share with the outside world. Check all the links you post for parents, or share outside of your classroom. (Here are 8 Awesome Reasons to Go Incognito.)
Please note: If you don’t have access, your Google admin can disable this feature in your school account.
Dynamic Learning with Google (Part 3)
In part four, we are moving on to our last two characteristics in the Dynamic Learning Framework, Beyond the Walls, and Beyond the Due Date. Dynamic Learning is at the heart of my book, Shake Up Learning: Practical Ideas to Move Learning from Static to Dynamic.
Google is NOT a magic solution, but it allows us to create Dynamic Learning experiences for our students.
If you missed parts 1-3, be sure to go back to episode 44 so you will get the big picture of how this all fits together!
We are going to talk about classroom strategies to help you give students a global audience for their work, meaningful connections with outside classrooms and experts, and how student portfolios can support student learning even after it has been assessed.
Get the FREE Dynamic Learning with Google Toolkit
Fill out the form below to get access to the toolkit designed to go with this podcast series. In this Google Sheet, you will see how the Dynamic Learning characteristics align with classroom strategies and a list of recommended Google tools to help you do it!
Grab a copy of the FREE Dynamic Learning with @GoogleforEdu Toolkit!!!
Click To Tweet
Beyond the Walls
I want you to think about both sides of the walls of your classroom. Bring the world to your students, and bring your students to the world! Every student in every grade should have opportunities to connect and learn globally as well as publish their work for a global and intentional audience.
Beyond the Walls with Publishing Student Work for an Expanded Audience
Do you give your students an audience for their work?
I had an eye-opening experience with my own students many years ago. Something magical happened when I had them publish their writing online where others could read and comment. Suddenly, my students wanted to revise and improve their work. Their words will continue to echo in my head, “Can I revise mine? I didn’t know anyone would read it besides you.”
Arrow to my heart! Yes, we love to believe that as teachers, we are our students’ favorite audience, but that gets old and tired, and frankly is about as inauthentic as it gets. Students can and should get feedback from others that are outside of their immediate classroom.
Before you freak out about privacy and safety, let me say that these strategies can be accomplished without any risks to privacy or safety. We do not need to share student names or faces to give them an audience for their work.
We can also take this in baby steps. Consider sharing student work in small steps and working up to a global audience. I like to refer to this as an expanded audience.
Share with a classroom on the same campus
Share with a classroom on another campus in your district or region
Share with a classroom in another state
Share with a classroom in another country
Share globally and publicly
It doesn’t have to be a perfect audience to see the impact this will have on the quality of work you receive from your students.
So how can Google tools support online publishing?
Most Google applications allow us to share with specific individuals or with a special link. Keep in mind, just because you have made a Google Doc public doesn’t mean anyone will find it. It’s more important that we think purposely about how to share and who to share it with.
My favorite method for sharing student work is on a Google Site or a Blogger blog.
Google Sites makes it easy to embed just about any of our student’s Google-created projects. However, it doesn’t have a native commenting feature that can really take things to the next level.
That’s where I give Blogger the edge. Blogger is a traditional blogging platform that allows for comment. With a blog post, we can share student work and collect feedback from other students, parents, or experts in the field of study. Comments will take things to the next level, a superpower in publishing!
For students under 13, this should be managed by the teacher on a teacher blog. Over 13 students should be given their own space (monitored and assessed) to share their work, their reflections on learning, and respond to feedback.
Remember, the focus of this post is about using Google tools, but there are hundreds of other tools from which to choose.
Again, we don’t have to share names or faces to give students a new audience for their work. In fact, using pen names can be a fun twist, especially for younger students.
But our older, secondary students need to be able to share and take claim to their accomplishments. They will be Googled before they are interviewed for their first job or when they apply to college. I want these searches to reflect what students have learned and created, not their latest Tik Tok video.
YouTube is the second-largest search engine in the world and can be a great place to showcase student work and get feedback. But one big drawback is the junk that exists on YouTube, and the trolls who leave irrelevant comments.
However, I have seen many schools create a campus or classroom YouTube channel sharing student work with great success. Don’t count it out just yet. Just be purposeful, mindful, and teach your students how to manage this world. They will need those digital citizenship skills!
(See also Every Student Should Publish for the World.)
Do you give your students an audience for their work? YOU SHOULD! Here’s how:
Click To Tweet
Beyond the Walls with Global Connections
Let’s explore ways to bring the world into our classrooms!
Google tools naturally fit into this equation. When it comes to bringing in outside authors, experts, virtual tours, or even connecting to other classrooms, Google Hangouts Meet makes this a breeze. These experiences should be teacher-led to ensure the activity is safe and purposeful.
No matter what you are studying in your classroom, there is probably an outside connection that you can make to enrich this experience. And guess what? The experts and authors that we often think are unreachable are actually reachable! In this connected world, most people have an online presence or social account. All you have to do is ask!
These connections do not require any funding, permission forms, yellow busses, or any fancy equipment. All you need is an internet connection and a device with a camera.
Mystery Hangouts are particularly great for elementary grade levels. In a Mystery Hangout, your classroom will video chat with another classroom located in another region, state, or country. Using questioning skills and context clues, students must figure out where the other class is located. These are super fun!
Beyond the Due Date
I know this sounds scary, but I promise it isn’t! Consider allowing students to continue the work that interests them beyond the final assessment of the assignment or task. Thinking, learning, and exploring shouldn’t be stifled simply because it was time to turn it in.
When we see students showing sparks of interest in a project–when they don’t want to stop learning–we must capitalize on these moments! Often, the act of turning in an assignment can stifle their passion, learning, and creativity.
Think about those sparks in your classroom, ask them about it, encourage them, coach them.
Let me be clear. This strategy is not about giving students extra time to finish assignments. That’s a discussion for another day. This is about seizing opportunities! Don’t you wish every student was excited to learn?
The other thing to know about this Dynamic Learning characteristic is it is rarely something that is the complete focus of your lesson, but it can easily be embedded in PBL, especially Genius Hour. It is more about capitalizing on the learning sparks we find in our students.
Beyond the Due Date with Student Portfolios
Portfolios are great for showcasing student work and growth over time, but they can also be a fantastic way for students to document and reflect on their interests and passions.
Google Sites is the perfect tool for student portfolios. As I mentioned earlier, Google Sites makes it super easy to embed work created in other Google applications, like Docs, Slides, Sheets, and more.
Check out this post on How to Create Powerful Student ePortfolios with Google Sites, by Mike Mohammed.
Blogger is also a great choice for teachers to manage portfolios or from students 13 and older to manage their own.
Another favorite tool is Google Slides! Slides is probably the most flexible tool in G Suite. But it doesn’t allow embedding like Sites and Blogger.
A student interest portfolio should definitely go beyond one and done, and be a long term project. It’s the perfect project for students who finish early, have extra time, or need enrichment. But it’s even better for students that need time and encouragement to find what they love.
Beyond the Due Date with Mentorship and Coaching
Once we have identified those sparks in our students, we can take on the role of a coach or mentor.
One of the best ways to cultivate passions within our students is through coaching and mentoring. This may come directly from the teacher where appropriate.
When we find out what interests our students, we can talk about it. This might be a few seconds in the hallway to check-in, build that relations, and fan the flame of that learning spark.
For instance, I may ask a student if they read the book I recommended, visited a website I shared or connected with a student with the same interest. We can continue to share resources to help the student take their learning further.
Just encouraging students and helping them find their passions can be a game-changer for many kiddos.
Building these relationships with your students will help them find things that interest them, not just what adults tell them they should be interested in.
How Will You Shake Up Learning?
We have covered A LOT of ground in this 4-part series on Dynamic Learning with Google. I have shared a ton of practical ways to use Google tools to support the Dynamic Learning Framework.
Don’t forget to grab a copy of the FREE Dynamic Learning with Google Toolkit (form above).
How will you Shake Up Learning this year? How will you use the Dynamic Learning Framework in your classroom? I know you have some amazing ideas! Please share those with me in the comments below, or leave me a voice message here.
If you missed the first three parts, they are available here:
Part 3: BEYOND the Grade Level and Subject
Podcast Question of the Week
What is one way you can globally connect your students to other classrooms, authors, or experts?
Post your answer to your favorite social media platform using the hashtag #ShakeUpLearning, or share it in the Shake Up Learning Community on Facebook!
 The Shake Up Learning Book Study
Don’t miss our next book study! It’s completely FREE, and it’s all available online!
You can also enter to win an autographed copy of Shake Up Learning!
© Shake Up Learning 2020. Unauthorized use and/or duplication of this material without express and written permission from this blog’s author and/or owner is strictly prohibited. Excerpts and links may be used, provided that full and clear credit is given to Kasey Bell and Shake Up Learning with appropriate and specific direction to the original content on ShakeUpLearning.com. See: Copyright Policy.
The post It’s Not About Google (Part 4: BEYOND the Walls and Due Date) – SULS047 appeared first on Shake Up Learning.
It’s Not About Google (Part 4) – SULS047
The post It’s Not About Google (Part 4) – SULS047 appeared first on Shake Up Learning.
Part 4 is finally here! Even when we love technology and Google tools, we have to remember that it’s NOT about Google.
Our bottom line as educators is always about the learning and doing what’s best for students.
In this 4-part podcast series on Dynamic Learning with Google, Kasey shares all her favorite lesson ideas!
In part four, Kasey explains how we can go BEYOND the walls of our classrooms, and how to go BEYOND the due date and encourage students to continue learning about the things that interest them.
BONUS: Get the Dynamic Learning with Google Toolkit to help you find the best tool to support Dynamic Learning in your classroom.
Did you miss parts 1, 2, or 3?
Listen to part 1 (e44), part 2 (e45), and part 3 (e46) so you don’t miss a thing! The entire series is also available here.
Learn how you can go BEYOND the walls of your classroom with #GSuiteEdu tools in part 4 of this EPIC series!
Click To Tweet
Listen to this article:
...
Shoutout
Shoutout to Elizabeth Ledkins from our Facebook community for sharing her 60-second PD idea, a one-minute screencast tutorial. She records with Screencastify and uploads it to YouTube. Then she embeds the video in an email to teachers.
Do you have a question or idea to share on the podcast? Leave me a message here.
Quick Tip of the Week
In Google Chrome, use Incognito mode to check that your public links are accessible and shared correctly. Incognito is a unique browser window that will not automatically log you into any accounts.
In Chrome, click on the 3 dots > select New Incognito Window. (Also works on mobile.)
Or use the keyboard shortcut:
Control + Shift + N (PC and Chromebook)
Command + Shift + N (Mac)
I use this trick to check my links to Google files, Google Sites, and other links I share with the outside world. Check all the links you post for parents, or share outside of your classroom. (Here are 8 Awesome Reasons to Go Incognito.)
Dynamic Learning with Google (Part 3)
In part four, we are moving on to our last two characteristics in the Dynamic Learning Framework, Beyond the Walls, and Beyond the Due Date. Dynamic Learning is at the heart of my book, Shake Up Learning: Practical Ideas to Move Learning from Static to Dynamic.
Google is NOT a magic solution, but it allows us to create Dynamic Learning experiences for our students.
If you missed parts 1-3, be sure to go back to episode 44 so you will get the big picture of how this all fits together!
We are going to talk about classroom strategies to help you give students a global audience for their work, meaningful connections with outside classrooms and experts, and how student portfolios can support student learning even after it has been assessed.
Get the FREE Dynamic Learning with Google Toolkit
Fill out the form below to get access to the toolkit designed to go with this podcast series. In this Google Sheet, you will see how the Dynamic Learning characteristics align with classroom strategies and a list of recommended Google tools to help you do it!
Grab a copy of the FREE Dynamic Learning with @GoogleforEdu Toolkit!!!
Click To Tweet
Beyond the Walls
I want you to think about both sides of the walls of your classroom. Bring the world to your students, and bring your students to the world! Every student in every grade should have opportunities to connect and learn globally as well as publish their work for a global and intentional audience.
Beyond the Walls with Publishing Student Work for an Expanded Audience
Do you give your students an audience for their work?
I had an eye-opening experience with my own students many years ago. Something magical happened when I had them publish their writing online where others could read and comment. Suddenly, my students wanted to revise and improve their work. Their words will continue to echo in my head, “Can I revise mine? I didn’t know anyone would read it besides you.”
Arrow to my heart! Yes, we love to believe that as teachers, we are our students’ favorite audience, but that gets old and tired, and frankly is about as inauthentic as it gets. Students can and should get feedback from others that are outside of their immediate classroom.
Before you freak out about privacy and safety, let me say that these strategies can be accomplished without any risks to privacy or safety. We do not need to share student names or faces to give them an audience for their work.
We can also take this in baby steps. Consider sharing student work in small steps and working up to a global audience. I like to refer to this as an expanded audience.
Share with a classroom on the same campus
Share with a classroom on another campus in your district or region
Share with a classroom in another state
Share with a classroom in another country
Share globally and publicly
It doesn’t have to be a perfect audience to see the impact this will have on the quality of work you receive from your students.
So how can Google tools support online publishing?
Most Google applications allow us to share with specific individuals or with a special link. Keep in mind, just because you have made a Google Doc public doesn’t mean anyone will find it. It’s more important that we think purposely about how to share and who to share it with.
My favorite method for sharing student work is on a Google Site or a Blogger blog.
Google Sites makes it easy to embed just about any of our student’s Google-created projects. However, it doesn’t have a native commenting feature that can really take things to the next level.
That’s where I give Blogger the edge. Blogger is a traditional blogging platform that allows for comment. With a blog post, we can share student work and collect feedback from other students, parents, or experts in the field of study. Comments will take things to the next level, a superpower in publishing!
For students under 13, this should be managed by the teacher on a teacher blog. Over 13 students should be given their own space (monitored and assessed) to share their work, their reflections on learning, and respond to feedback.
Remember, the focus of this post is about using Google tools, but there are hundreds of other tools from which to choose.
Again, we don’t have to share names or faces to give students a new audience for their work. In fact, using pen names can be a fun twist, especially for younger students.
But our older, secondary students need to be able to share and take claim to their accomplishments. They will be Googled before they are interviewed for their first job or when they apply to college. I want these searches to reflect what students have learned and created, not their latest Tik Tok video.
YouTube is the second-largest search engine in the world and can be a great place to showcase student work and get feedback. But one big drawback is the junk that exists on YouTube, and the trolls who leave irrelevant comments.
However, I have seen many schools create a campus or classroom YouTube channel sharing student work with great success. Don’t count it out just yet. Just be purposeful, mindful, and teach your students how to manage this world. They will need those digital citizenship skills!
(See also Every Student Should Publish for the World.)
Do you give your students an audience for their work? YOU SHOULD! Here’s how:
Click To Tweet
Beyond the Walls with Global Connections
Let’s explore ways to bring the world into our classrooms!
Google tools naturally fit into this equation. When it comes to bringing in outside authors, experts, virtual tours, or even connecting to other classrooms, Google Hangouts Meet makes this a breeze. These experiences should be teacher-led to ensure the activity is safe and purposeful.
No matter what you are studying in your classroom, there is probably an outside connection that you can make to enrich this experience. And guess what? The experts and authors that we often think are unreachable are actually reachable! In this connected world, most people have an online presence or social account. All you have to do is ask!
These connections do not require any funding, permission forms, yellow busses, or any fancy equipment. All you need is an internet connection and a device with a camera.
Mystery Hangouts are particularly great for elementary grade levels. In a Mystery Hangout, your classroom will video chat with another classroom located in another region, state, or country. Using questioning skills and context clues, students must figure out where the other class is located. These are super fun!
Beyond the Due Date
I know this sounds scary, but I promise it isn’t! Consider allowing students to continue the work that interests them beyond the final assessment of the assignment or task. Thinking, learning, and exploring shouldn’t be stifled simply because it was time to turn it in.
When we see students showing sparks of interest in a project–when they don’t want to stop learning–we must capitalize on these moments! Often, the act of turning in an assignment can stifle their passion, learning, and creativity.
Think about those sparks in your classroom, ask them about it, encourage them, coach them.
Let me be clear. This strategy is not about giving students extra time to finish assignments. That’s a discussion for another day. This is about seizing opportunities! Don’t you wish every student was excited to learn?
The other thing to know about this Dynamic Learning characteristic is it is rarely something that is the complete focus of your lesson, but it can easily be embedded in PBL, especially Genius Hour. It is more about capitalizing on the learning sparks we find in our students.
Beyond the Due Date with Student Portfolios
Portfolios are great for showcasing student work and growth over time, but they can also be a fantastic way for students to document and reflect on their interests and passions.
Google Sites is the perfect tool for student portfolios. As I mentioned earlier, Google Sites makes it super easy to embed work created in other Google applications, like Docs, Slides, Sheets, and more.
Check out this post on How to Create Powerful Student ePortfolios with Google Sites, by Mike Mohammed.
Blogger is also a great choice for teachers to manage portfolios or from students 13 and older to manage their own.
Another favorite tool is Google Slides! Slides is probably the most flexible tool in G Suite. But it doesn’t allow embedding like Sites and Blogger.
A student interest portfolio should definitely go beyond one and done, and be a long term project. It’s the perfect project for students who finish early, have extra time, or need enrichment. But it’s even better for students that need time and encouragement to find what they love.
Beyond the Due Date with Mentorship and Coaching
Once we have identified those sparks in our students, we can take on the role of a coach or mentor.
One of the best ways to cultivate passions within our students is through coaching and mentoring. This may come directly from the teacher where appropriate.
When we find out what interests our students, we can talk about it. This might be a few seconds in the hallway to check-in, build that relations, and fan the flame of that learning spark.
For instance, I may ask a student if they read the book I recommended, visited a website I shared or connected with a student with the same interest. We can continue to share resources to help the student take their learning further.
Just encouraging students and helping them find their passions can be a game-changer for many kiddos.
Building these relationships with your students will help them find things that interest them, not just what adults tell them they should be interested in.
How Will You Shake Up Learning?
We have covered A LOT of ground in this 4-part series on Dynamic Learning with Google. I have shared a ton of practical ways to use Google tools to support the Dynamic Learning Framework.
Don’t forget to grab a copy of the FREE Dynamic Learning with Google Toolkit (form above).
How will you Shake Up Learning this year? How will you use the Dynamic Learning Framework in your classroom? I know you have some amazing ideas! Please share those with me in the comments below, or leave me a voice message here.
If you missed the first three parts, they are available here:
Part 3: BEYOND the Grade Level and Subject
Podcast Question of the Week
What is one way you can globally connect your students to other classrooms, authors, or experts?
Post your answer to your favorite social media platform using the hashtag #ShakeUpLearning, or share it in the Shake Up Learning Community on Facebook!
The Shake Up Learning Book StudyDon’t miss our next book study! It’s completely FREE, and it’s all available online!
You can also enter to win an autographed copy of Shake Up Learning!
© Shake Up Learning 2020. Unauthorized use and/or duplication of this material without express and written permission from this blog’s author and/or owner is strictly prohibited. Excerpts and links may be used, provided that full and clear credit is given to Kasey Bell and Shake Up Learning with appropriate and specific direction to the original content on ShakeUpLearning.com. See: Copyright Policy.
The post It’s Not About Google (Part 4) – SULS047 appeared first on Shake Up Learning.