
Becca Hillburn's Blog, page 50
November 25, 2015
Small Business Saturday
This Thursday is Thanksgiving, and I know many of you who celebrate it will be spending it with your family and loved ones. Following that are Black Friday, Small Business Saturday, and Cyber Monday, which I'm sure at least a few of you also 'celebrate'.
For many, small business means the local mom and pop shops in our towns, stores that have been around for decades, and that's great. But small business ALSO includes digital storefronts such as mine. If you've made a vow to shop local, please don't disclude online shops- check (or ask) for location information. Many of us cannot afford a physical storefront of our own, and many brick and mortar shops aren't willing to pay fair prices for our work without extreme markup on their end. Some aren't willing to carry our work at all, even those that advertise that they sell locally produced items! The only real option for selling our work and making a living is through is a digital storefront.
If you love giving unique gifts, purchasing from an artist's digital storefront is a great way to give something that's one of a kind. From Christmas commissions of kids, pets, couples, and more to hand bound mini comics assembled with love, or unique prints to deck the walls of a teen's room, taking your Small Business Saturday shopping online can really land you something special.
Some notes on buying from online shops:
If you want a commission, please order it BEFORE December. Every year, I get a couple last minute Christmas commissions the week before Christmas, and in the past, I've ruined my visit with family by trying to juggle last minute Christmas commissions with Christmas shopping and spending time with my family. While the thought (and the money) are both very appreciated, I would appreciate it even more (and save both of us the overnight shipping costs) if orders were placed in the last week of November, or the first week of December, and I think many of my artist friends feel the same. This gives us time to do a wonderful job on your custom art, send it off, and for you to receive it so you can wrap it up for your winter holiday gift giving.
Regular shop orders are a little different- up until I leave for Louisiana in mid December leaves me plenty of time for me to pack and ship your order to you, and I don't mind mailing copies of 7" Kara up into Christmas week, as I leave copies at my mom's house.
If You're Buying in Bulk, Please Email the Shopowner Beforehand
Some creators don't necessarily keep a lot of stock on hand at any one time, some need advance notice in order to make enough for a bulk order. Some are willing to do reduced or wholesale rates, and some may need to make shipping arrangements. If you're buying in bulk (lots of grandchildren, nieces or nephews, stocking stuffers, gifts for teammates or co workers), please let the shop owner know ahead of time what you have in mind. Many are quite happy to accommodate your requests!
Your Shopowner/Artist is a Person Too!
We wear many hats as small businesses- creative team, production, promotion, site maintenance, inventory, and mistakes sometimes happen! If we fail to respond within a couple days, it's alright to send us another email or message, sometimes emails end up missorted into the spam folder, or sometimes your message may not get delivered the first time.
If you're a reader of this blog, now would be an EXCELLENT time to peruse my shop. You can take advantage of my Small Business Saturday coupon code for 20% off (thinkdigital) or my Cyber Monday code for 30% off (shophandmade) and your order not only helps to support this blog (as always) but it helps me purchase airfare home to visit my family for the holidays, it keeps my cat in kibble, and it enables me to continue to produce content and art for you to enjoy. By ordering now, I have plenty of time to lovingly package your order and send it out to you so that it can arrive in time for Christmas, with no need for rush shipping.
Due to a combination of untimely hand injury and website maintanence, I'm still getting everything updated, but the shop should be good to go by Saturday.
Mini comics and Ashcans:
Favorite Fictional Femmes
Magical Girl March
Artistically Challenged (2014-2015 sketchbook)
Japantrip
Another Year of Watercolor (Hardbound watercolor collection from 2014-2015)
Comics:
7" Kara (comes with your choice of wooden Kara charm)
Chainmail Bikini
Wooden Charms (available 3 ways- phonecharm, keychain, or necklace)
Utahraptor
Pterodactyl
Raccoon
Red Panda
Acorn
Leaf
Sabertooth Tiger
Jackalope
Llamas
Kara with Acorn
Kara head
Sassy Buttons:
Bored with Boys
Cuties Makin' Comics
Just Nope
Don't Touch
Shonen Hero
I'm Not Your Baby
Go Away
Shoujo Heroine
You Don't Know Me
Don't Wanna
I Got This
Former Shoujo Heroine
Never Not Cute
Stickers and Sticker Sets
Mini Prints
Dino Mini Print Set
Cowgirls Mini Prints
Individual Chibi Mini Prints
Original Art
Commissions
For detailed commissions, or commissions with multiple characters, please email me in advance for a quote.
8"x8" Mini Watercolor Commission
10"x14" Watercolor Commission
Copic Marker Illustration
Physical Stores that Carry My Work:
Hastings (Nashville, TN)
Brainfreeze Comics (Nashville, TN)
Less than 100 Pop Up Shop (New Orleans, La)
Other Artists and Creators
I'm not the only artist with a digital storefront who could benefit from your support this holiday season! Check out these other fantastic artists and crafters, and make your holidays a little more handmade.
Comics and Art
Fine Sometimes Rain
JLMK Art
Altar Girl
Vanessa Satone
ZambiCandy (also has a lot of homegoods and apparel!)
Bekyoot (another shop with homegoods and apparel options!)
Zorilita
Chromatic Press (small comic publisher)
Italsma
Paragon Ketch
ElectricAbyss
Aisazia
Cowboy House (comic subscription service!)
Mike Freiheit
Goni Montes
Browsable:
Gumroad- mini comics, Photoshop brushes, and other downloadables
Fiber Arts
Merry Manias
Household Goods
Pixel&Print
TofuBeast
JantheSpinner
Kimchi Kawaii (phone cases and boxes)
Plushies and Kid's Toys
BeeZeeArt
Giggle Tree
Gentle Moon Bell (custom plushes)
Clothes
SnortMonster
YYYYs
Knot Fade Away (knit goods)
BriAbby (knit goods)
Jewelry
tittybats
Aimee Petkus (I know her site looks SUPER professional, but I assure you, it's a two person operation, one Aimee and one Greg)
Beth Cyr Jewelry
C'lay La Vie (clay jewelry)
Indie Games
http://itch.io/
2 Player Productions
The Dream Machine
Brian Wolf (Tabletop games)
Tech
The Color Hug
Small Business Saturday isn't just for your local brick and mortar mom and pop shops. There are lots of fantastic small businesses that do the majority of their business online. These online shops are artists, skilled crafters, designers, and programmers who are all trying to make a living from their digital small business. By purchasing directly from their shops, you're ensuring that these people get the majority of the profit for their hard work, rather than the much smaller margins that selling wholesale to local retailers often demand. Your order is often one of a kind and customizable, and it may not be available in any physical storefronts or in mass quantity. When you want to shop Small Business, please also remember to consider ONLINE small businesses, especially during the holidays.
Please consider donating to this blog or purchasing from Natto-shop (http://nattosoup.com/shop) if you want me to continue publishing quality content. All materials tested were purchased from my own pocket. Keep on Truckin' Nattosoup is not under any sponsorship.


November 23, 2015
Holiday Gift Guide: Alcohol Markers for the Aspiring Artist
I think MOST of my readers have found this blog while searching for information on alcohol based markers like Prismacolor, Spectrum Noir, Copic, and Shin Han Twin Touch. While I've covered a wide variety of brands individually (check out my review section!), and I've done gift guides for young artists (link) in the past, I had yet to do a marker guide, let alone a marker gift guide. Whether you're a teenager or an undergrad asking for markers as a present this upcoming holiday season, or a parent or relative trying to purchase markers for someone new to alcohol markers, I hope this post, which is mostly a list with some explanation, is useful to you.
There are a lot of items on this list, and while I recommend all of them individually, don't let the length intimidate you. Where applicable, I explain when items are duplicates, or perform similar functions.
Most of my links in this post are to DickBlick and Amazon. Whenever possible I tried to link to DickBlick, as I regularly buy my art supplies from them, and I think they're fantastic overall- cheap prices, lots of openstock options, fast shipping, good customer service. When that is NOT possible, I do provide my Amazon affiliates link, although you may be able to find those products in person in craft and hobby stores like Michaels, or brick and mortar art supply stores. DickBlick and Amazon do pay me a percentage for sales, money earned from that goes to blog upkeep, purchasing supplies to review, and minor reimbursement for time spent writing.
How to Use This Gift Guide
I recommend right clicking links and hitting Open in New Tab, as there are A LOT of links.
If you are the giftee:
I recommend you make wishlists on Blick and Amazon, and share those with your 'gift'er' so they can easily purchase your present. By creating a wishlist, you can share your selections with several people, which is perfect if say, your parents and your younger siblings are all chipping in to buy you markers.
If you are the gifter:
Sites like DickBlick offer bulk savings for many of the brands they carry, so make sure you take advantage of that if possible. They also offer free shipping once you've hit a certain price point, so you may want to take advantage of that as well, especially for heavier items. You can do both of these things by making your purchase in one lump sum, if possible. DickBlick takes credit cards and Amazon Payments.
If you are buying for yourself:
I recommend you make a wishlist, and any time you're shopping at either site, you pick a couple items from the list. This way, you can spread the cost of your purchase across several months, slowly collecting markers and finding out which ones you still need to buy, based on your needs as well as my recommendations.
Back when I lived near a DickBlick, and had access to openstock Copics (all the stores around here lock them up), I'd buy myself a new color every time I visited the store. Now that I have most of the Copic colors I want, I've started filling in the color gaps with Shin Han Twin Touch markers, Blick Studio Brush markers, and Prismacolor Premier markers. I like to buy Prismacolor markers openstock- one or two every time I buy something from DickBlick, one or two every time I visit my local Pla-Za or Jerry's Artarama. While I may spend a bit more by purchasing openstock, I am getting colors I know I need, rather than a set of colors I may find difficult to use.
Why Alcohol Based Markers? Aren't Waterbased Good Enough?
While there are many FANTASTIC waterbased markers out there, the short answer is no, not really. Waterbased markers are prone to tearing up your paper, are difficult to blend, and work best on very specific types of paper. While they are often much cheaper than alcohol based markers, they have a high learning curb, and you usually see your best results after years of practice, or after learning how to use alcohol markers.
Alcohol markers on the other hand are quick drying, do not abrade paper surfaces, come in a wide variety of colors, and are often refillable. These days, alcohol based markers are available at a variety of stores, from Michael's to your local art supply shop, with two of the biggest and most common brands being Copic and Prismacolor.
You may think (or you may have been informed) that Copic is the end all, be all for alcohol based markers. While Copic markers are fantastic, there are plenty of fantastic alternatives available, and even amongst Copic brand markers, there's a degree of variety. Although Copic, as a whole, has a huge variety of colors to choose from, not every model of marker offers all the colors, so if you're planning your colors ahead of time, it pays to check and make sure that the colors you want are available in the markers you can afford, or plan to purchase.
My personal preference are Copic Sketch or Copic Ciao. When I first started collecting Copic markers, Copic had not released their Ciao line, but over the years I've written about alcohol markers, I've purchased a few Ciaos to test, and I've found them to be nearly as good as the Sketch markers. All of Copic's markers are refillable, and feature replaceable nibs, which makes these markers a longterm investment.
As Copic markers are on my recommended list, and they're both commonly available and offer a confusing amount of options, I'm going to briefly go over the major types.
Copic Original
Comes with a bullet nib and a chisel nibNibs are replaceable, wide variety of nib types to use
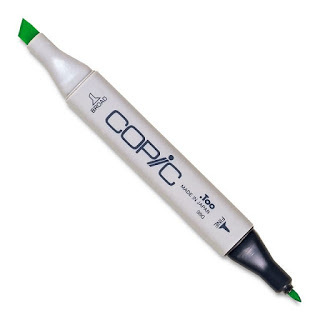 Image Source
Copic Sketch
Comes with chisel nib and super brush nibNibs are replacable, variety of replacements availableLargest color selection availableMost popular type of Copic
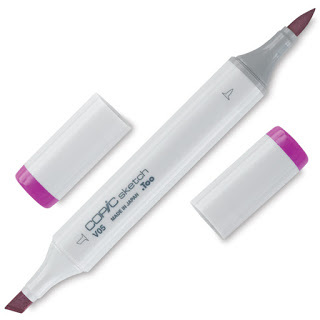 Image Source
Copic Ciao
comes with Chisel and superbrushreplacement nibs availablegreat way to affordably start a collection
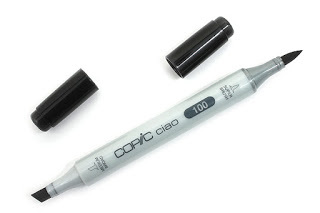 Image Source
Copic Wide
Comes with angled chisel nibReplacable nibs, only a couple nib optionsSmallest color family availableUseful for covering large areas of color
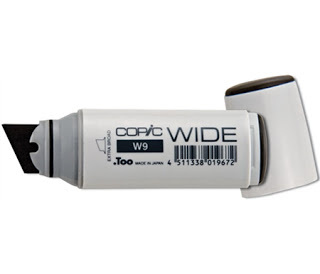 Image Source
Various Inks- Used to refill your markers, but you can also paint with it if you wish
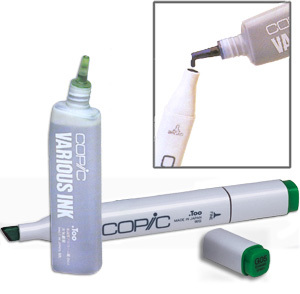 Image Source
Copic Wide, Copic Sketch, and Copic Original also come with blank markers, so if there's a color you like that's available in Various Ink, you can fill your own markers. I do this with Copic Wides, to make the colors I need for alcohol ink washes.
Copic Ciao Markers- refillable markers with replaceable nibs
Absolute Must- Necessary for Maintaining Your Marker Collection
Copic Ciao Colorless Blender- $3.59 on DickBlickColorless Blender Refill- $6.29 on DickBlick (will refill your Colorless Blender marker several times though, so it's definitely worth the investment)
Replacement superbrush nibs- $7.39 on Amazon Prime (free two day shipping)
Copic nib tweezers- $8.12 on Amazon with free shipping
Recommended Sets
Skintone Basics- Pick the one you feel will best suit your needs.
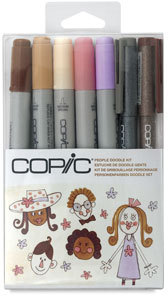 Image Source
Doodle Pack- People - Includes 5 markers, and 2 Copic-proof Multiliners, black and dark brown- $23.93 (DickBlick)
OR
Copic Ciao Markers, Skin, 6 Pack (just markers, includes )- $32.94 (Amazon)
Basic Starter Set:
 Image Source
12 Piece Basic Set (Includes Blue Violet, Violet, Shock Pink, Lipstick Red, Cadmium Orange, Yellow, Yellowish Green, Forest Green, Blue Green, Ultramarine, Burnt Umber, and Black. ) - $43.11
Additional Useful Colors for Skin (openstock from DickBlick) $3.59- Augment as you see necessary, or discover a need.
E57
E37
E59
E79
E35
Colors for Blending, Shading, and/or adding details to skin:
Openstock Ciaos are $3.59 each at DickBlick, select those that seem relevant to your needs.
R000-
BG10
B00
E02
BV23
V01
RV21
YR02
YG23
R11
RV000
If you'd like to purchase a single set that should cover your basic color needs for the first couple years of using alcohol markers, and you don't want to purchase markers piecemeal openstock every time you visit an art store (it's how I collect markers, btw), I recommend
Copic Ciao 36 marker set D, 36 slot wallet included- $109.98 on Amazon
Keep in mind that when buying multiple sets, there are repeat colors, so you will end up with duplicates.
Blick Studio Brush Markers
I highly recommend you read my review (link) on Blick Original Studio Markers, Blick Brush Markers, and Utrecht Design Markers, but if you're short on time, take the fact that I'm mentioning these markers in this Holiday Gift Guide as an endorsement!
Blick Studio Brush markers are not refillable, and you can't replace the nibs, but the brush nib is almost as good as the Copic Super brush nib on Copic Ciao and Copic Sketch markers, and they make a fine compliment to your marker collection.
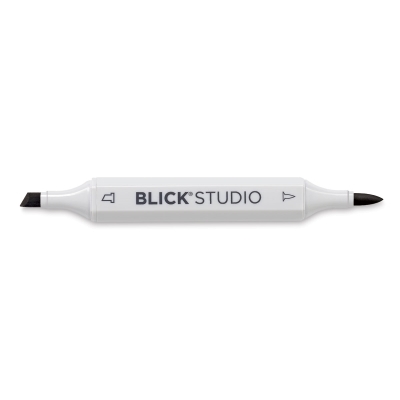 Image from DickBlick
 Image from DickBlick
If you want to buy many alcohol based markers at one time, and you'd like to do so affordably, Blick's Studio Brush markers are a great way to build up a collection. I recommend you use these markers to augment your Copic Ciao collection, and replace Blick Studio Brush markers as they run out with Copic Sketch or Copic Ciao, both of which are refillable.
Studio Brush Markers tend to be a little less saturated than Copic or Prismacolor markers, so I recommend staying away from very saturated colors like purples and reds if you can afford them elsewhere.
Recommended Colors:
List price is $2.99, cheaper if you buy in bulk (12+ markers) or in sets.
Basic Gray:
1
2
3
4
5
6
Apple Green
Coral Pink
Ink Blue
Warm Black
Yellow Ochre
Wine
Warm Gray:
20%
40%
70%
80%
True Blue
Brick Red
Prismacolor
Prismacolor markers come in two styles- Prismacolor Double Ended Brush Tip Markers and Prismacolor Double Ended Art Markers. Don't let the name fool you- for artists and illustrators, you will probably want the Brush Tip Markers over the Double Ended Art Markers, but I do wish Prismacolor would mash up the best of both worlds, and offer a brush tip marker that ALSO has their chisel tip, as it's the best I've ever encountered.
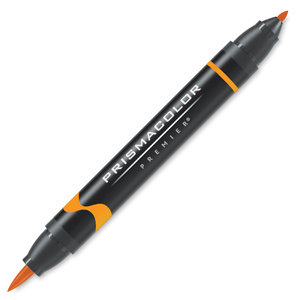 Prismacolor Double Ended Brush Tip Marker- Photo from DickBlick
 Prismacolor Double Ended Art Marker- Photo from DickBlick
Like Blick Studio Brush Markers, Prismacolor markers are not refillable, and do not have replacable nibs. They tend to shine at saturated, intense colors such as yellow greens, yellows, and purples, areas where both Copic and Blick Studio Brush markers fall flat.
Recommended Sets:
If you'd prefer to buy your grays as a set, French grays are a lovely alternative to warm grays (or addition, if you do a lot of architectural work), and can be used to shade skintones, or to stretch a limited range or skintones.
French Grays, set of 12 - $26.69 on DickBlick
At DickBlick, Prismacolor's Brush markers are listed at $3.19, but the first bulk pricebreak starts at 6 markers ($2.98), and the second discount starts at 12 ($2.87)
Note: I have not tested the entire range of Prismacolor markers, and my recommendations are based on my general familiarity with what the markers excel at, my familiarity with the shortcomings of Copic Ciao and Blick Studio brush markers, and Blick's flawed color chip representations on site. If you've already ordered a number of Copic or Blick Studio Brush reds, hold off ordering Prismacolor reds until you know for certain whether you really do need more.
Recommended Open Stock Colors
Cherry
Crimson Red
Green Tea
Magenta
Mineral Orange
Parma Violet
Parrot Green
Pale Vermillion
Rhodamine
If You Like Neons-
Neon Blue
Neon Green
Neon Orange
Neon Pink
Neon Yellow
Neon Yello Green
Marker Accessories
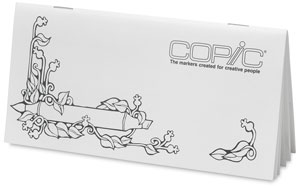
 Cover of Copic Swatch Book. Photo from DickBlick
 Interior of Copic Swatch Book. As you acquire markers, you use the chisel nib to fill in the appropriate square. I apply my Blick Studio Brush or Prismacolor markers to a piece of sticker paper, and apply that in the appropriate color family. Keeping track of your markers lets you know which you already own, and where you need to focus your buying power. Photo from DickBlick
Copic Swatch Book- $5.19
Marker Cases and Storage
Travel case
Alvin Prestige Marker- Case holds 48 markers- great for a mixed set of Prismacolor, Blick Studio Brush Markers, and Prismacolor markers. Sized to hold larger markers like Prismacolor. $21.77 on DickBlick
Spectrum Noir Marker case- holds approx 36 markers, depending on what you have $3.93 on DickBlick
Box storage
ArtBin Marker Storage Satchel- Holds up to 64 markers, $19.57 on DickBlick
Display storage
Spectrum Noir marker storage trays- six tray set holds 72 markers on display. For use on desktop. $19.99 on DickBlick
Correctional Accessories
Everyone makes mistakes, and while you should always wait until the end of the project to make your corrections, these opaque white art supplies are also great for adding highlights and sparkles to hair, eyes, jewelry, metal- basically anything with a shine.
White gouache- $5.09 on DickBlick. Water this down just a smidge, and apply with a fairly stiff bristled brush.
Copic Opaque White- $8.67 on Amazon Prime. Water this one down a smidge as well, stir until it reaches a consistency you can work with, and apply with a synthetic brush.
Signo white gel pen- $8.96 on Amazon Prime for 5, used at the last stage for spot corrections, adding white highlights or details.
Inking Accessories
Note: You don't need to buy all of these immediately, and some are repetitive- both Multiliners and Microns are alcohol proof, waterproof technical pens that are a mainstay for many young artists learning the ropes.
Sailor Mitsuo Aida-The only brushpen I've found that is both Copic and waterproof. Twintipped with a small fude brush, and a large fude brush. You can read my review here. $4.45 on Jetpens (note: Not an affiliate link)Kaimai Sol K Ink $11.00 on Jetpens (Note: Not an affiliate link) (for brushes, dip pens, or to refill your Pentel Pocket Brush cartridges. Copic-proof, not waterproof)
Copic Multiliners- Set of 9, includes sizes 0.03 mm, 0.05 mm, 0.1 mm, 0.3 mm, 0.5 mm, 0.8 mm, and 1.0 mm, Brush Small, Brush Medium on DickBlick $25.09
Copic Multiliners, Openstock, Recommended Sizes- $2.79 each on DickBlick
.3
.5
.8
Brush Medium
Sakura Microns
Set of 8, various tip sizes, all in black $16.16 on DickBlick
Papers
Note: You don't need to buy all of these, you'd probably be just fine buying a ream of cardstock, but these are papers I use when I create marker illustrations, and I vouch for their results. For artists who are still learning, I recommend the ream of cardstock and the XL watercolor paper, as they're the most cost efficient while still producing nice results.
Cardstock- Neenah 120 lb cardstock, 8.5"x11", $14.14 for a ream on AmazonCanson XL Watercolor Paper- 9"x12", 30 sheets, $6.21 on Amazon
Strathmore 500 series Plate bristol- http://www.dickblick.com/items/13313-... 14"x11", 15 sheet pad, $15.46 on DickBlick
Copic PM paper- Size A5, lowest price is $12.22 on Amazon
Strathmore 400 series Mixed Media Paper- 9"x12", 15 sheets, $5l94 on DickBlick
Other Places to Purchase Markers
MarkerPop
Carpe Diem Markers
Jetpens
Other Resources
COPIC 101: EVERYTHING YOU NEED TO KNOW ABOUT THE WORLD'S BEST MARKER
Copic 101 (From the actual Copic site)
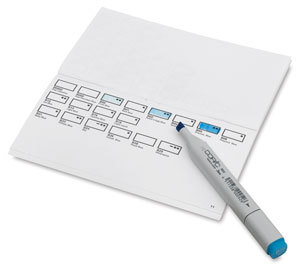
Printable Blank Copic Color Chart (fill this in as you collect your markers. I recommend getting this printed at Office Max/Office Depot/through a copier machine, as toner ink can resist alcohol marker applications)
What Copics to Start With? And Where to Buy Them? -- Baylee Jae
Blending Copic Markers by Baylee Creations-- Copic Marker
Copic Markers 101- Animetalchick
Please consider donating to this blog or purchasing from Natto-shop (http://nattosoup.com/shop) if you want me to continue publishing quality content. All materials tested were purchased from my own pocket. Keep on Truckin' Nattosoup is not under any sponsorship.
There are a lot of items on this list, and while I recommend all of them individually, don't let the length intimidate you. Where applicable, I explain when items are duplicates, or perform similar functions.
Most of my links in this post are to DickBlick and Amazon. Whenever possible I tried to link to DickBlick, as I regularly buy my art supplies from them, and I think they're fantastic overall- cheap prices, lots of openstock options, fast shipping, good customer service. When that is NOT possible, I do provide my Amazon affiliates link, although you may be able to find those products in person in craft and hobby stores like Michaels, or brick and mortar art supply stores. DickBlick and Amazon do pay me a percentage for sales, money earned from that goes to blog upkeep, purchasing supplies to review, and minor reimbursement for time spent writing.
How to Use This Gift Guide
I recommend right clicking links and hitting Open in New Tab, as there are A LOT of links.
If you are the giftee:
I recommend you make wishlists on Blick and Amazon, and share those with your 'gift'er' so they can easily purchase your present. By creating a wishlist, you can share your selections with several people, which is perfect if say, your parents and your younger siblings are all chipping in to buy you markers.
If you are the gifter:
Sites like DickBlick offer bulk savings for many of the brands they carry, so make sure you take advantage of that if possible. They also offer free shipping once you've hit a certain price point, so you may want to take advantage of that as well, especially for heavier items. You can do both of these things by making your purchase in one lump sum, if possible. DickBlick takes credit cards and Amazon Payments.
If you are buying for yourself:
I recommend you make a wishlist, and any time you're shopping at either site, you pick a couple items from the list. This way, you can spread the cost of your purchase across several months, slowly collecting markers and finding out which ones you still need to buy, based on your needs as well as my recommendations.
Back when I lived near a DickBlick, and had access to openstock Copics (all the stores around here lock them up), I'd buy myself a new color every time I visited the store. Now that I have most of the Copic colors I want, I've started filling in the color gaps with Shin Han Twin Touch markers, Blick Studio Brush markers, and Prismacolor Premier markers. I like to buy Prismacolor markers openstock- one or two every time I buy something from DickBlick, one or two every time I visit my local Pla-Za or Jerry's Artarama. While I may spend a bit more by purchasing openstock, I am getting colors I know I need, rather than a set of colors I may find difficult to use.
Why Alcohol Based Markers? Aren't Waterbased Good Enough?
While there are many FANTASTIC waterbased markers out there, the short answer is no, not really. Waterbased markers are prone to tearing up your paper, are difficult to blend, and work best on very specific types of paper. While they are often much cheaper than alcohol based markers, they have a high learning curb, and you usually see your best results after years of practice, or after learning how to use alcohol markers.
Alcohol markers on the other hand are quick drying, do not abrade paper surfaces, come in a wide variety of colors, and are often refillable. These days, alcohol based markers are available at a variety of stores, from Michael's to your local art supply shop, with two of the biggest and most common brands being Copic and Prismacolor.
You may think (or you may have been informed) that Copic is the end all, be all for alcohol based markers. While Copic markers are fantastic, there are plenty of fantastic alternatives available, and even amongst Copic brand markers, there's a degree of variety. Although Copic, as a whole, has a huge variety of colors to choose from, not every model of marker offers all the colors, so if you're planning your colors ahead of time, it pays to check and make sure that the colors you want are available in the markers you can afford, or plan to purchase.
My personal preference are Copic Sketch or Copic Ciao. When I first started collecting Copic markers, Copic had not released their Ciao line, but over the years I've written about alcohol markers, I've purchased a few Ciaos to test, and I've found them to be nearly as good as the Sketch markers. All of Copic's markers are refillable, and feature replaceable nibs, which makes these markers a longterm investment.
As Copic markers are on my recommended list, and they're both commonly available and offer a confusing amount of options, I'm going to briefly go over the major types.
Copic Original
Comes with a bullet nib and a chisel nibNibs are replaceable, wide variety of nib types to use
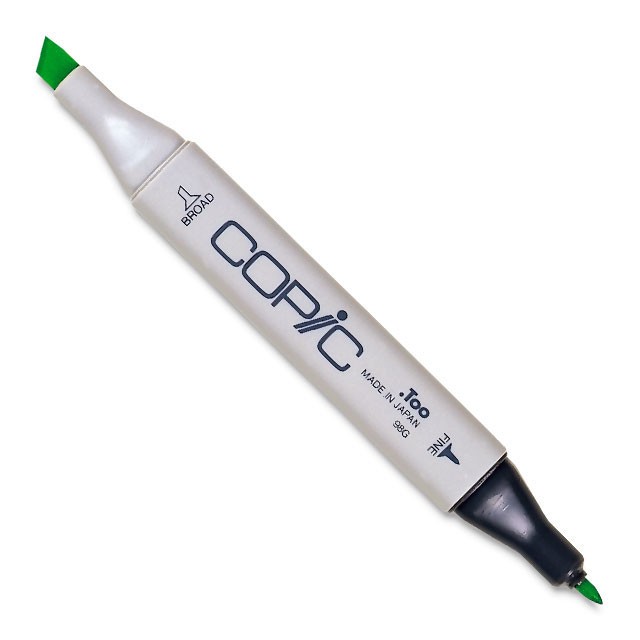 Image Source
Copic Sketch
Comes with chisel nib and super brush nibNibs are replacable, variety of replacements availableLargest color selection availableMost popular type of Copic
 Image Source
Copic Ciao
comes with Chisel and superbrushreplacement nibs availablegreat way to affordably start a collection
 Image Source
Copic Wide
Comes with angled chisel nibReplacable nibs, only a couple nib optionsSmallest color family availableUseful for covering large areas of color
 Image Source
Various Inks- Used to refill your markers, but you can also paint with it if you wish
 Image Source
Copic Wide, Copic Sketch, and Copic Original also come with blank markers, so if there's a color you like that's available in Various Ink, you can fill your own markers. I do this with Copic Wides, to make the colors I need for alcohol ink washes.
Copic Ciao Markers- refillable markers with replaceable nibs
Absolute Must- Necessary for Maintaining Your Marker Collection
Copic Ciao Colorless Blender- $3.59 on DickBlickColorless Blender Refill- $6.29 on DickBlick (will refill your Colorless Blender marker several times though, so it's definitely worth the investment)
Replacement superbrush nibs- $7.39 on Amazon Prime (free two day shipping)
Copic nib tweezers- $8.12 on Amazon with free shipping
Recommended Sets
Skintone Basics- Pick the one you feel will best suit your needs.
 Image Source
Doodle Pack- People - Includes 5 markers, and 2 Copic-proof Multiliners, black and dark brown- $23.93 (DickBlick)
OR
Copic Ciao Markers, Skin, 6 Pack (just markers, includes )- $32.94 (Amazon)
Basic Starter Set:
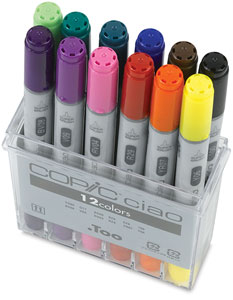 Image Source
12 Piece Basic Set (Includes Blue Violet, Violet, Shock Pink, Lipstick Red, Cadmium Orange, Yellow, Yellowish Green, Forest Green, Blue Green, Ultramarine, Burnt Umber, and Black. ) - $43.11
Additional Useful Colors for Skin (openstock from DickBlick) $3.59- Augment as you see necessary, or discover a need.
E57
E37
E59
E79
E35
Colors for Blending, Shading, and/or adding details to skin:
Openstock Ciaos are $3.59 each at DickBlick, select those that seem relevant to your needs.
R000-
BG10
B00
E02
BV23
V01
RV21
YR02
YG23
R11
RV000
If you'd like to purchase a single set that should cover your basic color needs for the first couple years of using alcohol markers, and you don't want to purchase markers piecemeal openstock every time you visit an art store (it's how I collect markers, btw), I recommend
Copic Ciao 36 marker set D, 36 slot wallet included- $109.98 on Amazon
Keep in mind that when buying multiple sets, there are repeat colors, so you will end up with duplicates.
Blick Studio Brush Markers
I highly recommend you read my review (link) on Blick Original Studio Markers, Blick Brush Markers, and Utrecht Design Markers, but if you're short on time, take the fact that I'm mentioning these markers in this Holiday Gift Guide as an endorsement!
Blick Studio Brush markers are not refillable, and you can't replace the nibs, but the brush nib is almost as good as the Copic Super brush nib on Copic Ciao and Copic Sketch markers, and they make a fine compliment to your marker collection.
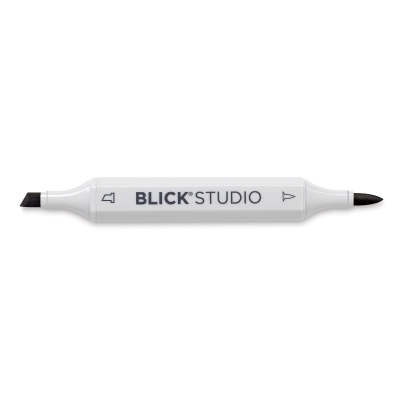 Image from DickBlick
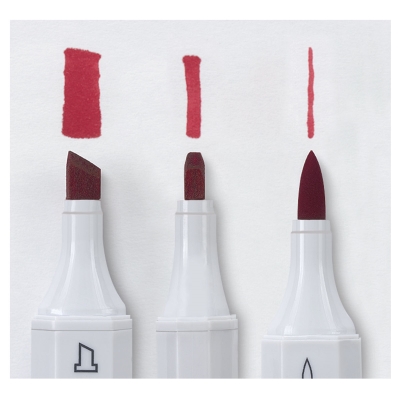 Image from DickBlick
If you want to buy many alcohol based markers at one time, and you'd like to do so affordably, Blick's Studio Brush markers are a great way to build up a collection. I recommend you use these markers to augment your Copic Ciao collection, and replace Blick Studio Brush markers as they run out with Copic Sketch or Copic Ciao, both of which are refillable.
Studio Brush Markers tend to be a little less saturated than Copic or Prismacolor markers, so I recommend staying away from very saturated colors like purples and reds if you can afford them elsewhere.
Recommended Colors:
List price is $2.99, cheaper if you buy in bulk (12+ markers) or in sets.
Basic Gray:
1
2
3
4
5
6
Apple Green
Coral Pink
Ink Blue
Warm Black
Yellow Ochre
Wine
Warm Gray:
20%
40%
70%
80%
True Blue
Brick Red
Prismacolor
Prismacolor markers come in two styles- Prismacolor Double Ended Brush Tip Markers and Prismacolor Double Ended Art Markers. Don't let the name fool you- for artists and illustrators, you will probably want the Brush Tip Markers over the Double Ended Art Markers, but I do wish Prismacolor would mash up the best of both worlds, and offer a brush tip marker that ALSO has their chisel tip, as it's the best I've ever encountered.
 Prismacolor Double Ended Brush Tip Marker- Photo from DickBlick
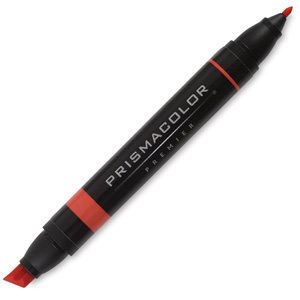 Prismacolor Double Ended Art Marker- Photo from DickBlick
Like Blick Studio Brush Markers, Prismacolor markers are not refillable, and do not have replacable nibs. They tend to shine at saturated, intense colors such as yellow greens, yellows, and purples, areas where both Copic and Blick Studio Brush markers fall flat.
Recommended Sets:
If you'd prefer to buy your grays as a set, French grays are a lovely alternative to warm grays (or addition, if you do a lot of architectural work), and can be used to shade skintones, or to stretch a limited range or skintones.
French Grays, set of 12 - $26.69 on DickBlick
At DickBlick, Prismacolor's Brush markers are listed at $3.19, but the first bulk pricebreak starts at 6 markers ($2.98), and the second discount starts at 12 ($2.87)
Note: I have not tested the entire range of Prismacolor markers, and my recommendations are based on my general familiarity with what the markers excel at, my familiarity with the shortcomings of Copic Ciao and Blick Studio brush markers, and Blick's flawed color chip representations on site. If you've already ordered a number of Copic or Blick Studio Brush reds, hold off ordering Prismacolor reds until you know for certain whether you really do need more.
Recommended Open Stock Colors
Cherry
Crimson Red
Green Tea
Magenta
Mineral Orange
Parma Violet
Parrot Green
Pale Vermillion
Rhodamine
If You Like Neons-
Neon Blue
Neon Green
Neon Orange
Neon Pink
Neon Yellow
Neon Yello Green
Marker Accessories
 Cover of Copic Swatch Book. Photo from DickBlick
 Interior of Copic Swatch Book. As you acquire markers, you use the chisel nib to fill in the appropriate square. I apply my Blick Studio Brush or Prismacolor markers to a piece of sticker paper, and apply that in the appropriate color family. Keeping track of your markers lets you know which you already own, and where you need to focus your buying power. Photo from DickBlick
Copic Swatch Book- $5.19
Marker Cases and Storage
Travel case
Alvin Prestige Marker- Case holds 48 markers- great for a mixed set of Prismacolor, Blick Studio Brush Markers, and Prismacolor markers. Sized to hold larger markers like Prismacolor. $21.77 on DickBlick
Spectrum Noir Marker case- holds approx 36 markers, depending on what you have $3.93 on DickBlick
Box storage
ArtBin Marker Storage Satchel- Holds up to 64 markers, $19.57 on DickBlick
Display storage
Spectrum Noir marker storage trays- six tray set holds 72 markers on display. For use on desktop. $19.99 on DickBlick
Correctional Accessories
Everyone makes mistakes, and while you should always wait until the end of the project to make your corrections, these opaque white art supplies are also great for adding highlights and sparkles to hair, eyes, jewelry, metal- basically anything with a shine.
White gouache- $5.09 on DickBlick. Water this down just a smidge, and apply with a fairly stiff bristled brush.
Copic Opaque White- $8.67 on Amazon Prime. Water this one down a smidge as well, stir until it reaches a consistency you can work with, and apply with a synthetic brush.
Signo white gel pen- $8.96 on Amazon Prime for 5, used at the last stage for spot corrections, adding white highlights or details.
Inking Accessories
Note: You don't need to buy all of these immediately, and some are repetitive- both Multiliners and Microns are alcohol proof, waterproof technical pens that are a mainstay for many young artists learning the ropes.
Sailor Mitsuo Aida-The only brushpen I've found that is both Copic and waterproof. Twintipped with a small fude brush, and a large fude brush. You can read my review here. $4.45 on Jetpens (note: Not an affiliate link)Kaimai Sol K Ink $11.00 on Jetpens (Note: Not an affiliate link) (for brushes, dip pens, or to refill your Pentel Pocket Brush cartridges. Copic-proof, not waterproof)
Copic Multiliners- Set of 9, includes sizes 0.03 mm, 0.05 mm, 0.1 mm, 0.3 mm, 0.5 mm, 0.8 mm, and 1.0 mm, Brush Small, Brush Medium on DickBlick $25.09
Copic Multiliners, Openstock, Recommended Sizes- $2.79 each on DickBlick
.3
.5
.8
Brush Medium
Sakura Microns
Set of 8, various tip sizes, all in black $16.16 on DickBlick
Papers
Note: You don't need to buy all of these, you'd probably be just fine buying a ream of cardstock, but these are papers I use when I create marker illustrations, and I vouch for their results. For artists who are still learning, I recommend the ream of cardstock and the XL watercolor paper, as they're the most cost efficient while still producing nice results.
Cardstock- Neenah 120 lb cardstock, 8.5"x11", $14.14 for a ream on AmazonCanson XL Watercolor Paper- 9"x12", 30 sheets, $6.21 on Amazon
Strathmore 500 series Plate bristol- http://www.dickblick.com/items/13313-... 14"x11", 15 sheet pad, $15.46 on DickBlick
Copic PM paper- Size A5, lowest price is $12.22 on Amazon
Strathmore 400 series Mixed Media Paper- 9"x12", 15 sheets, $5l94 on DickBlick
Other Places to Purchase Markers
MarkerPop
Carpe Diem Markers
Jetpens
Other Resources
COPIC 101: EVERYTHING YOU NEED TO KNOW ABOUT THE WORLD'S BEST MARKER
Copic 101 (From the actual Copic site)
Printable Blank Copic Color Chart (fill this in as you collect your markers. I recommend getting this printed at Office Max/Office Depot/through a copier machine, as toner ink can resist alcohol marker applications)
What Copics to Start With? And Where to Buy Them? -- Baylee Jae
Blending Copic Markers by Baylee Creations-- Copic Marker
Copic Markers 101- Animetalchick
Please consider donating to this blog or purchasing from Natto-shop (http://nattosoup.com/shop) if you want me to continue publishing quality content. All materials tested were purchased from my own pocket. Keep on Truckin' Nattosoup is not under any sponsorship.
November 22, 2015
Alcohol Based Markers Mini Review- Concept and Fab
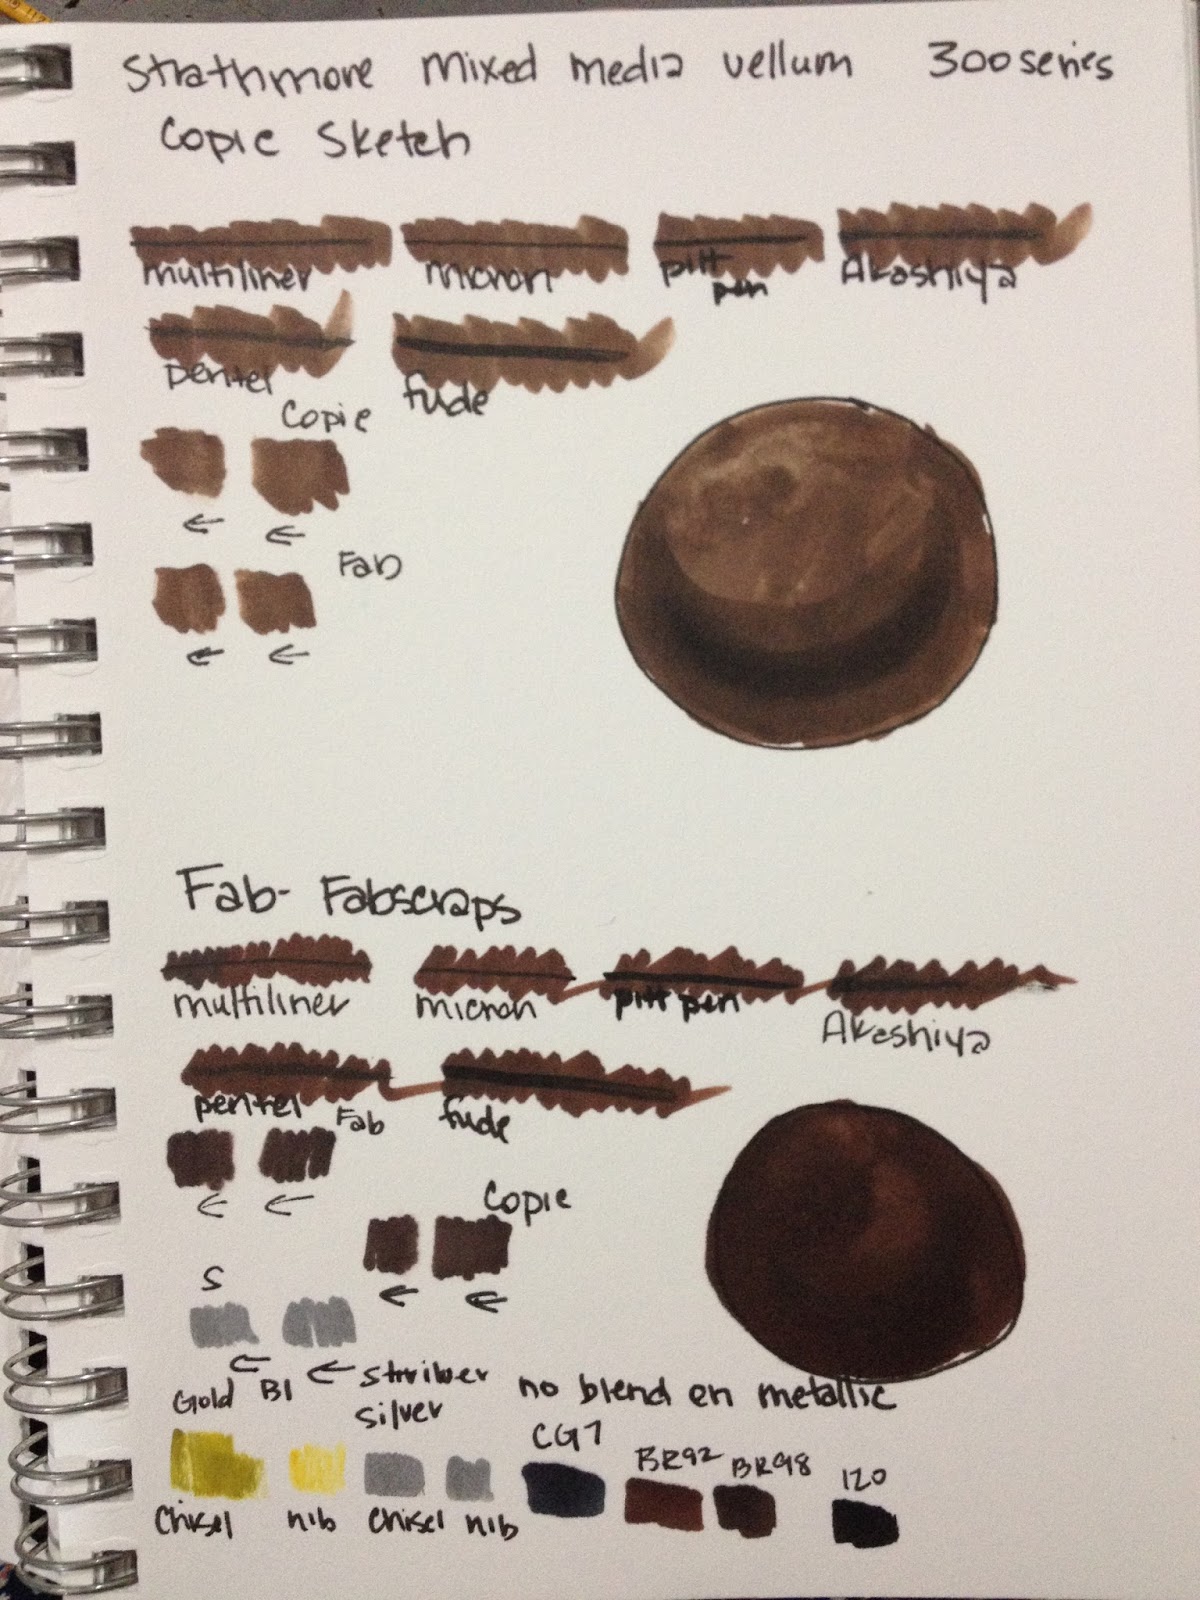
So while going through my archive and comparing it to my swatchbooks and the markers I have in my stash, I've found a few brands I purchased, tested, but never reviewed. In my Blick Studio Marker review, I covered the original Blick Alcohol Markers, Blick's new Studio Markers, and Utrecht's now defunct Design Markers, but there are a couple other brands I purchased and tested, but never reviewed.
I can see how this happened. With cheap alcohol based markers, there isn't much to differentiate between brands, especially when brands use the same bodies. It can be difficult to write post after post about marker brands that basically perform the same- same bad tips, same smelly inks, same poor blending, same body save for the printing. This is the case for Concept Markers, which I purchased in person at Jerry's Artarama a couple years ago, and Fab markers, which are made by Fabscraps, and were purchased a couple years ago off Overstock. Jerry's still sells Concept markers in addition to Copics, Charpaks, and Prismacolors, so unlike the Utrecht Design Markers, Concept may still be relevant to you. Fab markers, however, are harder to find as Overstock no longer sells them, but I found a set on Ebay (which will probably be long gone by the time you see this post). The set I found on eBay is the same set of 7 colors that I purchased on Overstock, which leads me to wonder if Fab made any other colors.
No one has ever written in to ask about Fabscraps or Concept markers, and I could have skipped them without anyone complaining. Chalk this up to me being a completionist when it comes to art supplies (gotta catch em all) and the fact that I'm buying these supplies out of pocket, so it feels like a waste for them to sit in my closet, forgotten.
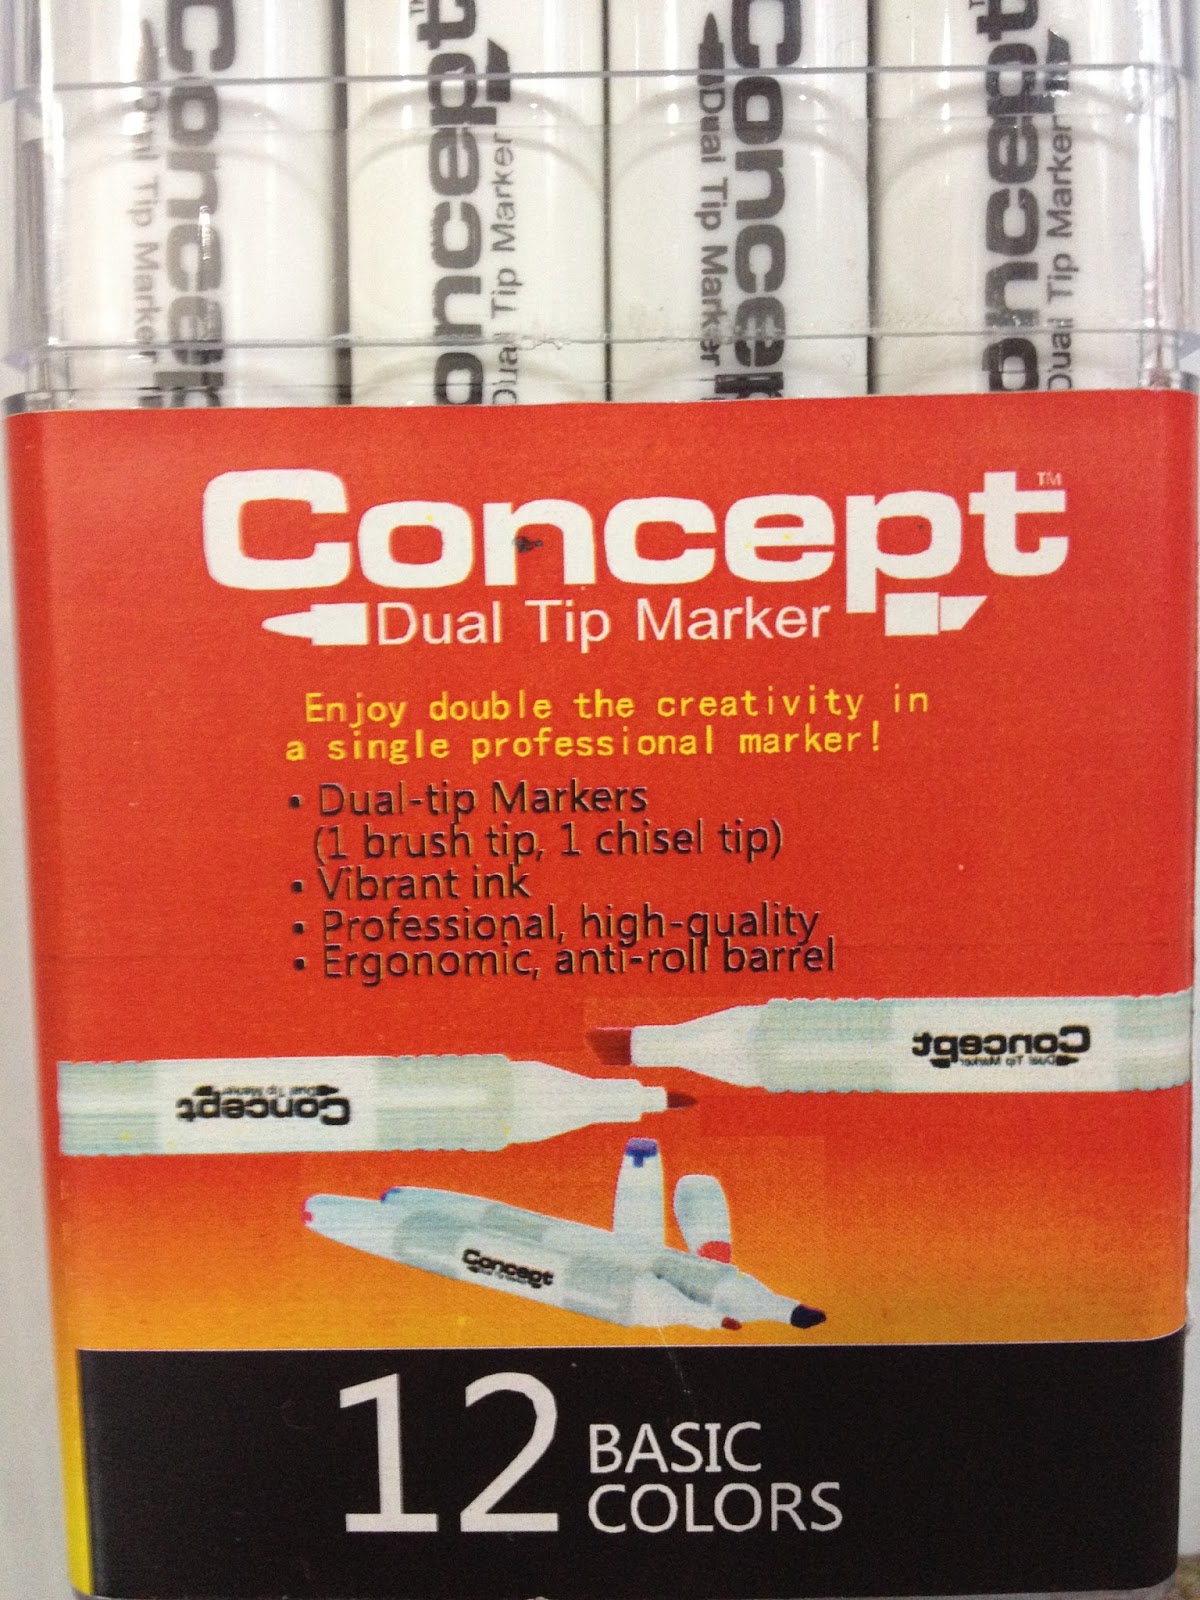
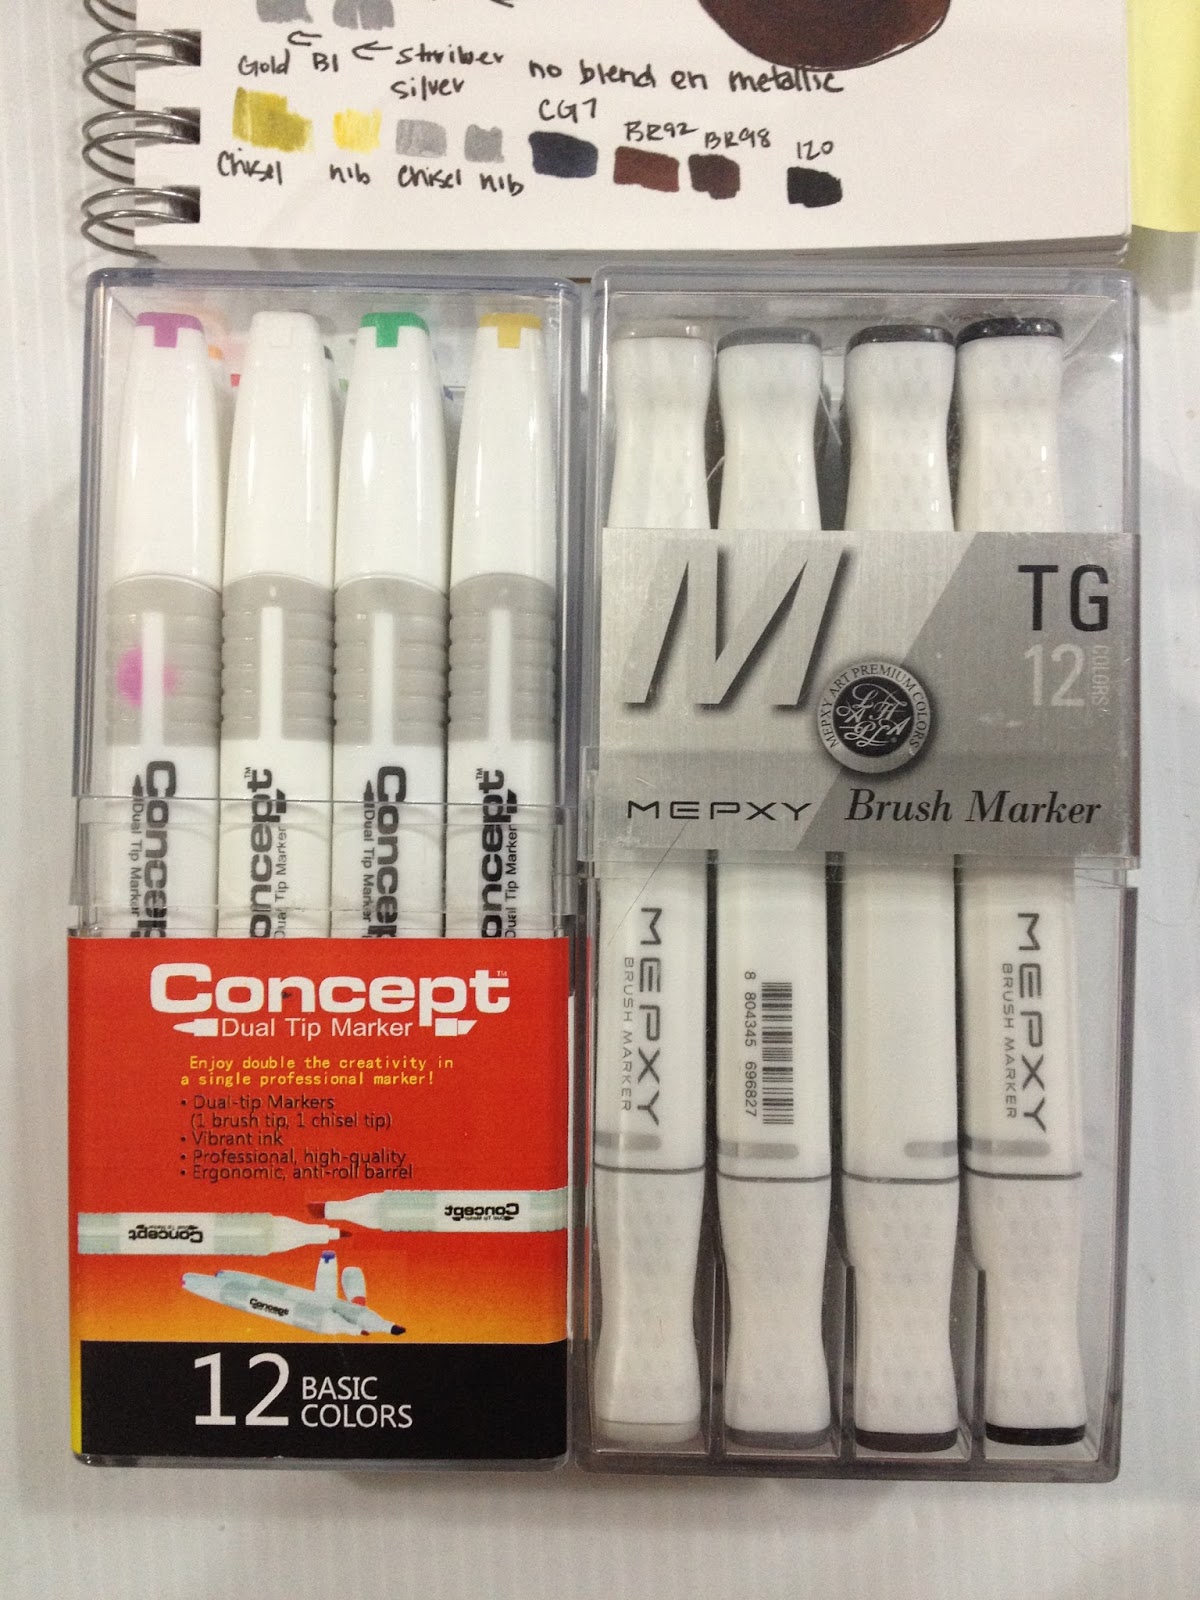
Concept markers
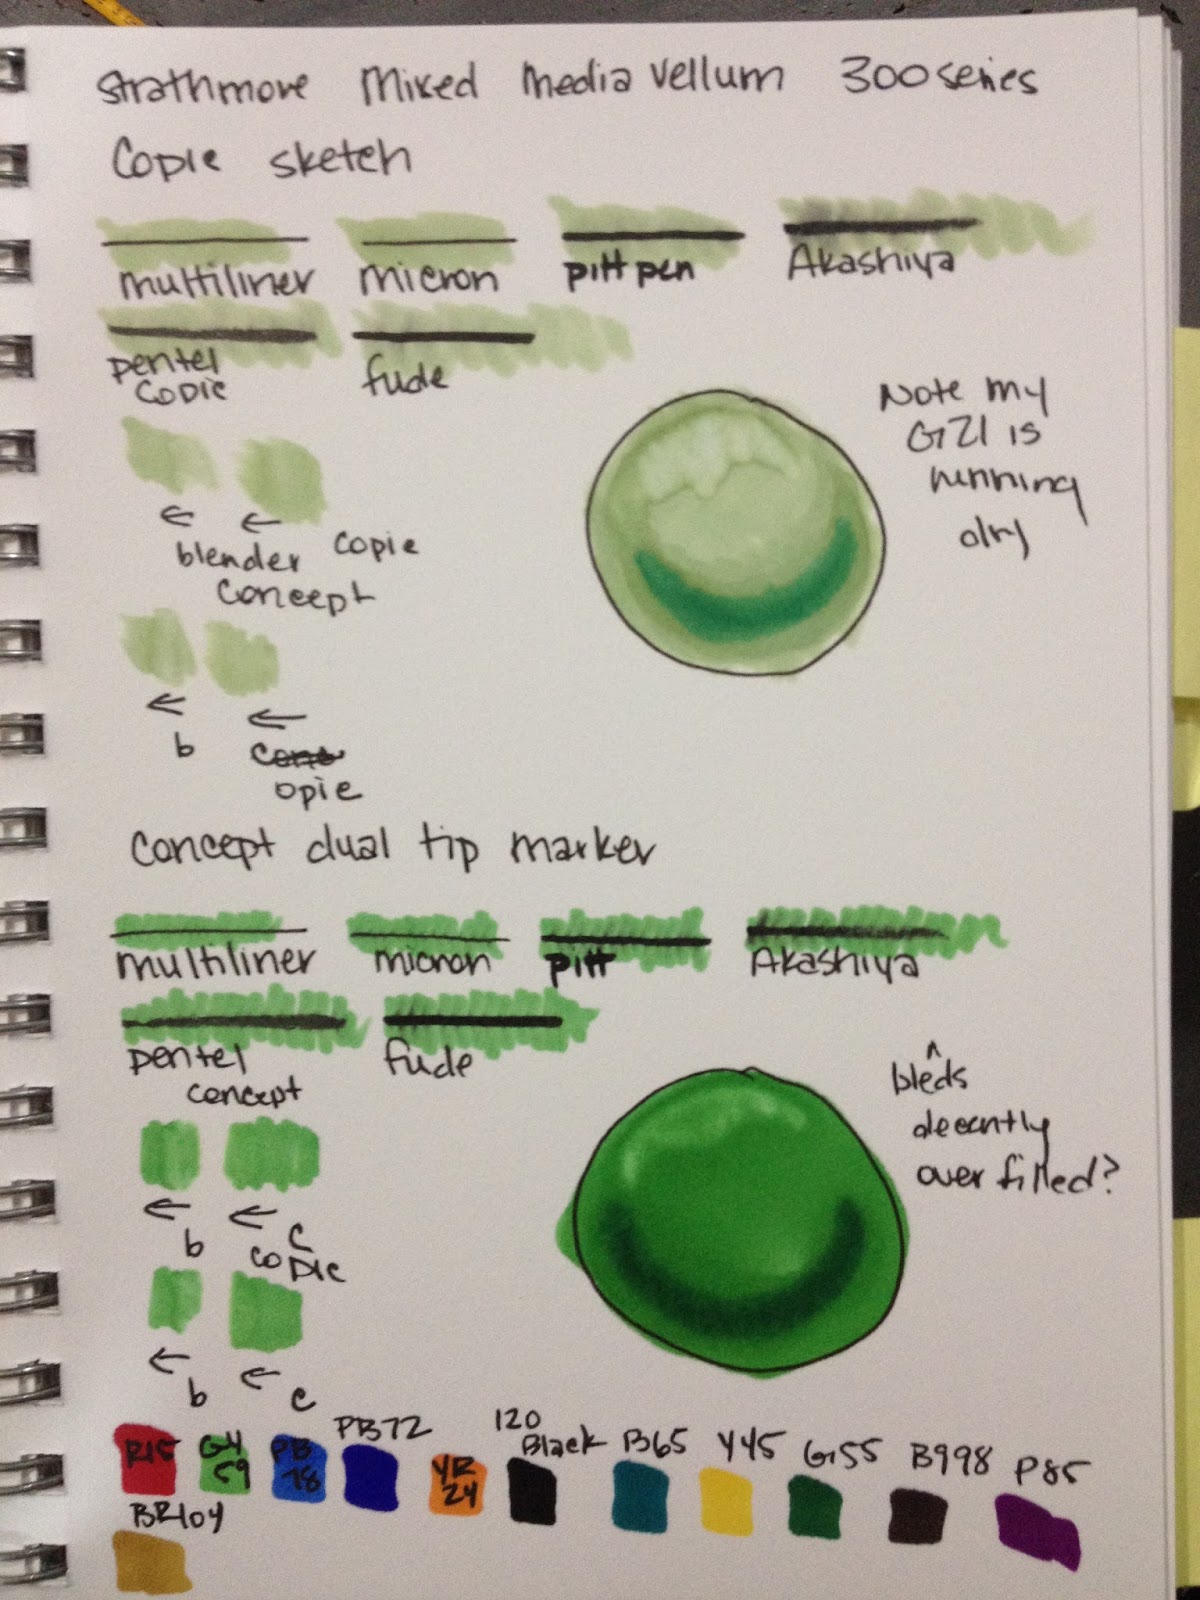
Bullet and chisel nibsCurrently on sale for $1.29 openstock on Jerry's Artarama website, sets are less New marker bodies look to be a bit different from the ones I havePromises 4 different linestyles in 1 bodyEasy to hold barrelNylon nibs72 Different ColorsThese markers make a lot of promises that I'm not sure they can keep. According to the Jerry's ArtaRama website:
The Packaging
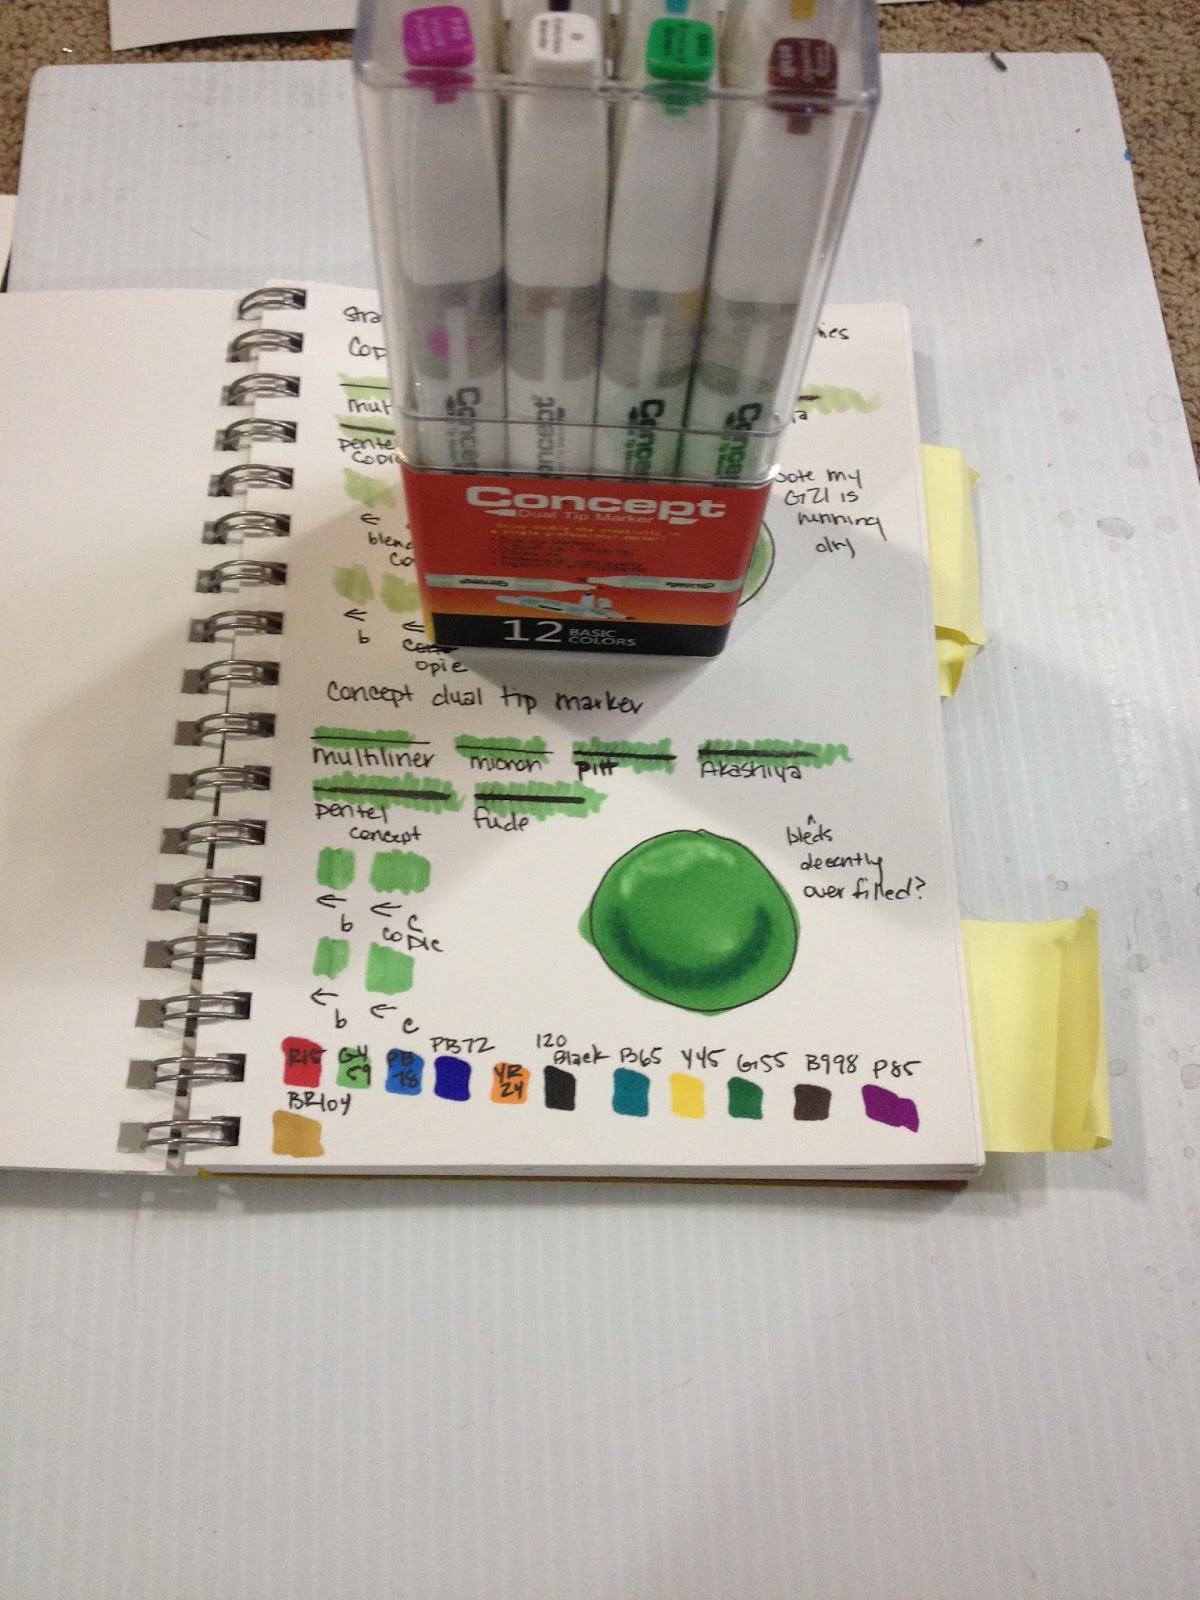
For the purposes of accurate testing (and probably because they weren't available openstock at the time) I purchased a set of 12 basic colors. My set of 12 came in a clear plastic box, which is pretty common for generic alcohol based markers.

Colors in set:
#15 Red
#24 Orange
#45 Yellow
#59 Green
#55 Green
#65 Blue Green
#76 Blue
#72 Blue
#85 Purple
#98 Brown
Black
blender
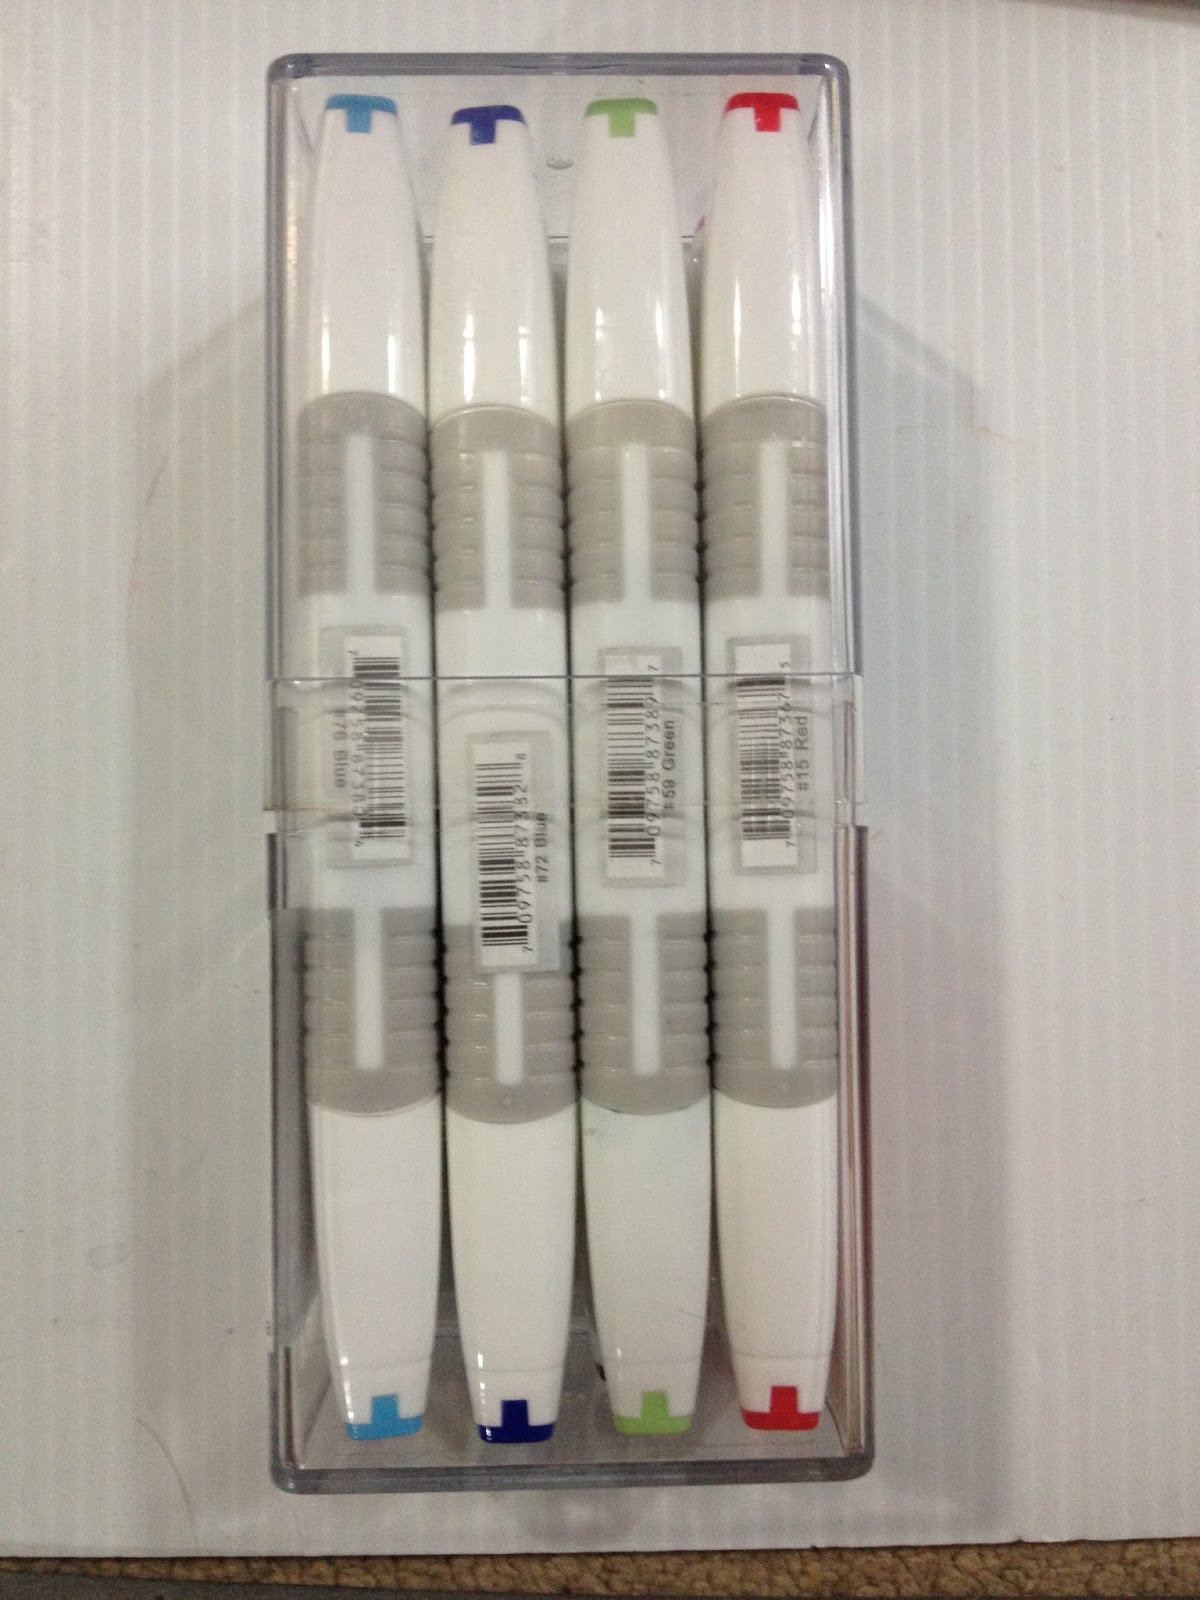
Text reads:


 Side by side comparison of Concept and MEXPY marker boxes. Same box, except the MEXPY box has handy dividers at the bottom to help hold markers in place. The Concept box lacks these dividers.
In between when I purchased my Concept markers, and when I actually managed to get around to writing this review, a new color palette was introduced for the body of Concept markers, so the markers you see in stores will differ visually from the ones I'm reviewing here.
New Body
 Image from the Jerry's ArtaRama site. Although the colors of the barrel have changed over the years, the features are identical.
 Image from Jerry's ArtaRama Site
 Image from Jerry's ArtaRama siteWithout owning any of the new Concept markers, and just going by the photos from Jerry's, it doesn't look like much has really changed about the Concept markers, especially not the nylon nibs.
Edit (9/21): I went to Jerry's Artarama today in Nashville, TN, and they have the old body Concept markers for sale in their openstock display, with the newer ones being sold in sets.
Old Body (Kind I have)


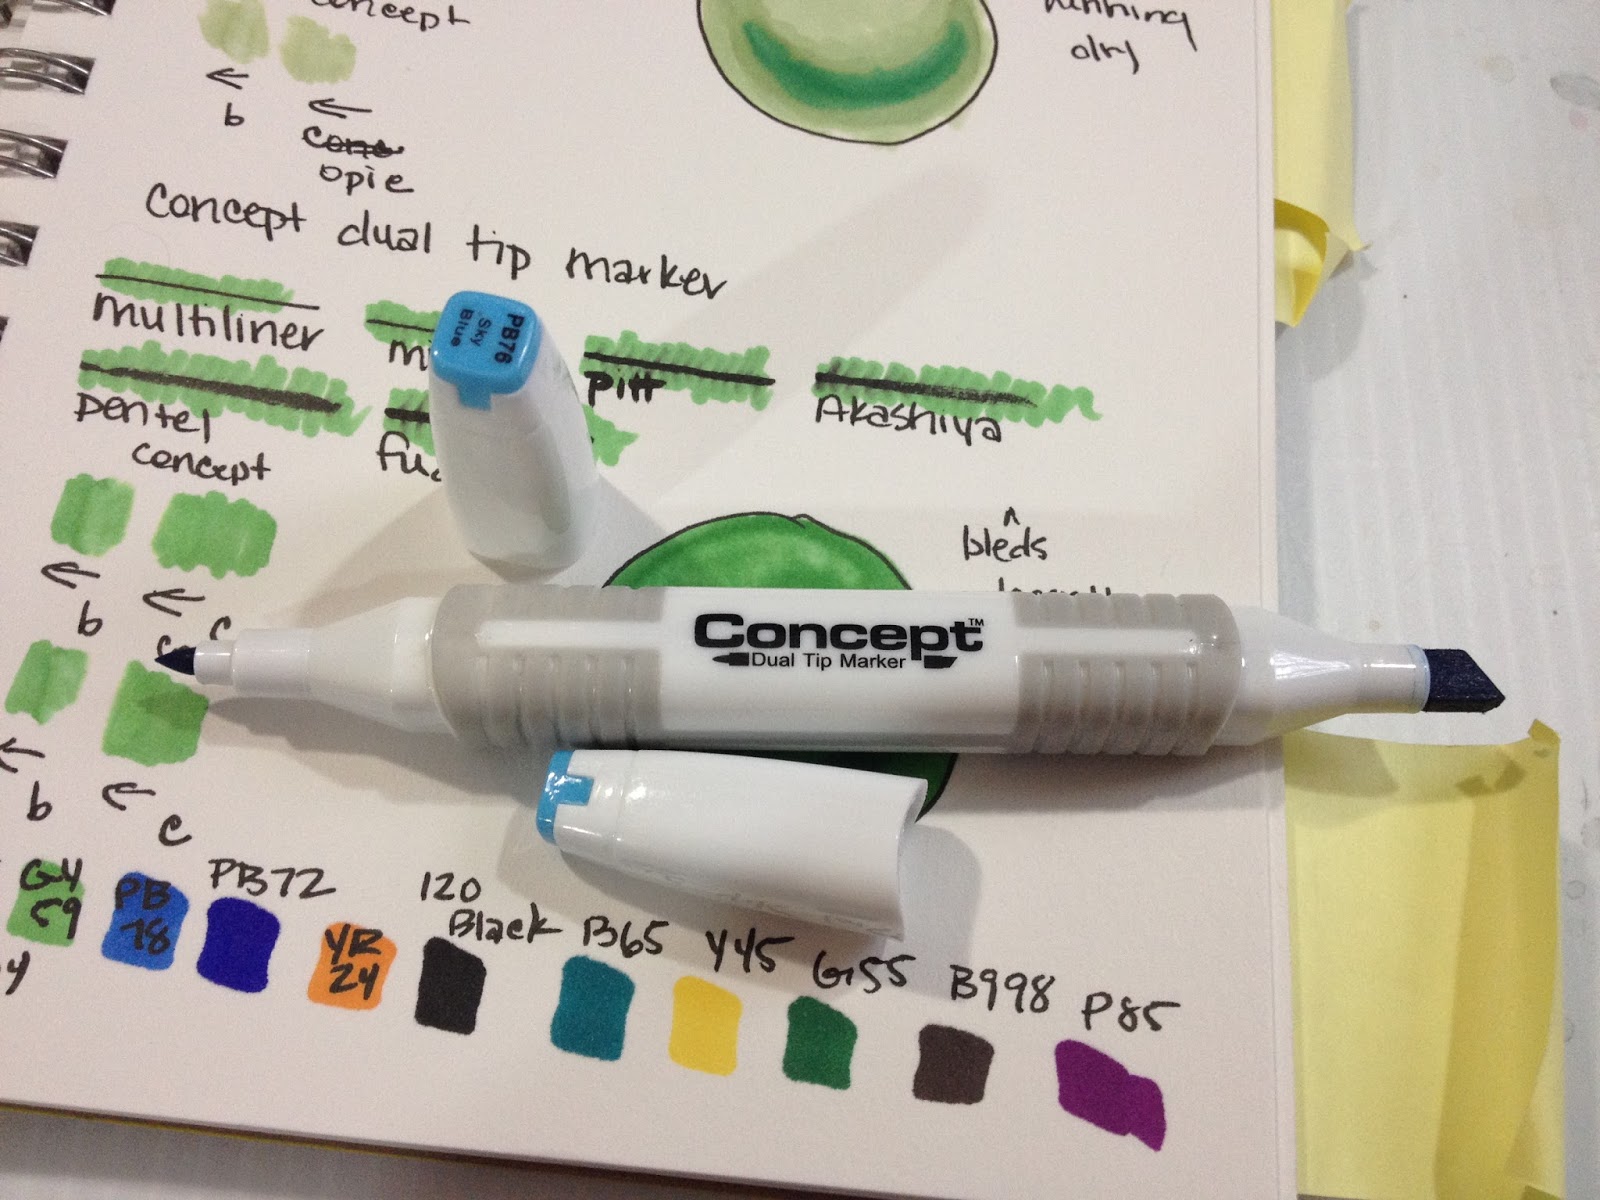
The caps feature the color number (for color families, I presume) and the color name, which is handyl, as the body of the marker includes neither of these things.

Nowhere to be seen is the soft brush nib promised on the side of my Concept box. No, that's a hard as rock bullet nib.
The plastic color chips at the top of each cap don't really do a good job indicating the color of the ink within.
The 'soft touch grip' is more sticky than cushy, and I've never had a problem with my hands becoming sore from using markers, so this solves a problem I don't think anyone's ever really had.
The Field Test

The Concept alcohol markers I received were reasonably juicy- several of the caps had ink in them, perhaps due to the fact that my markers may have been overfilled? They were pretty comparable in terms of ink smearing to the almost empty Copic sketches I used in this review (dry markers, especially dry brush markers, are prone to smearing ink, no matter how well cured the ink is), but laid down ink smoothly (even if it was a pain in the butt to apply with the chisel and bullet brush nibs). Concept markers react well to the included blender marker, and slightly less well to the Copic colorless blender.

The color chips on the top of the caps don't accurately reflect the color of the ink inside, so if you're going to use these markers, rely more on your swatches for accuracy, and the chips for just general color selection.
More About Concept Markers
Nine Reasons Concept Markers Will Change the Way You Draw
Product Spotlight: Concept Dual Tip Markers from Jerry's Artarama
Concept VS Fab
One of the problems I encountered repeatedly while writing this review was that I would put Concept photos in the Fab section and vice versa. These markers are almost completely identical in terms of body and nibs.

 Top: Concept
Bottom: Fab
 Top: Concept
Bottom: Fab
Pretty boring, right? There's so little to differentiate between the two brands, I can't help but wonder if Fabscraps just purchased a right to distribute the Concept markers under their own label.
Fab Markers by Fabscraps
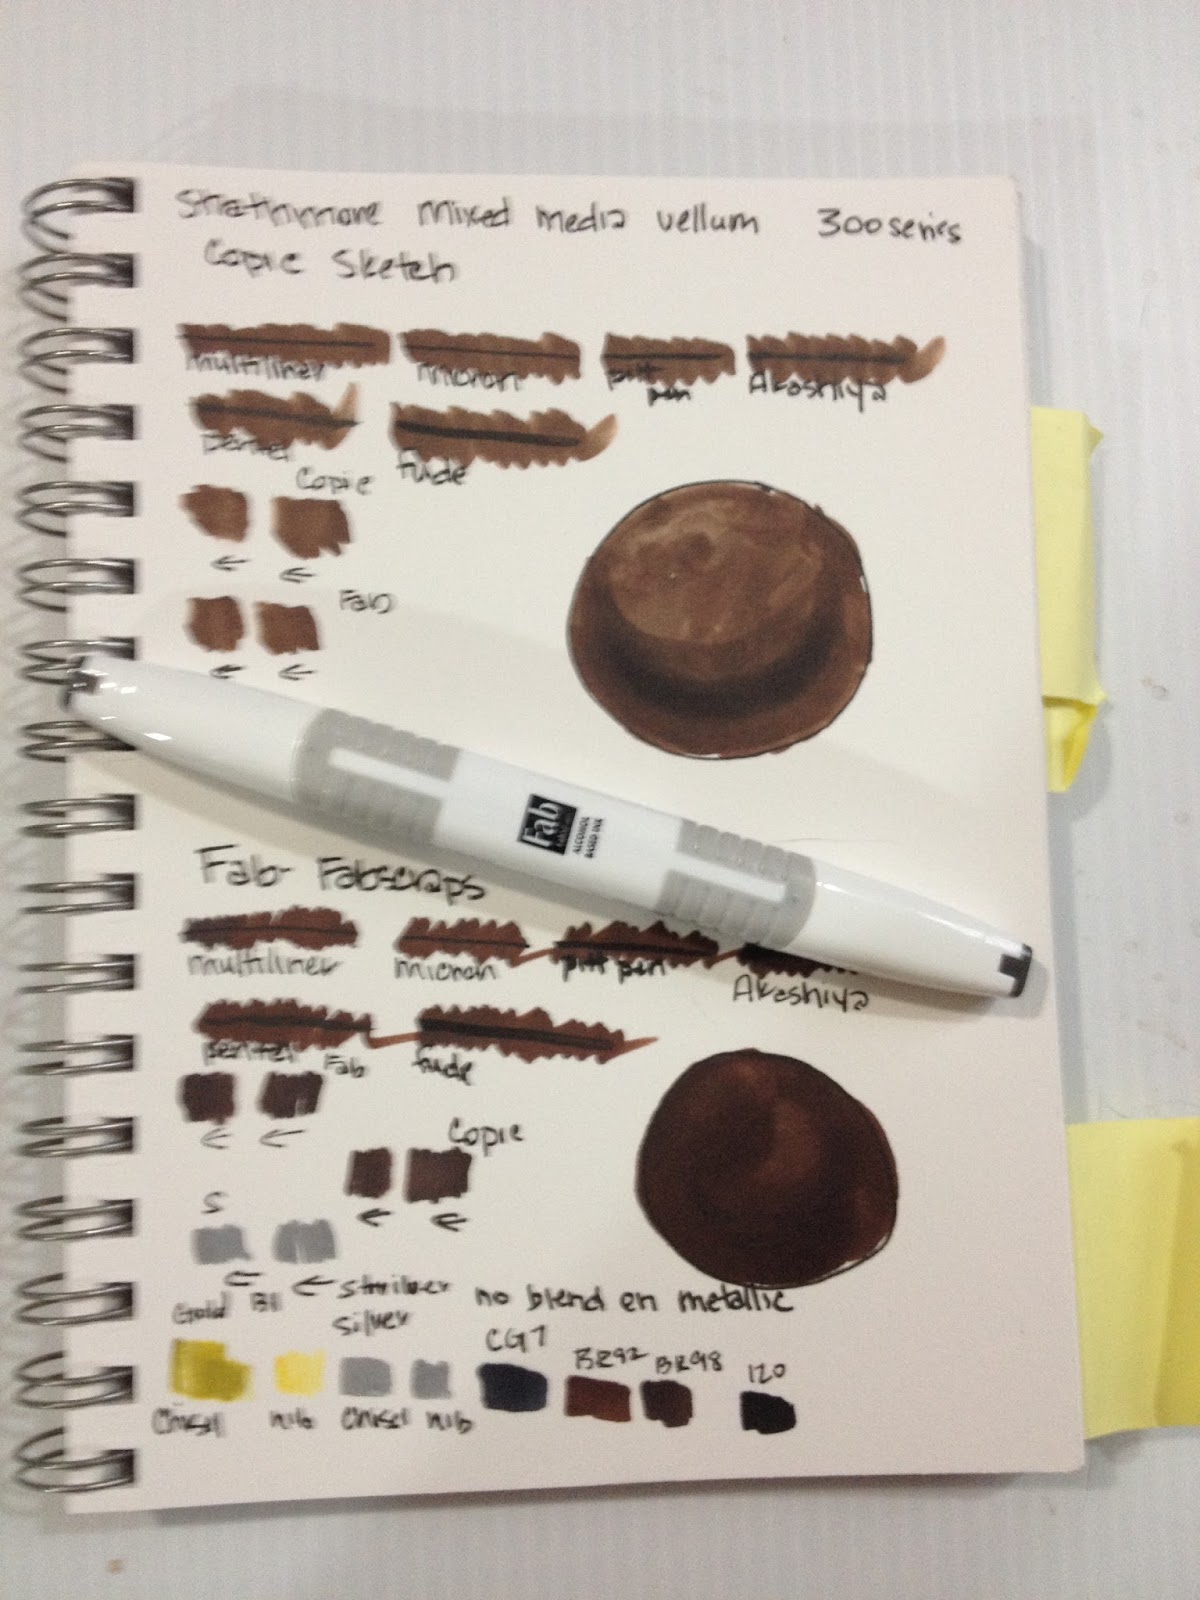
The Packaging
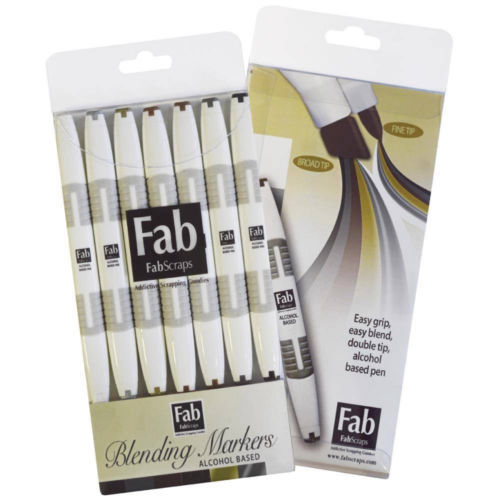 This is not my photo, I tossed the packaging awhile back. This photo is probably one of the official ones, and it was used for the Fab Markers eBay listing.I'd thrown away my packaging for the Fab markers a long time ago, but the package hasn't changed from the above image. My Fab markers came in a plastic box with a blender, two metallic markers, a blender, two browns, a gray, and a black.
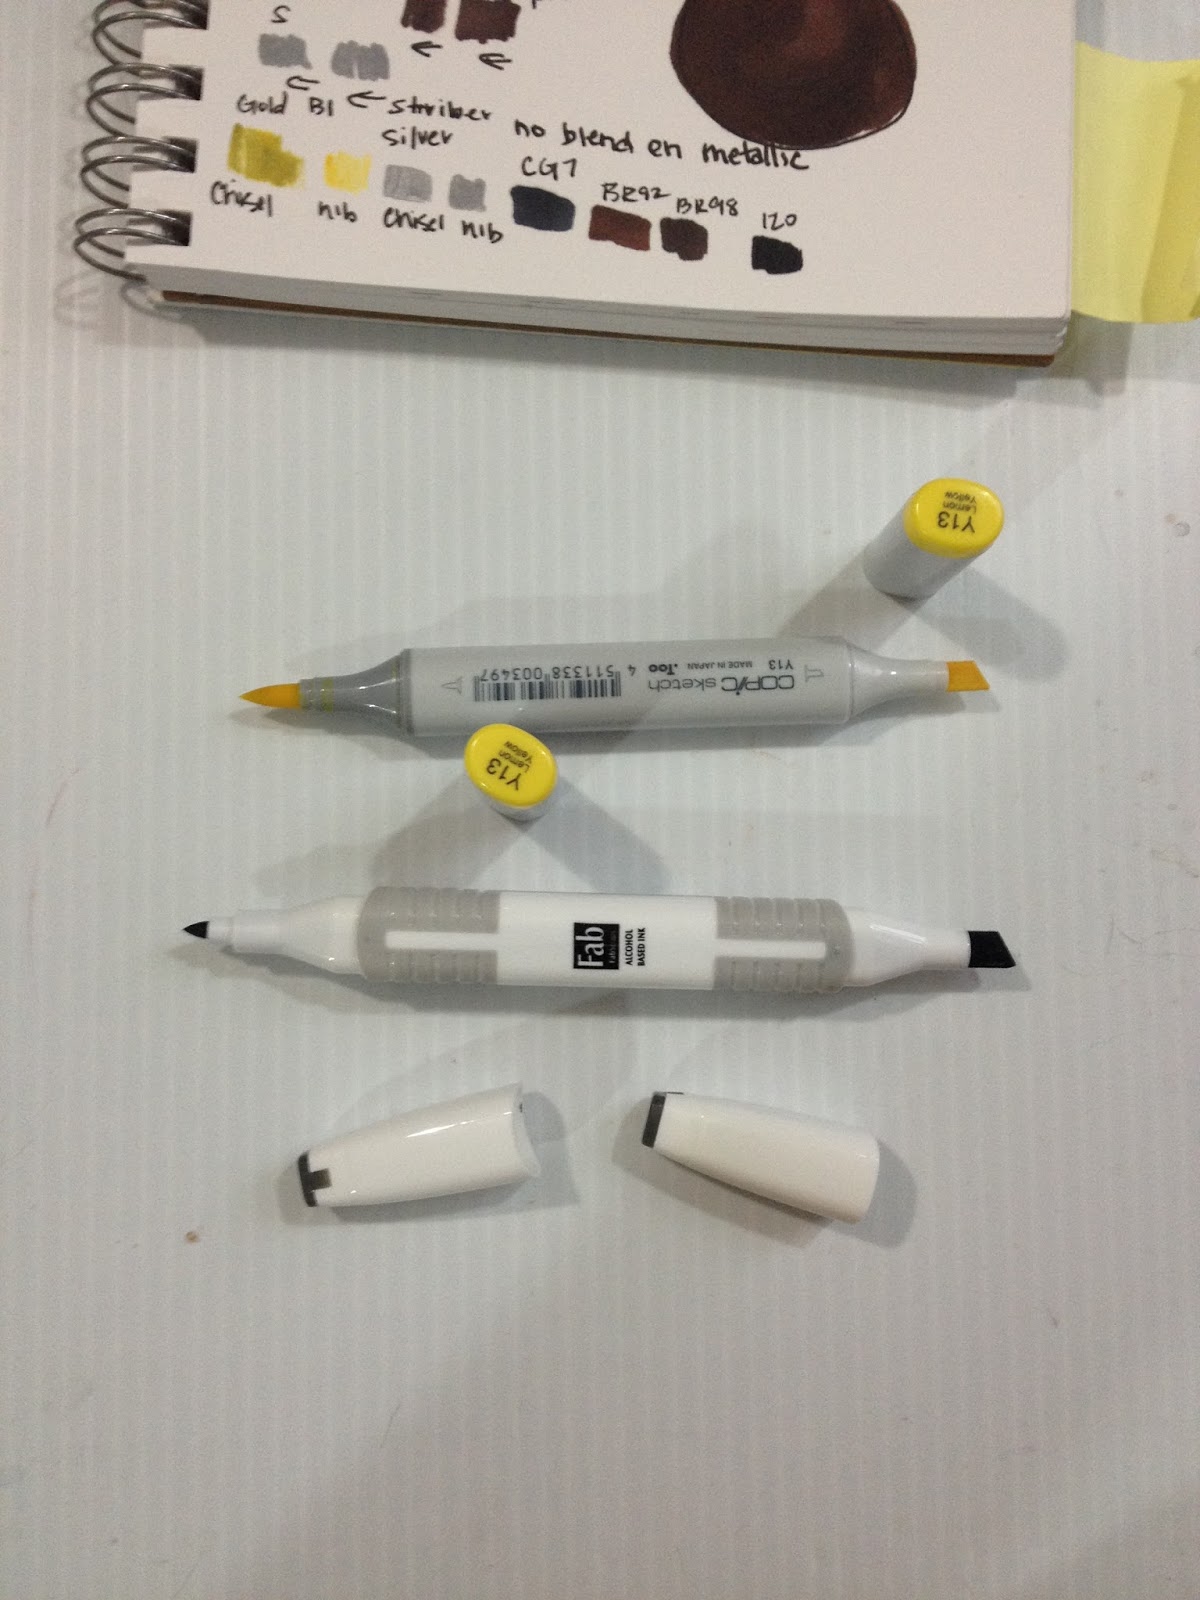
The Markers


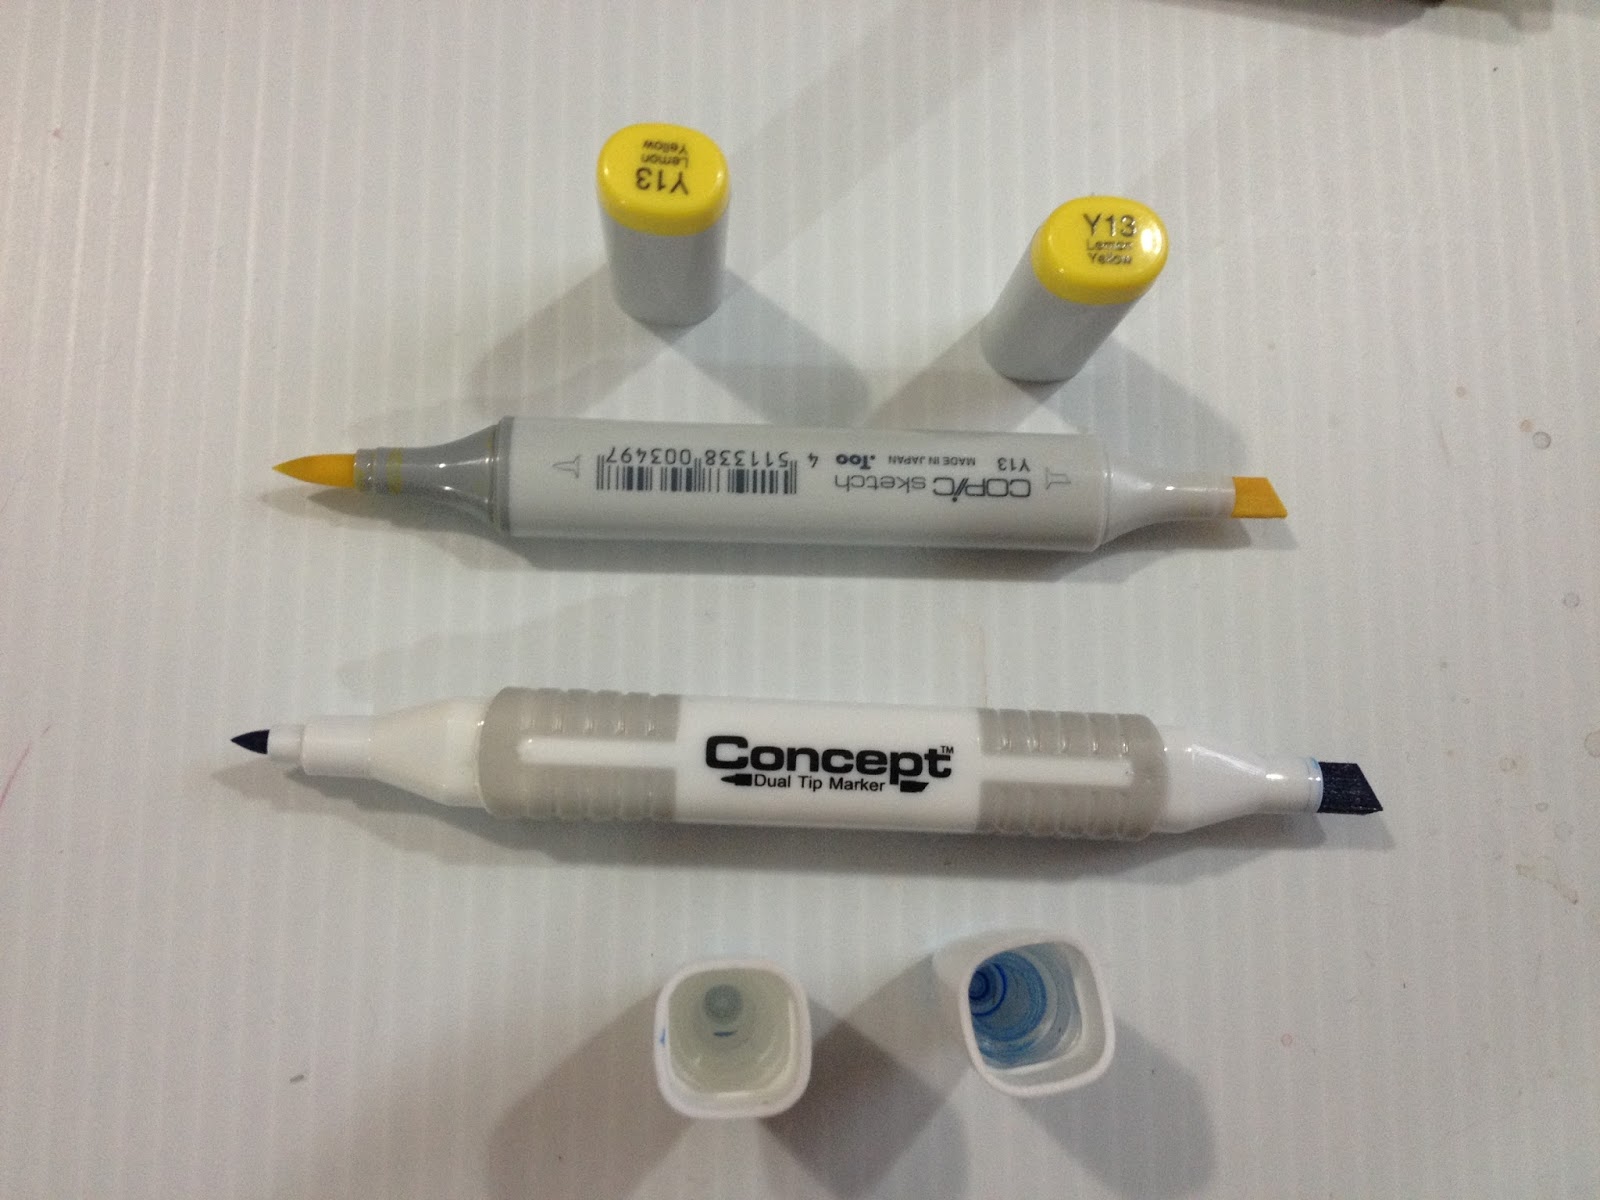
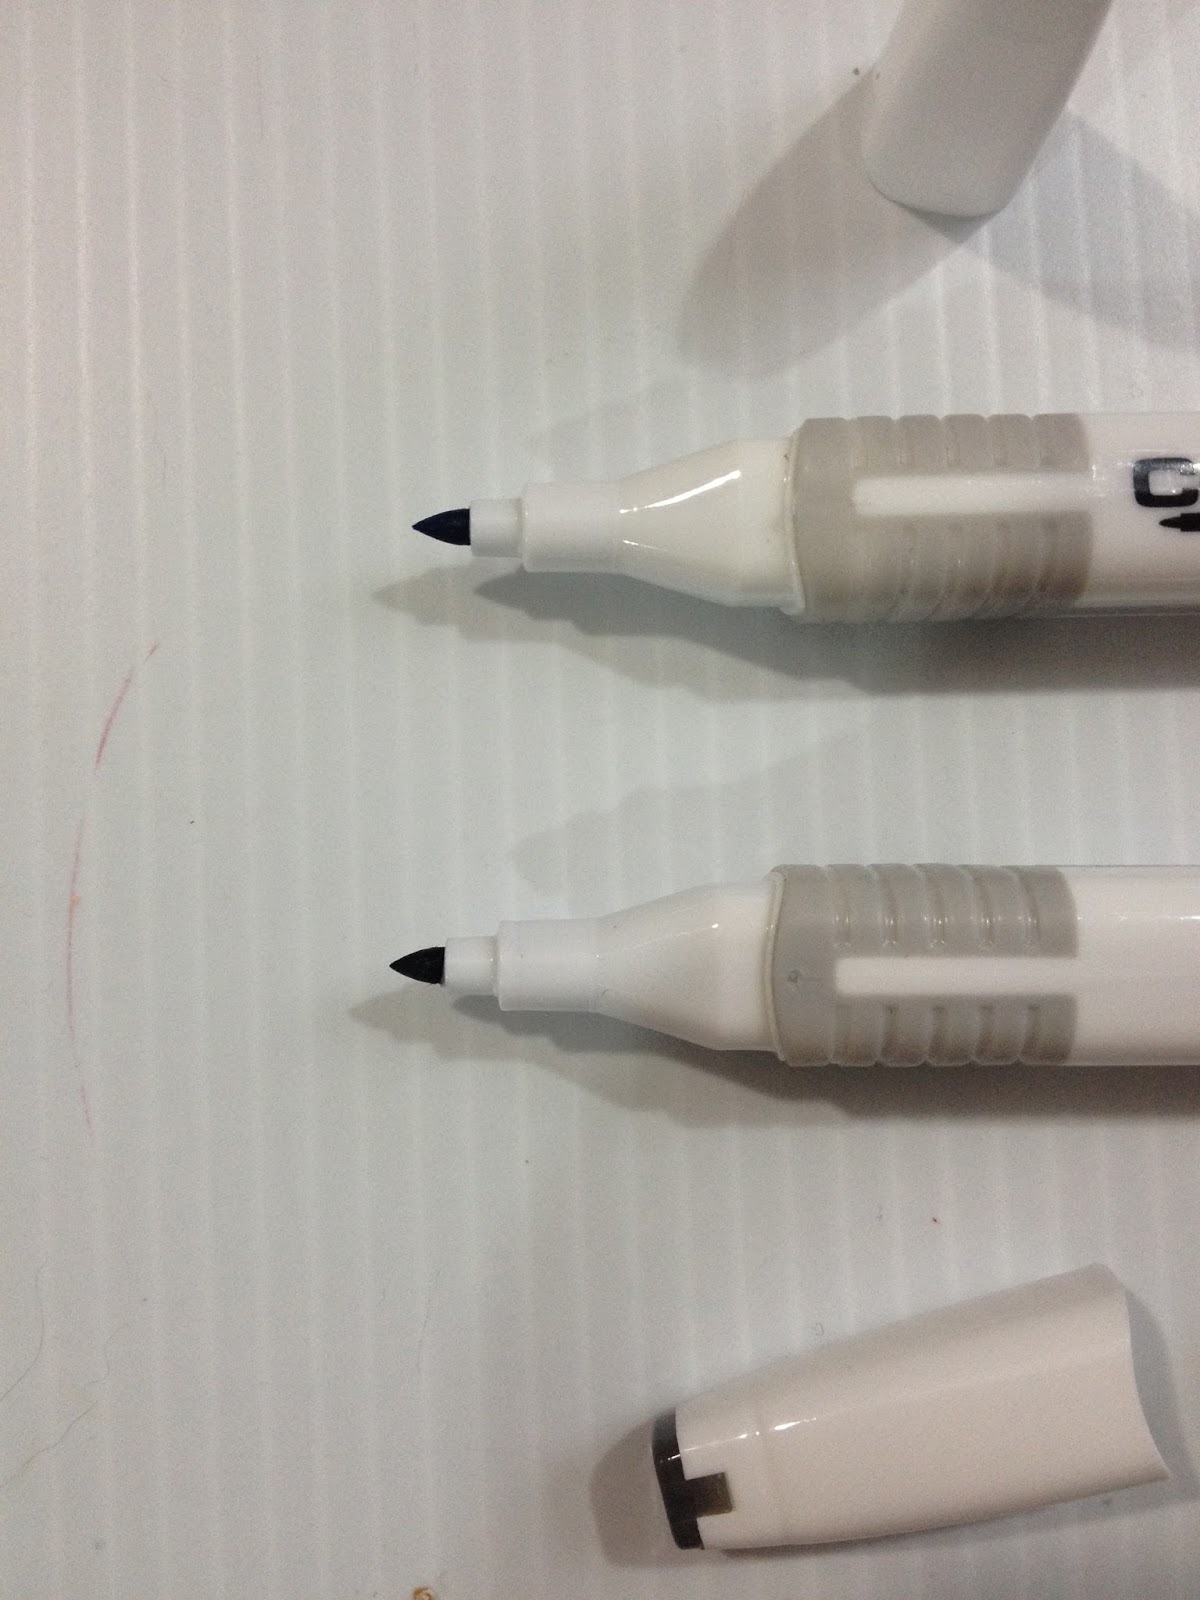
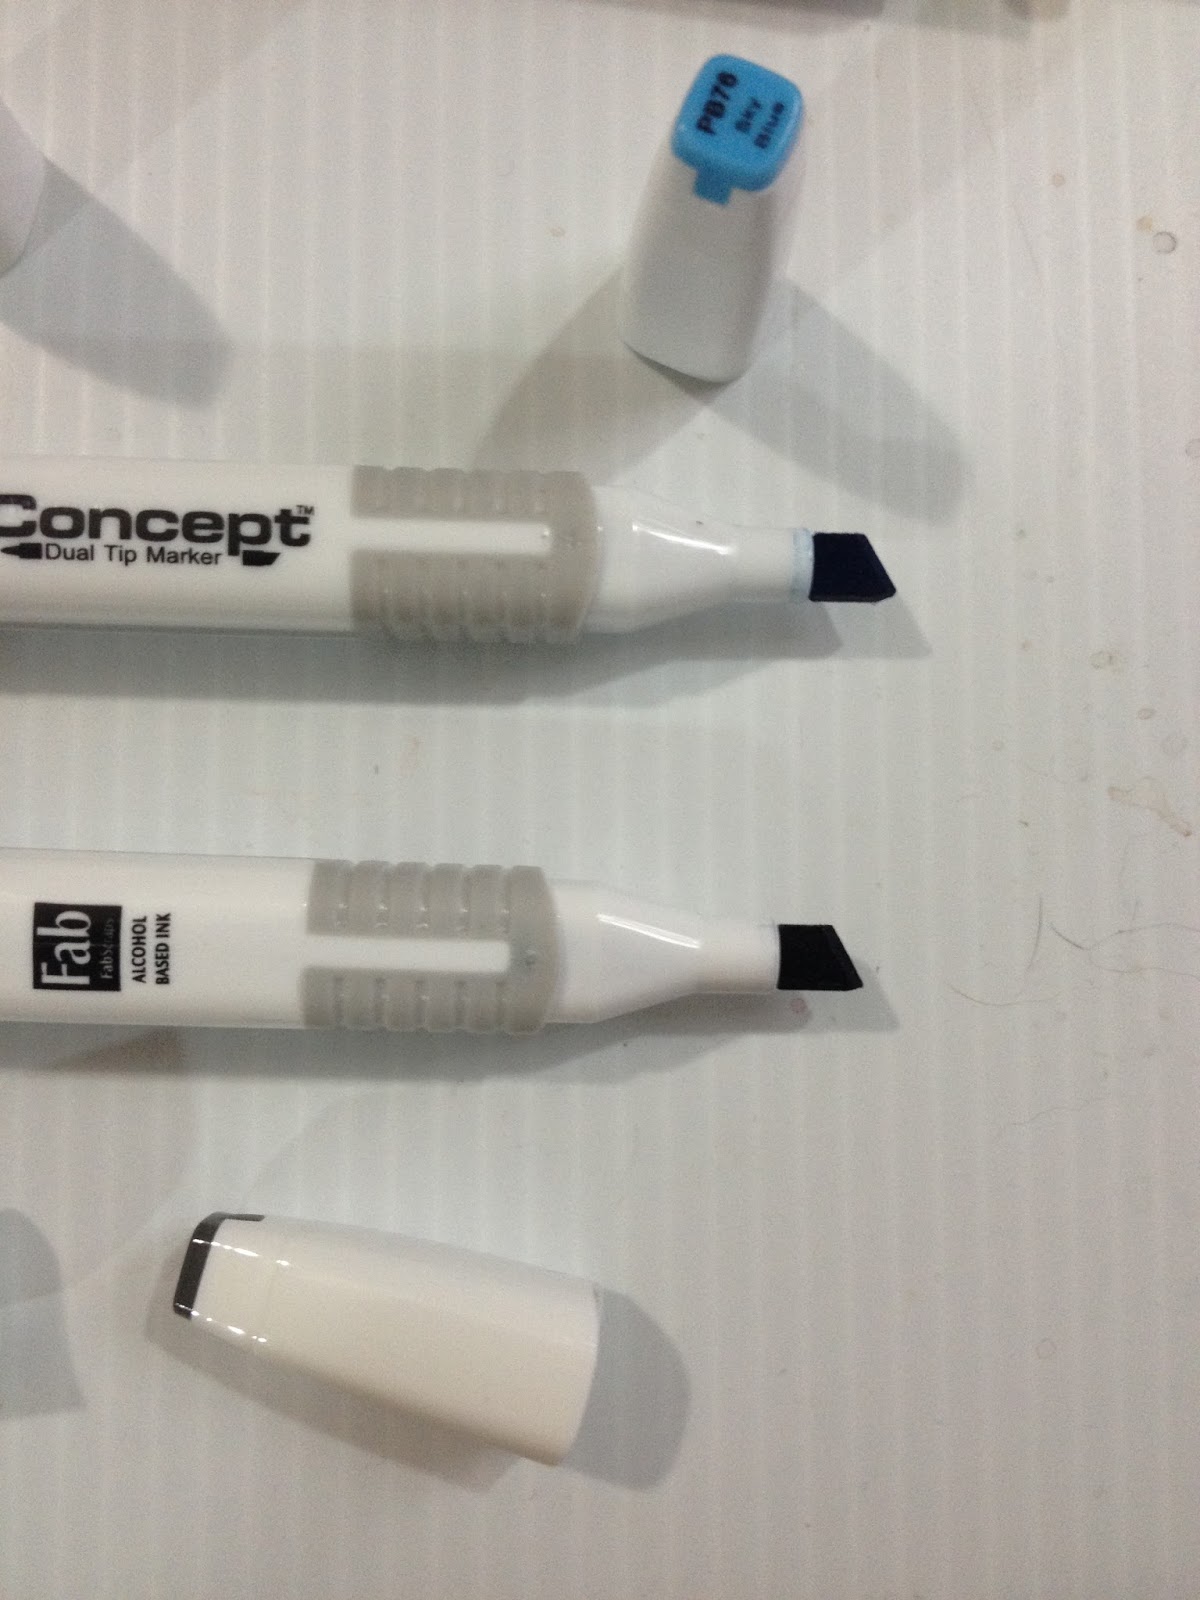
Compared to the Copic Sketch's Superbrush, the 'brush' on the Fab marker is really small and unimpressive, just like the Concept marker, and nothing at all like the nibs we were promised. The Fab box makes it look like a fude nib, or even a Pitt Pen medium brush nib, not this hard little bullet nib. The Chisel nib is boxy and sharp, fairly similar to Copic's chisel nib, and nowhere near as nice as Prismacolors Chisel nib. I used this nib to color the circle in my field test.
The Field Test

These markers aren't as juicy as the Concept markers, and the hard nib caused some smearing of the cured ink. The metallics are really unimpressive (but then, good metallic markers can be hard to find, especially non-pump action metallics), with the bullet nibs being very stingy with ink dispersion. I can't find other Fab marker colors, and I wonder if these are all that Fab made/licensed. If anyone knows, I'd appreciate the tip!
The Verdict
While neither of these brands are the absolute worst thing ever, they were pretty difficult to work with, even for a limited field test such as this. Both brands are uninspiring to test, and I didn't feel like putting them through more vigorous paces- why bother when there are other brands that handle so much better. The most disappointing were the Fab markers, with the promise of metallics that never panned out. The Concept markers, with their ridiculously low price point, could be a decent contender if their brush tip wasn't flat out awful. Jerry's, take a hint from Blick, and please introduce a super brush to your Concept markers, and I'd be happy to revisit the line.
Please consider donating to this blog or purchasing from Natto-shop (http://nattosoup.com/shop) if you want me to continue publishing quality content. All materials tested were purchased from my own pocket. Keep on Truckin' Nattosoup is not under any sponsorship.
I can see how this happened. With cheap alcohol based markers, there isn't much to differentiate between brands, especially when brands use the same bodies. It can be difficult to write post after post about marker brands that basically perform the same- same bad tips, same smelly inks, same poor blending, same body save for the printing. This is the case for Concept Markers, which I purchased in person at Jerry's Artarama a couple years ago, and Fab markers, which are made by Fabscraps, and were purchased a couple years ago off Overstock. Jerry's still sells Concept markers in addition to Copics, Charpaks, and Prismacolors, so unlike the Utrecht Design Markers, Concept may still be relevant to you. Fab markers, however, are harder to find as Overstock no longer sells them, but I found a set on Ebay (which will probably be long gone by the time you see this post). The set I found on eBay is the same set of 7 colors that I purchased on Overstock, which leads me to wonder if Fab made any other colors.
No one has ever written in to ask about Fabscraps or Concept markers, and I could have skipped them without anyone complaining. Chalk this up to me being a completionist when it comes to art supplies (gotta catch em all) and the fact that I'm buying these supplies out of pocket, so it feels like a waste for them to sit in my closet, forgotten.
Concept markers
Bullet and chisel nibsCurrently on sale for $1.29 openstock on Jerry's Artarama website, sets are less New marker bodies look to be a bit different from the ones I havePromises 4 different linestyles in 1 bodyEasy to hold barrelNylon nibs72 Different ColorsThese markers make a lot of promises that I'm not sure they can keep. According to the Jerry's ArtaRama website:
Concept Markers were designed with the discerning artist in mind. All Concept Markers offer a distinguished, high-quality, permanent ink, that evenly and effortlessly streams through both tips, at any angle. The construction is notably impeccable. Beginning with their barrel, it has an ergonomic shape, making it easy to hold and less likely to roll off of a table. Each end of a Concept Marker features a different tip. One end has a flexible fine tip, for applying details or thin outlines to artwork. The other end contains a chisel-shaped tip, that can draw up to three different line widths depending on the angle it is held. Both tips are made of nylon and are created to withstand frequent use and a range of pressures.Concept Alcohol based markers have a lot of stiff competition from Copic, Prismacolor, Letraset, and even Blick. All of these companies are currently making vibrant alcohol based markers that work well together, are easy to blend, and are well built. Given that Fab markers use the same bodies and seemingly nibs as the Concept markers, one can assume that many of these claims should extend to the Fab markers as well.
The color and style combinations available with Concept Dual-Tip Markers far exceeds other competing brands. With a line of 72 colors currently available, as well as a blender marker included in every set or available by itself , mixing colors has never been easier with markers, whether you're looking for fine detail or a broad wash.
The Packaging
For the purposes of accurate testing (and probably because they weren't available openstock at the time) I purchased a set of 12 basic colors. My set of 12 came in a clear plastic box, which is pretty common for generic alcohol based markers.

Colors in set:
#15 Red
#24 Orange
#45 Yellow
#59 Green
#55 Green
#65 Blue Green
#76 Blue
#72 Blue
#85 Purple
#98 Brown
Black
blender
Text reads:
Each of these high-quality markers feature 2 nylon tips that are packed with vibrant ink! One end is a brush tip, for soft line detail. The other end contains a chisel tip, which can draw 3 different controlled line widths. The ergonomic barrel of Concept markers is comfortable to hold and will not roll off of the table.

 Side by side comparison of Concept and MEXPY marker boxes. Same box, except the MEXPY box has handy dividers at the bottom to help hold markers in place. The Concept box lacks these dividers.
In between when I purchased my Concept markers, and when I actually managed to get around to writing this review, a new color palette was introduced for the body of Concept markers, so the markers you see in stores will differ visually from the ones I'm reviewing here.
New Body
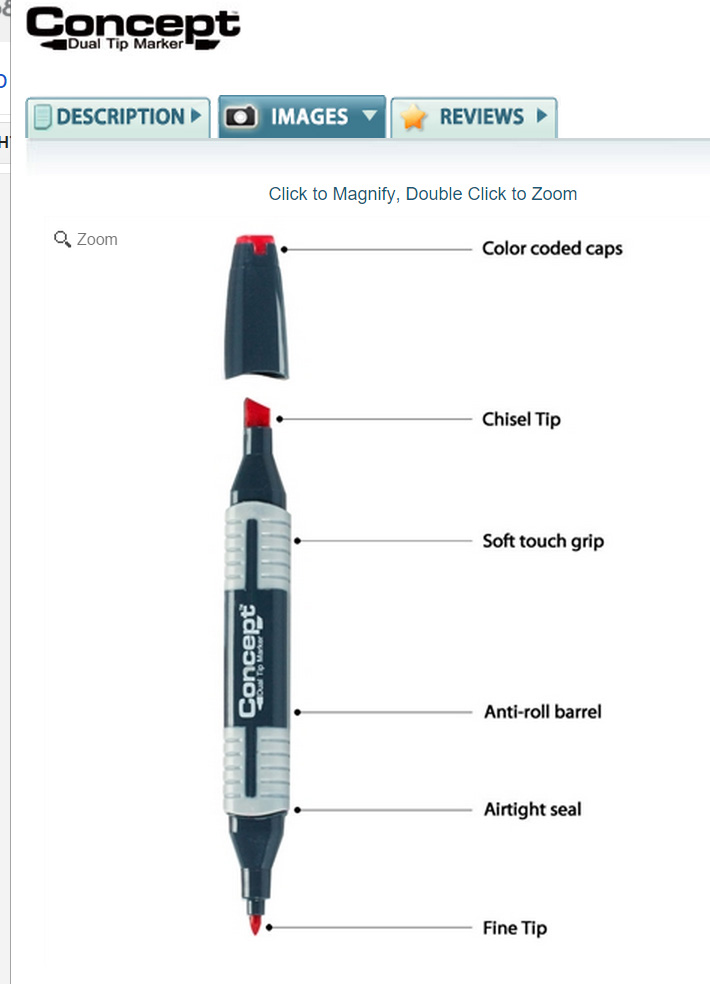 Image from the Jerry's ArtaRama site. Although the colors of the barrel have changed over the years, the features are identical.
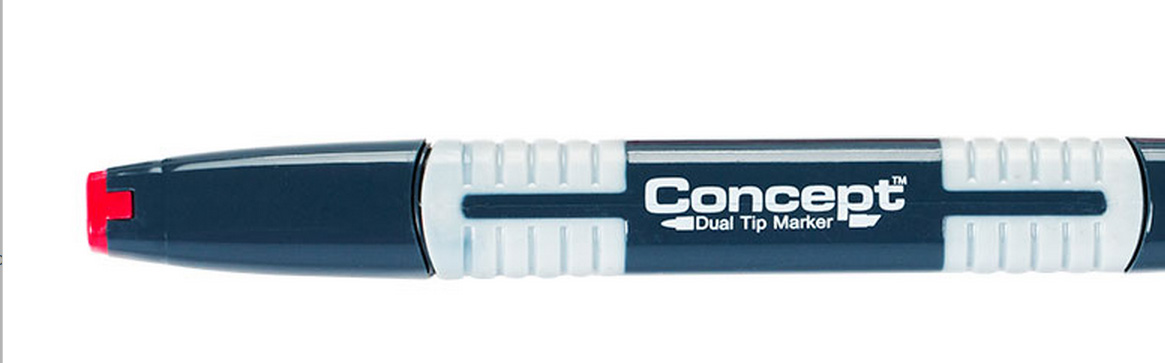 Image from Jerry's ArtaRama Site
 Image from Jerry's ArtaRama siteWithout owning any of the new Concept markers, and just going by the photos from Jerry's, it doesn't look like much has really changed about the Concept markers, especially not the nylon nibs.
Edit (9/21): I went to Jerry's Artarama today in Nashville, TN, and they have the old body Concept markers for sale in their openstock display, with the newer ones being sold in sets.
Old Body (Kind I have)

The caps feature the color number (for color families, I presume) and the color name, which is handyl, as the body of the marker includes neither of these things.
Nowhere to be seen is the soft brush nib promised on the side of my Concept box. No, that's a hard as rock bullet nib.
The plastic color chips at the top of each cap don't really do a good job indicating the color of the ink within.
The 'soft touch grip' is more sticky than cushy, and I've never had a problem with my hands becoming sore from using markers, so this solves a problem I don't think anyone's ever really had.
The Field Test
The Concept alcohol markers I received were reasonably juicy- several of the caps had ink in them, perhaps due to the fact that my markers may have been overfilled? They were pretty comparable in terms of ink smearing to the almost empty Copic sketches I used in this review (dry markers, especially dry brush markers, are prone to smearing ink, no matter how well cured the ink is), but laid down ink smoothly (even if it was a pain in the butt to apply with the chisel and bullet brush nibs). Concept markers react well to the included blender marker, and slightly less well to the Copic colorless blender.

The color chips on the top of the caps don't accurately reflect the color of the ink inside, so if you're going to use these markers, rely more on your swatches for accuracy, and the chips for just general color selection.
More About Concept Markers
Nine Reasons Concept Markers Will Change the Way You Draw
Product Spotlight: Concept Dual Tip Markers from Jerry's Artarama
Concept VS Fab
One of the problems I encountered repeatedly while writing this review was that I would put Concept photos in the Fab section and vice versa. These markers are almost completely identical in terms of body and nibs.

 Top: Concept
Bottom: Fab
 Top: Concept
Bottom: Fab
Pretty boring, right? There's so little to differentiate between the two brands, I can't help but wonder if Fabscraps just purchased a right to distribute the Concept markers under their own label.
Fab Markers by Fabscraps
The Packaging
 This is not my photo, I tossed the packaging awhile back. This photo is probably one of the official ones, and it was used for the Fab Markers eBay listing.I'd thrown away my packaging for the Fab markers a long time ago, but the package hasn't changed from the above image. My Fab markers came in a plastic box with a blender, two metallic markers, a blender, two browns, a gray, and a black.
The Markers

Compared to the Copic Sketch's Superbrush, the 'brush' on the Fab marker is really small and unimpressive, just like the Concept marker, and nothing at all like the nibs we were promised. The Fab box makes it look like a fude nib, or even a Pitt Pen medium brush nib, not this hard little bullet nib. The Chisel nib is boxy and sharp, fairly similar to Copic's chisel nib, and nowhere near as nice as Prismacolors Chisel nib. I used this nib to color the circle in my field test.
The Field Test
These markers aren't as juicy as the Concept markers, and the hard nib caused some smearing of the cured ink. The metallics are really unimpressive (but then, good metallic markers can be hard to find, especially non-pump action metallics), with the bullet nibs being very stingy with ink dispersion. I can't find other Fab marker colors, and I wonder if these are all that Fab made/licensed. If anyone knows, I'd appreciate the tip!
The Verdict
While neither of these brands are the absolute worst thing ever, they were pretty difficult to work with, even for a limited field test such as this. Both brands are uninspiring to test, and I didn't feel like putting them through more vigorous paces- why bother when there are other brands that handle so much better. The most disappointing were the Fab markers, with the promise of metallics that never panned out. The Concept markers, with their ridiculously low price point, could be a decent contender if their brush tip wasn't flat out awful. Jerry's, take a hint from Blick, and please introduce a super brush to your Concept markers, and I'd be happy to revisit the line.
Please consider donating to this blog or purchasing from Natto-shop (http://nattosoup.com/shop) if you want me to continue publishing quality content. All materials tested were purchased from my own pocket. Keep on Truckin' Nattosoup is not under any sponsorship.
November 20, 2015
Using Toned Tan Drawing Paper To Bring Sketches to Life
Recently I purchased a 9"x12" Strathmore Toned Tan sketchbook from Strathmore's 400 series. I'd seen artists on Instagram and Tumblr share their sketches, and I was always impressed by how nice things looked on toned paper. I liked the fact that the paper served as a midtone, and that you could add highlights with a white gel pen, white gouache, white color pencil, white chalk, or even white Winsor and Newton pigment markers. The paper is very smooth, perfect for inking on, and takes markers moderately well.
My media of choice for this paper are Prismacolor color pencils, Derwent Coloursoft color pencils, Sailor Mitsuo Aida brushpens, Copic markers (in warm grays!), colored Pitt Pens, and even Winsor & Newton Pigment markers. You can find links to all of these products at the bottom of this post, if you're interested in checking them out. It's really fun to play around on this paper, and the result is very finished and satisfying.
I highly recommend you purchase a set of Coloursoft color pencils, or at least purchase a white Coloursoft pencil, as these are some of the smoothest, buttery-est color pencils I've ever used. While they're a bit too soft for my warmup sketches, they're great for applying fields of color evenly. I plan on doing a post exploring them, and other color pencil brands in the future, but I think they're worth mentioning now. I'm also currently working on a large Winsor & Newton Pigment marker post (waiting on my Winsor & Newton marker paper sample to come in, as well as my set of skintones), but if you have any questions about either brand, don't hesitate to ask!
While the paper takes markers decently well, they will bleed through, so I recommend putting a sheet of scrap paper beneath pages you plan on rendering with markers. I also sketched my inked pieces with pencil first, and pencil erases very cleanly from this paper, leaving no scuffs or marks. As always, I allow the Mitsuo Aida ink to dry 24 hours before I apply any water or alcohol based media on top, to prevent smearing.
 Completed with Prismacolor pencils
 Completed with a Sailor Mitsuo Aida pen, Copic Markers, and white highlights were added with a white Winsor & Newton Pigment Marker
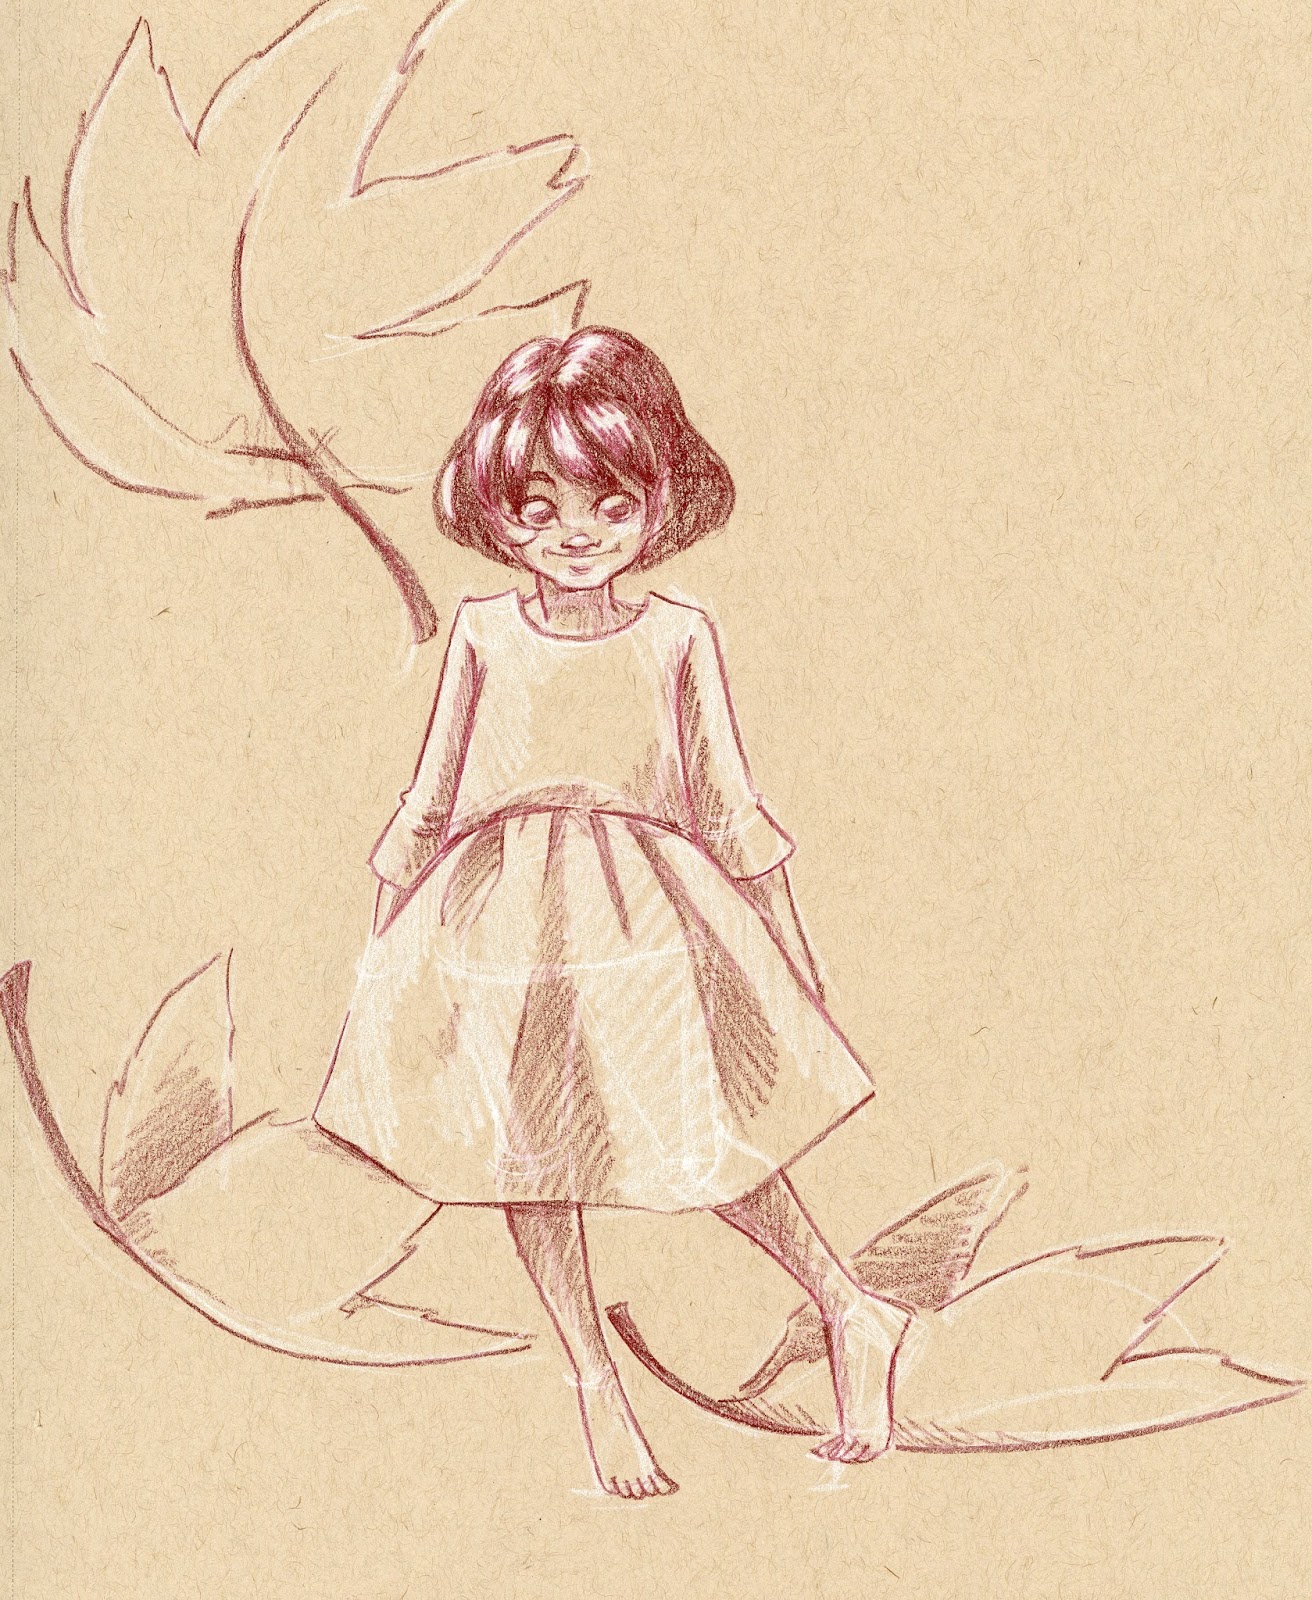 Prismacolor pencils
 Completed with Sailor Mitsuo Aidia, select Copic Warm Grays, and white Winsor & Newton Pigment Marker
 Completed with Prismacolor Pencils and Derwent Coloursoft (white)
 Kara costume 1: Dandelion Completed with Sailor Mitsuo Aida, Pitt Pens, and Winsor & Newton Pigment Markers
 Completed with Prismacolor pencils, Derwent Coloursoft, Recollections Opaque White Marker, and Winsor & Newton Pigment Markers
 Kara costume 2: Dragonfly Completed with Sailor Mitsuo Aida, Pitt Pens, Copics, and Winsor & Newton Pigment Markers
 Kara costume 3: Frog Completed with Sailor Mitsuo Aida and Winsor& Newton Pigment Markers
 Completed with Prismacolor Pencils and Derwent Coloursoft
 Completed with Prismacolor Pencils and Derwent Coloursoft
 Completed with Prismacolor pencils and Derwent Coloursoft
 Kara costume 4: Goldfish Completed with Winsor & Newton Pigment Markers. Gold shadows were added with Pitt Pens
If you're looking to spice up your sketching, or want to give your art an interesting new direction, you should check out Strathmore's Toned sketchbooks, available in a warm gray and this tan.
Supplies Used In This Post
Please consider donating to this blog or purchasing from Natto-shop (http://nattosoup.com/shop) if you want me to continue publishing quality content. All materials tested were purchased from my own pocket. Keep on Truckin' Nattosoup is not under any sponsorship.

November 18, 2015
Alcohol-based, Waterbased, Watercolor-A Quick Overview
In the past, I've briefly touched on the differences between alcohol based markers and water based markers in the post How to Know if a Marker is Waterbased/Waterproof. At the time, I was testing A LOT of alcohol based markers, but had very little experience with using waterbased markers for creating art. I made a lot of assumptions in that post based on research, but not based on experience, and now that I have a little more experience with waterbased markers, watercolor markers, and alcohol based markers, I wanted to revisit the topic. I also wrote a post Alcohol Based Markers Vs Water Based, as I felt the topic could benefit from even more exploration. I recommend you guys check out both of those posts if you need a background on waterbased and alcohol based markers.
Since writing those posts, I've become very involved in testing watercolor markers in addition to alcohol and waterbased markers, so I wanted to throw them into the mix and do a post that covers all three.
General Uses
Alcohol Based Markers
Examples: Copic Sketch, Prismacolor, Spectrum Noir
Traits: Sometimes refillable, nibs sometimes replaceable,
StampingCardmakingProfessional IllustrationProduct Design/ConceptAdult Coloring Books
Waterbased Markers
Examples: Crayola Supertip, Crayola classroom markers, CraZArt Supertip
Student work- classwork, class activitiesAdult Coloring Books
Watercolor Markers
Examples: Tombow ABT, Marvy LePlumeII, Zig Art and Graphic Twin
CardmakingStampingProfessional IllustrationWatercolor IllustrationWaterbased markers are a major category, like alcohol based markers, whereas watercolor markers are a subset of waterbased markers.
In stores, when you see markers advertised as waterbased markers (as opposed to watercolor markers), these are usually student grade markers. This doesn't mean you shouldn't give them a shot, it just means you may have to stretch to find a good use for them.
Common Issues
Alcohol Based Markers
Expensive to procure a large enough set to fulfill many illustration needsOnly a couple common brands in the US are refillable, refills may be hard to get
Waterbased Markers
Not designed for professional illustrationRepeated application causes damage to paper surface, ruins eventual illustrationDifficult to make something that looks niceColor selection is limited, largest set I've seen is 75 total colorsMost brands can't blendMost brands can't LayerNibs are often awfulDifficult to apply color without it streaking
Watercolor Markers
Learning curve if using for illustrationTake getting used toPreviously difficult to find everywhereNon-refillableMore expensive than waterbased markers
Finding The Right Papers
The number one thing I was curious about was cross blend-ability. Can you blend alcohol based markers with water? Can you use a waterbased colorless blender with waterbased markers? Can you use water to blend waterbased markers? I had pretty much all the tools I needed for some basic tests, so I dived right in one evening, taking photos along the way.
Test Subjects:
Crayola Waterbased Markers
Zig Art and Graphic Twin Watercolor Markers
Copic Sketch Alcohol Based Markers
 Top: Crayola Supertip waterbased markers. Bottom row: Tombow ABT Colorless blender, Zig Art and Graphic Twin watercolor markers, Copic Ciao colorless blender, Copic Sketch marker, waterbrush filled with water.
 Although not all alcohol based markers feature a Japanese brush nib (or Super Brush, as Copic calls it), Copic Sketch and Copic Ciao come with them. The large, soft, rubbery brush nib on the Zig Art and Graphic Twin is the closest I've come to a Super Brush on a watercolor marker- both brush nibs are able to give very delicate strokes. The Super Tip on the Crayola isn't so super in comparison, it's very stiff and dry. I have found a couple brands of waterbased markers that DO offer brush nibs- a brand sold at The Paper Source, and Sargent's Classic waterbased markers, both of which will be reviewed here in the upcoming months.

Although not all alcohol based markers are refillable, many are, and the Copic Sketch I use in this review is not only refillable, but you can replace both of the nibs easily. You cannot replace the nibs on the Zig Art and Graphic Twin or the Crayola Supertips- these cheaper markers are intended to be disposable.
The Blenders:
Tombow ABT Colorless Blender
Copic Caio Alcohol Colorless Blender
Clean Waterbrush full of water
 From left to right: Pentel waterbrush, Tombow ABT colorless blender (waterbased), Copic Ciao Colorless Blender (alcohol based)IN GENERAL: You can assume that waterbased markers can be blended by waterbased blenders or water, and alcohol based markers can be blended with alcohol.
HOWEVER: Alcohol does affect watercolors while they are still wet, so I wanted to see what effect Colorless Blender would have on still wet waterbased marker and watercolor marker.
The Swatch Tests:
The Papers:
Swatchbook- Strathmore Watercolor Paper
Cardstock
Pacon Marker Paper
Strathmore Coldpress Watercolor Journal Paper

On watercolor paper, only alcohol based colorless blender (Copic brand, in this case) affects alcohol based marker (again, Copic). Water and Tombow ABT colorless blender do nothing.

On watercolor paper, alcohol based colorless blender, Tombow ABT colorless blender, and water all effect Crayola waterbased markers to different degrees.

On watercolor paper, alcohol based colorless blender, Tombow ABT colorless blender, and water all effect watercolor markers like Zig Art and Graphic Twin.
Cardstock


On cardstock, only alcohol based colorless blender effects alcohol based markers. Tombow ABT colorless blender and water do nothing.

On cardstock, Copic's alcohol based colorless blender has no effect on waterbased markers like Crayola, and Tombow ABT and water have limited effect. Tombow ABT and water cause paper damage when applied over waterbased marker on cardstock.

On cardstock, alcohol based colorless blender has little effect on watercolor markers like the Zig Art and Graphic Twin. Water and Tombow ABT's colorless blender have some effect. Water causes paper damage on cardstock.
Marker Paper


On marker paper, only alcohol based colorless blender effects alcohol based marker ink. Tombow ABT and water do nothing.

On marker paper, alcohol based colorless blender has little effect on waterbased markers like Crayolas. Tombow ABT's colorless blender does disrupt the ink a little, but not enough to encourage blending on marker paper, and water disrupts the paper surface.

On marker paper, alcohol based colorless blender does cause the pigment of the watercolor marker to shift a little, but not significantly. Tombow ABT's colorless blender has a better result, although not significant blending. Water causes pilling, and ruins the paper's surface.
General Notes:
It seems like Crayola waterbased markers perform almost as well as the Zig Art and Graphic Twin watercolor markers for these preliminary tests. Both react to Copic Colorless Blender (basically, alcohol), the Tombow ABT (which is a watercolor marker) blender, and regular water in a waterbrush. Surprisingly, the Crayola I tested (a rich reddish brown, which tend to be prone to seperation) did not separate in these conditions, regardless of the paper.
Reworking waterbased and watercolor media with water and the Tombow ABT colorless blender causes the page to pill, so if you work in multiple layers (basically anything more than one layer blended out) cardstock and marker paper aren't good choices for water based and watercolor media.
On watercolor paper, all three blenders worked to some degree with watercolor and waterbased markers. Not surprisingly, waterbased blenders had zero effect on alcohol based markers. On the other two papers tested, waterbased and watercolor markers faired much worse, as the papers aren't designed to handle media with slow evaporation times. Alcohol based inks and blenders did just fine on cardstock, and decently well on Pacon's marker paper, but that's because the solvent dries almost immediately, so layers can be applied without damaging the paper's surface.
Compatible Inking Products:
Sailor Mitso Aida- Compatible with Alcohol, Waterbased, and Watercolor, if allowed to fully dry
India Ink- Compatible with waterbased, watercolor, NOT COMPATIBLE WITH ALCOHOL BASED INKS
Memento Inks- Compatible with Copic (link)
Copic Multiliner- Compatible with alcohol, waterbased, and watercolor, if allowed to fully dry
If you're interested in reading more about alcohol based markers, check out these links!
Alcohol-based Markers vs. Waterbased Markers
If you're interested in reading more about watercolor markers, check out these links!
Watercolor Brush Pen Review: Docrafts Artiste Watercolor Markers
Watercolor Brush Pen Review: Zig Art and Graphic Twin
Mini Review: Winsor & Newton Watercolor Markers
Watercolor Brushpen Review: Tombow ABT
Watercolor Marker Review: Letraset's Aquamarkers
Watercolor Pen Review: Marvy LePlume II
If you're interested in reading more about waterbased markers like Crayola, check out these links!
Walmart Art Supply Review: Waterbased Markers
For the Materials Mentioned in this Post
Please check out my affiliates recommendations below!
Amazon.com Widgets
Your purchase from this widget, and from any of my Amazon Affiliates links and widgets, helps support this blog financially. I use the proceeds to purchase more supplies to review, which leads to more in-depth, better researched art supply reviews. If you enjoy these art supply reviews, and if you have benefited from my shared experiences, please consider doing your art supply shopping through my links.
Please consider donating to this blog or purchasing from Natto-shop (http://nattosoup.com/shop) if you want me to continue publishing quality content. All materials tested were purchased from my own pocket. Keep on Truckin' Nattosoup is not under any sponsorship.
Since writing those posts, I've become very involved in testing watercolor markers in addition to alcohol and waterbased markers, so I wanted to throw them into the mix and do a post that covers all three.
General Uses
Alcohol Based Markers
Examples: Copic Sketch, Prismacolor, Spectrum Noir
Traits: Sometimes refillable, nibs sometimes replaceable,
StampingCardmakingProfessional IllustrationProduct Design/ConceptAdult Coloring Books
Waterbased Markers
Examples: Crayola Supertip, Crayola classroom markers, CraZArt Supertip
Student work- classwork, class activitiesAdult Coloring Books
Watercolor Markers
Examples: Tombow ABT, Marvy LePlumeII, Zig Art and Graphic Twin
CardmakingStampingProfessional IllustrationWatercolor IllustrationWaterbased markers are a major category, like alcohol based markers, whereas watercolor markers are a subset of waterbased markers.
In stores, when you see markers advertised as waterbased markers (as opposed to watercolor markers), these are usually student grade markers. This doesn't mean you shouldn't give them a shot, it just means you may have to stretch to find a good use for them.
Common Issues
Alcohol Based Markers
Expensive to procure a large enough set to fulfill many illustration needsOnly a couple common brands in the US are refillable, refills may be hard to get
Waterbased Markers
Not designed for professional illustrationRepeated application causes damage to paper surface, ruins eventual illustrationDifficult to make something that looks niceColor selection is limited, largest set I've seen is 75 total colorsMost brands can't blendMost brands can't LayerNibs are often awfulDifficult to apply color without it streaking
Watercolor Markers
Learning curve if using for illustrationTake getting used toPreviously difficult to find everywhereNon-refillableMore expensive than waterbased markers
Finding The Right Papers
The number one thing I was curious about was cross blend-ability. Can you blend alcohol based markers with water? Can you use a waterbased colorless blender with waterbased markers? Can you use water to blend waterbased markers? I had pretty much all the tools I needed for some basic tests, so I dived right in one evening, taking photos along the way.
Test Subjects:
Crayola Waterbased Markers
Zig Art and Graphic Twin Watercolor Markers
Copic Sketch Alcohol Based Markers
 Top: Crayola Supertip waterbased markers. Bottom row: Tombow ABT Colorless blender, Zig Art and Graphic Twin watercolor markers, Copic Ciao colorless blender, Copic Sketch marker, waterbrush filled with water.
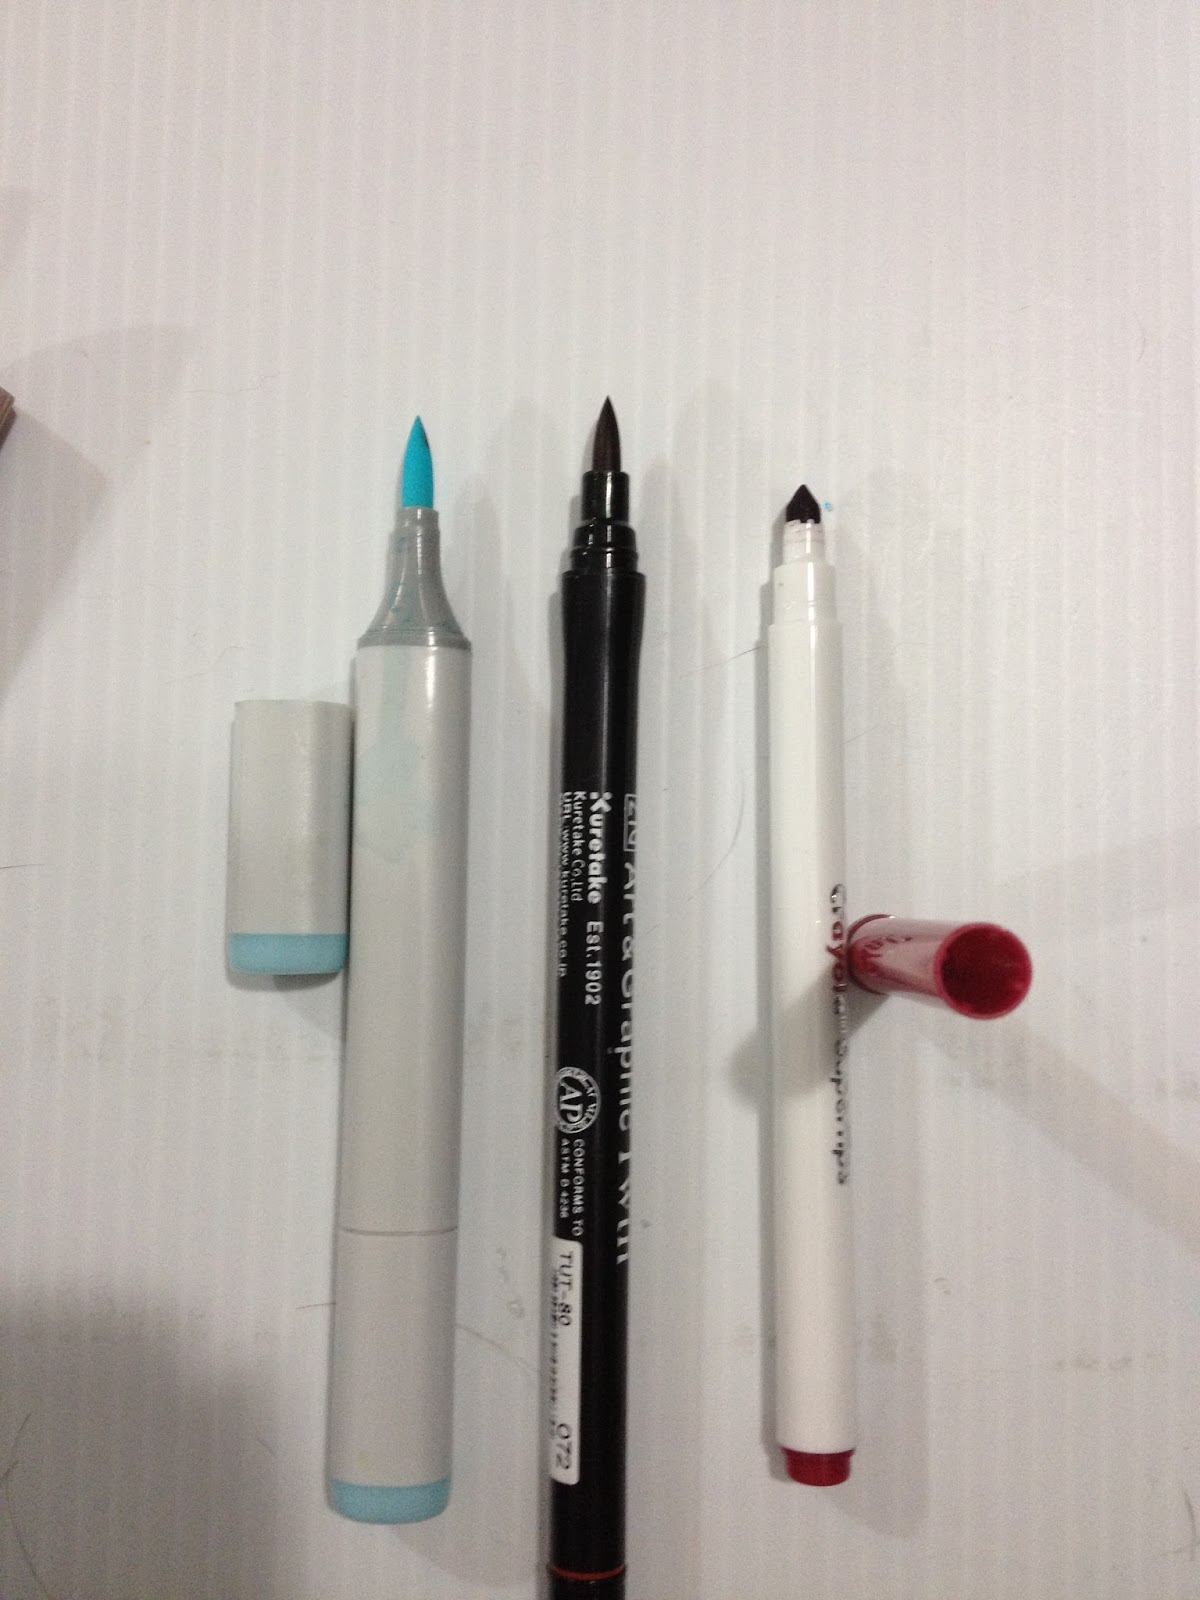 Although not all alcohol based markers feature a Japanese brush nib (or Super Brush, as Copic calls it), Copic Sketch and Copic Ciao come with them. The large, soft, rubbery brush nib on the Zig Art and Graphic Twin is the closest I've come to a Super Brush on a watercolor marker- both brush nibs are able to give very delicate strokes. The Super Tip on the Crayola isn't so super in comparison, it's very stiff and dry. I have found a couple brands of waterbased markers that DO offer brush nibs- a brand sold at The Paper Source, and Sargent's Classic waterbased markers, both of which will be reviewed here in the upcoming months.
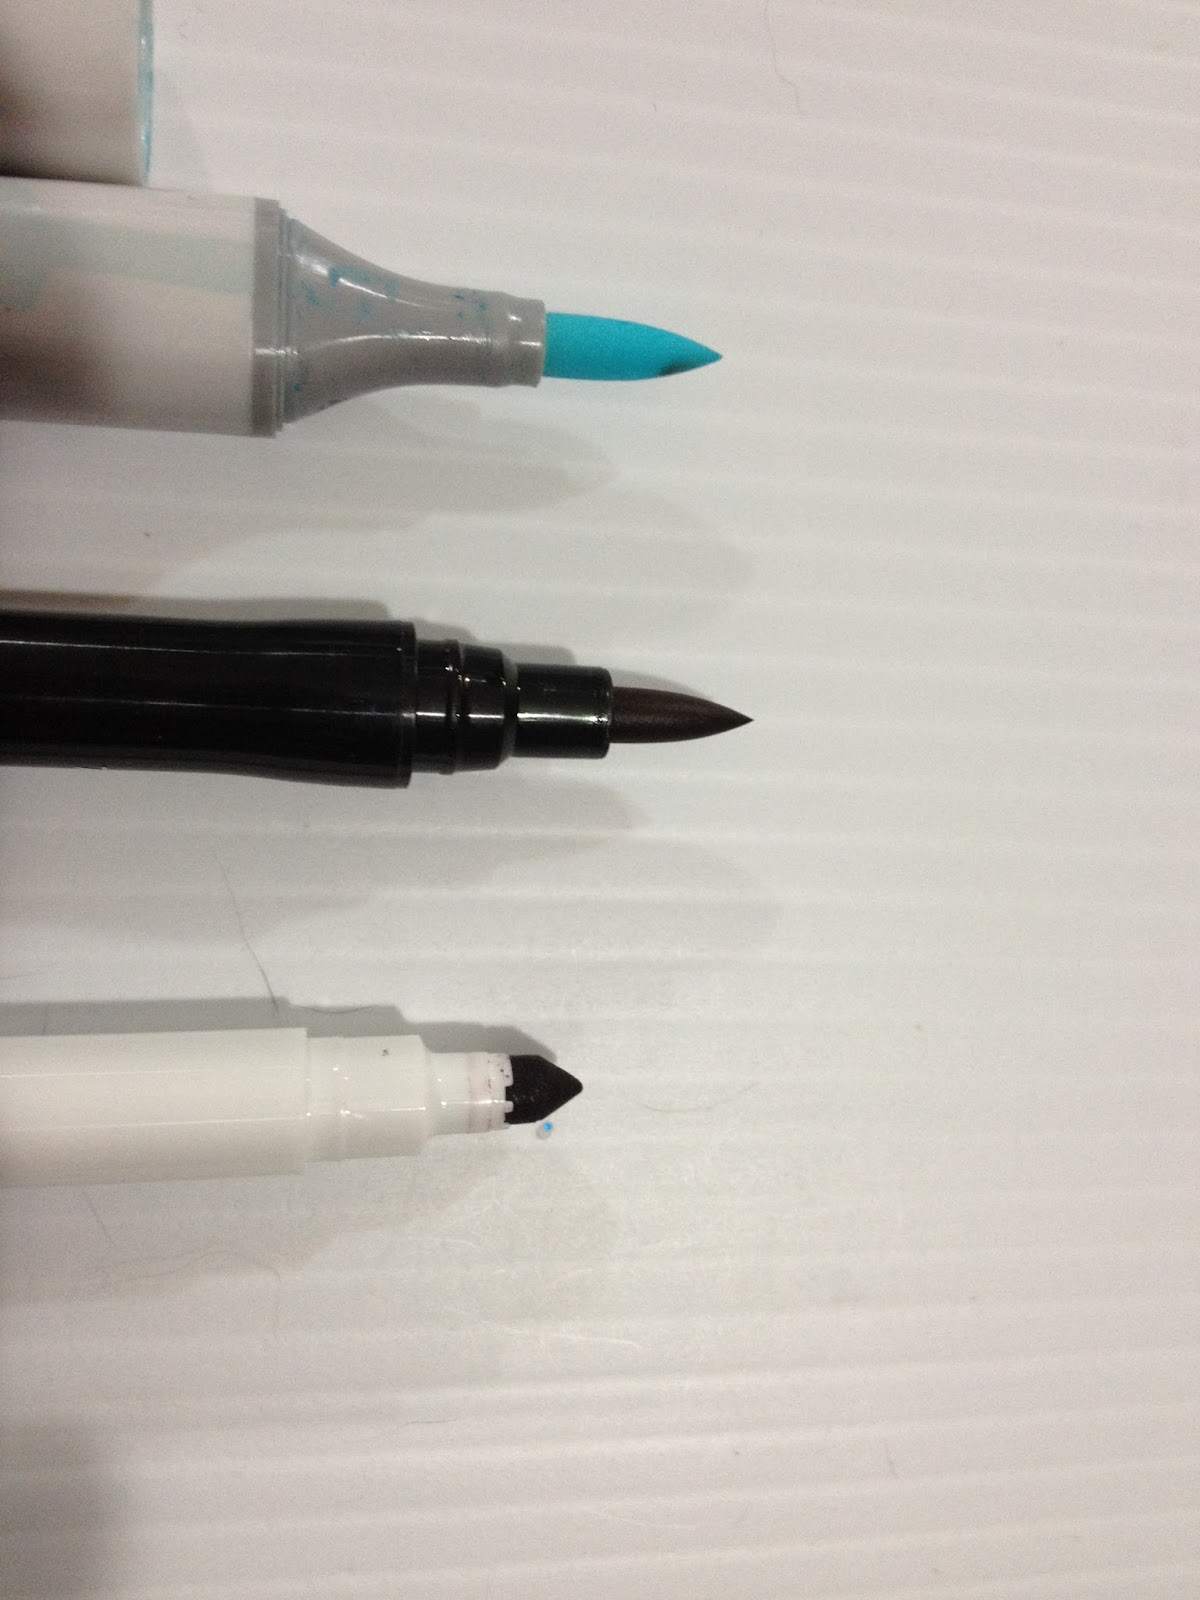
Although not all alcohol based markers are refillable, many are, and the Copic Sketch I use in this review is not only refillable, but you can replace both of the nibs easily. You cannot replace the nibs on the Zig Art and Graphic Twin or the Crayola Supertips- these cheaper markers are intended to be disposable.
The Blenders:
Tombow ABT Colorless Blender
Copic Caio Alcohol Colorless Blender
Clean Waterbrush full of water
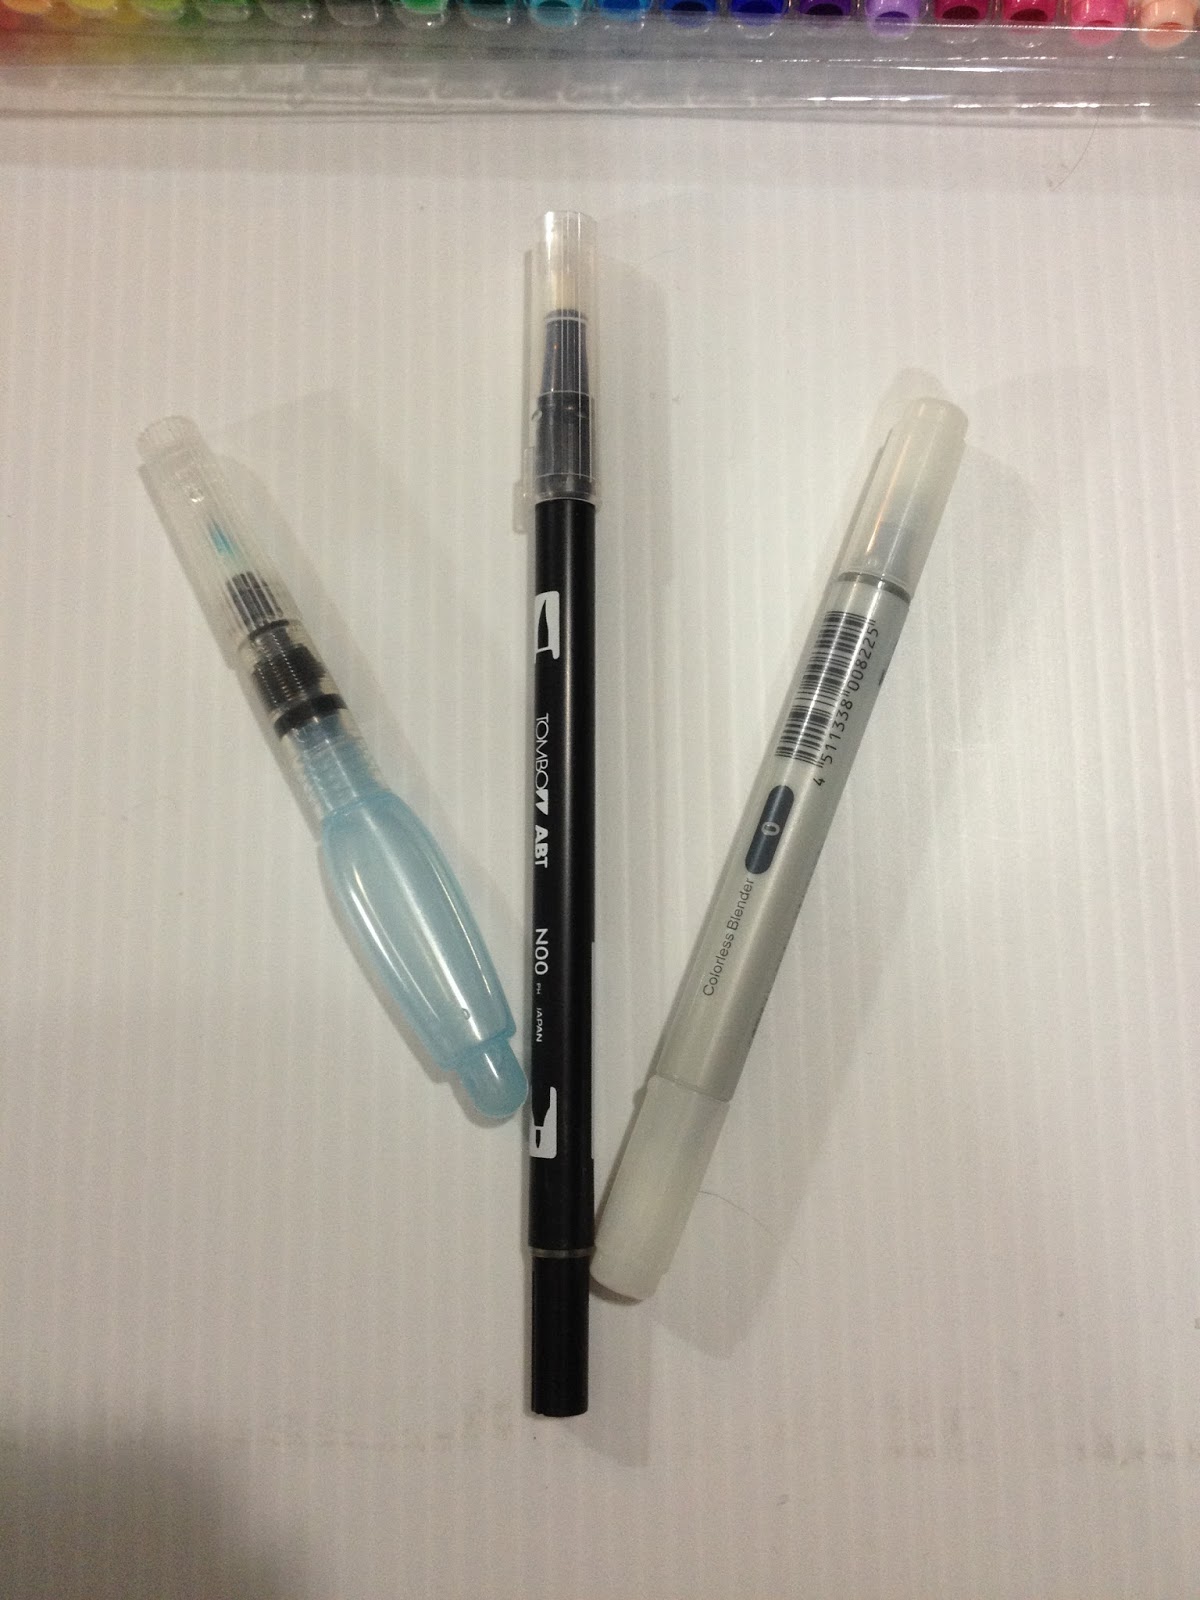 From left to right: Pentel waterbrush, Tombow ABT colorless blender (waterbased), Copic Ciao Colorless Blender (alcohol based)IN GENERAL: You can assume that waterbased markers can be blended by waterbased blenders or water, and alcohol based markers can be blended with alcohol.
 HOWEVER: Alcohol does affect watercolors while they are still wet, so I wanted to see what effect Colorless Blender would have on still wet waterbased marker and watercolor marker.
The Swatch Tests:
The Papers:
Swatchbook- Strathmore Watercolor Paper
Cardstock
Pacon Marker Paper
Strathmore Coldpress Watercolor Journal Paper
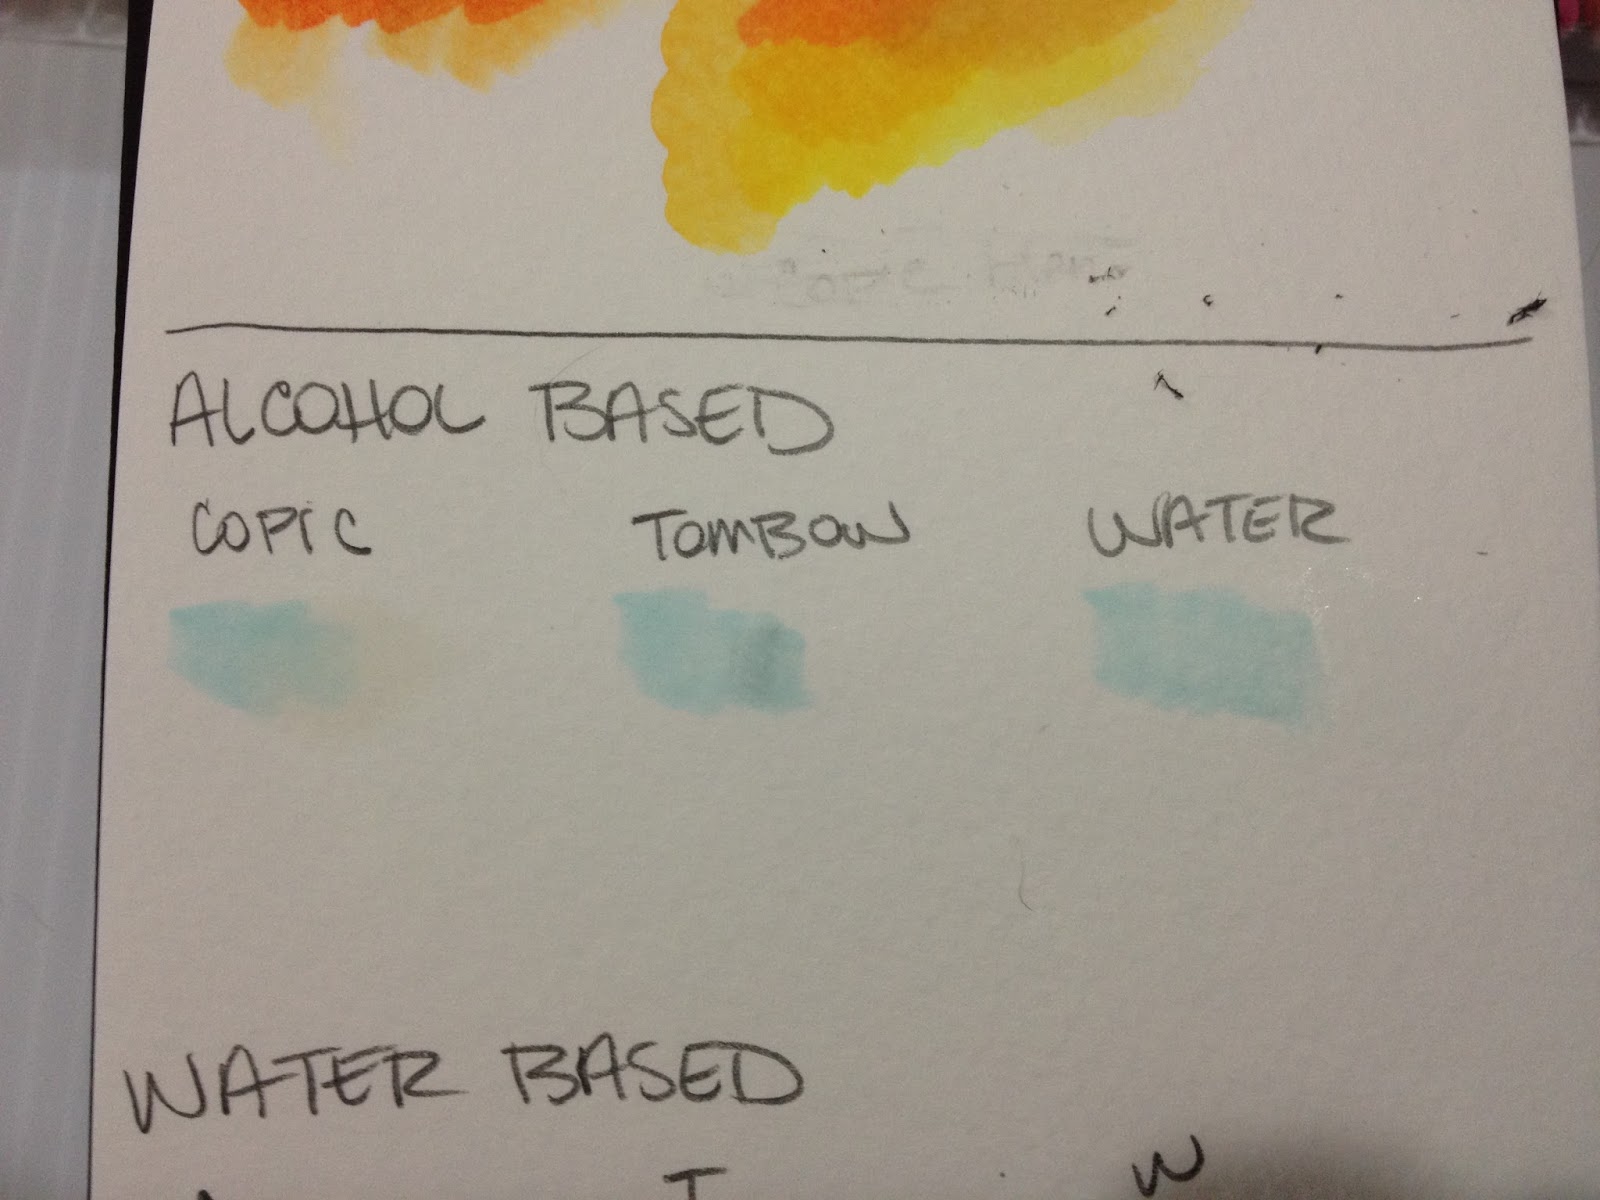
On watercolor paper, only alcohol based colorless blender (Copic brand, in this case) affects alcohol based marker (again, Copic). Water and Tombow ABT colorless blender do nothing.

On watercolor paper, alcohol based colorless blender, Tombow ABT colorless blender, and water all effect Crayola waterbased markers to different degrees.

On watercolor paper, alcohol based colorless blender, Tombow ABT colorless blender, and water all effect watercolor markers like Zig Art and Graphic Twin.
Cardstock
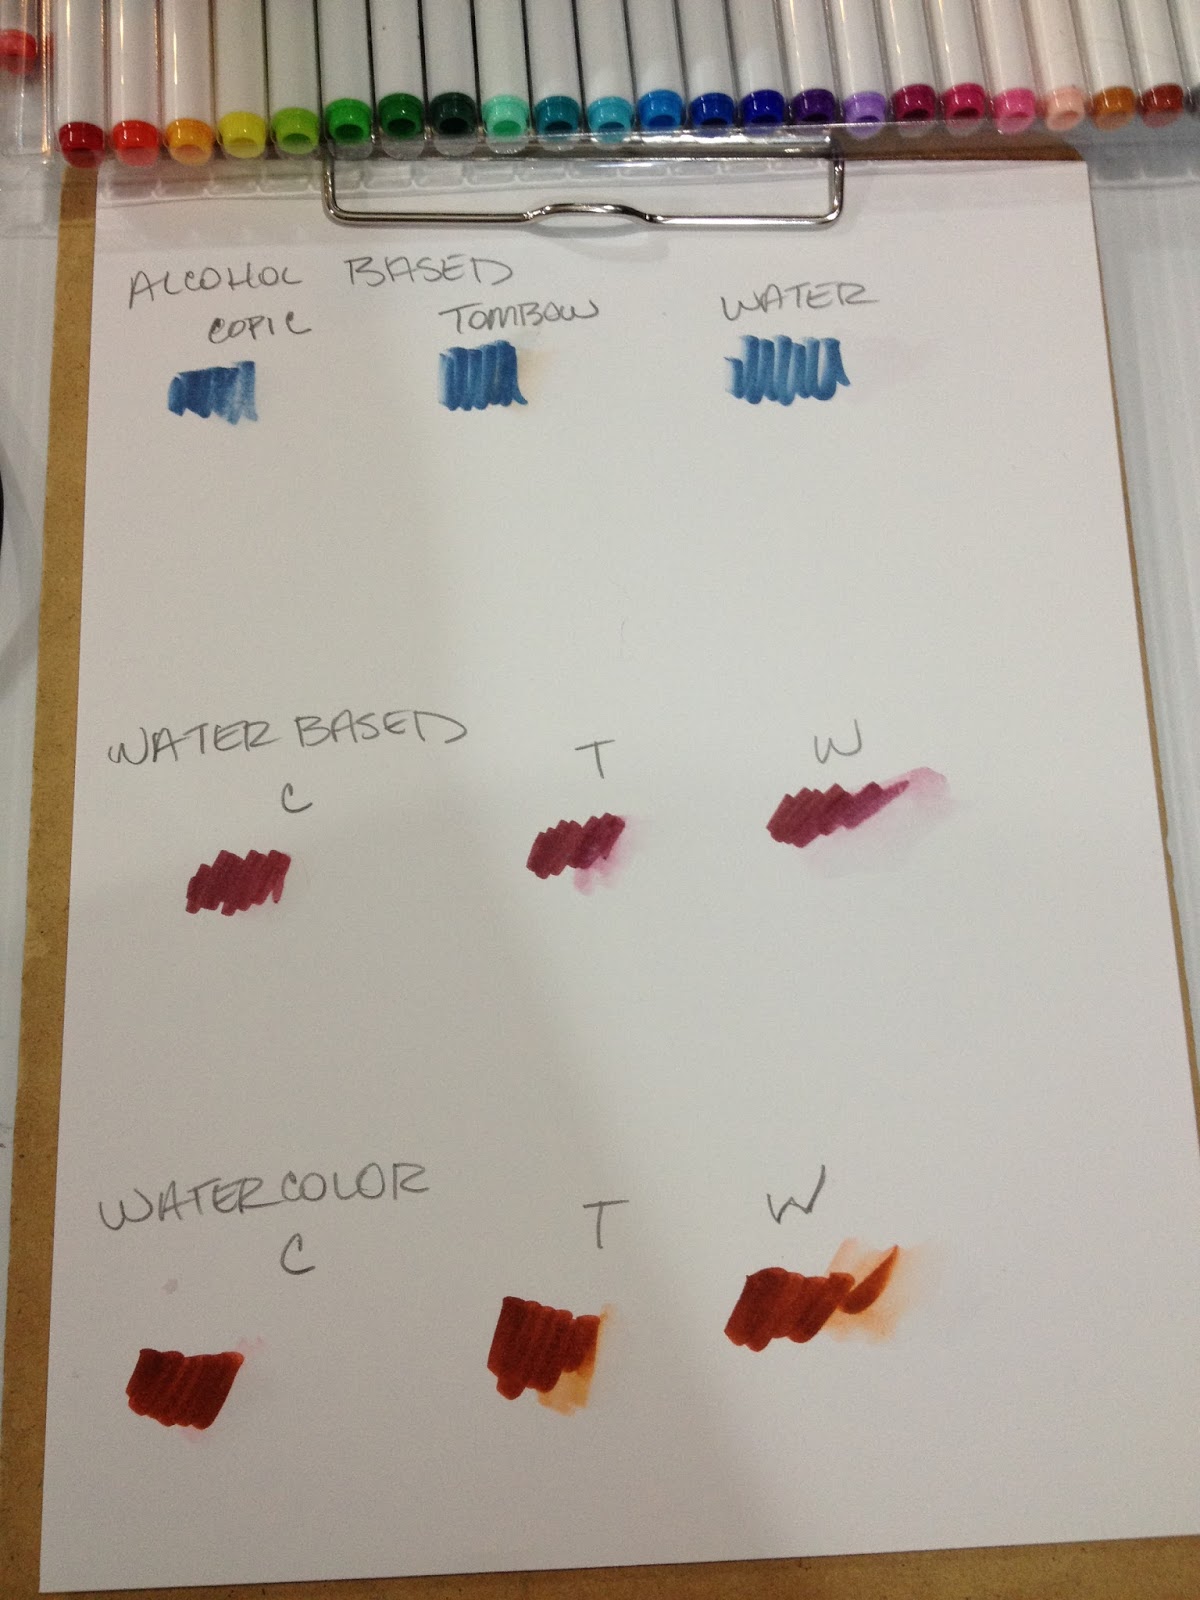
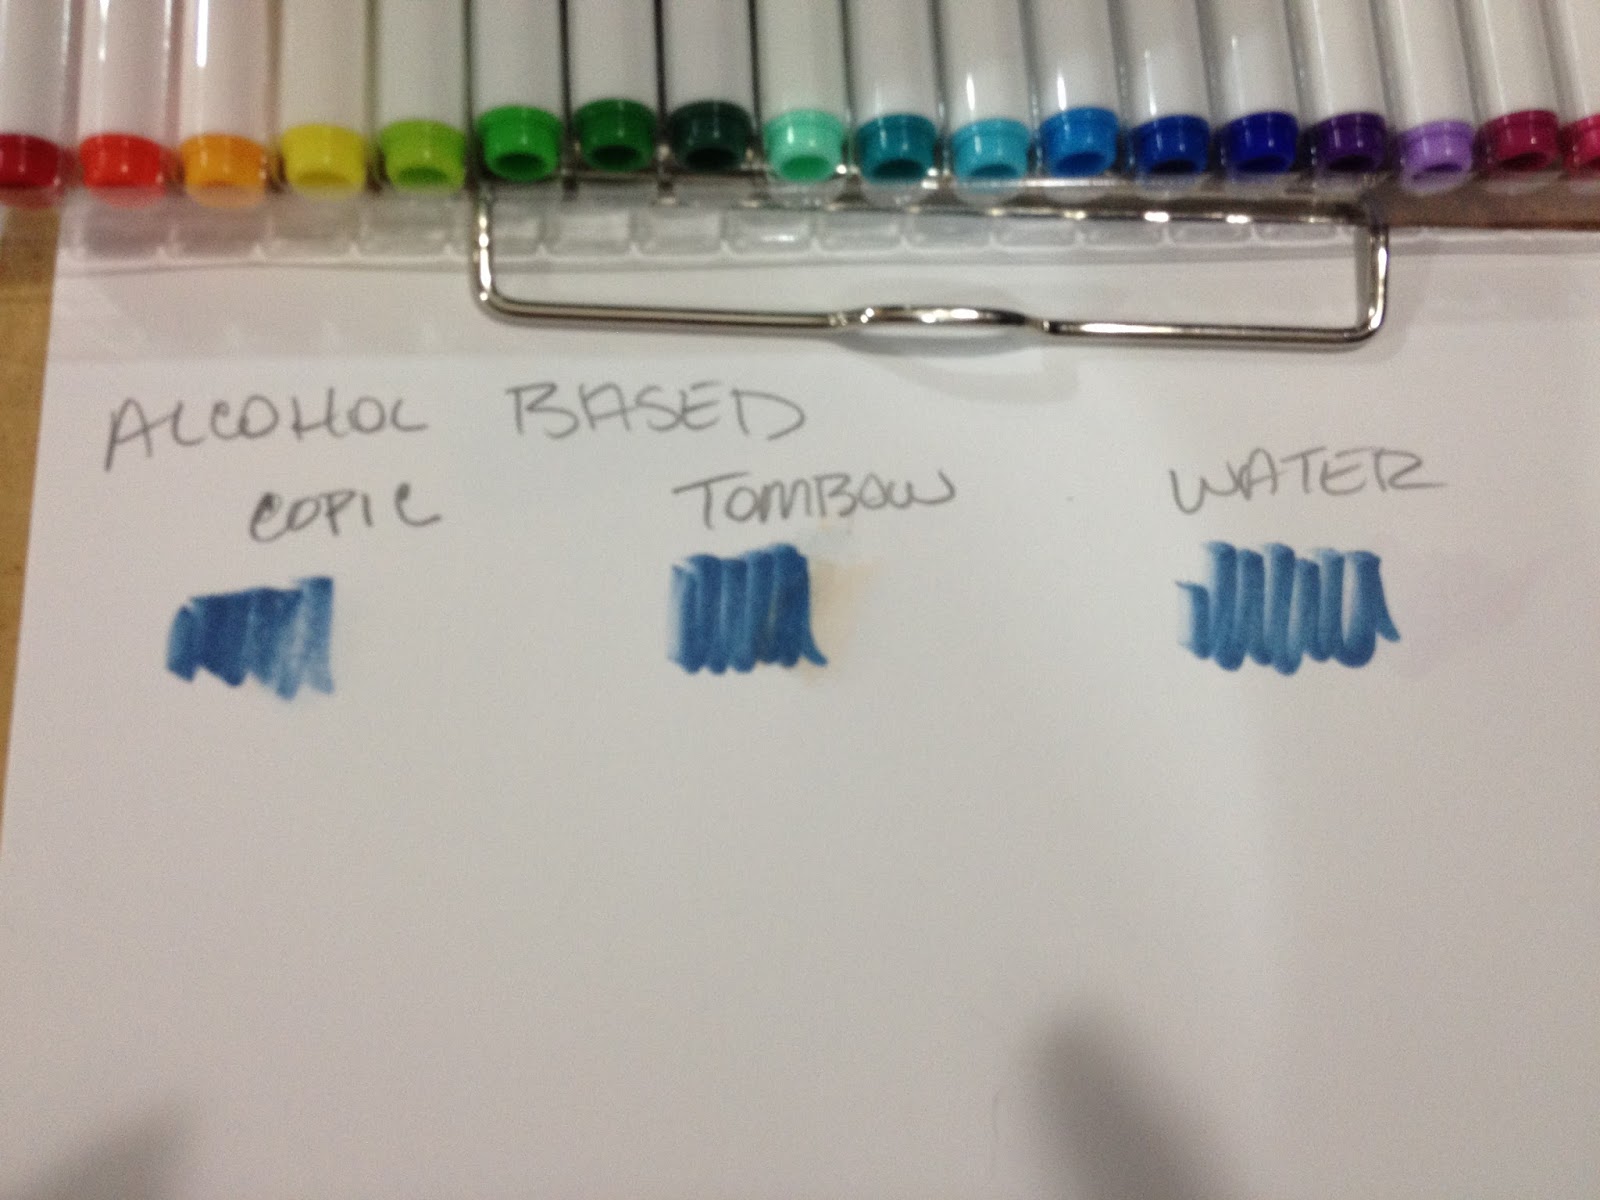
On cardstock, only alcohol based colorless blender effects alcohol based markers. Tombow ABT colorless blender and water do nothing.
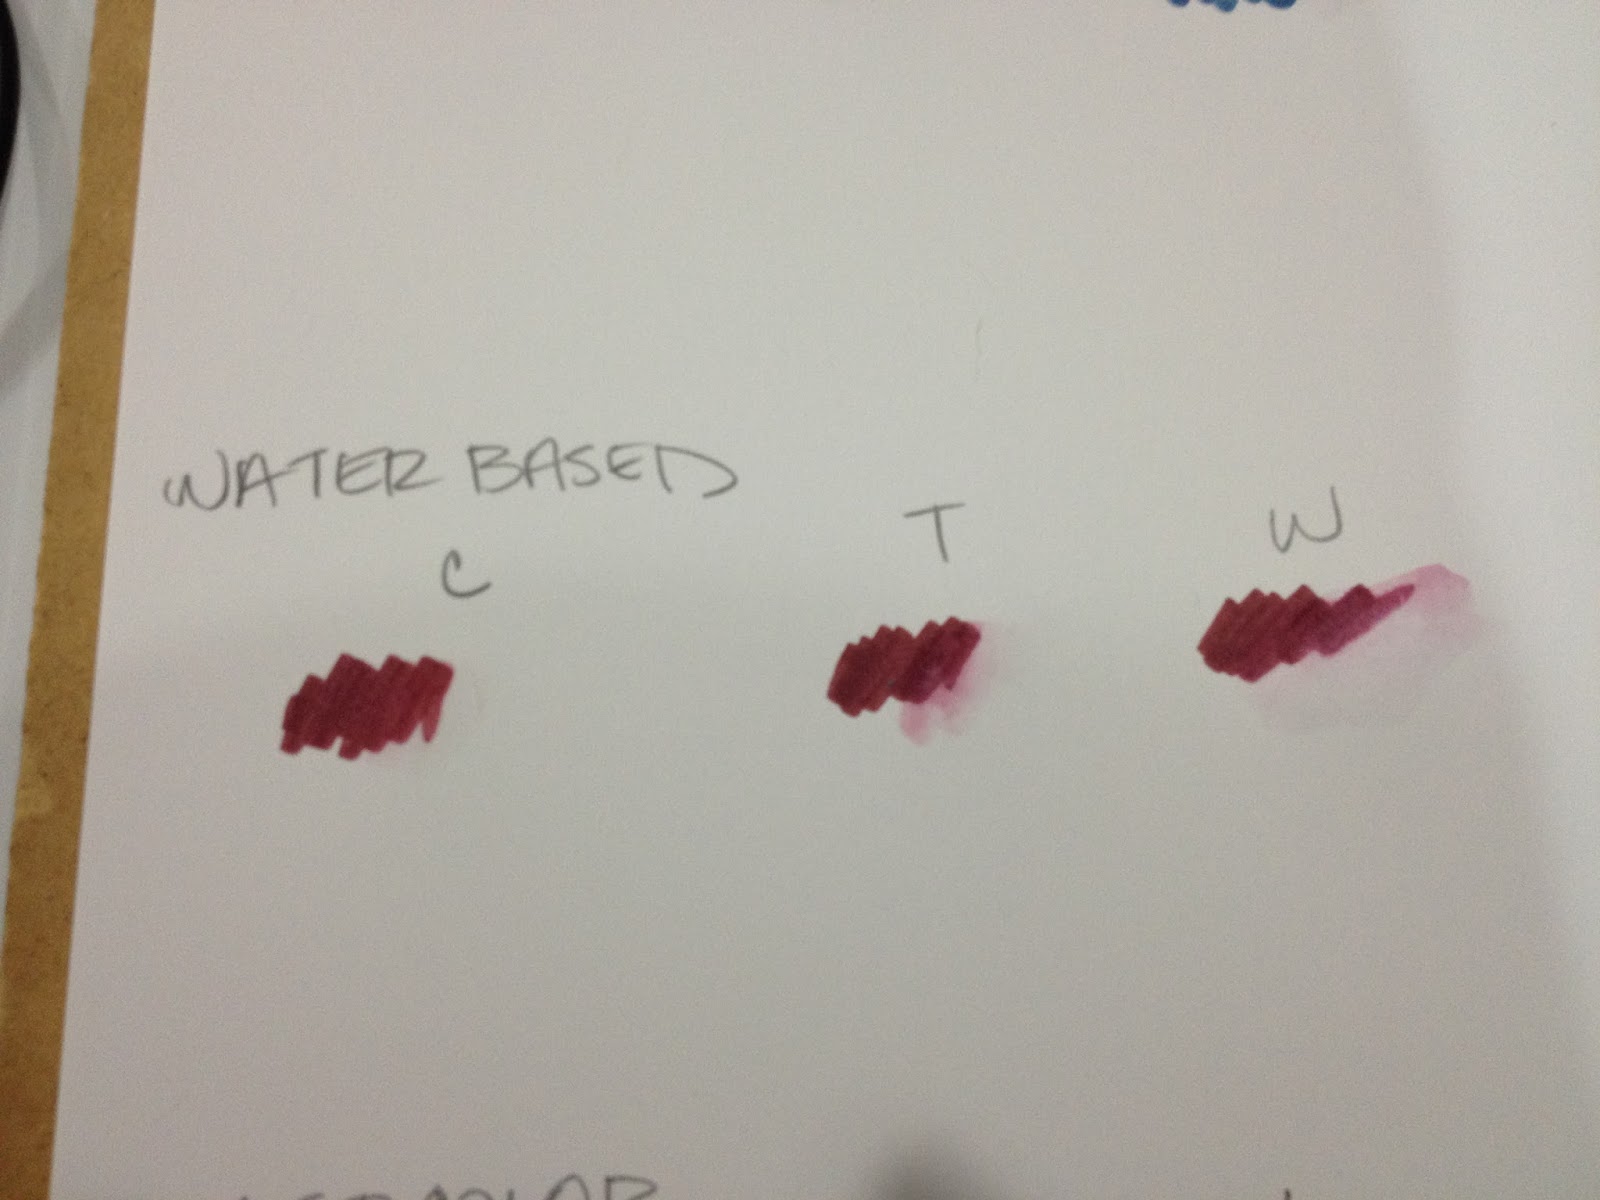
On cardstock, Copic's alcohol based colorless blender has no effect on waterbased markers like Crayola, and Tombow ABT and water have limited effect. Tombow ABT and water cause paper damage when applied over waterbased marker on cardstock.

On cardstock, alcohol based colorless blender has little effect on watercolor markers like the Zig Art and Graphic Twin. Water and Tombow ABT's colorless blender have some effect. Water causes paper damage on cardstock.
Marker Paper
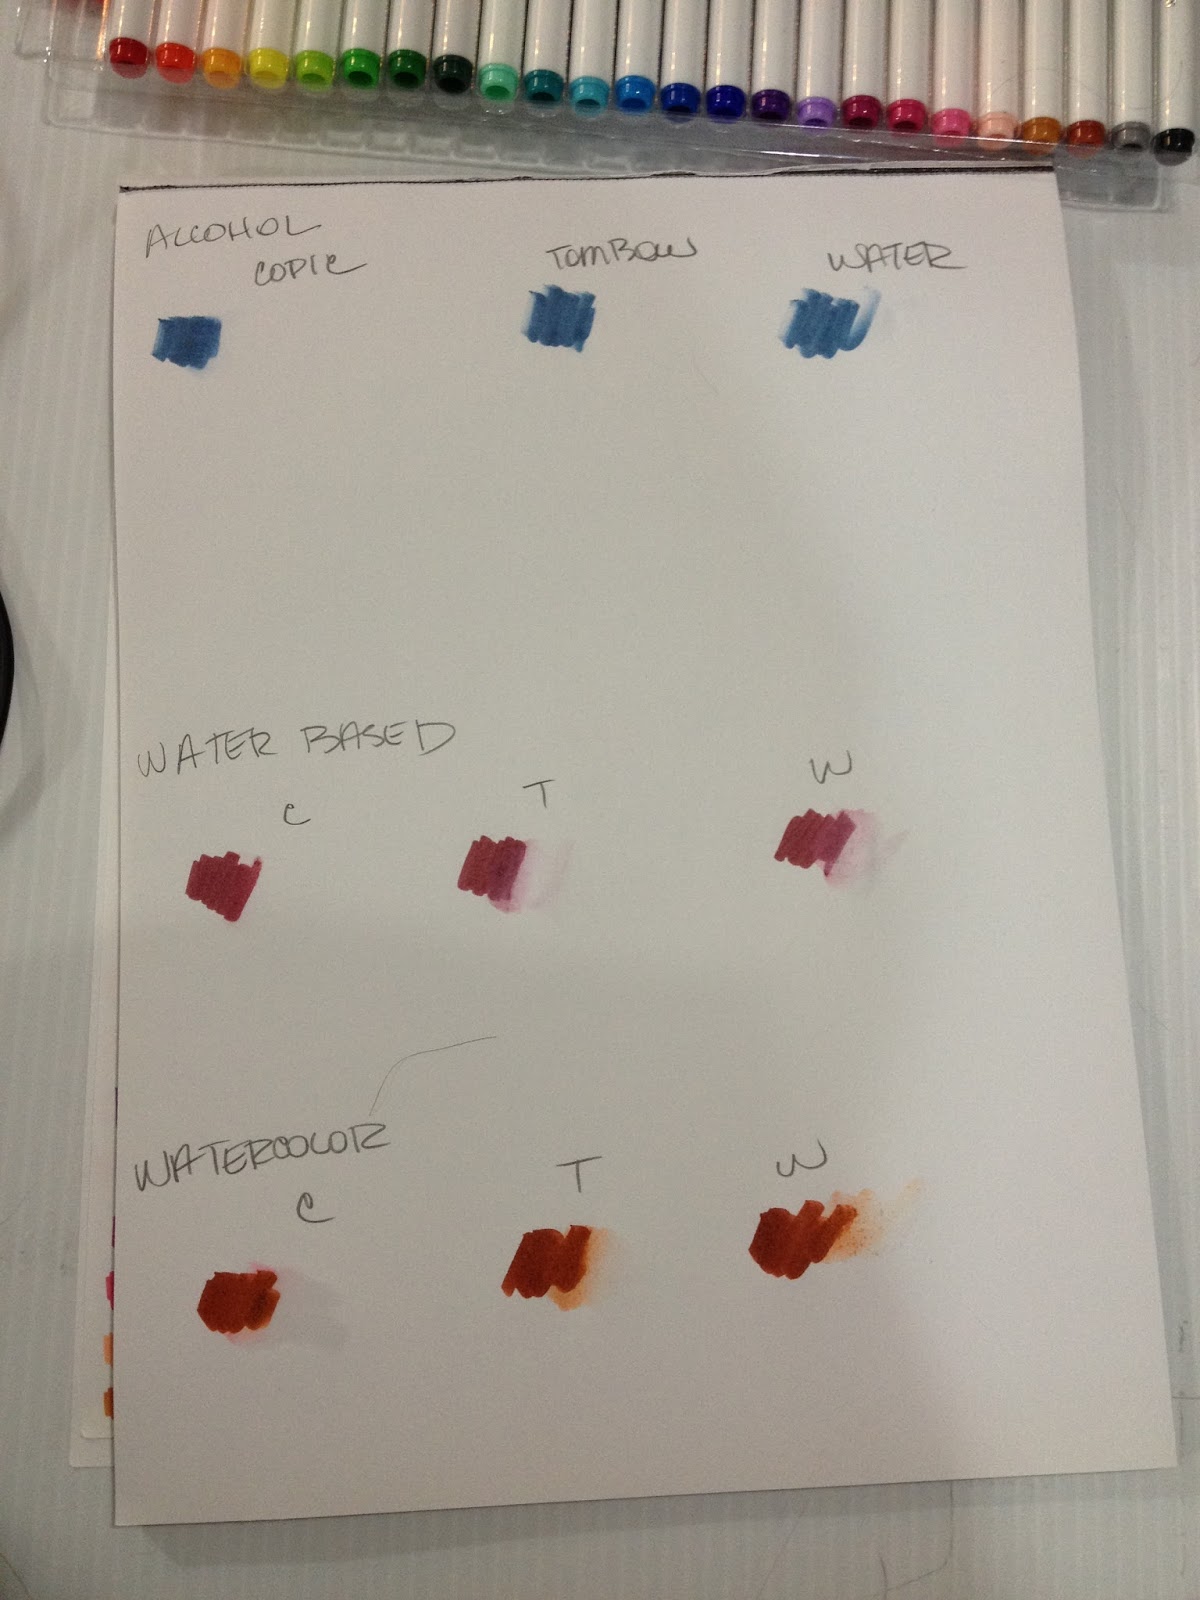

On marker paper, only alcohol based colorless blender effects alcohol based marker ink. Tombow ABT and water do nothing.

On marker paper, alcohol based colorless blender has little effect on waterbased markers like Crayolas. Tombow ABT's colorless blender does disrupt the ink a little, but not enough to encourage blending on marker paper, and water disrupts the paper surface.

On marker paper, alcohol based colorless blender does cause the pigment of the watercolor marker to shift a little, but not significantly. Tombow ABT's colorless blender has a better result, although not significant blending. Water causes pilling, and ruins the paper's surface.
General Notes:
It seems like Crayola waterbased markers perform almost as well as the Zig Art and Graphic Twin watercolor markers for these preliminary tests. Both react to Copic Colorless Blender (basically, alcohol), the Tombow ABT (which is a watercolor marker) blender, and regular water in a waterbrush. Surprisingly, the Crayola I tested (a rich reddish brown, which tend to be prone to seperation) did not separate in these conditions, regardless of the paper.
Reworking waterbased and watercolor media with water and the Tombow ABT colorless blender causes the page to pill, so if you work in multiple layers (basically anything more than one layer blended out) cardstock and marker paper aren't good choices for water based and watercolor media.
On watercolor paper, all three blenders worked to some degree with watercolor and waterbased markers. Not surprisingly, waterbased blenders had zero effect on alcohol based markers. On the other two papers tested, waterbased and watercolor markers faired much worse, as the papers aren't designed to handle media with slow evaporation times. Alcohol based inks and blenders did just fine on cardstock, and decently well on Pacon's marker paper, but that's because the solvent dries almost immediately, so layers can be applied without damaging the paper's surface.
Compatible Inking Products:
Sailor Mitso Aida- Compatible with Alcohol, Waterbased, and Watercolor, if allowed to fully dry
India Ink- Compatible with waterbased, watercolor, NOT COMPATIBLE WITH ALCOHOL BASED INKS
Memento Inks- Compatible with Copic (link)
Copic Multiliner- Compatible with alcohol, waterbased, and watercolor, if allowed to fully dry
If you're interested in reading more about alcohol based markers, check out these links!
Alcohol-based Markers vs. Waterbased Markers
If you're interested in reading more about watercolor markers, check out these links!
Watercolor Brush Pen Review: Docrafts Artiste Watercolor Markers
Watercolor Brush Pen Review: Zig Art and Graphic Twin
Mini Review: Winsor & Newton Watercolor Markers
Watercolor Brushpen Review: Tombow ABT
Watercolor Marker Review: Letraset's Aquamarkers
Watercolor Pen Review: Marvy LePlume II
If you're interested in reading more about waterbased markers like Crayola, check out these links!
Walmart Art Supply Review: Waterbased Markers
For the Materials Mentioned in this Post
Please check out my affiliates recommendations below!
Amazon.com Widgets
Your purchase from this widget, and from any of my Amazon Affiliates links and widgets, helps support this blog financially. I use the proceeds to purchase more supplies to review, which leads to more in-depth, better researched art supply reviews. If you enjoy these art supply reviews, and if you have benefited from my shared experiences, please consider doing your art supply shopping through my links.
Please consider donating to this blog or purchasing from Natto-shop (http://nattosoup.com/shop) if you want me to continue publishing quality content. All materials tested were purchased from my own pocket. Keep on Truckin' Nattosoup is not under any sponsorship.
November 15, 2015
Brush Pen Review: Sakura Pigma Professional Brush MB
A couple months ago, Jetpens sent me a care package of brush pens to review, and for the most part, I reviewed them post-haste. Although I tested this Pigma Sensei Medium Black almost as soon as I unpackaged it, somehow between conventions and freelance, I didn't realize I neglected this pen. I'm going to amend that today
Sakura
Sakura makes a few different types of technical and inking pens
Micron- sizes 01(.25) -08 (.5), comes in a variety of colors that feature Pigma archival ink, although only 05 (.45) is available in all of their Pigma colors.
Graphic- Bullet nib (1mm) and two calligraphy tips (2mm and 3mm) Available in three colors- red, blue, black (I find these useful for drawing panel borders)
Pigma Brush- Available in several colors. Fine tip brushpen.
Pigma Sensei- Uses Pigma ink, aimed at beginner artists. Looks like the nibs are harder to crush if you have a heavy hand, but while there's a lot of hype available on the Sakura site, there isn't much hard information.
Pigma Professional Brush- Available in three sizes- FB (looks like a fude pen) MB (looks like a Super Brush) and BB (REALLY looks like a Super Brush)
I think most comic artists are familiar with Sakura Microns to varying degrees. I used Sakura Microns in undergrad for comics and inking pieces I intended to marker, as they're Copic-proof once fully cured. These technical pens are widely available at most art, hobby, and craft stores. Sakura Graphic are also fairly widely available, I think I purchased mine at Michaels, and I have used the 1 mm bullet nib for inking lettering and panel borders, and the 2mm and 3mm calligraphy nibs for inking panel borders. Pigma Brush is a little harder to find, but most art supply stores should have them in stock. I own one, and I've used it for inking, but I prefer fude pens. Since it uses the Pigma ink, it should be water and Copic proof once fully dried.
The Pigma Sensei is the newest addition to Sakura's inking pen family, and is aimed at aspiring mangaka and comic artists, whereas the Microns are aimed at professionals. Before Jetpens sent me this Pigma Sensei MB, I'd never used Pigma Sensei products before. Recently, Aryana Guerrero sent me a sent of the Pigma Sensei pens to review, so that Pigma Sensei follow up should be coming soon. Thank you again, Aryana!
That leaves us with today's review, the Pigma Professional Brush. I've seen these at larger art stores, like DickBlick and Jerry's ArtaRama, but usually in sets rather than openstock. Jetpens carries the FB, MB, and BB and sets that have two FB, two MB, or two BB, but I don't see any sets that have one of each pen on Jetpens. FB, MB, and BB all cost $3.90 individually.
The Pen
The body is matte black plastic with white printing on the barrel that reads Pigma MB, Sakura Japan, and has a barcode. The cap does not have a clip, but it does have a nub to prevent it from rolling when you set it down on your desk.


The nib is solid, no individual bristles like the Pentel Pocket Brush or the Sailor Fude Nagomi, but I prefer solid brush nibs anyway. If you like drybrush effects, avoid solid nib brush pens and go for individual bristled brush pens, but if you need to easily do solid fills, go for a solid nib.

The cap is embossed with a gold MB on the top- Medium Brush- and posts to the back of the pen while you're drawing.

Since I'm reviewing an inking brush pen, I decided to pull out some of my other inking brush pens.
 From Left to Right: Pigma Professional, Copic Multiliner's Big Brush, Sakura Pigma Brush, Pitt Pen Brush
 From Left to Right: Pigma Professional Brush, Copic Multiliner Brush Medium, Sakura Pigma Brush, Pitt Pen Brush Of this batch, the Pigma Professional is just slightly smaller than the Copic Brush Medium, and far larger than Sakura's Pigma Brush. Unlike these inking brush pens, there's no clip on the Pigma Professional, and the body is comparatively minimal in design. None of these brushpens have the metal sheath that many good technical pens have around the nib- that sheath is meant to help keep felt nibs firm, which would be detrimental in a brushpen's performance. The Copic Brush Medium's brush is much more like a Copic Super Brush Nib, and its one of my preferred larger brush nibs. The Copic Brush Medium has a lot of give to it, much more than the Pigma Professional MB. The Pigma Professional Brush BB is probably more similar to the Copic Medium Brush than the Pigma Professional MB brush.
I also pulled out my calligraphy-intended inking pens, the Kuretake No. 33 and my Pilot Small Soft Tip Fine (both are from Jetpens, but the Pilot Small Soft Tip Fine was part of the care of Jetpens lucky dip bag) to compare. The Kuretake No. 33 is $3.30 and the Pilot Small Soft Tip Fine is $5.00.
Unlike the Pilot Small Soft Tip Fine or the Kuretake No. 33, the Pigma Professional MB does not squeak when you ink with it. The ink is richer than the Pilot Small Soft Tip Fine, but not as velvety as the Kuretake No. 33. The body is only slightly less smaller than the Kuretake No. 33, but much larger than the maybe-too-thin Pilot Small Soft Tip Fine, and feels good in the hand.
 From Top: Kuretake No. 33, Pigma Professional Brush MB, Pilot Brush Pen-Soft Small- Fine
 From Top: Kuretake No. 33, Pigma Professional Brush MB, Pilot Brush Pen-Soft Small-Fine
The Pigma Professional looks a lot more like these brushes, which are meant for calligraphy (but I use them for inking) than it does the inking brushes. The cap does post, but there's no clip, and like the Pilot Small Soft Tip Fine and the Kuretake No. 3, there's a nub on the cap to help keep the pen from rolling when the cap is on or posted.
None of the aforementioned pens are refillable, and none feature replaceable nibs, although I have heard you can remove the Pitt Pen brush nib and flip it.

 From left to right: Copic Multiliner Brush Medium, Pigma Professional Brush MBB, Kuretake No. 33, Sailor Brush Pen Soft Small Fine
The Field Test


The Verdict
While this isn't a bad brush pen, if you're looking for a larger brush pen, I prefer the Pilot Pocket Brush pen ($5.00) or the Pilot Small Soft Tip Fine ($5.00), although both do cost more than the Pigma Sensei MB ($3.90). The ink in the Pilot pens is just so velvety and rich, and the brushes are so responsive, but this is personal preference. I found the Pigma Professional Brush to be a little stiff, like the Copic Multiliner Bold Brush, and not as responsive as I'd hoped (I was hoping for Copic Super Brush levels of sensitivity, but that may be my endless grail.)
I definitely think the Pigma Sensei MB is a step up from Sakura's Micron brush, and it's fairly close to a Copic Super Brush. If you guys are interested, I can do a Copic and water fastness test on the Sakura Pigma MB- drop me an email (or a tweet, or send me an Ask on Tumblr) and let me know you're interested! If enough of you write in, I'll do Copic and Waterfastness tests for Copic Multiliners, Sakura Microns, Pitt Pens, Pentel Pocket brush with the standard cartridge, and Kuretake Fudegokochi. However, I didn't deem that necessary for this review, because in the past, Pigma inks have been both Copic and waterfast if you give them at least 24 hours to dry, and I can't see that being a trait Sakura is eager to be rid of.
If you found this review useful, please consider emailing Jetpens and letting them know what you thought! I THINK they're aware of these reviews (I've pointed a lotta traffic in their direction over the years), but it would probably mean a lot more if my readers chimed in with support too! Maybe with your endorsement, I could unlock another lucky dip care package, or even store credits like RobotNinjaMonsters or KWernerDesign have received. I've got a wishlist full of goodies I'd love to review here, and the recognition would warm the cockles of my dark, shriveled little artist's heart. Jetpens has gotten so much of my money and support over the years, and this little one woman business could certainly use some support in return, so please do consider dropping them a line in my favor.
Please consider donating to this blog or purchasing from Natto-shop (http://nattosoup.com/shop) if you want me to continue publishing quality content. All materials tested were purchased from my own pocket. Keep on Truckin' Nattosoup is not under any sponsorship.
Sakura
Sakura makes a few different types of technical and inking pens
Micron- sizes 01(.25) -08 (.5), comes in a variety of colors that feature Pigma archival ink, although only 05 (.45) is available in all of their Pigma colors.
Graphic- Bullet nib (1mm) and two calligraphy tips (2mm and 3mm) Available in three colors- red, blue, black (I find these useful for drawing panel borders)
Pigma Brush- Available in several colors. Fine tip brushpen.
Pigma Sensei- Uses Pigma ink, aimed at beginner artists. Looks like the nibs are harder to crush if you have a heavy hand, but while there's a lot of hype available on the Sakura site, there isn't much hard information.
Pigma Professional Brush- Available in three sizes- FB (looks like a fude pen) MB (looks like a Super Brush) and BB (REALLY looks like a Super Brush)
I think most comic artists are familiar with Sakura Microns to varying degrees. I used Sakura Microns in undergrad for comics and inking pieces I intended to marker, as they're Copic-proof once fully cured. These technical pens are widely available at most art, hobby, and craft stores. Sakura Graphic are also fairly widely available, I think I purchased mine at Michaels, and I have used the 1 mm bullet nib for inking lettering and panel borders, and the 2mm and 3mm calligraphy nibs for inking panel borders. Pigma Brush is a little harder to find, but most art supply stores should have them in stock. I own one, and I've used it for inking, but I prefer fude pens. Since it uses the Pigma ink, it should be water and Copic proof once fully dried.
The Pigma Sensei is the newest addition to Sakura's inking pen family, and is aimed at aspiring mangaka and comic artists, whereas the Microns are aimed at professionals. Before Jetpens sent me this Pigma Sensei MB, I'd never used Pigma Sensei products before. Recently, Aryana Guerrero sent me a sent of the Pigma Sensei pens to review, so that Pigma Sensei follow up should be coming soon. Thank you again, Aryana!
That leaves us with today's review, the Pigma Professional Brush. I've seen these at larger art stores, like DickBlick and Jerry's ArtaRama, but usually in sets rather than openstock. Jetpens carries the FB, MB, and BB and sets that have two FB, two MB, or two BB, but I don't see any sets that have one of each pen on Jetpens. FB, MB, and BB all cost $3.90 individually.
The Pen
The body is matte black plastic with white printing on the barrel that reads Pigma MB, Sakura Japan, and has a barcode. The cap does not have a clip, but it does have a nub to prevent it from rolling when you set it down on your desk.

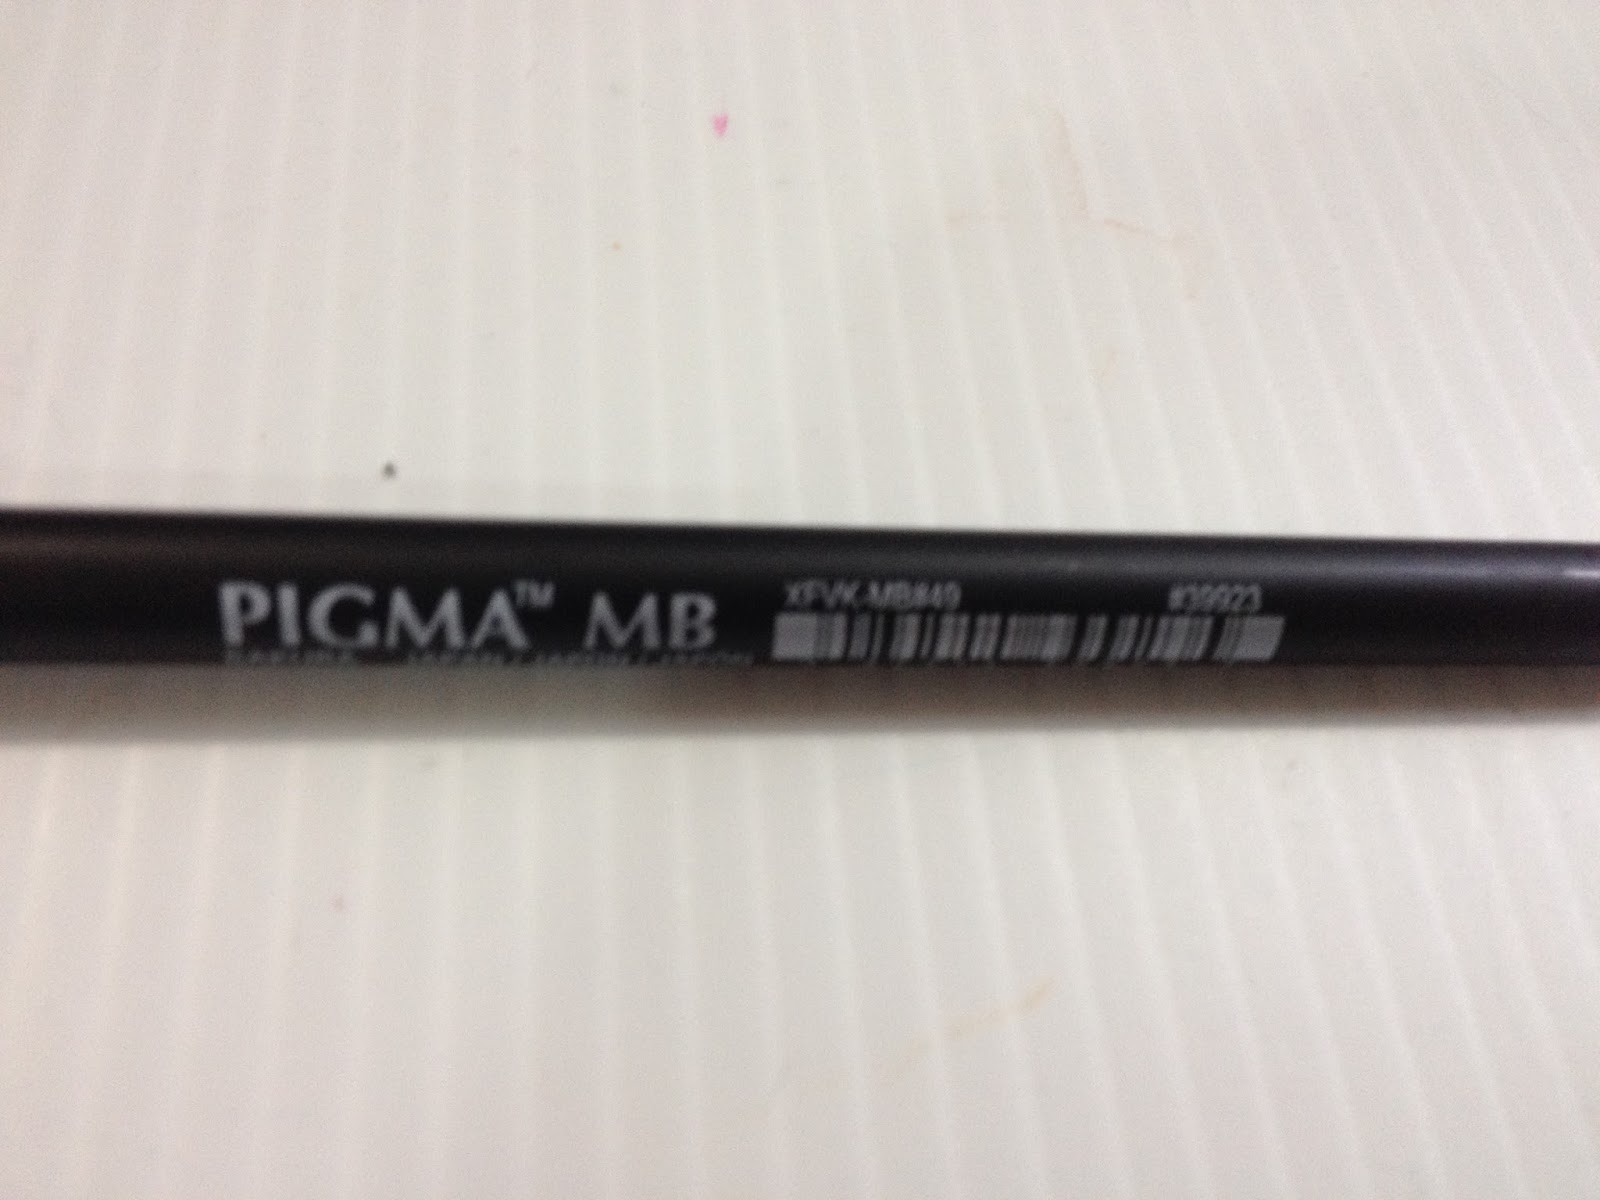

The nib is solid, no individual bristles like the Pentel Pocket Brush or the Sailor Fude Nagomi, but I prefer solid brush nibs anyway. If you like drybrush effects, avoid solid nib brush pens and go for individual bristled brush pens, but if you need to easily do solid fills, go for a solid nib.

The cap is embossed with a gold MB on the top- Medium Brush- and posts to the back of the pen while you're drawing.
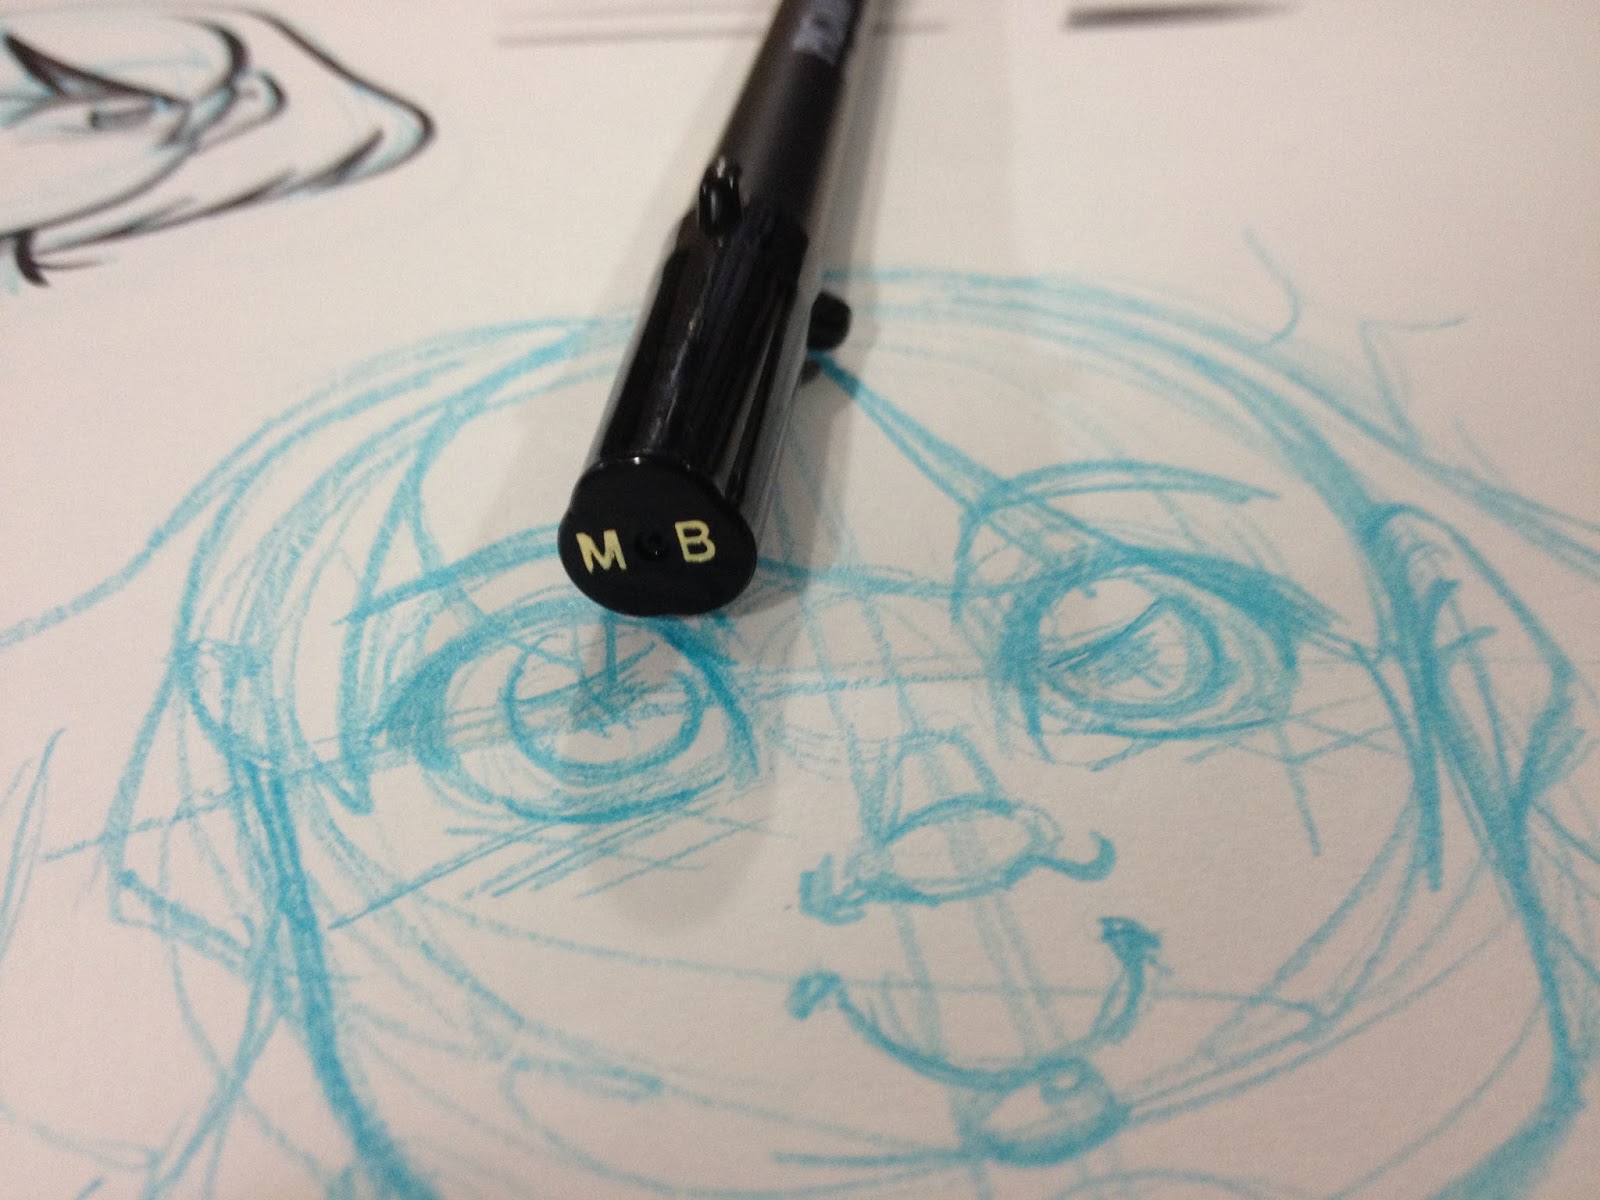
Since I'm reviewing an inking brush pen, I decided to pull out some of my other inking brush pens.
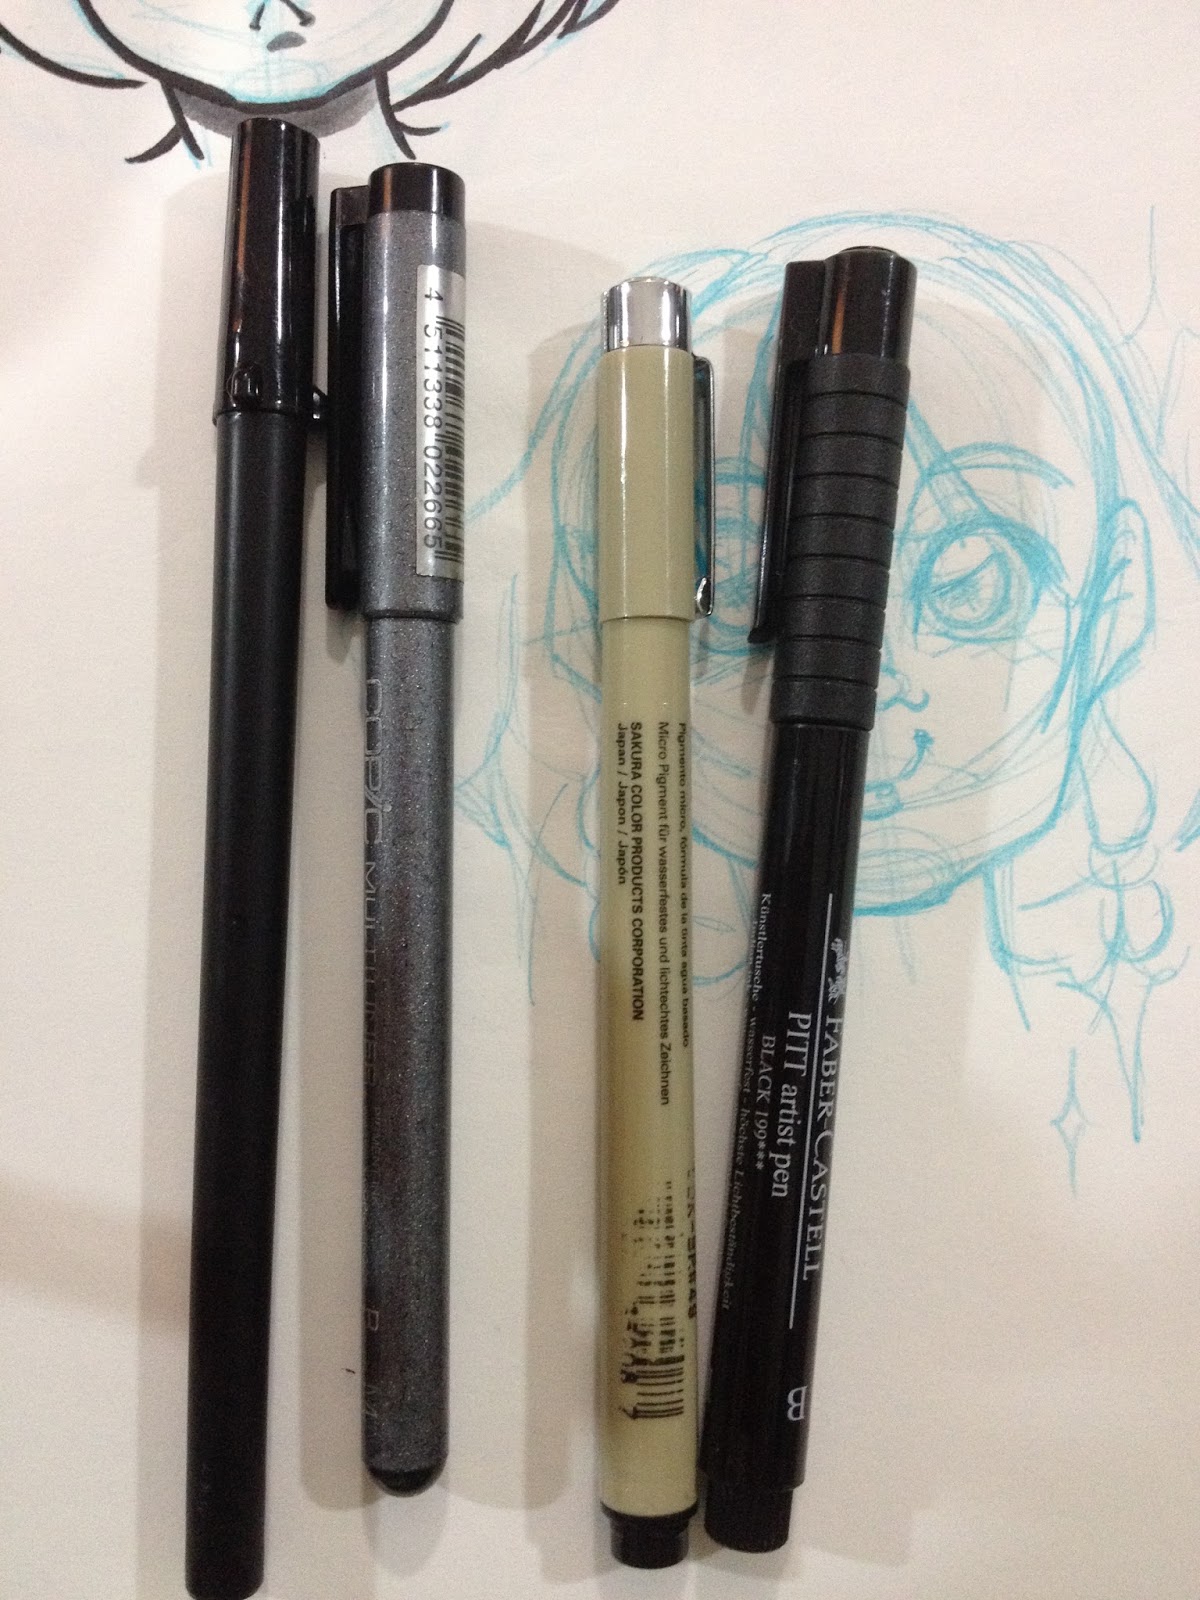 From Left to Right: Pigma Professional, Copic Multiliner's Big Brush, Sakura Pigma Brush, Pitt Pen Brush
 From Left to Right: Pigma Professional Brush, Copic Multiliner Brush Medium, Sakura Pigma Brush, Pitt Pen Brush Of this batch, the Pigma Professional is just slightly smaller than the Copic Brush Medium, and far larger than Sakura's Pigma Brush. Unlike these inking brush pens, there's no clip on the Pigma Professional, and the body is comparatively minimal in design. None of these brushpens have the metal sheath that many good technical pens have around the nib- that sheath is meant to help keep felt nibs firm, which would be detrimental in a brushpen's performance. The Copic Brush Medium's brush is much more like a Copic Super Brush Nib, and its one of my preferred larger brush nibs. The Copic Brush Medium has a lot of give to it, much more than the Pigma Professional MB. The Pigma Professional Brush BB is probably more similar to the Copic Medium Brush than the Pigma Professional MB brush.
I also pulled out my calligraphy-intended inking pens, the Kuretake No. 33 and my Pilot Small Soft Tip Fine (both are from Jetpens, but the Pilot Small Soft Tip Fine was part of the care of Jetpens lucky dip bag) to compare. The Kuretake No. 33 is $3.30 and the Pilot Small Soft Tip Fine is $5.00.
Unlike the Pilot Small Soft Tip Fine or the Kuretake No. 33, the Pigma Professional MB does not squeak when you ink with it. The ink is richer than the Pilot Small Soft Tip Fine, but not as velvety as the Kuretake No. 33. The body is only slightly less smaller than the Kuretake No. 33, but much larger than the maybe-too-thin Pilot Small Soft Tip Fine, and feels good in the hand.
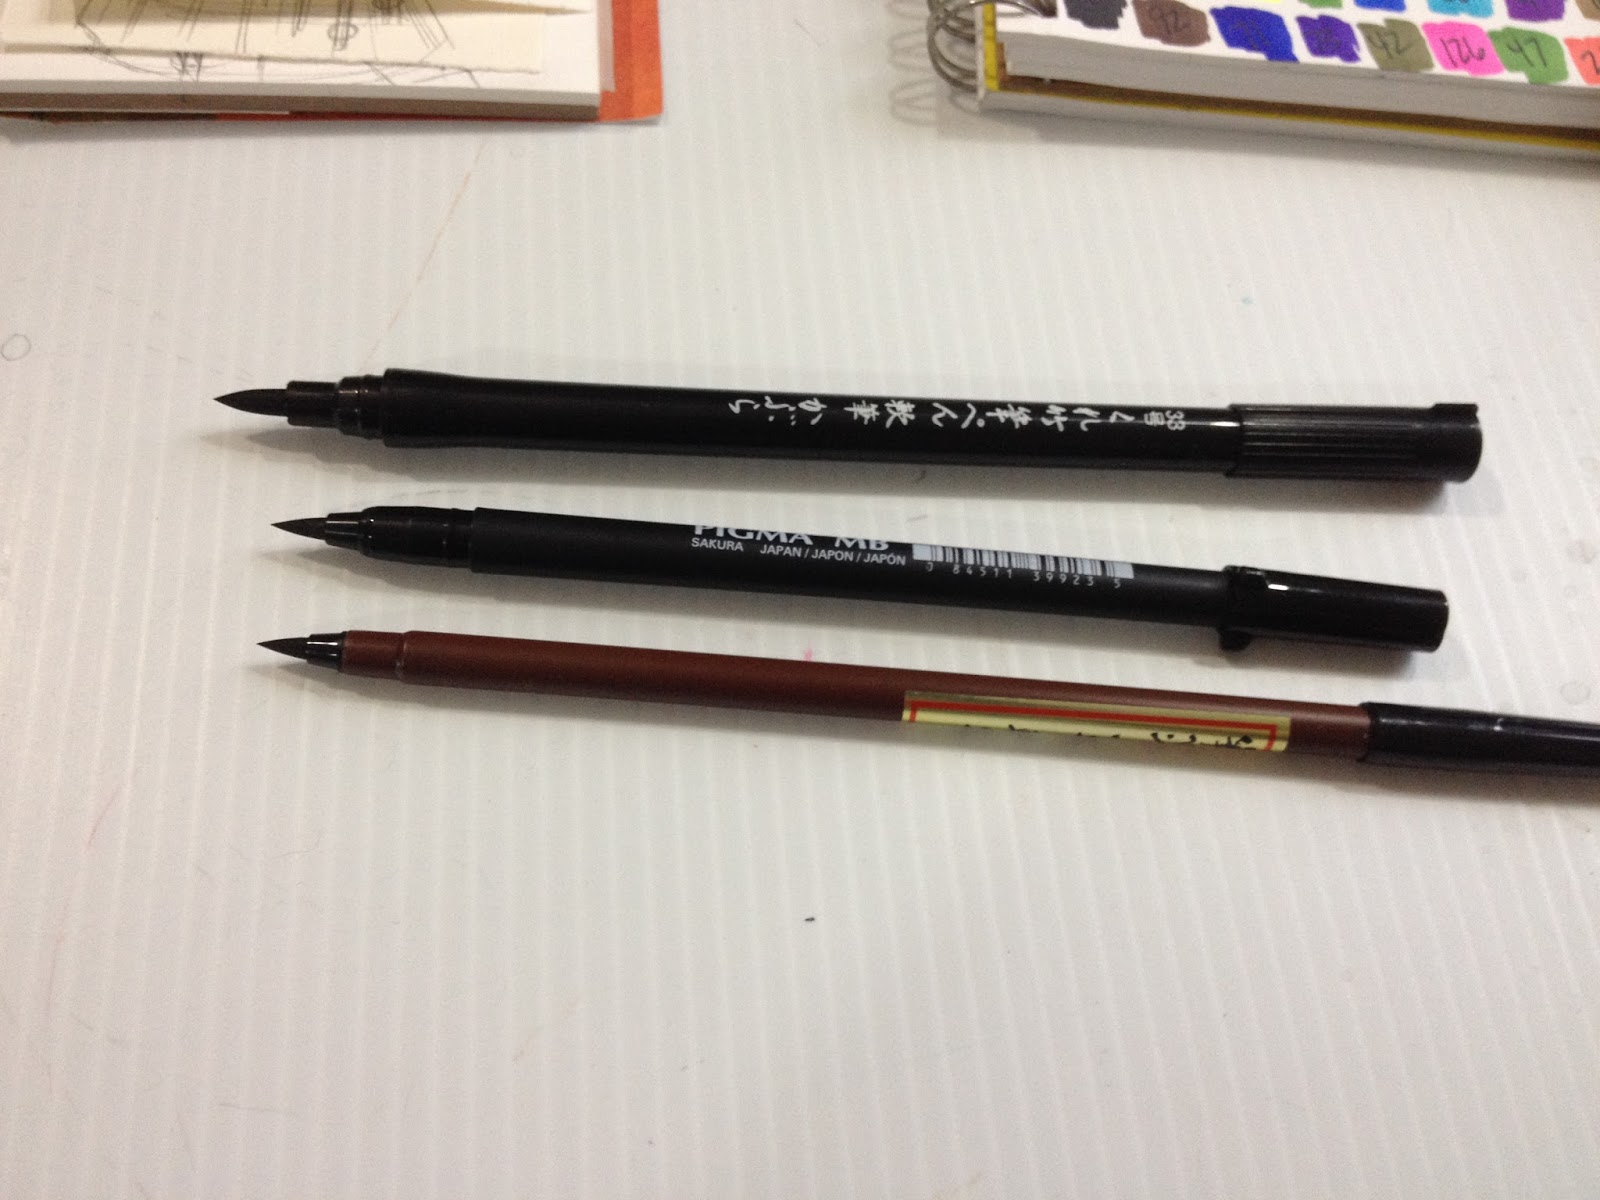 From Top: Kuretake No. 33, Pigma Professional Brush MB, Pilot Brush Pen-Soft Small- Fine
 From Top: Kuretake No. 33, Pigma Professional Brush MB, Pilot Brush Pen-Soft Small-Fine
The Pigma Professional looks a lot more like these brushes, which are meant for calligraphy (but I use them for inking) than it does the inking brushes. The cap does post, but there's no clip, and like the Pilot Small Soft Tip Fine and the Kuretake No. 3, there's a nub on the cap to help keep the pen from rolling when the cap is on or posted.
None of the aforementioned pens are refillable, and none feature replaceable nibs, although I have heard you can remove the Pitt Pen brush nib and flip it.

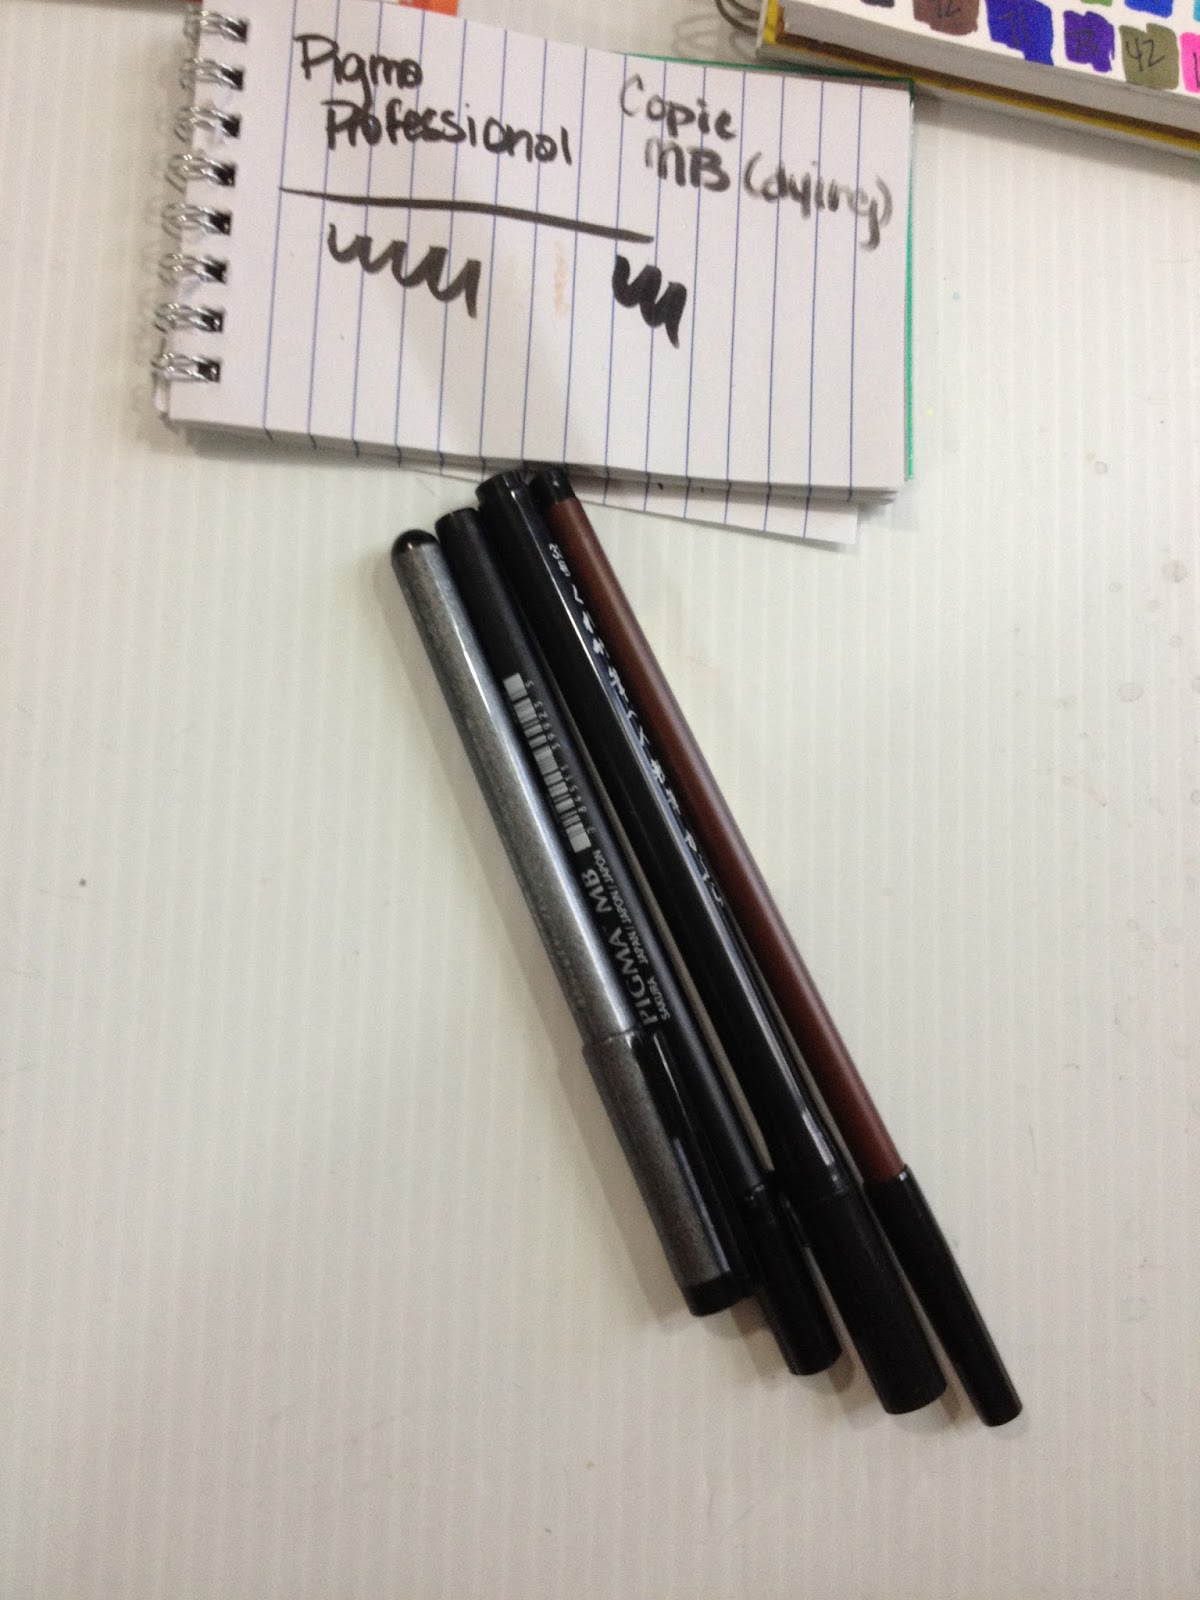 From left to right: Copic Multiliner Brush Medium, Pigma Professional Brush MBB, Kuretake No. 33, Sailor Brush Pen Soft Small Fine
The Field Test
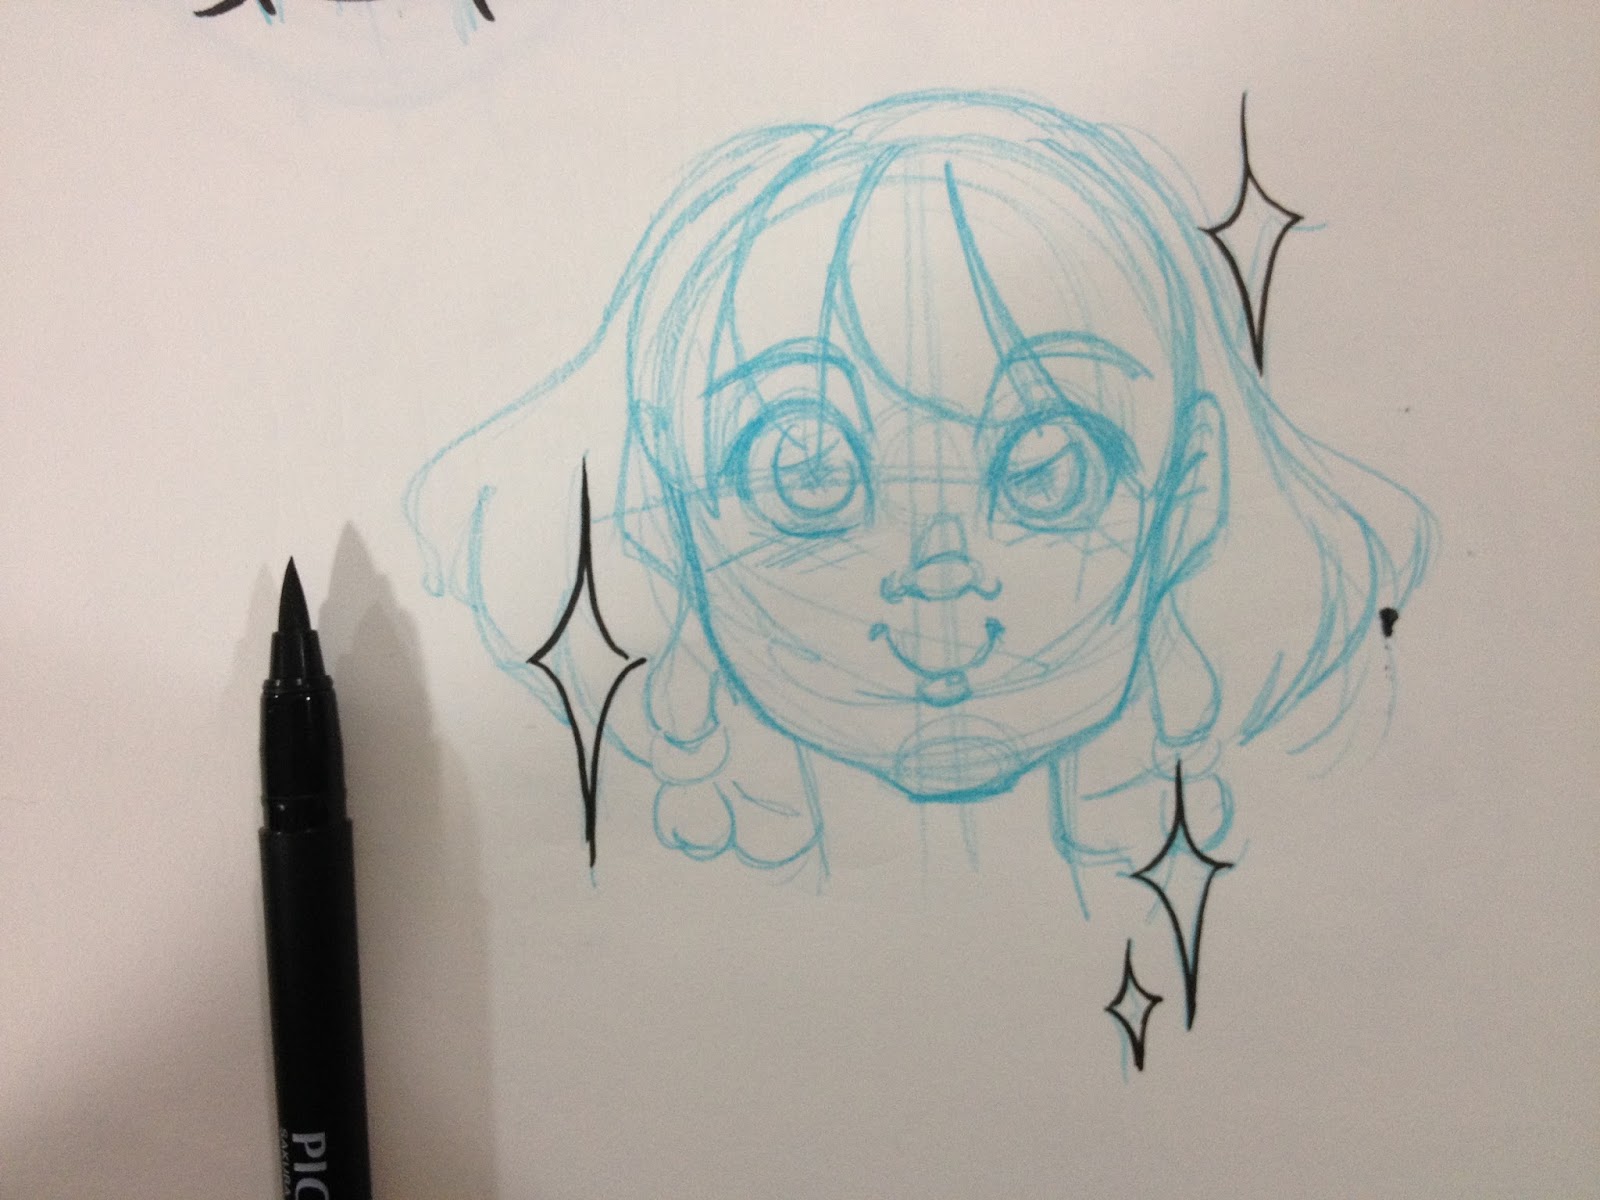
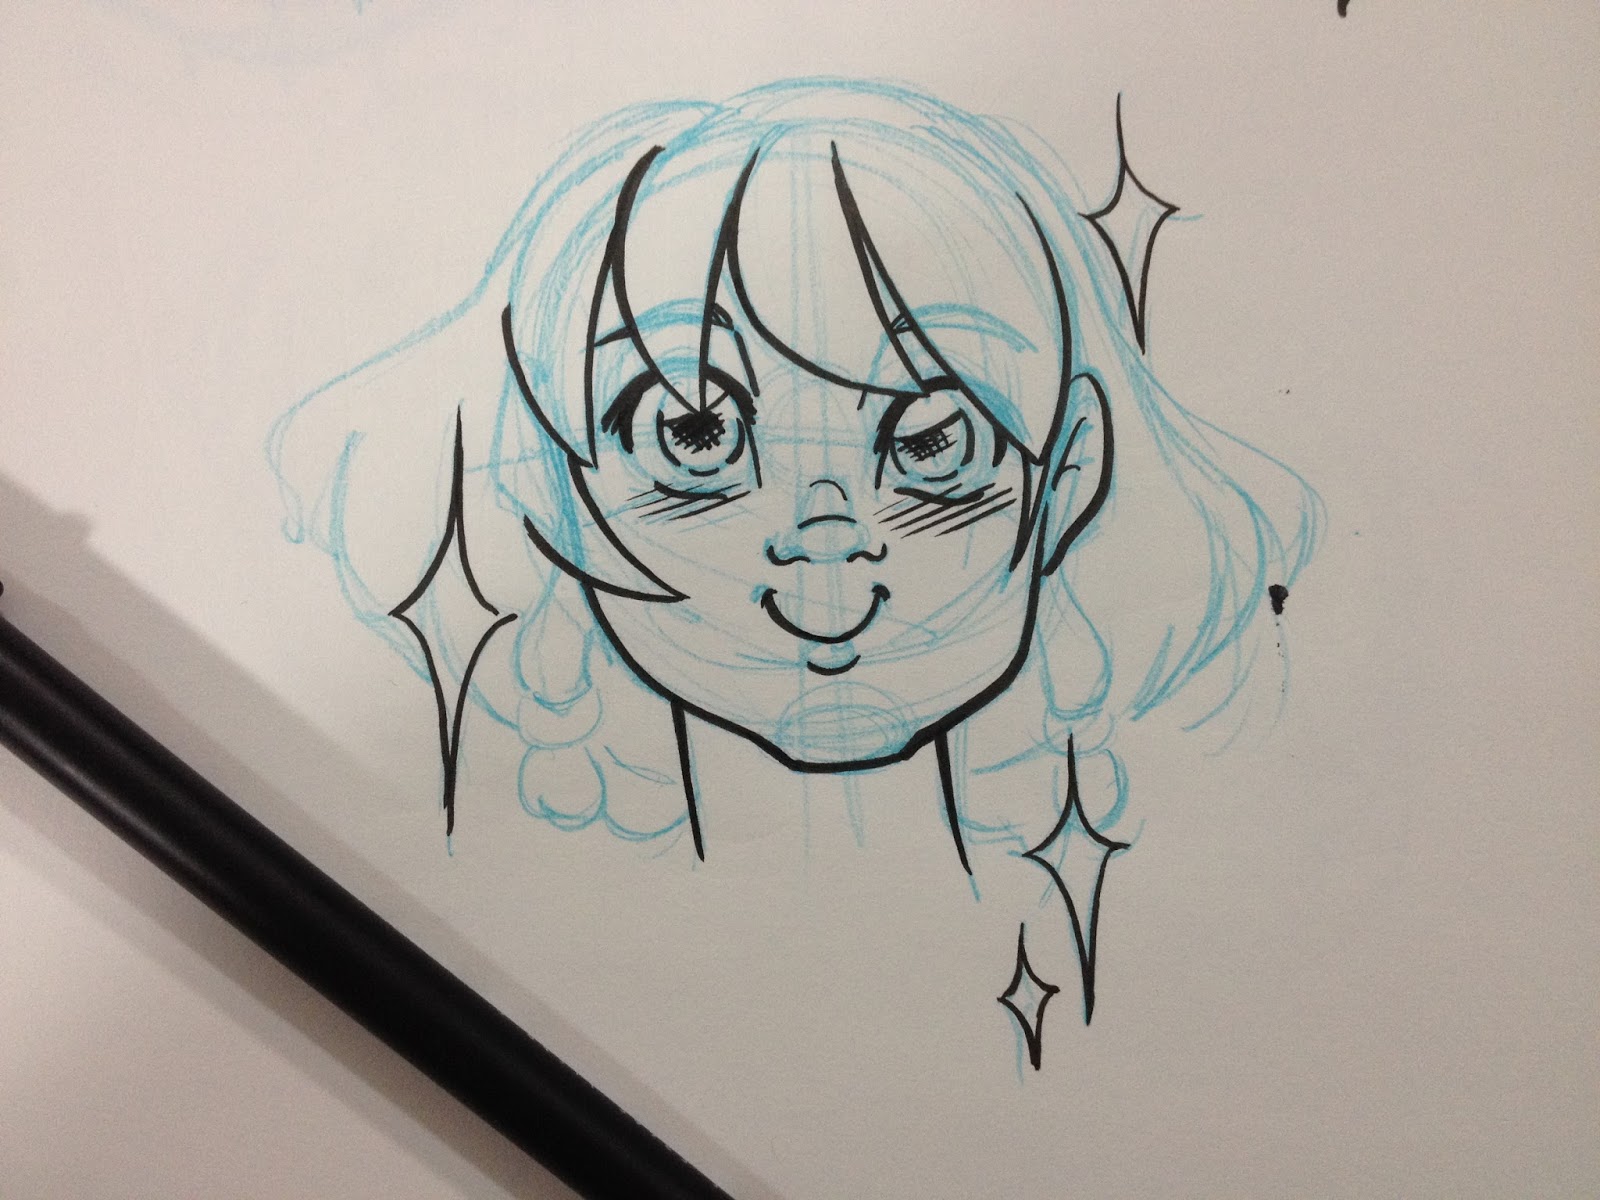
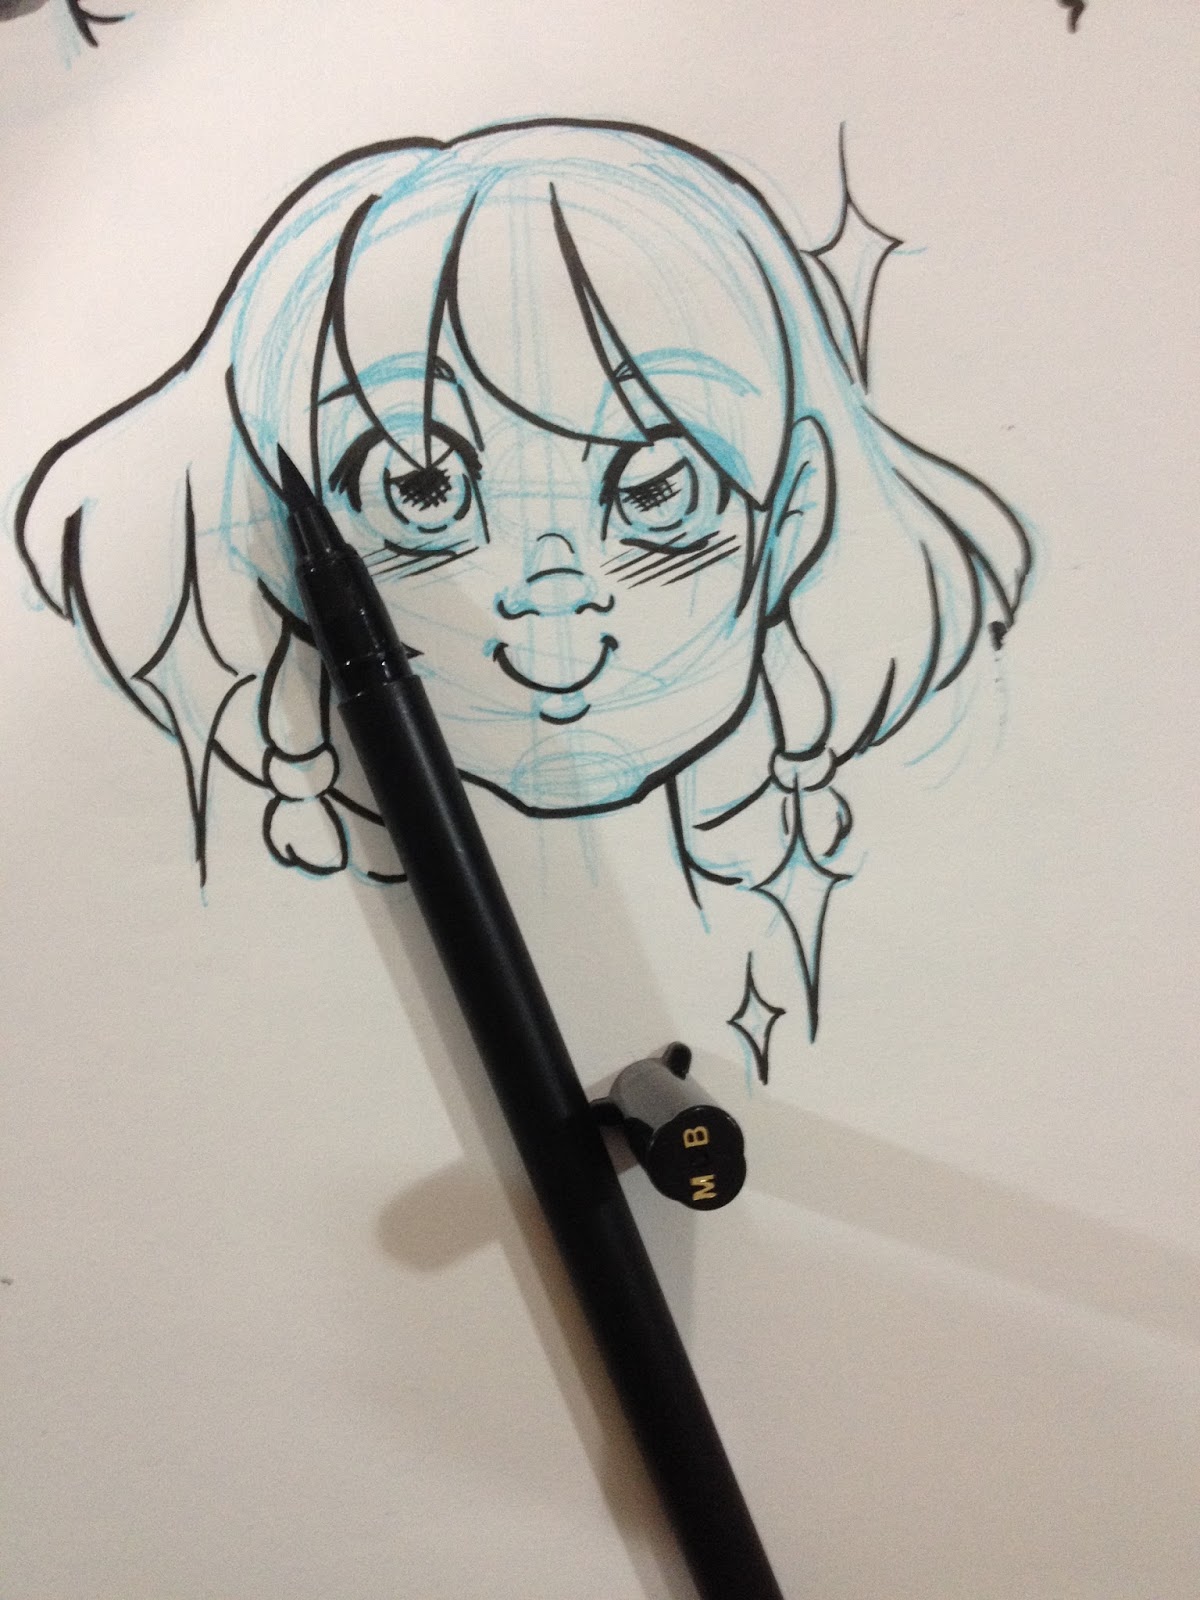
The Verdict
While this isn't a bad brush pen, if you're looking for a larger brush pen, I prefer the Pilot Pocket Brush pen ($5.00) or the Pilot Small Soft Tip Fine ($5.00), although both do cost more than the Pigma Sensei MB ($3.90). The ink in the Pilot pens is just so velvety and rich, and the brushes are so responsive, but this is personal preference. I found the Pigma Professional Brush to be a little stiff, like the Copic Multiliner Bold Brush, and not as responsive as I'd hoped (I was hoping for Copic Super Brush levels of sensitivity, but that may be my endless grail.)
I definitely think the Pigma Sensei MB is a step up from Sakura's Micron brush, and it's fairly close to a Copic Super Brush. If you guys are interested, I can do a Copic and water fastness test on the Sakura Pigma MB- drop me an email (or a tweet, or send me an Ask on Tumblr) and let me know you're interested! If enough of you write in, I'll do Copic and Waterfastness tests for Copic Multiliners, Sakura Microns, Pitt Pens, Pentel Pocket brush with the standard cartridge, and Kuretake Fudegokochi. However, I didn't deem that necessary for this review, because in the past, Pigma inks have been both Copic and waterfast if you give them at least 24 hours to dry, and I can't see that being a trait Sakura is eager to be rid of.
If you found this review useful, please consider emailing Jetpens and letting them know what you thought! I THINK they're aware of these reviews (I've pointed a lotta traffic in their direction over the years), but it would probably mean a lot more if my readers chimed in with support too! Maybe with your endorsement, I could unlock another lucky dip care package, or even store credits like RobotNinjaMonsters or KWernerDesign have received. I've got a wishlist full of goodies I'd love to review here, and the recognition would warm the cockles of my dark, shriveled little artist's heart. Jetpens has gotten so much of my money and support over the years, and this little one woman business could certainly use some support in return, so please do consider dropping them a line in my favor.
Please consider donating to this blog or purchasing from Natto-shop (http://nattosoup.com/shop) if you want me to continue publishing quality content. All materials tested were purchased from my own pocket. Keep on Truckin' Nattosoup is not under any sponsorship.
November 13, 2015
Inktober 2015 Inks
So Inktober 2015 is finally INKTOVER. This year, although I had planned to do four separate weekly challenges, I ended up focusing on just the first one for the entire month, but I made sure that I did lots of sketching with a brushpen to hone other inky skills as well. I'd originally decided to use only a brush for my Inktober challenges, as I ink with brushpens for this blog almost every day, and I ended up inking all of the fanart sketches I'd drawn in September and October as part of my quest to find a B-Style.
Every character I drew for Inktober is a character that has inspired or influenced my work or my professional outlook (except for the self portrait at the end).
All of these were inked on cold press watercolor paper with a Creative Mark Rhapsody brush using Kuretake India Ink. These are my uncorrected scans- to see the real version, keep an eye out for the Inktober 2015 mini I'm putting together! I plan on watercoloring these later on, so keep an eye out or that too! I have some video recorded for a handful of these, the video will be underneath the inks.
All of these inks (and 10 new ones) are included in my new mini comic, Favorite Fictional Femmes, which will be available for purchase from me, in person, at NOCAZfest at the New Orleans Public Library. All proceeds go to keeping my lights on, and feeding my cat and myself.
 Usagi and Luna
 Aurora and Ignatius from Child of Light
 Baby Amethyst as a witch
 Bee and Puppycat
 Connie from Steven Universe
 Bulma from Dragonball
 Sakura from Gekkan Shoujo Nozaki-kun
 DeeDee from Dexter's Lab
 Tina Belcher
 Kiki and Jiji
 Card Captor Sakura
 Selina Meyers
 Louise Belcher
 Madoka
 Mabel
Mabel Satsuki and Mei from My Neighbor Totoro
Inktober Timelapse- Nattosoup
 ChiChi from Dragonball
 Sophie Hatter from Howl's Moving Castle
 Ponyo
Ponyo Kara, from my own comic, 7" KaraInktober Inking Demo-Nattosoup
 Sasami and Ryo-Ohki from Tenchi Muyo
 Sailor Jupiter and Venus Inking Sailor Jupiter and Venus for Inktober- Nattosoup
 Tsukimi from Princess Jellyfish
Inktober Day 25 Timelapse- Nattosoup
 Laura Ingalls
 Anne Shirley
 Isabelle
 Gaz from Invader Zim
 Bubbles, Blossom, and Buttercup
 Yotsuba from Yotsuba&!Inktober Day 24
 Princess Carolyn
 A portrait of the artist
Please consider donating to this blog or purchasing from Natto-shop (http://nattosoup.com/shop) if you want me to continue publishing quality content. All materials tested were purchased from my own pocket. Keep on Truckin' Nattosoup is not under any sponsorship.

November 11, 2015
Stretching Watercolor Paper Revisited
You guys have requested more tutorials, especially those for Copic markers and for watercolors, and there's nothing more basic for many watercolor artists than stretching the paper they're going to paint on. A couple years ago, I made a post that detailed how I stretched watercolor paper for comics. I've since changed my methods to something that works much better, and I thought I'd go ahead and write about it here. I've mentioned my new method in year before last's Mechacon Introduction to Watercolor panel, but I know some readers aren't able to easily view videos, or prefer text posts. However, for completion, I'm going to go ahead and include that here. If there's anything that's unclear in the images, I recommend double checking the video.
Introduction to Watercolor- Mechacon 2014
The All New Stretching Watercolor Post~!
The page used in this demonstration is the first page from Knight School, my watercolor comic for the upcoming 1001 Lady Knights anthology. I'll let you guys know when the Kickstarter campaign is up, so you can order your copies!
The Materials
Plastic Gatorboard
Blue Painter's Tape (I recommend 1.5", 3M's blue painter's tape is my favorite)
Binder clips
Bulldog Clips
Viva paper towels
Mister
Wash brush
Cup of clean water
Amazon.com Widgets
The Process

Before you get started, you're going to want everything assembled and within easy reach, because when you start stretching your page, you can't take a break.

I start by turning my pencilled image over, and spraying the back with water.


I use a mop brush to spread the water evenly across the paper.

And use my paper towels to blot off the excess water.

I flip the page over. As you can see, the bluelines are still on the page.


I spray this side as well.

As you can see, spraying it and mopping it down cause the bluelines to run. By the time we're finished stretching this paper, they will be gone, so its important that you pencil or ink your image BEFORE stretching it. This technique also only works with ink jet printers, as laser jet toner is waterproof.

We're going to blot our paper down, and then apply ANOTHER wash of water to ensure the blue is gone.


I like to use 3m's blue drafting tape over watercolor tape (watercolor tape is awful). I find the blue painter's tape tends to stick better than white masking/drafting tape, and I don't like using illustration tape at all, not even for my perspective grids (masking tape all the way, baby!). To help prevent paper tearing when we remove the tape (after our watercolor is all done and dry, days later), I adhere it to the underside of my arm, because (let's be real here) the dead skin cells will stick to the tape and make it a little less tacky. If you are not a cat-herder like I am, you can also stick it to your pants leg, and the lint will do the same. I am constantly covered in a fine layer of cat hair, so this method does not work for me. While it's on my arm, I give it a quick swipe from my wet mop brush.
You're going to place the tape along the edges of your image- for me, I can just follow the borders of my panels. I don't have photos for this part, because SPEED IS KEY. As soon as you get your tape down, you're going to use your paper towel (one of the ones you've already used is fine, so long as it isn't sopping) to press the tape against your paper, and to blot off excess water. It is key that you wet your tape down, it'll help it adhere to the wet paper better. As I go, I use bulldog or binder clips to help hold the tape against my paper, and I usually leave those clips on until the final stages of my painting. You're going to tape down all four sides, and use clips where you can.

And that's how I currently stretch watercolor paper! If you aren't a fan of stretching your watercolor paper, you can buy it in pre-gummed blocks, but you can't run those through your inkjet printer. I use both pad bound and blocks in my studio, and I think both have their uses. You can buy both pad bound and gum bound watercolor paper as either cotton rag or wood pulp based paper, and a little experimenting will help you find the right paper for your projects.
Enjoyed this post? Consider using the social network links in the top bar to share it with your friends! A little signal boosting can go a long way, and I'd love to see my audience continue to grow. REALLY liked this post? Consider sending me a Paypal tip, located in the sidebar.
Please consider donating to this blog or purchasing from Natto-shop (http://nattosoup.com/shop) if you want me to continue publishing quality content. All materials tested were purchased from my own pocket. Keep on Truckin' Nattosoup is not under any sponsorship.
Introduction to Watercolor- Mechacon 2014
The All New Stretching Watercolor Post~!
The page used in this demonstration is the first page from Knight School, my watercolor comic for the upcoming 1001 Lady Knights anthology. I'll let you guys know when the Kickstarter campaign is up, so you can order your copies!
The Materials
Plastic Gatorboard
Blue Painter's Tape (I recommend 1.5", 3M's blue painter's tape is my favorite)
Binder clips
Bulldog Clips
Viva paper towels
Mister
Wash brush
Cup of clean water
Amazon.com Widgets
The Process

Before you get started, you're going to want everything assembled and within easy reach, because when you start stretching your page, you can't take a break.
I start by turning my pencilled image over, and spraying the back with water.
I use a mop brush to spread the water evenly across the paper.

And use my paper towels to blot off the excess water.

I flip the page over. As you can see, the bluelines are still on the page.

I spray this side as well.
As you can see, spraying it and mopping it down cause the bluelines to run. By the time we're finished stretching this paper, they will be gone, so its important that you pencil or ink your image BEFORE stretching it. This technique also only works with ink jet printers, as laser jet toner is waterproof.

We're going to blot our paper down, and then apply ANOTHER wash of water to ensure the blue is gone.
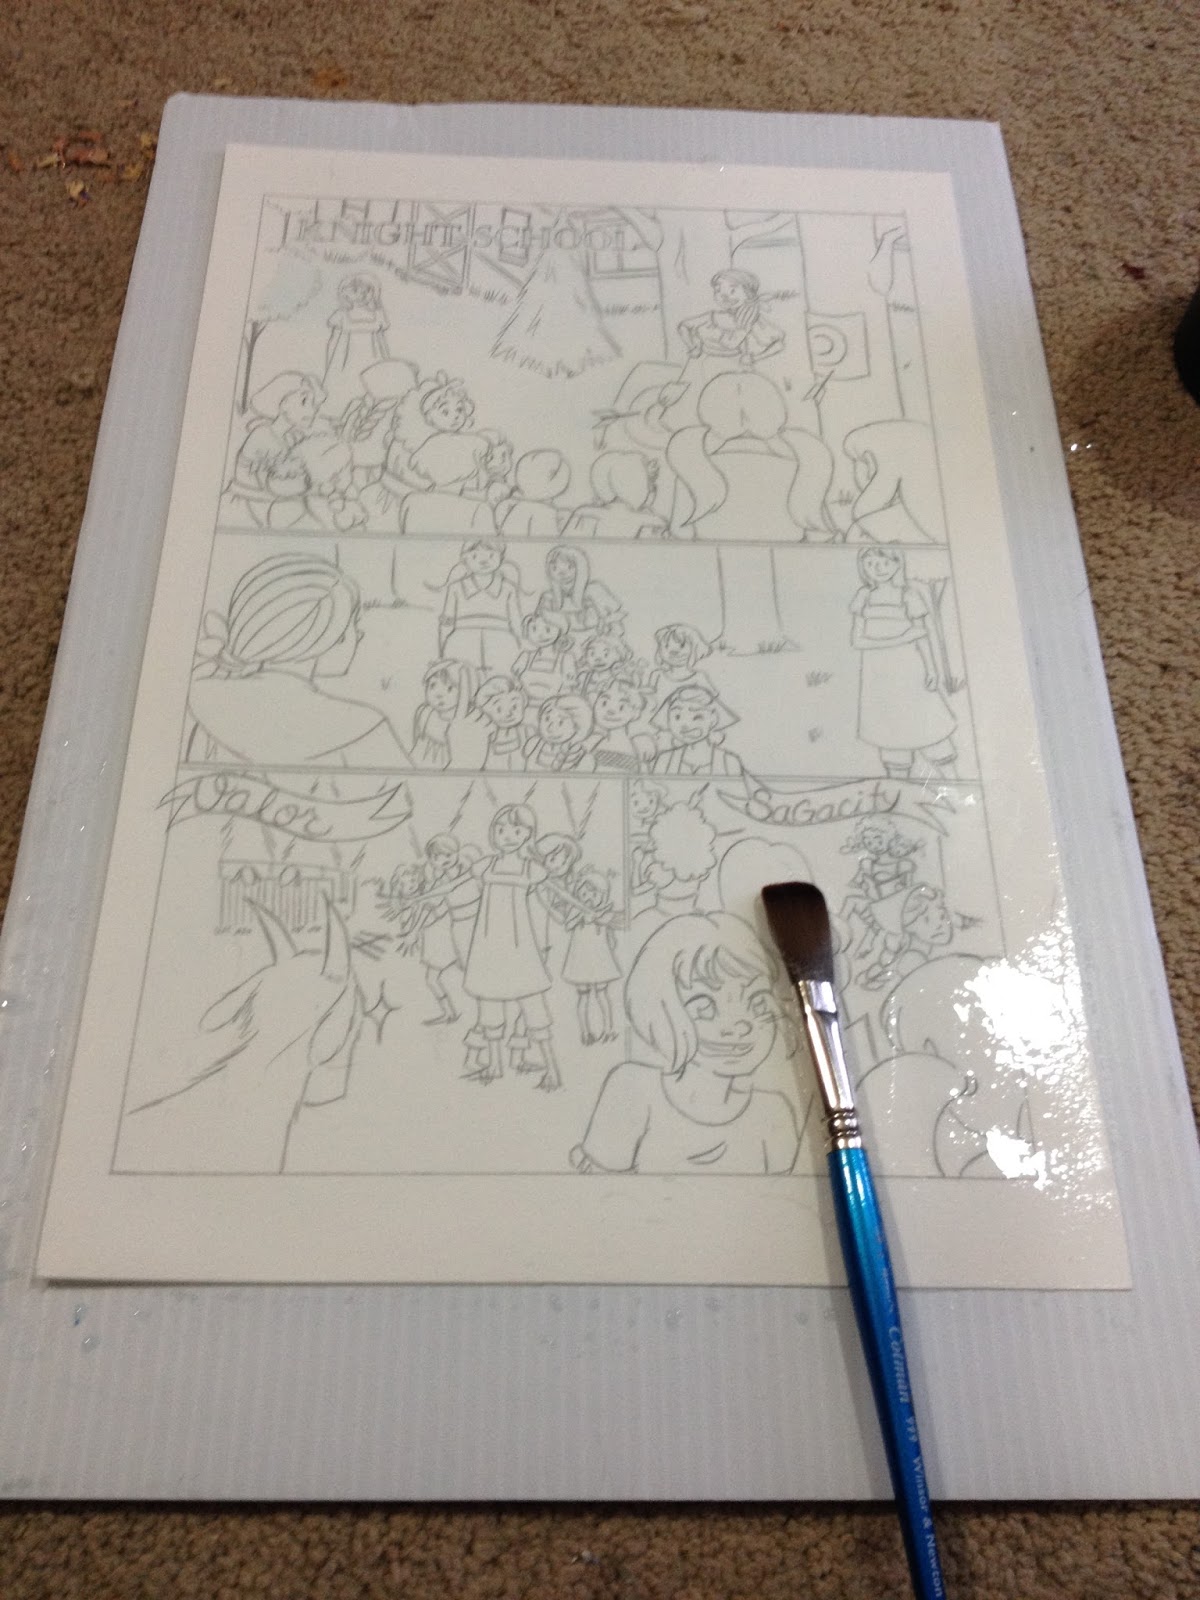

I like to use 3m's blue drafting tape over watercolor tape (watercolor tape is awful). I find the blue painter's tape tends to stick better than white masking/drafting tape, and I don't like using illustration tape at all, not even for my perspective grids (masking tape all the way, baby!). To help prevent paper tearing when we remove the tape (after our watercolor is all done and dry, days later), I adhere it to the underside of my arm, because (let's be real here) the dead skin cells will stick to the tape and make it a little less tacky. If you are not a cat-herder like I am, you can also stick it to your pants leg, and the lint will do the same. I am constantly covered in a fine layer of cat hair, so this method does not work for me. While it's on my arm, I give it a quick swipe from my wet mop brush.
You're going to place the tape along the edges of your image- for me, I can just follow the borders of my panels. I don't have photos for this part, because SPEED IS KEY. As soon as you get your tape down, you're going to use your paper towel (one of the ones you've already used is fine, so long as it isn't sopping) to press the tape against your paper, and to blot off excess water. It is key that you wet your tape down, it'll help it adhere to the wet paper better. As I go, I use bulldog or binder clips to help hold the tape against my paper, and I usually leave those clips on until the final stages of my painting. You're going to tape down all four sides, and use clips where you can.

And that's how I currently stretch watercolor paper! If you aren't a fan of stretching your watercolor paper, you can buy it in pre-gummed blocks, but you can't run those through your inkjet printer. I use both pad bound and blocks in my studio, and I think both have their uses. You can buy both pad bound and gum bound watercolor paper as either cotton rag or wood pulp based paper, and a little experimenting will help you find the right paper for your projects.
Enjoyed this post? Consider using the social network links in the top bar to share it with your friends! A little signal boosting can go a long way, and I'd love to see my audience continue to grow. REALLY liked this post? Consider sending me a Paypal tip, located in the sidebar.
Please consider donating to this blog or purchasing from Natto-shop (http://nattosoup.com/shop) if you want me to continue publishing quality content. All materials tested were purchased from my own pocket. Keep on Truckin' Nattosoup is not under any sponsorship.
November 8, 2015
Walmart Art Supply Review: Pilot Precise V5
A few days ago I mentioned in the Papermate Flair Ultrafine review that the Walmart I purchased all my Walmart Art Supply Review supplies did not have much in the way of finelining or technical pens in their tiny Scrapbooking section. This bears repeating, because the Pilot V5 Rollerball pen was the first pen I picked up from their stationary section that I hoped might fit the 'inking' requirement I outlined in my post on Basic Comic Supplies. Although when I was a wee preteen, I used ballpoint pens to ink my comic pages, I've since learned that ballpoint pens are awful for inking over nonphoto blue or graphite, and I've recently learned that rollerball pens aren't so great for that either.
When I picked up the Pilot Precise V5 rollerball pen from the Luling Walmart, I was blissfully unaware of this, and I'd hoped that rollerballs, which tend to have a free flowing ink, wouldn't be nearly as difficult to ink with as ballpoint pens.
The Packaging
Like so many things at Walmart, these pens came blister packed, two in a package. As a reviewer, I really prefer open stock, because commitment to products scares me.


The Stats:
Extra fine tip- .5 mmPrecise, clean linePrecision tip Smooth and Long WritingBlack InkMade by PilotLiquid InkAvailable in other colors and sizesPilot also promises:
This doesn't sound like the best deal, as Pilot products in the US tend to be pretty cheapd purchasing an envelope and postage will probably cost as much as the defective pens did. You're probably better off just returning it to your Walmart.
The package also includes a tip I didn't know, which I'll try out the next time I fly: When using most liquid ink pens on an airplane, bbe sure to remove the cap with point upward to avoid problems that could occur due to cabin pressure.
The Pen
The Pilot Precise V5 features a plastic pen body with an ink viewing window on the side, a posting cap, and a metal clip.


It also includes a viewing window where you grip the pen, although I've always wondered why rollerball pens tend to include this window, as it doesn't really signify your ink levels. If you have insight on this, please let me know via email! Your response will be shared in that week's Saturday Mailbag.

The point looks fairly fine, although for many artists, .5 isn't that fine- .3 and below are what many consider 'fine'.
The Field Test

My preliminary test showed that the V5 is fine for doodling, with generous ink flow that isn't prone to splotching, but does take a moment to try. Unfortunately, the waxiness of non photo blue pencils creates a resist with the liquid ink, and can clog up the rollerball, so this isn't a good pen for inking.
Immediate Water Application
Immediate water application causes the ink to run drastically, but the effect is almost like a watercolor marker or brushpen, and could be utilized for color application.
Makes a good pseudo inkwash- of course you apply more ink where you would like the shadows to be darker, quickly swipe with clean water.
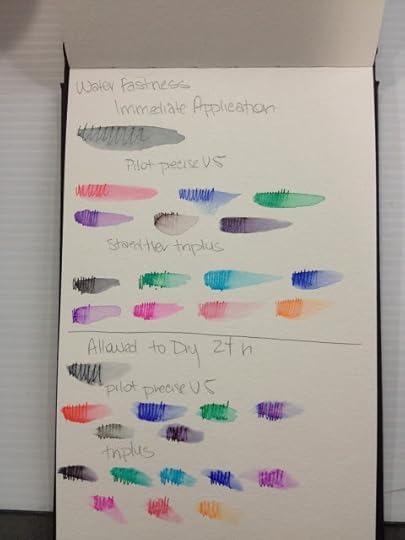
V5 is at top of page.
Ink Sketches to Demonstrate Faux Inkwash Technique
Water was applied immediately after sketch was completed with a clean brush. You could also use a waterbrush if you so desired. For darker areas, I drew more lines, as it meant more ink would come into play when water was added.

 Gesture sketches of my cat Bowie.
After 24 Hour Dry Time

Even after drying for 25 hours, water still activates the ink in the Pilot Precise V5, making this pen unsuitable for watercolor lineart.
But often pens that aren't watersafe ARE Copic-safe, so it's time to pull out the markers and find out!
Immediate Copic Application
Paper used: Fluid Hot Press watercolor paper (smooth finish)


Application of Copic ink caused smearing. It's pretty common for Copic to smear ink upon immediate application, even for Copic-proof products like Multiliners.
After 24 Hour Dry Time
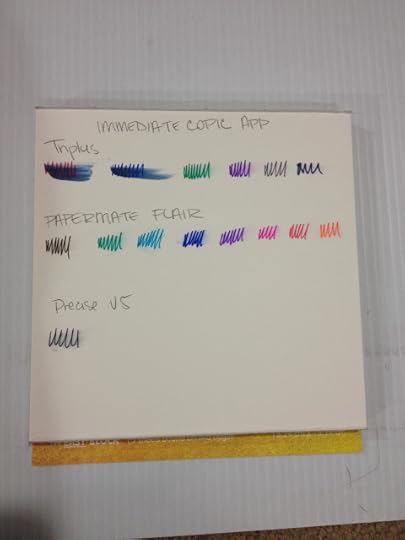

Unfortunately, even allowing the V5 ink to dry 24 hours didn't stop Copic ink from smearing the liquid ink.
This pen is not suitable for inking pieces you intend to color with alcohol based markers.
The Verdict
The Pilot Precise V5 is great for doodling, and can be used to create spontaneous faux ink-wash effects in your sketchbook. This is great for tonal studies, but not so great for inking watercolors or pieces you intend to render with alcohol based markers. You cannot ink over non photo blue lead with this pen, and graphite will probably also cause skipping.
Please consider donating to this blog or purchasing from Natto-shop (http://nattosoup.com/shop) if you want me to continue publishing quality content. All materials tested were purchased from my own pocket. Keep on Truckin' Nattosoup is not under any sponsorship.
When I picked up the Pilot Precise V5 rollerball pen from the Luling Walmart, I was blissfully unaware of this, and I'd hoped that rollerballs, which tend to have a free flowing ink, wouldn't be nearly as difficult to ink with as ballpoint pens.
The Packaging
Like so many things at Walmart, these pens came blister packed, two in a package. As a reviewer, I really prefer open stock, because commitment to products scares me.
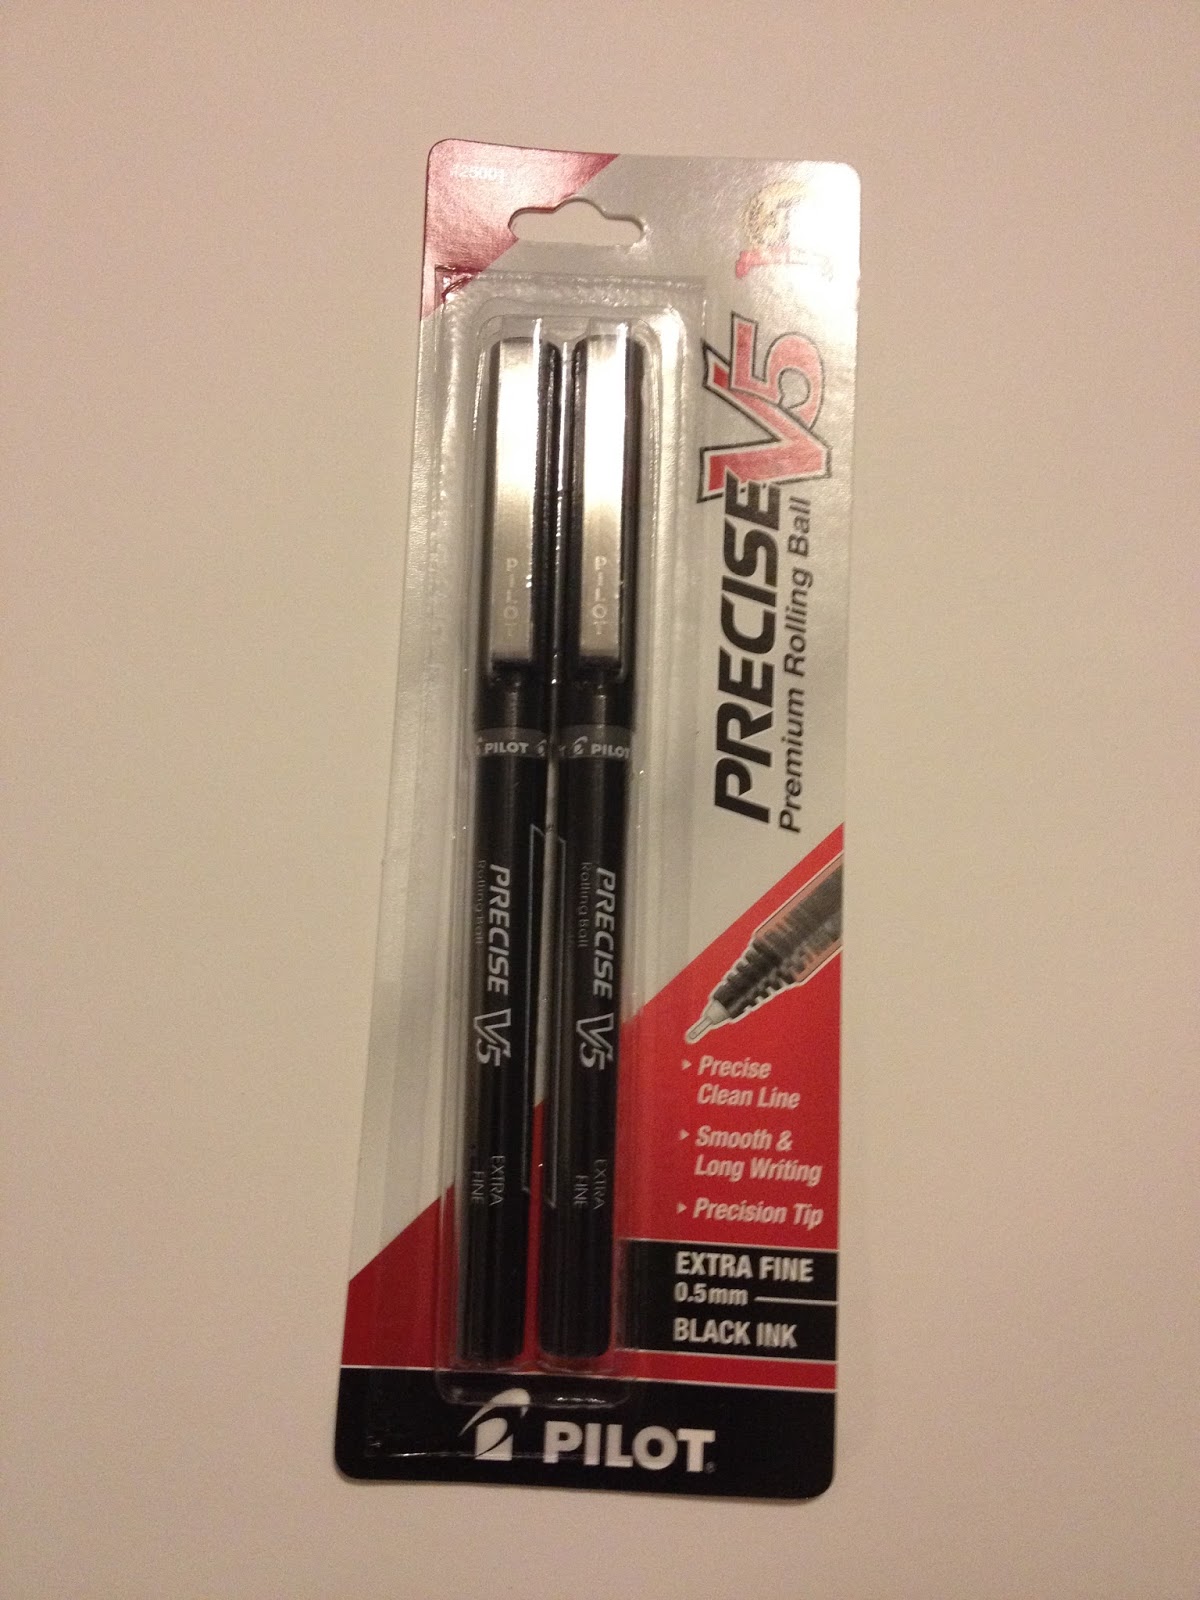

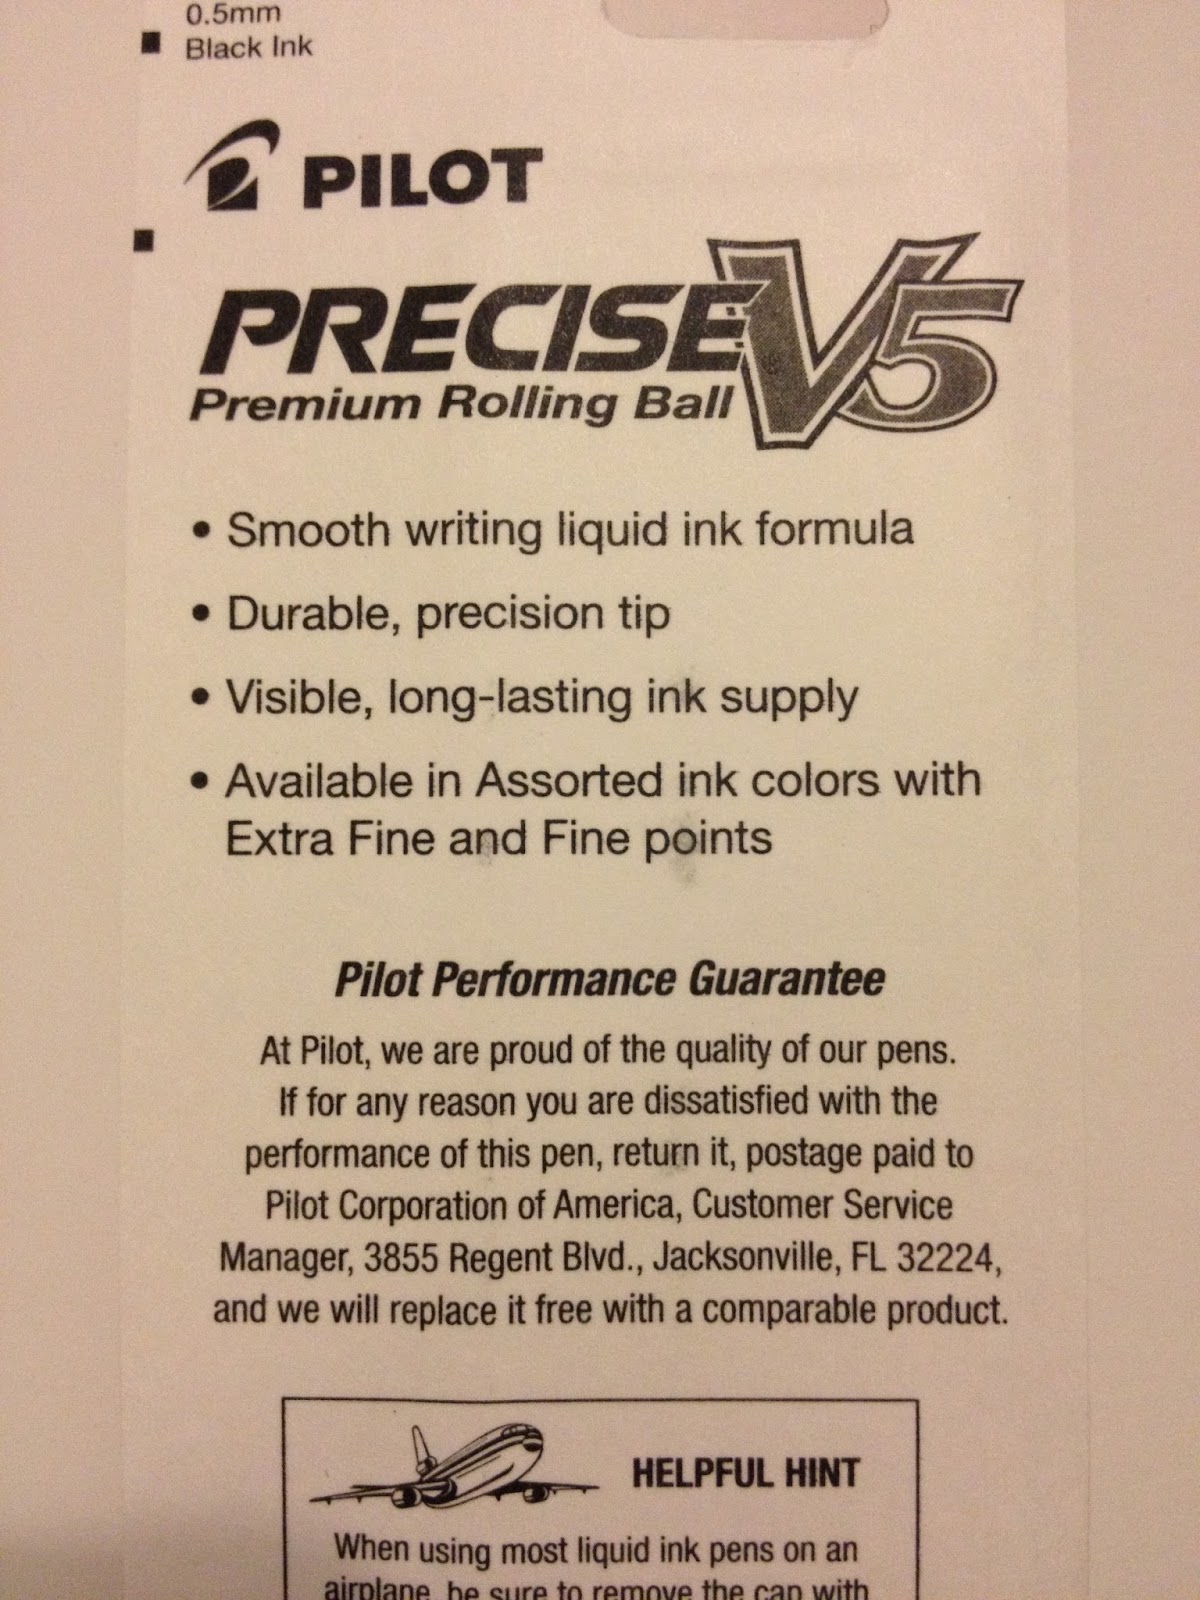

The Stats:
Extra fine tip- .5 mmPrecise, clean linePrecision tip Smooth and Long WritingBlack InkMade by PilotLiquid InkAvailable in other colors and sizesPilot also promises:
At Pilot, we are proud of the quality of our pens. If for any reason you are dissatisfied with the performance of this pen, return it, postage paid to Pilot Corporation of America, Customer Service Manager, 3855 Regent Blvd, Jacksonville, FL 224, and we will replace it free with a comparable product.
This doesn't sound like the best deal, as Pilot products in the US tend to be pretty cheapd purchasing an envelope and postage will probably cost as much as the defective pens did. You're probably better off just returning it to your Walmart.
The package also includes a tip I didn't know, which I'll try out the next time I fly: When using most liquid ink pens on an airplane, bbe sure to remove the cap with point upward to avoid problems that could occur due to cabin pressure.
The Pen
The Pilot Precise V5 features a plastic pen body with an ink viewing window on the side, a posting cap, and a metal clip.
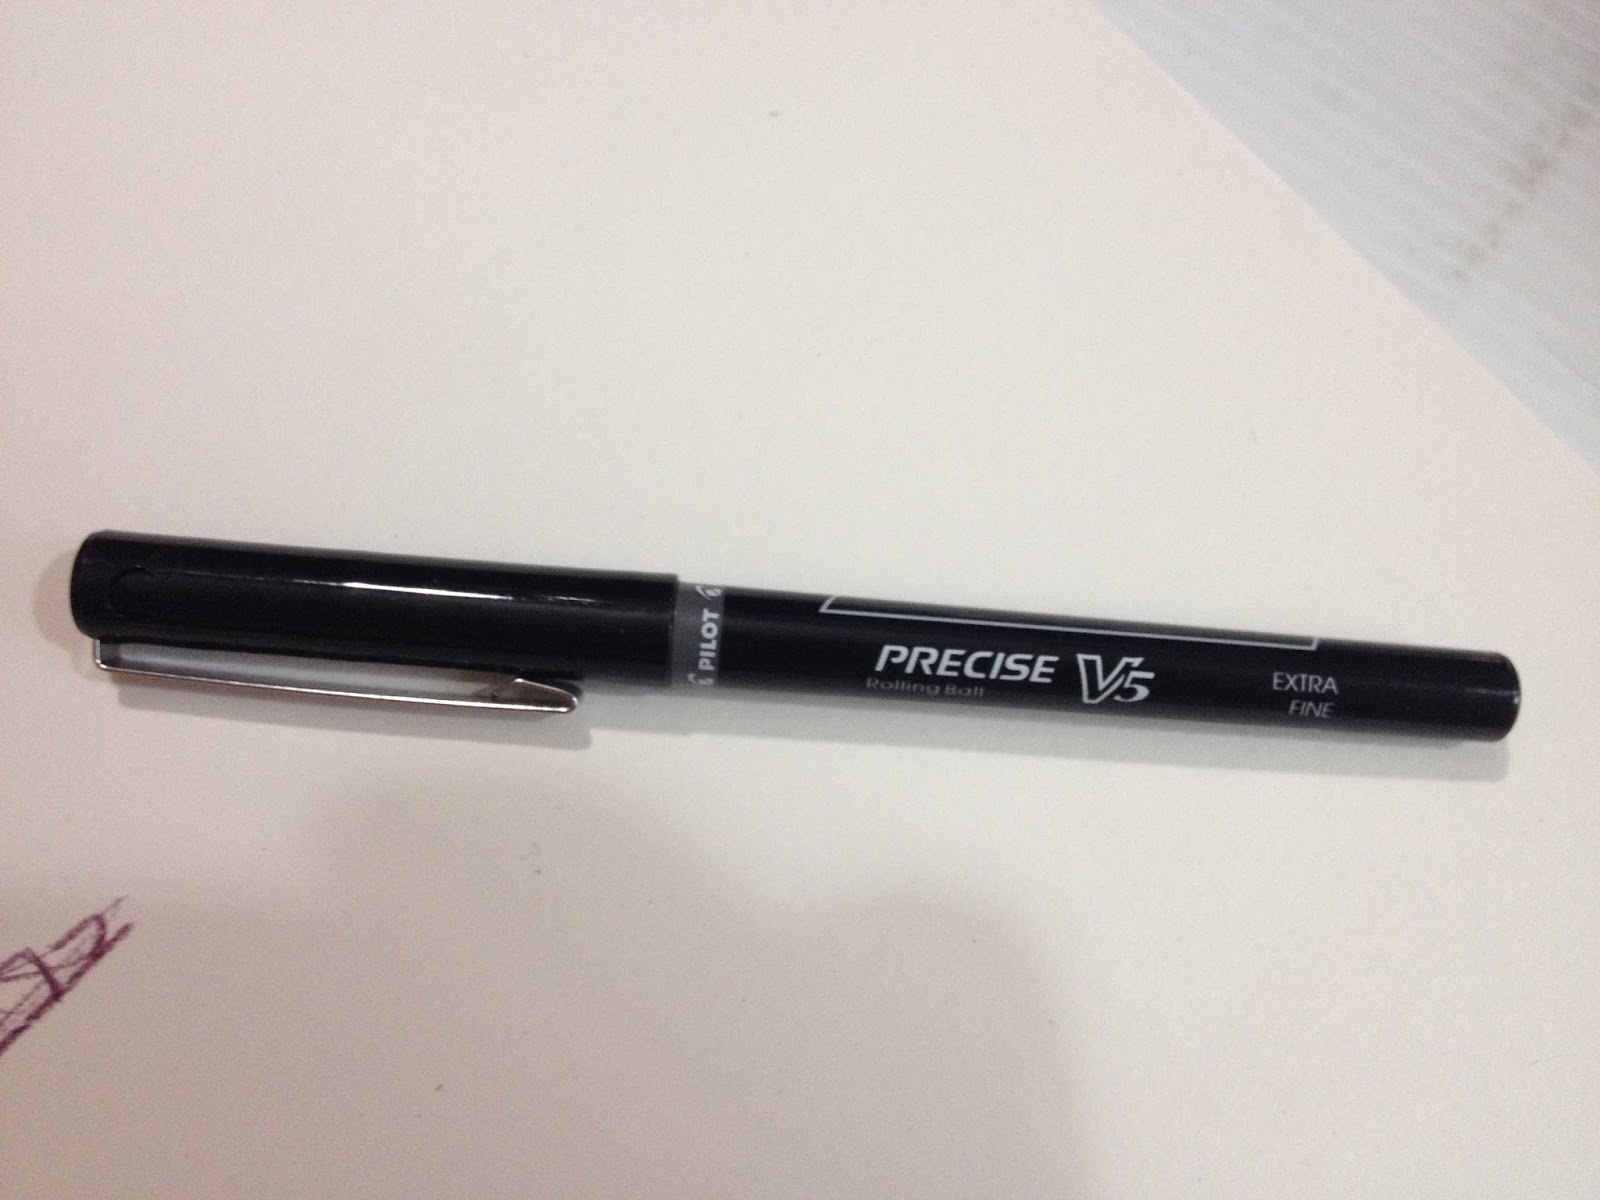
It also includes a viewing window where you grip the pen, although I've always wondered why rollerball pens tend to include this window, as it doesn't really signify your ink levels. If you have insight on this, please let me know via email! Your response will be shared in that week's Saturday Mailbag.
The point looks fairly fine, although for many artists, .5 isn't that fine- .3 and below are what many consider 'fine'.
The Field Test
My preliminary test showed that the V5 is fine for doodling, with generous ink flow that isn't prone to splotching, but does take a moment to try. Unfortunately, the waxiness of non photo blue pencils creates a resist with the liquid ink, and can clog up the rollerball, so this isn't a good pen for inking.
Immediate Water Application
Immediate water application causes the ink to run drastically, but the effect is almost like a watercolor marker or brushpen, and could be utilized for color application.
Makes a good pseudo inkwash- of course you apply more ink where you would like the shadows to be darker, quickly swipe with clean water.
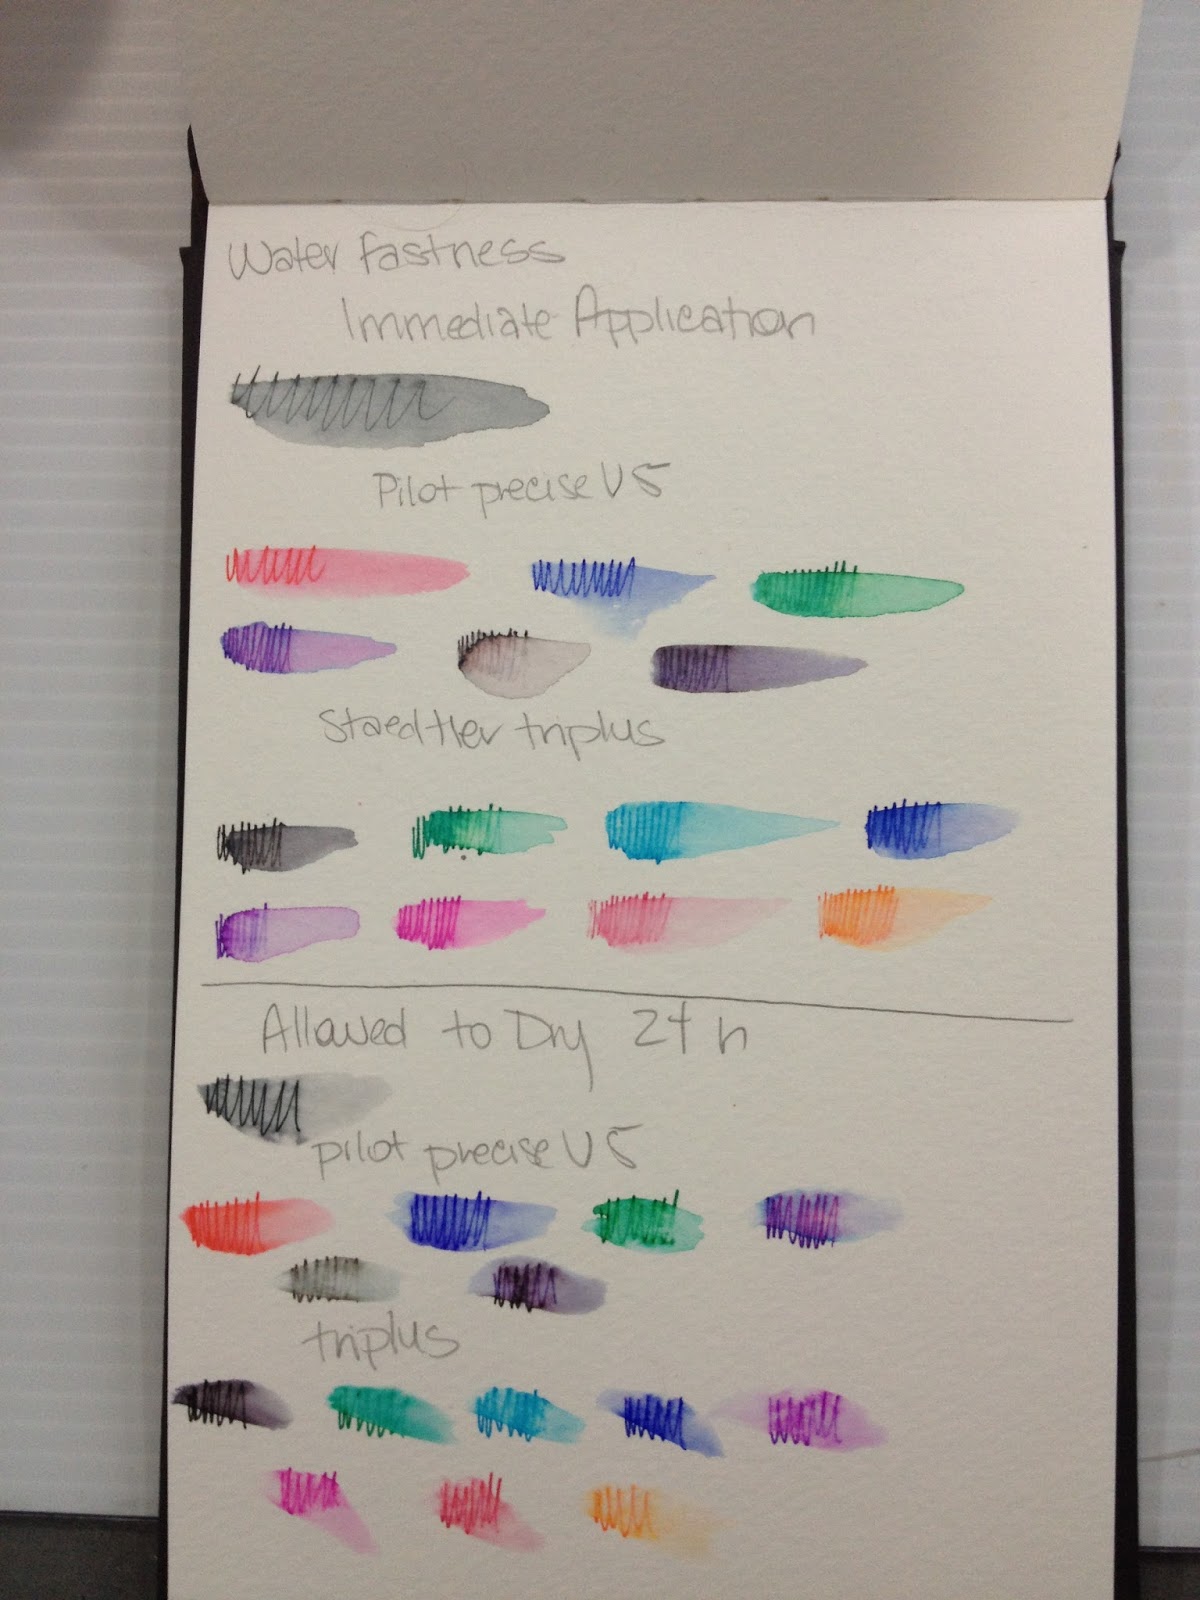
V5 is at top of page.
Ink Sketches to Demonstrate Faux Inkwash Technique
Water was applied immediately after sketch was completed with a clean brush. You could also use a waterbrush if you so desired. For darker areas, I drew more lines, as it meant more ink would come into play when water was added.

 Gesture sketches of my cat Bowie.
After 24 Hour Dry Time

Even after drying for 25 hours, water still activates the ink in the Pilot Precise V5, making this pen unsuitable for watercolor lineart.
But often pens that aren't watersafe ARE Copic-safe, so it's time to pull out the markers and find out!
Immediate Copic Application
Paper used: Fluid Hot Press watercolor paper (smooth finish)

Application of Copic ink caused smearing. It's pretty common for Copic to smear ink upon immediate application, even for Copic-proof products like Multiliners.
After 24 Hour Dry Time
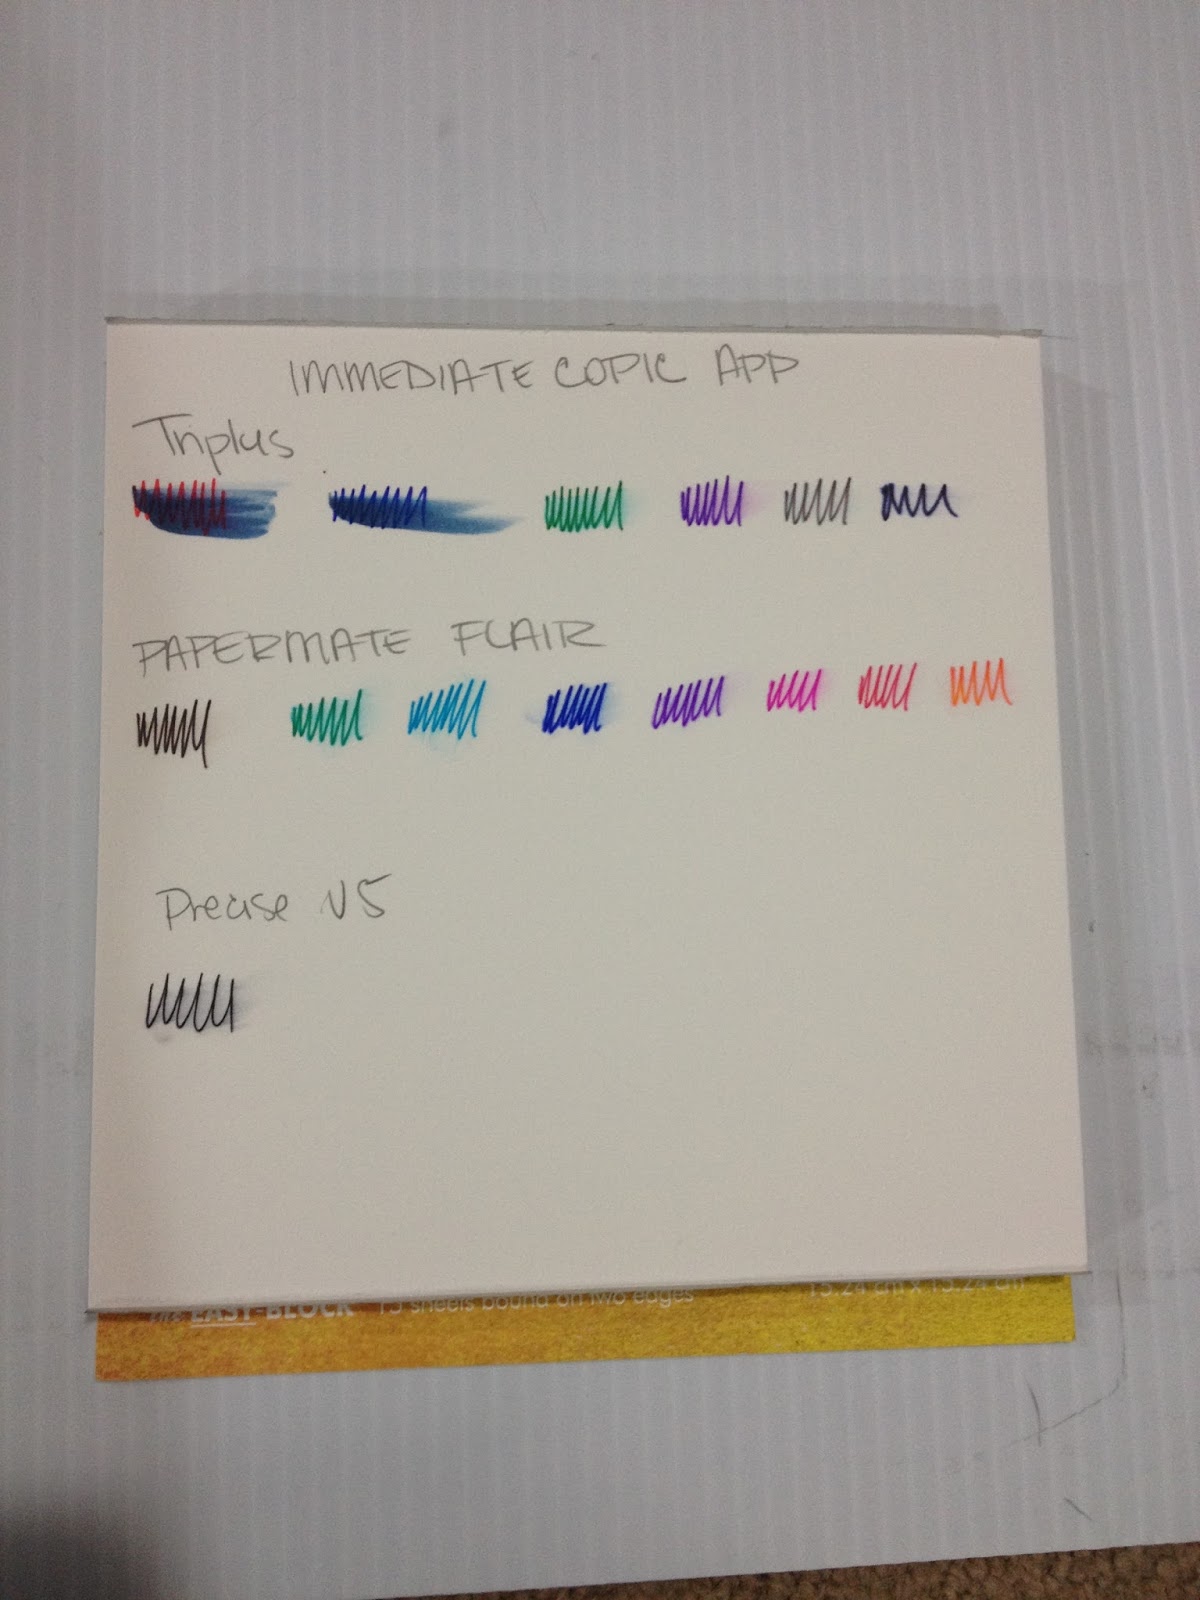
Unfortunately, even allowing the V5 ink to dry 24 hours didn't stop Copic ink from smearing the liquid ink.
This pen is not suitable for inking pieces you intend to color with alcohol based markers.
The Verdict
The Pilot Precise V5 is great for doodling, and can be used to create spontaneous faux ink-wash effects in your sketchbook. This is great for tonal studies, but not so great for inking watercolors or pieces you intend to render with alcohol based markers. You cannot ink over non photo blue lead with this pen, and graphite will probably also cause skipping.
Please consider donating to this blog or purchasing from Natto-shop (http://nattosoup.com/shop) if you want me to continue publishing quality content. All materials tested were purchased from my own pocket. Keep on Truckin' Nattosoup is not under any sponsorship.
November 6, 2015
19 Watercolor Studies You Have to See To Believe
Hey, clickbait titles are ok when used ironically, right?
Something people often assume about me as an illustrator is that I'm too tied to the post-manga style that I use for 7" Kara and Gizmo Grandma. There's an assumption that it's the only way I CAN draw. That's a frustrating stereotype to try to combat- all I can do is try to produce work that shows otherwise, and hope that those who have formed opinions about my abilities care enough to double check once in awhile. These studies weren't done for those people, they were done for me, because I want to continue to grow as a watercolor artist, but I thought it was worth mentioning to other artists working to establish a brand- even if you go to efforts to show you have some range, people will often assume that all your work is exactly the same as their first impression of you.
These 4"x6" watercolors were referenced from microfashion photos found on Pinterest. Although these are not for sale, this style is available for commission- email me with your photo and I'll give you a quote. For now, I would prefer to focus on kids and pets, mostly because they fit the 4"x6" format I like, and can be completed in an evening.
These were painted on a block of Fabriano 160lb cold press watercolor paper with a combination of Winsor&Newton watercolor paints, Holbien watercolor paints, white gouache, and Prismacolor pencils for minor details. Rather than premixing colors the way I do for comic pages, I focused on mixing colors on the palette as they appeared in the photo, even if the colors were not those I would select for comics- like Payne's Gray as a shadow to skin, rather than a violet.
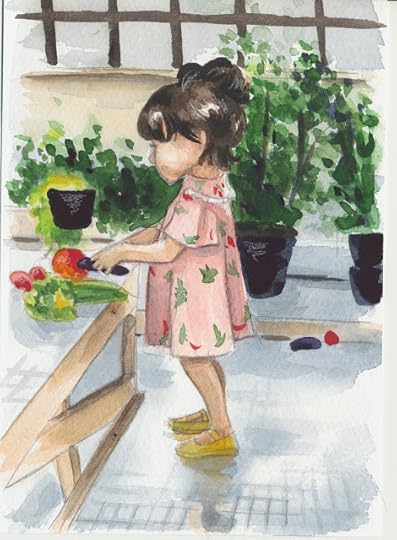
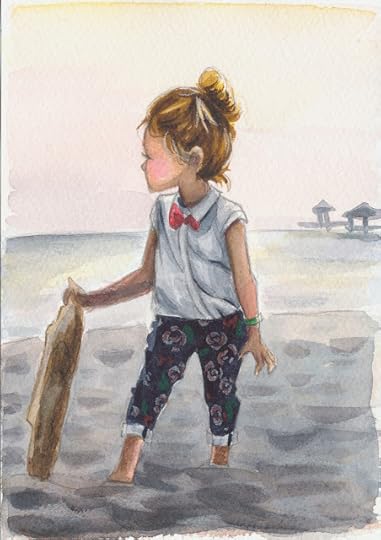
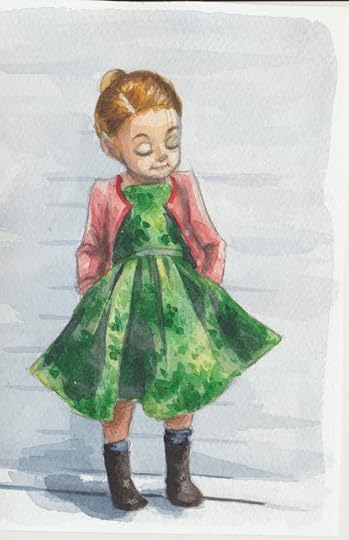
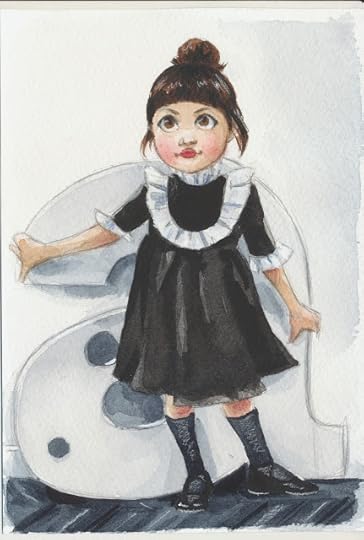


Please consider donating to this blog or purchasing from Natto-shop (http://nattosoup.com/shop) if you want me to continue publishing quality content. All materials tested were purchased from my own pocket. Keep on Truckin' Nattosoup is not under any sponsorship.
Something people often assume about me as an illustrator is that I'm too tied to the post-manga style that I use for 7" Kara and Gizmo Grandma. There's an assumption that it's the only way I CAN draw. That's a frustrating stereotype to try to combat- all I can do is try to produce work that shows otherwise, and hope that those who have formed opinions about my abilities care enough to double check once in awhile. These studies weren't done for those people, they were done for me, because I want to continue to grow as a watercolor artist, but I thought it was worth mentioning to other artists working to establish a brand- even if you go to efforts to show you have some range, people will often assume that all your work is exactly the same as their first impression of you.
These 4"x6" watercolors were referenced from microfashion photos found on Pinterest. Although these are not for sale, this style is available for commission- email me with your photo and I'll give you a quote. For now, I would prefer to focus on kids and pets, mostly because they fit the 4"x6" format I like, and can be completed in an evening.
These were painted on a block of Fabriano 160lb cold press watercolor paper with a combination of Winsor&Newton watercolor paints, Holbien watercolor paints, white gouache, and Prismacolor pencils for minor details. Rather than premixing colors the way I do for comic pages, I focused on mixing colors on the palette as they appeared in the photo, even if the colors were not those I would select for comics- like Payne's Gray as a shadow to skin, rather than a violet.


Please consider donating to this blog or purchasing from Natto-shop (http://nattosoup.com/shop) if you want me to continue publishing quality content. All materials tested were purchased from my own pocket. Keep on Truckin' Nattosoup is not under any sponsorship.


