
Becca Hillburn's Blog, page 49
December 21, 2015
Using Distress's Picket Fence Opaque White Marker for Details
I am always on the lookout for a grail opaque white pen. Ideally I want a brush, I want variable opacity, I want to be able to rework it. Years ago, I was tipped off that Posca makes a brush similar to this, and I did use the Posca white brush pen for awhile (especially to add white highlights on the comic Momotaro), but I wasn't entirely satisfied with it or its results.
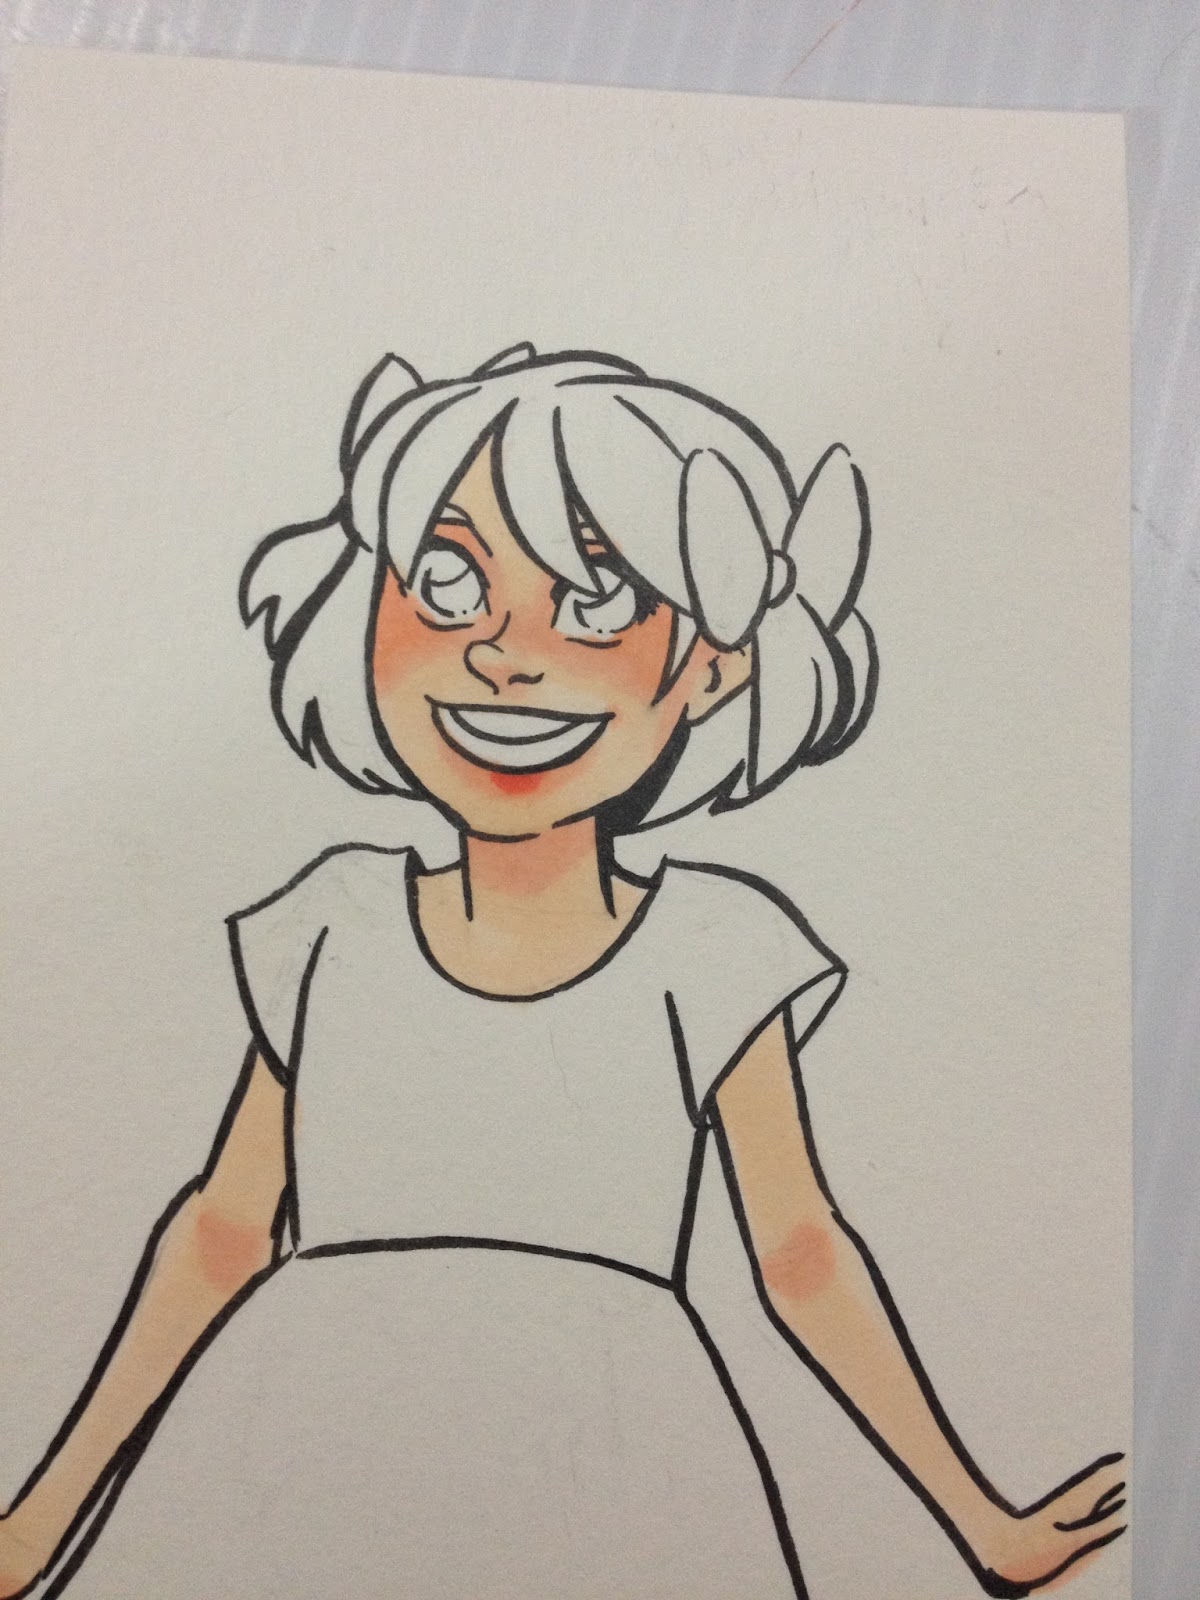
When researching Tim Holtz Distress markers for my review , I found out about the unique white pigment brush pen in the Distress markers line. Picket Fence is a twin tipped opaque white pigment brushpen that seemed designed for adding white details, and if it worked as promised, seemed like an idea solution for many illustrators looking for subtle whites. I've covered my basic thoughts on Distress markers in general, and Picket Fence specifically in my Distress markers review, and I've already covered in Copic Tutorial- Skin Basics, Freckles, Hair, Clothes the basics of coloring Kara's skin in the illustration used for this tutorial, so if you're looking for basic Copic tips, I recommend you check that out first. This is a specialized tutorial that focuses on using Tim Holtz Distress marker in Picket Fence (an opaque white) to add white details over Copic marker or watercolor.
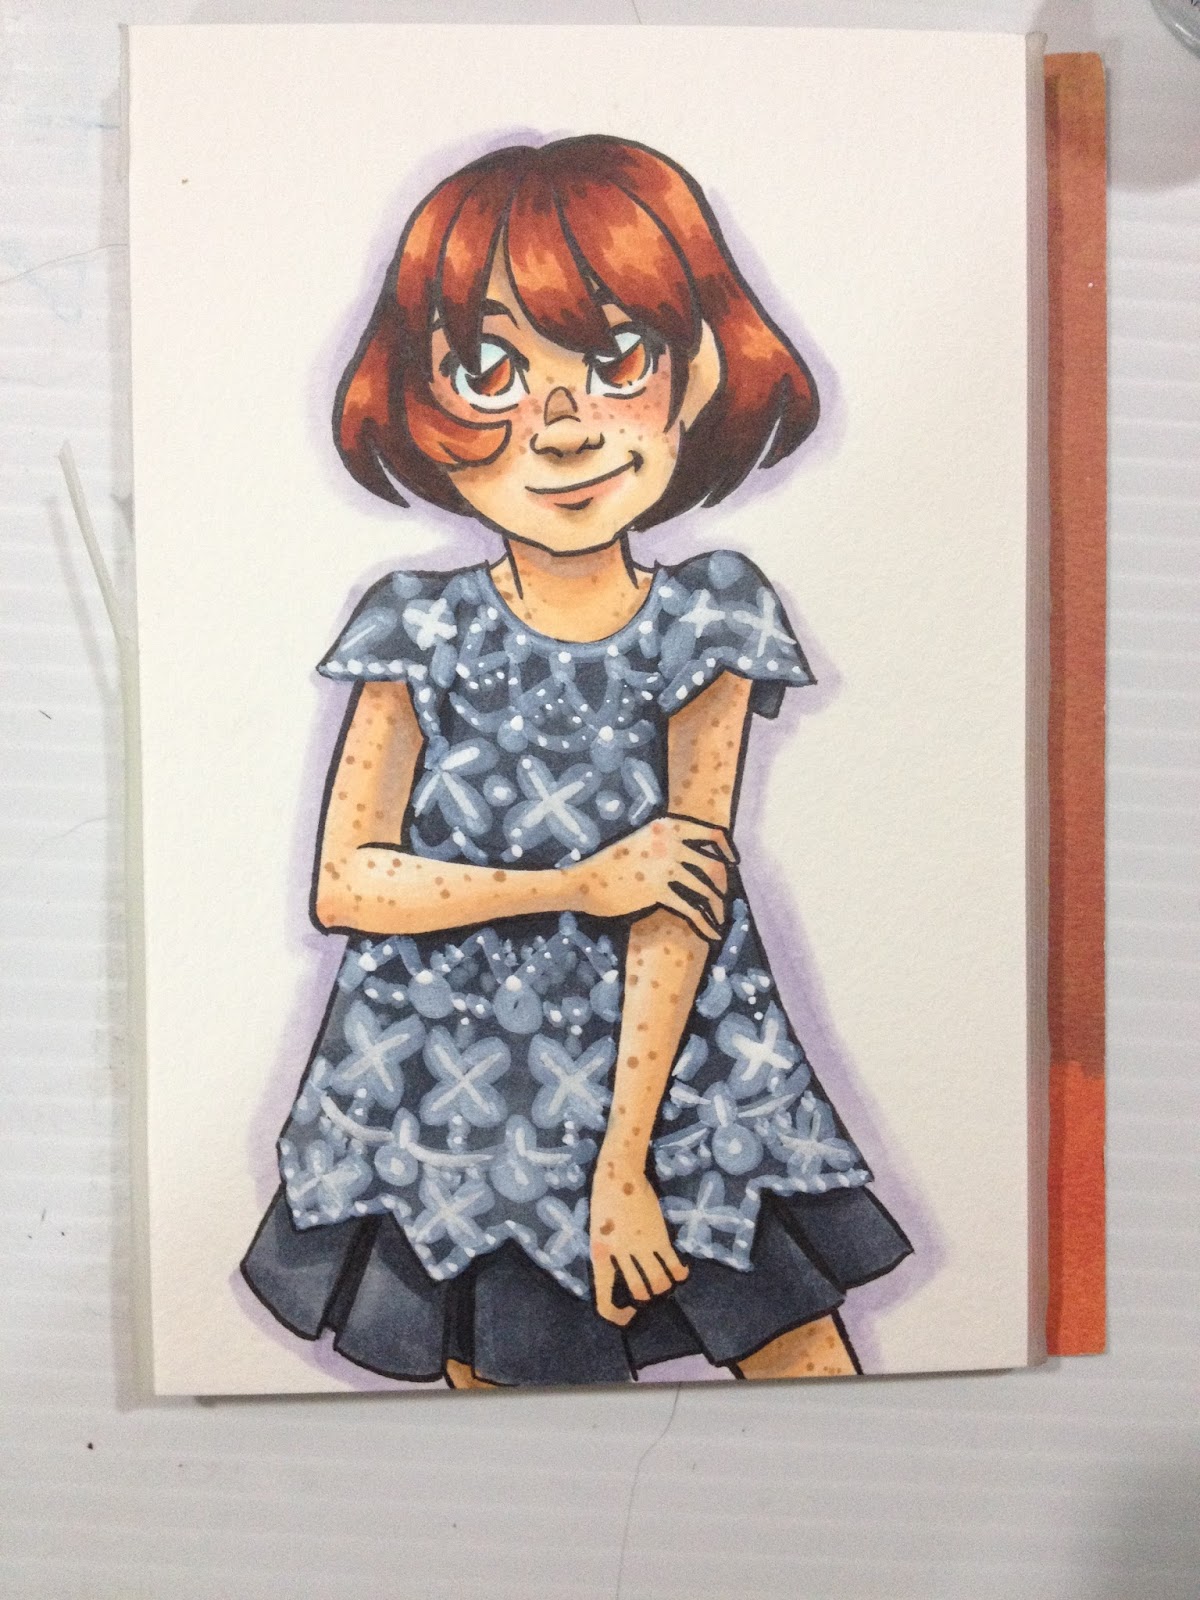
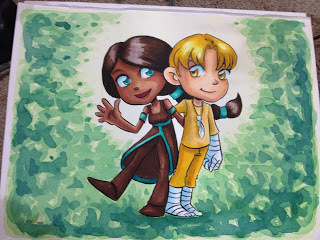
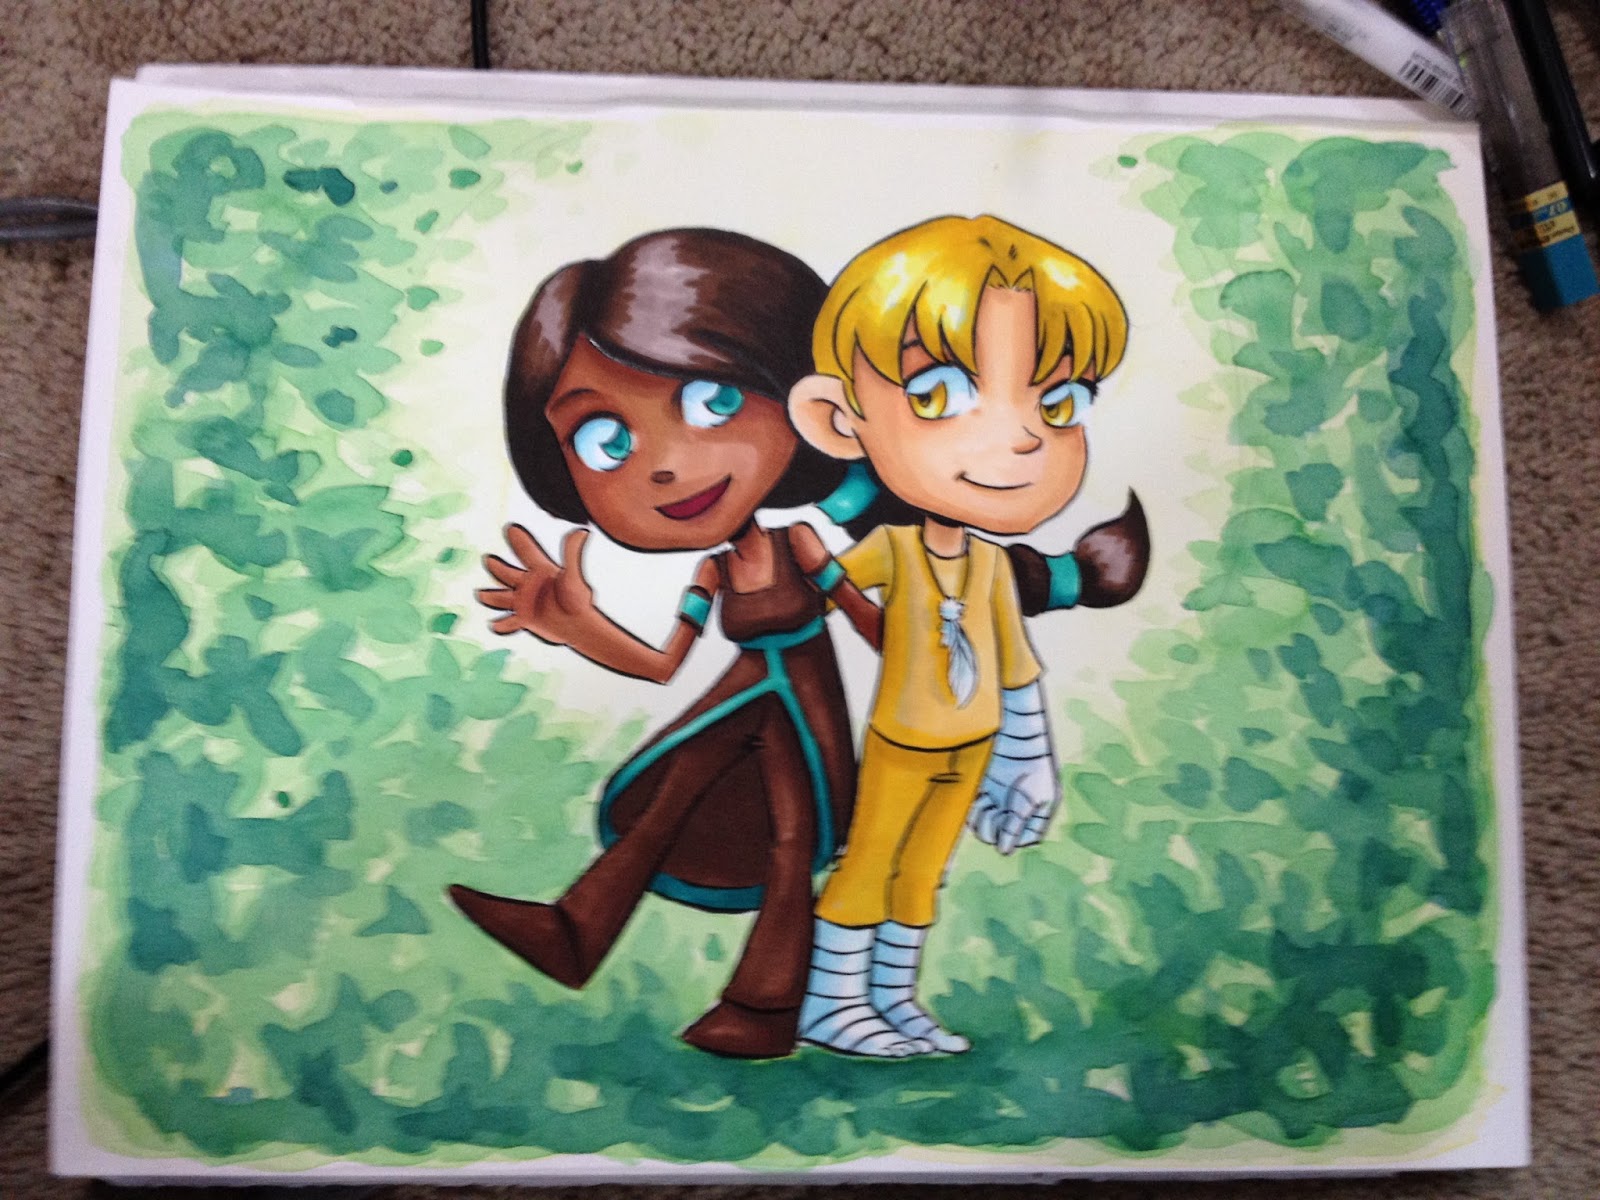
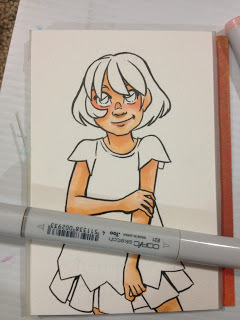
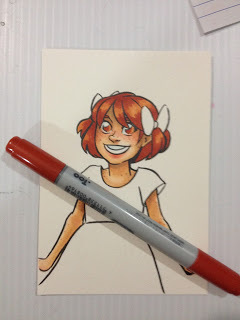
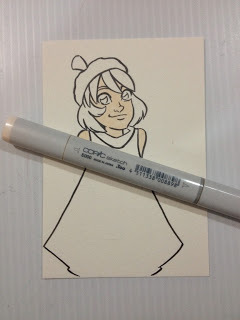
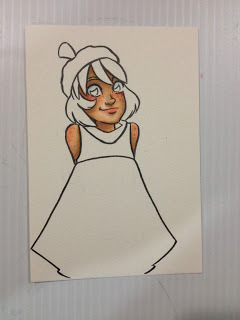
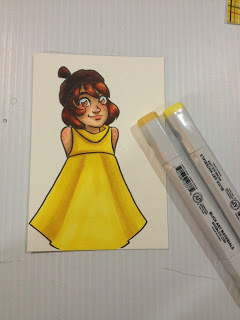
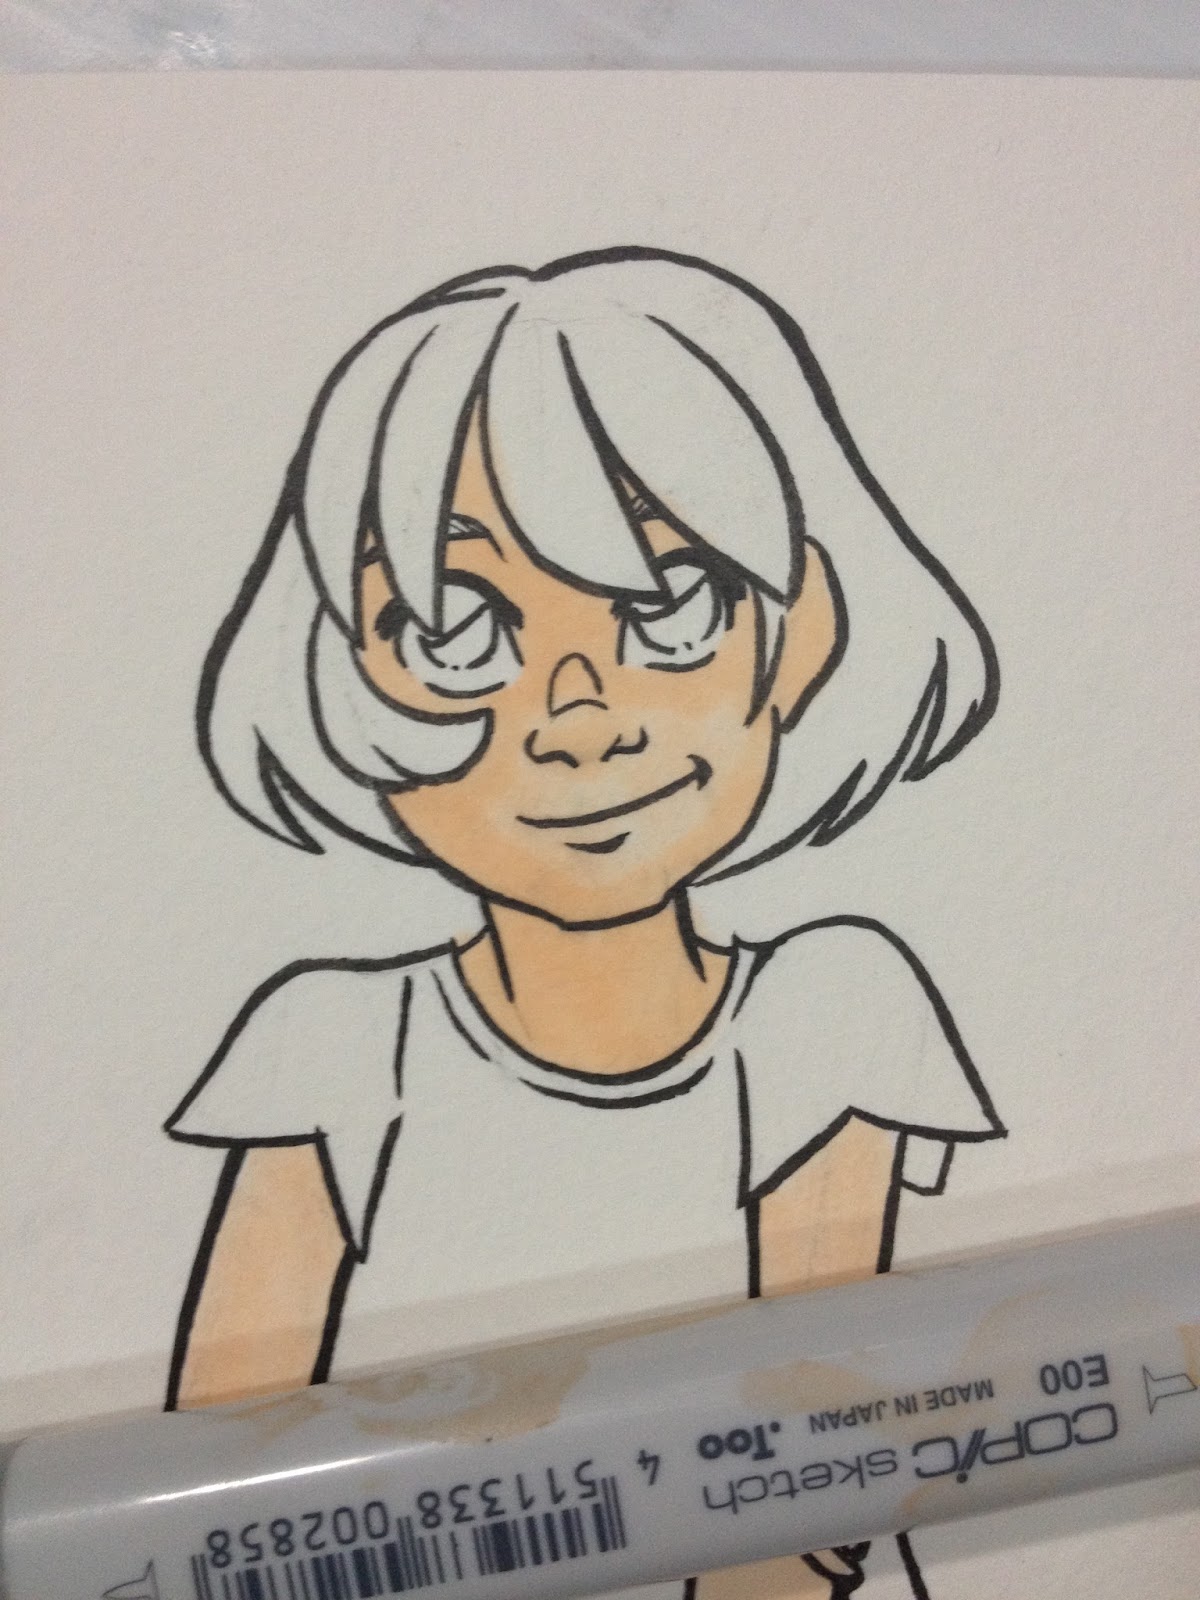
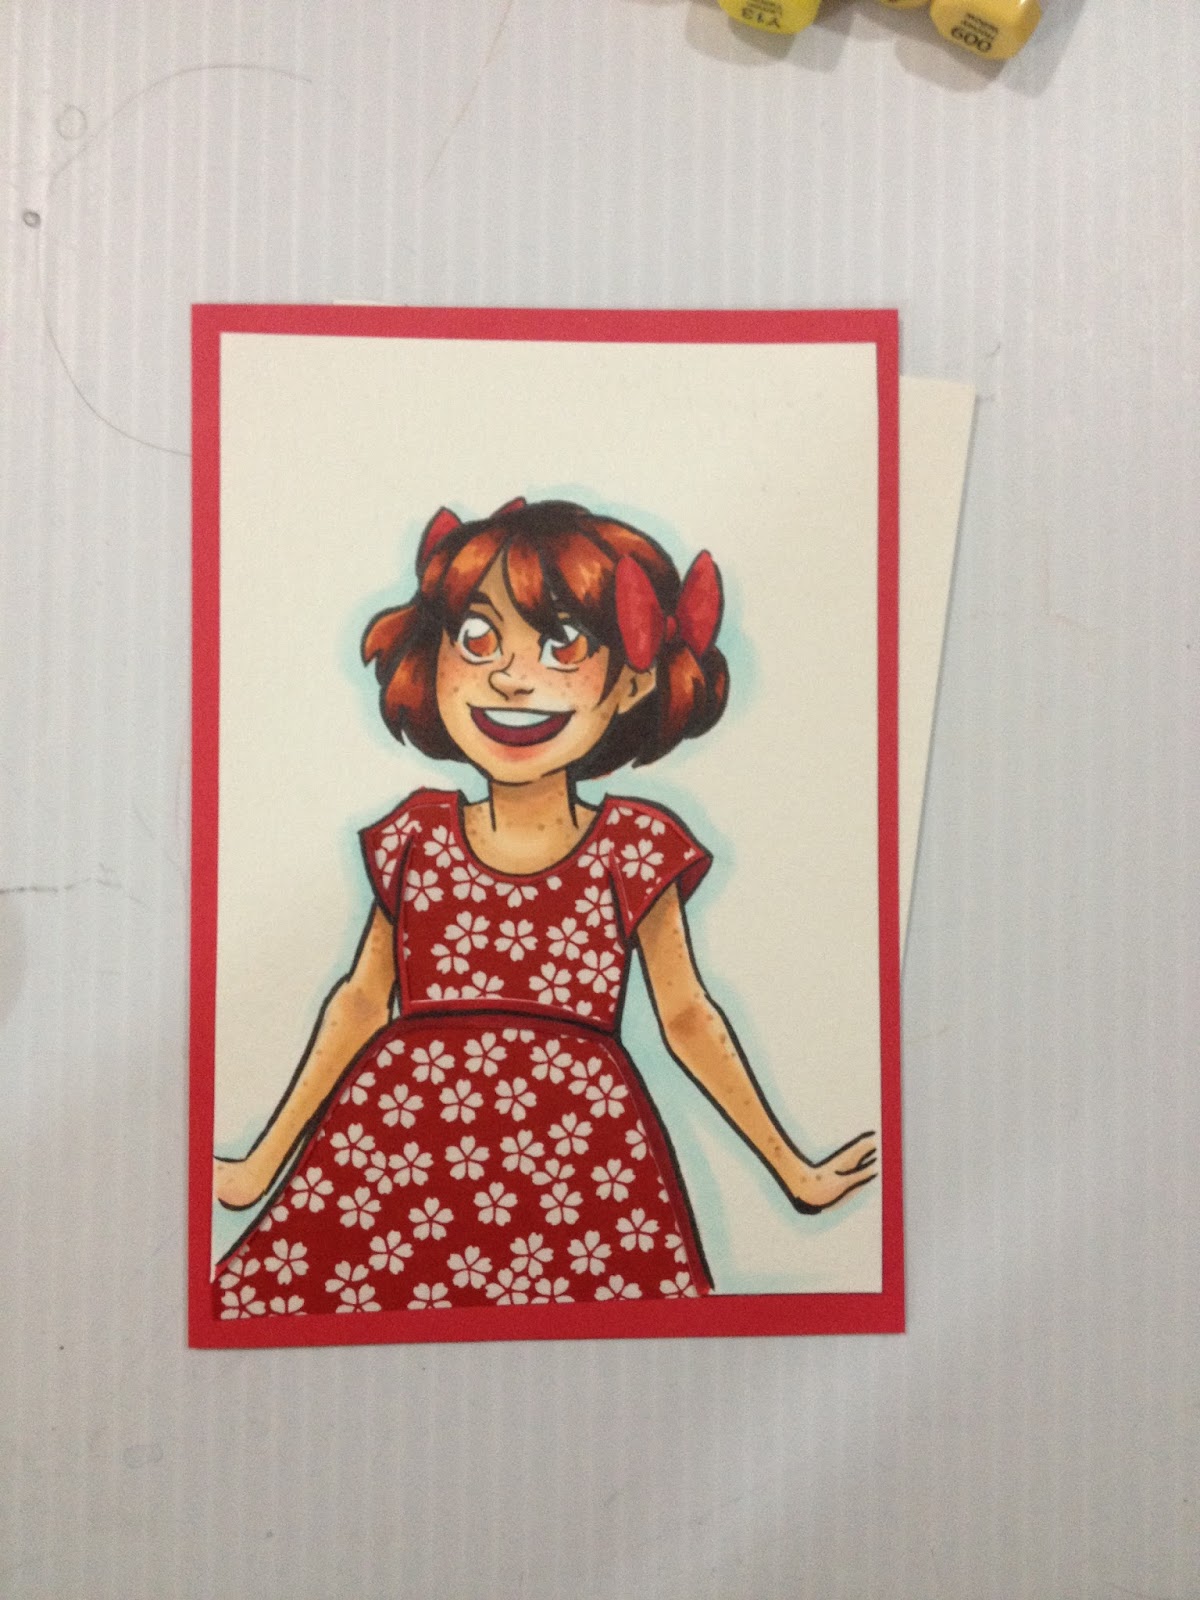
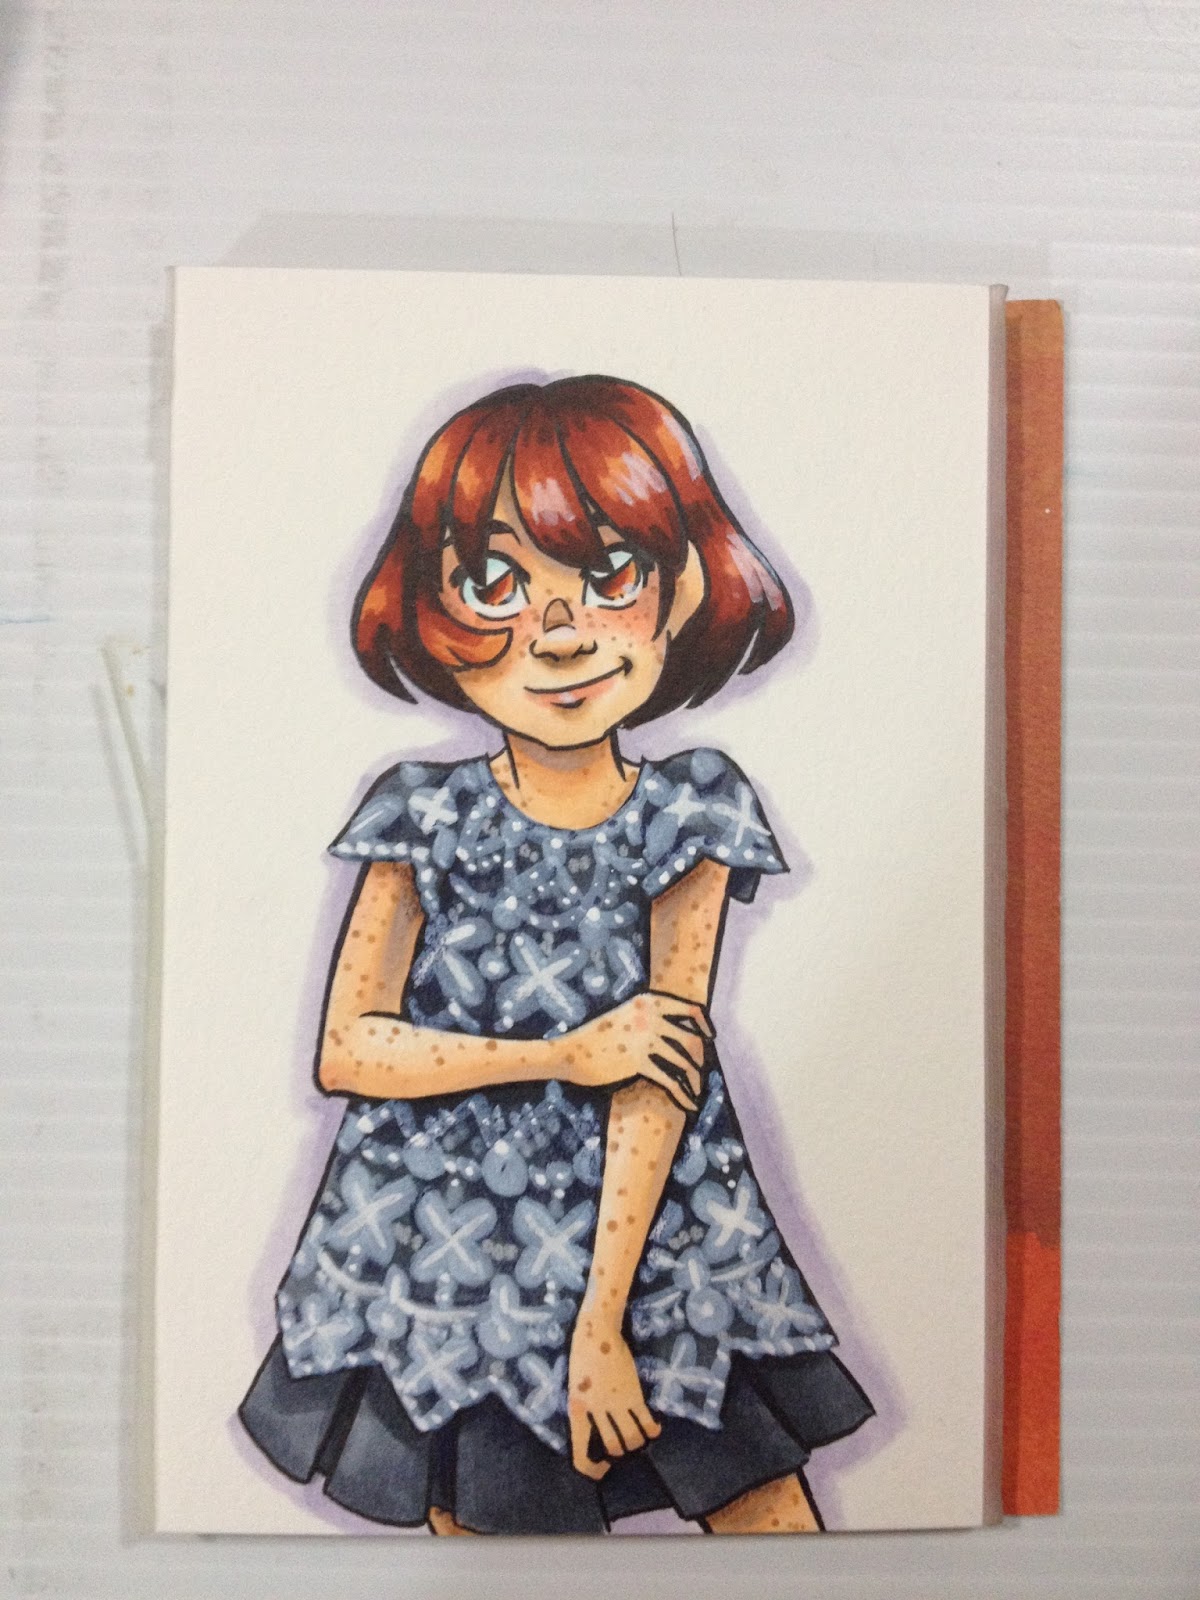 The finished illustration
You can get your own Picket Fence scrapbooking stores that carry Ranger products, at many Michael's, or through my Amazon affiliates link.
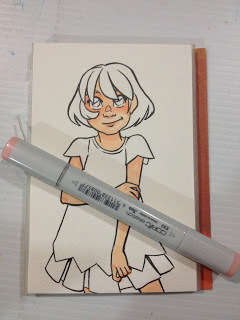
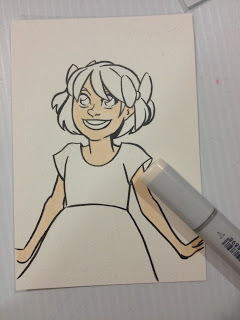
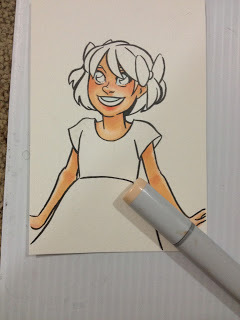
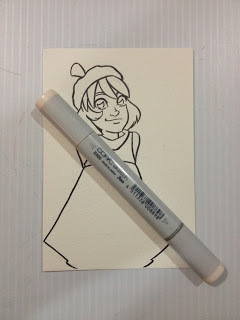
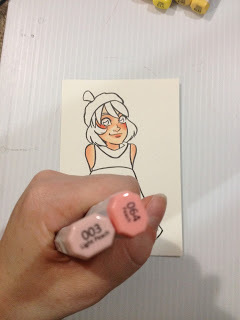
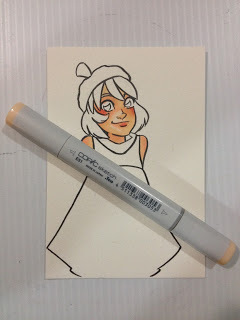
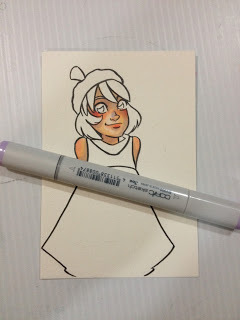
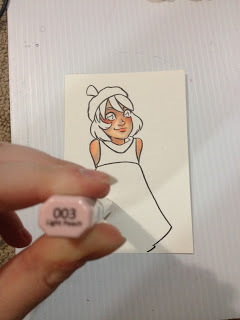
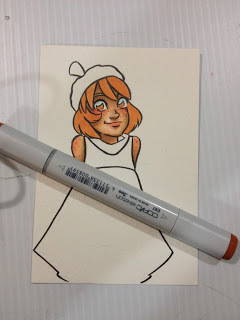
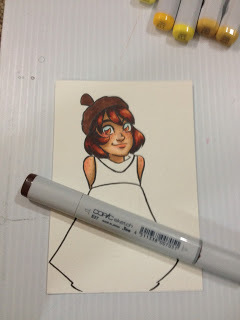
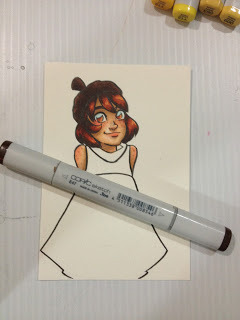
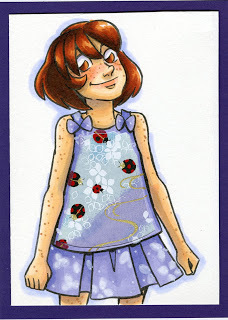
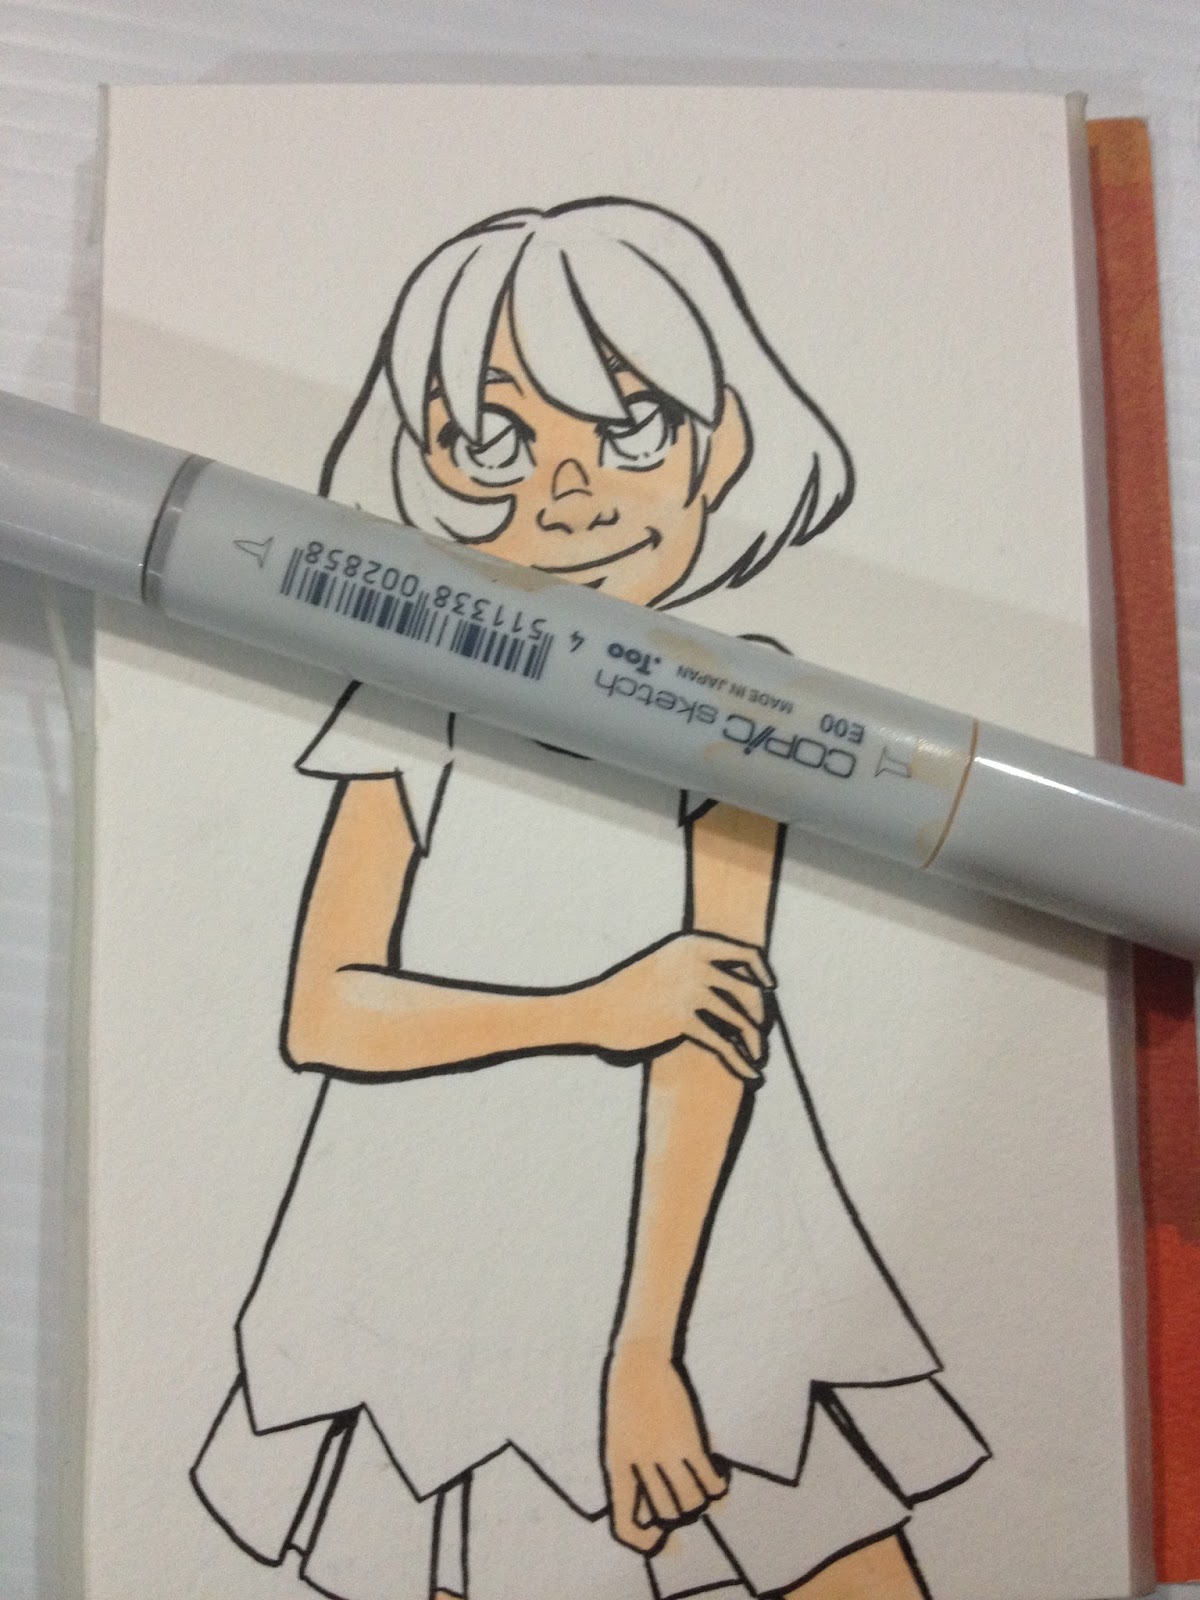
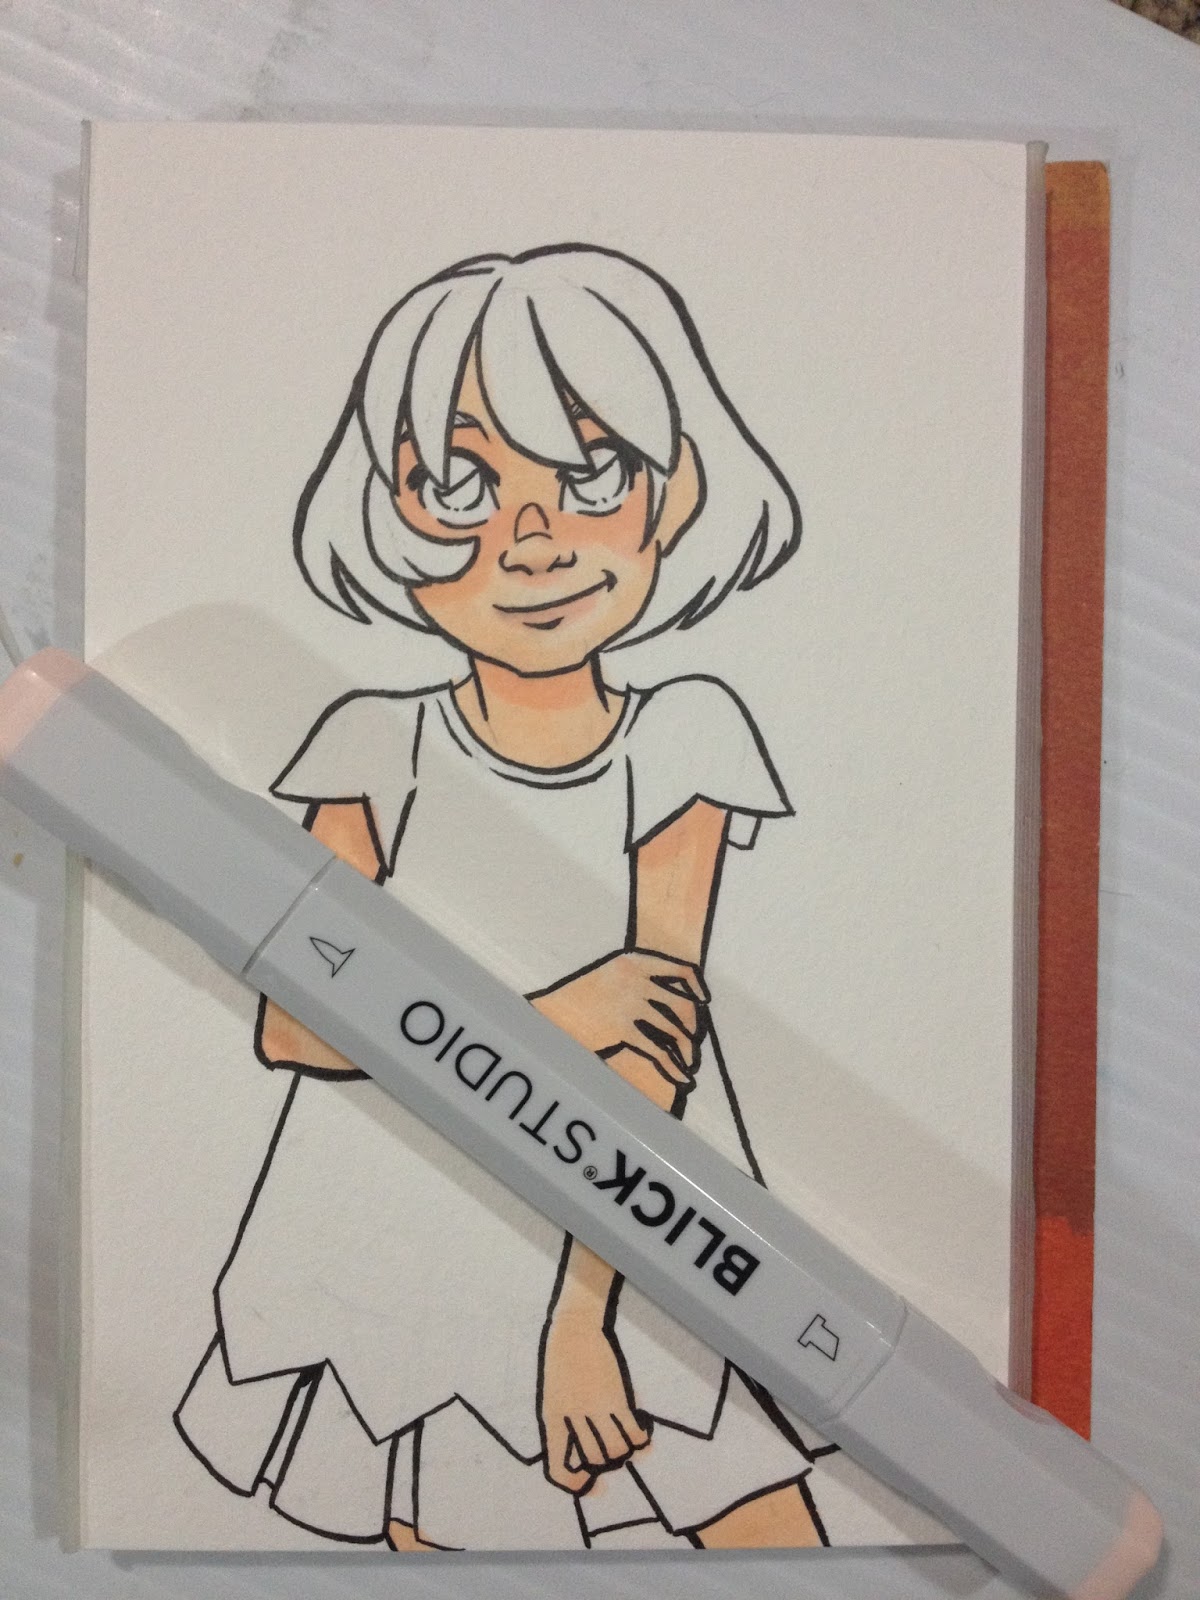
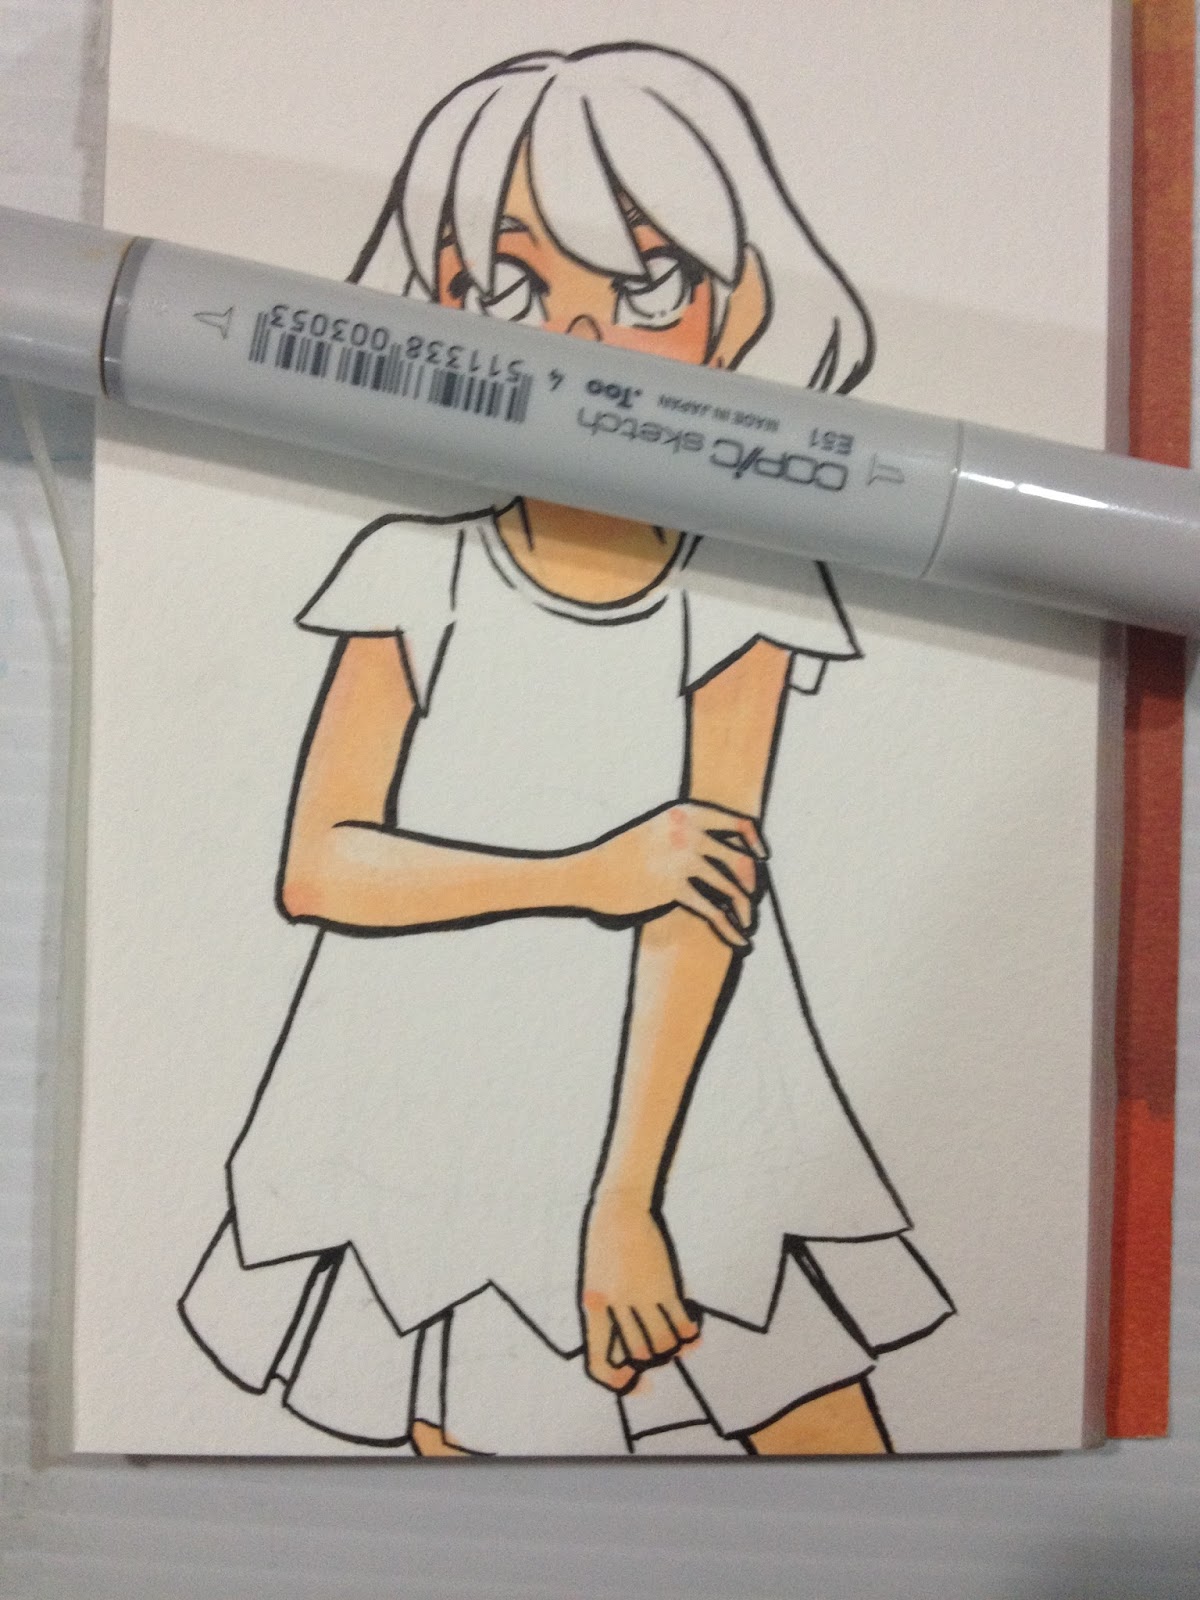
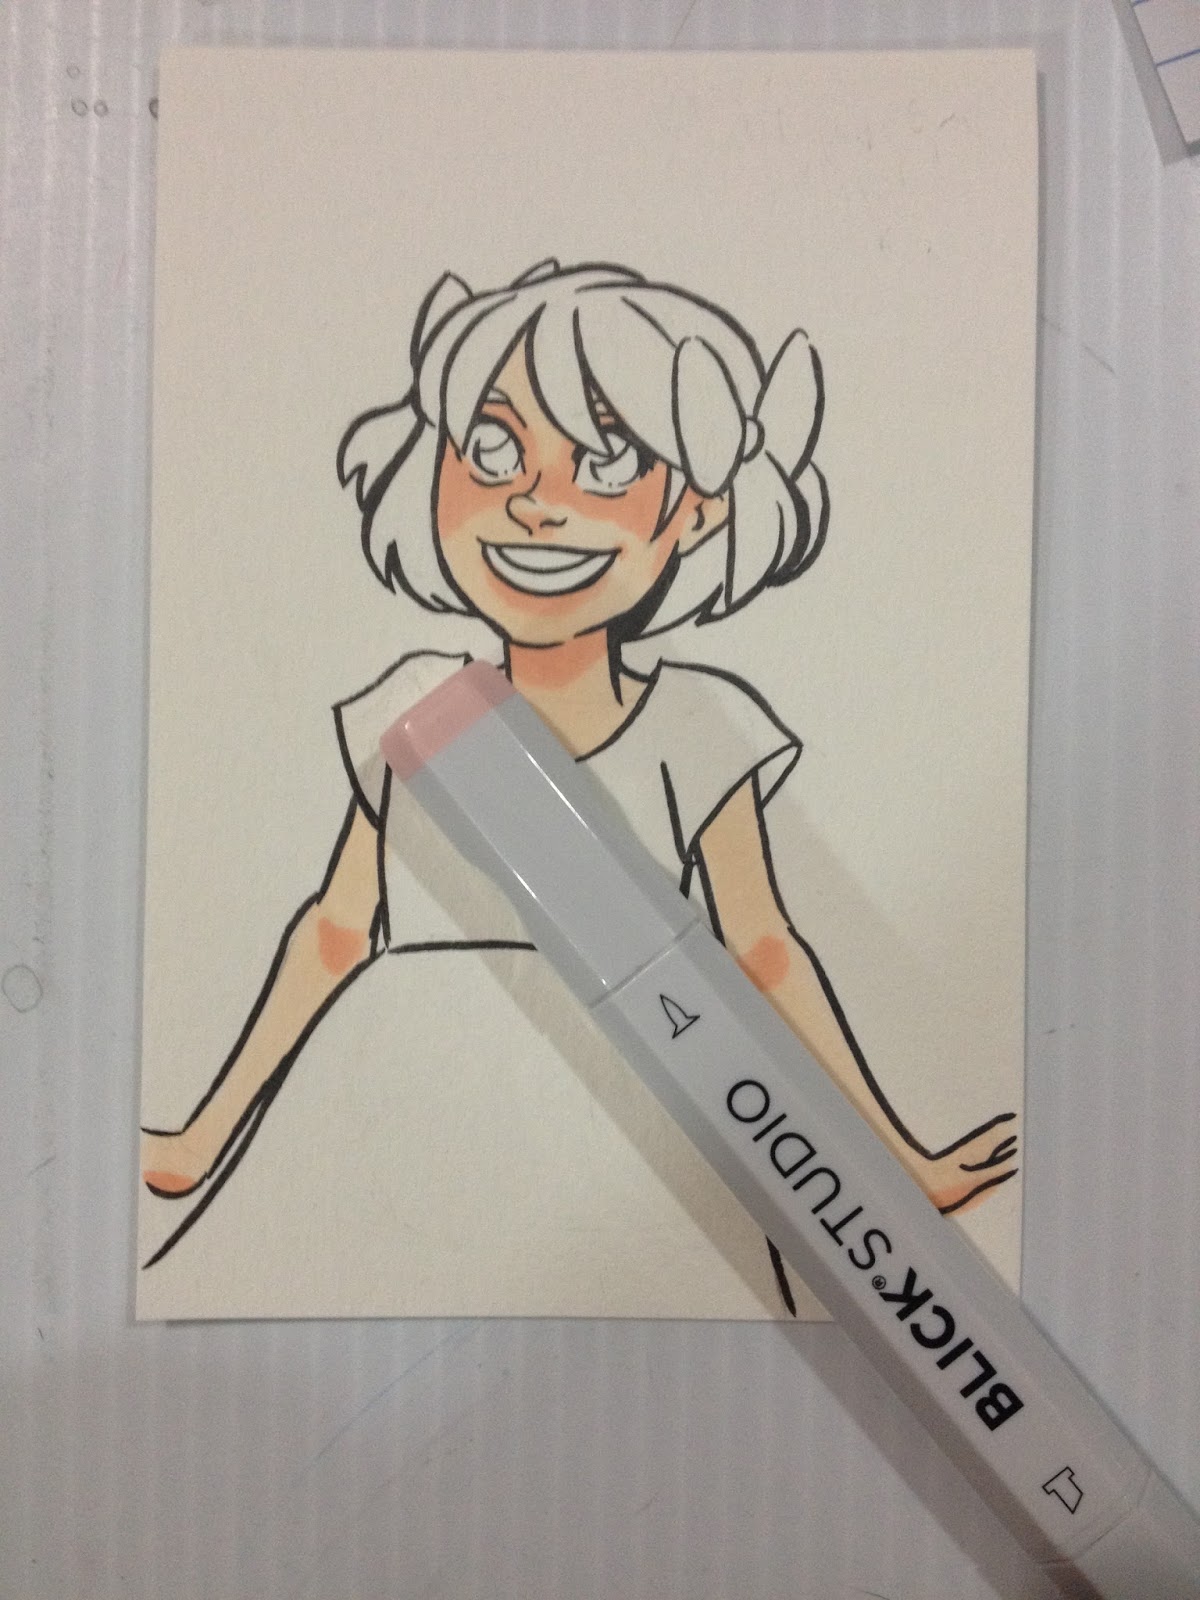
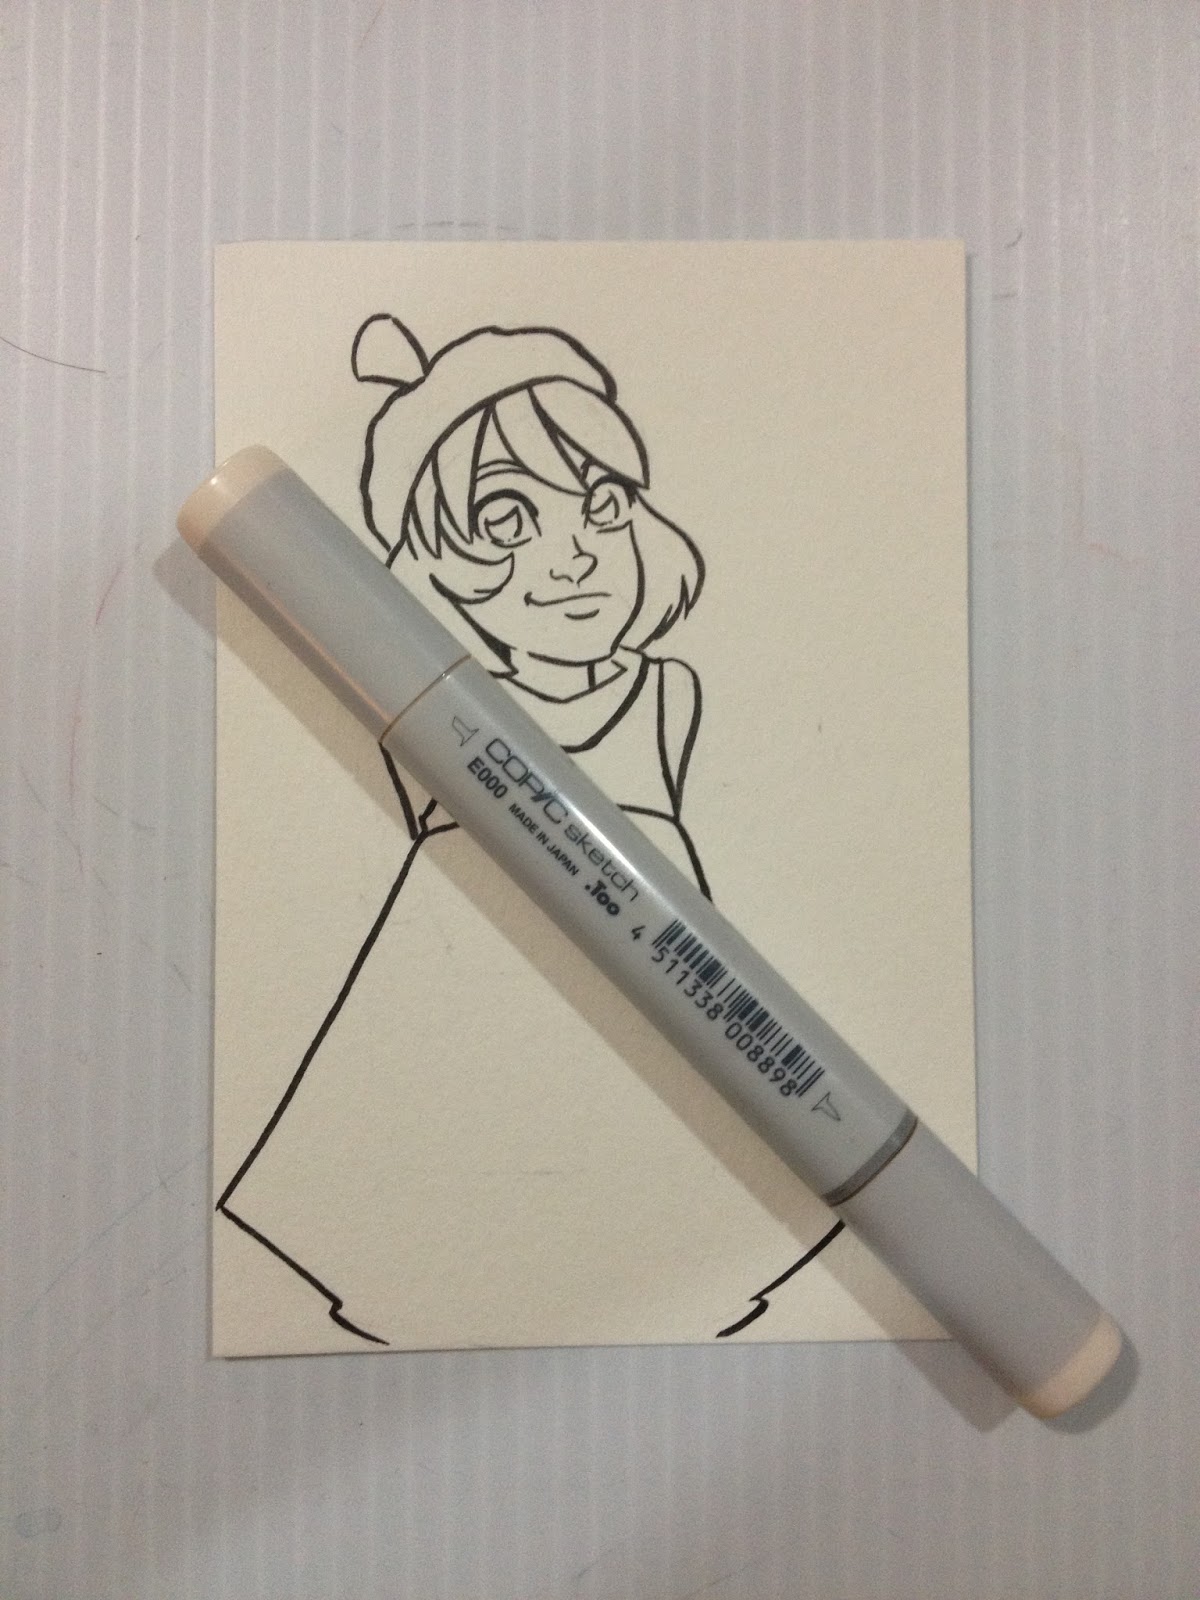
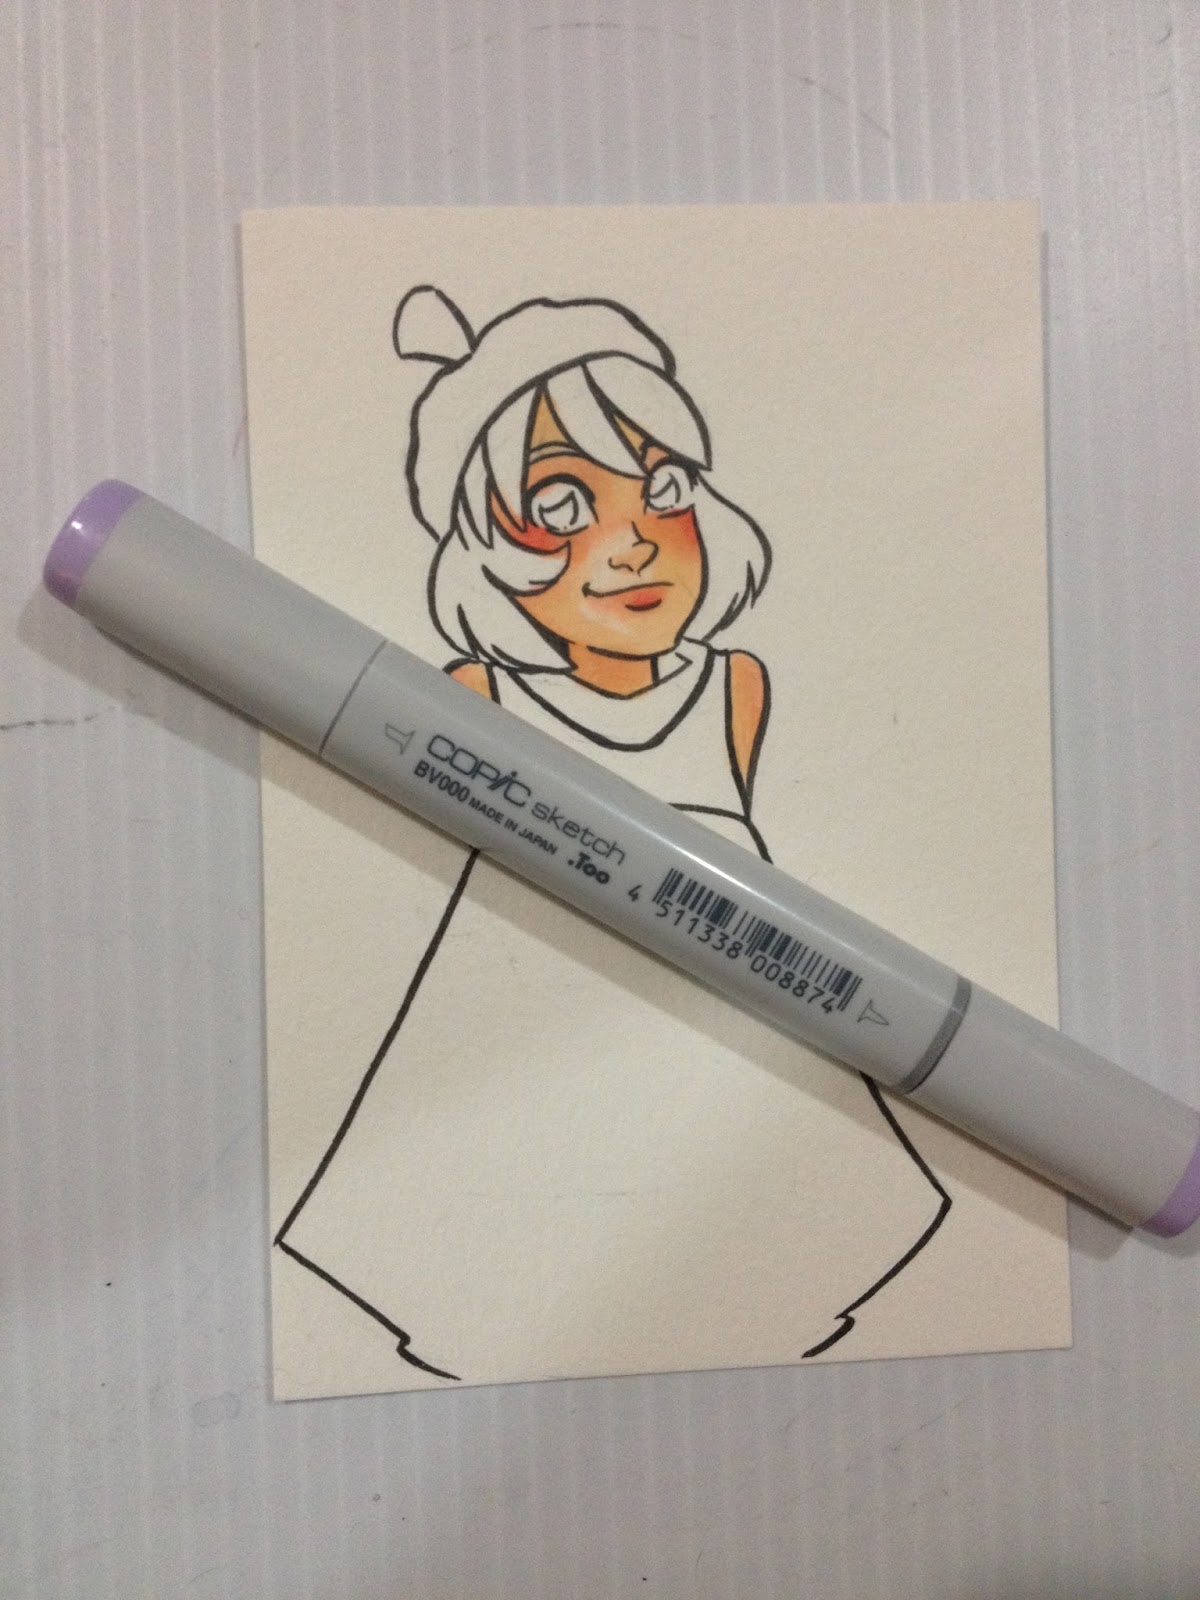
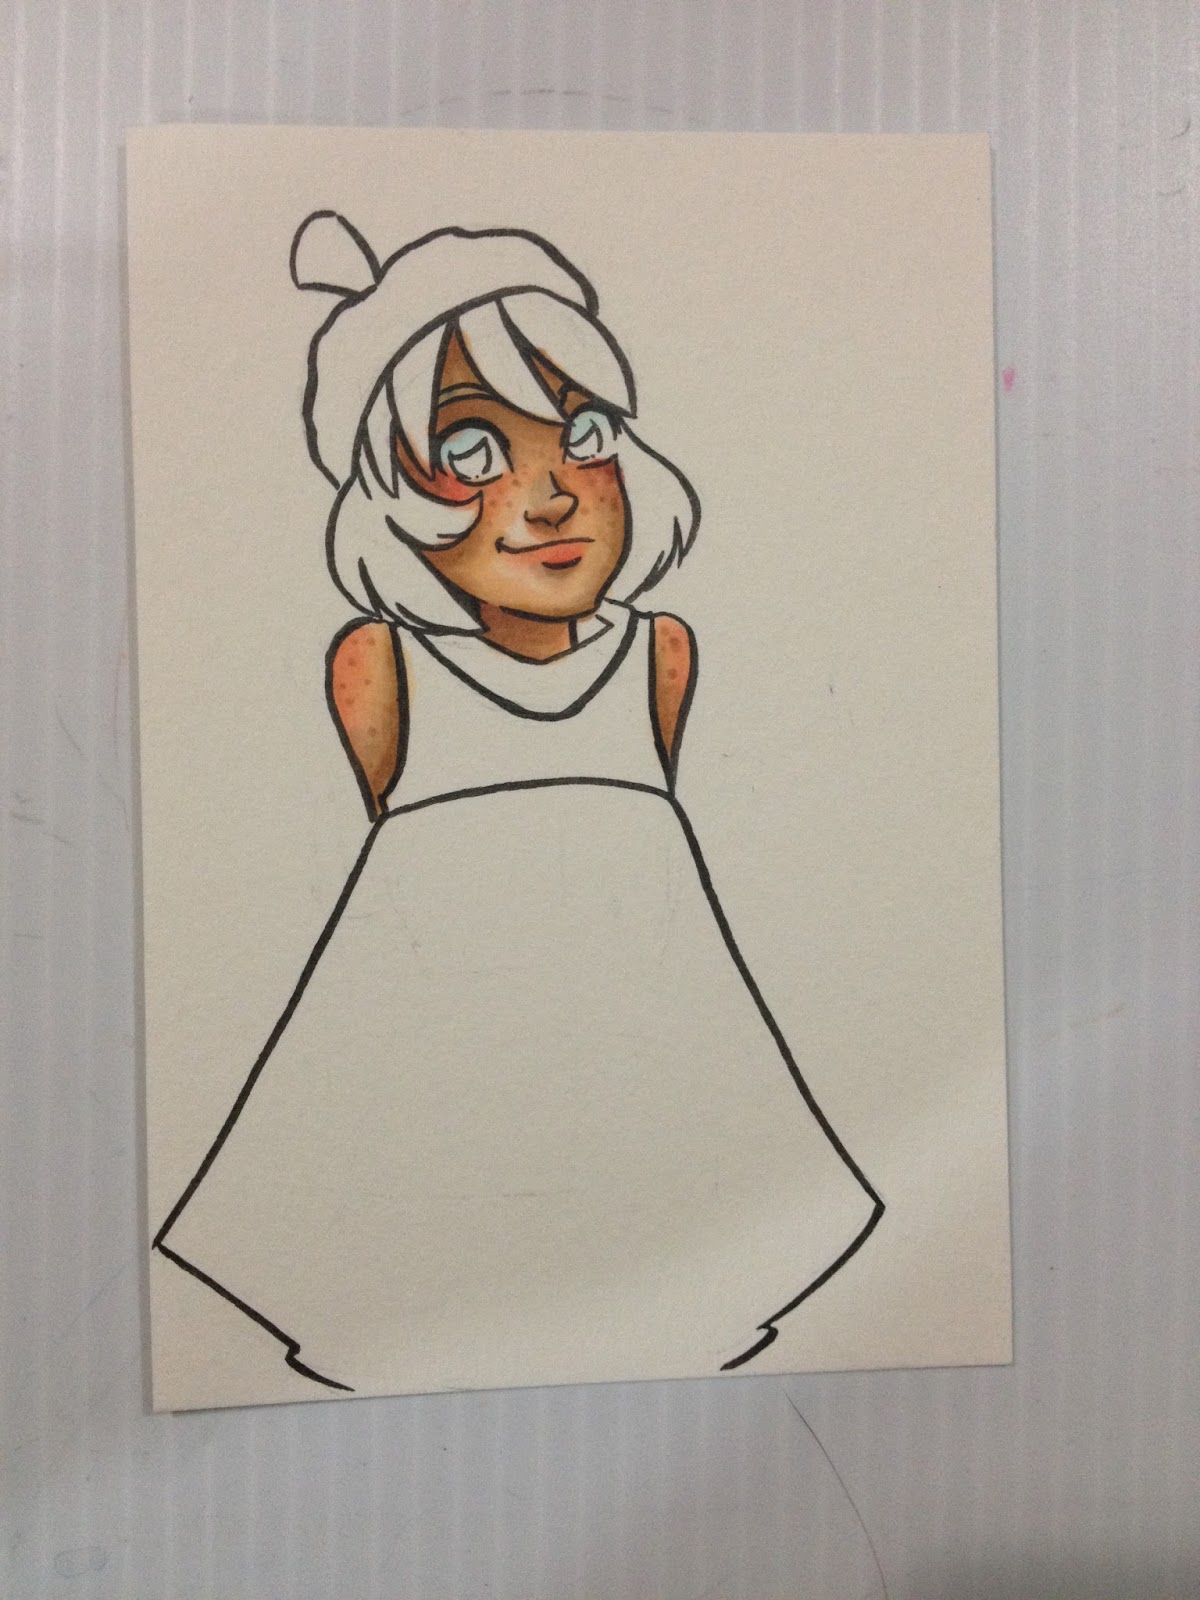
I'm starting this tutorial with markered illustration I created for the purposes of this tutorial. Kara is wearing a dark, plain gray dress, because I thought the white would really stand out against it.


Although I haven't used my Picket Fence very much, it's already showing a fair amount of wear and tear on the tip of the brush, which makes delicate or finicky applications difficult.
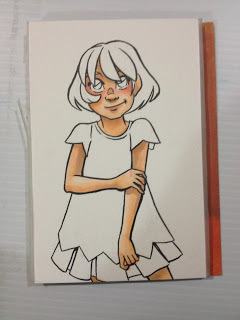
First Application of Picket Fence
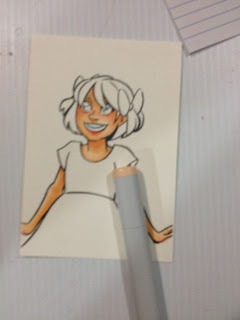
Picket Fence applies clear and dries to a white, so that combined with my broken in brush nib made it difficult to draw in a complicated design. I opted to keep it fairly simple- I edged the sleeves and bottom of the lace, and focused on drawing triangles and trefoils in this initial layer. I used the larger brush nib so I could cover ground quickly.
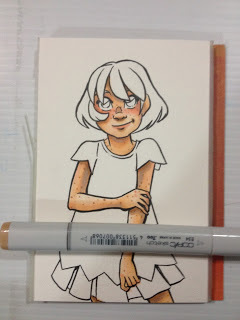
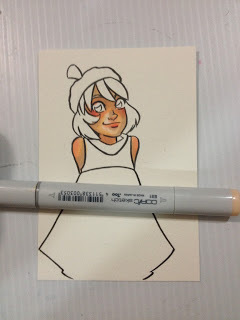
Second Application of Picket Fence

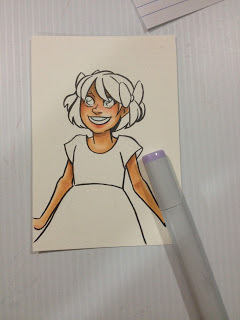
For the second application of Picket Fence, intended to build up opacity, I tried to use the smaller fiber nib to draw in tiny details. Unfortunately the stiffness of this nib tends to scrape away prior layers of Picket Fence, rather than depositing more pigment.
It's a bit difficult to do intricate designs like lace, because the Picket Fence Opaque White goes on clear and dries to white. The smaller nib is almost useless, as it's very scratchy and wanted to tear up the completely dry paper I tested it on. You can't layer Picketfence for more opaque whites- repeated application just wipes away your initial application. Also, my Picket Fence's brush nib is fraying pretty badly.
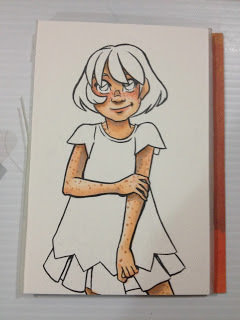
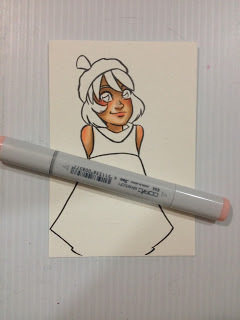
Using Copic Opaque White for Additional Details
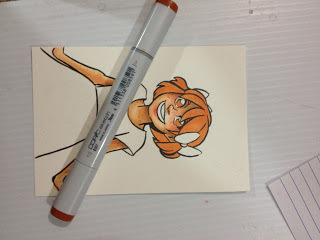
Since Picket Fence had done all it was going to do for my illustration, I fished out my Copic Opaque White. This is a bottle with the tiny little applicator brush, which I absolutely hate using, as it doesn't deposit the Opaque White where you want it to go, so I pulled out some fine synthetic brushes.

Copic Opaque White is much more opaque than Distress marker's Picket Fence, and it makes a good second layer.
Accents of Copic White really do a lot to help push a lacy look with the Picket Fence. (Secret: I hate the fine applicator on my Copic Opaque, and I just use a regular synthetic round instead), and I'm going to let that dry completely before I go in with the white color pencil, and add some shading with an Indigo Blue color pencil.
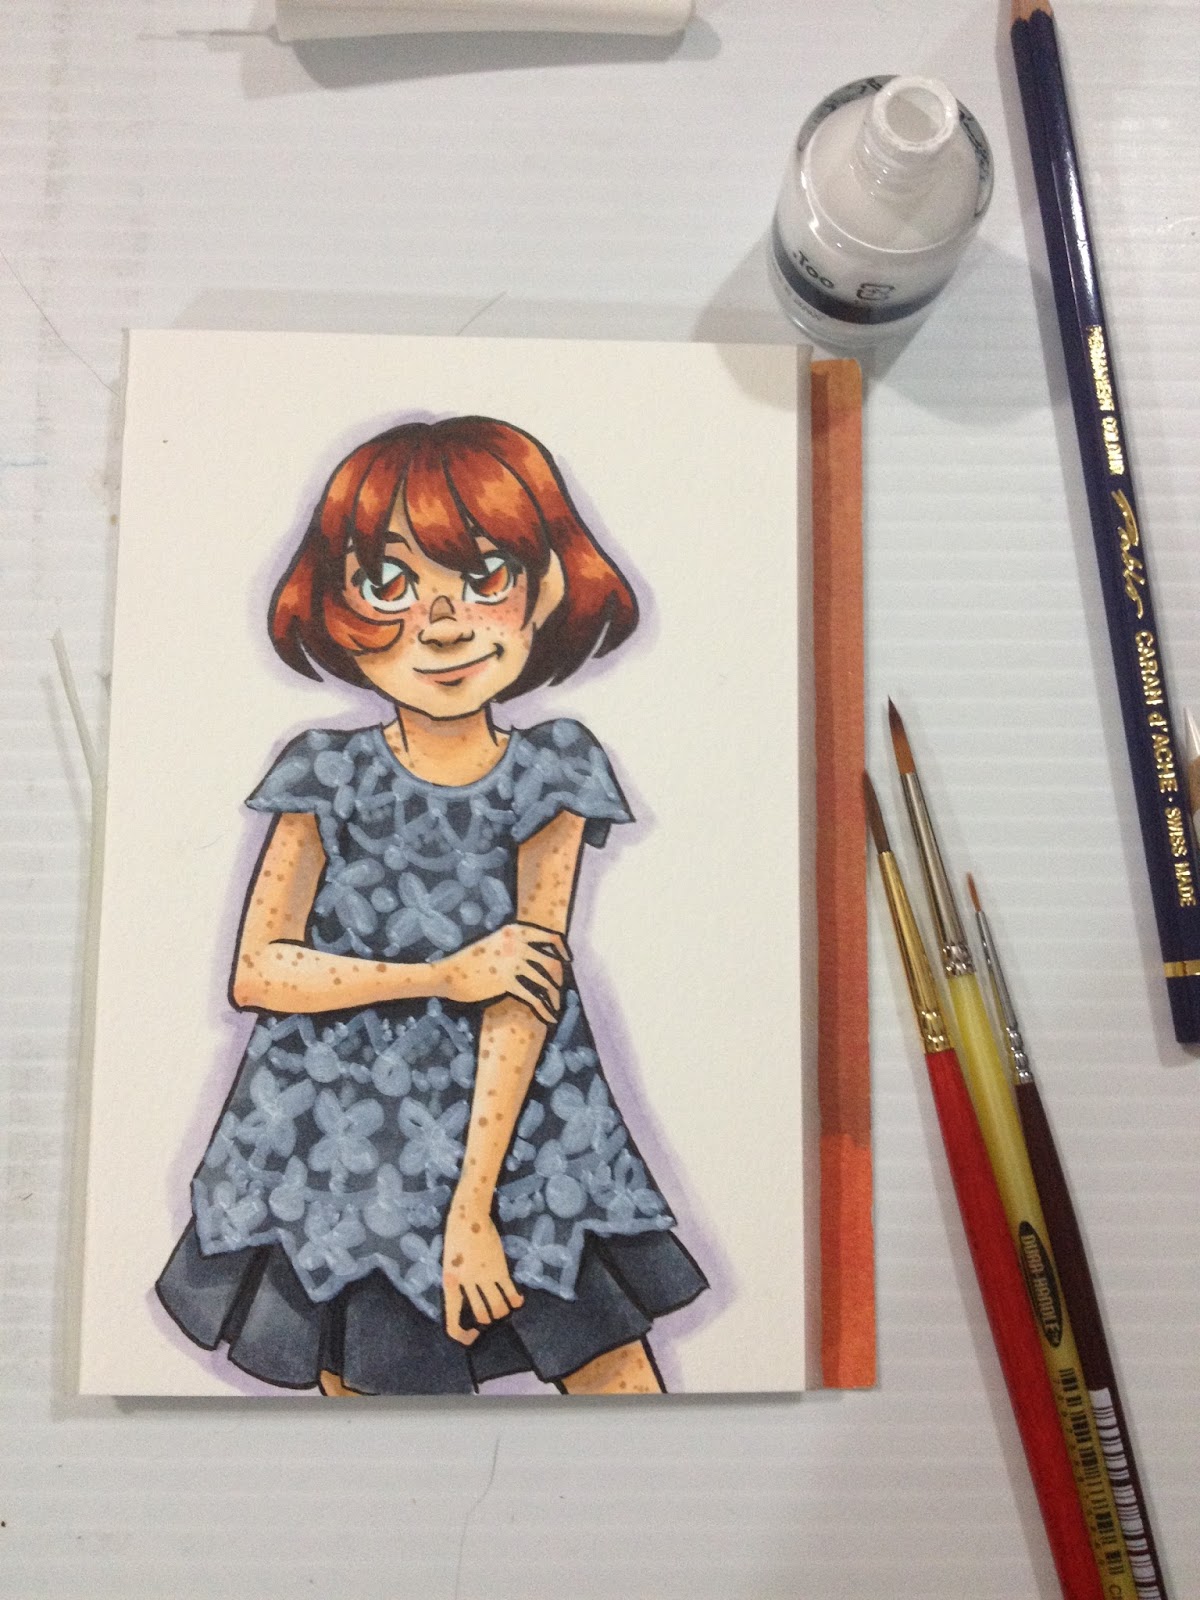
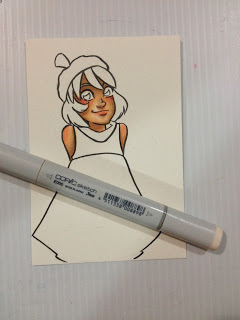
Using White Color Pencil for Further Details
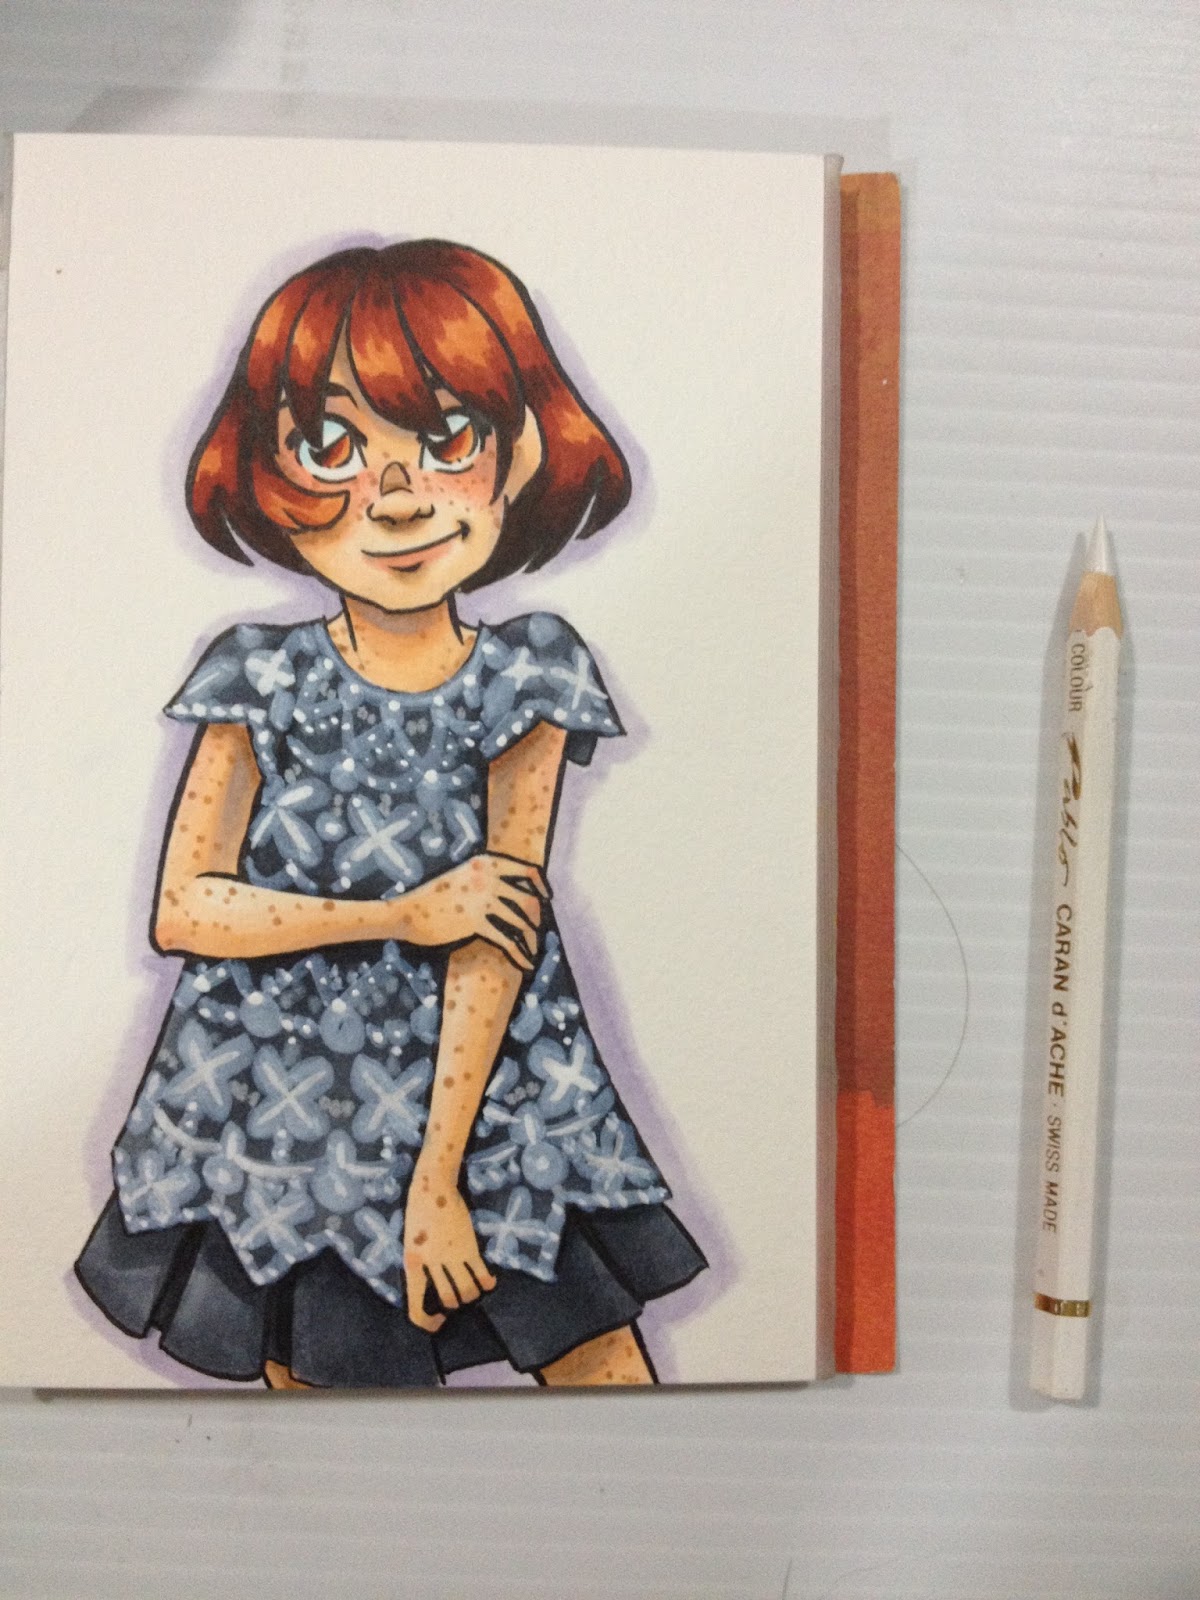
I wasn't done adding in detail though! I fished out my Caran d'Ache Pablo's titanium white to add in even more fine details.
White color pencil does not want to go over Picket Fence, so I used it to add a few more details. My Blue Indigo color pencil DID go over Picket Fence (as well as Opaque White), so I used that to add a little shading both beneath the lace and on top of the lace where Kara's arms would cast a shadow.
Using Indigo Color Pencil to Sketch in Shadows
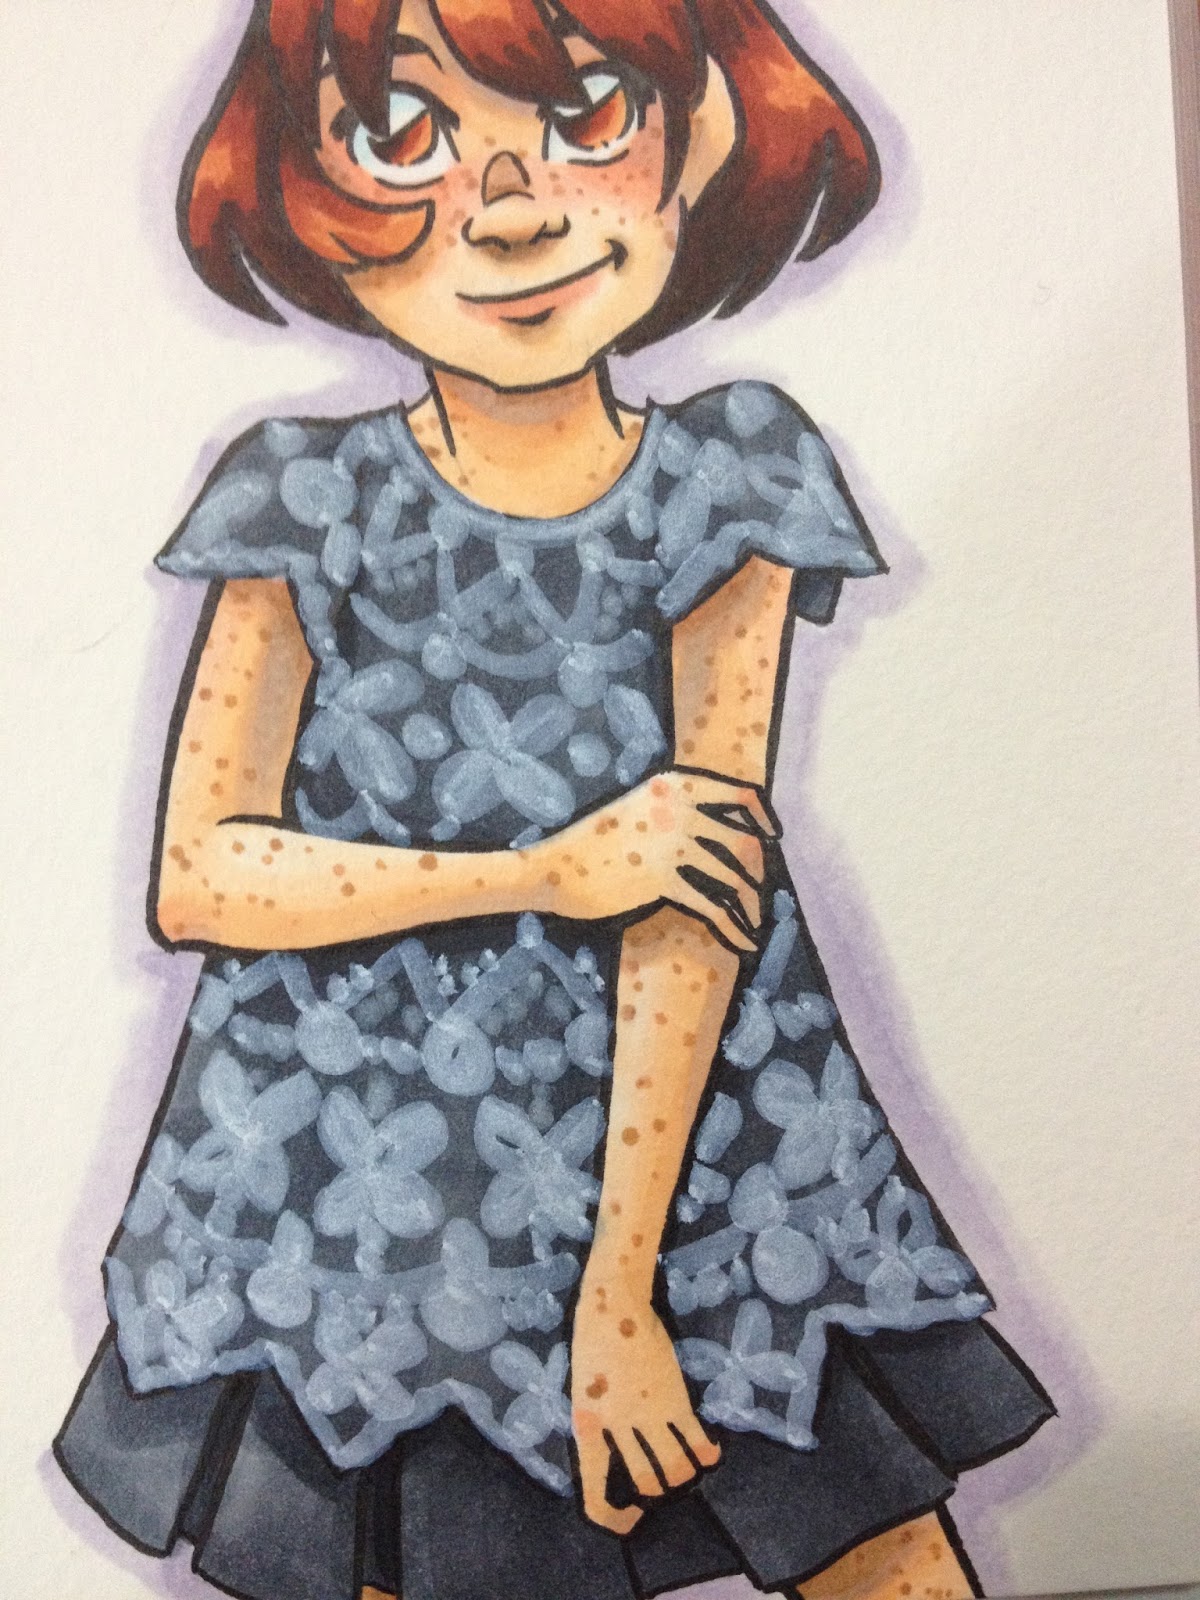
My lace still doesn't really look like lace sitting on TOP of the dress, so I decided to use an Indigo color pencil to add some shadows beneath the applied white.
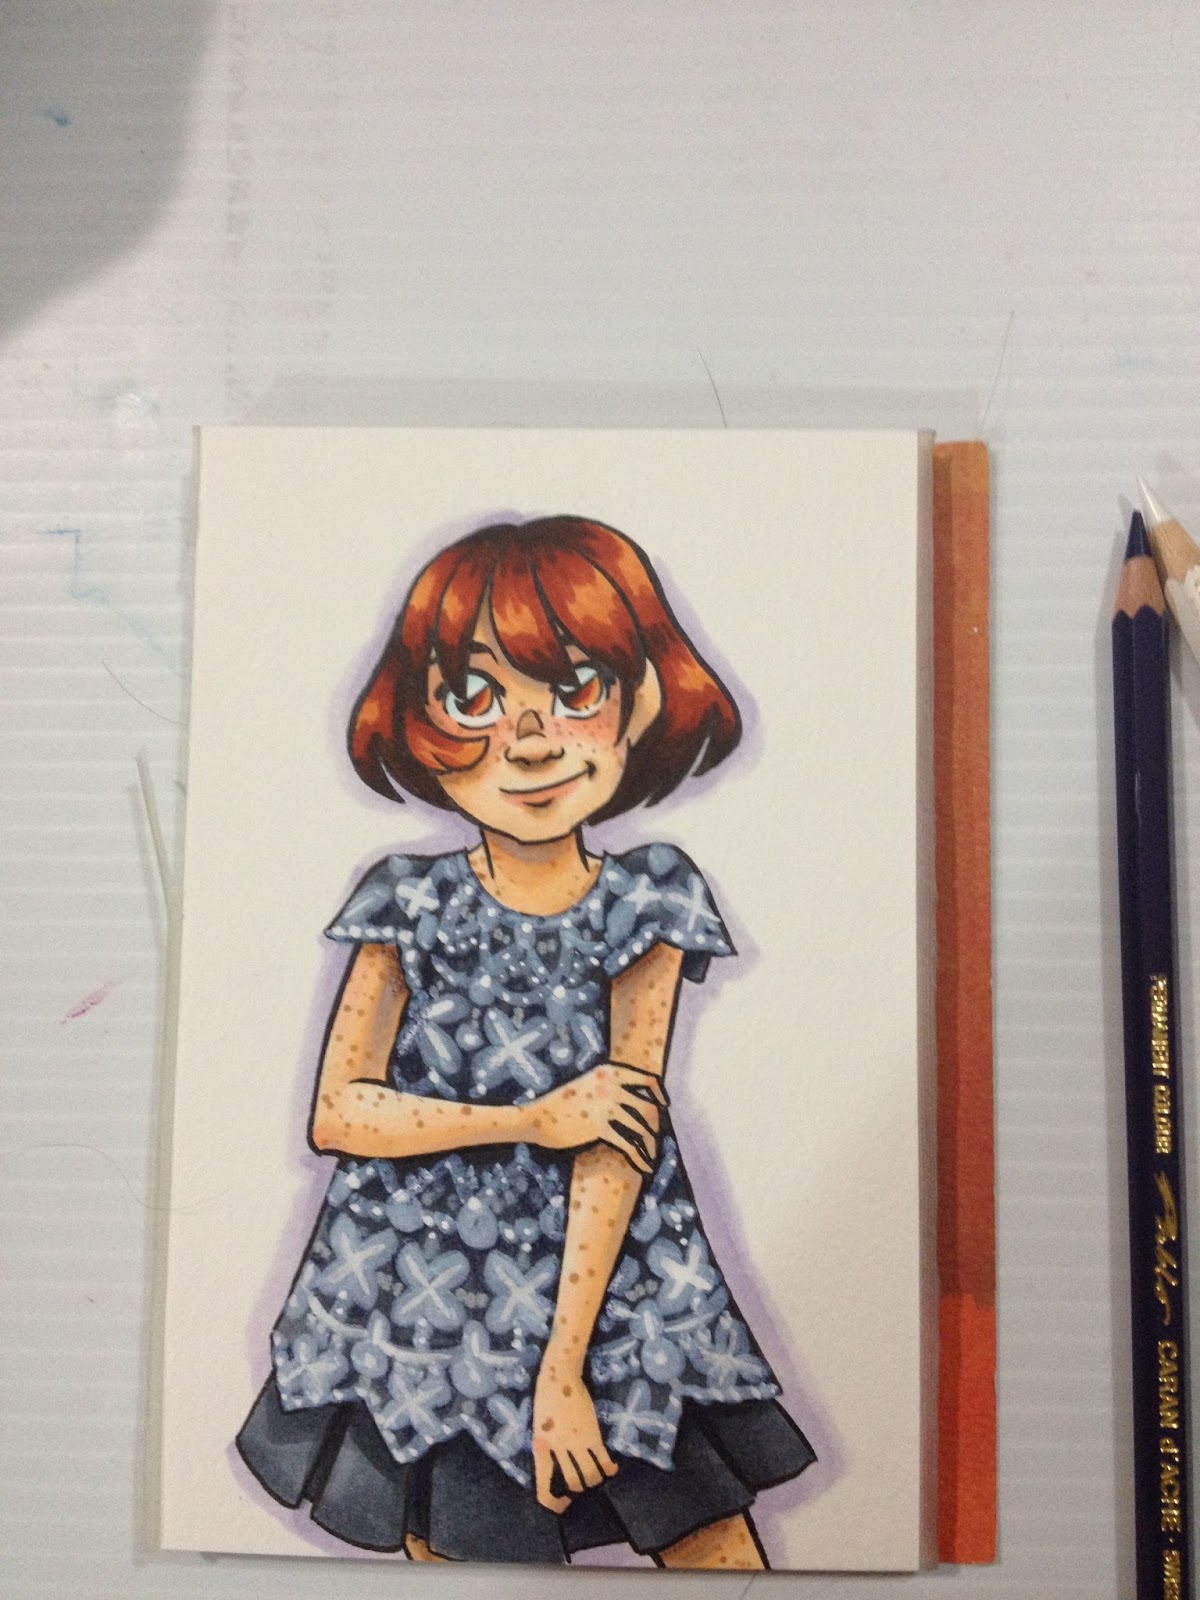
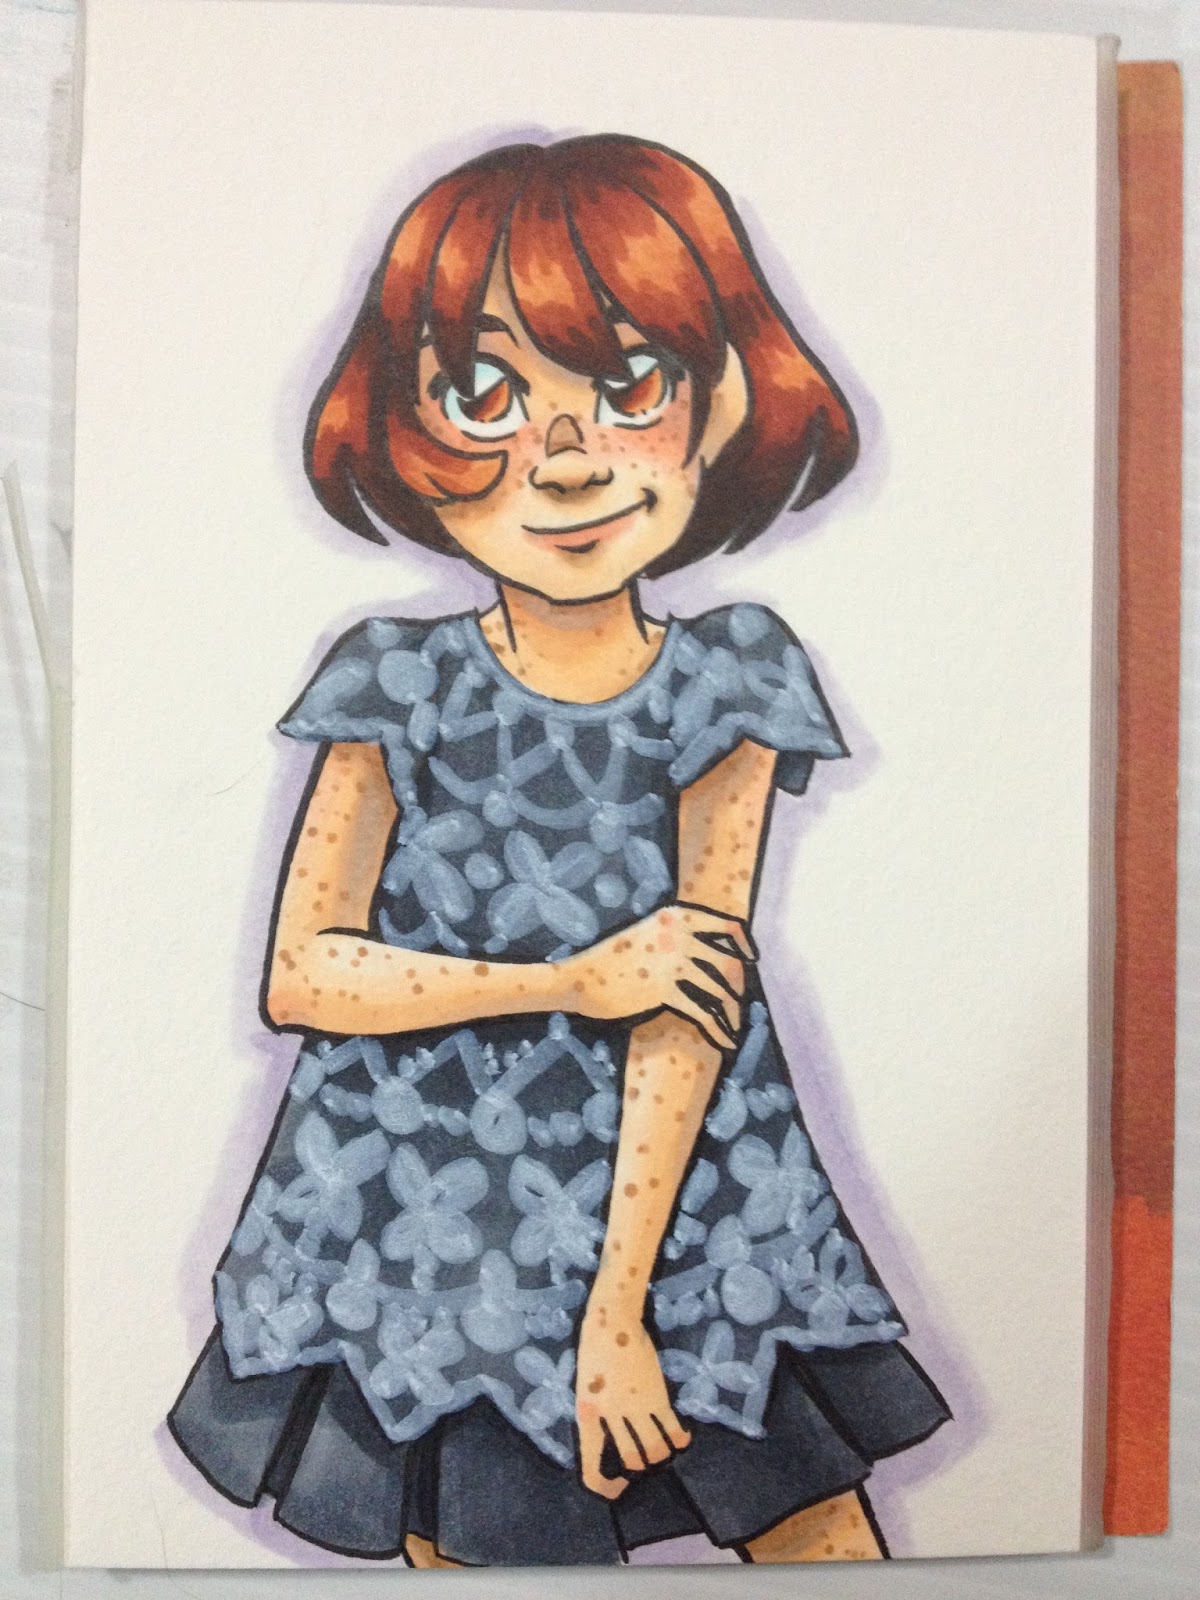
Last I used a little more Picket Fence to add white highlights to Kara's hair, eyes, nose, and lips.

Using Picket Fence With Copics and Watercolor for Highlights
You can also use your Picket Fence in conjuction with watercolors, and even brush away some of the pigment for a better transition between opaque white and your original illustration.
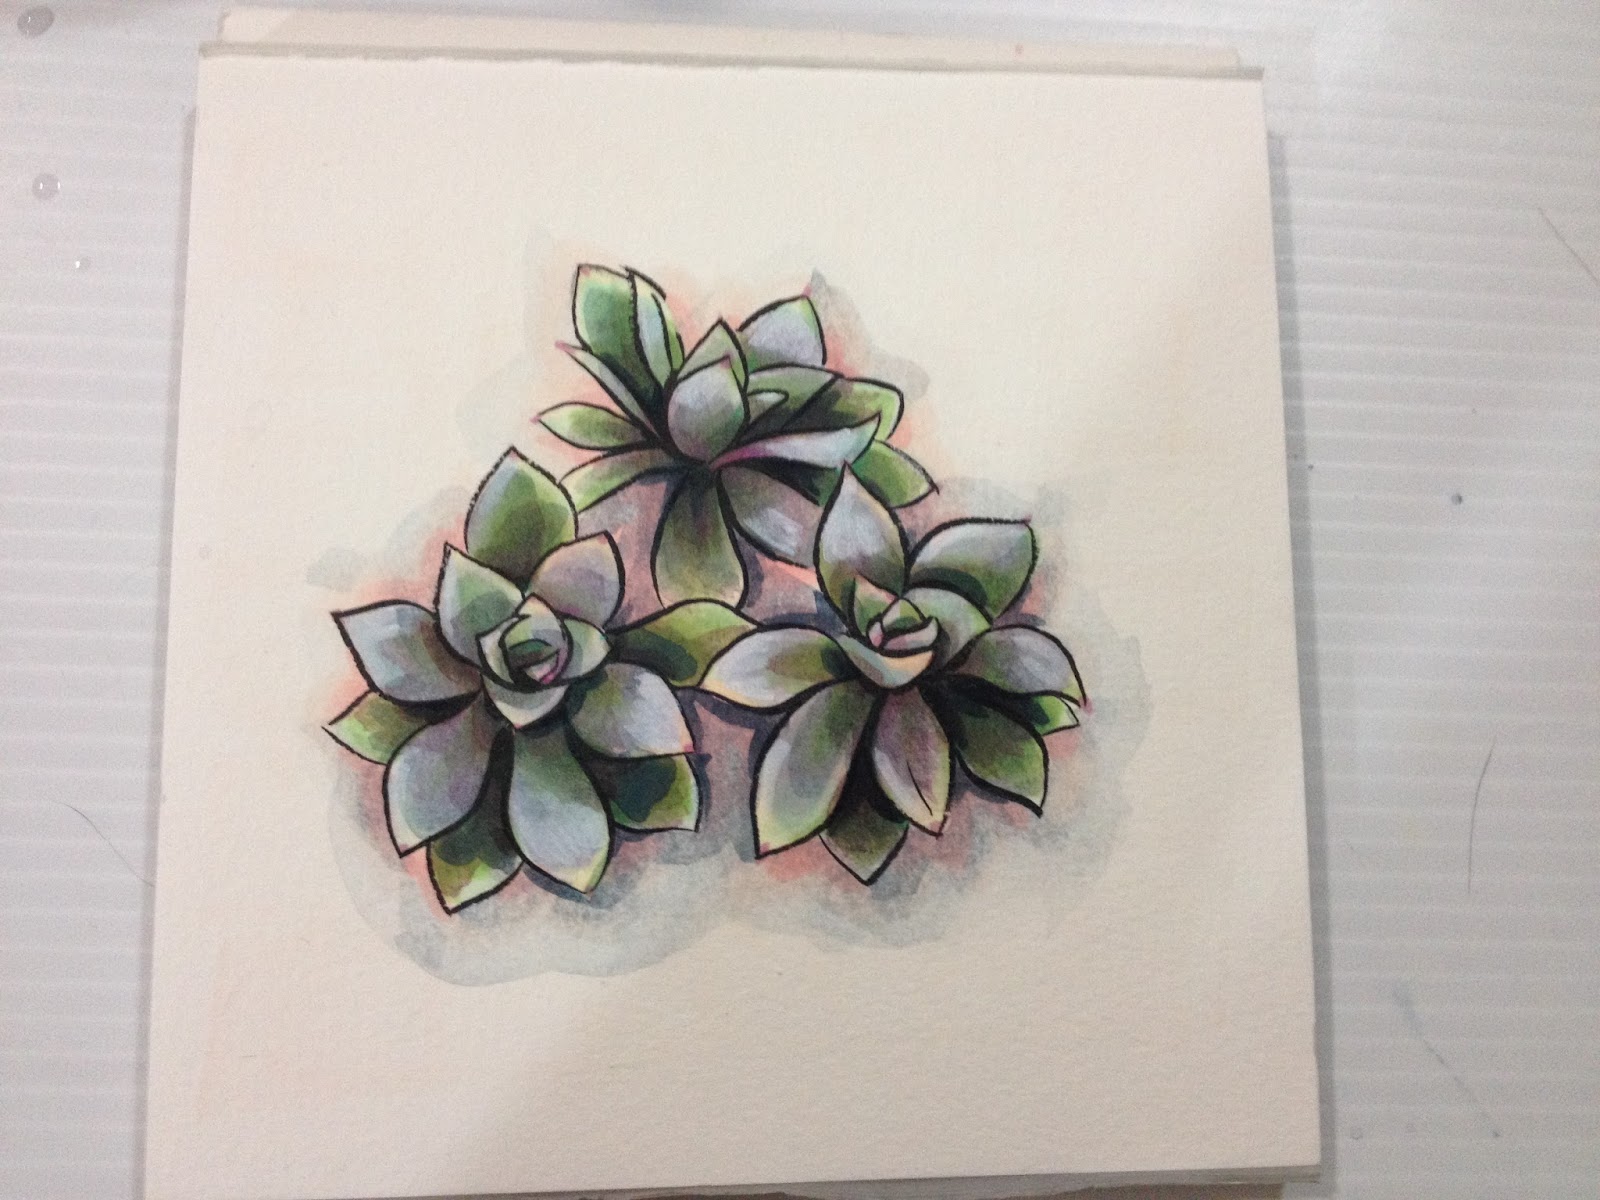
Colored pencil was applied first, then Picket Fence was applied on top. Picket Fence was softened by using a clean wet brush to brush away some of the opaque white and better blend the transition of applied white.

Picket Fence is an interesting opaque white solution that isn't suitable for corrections, but geared towards accents. It does leave a slightly shiny residue, so if you're looking for a more subdued opaque white application, you may prefer Winsor Newton Pigment Marker's Opaque White.
If you're looking for other interesting opaque white products, you should check out my upcoming post about toning techniques in a Strathmore Toned Tan drawing book- I use Winsor and Newton's brand new opaque white blender with Copics and color pencils for toned sketches that pop!
Please consider donating to this blog or purchasing from Natto-shop (http://nattosoup.com/shop) if you want me to continue publishing quality content. All materials tested were purchased from my own pocket. Keep on Truckin' Nattosoup is not under any sponsorship.


December 17, 2015
Copic and Watercolor Mixed Media Tutorial
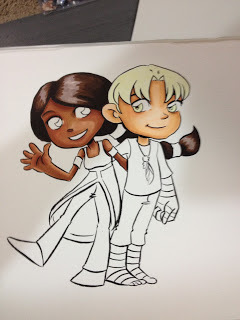
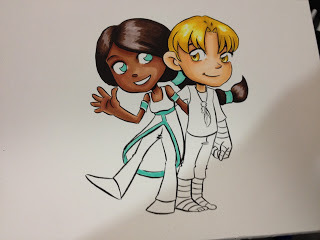
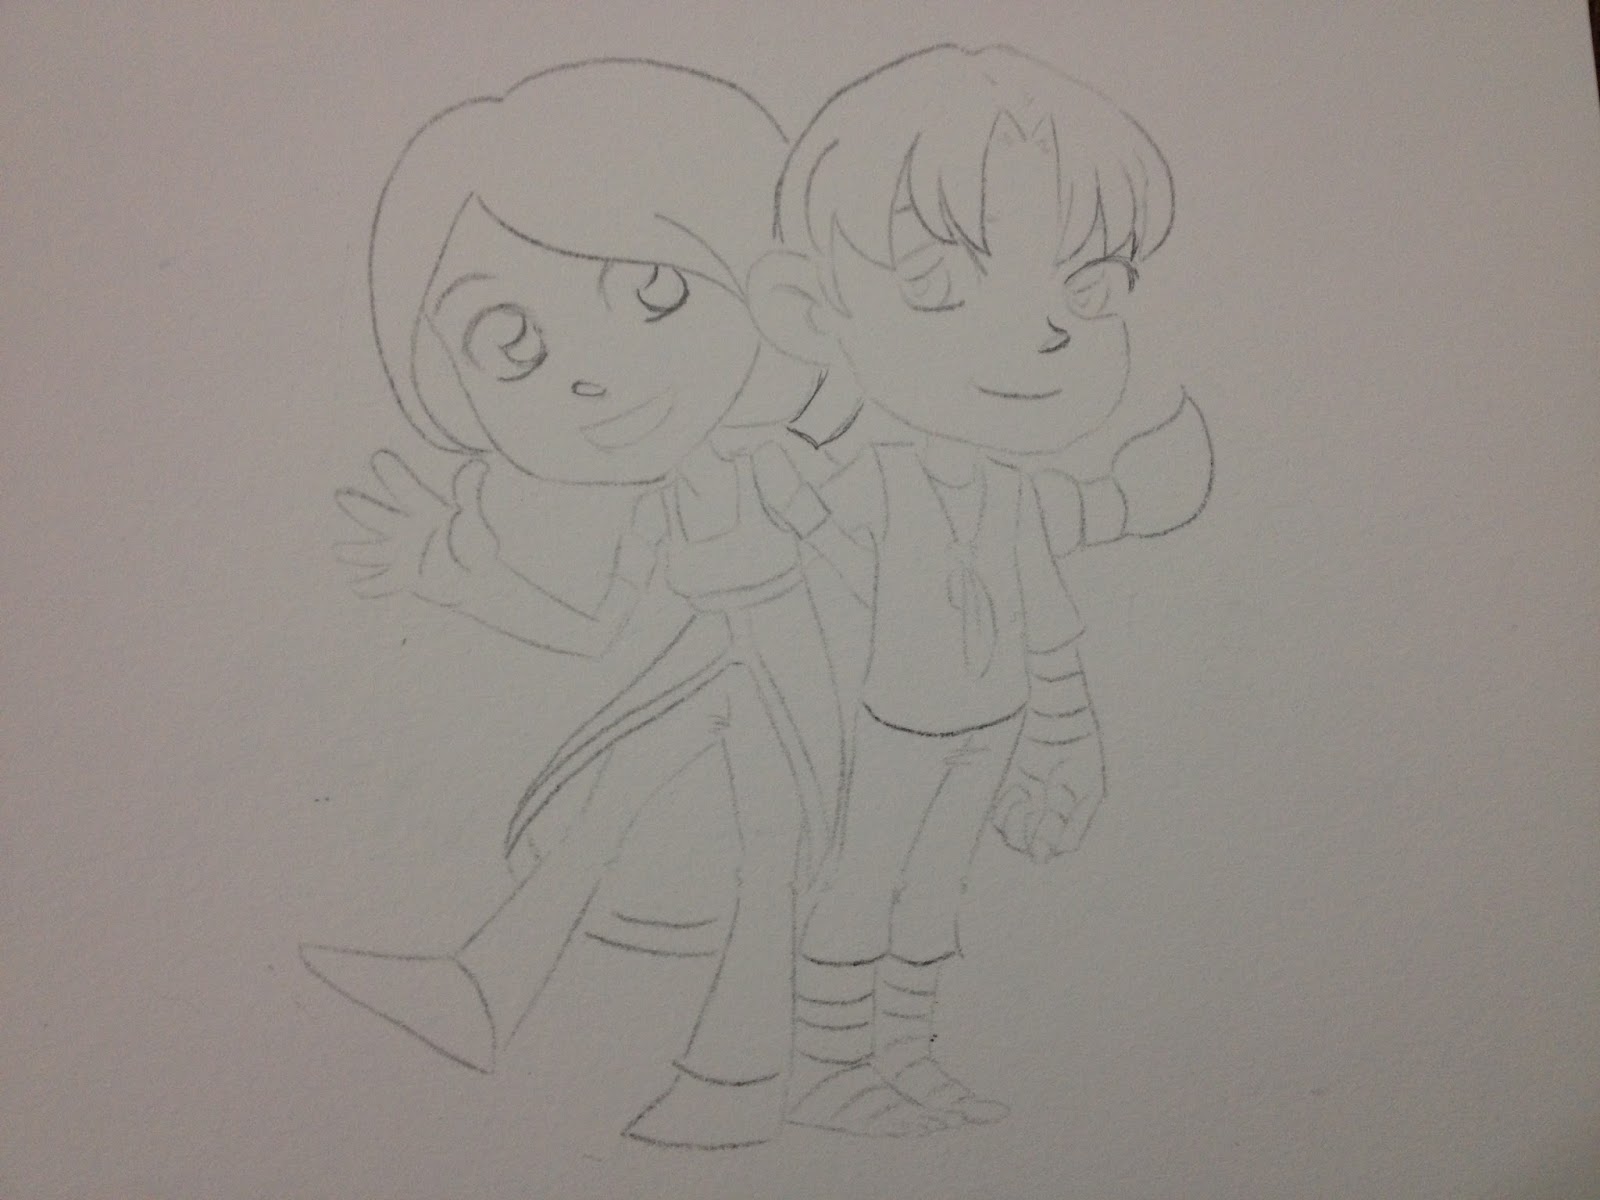
While cleaning up my Blog Stuff folder, I found some photos from a Copic and Watercolor commission I did last Christmas for Aisazia. I've mentioned using Copics and watercolors together several times, but I don't think I've ever done a step by step tutorial, so I think now is a great time to revisit those photos and make them into a post.

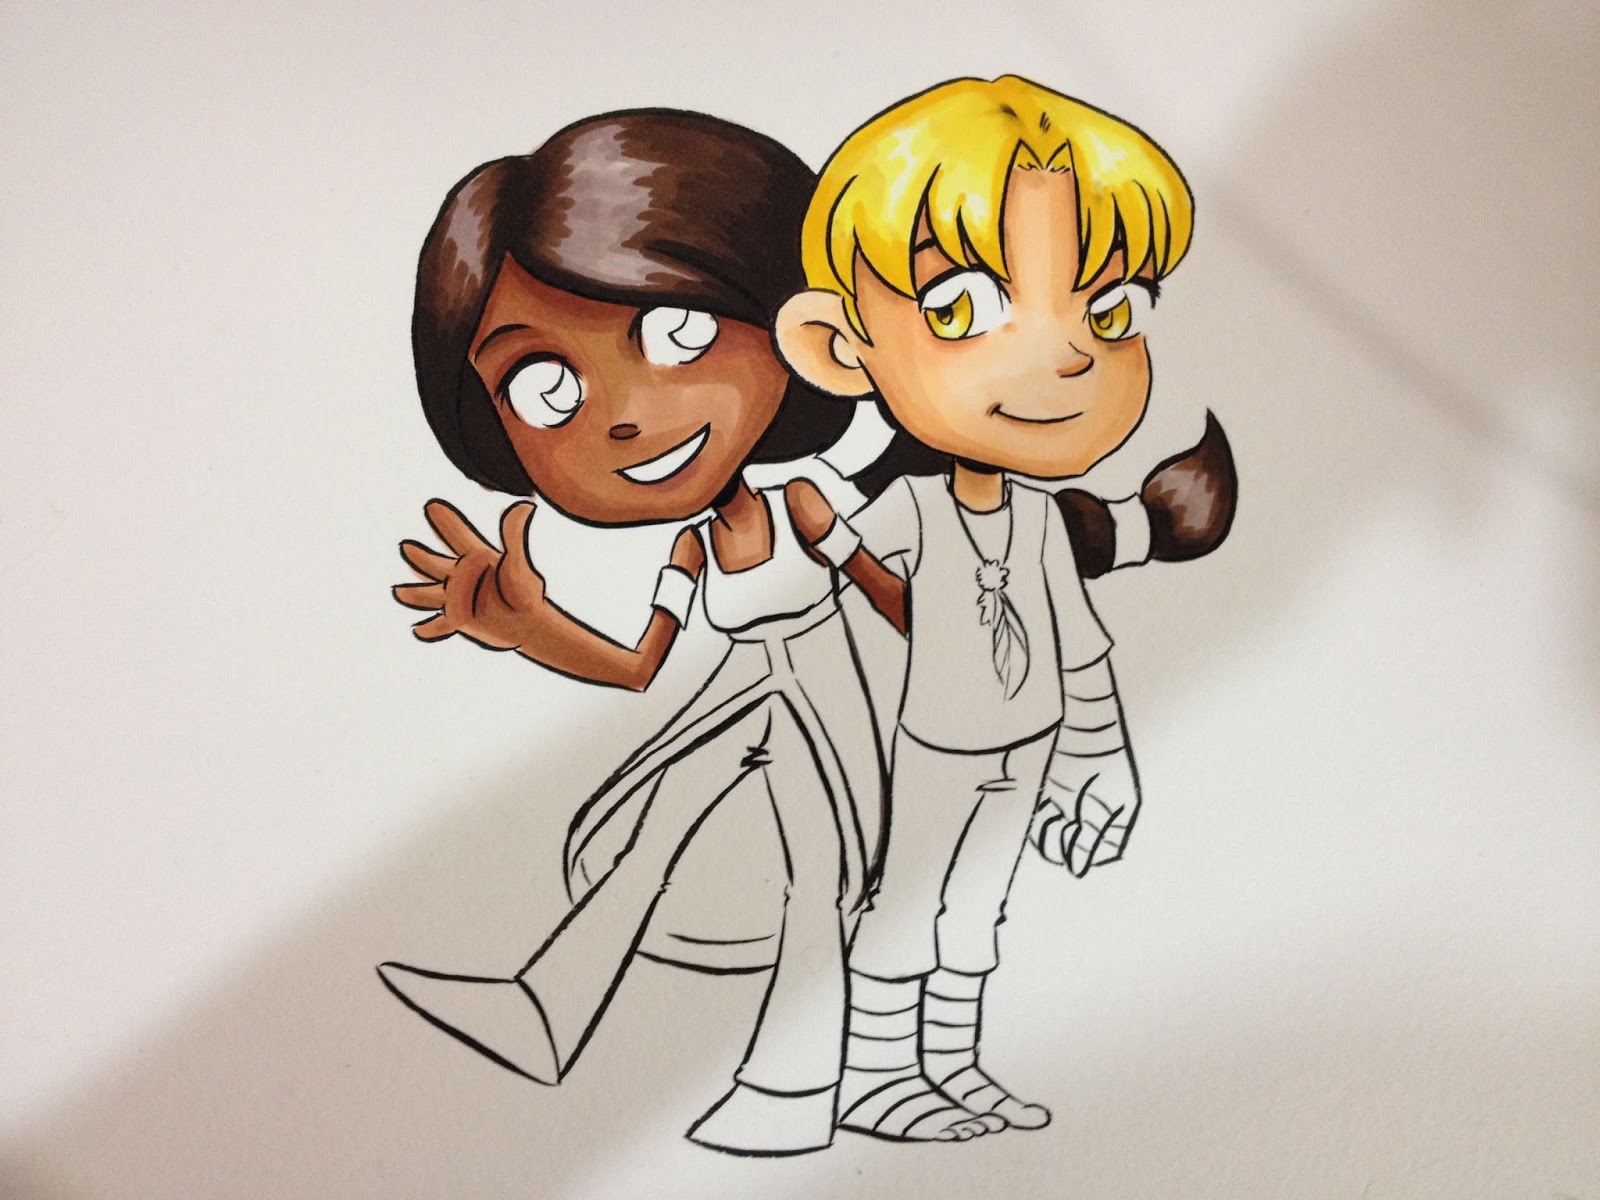
This illustration was done on 9"x12" Fluid watercolor paper. I believe I inked it with Kaimai Sol K ink, which is Copic-proof, but not entirely water proof (this is before I discovered the Sailor Mitsuo Aida),and was inked with a Creative Mark Rhapsody kolinsky sable brush from Jerry's Artarama.
Using watercolors with your alcohol based markers is a great way to extend a limited marker collection, preserve color saturation, and become comfortable with a new medium. I recommend starting with your markers first, and then proceeding to watercolors when you've finished applying your markers, but in theory, neither medium should disturb the other because the two have different solvents. Copics, Prismacolors, and other alcohol based markers use quick evaporating alcohol as their solvent, and watercolors use water as a solvent. This means that water won't disrupt the dyes in alcohol based marker inks, and theoretically, the alcohol won't disrupt the pigments used in watercolors. I can vouch that this technique works Copics to watercolor, but I don't promise that the reverse is true.
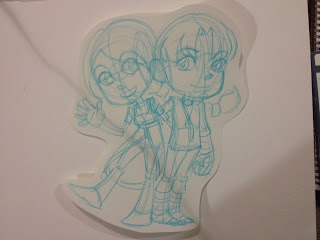
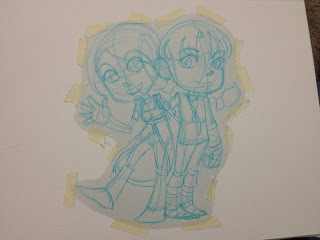
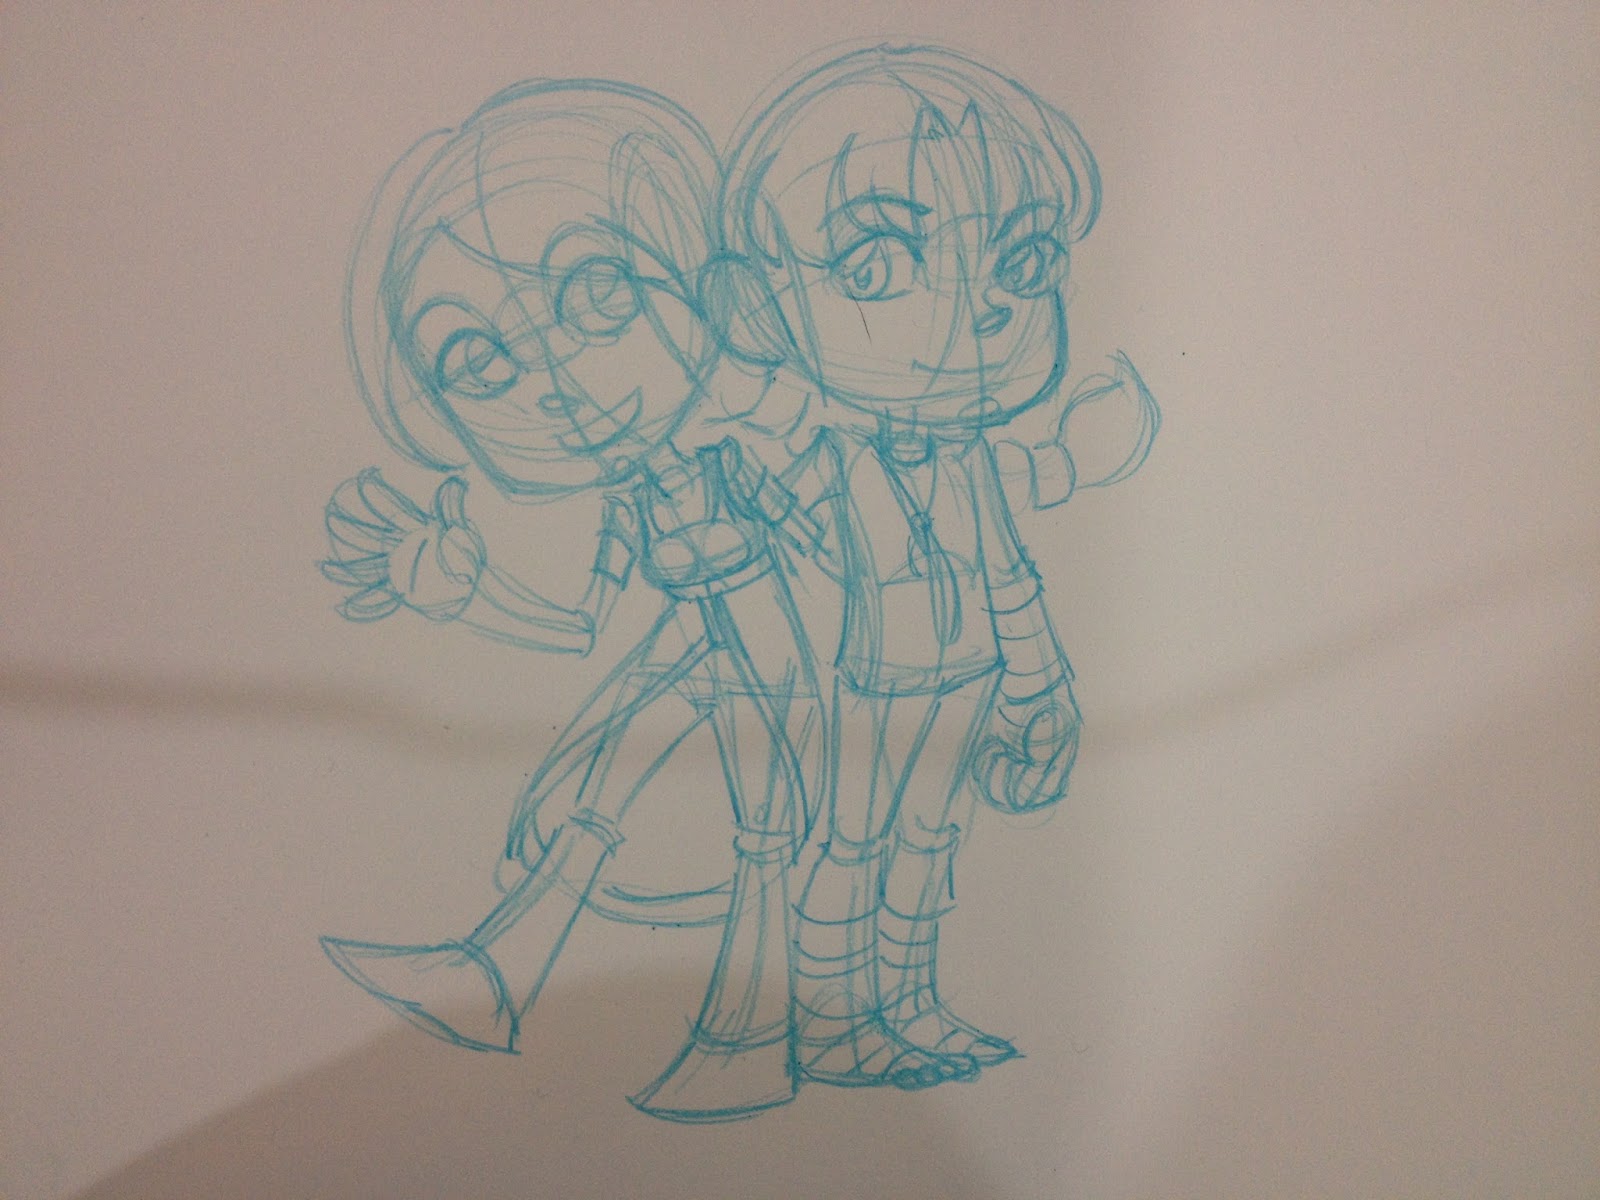
Step 1: Blueline Sketch
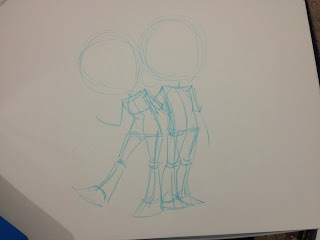
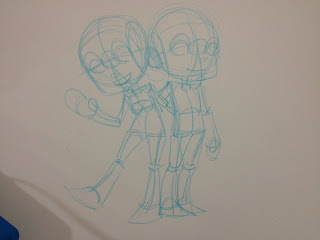
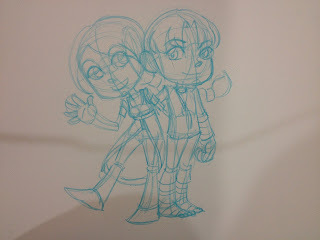
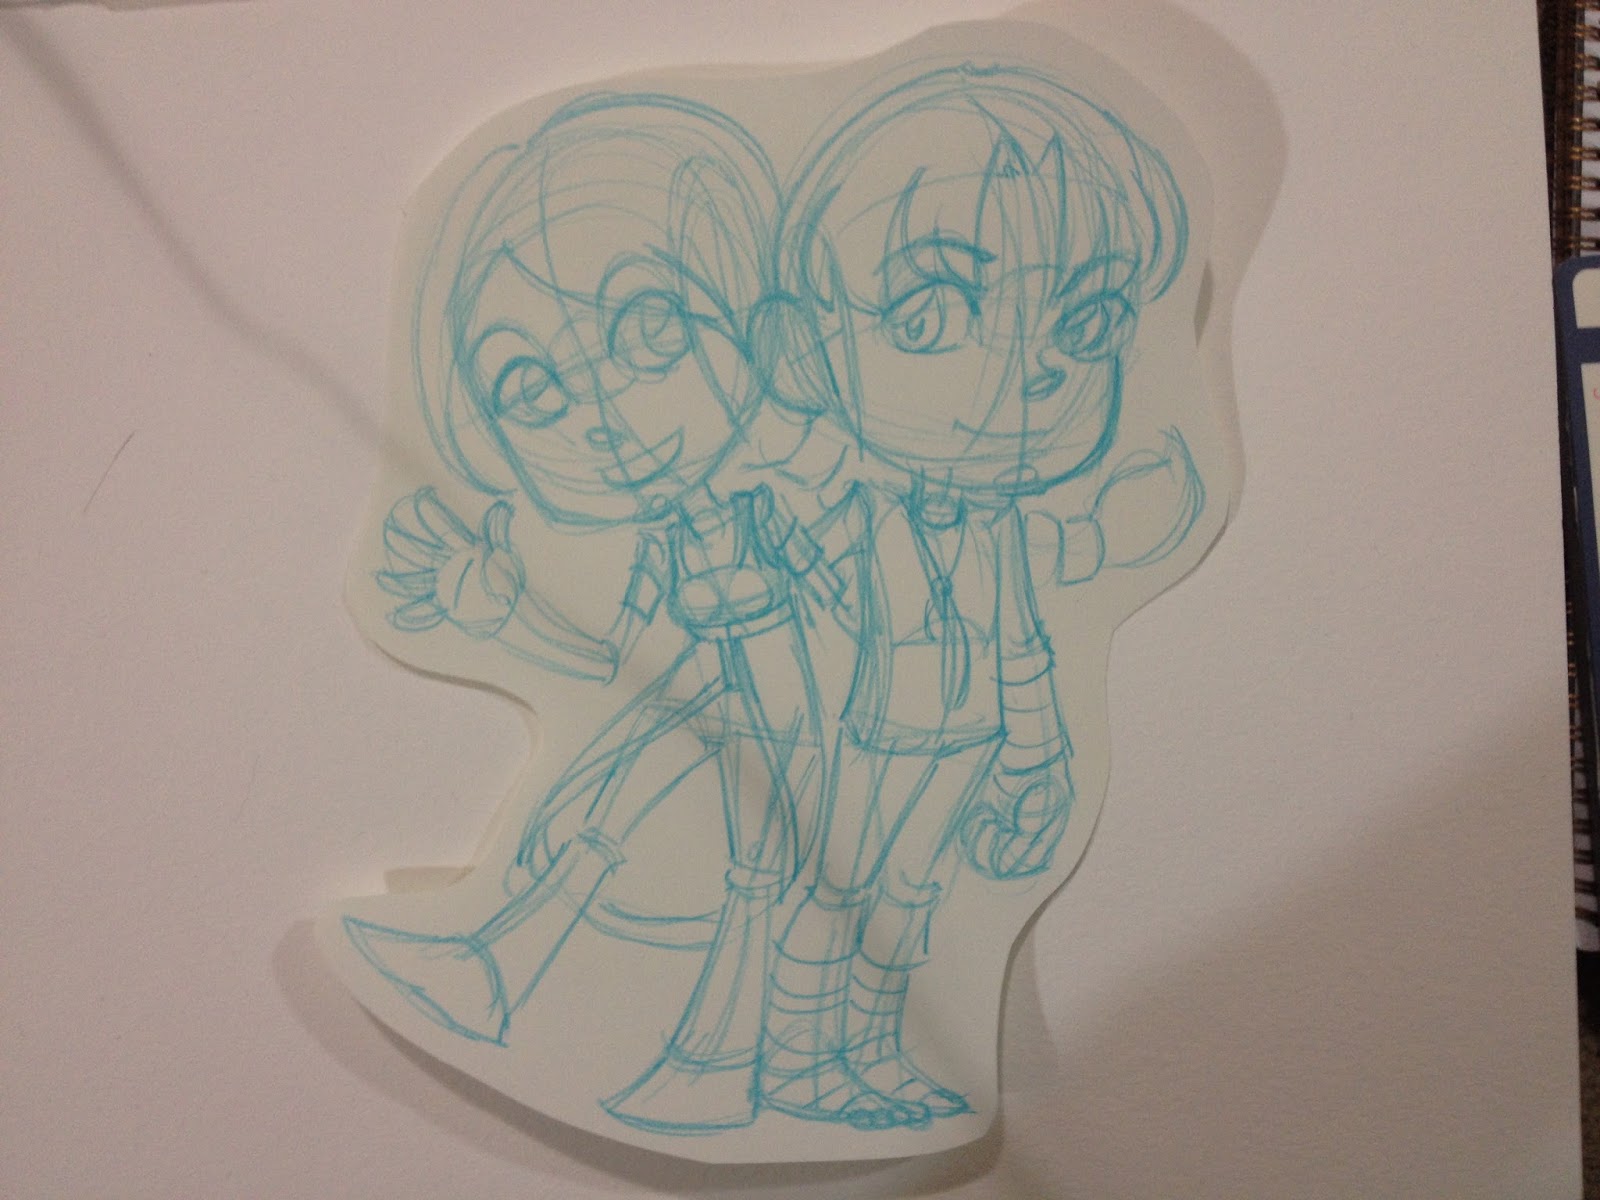
Step 2: Graphite Transfer onto Watercolor paper
Not shown: Applying graphite (I like to use 6B graphitee sticks) to the back of the sketch paper.
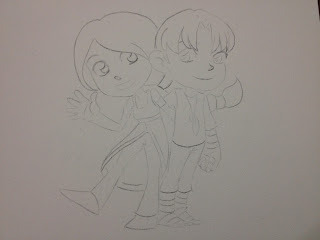
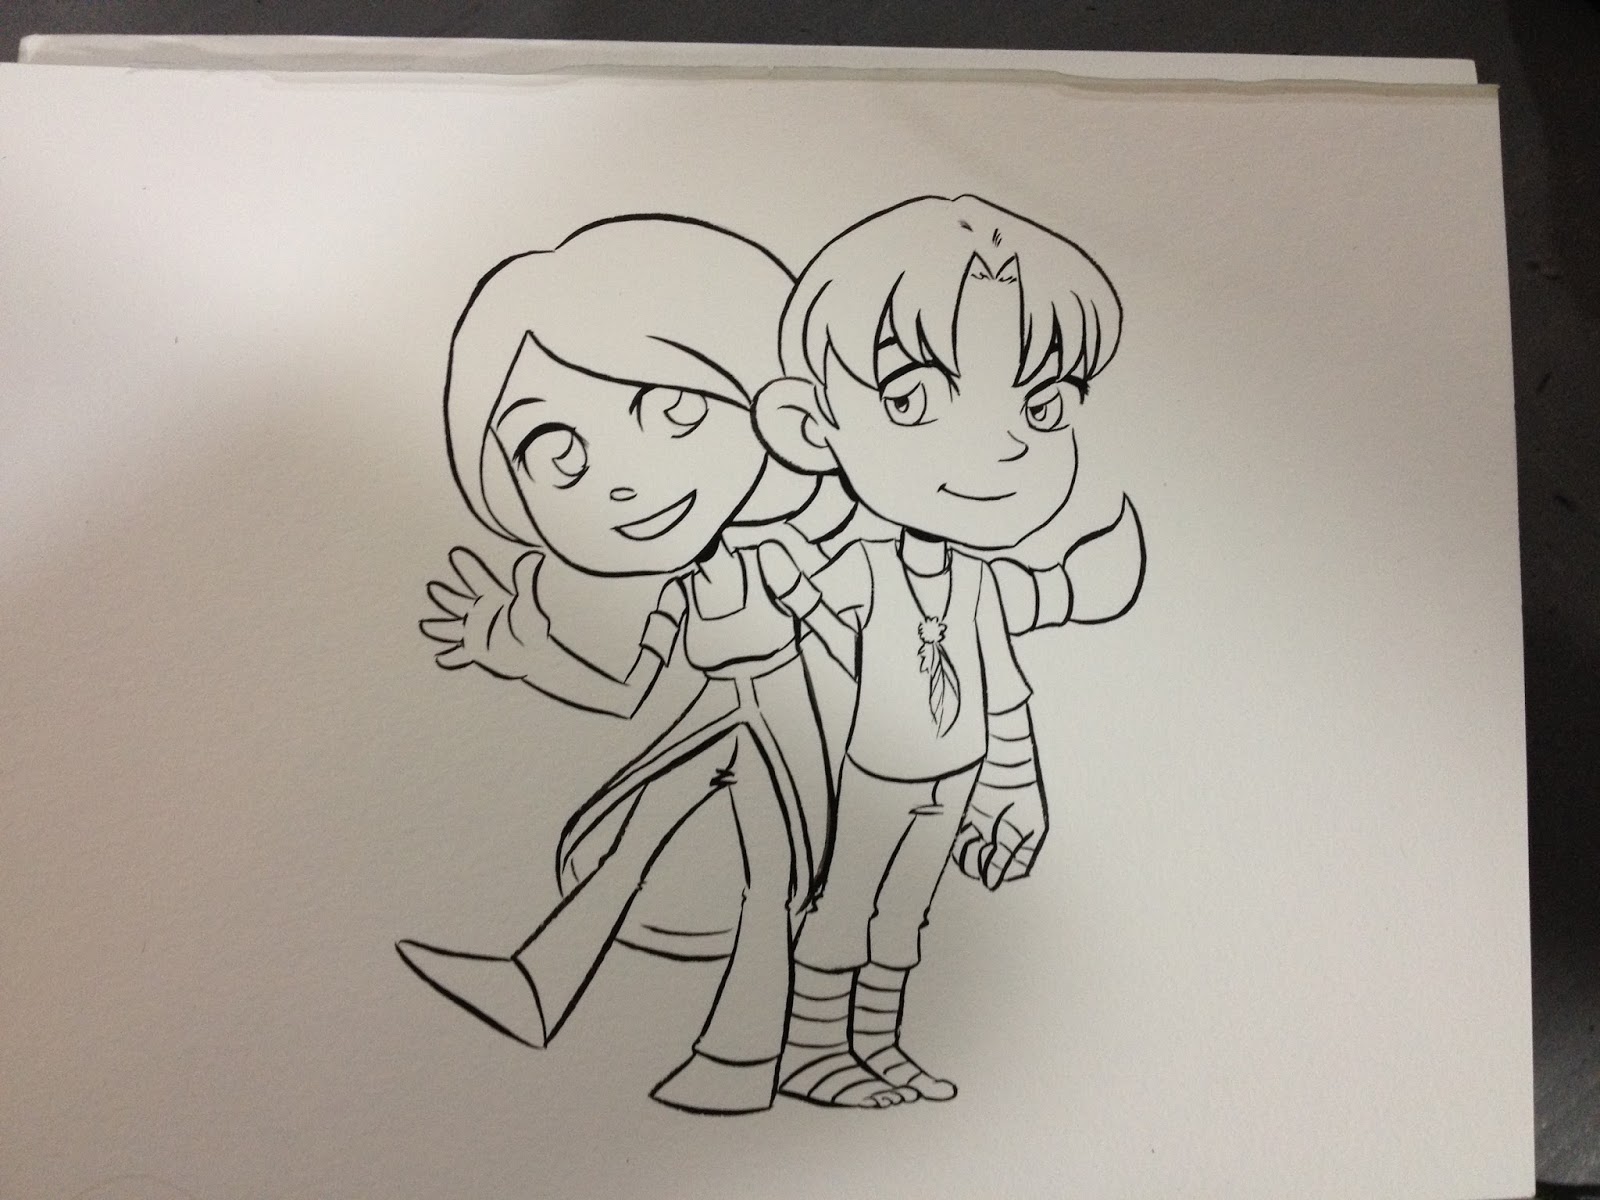
Step 3: Inks

Step 4: Copic
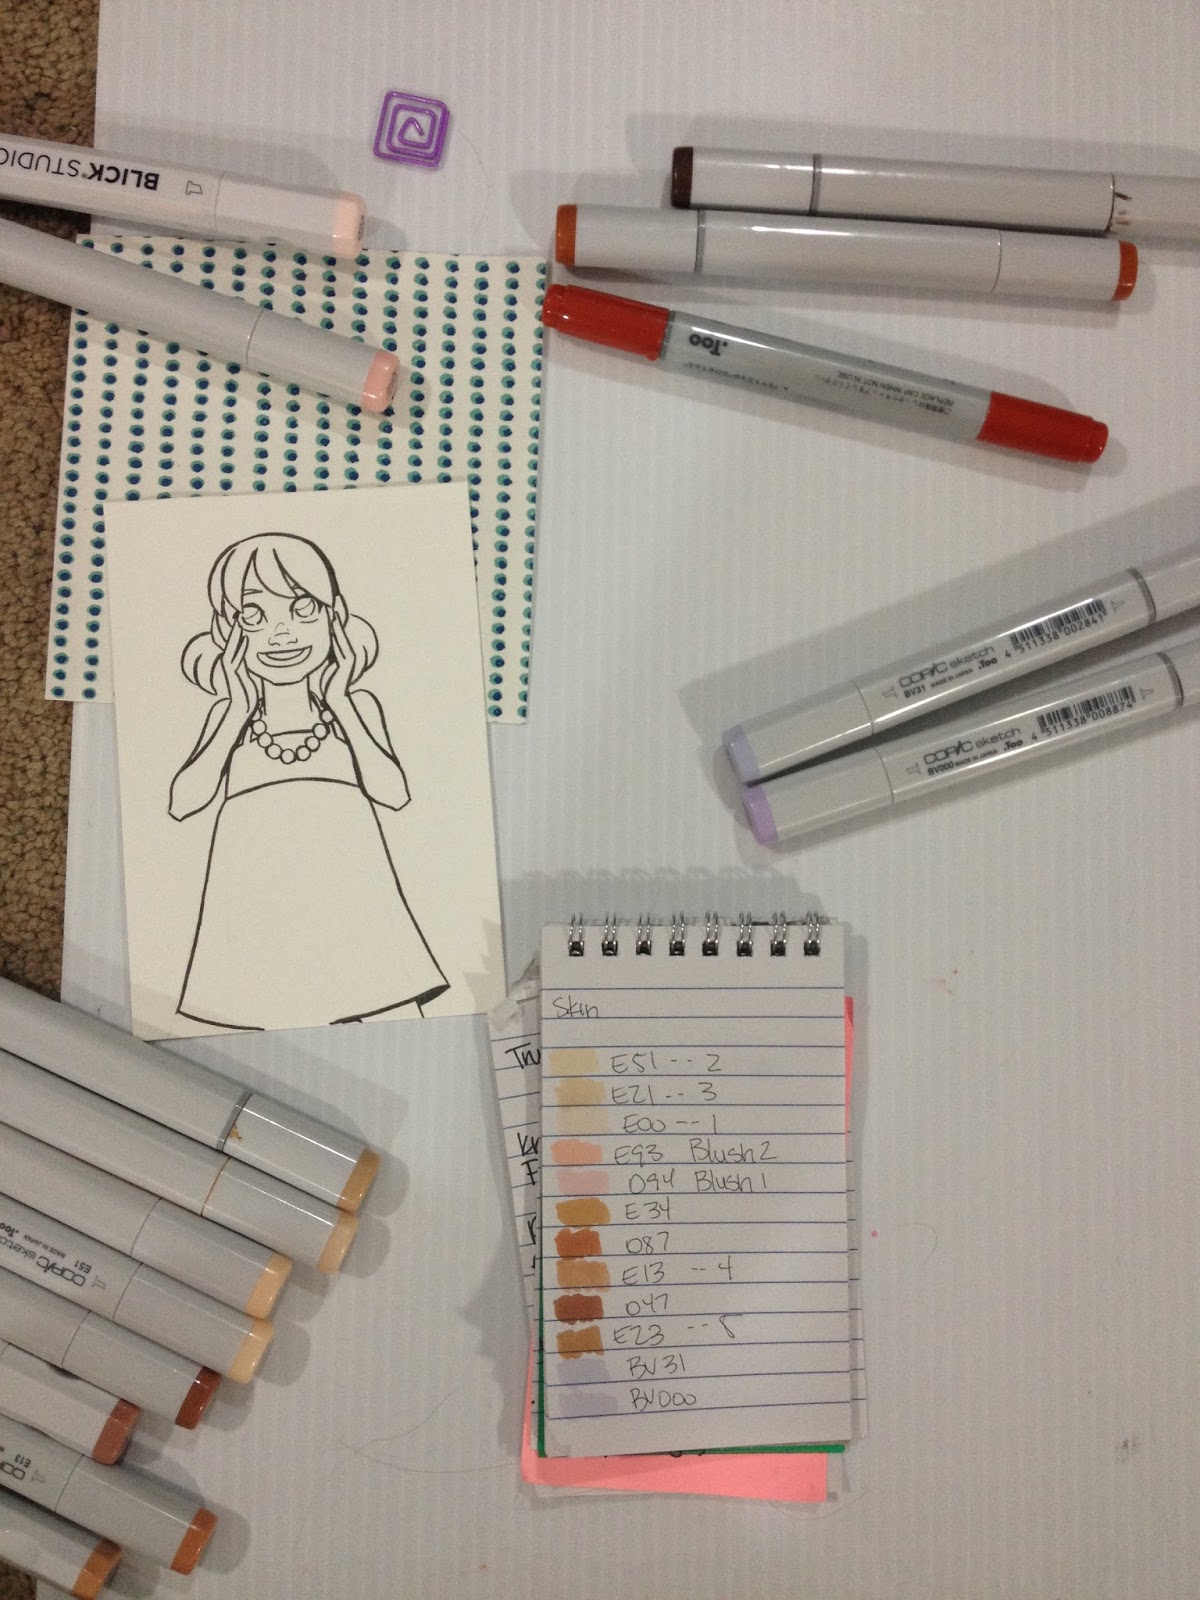
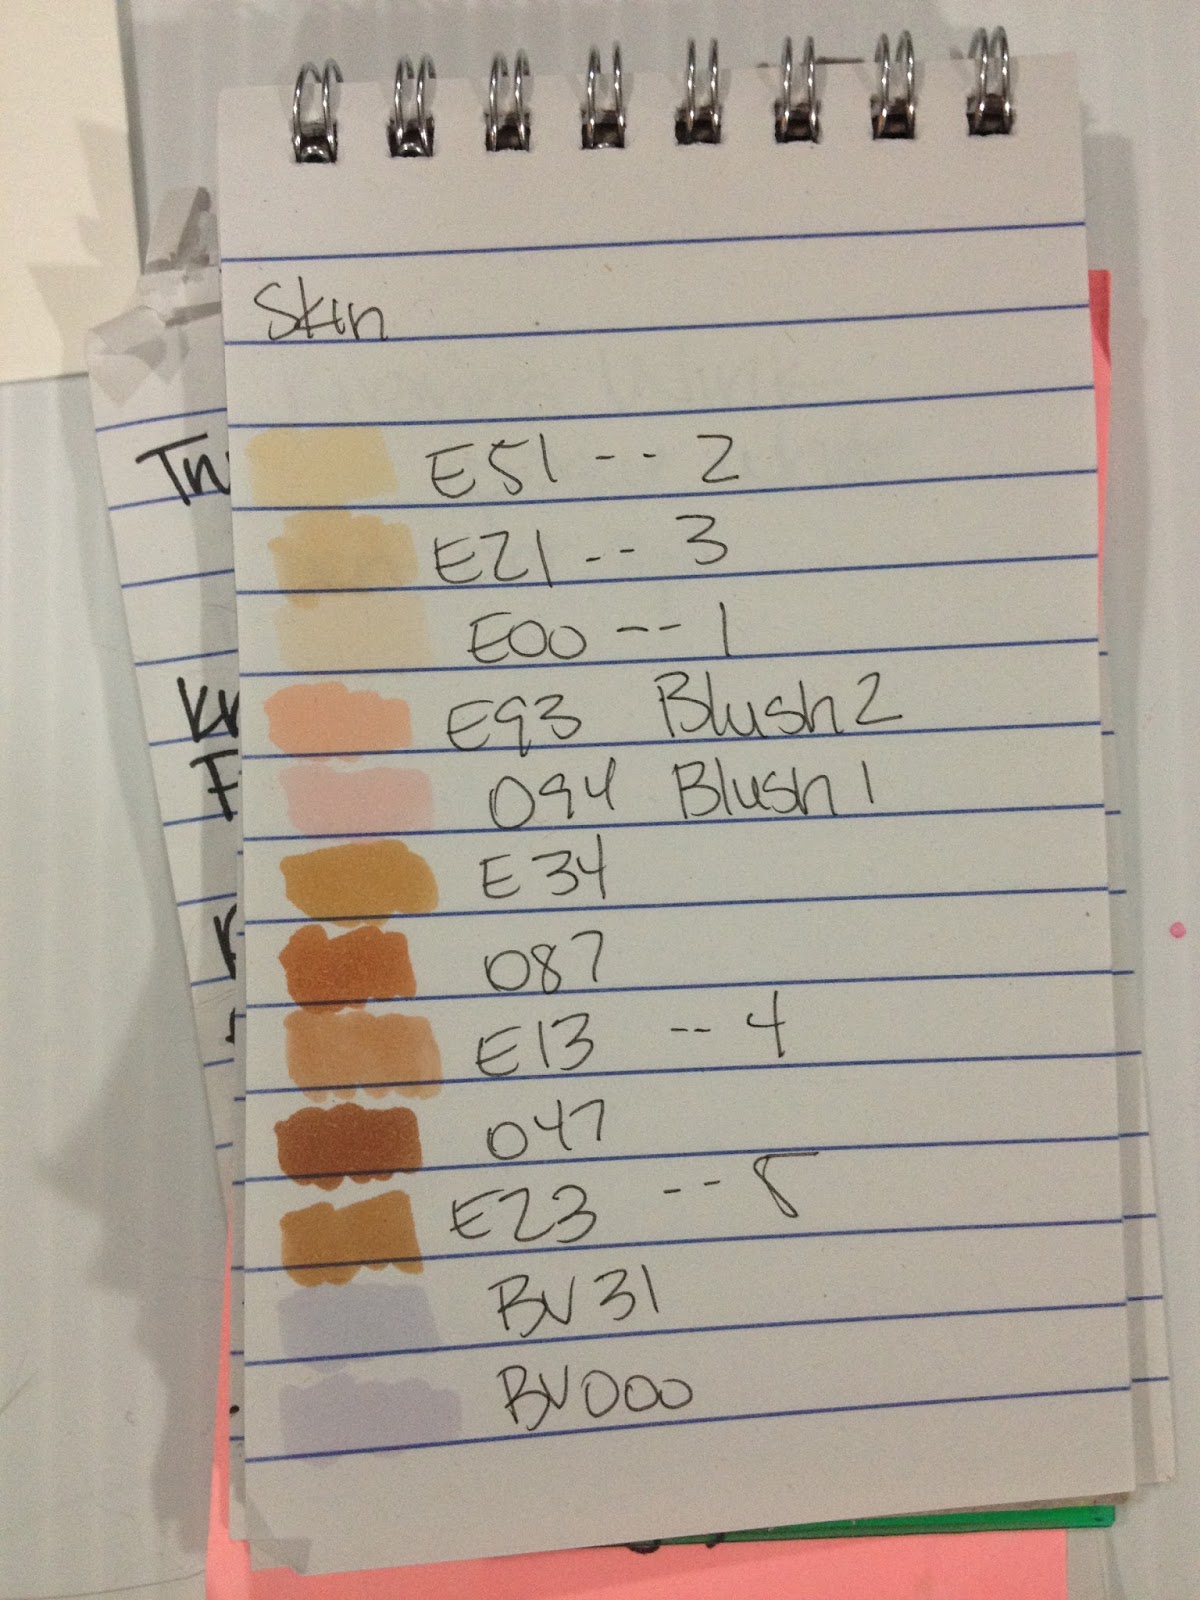
Aisazia kindly provided me with plenty of great reference for her characters, and I wanted to make sure I did them justice, so I did a lot of swatching to ensure I got the colors right.
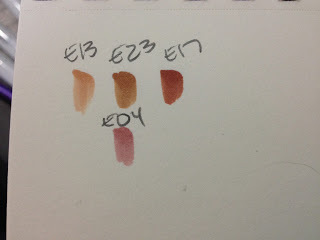
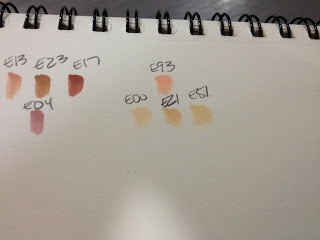
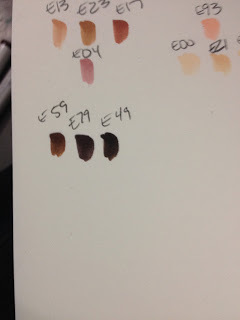
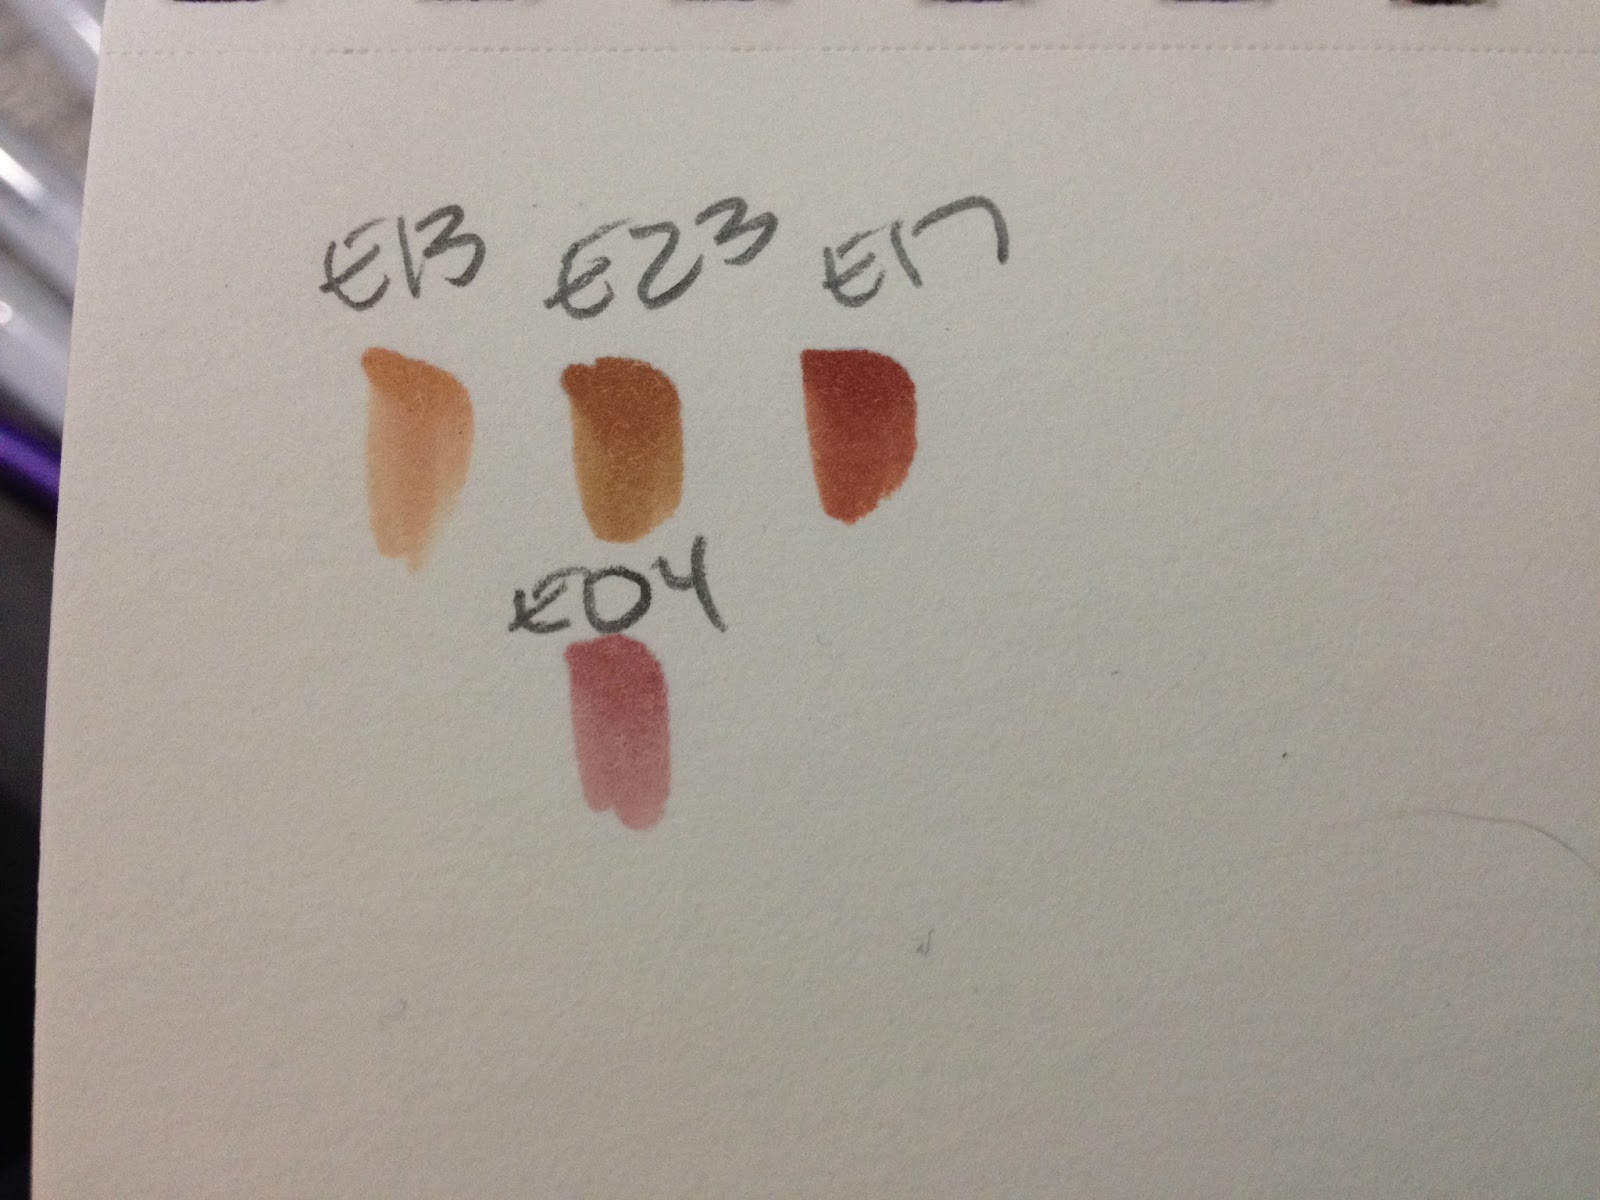
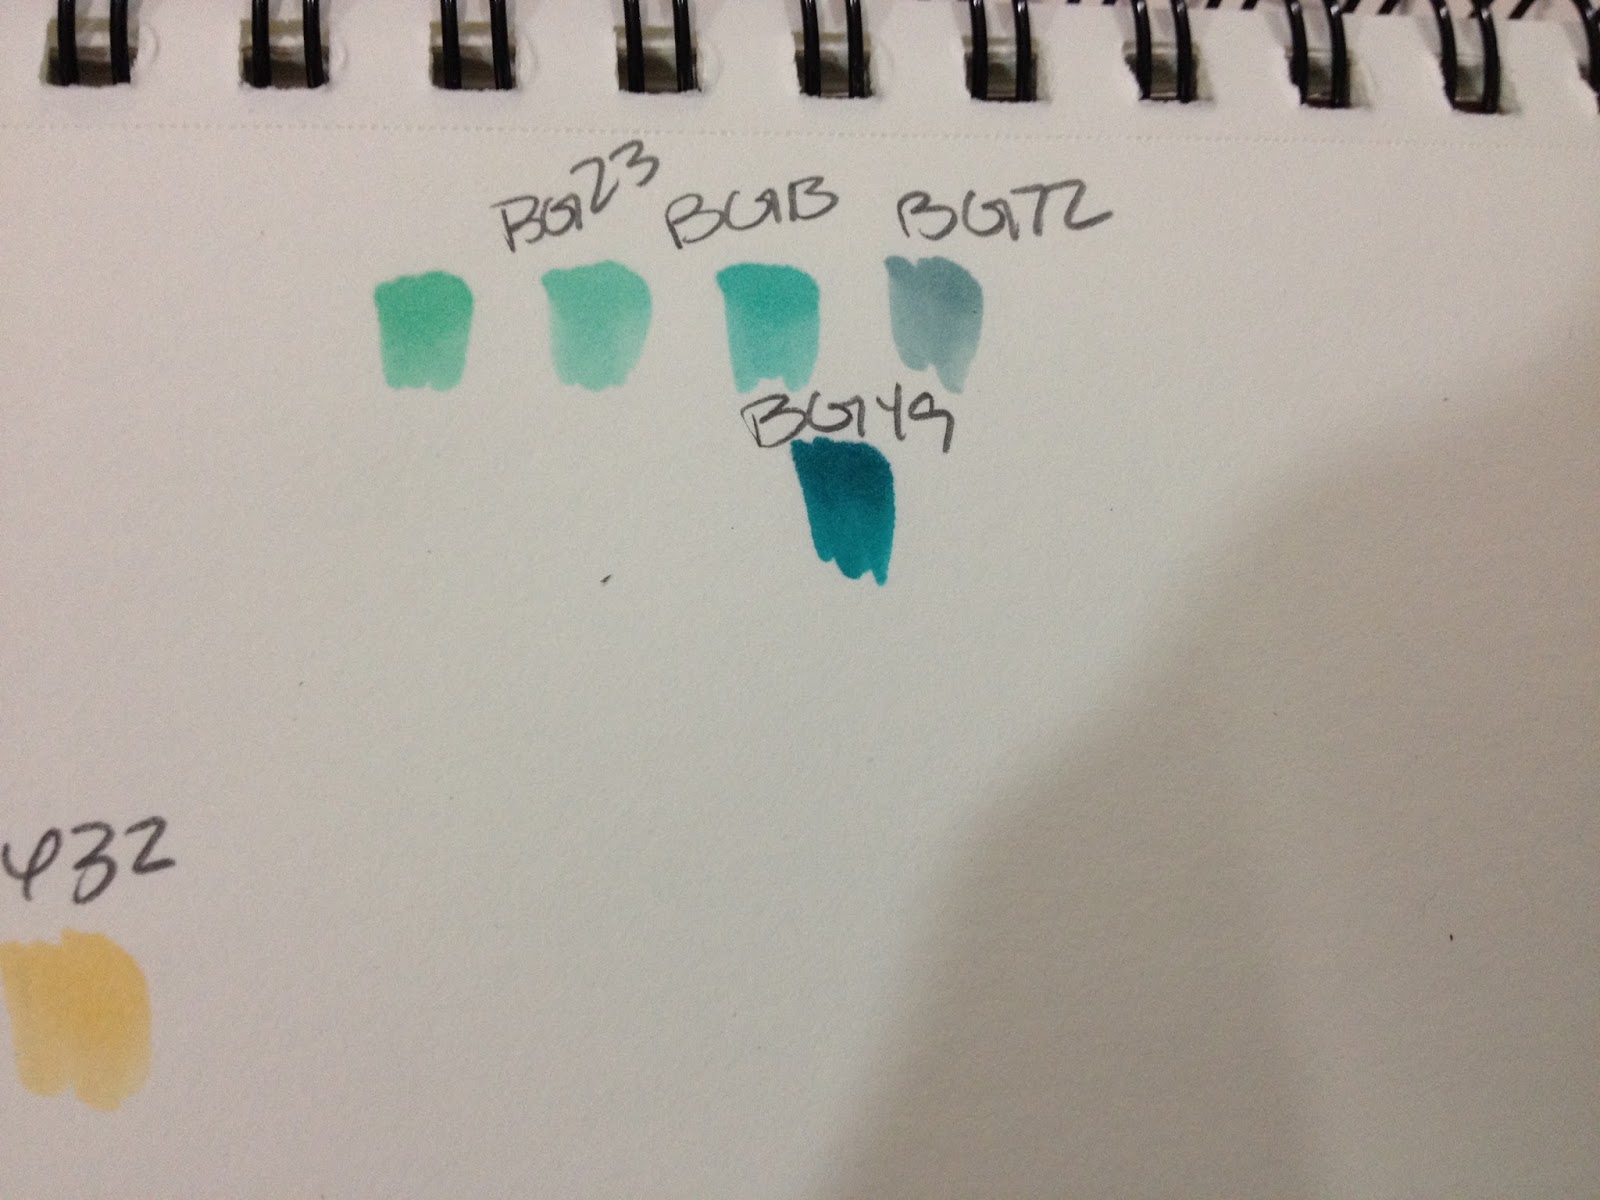
As I'd mentioned in an earlier Copic tutorial, it's important to make swatches and keep notes about what colors work and which ones don't on a separate piece of paper. You can even reference combinations that worked out well for later use! Above are the skintones, blushes, and shading for both characters.

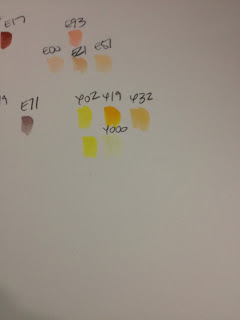
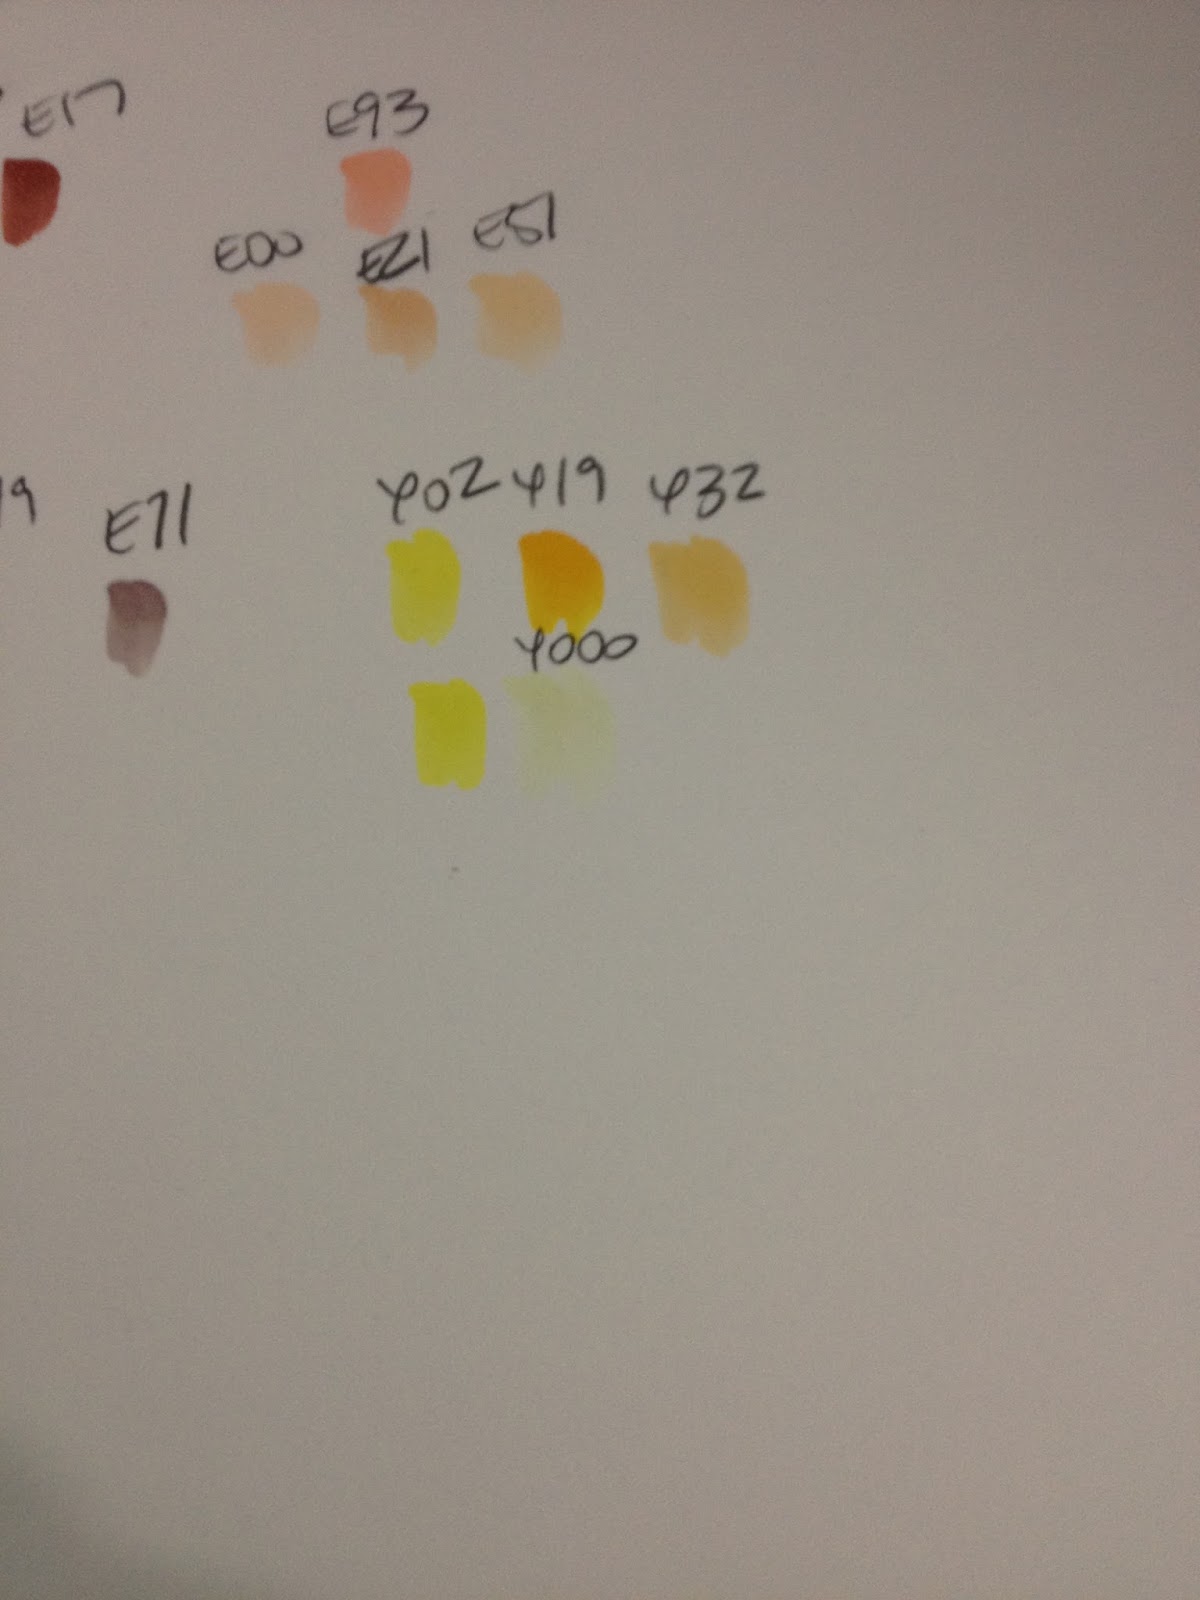
Swatches for the male character's hair.


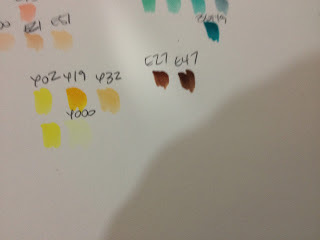
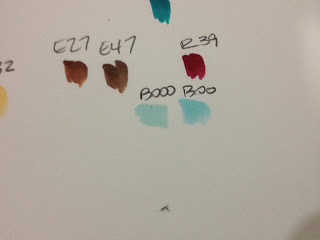
Swatches for shading on the female character's outfit, and finding the right blue to serve as a shadow on the male character's bandages.
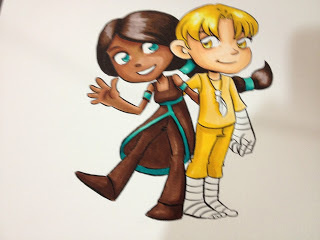
When you're entirely finished with your alcohol based markers, you can move on to watercolors. Copic and watercolor can be used together because water will not reactivate the dyes used in alcohol based markers. You might be able to do watercolor first, and later add Copic accents, but I don't recommend it, as the pigments used in watercolors might ruin the nibs of your alcohol based markers.
Copics and watercolor really suit each other because alcohol based markers are capable of very vibrant color, and the watercolor adds shadow and contrasting color without turning your original colors to mud.
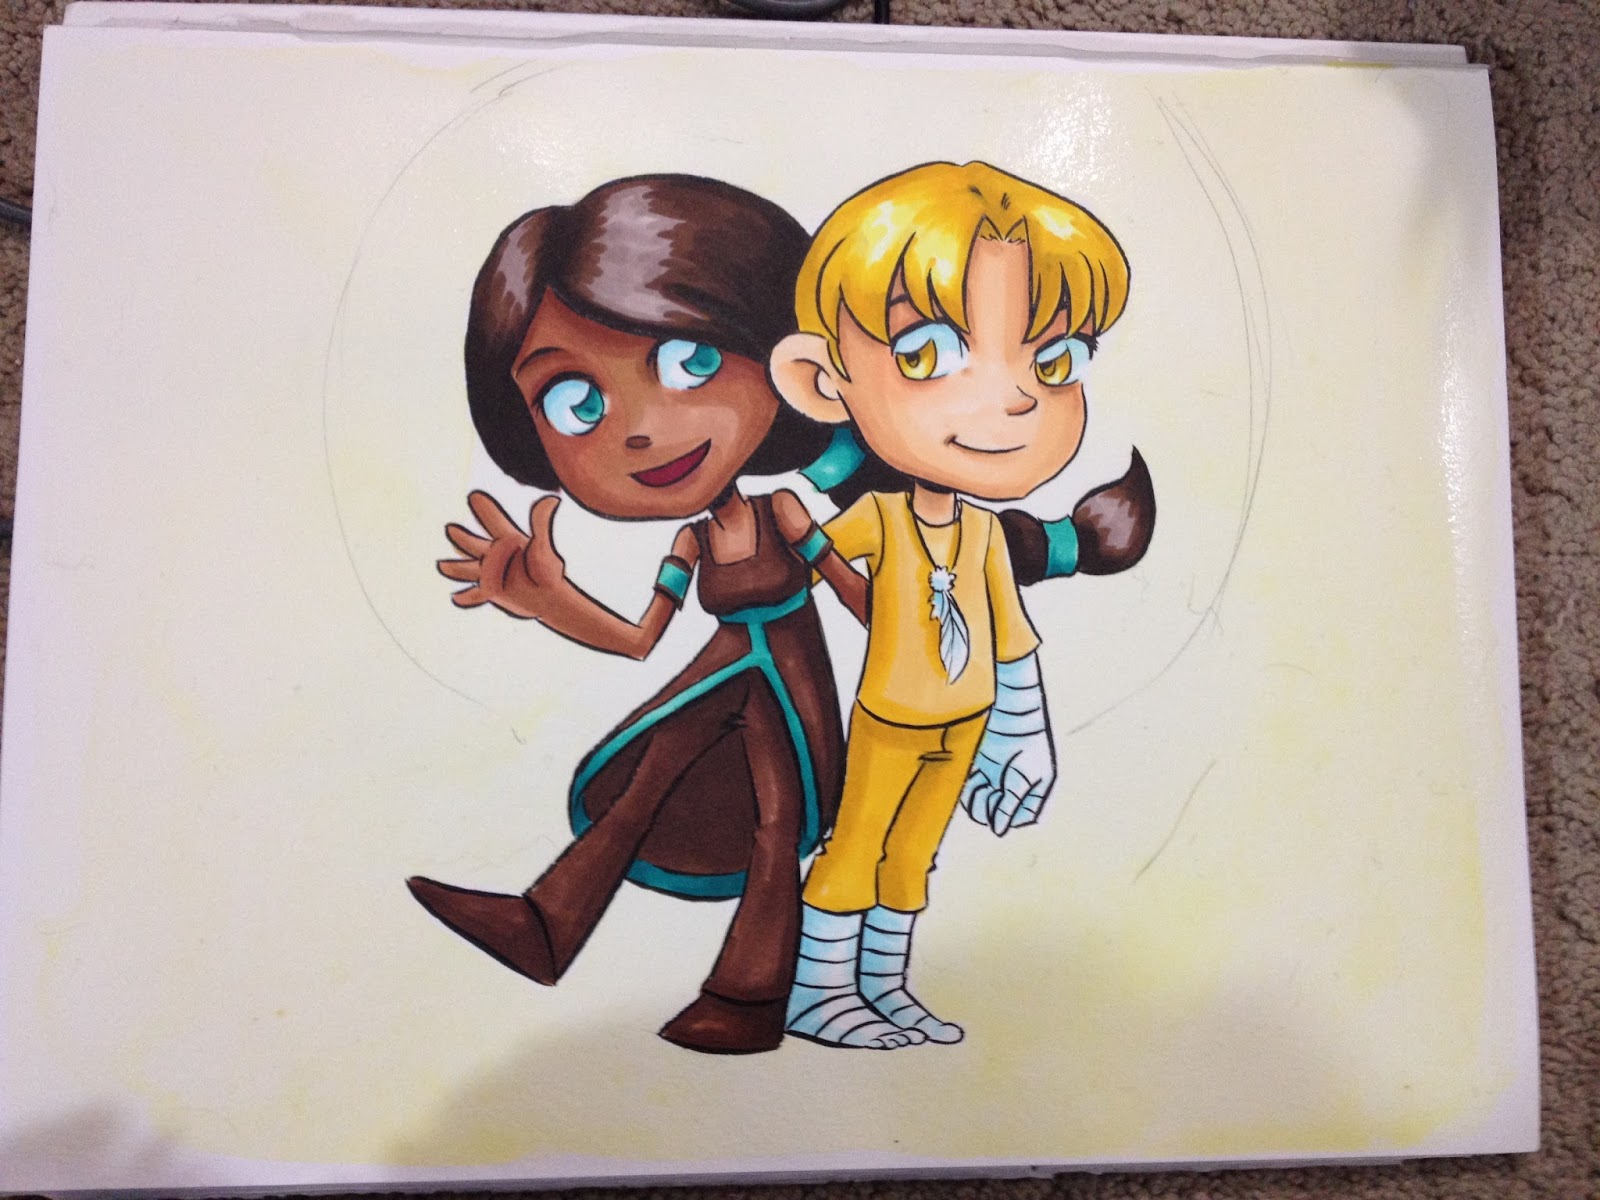
Step 5: Watercolor

Now that I've laid in everything with my Copics, it's time to add shadow and a background. The client requested a leafy green background, so I lay in some yellow around the figures.
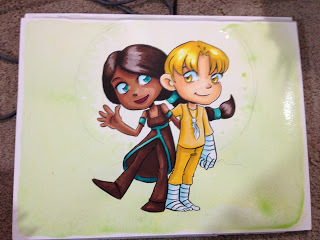
And I start blocking in leaves with a very light green.
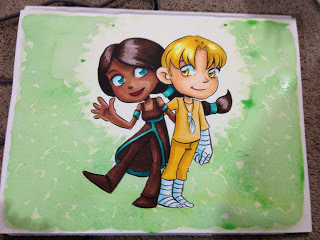

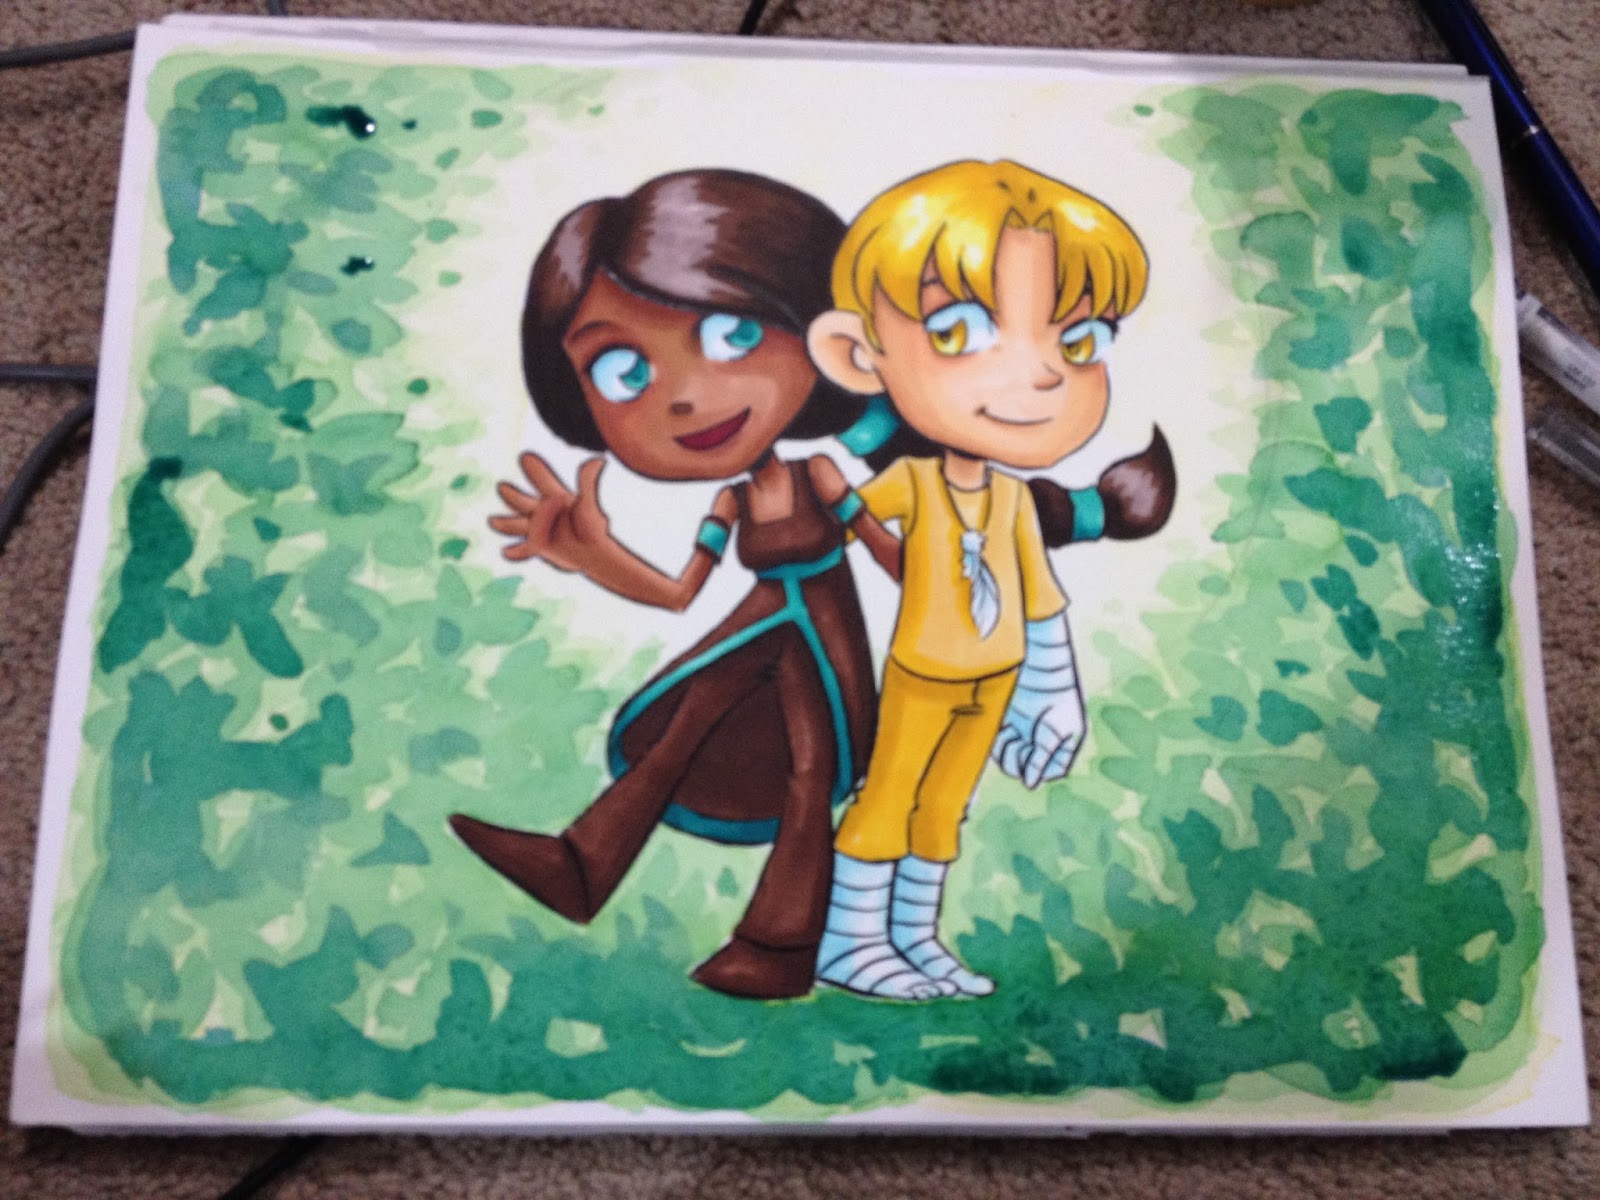
Step 6: Background And Applying Shadow to Figures
For skin shadows, I like using a reddish violet for Caucasian skin, and a darker red violet for darker skintones. For a general shadow color, I used a mixture of Indigo and Payne's Gray.
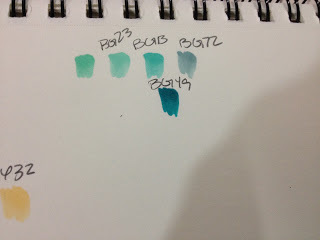
And I used a pthalo blue with a green cast to it to add shadows to the leaves.
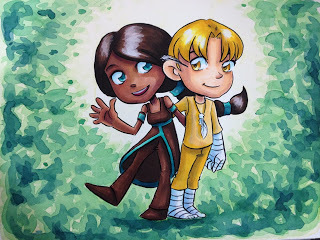
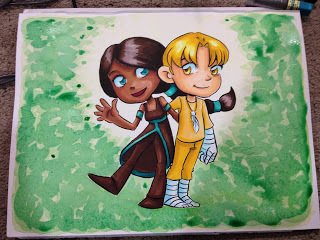
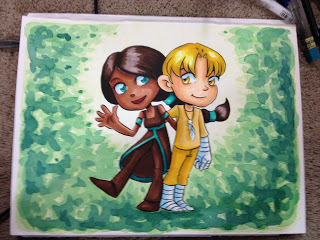
I used indigo for the very darkest leaf shadows, and added white gouache to the hair and painted his feather in, adding details with black ink later.
Introducing watercolor to your marker illustrations not only speeds up the process, but enables you to keep the bright, vibrant hues that markers are famous for. You can quickly apply shadow and background with watercolor, extending the life of your markers, and mixing the two media gives an more relaxed, organic feeling than working with marker alone.
Please consider donating to this blog or purchasing from Natto-shop (http://nattosoup.com/shop) if you want me to continue publishing quality content. All materials tested were purchased from my own pocket. Keep on Truckin' Nattosoup is not under any sponsorship.

This illustration was done on 9"x12" Fluid watercolor paper. I believe I inked it with Kaimai Sol K ink, which is Copic-proof, but not entirely water proof (this is before I discovered the Sailor Mitsuo Aida),and was inked with a Creative Mark Rhapsody kolinsky sable brush from Jerry's Artarama.
Using watercolors with your alcohol based markers is a great way to extend a limited marker collection, preserve color saturation, and become comfortable with a new medium. I recommend starting with your markers first, and then proceeding to watercolors when you've finished applying your markers, but in theory, neither medium should disturb the other because the two have different solvents. Copics, Prismacolors, and other alcohol based markers use quick evaporating alcohol as their solvent, and watercolors use water as a solvent. This means that water won't disrupt the dyes in alcohol based marker inks, and theoretically, the alcohol won't disrupt the pigments used in watercolors. I can vouch that this technique works Copics to watercolor, but I don't promise that the reverse is true.
Step 1: Blueline Sketch


Step 2: Graphite Transfer onto Watercolor paper
Not shown: Applying graphite (I like to use 6B graphitee sticks) to the back of the sketch paper.

Step 3: Inks
Step 4: Copic
Aisazia kindly provided me with plenty of great reference for her characters, and I wanted to make sure I did them justice, so I did a lot of swatching to ensure I got the colors right.


As I'd mentioned in an earlier Copic tutorial, it's important to make swatches and keep notes about what colors work and which ones don't on a separate piece of paper. You can even reference combinations that worked out well for later use! Above are the skintones, blushes, and shading for both characters.

Swatches for the male character's hair.


Swatches for shading on the female character's outfit, and finding the right blue to serve as a shadow on the male character's bandages.
When you're entirely finished with your alcohol based markers, you can move on to watercolors. Copic and watercolor can be used together because water will not reactivate the dyes used in alcohol based markers. You might be able to do watercolor first, and later add Copic accents, but I don't recommend it, as the pigments used in watercolors might ruin the nibs of your alcohol based markers.
Copics and watercolor really suit each other because alcohol based markers are capable of very vibrant color, and the watercolor adds shadow and contrasting color without turning your original colors to mud.
Step 5: Watercolor
Now that I've laid in everything with my Copics, it's time to add shadow and a background. The client requested a leafy green background, so I lay in some yellow around the figures.

And I start blocking in leaves with a very light green.


Step 6: Background And Applying Shadow to Figures
For skin shadows, I like using a reddish violet for Caucasian skin, and a darker red violet for darker skintones. For a general shadow color, I used a mixture of Indigo and Payne's Gray.

And I used a pthalo blue with a green cast to it to add shadows to the leaves.
I used indigo for the very darkest leaf shadows, and added white gouache to the hair and painted his feather in, adding details with black ink later.
Introducing watercolor to your marker illustrations not only speeds up the process, but enables you to keep the bright, vibrant hues that markers are famous for. You can quickly apply shadow and background with watercolor, extending the life of your markers, and mixing the two media gives an more relaxed, organic feeling than working with marker alone.
Please consider donating to this blog or purchasing from Natto-shop (http://nattosoup.com/shop) if you want me to continue publishing quality content. All materials tested were purchased from my own pocket. Keep on Truckin' Nattosoup is not under any sponsorship.
December 13, 2015
Copic Tutorial- Skin Basics, Freckles, Hair, Clothes
Basic Tips Before We Get Started
Copics are a bit of a fetish for many illustrators, particularly illustrators who have been strongly influenced by anime and manga, but they aren't the end all be all of alcohol based markers. I've written about several other brands over the years, and while I have a sizable collection of Copic sketch markers, I also have Shin Han Twin Touch markers, Blick Studio Brush markers, and several Prismacolors. Many marker brands are intermixable- so long as you're buying alcohol based markers, not water or xylene based, your markers will more or less work together.
Most artists who use Copics and other alcohol based markers for illustration prefer brush tipped markers like Copic Sketch and Ciao, Prismacolor Premier, Letraset Flex, and Blick Studio Brush markers. While you CAN use bullet nib alcohol based markers, those make it a lot harder to get even coverage, and it takes a lot longer to color. Cheaper marker brands, like Finecolour, Artist's Loft, and Hobby Lobby's alcohol based markers only come with a bullet nib option, and may be so annoying to use that you feel alcohol based markers aren't for you. Before you fully decide, I recommend you pick up a few brush tipped alcohol based markers in the same color family (like three Prismacolor Premier markers in the green family) and play around with those on nice cardstock before you fully decide to give up on alcohol based markers.
A general rule of thumb is cheaper brands, like Finecolour or even Blick Studio Brush, will have less color saturation in the dyes used for markers. Saturation can be built up by layering, but they will never be as saturated as Copic or Prismacolor inks.
Prismacolor makes certain colors that Copic doesn't, so if you are having trouble finding a color in the Copic family, check Prismacolor. Prisma excels at bright, saturated colors- intense yellows, hot red violets, and fluorescents.
I recommend that you check out my Holiday Gift Guide on markers for the aspiring artist if you're looking for color suggestions and brand recommendations. I also have a video that features my three favorite non-Copic brands below.
3 Cheap Copic Marker Alternatives
But If You Have to Have Copics
Copic Ciaos are almost as good as Copic Sketches, and a couple bucks cheaper if you can find them in person! They're slightly smaller, so they hold less ink, but they're refillable and have the same Super Brush nibs as the Copic Sketch.
Focus on buying a set of Warm Grays and amassing a collection of skintones that work for the type of work you want to do.
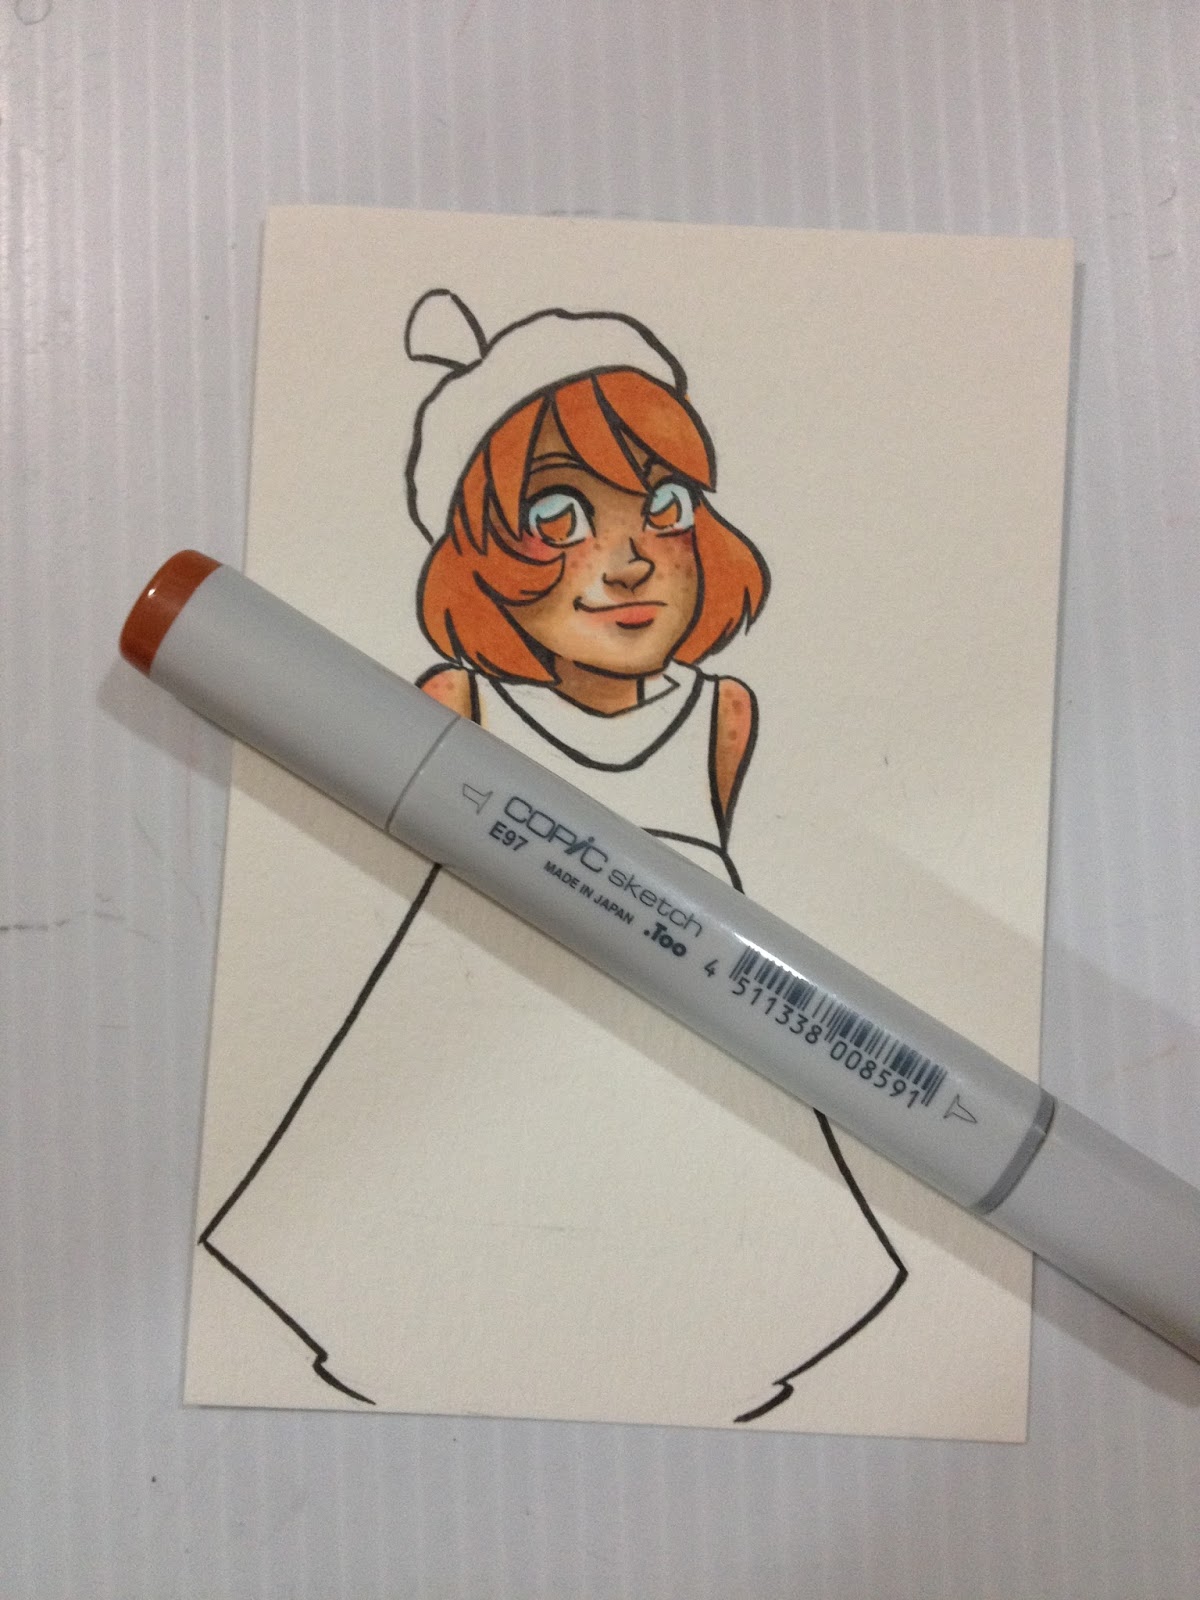
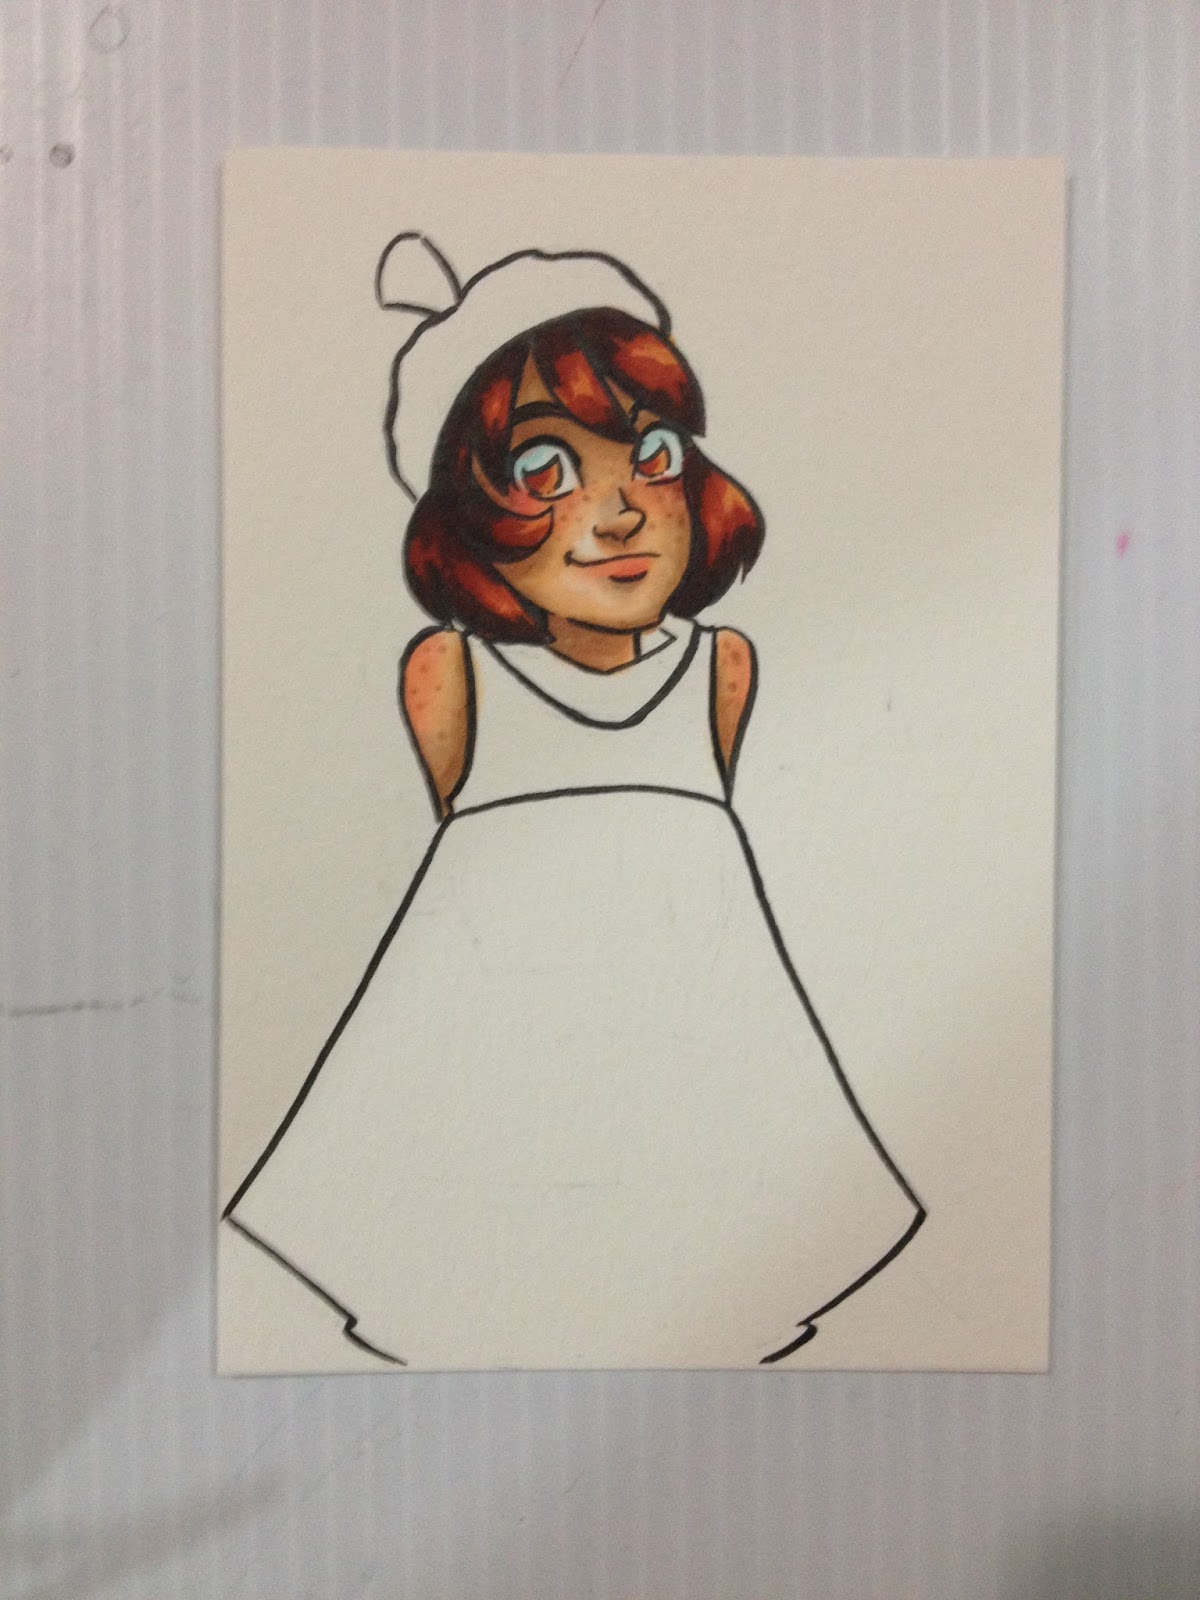
Your markers can do double or even triple duty through layering! The first layer of a color is very light, and often a bit streaky, but the second and third are much darker and saturated. While you build up your marker collection, keep in mind that layering can make just a handful of markers work wonders.

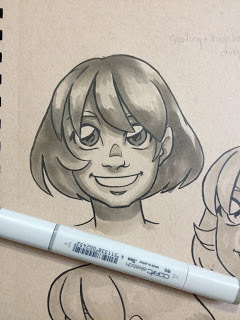
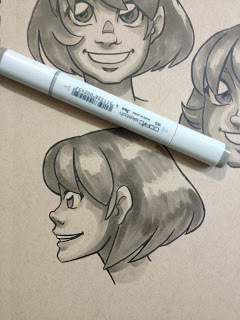
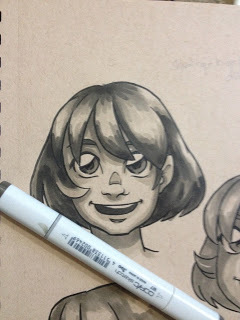
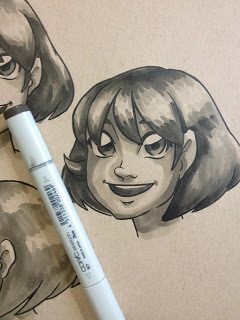
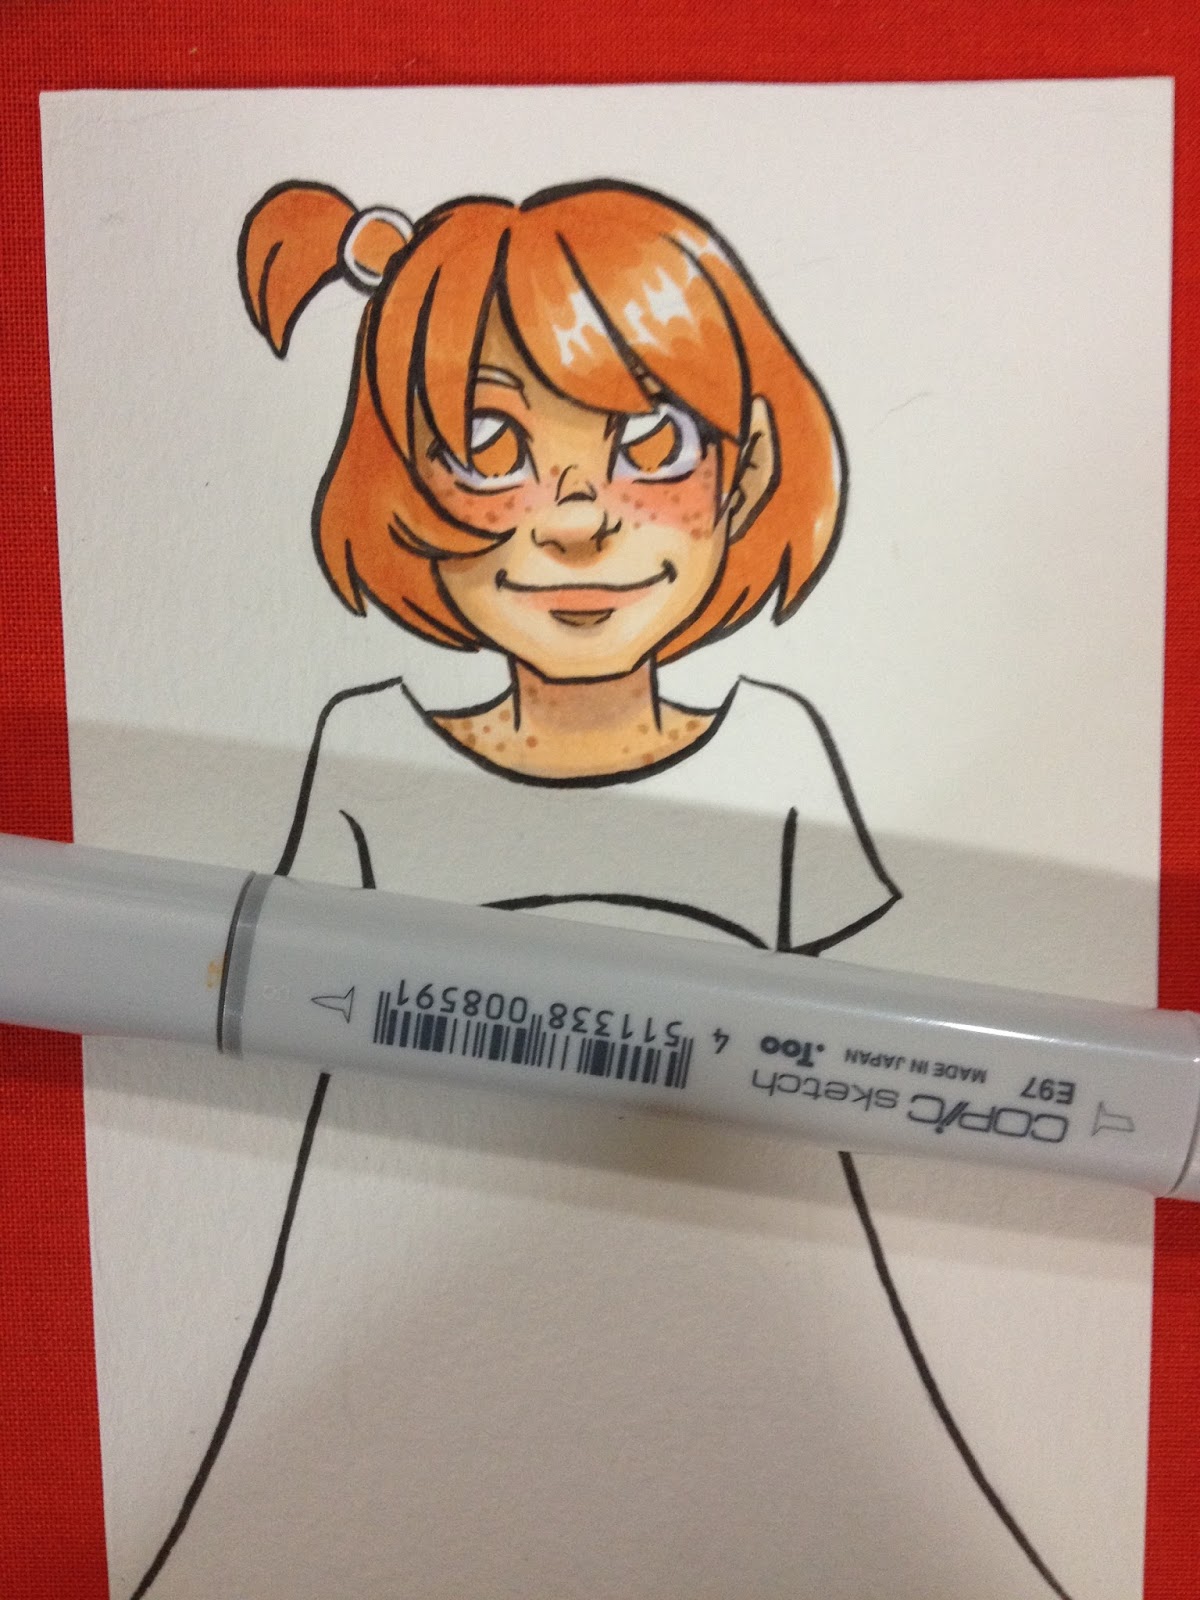
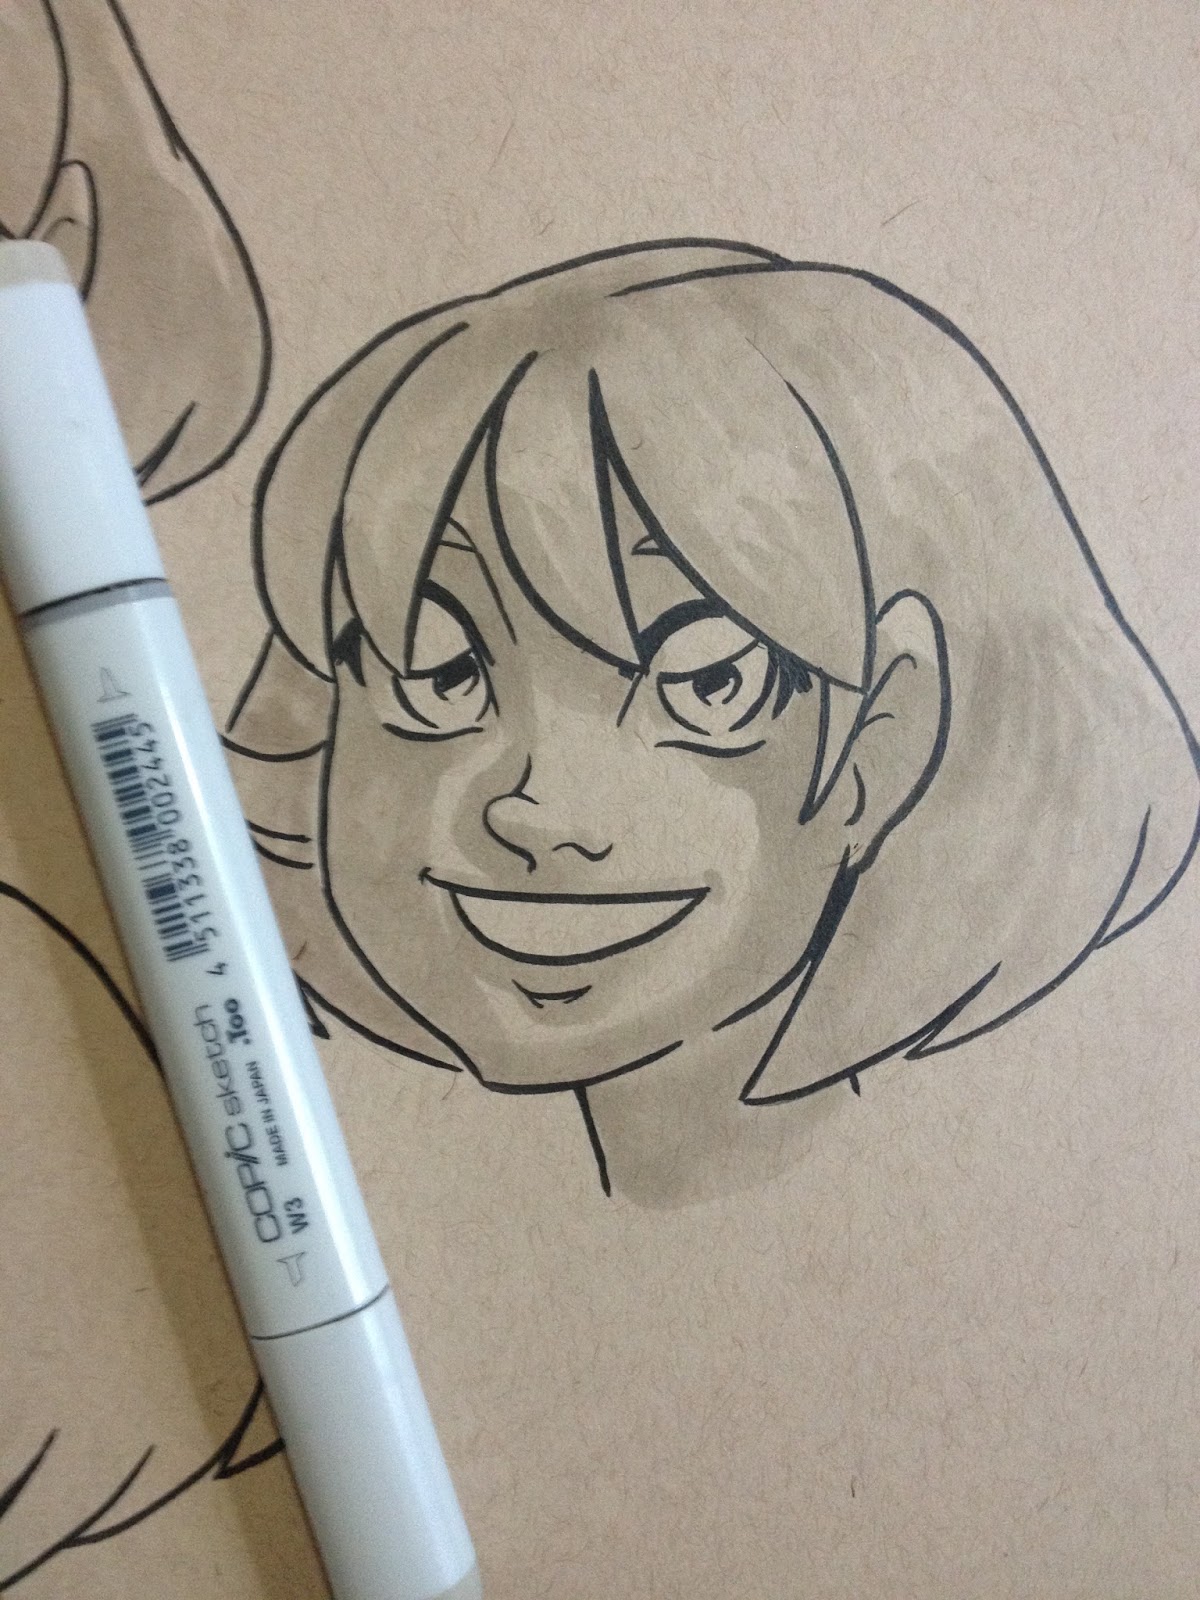
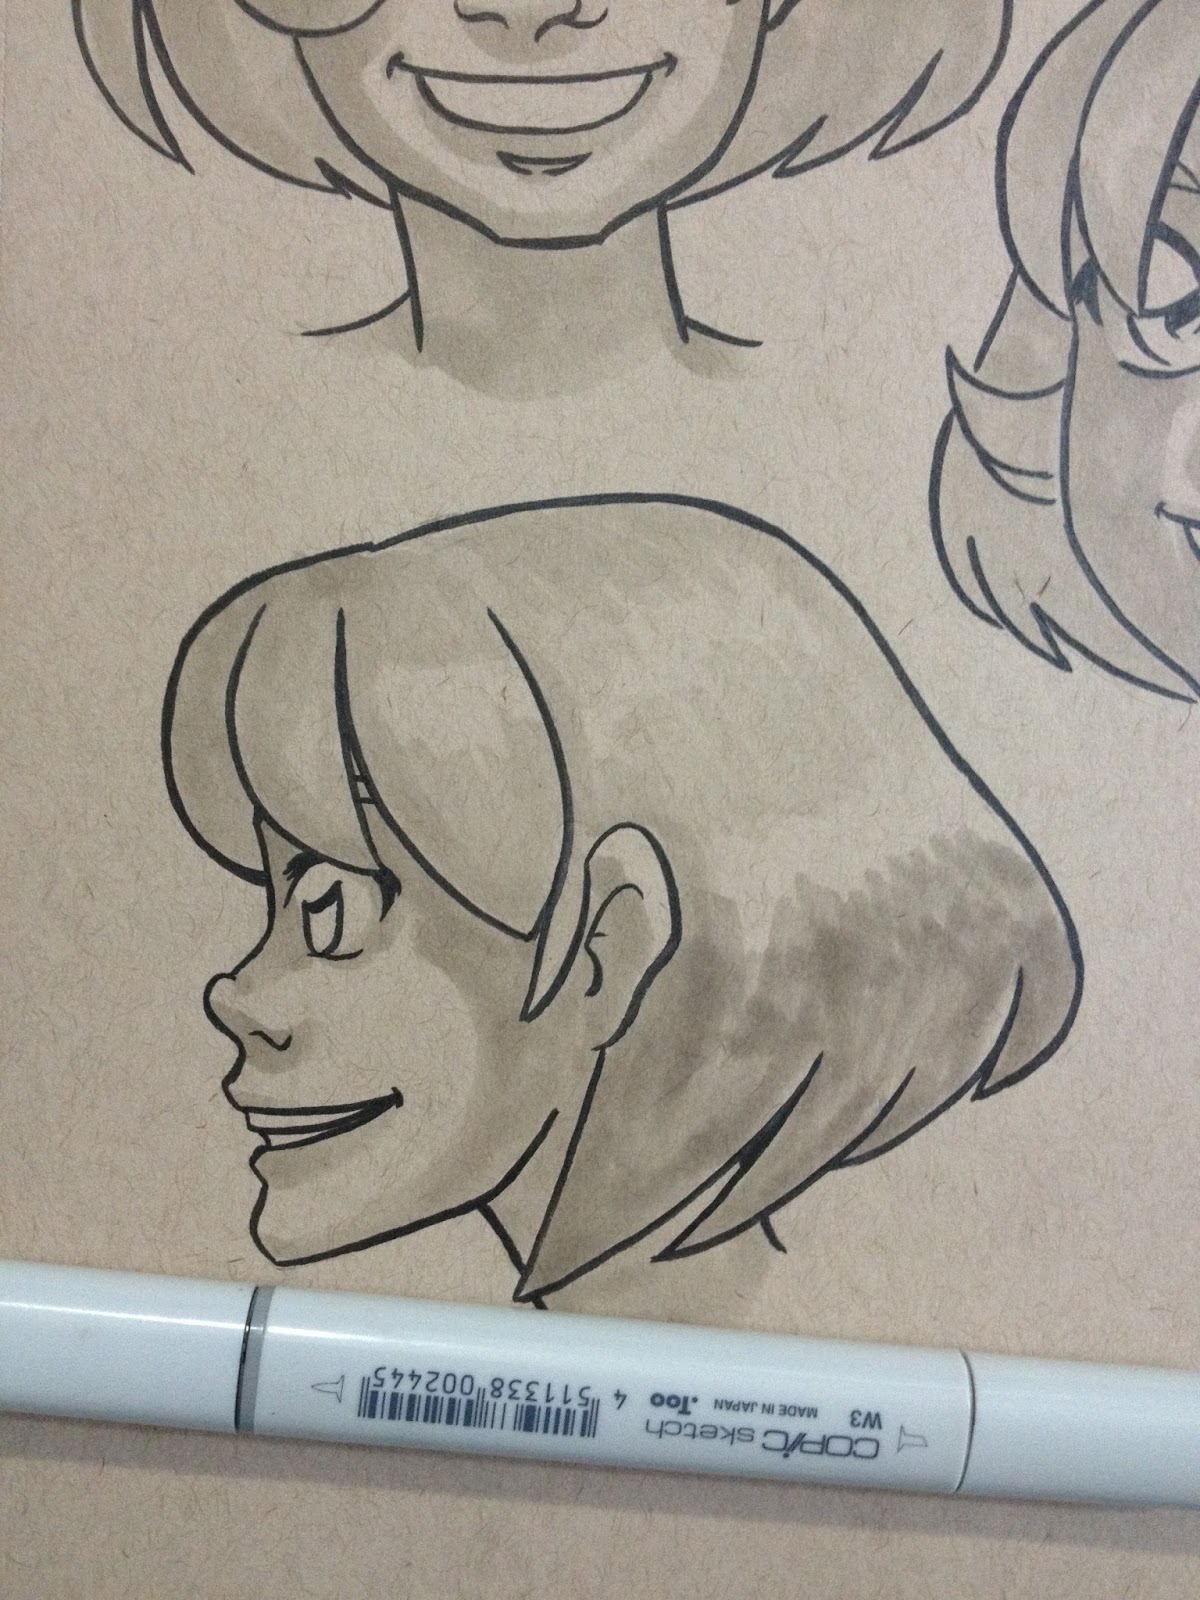
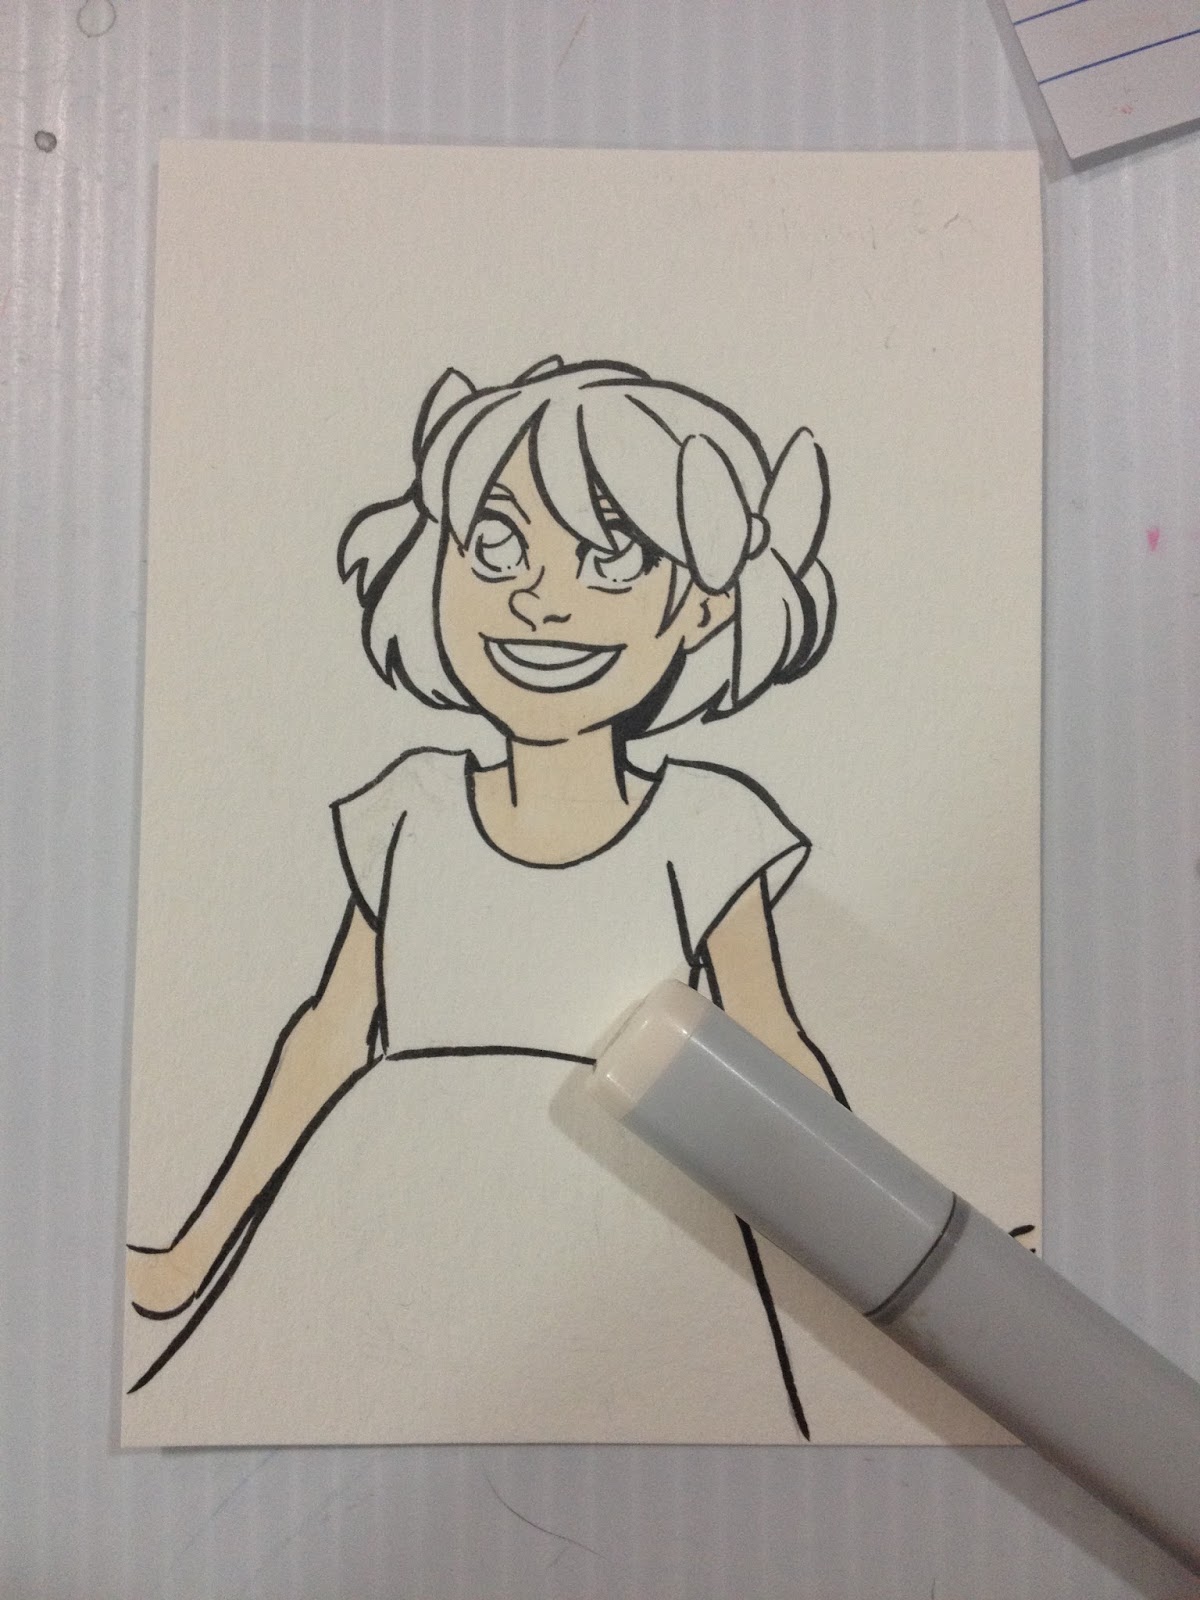
Two layers of E97 have been applied to Kara's hair.

As you can see, the first layer is much lighter than the second.
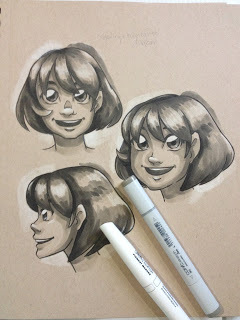
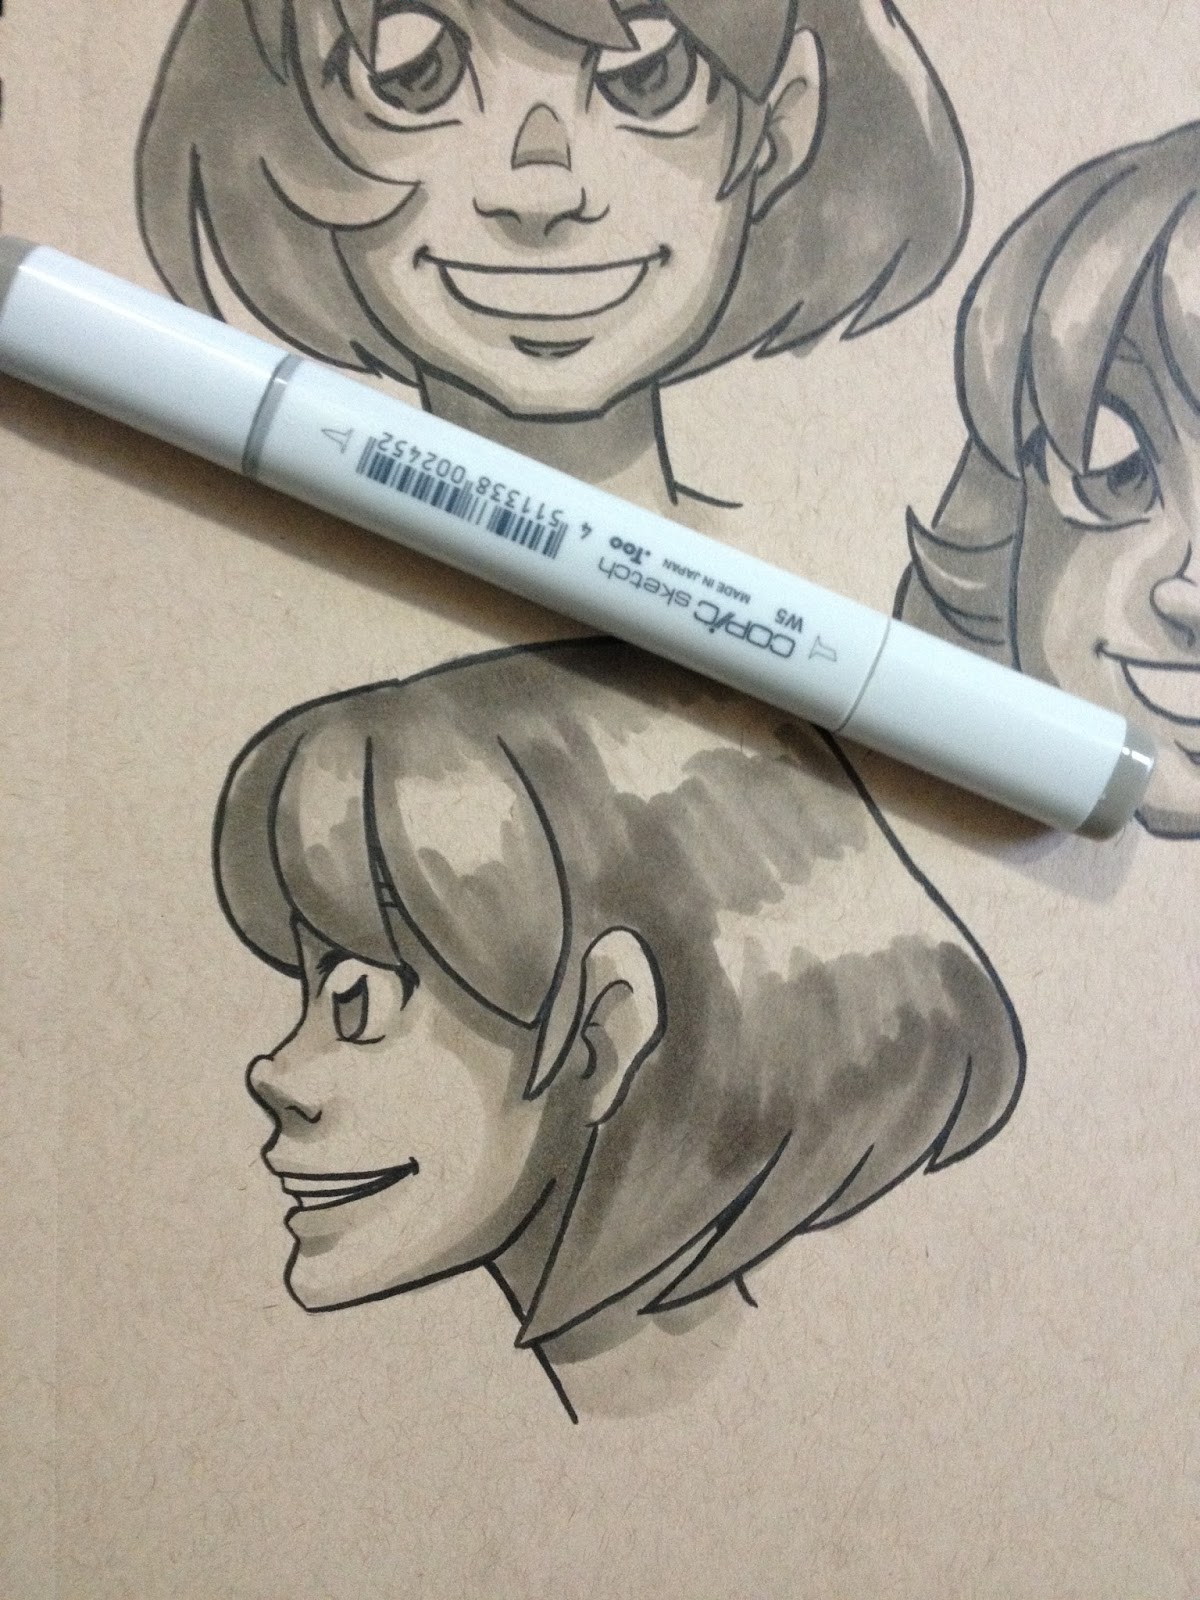
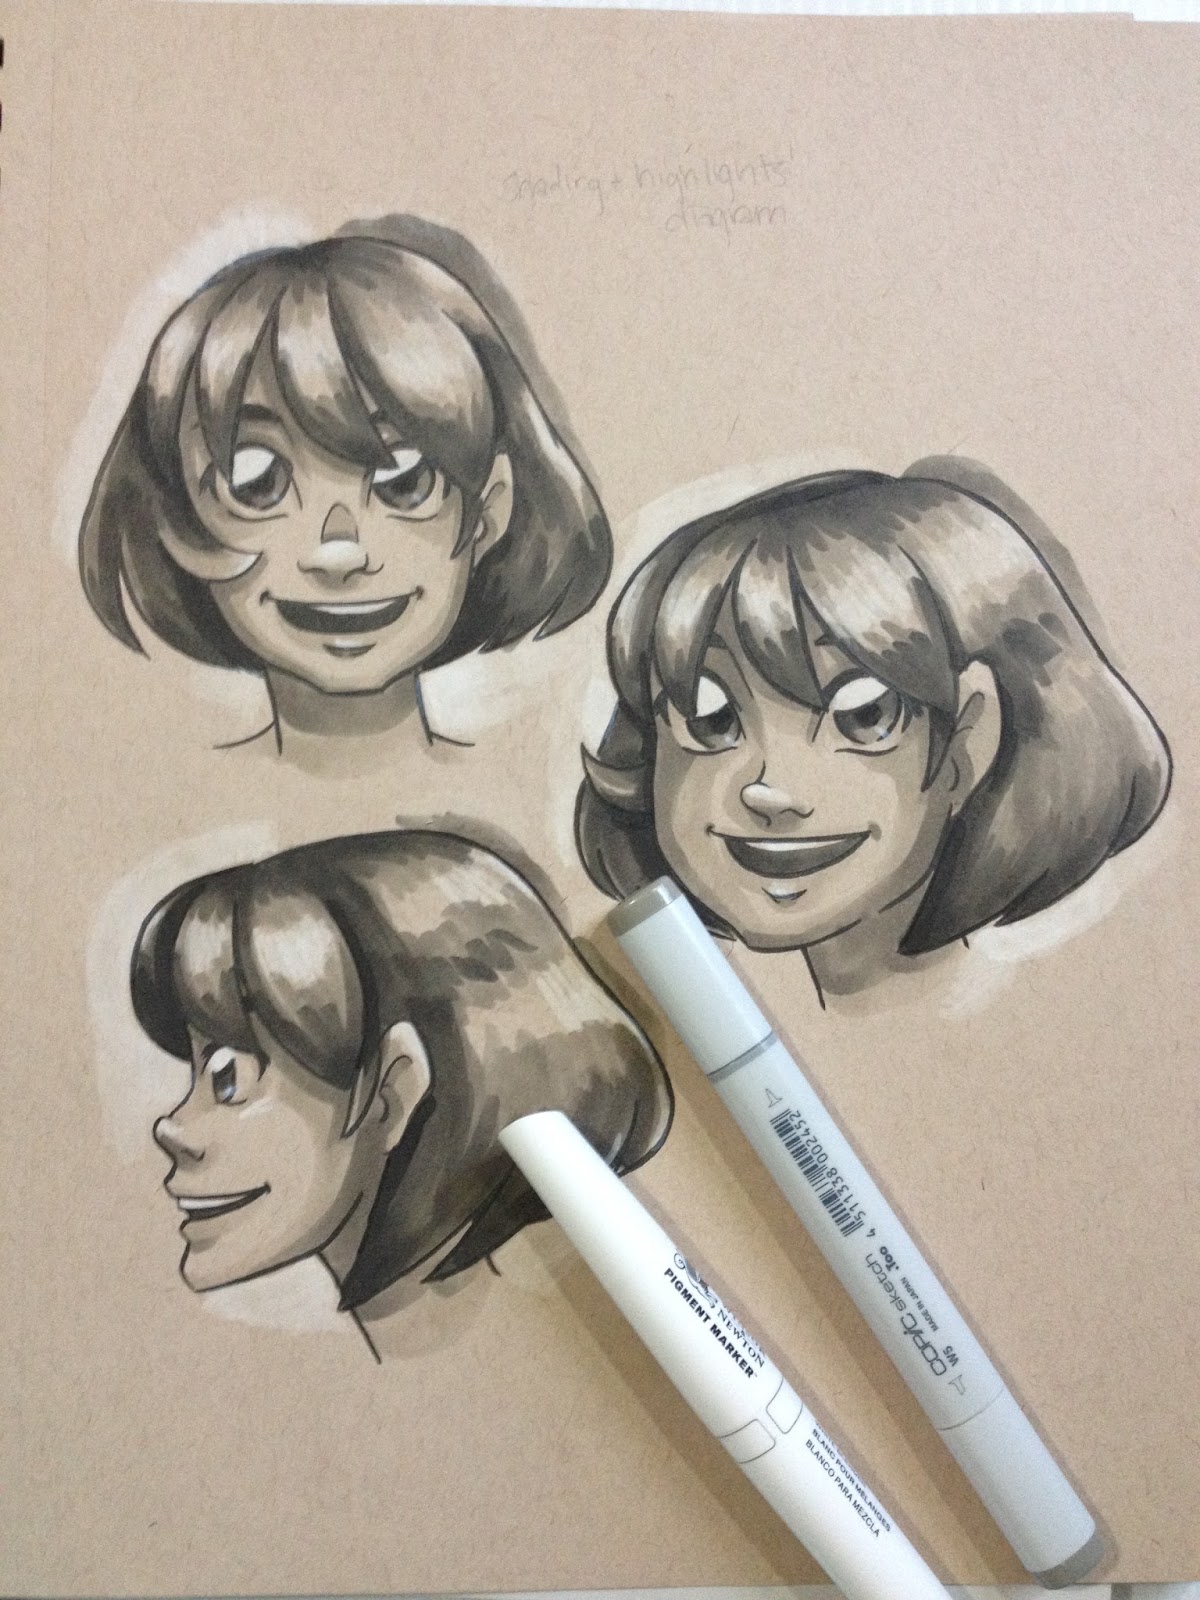
While you're still building that collection, consider keeping your pieces as tonal studies, or tonal studies with a single color highlight. Colored paper, like Strathmore's Toned Tan and Toned Gray, give you an additional color- the color of the paper, and if you use white color pencil, that's two more colors.
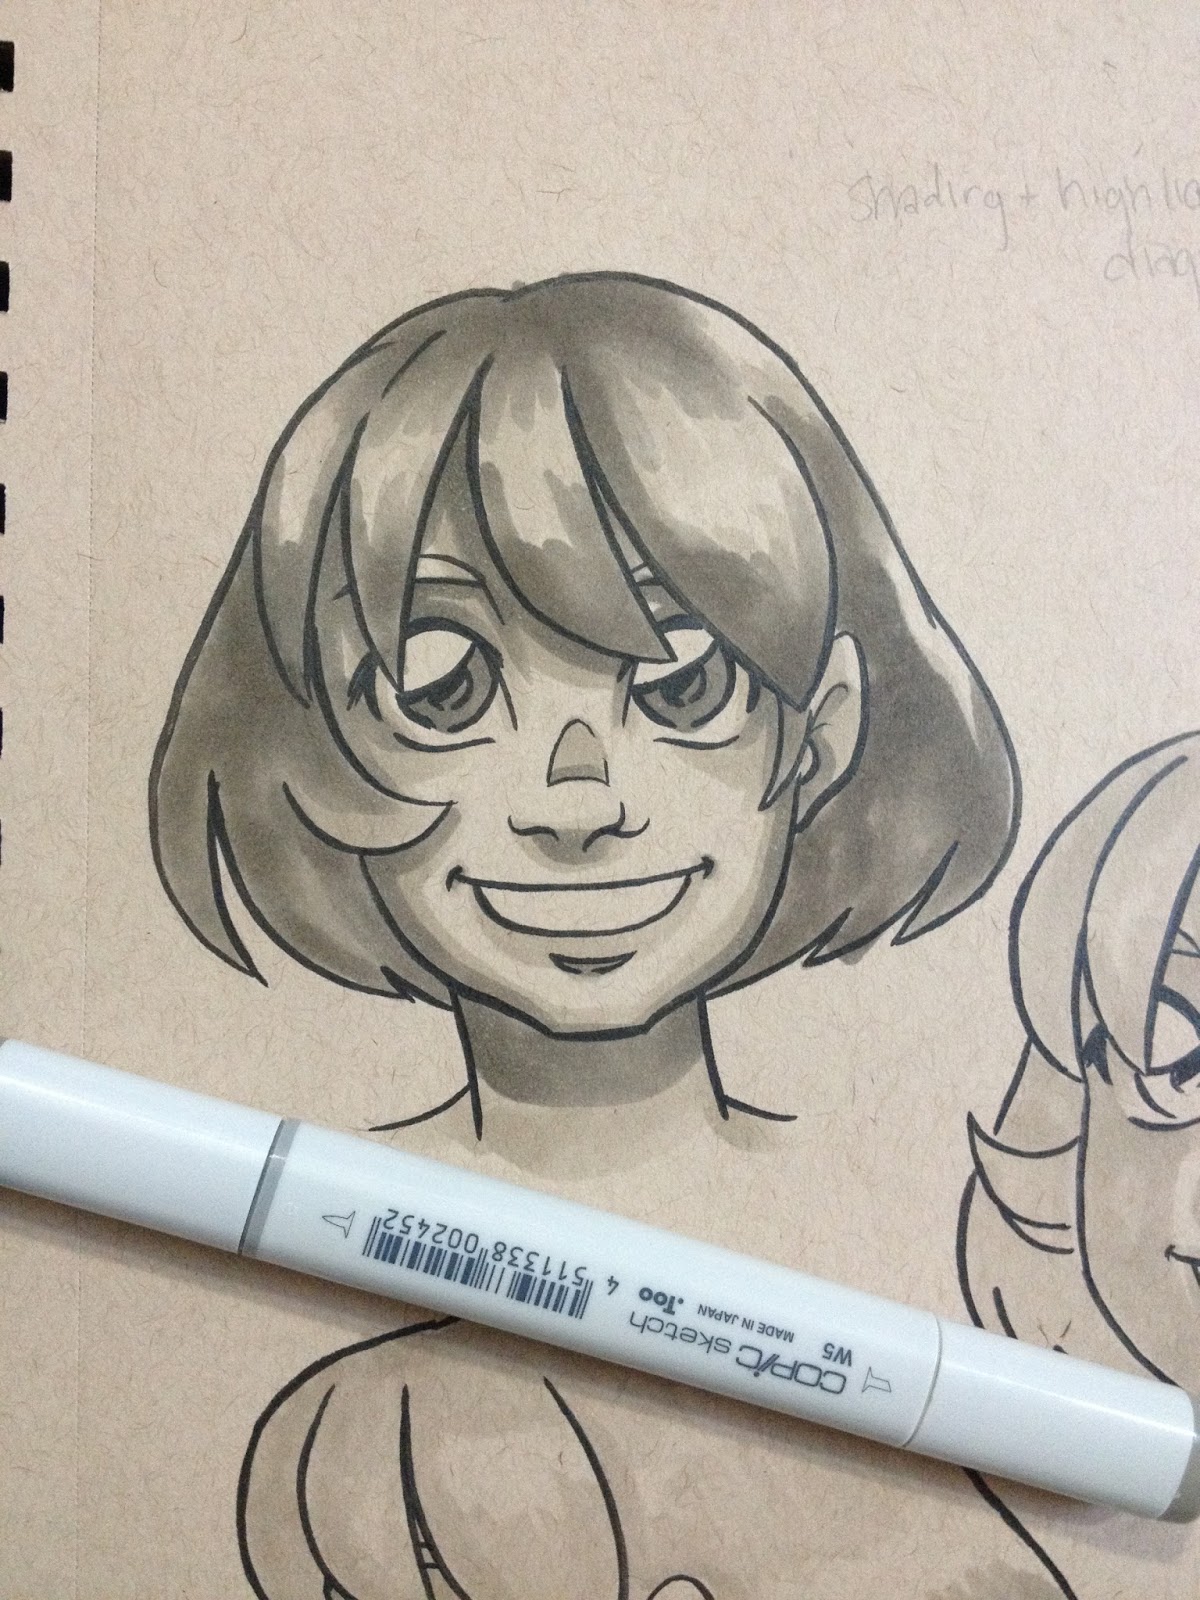
Determining where your shadows go
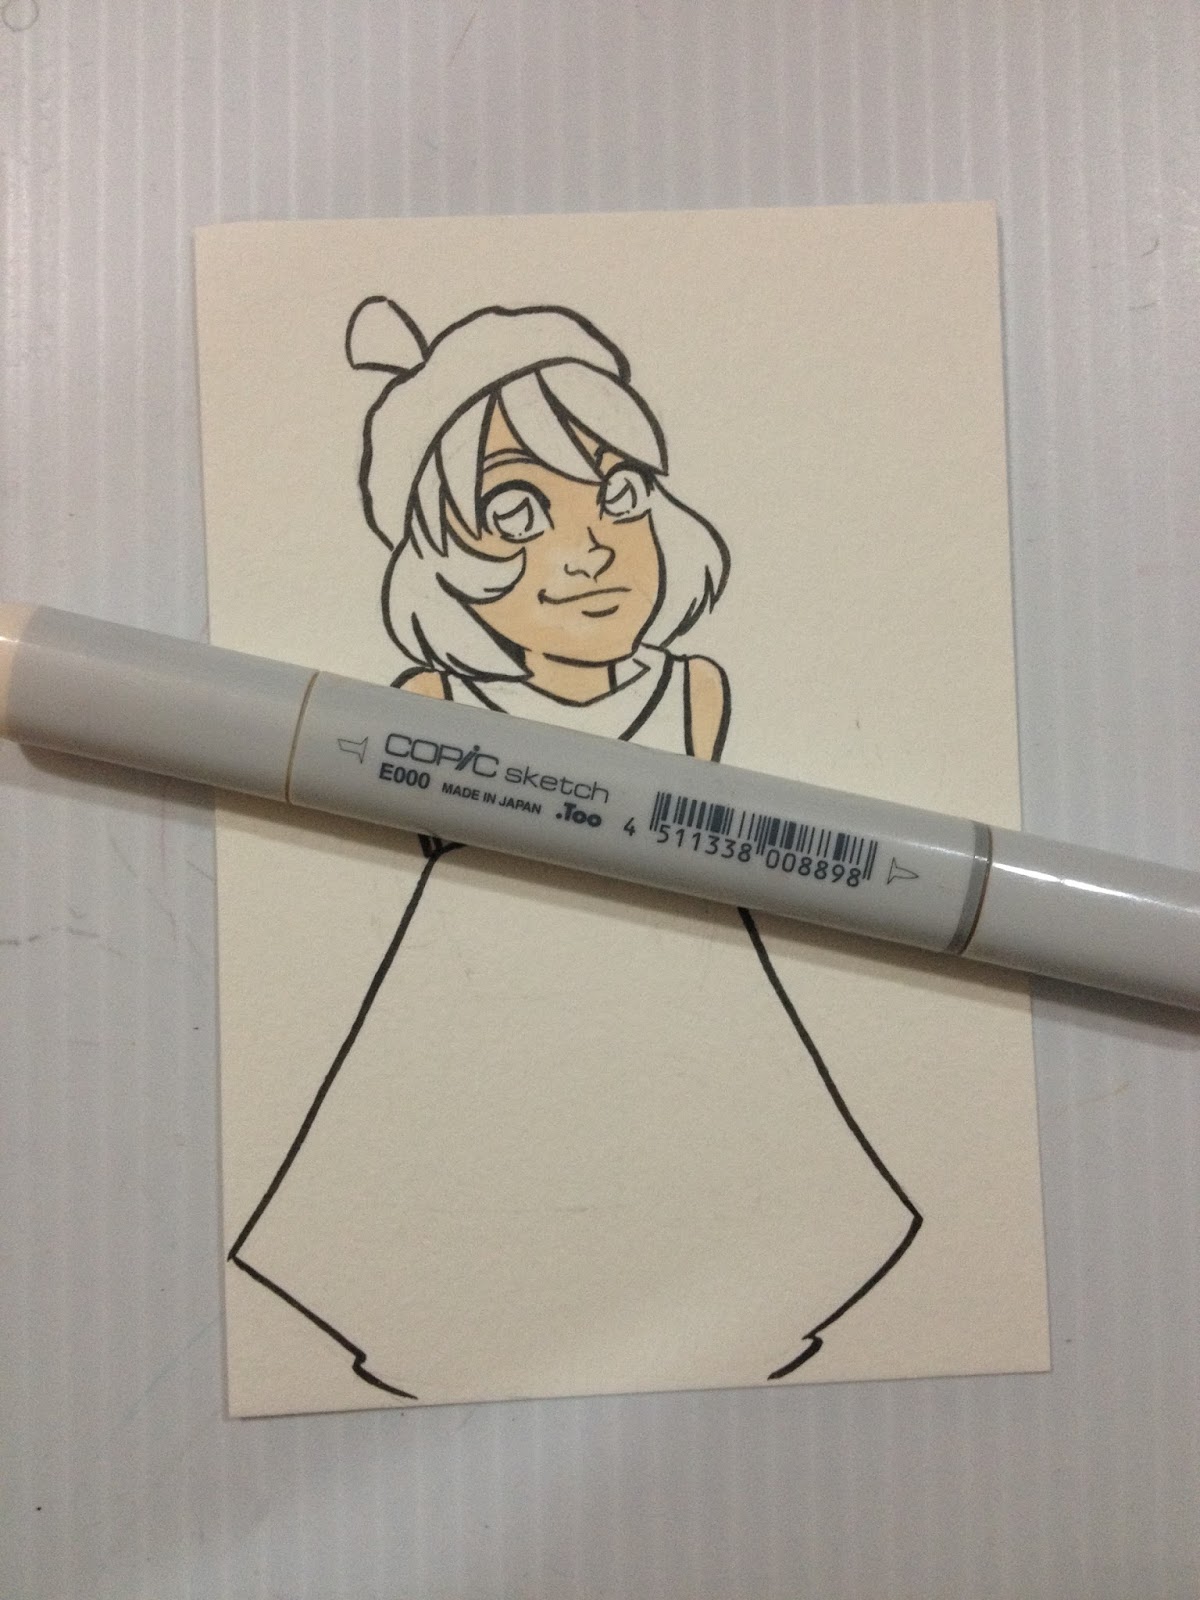
I approach shadows in layers. I'll do a base of E000 all over the skin, then lay in basic shadows with E000. I usually apply blush after this stage, lately I really enjoy a combination of Blick's Shell Pink with Copic's Tea Rose after. Shell pink is a lighter pink, and the contrast isn't so harsh. The areas in which I apply shadow with E000 are shown below in the tonal studies.
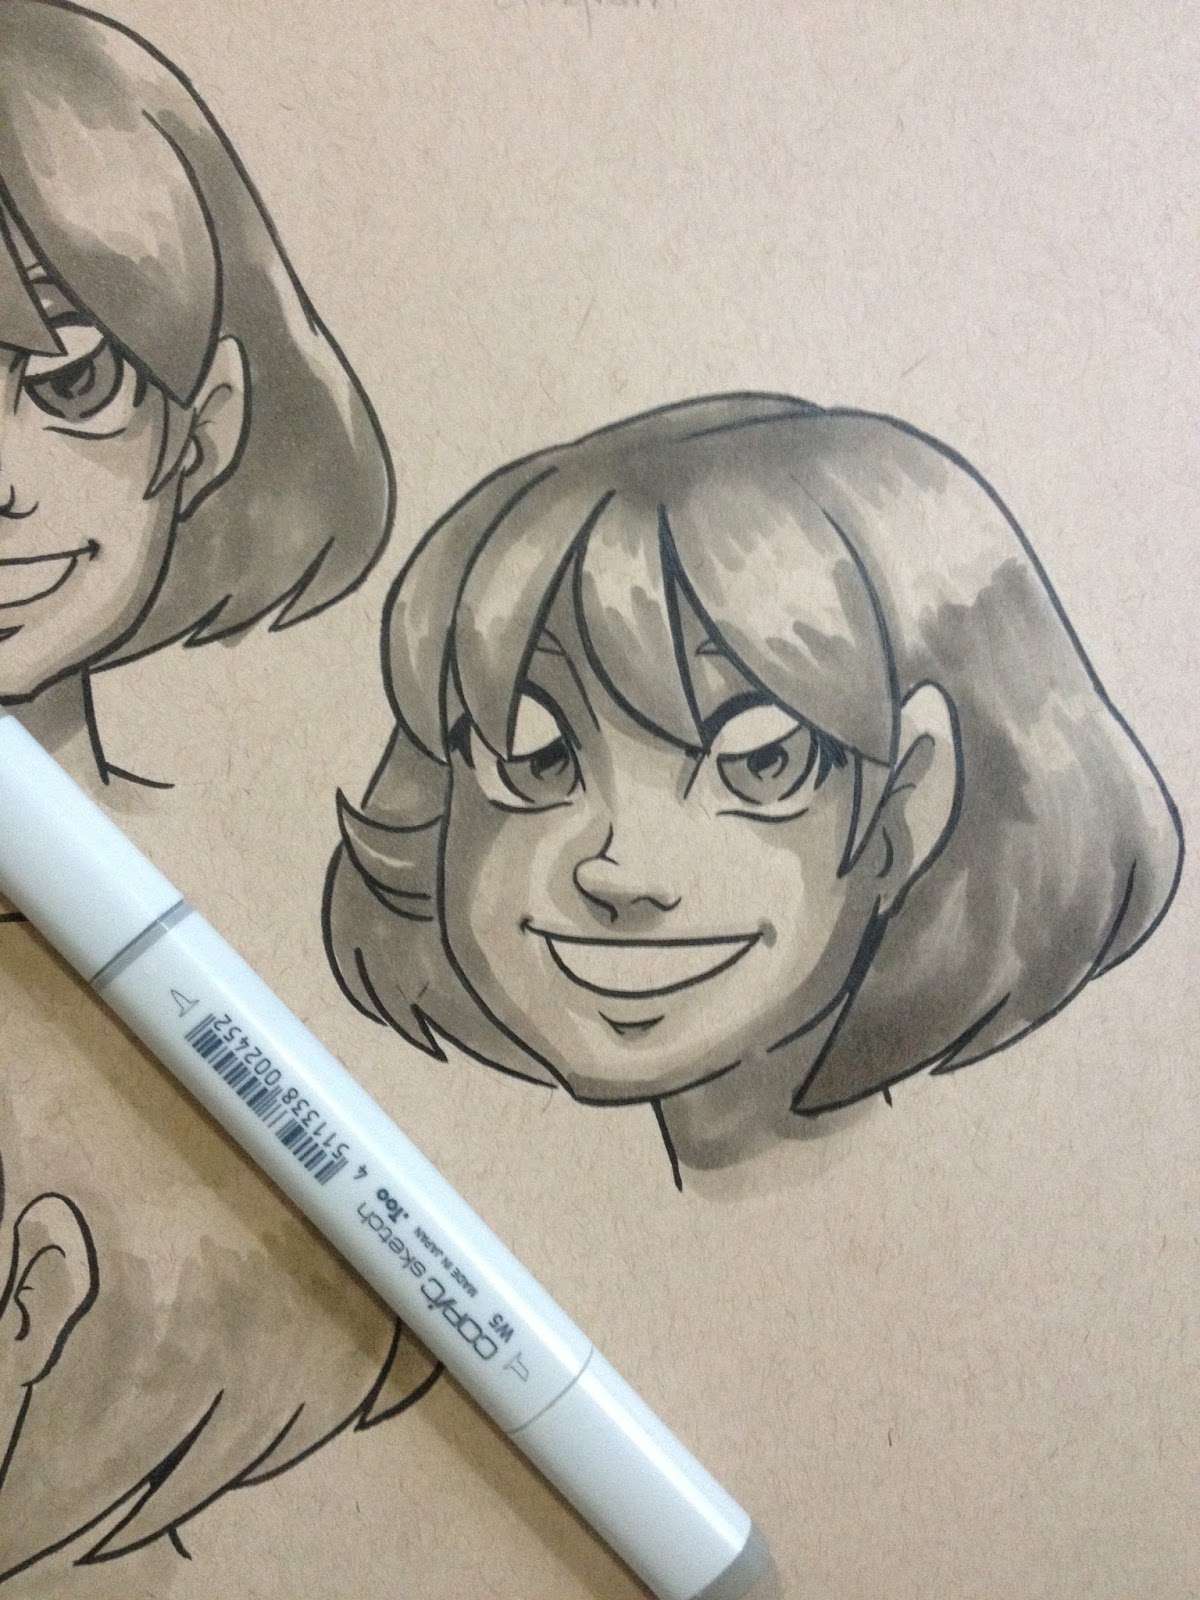
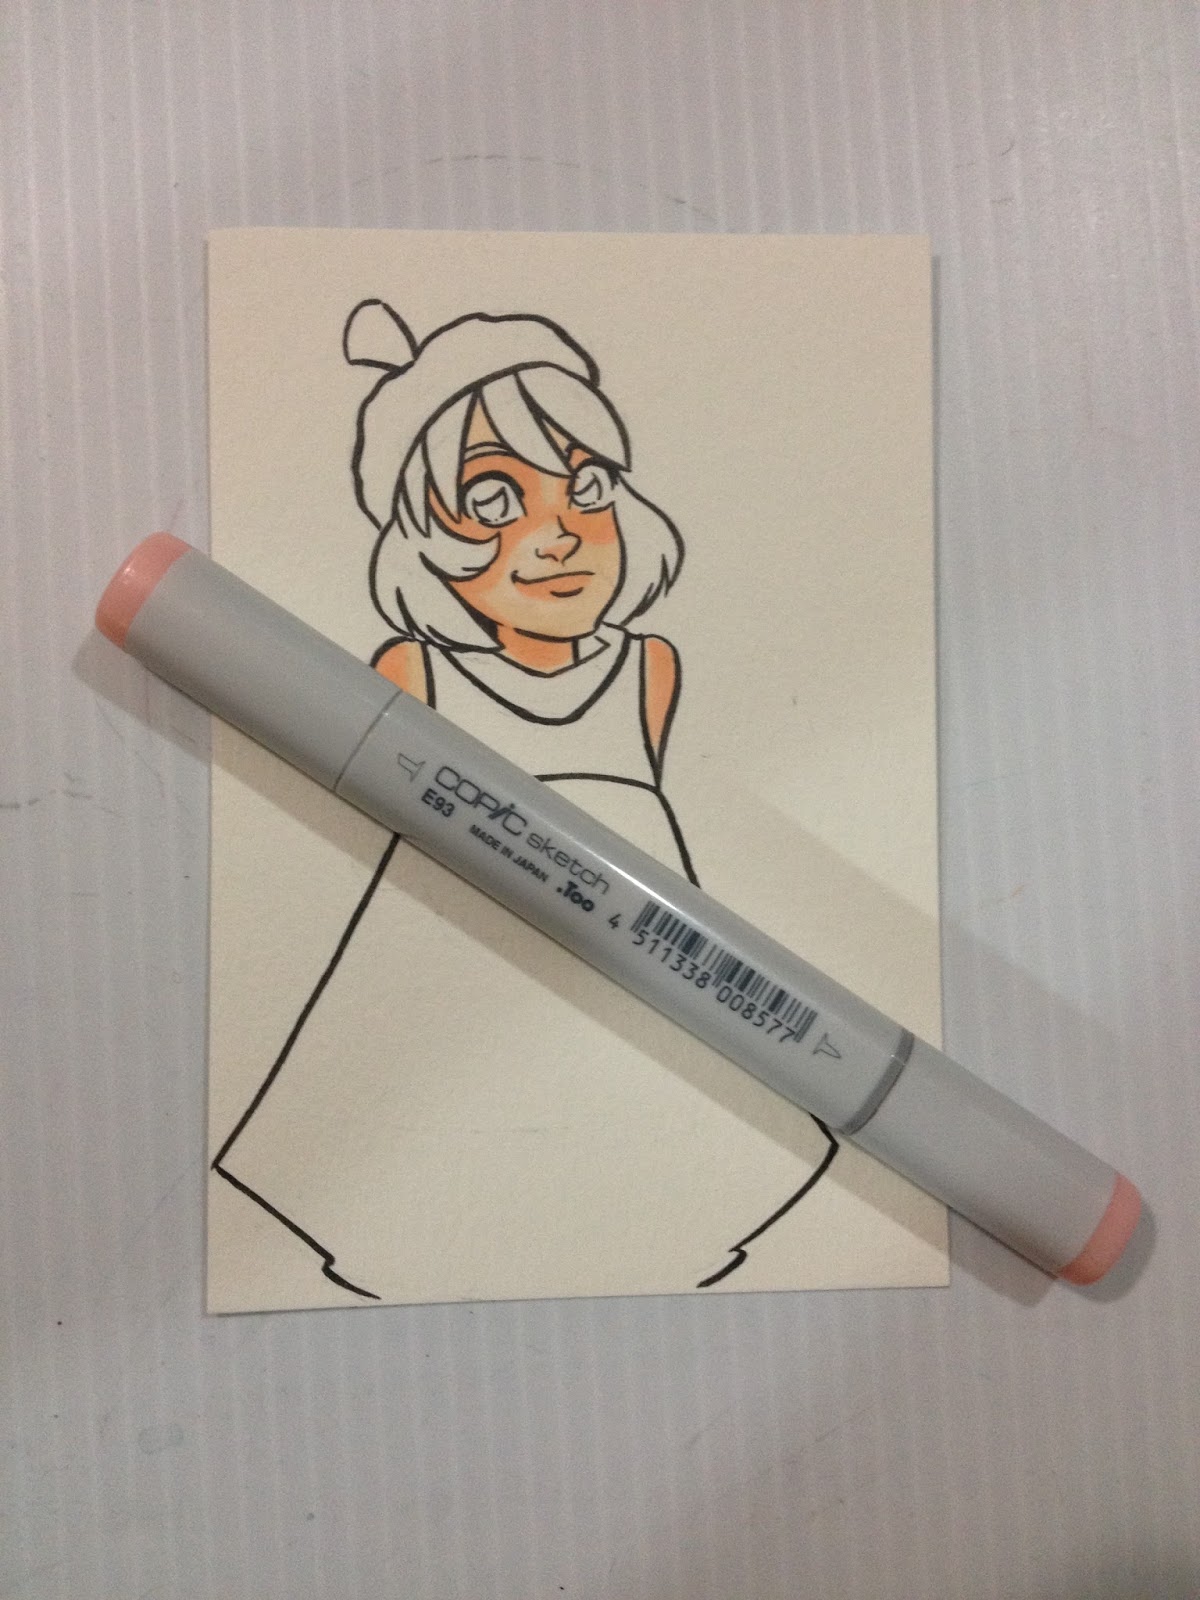
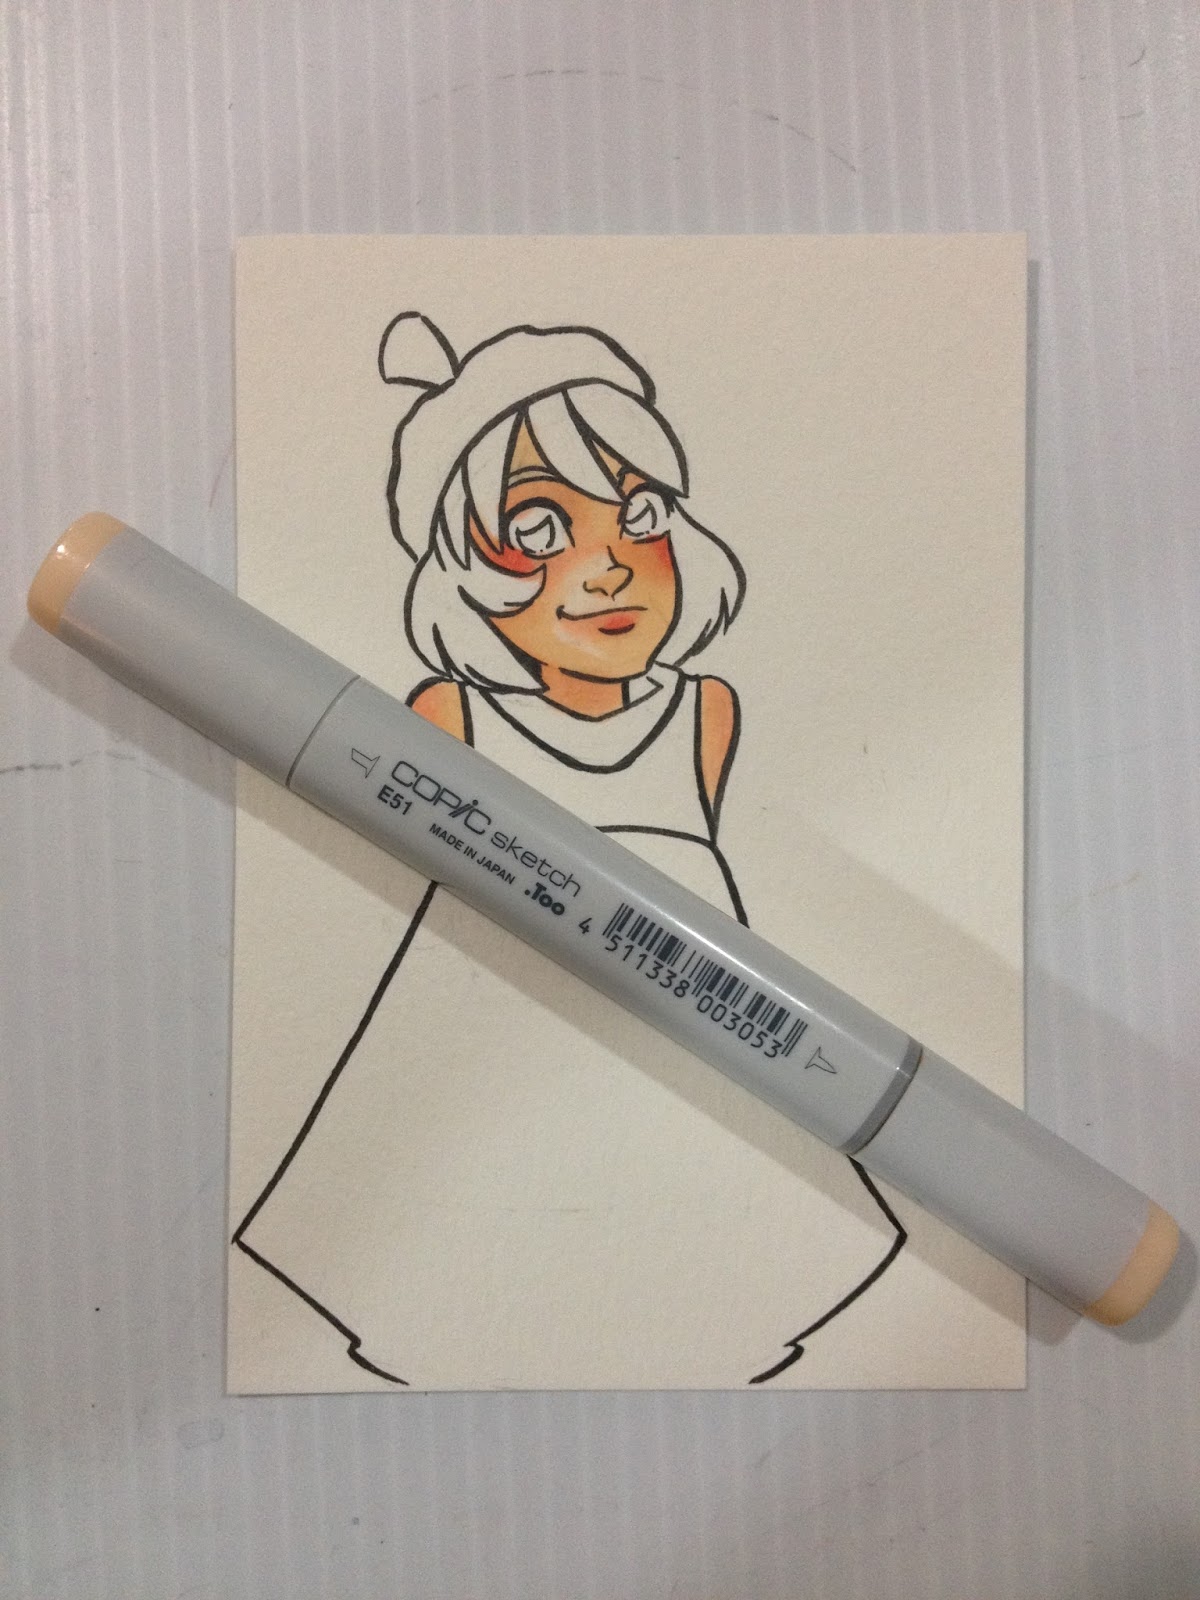
After I've applied my first round of shadows, and put in my initial applications of blush, I go in and intensify my shadows with E51, as demonstrated below with these tonal studies.

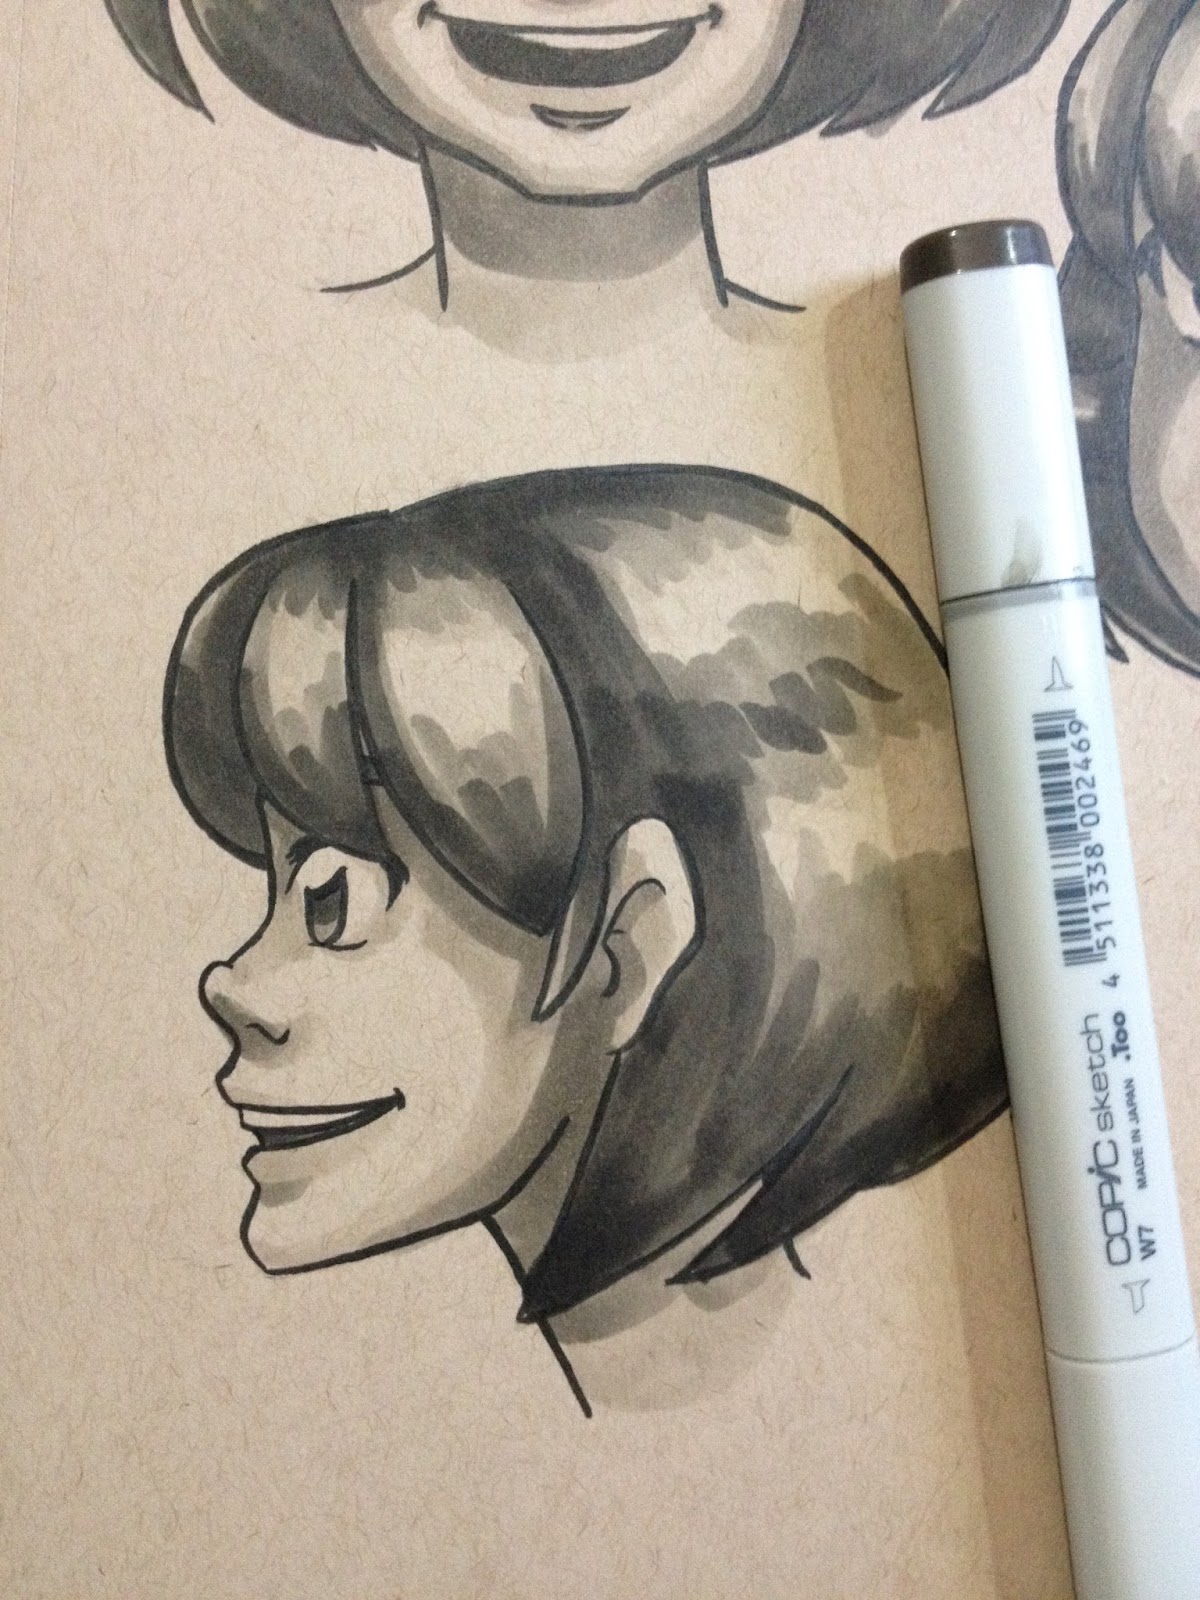
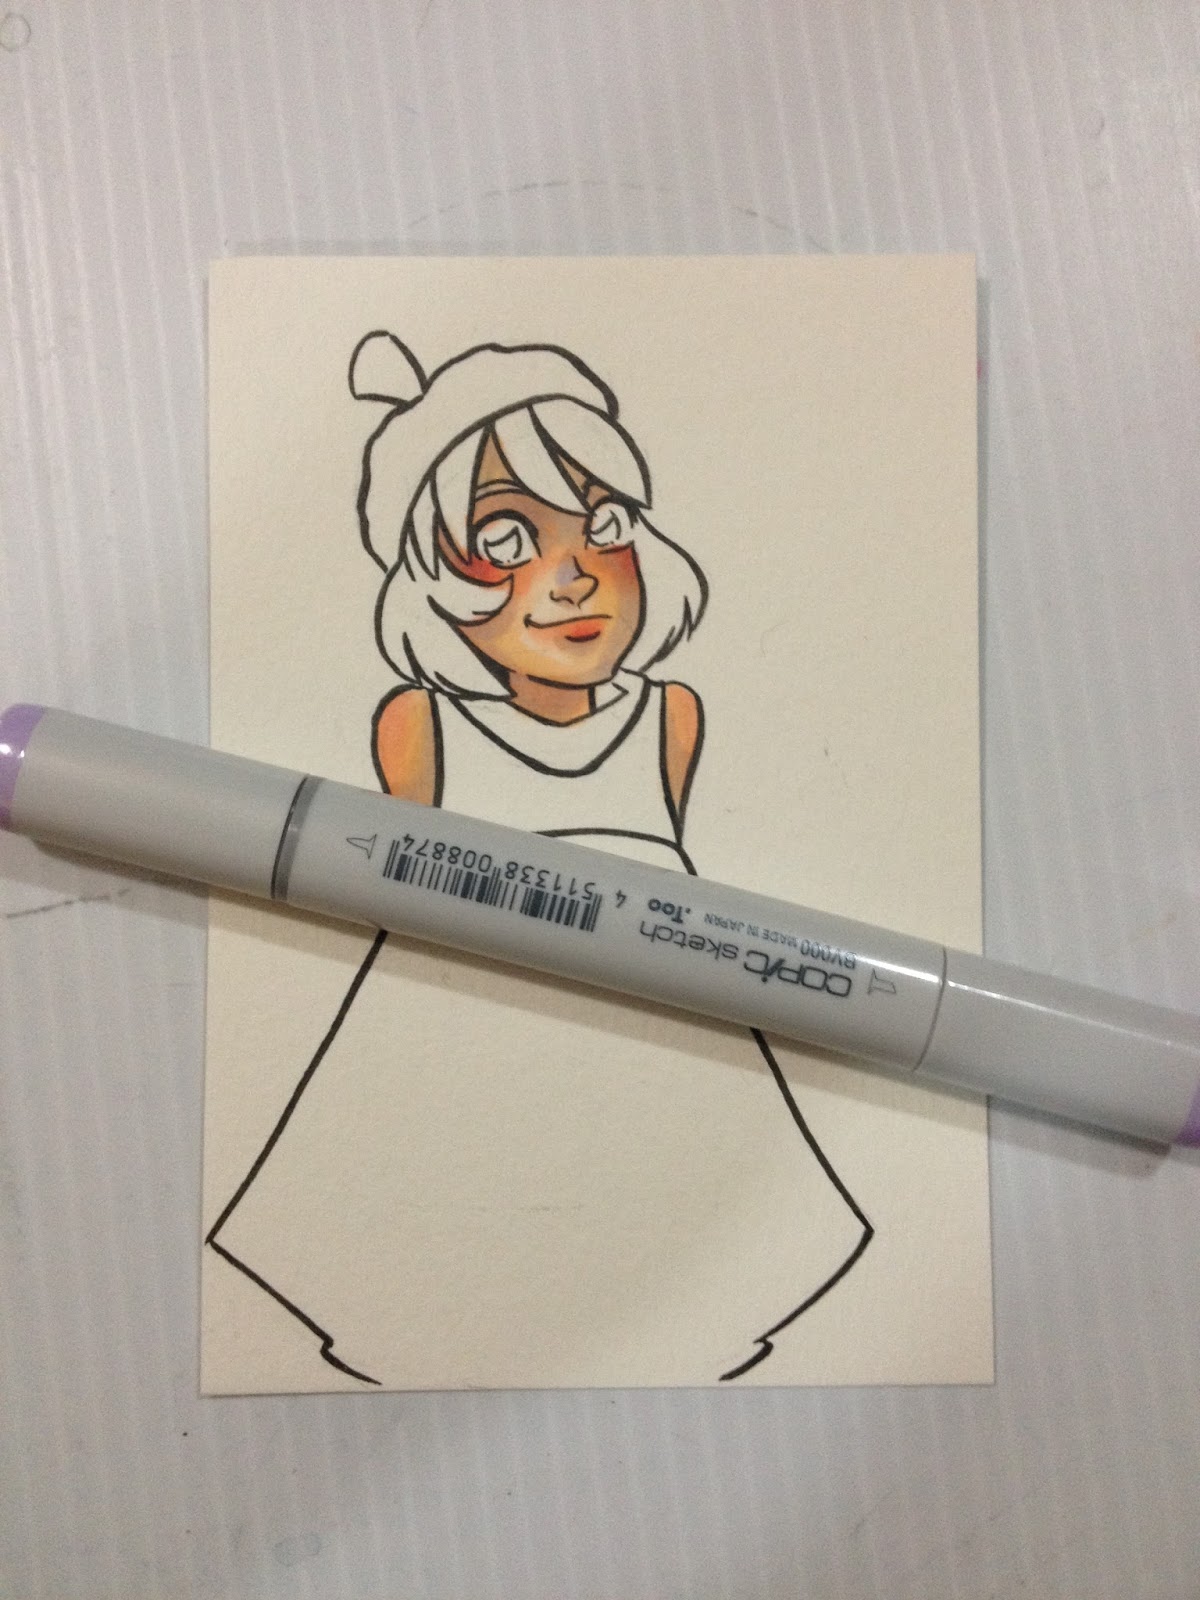
At this stage, I may add in shadows with E21, or I may put in my contrasting shadows with BV000 or BV31, depending on the image. The contrasting shadows should be applied sparingly, as they will REALLY gray out your skintone. I find they work best under bangs, inside ears, under chin, and where clothing casts shadow. If you apply a layer of E51 or E21 on top, it will warm the shadows up a little bit, but the cast shadows wont have a strong a delineation. I've demonstrated shadows put in by E21 or BV colors with the tonal study below.

For kicks and giggles, I used some opaque white media (Winsor & Newton white pigment marker) to add white highlights and make the tonal study pop.

You can use colored pencils and watercolors to stretch how far your markers go- once you've finished applying your marker color, you can add highlights, shadows, contrasting color, and details with color pencils and markers.
 Example of a Copic study from reference. Mixed media
If you really want to get better at using markers as an art medium, do studies. Do them in Copic, do them in Watercolor (many of the prinicpals of color application are the same), do them regularly from photographs and from life.
 Example of using watercolors and pencil colors with Copics. Shade was added to the mushrooms using watercolor, as watercolor tones down Copic without making it muddy. After everything was dried, white color pencil, and white color pencil were used to add the white highlights on the red caps.Color Swatching for Reference
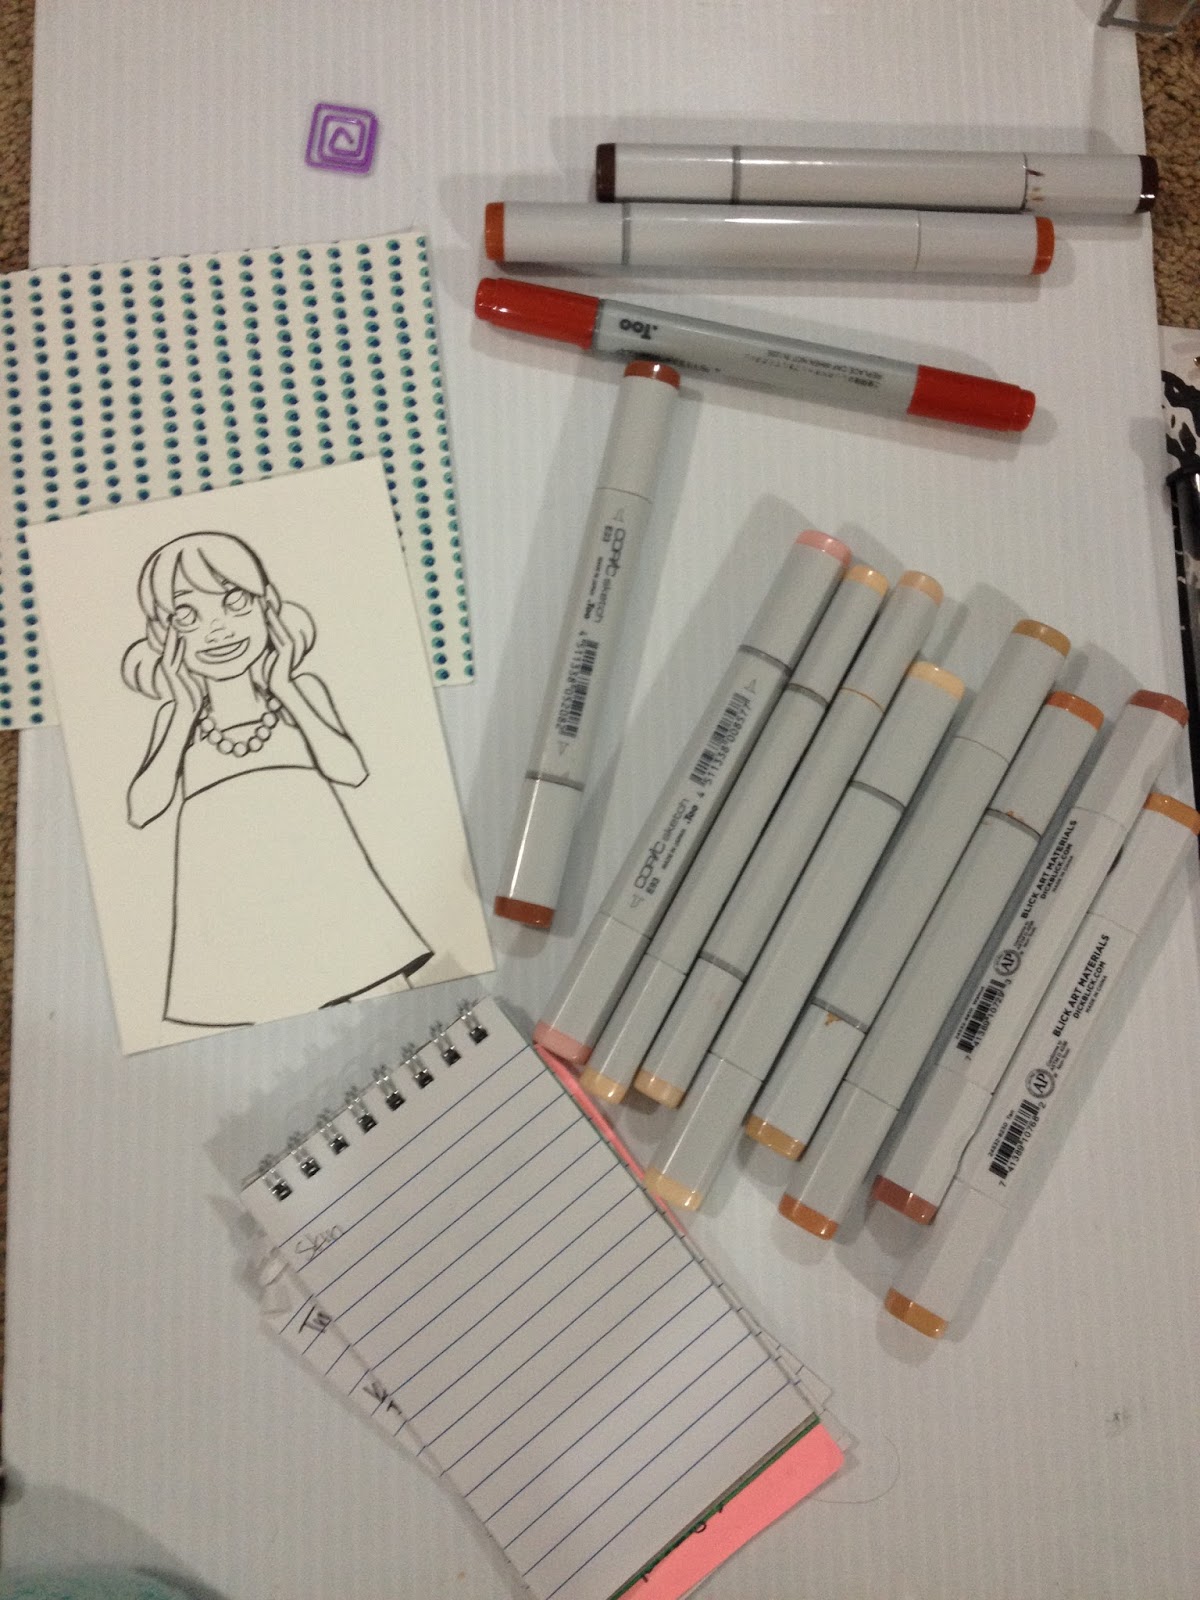
I've found that it helps to make swatches of all the possible colors I want to use and then cross out the ones that won't work, and number the ones I think will in order that I want to use them. If you find yourself using the same colors over and over (for skintones, hair, animals), consider tacking up those cheat sheets for quick reference. Although Copic's color chips are A LOT more reliable than most other brands, they are still not 100% accurate, so it's wise to make swatches before you risk ruining something, especially if you're trying to do color matching.
Step 1: Select all possible markers you might use for the piece.

Step 2: Swatch on the paper, and make sure you note the color numbers.

Step 3: Number in order of use.

Step 4: Final Piece

Selecting A Paper for Your Illustration
For many layers of color, subtle gradient changes:
You want something thick that will absorb your ink. Good choices include uncoated cardstock, wood pulp based watercolor paper (both hot and cold press, but not rough), and smooth or plate bristol. These dense fibers will hold the ink and keep it wet longer, so this is perfect if you really like smooth blends, but tends to make fine details feather out. This tutorial uses watercolor paper that has been inked with a Copic-proof Sailor Mitsuo Aida. This is my preferred paper for marker illustrations.
For clean, sharp changes in color, few layers, striking special effects with alcohol and colorless blender:
Coated, thinner, non-absorbive papers like tracing paper, Copic papers, and marker paper in general are good if you want more dramatic transitions, or enjoy putting in lots of fine detail, or like special effects. On coated papers, the ink will sit on top of the paper rather than soaking in, and is easily reactivated. Tracing paper is also a very viable option, especially if you want to add color to a sketch, but can't add it to the original due to correction fluid, or sketching materials.
My favorite colors for Caucasian skin:
E000
E51
E21
E34
E13
Freckles:
E34
E13
E23
You can get these colors below, and help support this blog!
Amazon.com Widgets
How I Color Kara's Skin

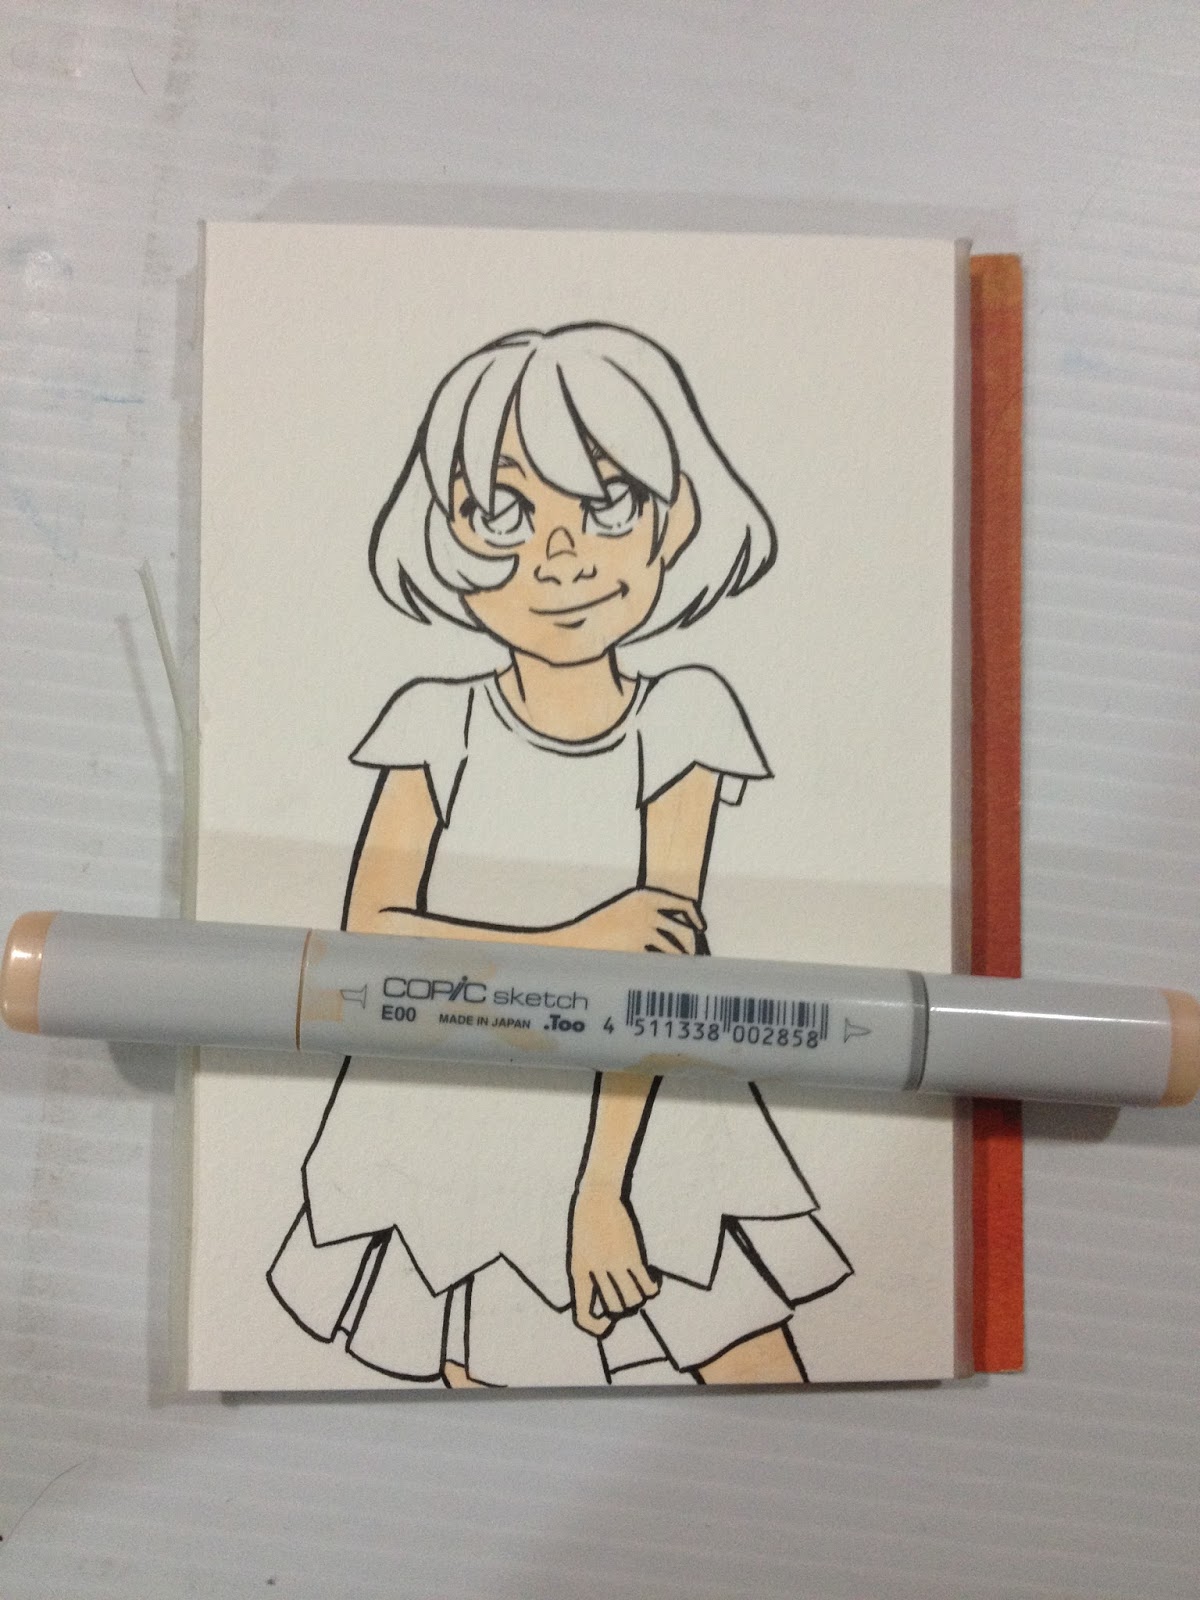
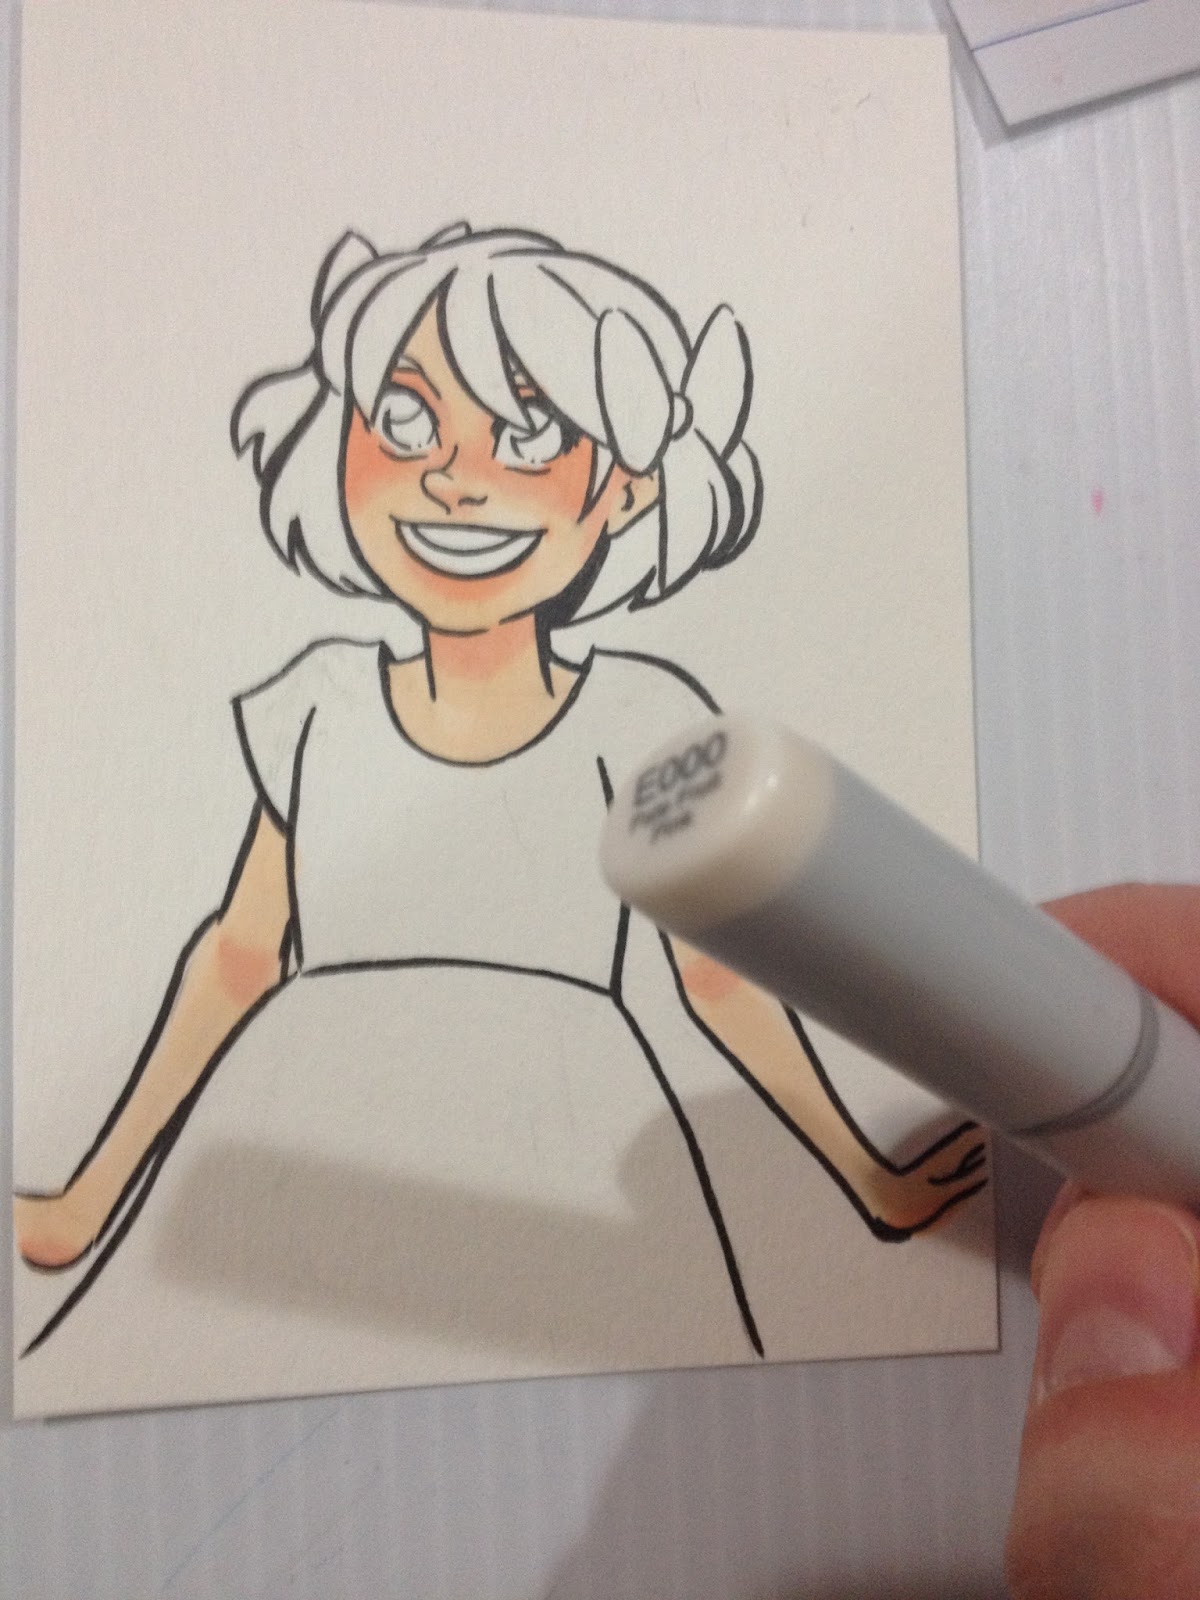
I apply an all over base layer of E00- Milky White. Aplying a base layer means that your subsequent layers won't have streaking, because you've primed the paper. It also helps facilitate blending between all layers. If you prefer strong, sharp shadows, allow your paper to dry for 5-10 minutes before applying that color.

I mark in my first round of shadows in E00 as well- from under the bangs to the bump in Kara's nose, the sides of her face, under her lip, her neck, upper arms (in this example), lower side of Kara's forearms, tops of leg.


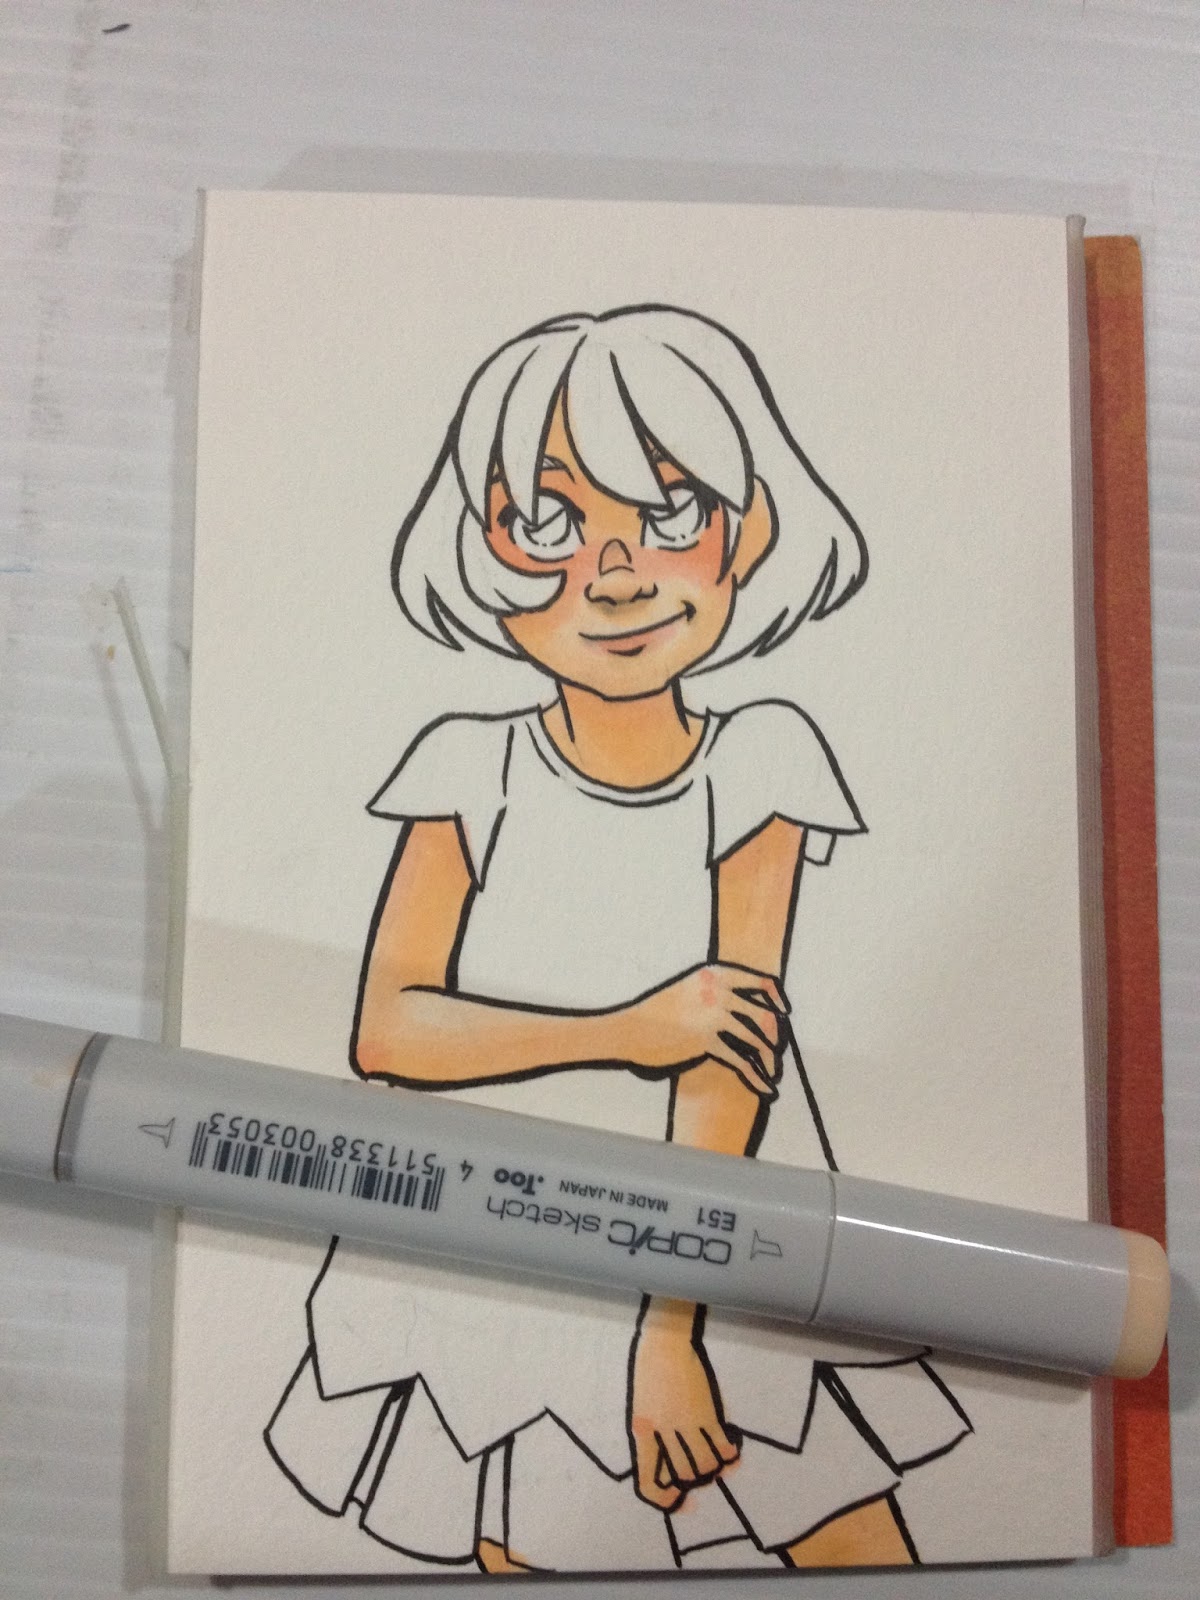
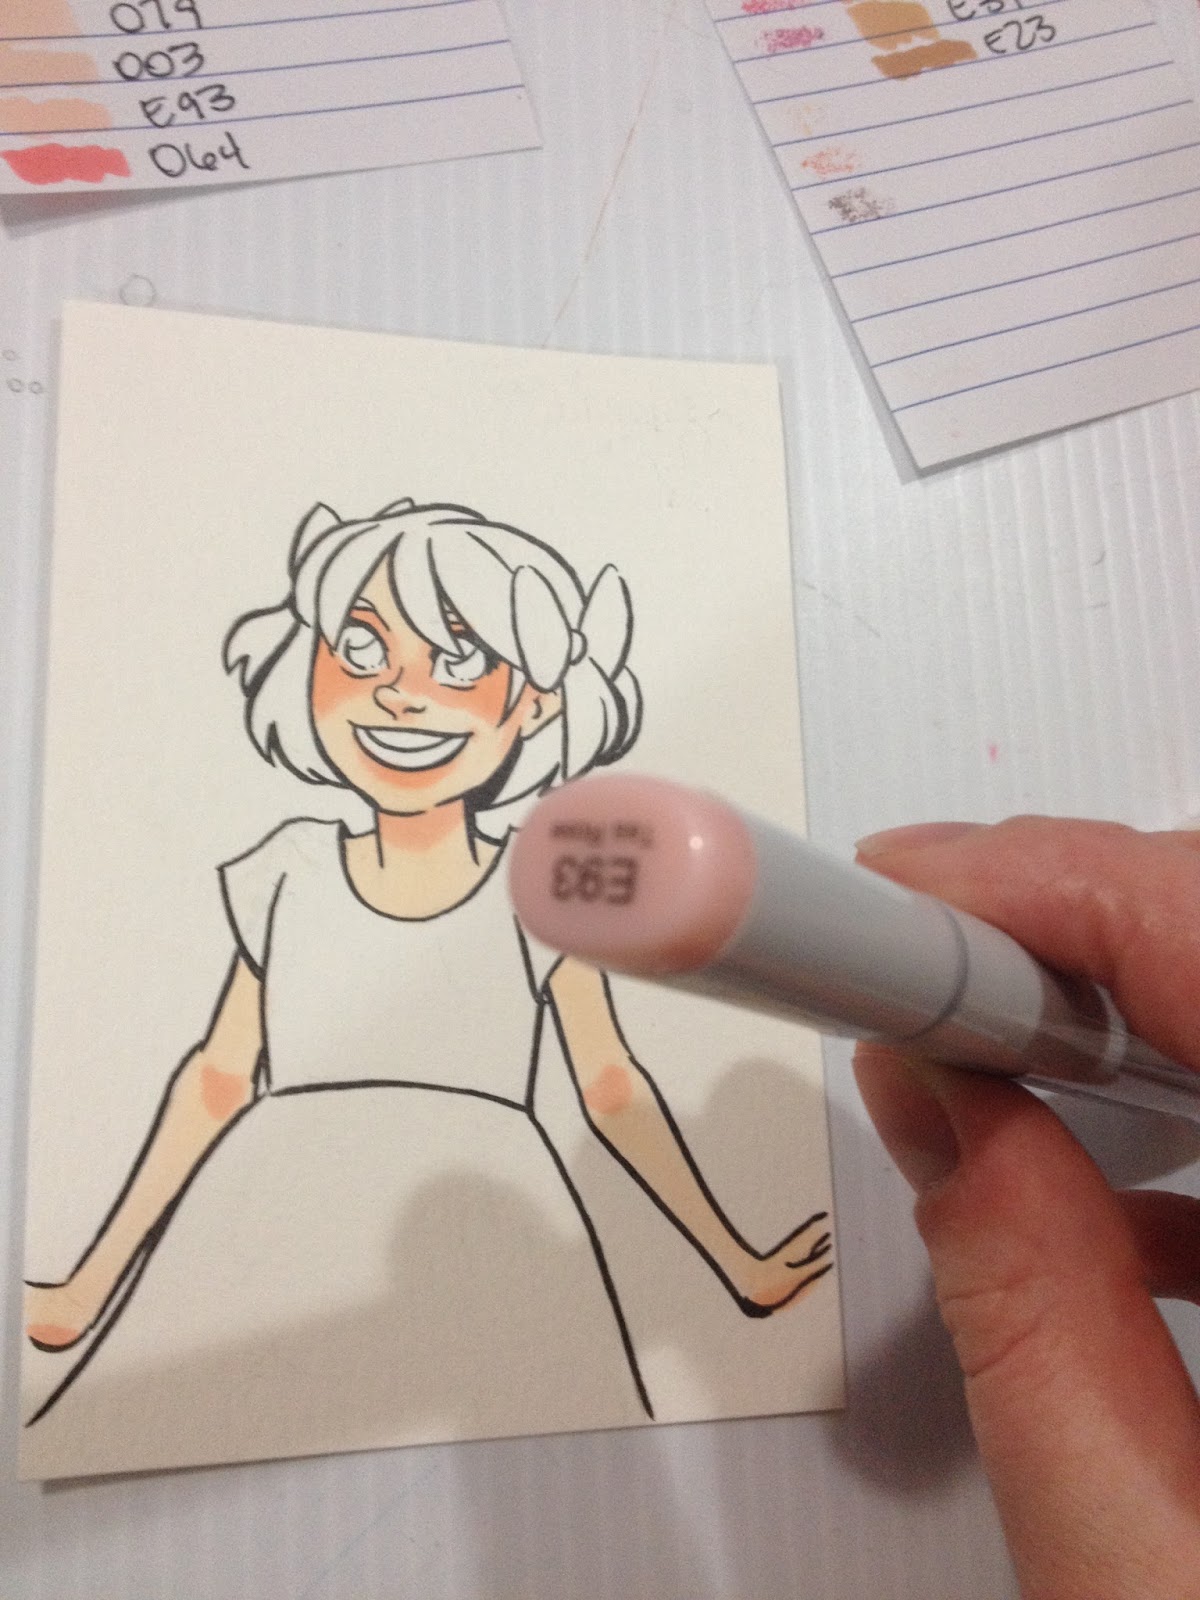
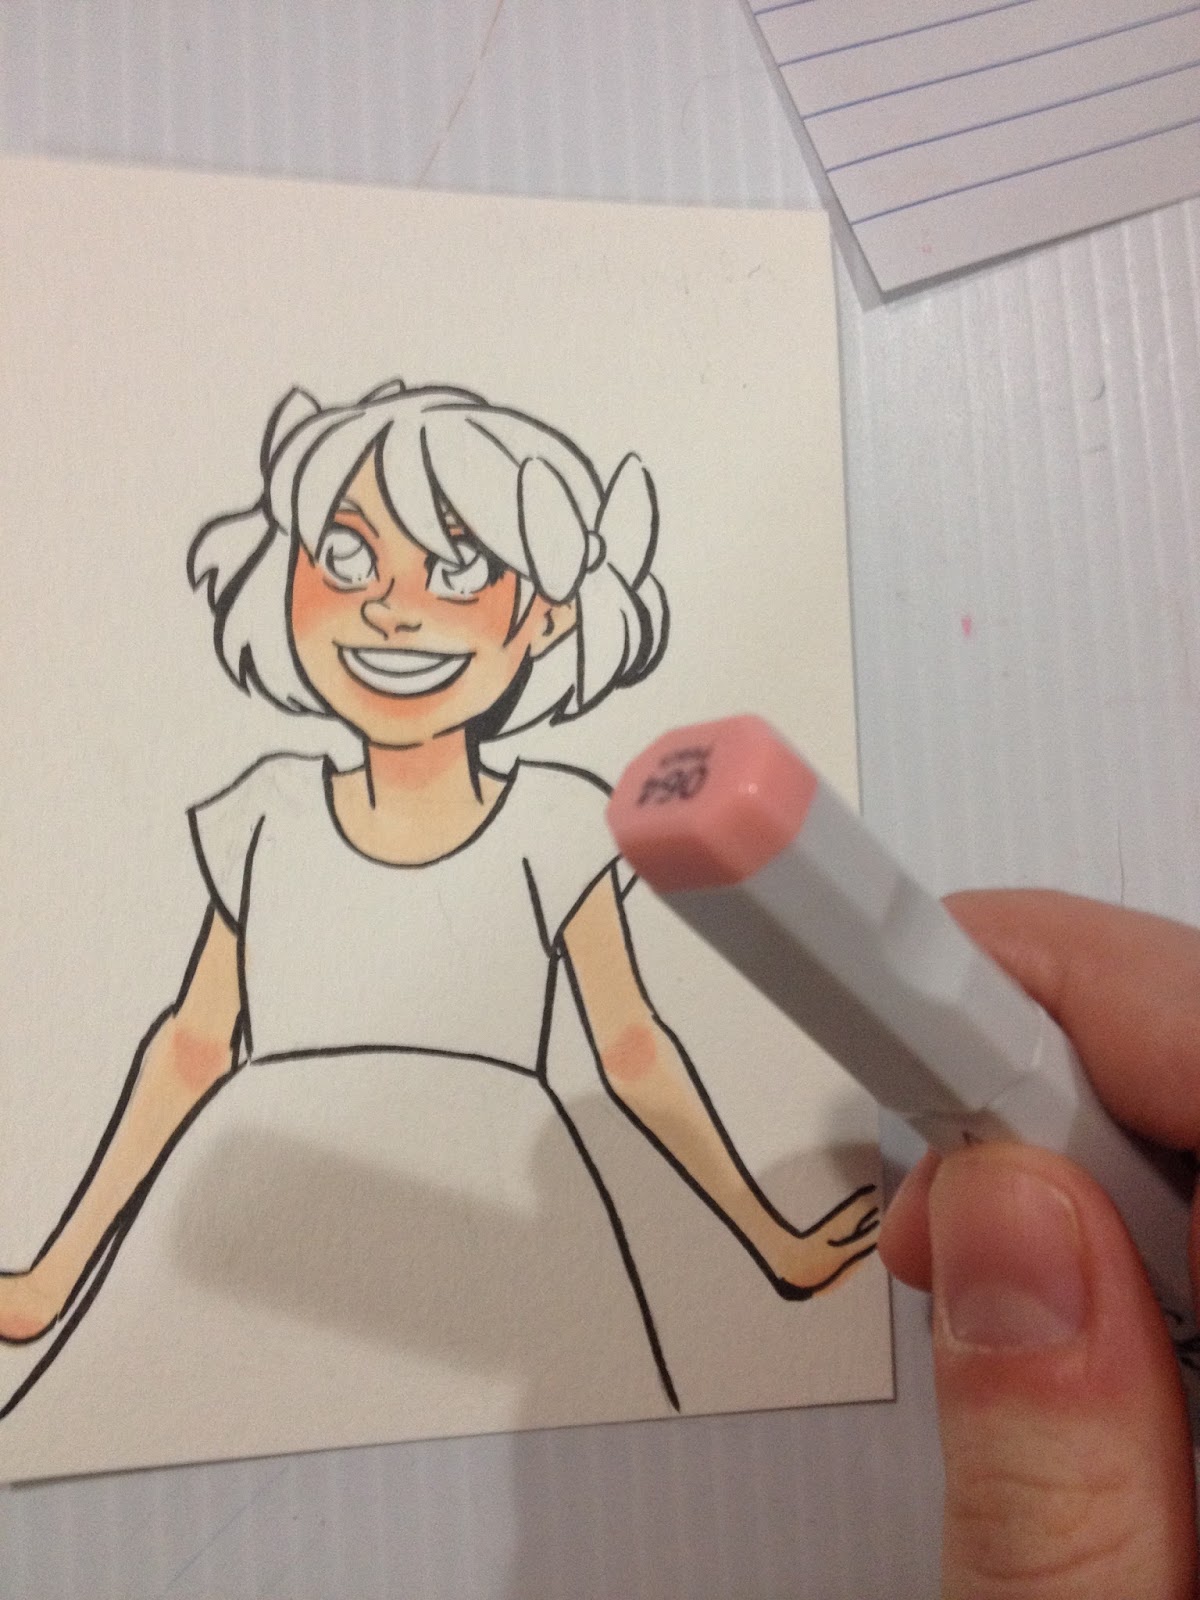
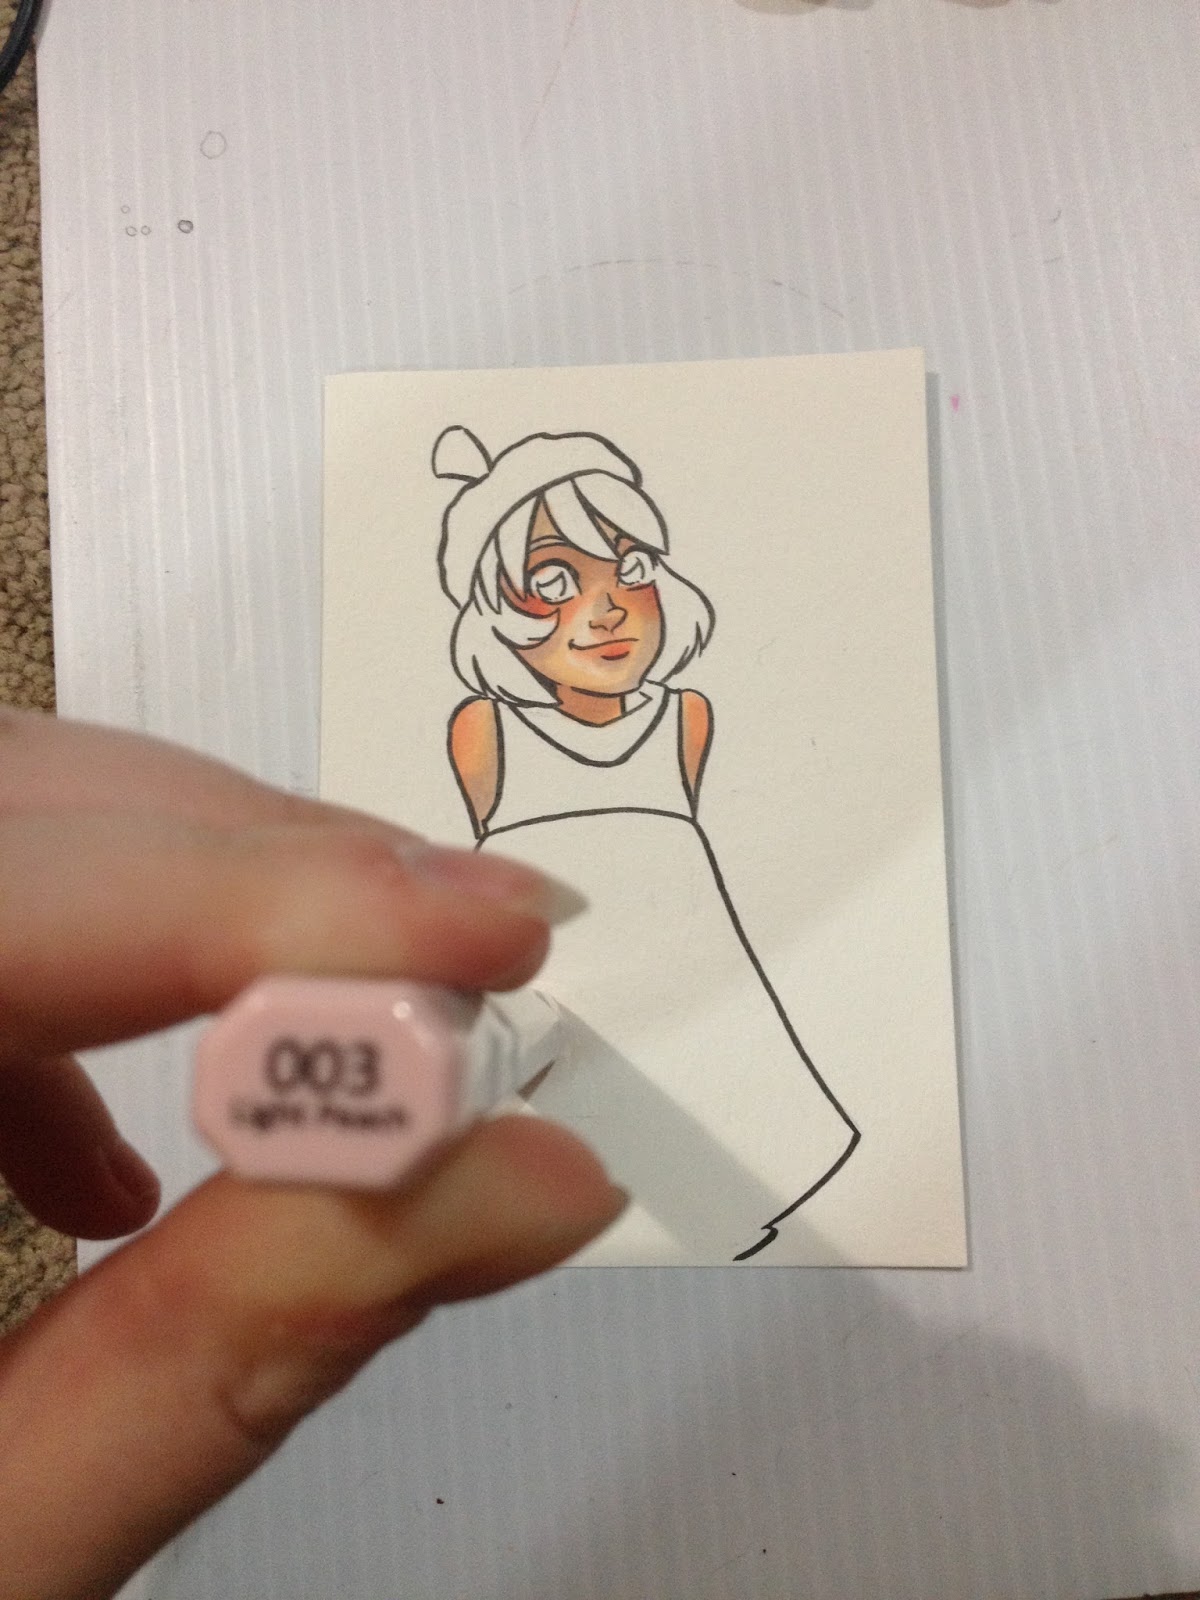
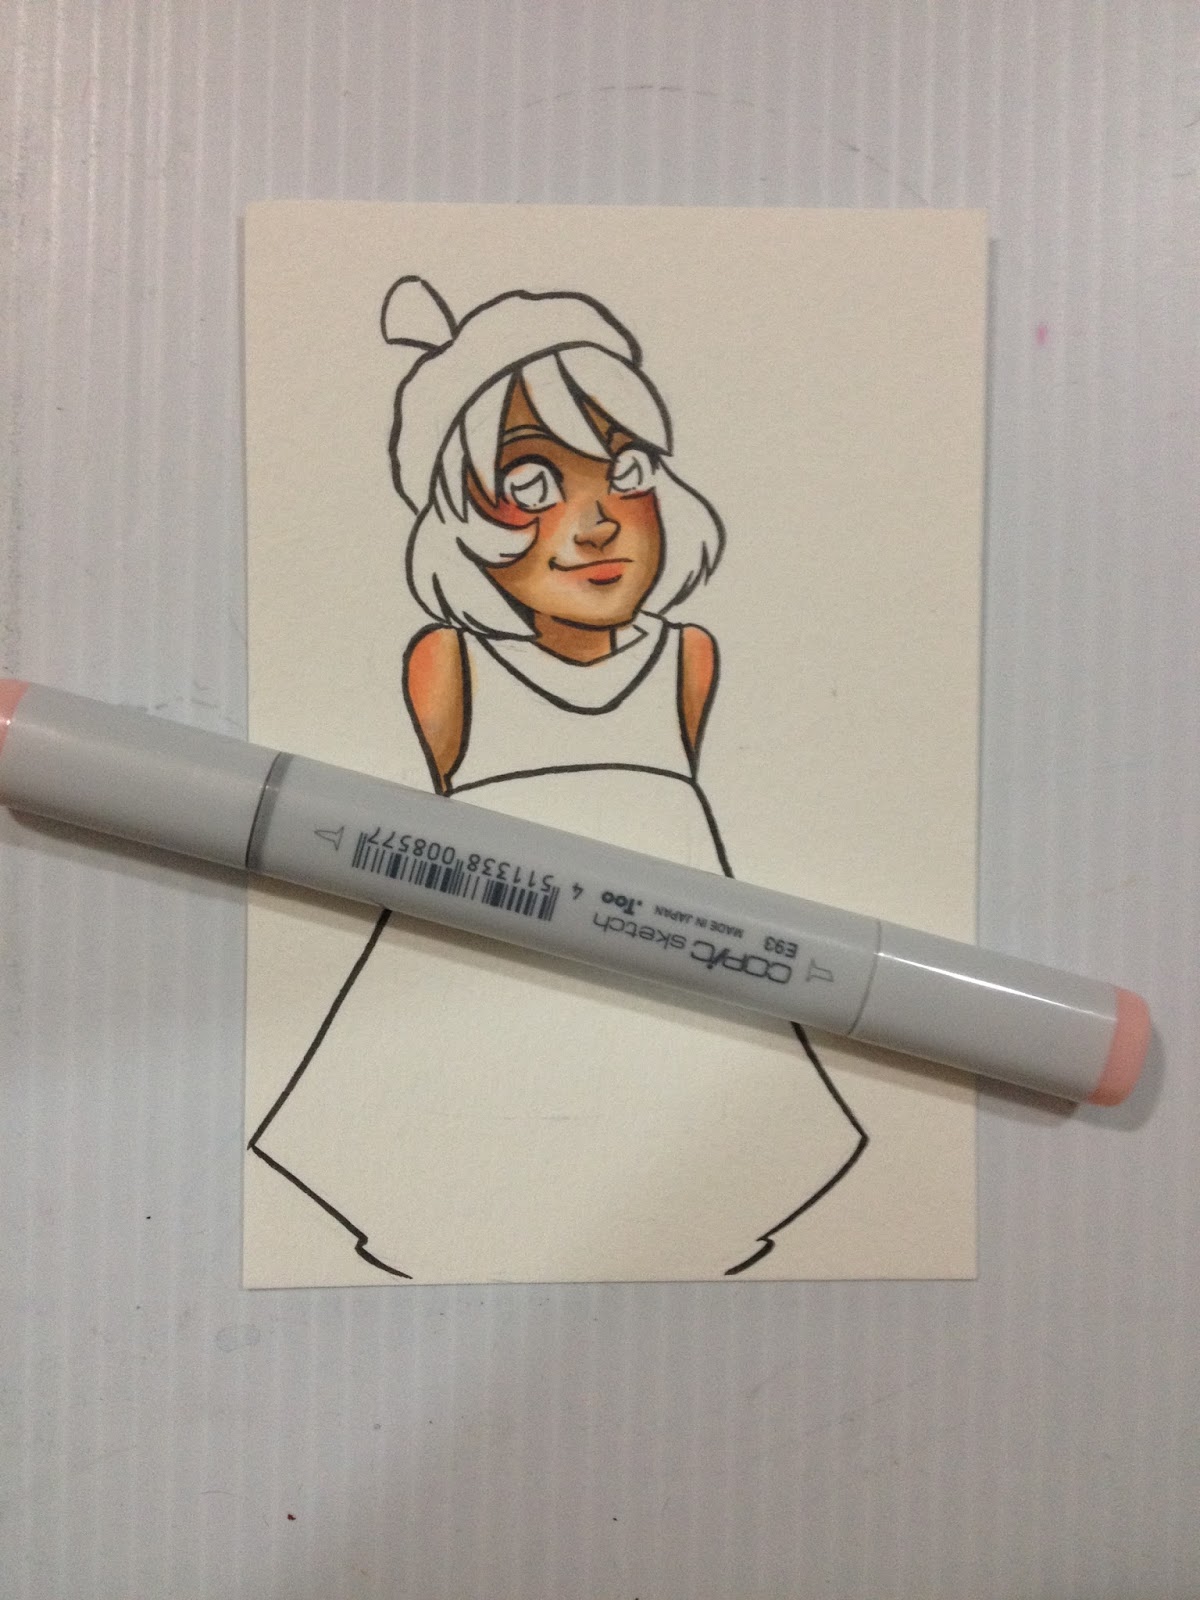
I use Blick Studio's Shell Pink to block in blush- Kara's cheeks and across the bridge of her nose, above her eyelids, the underside of her nose, lips, under her chin, elbows, knuckles. I darken this up a bit with Copic's E93- Tea Rose.

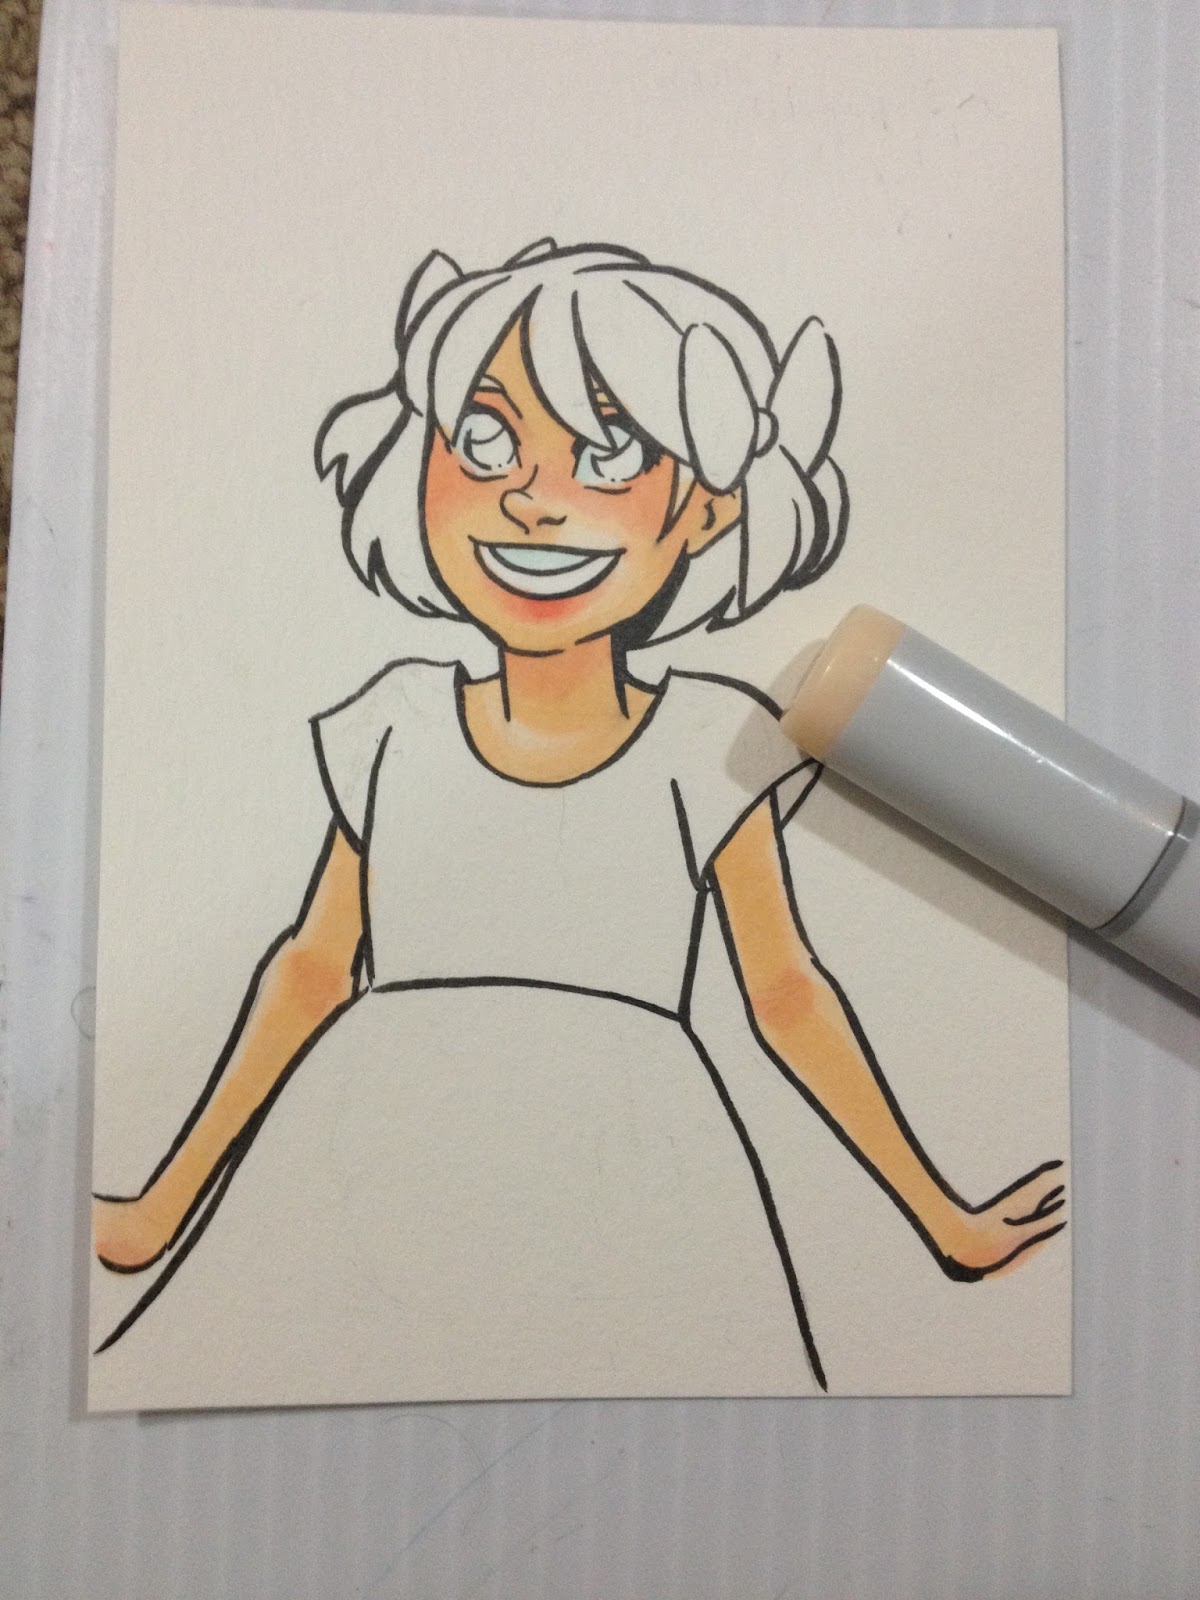
Once I've made the skin's shadows as dark as I can with the E00, I switch to E51- Milky White, to continue to darken my shadows. I mostly just intensify the shadows already put down with E00.
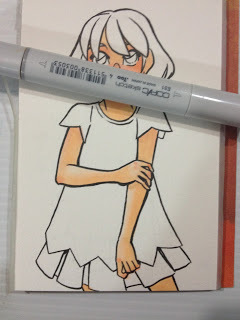

As you can see, underneath Kara's nose, the Mitsuo Aida ink smeared a bit. This is unusual- I was very careful to erase all graphite, I allowed the ink to cure fully overnight, and my marker is nice and juicy.
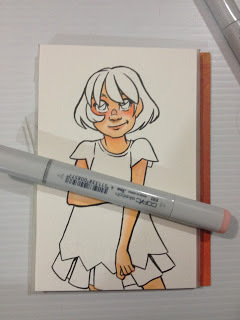
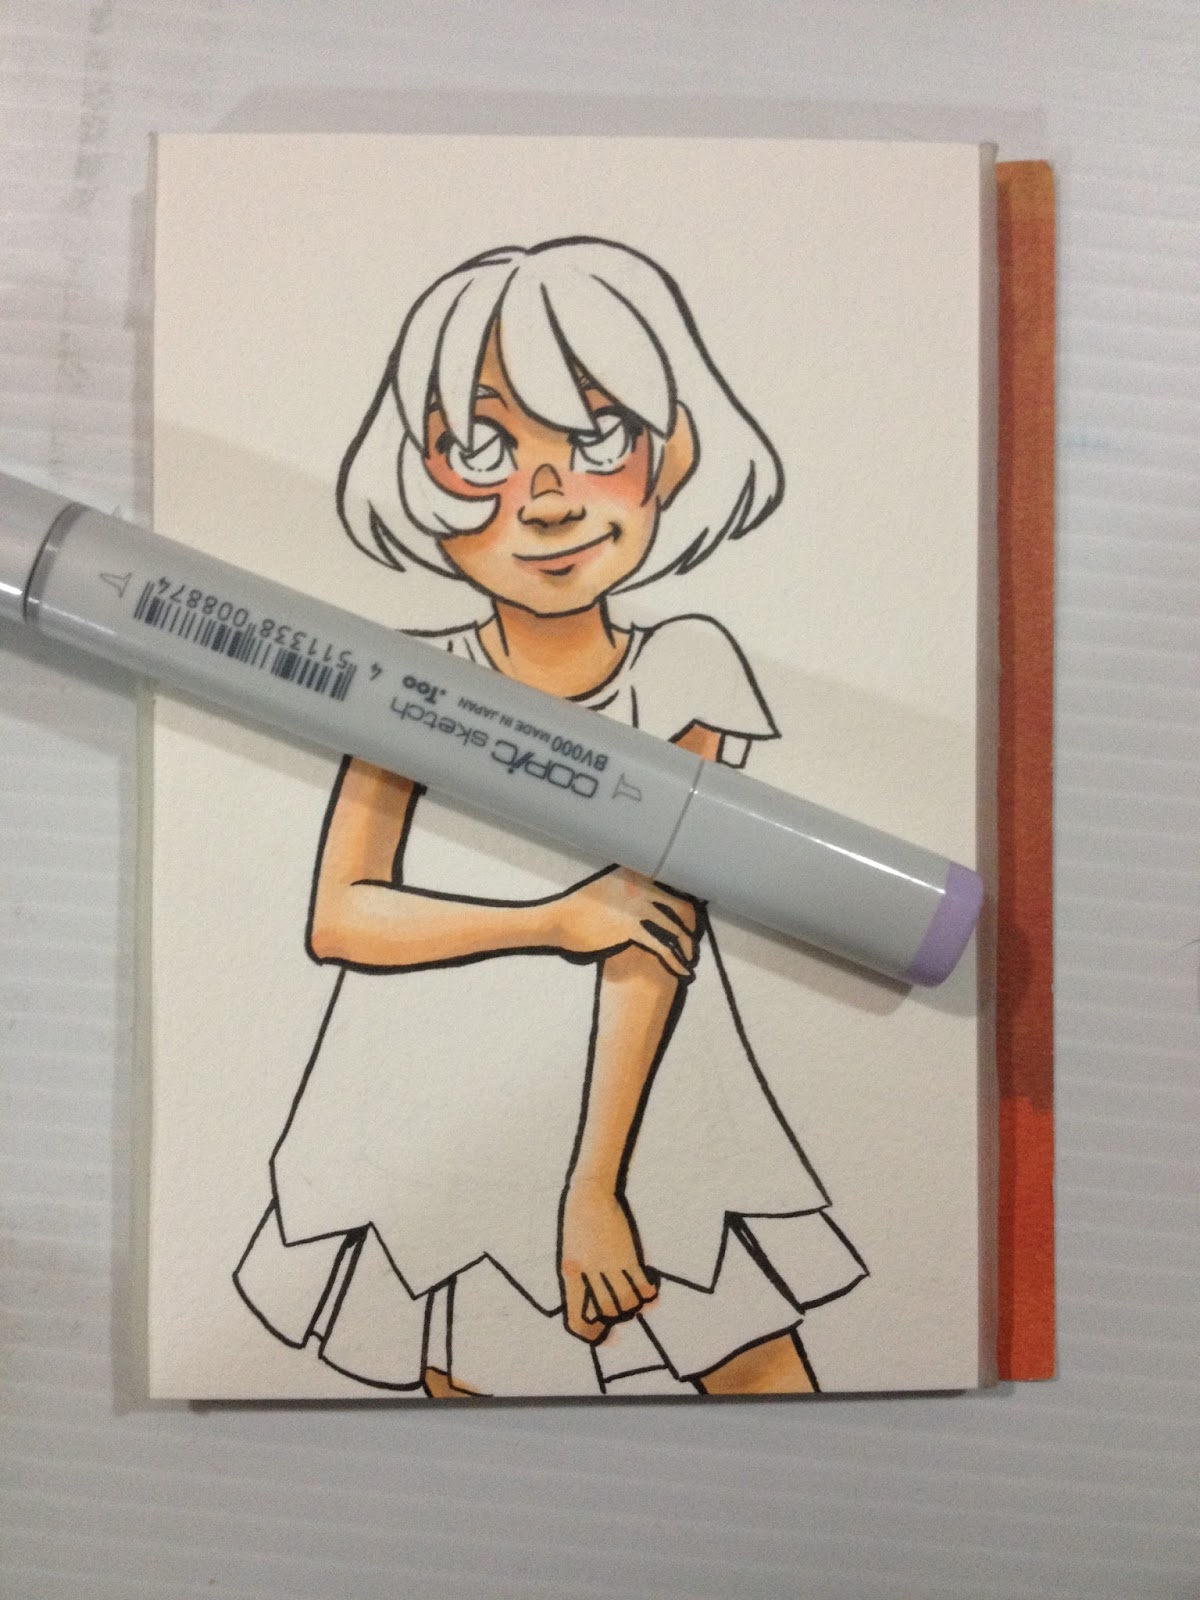
The last color I really rely on for skin toned shadows is E21- Baby Skin Pink, and I use it fairly sparingly- where direct shadows would be cast. In this example, under Kara's chin, under her bangs, under her skirt and her sleeves.

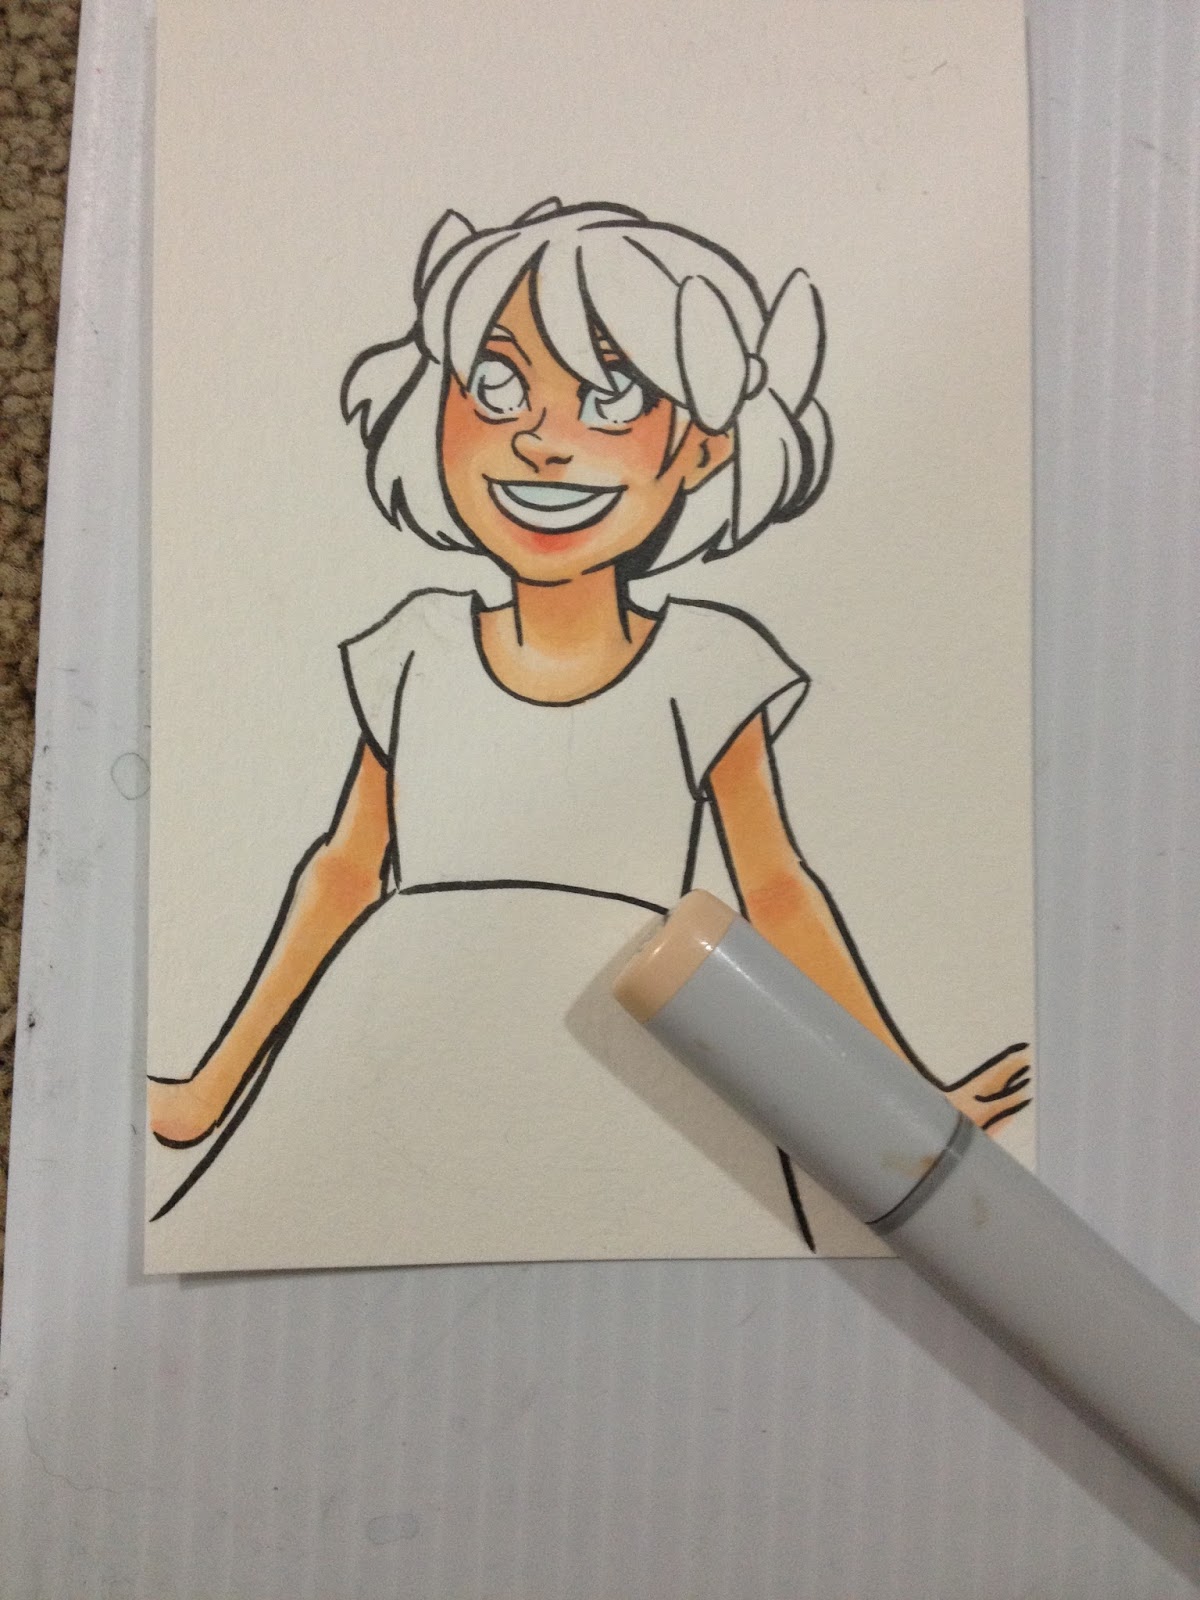
BVOOO-Iridescent Mauve is a great color to use to cool down hot shadows. If you find you've applied too much, you can use E21 or E51 to reduce the shadows a bit.
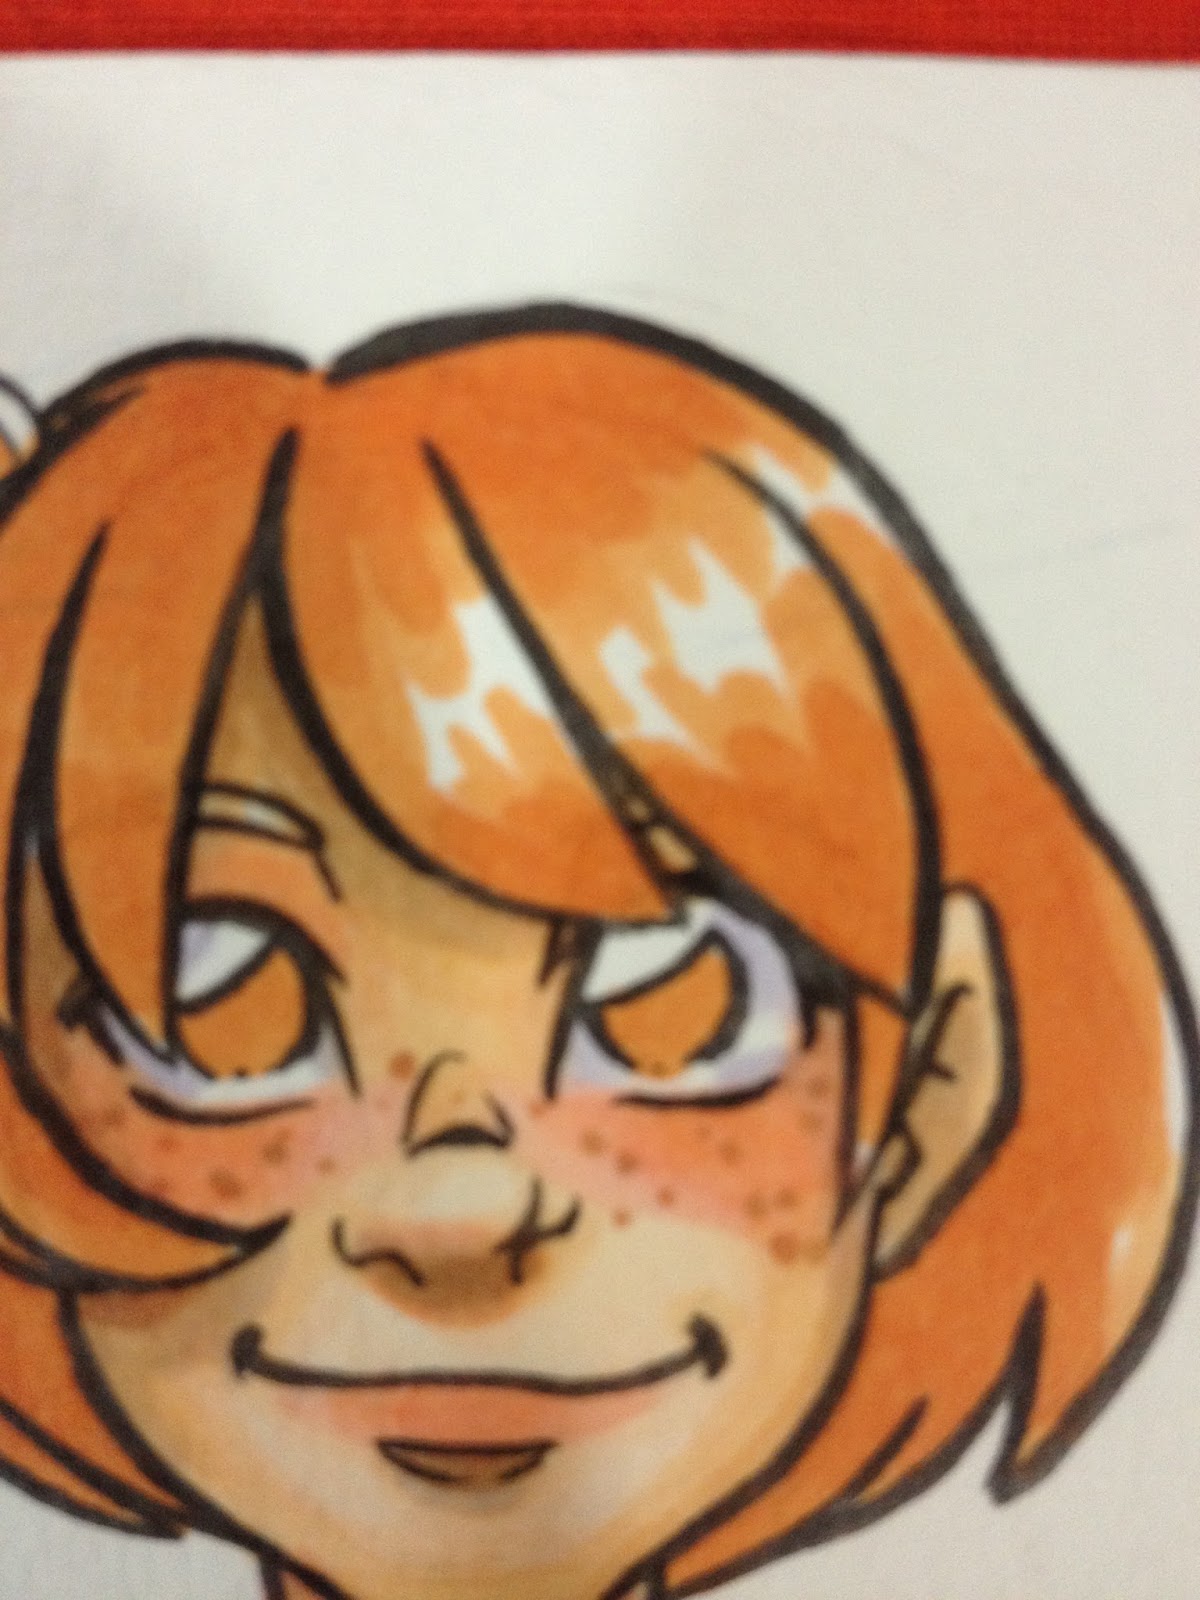
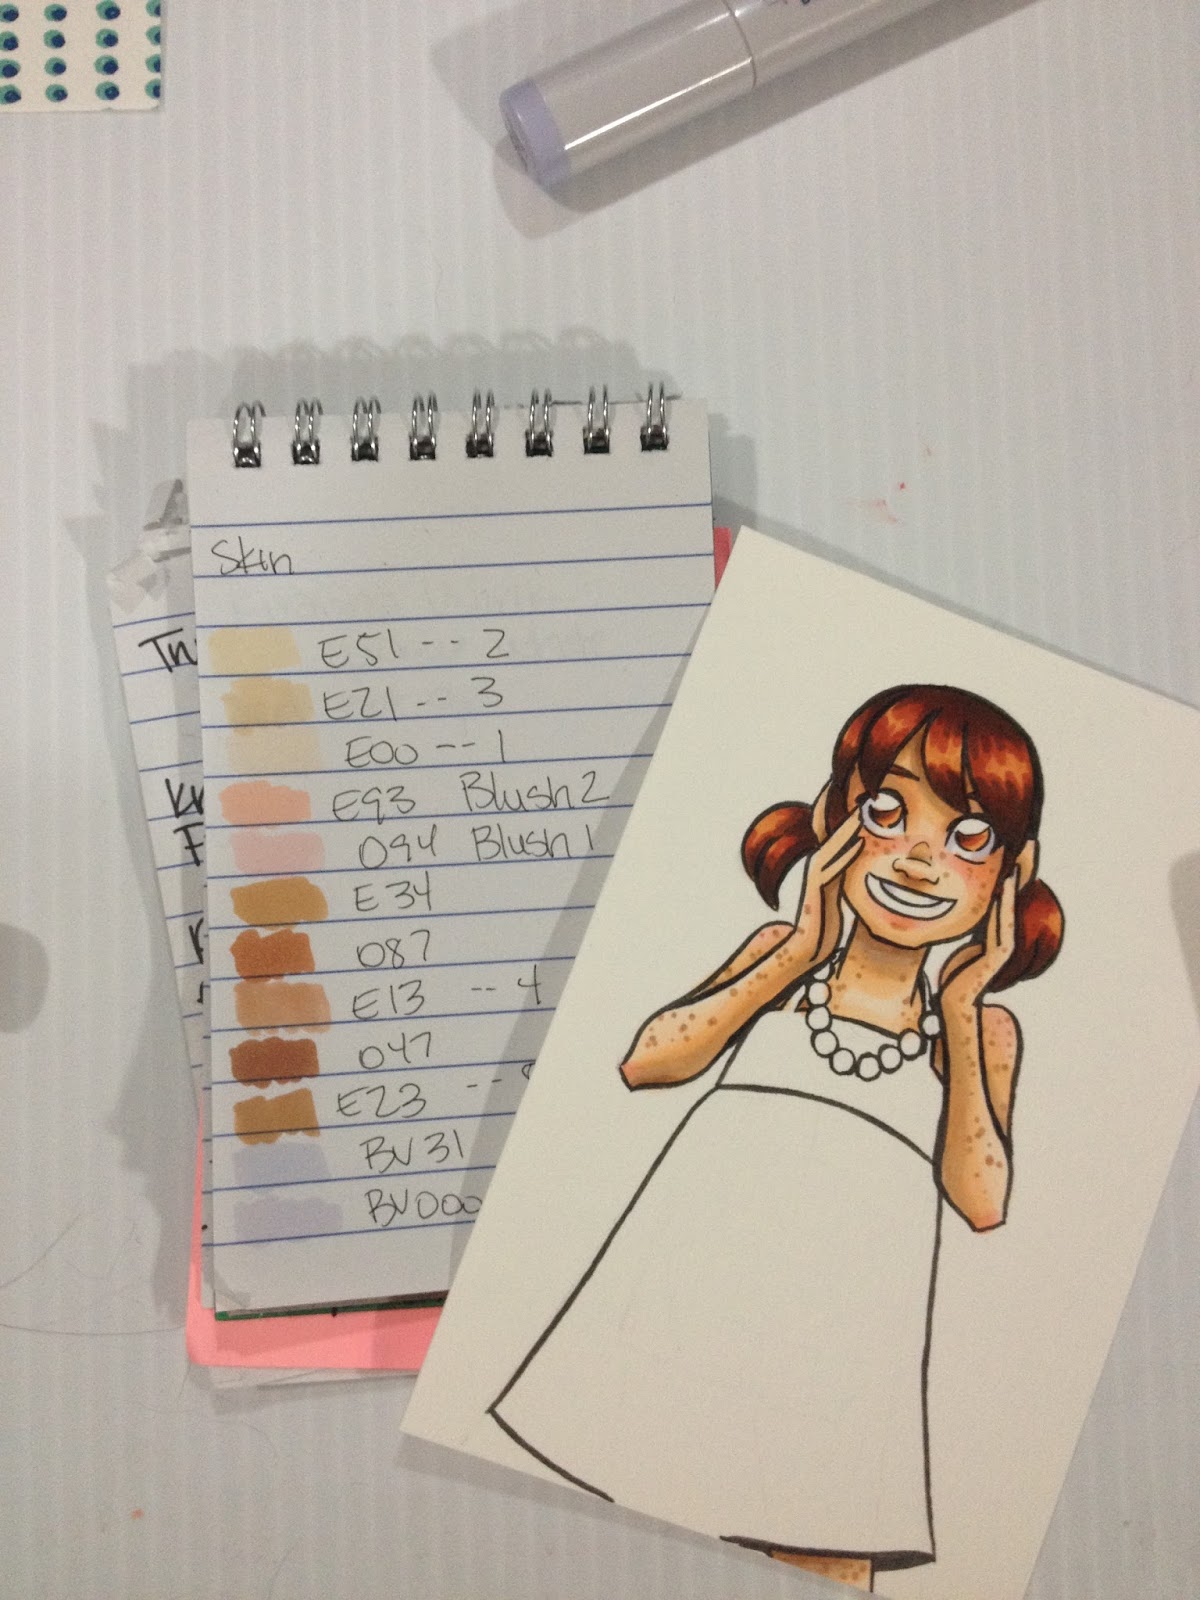
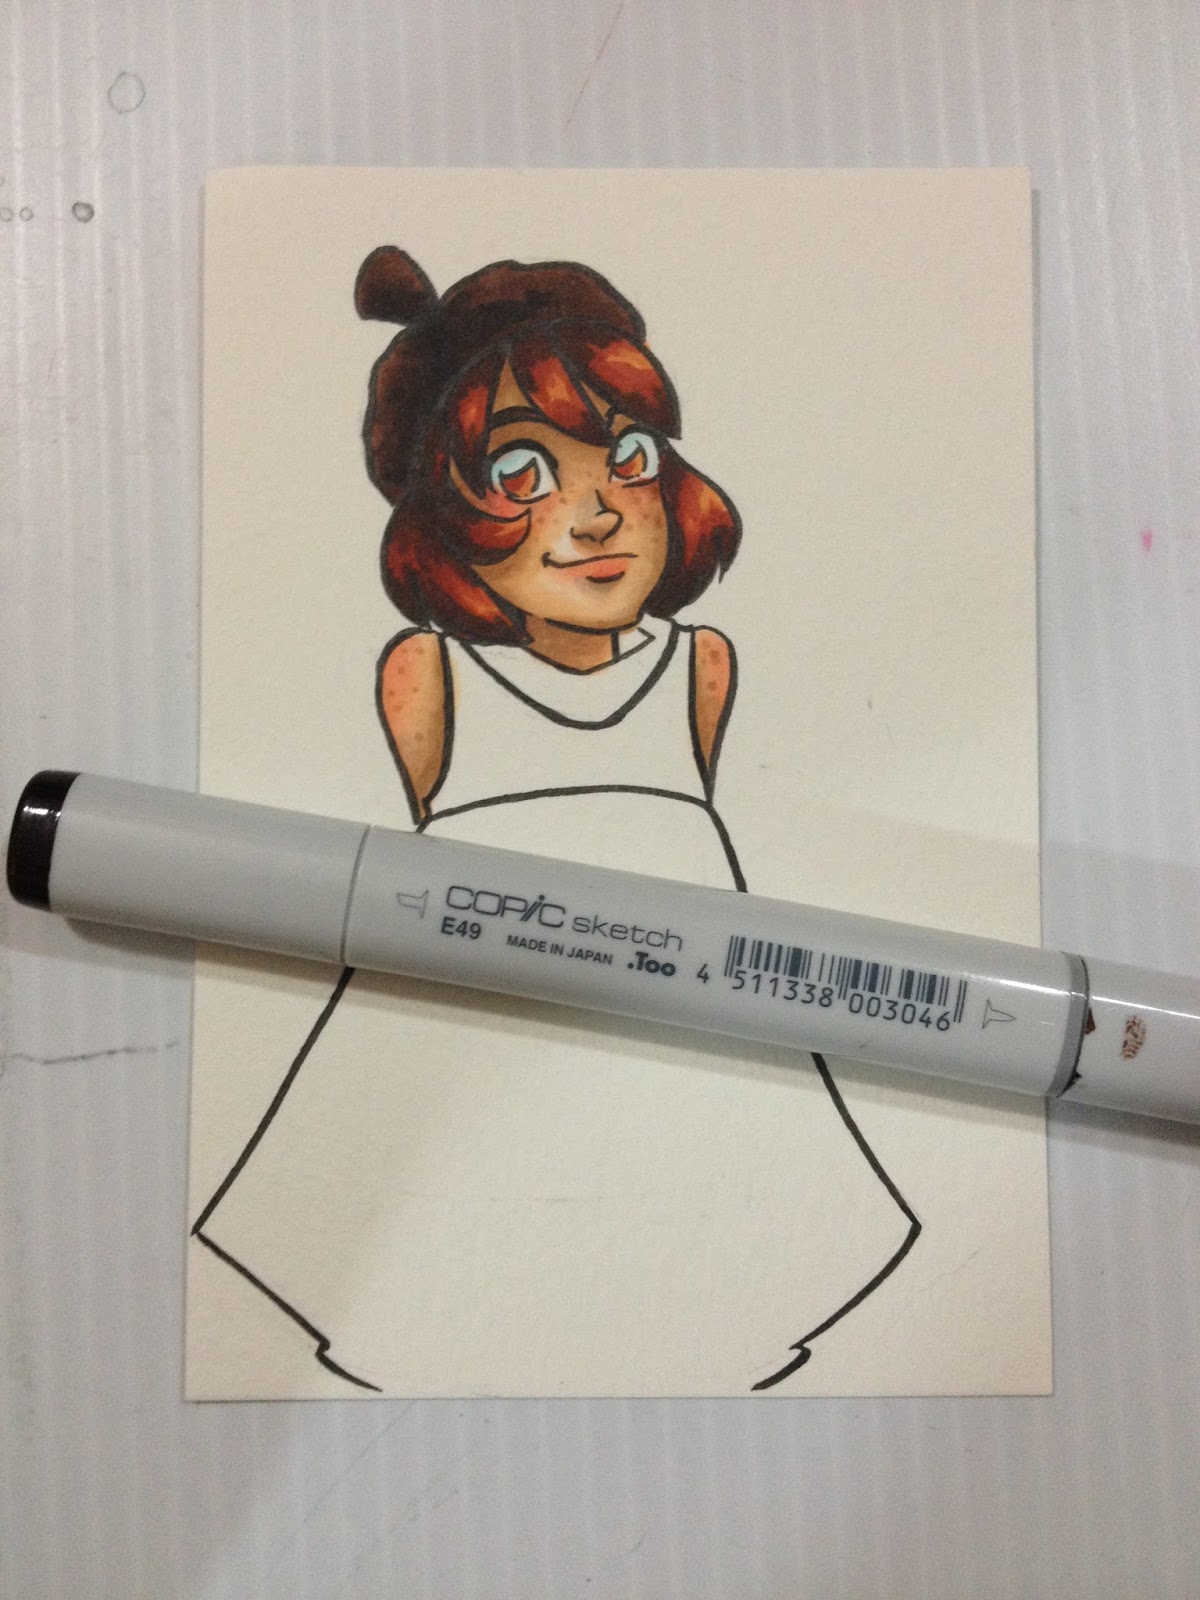
For freckles, I apply E34- Orientale along the bridge of Kara's nose, her cheeks, her shoulders and the outside of her neck, arms, and legs. For small pictures like this one, try to vary the size of your freckle dots. FOr larger ones, try to vary not only the size, but the shape. I like to apply another layer of freckles with E13- Suntan, and I add a few lonely specks with E23- Hazelnut, as freckles can vary slightly in color.
To see this completed image, keep an eye out for an upcoming post about using Distress Markers' Picket Fence as an opaque white accent!
My Favorite Colors for Darker Skintones
BlushE04, Applied to cheeks, eyelids, bottom of nose, lips, chin, reapplied after E23 applicationR85- Trying to get a darker blush that shows up well without displacing original color of skin
Skin
E71- All over baseE27- Majority of face, blocking in shadowE23- Blend between E71 and E 27E37 Blending out E27, but sits on top of paper and doesn't blend wellE34- Used to blend out the E37 that just sat on paper surface, lighten up some areas a little bit

If you're interested in how I render darker skintones, check out my step by step process for Naomi in my Walmart Art Supply Review of Pacon marker paper.
Using Copic Markers on Cold Press Watercolor Paper
You don't need to use high end watercolor paper for Copics, in fact, cheaper is sometimes better! I'm using Canson XL watercolor paper, which is 160lb wood pulp, mould made paper with a very low tooth. It's a thirsty paper, so it'll drain your markers, but you can achieve lovely blends, and it's very forgiving. This sort of paper is fantastic if you want to do mixed media applications with your markers as it works well with watercolor markers, waterbased markers, watercolors, watercolor pencils, and even colored pencils.


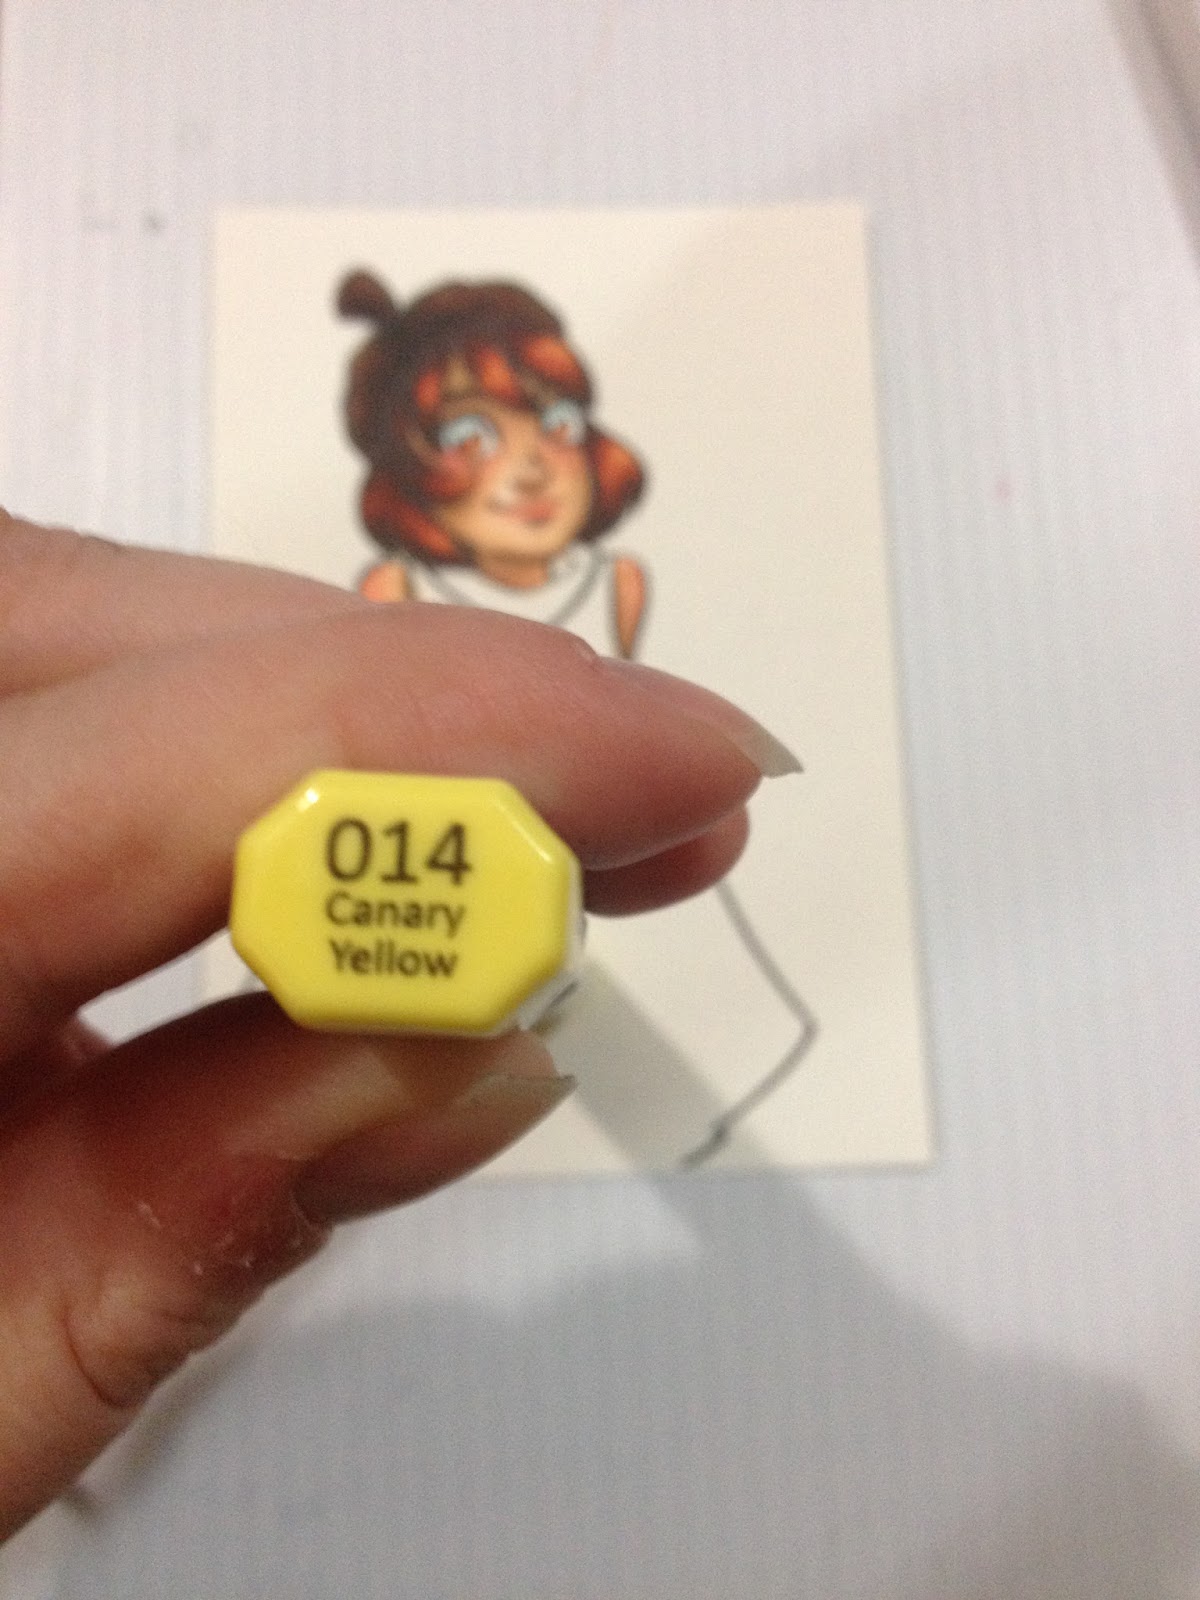
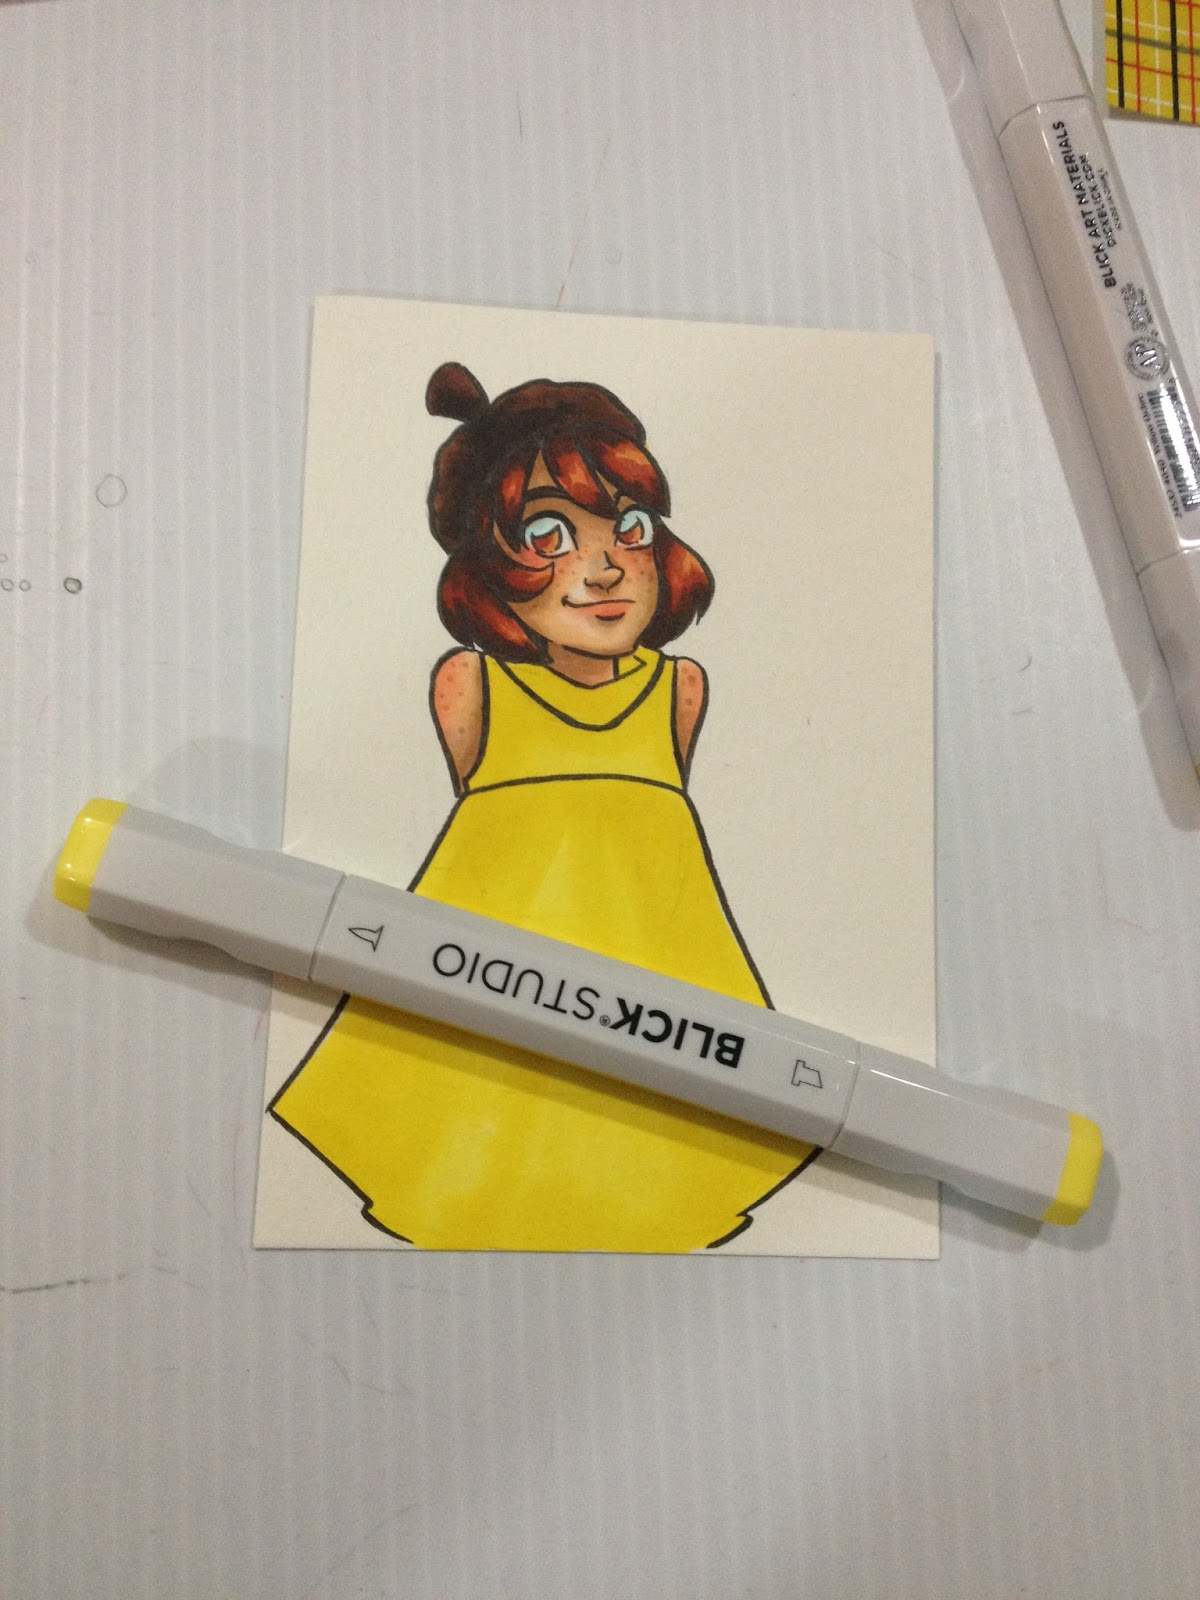
Using Decorative Paper as a Cute Accent
Another way you can stretch your marker collection is to purchase packs of decorative paper. You can often find scrapbook paper at Dollar stores, Walmart, and Michaels. I have a large collection of chiyogami origami paper that I like to use for illustration.
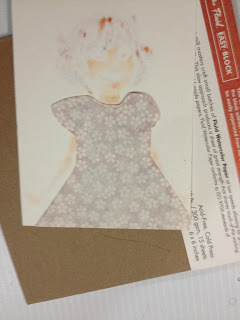
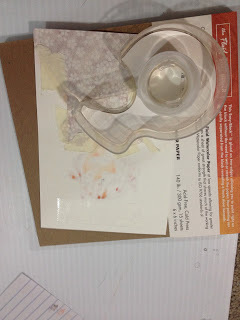


 When doing cut paper inserts, I think it's really important that you color the area you plan on removing anyway, so that there's an outline of color AND shadow.
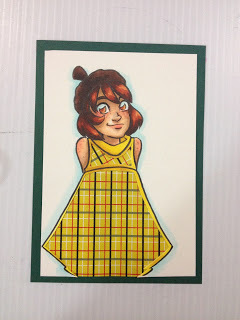

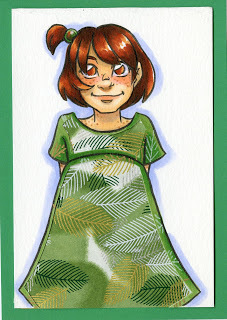
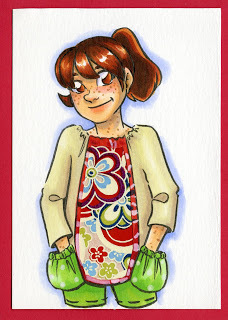
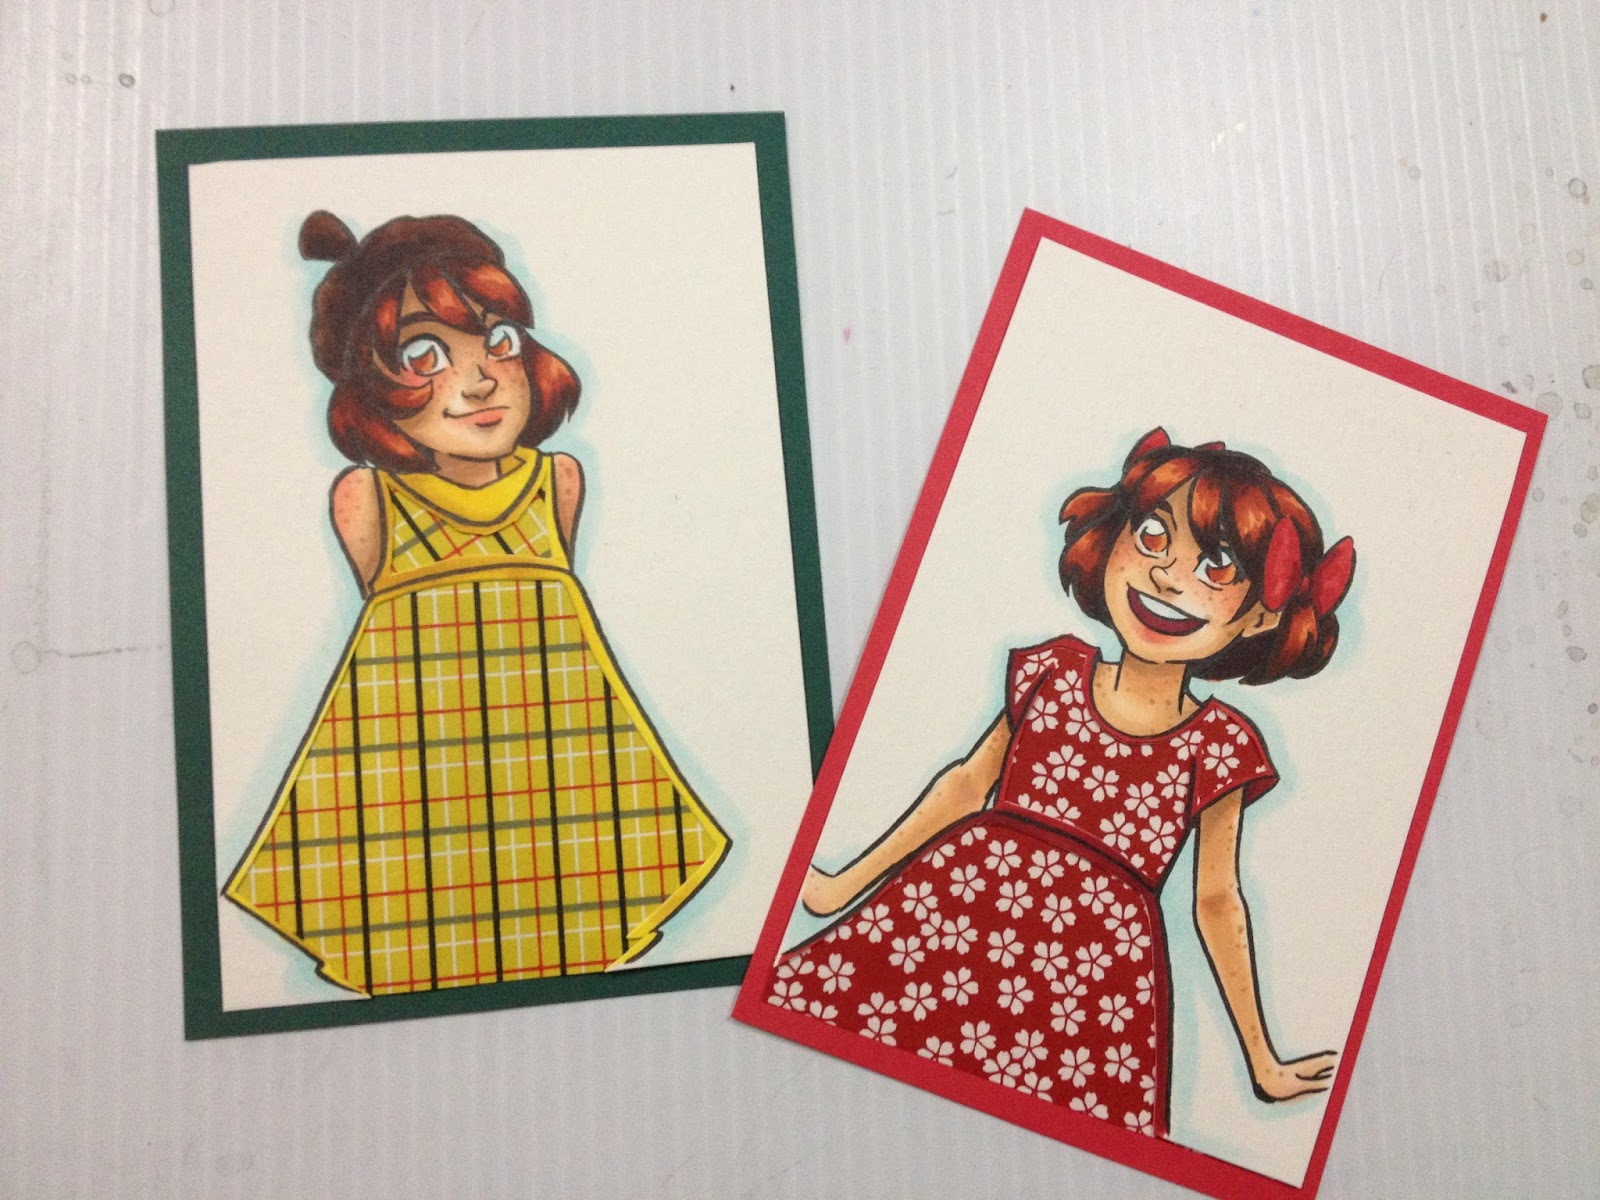
You can also practice surface pattern design by extending the pattern of the paper onto your watercolor surface, to better blend the combination of the two, as I've done with the above four pieces. For these, I used a Recollections Opaque White Pen (those things are actually really great!) and a gold Sharpie (not archival, but my Signos keep blocking up).
I plan on doing many more posts on using alcohol based markers in the future, and hope to have some videos coming up, so keep watching, and please, send in your questions and comments!
Please consider donating to this blog or purchasing from Natto-shop (http://nattosoup.com/shop) if you want me to continue publishing quality content. All materials tested were purchased from my own pocket. Keep on Truckin' Nattosoup is not under any sponsorship.
Copics are a bit of a fetish for many illustrators, particularly illustrators who have been strongly influenced by anime and manga, but they aren't the end all be all of alcohol based markers. I've written about several other brands over the years, and while I have a sizable collection of Copic sketch markers, I also have Shin Han Twin Touch markers, Blick Studio Brush markers, and several Prismacolors. Many marker brands are intermixable- so long as you're buying alcohol based markers, not water or xylene based, your markers will more or less work together.
Most artists who use Copics and other alcohol based markers for illustration prefer brush tipped markers like Copic Sketch and Ciao, Prismacolor Premier, Letraset Flex, and Blick Studio Brush markers. While you CAN use bullet nib alcohol based markers, those make it a lot harder to get even coverage, and it takes a lot longer to color. Cheaper marker brands, like Finecolour, Artist's Loft, and Hobby Lobby's alcohol based markers only come with a bullet nib option, and may be so annoying to use that you feel alcohol based markers aren't for you. Before you fully decide, I recommend you pick up a few brush tipped alcohol based markers in the same color family (like three Prismacolor Premier markers in the green family) and play around with those on nice cardstock before you fully decide to give up on alcohol based markers.
A general rule of thumb is cheaper brands, like Finecolour or even Blick Studio Brush, will have less color saturation in the dyes used for markers. Saturation can be built up by layering, but they will never be as saturated as Copic or Prismacolor inks.
Prismacolor makes certain colors that Copic doesn't, so if you are having trouble finding a color in the Copic family, check Prismacolor. Prisma excels at bright, saturated colors- intense yellows, hot red violets, and fluorescents.
I recommend that you check out my Holiday Gift Guide on markers for the aspiring artist if you're looking for color suggestions and brand recommendations. I also have a video that features my three favorite non-Copic brands below.
3 Cheap Copic Marker Alternatives
But If You Have to Have Copics
Copic Ciaos are almost as good as Copic Sketches, and a couple bucks cheaper if you can find them in person! They're slightly smaller, so they hold less ink, but they're refillable and have the same Super Brush nibs as the Copic Sketch.
Focus on buying a set of Warm Grays and amassing a collection of skintones that work for the type of work you want to do.
Your markers can do double or even triple duty through layering! The first layer of a color is very light, and often a bit streaky, but the second and third are much darker and saturated. While you build up your marker collection, keep in mind that layering can make just a handful of markers work wonders.
Two layers of E97 have been applied to Kara's hair.
As you can see, the first layer is much lighter than the second.
While you're still building that collection, consider keeping your pieces as tonal studies, or tonal studies with a single color highlight. Colored paper, like Strathmore's Toned Tan and Toned Gray, give you an additional color- the color of the paper, and if you use white color pencil, that's two more colors.
Determining where your shadows go
I approach shadows in layers. I'll do a base of E000 all over the skin, then lay in basic shadows with E000. I usually apply blush after this stage, lately I really enjoy a combination of Blick's Shell Pink with Copic's Tea Rose after. Shell pink is a lighter pink, and the contrast isn't so harsh. The areas in which I apply shadow with E000 are shown below in the tonal studies.

After I've applied my first round of shadows, and put in my initial applications of blush, I go in and intensify my shadows with E51, as demonstrated below with these tonal studies.
At this stage, I may add in shadows with E21, or I may put in my contrasting shadows with BV000 or BV31, depending on the image. The contrasting shadows should be applied sparingly, as they will REALLY gray out your skintone. I find they work best under bangs, inside ears, under chin, and where clothing casts shadow. If you apply a layer of E51 or E21 on top, it will warm the shadows up a little bit, but the cast shadows wont have a strong a delineation. I've demonstrated shadows put in by E21 or BV colors with the tonal study below.


For kicks and giggles, I used some opaque white media (Winsor & Newton white pigment marker) to add white highlights and make the tonal study pop.

You can use colored pencils and watercolors to stretch how far your markers go- once you've finished applying your marker color, you can add highlights, shadows, contrasting color, and details with color pencils and markers.
 Example of a Copic study from reference. Mixed media
If you really want to get better at using markers as an art medium, do studies. Do them in Copic, do them in Watercolor (many of the prinicpals of color application are the same), do them regularly from photographs and from life.
 Example of using watercolors and pencil colors with Copics. Shade was added to the mushrooms using watercolor, as watercolor tones down Copic without making it muddy. After everything was dried, white color pencil, and white color pencil were used to add the white highlights on the red caps.Color Swatching for Reference
I've found that it helps to make swatches of all the possible colors I want to use and then cross out the ones that won't work, and number the ones I think will in order that I want to use them. If you find yourself using the same colors over and over (for skintones, hair, animals), consider tacking up those cheat sheets for quick reference. Although Copic's color chips are A LOT more reliable than most other brands, they are still not 100% accurate, so it's wise to make swatches before you risk ruining something, especially if you're trying to do color matching.
Step 1: Select all possible markers you might use for the piece.
Step 2: Swatch on the paper, and make sure you note the color numbers.
Step 3: Number in order of use.
Step 4: Final Piece
Selecting A Paper for Your Illustration
For many layers of color, subtle gradient changes:
You want something thick that will absorb your ink. Good choices include uncoated cardstock, wood pulp based watercolor paper (both hot and cold press, but not rough), and smooth or plate bristol. These dense fibers will hold the ink and keep it wet longer, so this is perfect if you really like smooth blends, but tends to make fine details feather out. This tutorial uses watercolor paper that has been inked with a Copic-proof Sailor Mitsuo Aida. This is my preferred paper for marker illustrations.
For clean, sharp changes in color, few layers, striking special effects with alcohol and colorless blender:
Coated, thinner, non-absorbive papers like tracing paper, Copic papers, and marker paper in general are good if you want more dramatic transitions, or enjoy putting in lots of fine detail, or like special effects. On coated papers, the ink will sit on top of the paper rather than soaking in, and is easily reactivated. Tracing paper is also a very viable option, especially if you want to add color to a sketch, but can't add it to the original due to correction fluid, or sketching materials.
My favorite colors for Caucasian skin:
E000
E51
E21
E34
E13
Freckles:
E34
E13
E23
You can get these colors below, and help support this blog!
Amazon.com Widgets
How I Color Kara's Skin
I apply an all over base layer of E00- Milky White. Aplying a base layer means that your subsequent layers won't have streaking, because you've primed the paper. It also helps facilitate blending between all layers. If you prefer strong, sharp shadows, allow your paper to dry for 5-10 minutes before applying that color.
I mark in my first round of shadows in E00 as well- from under the bangs to the bump in Kara's nose, the sides of her face, under her lip, her neck, upper arms (in this example), lower side of Kara's forearms, tops of leg.
I use Blick Studio's Shell Pink to block in blush- Kara's cheeks and across the bridge of her nose, above her eyelids, the underside of her nose, lips, under her chin, elbows, knuckles. I darken this up a bit with Copic's E93- Tea Rose.

Once I've made the skin's shadows as dark as I can with the E00, I switch to E51- Milky White, to continue to darken my shadows. I mostly just intensify the shadows already put down with E00.

As you can see, underneath Kara's nose, the Mitsuo Aida ink smeared a bit. This is unusual- I was very careful to erase all graphite, I allowed the ink to cure fully overnight, and my marker is nice and juicy.

The last color I really rely on for skin toned shadows is E21- Baby Skin Pink, and I use it fairly sparingly- where direct shadows would be cast. In this example, under Kara's chin, under her bangs, under her skirt and her sleeves.
BVOOO-Iridescent Mauve is a great color to use to cool down hot shadows. If you find you've applied too much, you can use E21 or E51 to reduce the shadows a bit.


For freckles, I apply E34- Orientale along the bridge of Kara's nose, her cheeks, her shoulders and the outside of her neck, arms, and legs. For small pictures like this one, try to vary the size of your freckle dots. FOr larger ones, try to vary not only the size, but the shape. I like to apply another layer of freckles with E13- Suntan, and I add a few lonely specks with E23- Hazelnut, as freckles can vary slightly in color.
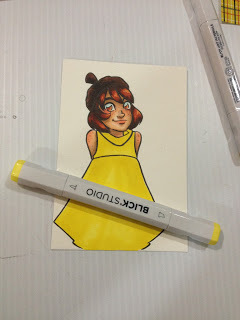
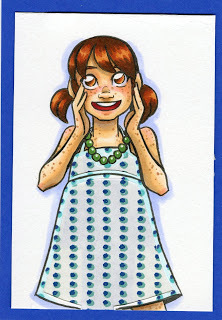
To see this completed image, keep an eye out for an upcoming post about using Distress Markers' Picket Fence as an opaque white accent!
My Favorite Colors for Darker Skintones
BlushE04, Applied to cheeks, eyelids, bottom of nose, lips, chin, reapplied after E23 applicationR85- Trying to get a darker blush that shows up well without displacing original color of skin
Skin
E71- All over baseE27- Majority of face, blocking in shadowE23- Blend between E71 and E 27E37 Blending out E27, but sits on top of paper and doesn't blend wellE34- Used to blend out the E37 that just sat on paper surface, lighten up some areas a little bit


If you're interested in how I render darker skintones, check out my step by step process for Naomi in my Walmart Art Supply Review of Pacon marker paper.
Using Copic Markers on Cold Press Watercolor Paper
You don't need to use high end watercolor paper for Copics, in fact, cheaper is sometimes better! I'm using Canson XL watercolor paper, which is 160lb wood pulp, mould made paper with a very low tooth. It's a thirsty paper, so it'll drain your markers, but you can achieve lovely blends, and it's very forgiving. This sort of paper is fantastic if you want to do mixed media applications with your markers as it works well with watercolor markers, waterbased markers, watercolors, watercolor pencils, and even colored pencils.


Using Decorative Paper as a Cute Accent
Another way you can stretch your marker collection is to purchase packs of decorative paper. You can often find scrapbook paper at Dollar stores, Walmart, and Michaels. I have a large collection of chiyogami origami paper that I like to use for illustration.


 When doing cut paper inserts, I think it's really important that you color the area you plan on removing anyway, so that there's an outline of color AND shadow.
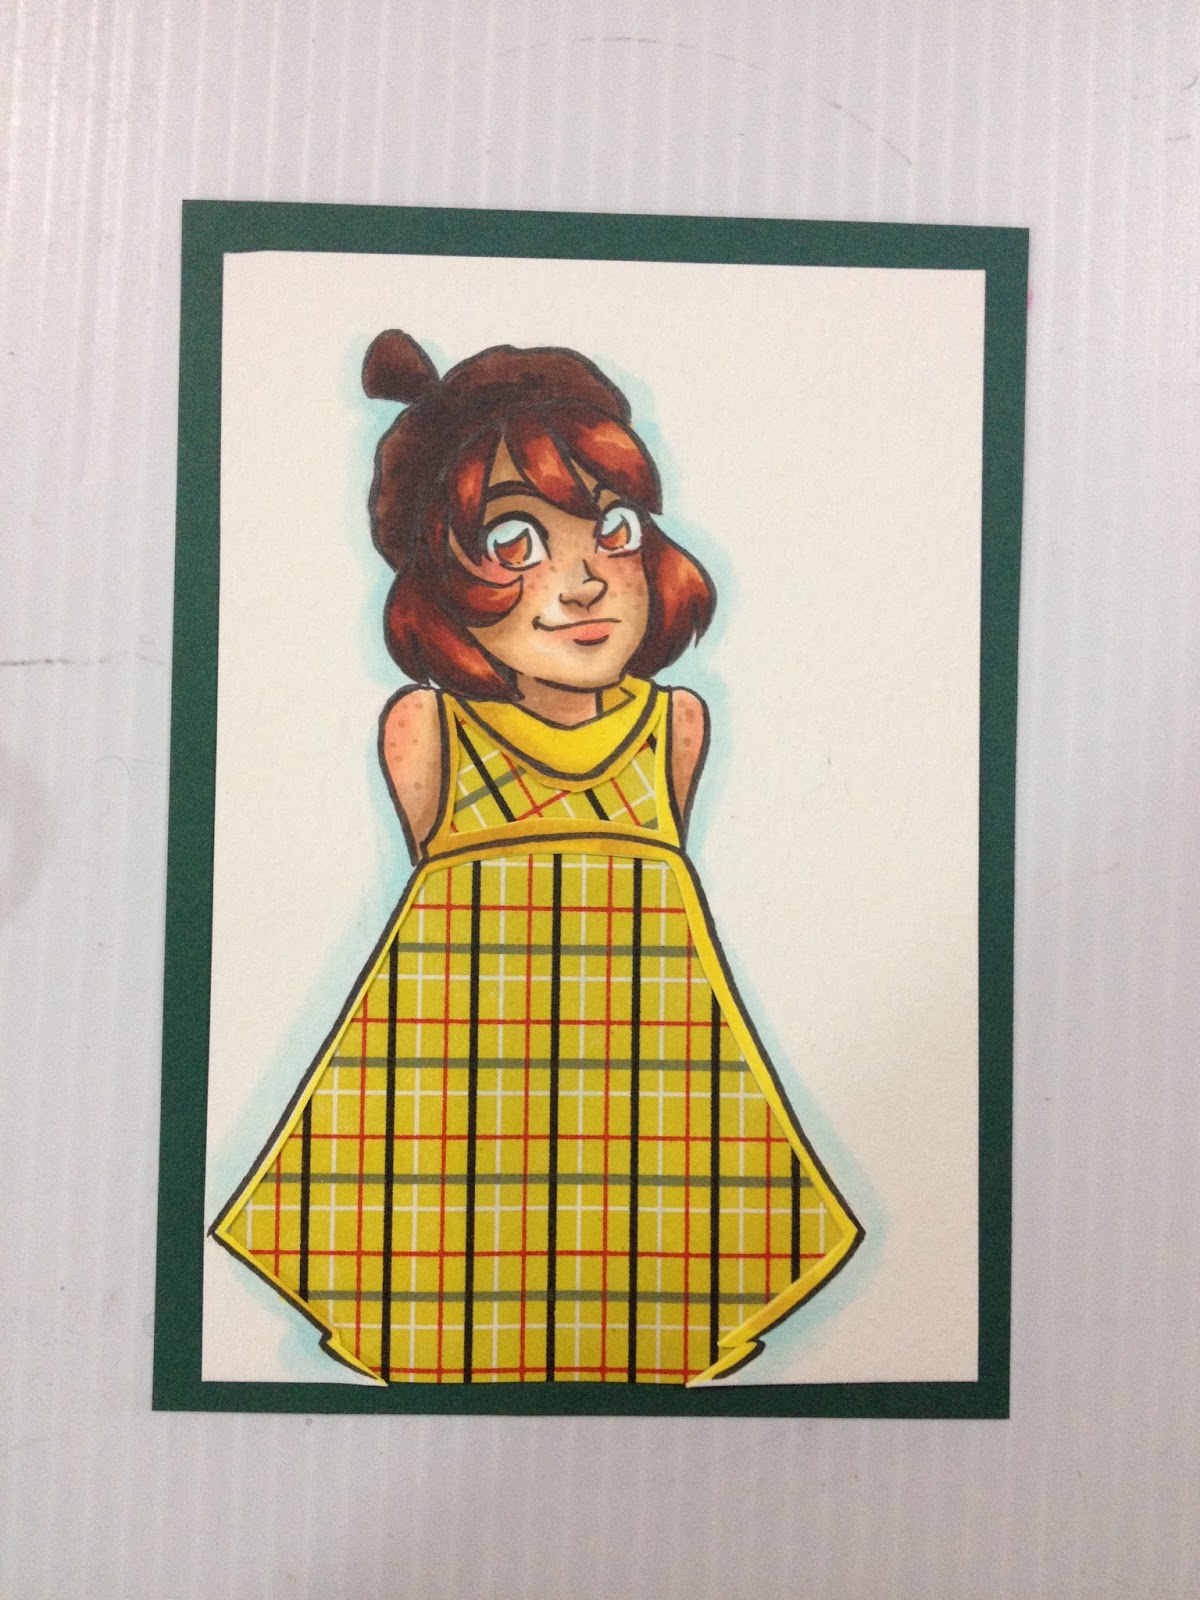


You can also practice surface pattern design by extending the pattern of the paper onto your watercolor surface, to better blend the combination of the two, as I've done with the above four pieces. For these, I used a Recollections Opaque White Pen (those things are actually really great!) and a gold Sharpie (not archival, but my Signos keep blocking up).
I plan on doing many more posts on using alcohol based markers in the future, and hope to have some videos coming up, so keep watching, and please, send in your questions and comments!
Please consider donating to this blog or purchasing from Natto-shop (http://nattosoup.com/shop) if you want me to continue publishing quality content. All materials tested were purchased from my own pocket. Keep on Truckin' Nattosoup is not under any sponsorship.
December 7, 2015
Target Art Supply Review: Introduction
I'd be a fool to pretend that most of my readers don't have a Walmart within an hour's driving distance, so I know my Walmart Art Supply series probably has the widest possible reach and application. But Walmart isn't the only big box chain in the country, and it's not the only source of supplies for many of my readers who live too far away from art supply stores to make the drive. So days after I bought all the materials for my Walmart Art Supply series, but before I'd photographed or processed them all, I was back behind the cart for even more affordable art supplies.
I've casually mentioned on my Instagram and Twitter that I'm also doing Target and Dollar Tree series, giving me the trifecta of cheap art supplies available in the US. I did my Target run at the Target at Esplanade, in Kenner, Louisiana, while I was in town for Mechacon. It was at the height of back to school shopping season, so your selection may vary greatly from what mine was depending on the time of year.
Before we dive into these reviews, I'd like to take a moment to thank those of you who've been supportive of this blog by writing in, donating things for review, and purchasing from my affiliate links. Your support really means a lot to me, especially since artist run art supply review blogs don't see the same popularity or sponsorship that many craft-focused blogs do, and certainly don't see anywhere near the support that popular Let's Play youtube channels see. Although my focus right now is on affordable and accessible art supplies (meaning no ordering online, no need for a credit or debit card), I have a lot of exciting reviews in the lineup (lots of new alcohol based markers, including Blicks revised Studio markers, for example). I've also integrated polls into my layout, allowing you guys to voice what you want without having to write an email. Since you guys have requested more tutorials, there will definitely be a focus on that in the near future as well.
I went into Target looking for the same sort of things I hunted for when shopping for the Walmart series: Drawing stuff, Inking Stuff, Coloring Stuff, Erasing Stuff, Storing Stuff. I tried not to buy things I could buy easily at Walmart, although I did make a couple goofs. You guys can check out everything I bought in my Target Art Supply Review Haul video below.
But for those of us who prefer to read our content, below are photos from my trip, as well as an itemized and priced list of what I bought.
A caveat: Target is often more expensive than Walmart for comparable things, so if you're looking for the biggest savings, I recommend you hit up Walmart first, and get what you can't find there at Target.
The Target
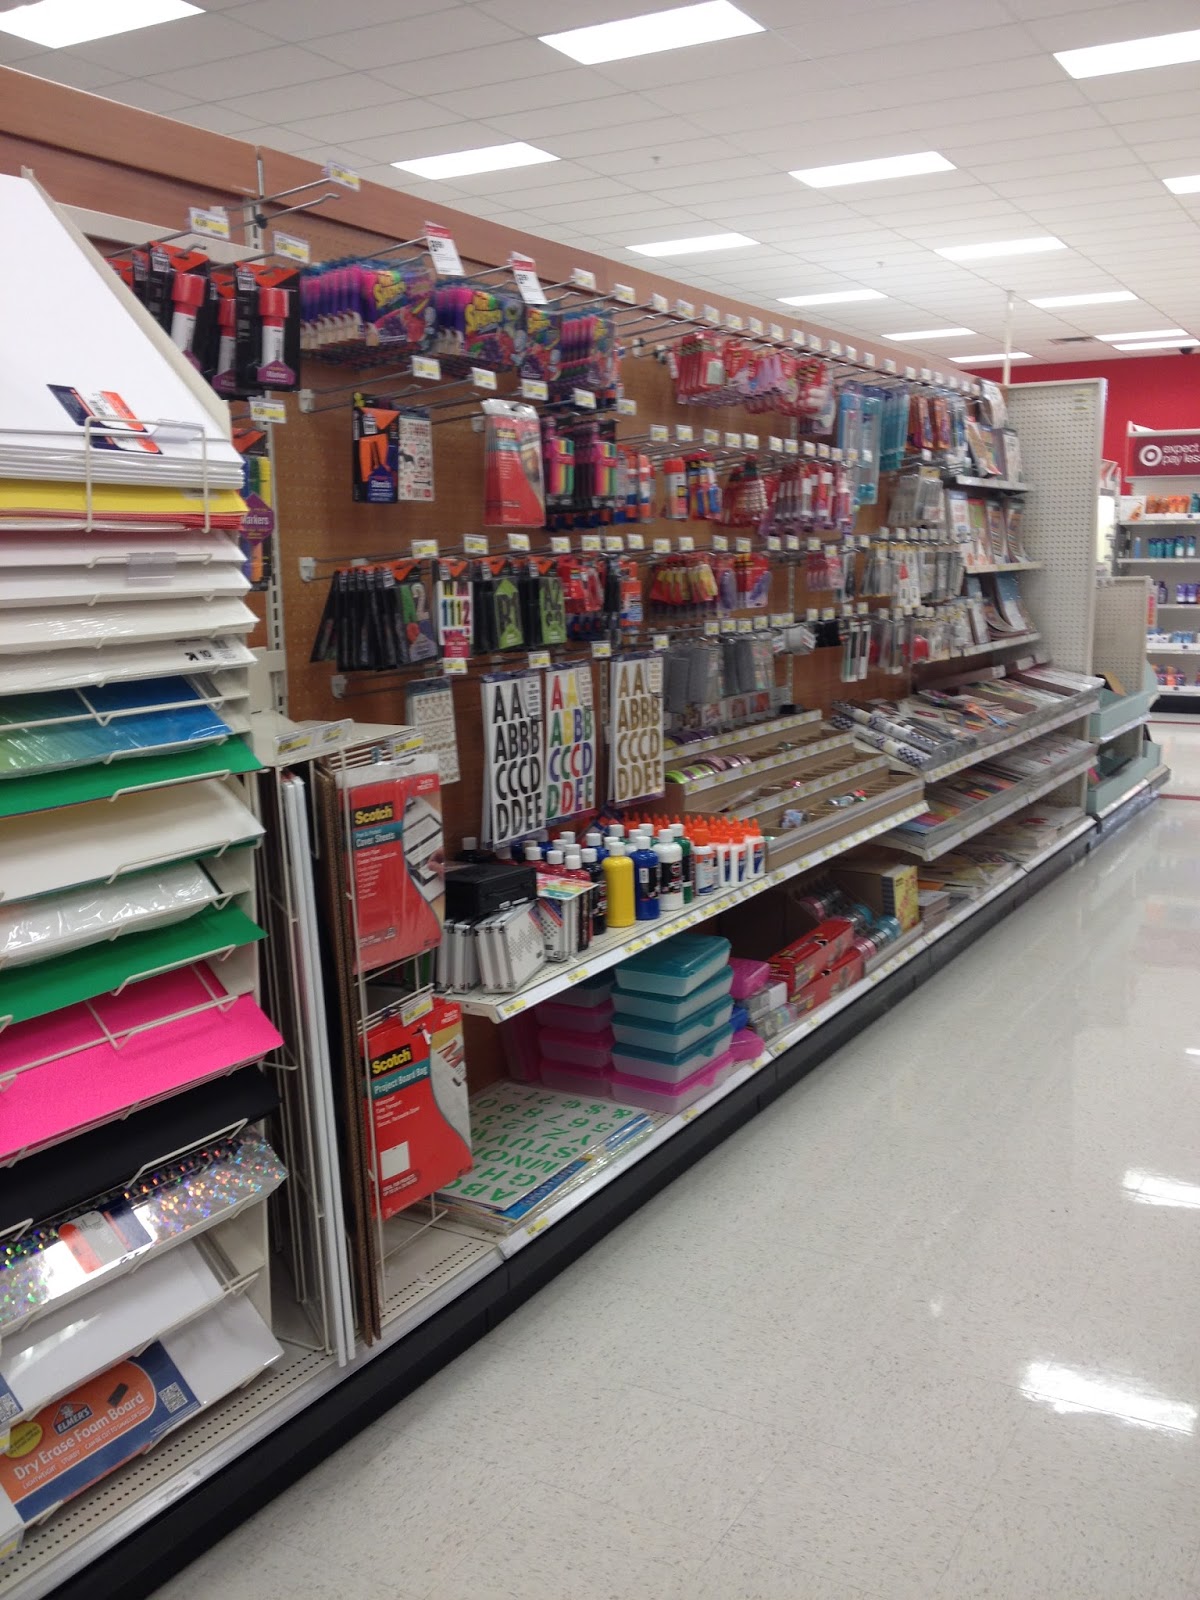
Arts and Crafts Section
I'm not sure if all Targets will eventually have a section like this, or if the Kenner Target is just one of the lucky ones, but the two Targets I've been to in the Nashville area don't have craft sections, and the Target in Savannah, GA, didn't have one either. The craft section in the Kenner Target is only one aisle, but it has a few interesting supplies, although variety is limited.

Boxed spools of ribbon, boxed glitter, any item that's sold en masse is sold as a set.

Sets of brushes on a picked over pegboard. I opted not to pick any up, I probably should have examined the small brush set in greater detail.

Yes, nothing says 'craft' more like unstocked shelves. The Crayon Gems look pretty cute though.
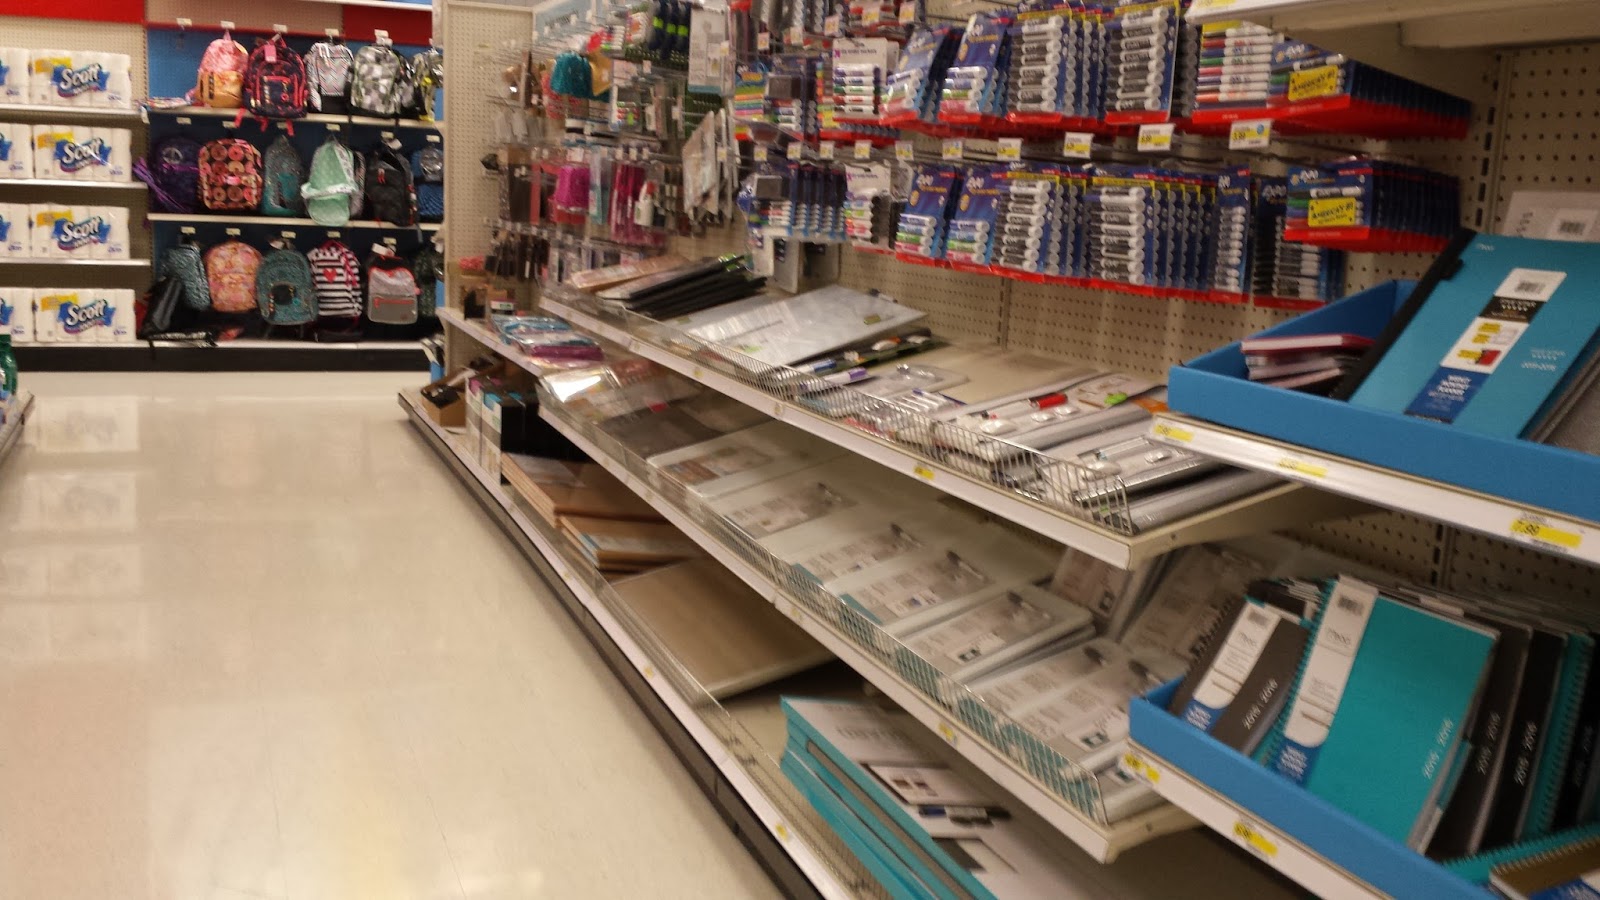
Kids Stationary/Art Supplies Permanent Section
I think most Targets have this section towards the front year round. You can get your basic school and kids' craft staples- glues, pencil boxes, ect.


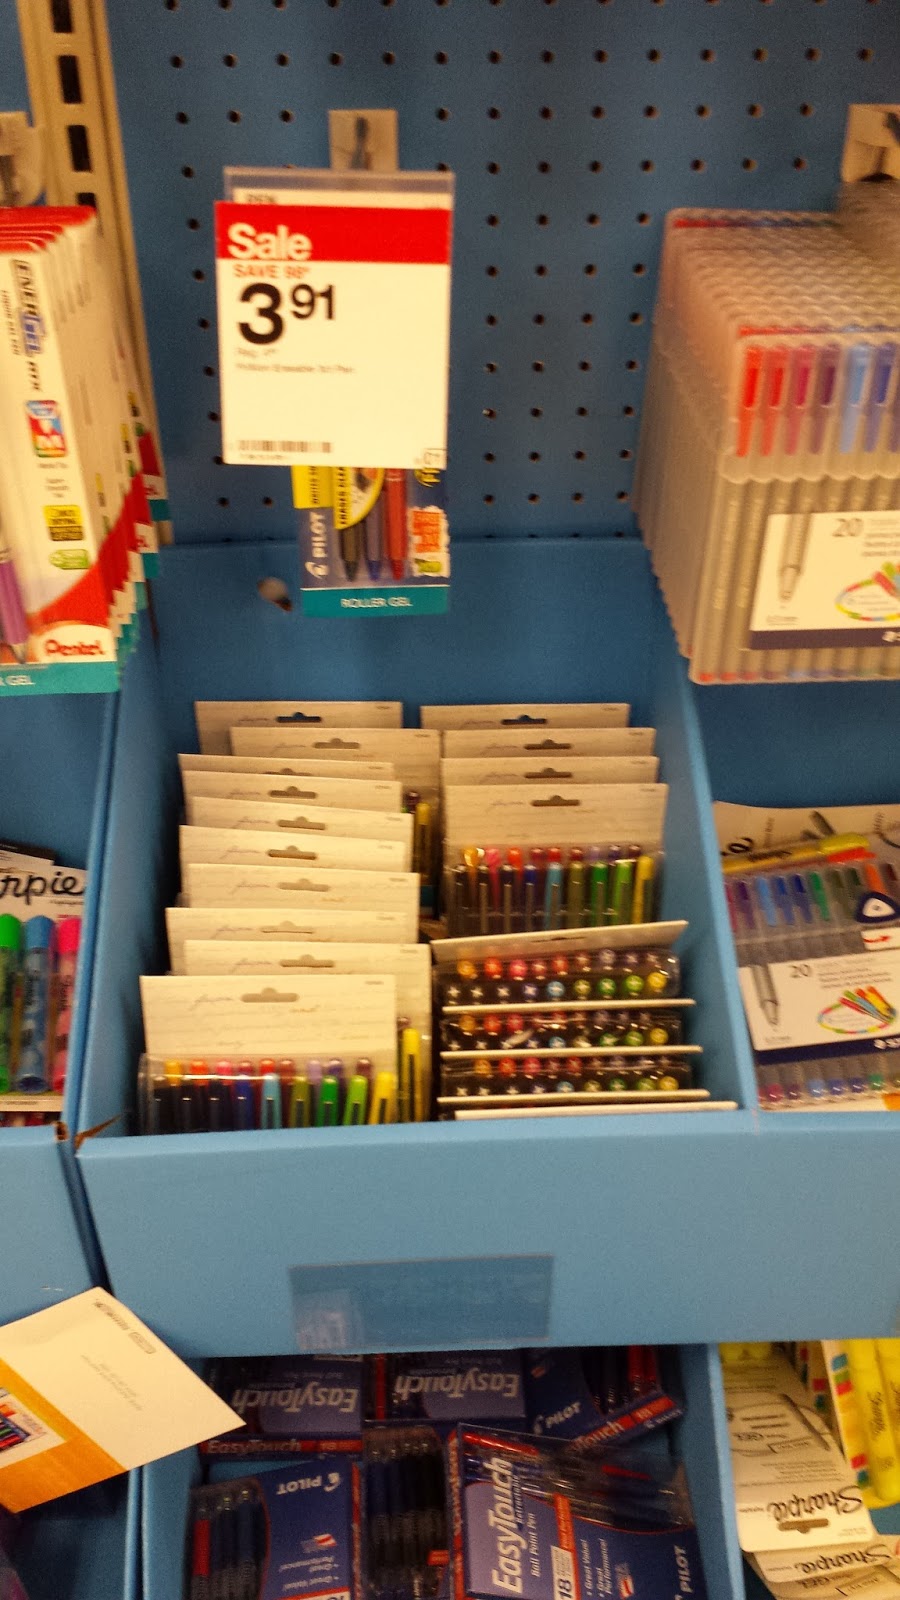
And this Target carries scrapbooking and journaling supplies by ek tools. I picked up the Calligraphy pens and the journaling pens for this review. As you can see, they were a bit pricy.


Although there are lots of notebooks to choose from, there are no sketchbooks here, and I couldn't find any unruled notebooks to use as a sketchbook in this section.

Lots of ballpoint pens and mechanical pencils to choose from.

Ok, I lied, Target has Moleskins, but given how smooth the paper, I don't like using them for sketchbooks, and I honestly think they're overpriced, so I opted not to review them in the Target Art Supply Review series.

It's always good to have a compass and protractor in your drafting supply stash.

When I was an artist in highschool, I carried my comic pages around with me in a plastic clipboard case like this. These are really handy if you like to work in 8.5"x11" format- you've got a hard surface, a clip to keep your paper in place, and somewhere to store your pages and supplies when you're not using them! I still use a regular chipboard clipboard for my at-con commissions, so I don't have to rely on the tabletop for a hard surface. I highly recommend you pick one up for your own stash.


Seasonal Back to School Section
By the time this review goes live, this section will have withered away with the summer leaves. I tried to get everything I could that suited this review in the regular school section, but I still browsed this area for additional goodies.


Even more pencils, leads, and erasers back here.


The last sketchbook in the entire store, and I bought it.
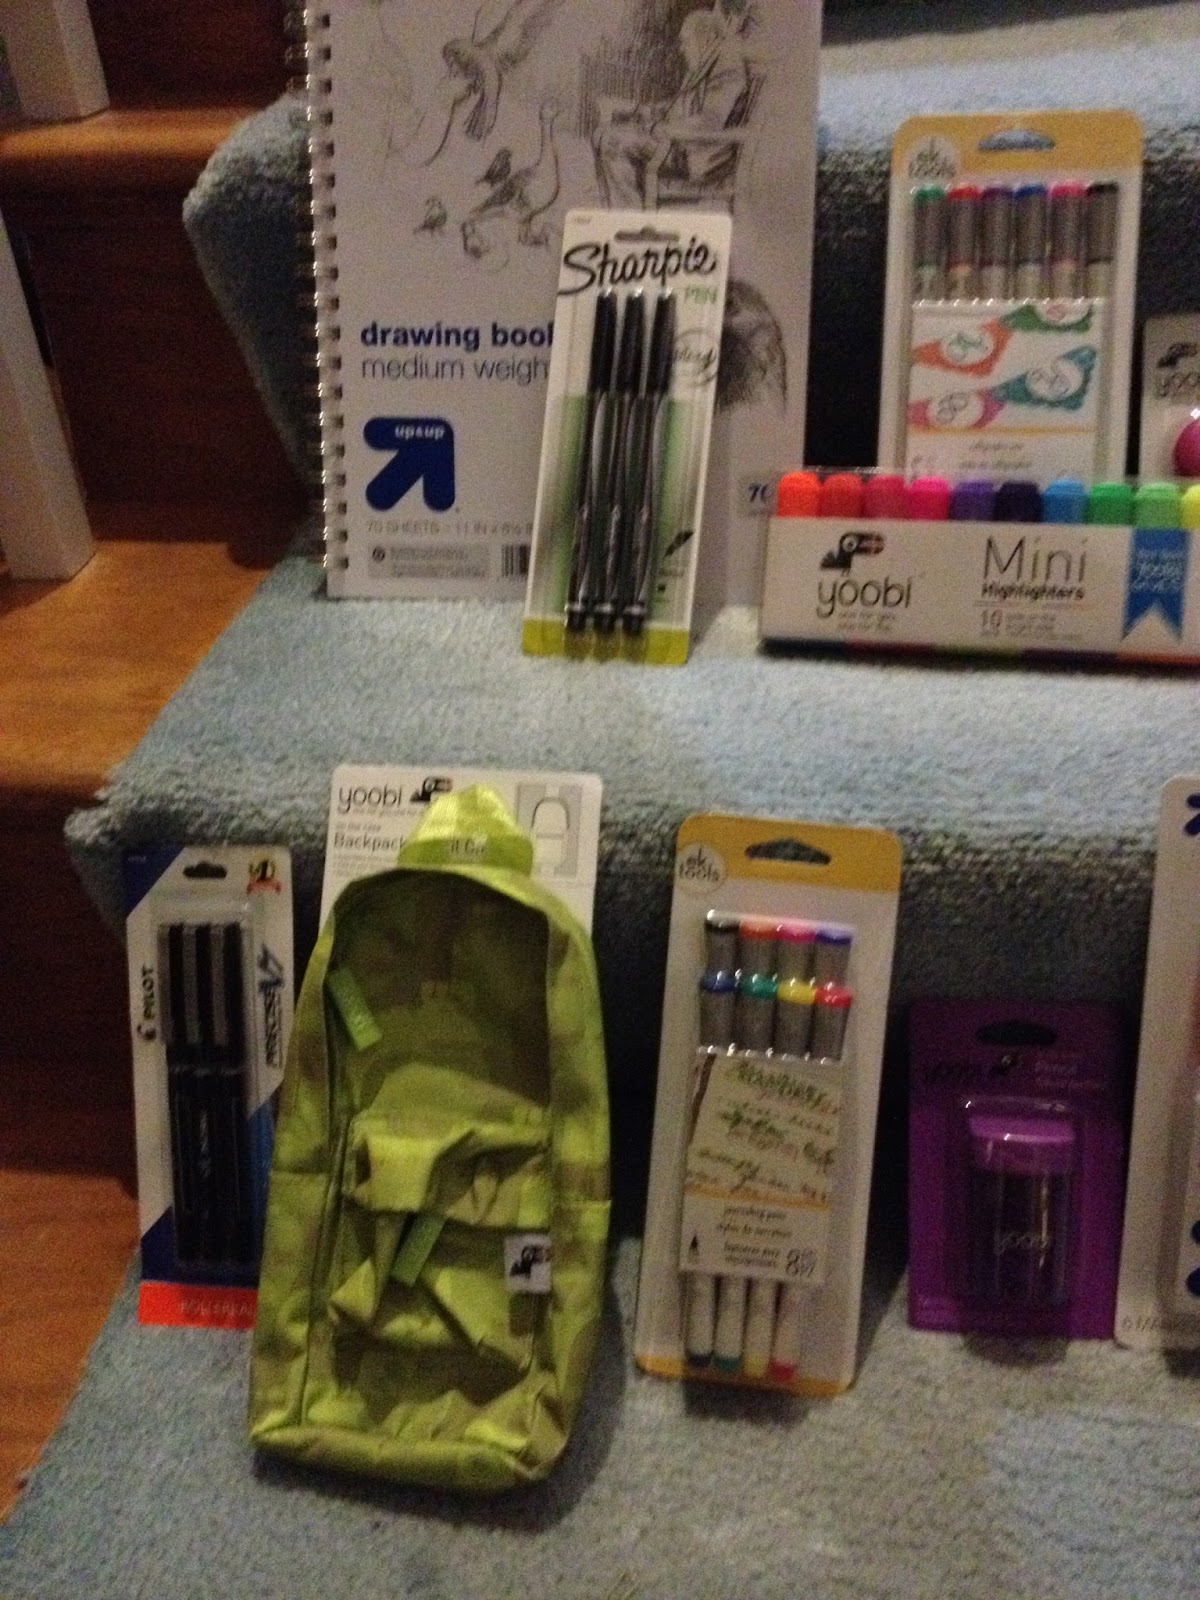
What I Bought
Mechancial Pencil- Gorilla Lead- 3.62
Up and Up Pack of Mechanical Pencils, .7 lead- $2.79
Sharpie Felt Tipped Pens- $2.97
Up and Up Waterbased Markers- $4.29
Up and Up Watercolor Markers- $4.00
Up and Up Watercolors- $1.77
Pencil Sharpener- $1.49
Yoobi Highlighters- $4.99
Eraser- $1.69
Yoobi Pencil Case- $4.99
Journalling Pens- $12.79
Calligraphy pens- $11.79
Sketchbook- $3.89
My Total
$56.08
My Photo Haul


I think you guys know how these series work by now. In the upcoming days and weeks, I'll be scrutinizing these products to see if they stand up to my artist standards. I know not all of these products are intended for that sort of scrutiny, but I believe some will surprise us with how well they perform.
If you enjoy this series, or any of my series, please make sure you share it with your friends and family on your social networks! You can also send me an email, or consider contacting any of the companies that manufacture these products, and let them know how much you enjoy my reviews! If you find these reviews really helpful, please consider sending me a tip via the Paypal donation link in the sidebar, or consider purchasing something for yourself or a loved one from the Nattoshop. Your support really means a lot to me, even if I'm awful about hoarding away your kind emails and taking entirely too long to answer them.
Please consider donating to this blog or purchasing from Natto-shop (http://nattosoup.com/shop) if you want me to continue publishing quality content. All materials tested were purchased from my own pocket. Keep on Truckin' Nattosoup is not under any sponsorship.
I've casually mentioned on my Instagram and Twitter that I'm also doing Target and Dollar Tree series, giving me the trifecta of cheap art supplies available in the US. I did my Target run at the Target at Esplanade, in Kenner, Louisiana, while I was in town for Mechacon. It was at the height of back to school shopping season, so your selection may vary greatly from what mine was depending on the time of year.
Before we dive into these reviews, I'd like to take a moment to thank those of you who've been supportive of this blog by writing in, donating things for review, and purchasing from my affiliate links. Your support really means a lot to me, especially since artist run art supply review blogs don't see the same popularity or sponsorship that many craft-focused blogs do, and certainly don't see anywhere near the support that popular Let's Play youtube channels see. Although my focus right now is on affordable and accessible art supplies (meaning no ordering online, no need for a credit or debit card), I have a lot of exciting reviews in the lineup (lots of new alcohol based markers, including Blicks revised Studio markers, for example). I've also integrated polls into my layout, allowing you guys to voice what you want without having to write an email. Since you guys have requested more tutorials, there will definitely be a focus on that in the near future as well.
I went into Target looking for the same sort of things I hunted for when shopping for the Walmart series: Drawing stuff, Inking Stuff, Coloring Stuff, Erasing Stuff, Storing Stuff. I tried not to buy things I could buy easily at Walmart, although I did make a couple goofs. You guys can check out everything I bought in my Target Art Supply Review Haul video below.
But for those of us who prefer to read our content, below are photos from my trip, as well as an itemized and priced list of what I bought.
A caveat: Target is often more expensive than Walmart for comparable things, so if you're looking for the biggest savings, I recommend you hit up Walmart first, and get what you can't find there at Target.
The Target
Arts and Crafts Section
I'm not sure if all Targets will eventually have a section like this, or if the Kenner Target is just one of the lucky ones, but the two Targets I've been to in the Nashville area don't have craft sections, and the Target in Savannah, GA, didn't have one either. The craft section in the Kenner Target is only one aisle, but it has a few interesting supplies, although variety is limited.

Boxed spools of ribbon, boxed glitter, any item that's sold en masse is sold as a set.

Sets of brushes on a picked over pegboard. I opted not to pick any up, I probably should have examined the small brush set in greater detail.

Yes, nothing says 'craft' more like unstocked shelves. The Crayon Gems look pretty cute though.
Kids Stationary/Art Supplies Permanent Section
I think most Targets have this section towards the front year round. You can get your basic school and kids' craft staples- glues, pencil boxes, ect.


And this Target carries scrapbooking and journaling supplies by ek tools. I picked up the Calligraphy pens and the journaling pens for this review. As you can see, they were a bit pricy.


Although there are lots of notebooks to choose from, there are no sketchbooks here, and I couldn't find any unruled notebooks to use as a sketchbook in this section.

Lots of ballpoint pens and mechanical pencils to choose from.

Ok, I lied, Target has Moleskins, but given how smooth the paper, I don't like using them for sketchbooks, and I honestly think they're overpriced, so I opted not to review them in the Target Art Supply Review series.

It's always good to have a compass and protractor in your drafting supply stash.

When I was an artist in highschool, I carried my comic pages around with me in a plastic clipboard case like this. These are really handy if you like to work in 8.5"x11" format- you've got a hard surface, a clip to keep your paper in place, and somewhere to store your pages and supplies when you're not using them! I still use a regular chipboard clipboard for my at-con commissions, so I don't have to rely on the tabletop for a hard surface. I highly recommend you pick one up for your own stash.

Seasonal Back to School Section
By the time this review goes live, this section will have withered away with the summer leaves. I tried to get everything I could that suited this review in the regular school section, but I still browsed this area for additional goodies.


Even more pencils, leads, and erasers back here.


The last sketchbook in the entire store, and I bought it.
What I Bought
Mechancial Pencil- Gorilla Lead- 3.62
Up and Up Pack of Mechanical Pencils, .7 lead- $2.79
Sharpie Felt Tipped Pens- $2.97
Up and Up Waterbased Markers- $4.29
Up and Up Watercolor Markers- $4.00
Up and Up Watercolors- $1.77
Pencil Sharpener- $1.49
Yoobi Highlighters- $4.99
Eraser- $1.69
Yoobi Pencil Case- $4.99
Journalling Pens- $12.79
Calligraphy pens- $11.79
Sketchbook- $3.89
My Total
$56.08
My Photo Haul


I think you guys know how these series work by now. In the upcoming days and weeks, I'll be scrutinizing these products to see if they stand up to my artist standards. I know not all of these products are intended for that sort of scrutiny, but I believe some will surprise us with how well they perform.
If you enjoy this series, or any of my series, please make sure you share it with your friends and family on your social networks! You can also send me an email, or consider contacting any of the companies that manufacture these products, and let them know how much you enjoy my reviews! If you find these reviews really helpful, please consider sending me a tip via the Paypal donation link in the sidebar, or consider purchasing something for yourself or a loved one from the Nattoshop. Your support really means a lot to me, even if I'm awful about hoarding away your kind emails and taking entirely too long to answer them.
Please consider donating to this blog or purchasing from Natto-shop (http://nattosoup.com/shop) if you want me to continue publishing quality content. All materials tested were purchased from my own pocket. Keep on Truckin' Nattosoup is not under any sponsorship.
December 4, 2015
Alcohol Based Marker Review: Artist's Loft
There's something really intriguing to me about stores that offer their own brand of alcohol based markers. I've tested Blick's Studio Brush markers, Blick's original Studio markers, Utrecht's DesignMarkers, Hobby Lobby's Art Markers, and today I'm going to show you guy Michael's Artist Loft alcohol based markers. I think part of the appeal is I'm always hoping to find a diamond in the rough, a hidden affordable gem that I can recommend to people who would like to start using alcohol based markers.
I did not buy these Artist Loft markers at Michael's- I've never even seen them at my Nashville area Michaels stores, and the only time I saw them in the wild was when visiting Illinois. I ordered mine off Amazon, and I thought I'd overpaid for the privilege, but these have a fairly high mark up even in stores. It was only when Michael's offered them for 50% off as part of a Back to School promotion that I thought they were reasonable.
Michael's carries many Artist Loft art materials- and I've been forewarned that their quality is often dubious, even for student standards. You have a few options when purchasing Artist Loft alcohol based markers from the online Michaels storefront. You can buy a two pack of just black markers, you can buy them in sets of 12 (basic, Natural, and Cool) or you can buy the entire set, including a case. You do not have the option of buying them open stock, buying replacement nibs, or purchasing replacement ink. At $44.99 for 12 markers, you're paying $3.75 per marker, if you don't have a coupon.
The Stats:
12 colorsNature/Pastel setTwin tippedAlcohol basedNon refillableNon replaceable nibsNot available open stockApprox $3.75 per markerSubject to availability in store, but you can order onlineI could not find a chart of all the colors available online. If you have the full set, and wouldn't mind making and scanning a chart, I would greatly appreciate it.
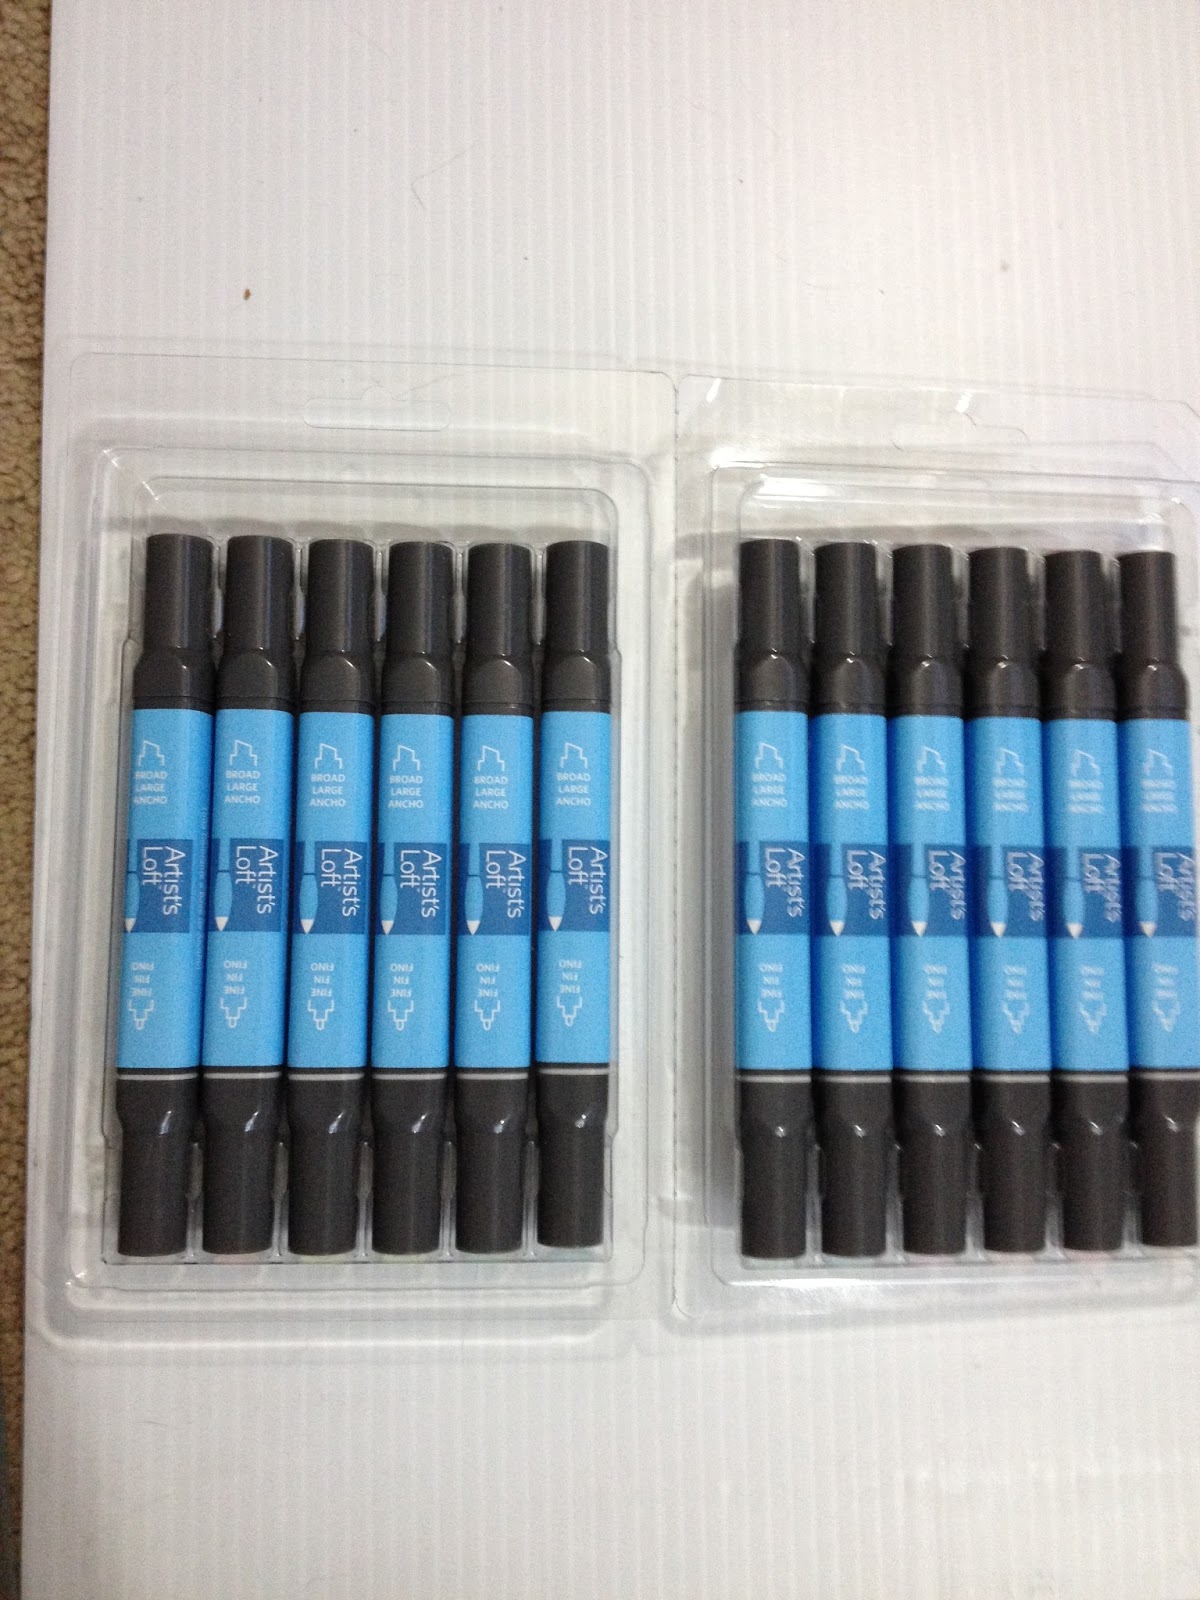
The Packaging

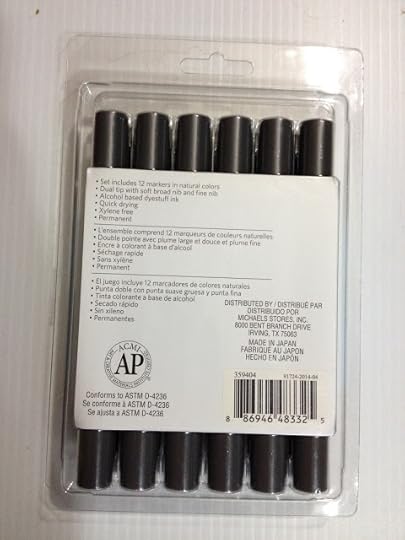

The packaging opens up to display all 12 markers in two sets of 6. The markers fit very snugly in this case, and are a bit difficult to remove if all markers are in place, so I used a mechanical pencil to wedge pencils out by their caps.

The Artist Loft alcohol based markers come in a reusable plastic clamshell case. While these cases aren't as sturdy as nylon marker cases you can buy seperately, they do keep your markers organized and together, and you don't have to pay anything additional. This may not seem like a dealbreaker for some of you, but when you've tested as many alcohol based markers as I have, included storage is always a nice perk, and beats the heck out of blister packaging that just gets tossed.
The Markers

These markers are twin tipped with a long bullet nib at one end, and a chisel nib at the other. Neither nib is flexible.

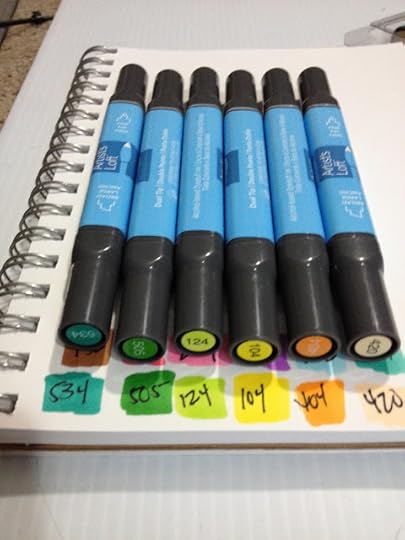
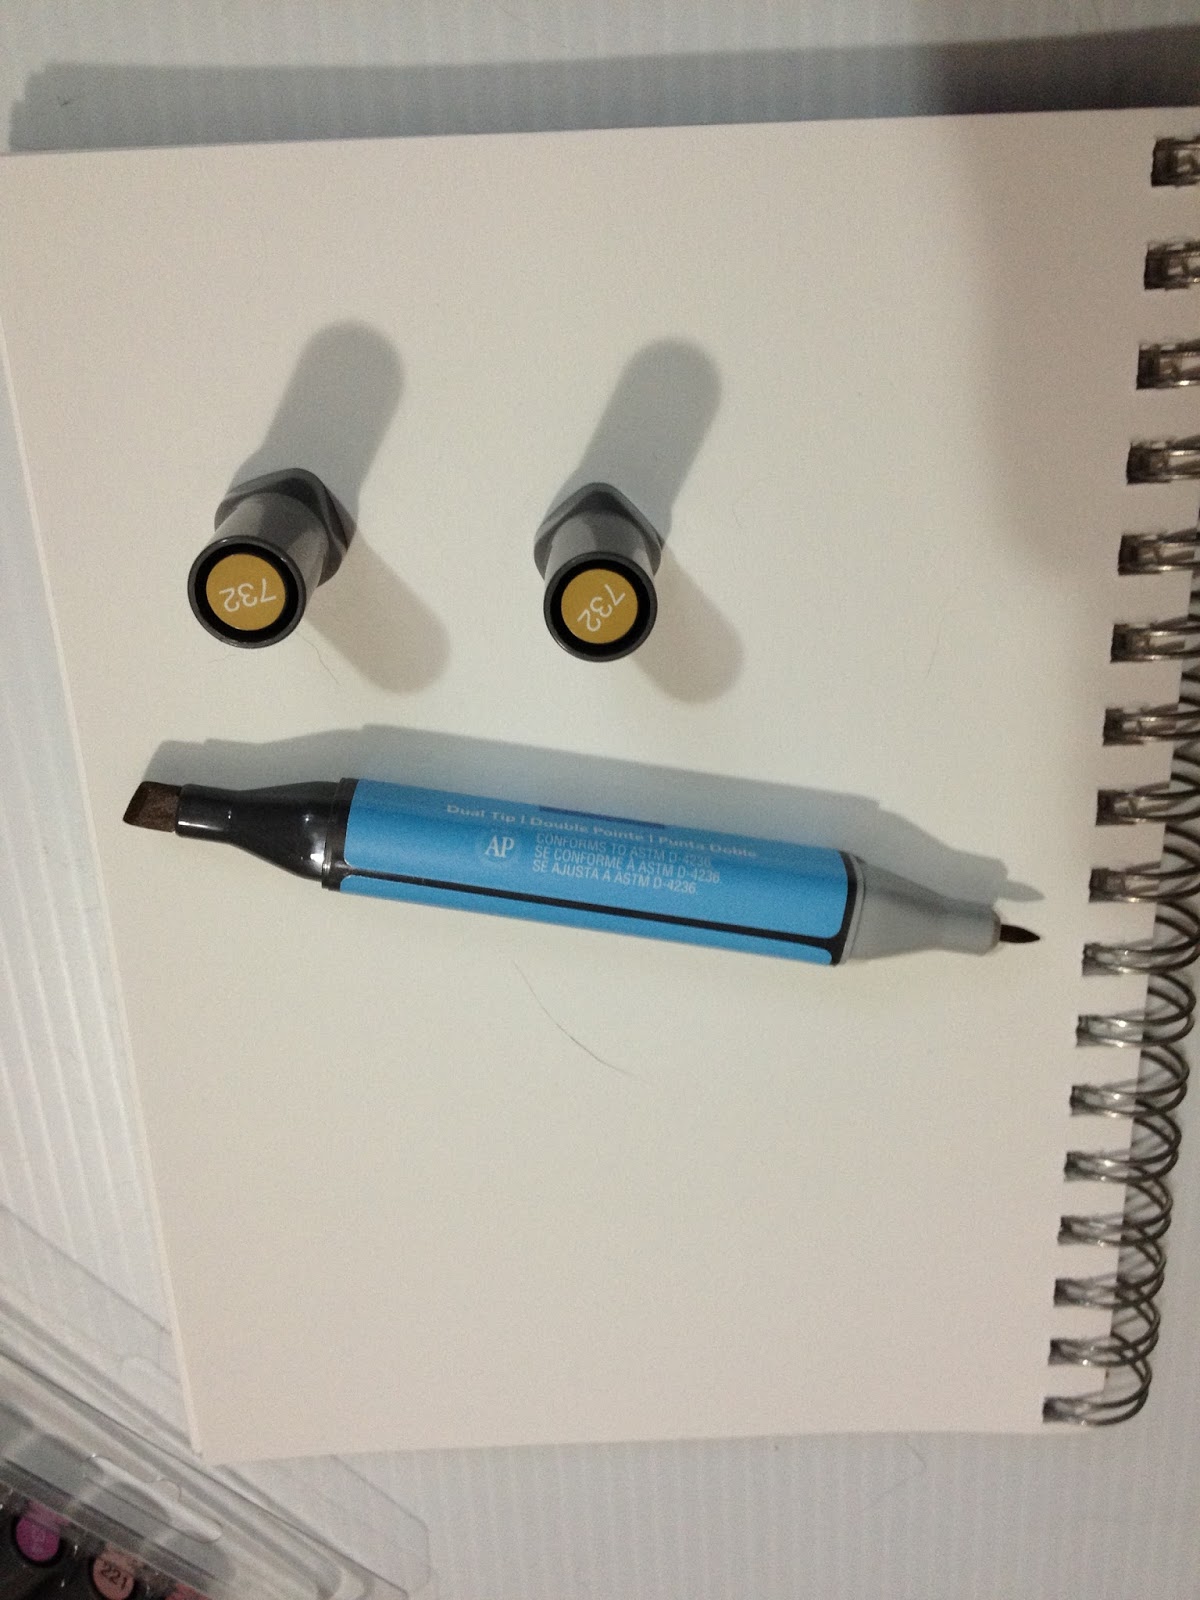
The colors don't exactly match those on the caps, but given how small Artist's Loft's range of alcohol based markers are, it's probably close enough. There seems to be a color numbering scheme for these markers 500's are Greens, 100s are Yellows, 400's are Oranges, 200's are Pink, 300's are Blues, 600's are Purples, and 700's are Browns.
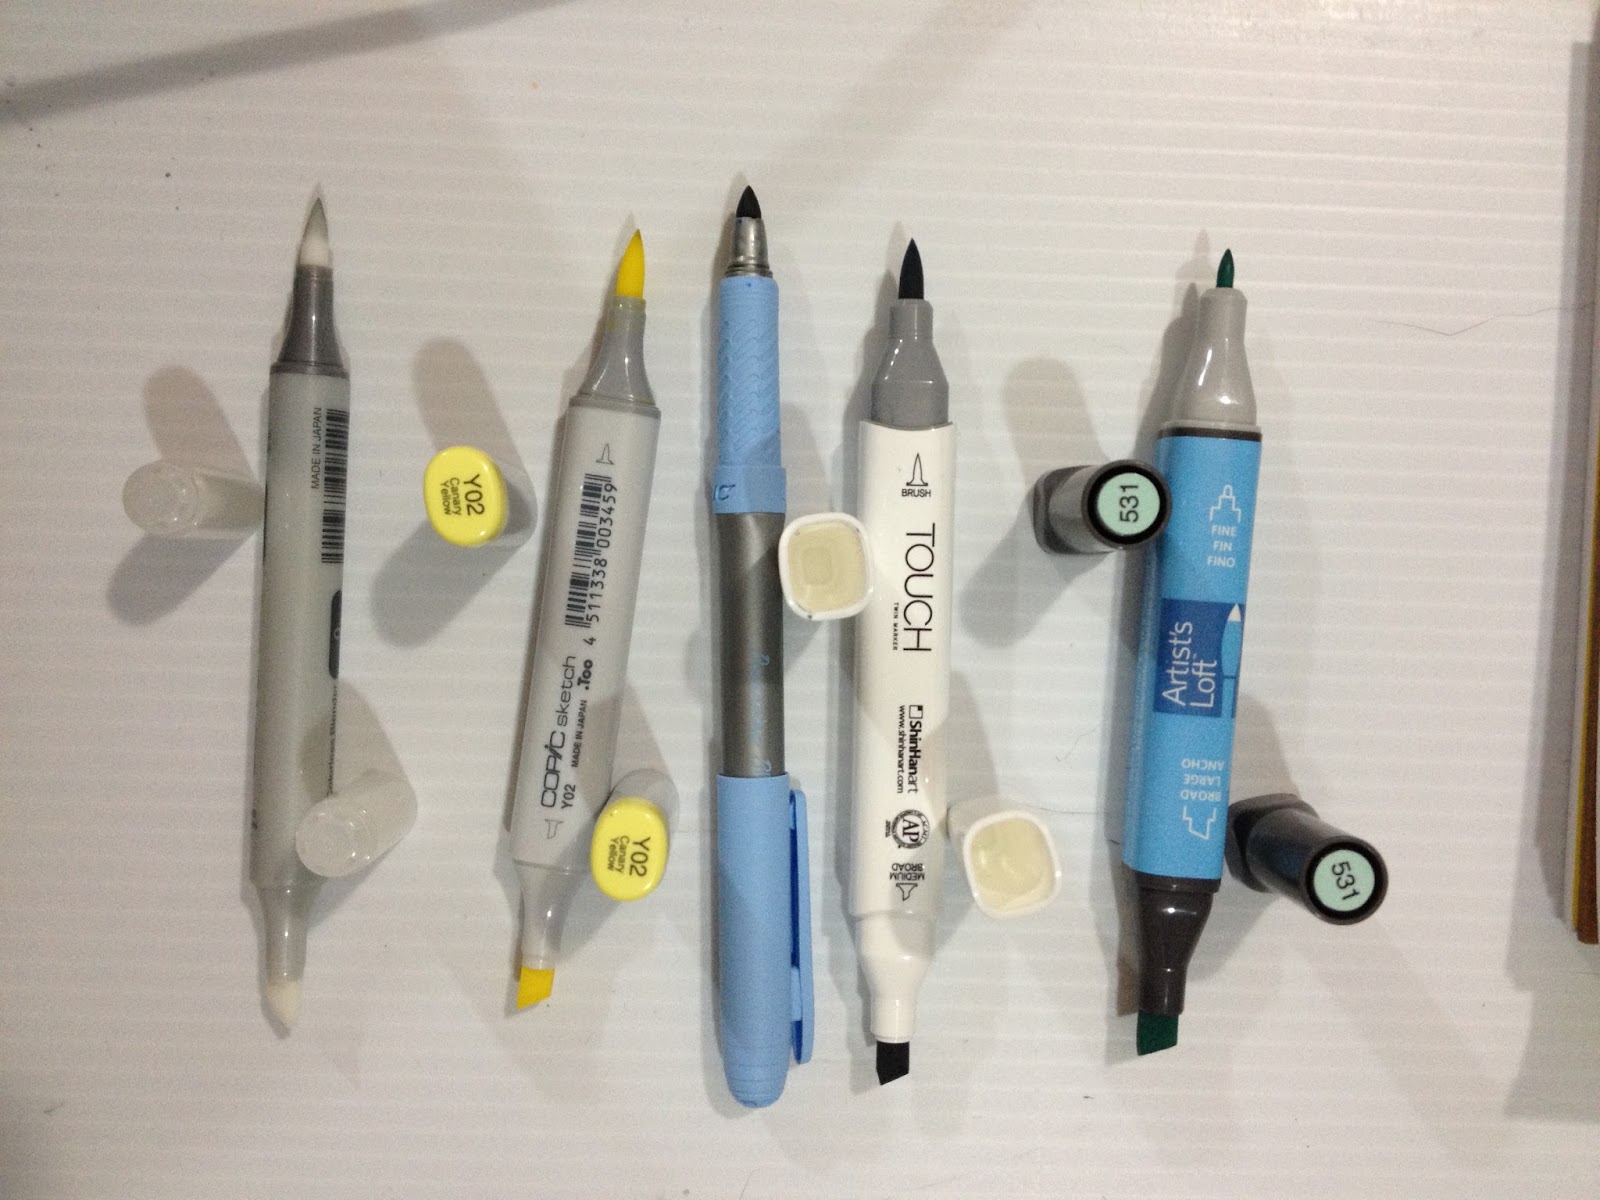
 From top to bottom: Artist's Loft, Shin Han Twin Touch, Bic Mark It, Copic Sketch, Copic Ciao
 From left to right: Copic Ciao, Copic Sketch, Bic Mark It, Shin Han Twin Touch, Artist's Loft
 From left to right: Copic Ciao, Copic Sketch, Bic Mark It, Shin Han Twin Touch, Artist's Loft
The Artist's Loft alcohol based markers look A LOT like the Kuretake Kurecolor Twin S markers I reviewed a couple years ago. They have a fairly stiff bullet nib on one end, and a rather roughly hewn chisel nib on the other.
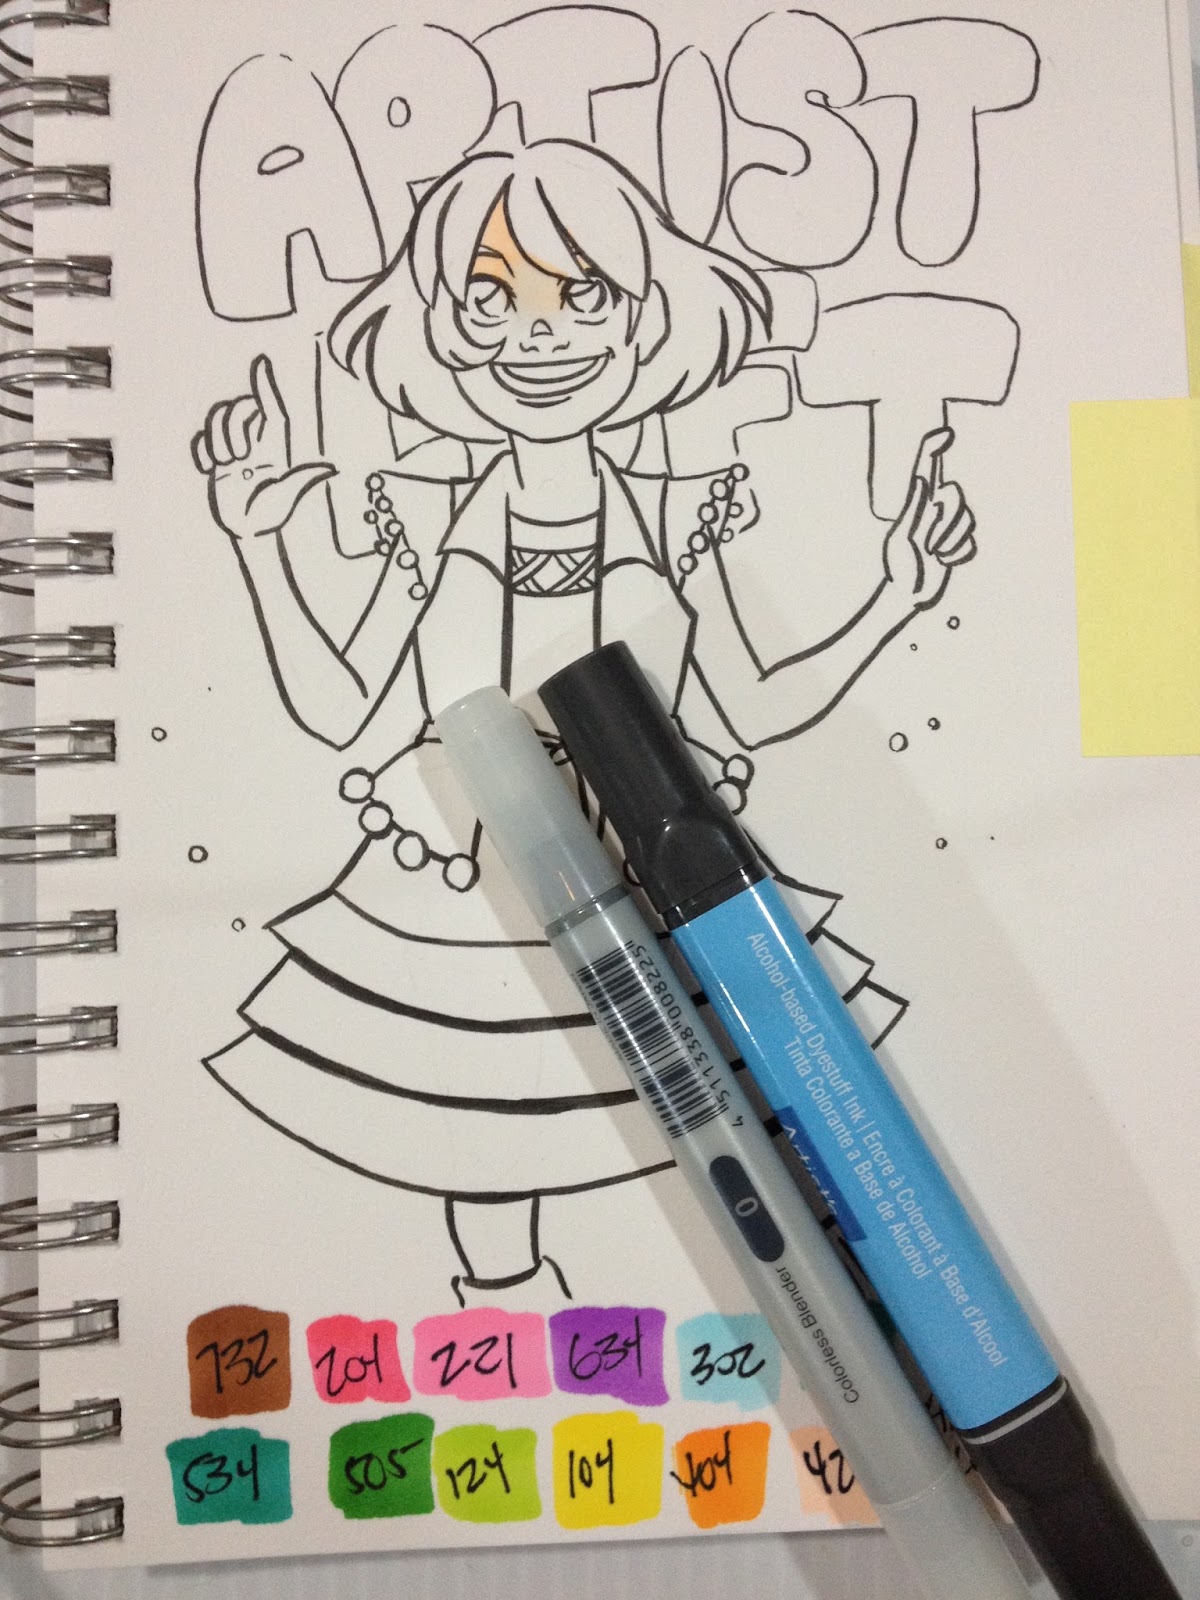
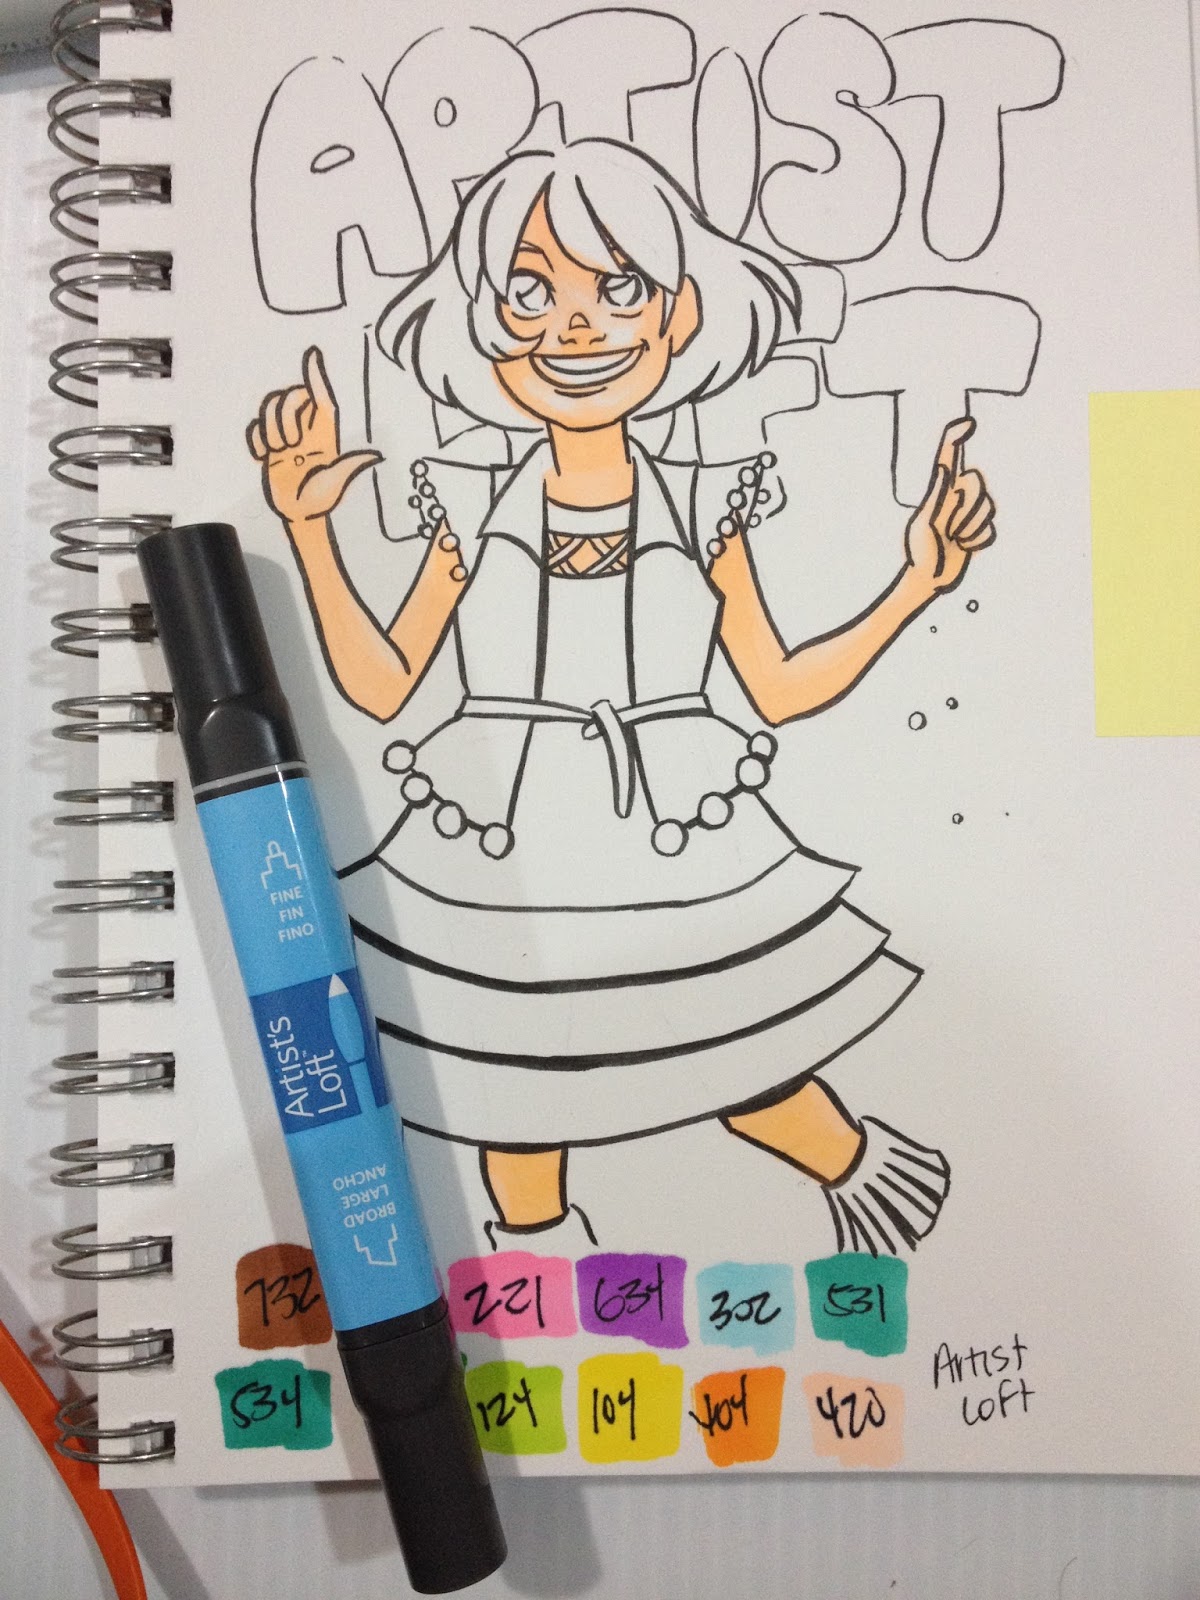
The Swatch Test on Strathmore Mixed Media Paper

It seems like none of the stickers actually match the ink inside the marker. Often the ink dries a very different color from how it originally goes down, which had me holding my breath for awhile, especially with Kara's skin.
The Field Test on Strathmore Mixed Media Paper

As this set doesn't come with it's own Colorless Blender, I'm using a Copic Ciao.


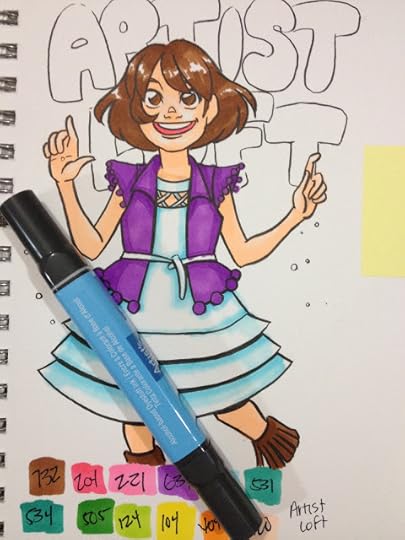
The peach included in the Natural set is a very UNnatural peach- very bright, and almost fluorescent when blended out. I used the Copic Ciao colorless blender, as this set did not come with a blender of it's own. Considering Artist's Loft is a Michael's brand, and Michael's sells sets of Prismacolors, and openstock Copic markers, it's not a stretch to imagine picking up a Prisma or Copic blender to go with your Artist's Loft alcohol based markers.

There also isn't really a good light blue option for shading whites. My options were 302 or 531, and both seemed too dark.
I did the best I could, and blended out as much as I could with the Copic Colorless Blender, but it's still a fairly harsh contrast, and I couldn't achieve even coverage.

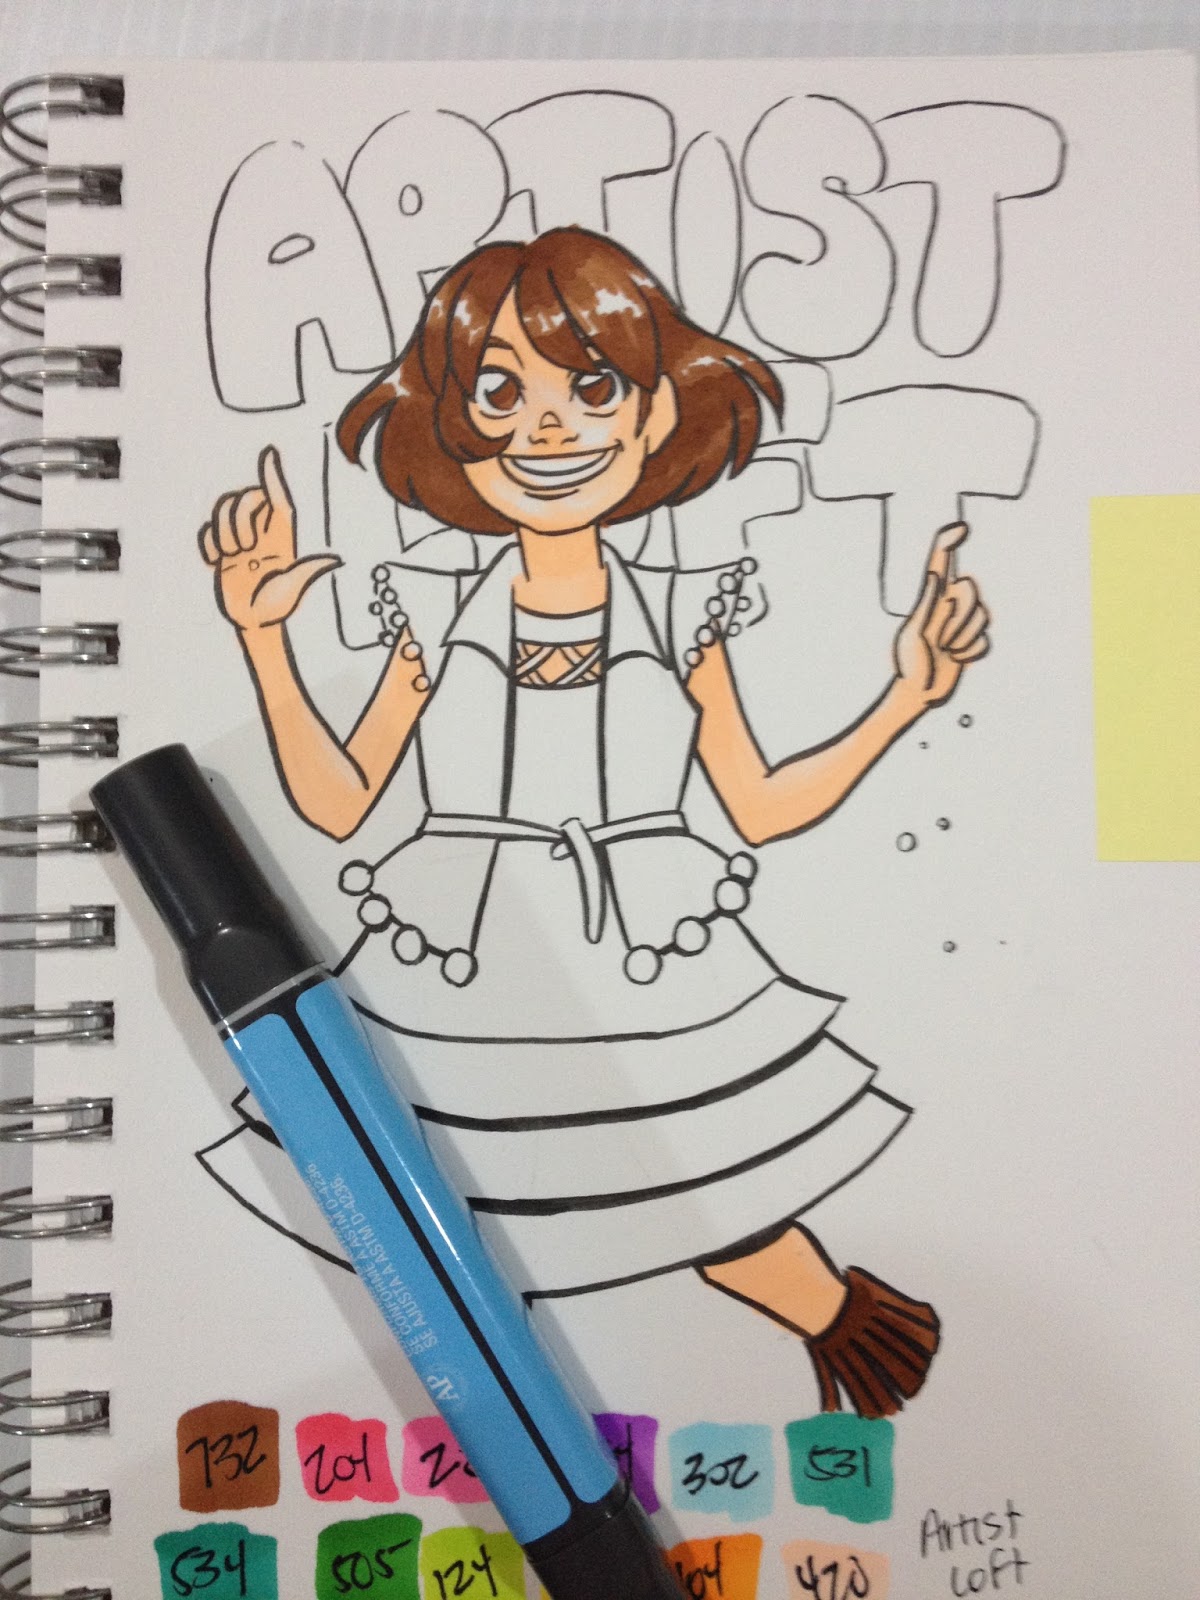
So rather than trying to force colors to blend into pastels, I just went with it, and used them at full strength for the rest of this test. Like Copics, Prismacolors, or Shin Han Twin Touches, these markers layer decently well, and if you're careful in application and apply your strokes either in little scrubby circles or in slow deliberate strokes, you can achieve uniform coverage.


Since this pack doesn't come with a colorless blender, I'll be augmenting the set with my Copic Ciao Colorless Blender. The peach, 420, is almost blindingly bright, and it was hard to blend it out enough to not be garish on Kara's face. There is only one brown in this set 732, which I used to color Kara's Hair, boots, and belt. Layering does not make this brown dark enough for it to really substitute for darker browns. The lightest blue, 302, served as the shadow on Kara's 'white' dress, but I couldn't blend it out enough for it to really be believable as a shadow. These colors are easier to lay down sans streaking than the waterbased markers I've been reviewng recently, but it's frustrating to color with the weird bullet nib.
There is nothing to make the Artist Loft alcohol based markers stand out amongst better known brands such as Prismacolor or Copic, both of which are sold at Michaels, some of which are even sold open stock.
The Back To School Sale:
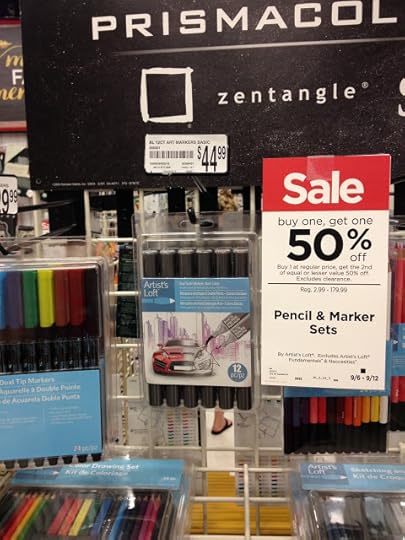
If you see these in the wild, and you're careful with your coupons, or time it for a sale, you can get a set of 12 Artist's Loft alcohol markers for around $22.50, or less than $2 per marker, which is pretty cheap. Granted, I've only seen Artist's Loft markers in the wild once (the above example, which was a back to school sale), and when they AREN'T on sale, they're a little over $3 per marker.
The Verdict:
These markers are overpriced, and under perform. The peach included in the natural color set I ordered from Amazon is almost fluorescent, and definitely not a color found in nature. Honestly, all of the colors in this set are too different from one another to really use for rendering florals, let alone people, and make smooth blends difficult unless I cheat and pull out my Copics. I just don't have enough similar colors to achieve the effects I want. These markers aren't available open stock, and aren't available at every Michaels, so your ability to even amass a collection is lower than sticking with a known property like Prismacolor markers.
Working with markers like these the Bic Mark Its, takes me twice as long to color a field test as it would with Copics, Prismacolors, or Blick Studio Markers, due to the limitations of the bullet nib. In addition, I feel like the the pieces for Artist's Loft and Bic Mark Its look so much more amateur than the Blick Studio markers piece- the blending is far less subtle and much more forced, transitions are harsher, and I'm able to achieve less subtle detail due to the size of the nibs. To an extent, the artist makes thematerials, not the other way around, but I feel like these tests really show that sub par materials can really make the difference in how the finished piece looks, and how much time you spend beating materials into submission as opposed to learning.
So that's another alcohol based marker review under my belt. If you found this review helpful, please consider using the handy Social buttons at the top of the post to share it with your friends, family, and readers. You can also help support this blog by writing an email to companies like Michael's, Copic, or Sanford on my behalf, and letting them know how much you enjoy my reviews. Thirdly, you can show your appreciation through financial support- by donating using the sidebar Paypal link, by commissioning me, or by purchasing something from the Nattoshop. This blog is currently not-for-profit, so your donations go towards buying more supplies for reviews, improving the equipment I use for creating post and video content, and reimbursing me (ever so slightly) for the many hours I put into this. I purchase the vast majority of these products out of pocket, so if you're interested in taking them of my hands, email me, and we can discuss payment.
Please consider donating to this blog or purchasing from Natto-shop (http://nattosoup.com/shop) if you want me to continue publishing quality content. All materials tested were purchased from my own pocket. Keep on Truckin' Nattosoup is not under any sponsorship.
I did not buy these Artist Loft markers at Michael's- I've never even seen them at my Nashville area Michaels stores, and the only time I saw them in the wild was when visiting Illinois. I ordered mine off Amazon, and I thought I'd overpaid for the privilege, but these have a fairly high mark up even in stores. It was only when Michael's offered them for 50% off as part of a Back to School promotion that I thought they were reasonable.
Michael's carries many Artist Loft art materials- and I've been forewarned that their quality is often dubious, even for student standards. You have a few options when purchasing Artist Loft alcohol based markers from the online Michaels storefront. You can buy a two pack of just black markers, you can buy them in sets of 12 (basic, Natural, and Cool) or you can buy the entire set, including a case. You do not have the option of buying them open stock, buying replacement nibs, or purchasing replacement ink. At $44.99 for 12 markers, you're paying $3.75 per marker, if you don't have a coupon.
The Stats:
12 colorsNature/Pastel setTwin tippedAlcohol basedNon refillableNon replaceable nibsNot available open stockApprox $3.75 per markerSubject to availability in store, but you can order onlineI could not find a chart of all the colors available online. If you have the full set, and wouldn't mind making and scanning a chart, I would greatly appreciate it.
The Packaging
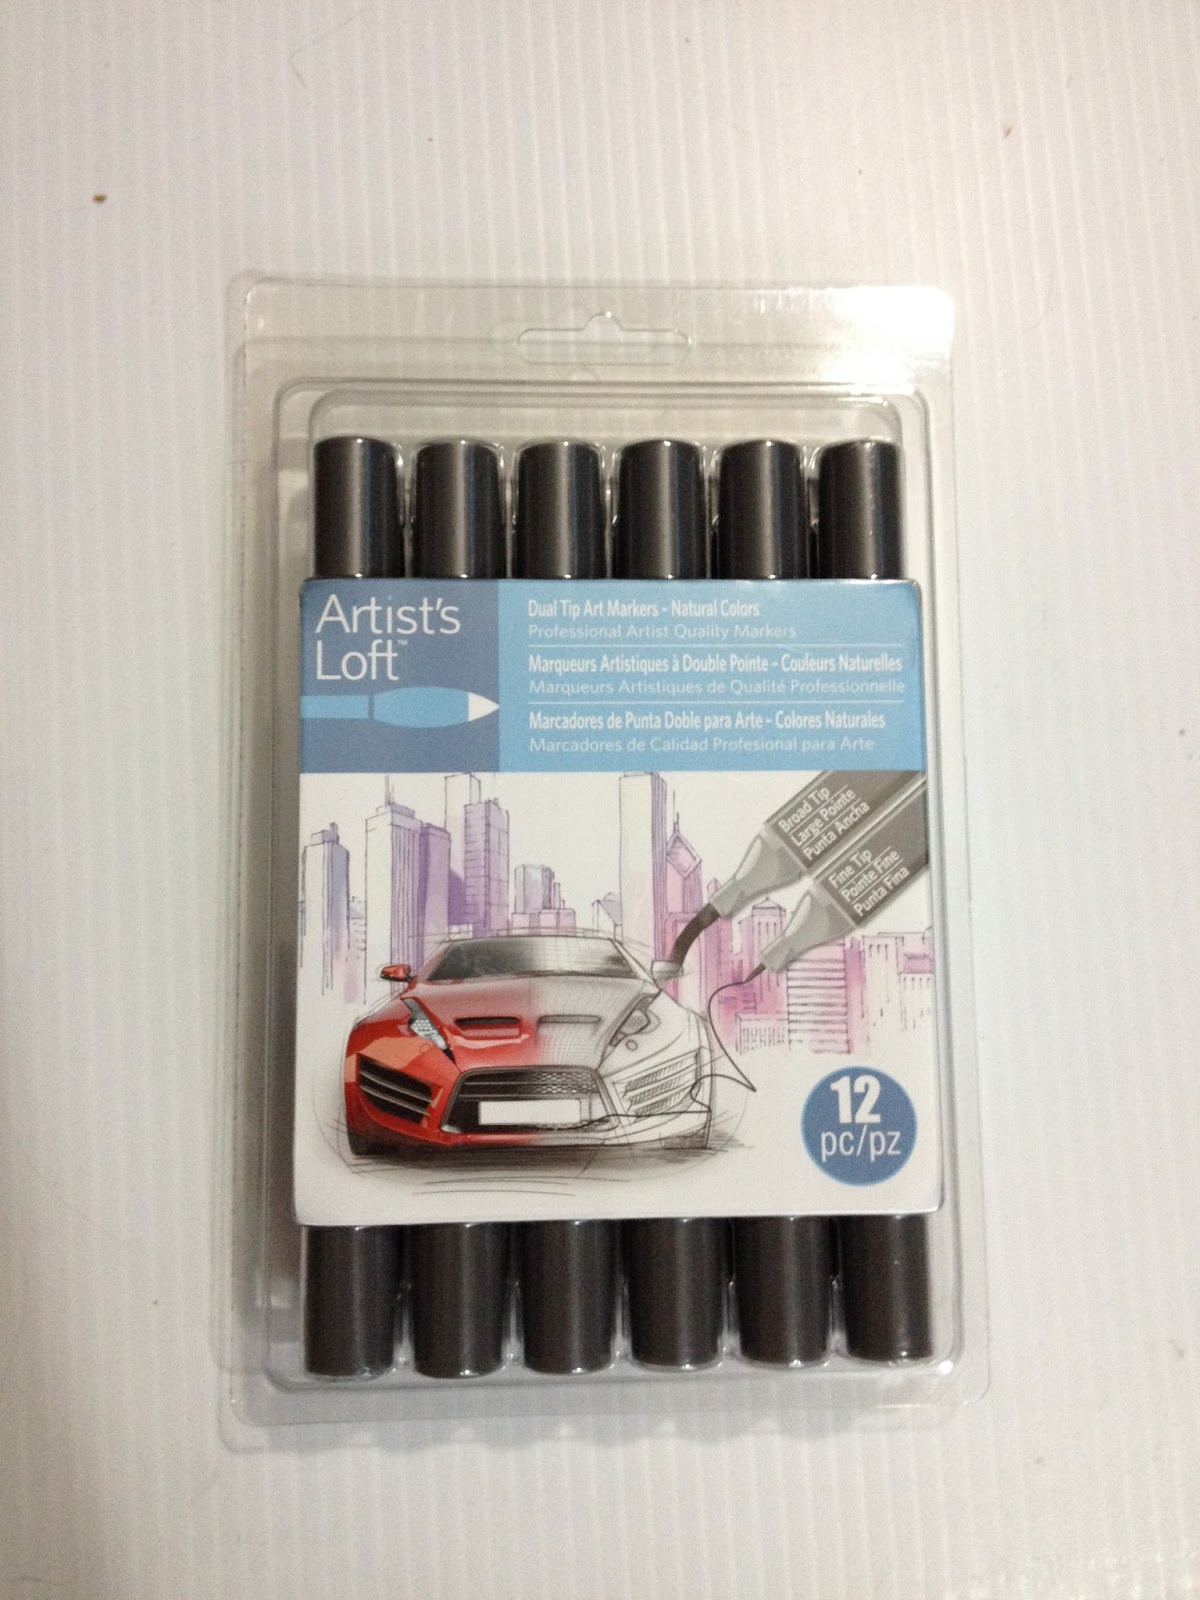


The packaging opens up to display all 12 markers in two sets of 6. The markers fit very snugly in this case, and are a bit difficult to remove if all markers are in place, so I used a mechanical pencil to wedge pencils out by their caps.
The Artist Loft alcohol based markers come in a reusable plastic clamshell case. While these cases aren't as sturdy as nylon marker cases you can buy seperately, they do keep your markers organized and together, and you don't have to pay anything additional. This may not seem like a dealbreaker for some of you, but when you've tested as many alcohol based markers as I have, included storage is always a nice perk, and beats the heck out of blister packaging that just gets tossed.
The Markers
These markers are twin tipped with a long bullet nib at one end, and a chisel nib at the other. Neither nib is flexible.


The colors don't exactly match those on the caps, but given how small Artist's Loft's range of alcohol based markers are, it's probably close enough. There seems to be a color numbering scheme for these markers 500's are Greens, 100s are Yellows, 400's are Oranges, 200's are Pink, 300's are Blues, 600's are Purples, and 700's are Browns.
 From top to bottom: Artist's Loft, Shin Han Twin Touch, Bic Mark It, Copic Sketch, Copic Ciao
 From left to right: Copic Ciao, Copic Sketch, Bic Mark It, Shin Han Twin Touch, Artist's Loft
 From left to right: Copic Ciao, Copic Sketch, Bic Mark It, Shin Han Twin Touch, Artist's Loft
The Artist's Loft alcohol based markers look A LOT like the Kuretake Kurecolor Twin S markers I reviewed a couple years ago. They have a fairly stiff bullet nib on one end, and a rather roughly hewn chisel nib on the other.
The Swatch Test on Strathmore Mixed Media Paper

It seems like none of the stickers actually match the ink inside the marker. Often the ink dries a very different color from how it originally goes down, which had me holding my breath for awhile, especially with Kara's skin.
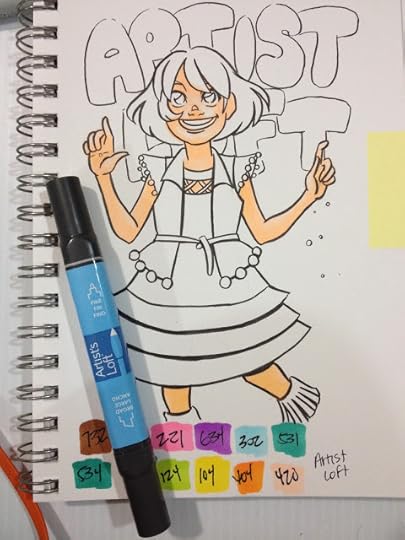
The Field Test on Strathmore Mixed Media Paper
As this set doesn't come with it's own Colorless Blender, I'm using a Copic Ciao.
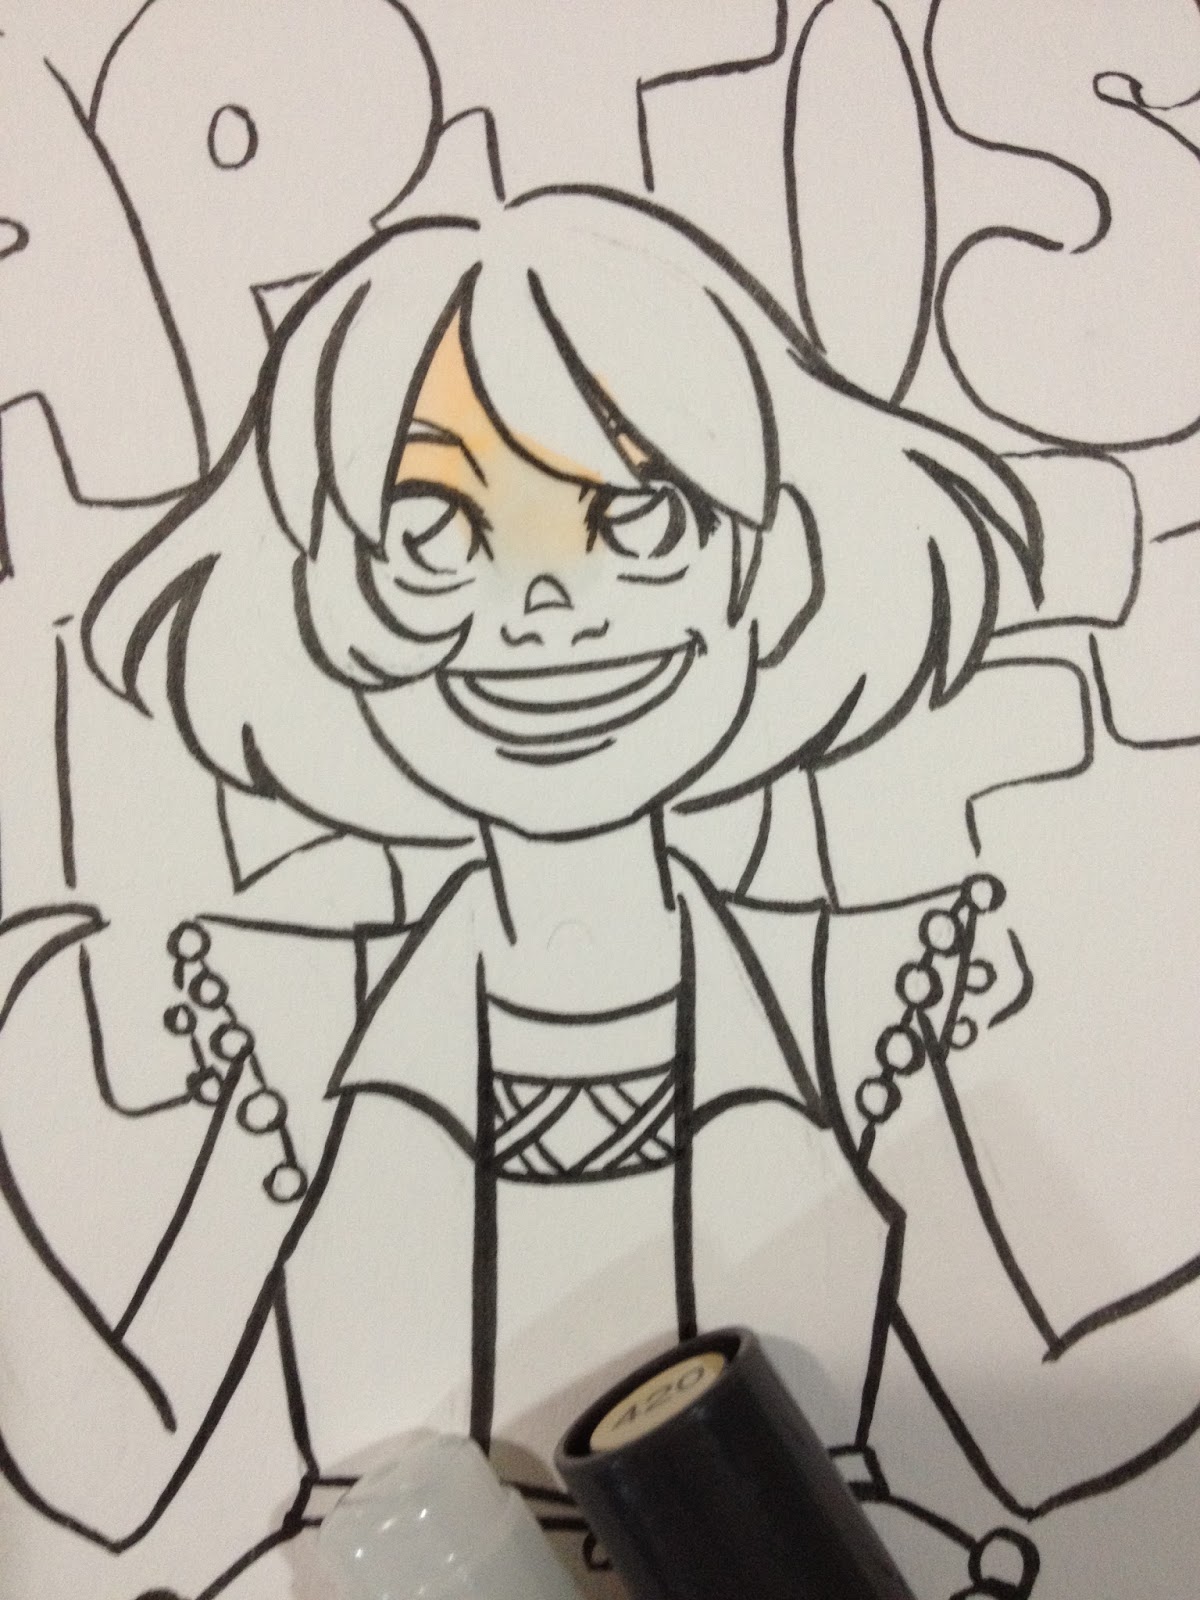

The peach included in the Natural set is a very UNnatural peach- very bright, and almost fluorescent when blended out. I used the Copic Ciao colorless blender, as this set did not come with a blender of it's own. Considering Artist's Loft is a Michael's brand, and Michael's sells sets of Prismacolors, and openstock Copic markers, it's not a stretch to imagine picking up a Prisma or Copic blender to go with your Artist's Loft alcohol based markers.

There also isn't really a good light blue option for shading whites. My options were 302 or 531, and both seemed too dark.

I did the best I could, and blended out as much as I could with the Copic Colorless Blender, but it's still a fairly harsh contrast, and I couldn't achieve even coverage.


So rather than trying to force colors to blend into pastels, I just went with it, and used them at full strength for the rest of this test. Like Copics, Prismacolors, or Shin Han Twin Touches, these markers layer decently well, and if you're careful in application and apply your strokes either in little scrubby circles or in slow deliberate strokes, you can achieve uniform coverage.
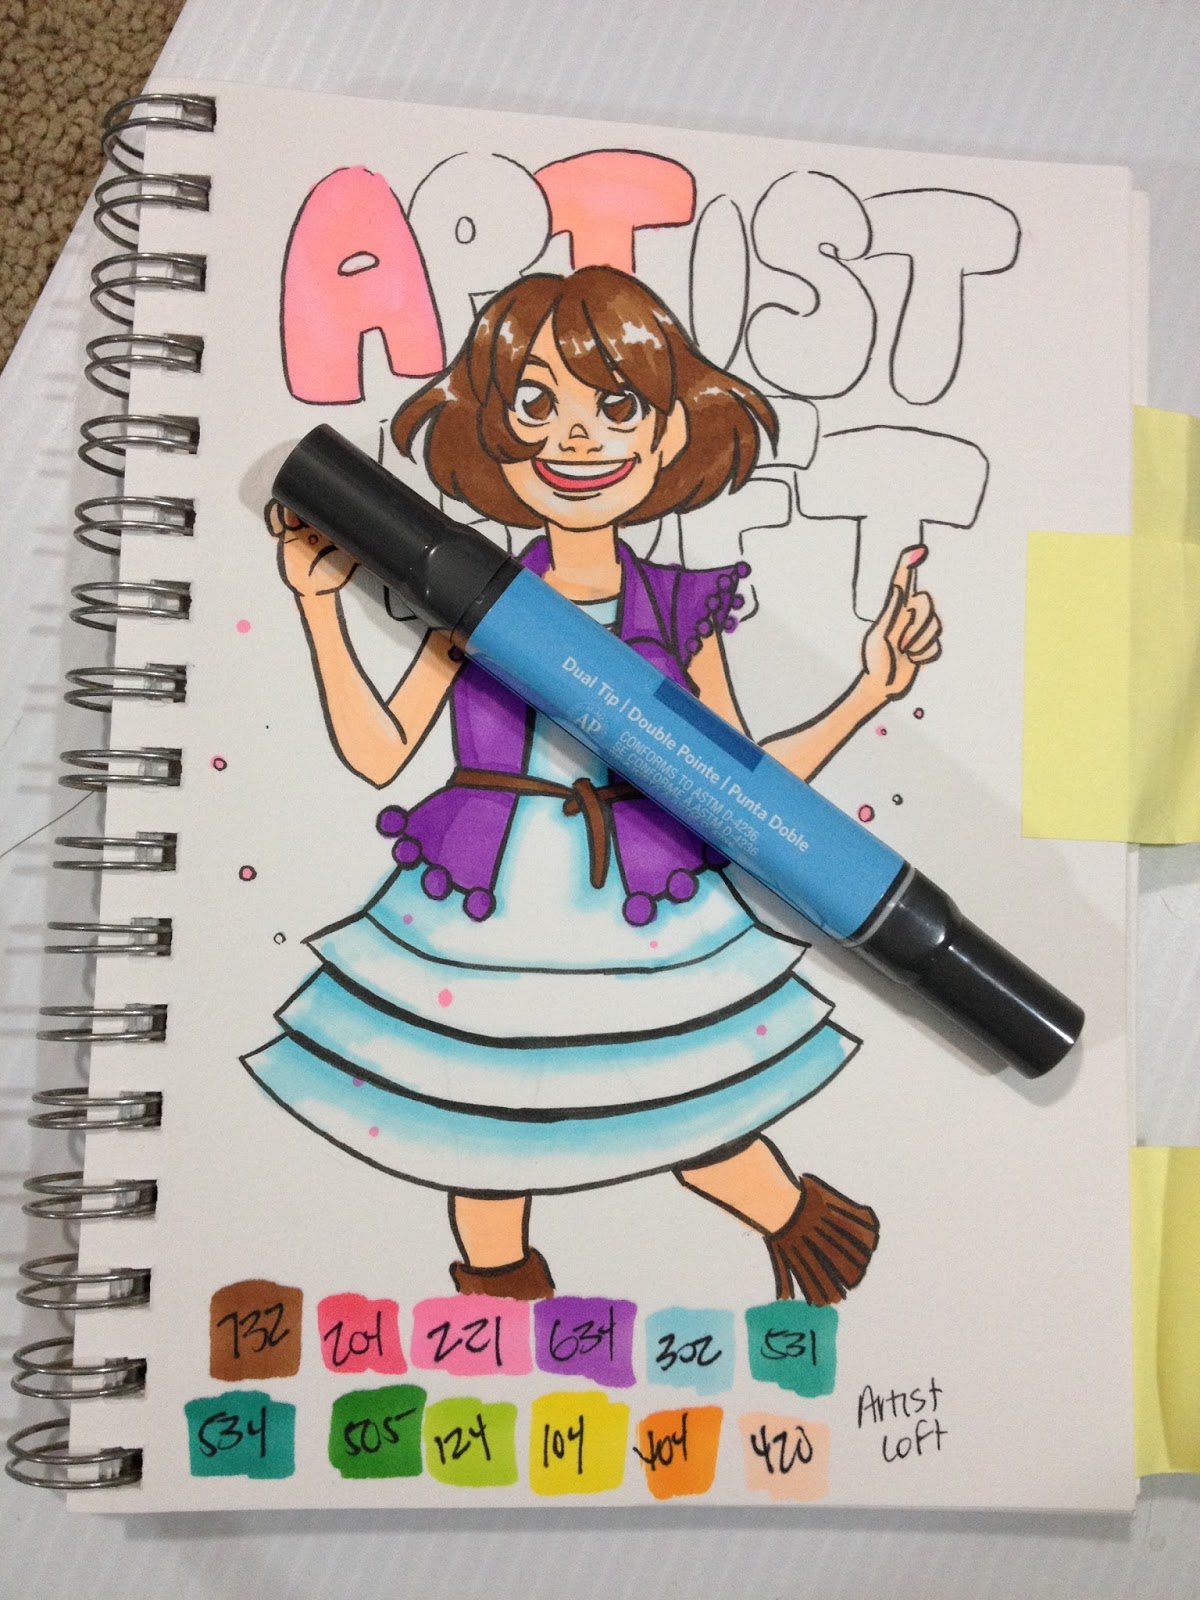
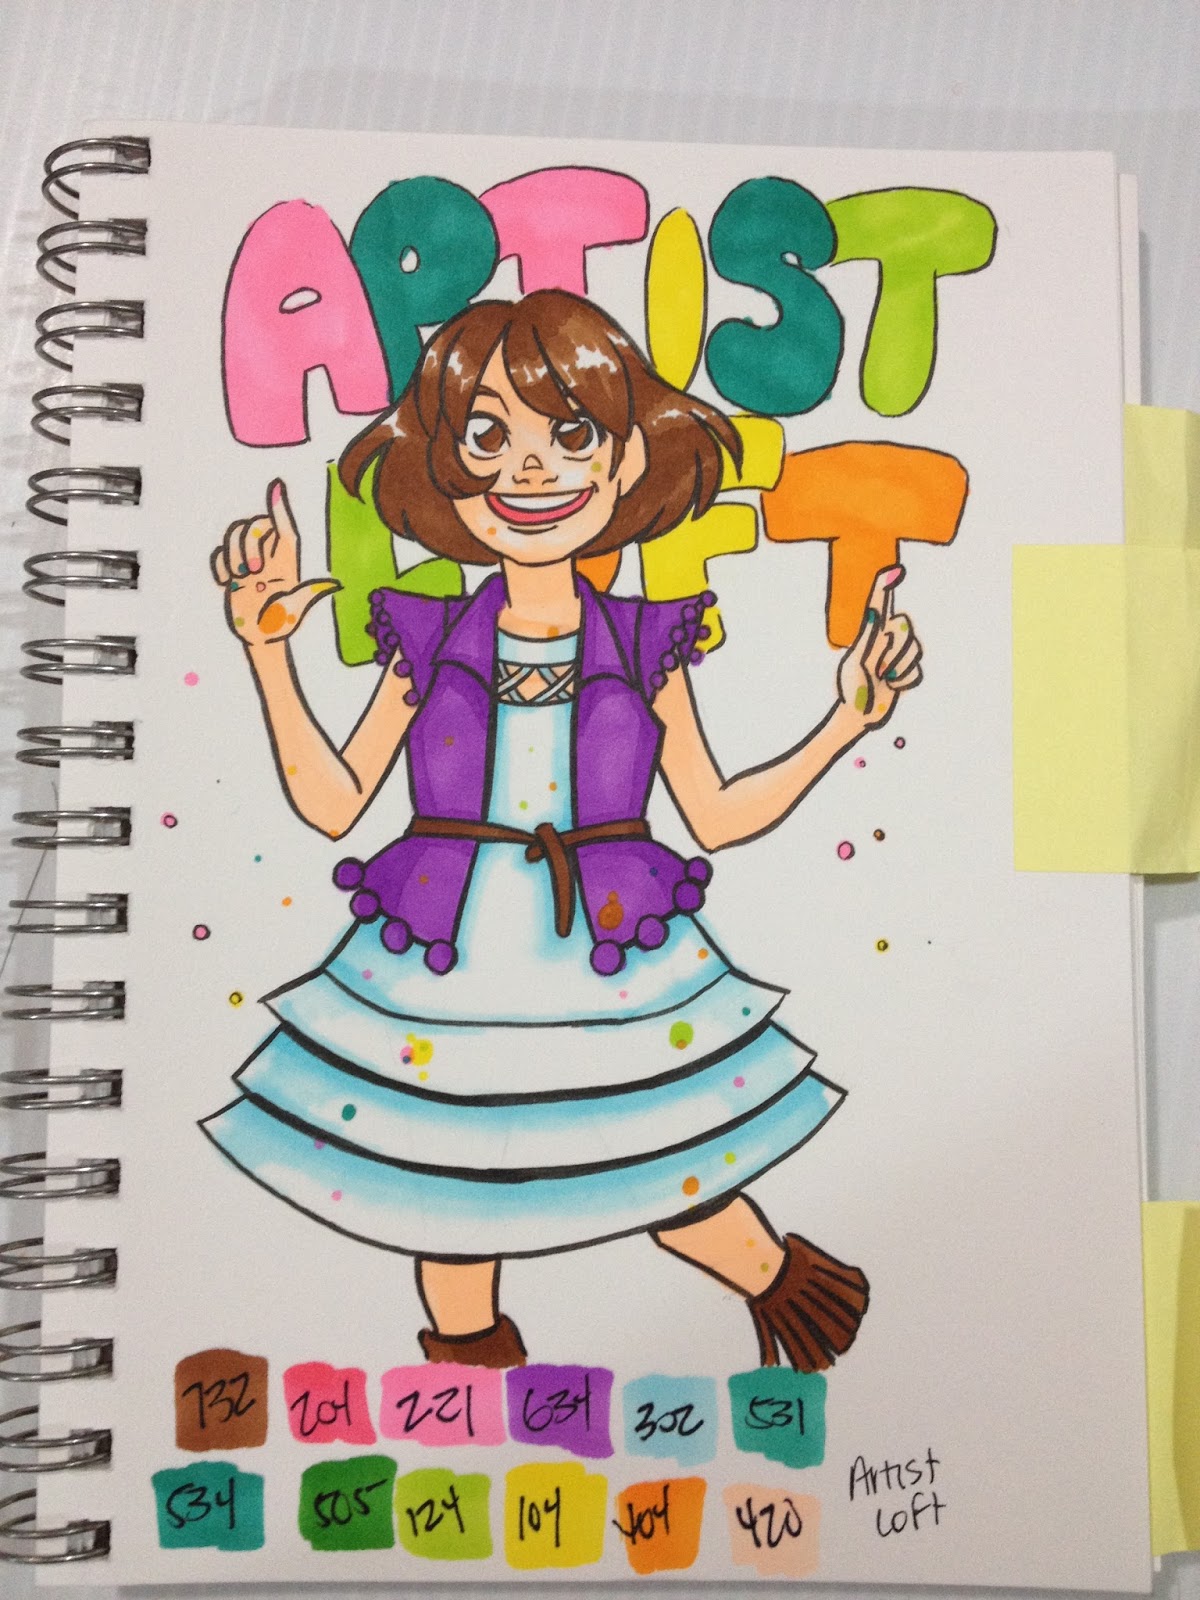
Since this pack doesn't come with a colorless blender, I'll be augmenting the set with my Copic Ciao Colorless Blender. The peach, 420, is almost blindingly bright, and it was hard to blend it out enough to not be garish on Kara's face. There is only one brown in this set 732, which I used to color Kara's Hair, boots, and belt. Layering does not make this brown dark enough for it to really substitute for darker browns. The lightest blue, 302, served as the shadow on Kara's 'white' dress, but I couldn't blend it out enough for it to really be believable as a shadow. These colors are easier to lay down sans streaking than the waterbased markers I've been reviewng recently, but it's frustrating to color with the weird bullet nib.
There is nothing to make the Artist Loft alcohol based markers stand out amongst better known brands such as Prismacolor or Copic, both of which are sold at Michaels, some of which are even sold open stock.
The Back To School Sale:

If you see these in the wild, and you're careful with your coupons, or time it for a sale, you can get a set of 12 Artist's Loft alcohol markers for around $22.50, or less than $2 per marker, which is pretty cheap. Granted, I've only seen Artist's Loft markers in the wild once (the above example, which was a back to school sale), and when they AREN'T on sale, they're a little over $3 per marker.
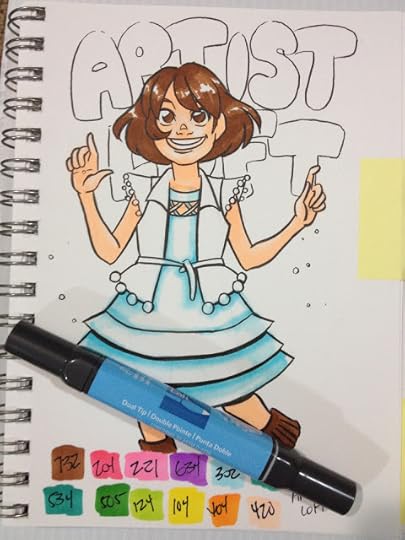
The Verdict:
These markers are overpriced, and under perform. The peach included in the natural color set I ordered from Amazon is almost fluorescent, and definitely not a color found in nature. Honestly, all of the colors in this set are too different from one another to really use for rendering florals, let alone people, and make smooth blends difficult unless I cheat and pull out my Copics. I just don't have enough similar colors to achieve the effects I want. These markers aren't available open stock, and aren't available at every Michaels, so your ability to even amass a collection is lower than sticking with a known property like Prismacolor markers.
Working with markers like these the Bic Mark Its, takes me twice as long to color a field test as it would with Copics, Prismacolors, or Blick Studio Markers, due to the limitations of the bullet nib. In addition, I feel like the the pieces for Artist's Loft and Bic Mark Its look so much more amateur than the Blick Studio markers piece- the blending is far less subtle and much more forced, transitions are harsher, and I'm able to achieve less subtle detail due to the size of the nibs. To an extent, the artist makes thematerials, not the other way around, but I feel like these tests really show that sub par materials can really make the difference in how the finished piece looks, and how much time you spend beating materials into submission as opposed to learning.
So that's another alcohol based marker review under my belt. If you found this review helpful, please consider using the handy Social buttons at the top of the post to share it with your friends, family, and readers. You can also help support this blog by writing an email to companies like Michael's, Copic, or Sanford on my behalf, and letting them know how much you enjoy my reviews. Thirdly, you can show your appreciation through financial support- by donating using the sidebar Paypal link, by commissioning me, or by purchasing something from the Nattoshop. This blog is currently not-for-profit, so your donations go towards buying more supplies for reviews, improving the equipment I use for creating post and video content, and reimbursing me (ever so slightly) for the many hours I put into this. I purchase the vast majority of these products out of pocket, so if you're interested in taking them of my hands, email me, and we can discuss payment.
Please consider donating to this blog or purchasing from Natto-shop (http://nattosoup.com/shop) if you want me to continue publishing quality content. All materials tested were purchased from my own pocket. Keep on Truckin' Nattosoup is not under any sponsorship.
December 2, 2015
Alcohol Based Marker Review: Art Markers from Hobby Lobby
I usually attempt to write a cute or funny little intro for all of my review posts. Sometimes that's the hardest part of the post- it has to tie in with the review, but I really want it to be at least moderately amusing for those of you who just aren't that into art supply reviews.
This time, I don't really have anything. I went to Hobby Lobby to buy a watercolor sketchbook upon a Youtube recommendation. I don't normally shop at Hobby Lobby, and one visit does not a hobby (lobby) make. While I was there, I saw that my local Hobby Lobby had a storebrand of alcohol based markers, and I figured I'd review them for you guys, because at heart, I'm a completionist. I want bragging rights for most alcohol based marker reviews, and like with Pokemon, I gotta catch them all.
I paid $29.99 at Hobby Lobby in early September- this is approximately $1.67 per marker, which is really cheap for alcohol based markers. I didn't have high hopes for these, but
The Stats
Double endedFast DryPermanentNon Toxic InkFine NibChisel Nib18 colors (advertises 12 primary colors+6 bonus colors)Resists light and waterSmooth Flow and CoverageNon Toxic
Only set my Hobby Lobby had, your selection may vary. I tried to find these markers online, and can't but, I did find this other set, which is the same price. They may have just changed the body design.
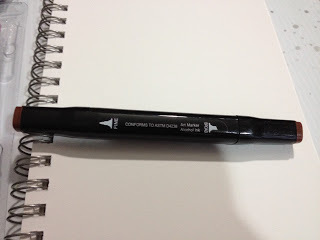
Packaging promises a 'professional graphic art marker', 'for all areas of design and illustration', 'versatile double nibs chisel & extra fine can produce a range of strokes from fine detail to wide color fill in'.
The Packaging:


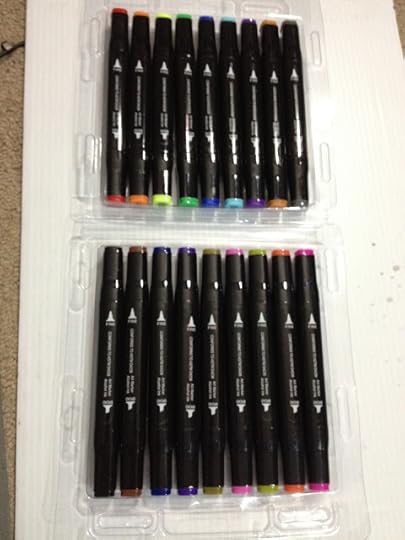
Hobby Lobby's art markers are packaged in a reusable plastic case that snaps shut. The markers are fairly snug in the plastic case the first few times you remove them, but eventually they feel loose and will fall out when you're trying to shut the case. I'm a big fan of packaging that is reusable- it means I don't have to purchase a case to store a collection of markers in.
The Markers:


 From top to bottom: Letraset Flex marker, Copic Sketch, Shin Han Twin Touch, Hobby Lobby Art Marker, ChartPak Ad Pro, Kuretake Touch Twin S, Prismacolor with the bullet nib, Prismacolor with the brush nib, Chromatix, Copic Ciao
 From top to bottom: Letraset Flex Marker, Copic Sketch, Shin Han Twin Touch, Hobby Lobby Art Marker, Charpak Ad Pro, Kuretake Twin S, Prismacolor with the chisel nib, Prismacolor with the brush nib. Right side: Chromatix, Copic Ciao
This 18 color set does not come with a blender marker, or any markers that really function as skintones. Honestly, the color selection is a little weird- all the colors included are very intense, only a few differ in value from the rest.
The Swatch Test:

The swatches were completed with the chisel nib of these Art Markers.
Field Test:
The field test was inked using a Sailor Mitsuo Aida fude pen, which is both Copic and waterproof. The field test was rendered in a Strathmore 300 series Mixed Media pad, which I use for all of my marker tests. The paper is similar to a very thick cardstock.


There are no usable skintones for Kara (or anyone, really) in this set, so I'm using Copic and Blick Studio Brush markers (link) to render Kara's skin.


Even the bullet nib is very prone to bleeding on the Strathmore Mixed Media Paper. The red is so intense, you can't really layer with it, the best you could probably do is blend it out a little with Copic/Prismacolor colorless blender. Using colorless blender to try and blend out the light blue makes it bleed even more. You can do tip to tip blending by appling the Art Marker Baby Blue to the colorless blender of your choice for a slightly less saturated Baby Blue. The only yellow in this set is a highlighter flourescent yellow, which is almost unusuable for any sort of realistic rendering.


It takes a lot of colorless blender to try and blend these colors into anything I'd find usuable for shading whites or lights, and the colors are so saturated that they're all about at the same value. Attempts to dilute the Art Marker's lightest blue with my Copic colorless blender did not go so well.


These markers bleed A LOT, even from the bullet nib, so your ability to produce 'fine detail', as promised on the packaging, is going to be limited. Both ends are pretty juicy- although these markers were hung up at Hobby Lobby, I stored them horizontaly in my 'to review' box.


I applied this horrible olive green to the "Hobby Lobby" and tried to blend it out a bit. You can see how poorly Art Markers react to Copic colorless blender- it blobs out unpredictably, rather than fairly uniform bleaching.

The Verdict
These aren't the worst alcohol based markers I've ever tested- that honor is shared by Concept and Fab, but these are a far cry from Copic, Prismacolor, or Shin Han Twin Touch. These markers have plenty of ink, but the nibs leave much to be desired, and they don't really play well with other markers. Although the price point is tempting, these markers are not refillable, and do not have replaceable nibs, and you can't purchase these open stock.
Really, what it comes down to is, are you feeling desperate, punk? Are you limited in your alcohol based marker vendors, and can't order online? Does your town only have a Hobby Lobby? If this sounds like you, then Hobby Lobby's Art Markers are fine, and while they don't perform as well as other alcohol based markers, they're an ok introduction to get you used to the inks.
However, if you have access to better, even if it costs more, I recommend going for Prismacolor Premiers, Blick Studio Brush markers, or Copic Ciaos. Brush tipped markers are easier to use, and are able to create smoother blends and better transitions than chisel nibs or bullet tips. Even if you only have a Hobby Lobby, many Hobby Lobbies do carry Copic markers.
Please consider donating to this blog or purchasing from Natto-shop (http://nattosoup.com/shop) if you want me to continue publishing quality content. All materials tested were purchased from my own pocket. Keep on Truckin' Nattosoup is not under any sponsorship.
This time, I don't really have anything. I went to Hobby Lobby to buy a watercolor sketchbook upon a Youtube recommendation. I don't normally shop at Hobby Lobby, and one visit does not a hobby (lobby) make. While I was there, I saw that my local Hobby Lobby had a storebrand of alcohol based markers, and I figured I'd review them for you guys, because at heart, I'm a completionist. I want bragging rights for most alcohol based marker reviews, and like with Pokemon, I gotta catch them all.
I paid $29.99 at Hobby Lobby in early September- this is approximately $1.67 per marker, which is really cheap for alcohol based markers. I didn't have high hopes for these, but
The Stats
Double endedFast DryPermanentNon Toxic InkFine NibChisel Nib18 colors (advertises 12 primary colors+6 bonus colors)Resists light and waterSmooth Flow and CoverageNon Toxic
Only set my Hobby Lobby had, your selection may vary. I tried to find these markers online, and can't but, I did find this other set, which is the same price. They may have just changed the body design.
Packaging promises a 'professional graphic art marker', 'for all areas of design and illustration', 'versatile double nibs chisel & extra fine can produce a range of strokes from fine detail to wide color fill in'.
The Packaging:

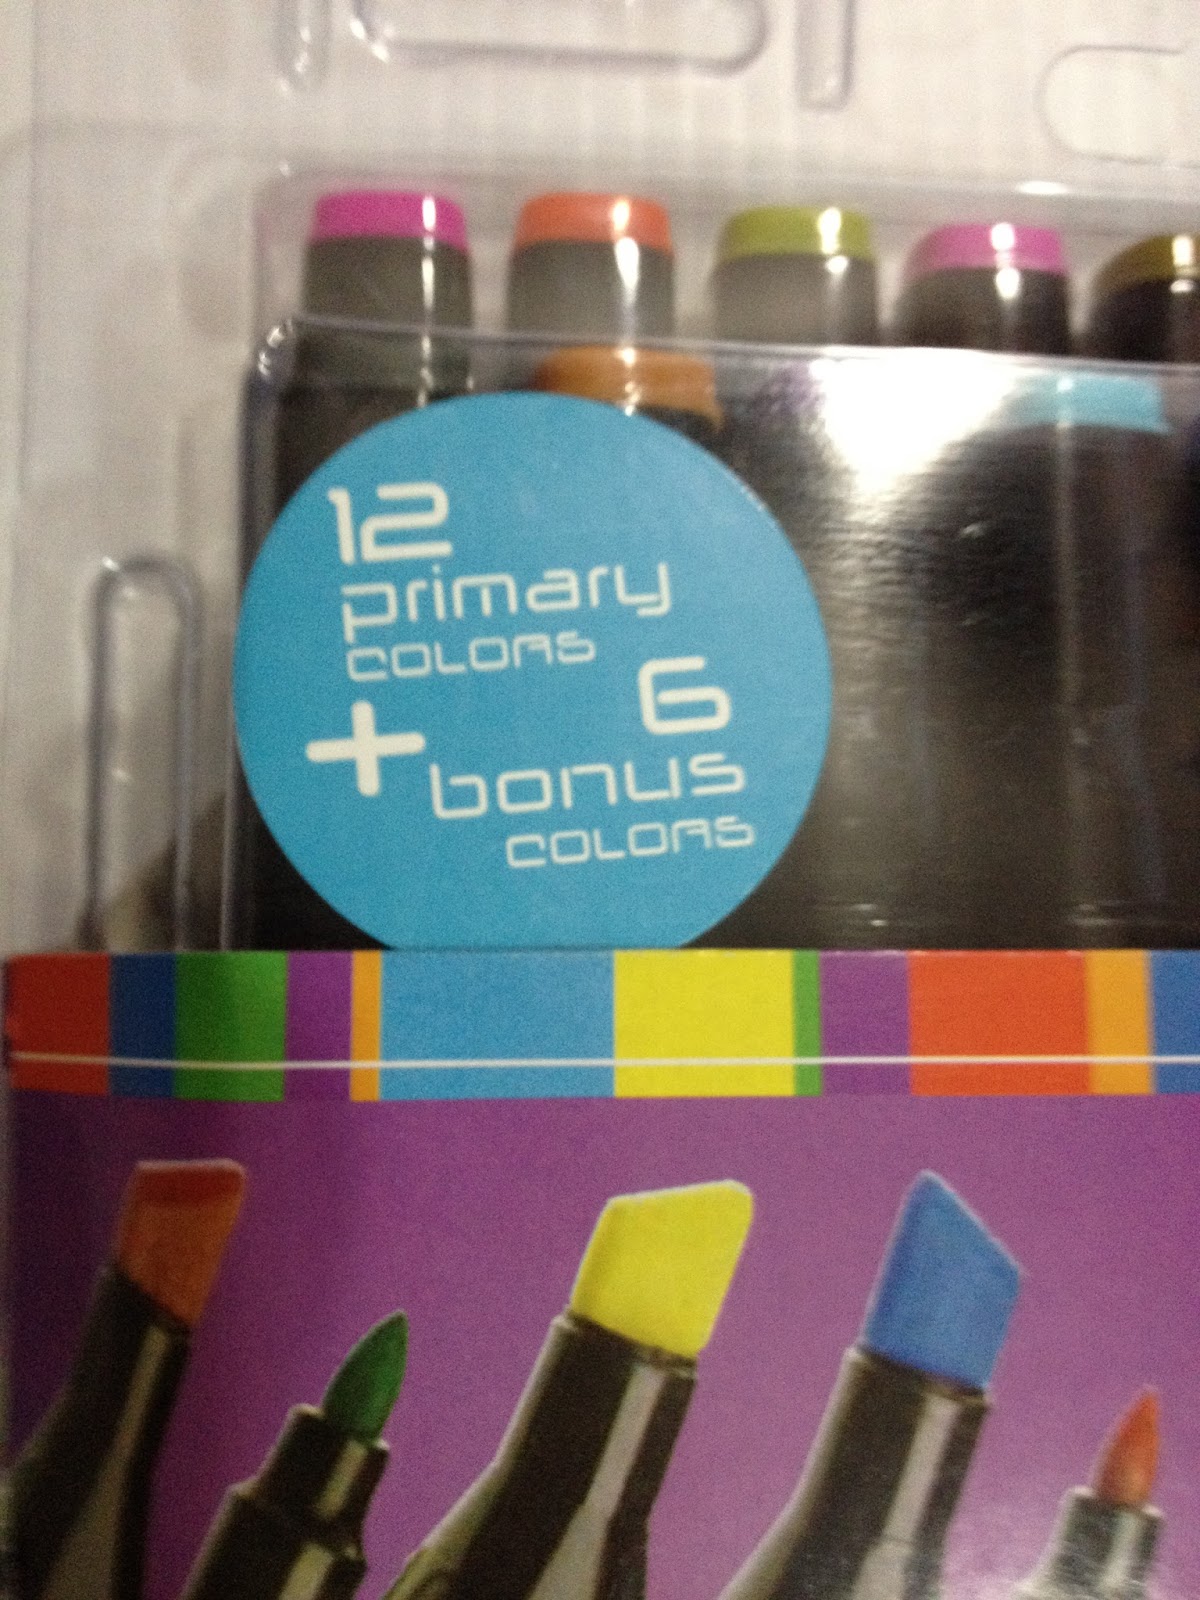


Hobby Lobby's art markers are packaged in a reusable plastic case that snaps shut. The markers are fairly snug in the plastic case the first few times you remove them, but eventually they feel loose and will fall out when you're trying to shut the case. I'm a big fan of packaging that is reusable- it means I don't have to purchase a case to store a collection of markers in.
The Markers:


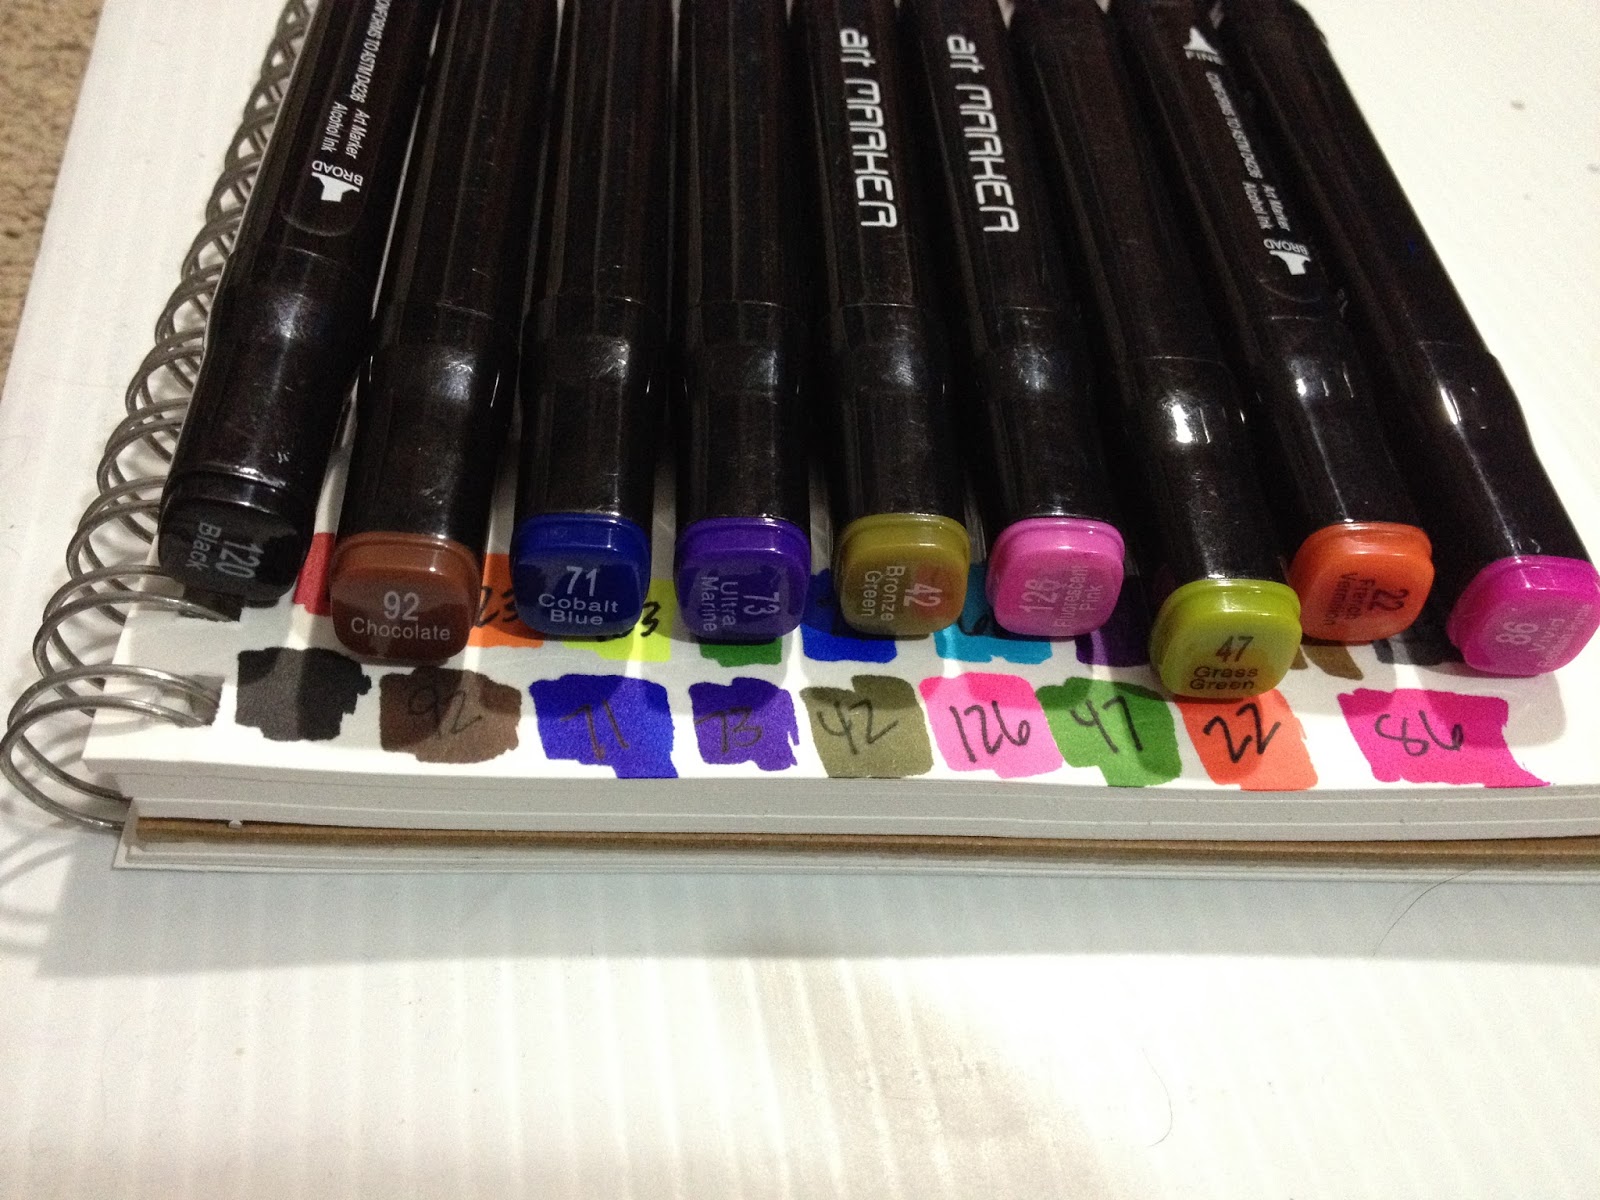
 From top to bottom: Letraset Flex marker, Copic Sketch, Shin Han Twin Touch, Hobby Lobby Art Marker, ChartPak Ad Pro, Kuretake Touch Twin S, Prismacolor with the bullet nib, Prismacolor with the brush nib, Chromatix, Copic Ciao
 From top to bottom: Letraset Flex Marker, Copic Sketch, Shin Han Twin Touch, Hobby Lobby Art Marker, Charpak Ad Pro, Kuretake Twin S, Prismacolor with the chisel nib, Prismacolor with the brush nib. Right side: Chromatix, Copic Ciao
This 18 color set does not come with a blender marker, or any markers that really function as skintones. Honestly, the color selection is a little weird- all the colors included are very intense, only a few differ in value from the rest.
The Swatch Test:
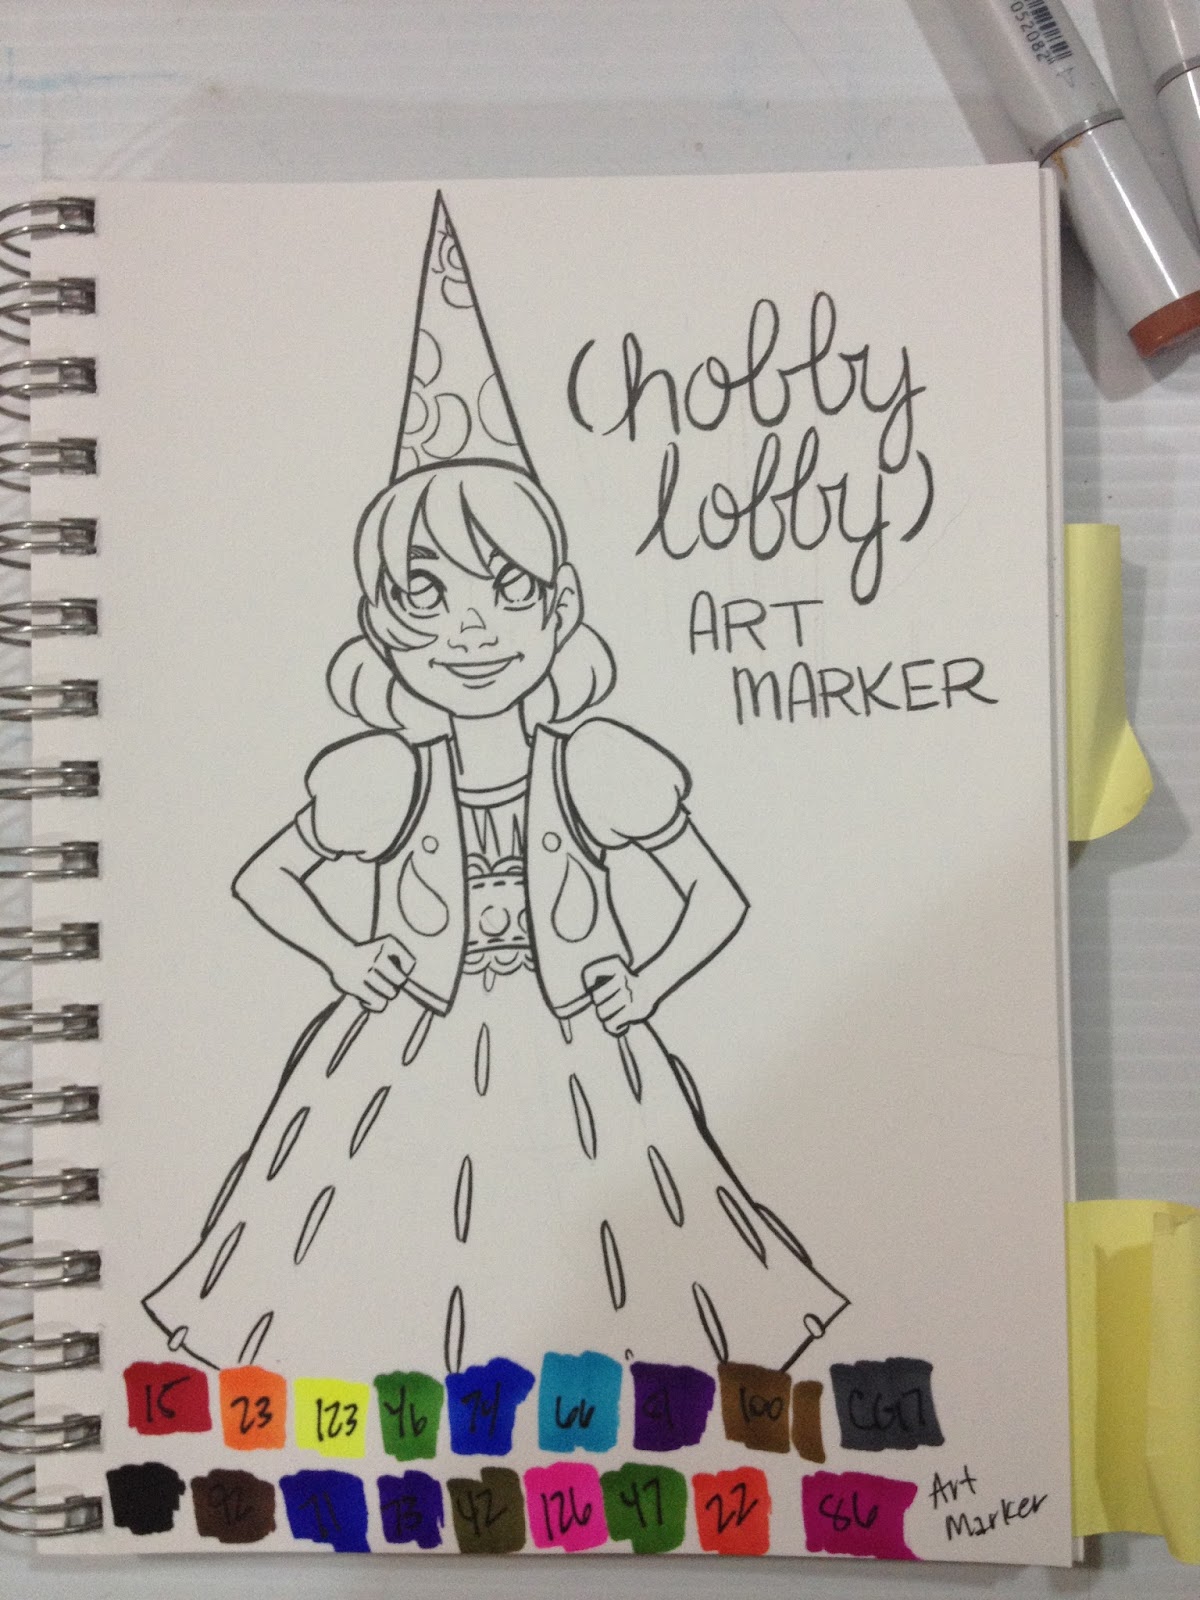
The swatches were completed with the chisel nib of these Art Markers.
Field Test:
The field test was inked using a Sailor Mitsuo Aida fude pen, which is both Copic and waterproof. The field test was rendered in a Strathmore 300 series Mixed Media pad, which I use for all of my marker tests. The paper is similar to a very thick cardstock.

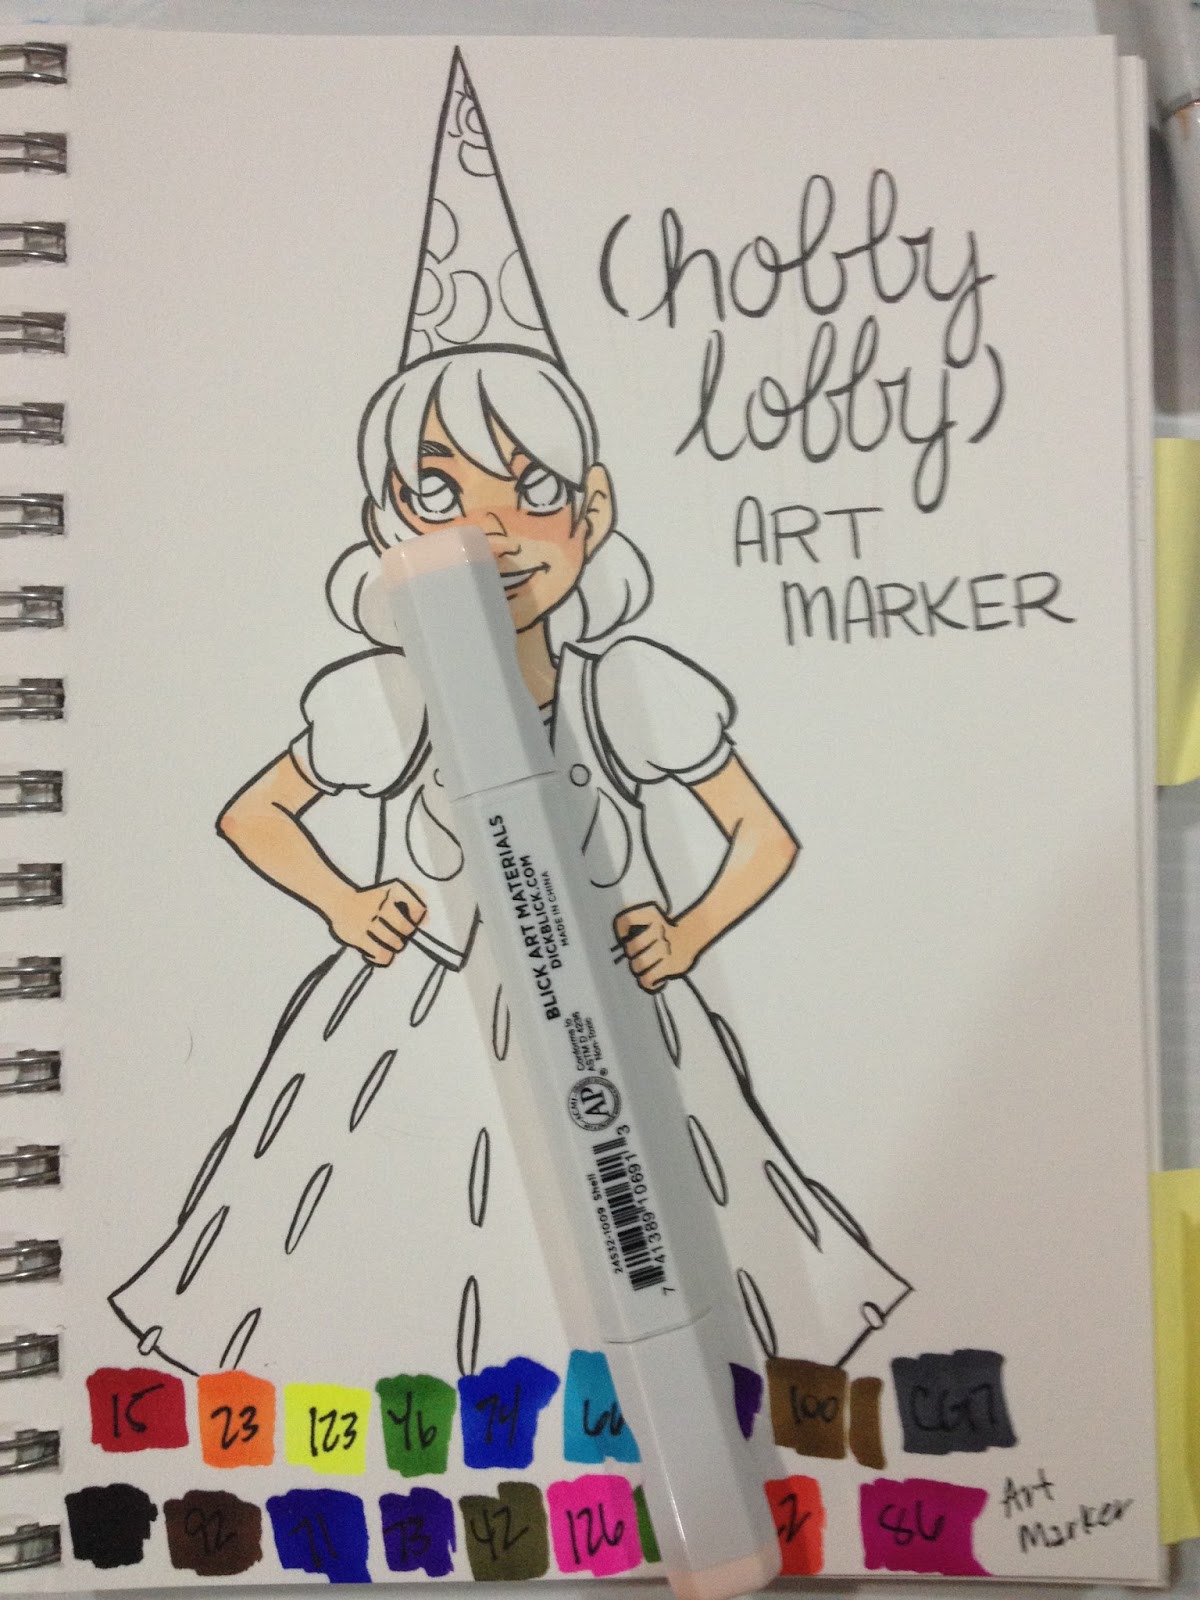

There are no usable skintones for Kara (or anyone, really) in this set, so I'm using Copic and Blick Studio Brush markers (link) to render Kara's skin.


Even the bullet nib is very prone to bleeding on the Strathmore Mixed Media Paper. The red is so intense, you can't really layer with it, the best you could probably do is blend it out a little with Copic/Prismacolor colorless blender. Using colorless blender to try and blend out the light blue makes it bleed even more. You can do tip to tip blending by appling the Art Marker Baby Blue to the colorless blender of your choice for a slightly less saturated Baby Blue. The only yellow in this set is a highlighter flourescent yellow, which is almost unusuable for any sort of realistic rendering.
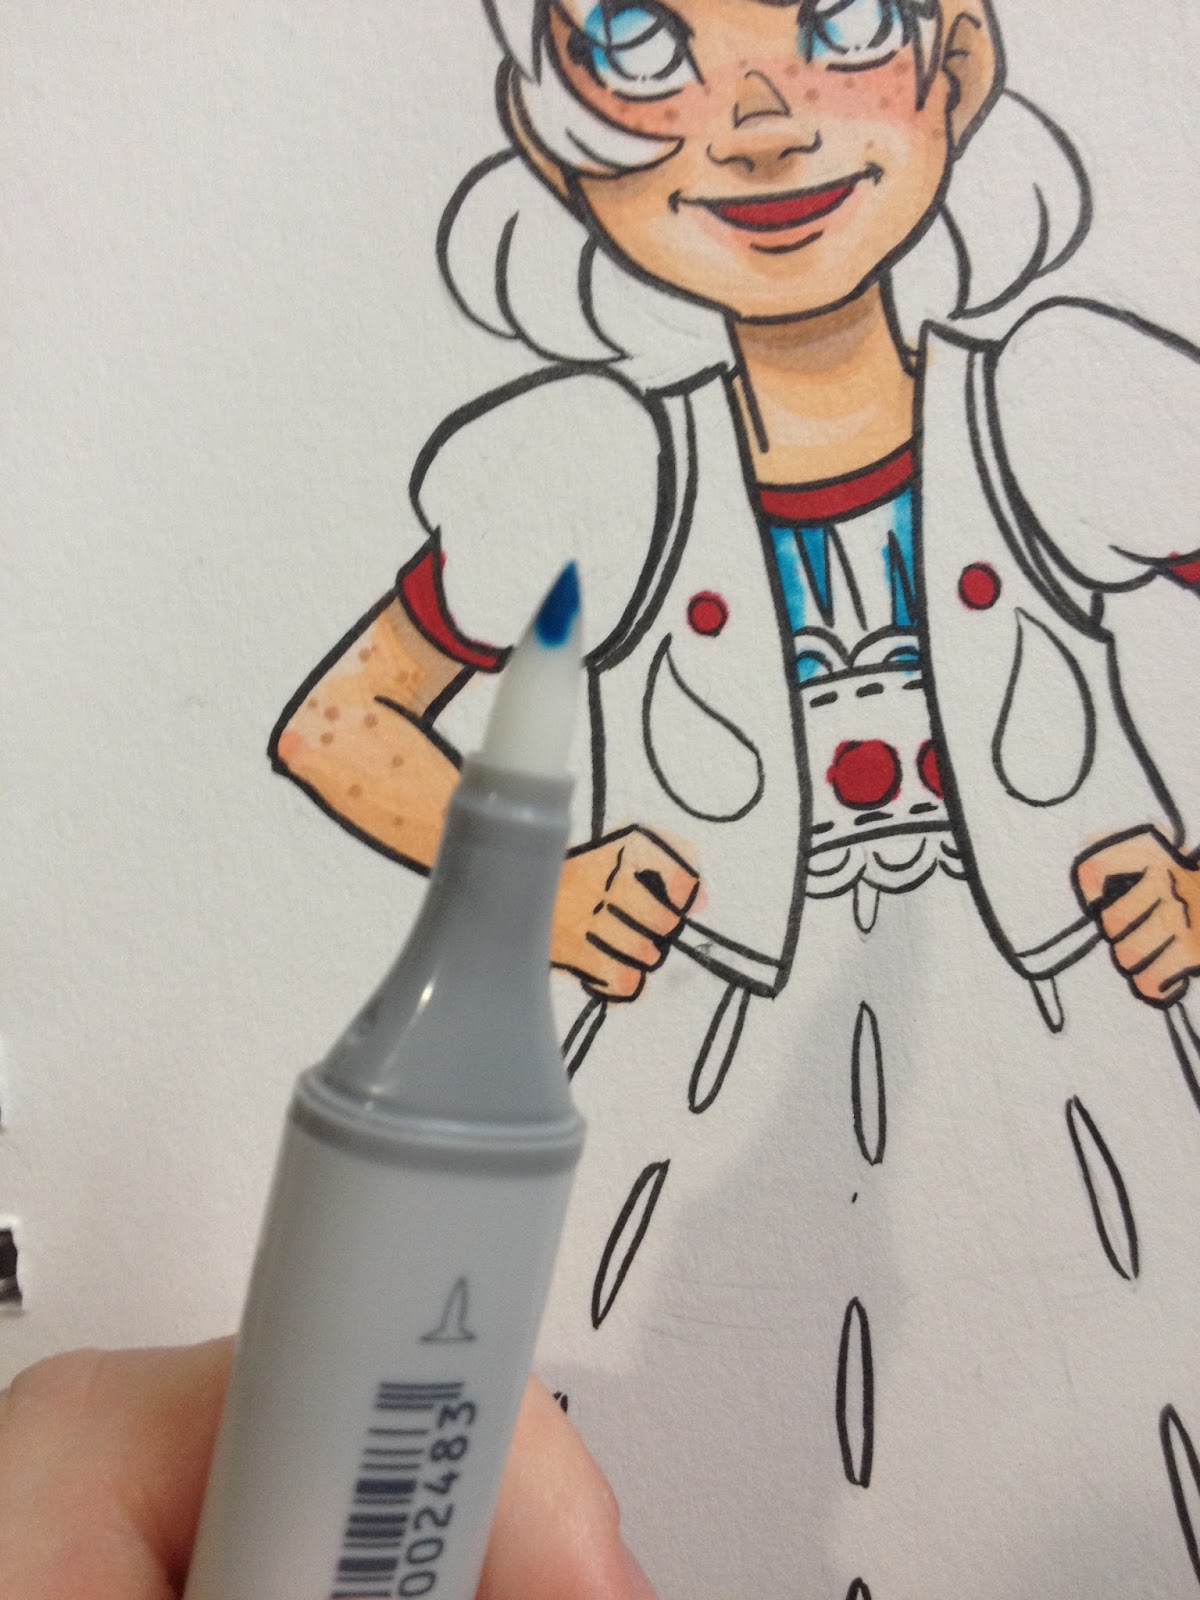
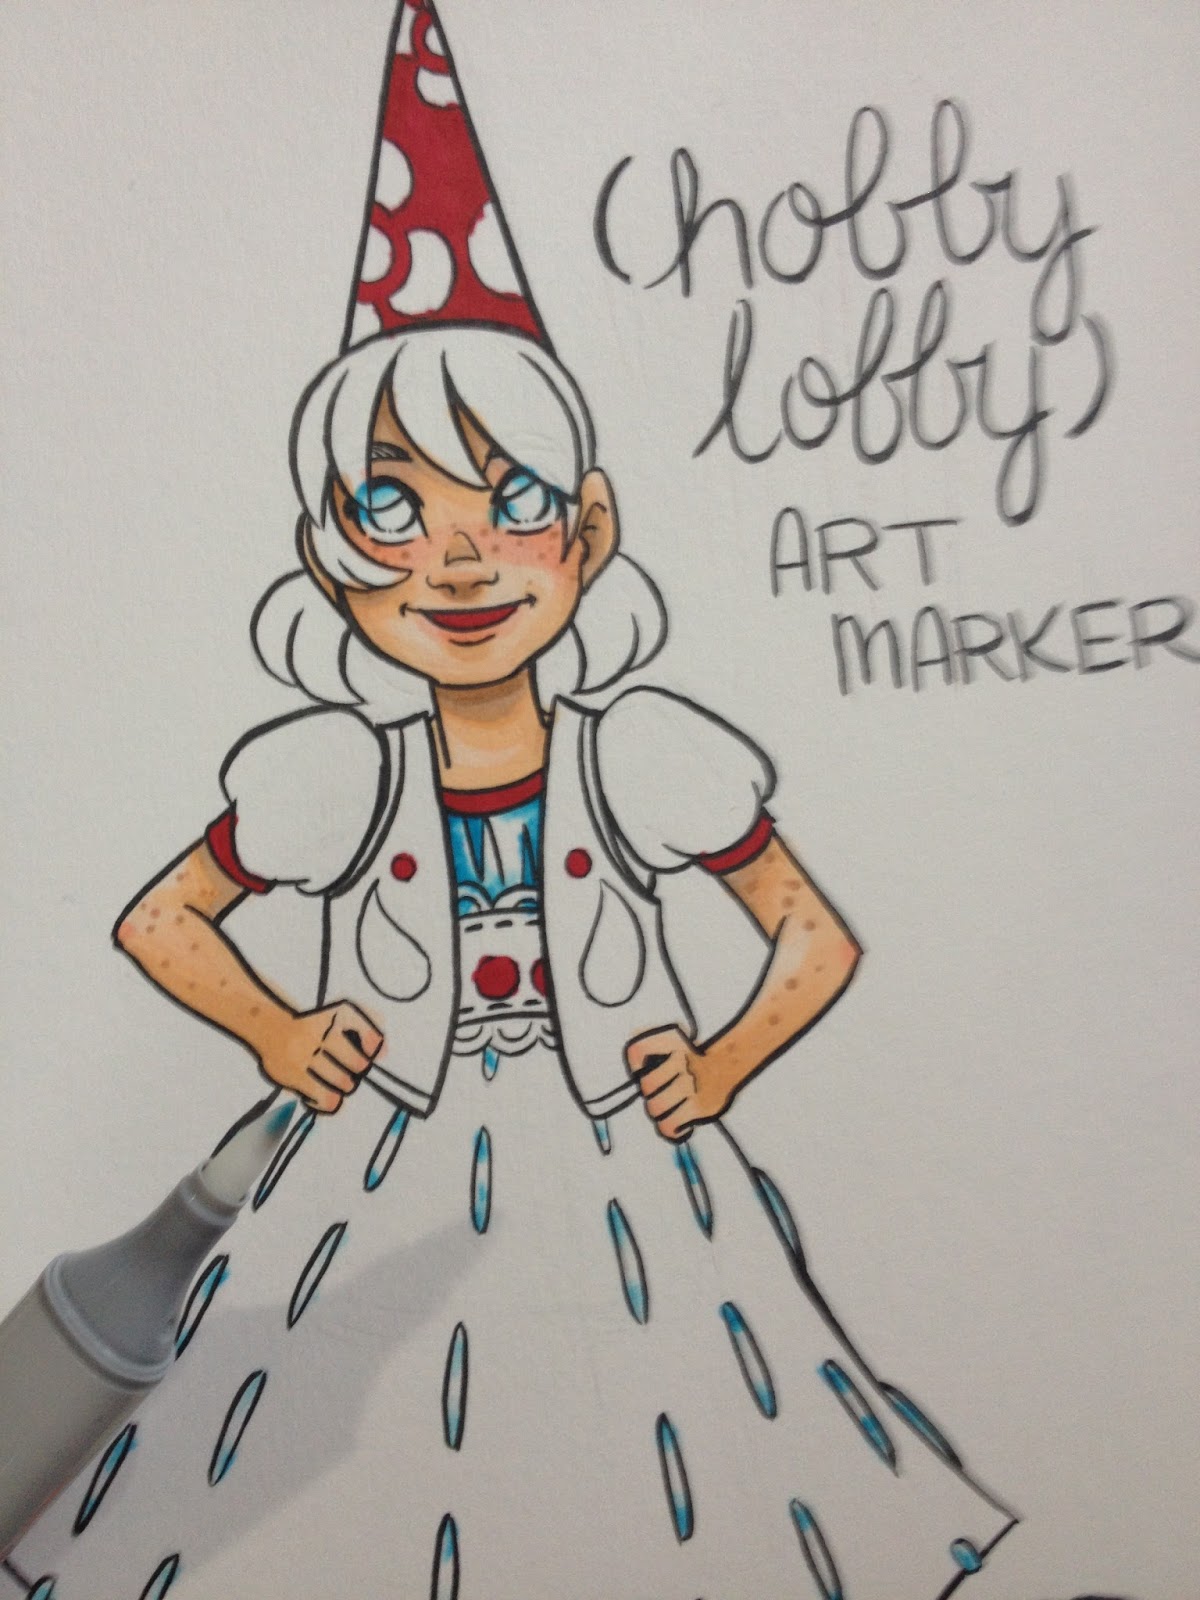

It takes a lot of colorless blender to try and blend these colors into anything I'd find usuable for shading whites or lights, and the colors are so saturated that they're all about at the same value. Attempts to dilute the Art Marker's lightest blue with my Copic colorless blender did not go so well.
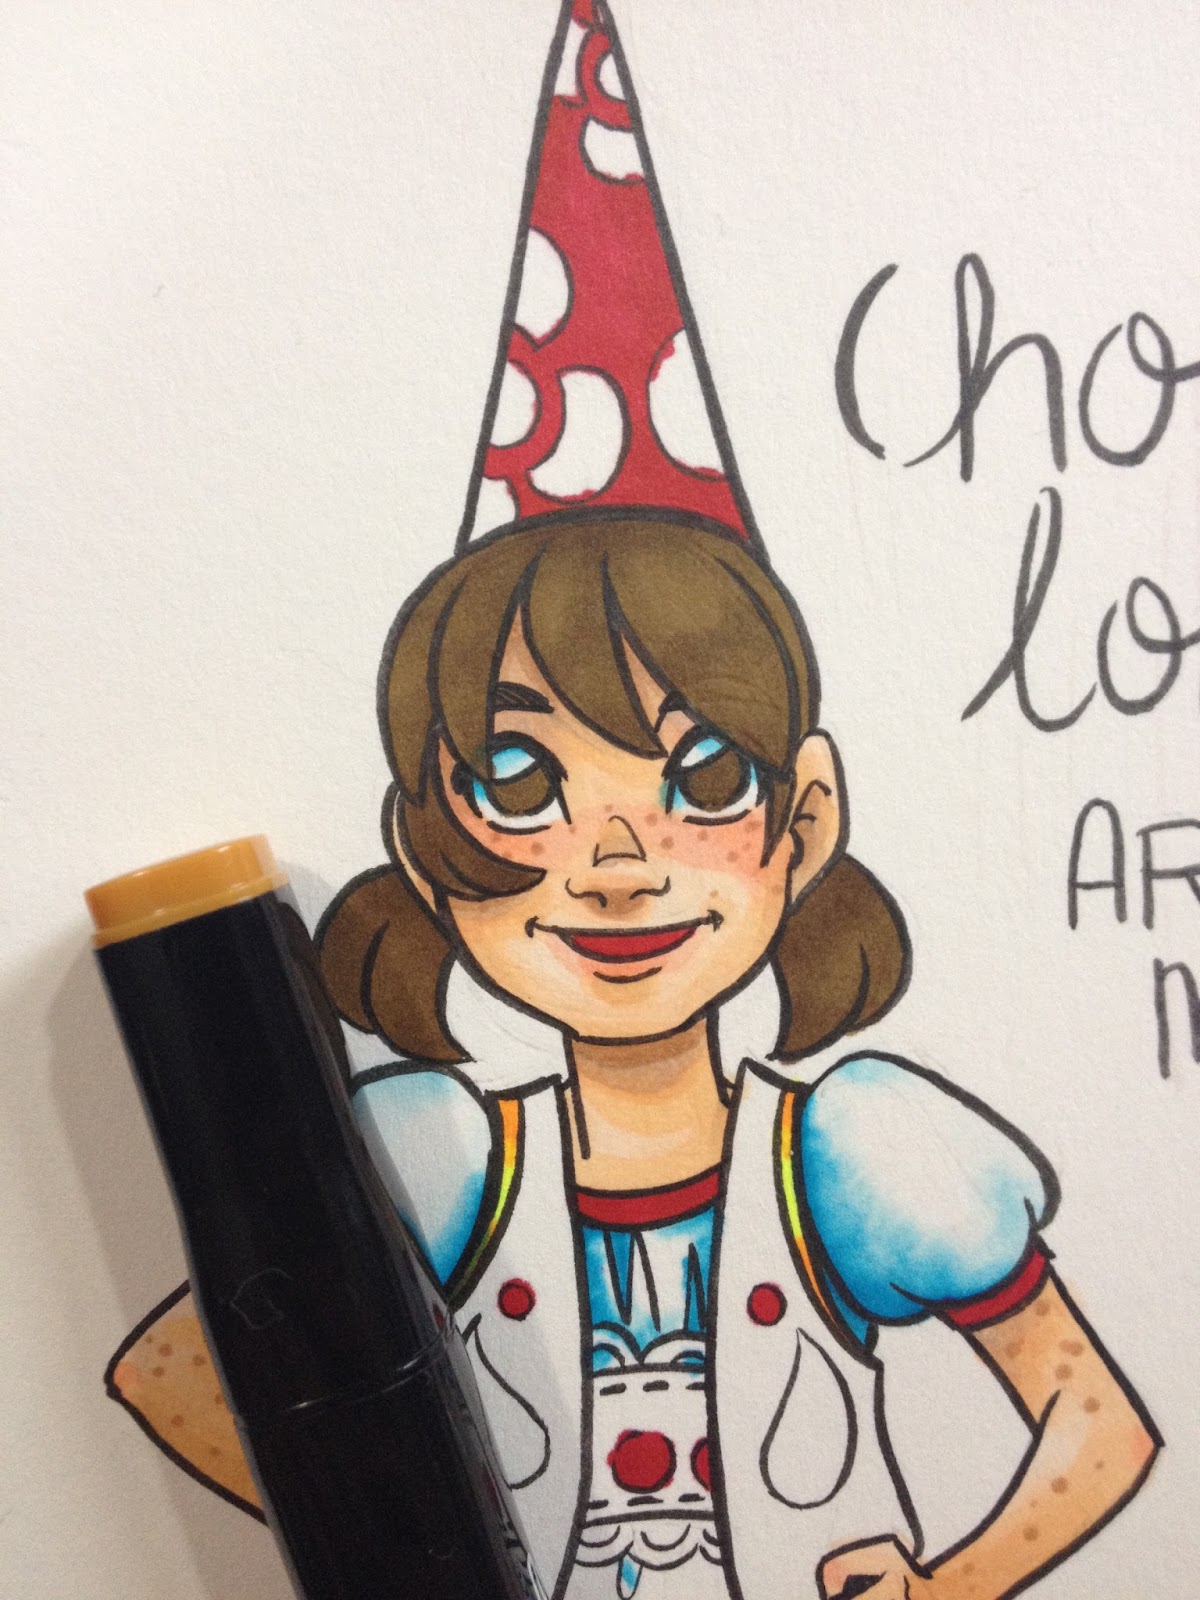

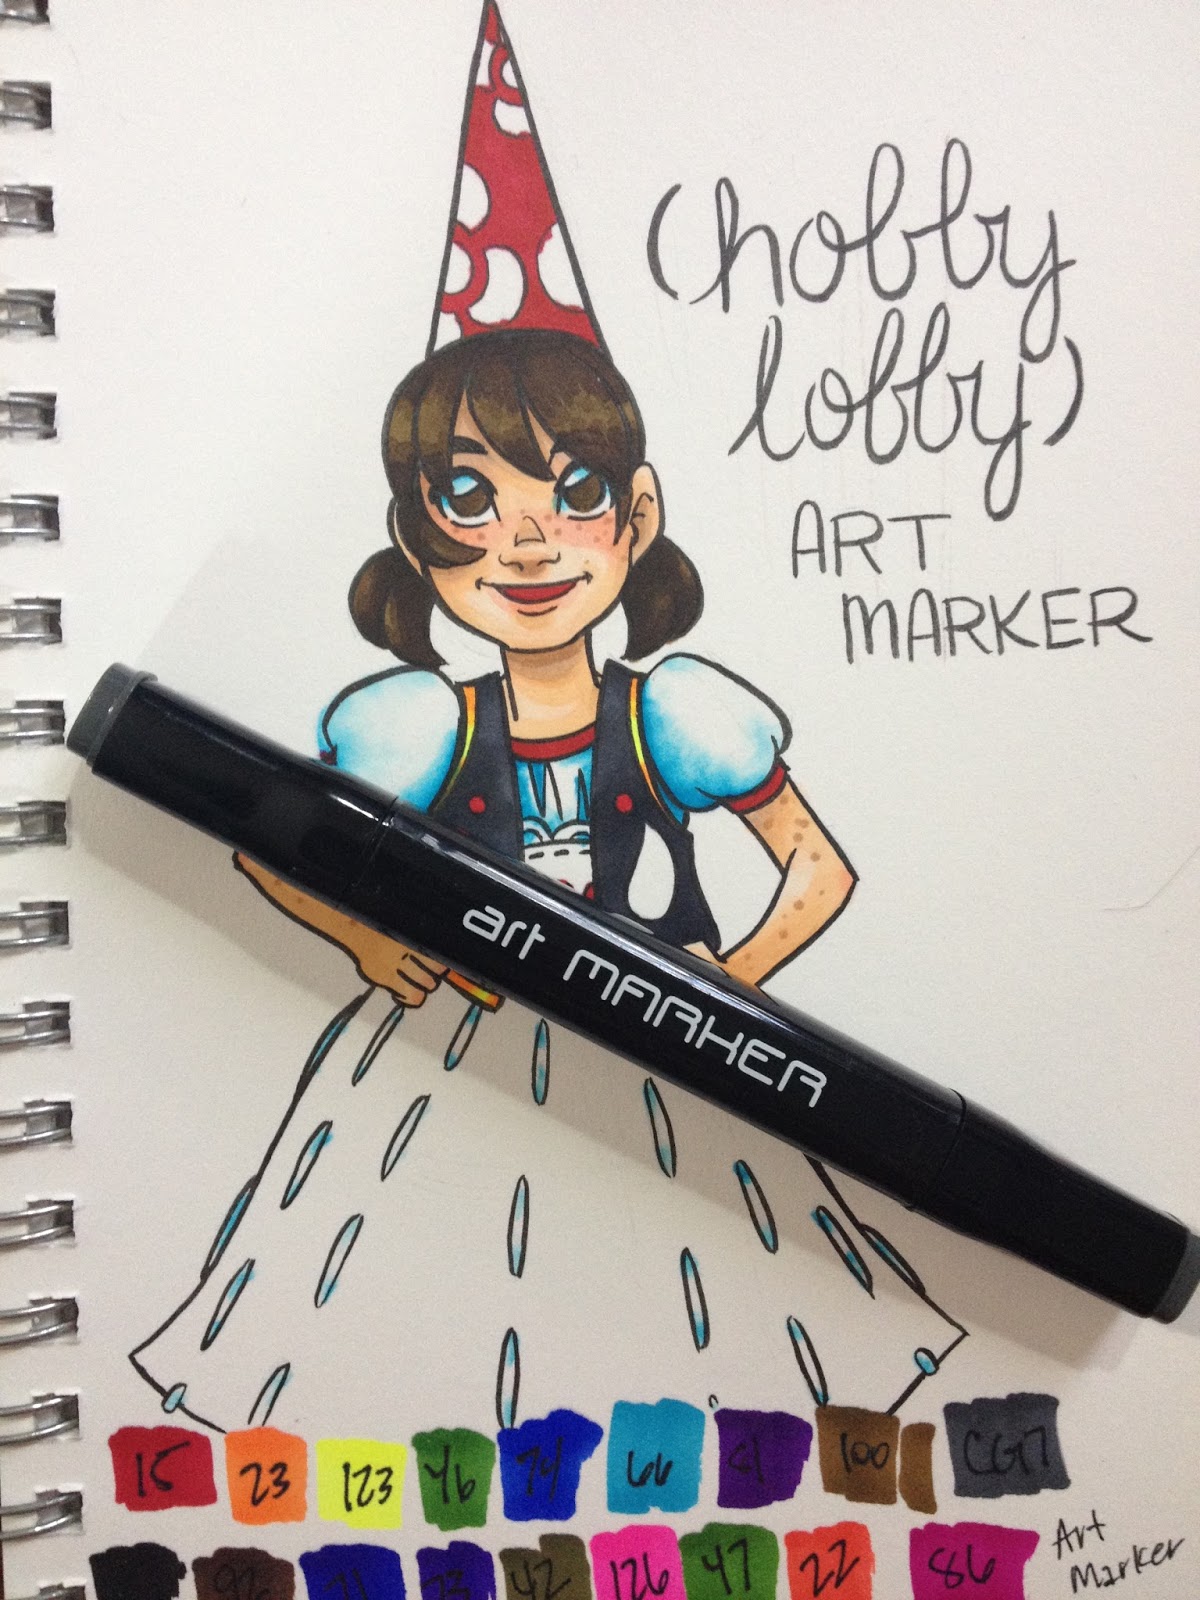

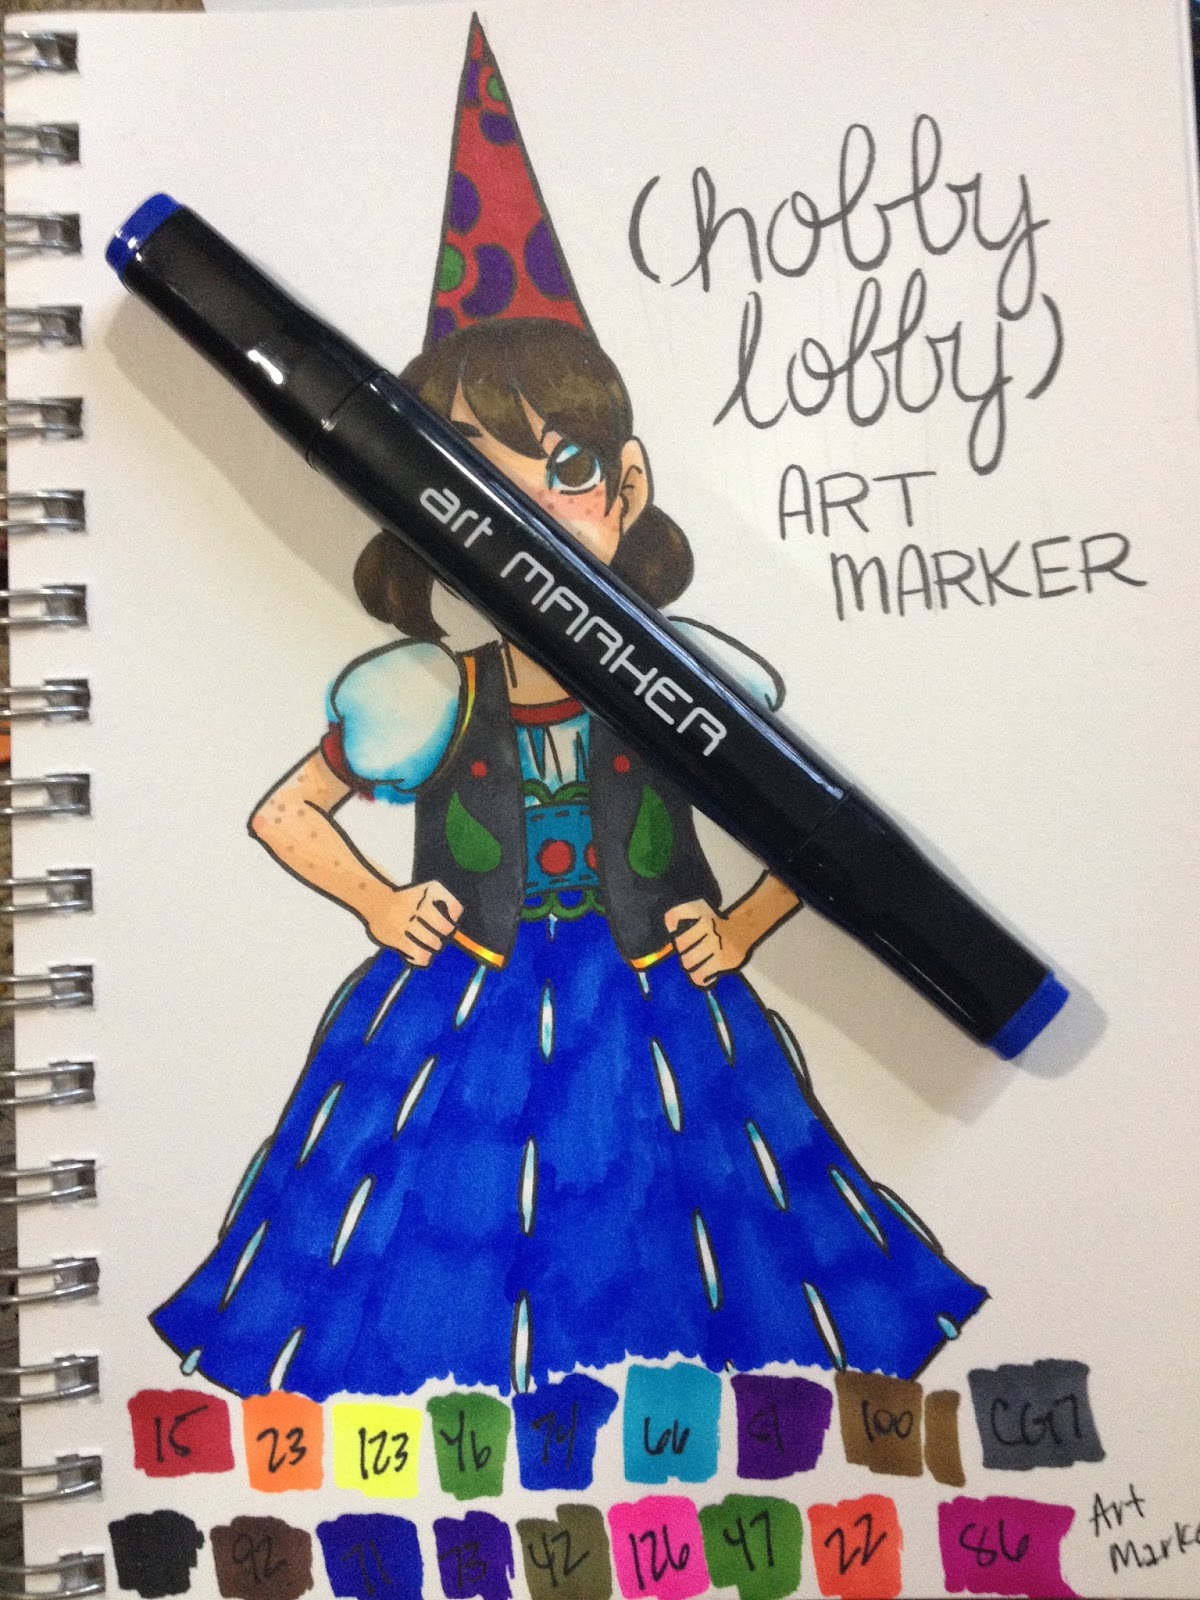
These markers bleed A LOT, even from the bullet nib, so your ability to produce 'fine detail', as promised on the packaging, is going to be limited. Both ends are pretty juicy- although these markers were hung up at Hobby Lobby, I stored them horizontaly in my 'to review' box.

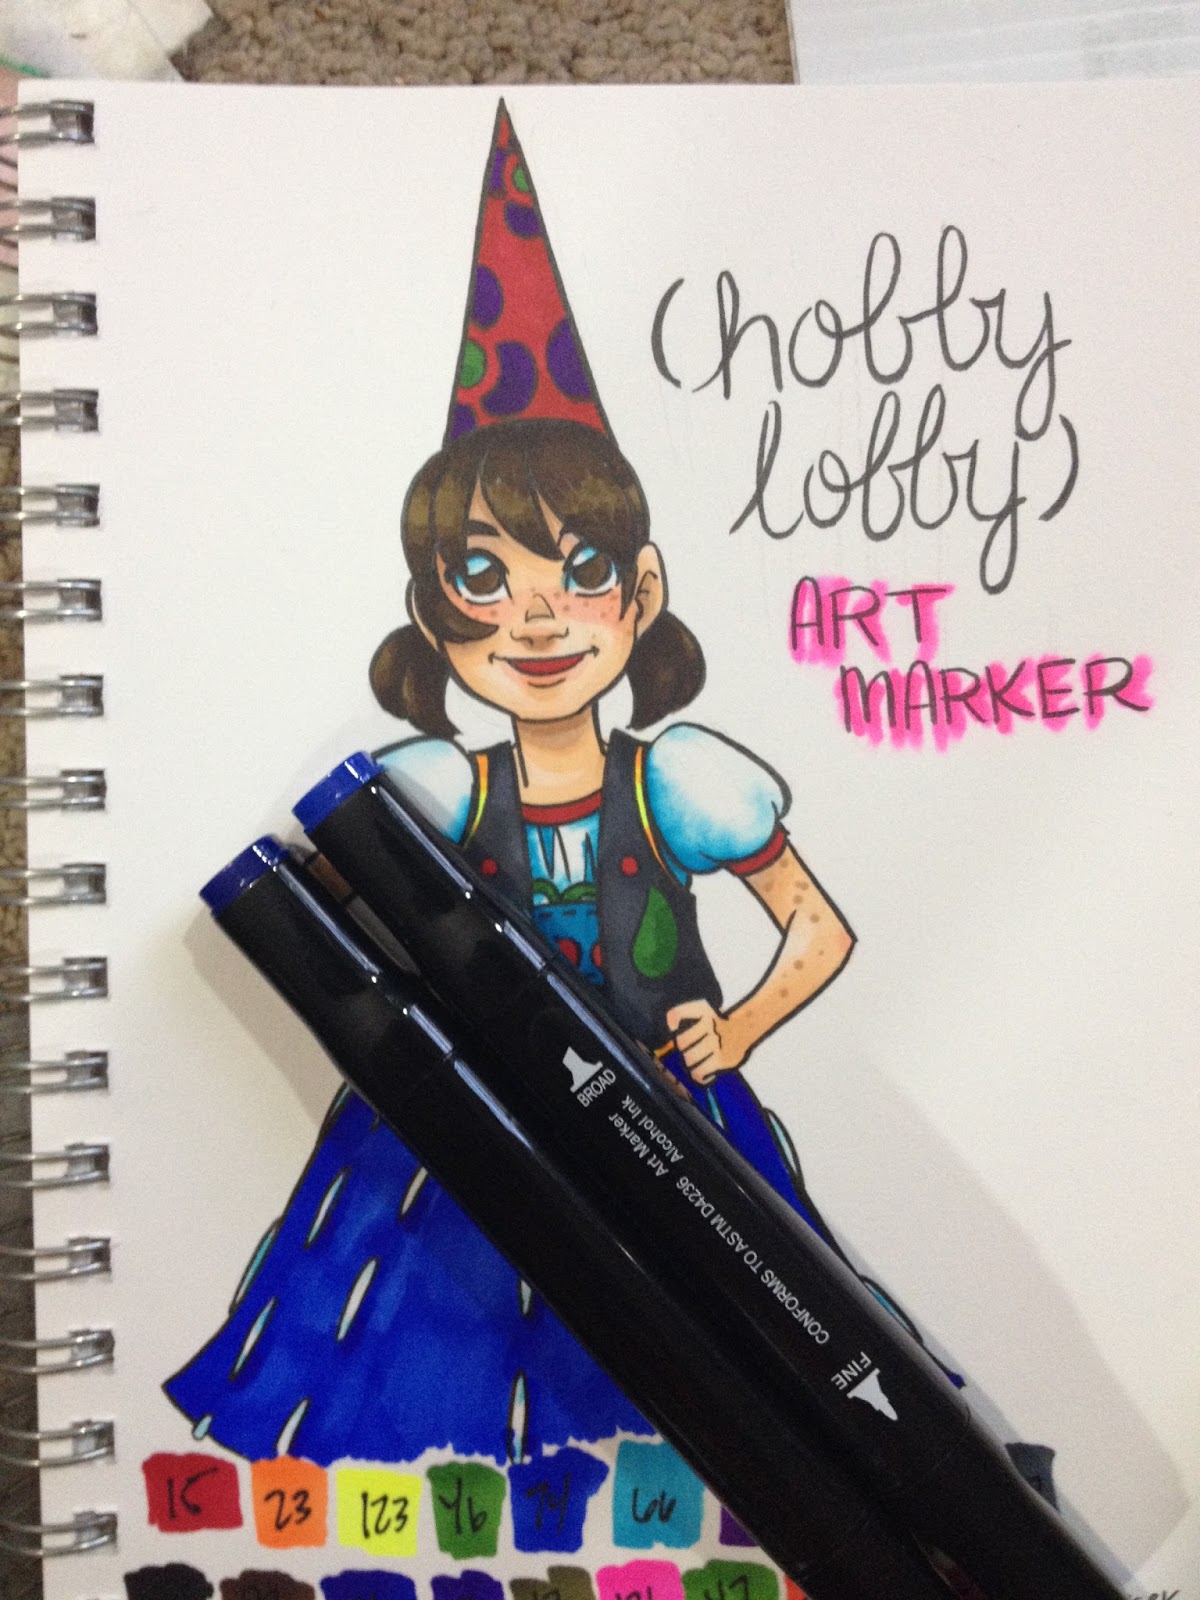
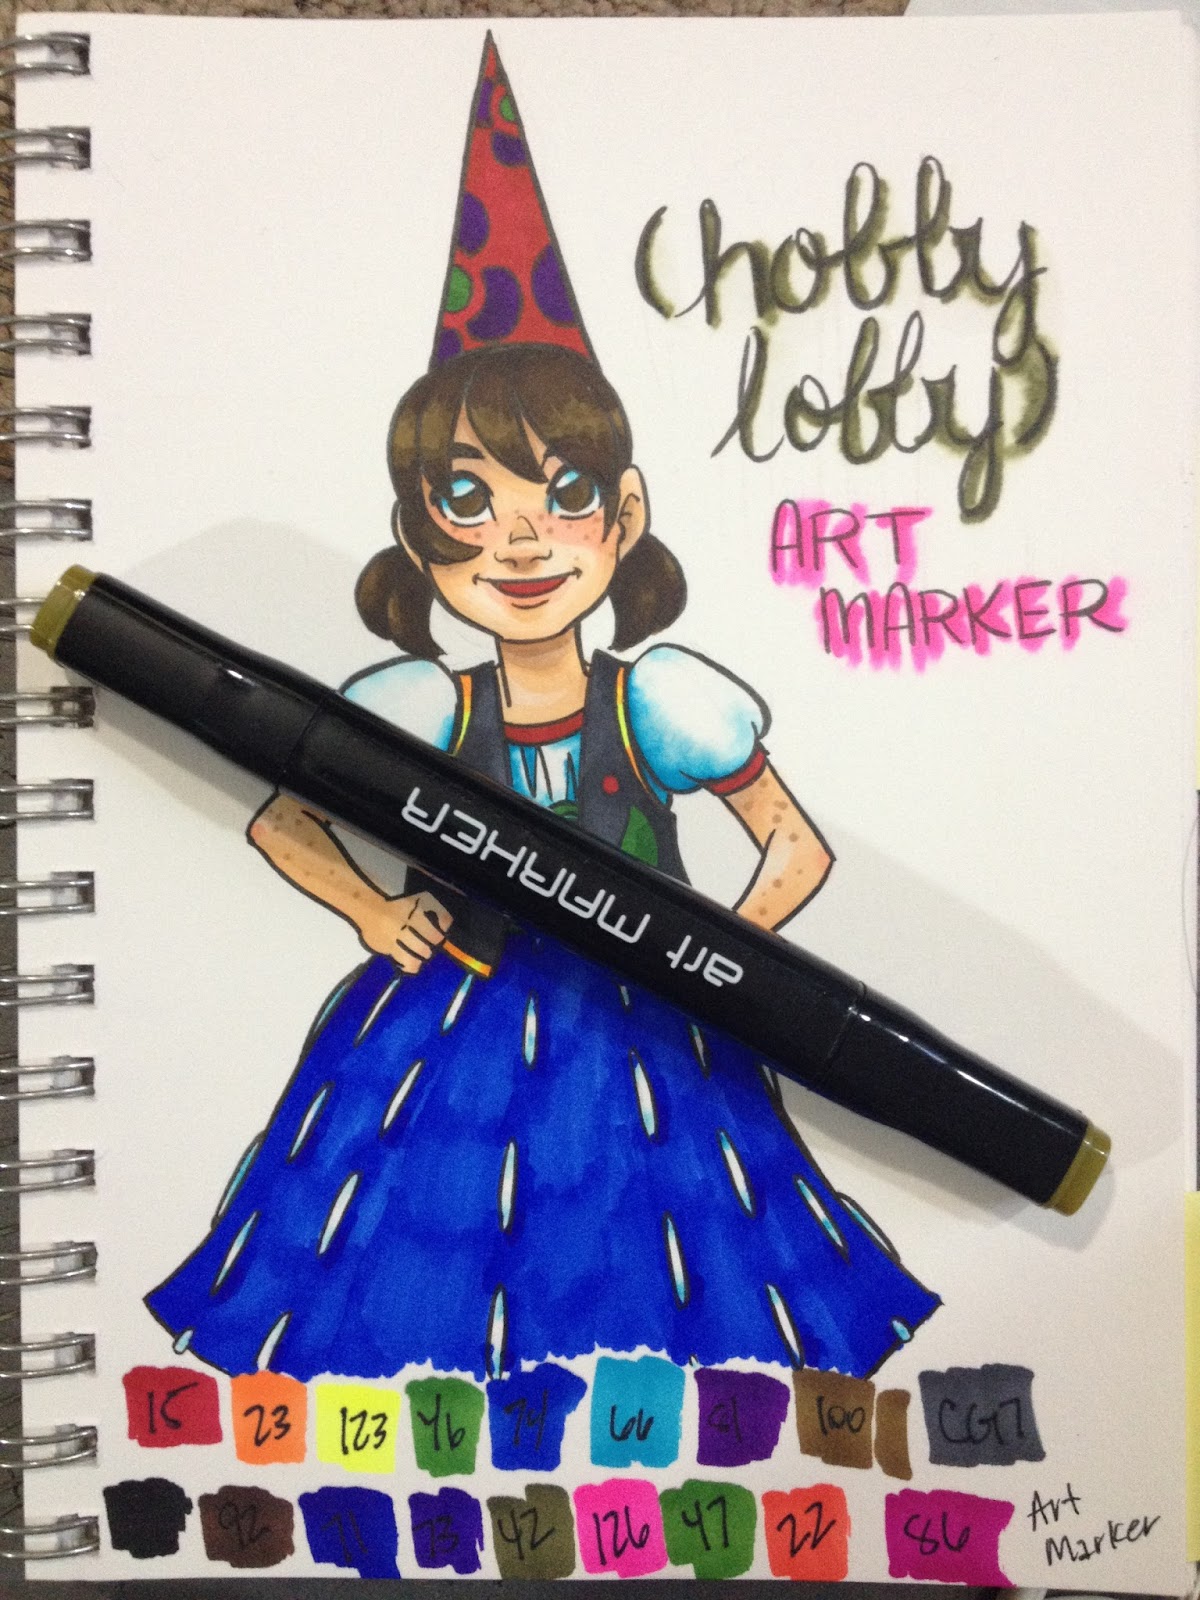
I applied this horrible olive green to the "Hobby Lobby" and tried to blend it out a bit. You can see how poorly Art Markers react to Copic colorless blender- it blobs out unpredictably, rather than fairly uniform bleaching.
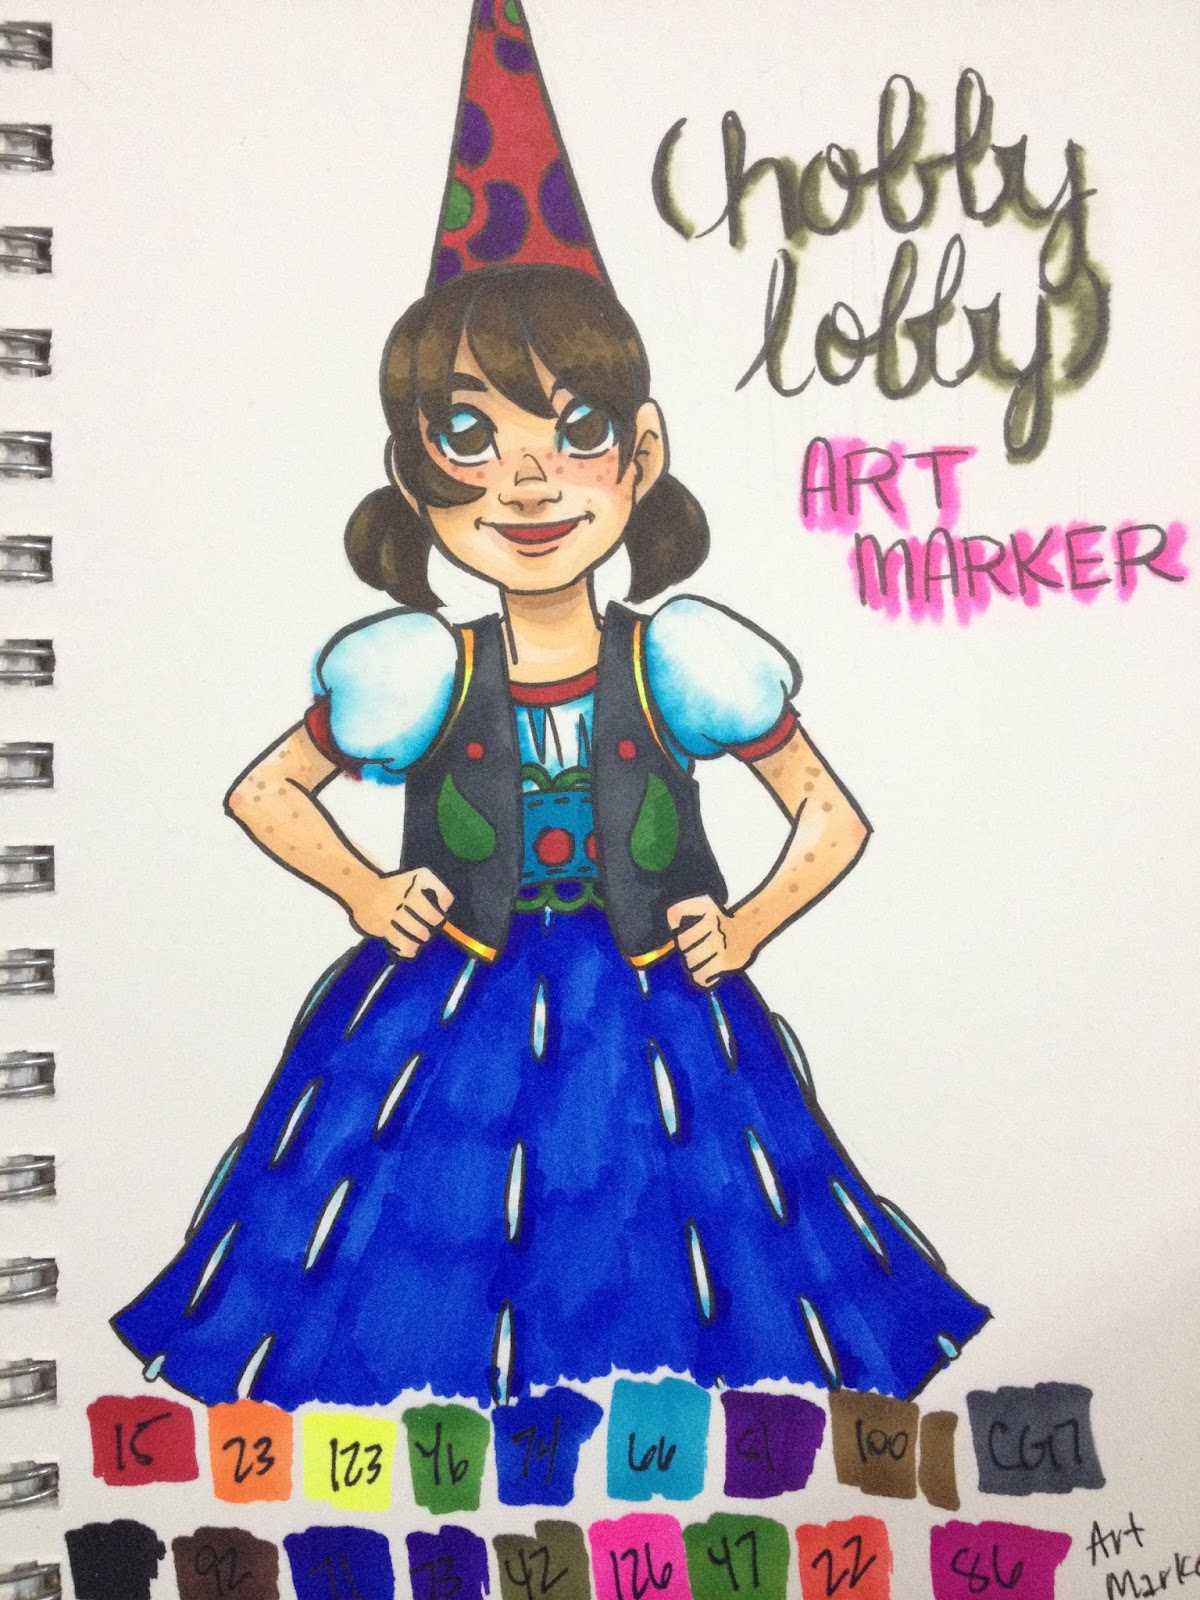
The Verdict
These aren't the worst alcohol based markers I've ever tested- that honor is shared by Concept and Fab, but these are a far cry from Copic, Prismacolor, or Shin Han Twin Touch. These markers have plenty of ink, but the nibs leave much to be desired, and they don't really play well with other markers. Although the price point is tempting, these markers are not refillable, and do not have replaceable nibs, and you can't purchase these open stock.
Really, what it comes down to is, are you feeling desperate, punk? Are you limited in your alcohol based marker vendors, and can't order online? Does your town only have a Hobby Lobby? If this sounds like you, then Hobby Lobby's Art Markers are fine, and while they don't perform as well as other alcohol based markers, they're an ok introduction to get you used to the inks.
However, if you have access to better, even if it costs more, I recommend going for Prismacolor Premiers, Blick Studio Brush markers, or Copic Ciaos. Brush tipped markers are easier to use, and are able to create smoother blends and better transitions than chisel nibs or bullet tips. Even if you only have a Hobby Lobby, many Hobby Lobbies do carry Copic markers.
Please consider donating to this blog or purchasing from Natto-shop (http://nattosoup.com/shop) if you want me to continue publishing quality content. All materials tested were purchased from my own pocket. Keep on Truckin' Nattosoup is not under any sponsorship.
December 1, 2015
Walmart Art Supply Review: Overall Verdict
Over the past couple months, I've covered a lot of products from Walmart. From student grade (Crayola Supertips, Crayola washable watercolors) to stationary (Flair, Triplus Fineliners, Precise V5 Rollerball) to actual supplies for artists (Daler Rowney Simply Watercolor, UCreate sketchbooks, Royal Langnickel brushes) I've tried to hit as many categories as I could. Often, what I found surprised me- Crayola Supertips can be used like watercolor markers, cheap Royal Langnickel brushes can be conditioned into something serviceable, Crayola washable watercolors are frustrating to paint with. What surprises me most of all is my desire to delve deeper, to help you guys find even more affordable art supplies to fuel your drawing needs.
When it's all said and done, you can create art with almost any office supply you have on hand. Many artists doodle on Post Its with sharpies and Wite-Out. But just because you CAN use it, doesn't mean you should rely on it. It's fun to noodle around with highlighters, but if that's your only option for markers, it quickly becomes a chore, and it definitely limits what you can do.
That said, there are several supplies I CAN recommend from Walmart, certainly enough to get you started. And your Walmart may have a wider selection than the Walmart I bought supplies from. If the Walmart site is any indication, there may even be Walmarts that carry actual alcohol markers like Spectrum Noir. For example, the Walmart in Harahan, Louisiana, has a slightly larger section of art supplies, and carries different brushes, paints, and markers than the Walmart in Luling, Louisiana.
From the Walmart Art Supply Series, I recommend:
Clearpoint mechanical pencilsUCreate sketchbooks Crayola Supertip 50 Washable Markers (as watercolor markers)Canson Biggie Watercolor paper (shown in introduction post)Triplus Fineliners for color lineart
One of the problems I had with this review is that it simply took way too long to post, when I gave each product it's own feature. With my new posting schedule of a new post launching approximately every three days, I might be able to knock out all the product tests for a few products in two days (say, Crayola washable Supertips, Crayola watercolors, and Daler Rowney watercolors), but it would take at least nine days for those three individual posts to air, and readers might feel cheated with the content, as it's a bit much to focus an entire review on a single pen, say the Pilot Precise V5 for example. The upside to this series was its affordability- when I reviewed brushpens from Jetpens, it was an expensive endeavor. Reviewing markers is much worse, and I knew that without sponsors, neither could be the bread and butter of this blog. Affordable art supply challenges like the Walmart Art Supply Review series, and my upcoming Target and Dollar Tree series, allow me to continue to review products that are relevant to my readers' needs, without breaking the bank. They also allow me to get back to my roots, and play around with good supplies I may have otherwise snubbed. Hopefully a combination of affordable, big box art supplies and more expensive artist grade materials will help me to better serve the audience that reads this blog.
Recently I ran a poll to find out what sort of artists did read this blog, and the overwhelming answers were hobbyist artist or student artist. I hope these affordable art supply series will benefit you guys. If it has, please take a moment to let me know, either through email, or on Twitter.
Do you buy your art supplies at Walmart? Leave a comment, and let me know what YOU like to use. Think I missed something? Let me know! Coming up next is my Target Art Supply Review series, and following that, I'll be reviewing art supplies from Dollar Tree.
Please consider donating to this blog or purchasing from Natto-shop (http://nattosoup.com/shop) if you want me to continue publishing quality content. All materials tested were purchased from my own pocket. Keep on Truckin' Nattosoup is not under any sponsorship.
November 29, 2015
Watercolor Marker Review: Distress Markers
Hey guys! The Natto-shop is having a 30% Cyber Monday sale tomorrow, for anything and everything in the shop. Now would be an EXCELLENT time to not only pick up some goodies (including comics, commissions, original watercolors, and lots more), but also to show some financial appreciation for the hours of hard work that go into testing, photographing, reviewing, writing, and editing this blog. Right now, there's lots of fresh stock, and I'm going to add EVEN MORE original art to the shop today, as well as blind bags, full of convention goodies. Just make sure you use the coupon code shophandmade tomorrow at checkout.
I often feel like manufacturers who specialize in 'craft' products are intentionally pulling the wool over their customers' eyes. Often the products you're paying for are uni-taskers: diecutters and embossers are really just stripped down printing presses, and many of the techniques stampers and cardmakers use are watered down printing techniques that are treated like innovations when they're really just overpriced simplifications. Still, there are many products marketed towards crafters that artists may find useful- many convention artists use the Silhouette for sticker and vinyl cutting, stamping markers make affordable watercolor markers, masking and stencil making techniques can be modified to suit the needs of the artist. There's a lot of potential for cross over in the art and craft supply markets, and often the distinction is an arbitrary one that is insulting to both parties. For artists, what we do is deemed over complicated, not worth the effort, not worth the money. For crafters, everything is presented as foolproof and low risk, but real techniques aren't taught because these people aren't 'artists', and it's assumed they aren't willing to take the time to learn.
I'm not a fan of either of these camps. I think art and illustration should be approachable, and I don't like supplies that make low ceiling'd assumptions about my interest level or abilities. With the advent of the internet, and the accessibility of information, you can learn how to do almost anything, if you're willing to sink the time, research, and practice into it. Many art supply stores offer classes at a variety of skill levels, and draftsmanship can be improved through practice and research. Many crafters sink a significant amount of money into their collection, and they deserve products that perform as advertised, and they deserve to know (if they're willing to look into it) which products will serve multiple purposes in their studios.
Ranger's Tim Holtz Distress Markers are very clearly marketed towards crafters, scrapbookers, card makers, but are not marketed to illustrators or artists. I have never seen these markers sold in a dedicated art supply store like Dick Blick, Jerry's Artarama, or Pla-Za, and I first found out about them by sifting through endless craft supply review videos doing research for this blog. I am not the target audience, I will probably hold these markers to harsher standards than they were designed to meet, and I think that's a good thing. If a craft product can't stand up to my standards, they may fail to meet yours, and for many of these marker reviews, the only real differences between what I'm looking for and what a crafter may be looking for are the following:
I often want colors to perform in very specific ways, and I will not forgive them for that failure. Good enough is NOT good enough if you're paying more than a dollar per marker.I expect a reasonable range of skin and hair tones because I primarily render figuresI am often using artist grade papers and inks, so I expect no negative interactions with craft grade productsI am working with original illustrations, not stamps or print outs, so I am going to be more disappointed at the time wasted if an illustration is ruined because a product fails to perform as promisedI have a body of reference to compare to- artist and student grade art materials, years of posts and pricepoints at my fingertips, so it's harder to sell me a bunk product, but I may be unnecessarily harsh on a decent product that is mismarketed. When this happens, I usually revisit the product later
I recognize that many of my readers have found this blog as crafters researching a product, and I apologize if any of my crafter readers are offended. I do not think my blog is the end all be all source (hence why I link other reviews at the bottom of most posts), but rather an alternative to craft supply bloggers who are often sent free product, create opinions based on a limited amount of use or access to product, or are compensated for every post written or recorded. This blog is fueled by my intense curiosity and passion for art and craft supplies, and paid for out of my own pocket by selling things from my online shop or in person.
I'm a comic artist and an illustrator by trade and education, and this blog does not contribute in a meaningful way to my income. If you like what I do, and you'd like to help support this blog, there are a variety of ways you can do so. You can signal boost my work by sharing it to your Facebook, Twitter, Tumblr, or Pinterest, you can send me a little tip via Paypal using the sidebar donation link, you can purchase copies of my ongoing, all ages watercolor comic, 7 " Kara through my shop, you can make your purchases through my Amazon affiliates links, or you can email companies on my behalf.
All that said, as I researched Tim Holtz Distress markers, I became excited about these products. They're designed to work with and compliment Ranger's other Distress products, including mists and stamp pads, and feature something I hadn't seen before- an opaque white marker with a solid foam brush nib. I watched A LOT of Youtube videos while waiting for my MarkerPop markers to come in, and I noticed that one of the biggest concerns consumers had was whether or not these were better than the existing Tombow ABT watercolor markers.
Watercolor Marker Review: Distress Markers
"water-reactive" waterbased According to Cha 2012- Time Holtz Demos his New Distress Markers!, these are made for blending.Colors aren't supposed to turn to mud - AKA color pigments should remain pure and distict on the paper, regardless of blending, layering or addition of waterRetail for $3.50 each according to videoDesigned to go with the Distress Ink Pads, which I have no experience withTwin Tipped- brush and detail nibIn 2015, Ranger will be releasing a new Distress color for every month, and this includes the Distress markers, so it seems like there are plans to expand the line.
These Ranger Distress markers were both purchased at the Michaels in Champaign, IL and ordered through MarkerPop when I ordered my Zig Clean Color Real Brush markers. This was first time I've ever seen them in person, despite going to two Michaels in NO, and two in Nashville. Also ordered from MarkerPop, openstock. About a month later, they've popped up in the scrapbooking section of the Nashville Michaels.
There were 35 original colors, and I should have purchased the bucket set on Amazon before buying a set of 5 at Michaels, or buying individual markers through Markerpop, but I had difficultly finding how many colors were in the bucket, and what colors were available overall, or a chart of what color names actually looked like.. Now there's 49, and you can buy the entire set (and help out this blog) by clicking this affiliate search link. Distress markers are available openstock through certain sites, in packs of 5, in sets of 12, or all 49.
Colors I purchased:
Picket Fence (opaque white)
Shaded Lilac
Abandoned Coral
Vintage Photo
Evergreen Bough
Frayed Burlap
Victorian Velvet
Walnut Stain
Rusty Hinge
Tea dye
Worn Lipstick
Milled Lavender
Brushed corduroy
Tattered Rose
Weathered Wood
Entire Collection
According to several of the videos linked at the bottom of this post, these markers can be used with a mist of water cheap watercolor background, which makes me think you can probably can do this with other watercolor markers that have free flowing pigment, like Zig Art and Graphic Twin
In my opinion, as an artist who selects colors for very specific uses, these colors have somewhat silly names (for an artist) that are more poetic that descriptive, so I didn't trust the names to give me an idea of the ink color. Also, for a designer who supposedly really likes the grungy browns (Tim Holtz), the Distress line is pretty threadbare when it comes to use-able skin and hair colors (i.e. BROWNS). I realize these markers weren't designed to be used for illustration, but a lot of stamps do feature people, so it's important to have a good selection of realistic colors, especially good skintones, hairtones, blushes. As late as it is in 2015, Holtz, Distress, and Ranger do have time to introduce these colors as part of their 2015 color of the month sales plan. At the time of writing, I was unable to find an official Ranger color chart for these markers, so I had to do some digging around.
Distress Marker Color Chart
 Distress Marker color chart by Jennifer McGuireInk
 Questions I Had Going Into This Review
Do watercolor blenders work, like Tombow ABT or Marvy LePlume II? Do Distress markers, which are dye based, play well with other dye based watercolor markers like Tombow ABT, Marvy LePlumeII, Zig Art and Graphic Twin?
This review will cover the basic qualities of Distress markers, but if there's interest, I'll revisit this post later to answer the above questions, and any questions you guys may have about Distress markers.
Something I found REALLY intriguing was the fact that Pickett Fence is Opaque white- goes on clear, dries white, and can supposedly be layered to build up layers of white. Pigment ink, not dye based, felt tipped bullet nib, not plastic finepoint like other Distress markers. A workable opaque white marker is a big deal for artists like myself- it can be used for corrections, to subtly lighten over rendered areas, and for special effects. I've tested a variety of white inks over the years, and am still amassing a collection of white artistic products.
The Pens
 To the left, a five pack of Distress markers purchased in person from Michaels, because I was concerned that the markers I'd ordered sight unseen wouldn't include usable skintones. I ended up having a couple duplicates, which were pulled and set aside before this post was written. On Amazon, it is difficult to find what colors are included in each 5 pack.
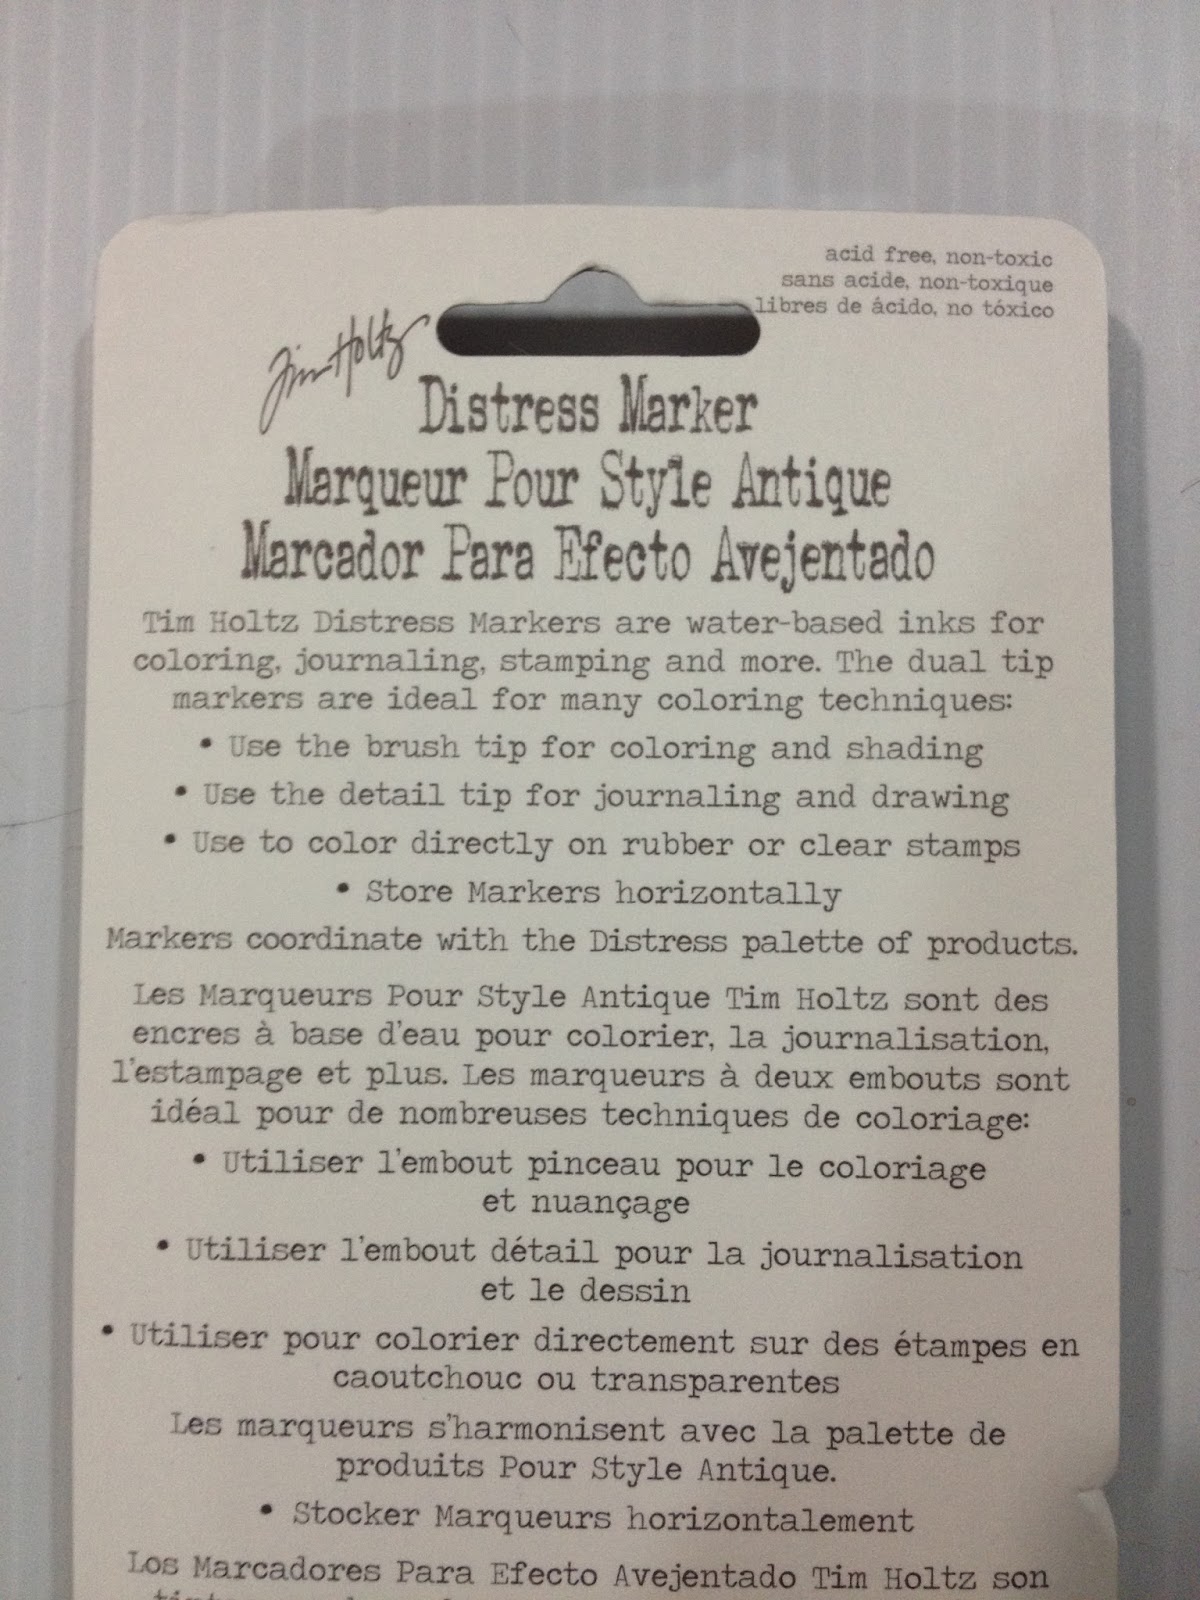
The print is hard to make out, so I'll transcribe it here:
Tim Holtz Distress Markers are water-based inks for coloring, journaling, stamping and more. The dual tip markers are idea for many coloring techniques:
Use the brush tip for coloring and shading
Use the detail tip for journaling and drawing Use the color directly on rubber or clear stapsStore markers horizontally
Markers coordinate with the Distress palette of products.The Markers
Unpackaged, I noticed that Distress markers use the same body as Chromatix alcohol based markers, with slightly different body screening.
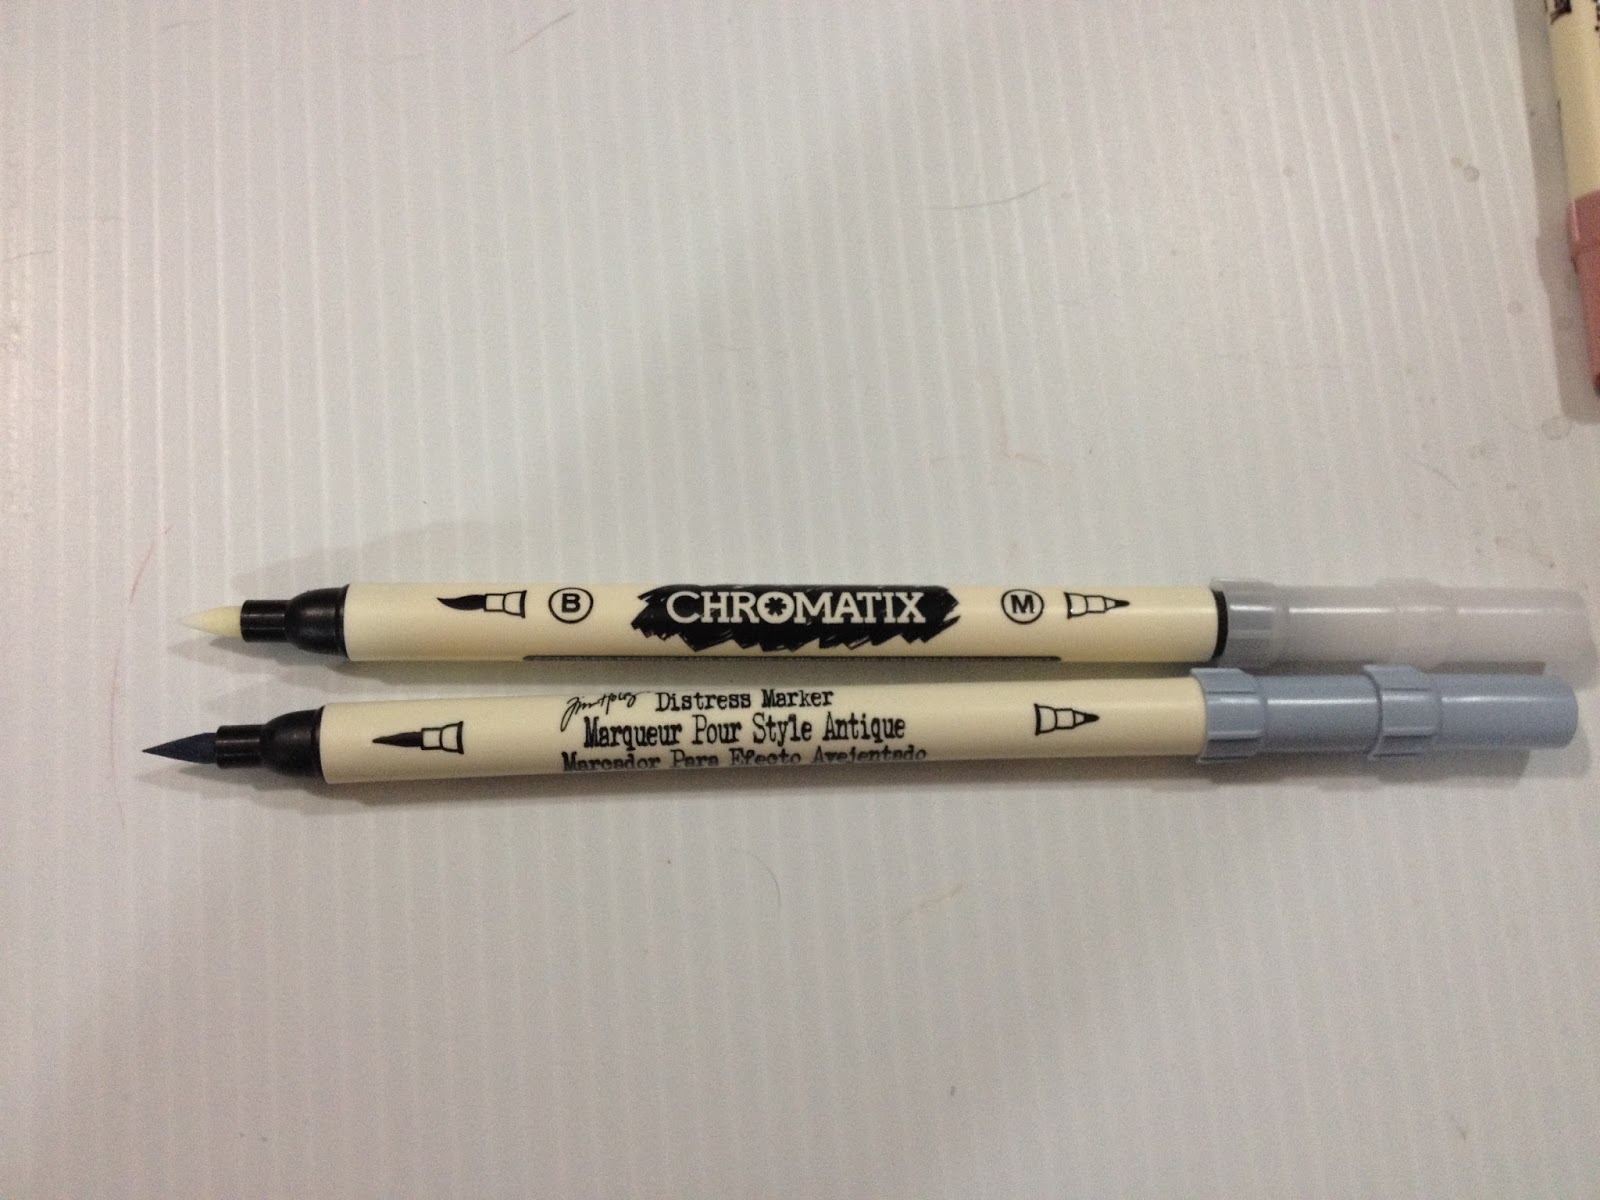 Top: Chromatix
Bottom: Distress MarkersWith both markers, if you can see the black band, it means the cap isn't on securely.
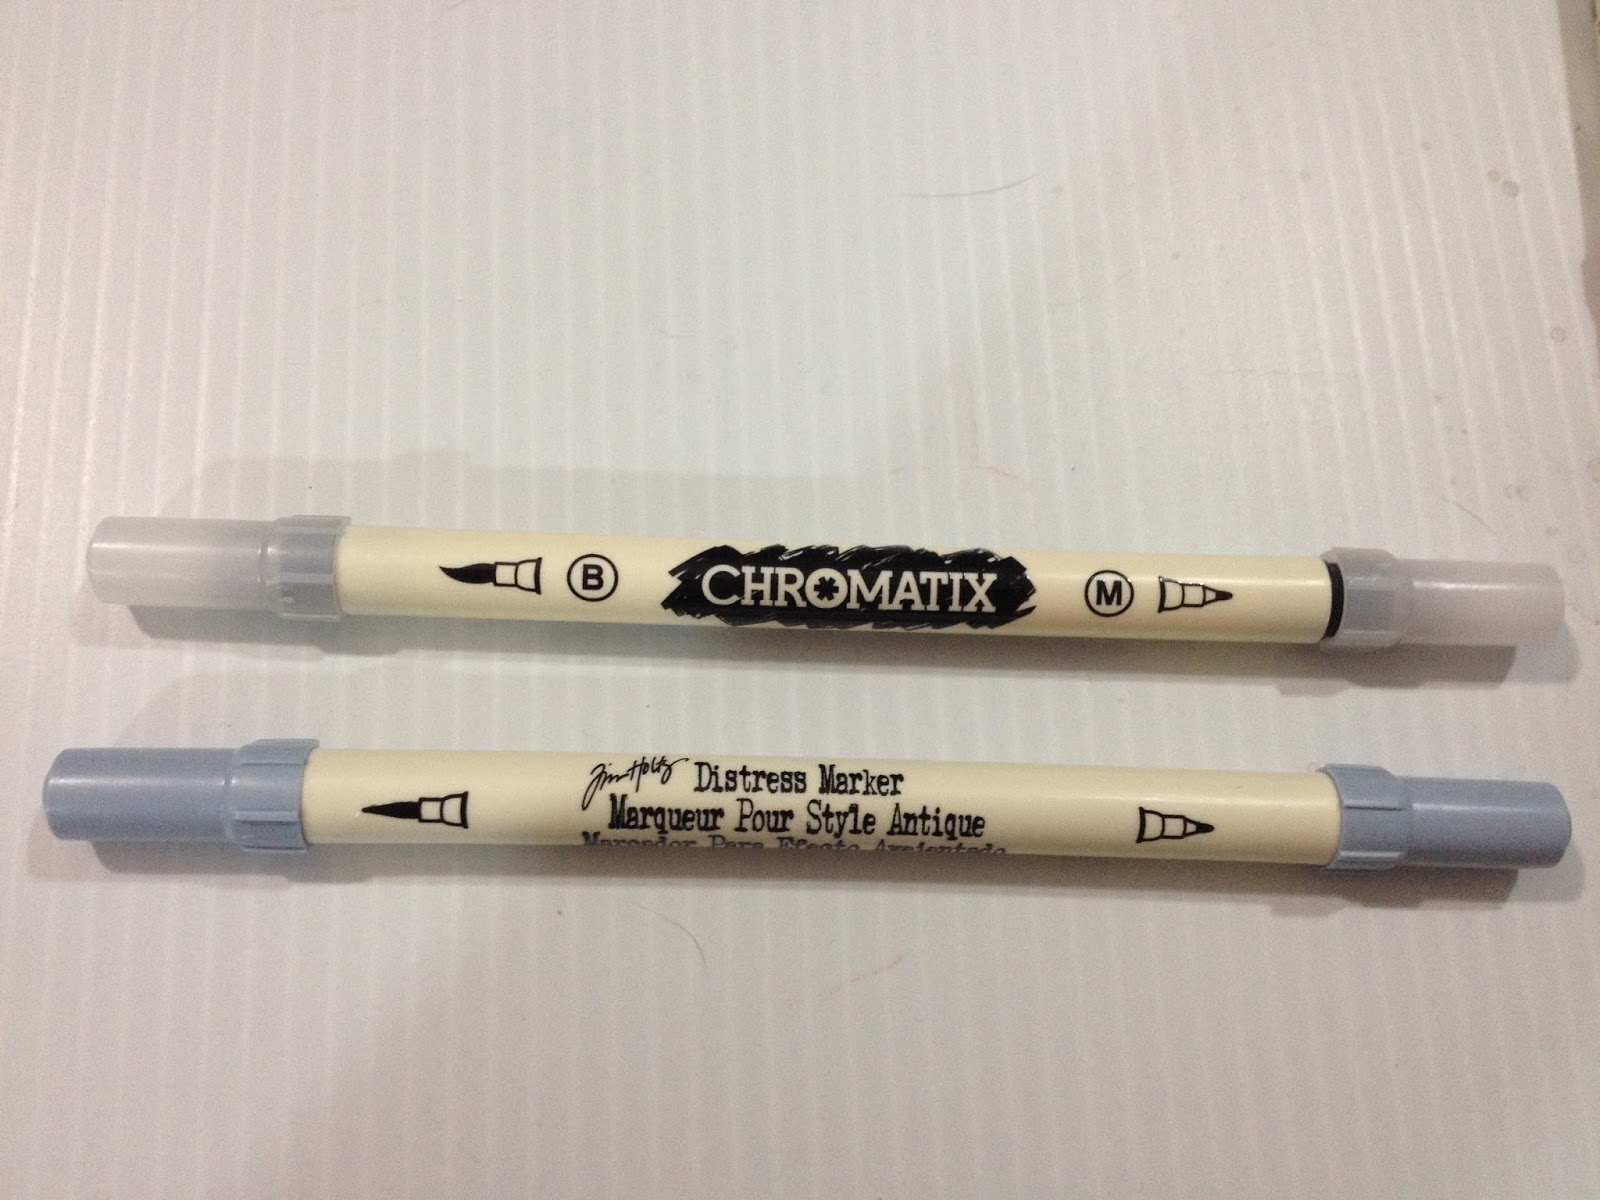

The Swatch Test:
Picket White Tests
To test the opacity of Picket Fence, I pulled out my handy black sketchbook, which I use for all white ink tests.
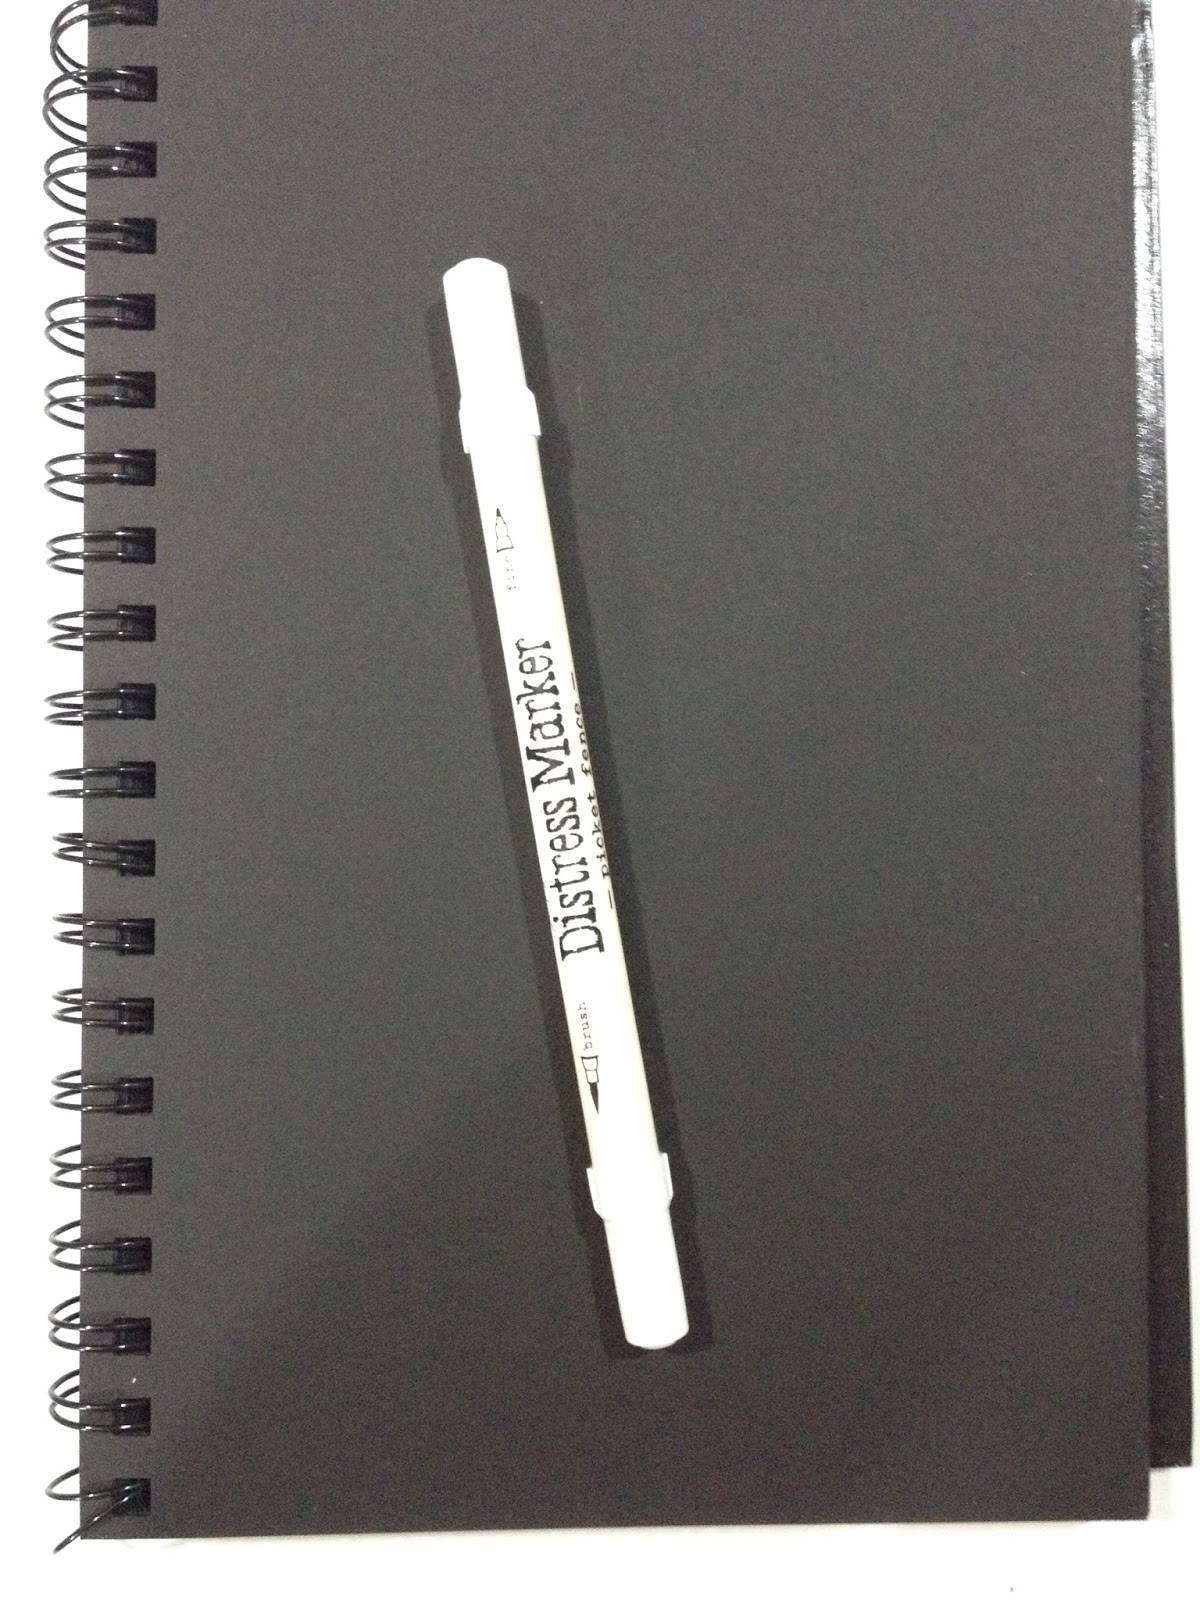
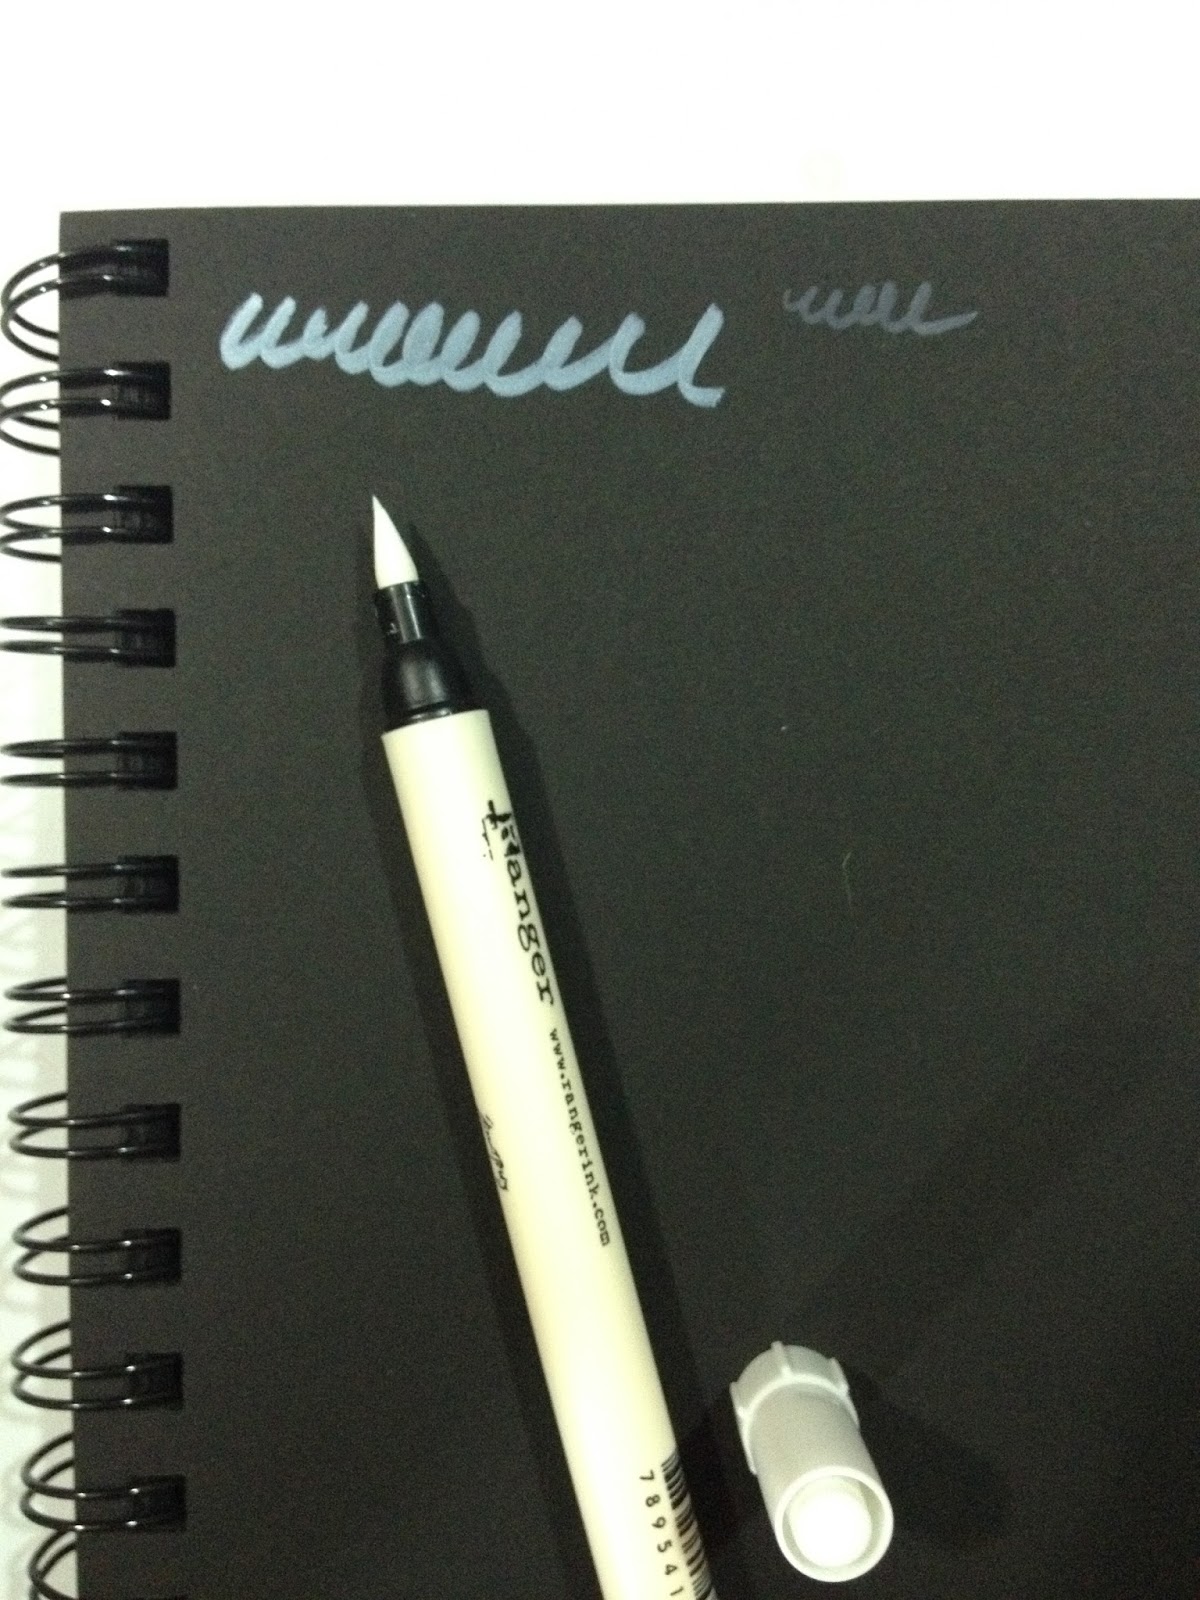
The ink did indeed go on clear, which makes it difficult to see where you've applied ink, but after about 20 seconds or so, it dries opaque.
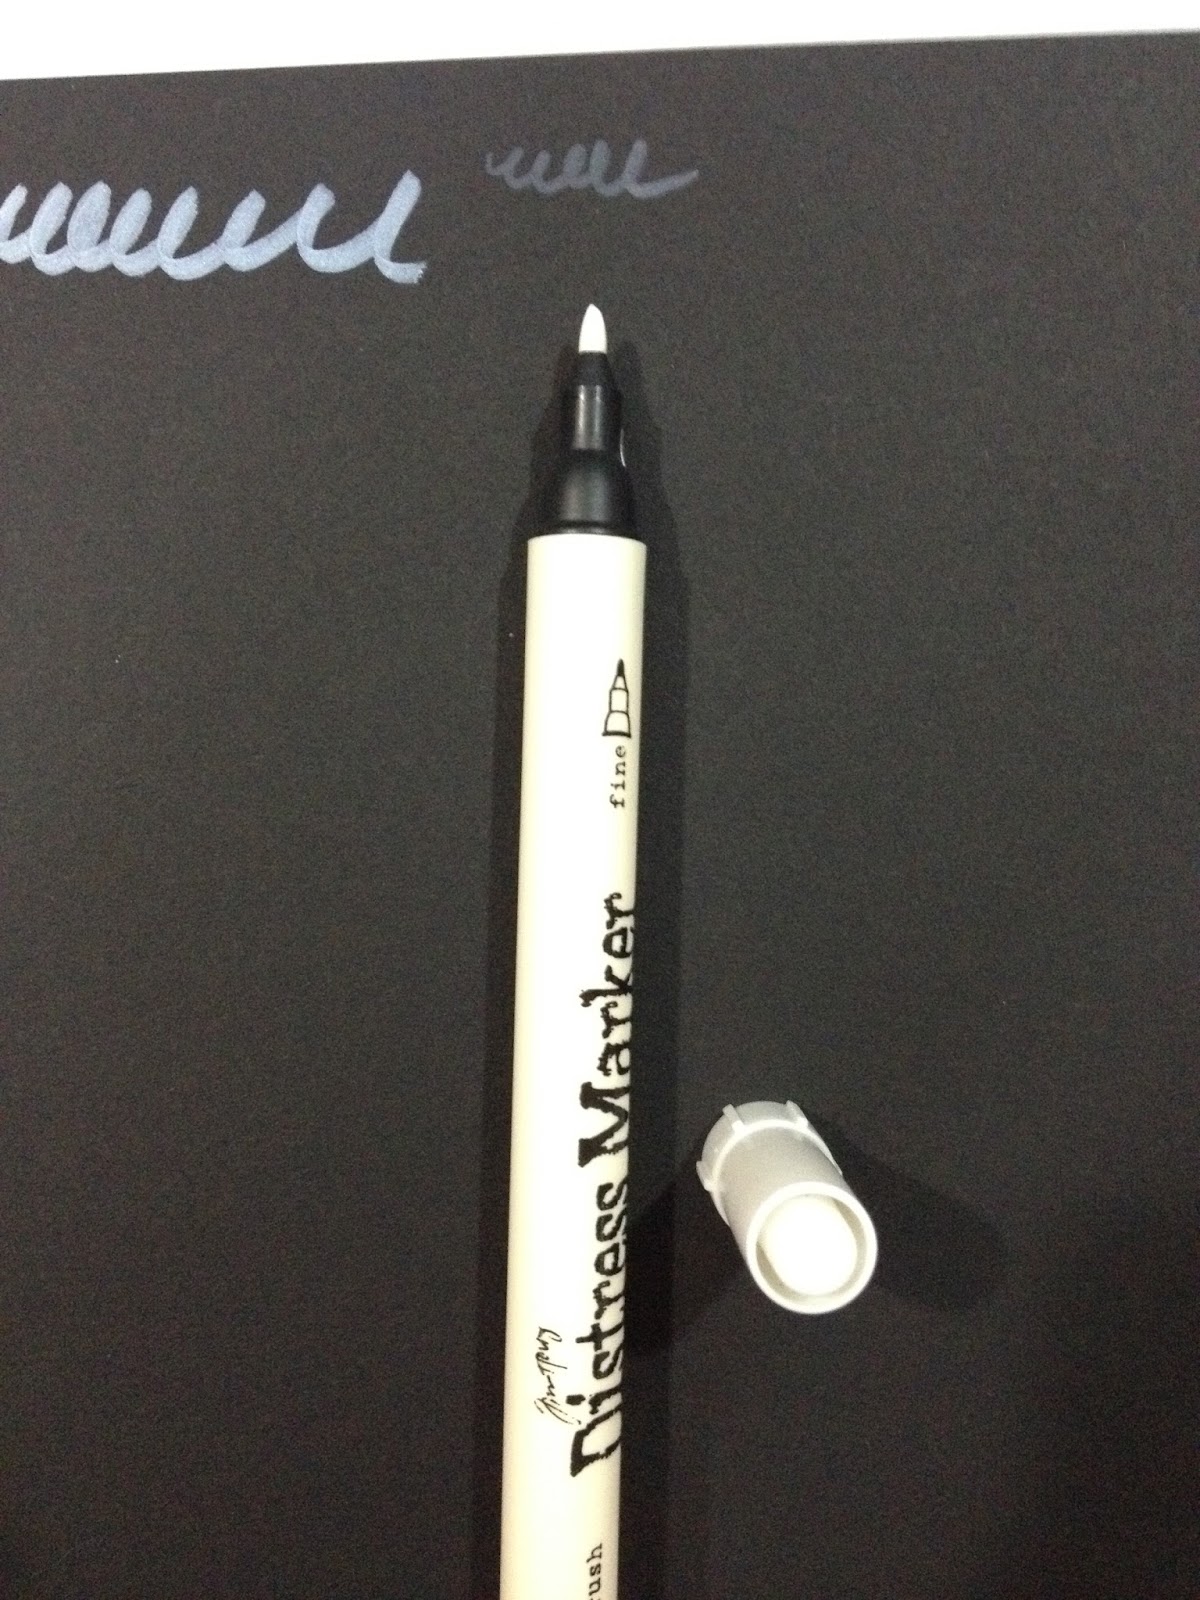
The smaller nib is scratchy and dry, despite these markers being stored horizontally.
Layering Test
Layer 1
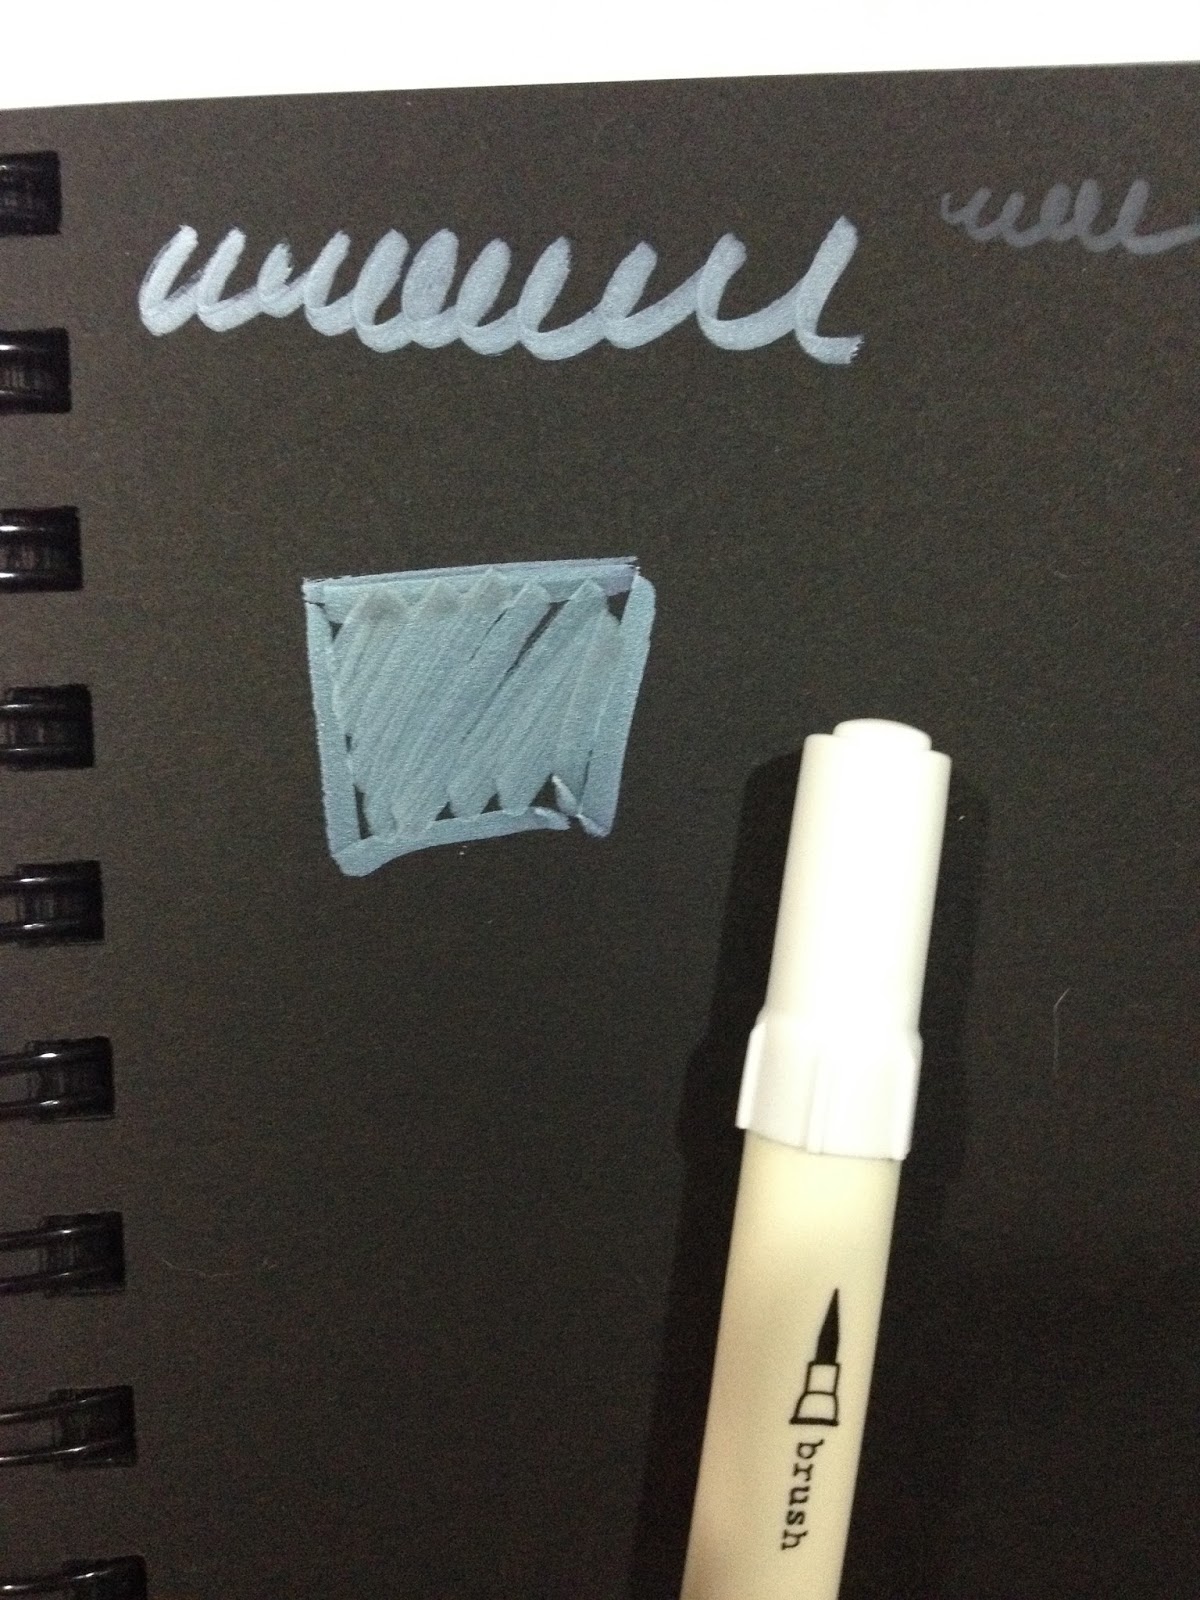
Layer 2
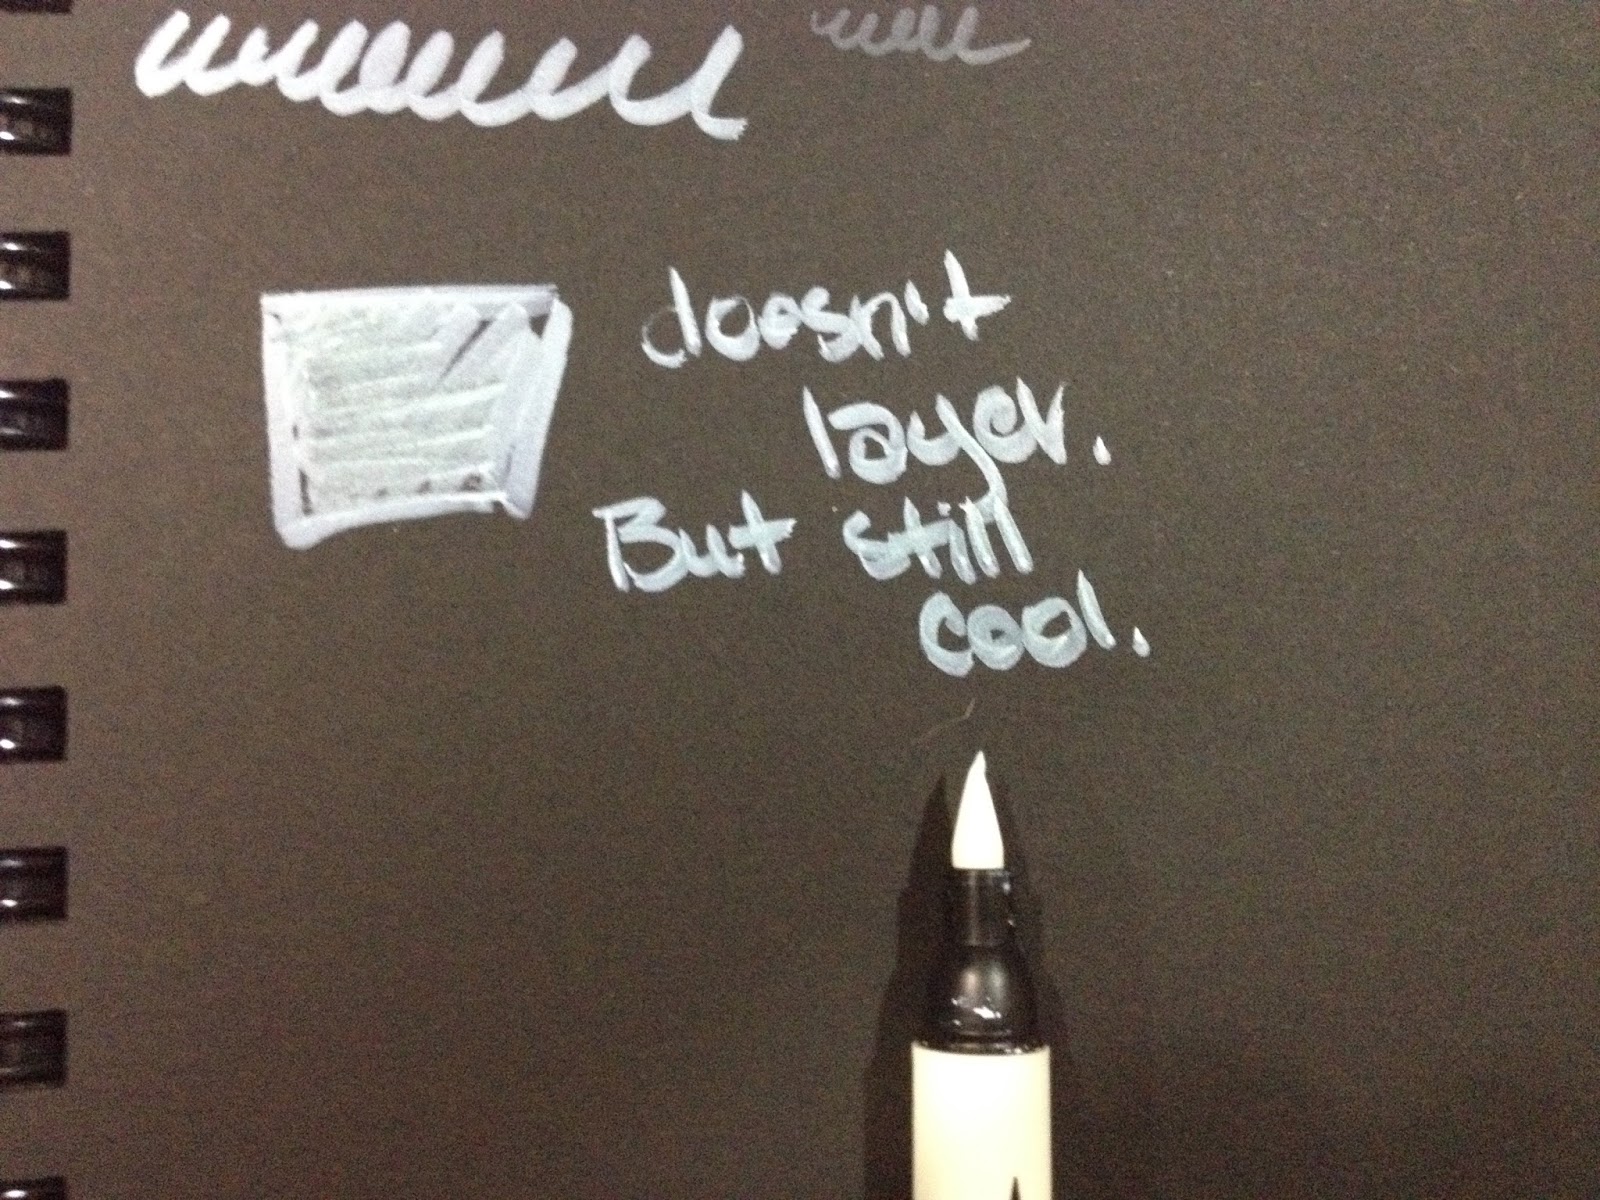
Despite promises that Picket Fence can be layered for subtle build of of opacity, applying additional layers just reactivates the original layer, so you can't really build up opacity through additional layers.
Marker Swatches on Watercolor Paper
These markers were swatched on 400 series Strathmore cold press watercolor paper. Each end was swatched, water immediately applied, and attempted to blend out before the other side was swatched.

The smaller swatch came from the plastic nib, and does not take to water easily.

The finished swatches and their corresponding markers. Most of these markers stayed true to their dye when water was added.

Since these markers are designed to blend, I decided to go ahead and do some blend tests. I'm using Canson's Biggie watercolor paper in 160lb cold press. This is a wood pulp based paper that I've had positive experiences with direct application of waterbased markers.
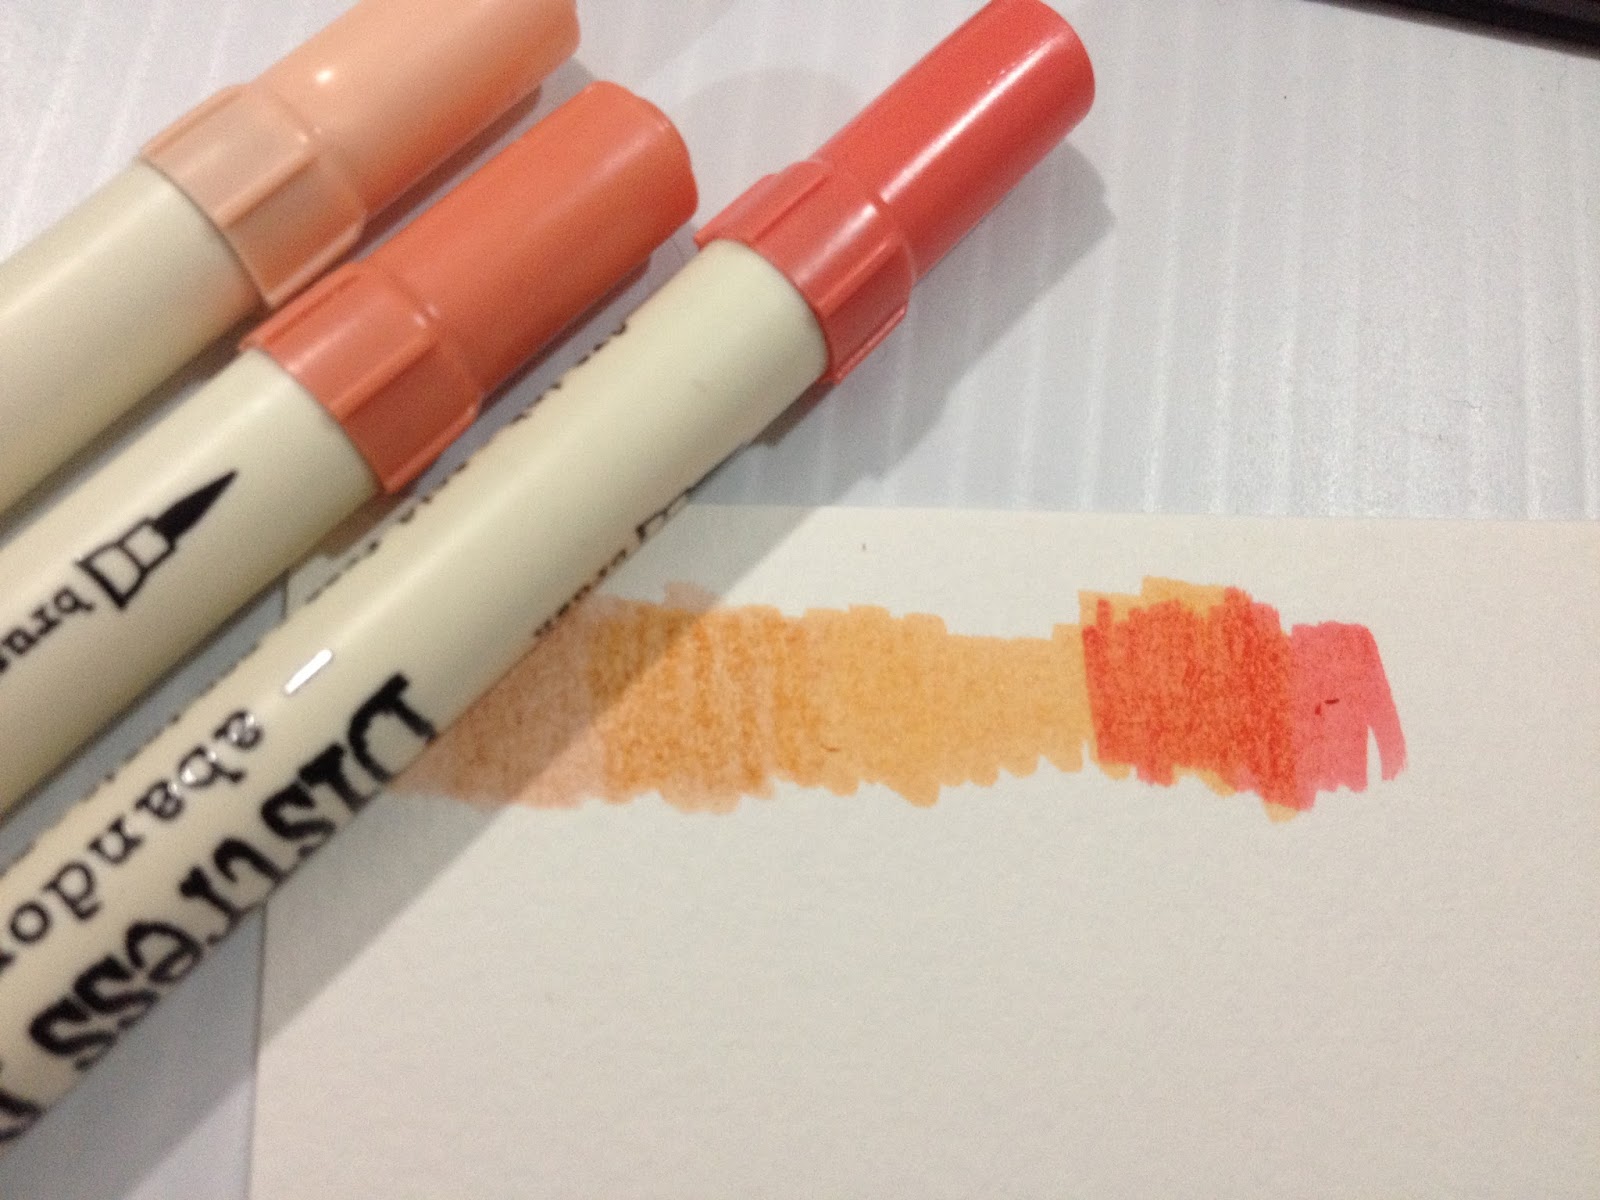
The first blend test is me blending colors into one another using just the markers. These markers do not blend the way alcohol based markers do, and while they can be layered, you aren't going to get a perfect gradation this way.


I pulled out two common waterbased colorless blending markers, the Tombow ABT colorless blender, and the Marvy LePlume II colorless blender. Distress markers blend easily with the Tombow ABT.

There's still a line where the marker last went down that you can't really blend out with the markers alone.
I'm not a fan of the fine tips on these markers. Not only does it feel scratchy, and stingy with the ink, but you can't get the line to blend out when you apply water.
The Field Test
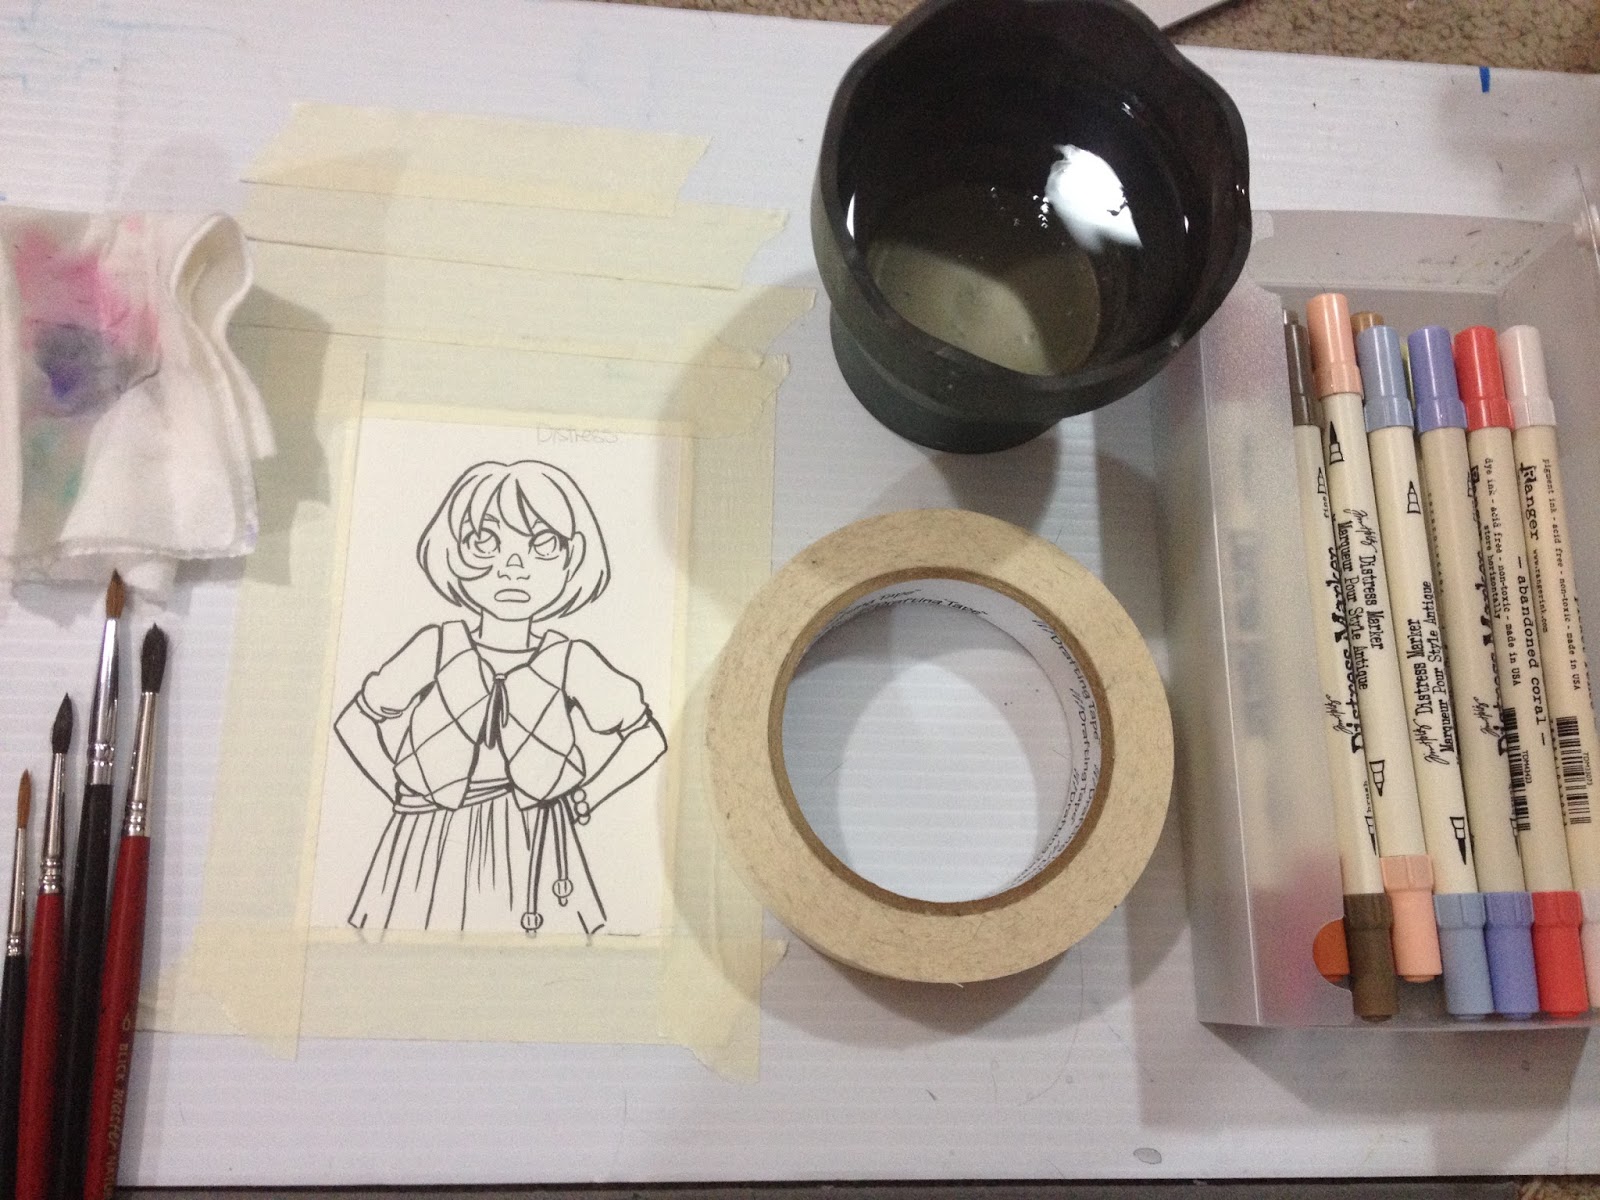
Colors Used:
Victorian Velvet (backround)
Dried Marigold (skin base)
Abandoned Coral (blush, accents on Kara's outfit)
Weathered wood (whites of eyes, shadows on clothing at end)
Milled lavendar (first round of skin shadows)
Shaded lilac (only a few secondary shadows)
Rusty Hinge (base of Kara's hair, base of Kara's eyes, first layer of freckles)
Vintage Photo (second layer of hair and eyes)
Shabby Shutters (Kara's Dress)
Evergreen bough (Kara's quilted vest)
Picket Fence (white highlights)

Can be blended out if you apply it to the masking tape first, and use a wet brush to apply to your watercolor paper. Direct application can also be easily blended out with a wet brush- no scrubbing needed.
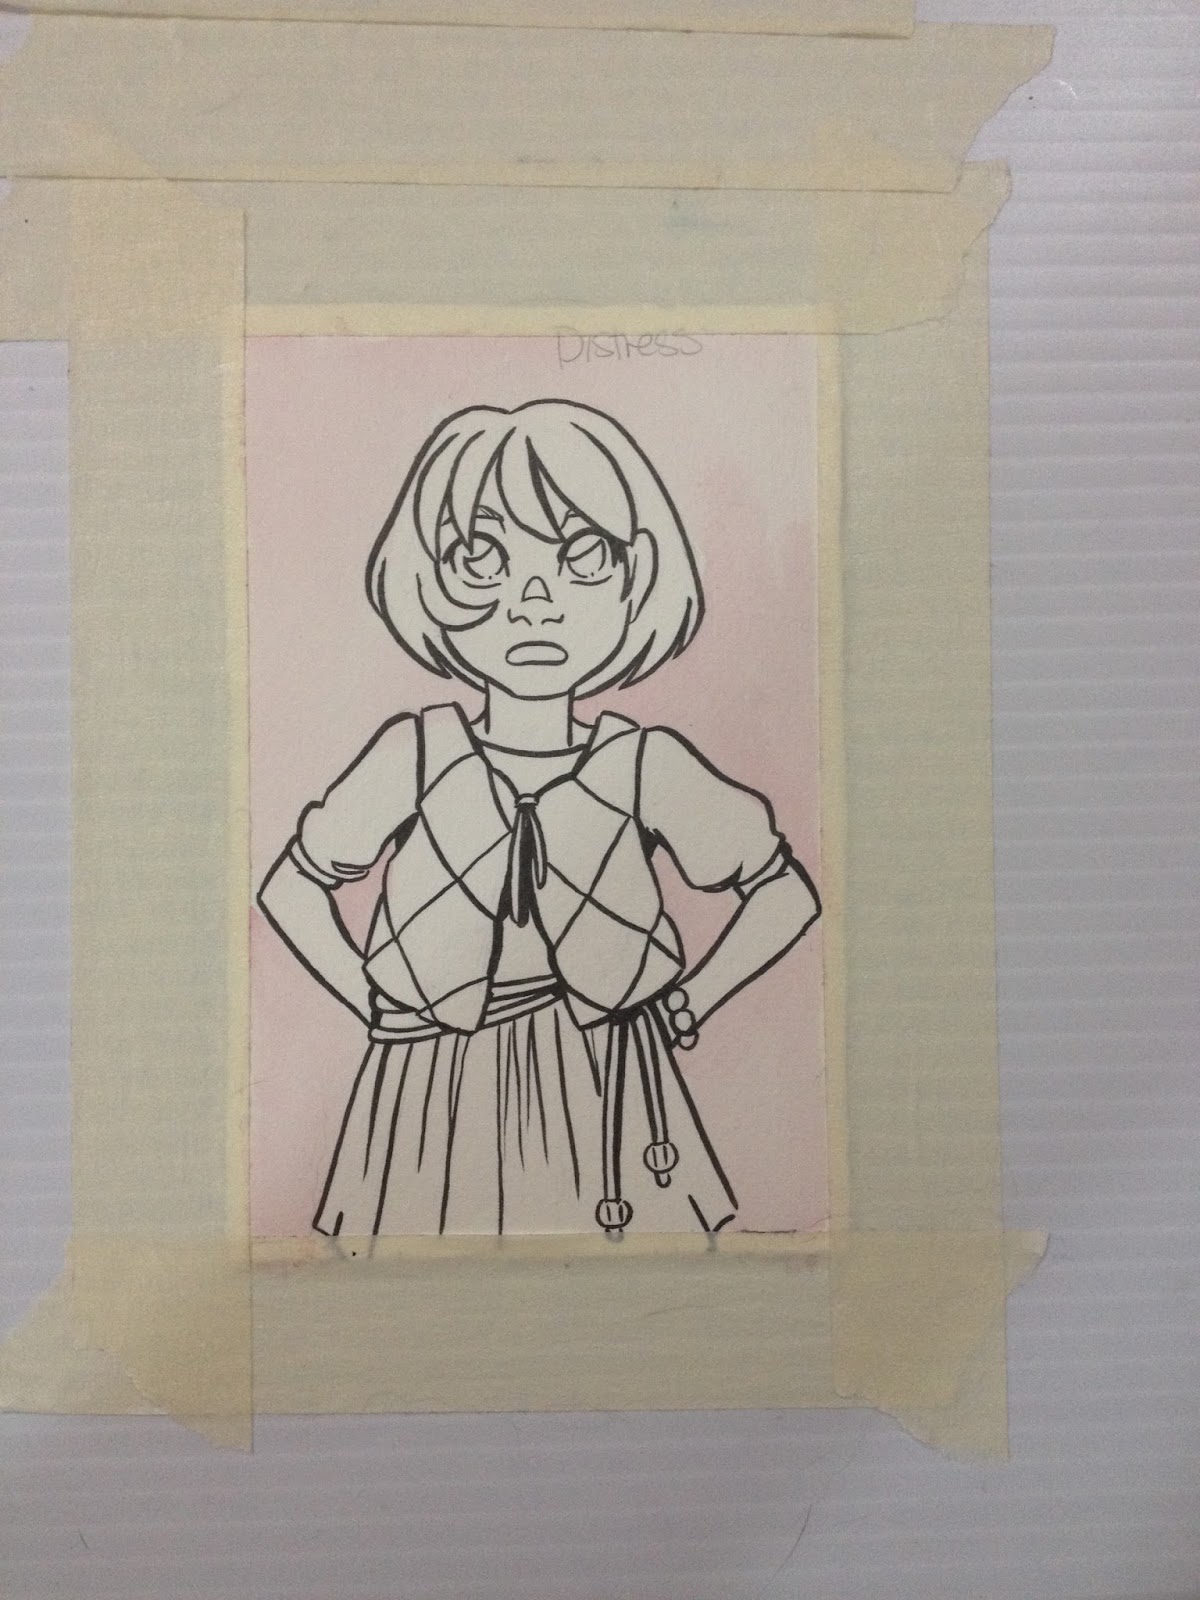
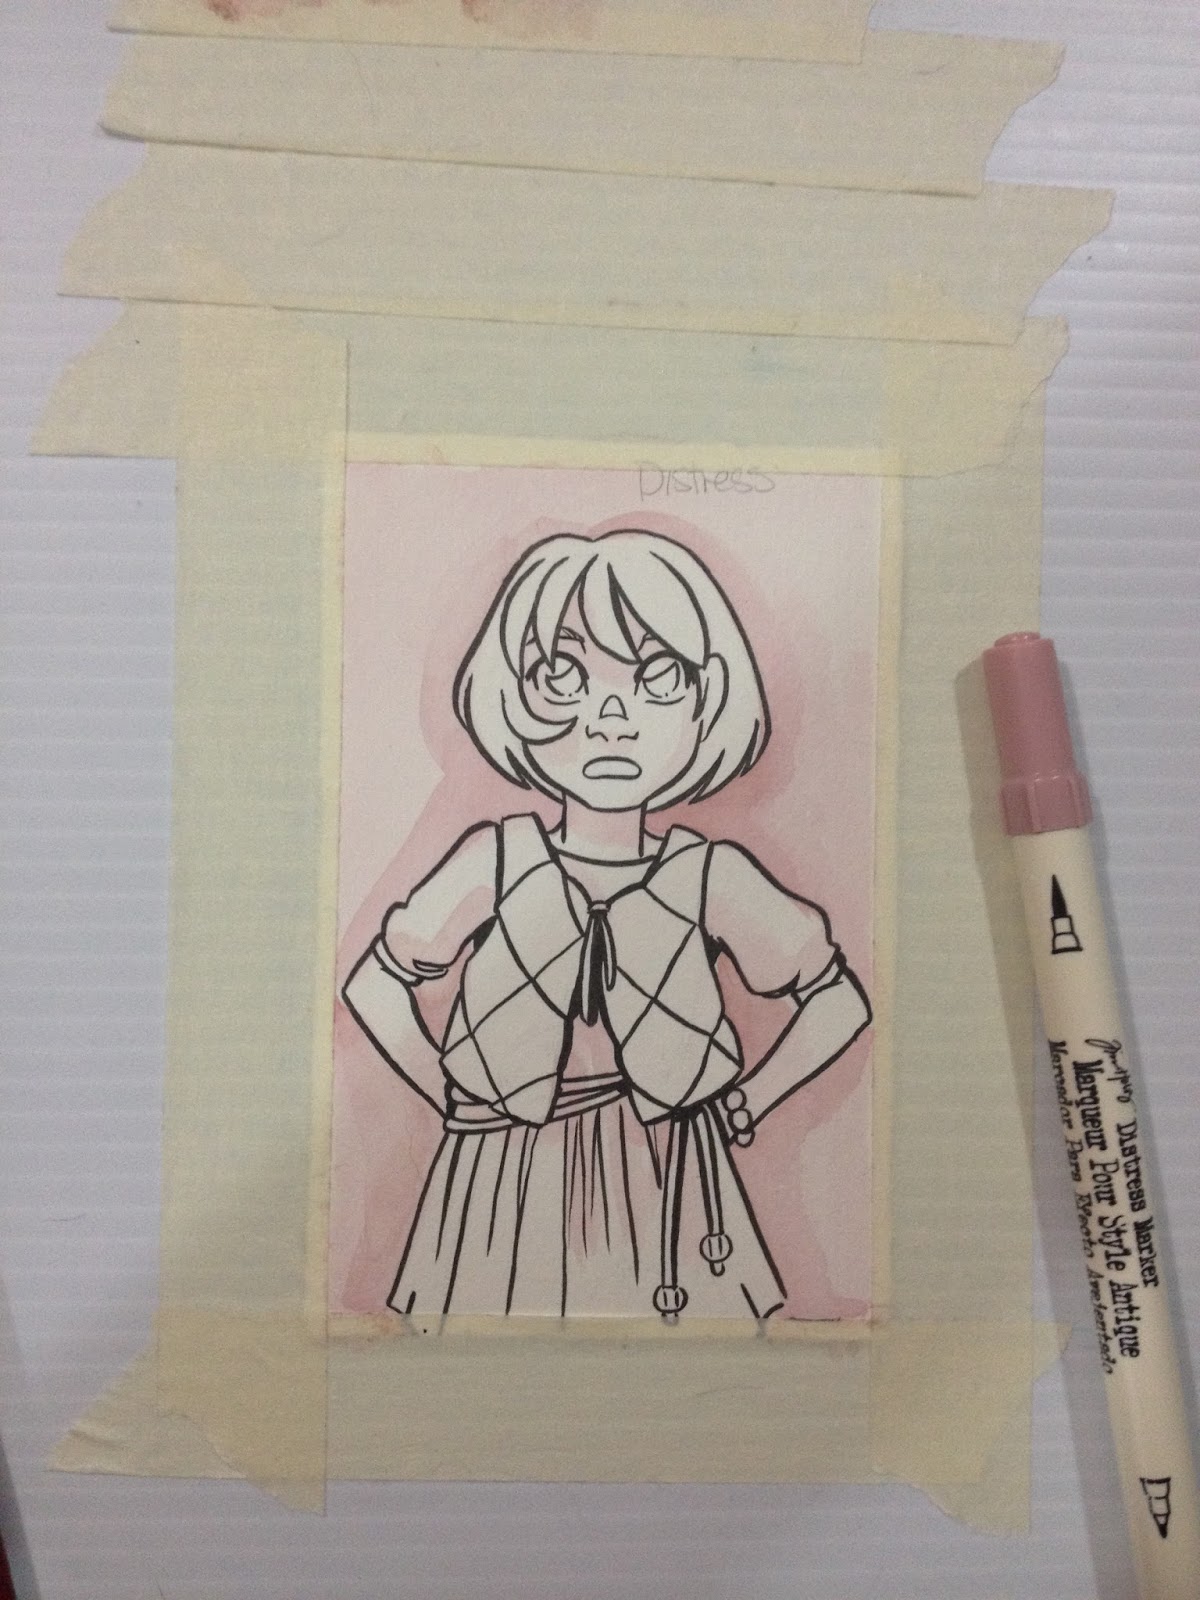

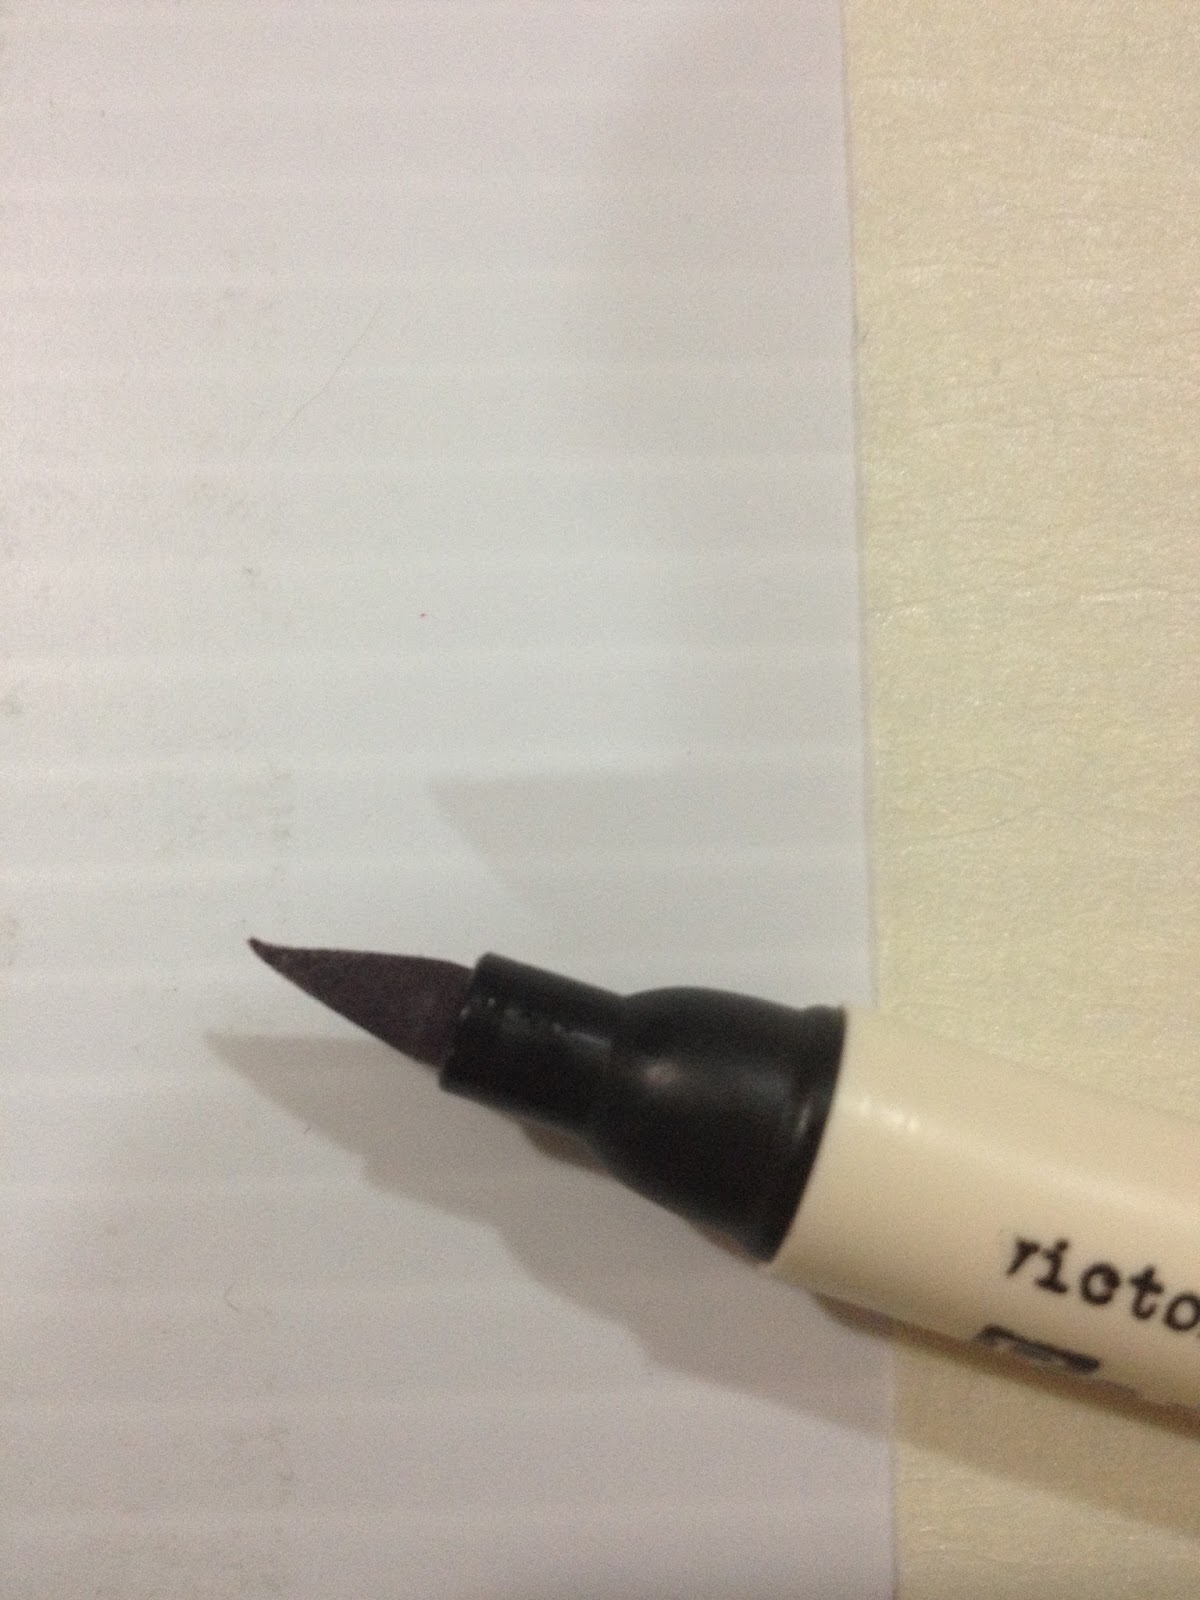
Unfortunately, applying marker to the masking tape seems to cause some damage to the Distress marker's brush tip. Color applied from the fine tip is much harder to blend out when applied directly to paper- could the plastic tip be slightly abrading the paper surface? It did abrade the paper- when I go over it with the brush nib (which is significantly lighter in color, le sigh), it starts pilling the paper. So if you want to use this for watercolor applications, don't use the plastic fine tip directly on your paper.

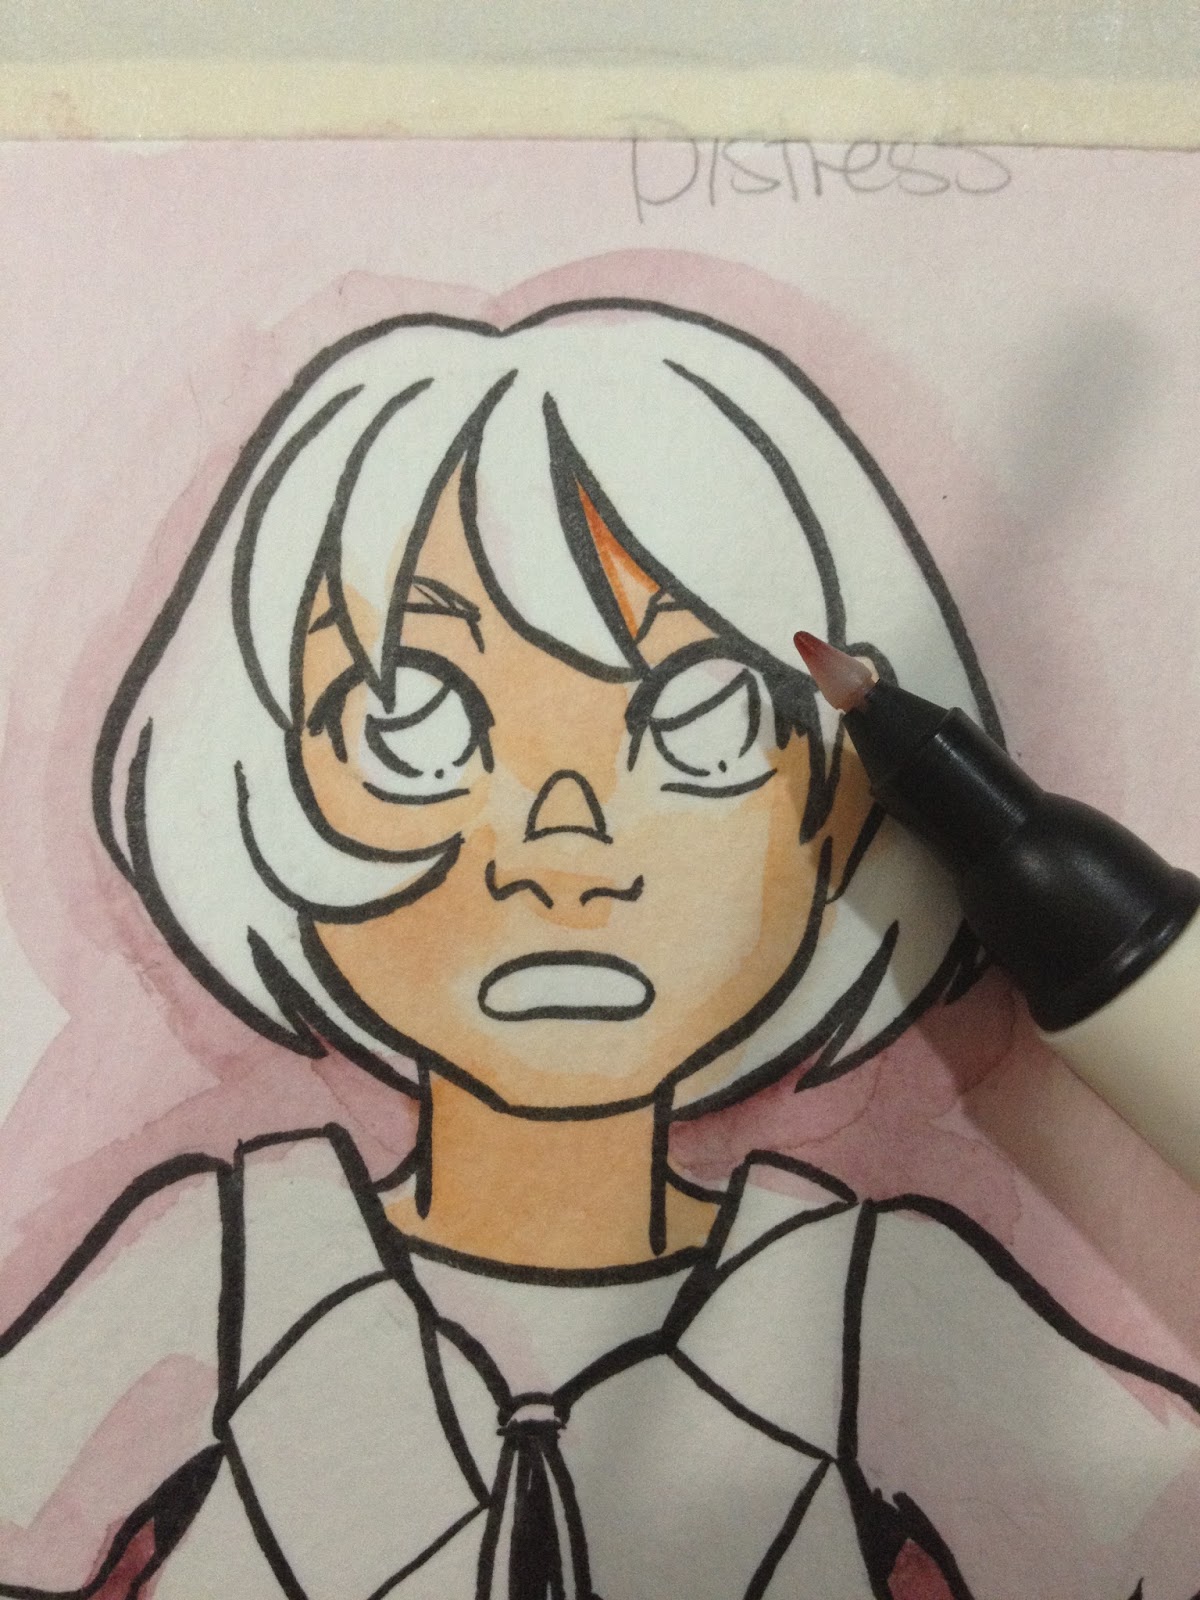
I applied the milled lavendar directly to the paper, as it's such a light purple, I thought diluting it would make it just about useless, but unfortunately, the application of the stuff brush nib to the paper causes further paper damage where the plastic tip had scratched up the surface. What's the point of watercolor markers if using them directly on the paper ruins the paper's surface?

Although I only found one good color for Caucasian skin- Dried Marigold. You'd never guess it works as a skintone based on that name or the color of the cap, but swatching proved otherwise.

Blush was applied first to the masking tape, then to Kara's skin with a clean wet brush.
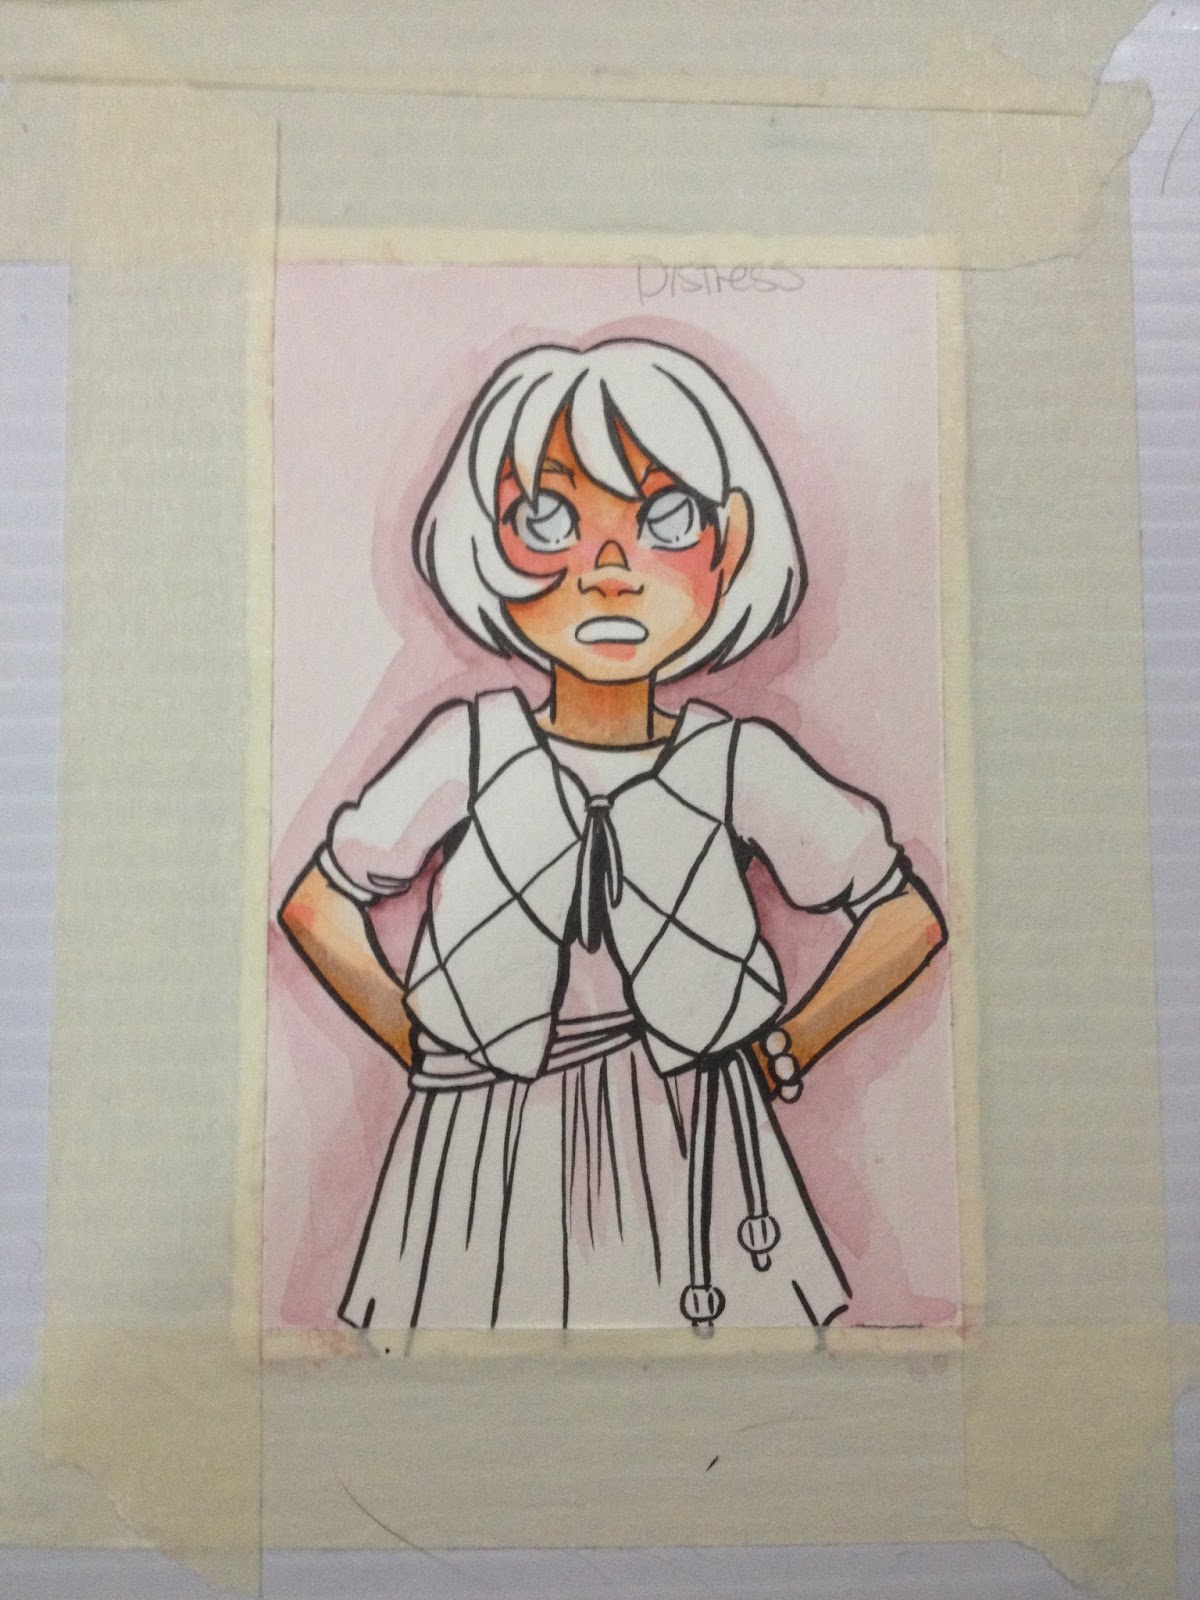
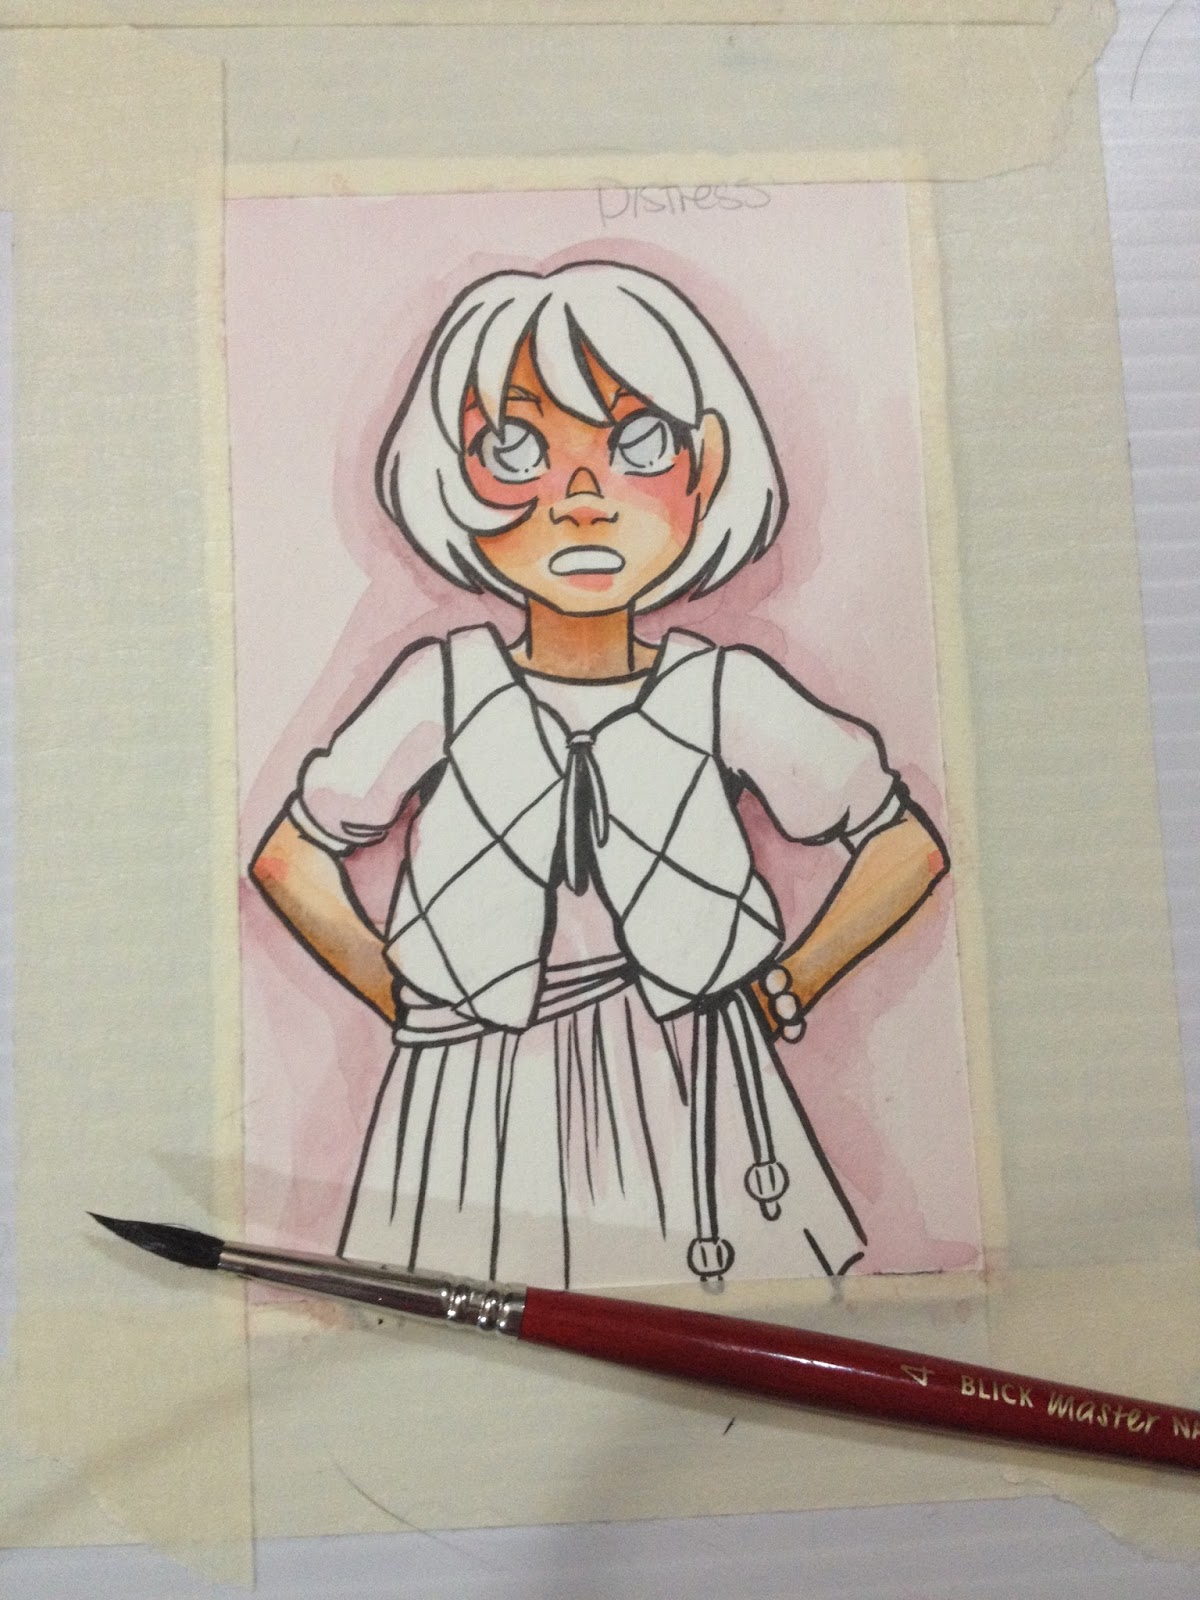
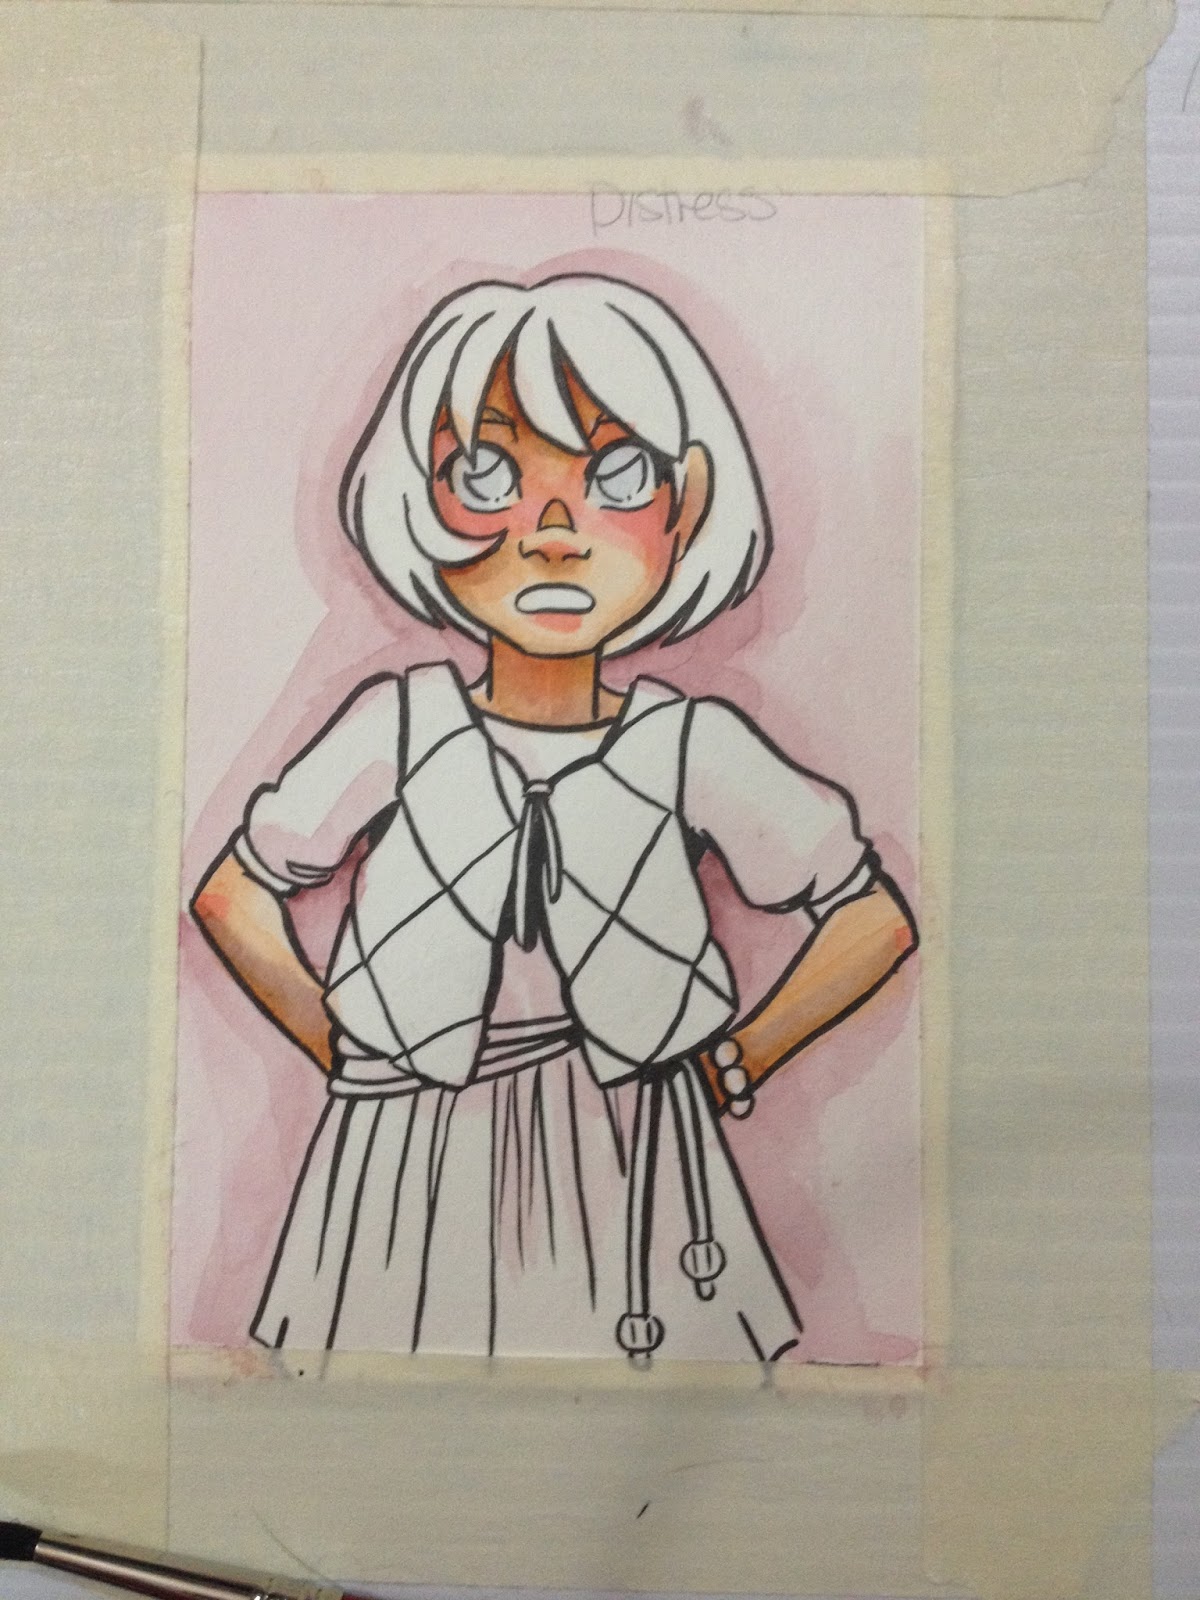

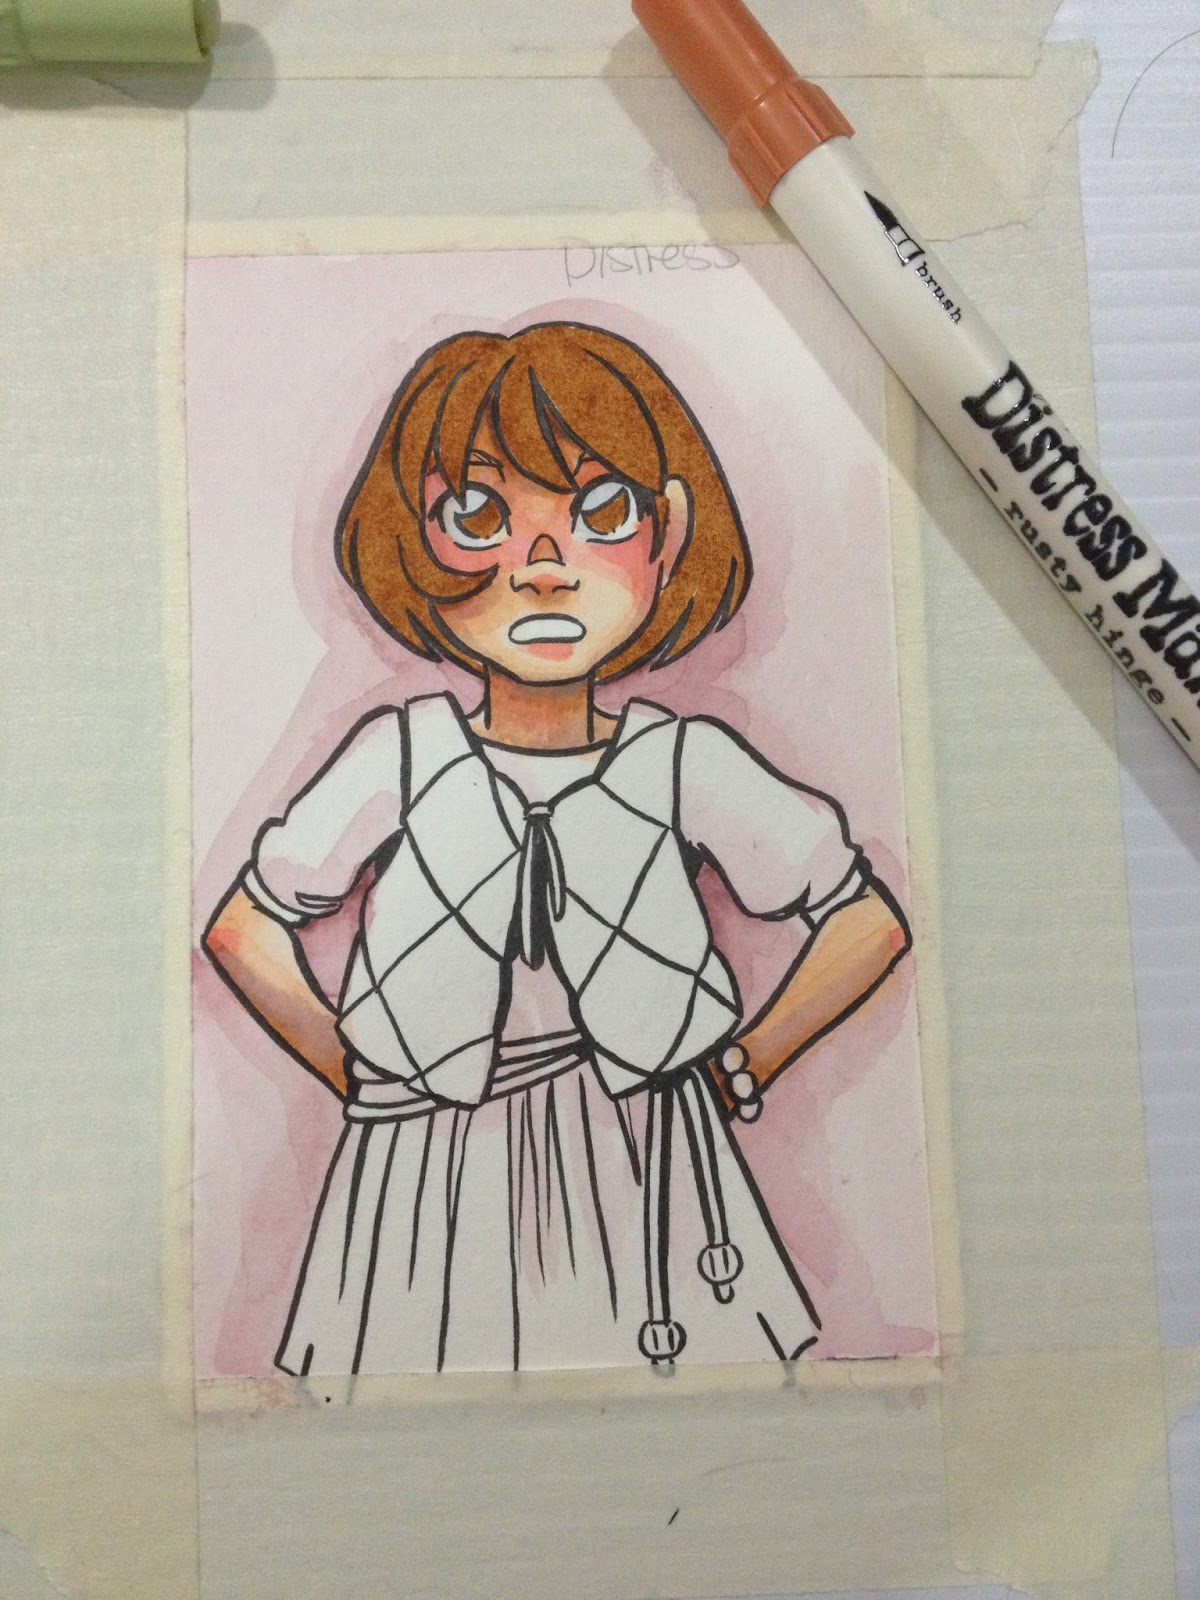
I applied color directly to Kara's hair, as I've had mediocre experiences in the past with trying to blend hair, and honestly, it often just looks better if it's directly applied, rather than washed in.
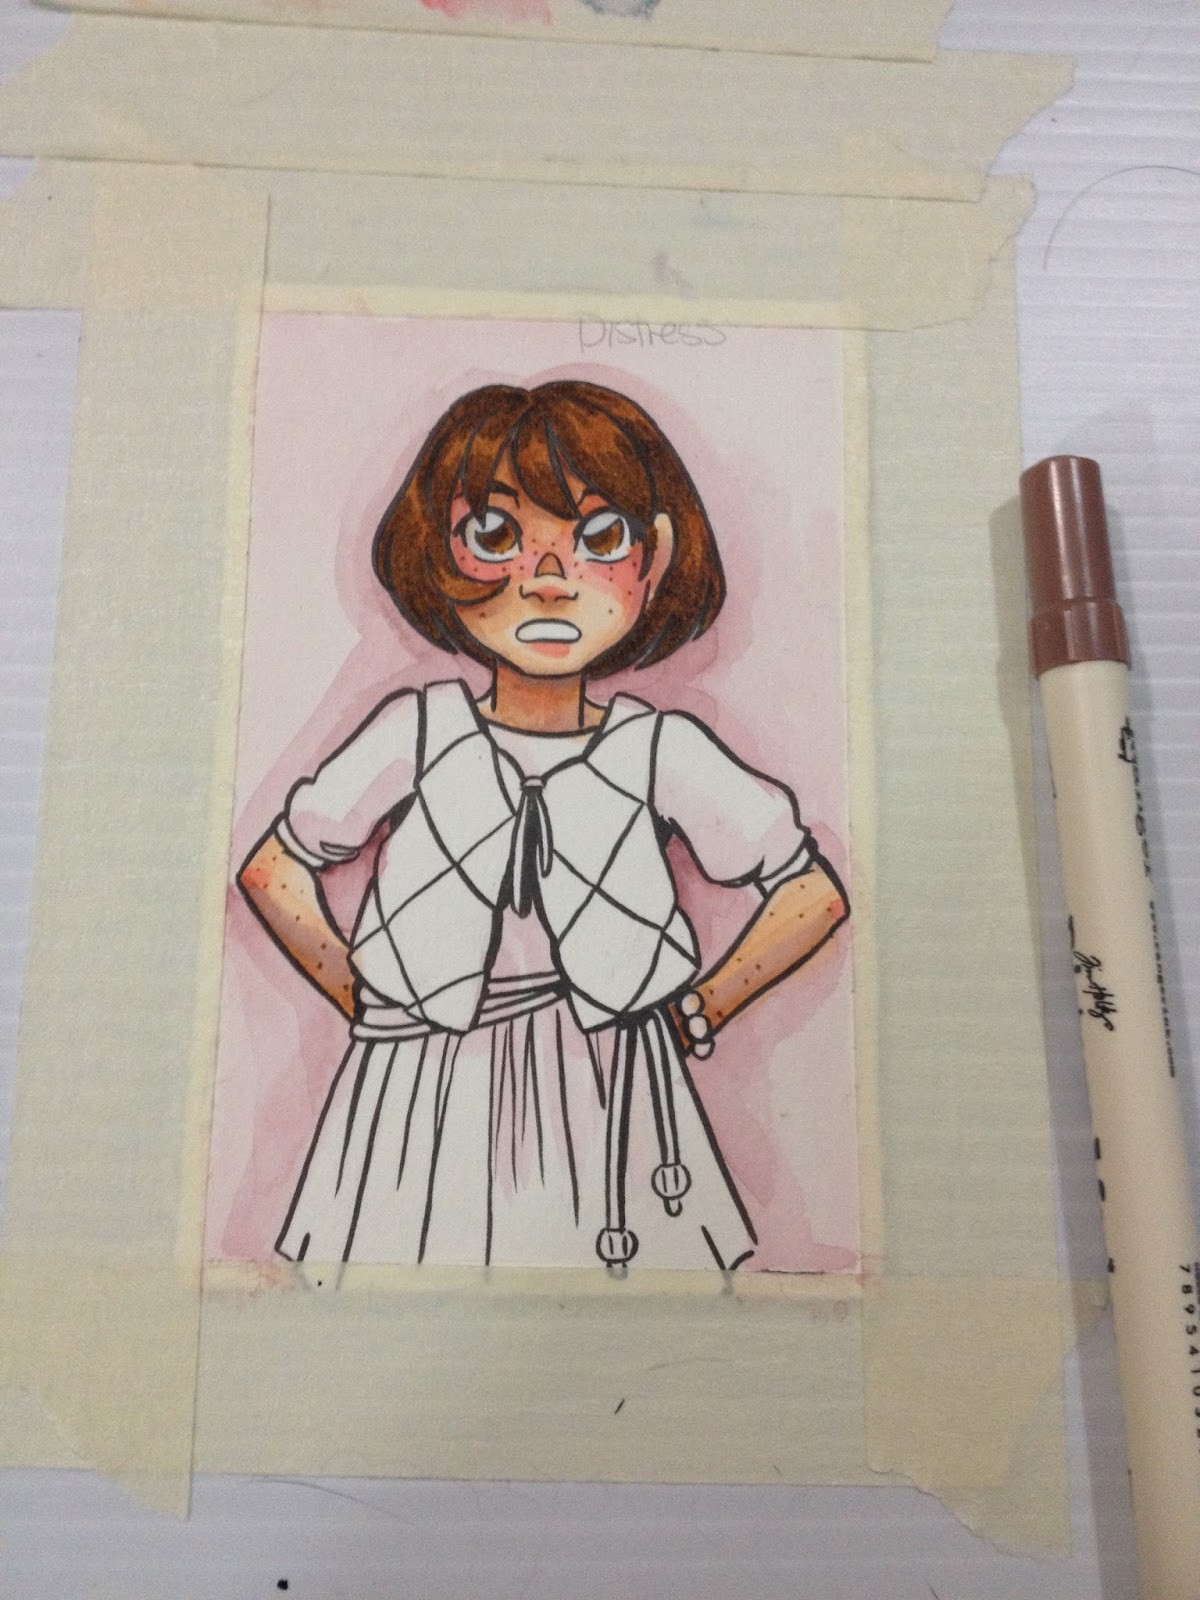
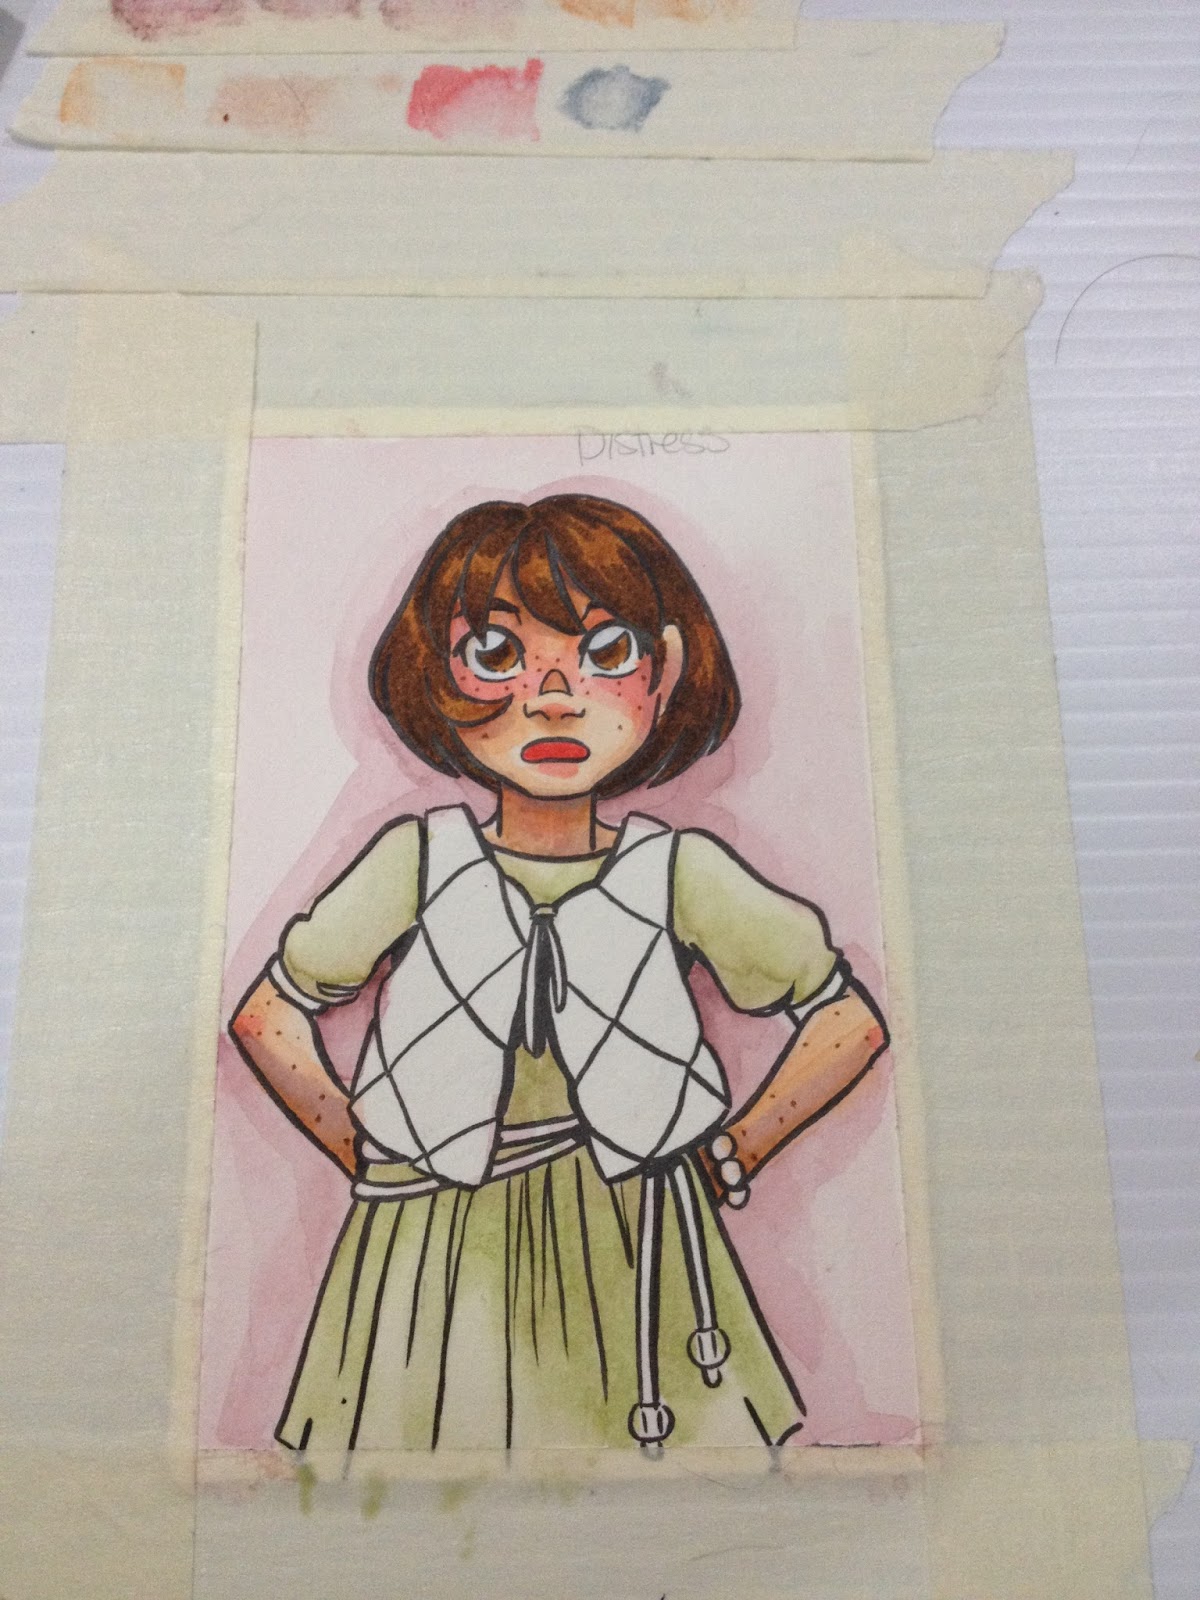
The green of Kara's dress was applied directly to shadows , and washed out to fill the rest of the area.
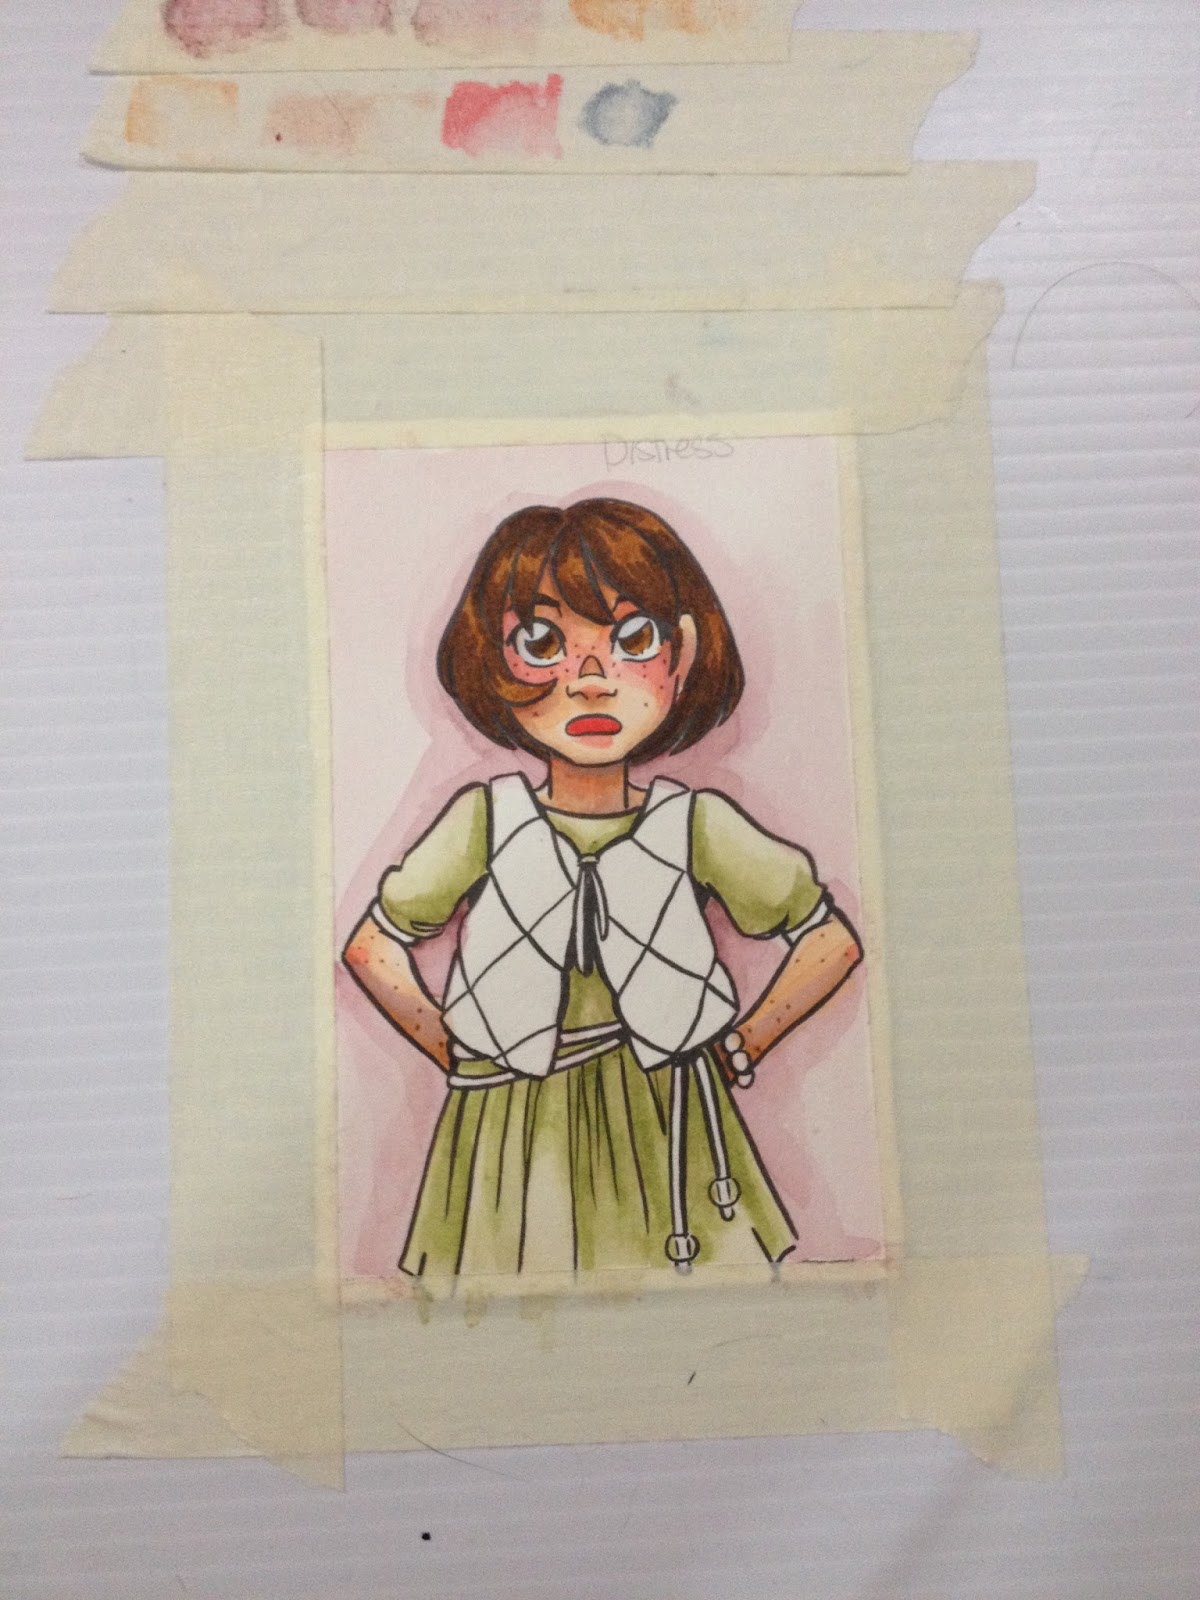
Color was reapplied to make the shadows a little more distinct.
I'd had some decent results with blending out initial applications of brush side ink to paper with a wet brush until I applied Evergreen Bough to Kara's vest. It took some working, but I managed to get the application to look intentional, rather than an inability to apply color (or an inability to get color to blend out), but I still found it pretty annoying.
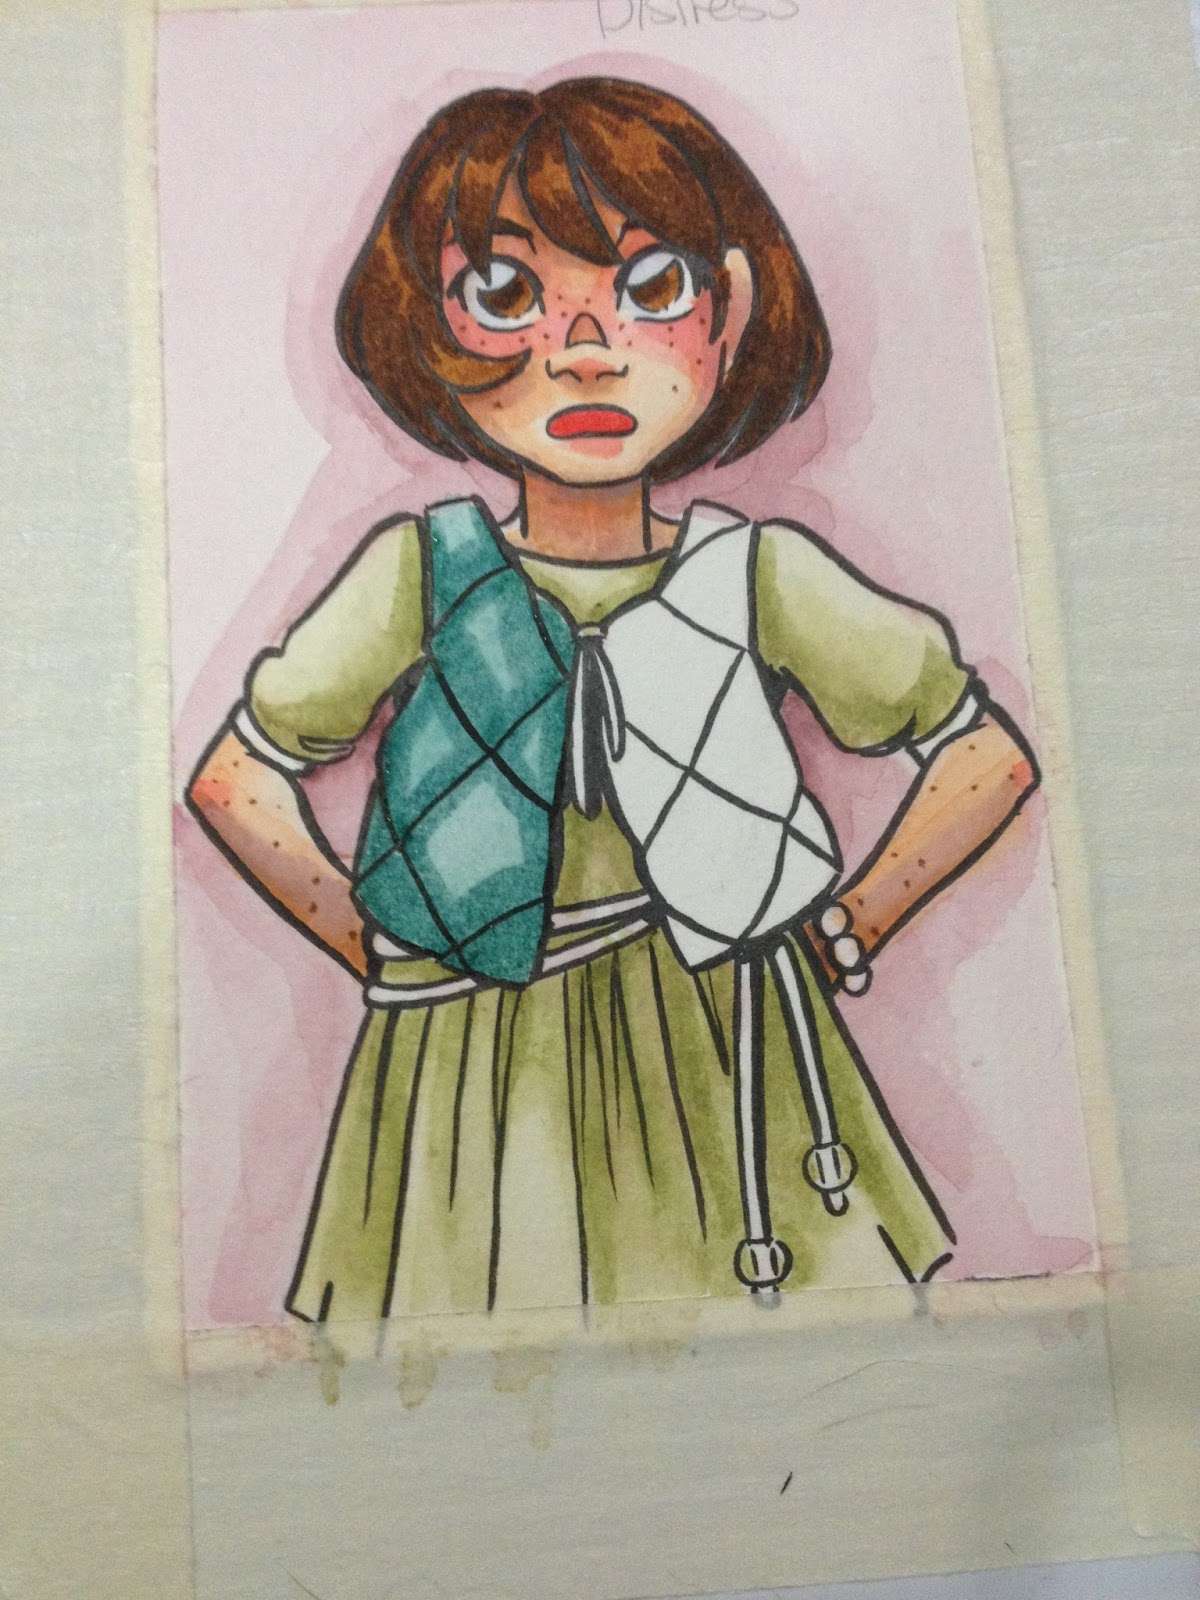
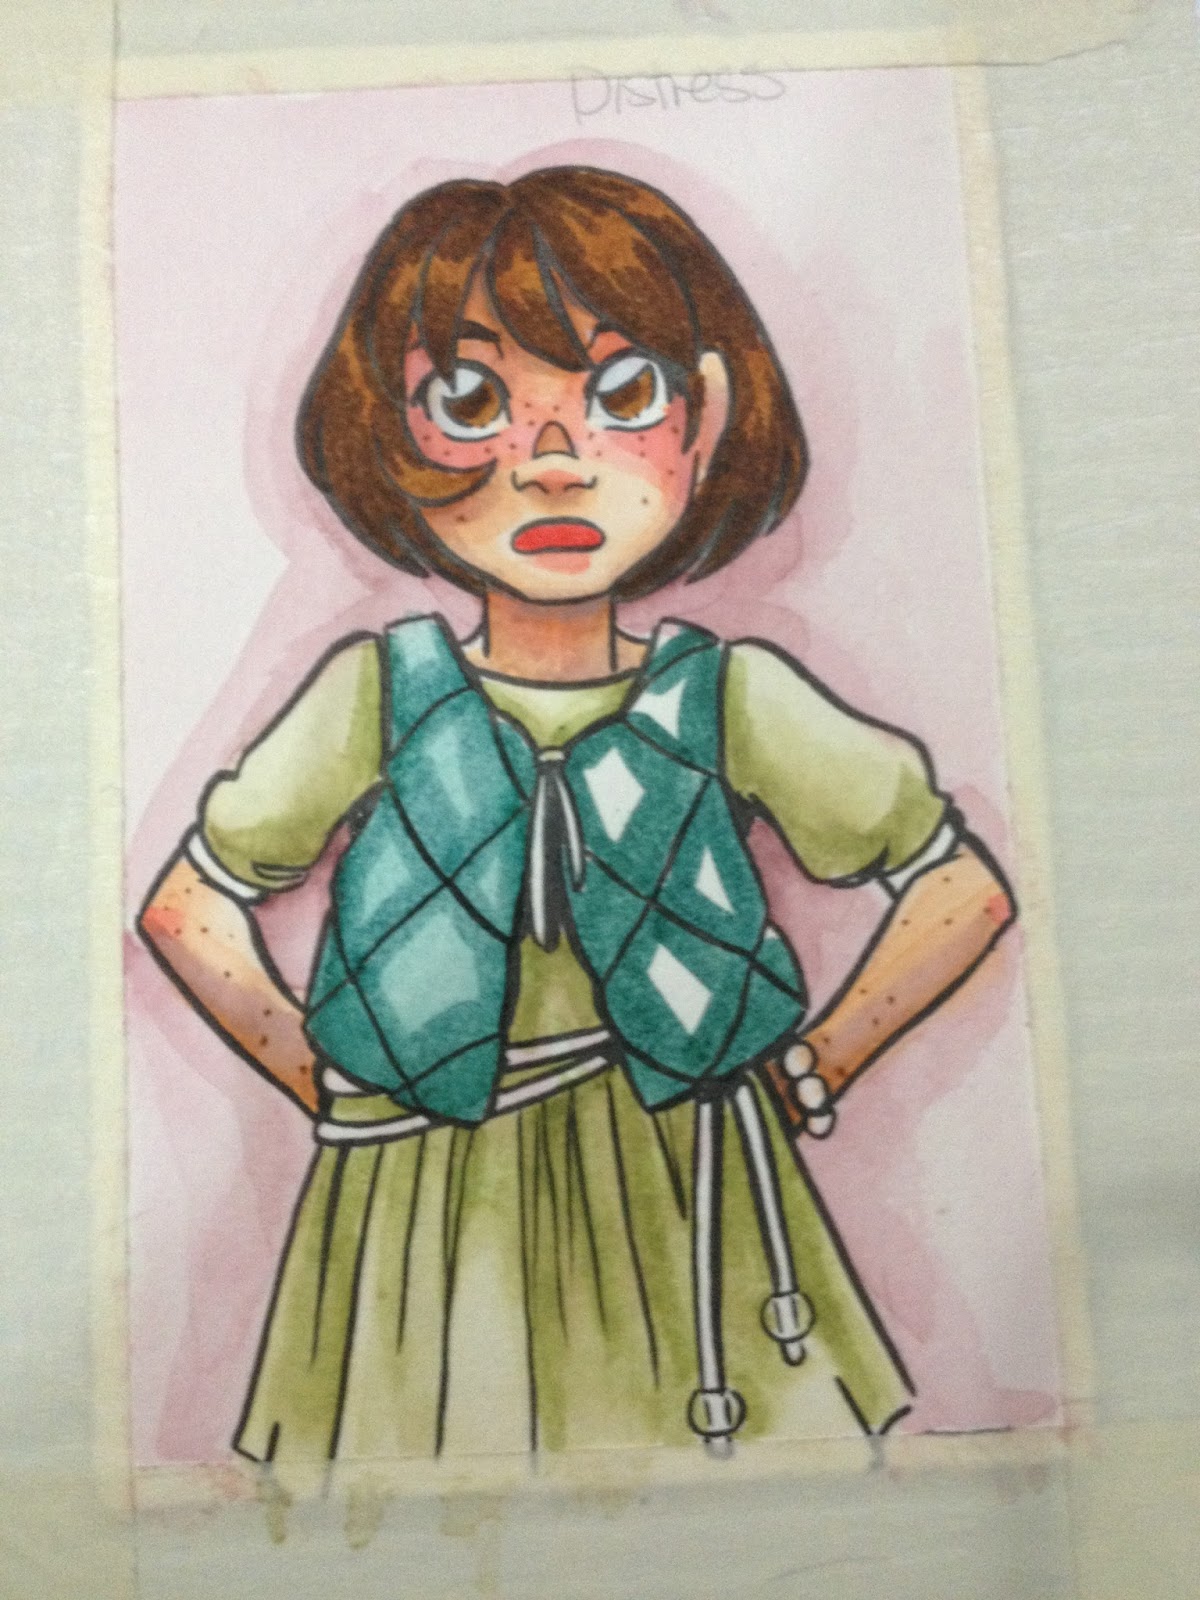
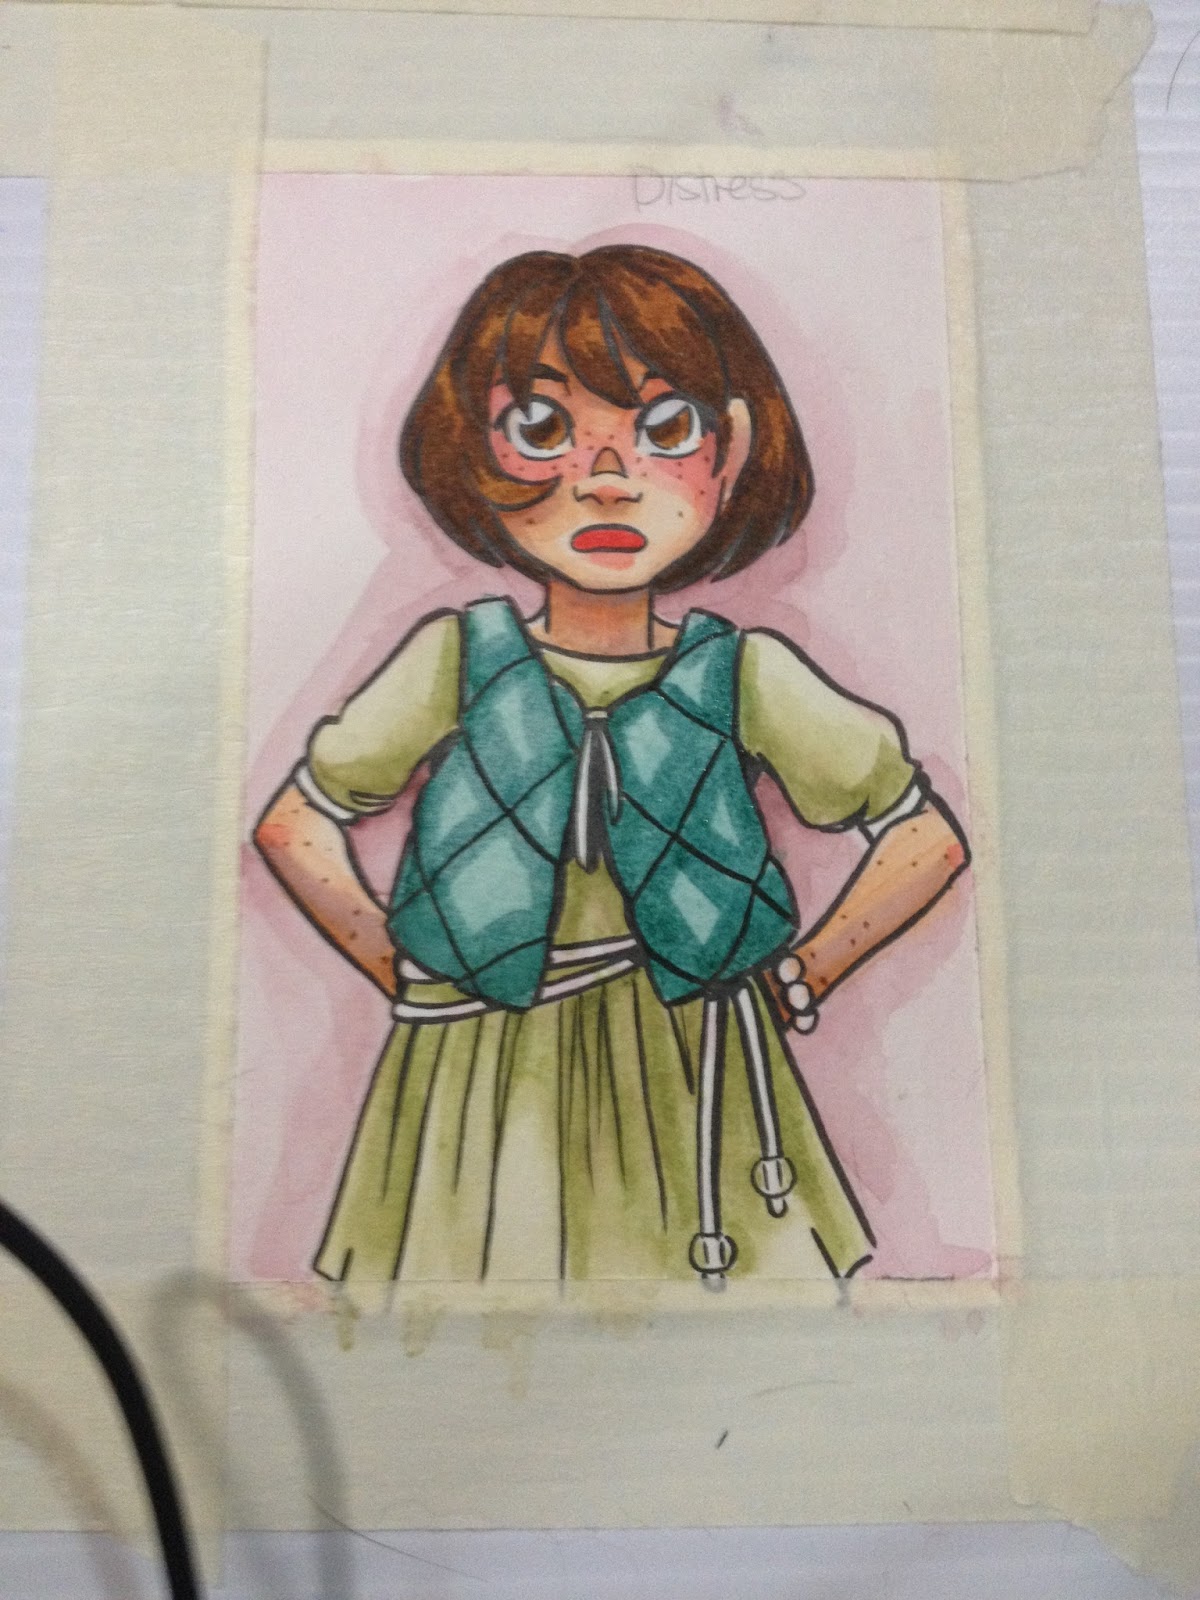

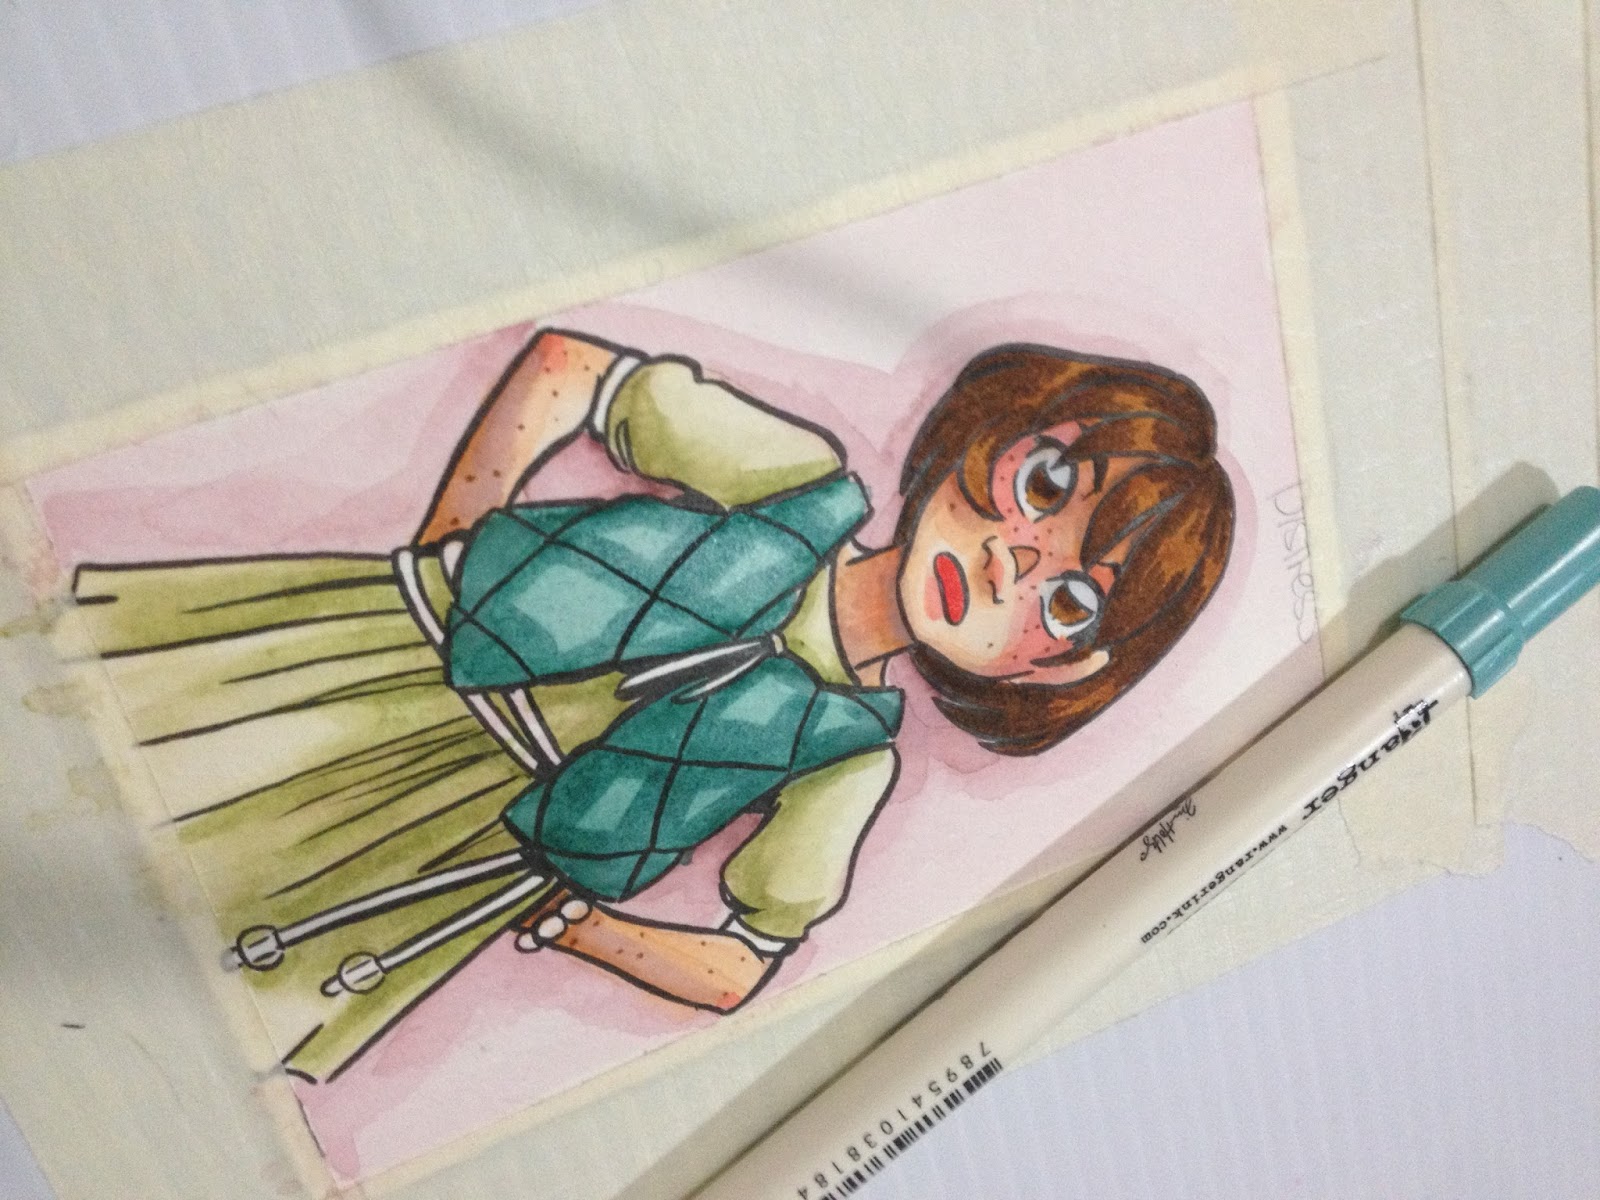
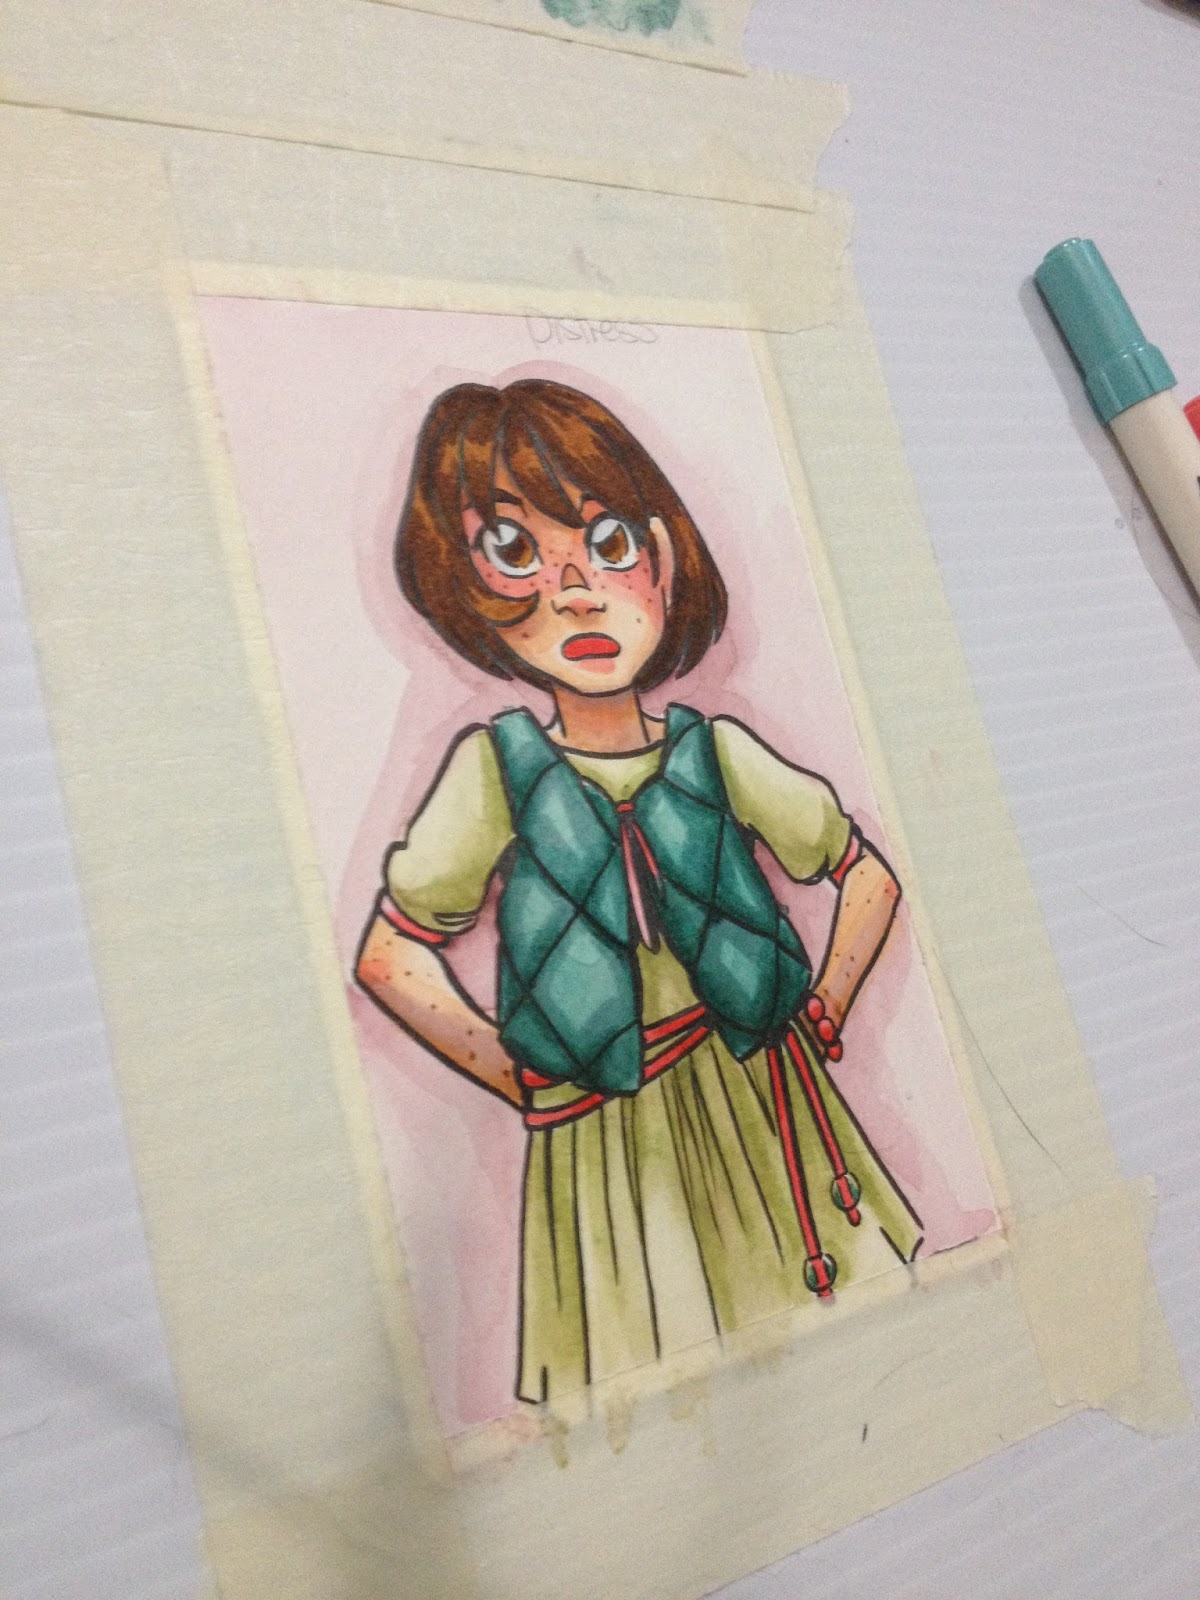
When everything dried, it was time to pull out the Picket Fence and apply white highlights.
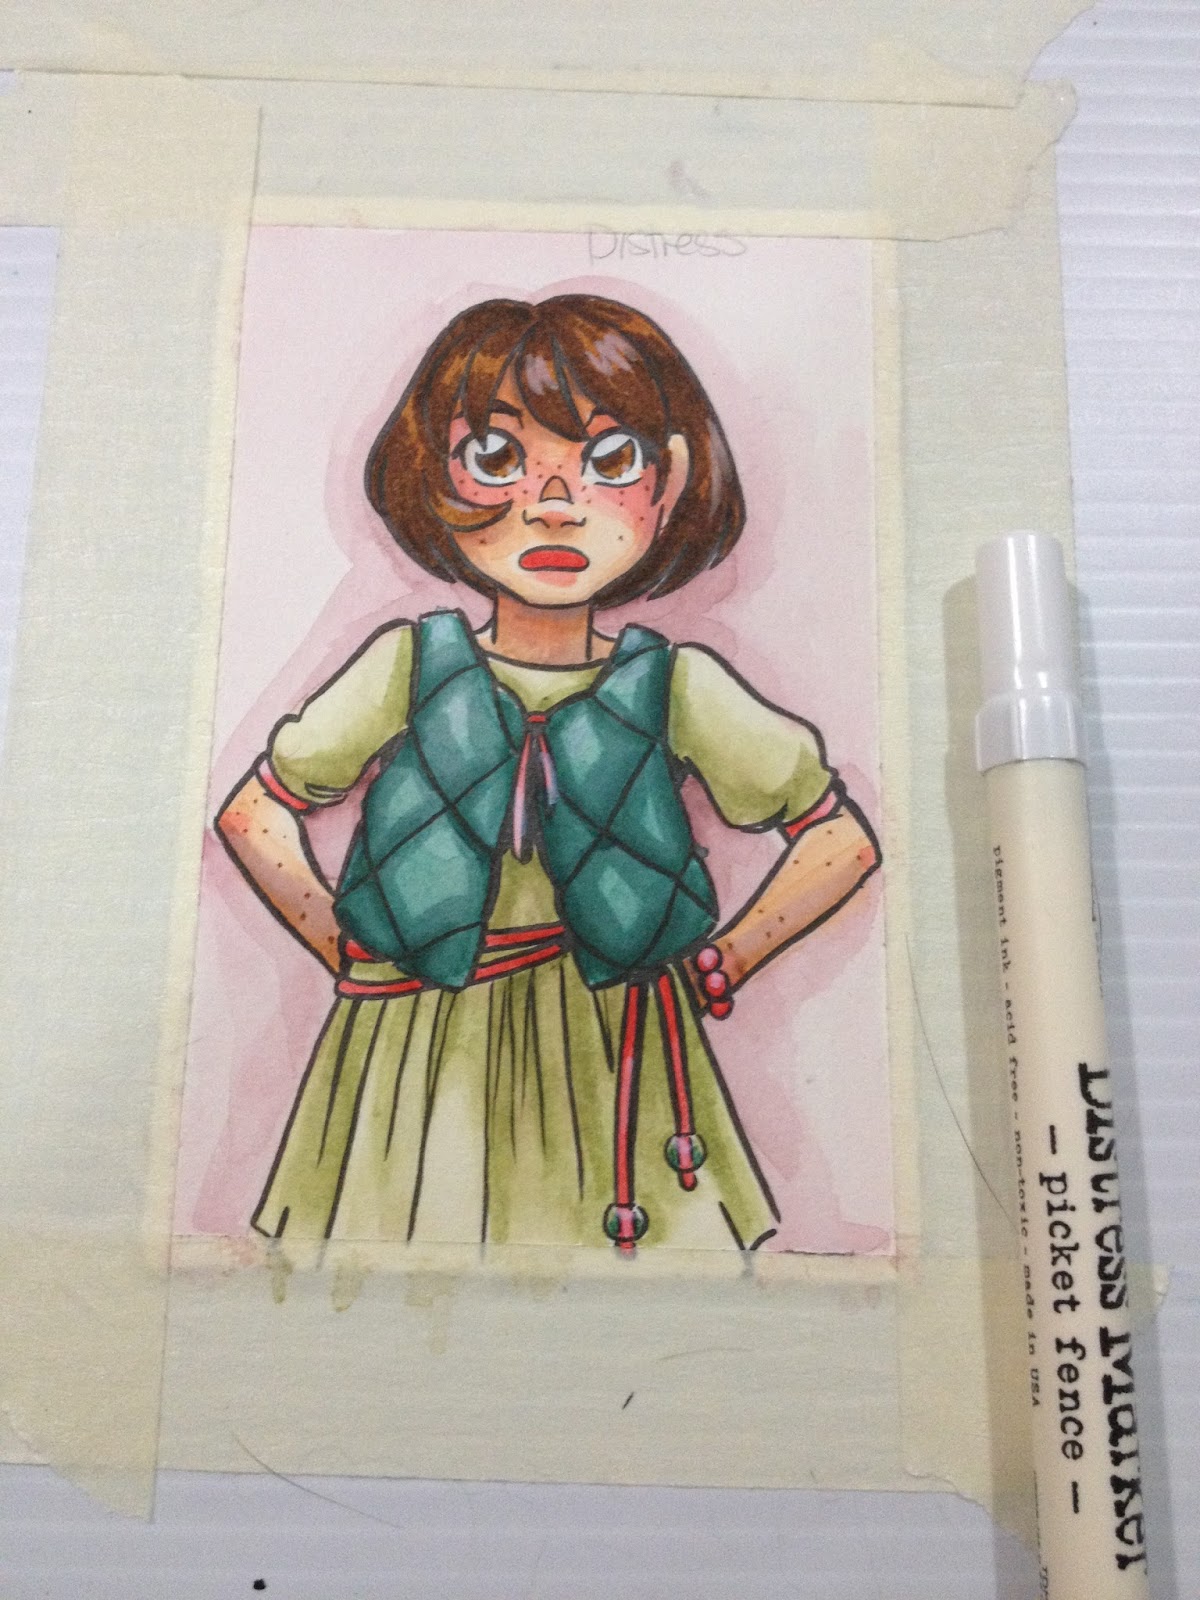
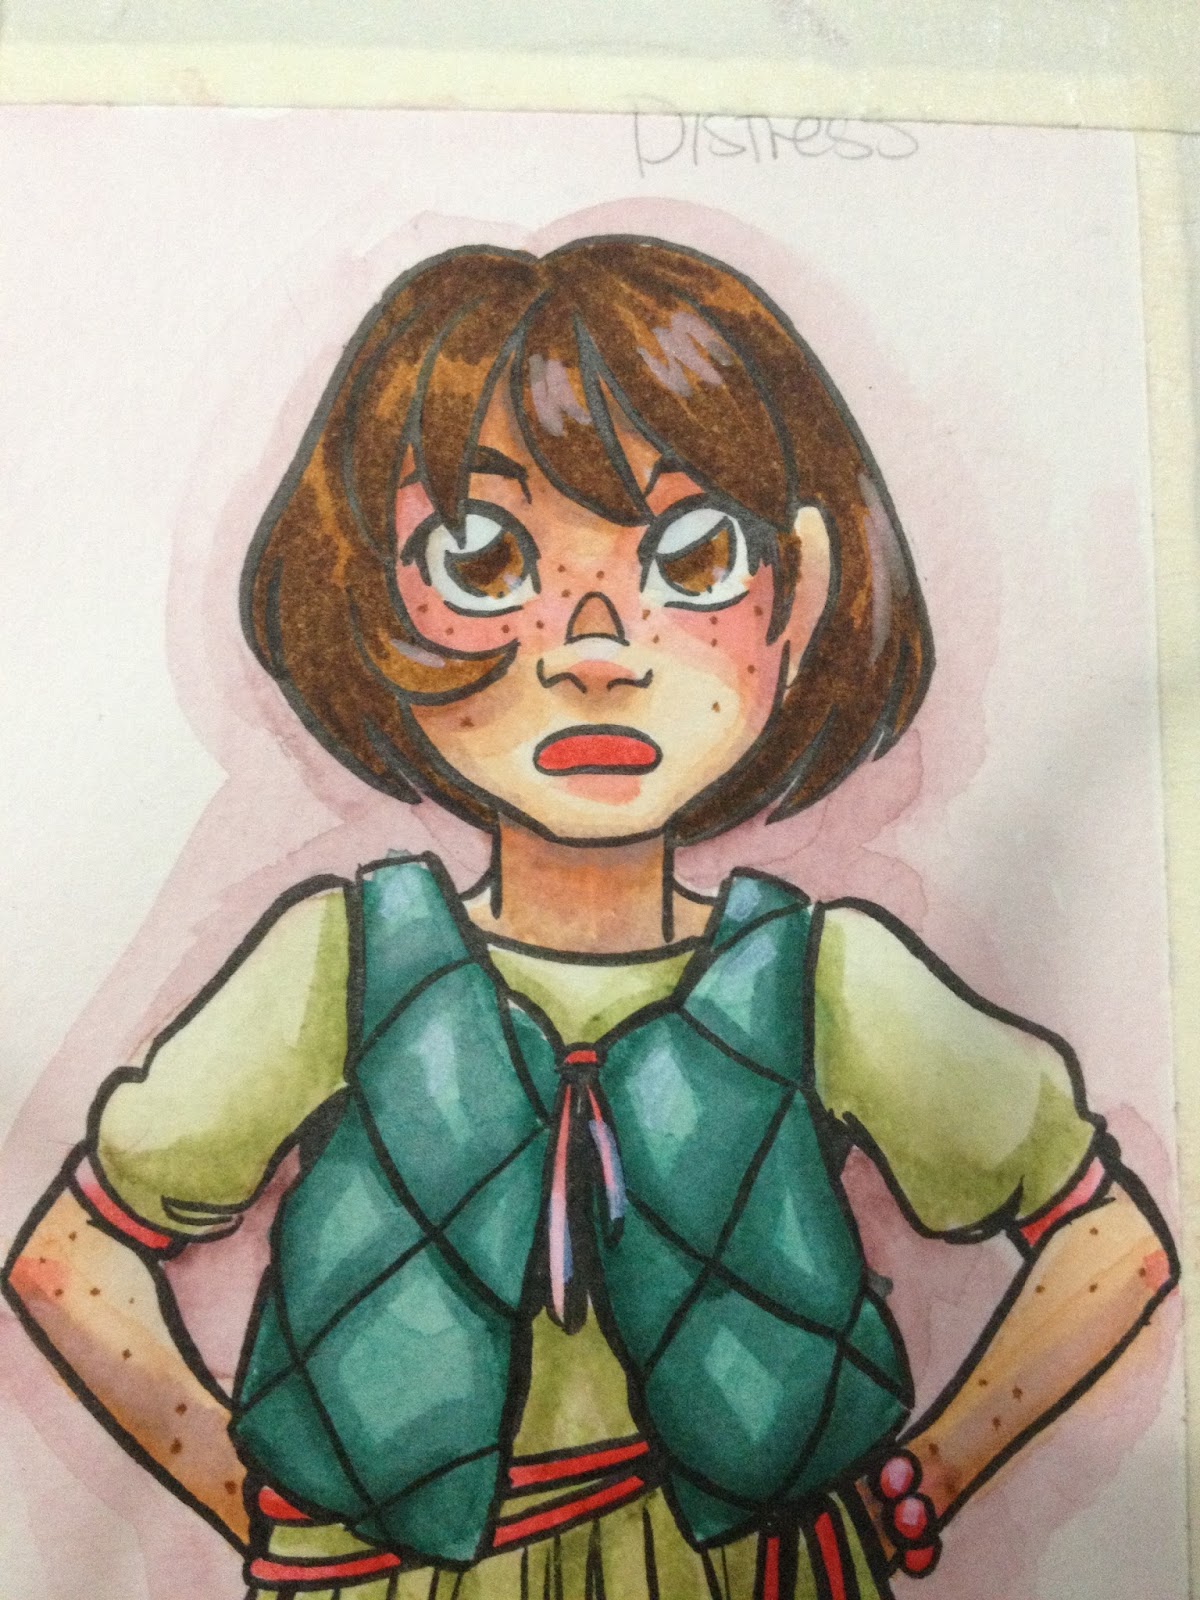
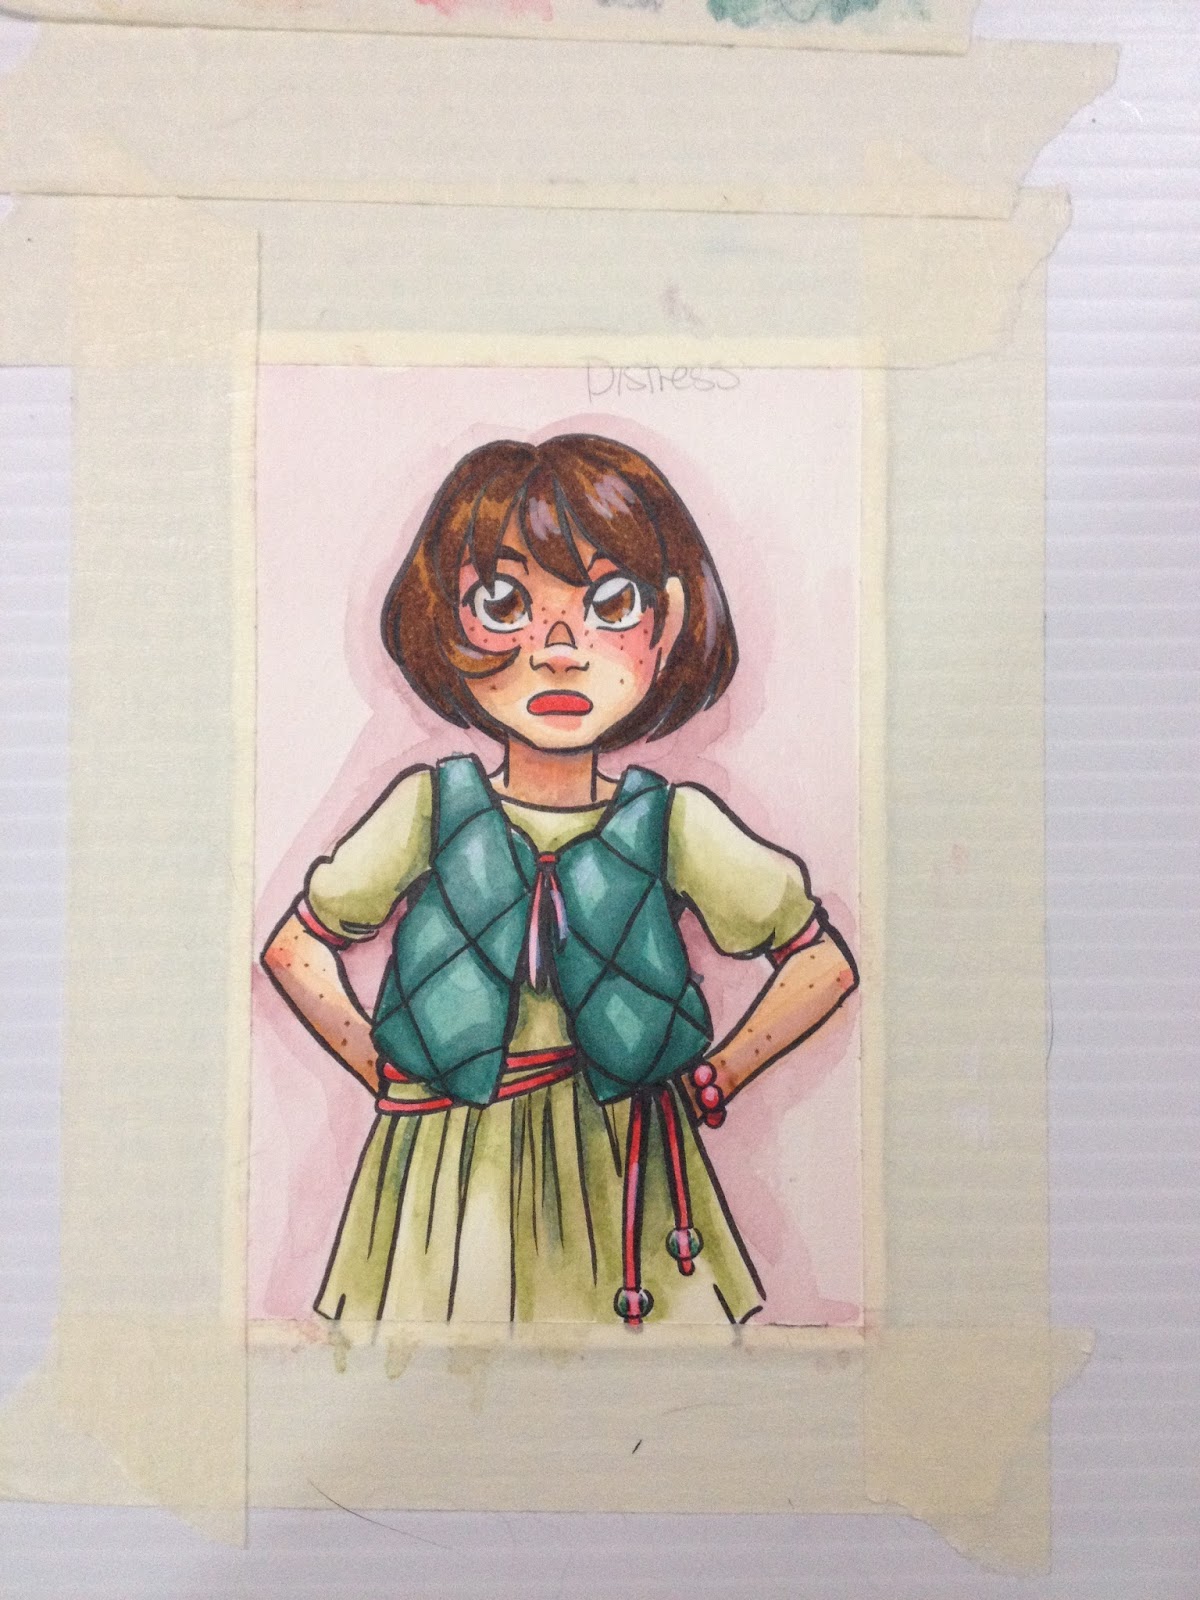
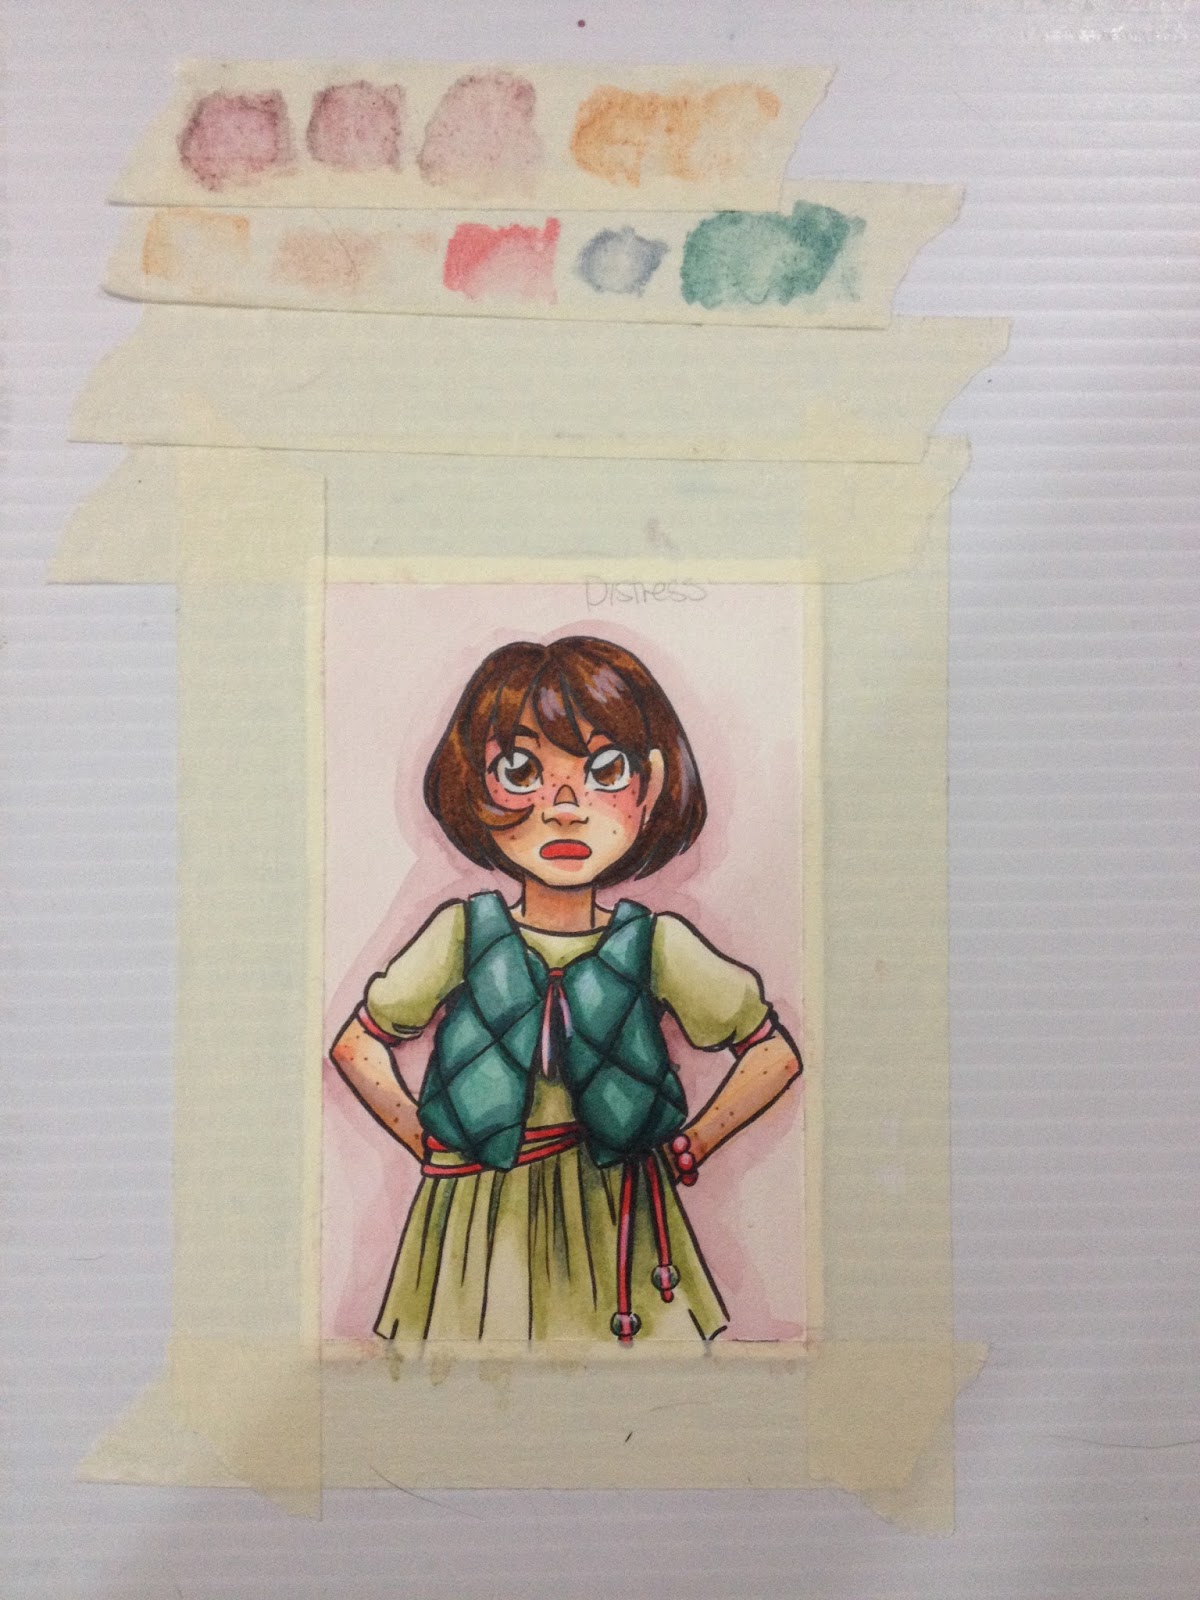
The Verdict
I know some crafters are curious as to whether or not Tim Holtz Distress markers are worth buying, especially if they already own Tombow ABT watercolor markers, or Zig Art and Graphic Twin markers. While I think the Distress markers have a number of issues, I think there are unique colors that may appeal to you if you like muted, soft colors (as I do). I am NOT a fan of the color naming scheme, and I hope Ranger releases an official color chart with all the available colors soon, especially since they released 12 new colors in 2015. I do not think the Distress markers are a replacement for Tombow ABT or Zig Art and Graphic Twin, but I do think they're a very nice addition to your existing collection of watercolor markers. You can purchase Distress markers in sets, but if you're looking to augment a collection, I recommend buying them openstock through MarkerPop, which is where I purchased my openstock Distress markers. You can find the 2015 new Distress markers, as well as some sets to get you started, in the widget below. Purchases through that widget help to financially support this blog, and are always much appreciated.
Amazon.com Widgets
I was really excited by Picket Fence- it's an opaque white watercolor marker, and I was promised (through several CHA and Ranger videos on Youtube) that I could wash the white out to blend the application, or even layer it. Initial tests on black paper were pretty underwhelming, and attempts to layer it, even after allowing it to dry, just cause the paper to pill. If you're going to use Picket Fence, make sure your paper is absolutely dry first.
Picket Fence can be blended out a bit with water, but it dries with a shine to it, which is a bit obnoxious when the rest of your work is matte. If you want to use color pencils in conjunction with Distress markers, I recommend you apply your regular Distress markers first, then your color pencil, then your Picket Fence.
Watercolor Markers In Order of Preference:
Zig Art and Graphic Twin (I seriously think these are fantastic, especially their brush nibs!)Tombow ABT Colorless Blender (even useful with waterbased markers like Crayola and Up and Up)Docrafts Artiste Watercolor MarkersCrayola Washable Supertips (Yep)Winsor & Newton Watercolor MarkersTombow ABTZig Clean Color (Not really that hot on the colors or the fact that once applied, they can't easily be blended out without leaving a harsh line of original application, but the individual nylon bristles won't tear up your paper)Distress MarkersLyra DuoAquaMarvy LePlume II (They just always seem to be dry when I buy them, and they feel lighter than other brands)
Videos used in researching this review:
CHA 2012- Tim Holtz Demos His New Distress Markers!
Distress Markers- Jennifer McGuire Ink
Penny Black and Jill Foster Distress Markers- PennyBlackInc
Tim Holtz Distress Markers Techniques-laurelscrafts
Distress Marker Techniques: Blitsy Creative Team- laurelcrafts
Distress Markers Watercolor-waterfilterlove
Comparison Video Spectrum Aqua VS. Distress Markers- Tina G
Distress markers tutorial- nicoletta zanella
New Distress Color March 2015-Tim Holtz
Tim Holtz demos at Ranger-CHA Mega Show 2015-ScrapTimeVideos
Links used in this review:
Jennifer McGuire Ink- Video+Giveaway+Chart: New Distress Markers
Openstock source for Distress Markers
(note, I am not an affiliate, nor are they a sponsor):
Simon Says Stamp
MarkerPop
Please consider donating to this blog or purchasing from Natto-shop (http://nattosoup.com/shop) if you want me to continue publishing quality content. All materials tested were purchased from my own pocket. Keep on Truckin' Nattosoup is not under any sponsorship.

November 27, 2015
Walmart Art Supply Review: Royal Langnickel Brush Value Pack
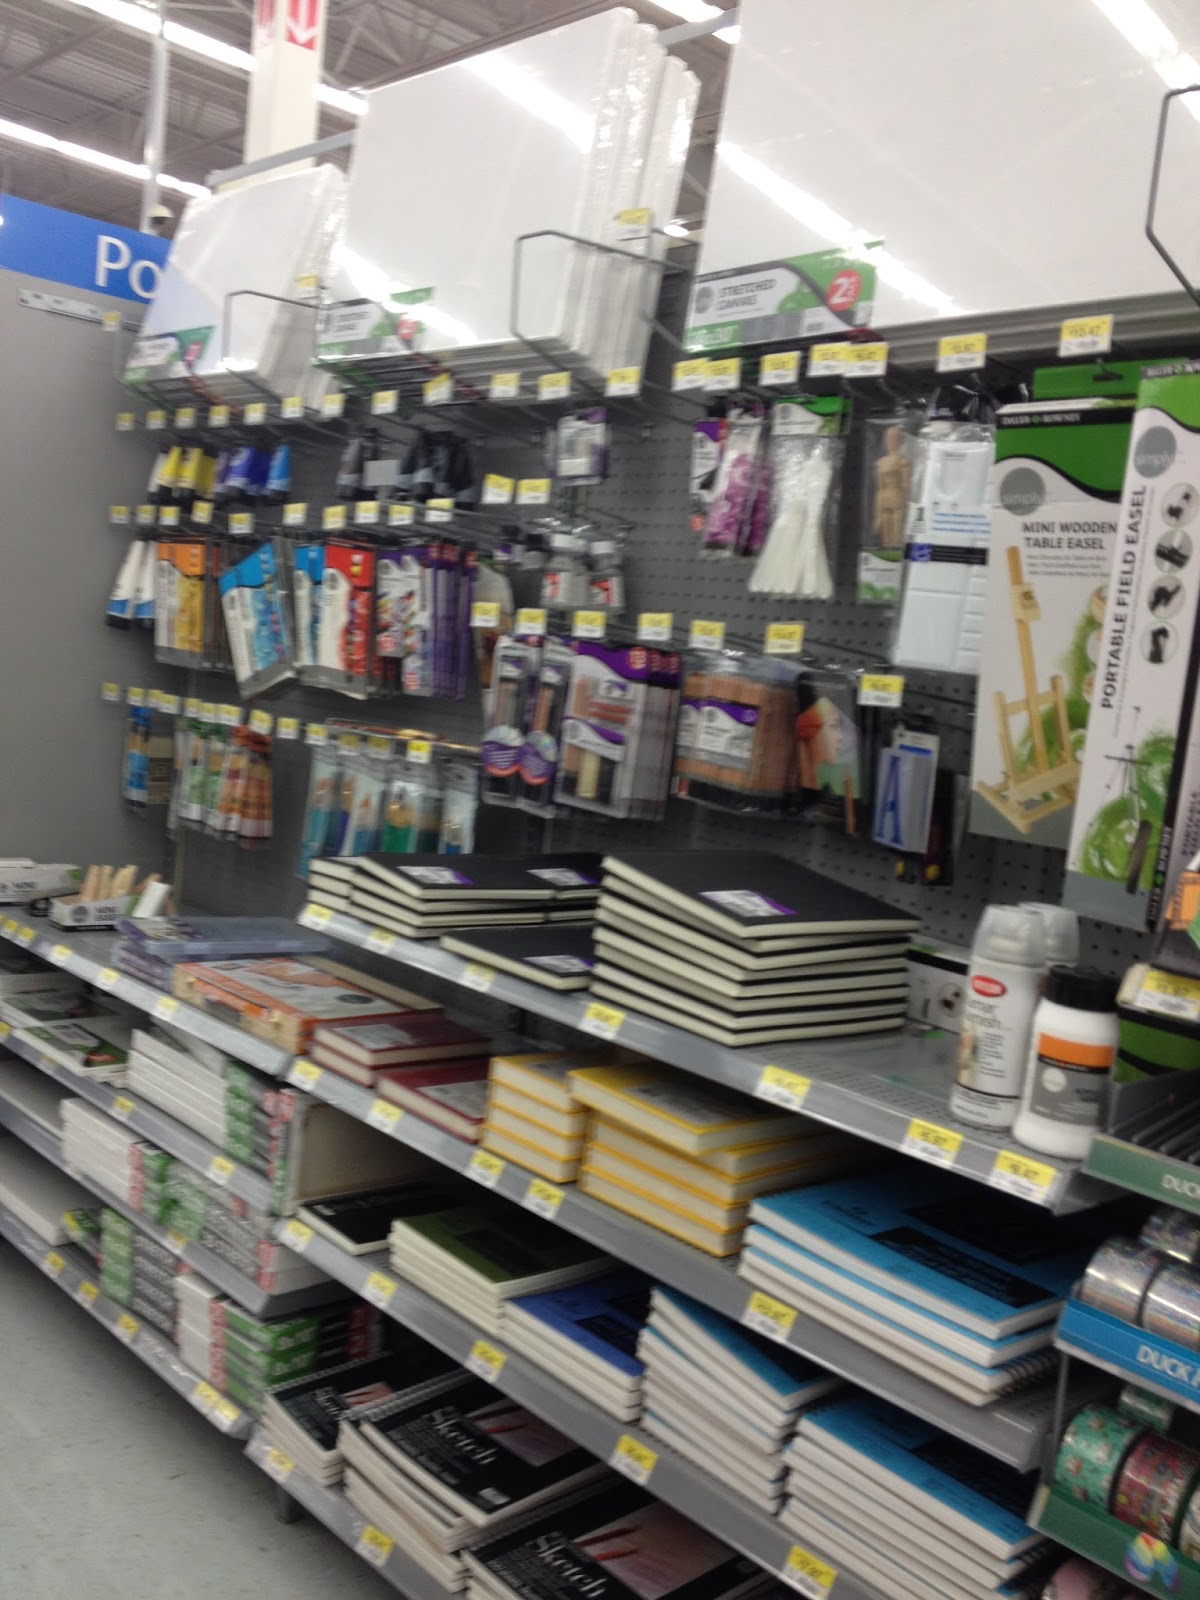 The Art Supply section of the Luling Walmart. Larger than it was when I was in undergrad, smaller than when I was in highschool. You aren't spoiled for selection here.For many, this is a sadly familiar sight- the third of an aisle dedicated to art supplies. Your options are as limited as your budget if you're shopping at Walmart for your art supplies, but I know this is it for many young artists, or artists on a budget. We've already covered two brands of watercolors sold at Walmart- Alex, Crayola watercolors, and Crayola markers, and I used Walmart-available brushes for both tests. If you haven't checked those reviews out, I highly recommend them, and if you're interested in the Royal Langnickel brushes I used, you should keep reading!
 A wide variety of brushes to choose from. Wait, no, that's not right. A tiny variety of rushes to choose from, but retrospectively, all three packs are marked as being usable for acrylics, watercolor, or tempera.My Walmart, not surprisingly, didn't have a very large selection of brushes to choose from, and no open stock brushes, which may have been for the best. Most of the bristle brushes on sale were made by Royal Langnickel, a brand I don't currently use. You can see their selection of 'Good' brushes here, which is the section I assume the Walmart brush set falls into. This page fairly represents the selection of Royal Langnickel brushes that were available at my Luling Walmart. The site lists these brushes at $9.99, but I paid $7.97.
I opted to buy the only set that advertised as being for watercolor- a squirrel and camel blend with bright yellow ferrules and green plastic handles. The included card gave me an easy rundown of the deets: Comes with a Free Brush Pouch10 Brushes totalSabel/CamelFor Acrylics, Watercolors, Temperas, and OilsFeatures an Exclusive EdgeBrushes include a flat-5/8", Shaders in 2, 6, 10, Rounds in 1, 3, 5, Detail Rounds in 3/10, 2/0, 0The back of the package recommends washing in soap and water, and reshaping with fingers, and I'm going to do just that before painting.The Packaging
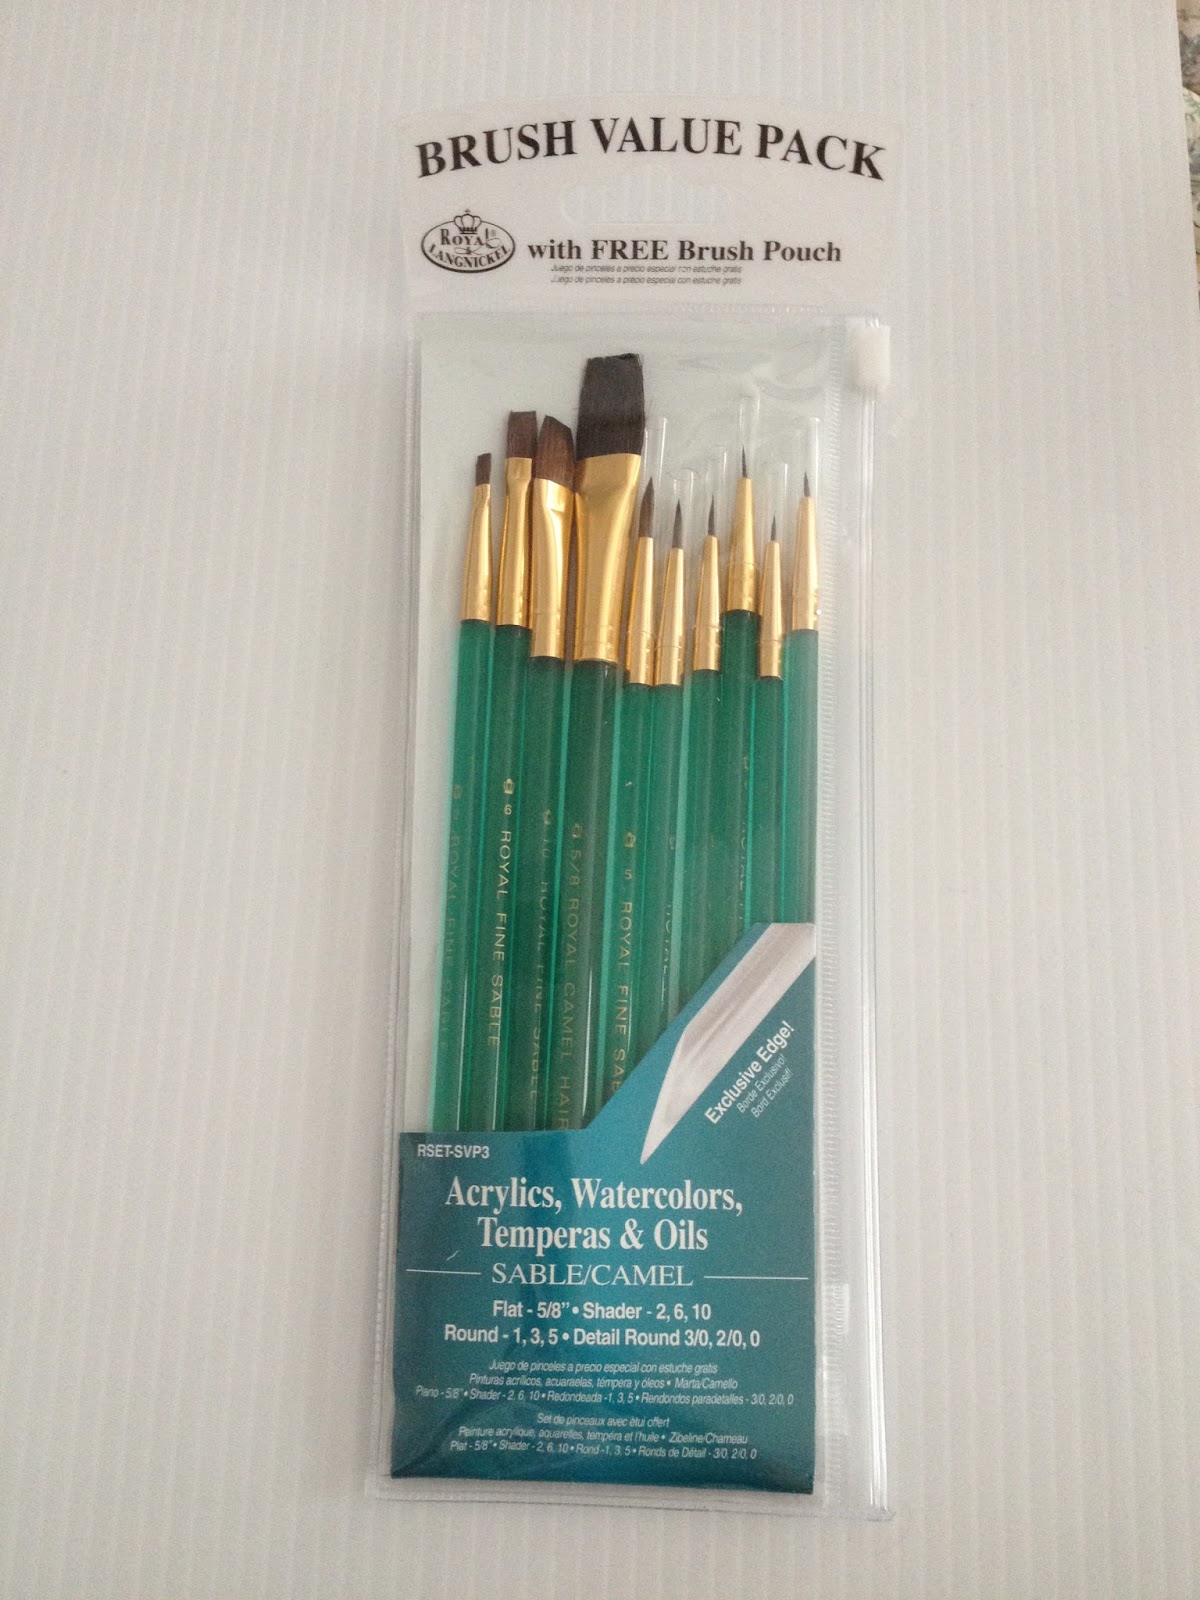
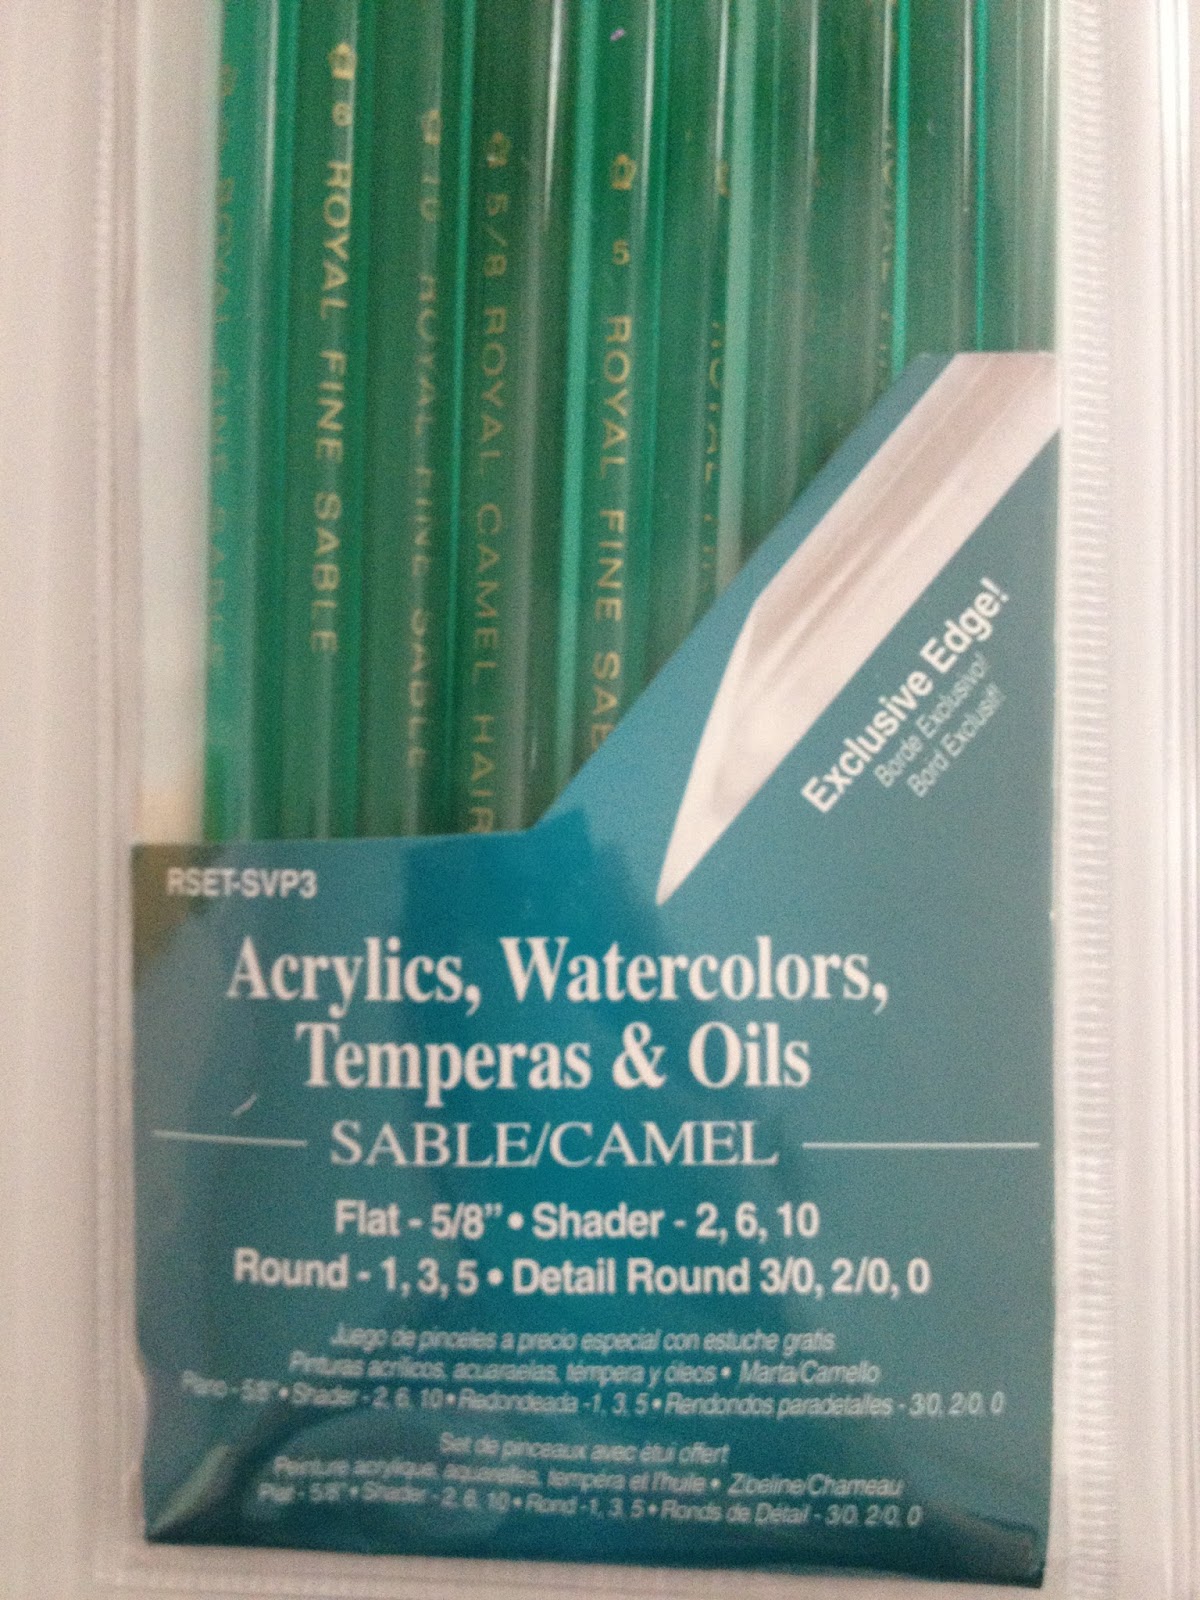
The Free Brush Pouch has me torn- I'm not really into the fact that it's a walking advertisement, but I LOVE when companies introduce reusable, sturdy packaging. I suppose you could just cut the top tag off, and it'd be just as good as any other pouch, so points to Royal Langnickel. The package has one of those little plastic ties to keep people from stealing brushes, but that's easy enough to snip, and this type of package generates very little waste, and means artists who are just starting out don't have to find storage solutions immediately.

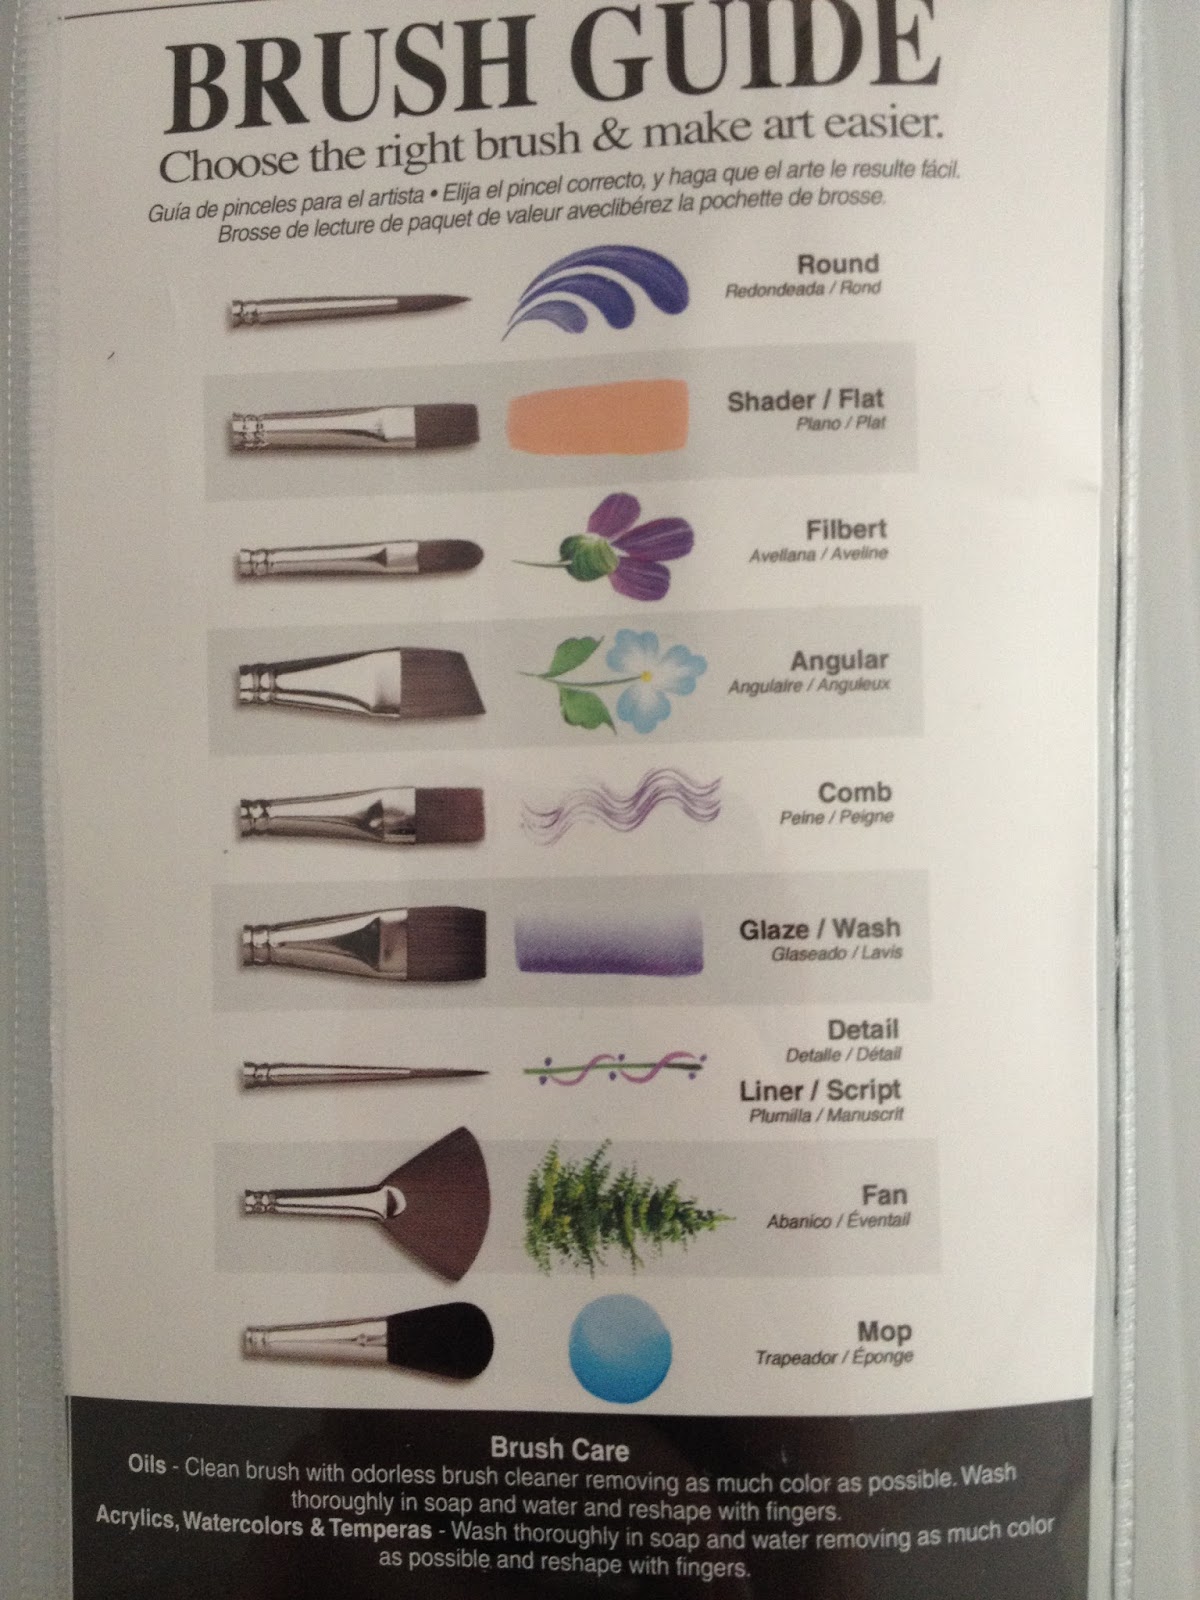
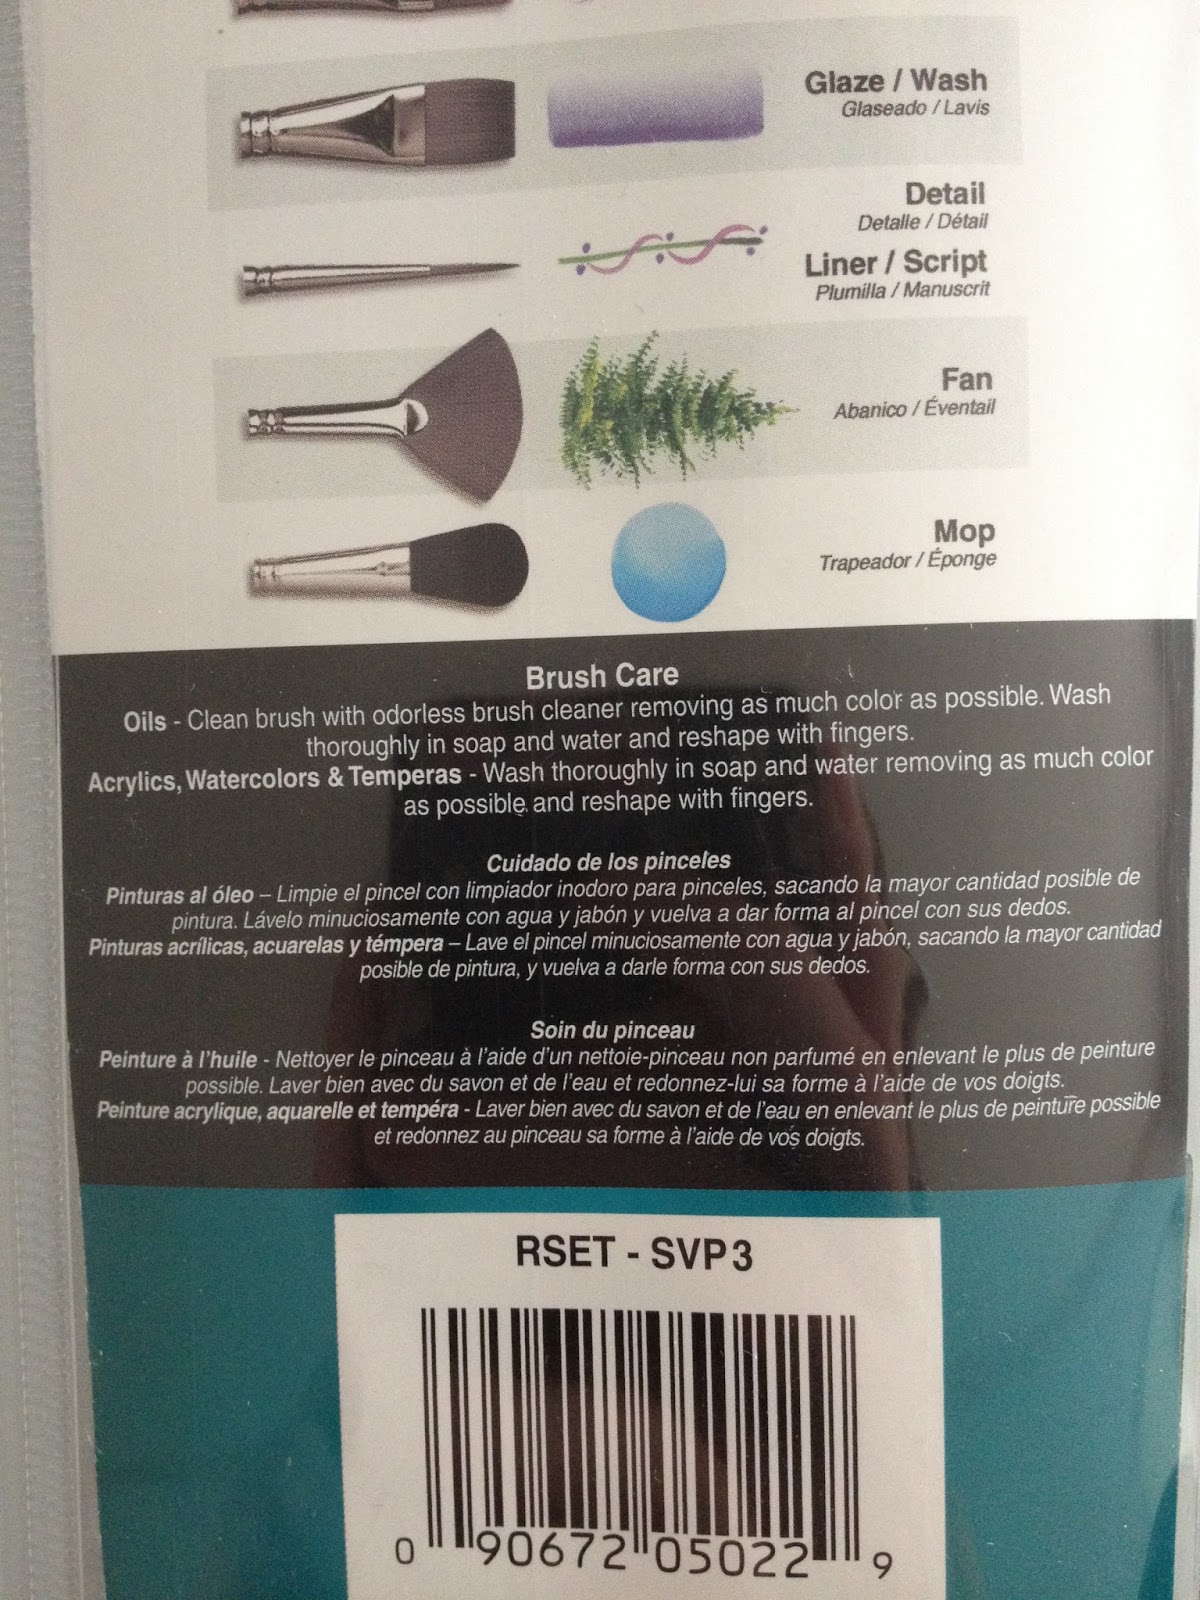
The back of the package has a brush guide that explains what each type of brush is generally used for, as well as care tips, which is really handy if you're new to watercoloring and need a bit of a brush primer.
The Brushes

These brushes feature what Royal Langnickel touts as an 'exclusive edge'!. Usually you see this sort of edge on cheaper acrylic hog bristle brushes- it's used to scrape away paint or do sgraffito techniques.
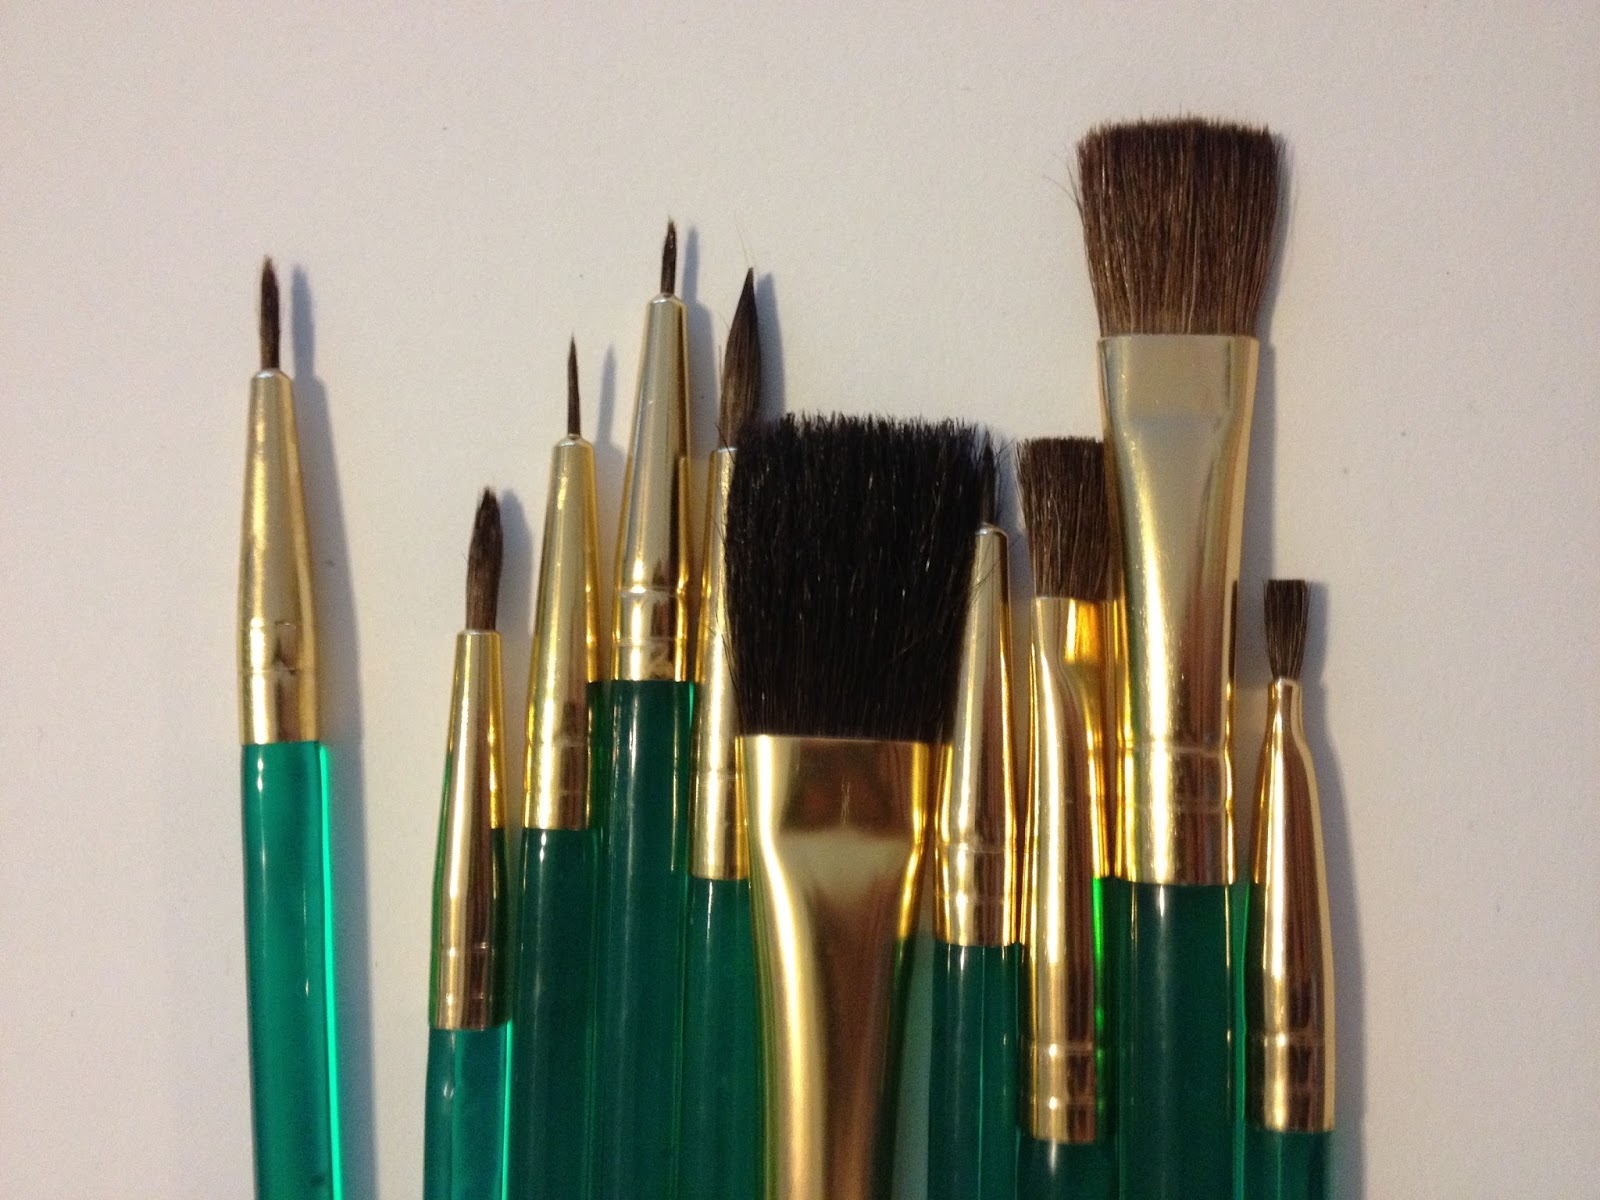
It looks like the majority are made with squirrel hair, except for the mop (the largest brush), which is a bit coarser and may be camel, as the package promises squirrel and camel fibers. These brushes are intended to be used for Acrylics, Watercolors, Temperas, and Oils, but squirrel is a bit soft for acrylics.

Upon opening the package, I found the brushes somewhat hard to remove, as they'd all been taped together at the bottom. They also feel really cheap, which shouldn't be surprising, as I only paid $7.97 for all of them. The metal ferrule feels light and flimsy, the plastic bodies are green plastic with a slanted edge at the bottom, and also feel very light. The size of the brush and Royal Camel Hair are printed on the side in gold paint. Some of the brushes have plastic caps over the bristles, while others do not, but all of the brushes have glue to protect the bristles. So the first thing I'm going to have to do is wash the glue out.
Preparing Brushes for First Use
So I've promised you guys that I'd try and do more video work for the blog, and this rough video was one of my first attempts. I demonstrate how to prepare brushes for first use, using nothing but what was on hand in my mom's bathroom (I was visiting out of town).
I noted this in the video, but for any of you guys who opted to skip it (and there's no shame in admitting it, sometimes I skip videos too if I'm not in a good place to watch them), these brushes started shedding hairs as I washed them, even though I was using cold water. Not really a sign of great things to come. I shampooed and conditioned the fibers, and left them with conditioner in them overnight.
I used what we had available, but you can use baby shampoo and a cheap, unscented conditioner for a better result, or you can use actual brush soap. But if you have brush soap on hand, you probably don't need me to teach you how to prepare brushes, do you?
After Washing
The brushes are much, much softer, although the mop has very wavy fibers- must be the camel hair. While washing the brushes, I really noticed how badly balanced these brushes really are- the plastic body isn't heavy enough to compensate for the metal ferrule (as lightweight as it is- it must be aluminum, so maybe it won't rust or tarnish) and the hairs that make up the brushes themselves.
Unfortunately, as I'm leaving Luling on Saturday, I'm going to have to pack these babies up and test them when I return to Nashville, sometime after Saturday. I am packing these brushes without any protective agent to prevent the bristles from getting bent, but I could have left the dried, hardened conditioner in for shipping, and washed them in Nashville. At this point, if the bristles are bent when I resume this review, that's my fault. I will note that the 0 round is already bent, and I think I mentioned that it was bent in the video about washing and conditioning your brushes. With a little care, they pack into the pouch ok, and hopefully the stiff plastic will keep my brushes safe during their travels. With this sort of case, you have to let your brushes dry out completely, or they will mildew.
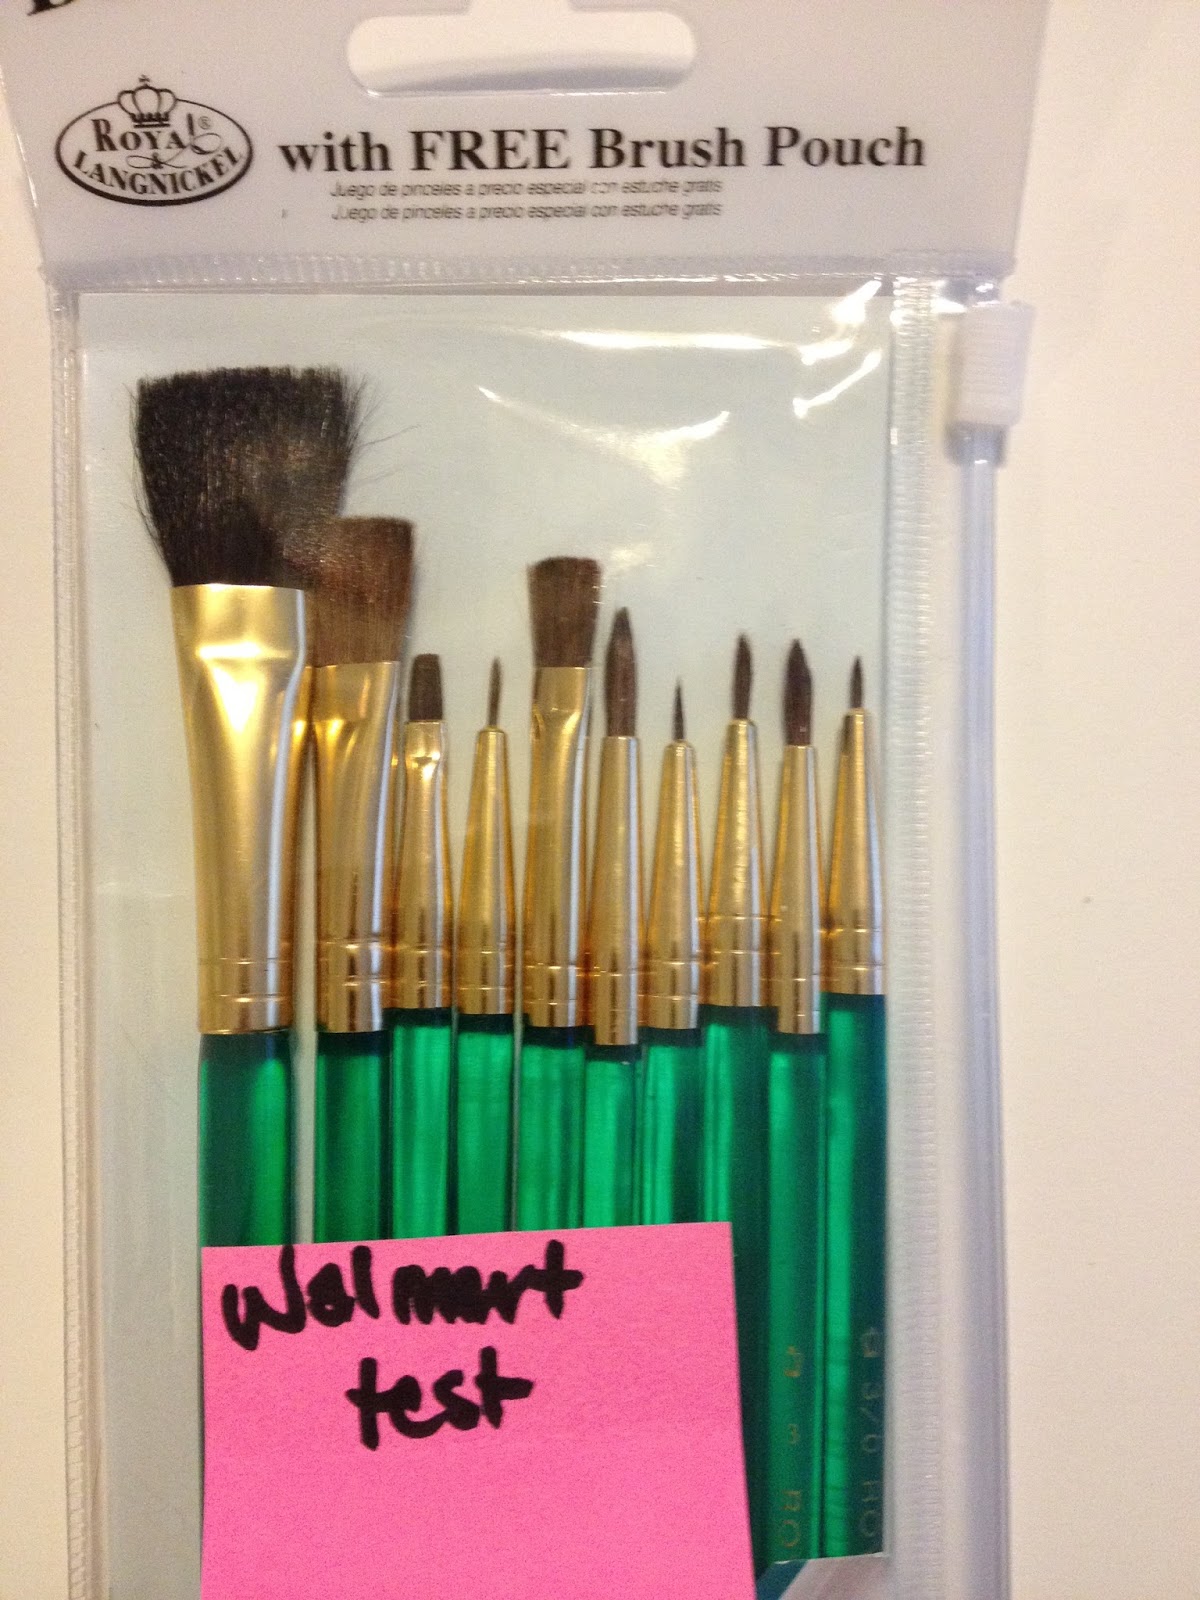 Brushes washed, dried, repacked, and labelled for shipping.The plastic case kept my brushes safe on the flight from New Orleans, La to Nashville, TN, and my brushes were ready to go.
 The Field Test
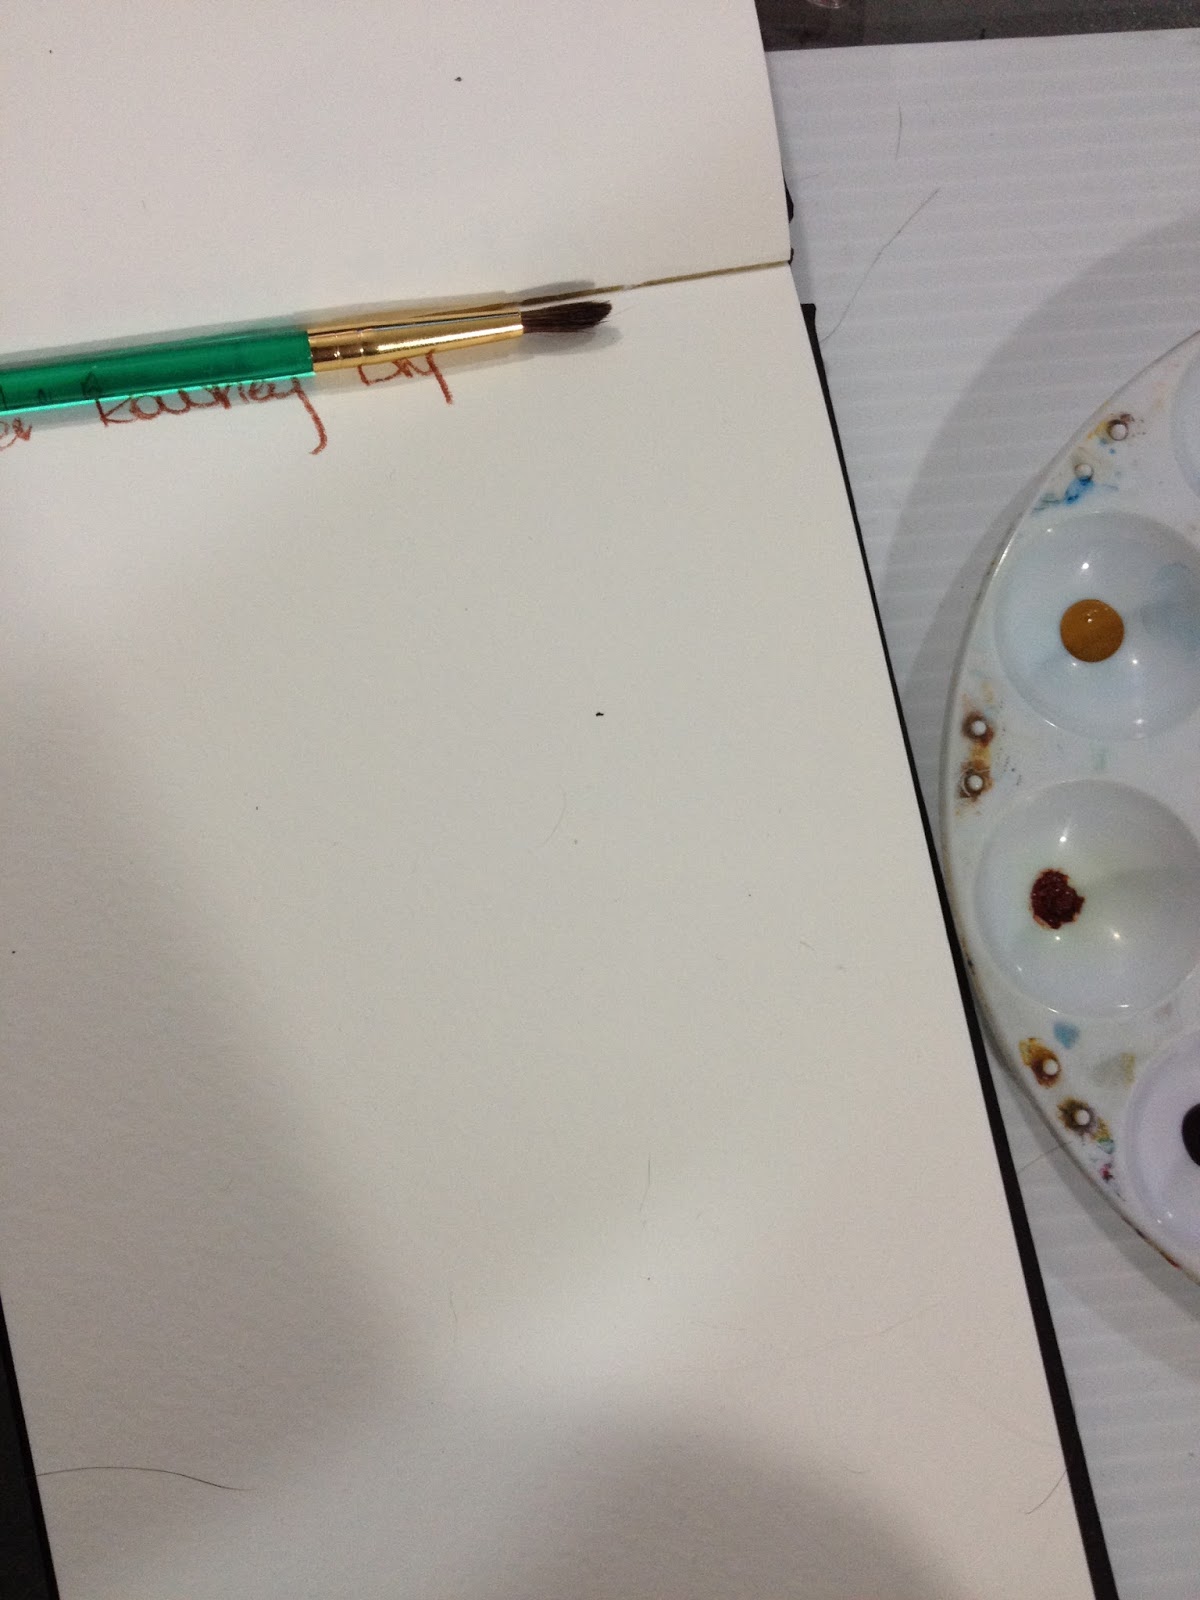 I used a Royal Langnickel round for the swatches as well, as I wanted to see how well they performed at scrubbing and releasing pigments.
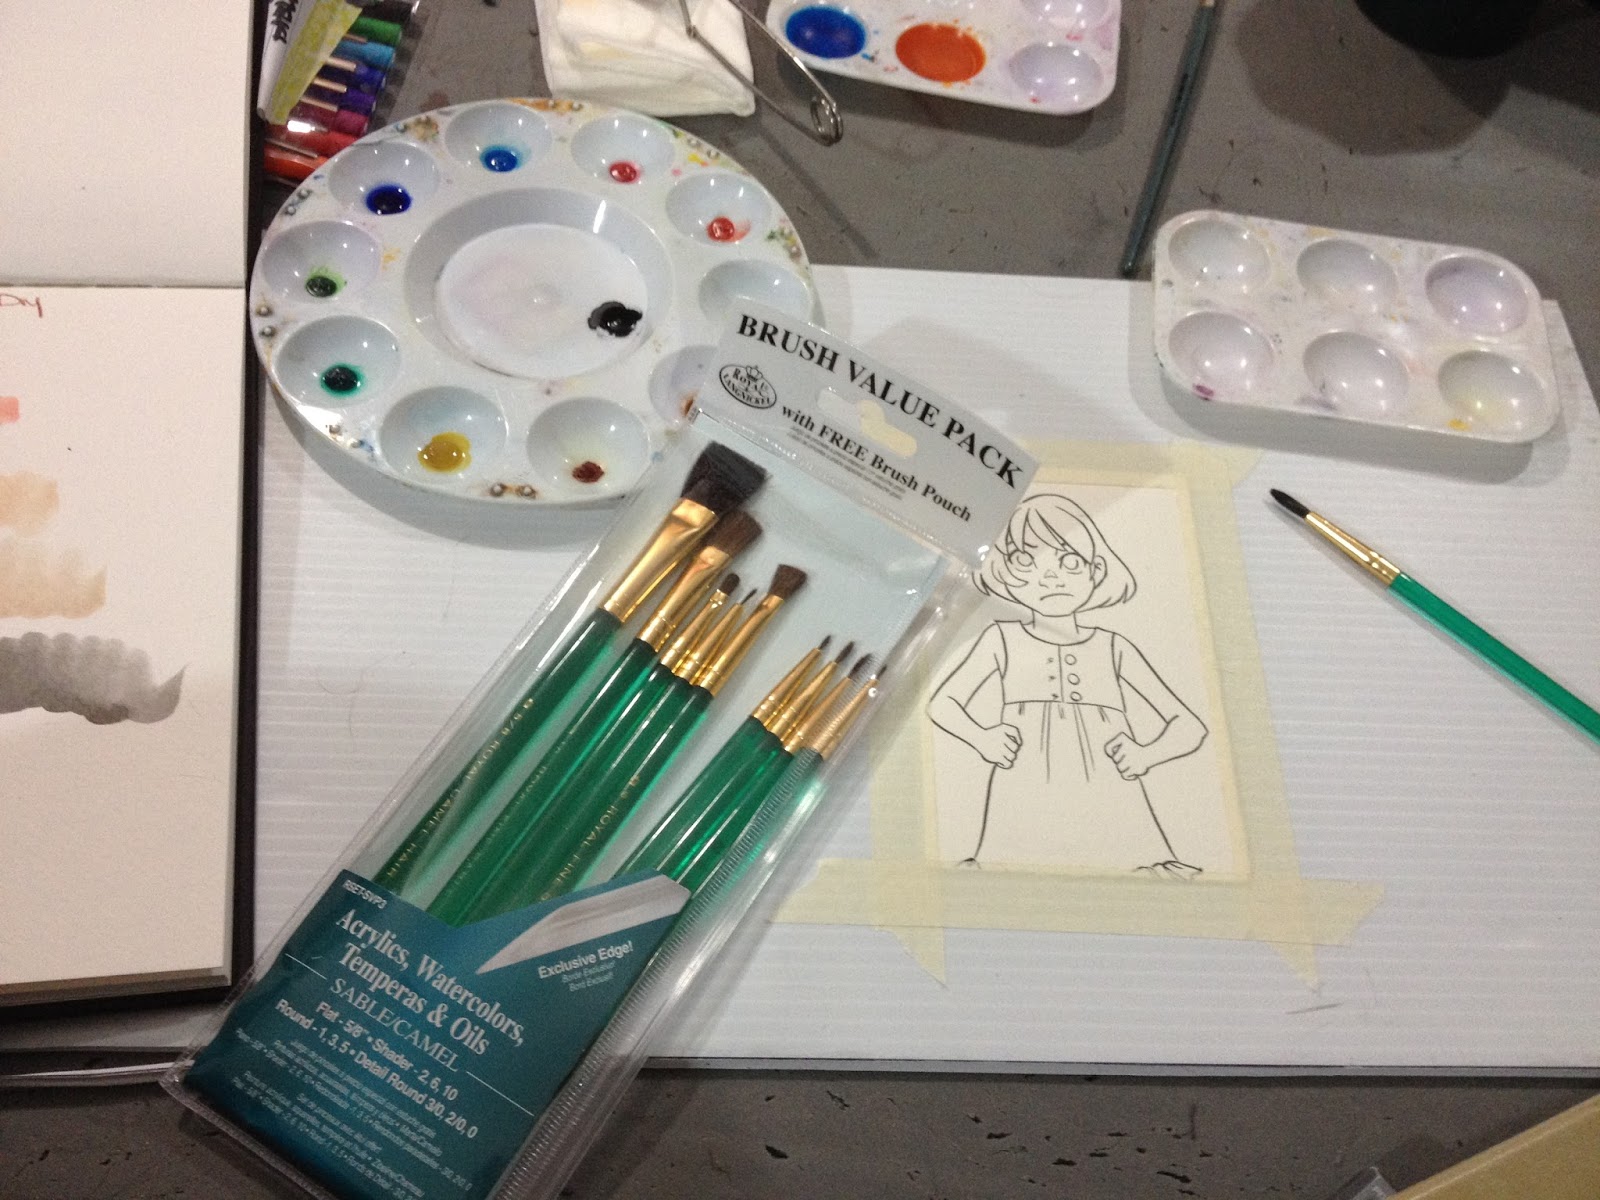
Did the Daler Rowney Swatch Test with the 5 round. It's ok. A couple straggly hairs even after washing and conditioning, but not the absolute worst brush I've ever used. Definitely feels light and cheap in the hand after years of painting with wood handled brushes.
The 5 doesn't really ever pull a point, so you can't get any sort of detail with it, it mostly just pushes the paint around. It has no belly, so it just sort of slops the water right onto the paper.
The 2 round does a little bit better job of holding a point and pulling details, but it still fights me when it comes to details.

And here's the finished watercolor! Check the
I also used a combination of the Crayola brush with the Royal Langnickel Brush set for the
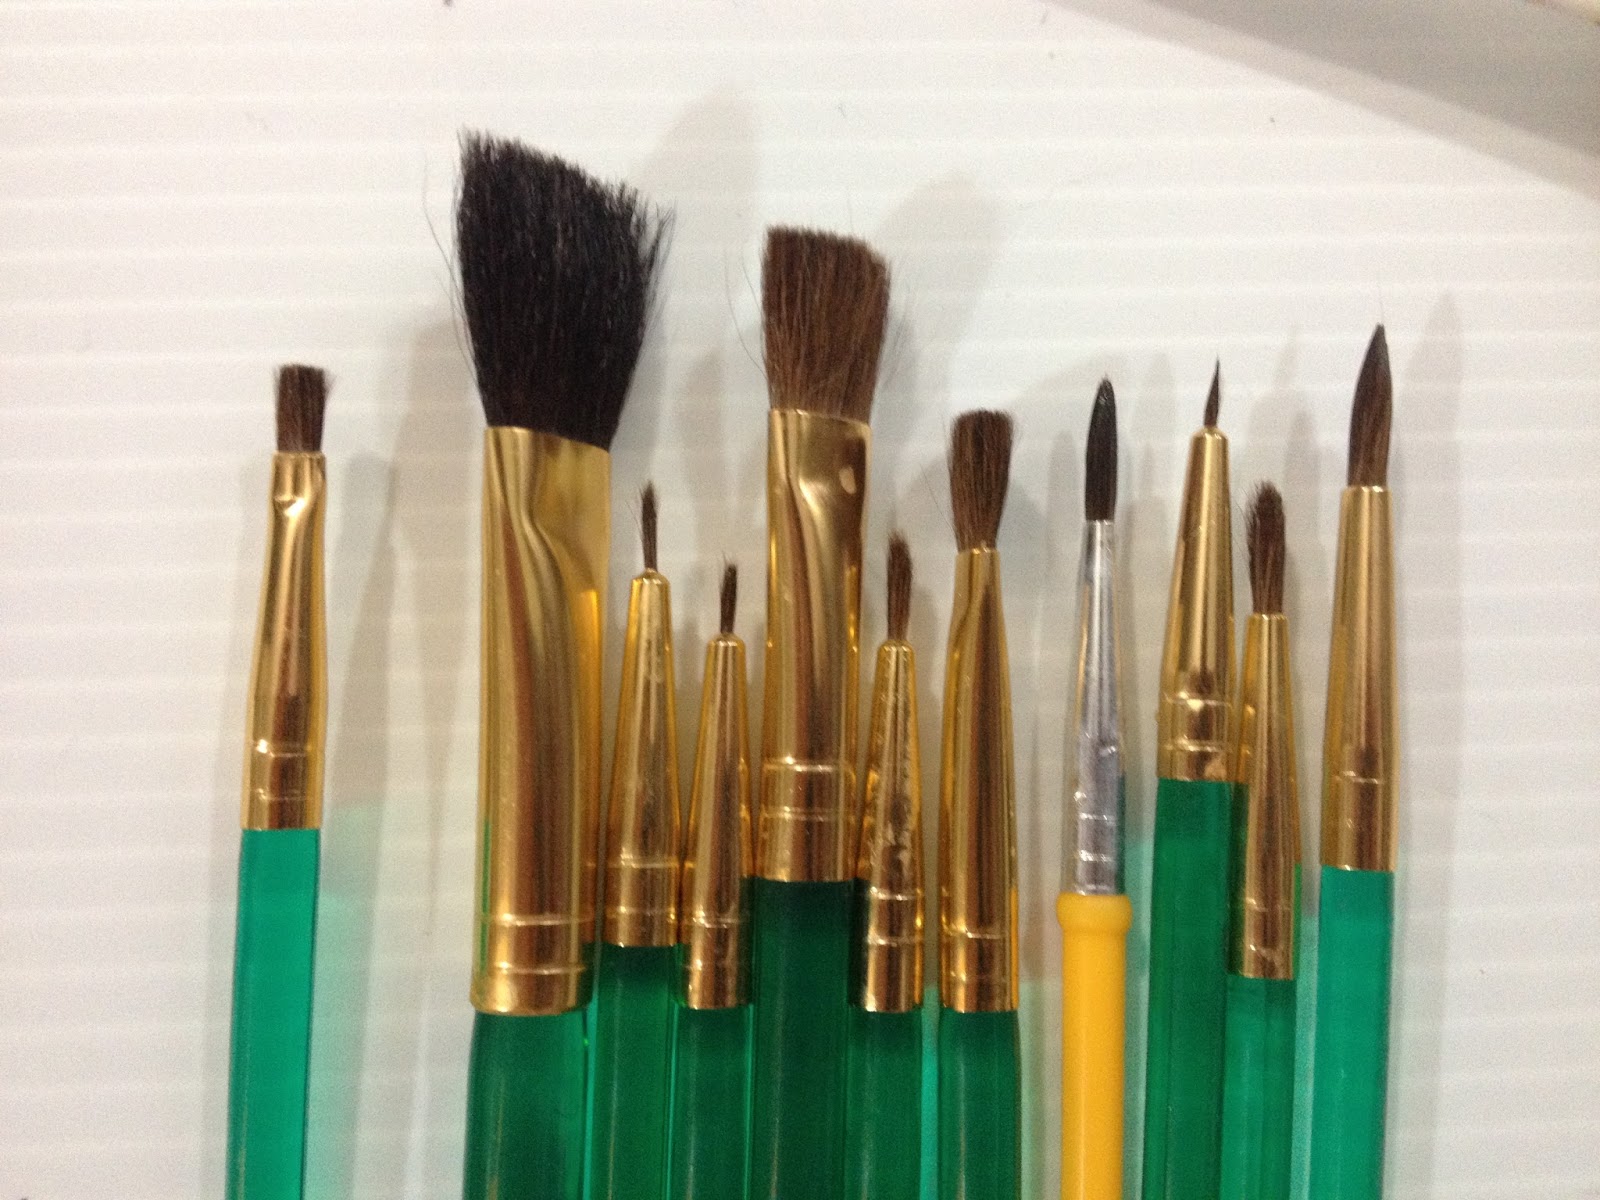
This is what they looked like after the Daler Rowney test. I didn't clean them in between, other than rinses in a cup of clean water. The yellow brush is the Crayola watercolor brush, included with the 8 piece Crayola children's watercolor set I purchased. The Crayola brush looks similar to the Royal Langnickel brushes, other than having a bump of plastic above the ferrule to keep it from wiggling out of place. I prefer the silver ferrule (probably aluminum) to the strangely yellow ferrules of the Royal Langnickel brushes.

I used the (I'm assuming) camel hair mop to apply a wash.
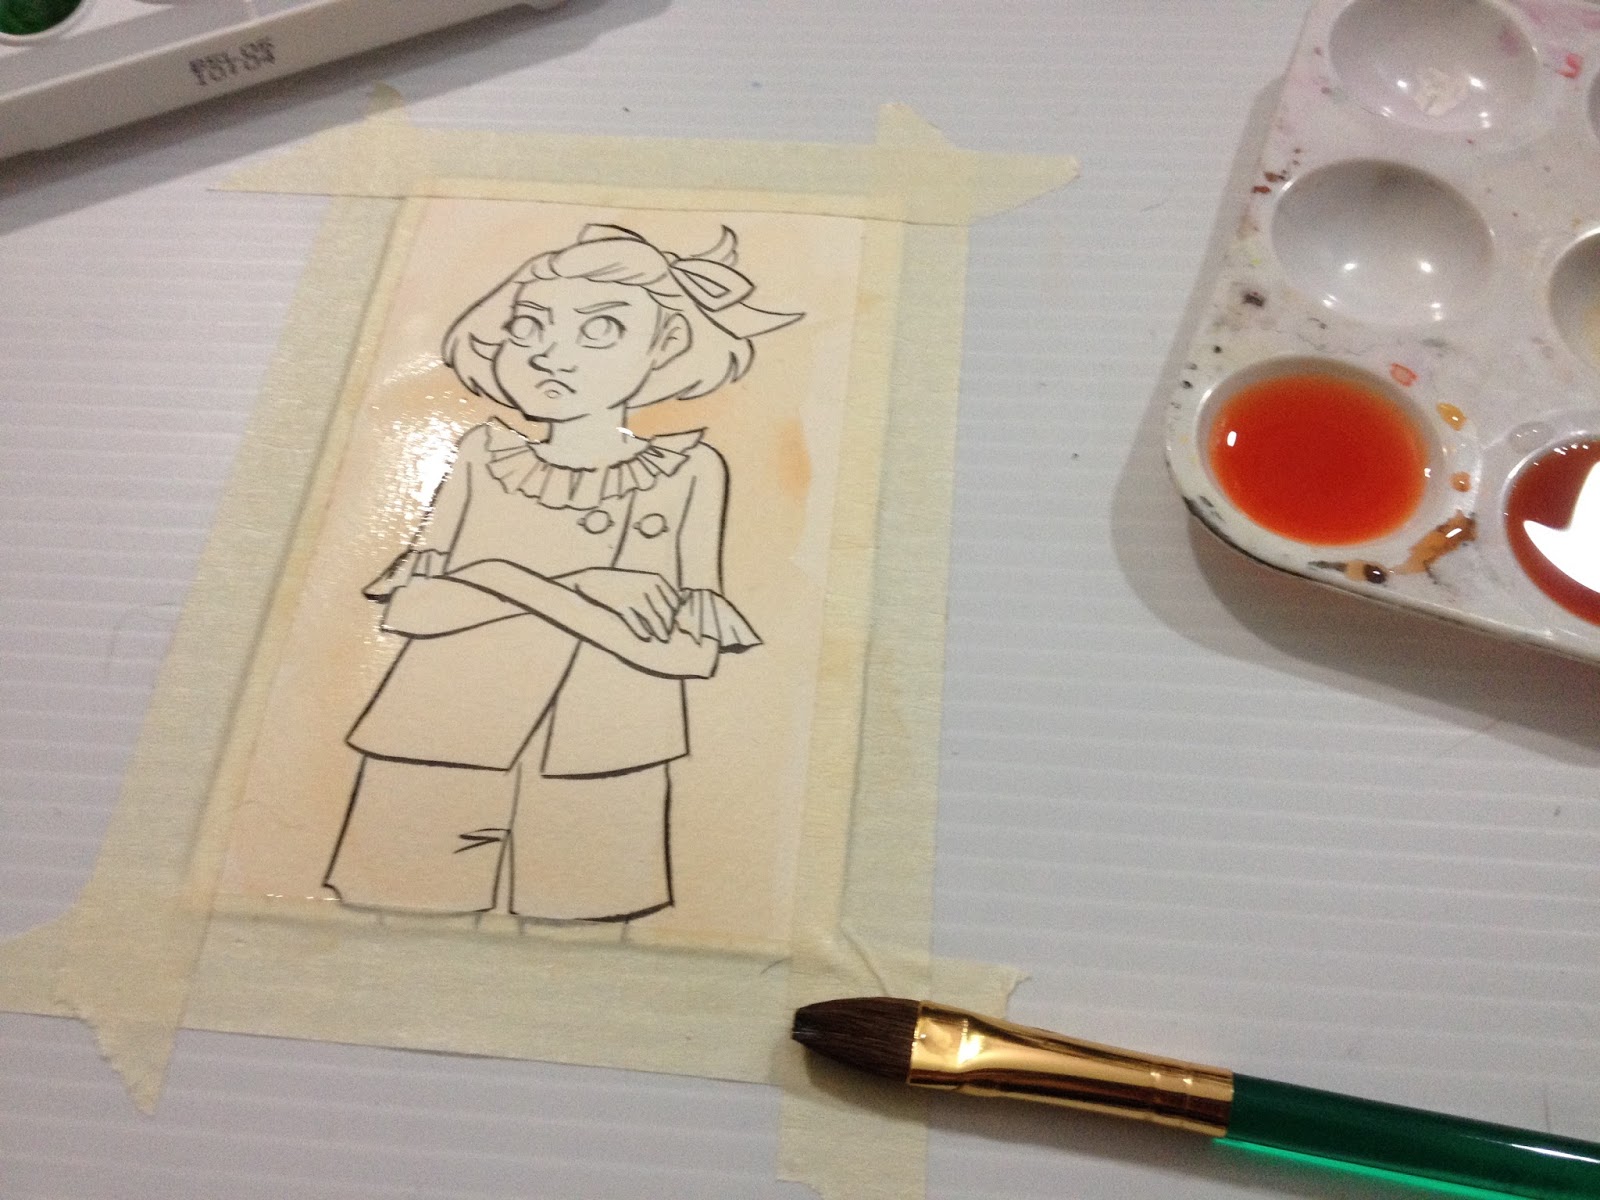
And knocked in background details with a smaller flat brush.

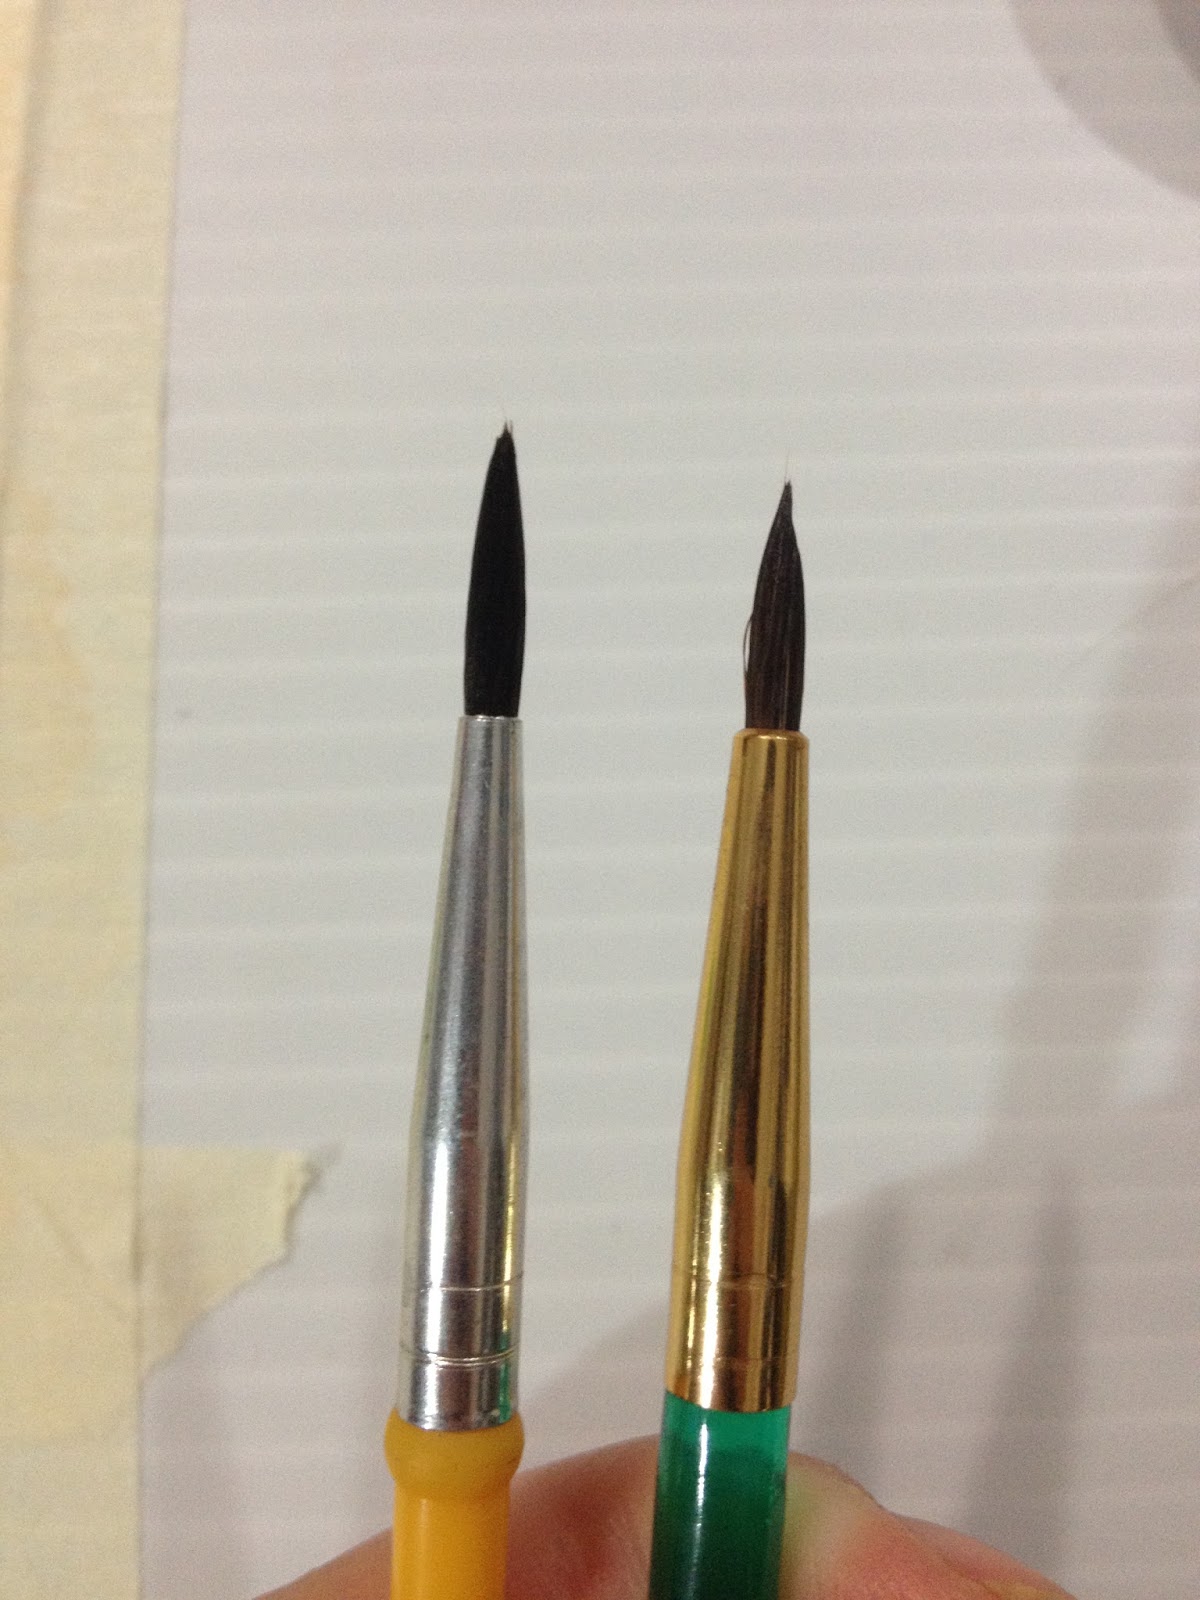 Left: Crayola Brush. Right: Royal Langnickel Size 2 Round As you can see, the free Crayola watercolor brush holds it shape as well as the Royal Langnickel brushes do, especially after a wash and conditioning. Both brushes have real hair bristles with metal ferrules that are double crimped toward the plastic body.
And here's the finished Crayola test. Check the review to see what I thought of the 8 pack of Crayola washable watercolors!
The Verdict
These brushes handle like beaten up, mistreated Escodas or Series 7s. They COULD be decent, but there's just enough wrong with them that they would never be your first choice if you had better options available. Even with cleaning and conditioning, the brushes still just push paint around, which isn't really what you want with a good watercolor brush.
Although these brushes aren't the absolute worst (at least they don't shed hairs in my paint, YET), I recommend skipping these if you have better options in your area. Brushes are an investment that can last a long time if well taken care of, so there's no excuse to scrimp. If you don't have better options in your area, or you want a full kit from the get go (and plan to replace brushes as you go), these are an alright start. These would be fine for a beginner watercolorist, or a particularly adept child with an interest in watercolor.
Please consider donating to this blog or purchasing from Natto-shop (http://nattosoup.com/shop) if you want me to continue publishing quality content. All materials tested were purchased from my own pocket. Keep on Truckin' Nattosoup is not under any sponsorship.

November 26, 2015
Watercolor Marker Review: Zig Clean Color Real Brush
I've had Clean Colors around for a long time- I purchased a few from Jetpens when I reviewed the Akashiya Sai set years ago, but since I've reviewed A LOT of watercolor and waterbased markers since those Akashiya Sai, I decided I wanted to revisit the Clean Colors to see if things had changed for me over the years. After reviewing my paltry stock of Clean Colors, I decided to order more because I've greatly changed how I test products, and I needed better skincolors in order to complete my current style of field test. The older Zig Clean Color Real Brush markers come with a color coordinated cap, post, and a gray area around the nib, and the newer ones come with a clear cap, color coordinated post and color coordinated area around the nib. Other real bristle brushes I've reviewed in the past include the aforementioned Akashiya Sai, Neopiko 4, Bienfang, and Pentel. Unfortunately, the Bienfang and Pentel brushes were reviewed in a joint mini review, which doesn't really do either brand justice, as the paper I tested on was awful. I'd love to revisit the Pentel or Bienfang watercolor brushes again in the future. You can find the Pentel brushpens here. If you'd like to donate a set of the Pentel brushpens for the purposes of review, you can do so through my Jetpens wishlist. Here's the link for Bienfang's watercolor brushpens, and if you're interested in donating a set for the purposes of review, here's a link to my Amazon wishlist.)
I'd ordered these, some Momentos, and some Distress markers from MarkerPop about a month ago, but due to a shortage of Zig Clean Color Markers (they've suddenly become popular amongst the crafting set, despite being out for several years), it took a long time for MarkerPop to get a new shipment in stock. Even waiting a month, MarkerPop didn't receive several of the colors I'd ordered, so they cancelled those and refunded me that part of the shipment. This isn't a real issue for me, just keep in mind if you're ordering these markers that there is some difficulty in getting certain colors and new shipments, so you may have to wait awhile for your markers.
Zig Clean Color watercolor markers are not the only watercolor markers that Zig, or Kuretake, make. I've favorably reviewed Zig's Art and Graphic Twin (link) not too long ago, and included a Zig Clean Color in the lineup for comparison. Browsing the Kuretake Zig 2013 Catalog (which is the most recent on their site) Zig Clean Color is a line of waterbased markers, and there are several available (although not in the US). There's Clean Color, Clean Color II, Clean Color Real Brush, Clean Color Kawaii. All but the Zig Clean Color Real Brush are twin tipped pens, but do not feature real nylon bristles.
Zig Clean Color Real Brush Stats
Available in sets-4, 6, 12, 24, 36, 48, 60 $2.78 openstock on MarkerPopAvailable through a variety of retailers, including MarkerPop, Jetpens, Amazon (my affiliate link, purchasing through this search link helps financially support this blog), DickBlickIndividual nylon bristles make this a real brush penWaterbasedDye ink80 total colors
Kuretake Zig Clean Color Real Brush Color Chart
 Color chart from Markerpop
The colors I started with:
Zig's set of 6 colors from Jetpens containing:
Carmine Red
Bright Yellow
Green
Persian Blue
Purple
Black
And purchased openstock, either from Jetpens or MarkerPop:
Blue Grey
Flesh Colour
Tea Rose
Mid Brown
Violet
Geranium Red
Dark Pink
Turquoise Green
Light Violet
Dark Brown
Oatmeal
Blush
Light Brown
Light Carmine
The Packaging
The pack of 6 comes in a reusable plastic case that snaps shut securely. All markers came with a shrinkwrapped plastic 'cap' that keeps the cap on the pen securely, but is annoying to remove.


 Left: Neopiko 4 packaging and pens Right: Zig Clean Color Real Brush packaging and brushes
The shrinkwrapped openstock markers are almost impossible to open, unfortunately all Clean Color Real Brush markers from Zig come with this shrinkwrap, and I suppose it does assure you that you aren't purchasing pens that may have been used up in-store before being shipped out.
Larger sets, starting at 24, come with a different type of plastic packaging that's more similar to the Neopiko 4 packaging shown above, and seems to be very sturdy.
 Image from Markerpop
The Markers
Zig Clean Color Real Brush markers are pretty similar to their brushpen cousins- single ended markers with product information printed on the body. Newer markers have a clear cap with the barrel around the nib color coded to match the ink, older markers have the color coded cap. Both types have a color coded post as well.
Below are some comparison shots for the Neopiko 4 and the Zig Clean Color Real Brush. These markers are very similar, but the Clean Color Real Brush pens are much easier to get in the US.
 Top: Deleter Neopiko 4
Below: Zig Clean Color Real Brush
Both pens have caps with clips that post to the back of the pen, and individual nylon bristles that give both pens a 'real brush' similar to inking brushpens like the Pentel Pocket Brush.
 Top: Clean Color Real Brush
Bottom: Neopiko 4


 Left; Zig Clean Color Real Brush
Right: Zig Art and Graphic Twin
Swatch Test
Swatches were done on Strathmore's Coldpress watercolor paper, in my hardcover swatchbook.


Although most of the dyes hold their integrity when water is add, Mid Brown takes on a green cast.


Allowing the ink to dry fully does make color dispersal a little more difficult, but not impossible.


Colors were blended into one another- orange first, then red, then orange pulling from the red. As you can see by the squiggle beneath, the orange pen picked up a fair amount of red dye. This is easily removed by doodling on a scrap piece of paper.
Colors Included in the 6 Piece Set


Skintones


Other Openstock Colors

Zig Clean Color Real Brush markers offer many vibrant, intense colors that hold up well, but the more natural colors- browns and tans and peaches, tend to fall apart quickly with the addition of water.
Field Test
This field test was done on cotton rag watercolor paper, which had been inked with the waterproof Sailor Mitsuo Aida.

Colors I'm Using For the Field Test:
Light Carmine (background)
Flesh Colour (gee what a DESCRIPTIVE name) (skintone)
Tea Rose (blush)
Light Violet (skin shadows)
Oatmeal (skin shadows, freckles)
Persian Blue (whites of eyes- shadow)
Light Brown
Mid Brown
Dark Brown
Blue Grey
Turquoise Green


Direct application of color to paper (wet or dry) cannot be entirely blended out. It will always be very obvious where you first applied color, regardless of how you scrub, at least with light carmine, the color I applied to the background.

 Color has been applied to tape, not to paper. A wet brush is then used to blend the color onto the paper.


To remedy some of the bluntless of the original application of Light Carmine, I applied color to the edges of my masking tape and used a wet brush to brush it onto my paper. Color dries a lot pinker than it goes on- it goes on a yellowish pink and dries to a blueish pink, almost a hot pink. It took a lot of work to make my initial application of Light Carmine
Coloring the Skin

Rather than applying color directly to the paper, I apply it to the masking tape I've set up beforehand.

The dye is mixed with a wet brush, and then applied to the paper. The Zig Clean Color Real Brush pens feature dye that is often too light for this technique to work to it's best advantage.


Tea Rose was applied in the same manner, then applied to the lips, nose, and cheeks.


For skin shadows, I applied the final layer of Flesh directly to the paper, and didn't worry too much about getting a smooth blend out.

Cast shadows were applied using this light purple applied to the masking tape, and then painted onto the paper.

More shadows were added in Oatmeal, applied to the masking tape, then painted onto the paper.

The caps don't snap on as securely as I would like, and seem like they might come off if you threw these pens in your bag. As I feared, indirect application of color (on masking tape, picked up with a wet brush, and applied to the picture) is very light, so it would take repeated indirect applications to build color up enough to match the mark made by direct application.
Rendering Hair

Kara's hair was rendered through direct application of marker to paper. Because the Clean Color Real Brush has real bristles, its able to pull really sharp details, like the highlight in Kara's hair.
Rendering Clothes

Direct application- hair. These work ok as traditional markers- the bristle tip keeps these pens from abraiding the paper, and are flexible enough for nuanced strokes, something that traditional waterbased (not necessarily watercolor, however) markers fall short on. I think this application is where the Clean Colors really excel- the bristle nib is more flexible and finer than the dense foam 'super brushes' on watercolor markers such as Tombow ABT, Zig Art and Graphic Twin, or Marvy LePlume II.


The Verdict
With so many watercolor markers to choose from, and some waterbased markers performing just as well as much more expensive watercolor markers, it's a little hard to justify purchasing Zig Clean Color markers, especially if you already own other watercolor markers. If you're looking for a particular effect, like the ability to render hair crisply, its a much easier argument to make. A handful of curated Zig Clean Colors will by no means break the bank, and can be a useful addition to your collection.
If you're purchasing these markers to use as a substitute for markers designed to be used with water, you're better off just purchasing Winsor & Newton watercolor markers, Docrafts Artiste Watercolor markers, or Zig Art and Graphic Twin markers, because those will react with water in a predictable way. You can even purchase Crayola Supertip waterbased markers and use those with a brush and a side palette
What's most surprising to me is how popular these markers have become recently, when they've been on the market for years, and haven't changed much. When I ordered more markers for this review from MarkerPop, I had to wait a month and a half for MarkerPop to get another order from Zig, and even with waiting, several of the colors I ordered never came in, and were canceled from my order.
By watching through some of the videos I've linked at the bottom of this post, I've realized that the paper you use makes a huge difference. It seems that on certain cardstocks, you can use these waterbased markers for immediate blending techniques without needing to pull out a blender marker, techniques that work well on these cardstocks but falls short on watercolor paper. At a later date, I may revisit many of my waterbased watercolor markers on Strathmore's plate bristol, and see if my opinion changes any.
Still Want Your Own?
You can order a set of Zig Clean Color watercolor markers AND help support this blog by ordering your markers through my Amazon Affiliates search link at the top of this post, or by ordering from the Amazon carousel below. Your support helps me purchase more supplies to review, provides a financial reward for the hours spent reviewing products for your entertainment, education, and benefit, and gives me an incentive to keep updating this blog with more useful content. If you aren't interested in your own set of Zig Clean Color markers, you can help support this blog by purchasing any product linked through one of my affiliate links, purchasing something from my online shop, putting a tip in my Paypal tip jar, or writing to any of the companies whose products I've reviewed. If you've found this, or ANY of my posts helpful, please consider sharing them to your social networks- Twitter, Tumblr, Facebook- by using the handy links above the post.
Products Mentioned In This Post
Neopiko 4 Review
Zig Art and Graphic Twin Review
Docrafts Artiste watercolor markers
Akashiya Sai watercolor markers
Winsor & Newton Watercolor markers
Crayola Supertip waterbased markers
Helpful Outside Links
Zig Clean Color Real Brush Tips- Kuretake website
More on the Clean Color Real Brush Pens+GIVEAWAY- There's a LOT of really useful information and tips in this post, so I highly recommend you read it before investing in any Clean Color Real Brush Pens
Helpful Videos
Zig Clean Color Real Brush Pens Q&A- Jennifer McGuire Ink
Zig Clean Color Real Brush Pens Intro- Jennifer McGuireInk
Clean Color Real Brush Pens- 6 Ways
Zig Clean Color Real Brush Markers- CraftTestDummies
Zig (Kuretake) Clean Color Real Brush- Marker art&hobby
Watercoloring with Zig Clean Color Real Brush Markers- Maureen Wong
Zig Clean Brush Water Color Markers- How to #TheDailyMarker30Day-The DailyMarker
Zig Clean Color Real Brush Markers and Cardstock Comparison- catherinestamps
Kuretake Zig Clean Color Real Brush Pen Review, Demo & Comparison- thefrugalcrafter Lidnsey Weirich
Amazon.com Widgets
Please consider donating to this blog or purchasing from Natto-shop (http://nattosoup.com/shop) if you want me to continue publishing quality content. All materials tested were purchased from my own pocket. Keep on Truckin' Nattosoup is not under any sponsorship.
I'd ordered these, some Momentos, and some Distress markers from MarkerPop about a month ago, but due to a shortage of Zig Clean Color Markers (they've suddenly become popular amongst the crafting set, despite being out for several years), it took a long time for MarkerPop to get a new shipment in stock. Even waiting a month, MarkerPop didn't receive several of the colors I'd ordered, so they cancelled those and refunded me that part of the shipment. This isn't a real issue for me, just keep in mind if you're ordering these markers that there is some difficulty in getting certain colors and new shipments, so you may have to wait awhile for your markers.
Zig Clean Color watercolor markers are not the only watercolor markers that Zig, or Kuretake, make. I've favorably reviewed Zig's Art and Graphic Twin (link) not too long ago, and included a Zig Clean Color in the lineup for comparison. Browsing the Kuretake Zig 2013 Catalog (which is the most recent on their site) Zig Clean Color is a line of waterbased markers, and there are several available (although not in the US). There's Clean Color, Clean Color II, Clean Color Real Brush, Clean Color Kawaii. All but the Zig Clean Color Real Brush are twin tipped pens, but do not feature real nylon bristles.
Zig Clean Color Real Brush Stats
Available in sets-4, 6, 12, 24, 36, 48, 60 $2.78 openstock on MarkerPopAvailable through a variety of retailers, including MarkerPop, Jetpens, Amazon (my affiliate link, purchasing through this search link helps financially support this blog), DickBlickIndividual nylon bristles make this a real brush penWaterbasedDye ink80 total colors
Kuretake Zig Clean Color Real Brush Color Chart
 Color chart from Markerpop
The colors I started with:
Zig's set of 6 colors from Jetpens containing:
Carmine Red
Bright Yellow
Green
Persian Blue
Purple
Black
And purchased openstock, either from Jetpens or MarkerPop:
Blue Grey
Flesh Colour
Tea Rose
Mid Brown
Violet
Geranium Red
Dark Pink
Turquoise Green
Light Violet
Dark Brown
Oatmeal
Blush
Light Brown
Light Carmine
The Packaging
The pack of 6 comes in a reusable plastic case that snaps shut securely. All markers came with a shrinkwrapped plastic 'cap' that keeps the cap on the pen securely, but is annoying to remove.

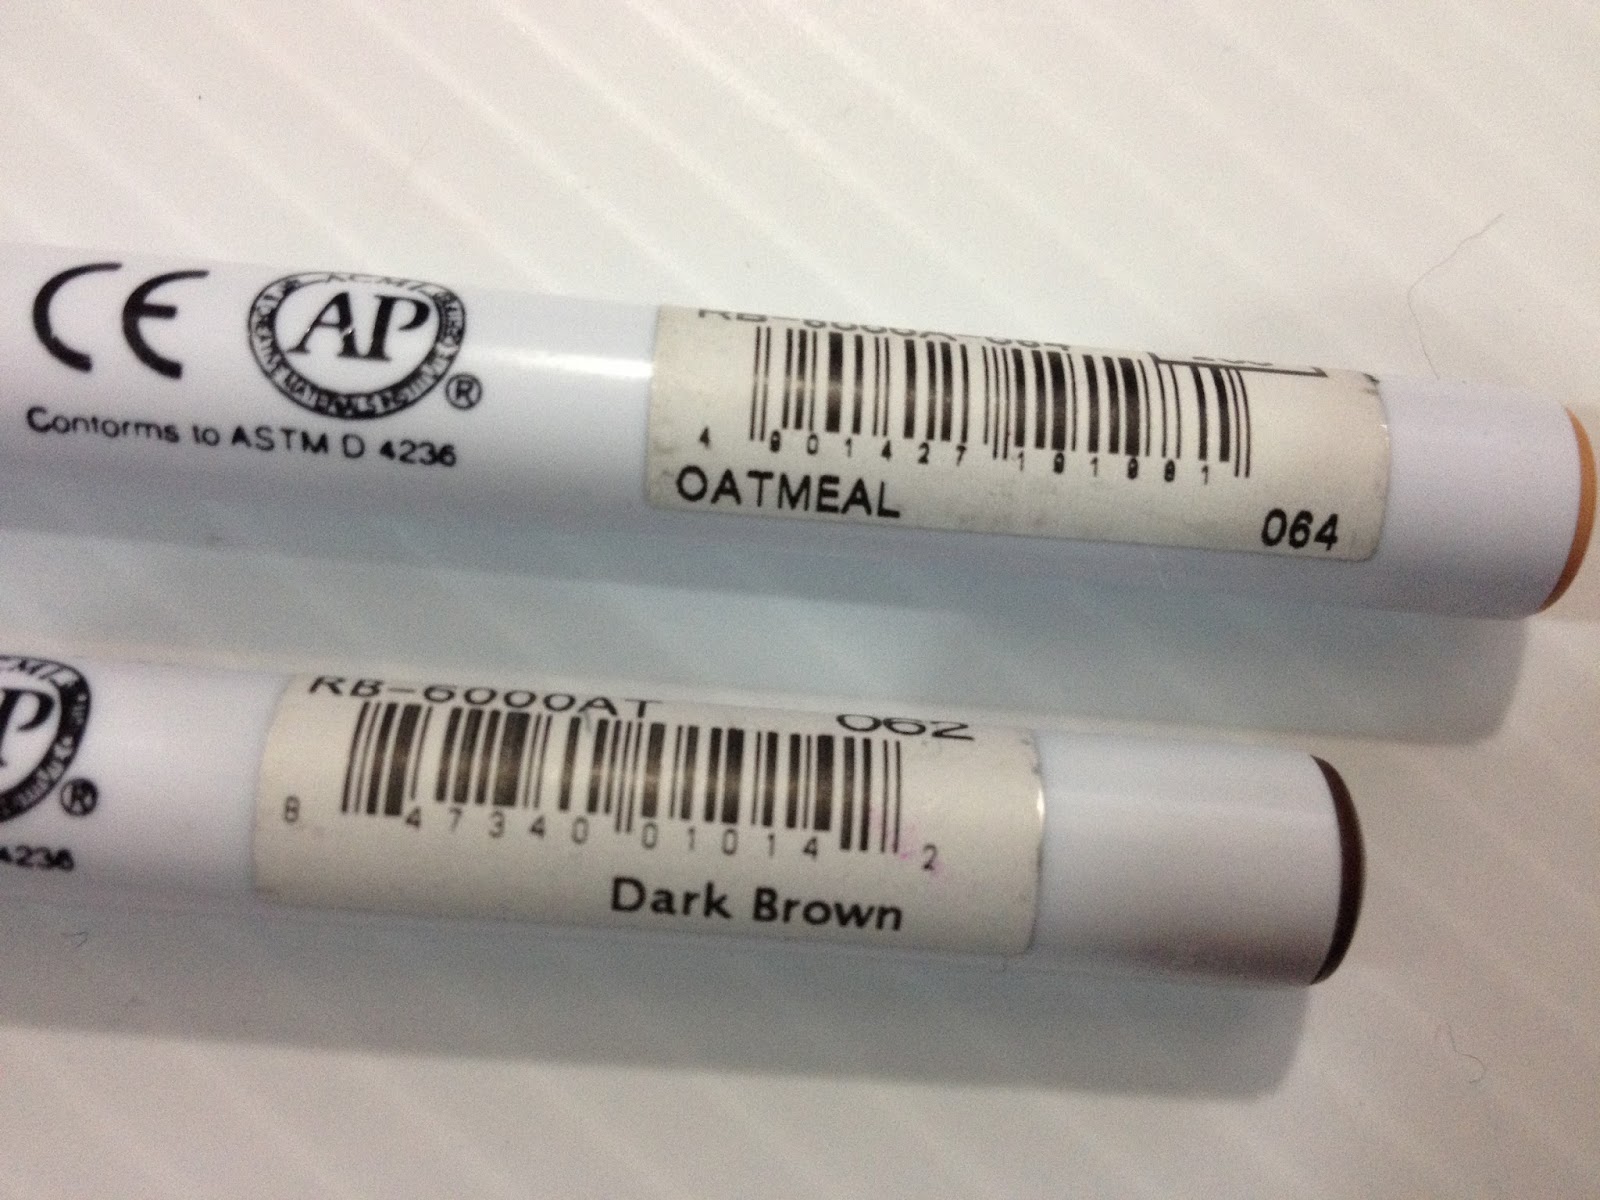


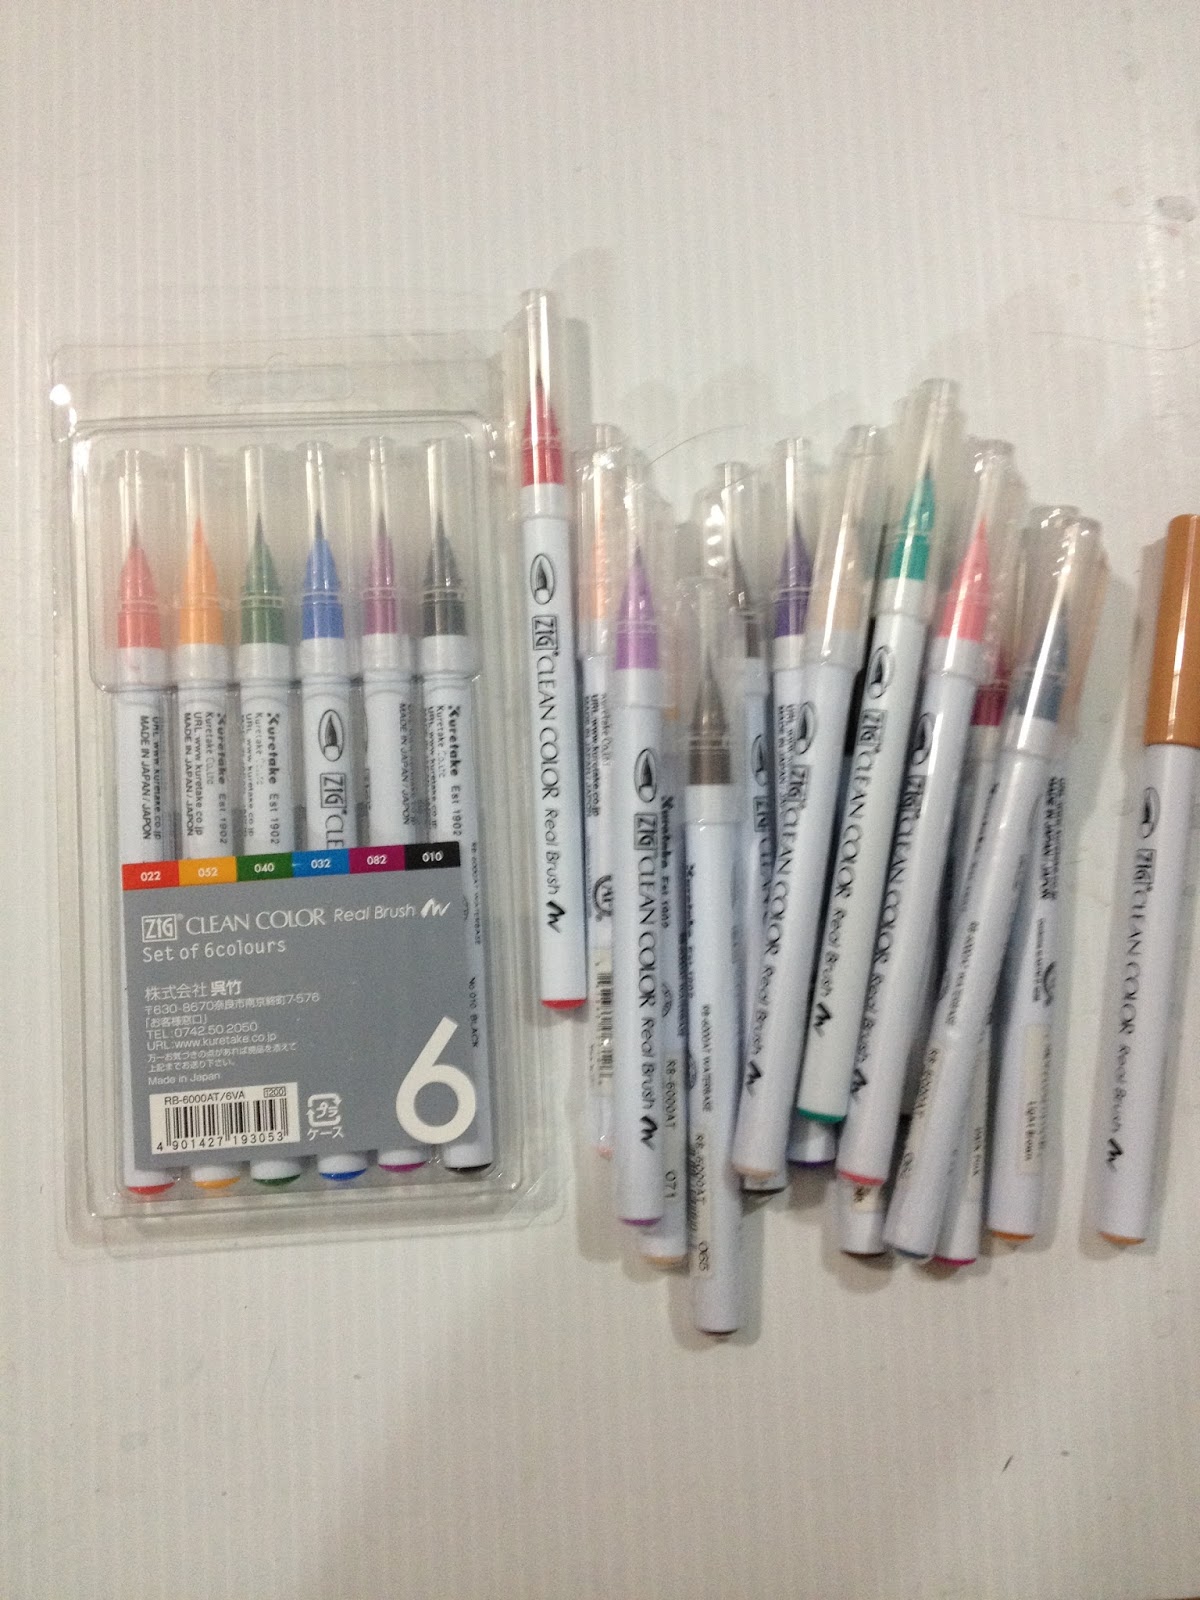
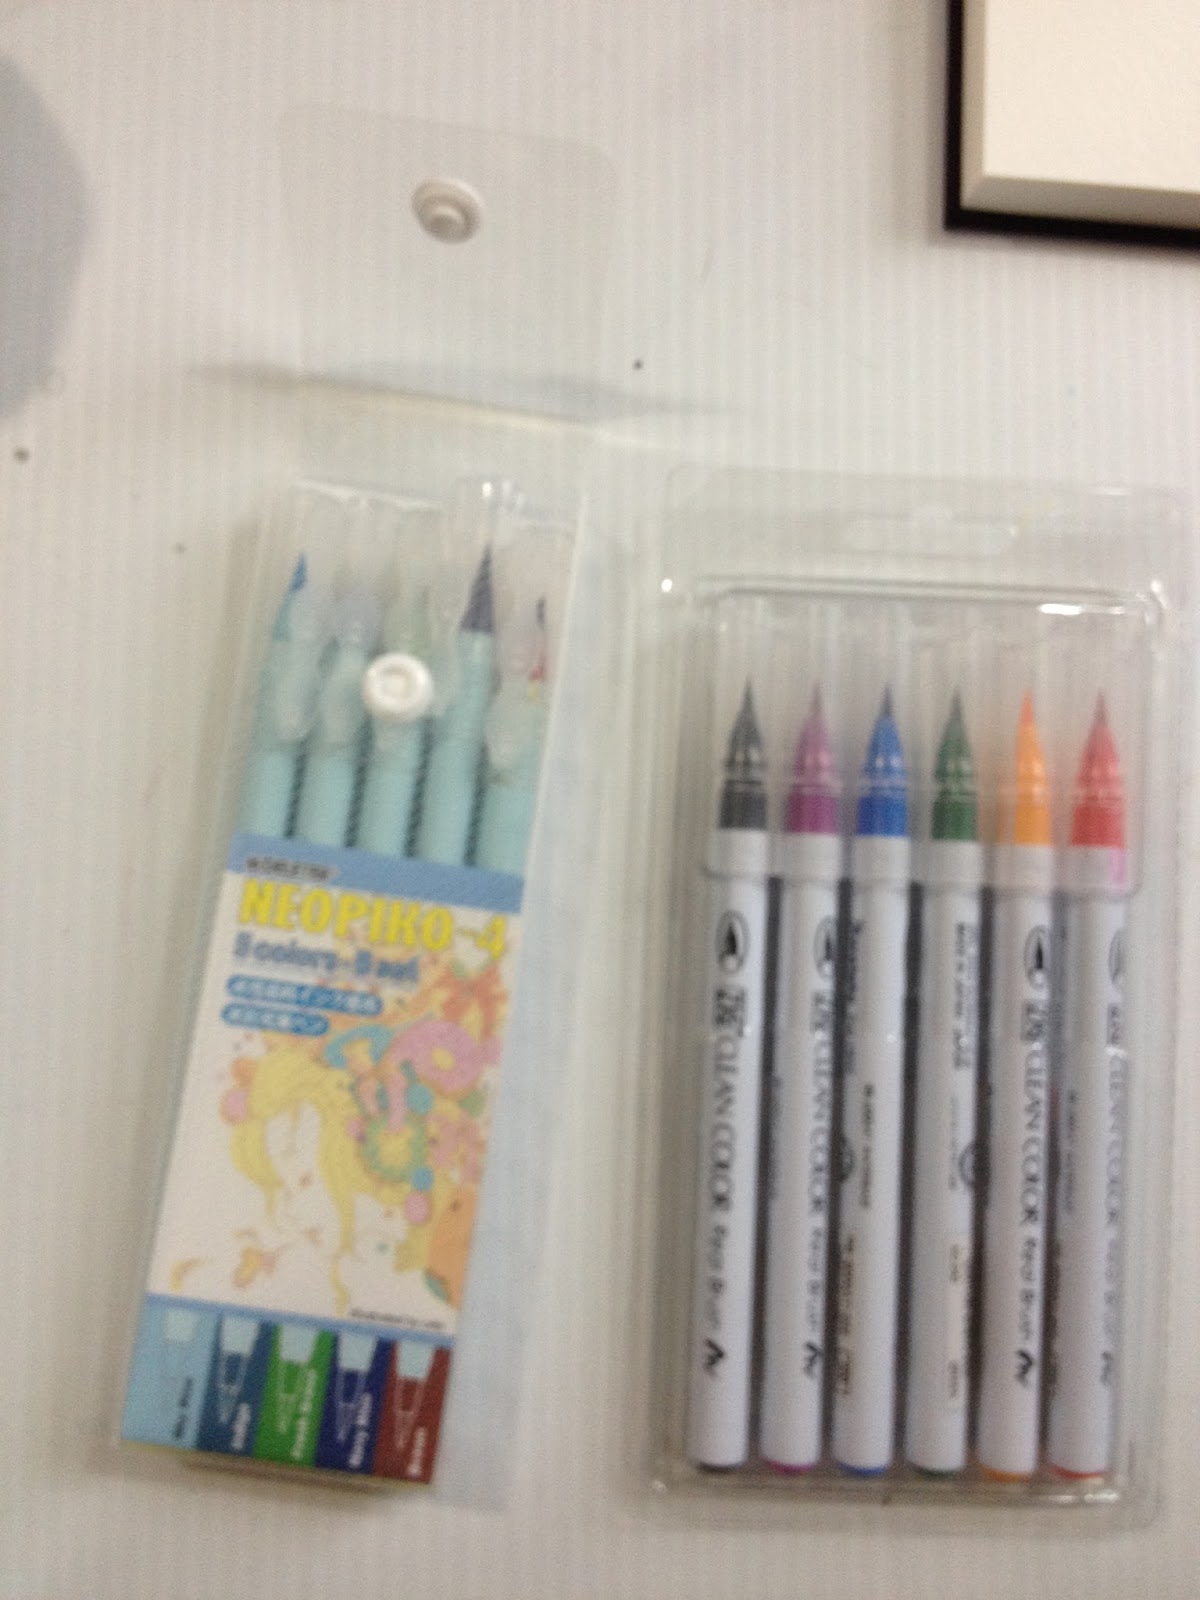 Left: Neopiko 4 packaging and pens Right: Zig Clean Color Real Brush packaging and brushes
The shrinkwrapped openstock markers are almost impossible to open, unfortunately all Clean Color Real Brush markers from Zig come with this shrinkwrap, and I suppose it does assure you that you aren't purchasing pens that may have been used up in-store before being shipped out.
Larger sets, starting at 24, come with a different type of plastic packaging that's more similar to the Neopiko 4 packaging shown above, and seems to be very sturdy.
 Image from Markerpop
The Markers
Zig Clean Color Real Brush markers are pretty similar to their brushpen cousins- single ended markers with product information printed on the body. Newer markers have a clear cap with the barrel around the nib color coded to match the ink, older markers have the color coded cap. Both types have a color coded post as well.
Below are some comparison shots for the Neopiko 4 and the Zig Clean Color Real Brush. These markers are very similar, but the Clean Color Real Brush pens are much easier to get in the US.
 Top: Deleter Neopiko 4
Below: Zig Clean Color Real Brush
Both pens have caps with clips that post to the back of the pen, and individual nylon bristles that give both pens a 'real brush' similar to inking brushpens like the Pentel Pocket Brush.
 Top: Clean Color Real Brush
Bottom: Neopiko 4
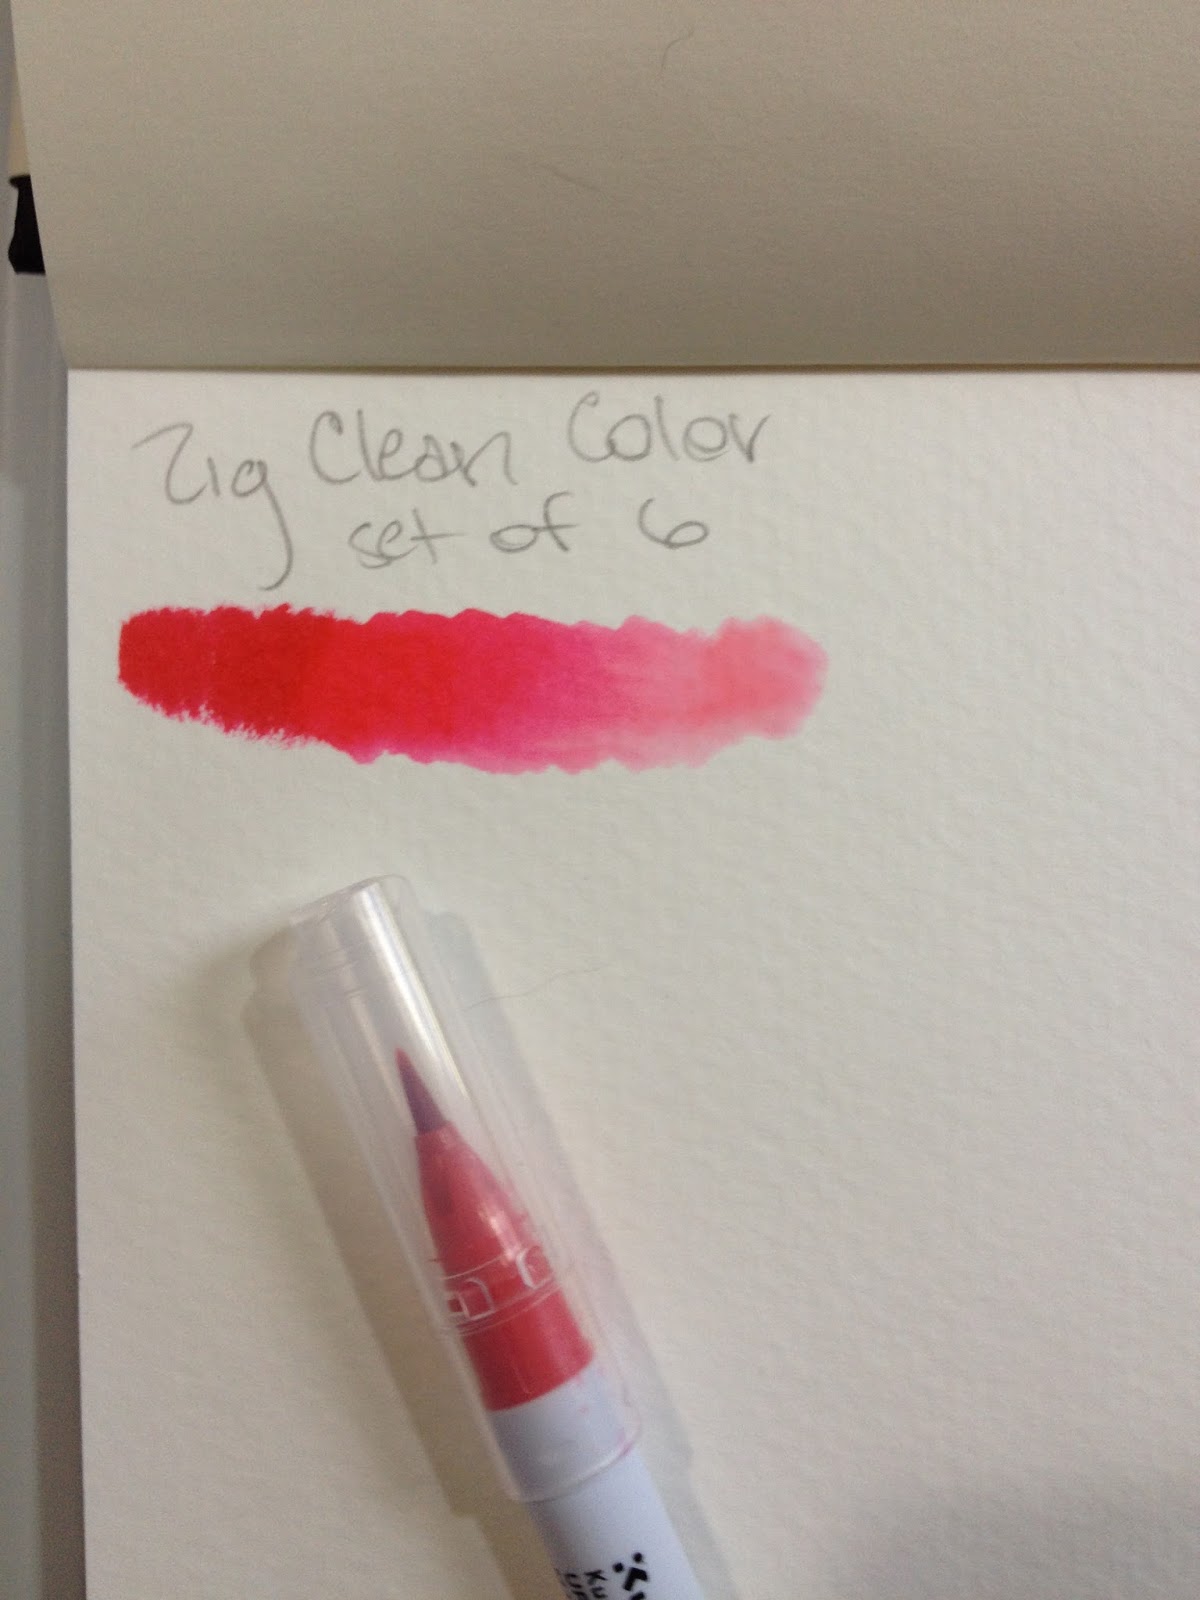

 Left; Zig Clean Color Real Brush
Right: Zig Art and Graphic Twin
Swatch Test
Swatches were done on Strathmore's Coldpress watercolor paper, in my hardcover swatchbook.
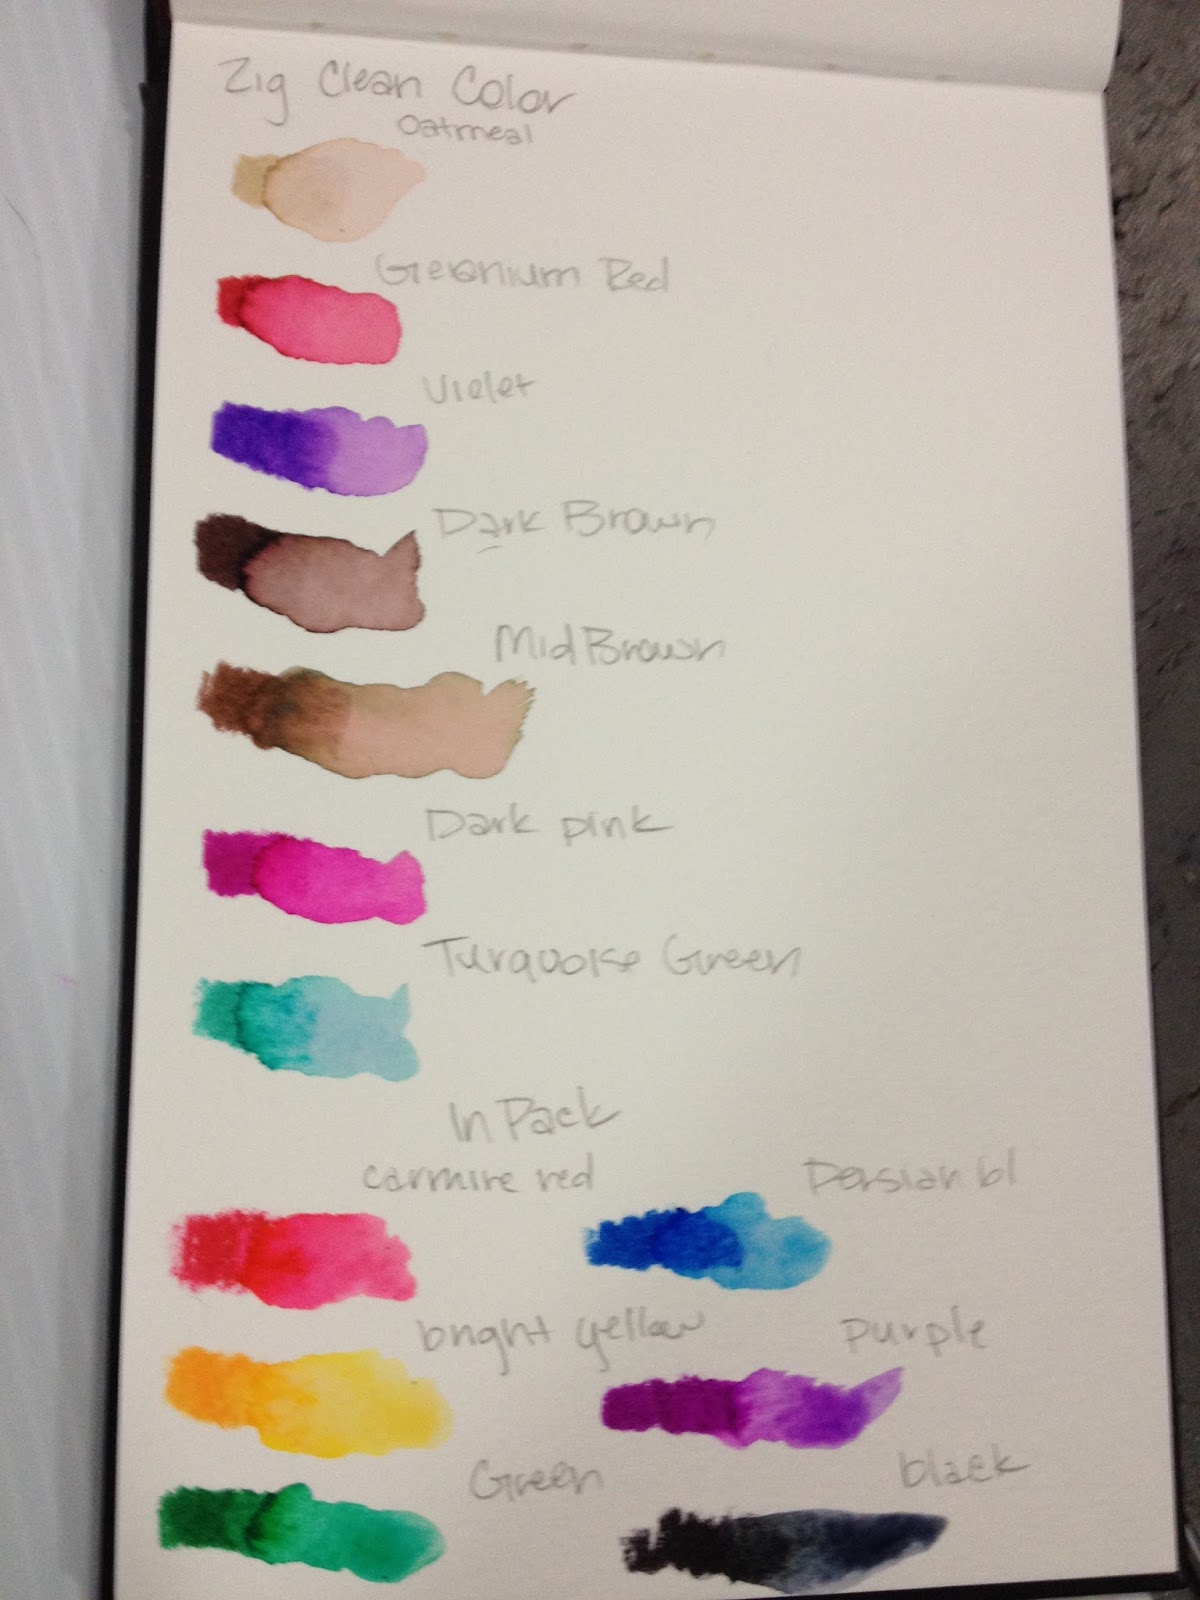

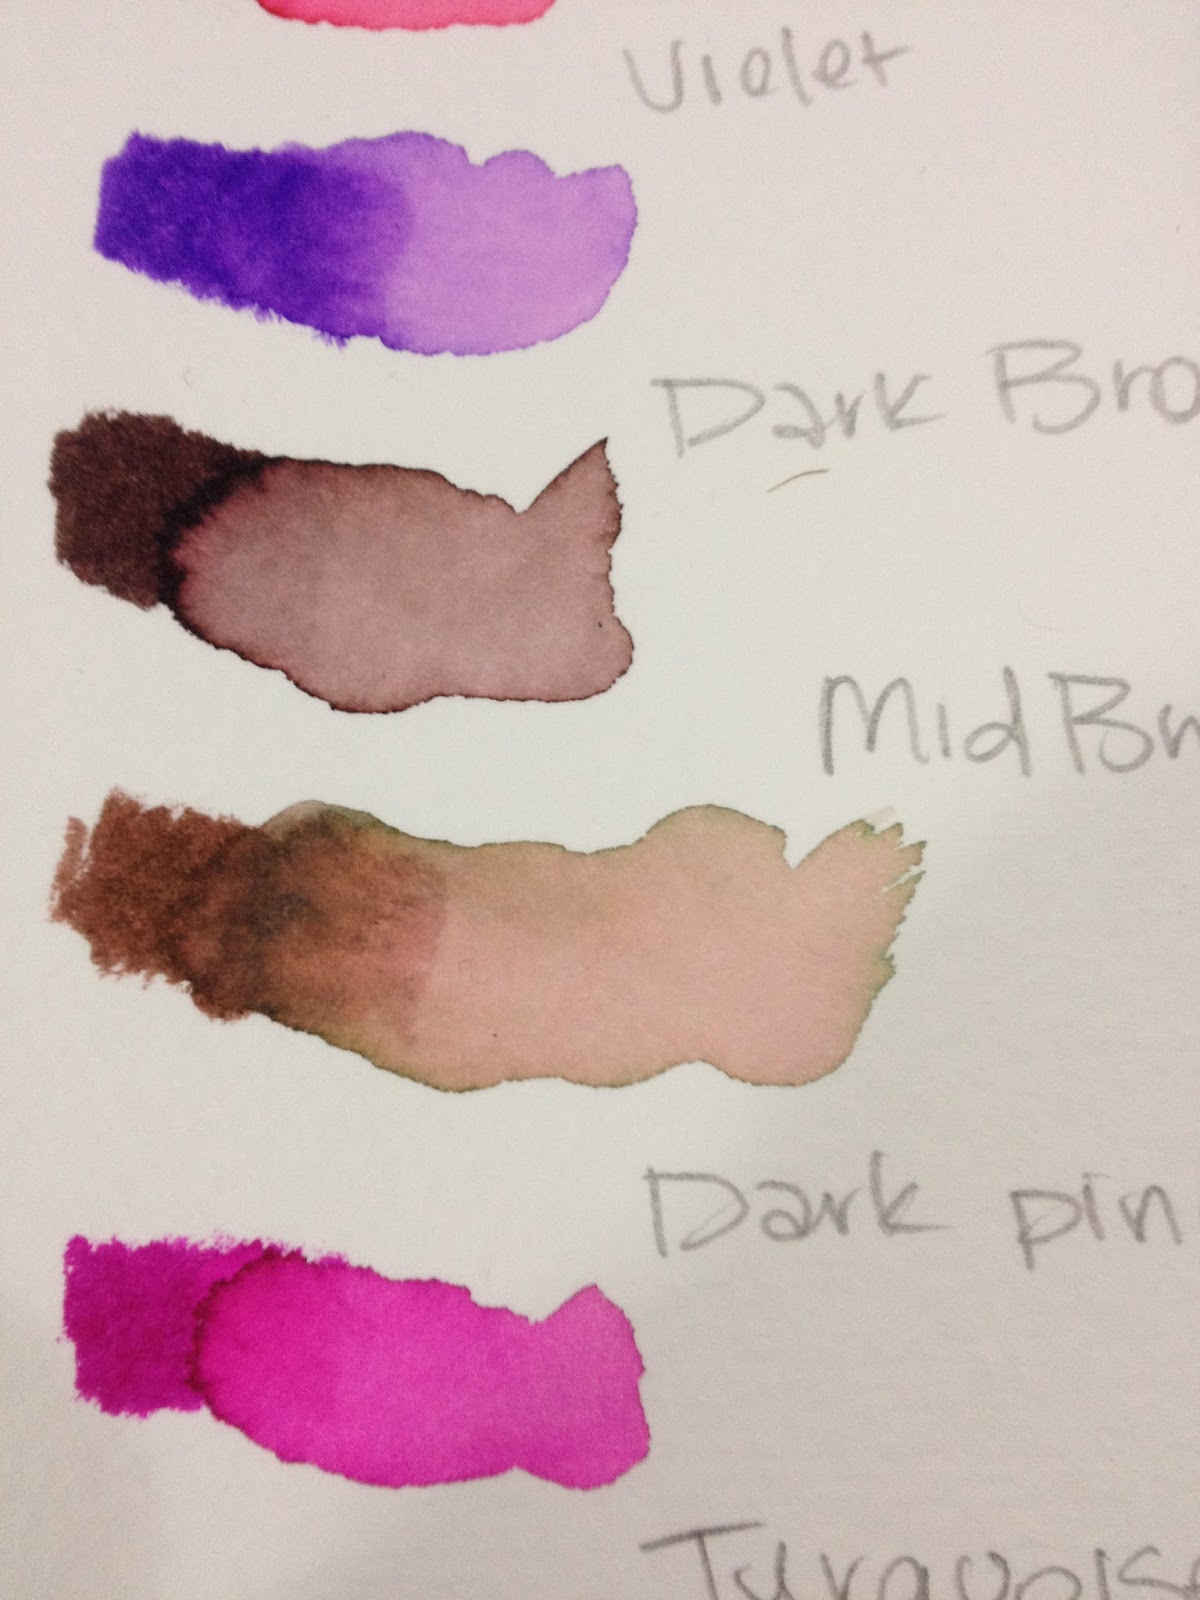
Although most of the dyes hold their integrity when water is add, Mid Brown takes on a green cast.


Allowing the ink to dry fully does make color dispersal a little more difficult, but not impossible.


Colors were blended into one another- orange first, then red, then orange pulling from the red. As you can see by the squiggle beneath, the orange pen picked up a fair amount of red dye. This is easily removed by doodling on a scrap piece of paper.
Colors Included in the 6 Piece Set


Skintones


Other Openstock Colors

Zig Clean Color Real Brush markers offer many vibrant, intense colors that hold up well, but the more natural colors- browns and tans and peaches, tend to fall apart quickly with the addition of water.
Field Test
This field test was done on cotton rag watercolor paper, which had been inked with the waterproof Sailor Mitsuo Aida.
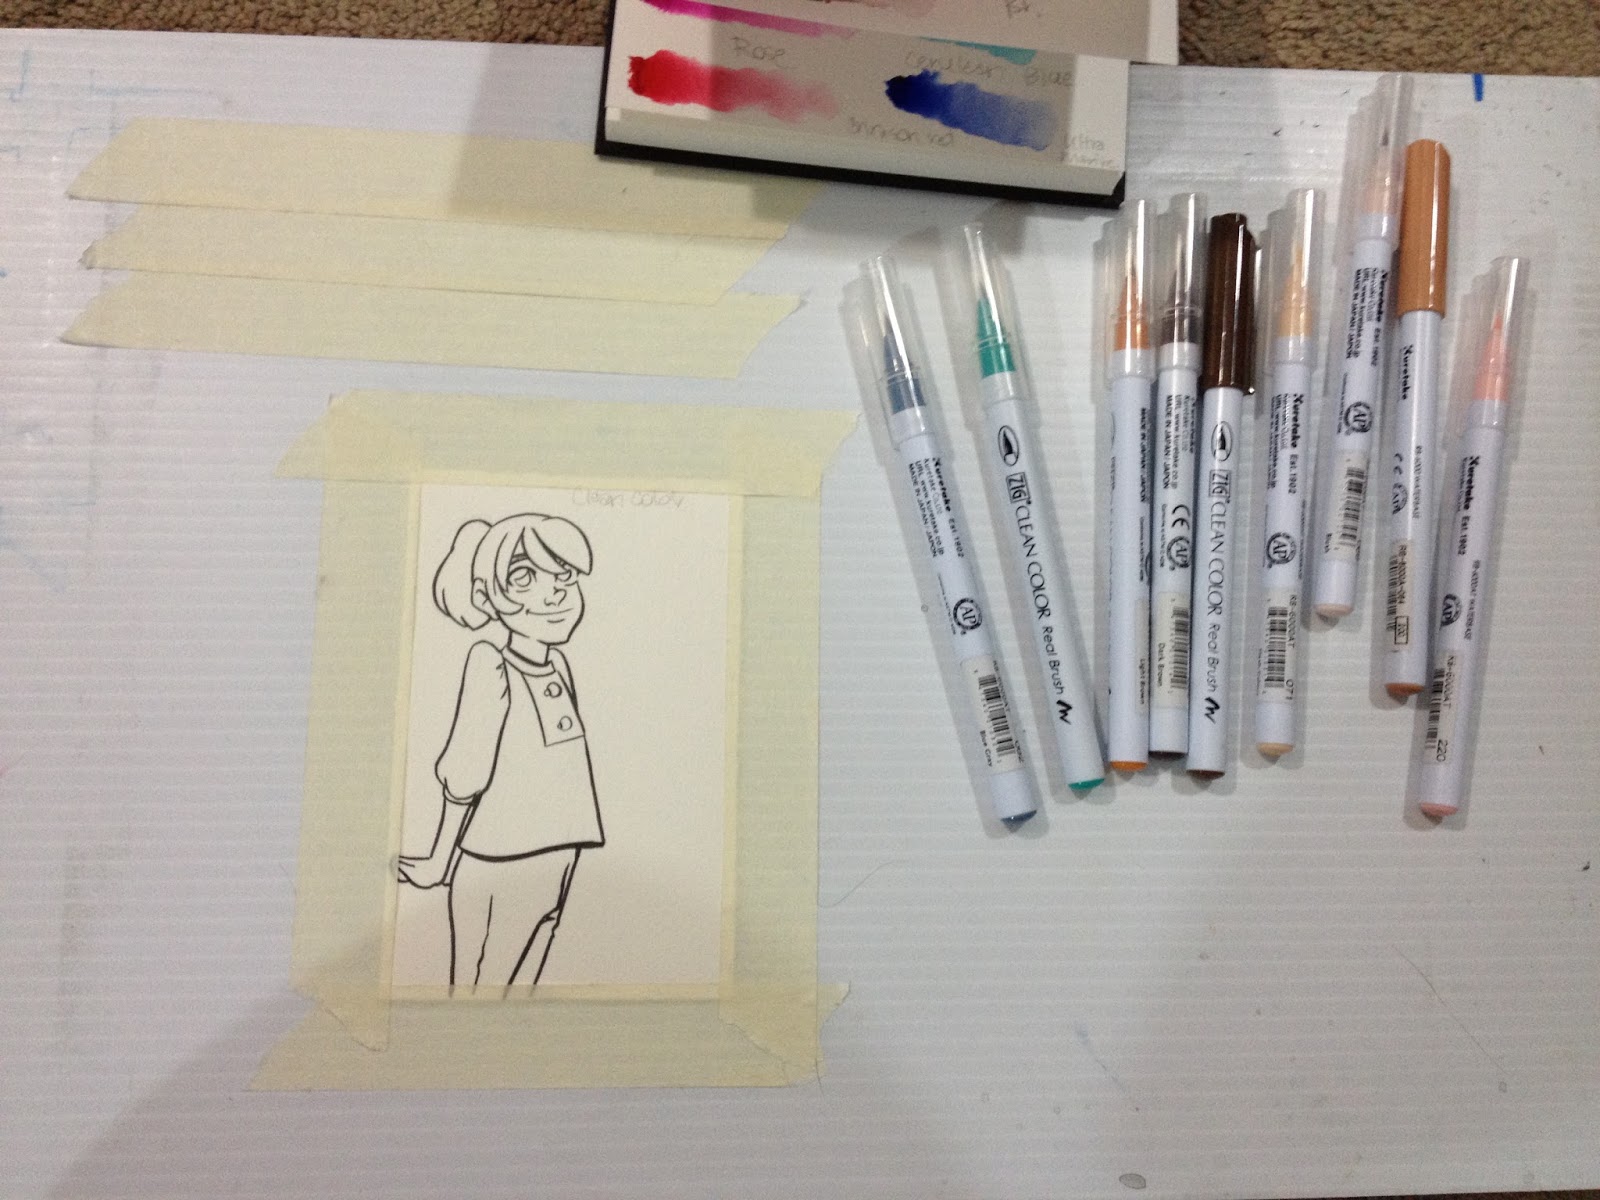
Colors I'm Using For the Field Test:
Light Carmine (background)
Flesh Colour (gee what a DESCRIPTIVE name) (skintone)
Tea Rose (blush)
Light Violet (skin shadows)
Oatmeal (skin shadows, freckles)
Persian Blue (whites of eyes- shadow)
Light Brown
Mid Brown
Dark Brown
Blue Grey
Turquoise Green
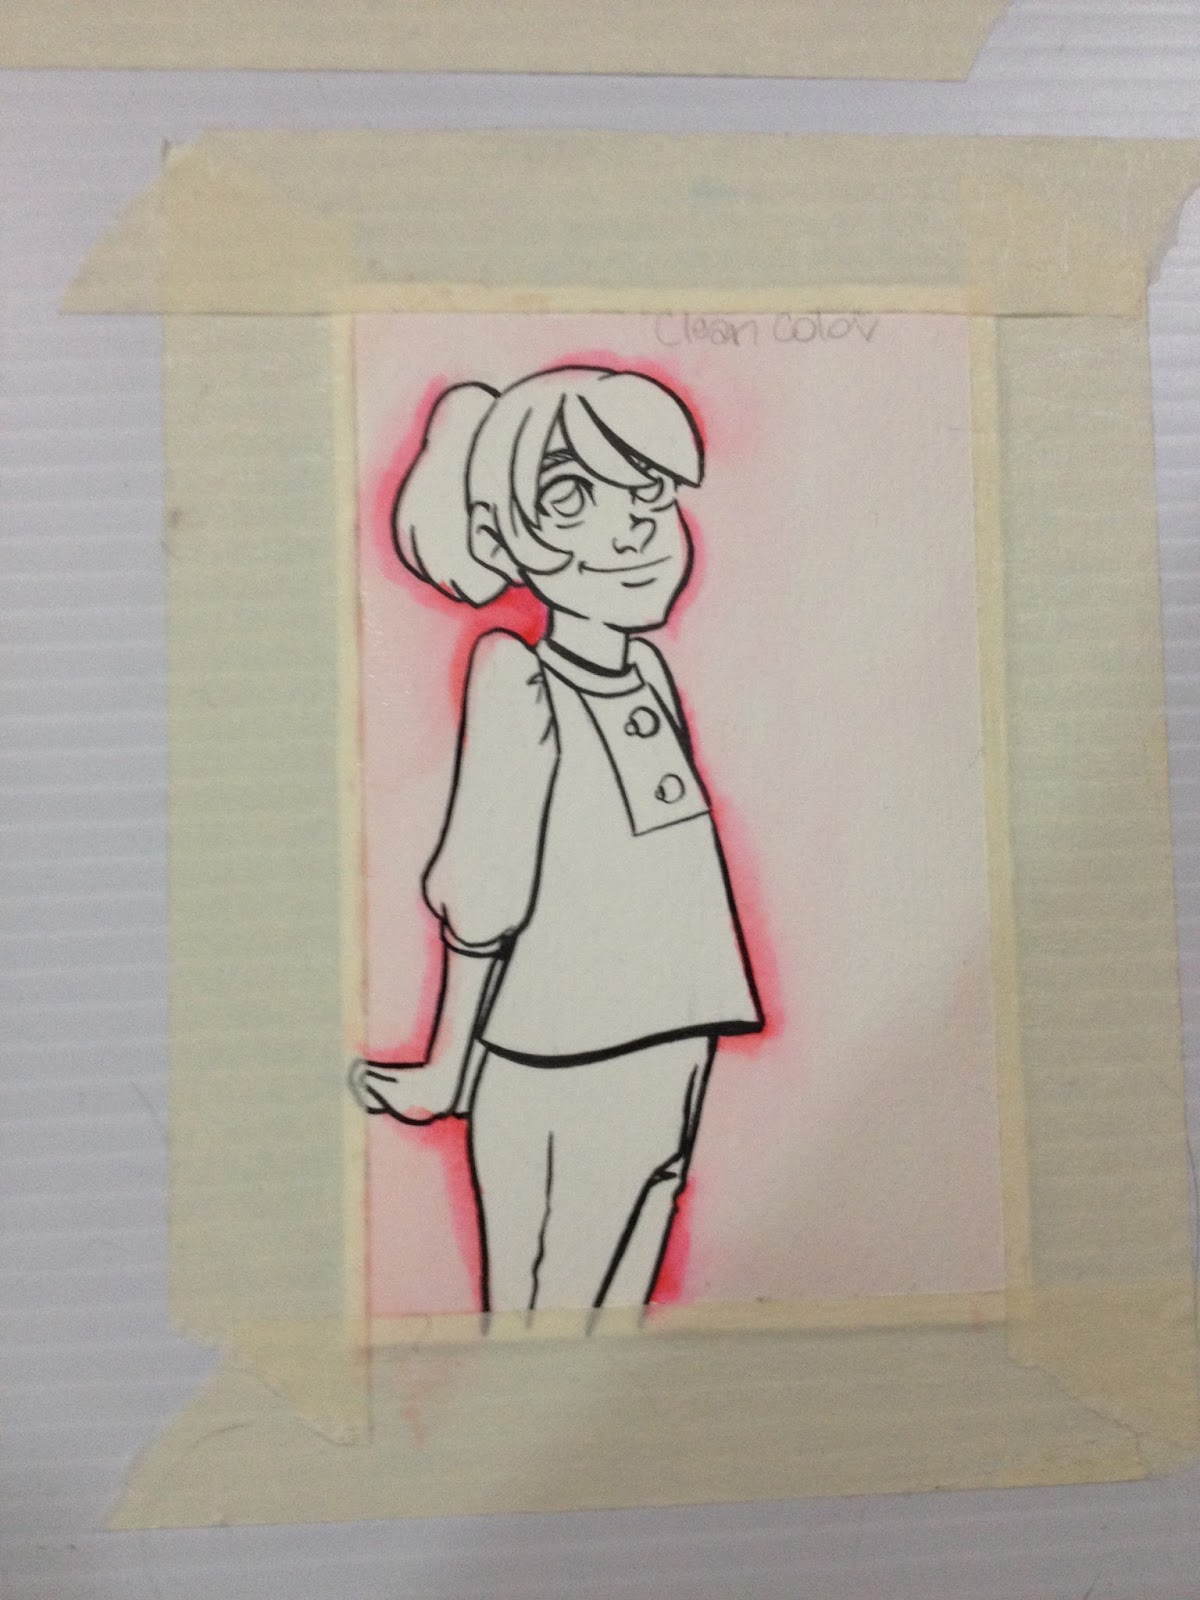
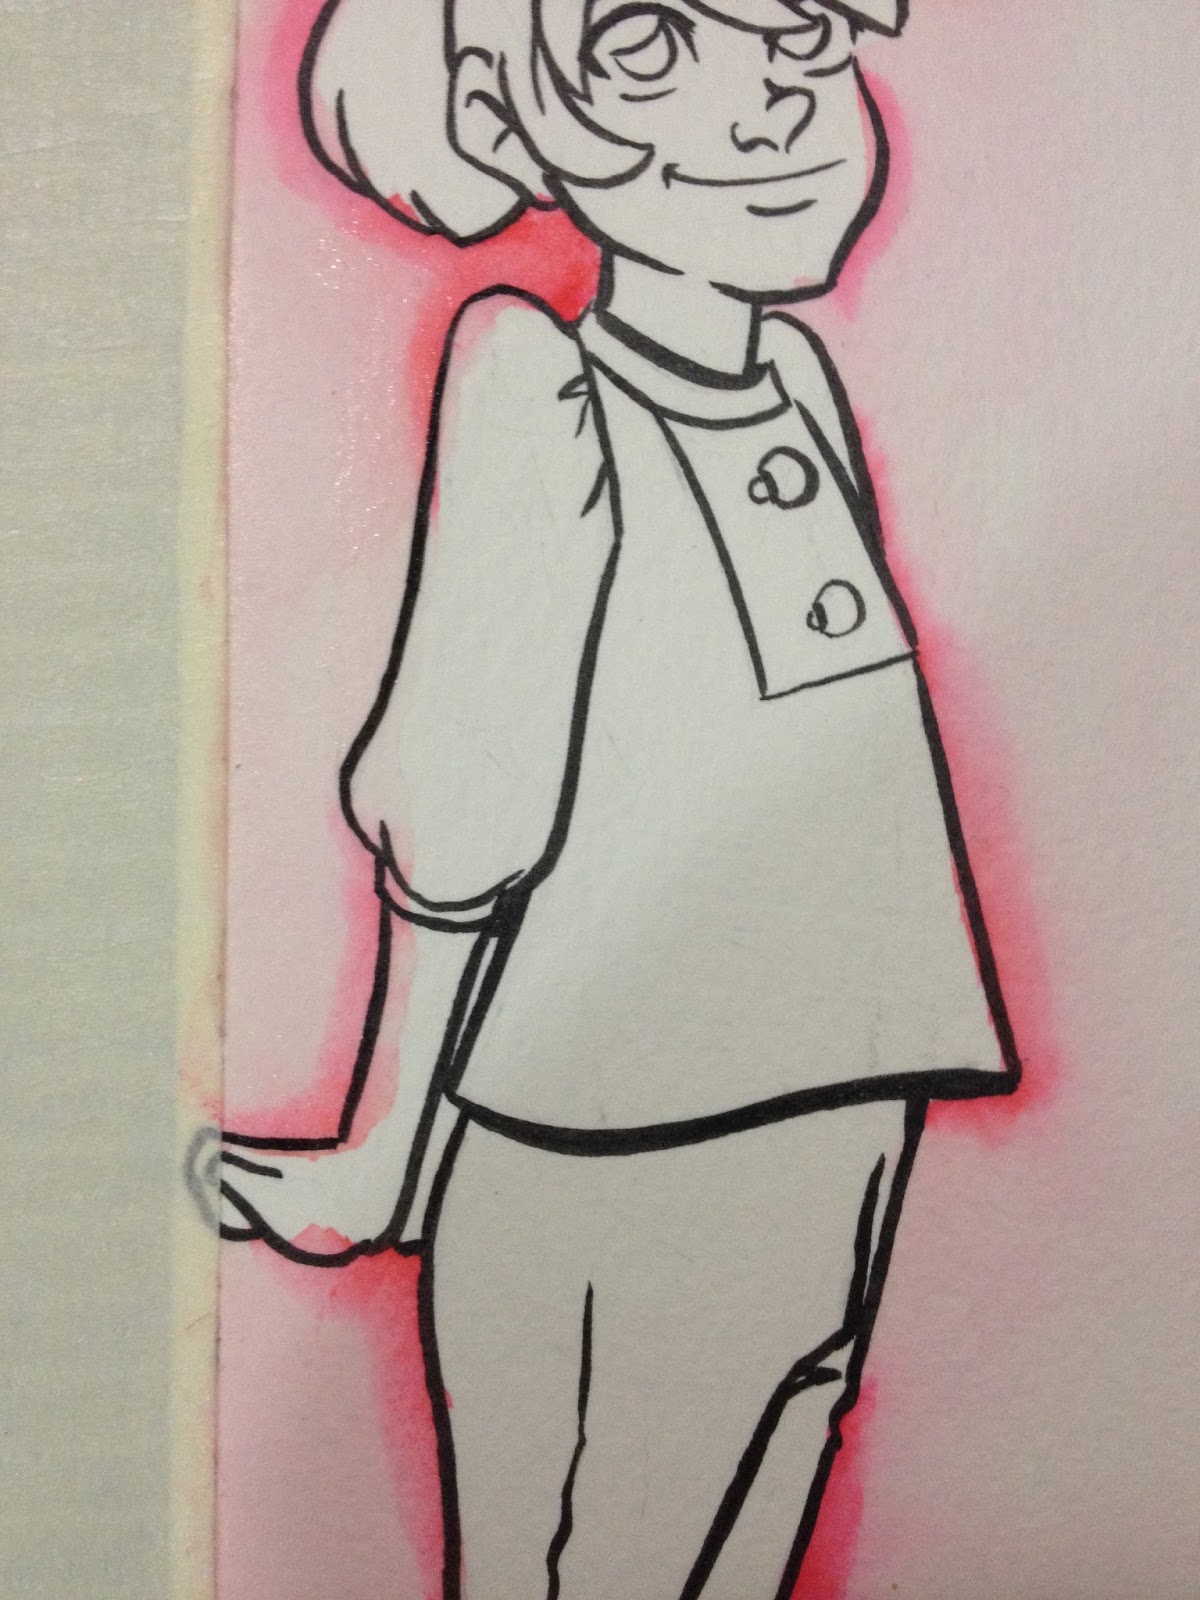
Direct application of color to paper (wet or dry) cannot be entirely blended out. It will always be very obvious where you first applied color, regardless of how you scrub, at least with light carmine, the color I applied to the background.

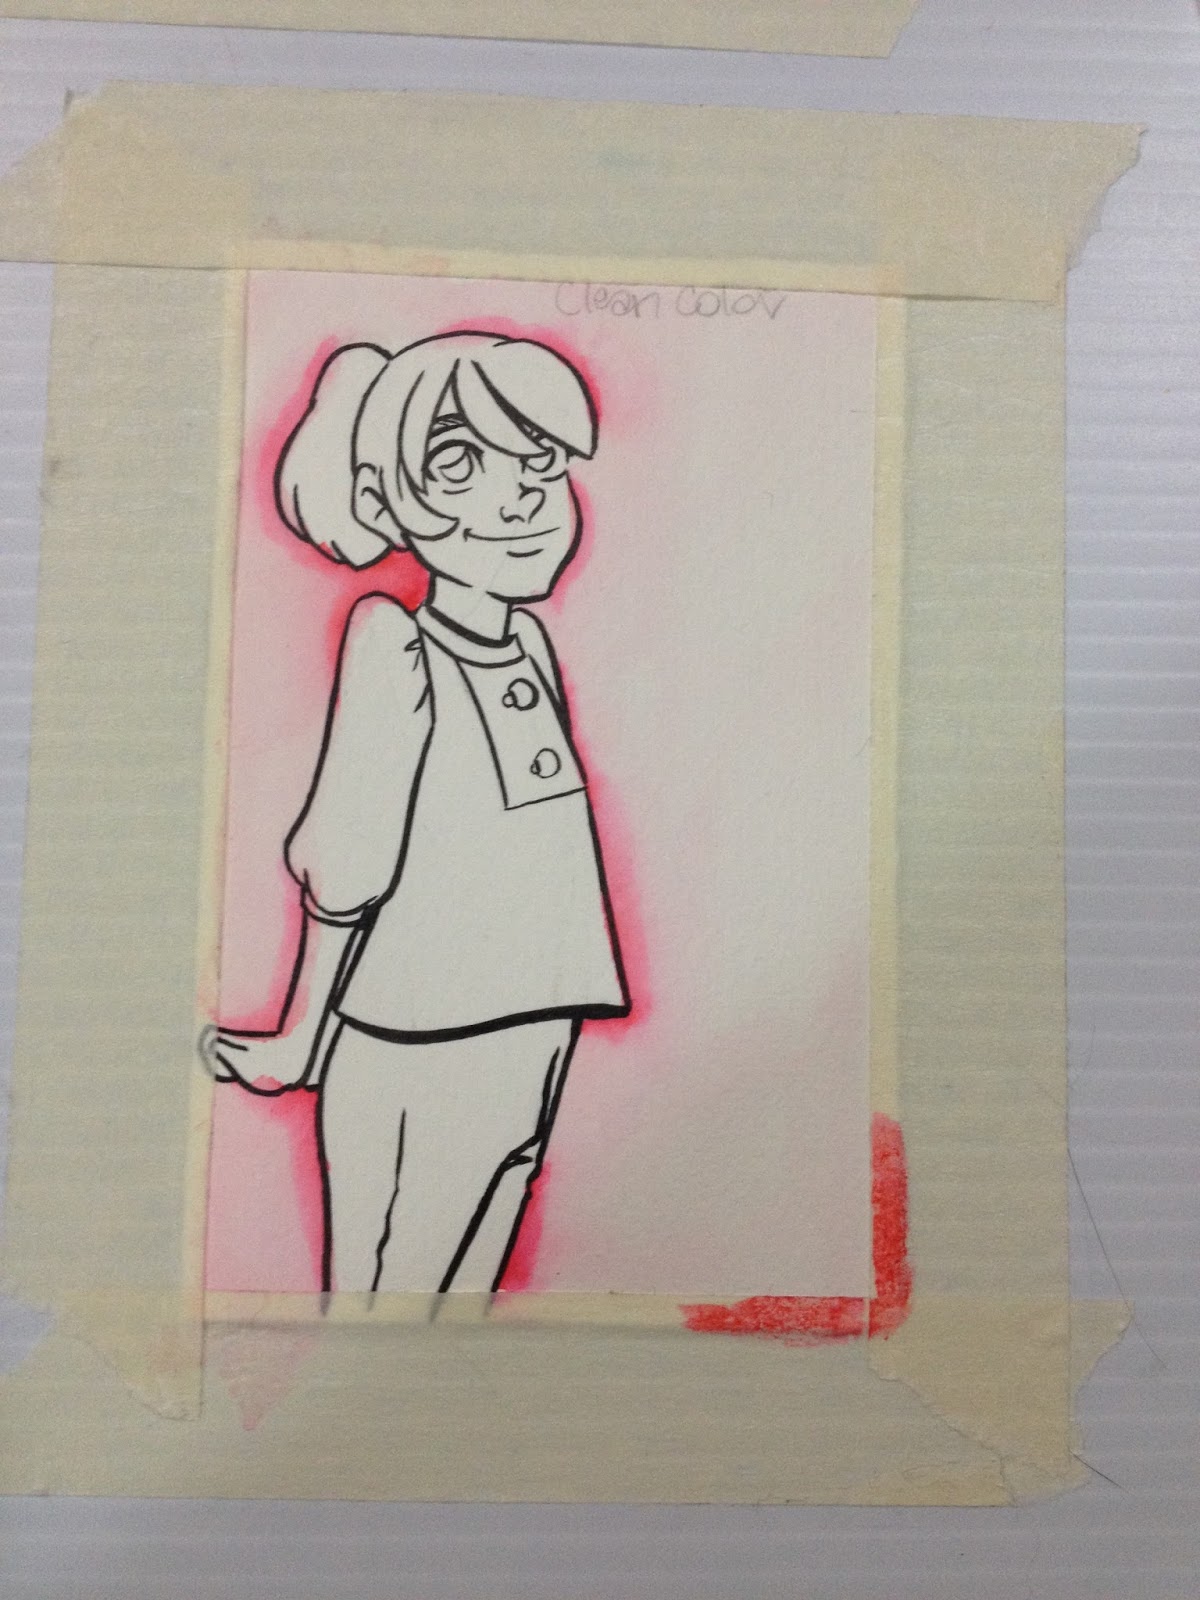 Color has been applied to tape, not to paper. A wet brush is then used to blend the color onto the paper.
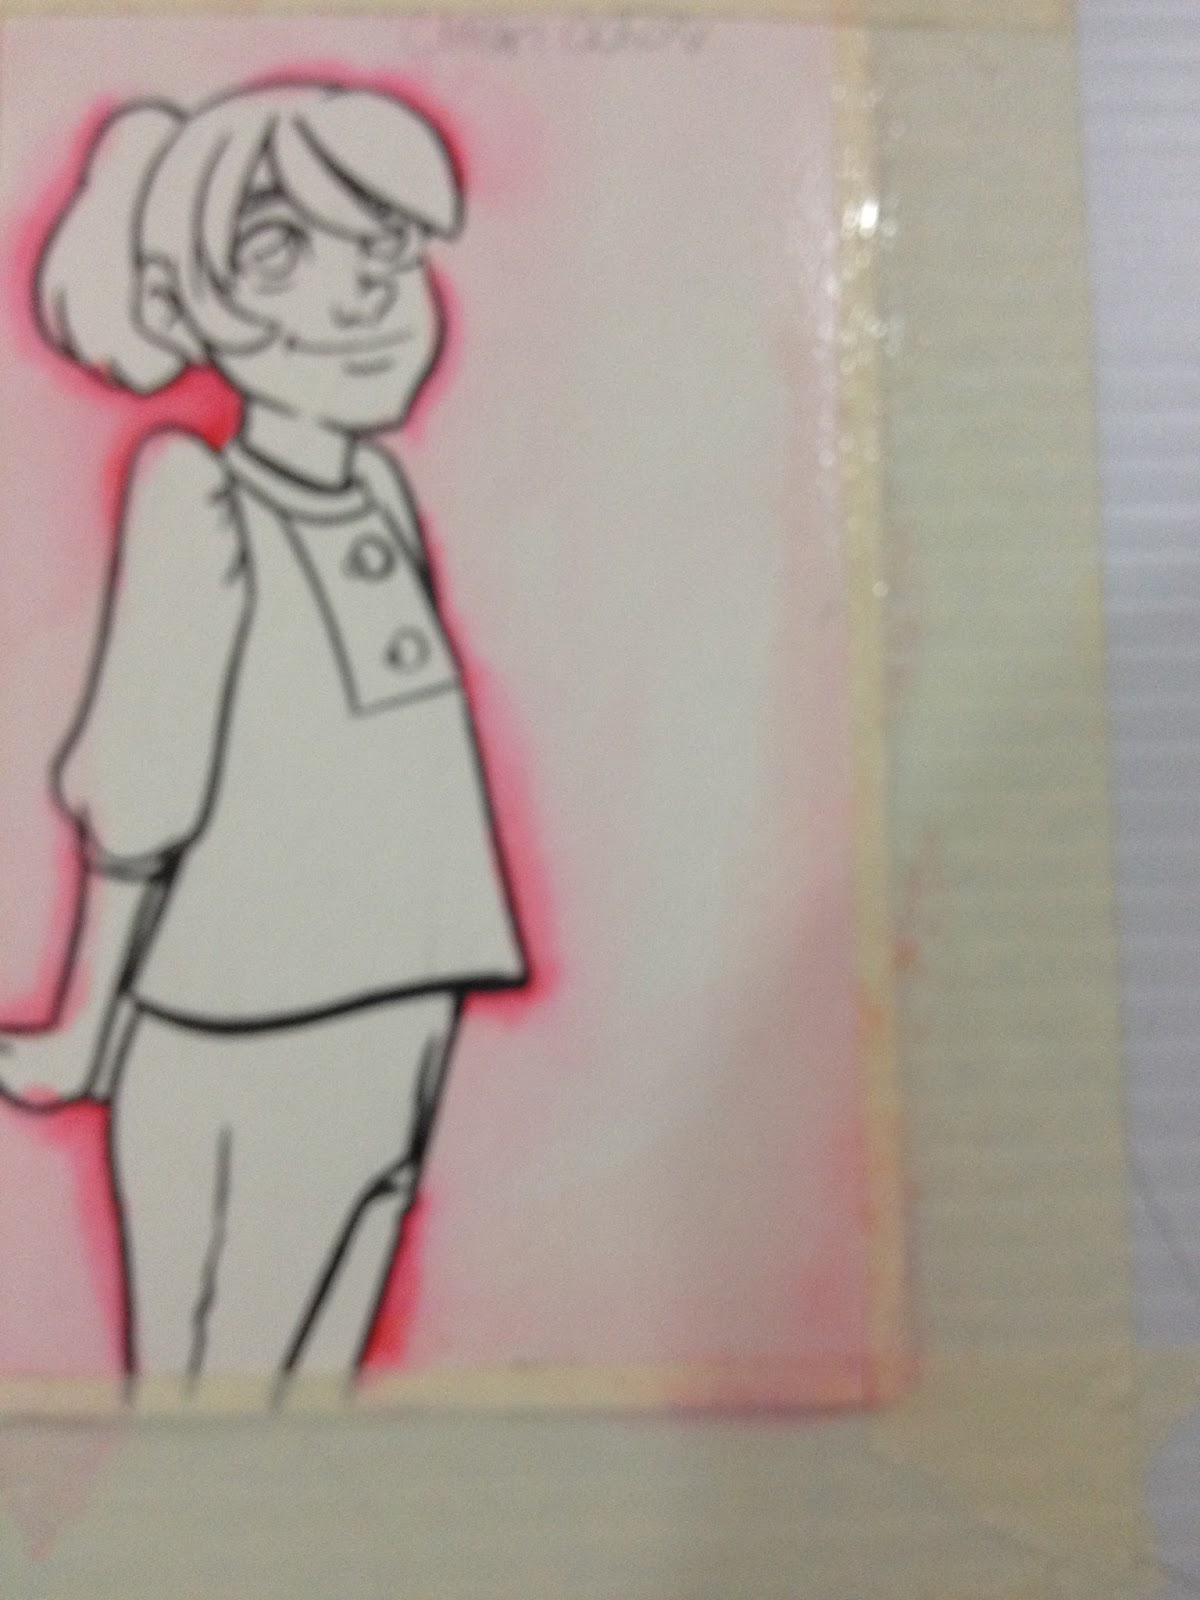

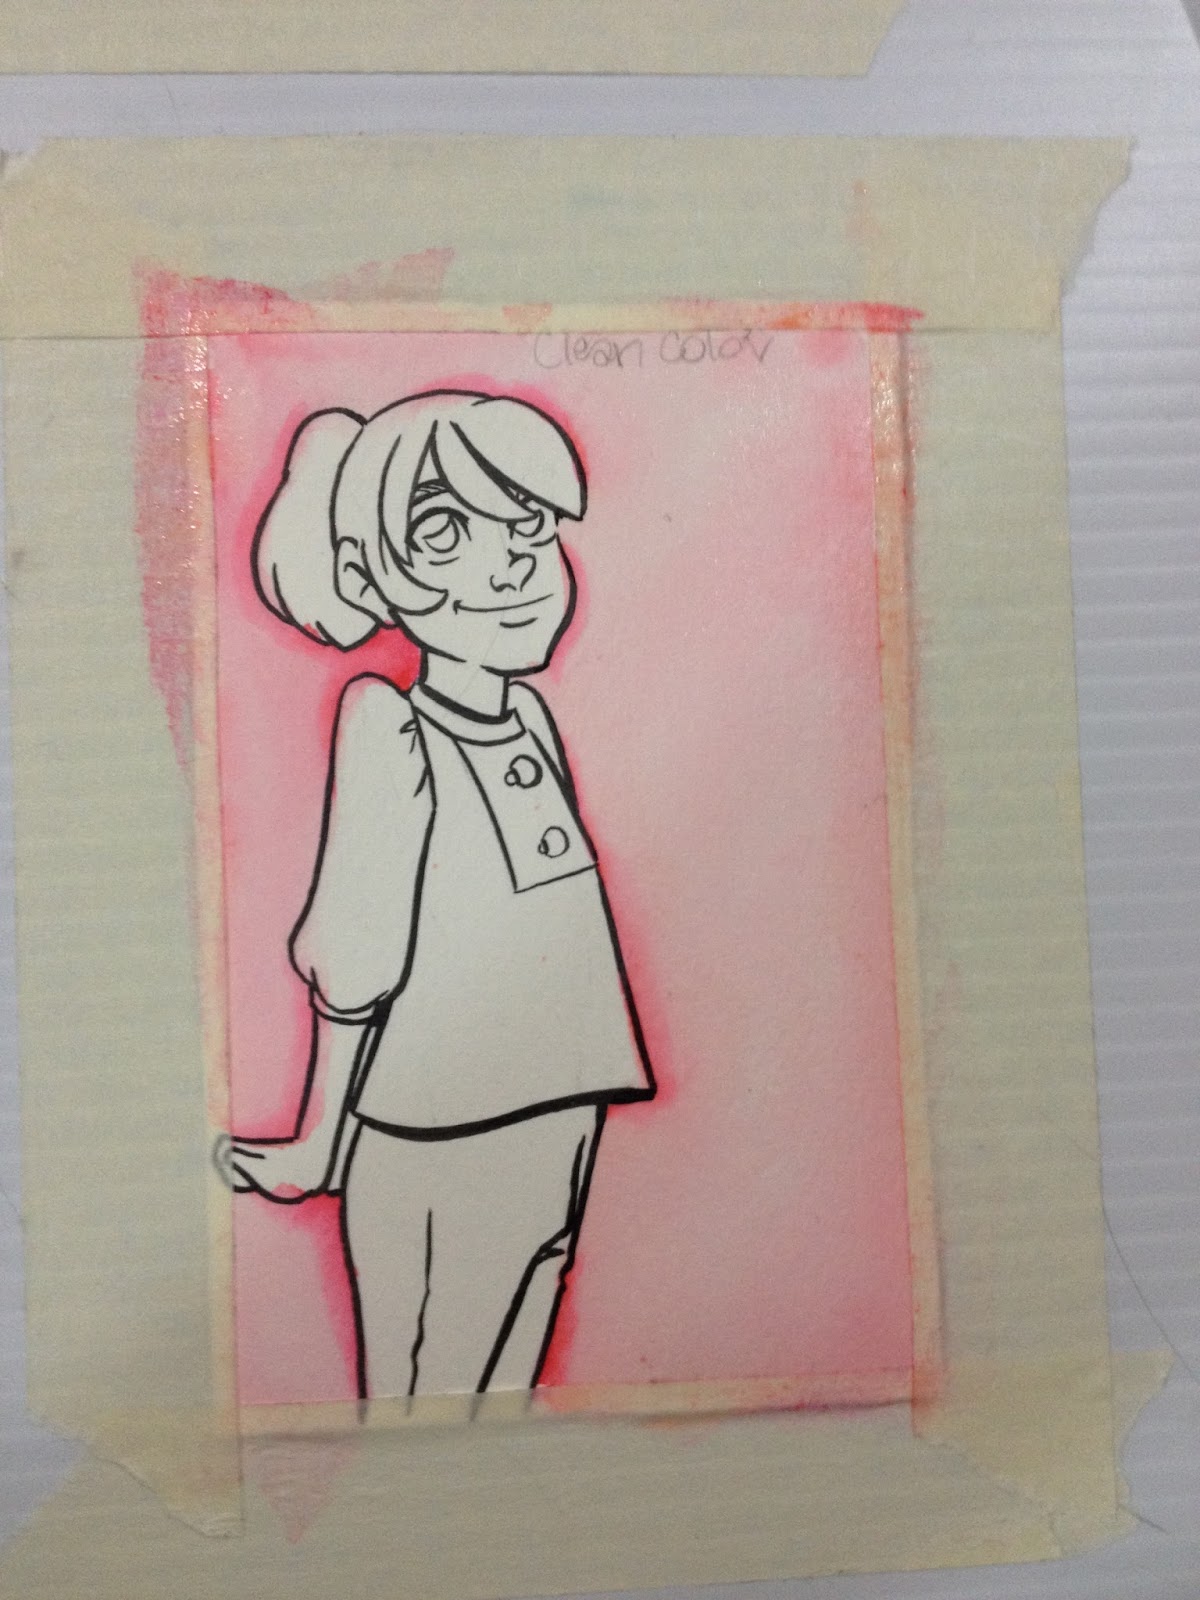
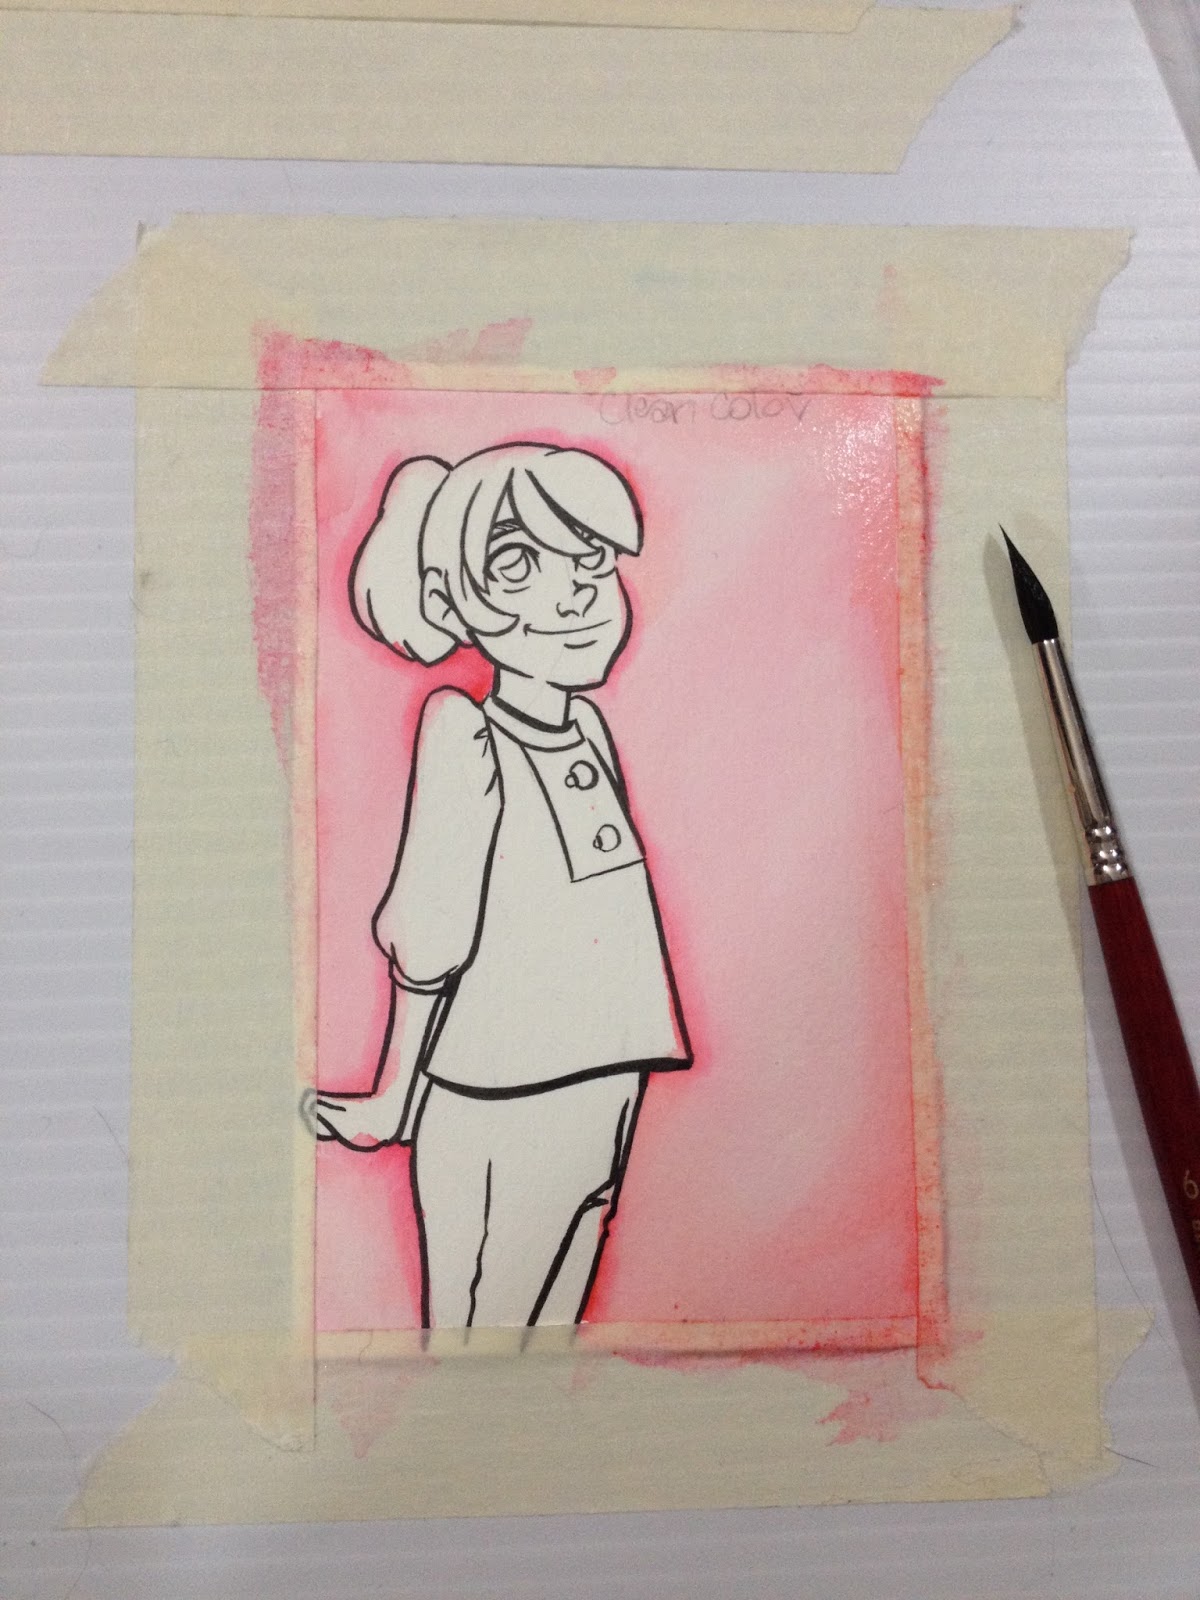
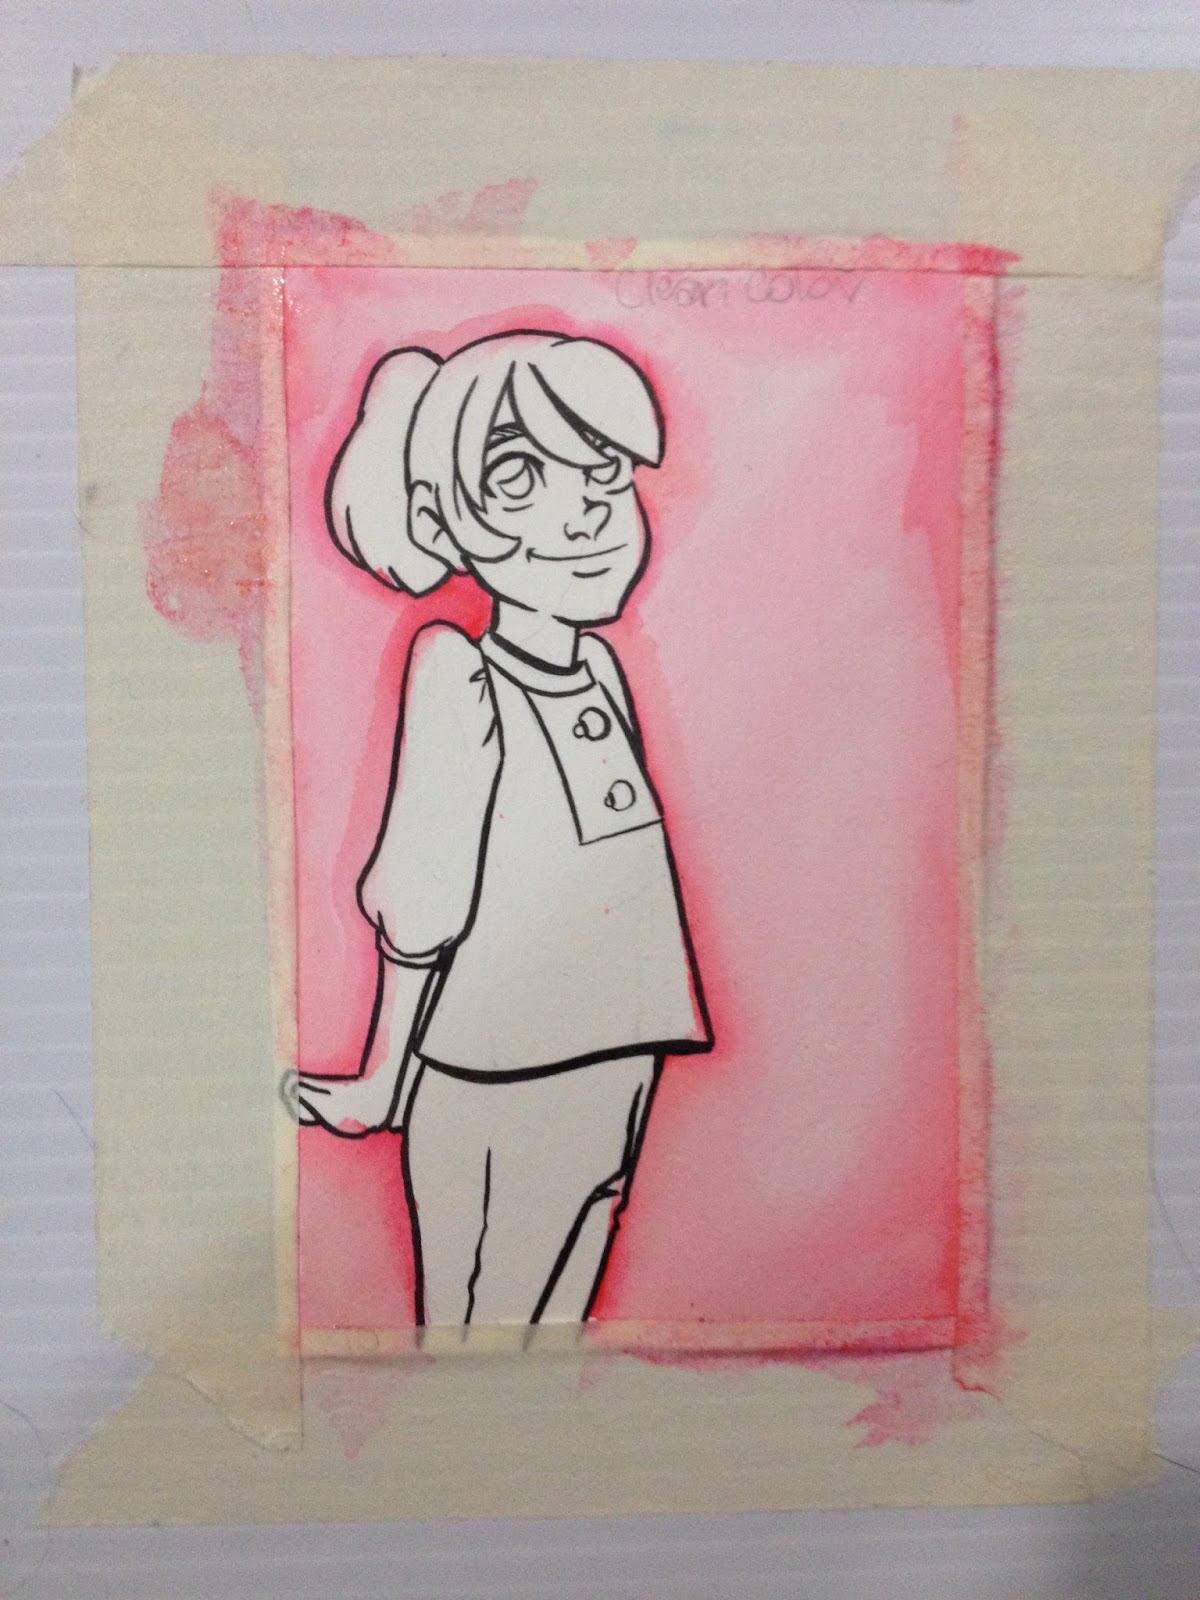
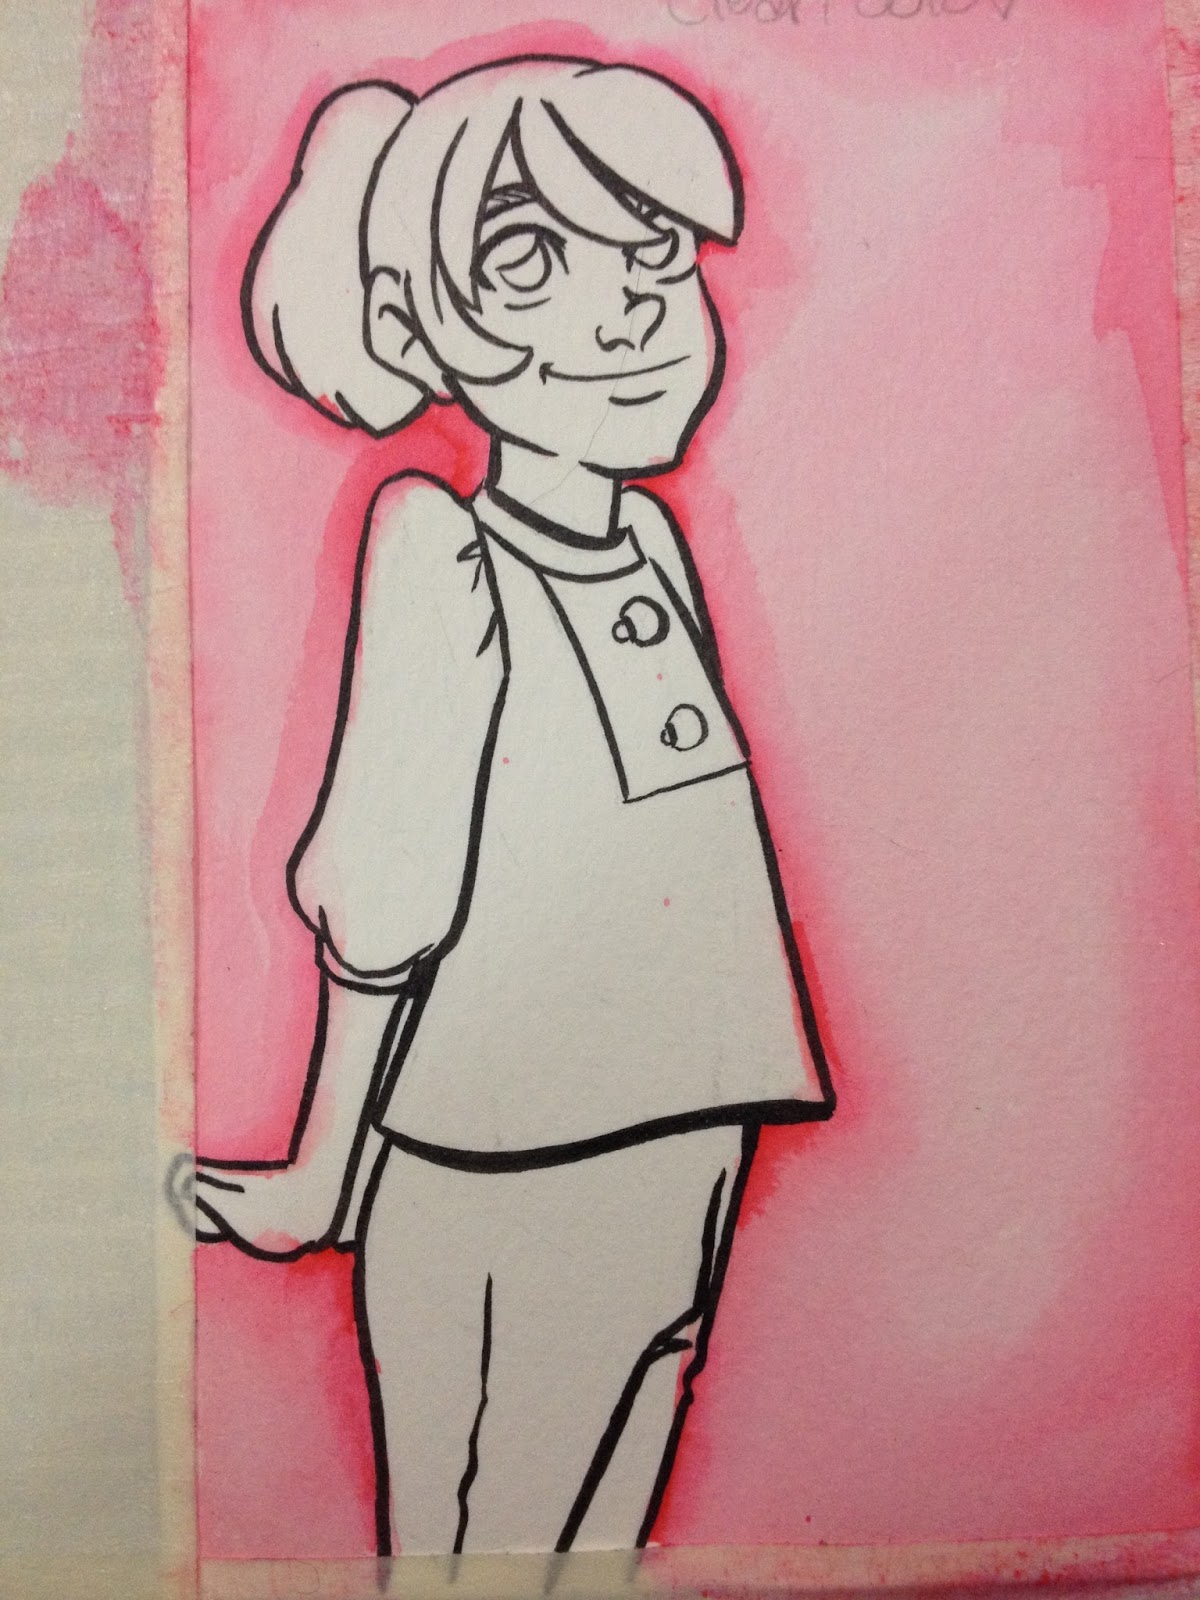
To remedy some of the bluntless of the original application of Light Carmine, I applied color to the edges of my masking tape and used a wet brush to brush it onto my paper. Color dries a lot pinker than it goes on- it goes on a yellowish pink and dries to a blueish pink, almost a hot pink. It took a lot of work to make my initial application of Light Carmine
Coloring the Skin
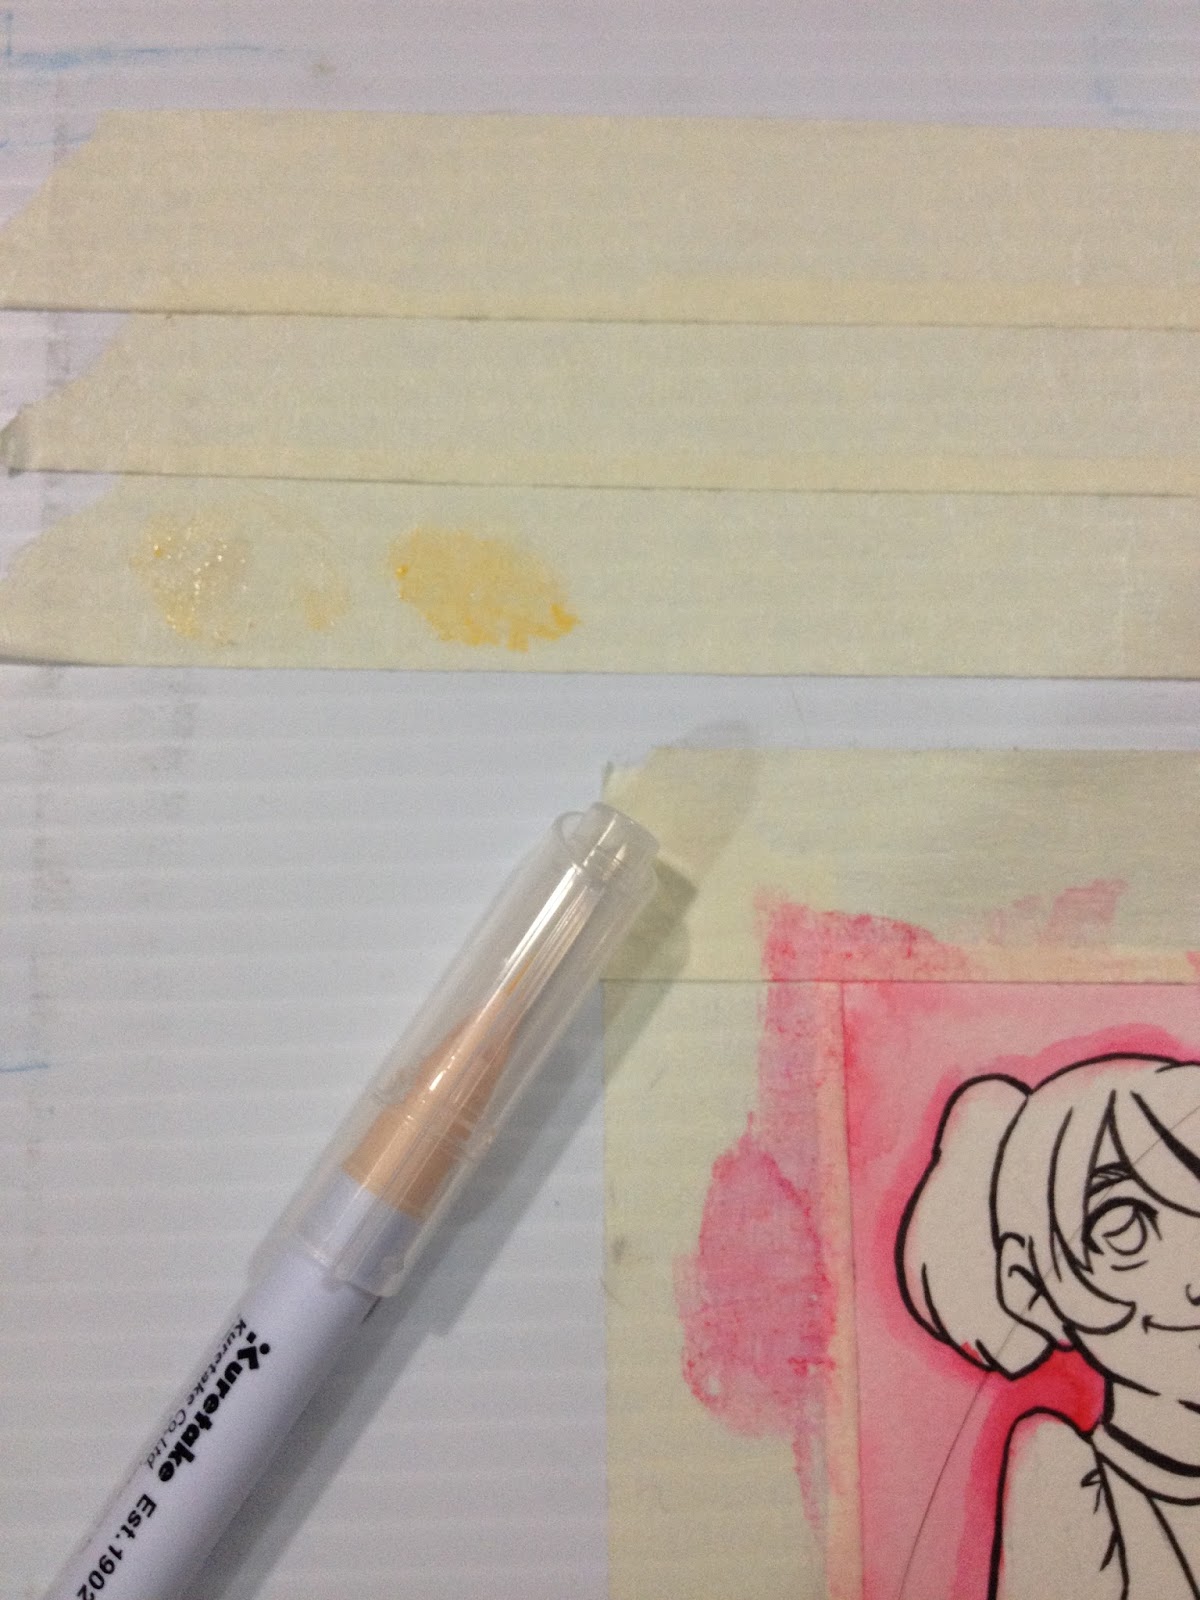
Rather than applying color directly to the paper, I apply it to the masking tape I've set up beforehand.

The dye is mixed with a wet brush, and then applied to the paper. The Zig Clean Color Real Brush pens feature dye that is often too light for this technique to work to it's best advantage.
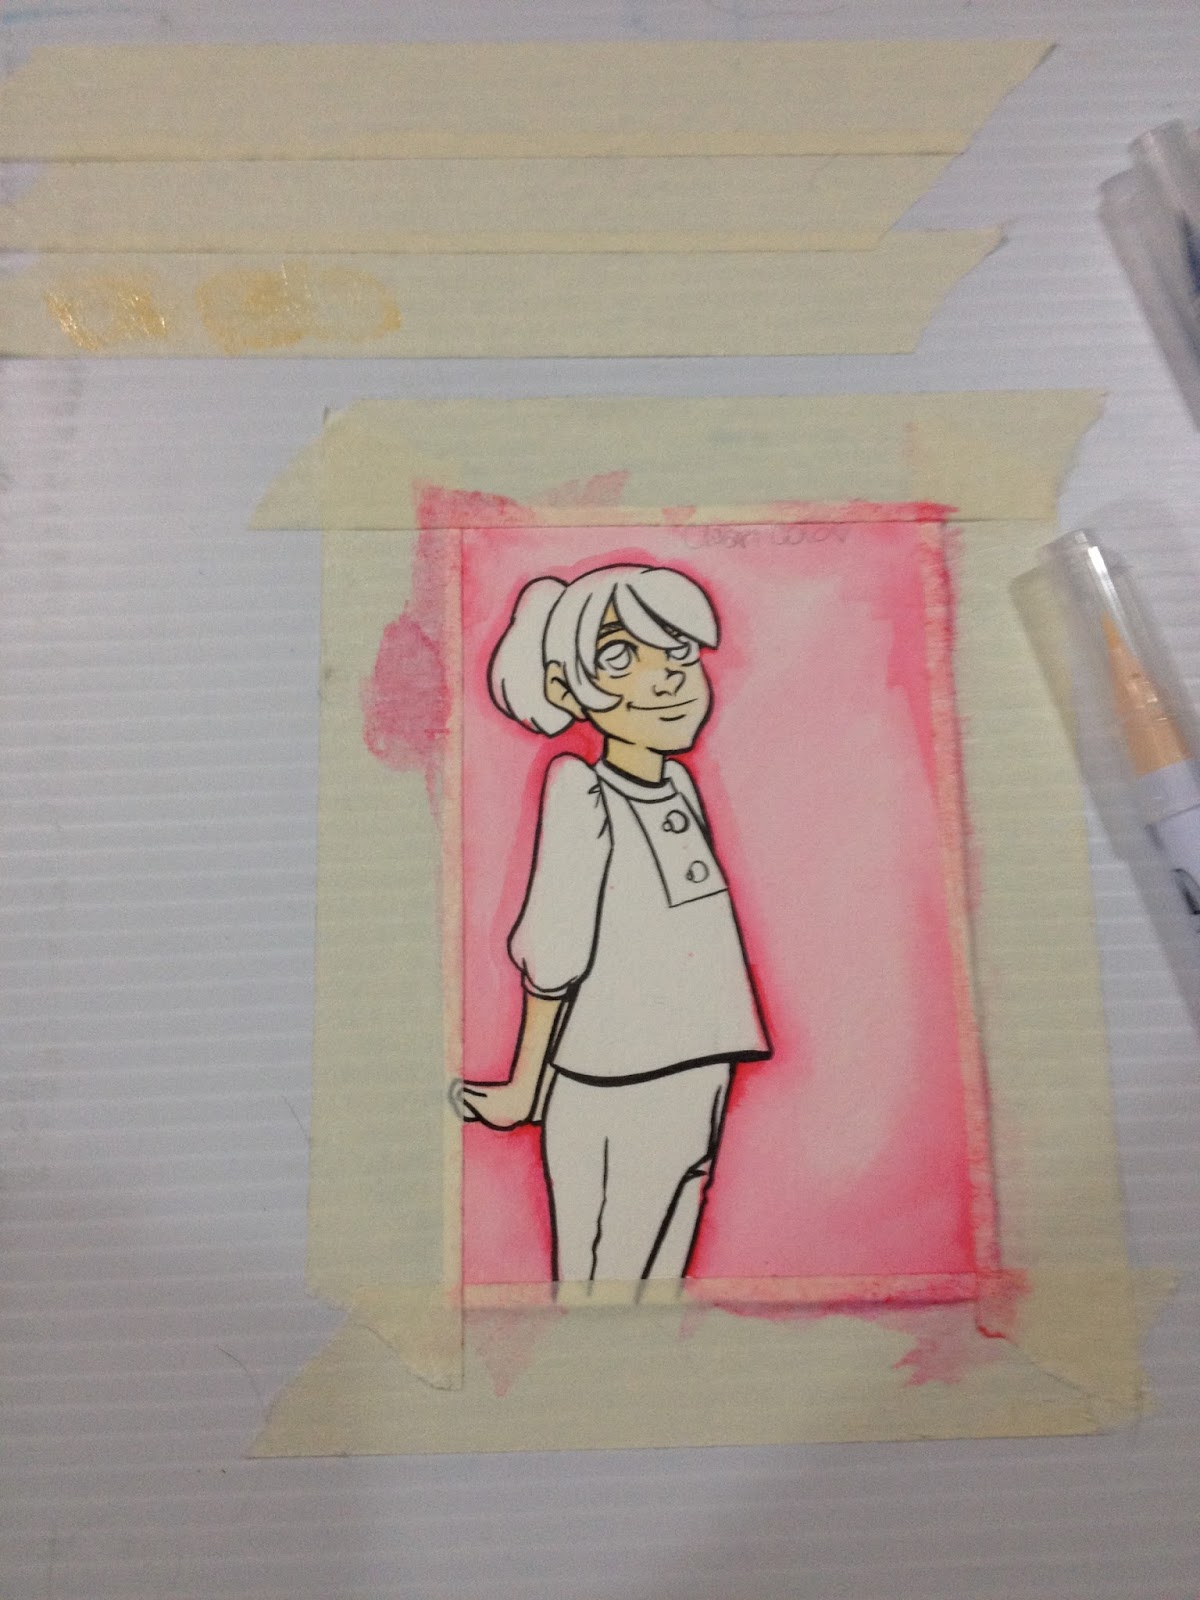
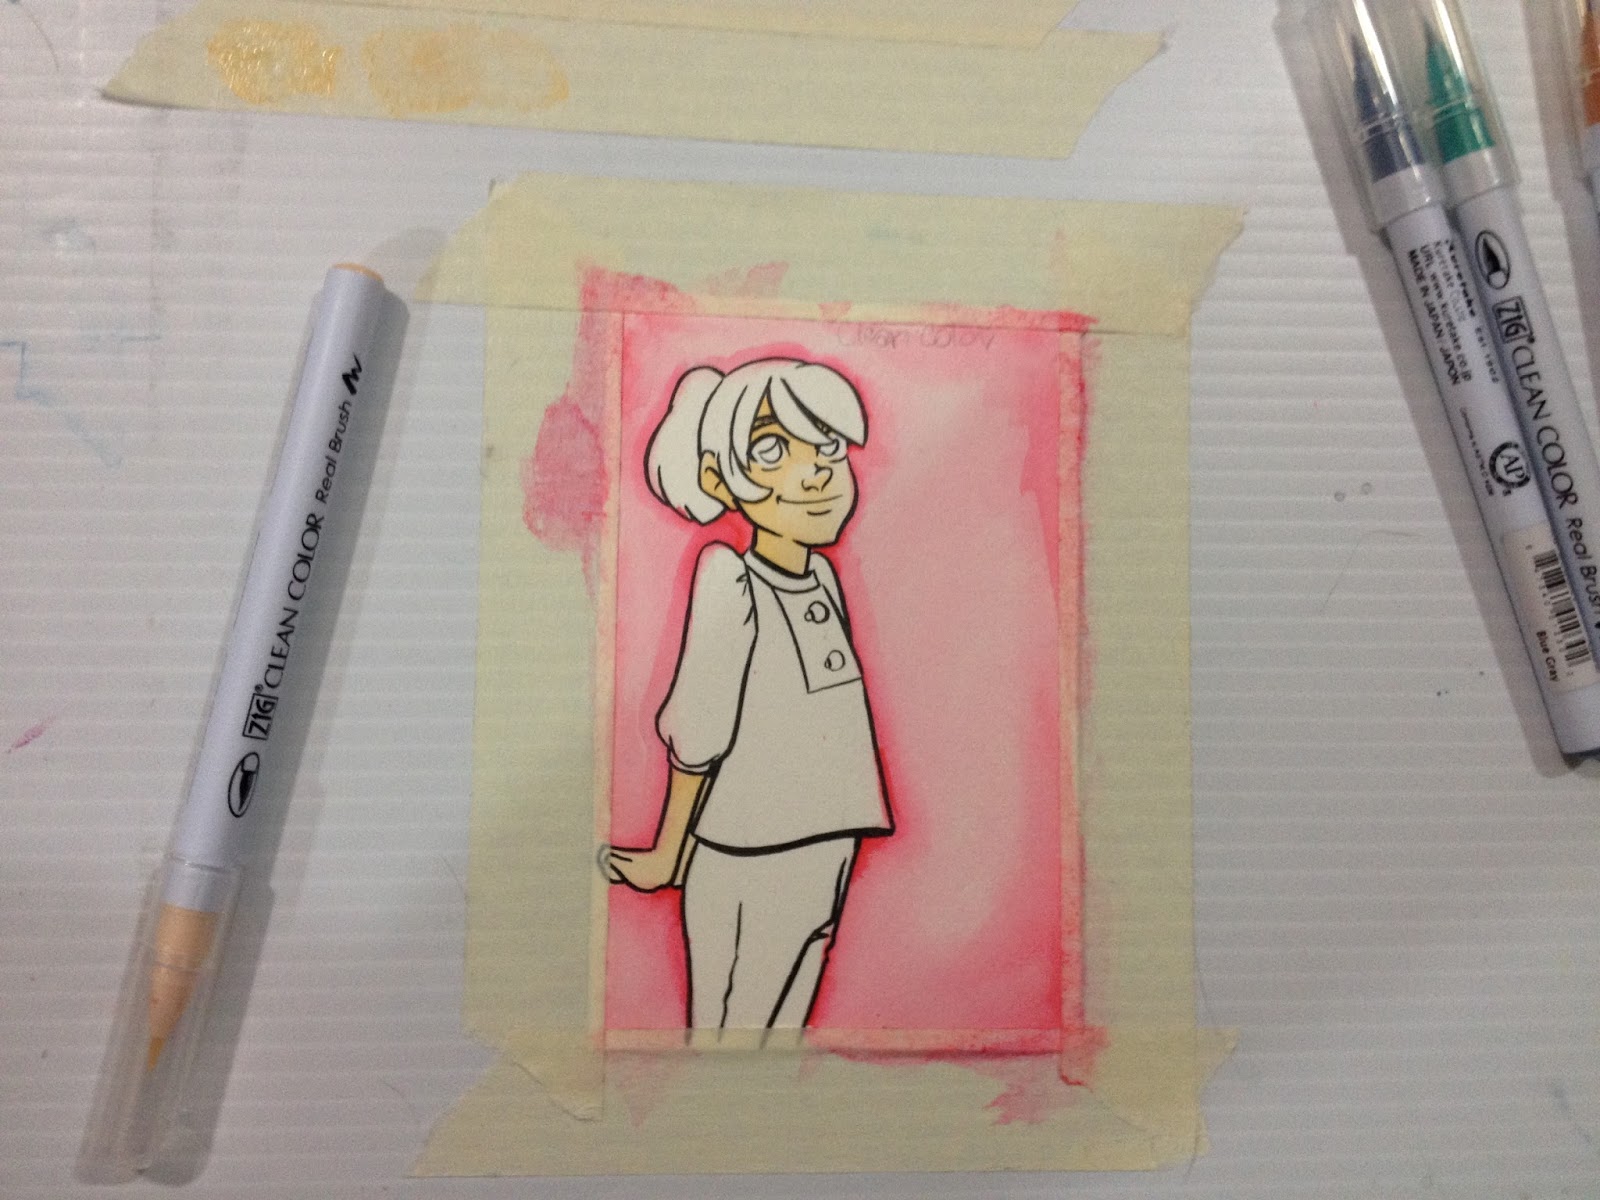
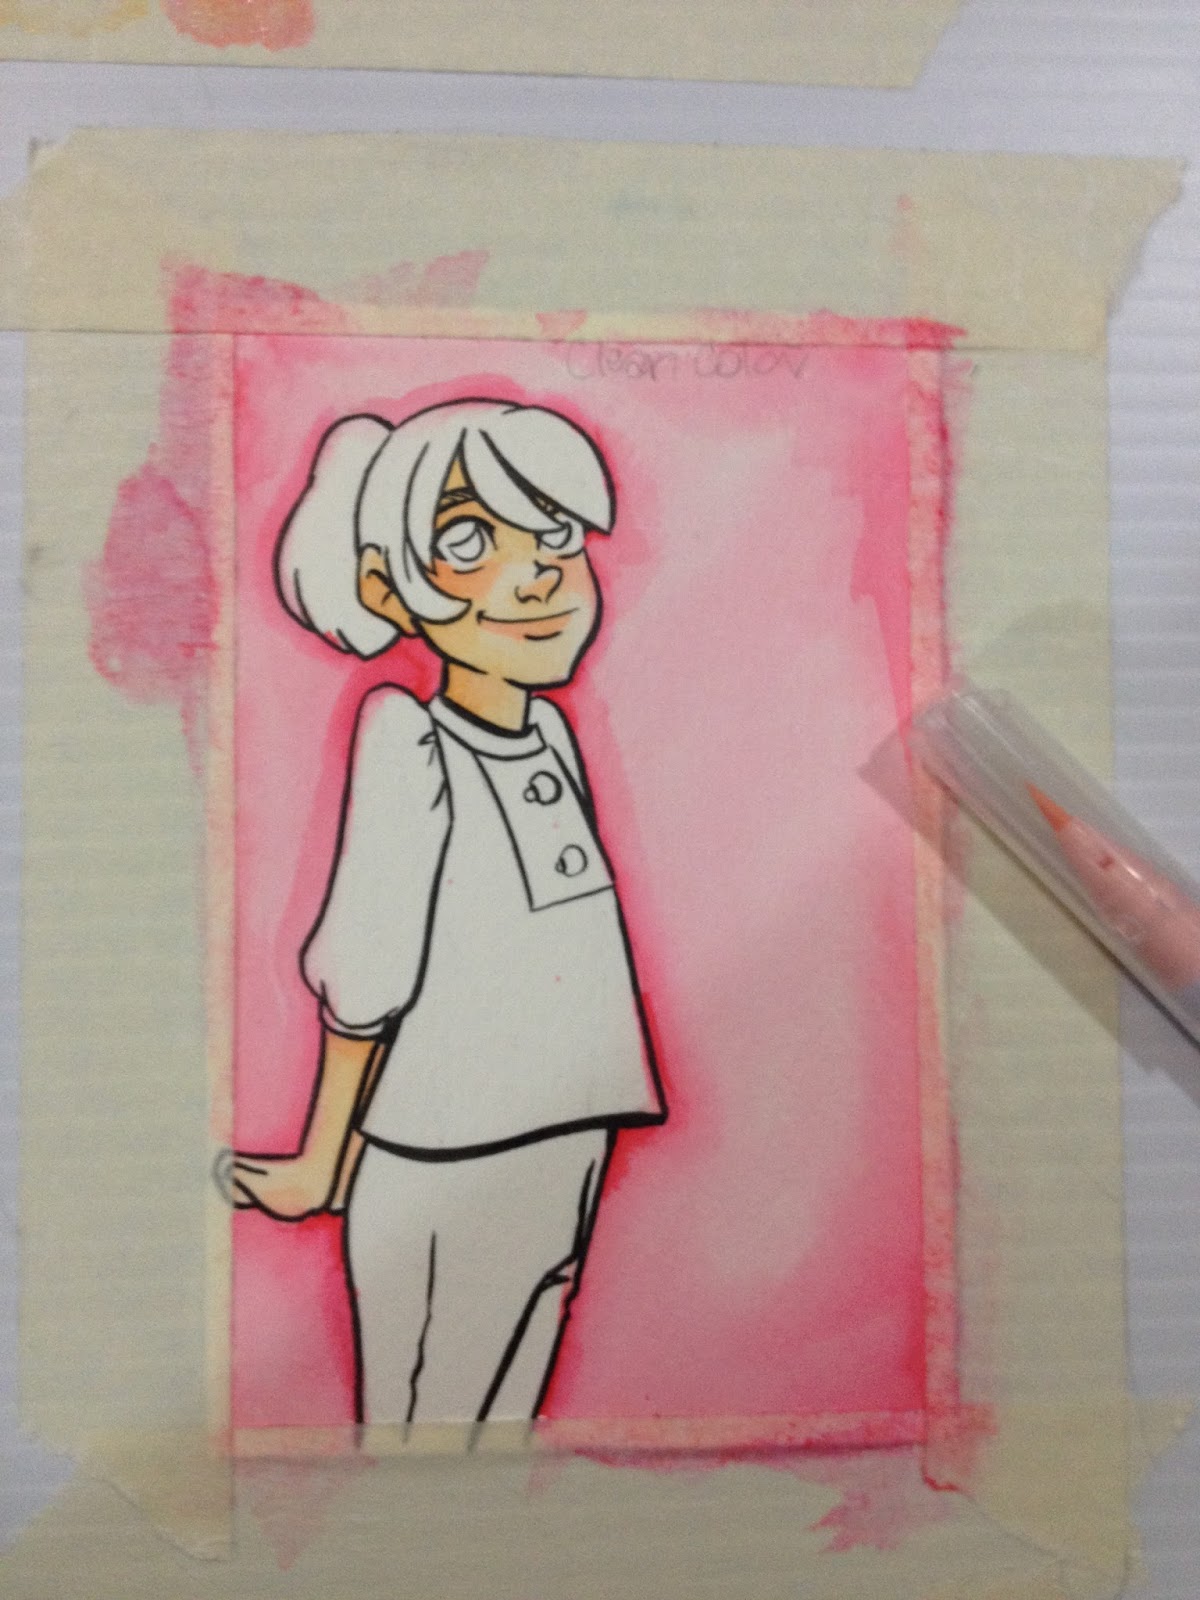
Tea Rose was applied in the same manner, then applied to the lips, nose, and cheeks.
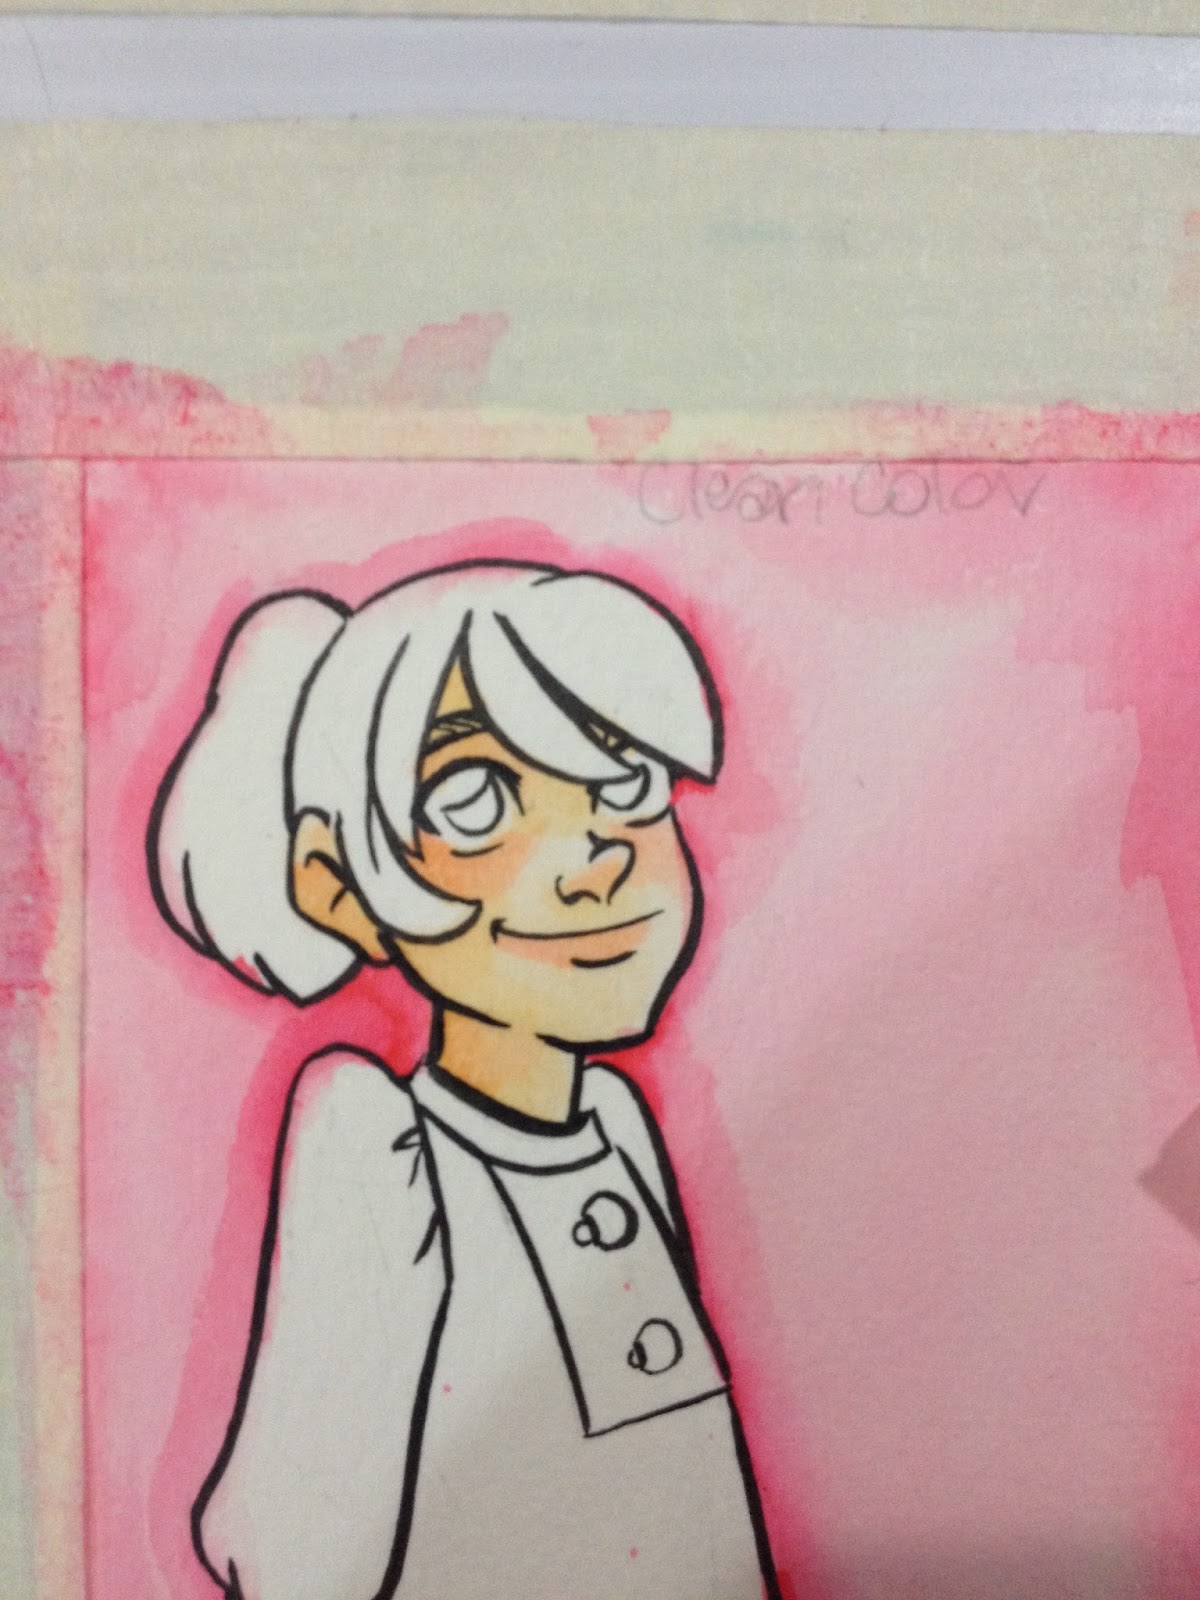
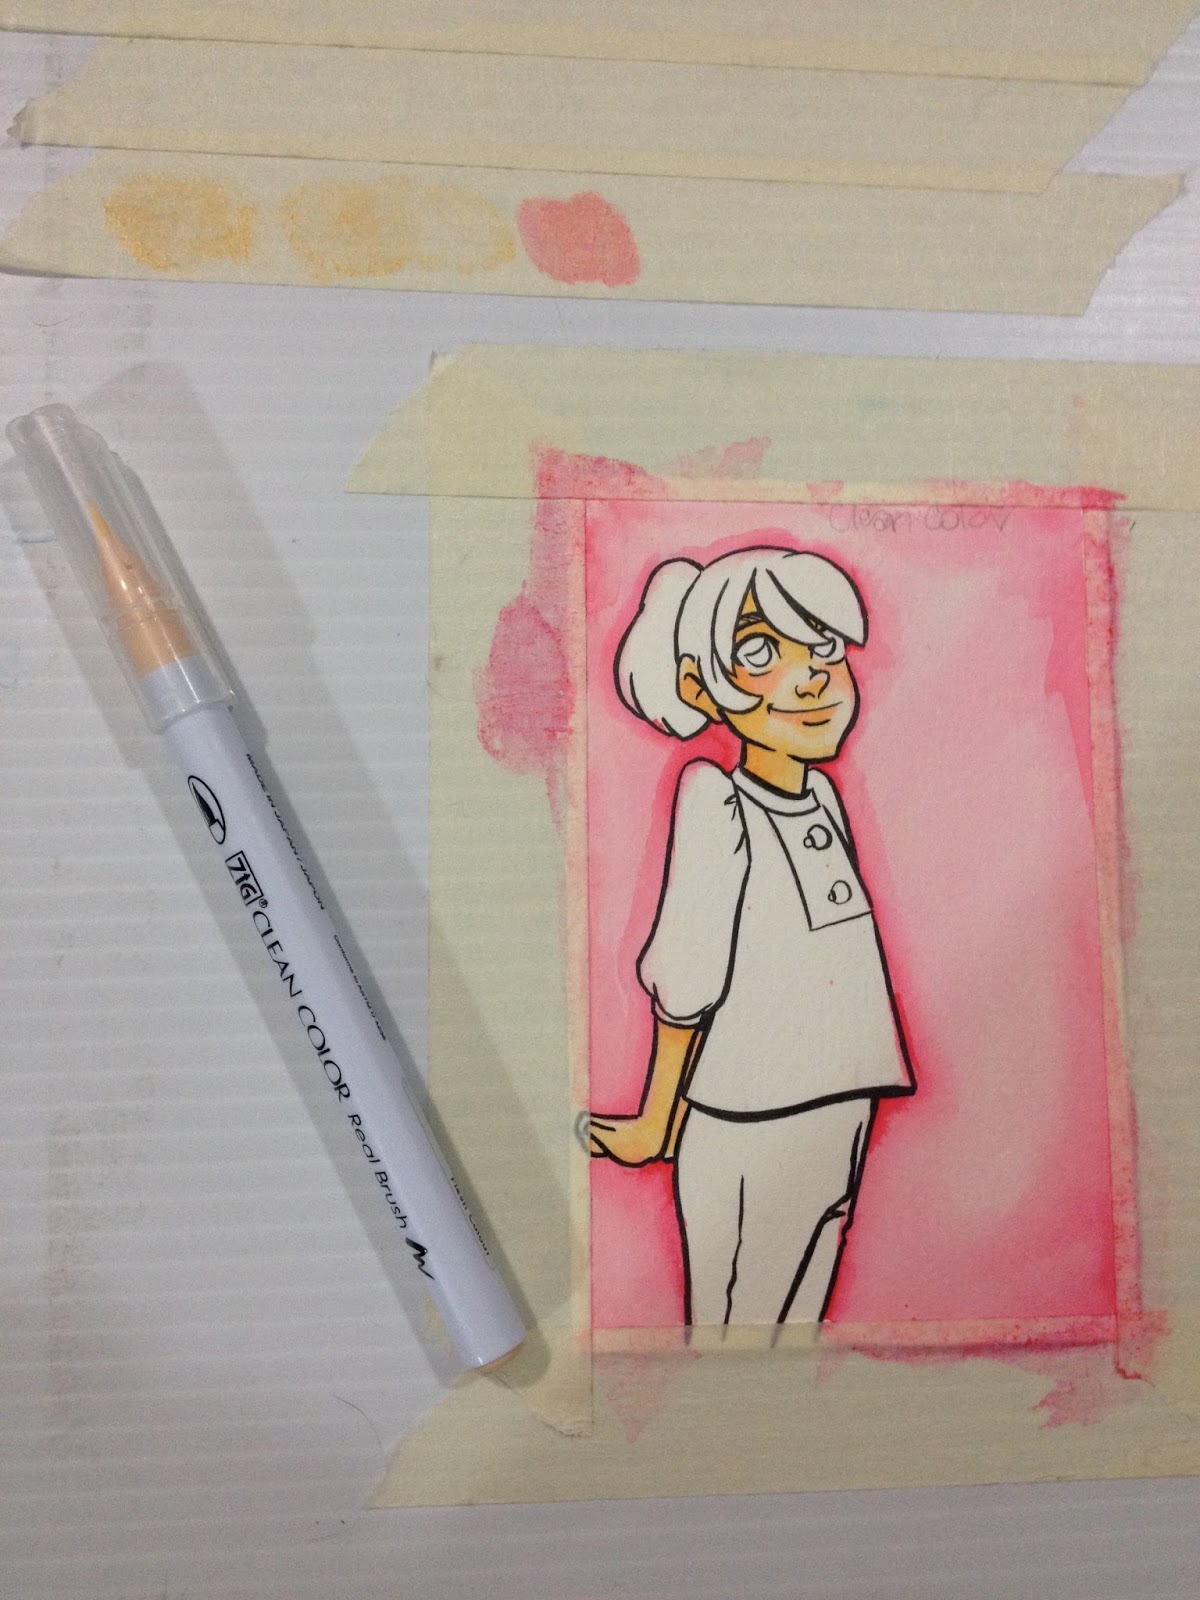
For skin shadows, I applied the final layer of Flesh directly to the paper, and didn't worry too much about getting a smooth blend out.
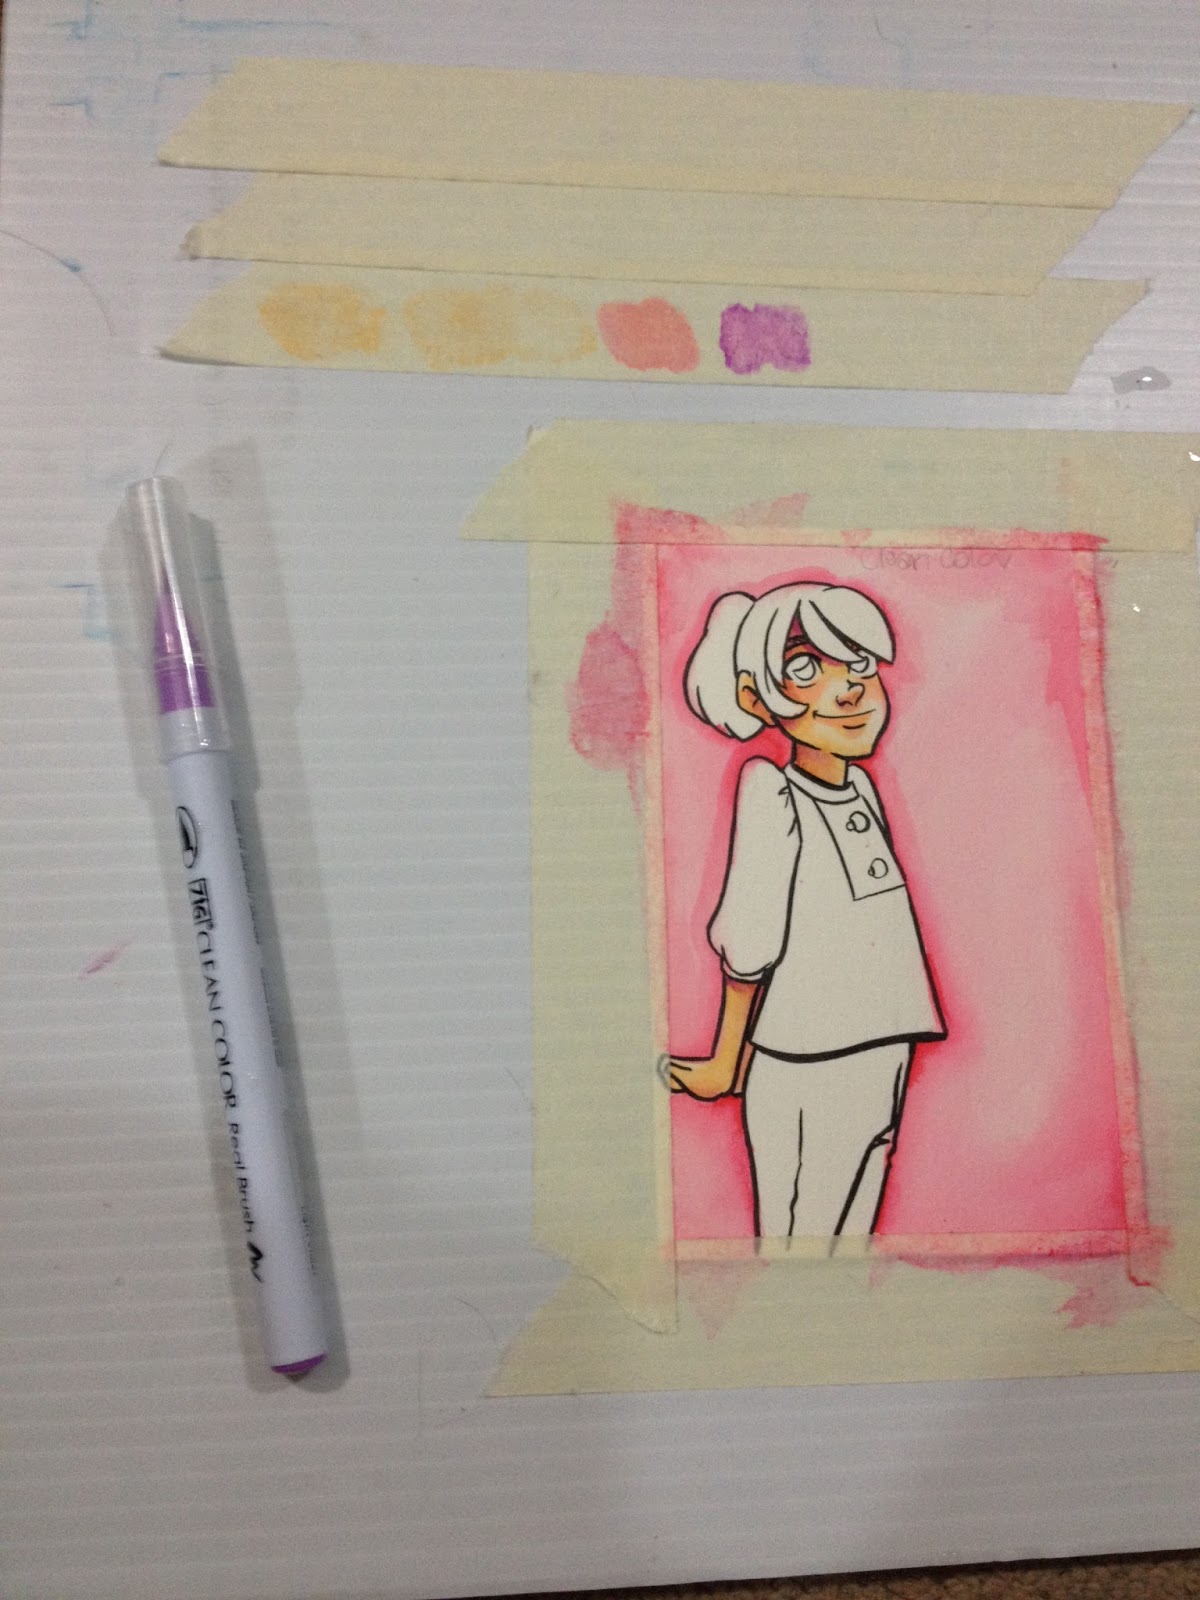
Cast shadows were applied using this light purple applied to the masking tape, and then painted onto the paper.

More shadows were added in Oatmeal, applied to the masking tape, then painted onto the paper.
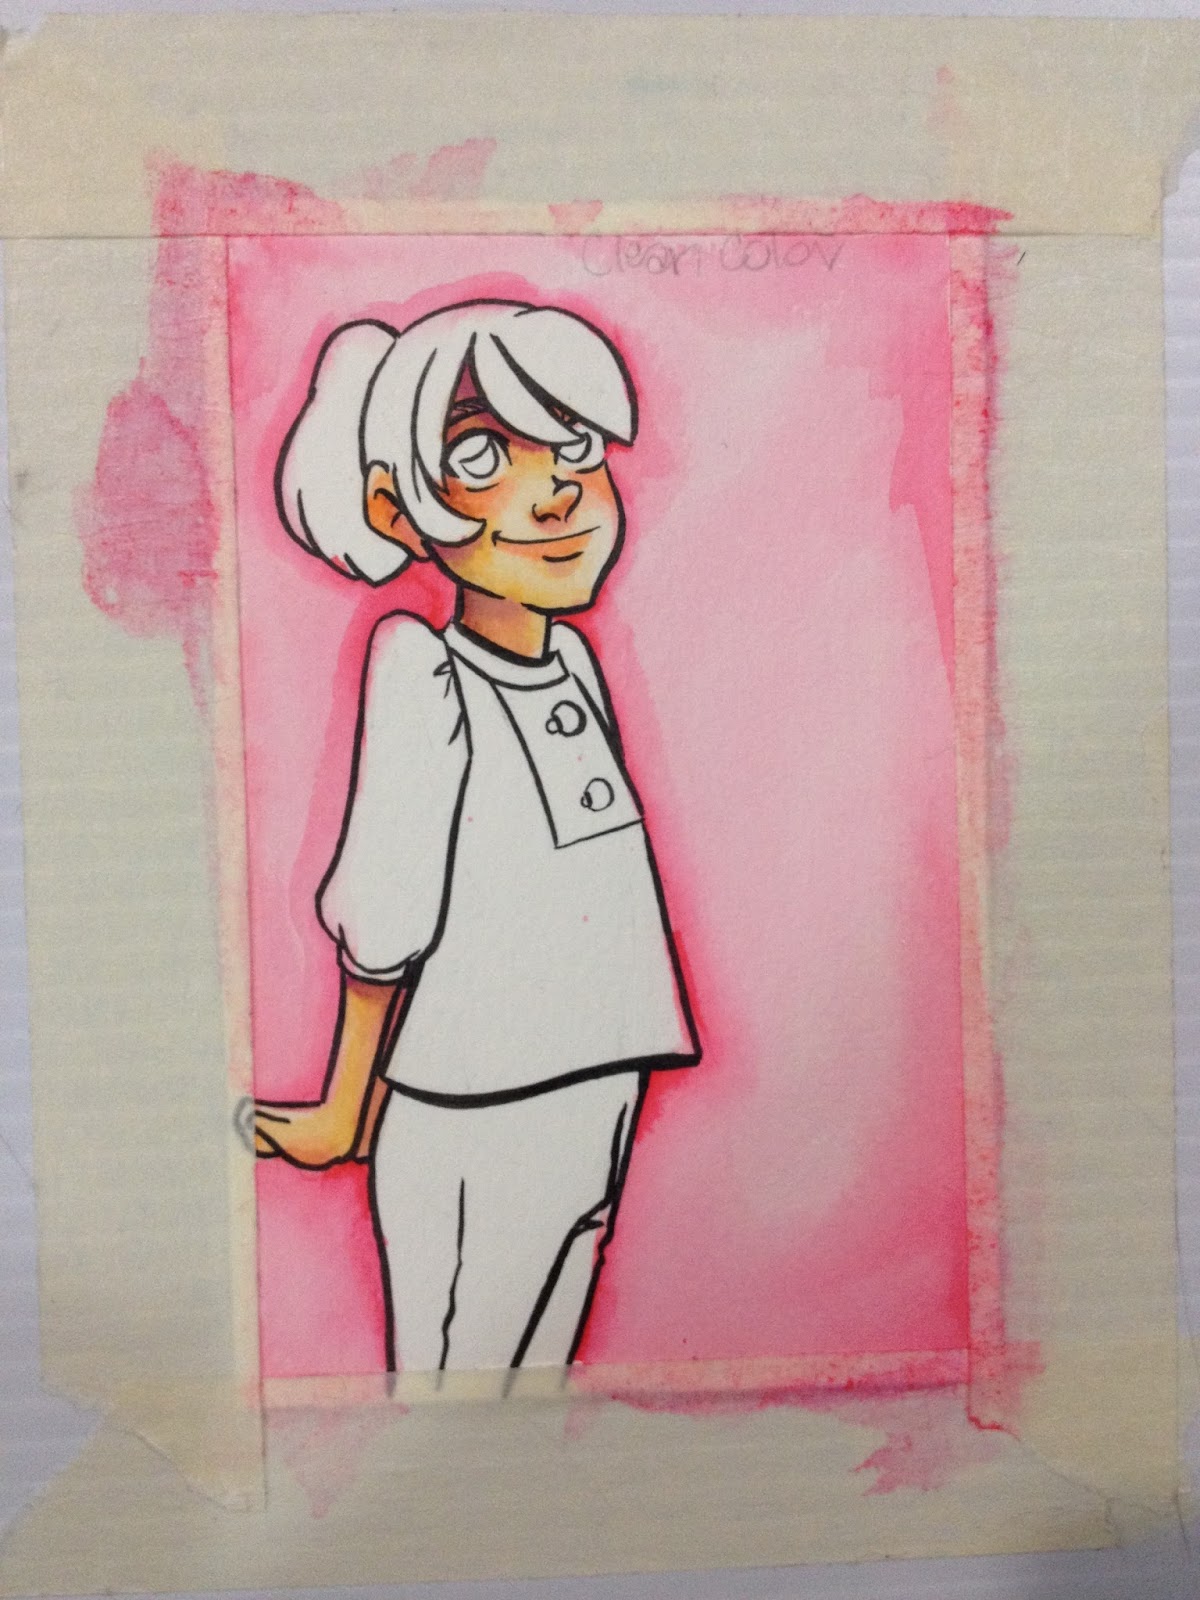
The caps don't snap on as securely as I would like, and seem like they might come off if you threw these pens in your bag. As I feared, indirect application of color (on masking tape, picked up with a wet brush, and applied to the picture) is very light, so it would take repeated indirect applications to build color up enough to match the mark made by direct application.
Rendering Hair
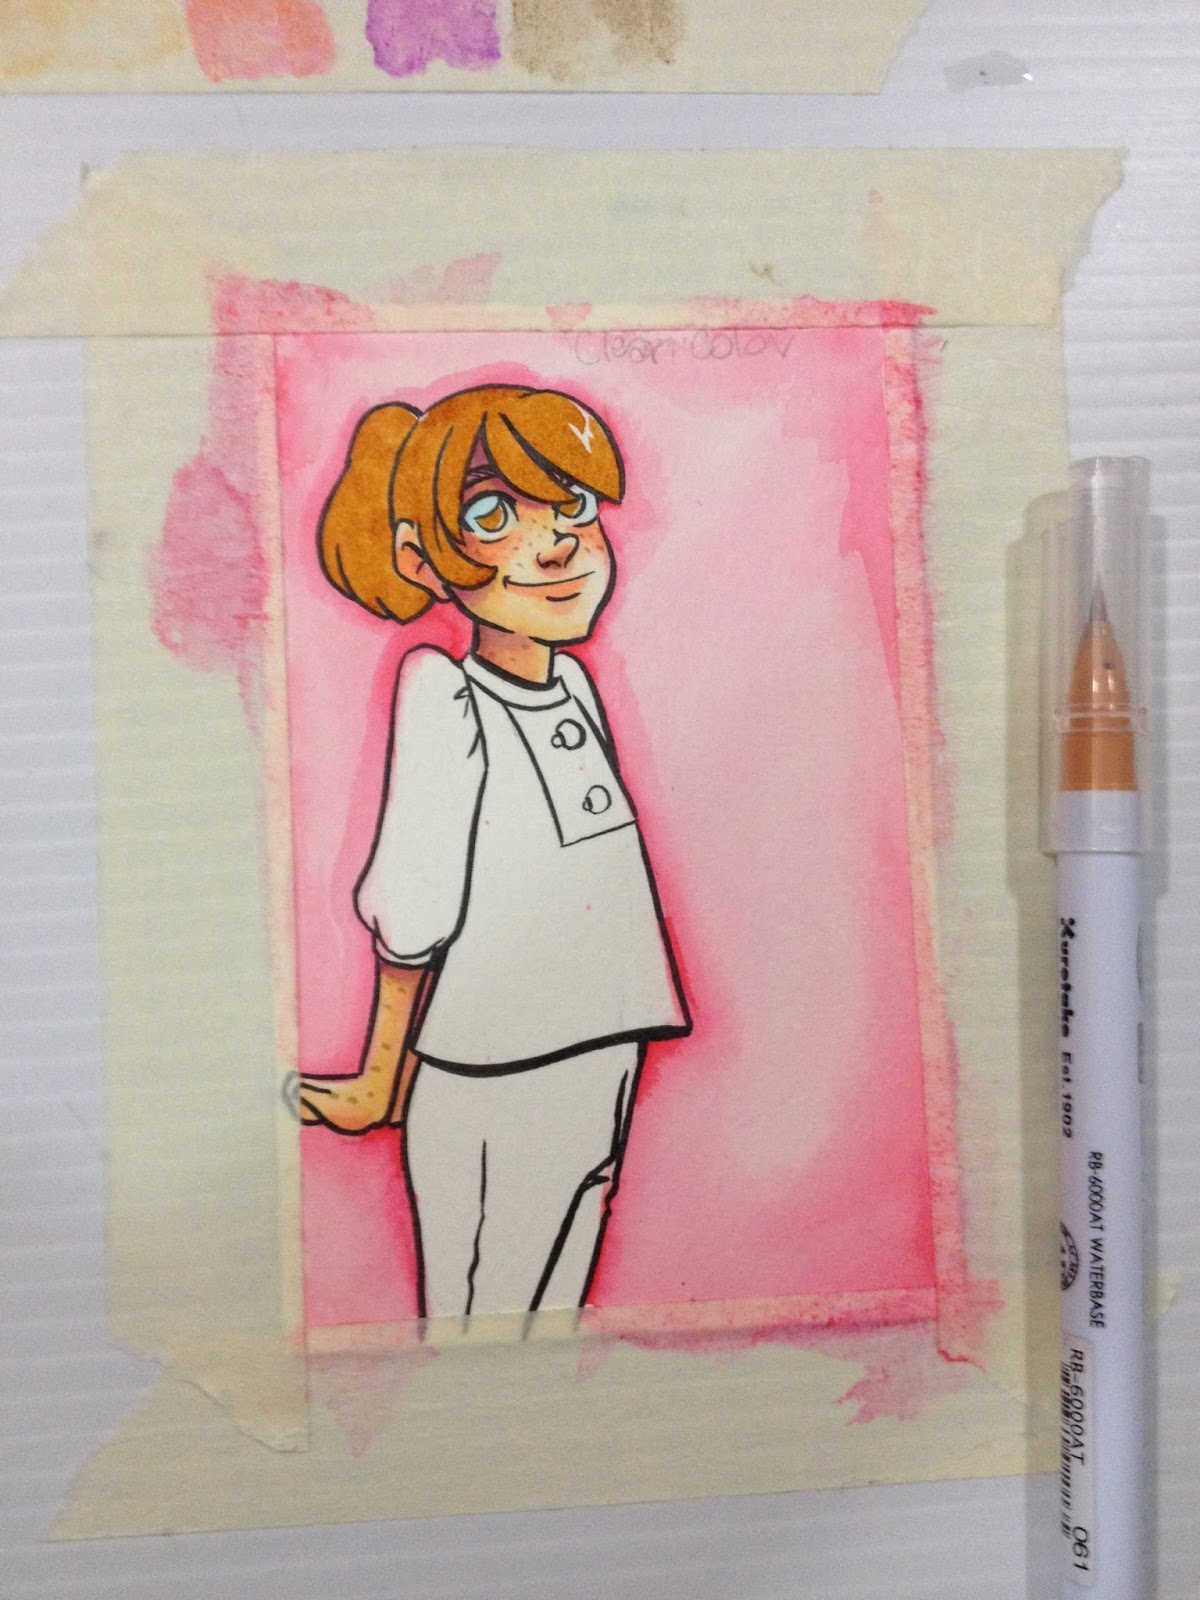
Kara's hair was rendered through direct application of marker to paper. Because the Clean Color Real Brush has real bristles, its able to pull really sharp details, like the highlight in Kara's hair.
Rendering Clothes
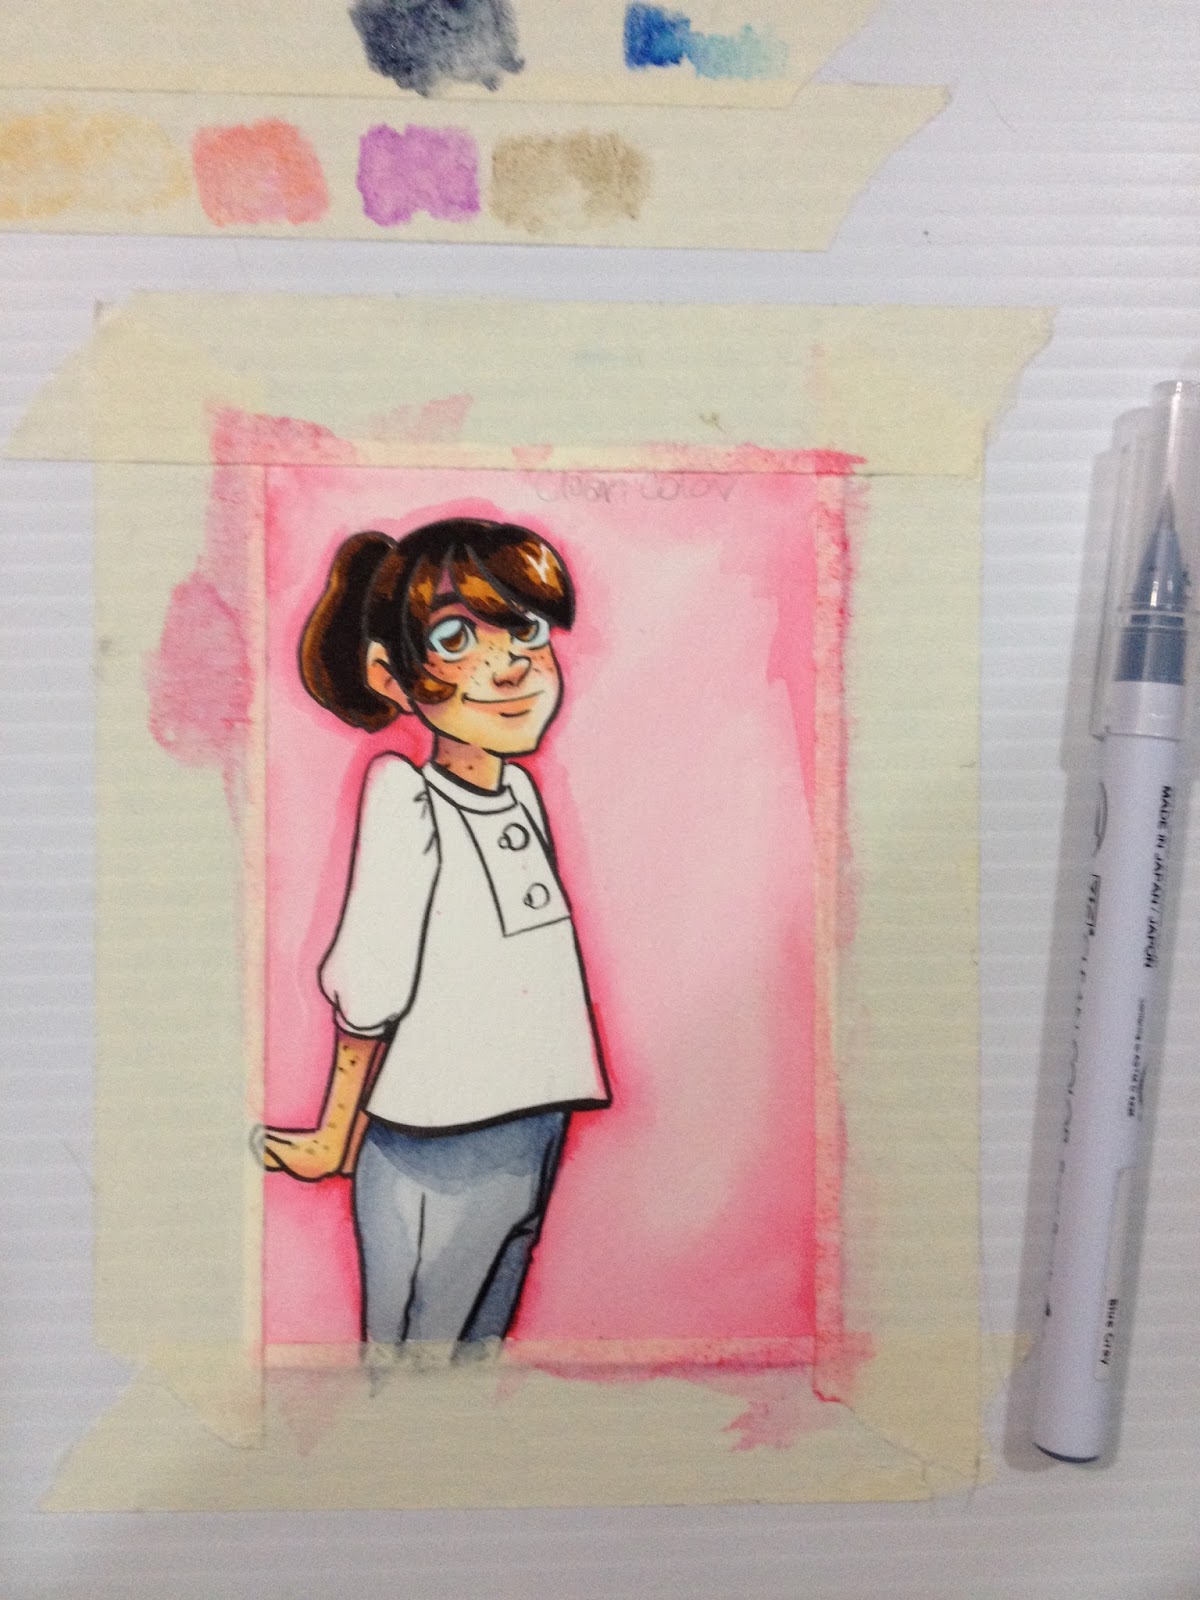
Direct application- hair. These work ok as traditional markers- the bristle tip keeps these pens from abraiding the paper, and are flexible enough for nuanced strokes, something that traditional waterbased (not necessarily watercolor, however) markers fall short on. I think this application is where the Clean Colors really excel- the bristle nib is more flexible and finer than the dense foam 'super brushes' on watercolor markers such as Tombow ABT, Zig Art and Graphic Twin, or Marvy LePlume II.
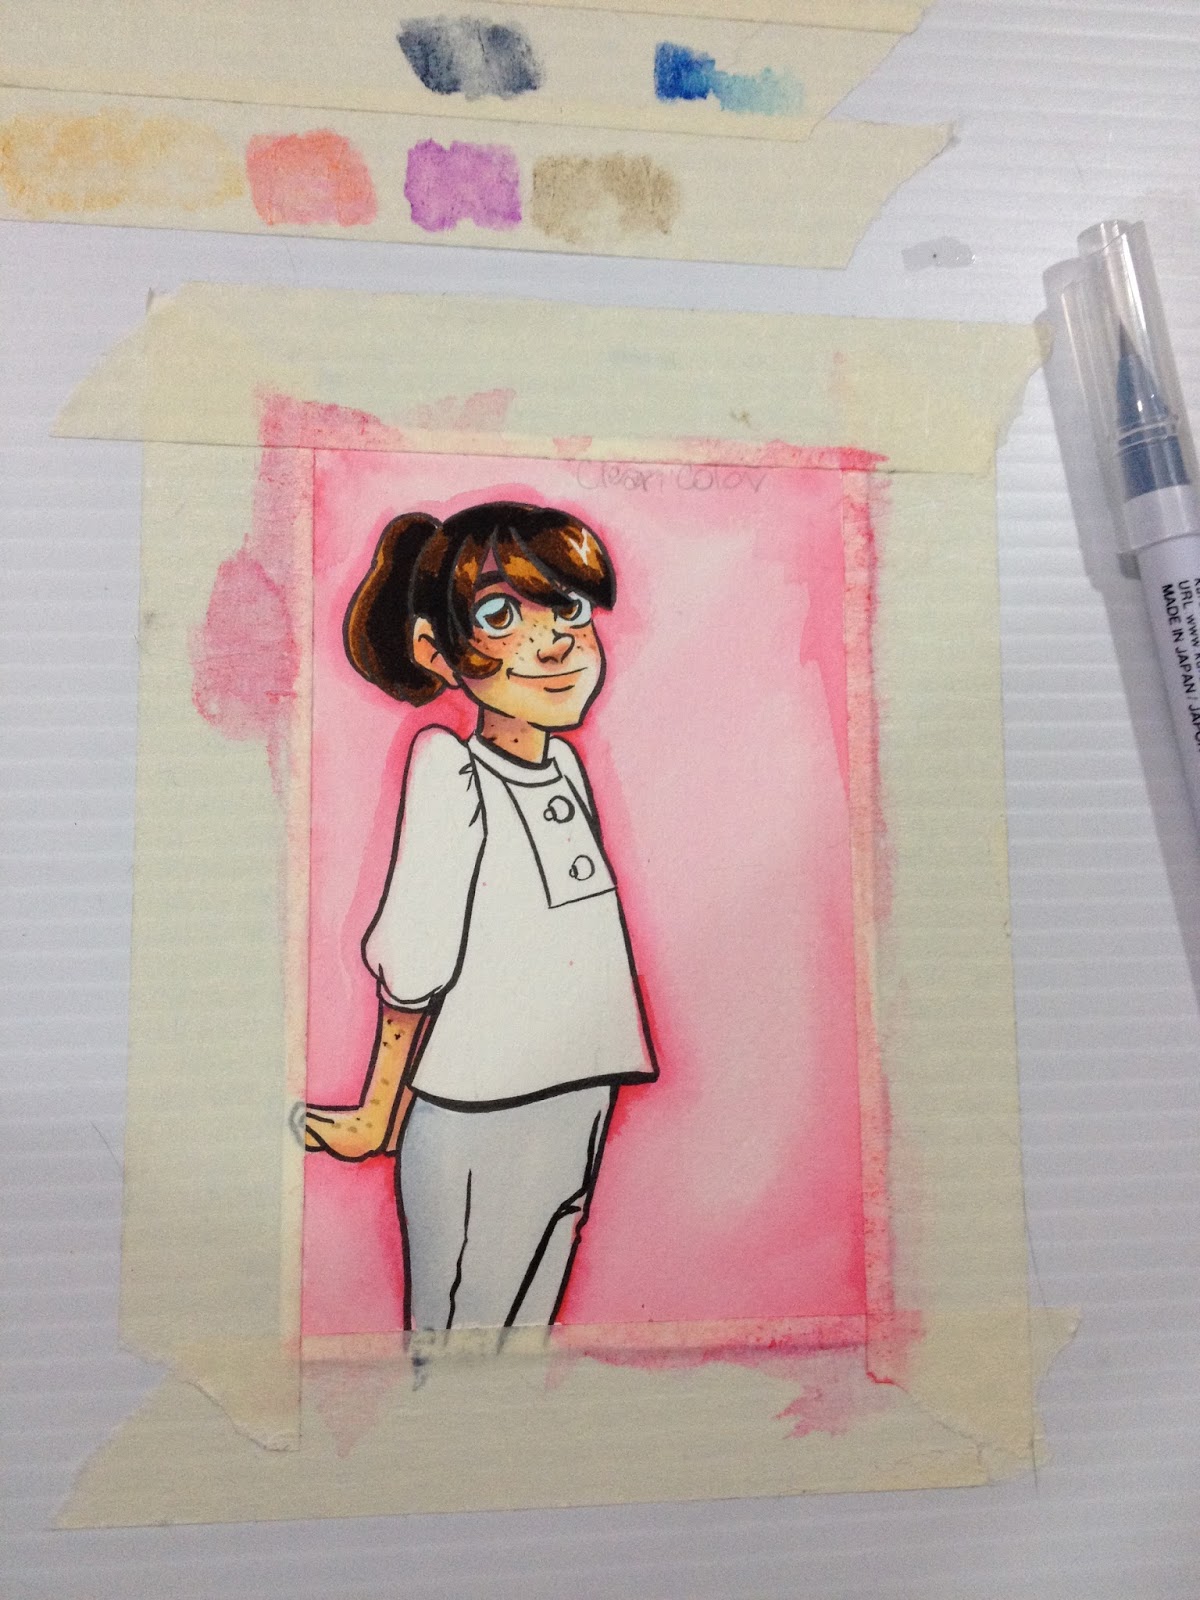
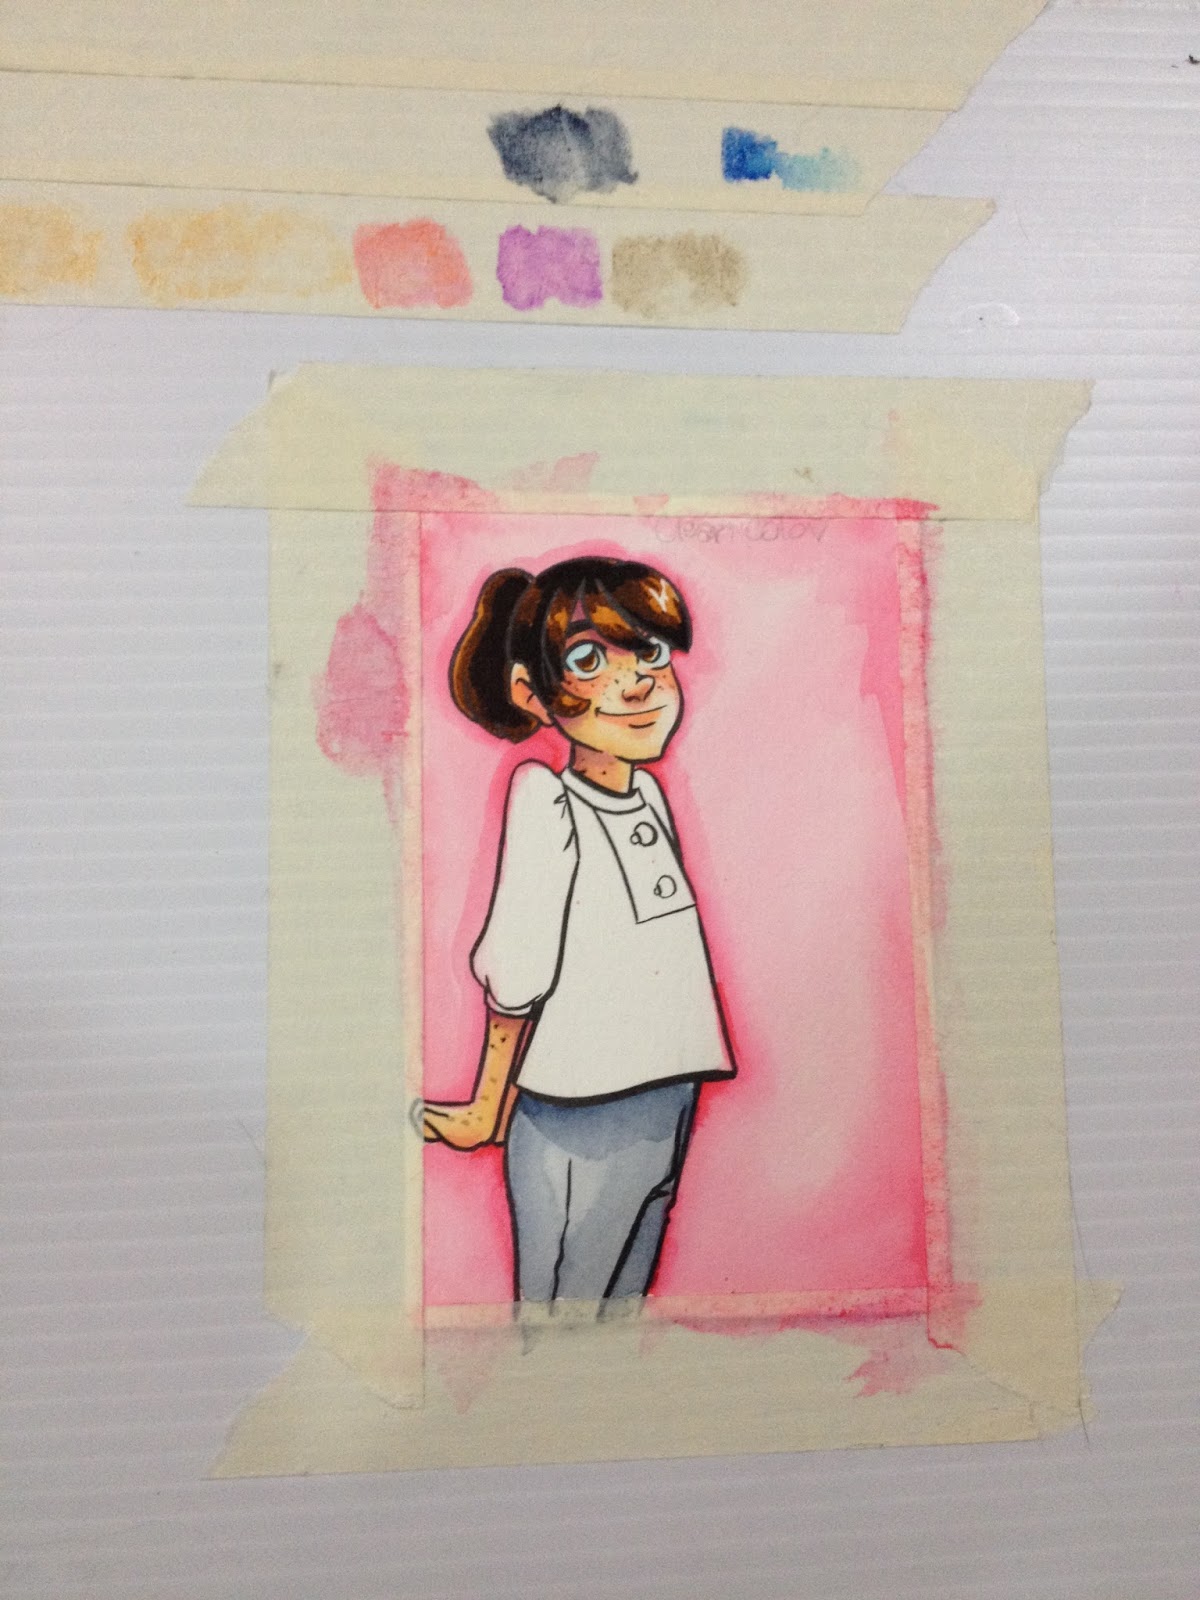
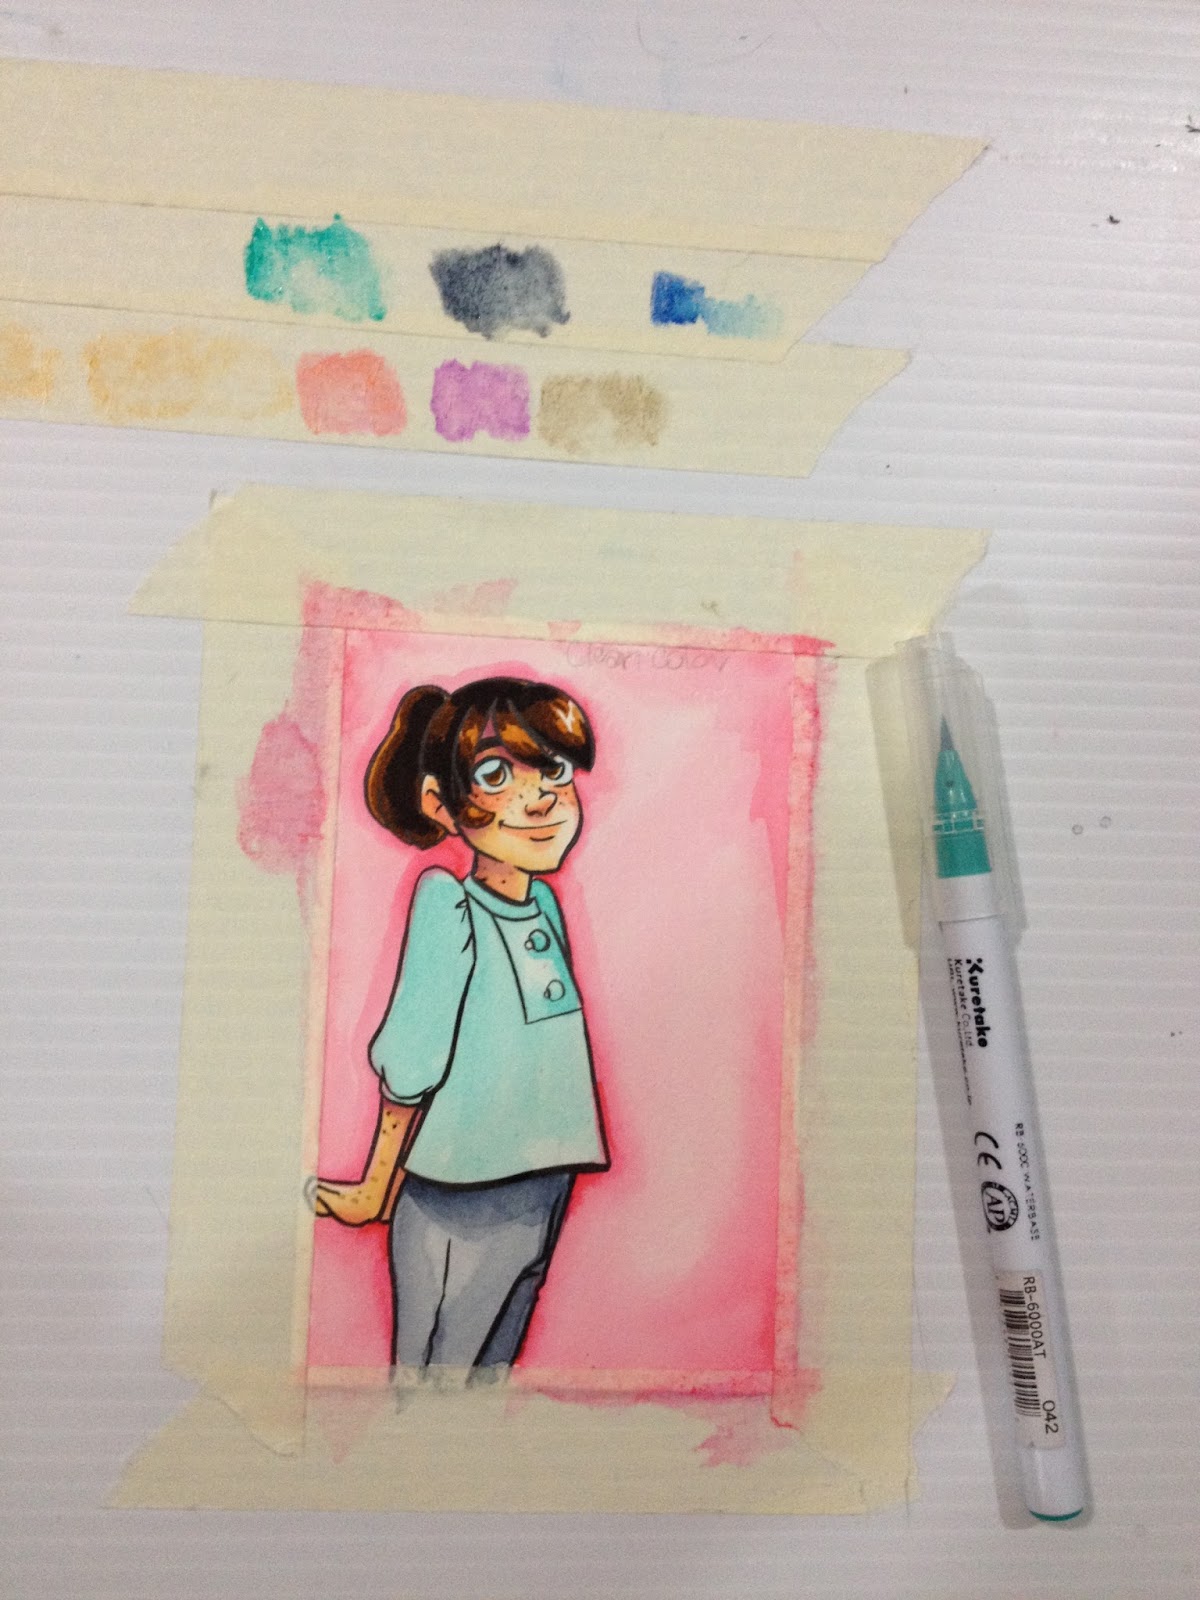
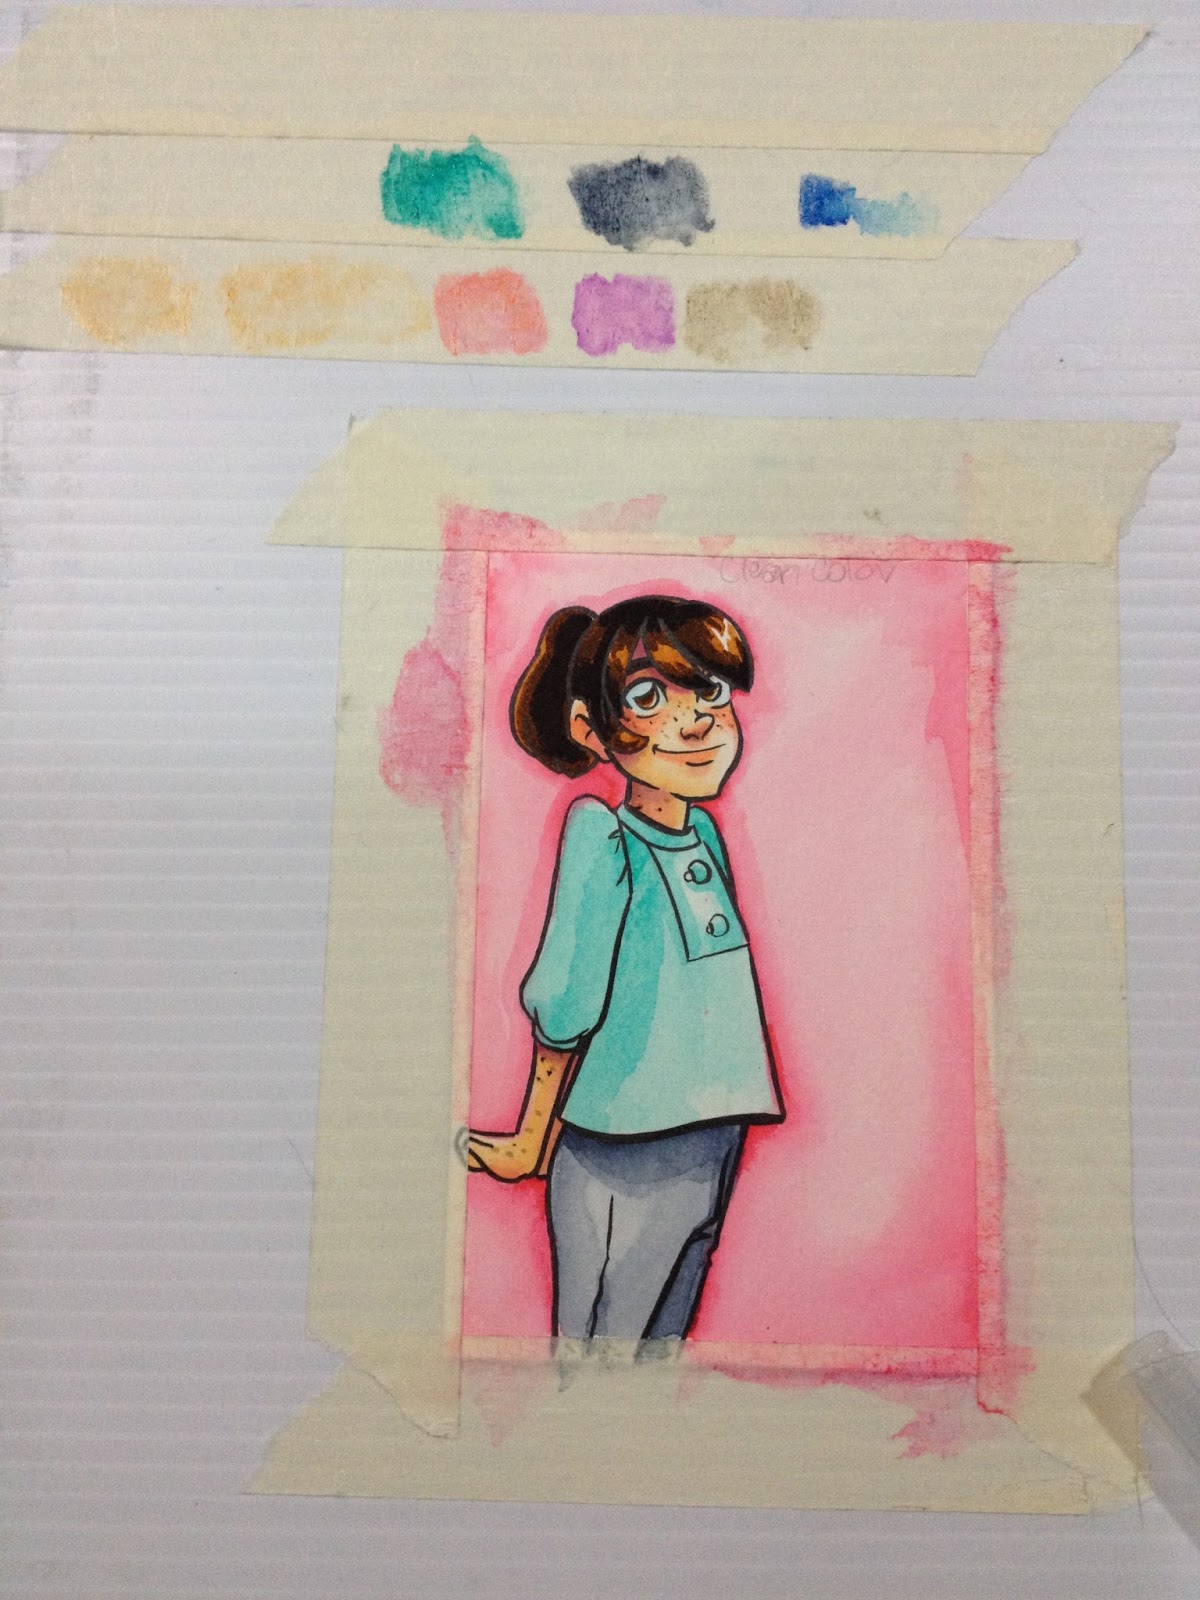
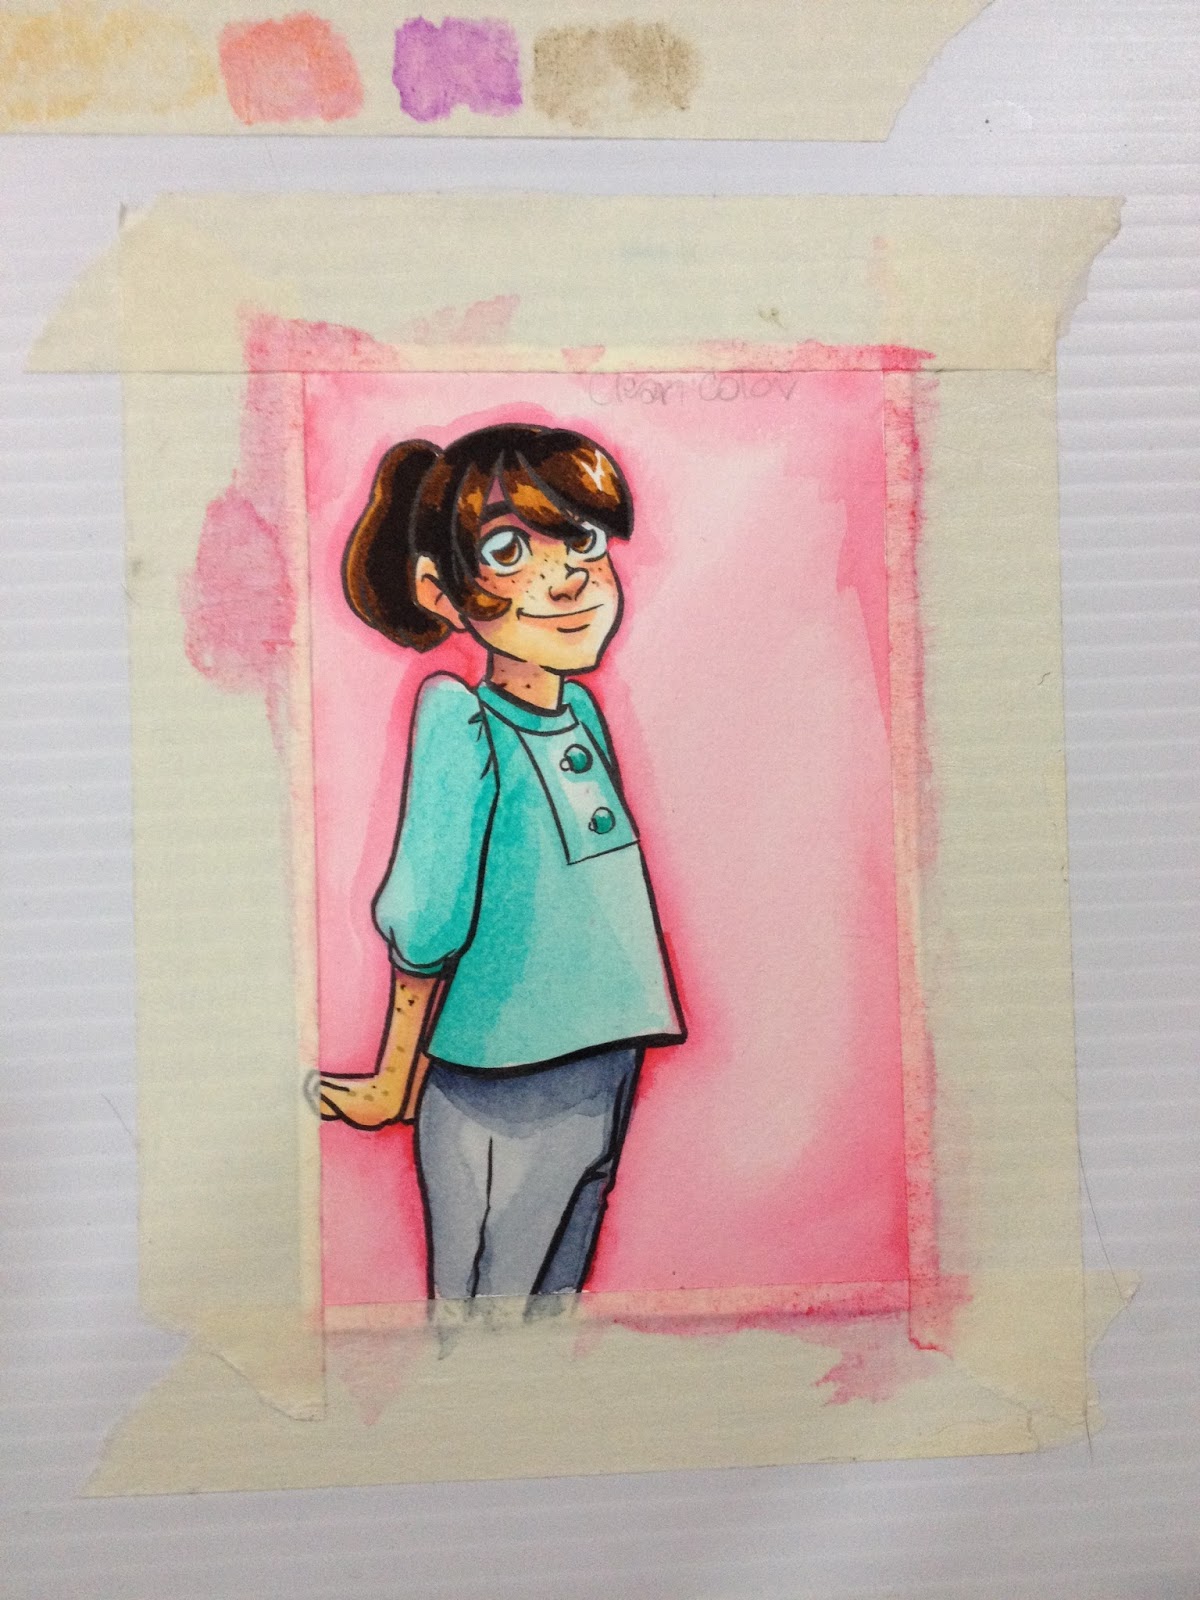
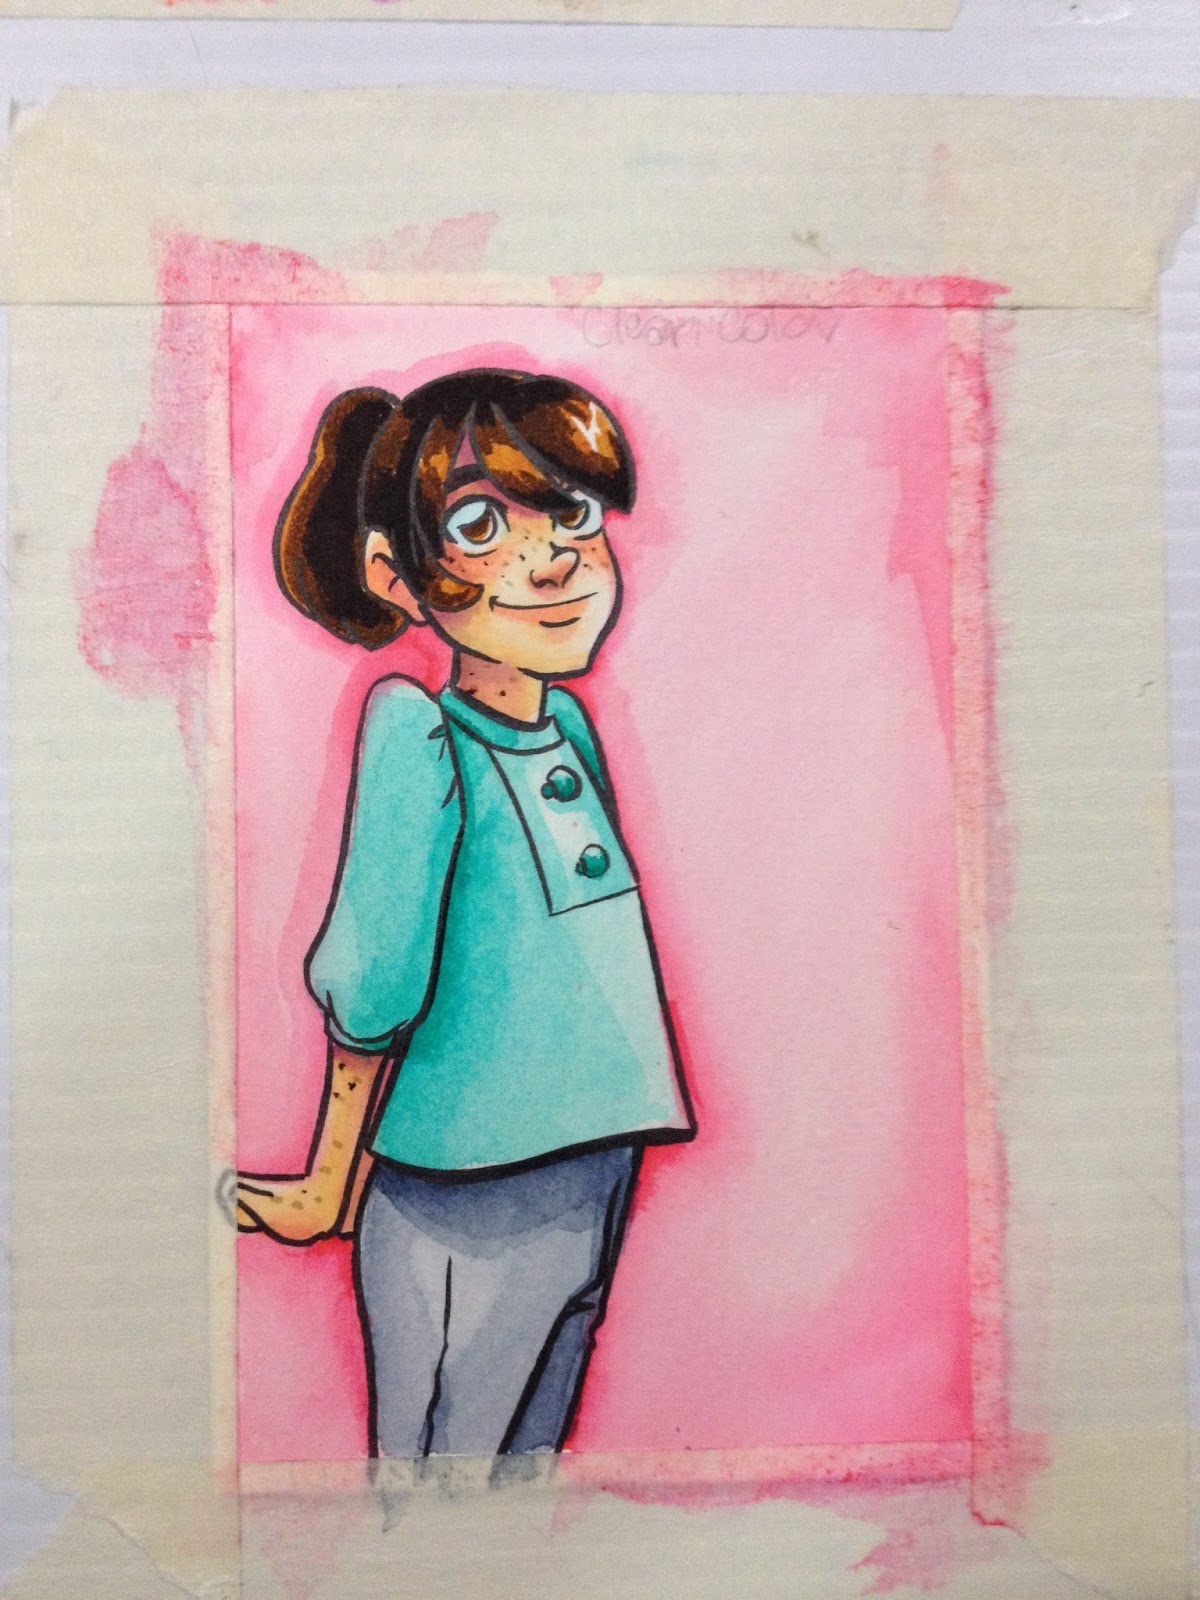
The Verdict
With so many watercolor markers to choose from, and some waterbased markers performing just as well as much more expensive watercolor markers, it's a little hard to justify purchasing Zig Clean Color markers, especially if you already own other watercolor markers. If you're looking for a particular effect, like the ability to render hair crisply, its a much easier argument to make. A handful of curated Zig Clean Colors will by no means break the bank, and can be a useful addition to your collection.
If you're purchasing these markers to use as a substitute for markers designed to be used with water, you're better off just purchasing Winsor & Newton watercolor markers, Docrafts Artiste Watercolor markers, or Zig Art and Graphic Twin markers, because those will react with water in a predictable way. You can even purchase Crayola Supertip waterbased markers and use those with a brush and a side palette
What's most surprising to me is how popular these markers have become recently, when they've been on the market for years, and haven't changed much. When I ordered more markers for this review from MarkerPop, I had to wait a month and a half for MarkerPop to get another order from Zig, and even with waiting, several of the colors I ordered never came in, and were canceled from my order.
By watching through some of the videos I've linked at the bottom of this post, I've realized that the paper you use makes a huge difference. It seems that on certain cardstocks, you can use these waterbased markers for immediate blending techniques without needing to pull out a blender marker, techniques that work well on these cardstocks but falls short on watercolor paper. At a later date, I may revisit many of my waterbased watercolor markers on Strathmore's plate bristol, and see if my opinion changes any.
Still Want Your Own?
You can order a set of Zig Clean Color watercolor markers AND help support this blog by ordering your markers through my Amazon Affiliates search link at the top of this post, or by ordering from the Amazon carousel below. Your support helps me purchase more supplies to review, provides a financial reward for the hours spent reviewing products for your entertainment, education, and benefit, and gives me an incentive to keep updating this blog with more useful content. If you aren't interested in your own set of Zig Clean Color markers, you can help support this blog by purchasing any product linked through one of my affiliate links, purchasing something from my online shop, putting a tip in my Paypal tip jar, or writing to any of the companies whose products I've reviewed. If you've found this, or ANY of my posts helpful, please consider sharing them to your social networks- Twitter, Tumblr, Facebook- by using the handy links above the post.
Products Mentioned In This Post
Neopiko 4 Review
Zig Art and Graphic Twin Review
Docrafts Artiste watercolor markers
Akashiya Sai watercolor markers
Winsor & Newton Watercolor markers
Crayola Supertip waterbased markers
Helpful Outside Links
Zig Clean Color Real Brush Tips- Kuretake website
More on the Clean Color Real Brush Pens+GIVEAWAY- There's a LOT of really useful information and tips in this post, so I highly recommend you read it before investing in any Clean Color Real Brush Pens
Helpful Videos
Zig Clean Color Real Brush Pens Q&A- Jennifer McGuire Ink
Zig Clean Color Real Brush Pens Intro- Jennifer McGuireInk
Clean Color Real Brush Pens- 6 Ways
Zig Clean Color Real Brush Markers- CraftTestDummies
Zig (Kuretake) Clean Color Real Brush- Marker art&hobby
Watercoloring with Zig Clean Color Real Brush Markers- Maureen Wong
Zig Clean Brush Water Color Markers- How to #TheDailyMarker30Day-The DailyMarker
Zig Clean Color Real Brush Markers and Cardstock Comparison- catherinestamps
Kuretake Zig Clean Color Real Brush Pen Review, Demo & Comparison- thefrugalcrafter Lidnsey Weirich
Amazon.com Widgets
Please consider donating to this blog or purchasing from Natto-shop (http://nattosoup.com/shop) if you want me to continue publishing quality content. All materials tested were purchased from my own pocket. Keep on Truckin' Nattosoup is not under any sponsorship.


