
Becca Hillburn's Blog, page 34
January 8, 2017
Watercolor Basics: Step by Step: Glazing Techniques
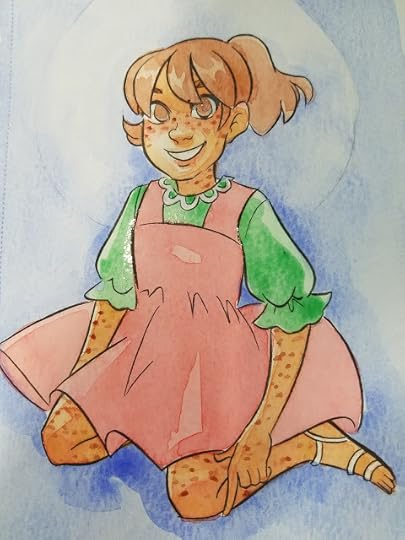
Now that we've introduced the basics of Watercolor Basics, it's time to take you step by step through some of the most common processes for completing a watercolor illustration. I'm going to take you from start to finish through my 2016 Christmas card illustration, explaining my techniques as I go. I have a series of video tutorials recorded concurrently that should be available on my Youtube channel soon, if you need some live action explanation.

If you enjoy this series, if you have learned something, or if I have inspired you in some way, please take a moment to share this, or any post, with your friends and familiy on your favorite social networking platform. There are handy sharing buttons below this post. If you enjoy art education content, and would like to be part of the process, please visit my Patreon for information on how to join the artnerd community. Backers get early access to popular series, backer exclusive content, and voting rights on upcoming content.
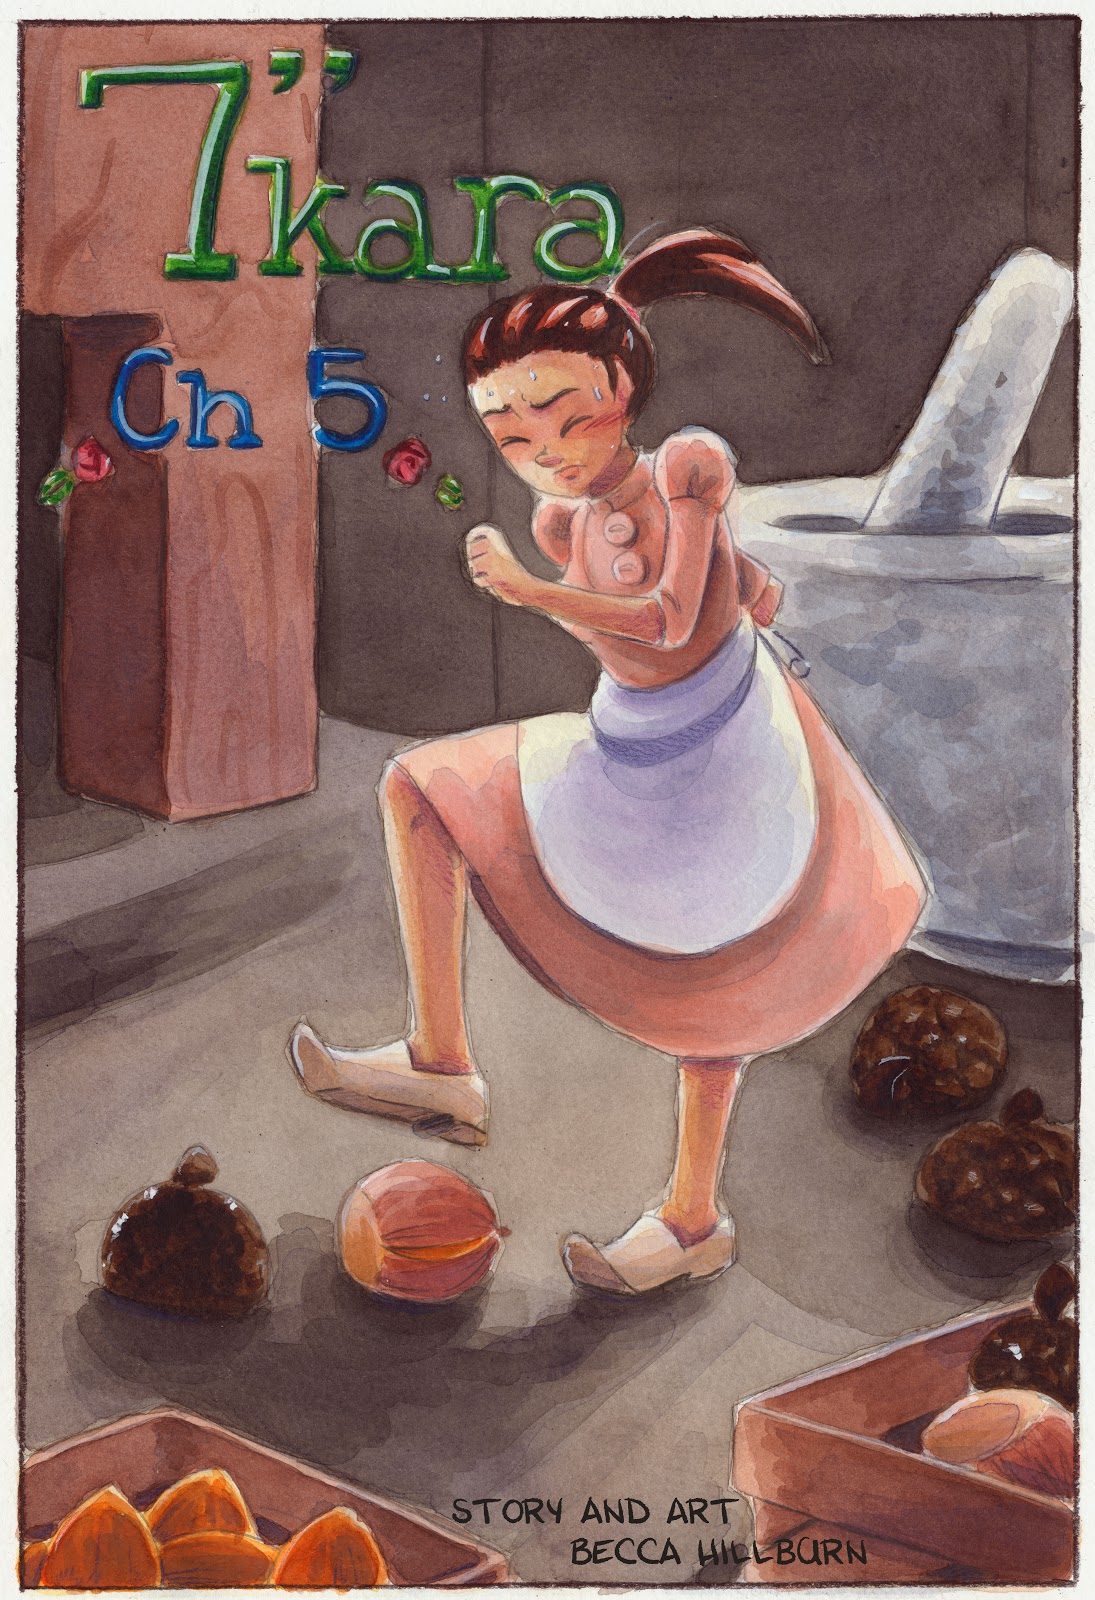
Glazing is a very simple technique that involves painting watercolor wet over dry. It's one of the first techniques a beginner watercolorist masters, and one of the techniques I used the most frequently when painting 7" Kara pages.

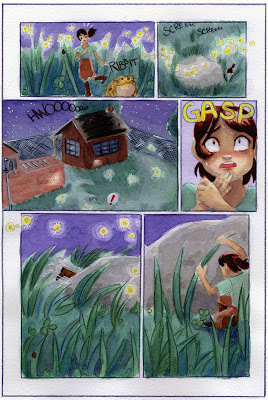
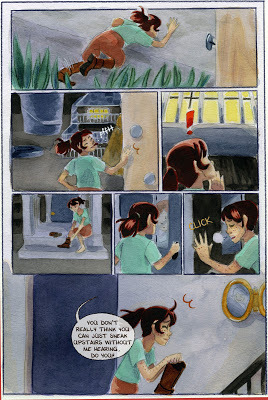
These pages are from Chapter 5 of 7" Kara. You can order Volume 1, which contains chapters 1-4, a bonus story, and concept art through Gumroad or my site. You can order a digital copy of Chapter 5 through Gumroad.
The majority of these pages were painted using glazing techniques and a lot of patience. Canson Montval paper can't handle fancy tricks, and doesn't take wet into wet too well, so if you're working on a student grade, cellulose paper like Montval, you'll either need to learn economy of line, or master glazing.
What is a Glaze?
A glaze is a thin layer of watercolor- wet over dry.
Why Glaze?
If you're working on inexpensive or difficult papers, delicate papers, or papers not designed for watercolor, thin glazes with long drytimes may allow you to achieve the results you want.Glazes are an easy technique to learnVersatileFor some artists, this may be the only technique you need
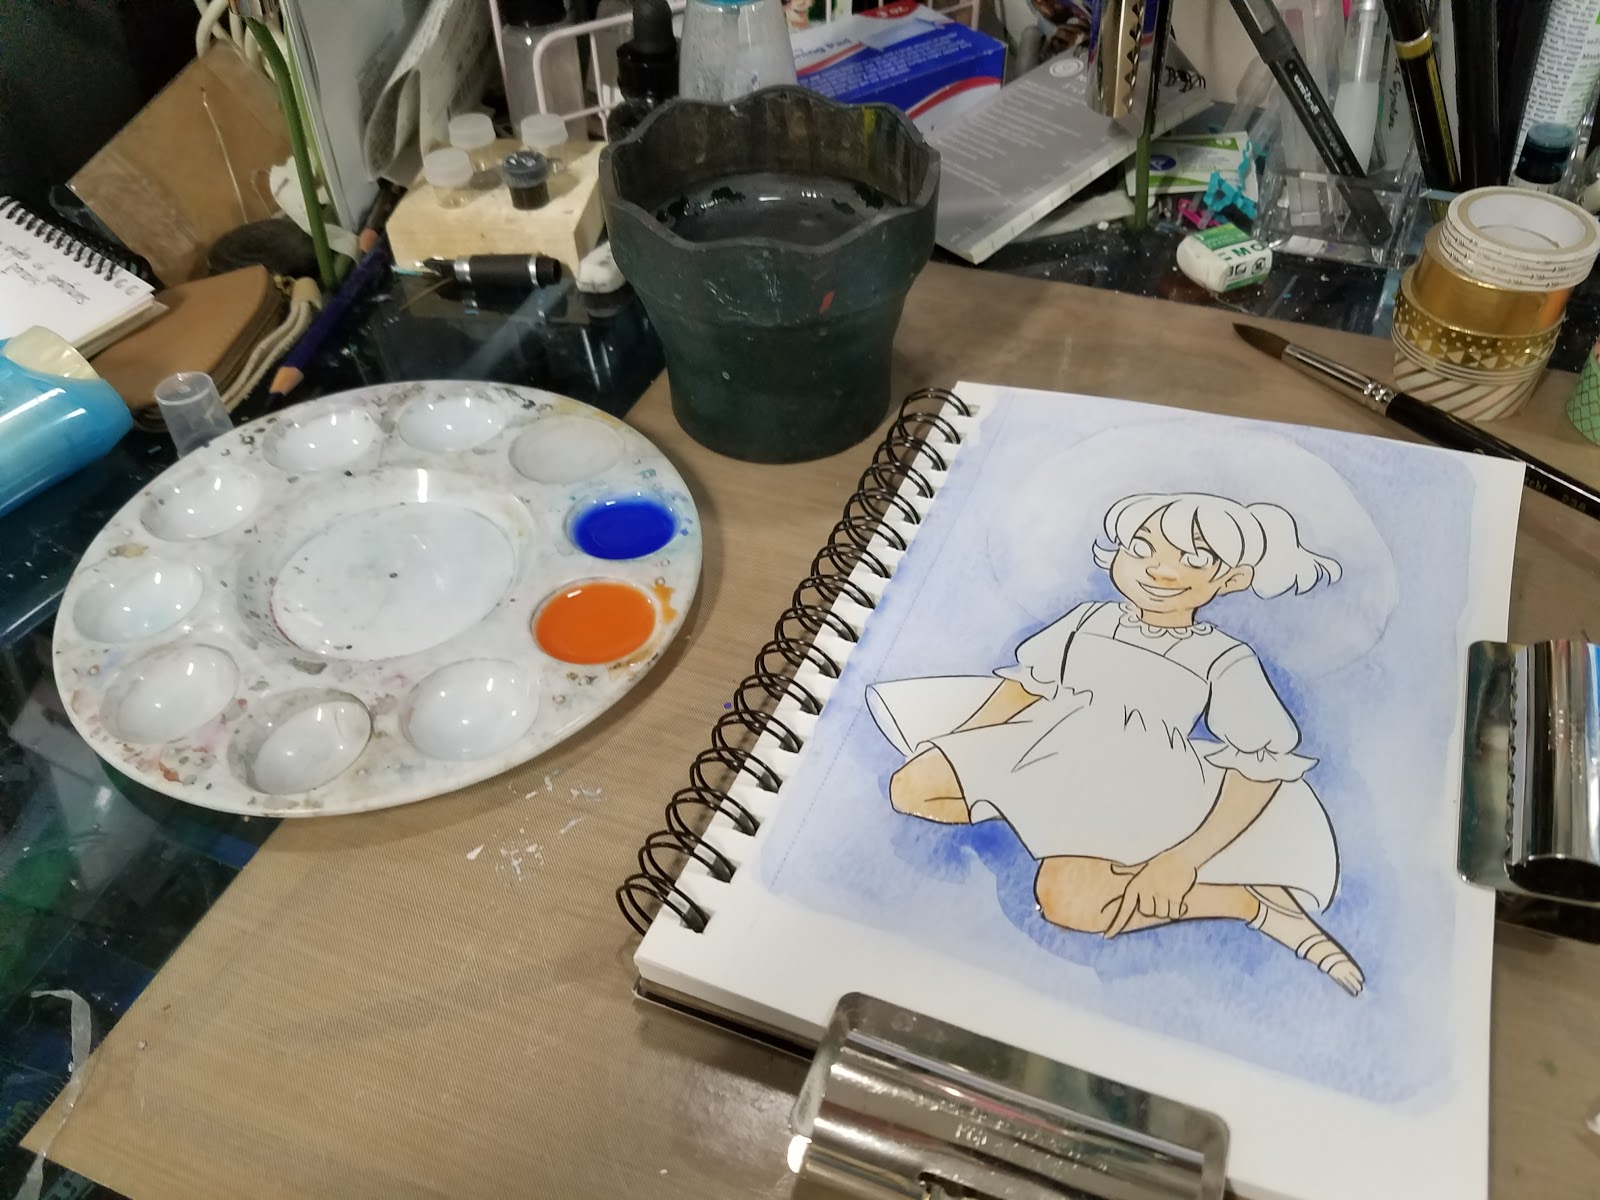
Materials Used in this Tutorial:
Watercolors of your choice (I use Winsor and Newton moist half pans, Daniel Smith, SoHo, and Holbein watercolors)
Daisy watercolor wells or palette of choice- For mixing large amounts of color
Watercolor brushes (I use mainly rounds)
2 watercolor cups- 1 clean, 1 dirty- I like the Faber-Castell collapsible cups
Paper towels
White Gouache
Synthetic Watercolor Brushes for Gouache
Paper used:
Canson Montval Sketchbook
Watercolor Brushes Used in this Tutorial:
For rounds larger than 6, I use synthetic brushes. Your preferences may vary from mine- I have several brands, and still have not found a brand I think perform as well as natural hair brushes. Synthetic brushes are much cheaper than natural hair brushes, especially at larger sizes, and are useful for blocking in color, as we will be doing in this tutorial.Creative Mark Rhapsody Kolinsky Sable Brushes- 4, 2, 1, 0Creative Mark Squirrel Brushes- 4, 6Blick Master Studio Squirrel- 4, 6Step 1: Preparing Your Image

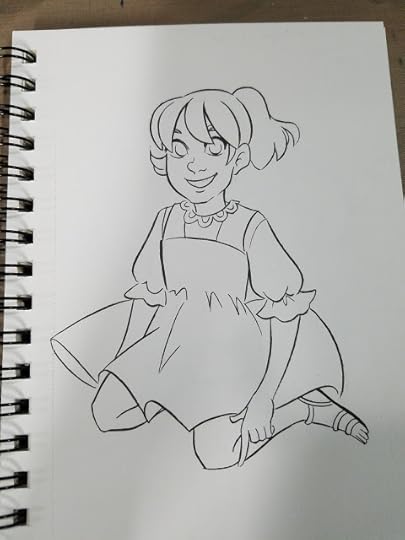
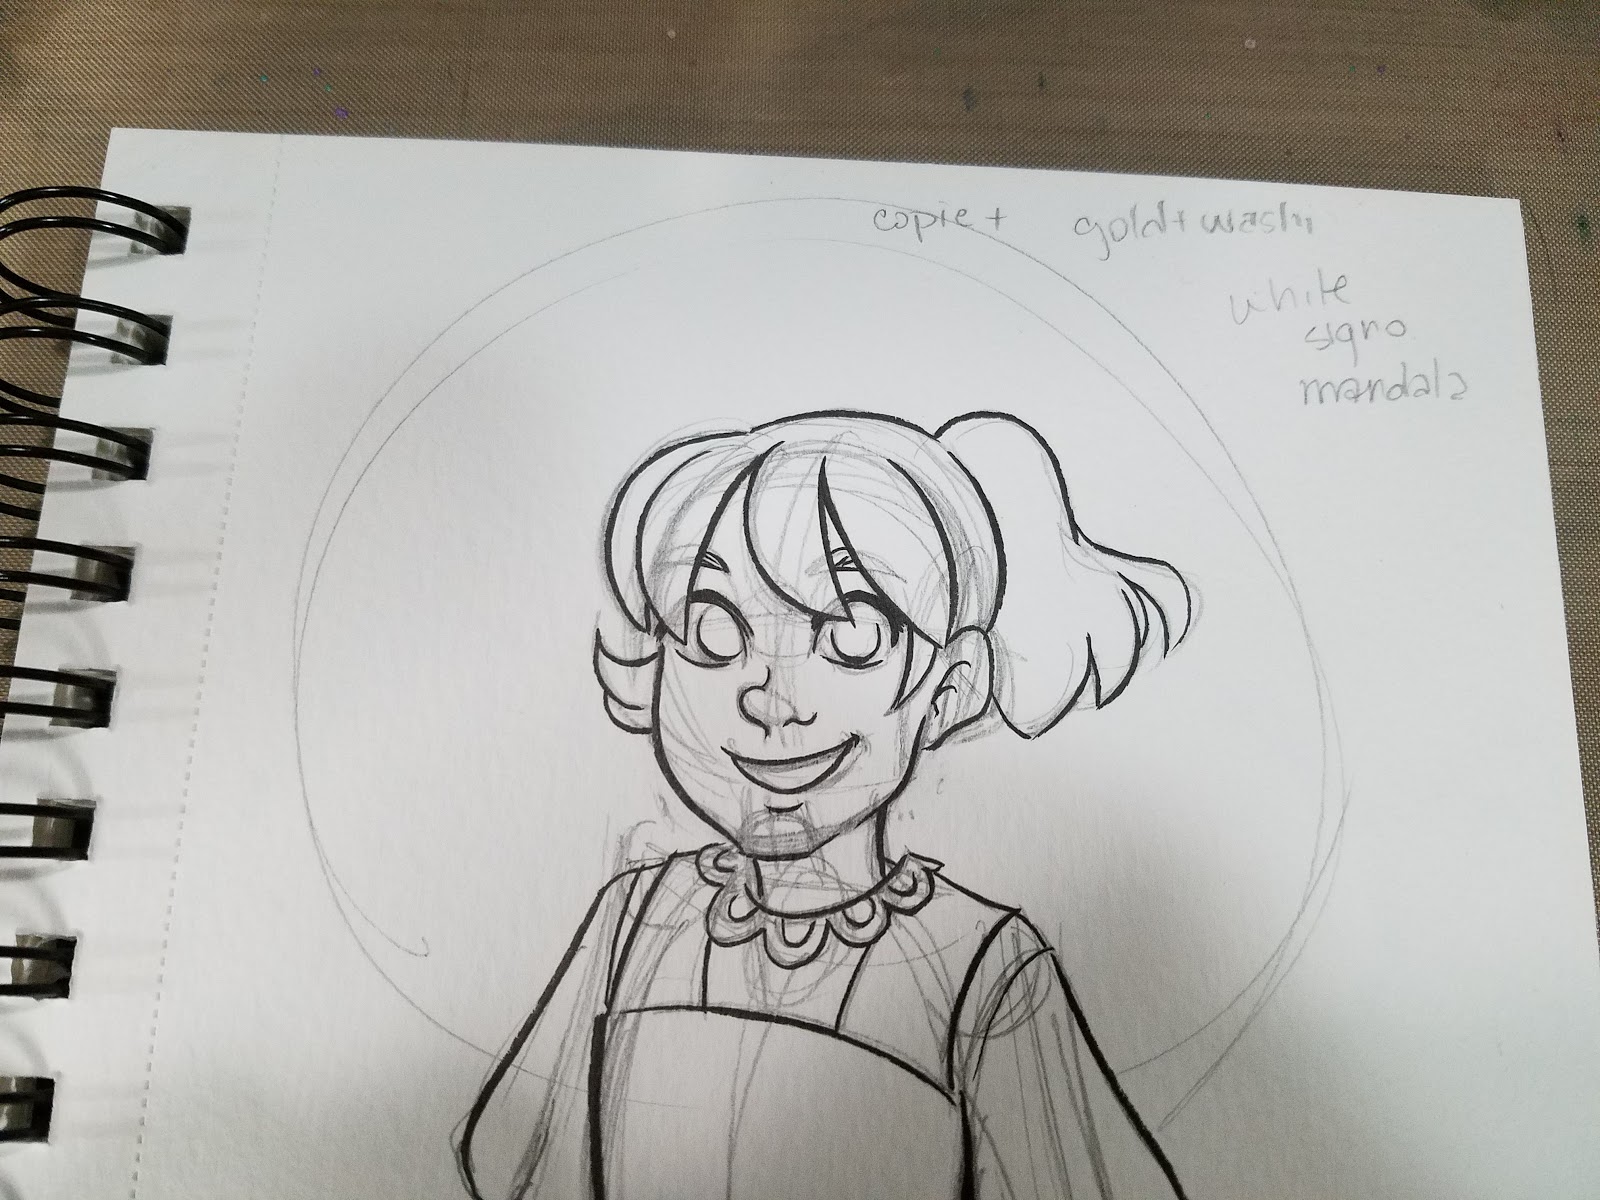
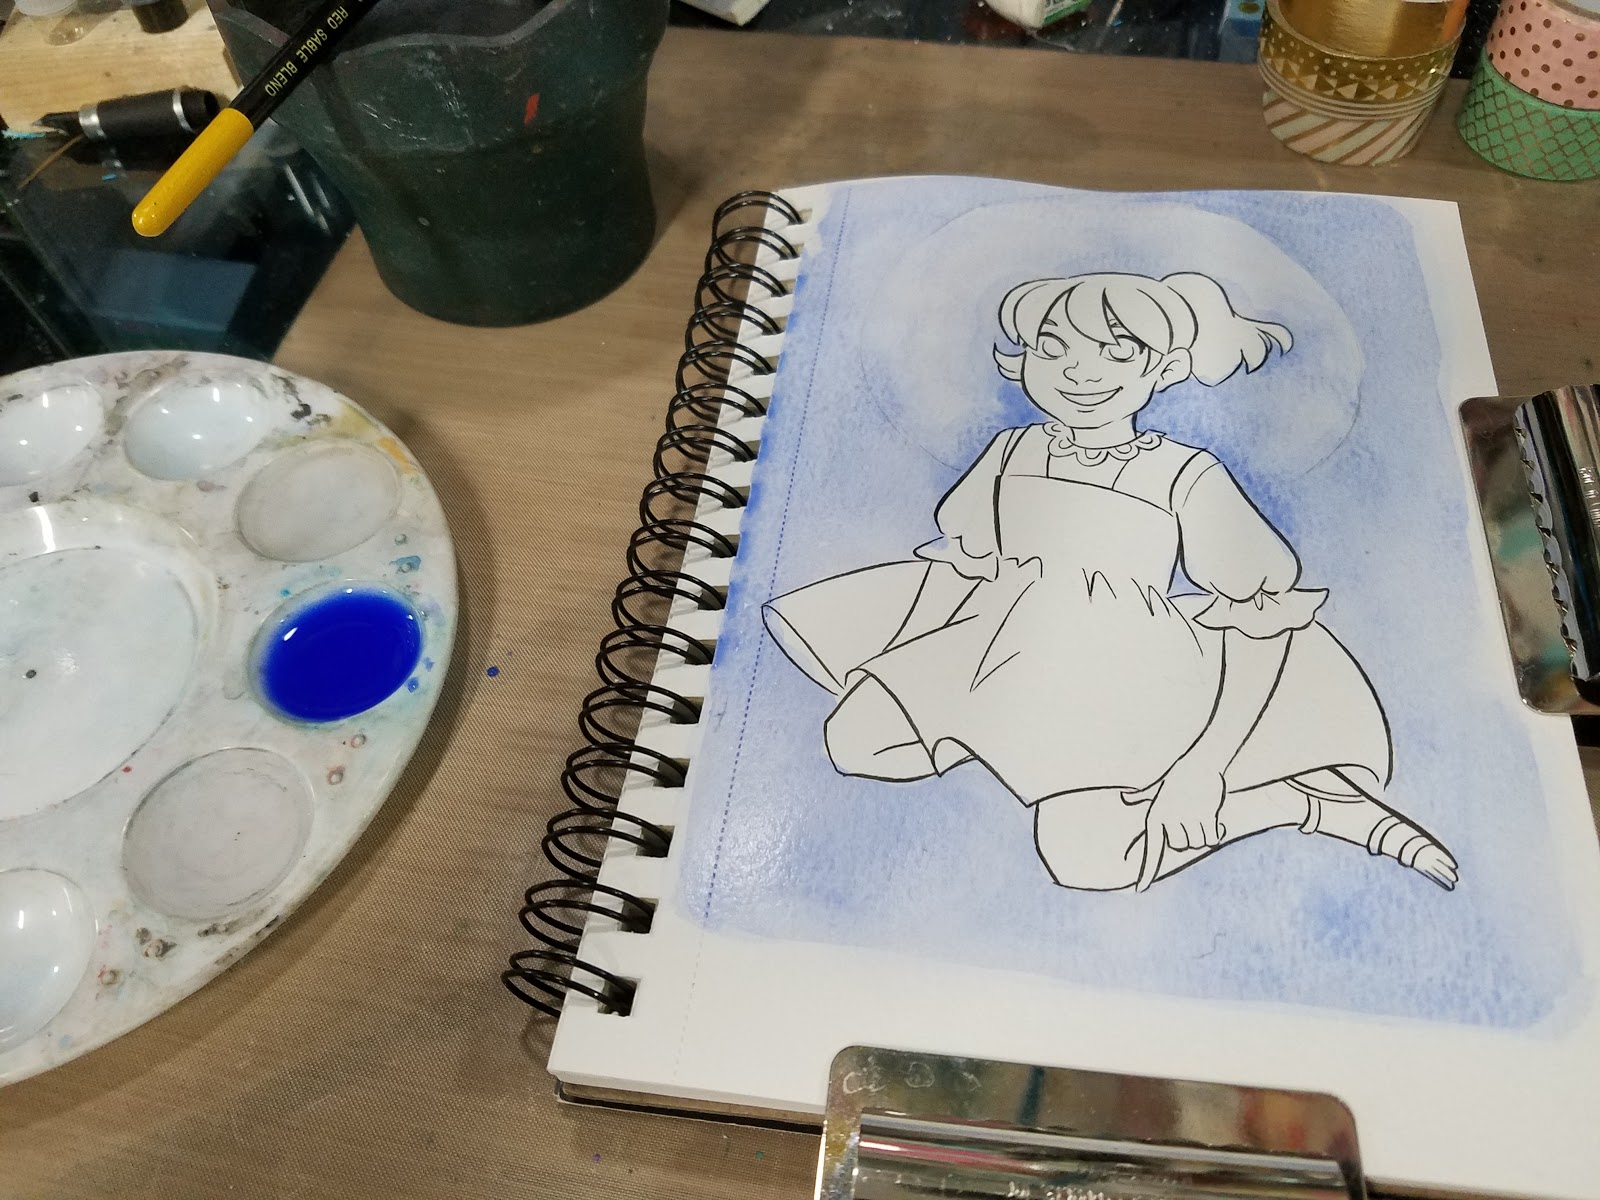
This illustration was inked with a Sailor Mitsuo Aida brushpen.

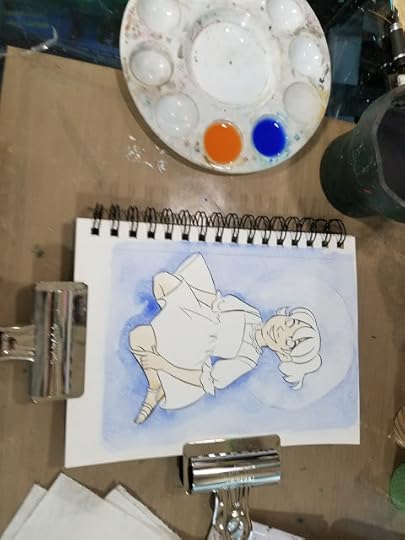
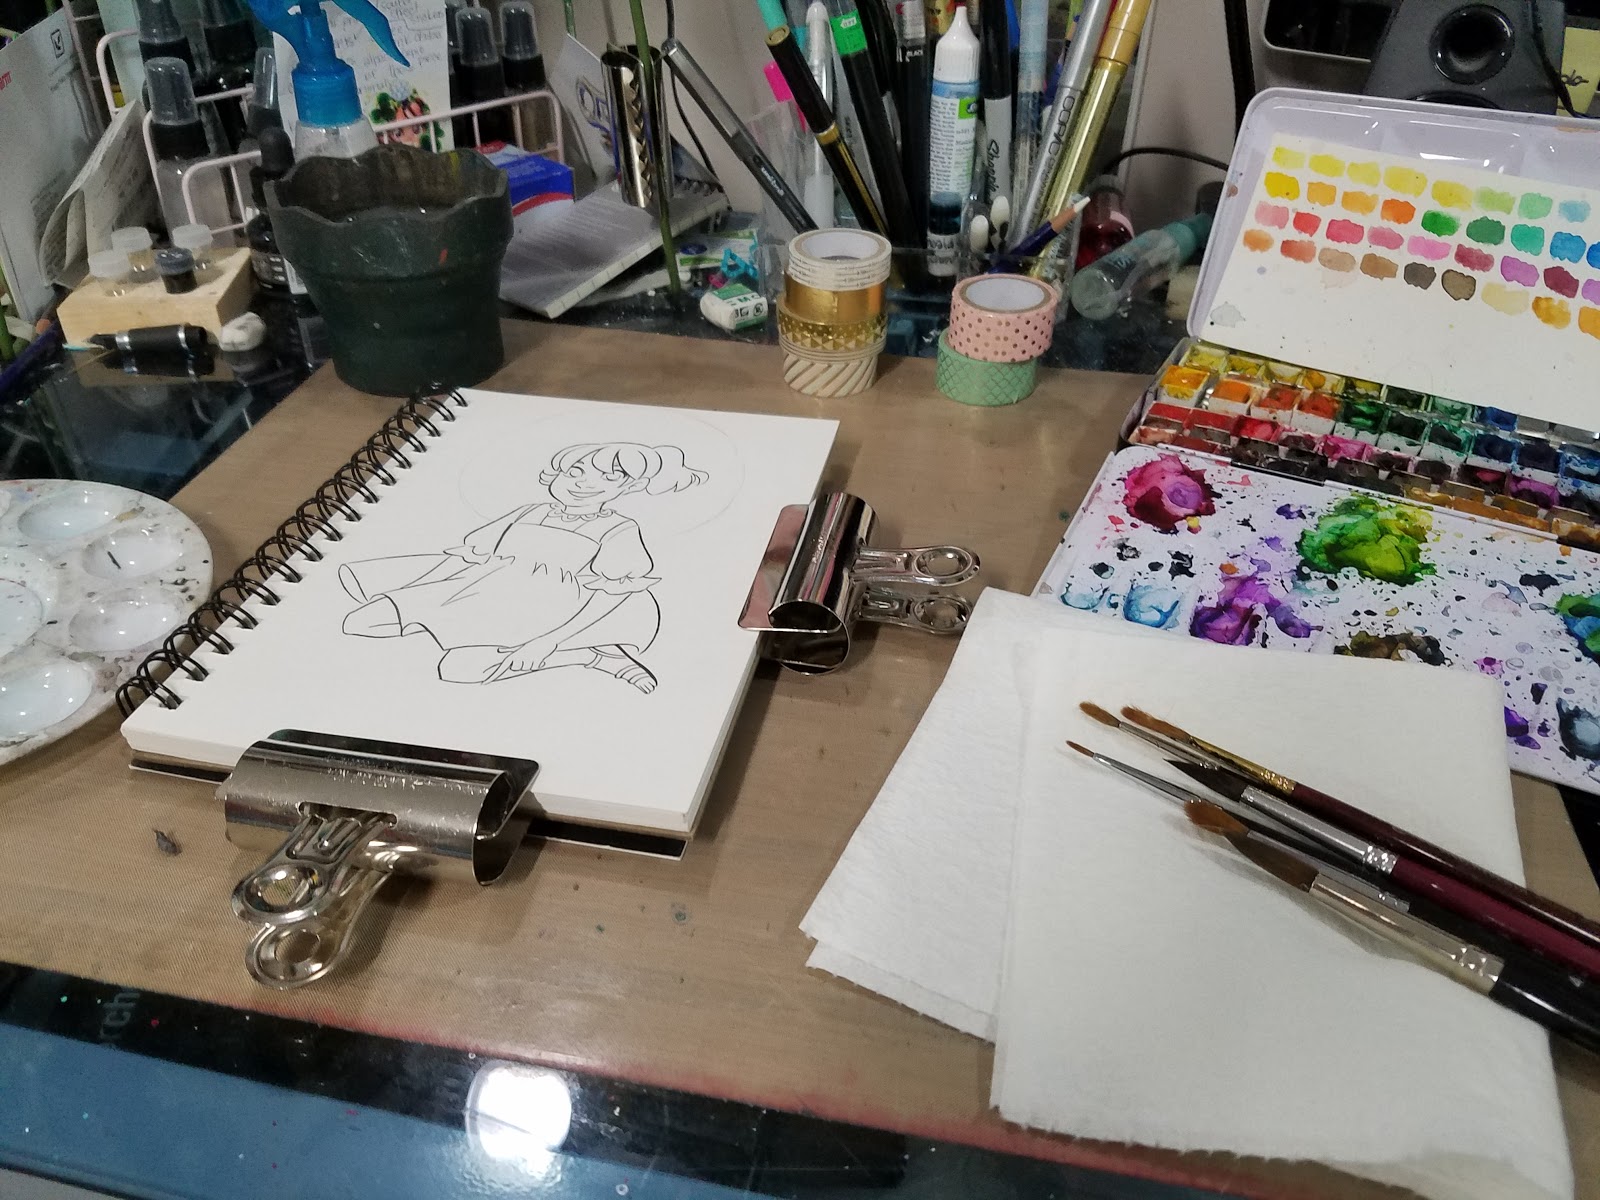
Step 2: Securing Your Image

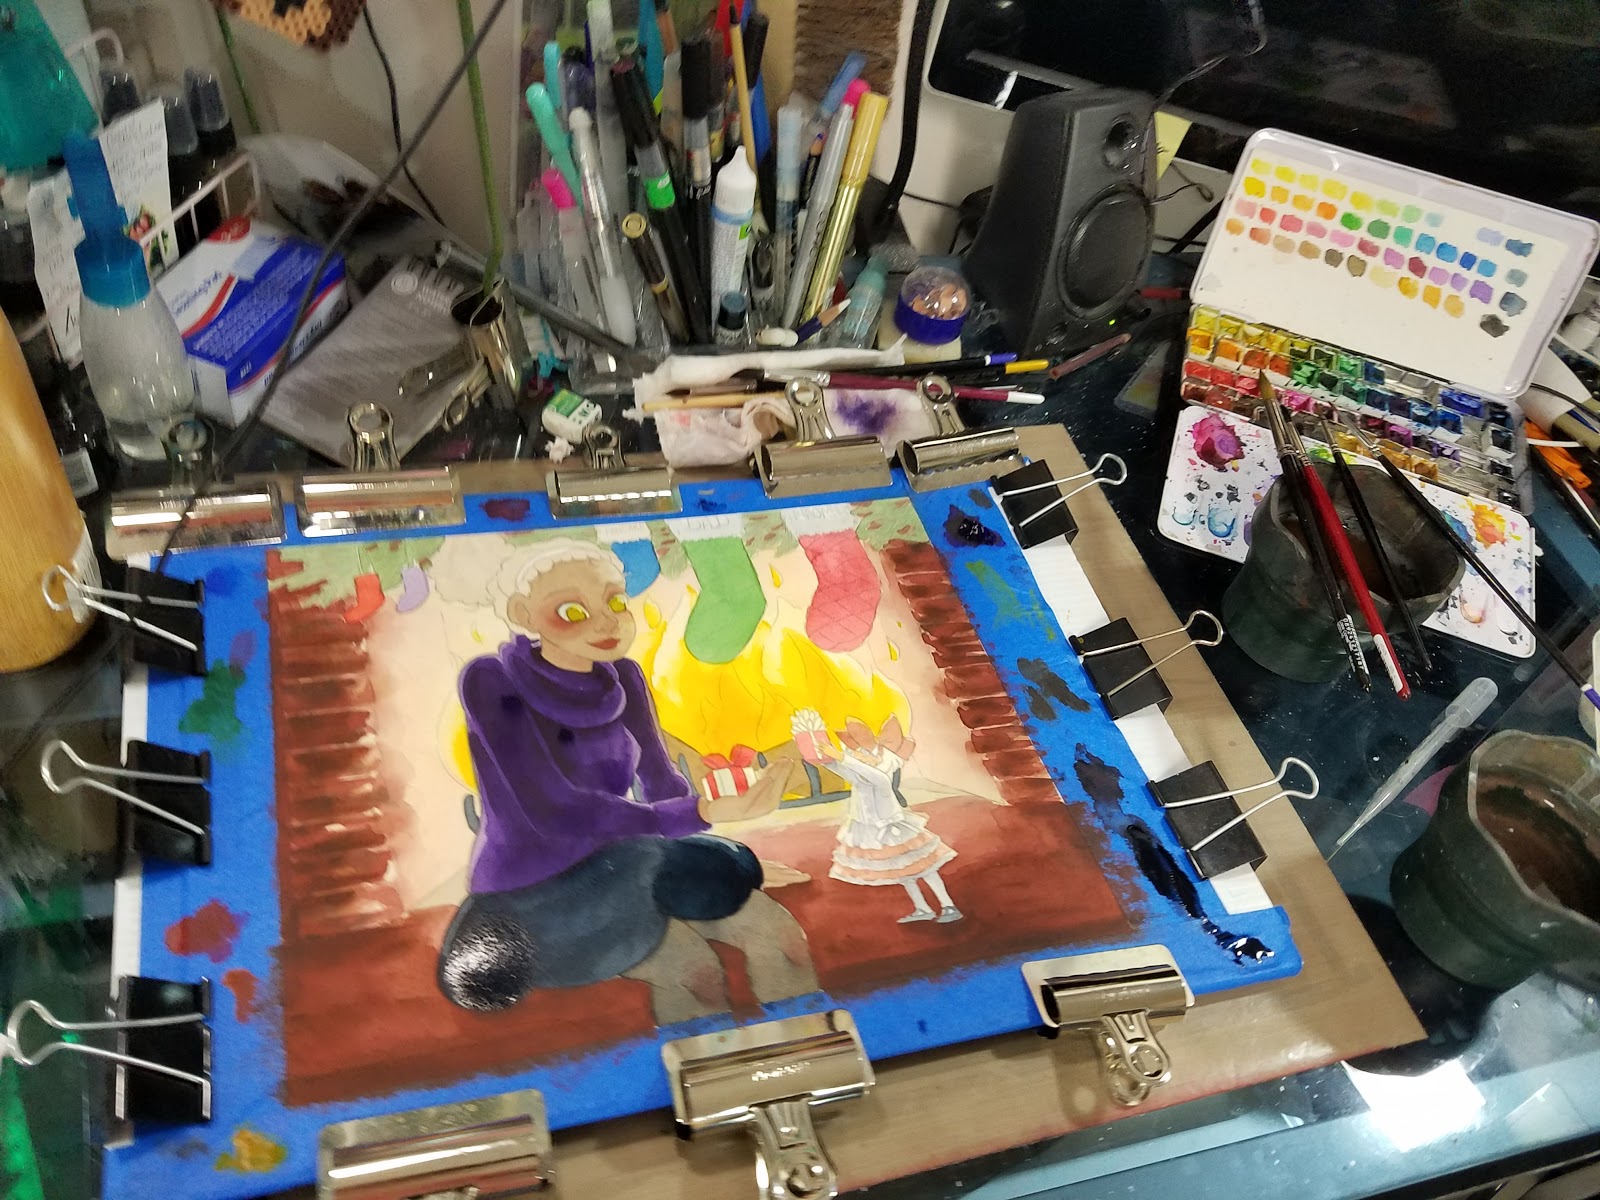
Although this is 140lb watercolor paper, and should not need stretching, I have not found a 140lb paper that is heavy duty enough that it doesn't need some securing. Since this paper is already spiral bound, I used two bulldog clips to clamp my paper down and help reduce buckling.
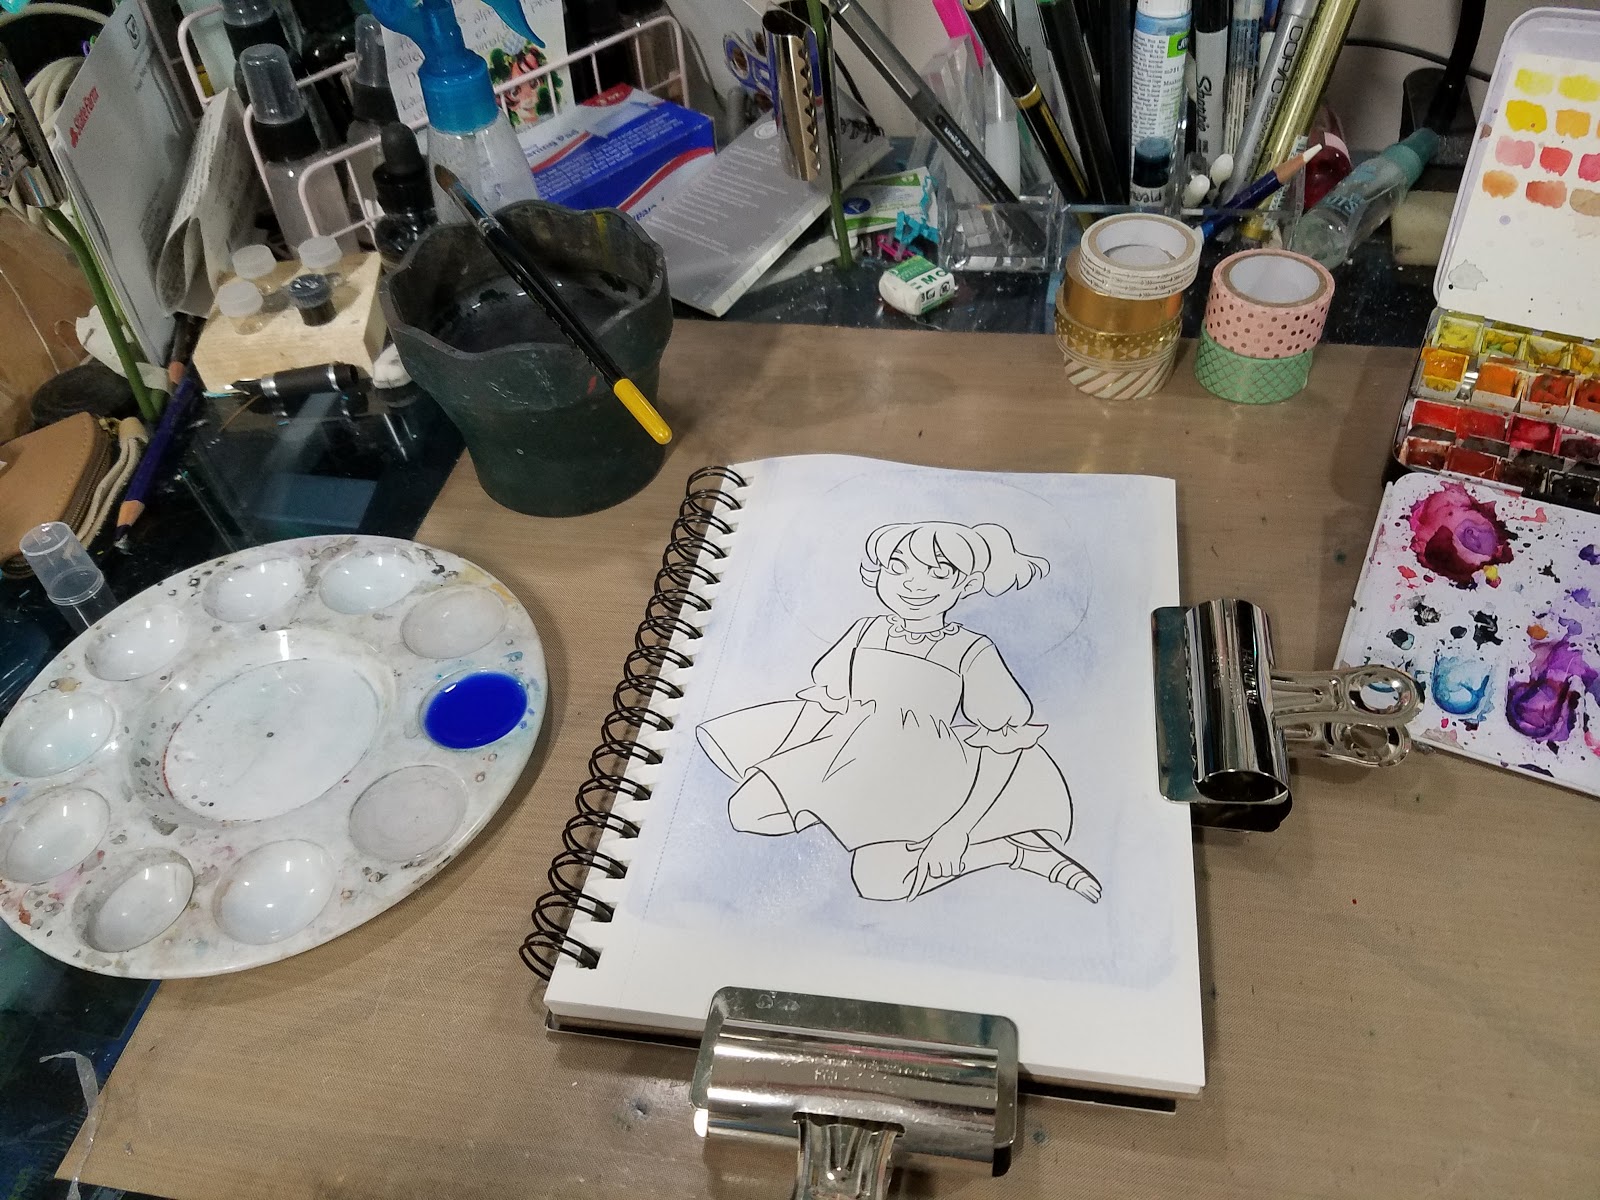
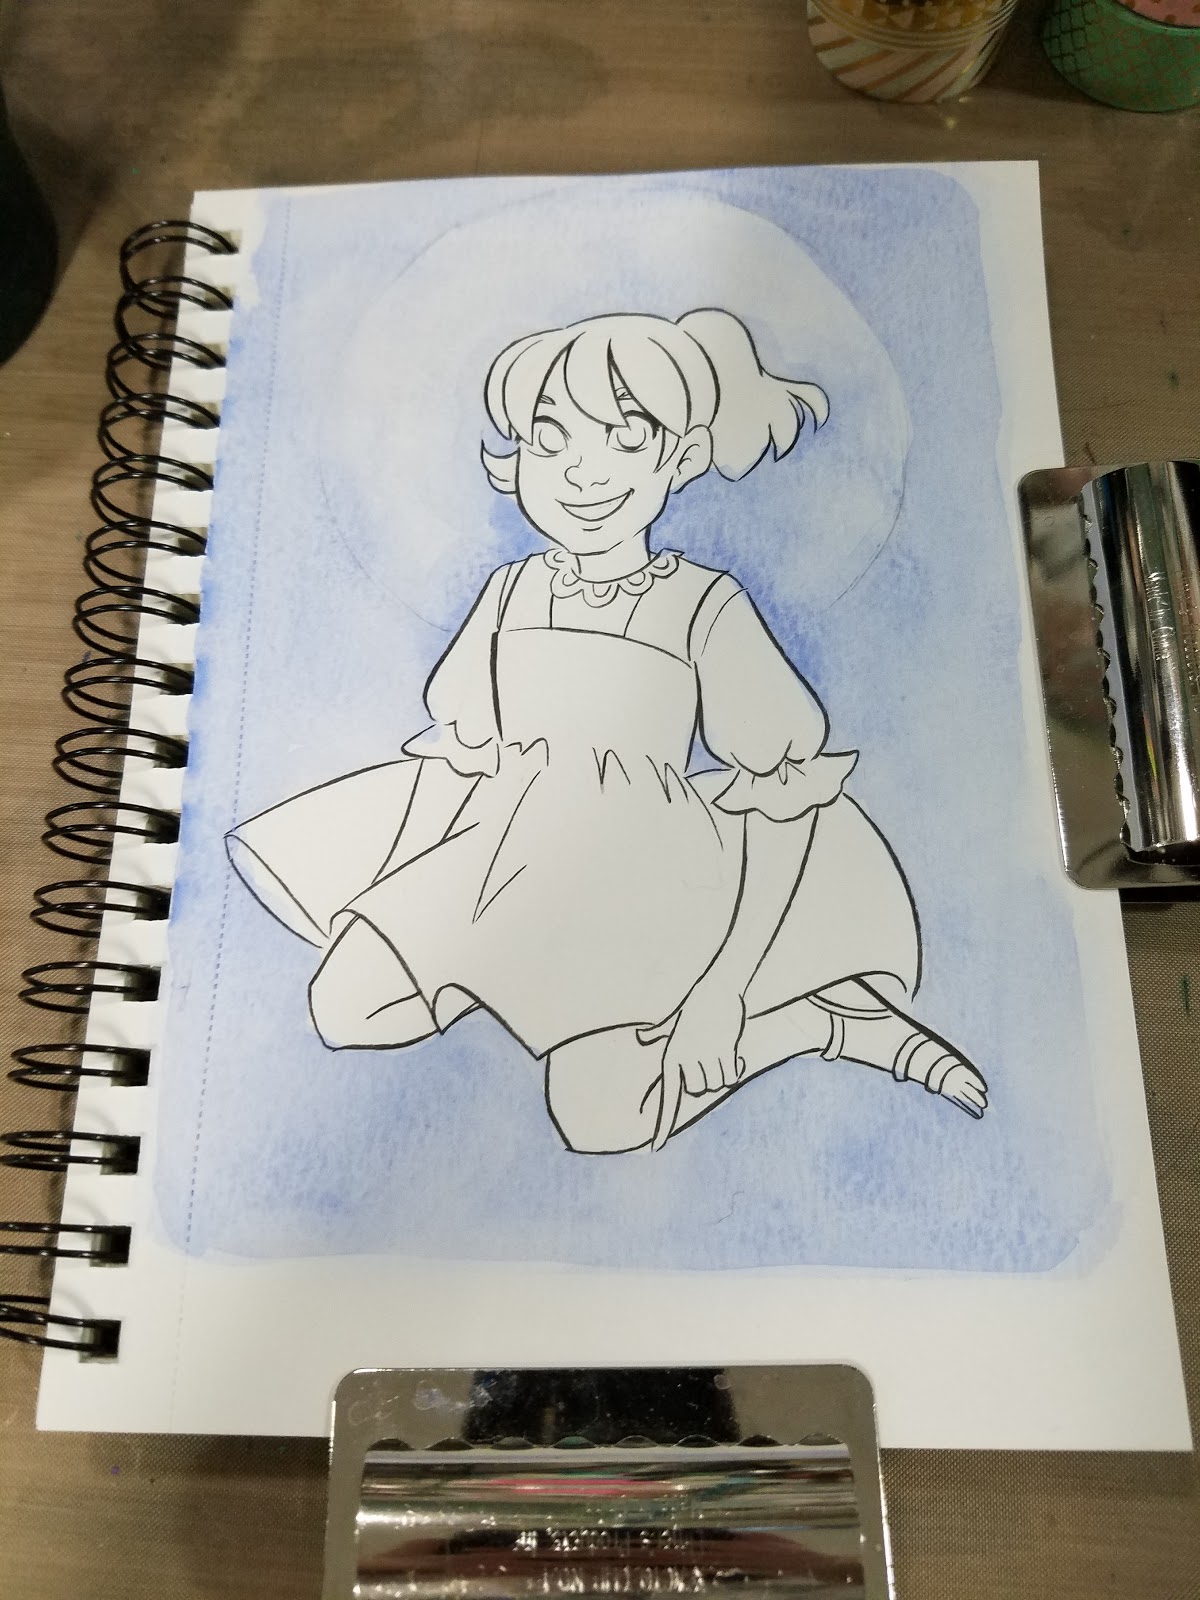
Step 3: Applying a Simple Wash

You could use masking film or masking fluid to mask off your area (which would make applying a wash much easier), but I have consistently had poor results with both, and opted to take the long route.
Step 4: Allow Wash To Dry
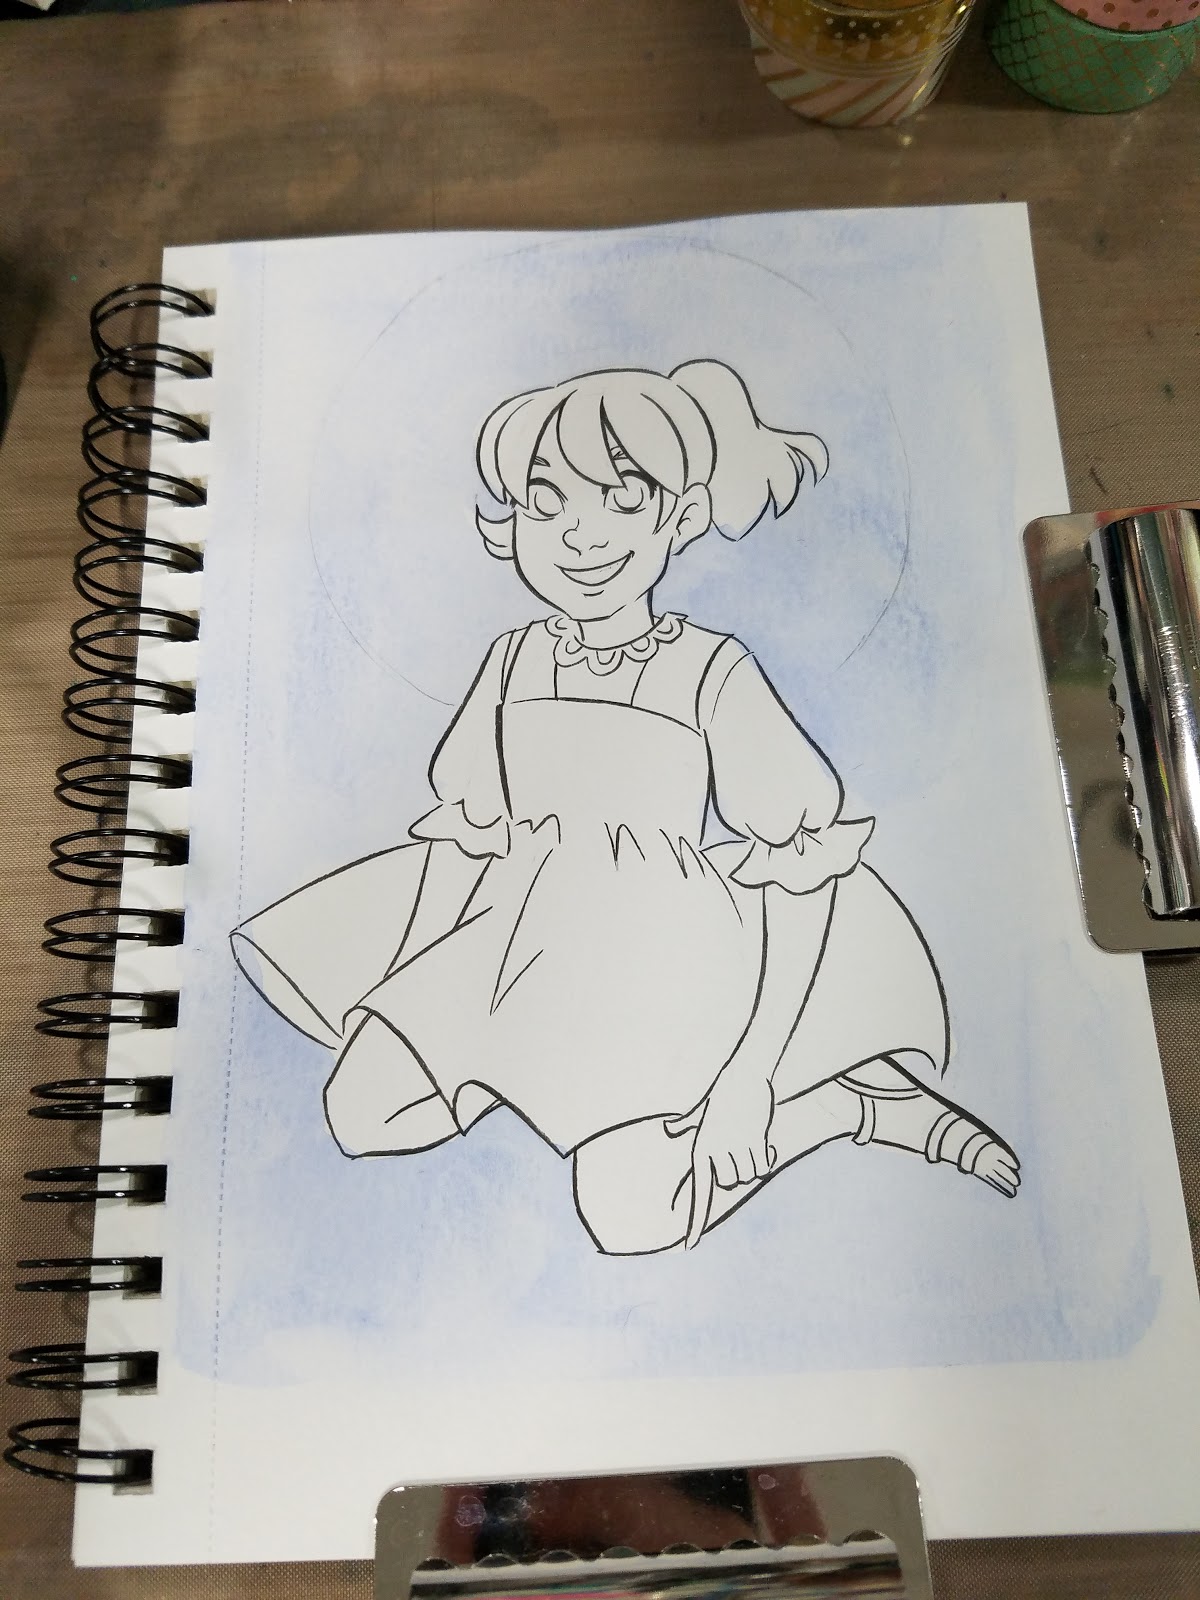
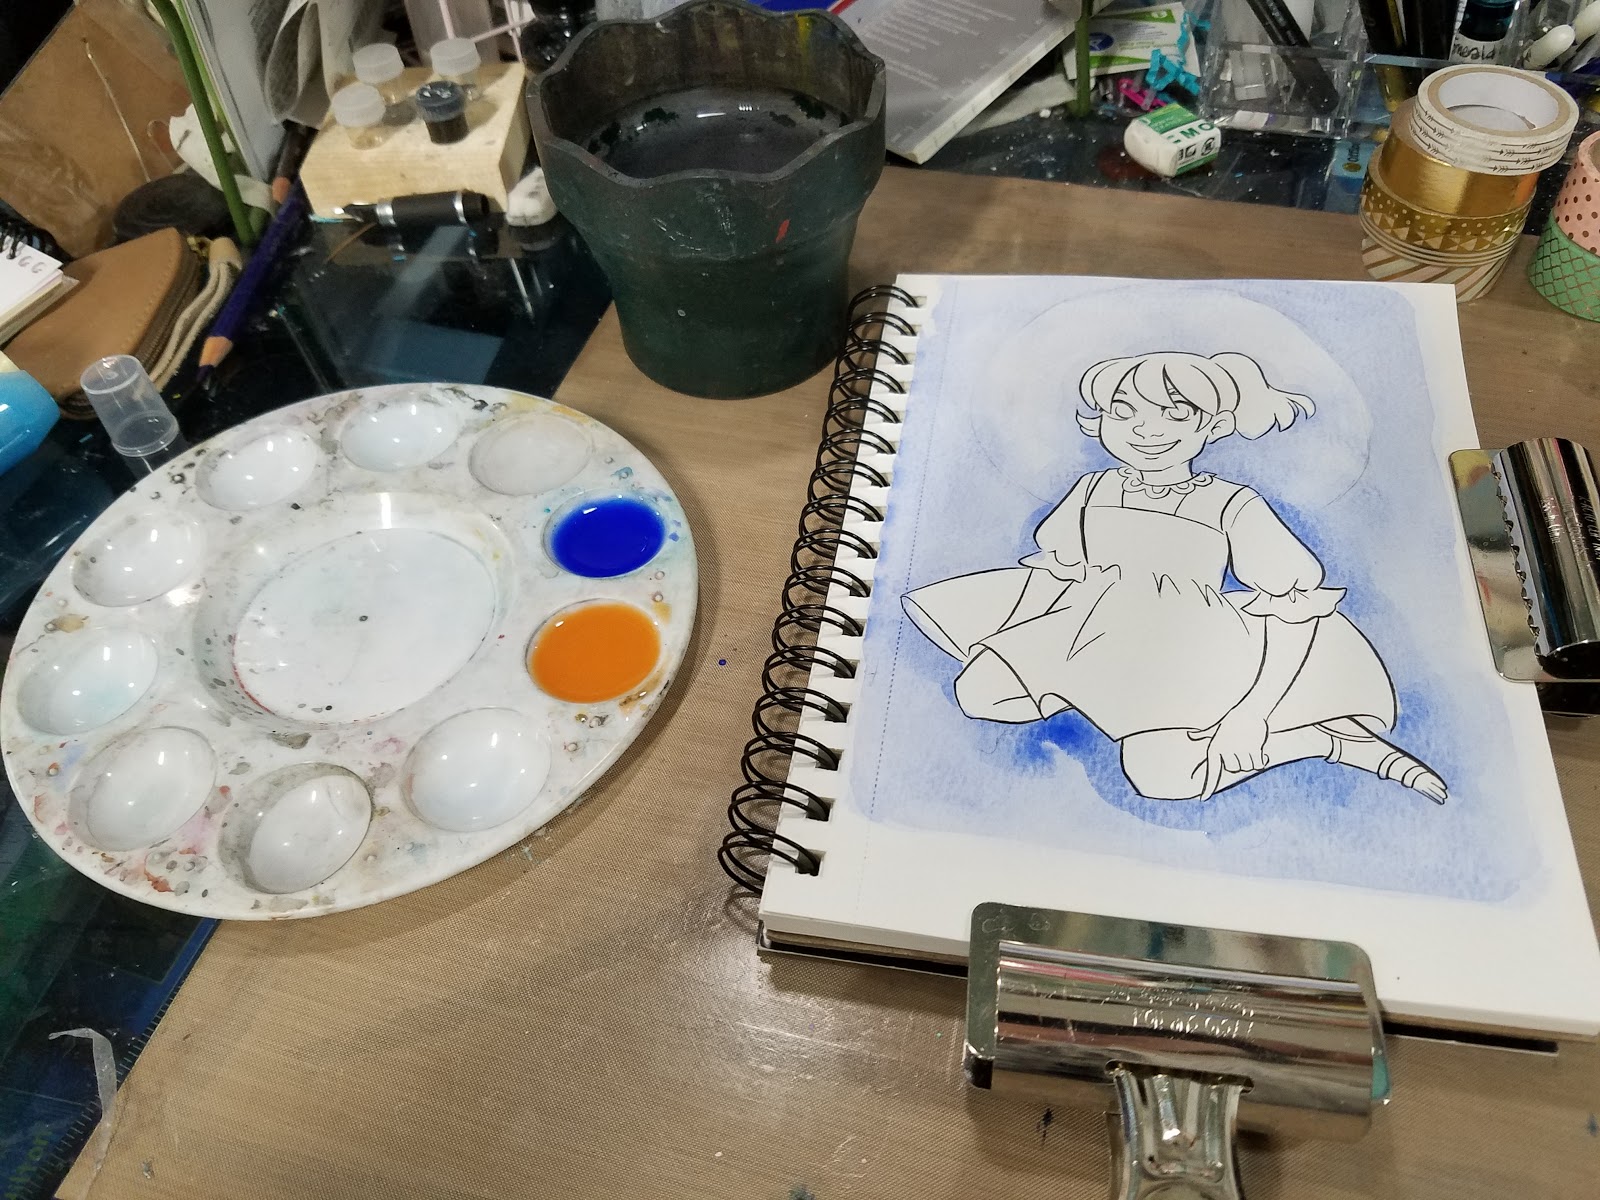
Step 5: Reapply Wash


Step 6: Add in background shadows

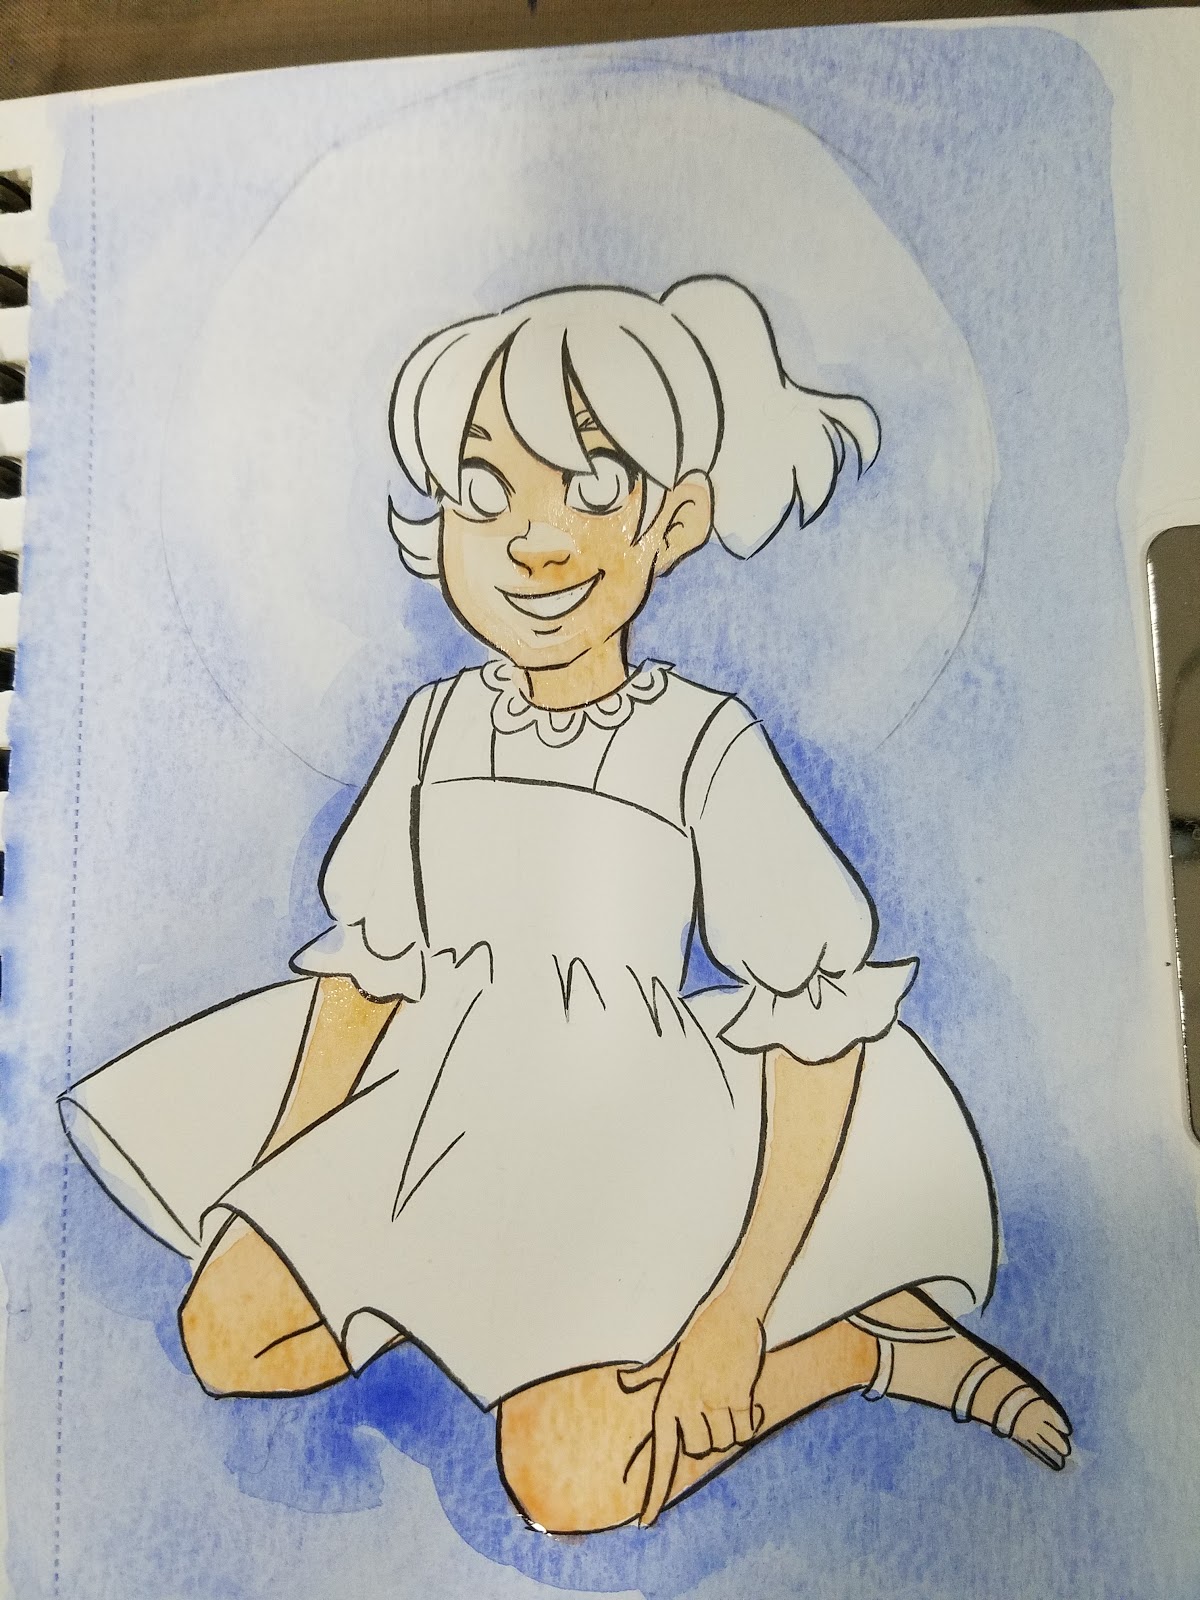
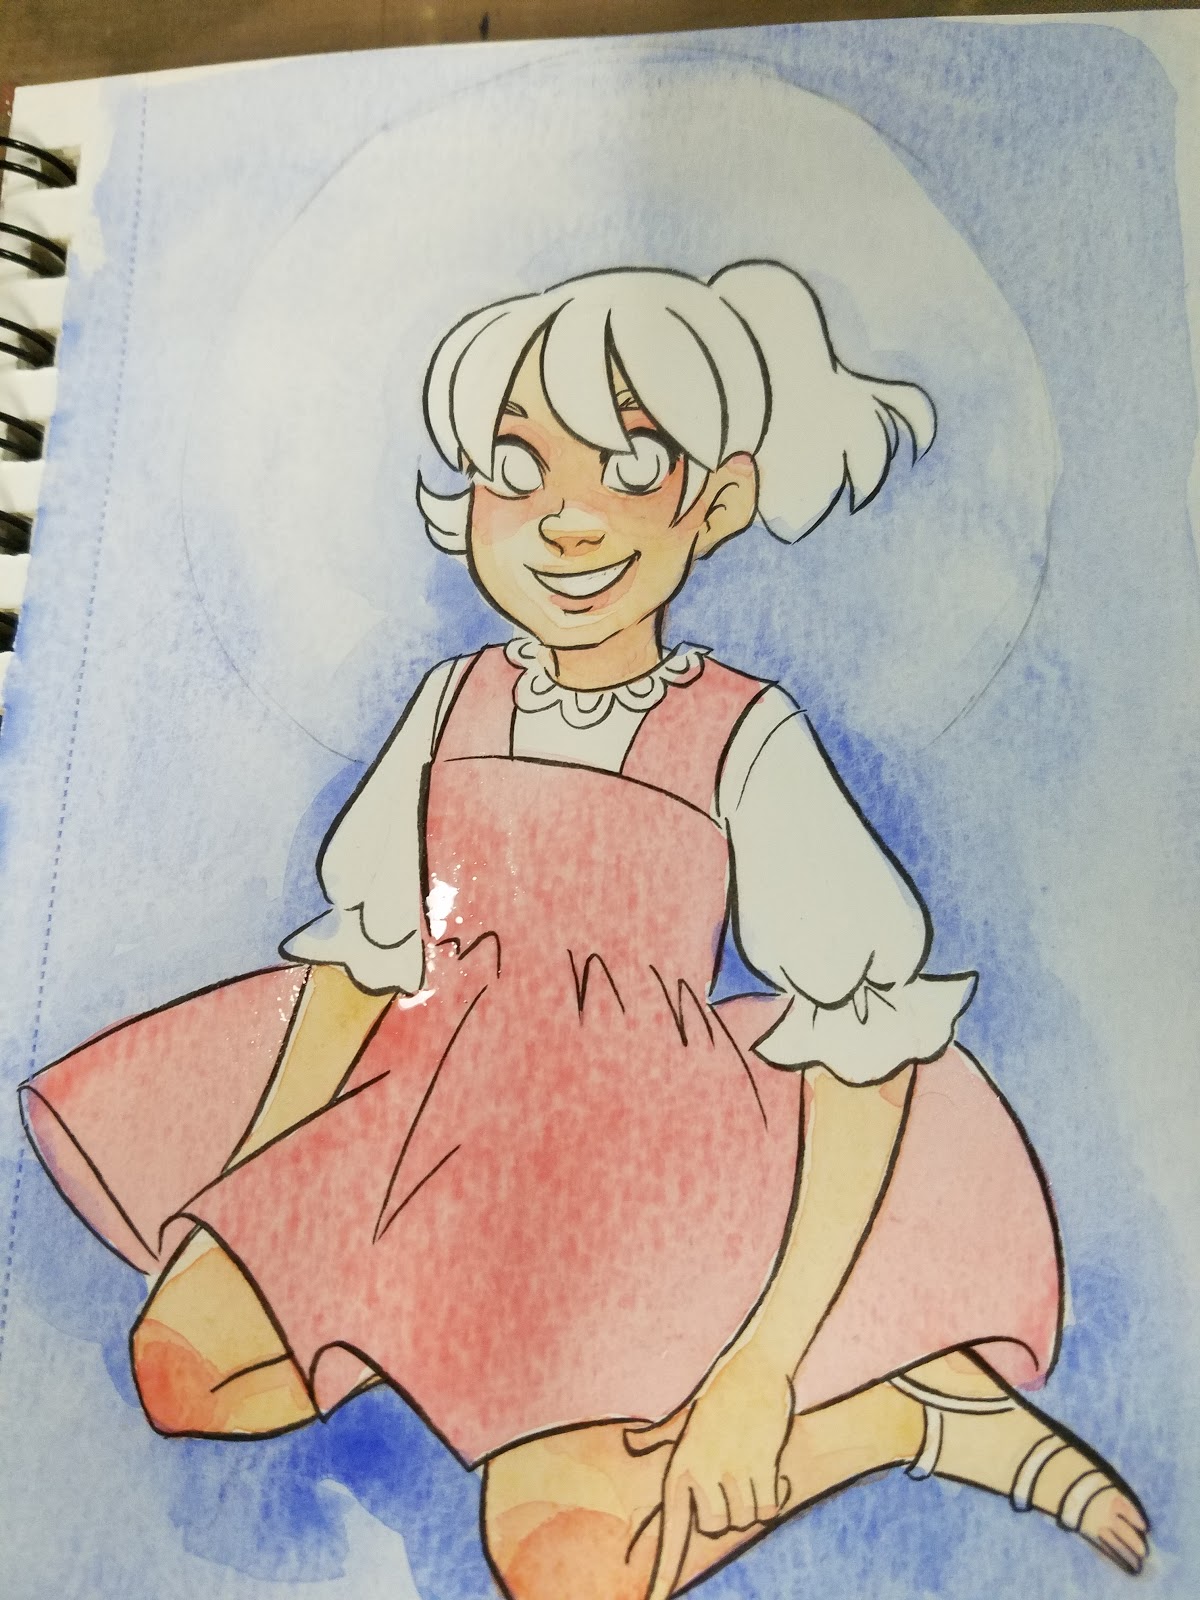
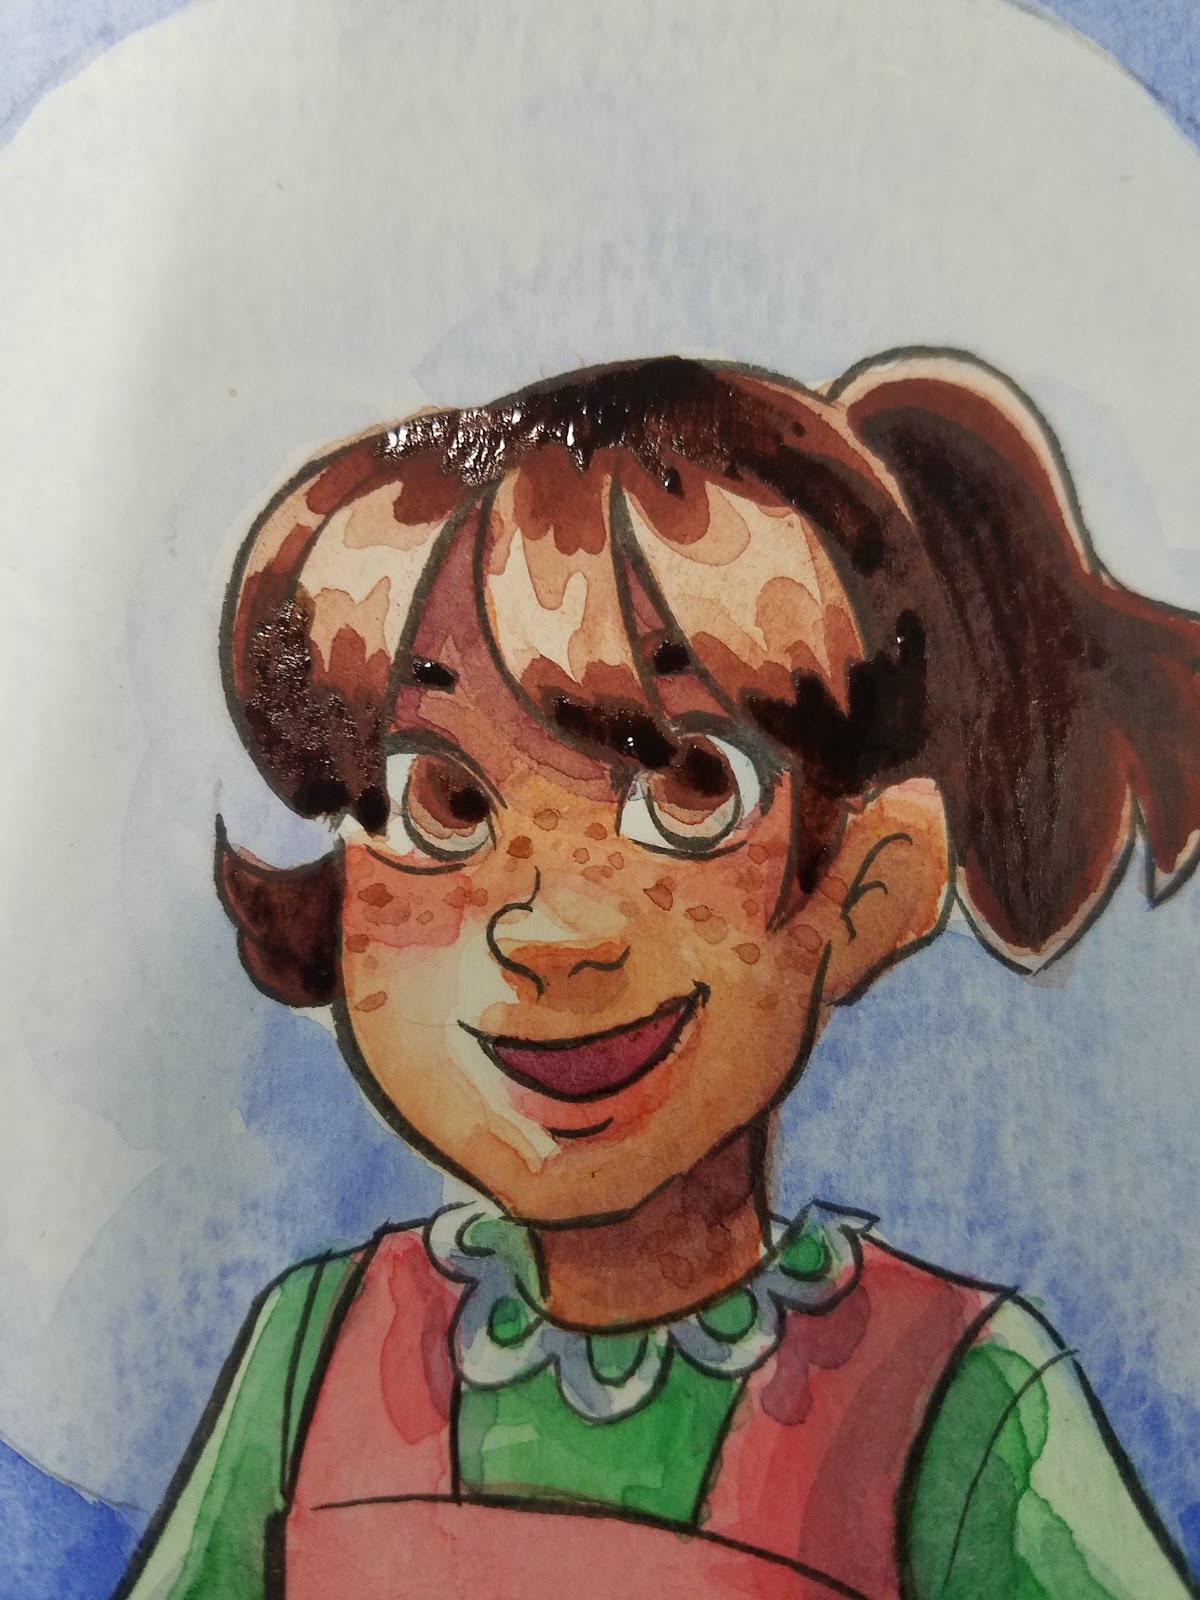
Step 7: Mix and Apply Skintone

Step 8: Add Skintone Shadows with Color


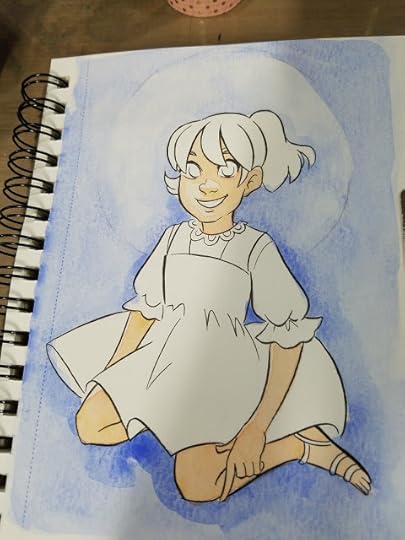
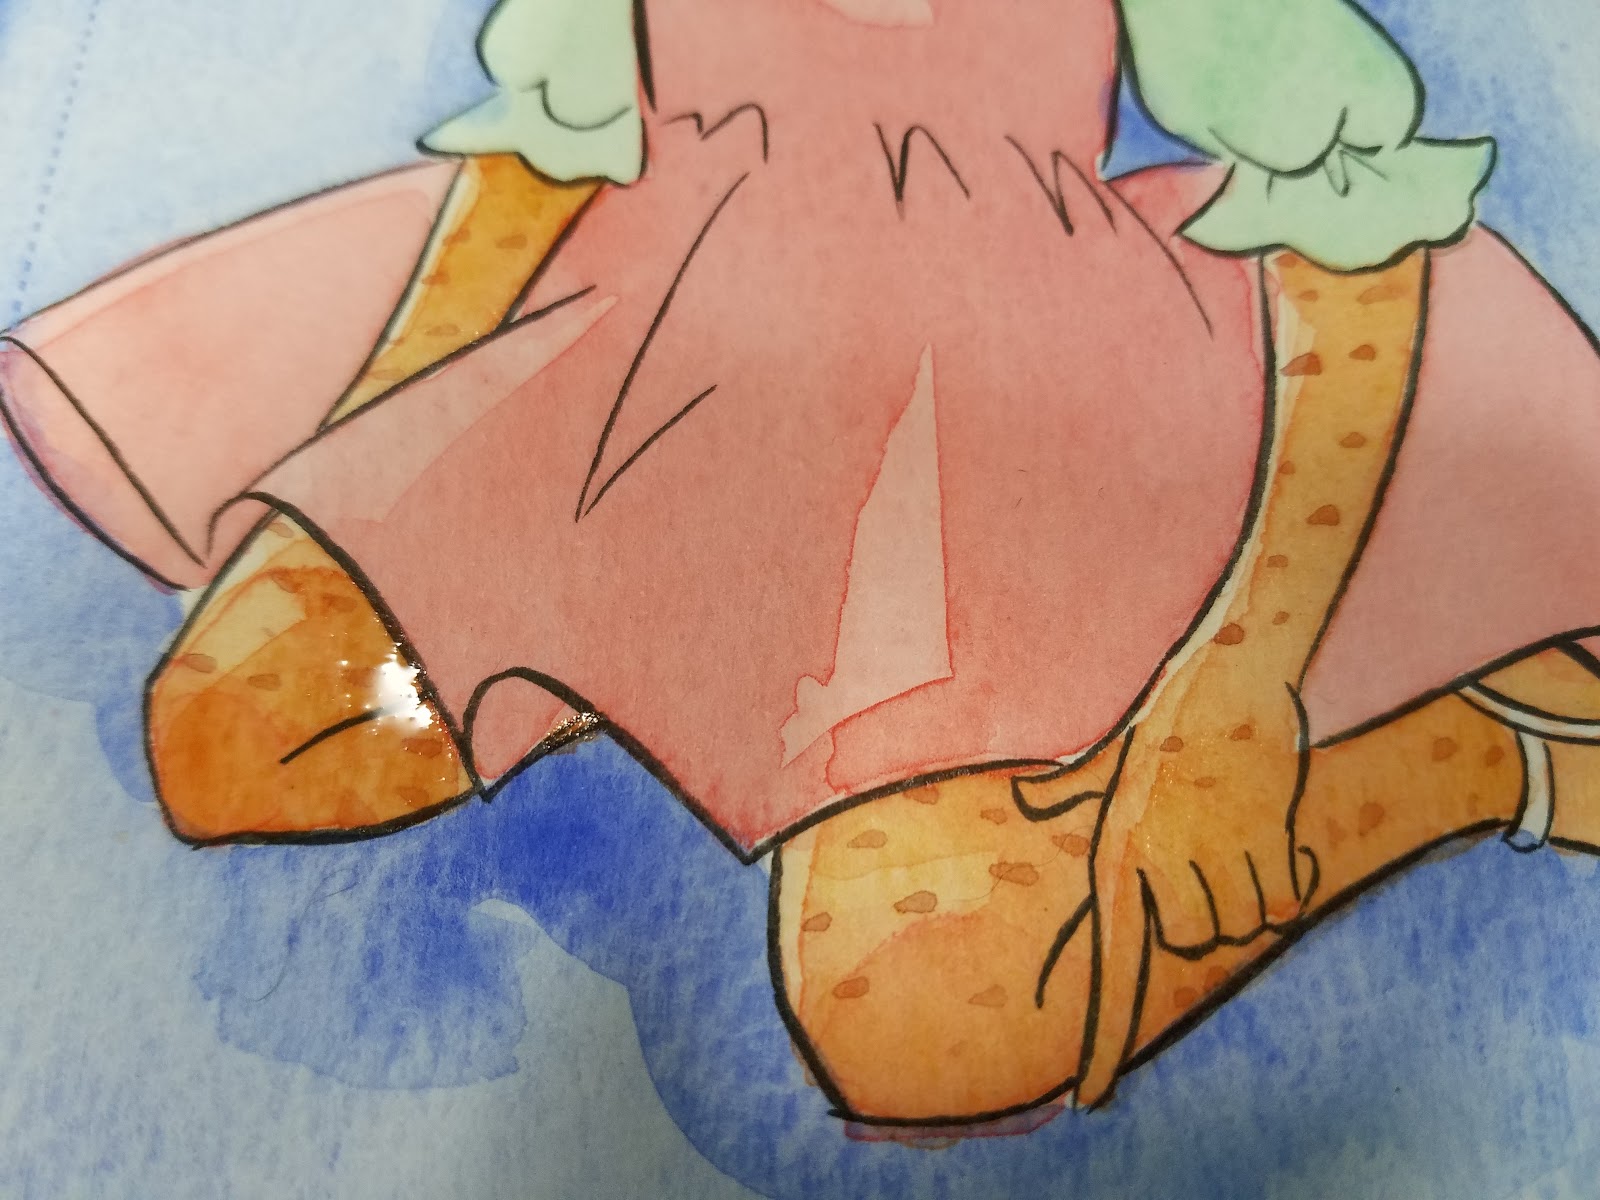
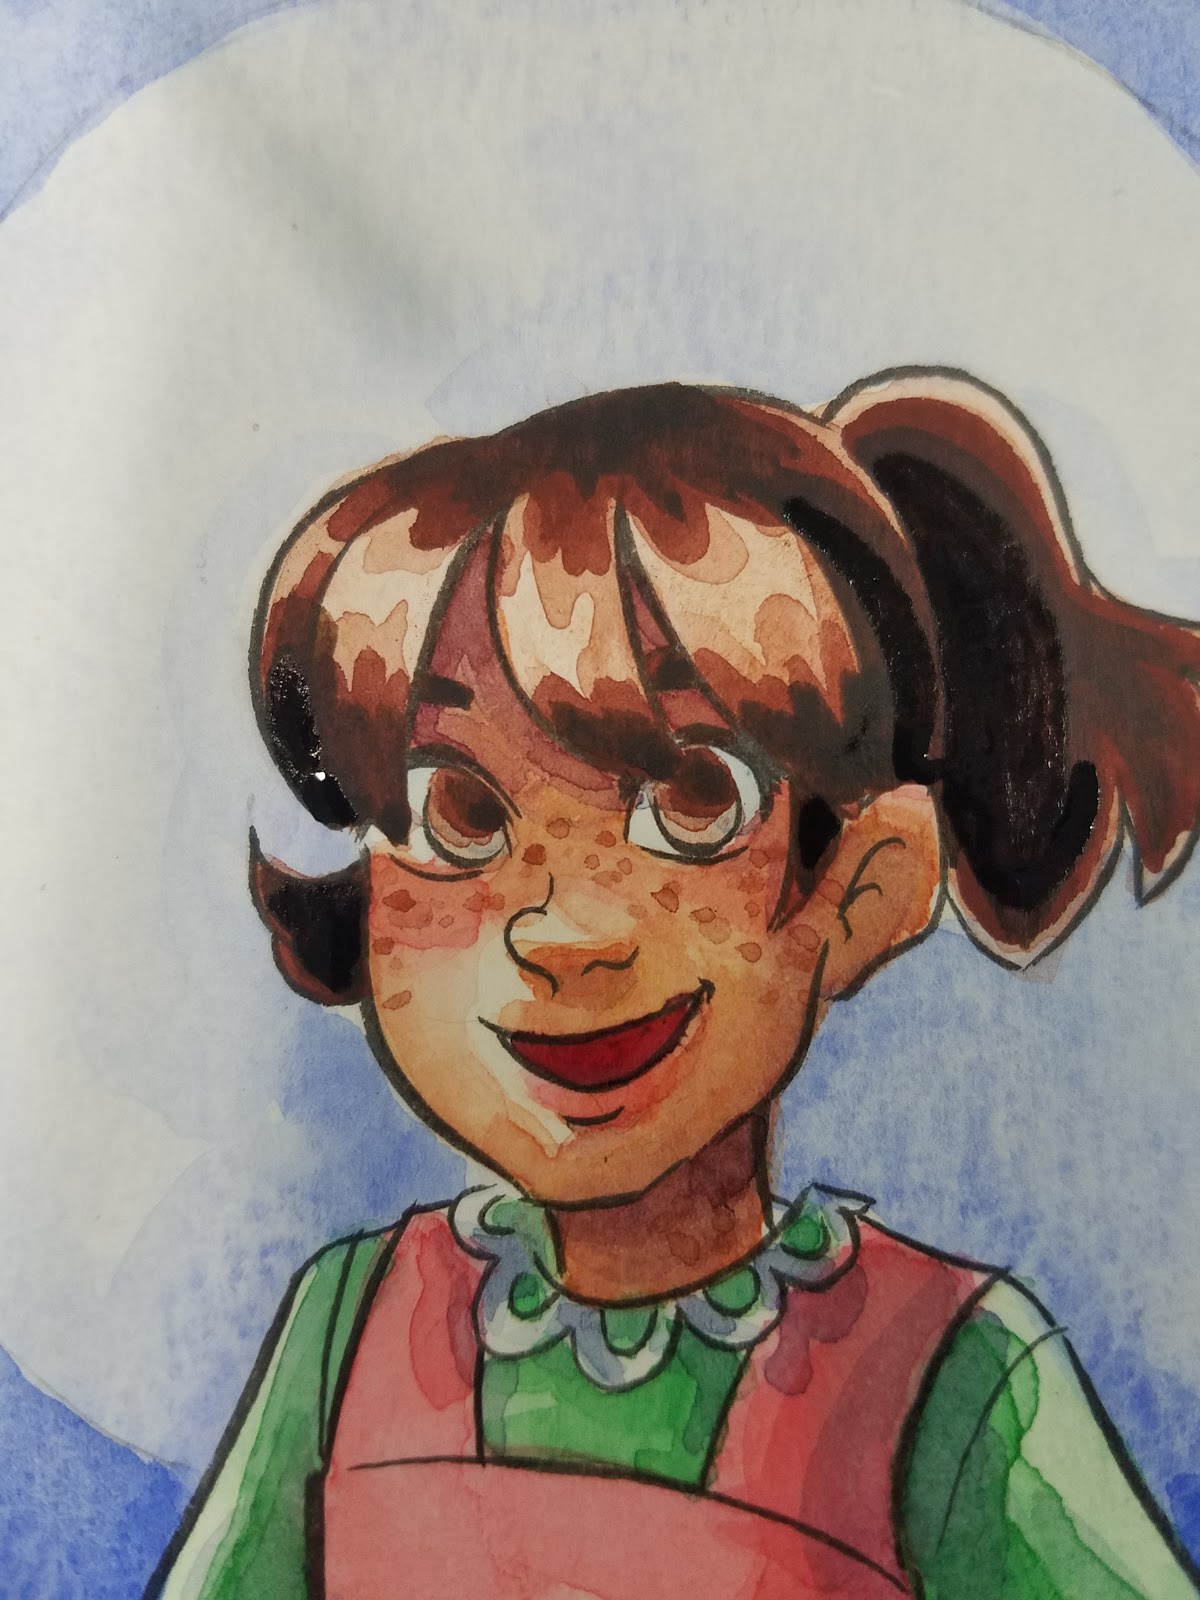
Step 9: Mix and apply blush
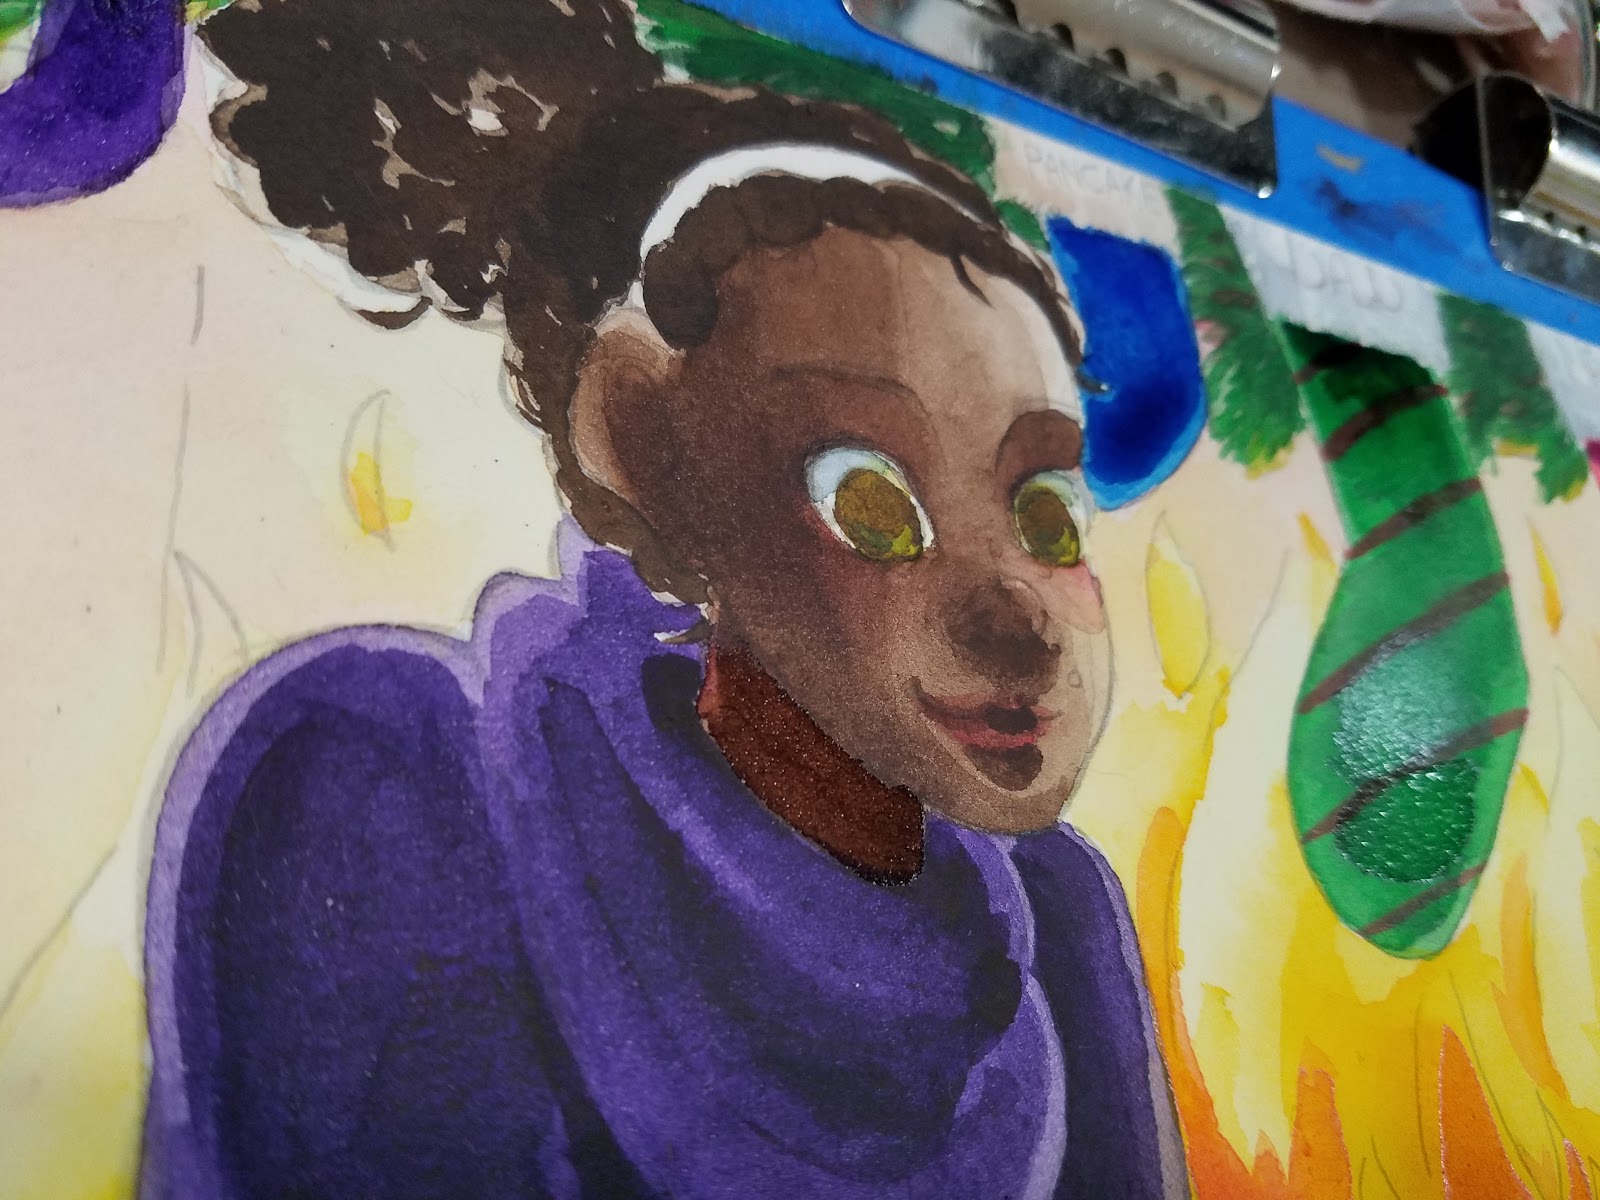
For first layer of blush, apply across cheeks and bridge of nose, beneath nose, to lips, tops of ears, knuckles on fingers and fingertips, elbows, knees, heels.

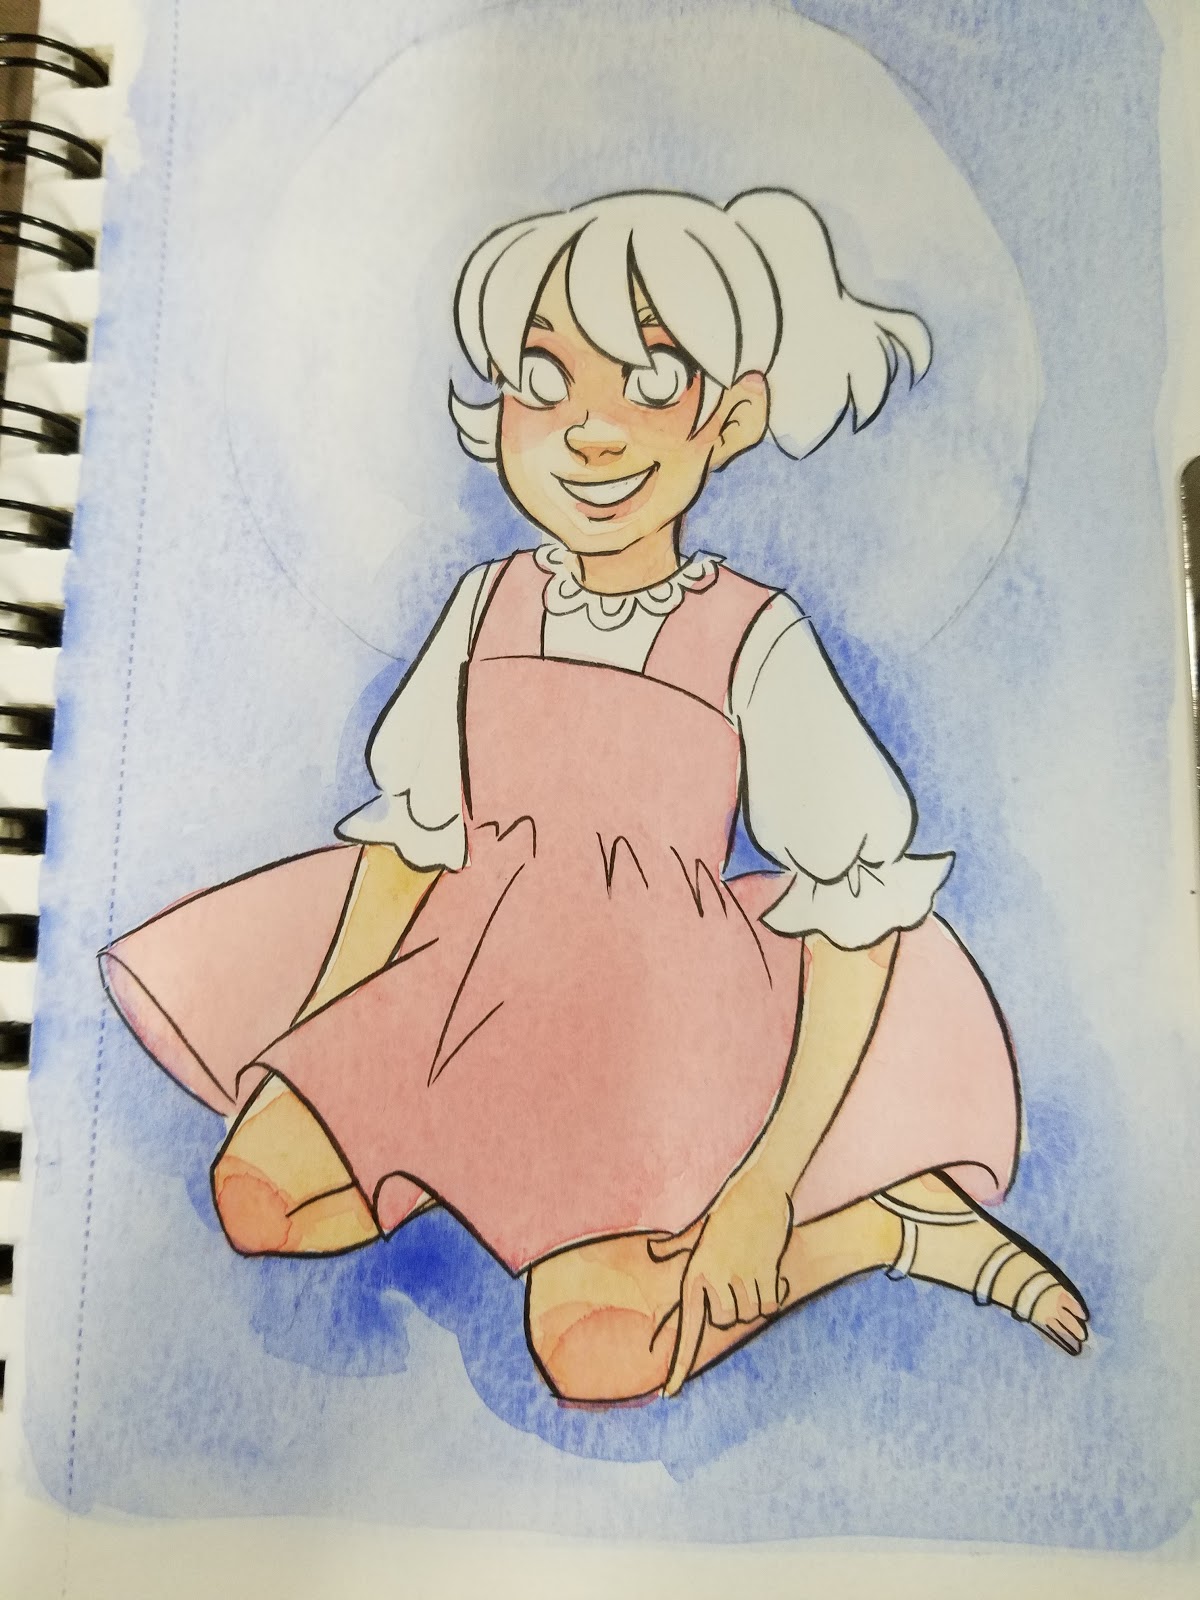
Step 10: Add another of blush to build up color.
Layer can blended out with clean water.

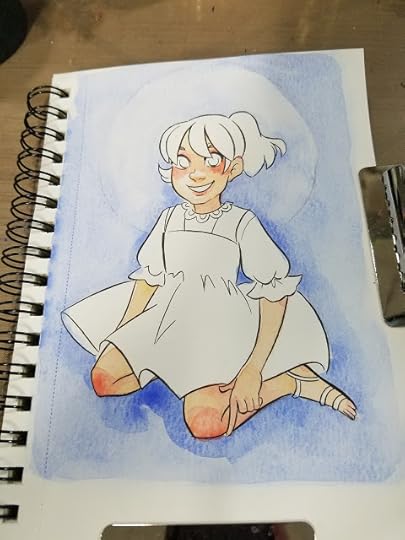
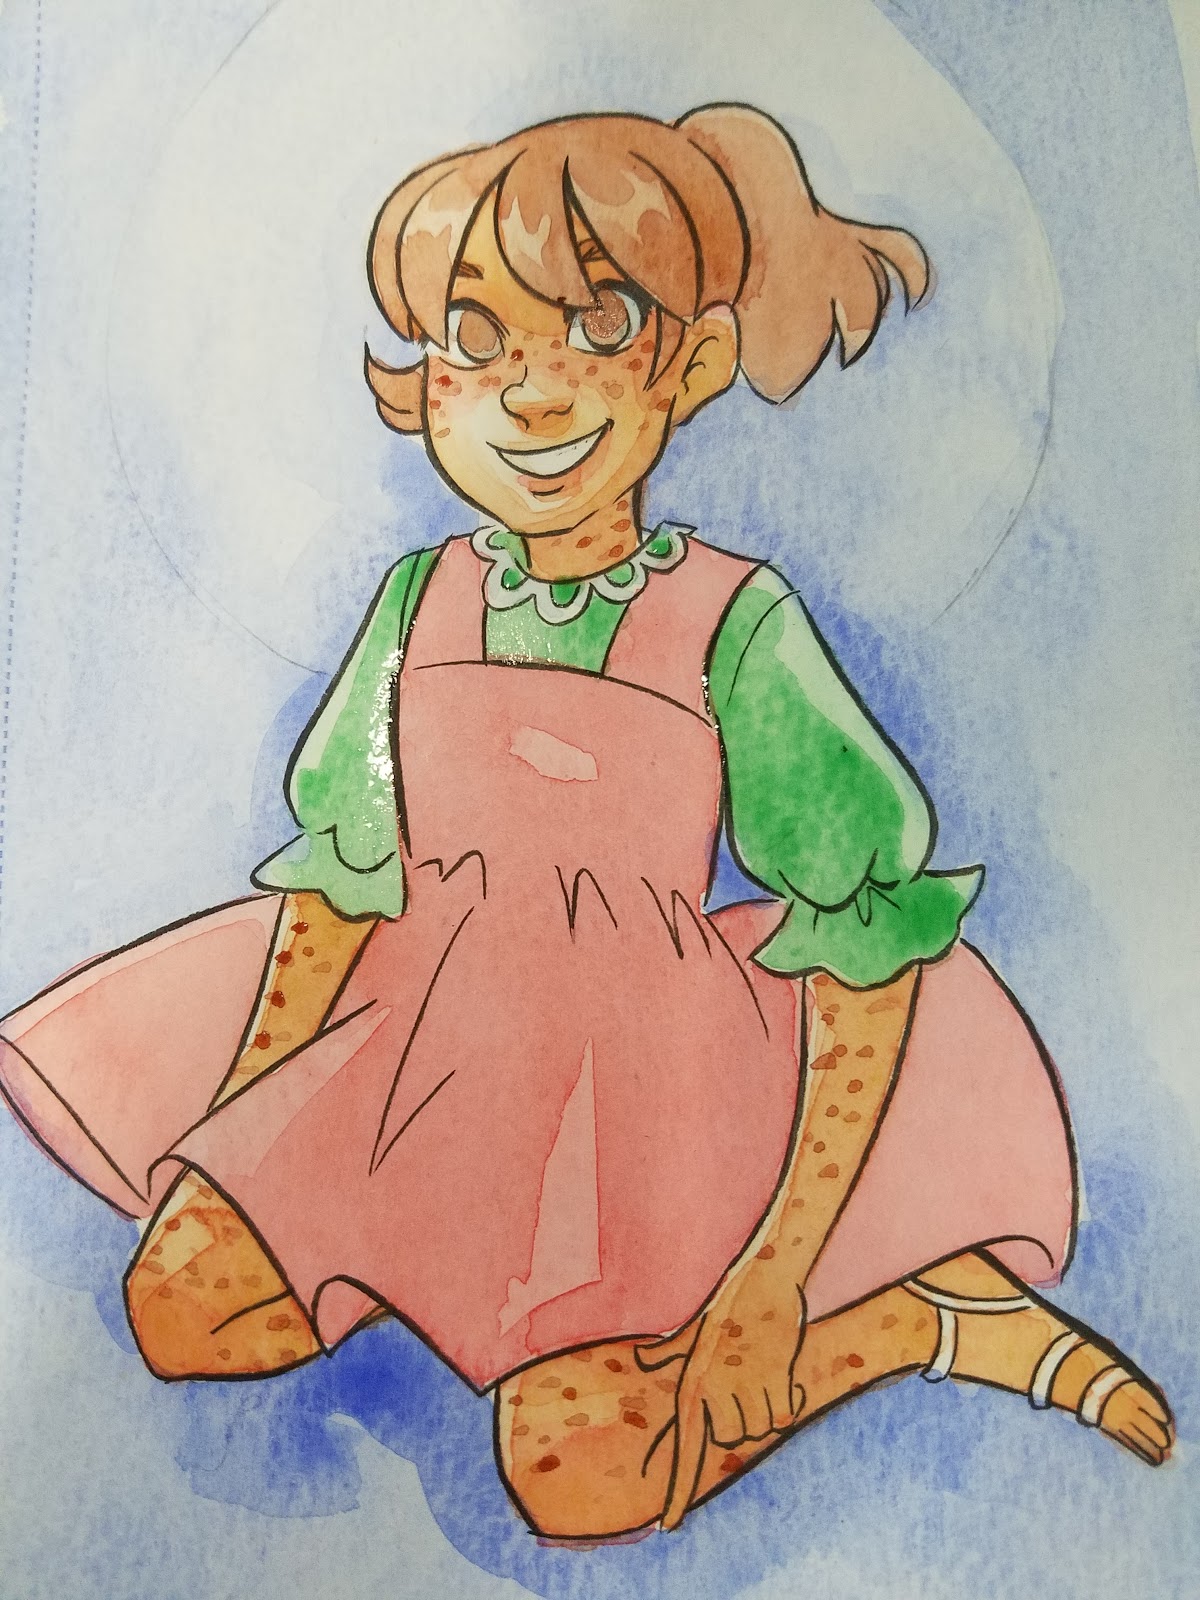
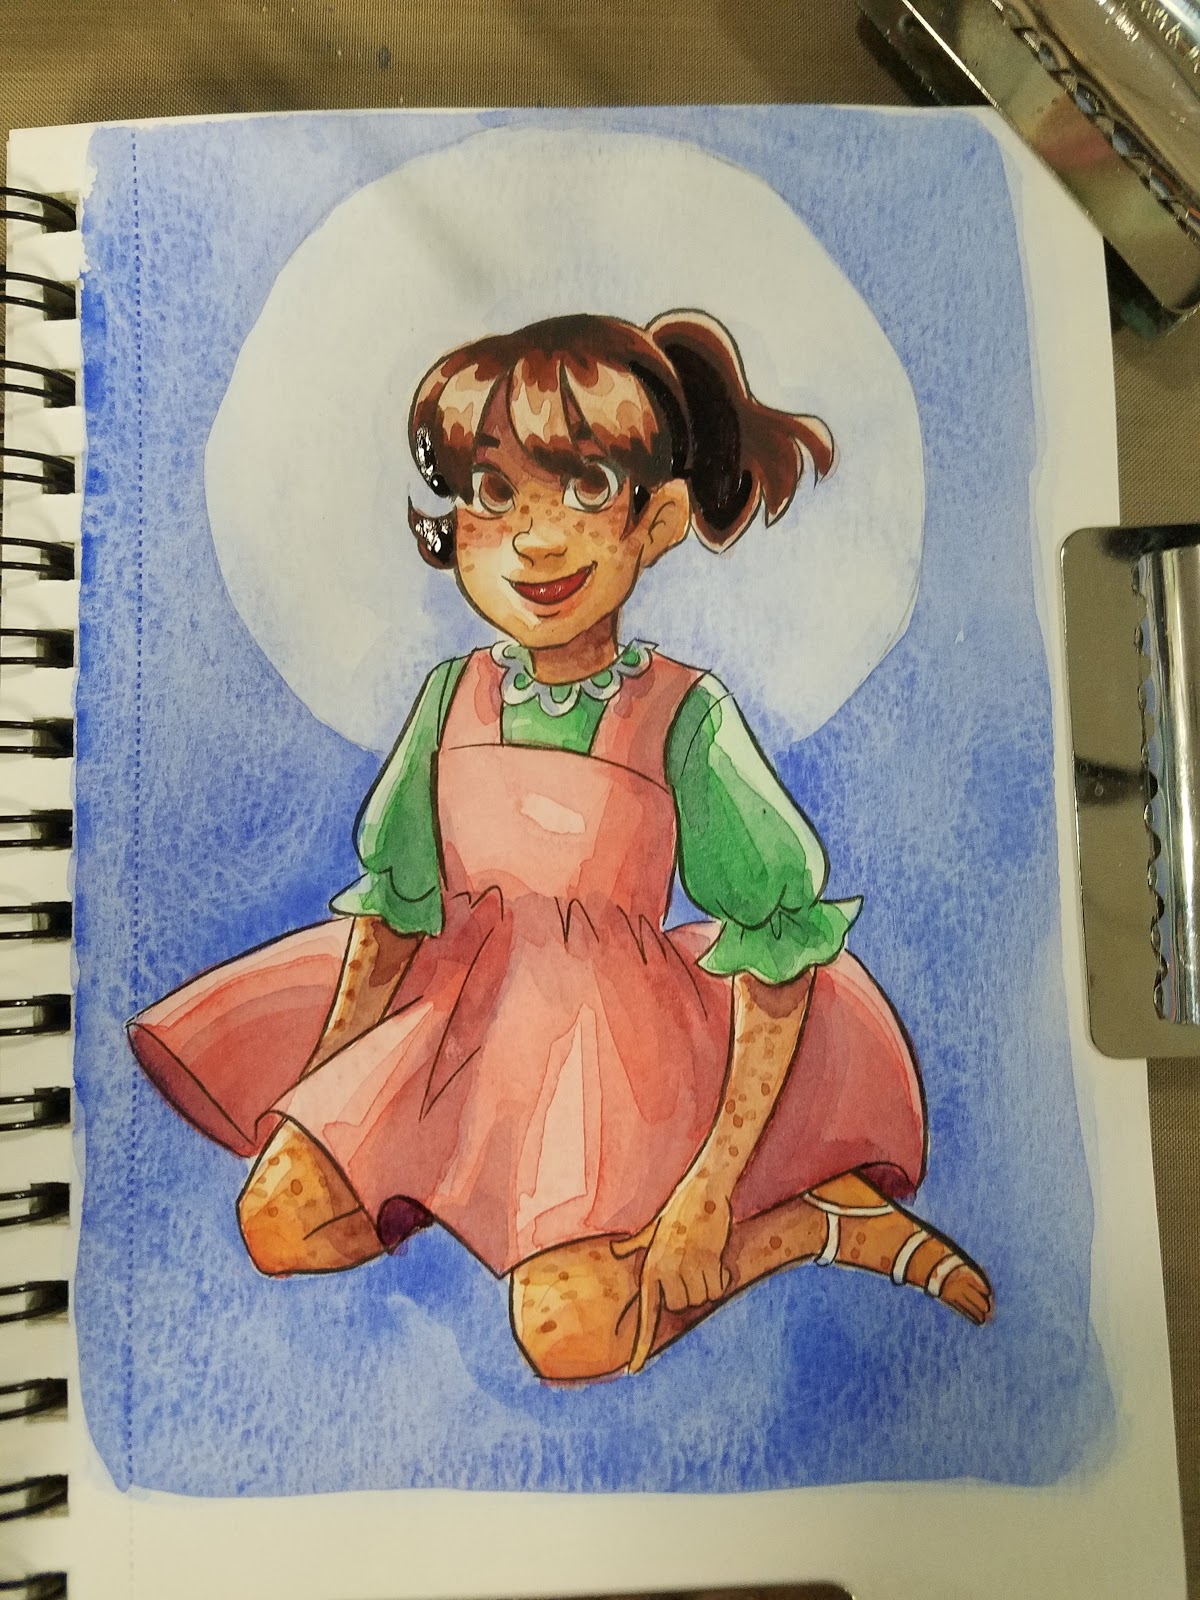
Step 11: Apply wash of color to largest article of clothes
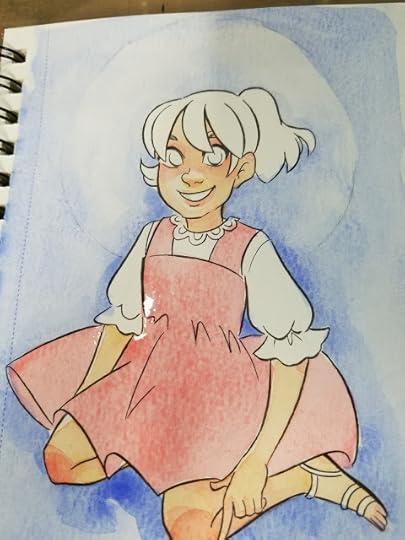
Step 12: Allow wash to dry
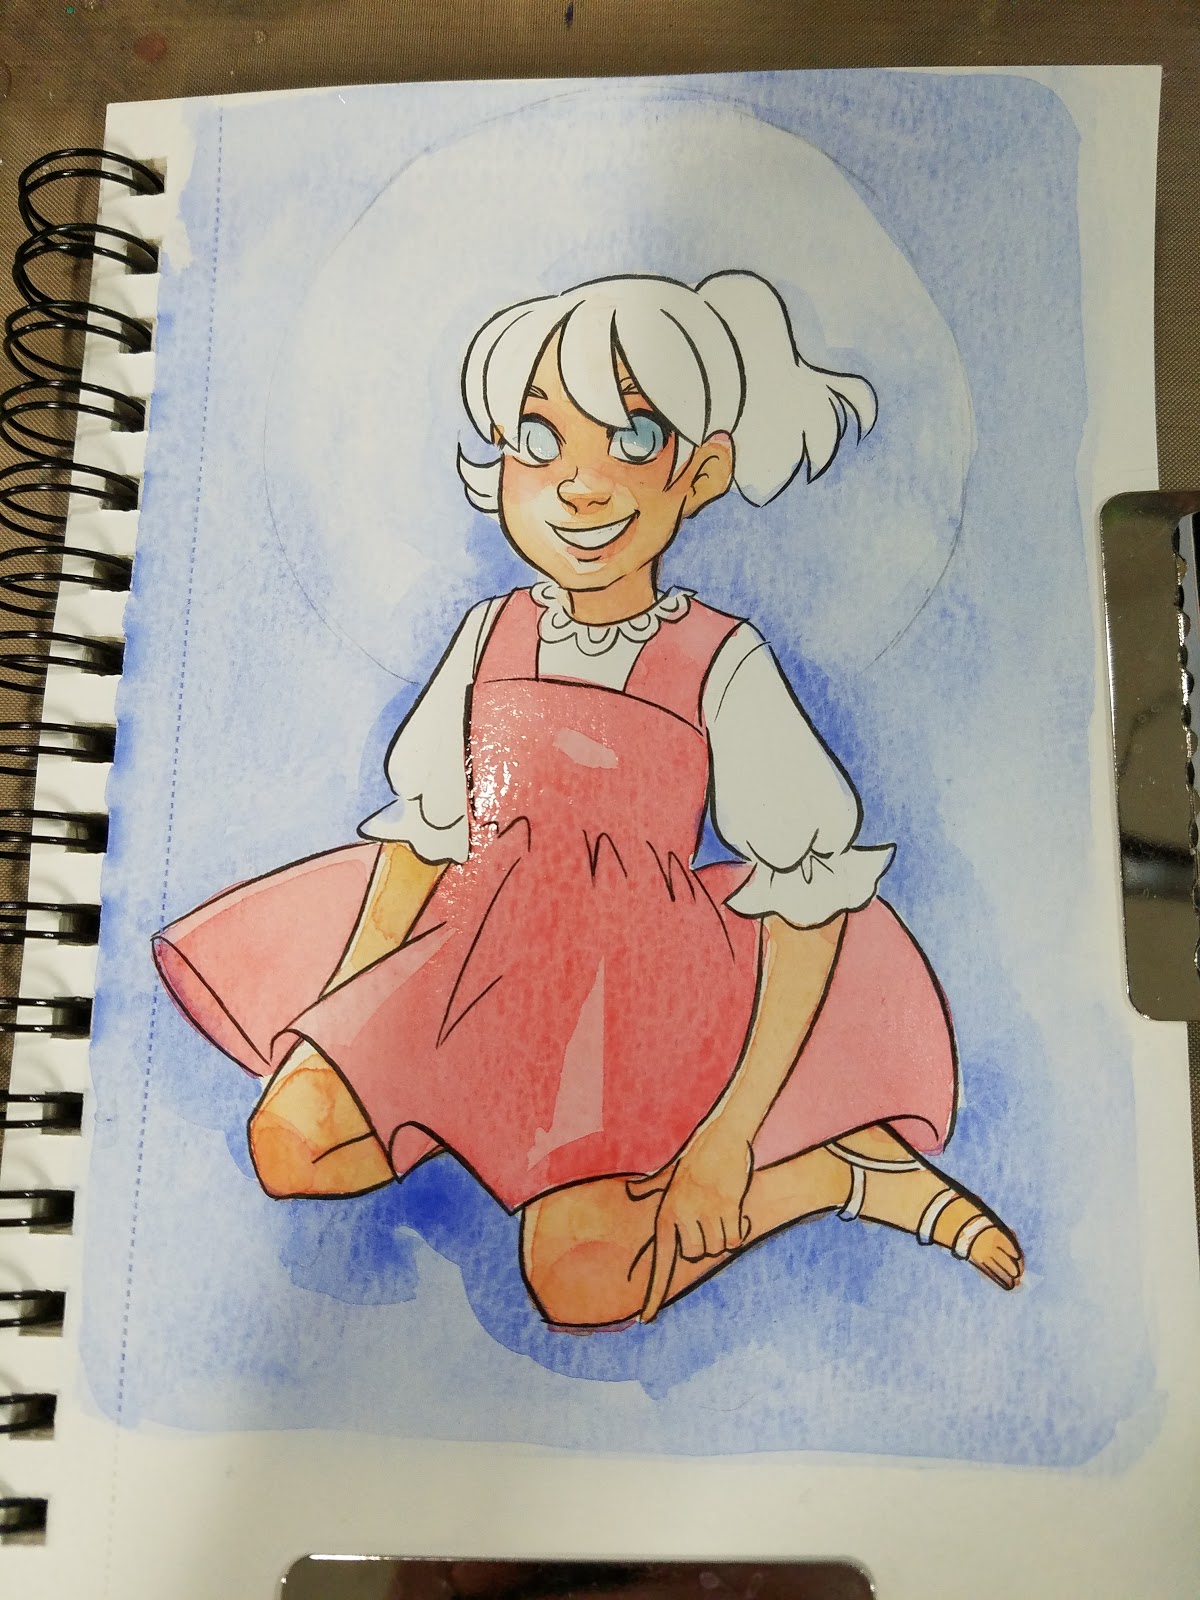
Step 13: With same color mixed (or slightly more saturated version), apply shadows to clothing.

Step 14: Fill in Smaller Articles of Clothing
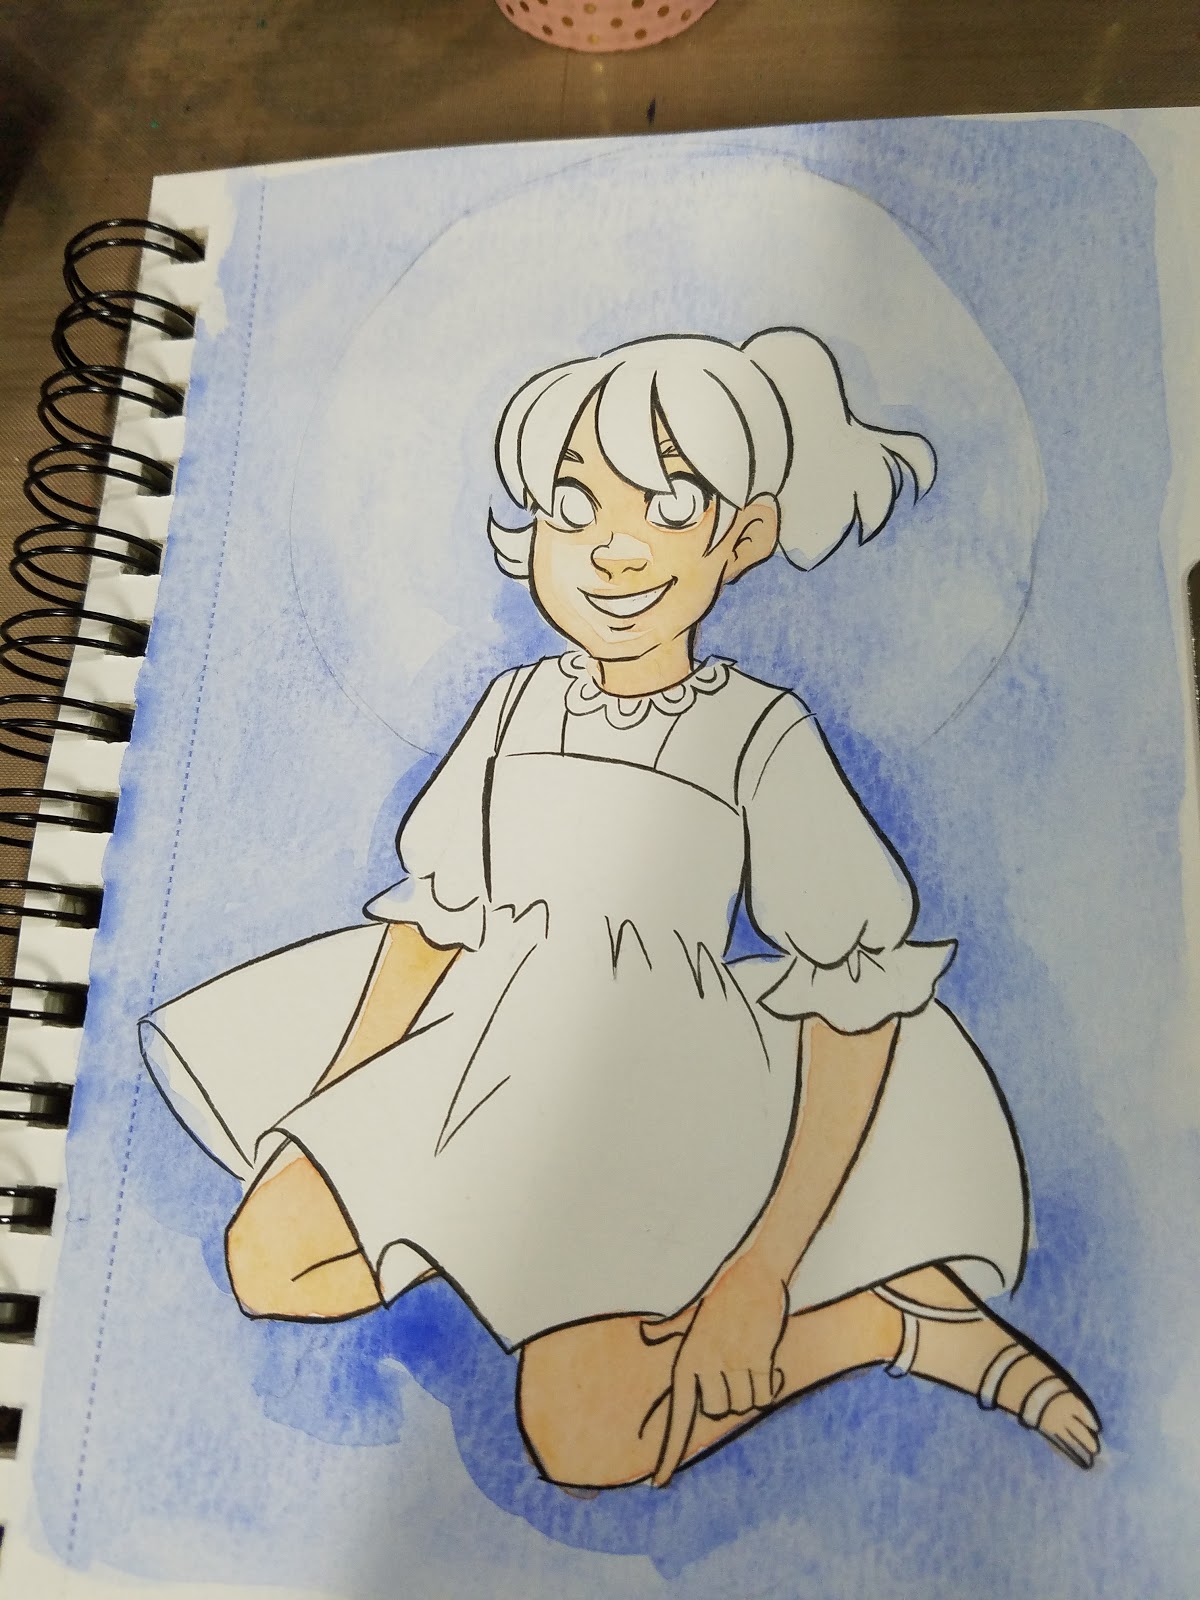
Step 15: As adjacent areas are dry, develop saturation and tone as necessary.
With glazes, the intention is to build up contrast and detail- so do not cover the entire area with every pass. Every pass should cover less than the one before.


 Step 16: Reserving your most concentrated colors for the end, apply dry onto dry or concentrated wet onto dry colors at the end.
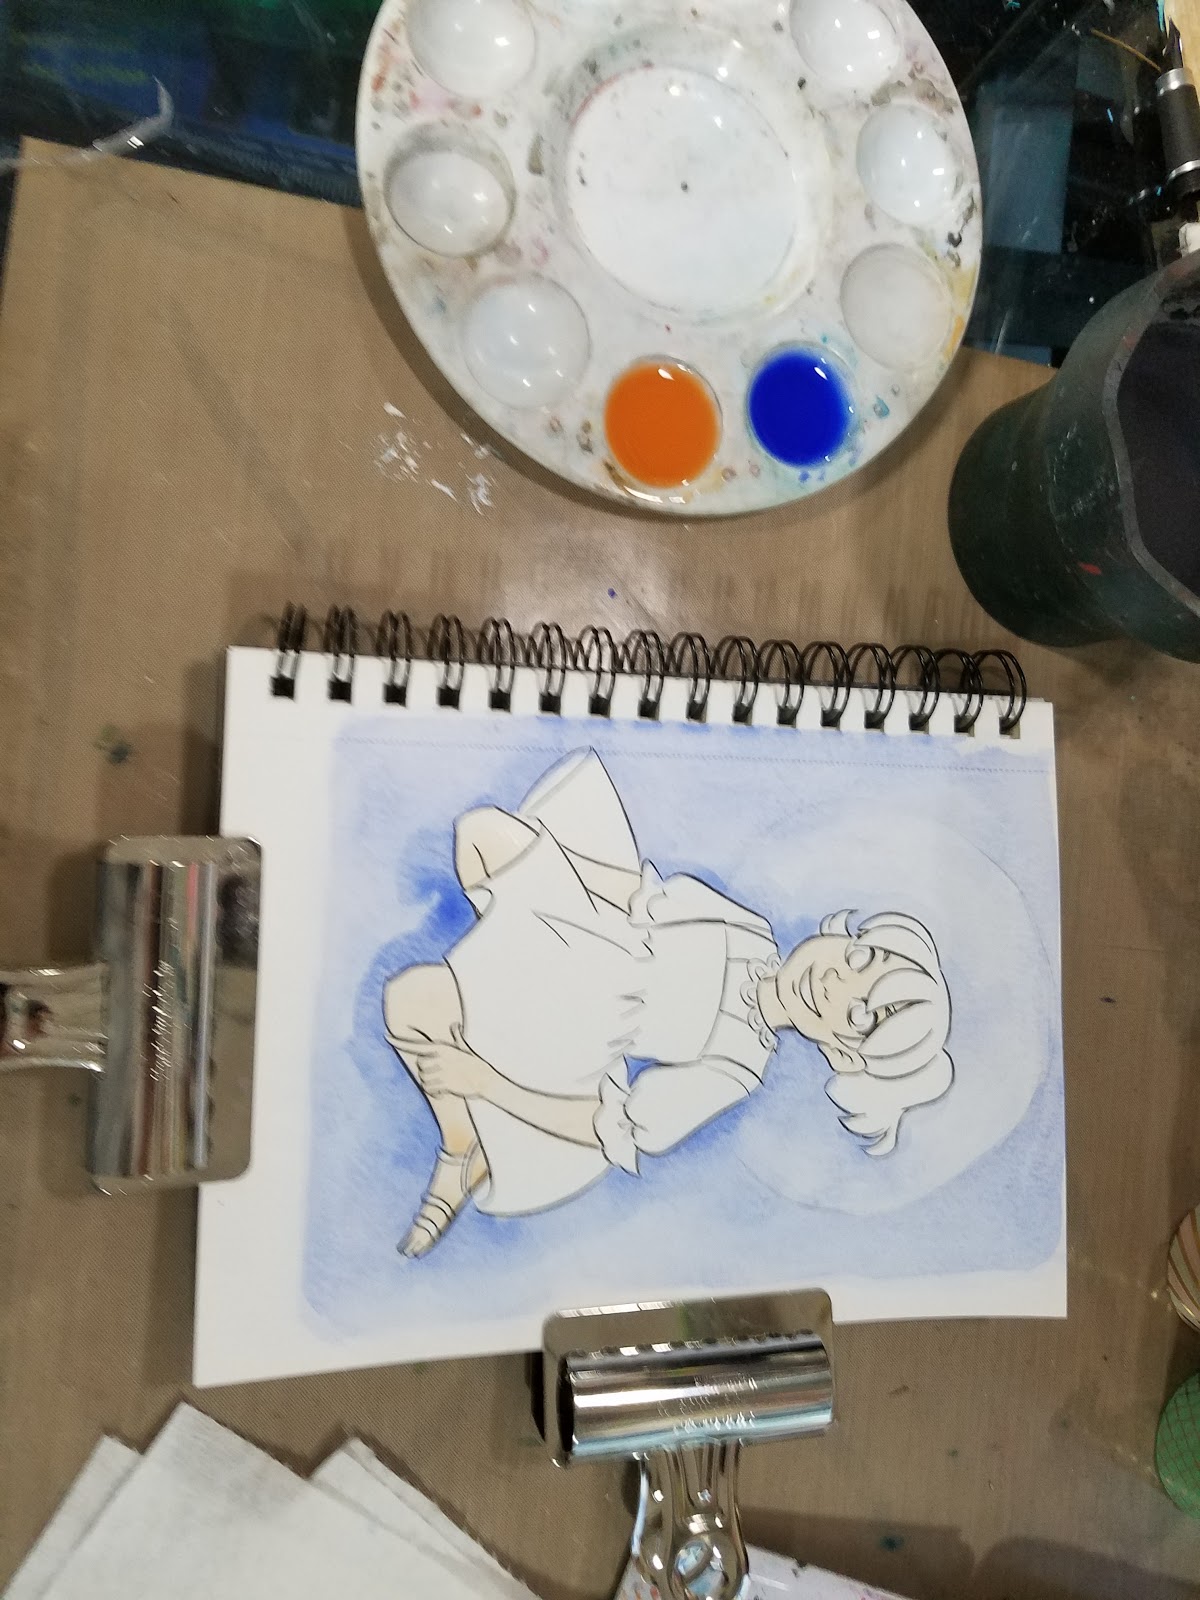
Step 17: If necessary, add another layer of background wash to darken the background and build up contrast.

Step 18: Allow background to dry completely
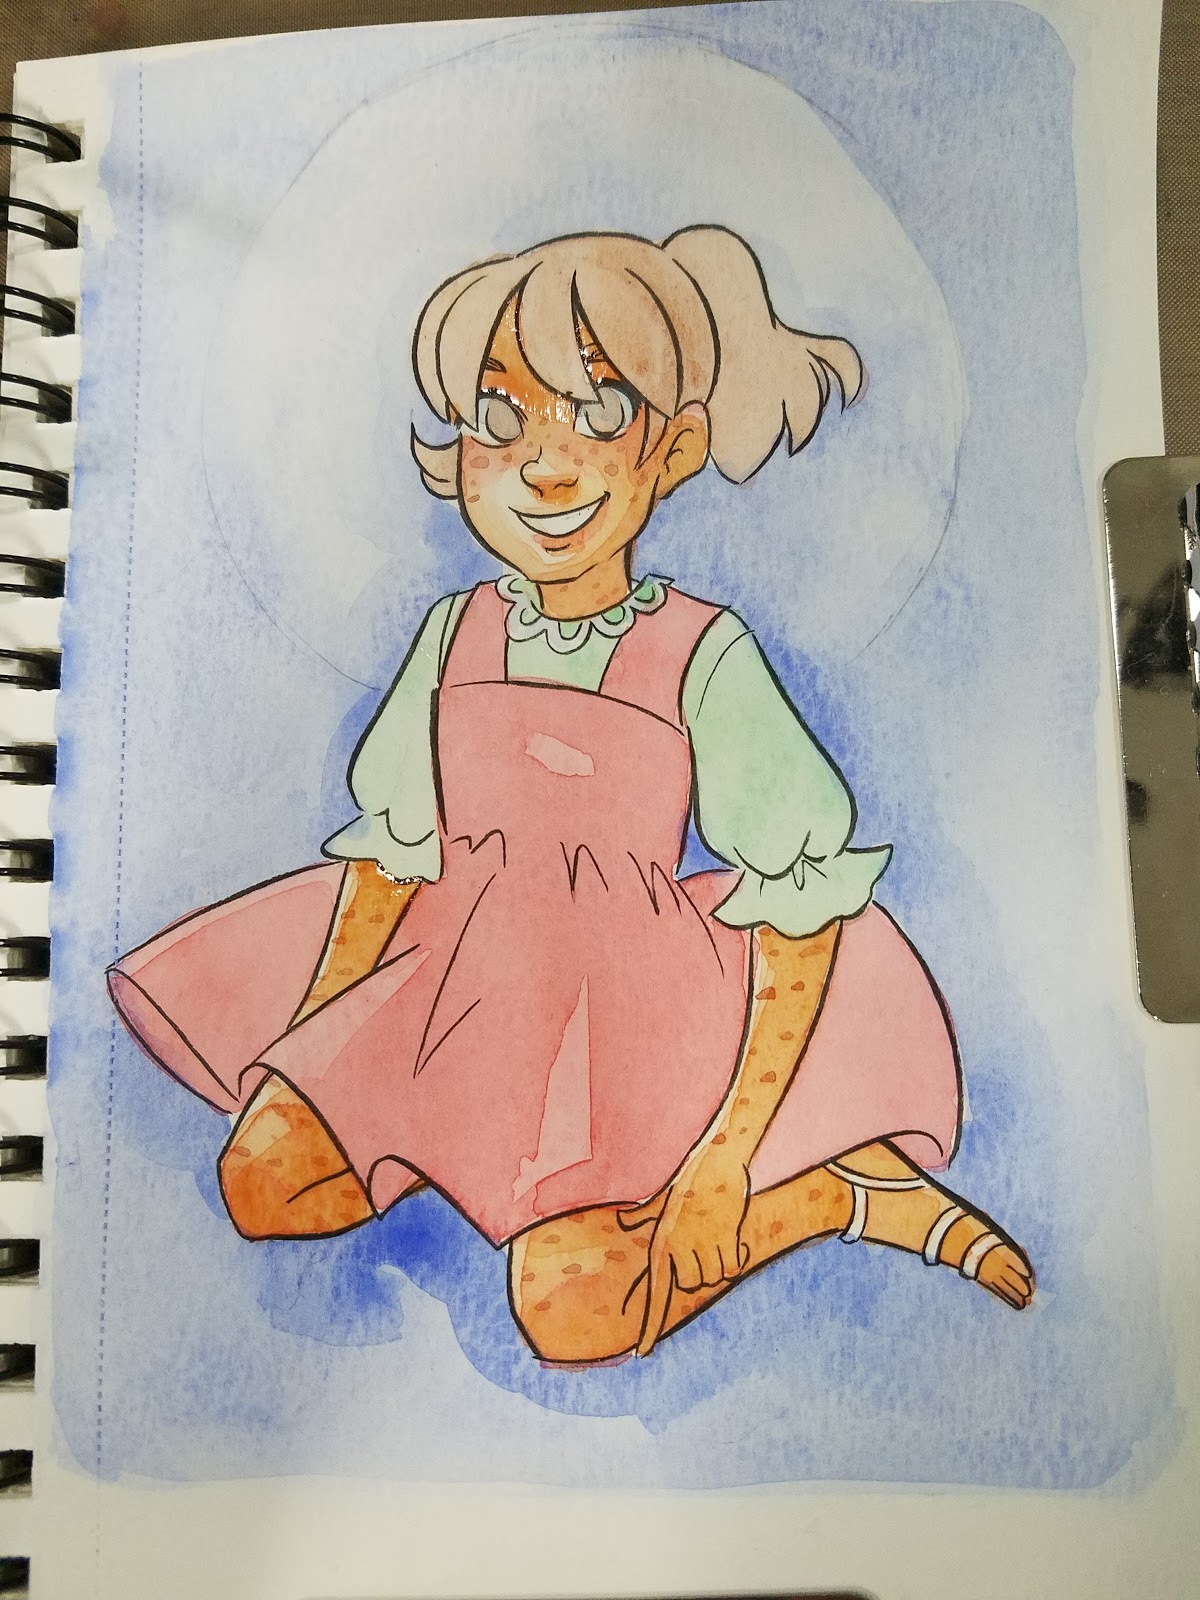
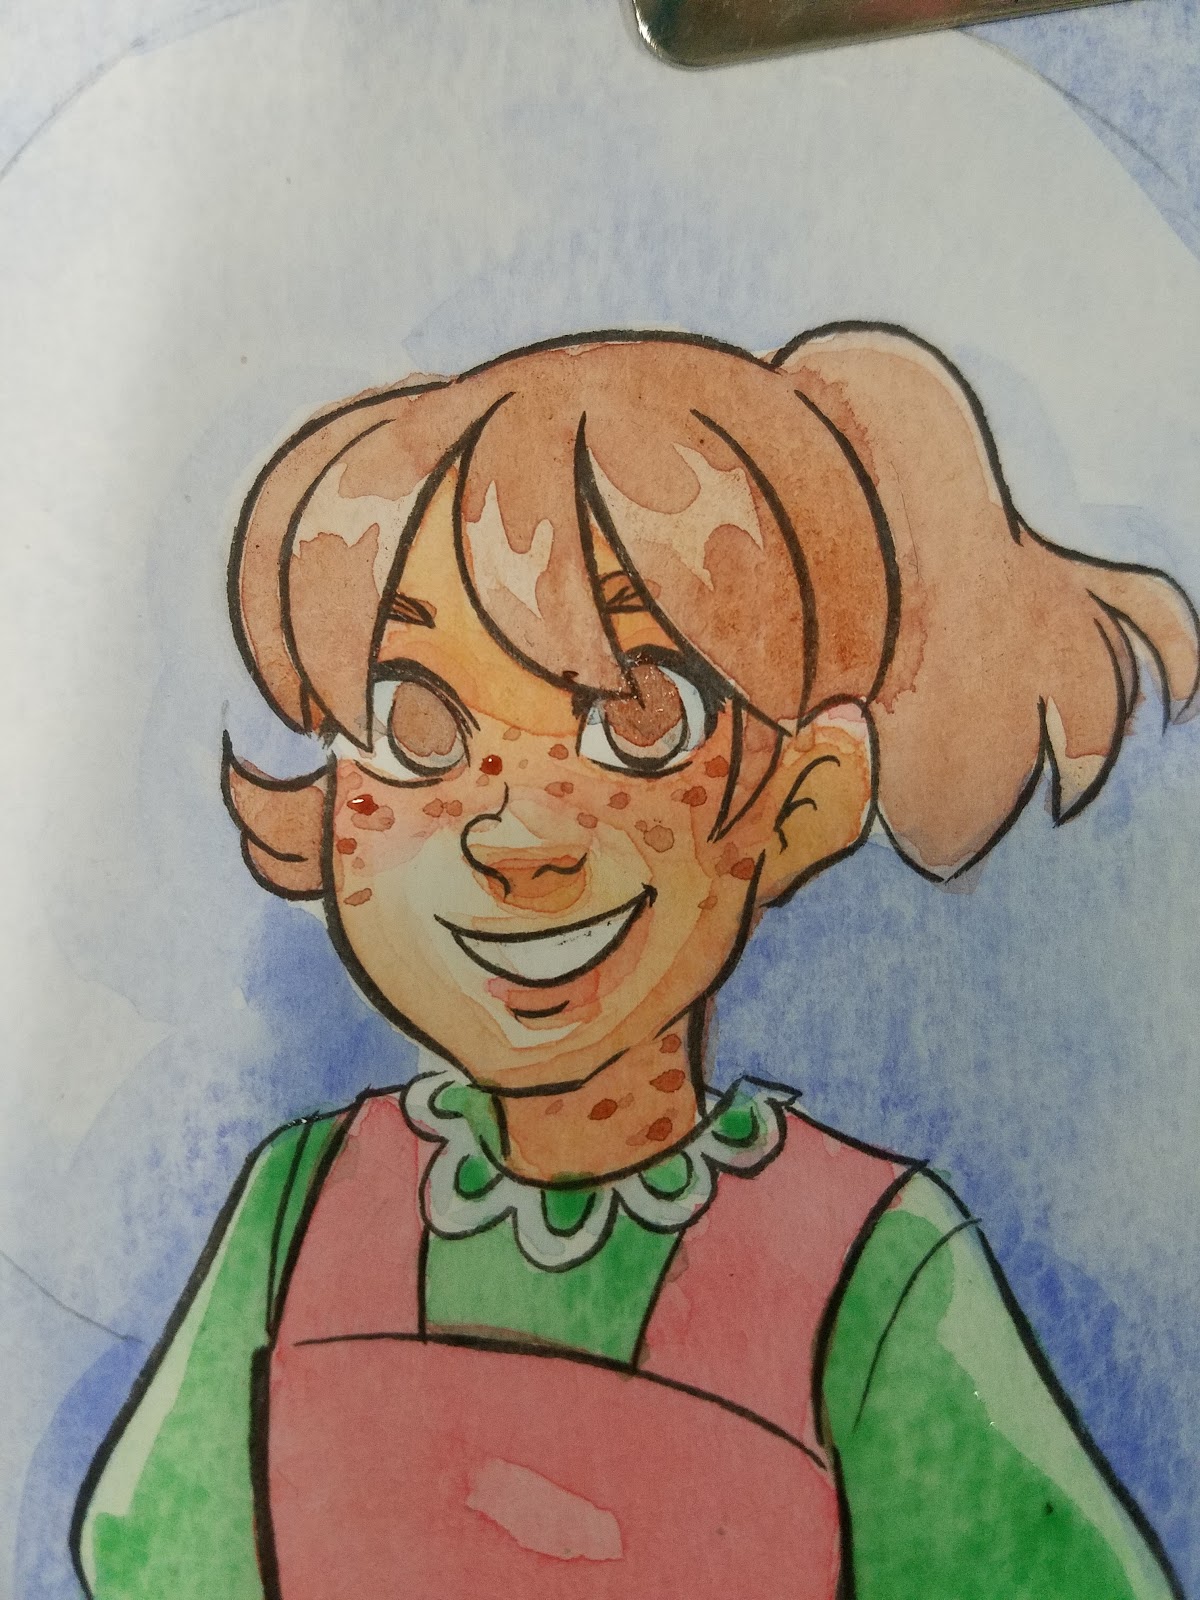
Step 19: Once everything is dry, apply shadow colors to skin (as demonstrated in the Watercolor Basics: Step by Step: Adding Shadows (link) tutorial)

For this illustration, I applied skin shadow beneath Kara's bangs under her chin, inside her ear, along the inside of her right arm, along the outside of her left arm, and on her legs.
Step 20: Add another glaze of shadow to darken skin.
Step 21: Apply most concentrated (dry onto dry) colors at this stage, to prevent reactivation or muddy colors


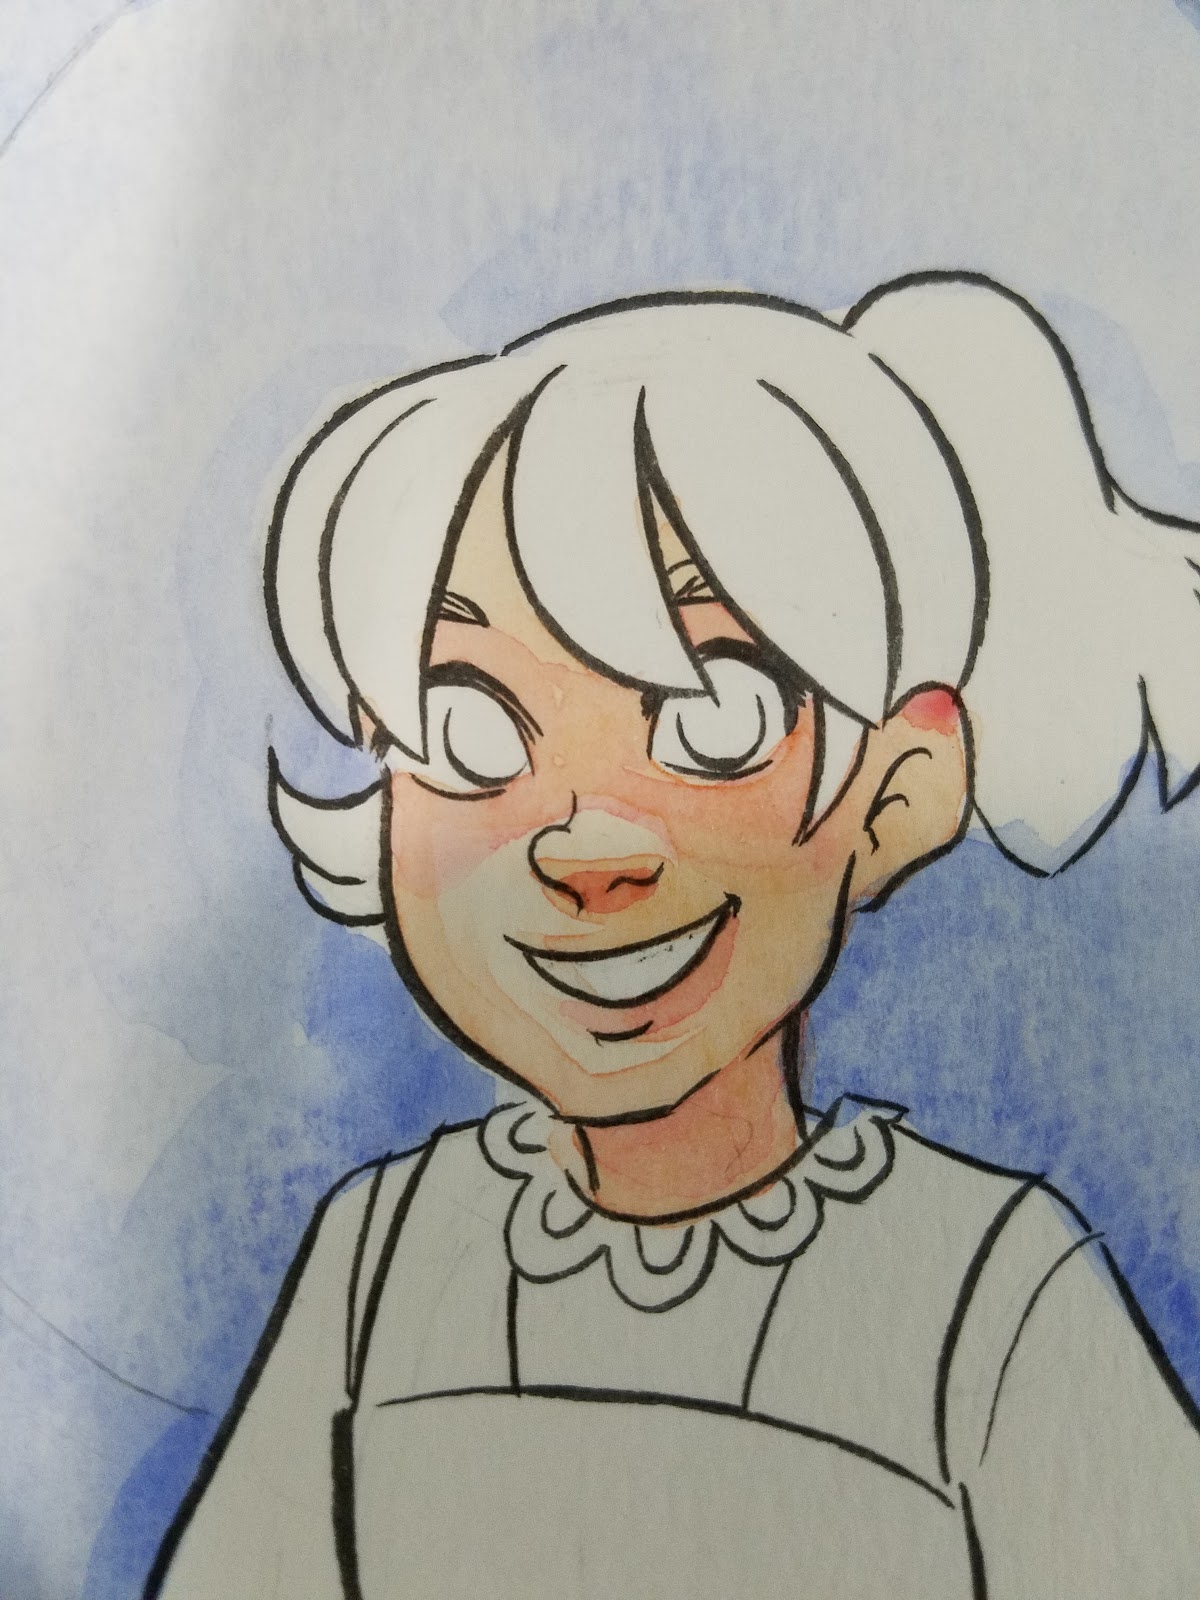
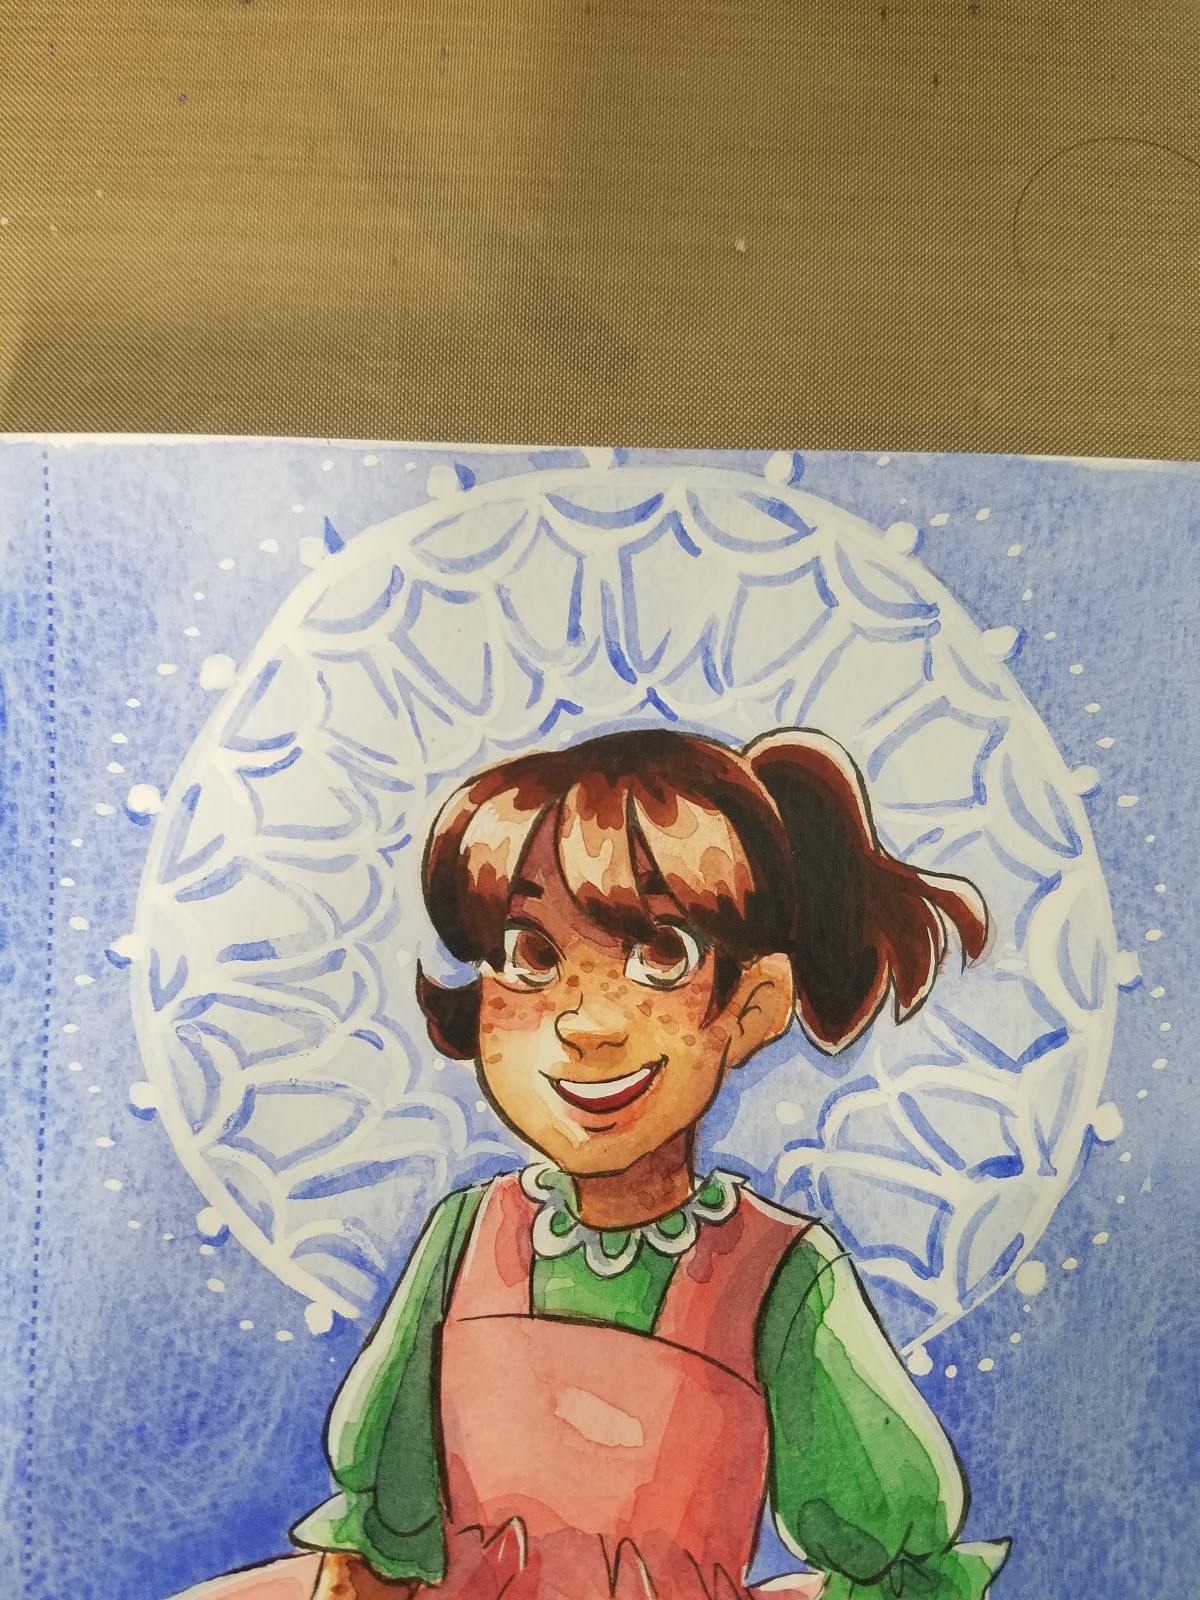
For the Mandala:
Materials used:White gouacheConcentrated mix of background color (ultramarine+cerulean)Small synthetic round (2)
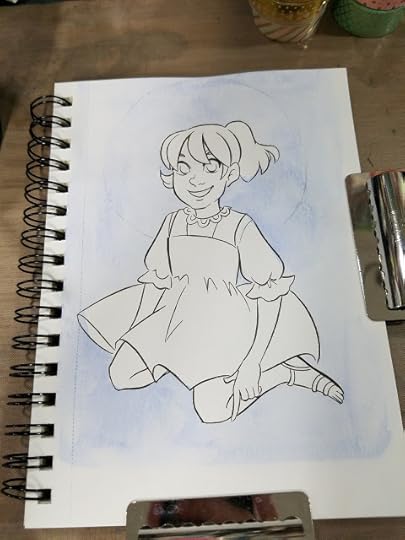
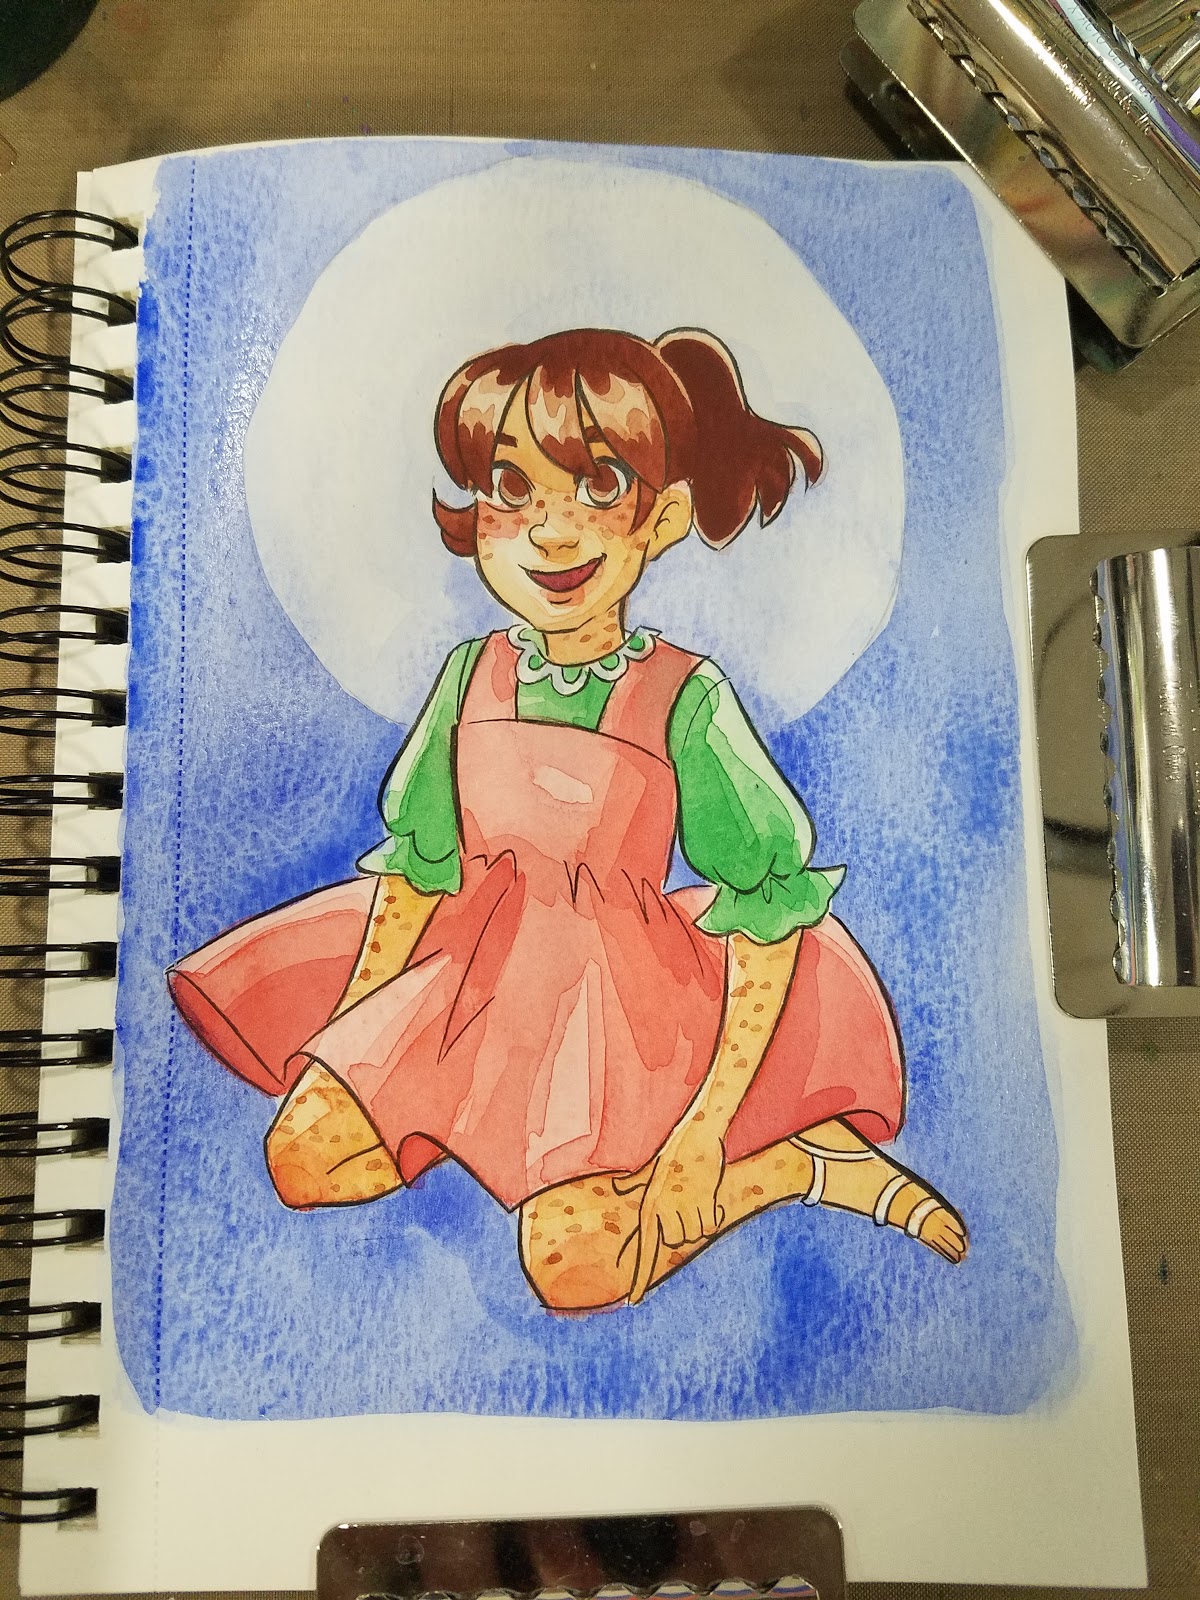
Step 1: Begin with your dried watercolor.
Note I've already left an area for the mandala lightly painted.
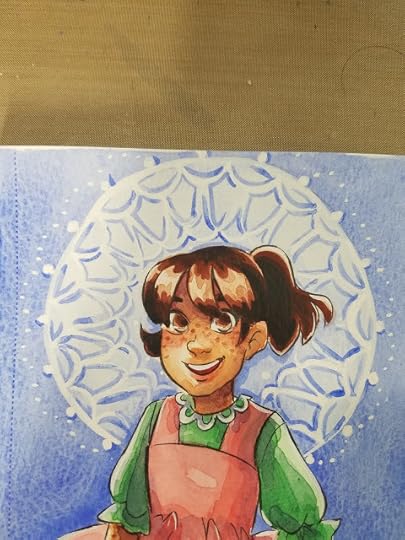
Step 2: Working from the outside, I outline the circle with gouache using the synthetic round, and add small, evenly spaced dots around the perimeter.
Step 3: Working one row at a time, I fill the circle in with loops and laces. Although the size varies from row to row, it stays consistent within the row itself.
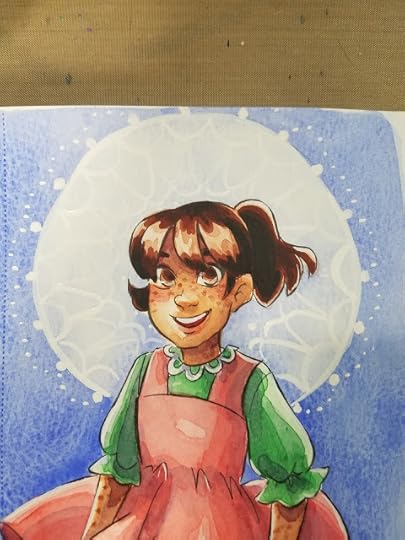
Step 4: To make the white gouache pop, use the background color to lightly edge your gouache.
If you make a mistake, correction is easy! Just wait until the paint dries, and then cover the mistake with white gouache.
Step 5: Allow to Dry
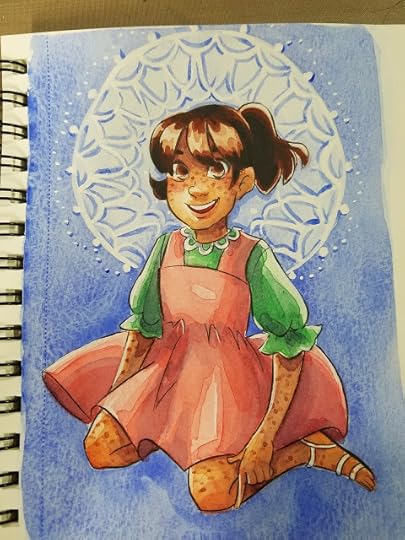
As you can see, glazing is a fairly simple technique that can give you great results. It's particularly suited to cheap, cellulose papers that can't withstand much work. Once you've mastered the basic glaze, you are well on your way to painting your own watercolor pages successfully.
Our Sponsor:

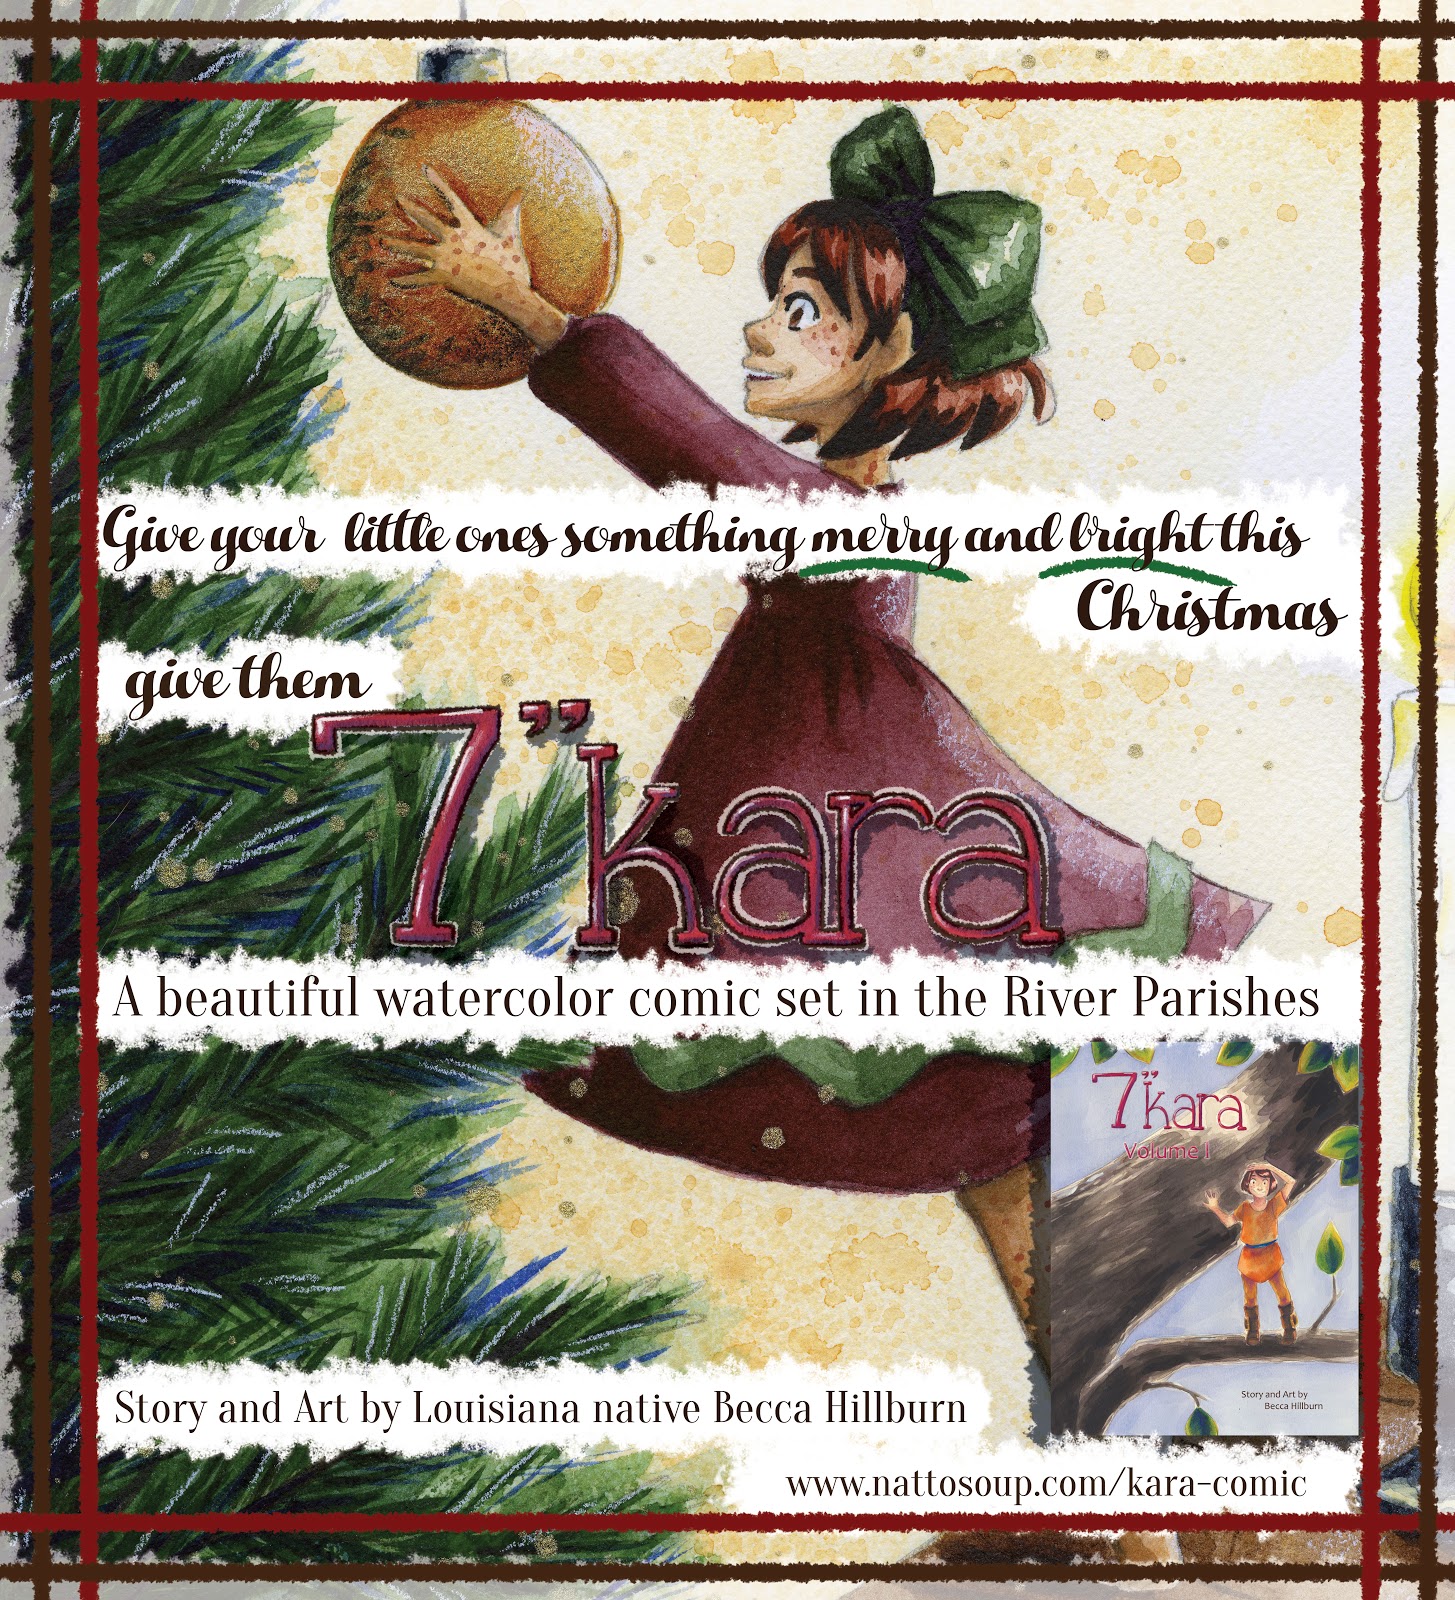
For more beautiful watercolor work, why not pick up a copy of 7" Kara, Volume 1? 7" Kara is a lush watercolor comic the entire family can enjoy, following the adventures of tiny Kara as she discovers humans, explores the backyard, and befriends a kitten. Created by Becca Hillburn, if you enjoy this blog and my art, you'll love 7" Kara. Volume 1 is available in the Natto-shop.
Please consider donating to this blog or purchasing from Natto-shop (http://nattosoup.com/shop) if you want me to continue publishing quality content. All materials tested were purchased from my own pocket. Keep on Truckin' Nattosoup is not under any sponsorship.

If you enjoy this series, if you have learned something, or if I have inspired you in some way, please take a moment to share this, or any post, with your friends and familiy on your favorite social networking platform. There are handy sharing buttons below this post. If you enjoy art education content, and would like to be part of the process, please visit my Patreon for information on how to join the artnerd community. Backers get early access to popular series, backer exclusive content, and voting rights on upcoming content.
Glazing is a very simple technique that involves painting watercolor wet over dry. It's one of the first techniques a beginner watercolorist masters, and one of the techniques I used the most frequently when painting 7" Kara pages.


These pages are from Chapter 5 of 7" Kara. You can order Volume 1, which contains chapters 1-4, a bonus story, and concept art through Gumroad or my site. You can order a digital copy of Chapter 5 through Gumroad.
The majority of these pages were painted using glazing techniques and a lot of patience. Canson Montval paper can't handle fancy tricks, and doesn't take wet into wet too well, so if you're working on a student grade, cellulose paper like Montval, you'll either need to learn economy of line, or master glazing.
What is a Glaze?
A glaze is a thin layer of watercolor- wet over dry.
Why Glaze?
If you're working on inexpensive or difficult papers, delicate papers, or papers not designed for watercolor, thin glazes with long drytimes may allow you to achieve the results you want.Glazes are an easy technique to learnVersatileFor some artists, this may be the only technique you need
Materials Used in this Tutorial:
Watercolors of your choice (I use Winsor and Newton moist half pans, Daniel Smith, SoHo, and Holbein watercolors)
Daisy watercolor wells or palette of choice- For mixing large amounts of color
Watercolor brushes (I use mainly rounds)
2 watercolor cups- 1 clean, 1 dirty- I like the Faber-Castell collapsible cups
Paper towels
White Gouache
Synthetic Watercolor Brushes for Gouache
Paper used:
Canson Montval Sketchbook
Watercolor Brushes Used in this Tutorial:
For rounds larger than 6, I use synthetic brushes. Your preferences may vary from mine- I have several brands, and still have not found a brand I think perform as well as natural hair brushes. Synthetic brushes are much cheaper than natural hair brushes, especially at larger sizes, and are useful for blocking in color, as we will be doing in this tutorial.Creative Mark Rhapsody Kolinsky Sable Brushes- 4, 2, 1, 0Creative Mark Squirrel Brushes- 4, 6Blick Master Studio Squirrel- 4, 6Step 1: Preparing Your Image

This illustration was inked with a Sailor Mitsuo Aida brushpen.

Step 2: Securing Your Image
Although this is 140lb watercolor paper, and should not need stretching, I have not found a 140lb paper that is heavy duty enough that it doesn't need some securing. Since this paper is already spiral bound, I used two bulldog clips to clamp my paper down and help reduce buckling.
Step 3: Applying a Simple Wash
You could use masking film or masking fluid to mask off your area (which would make applying a wash much easier), but I have consistently had poor results with both, and opted to take the long route.
Step 4: Allow Wash To Dry
Step 5: Reapply Wash
Step 6: Add in background shadows
Step 7: Mix and Apply Skintone

Step 8: Add Skintone Shadows with Color
Step 9: Mix and apply blush
For first layer of blush, apply across cheeks and bridge of nose, beneath nose, to lips, tops of ears, knuckles on fingers and fingertips, elbows, knees, heels.

Step 10: Add another of blush to build up color.
Layer can blended out with clean water.

Step 11: Apply wash of color to largest article of clothes
Step 12: Allow wash to dry

Step 13: With same color mixed (or slightly more saturated version), apply shadows to clothing.
Step 14: Fill in Smaller Articles of Clothing

Step 15: As adjacent areas are dry, develop saturation and tone as necessary.
With glazes, the intention is to build up contrast and detail- so do not cover the entire area with every pass. Every pass should cover less than the one before.


 Step 16: Reserving your most concentrated colors for the end, apply dry onto dry or concentrated wet onto dry colors at the end.
Step 17: If necessary, add another layer of background wash to darken the background and build up contrast.
Step 18: Allow background to dry completely
Step 19: Once everything is dry, apply shadow colors to skin (as demonstrated in the Watercolor Basics: Step by Step: Adding Shadows (link) tutorial)

For this illustration, I applied skin shadow beneath Kara's bangs under her chin, inside her ear, along the inside of her right arm, along the outside of her left arm, and on her legs.
Step 20: Add another glaze of shadow to darken skin.

Step 21: Apply most concentrated (dry onto dry) colors at this stage, to prevent reactivation or muddy colors
For the Mandala:
Materials used:White gouacheConcentrated mix of background color (ultramarine+cerulean)Small synthetic round (2)
Step 1: Begin with your dried watercolor.
Note I've already left an area for the mandala lightly painted.

Step 2: Working from the outside, I outline the circle with gouache using the synthetic round, and add small, evenly spaced dots around the perimeter.
Step 3: Working one row at a time, I fill the circle in with loops and laces. Although the size varies from row to row, it stays consistent within the row itself.

Step 4: To make the white gouache pop, use the background color to lightly edge your gouache.
If you make a mistake, correction is easy! Just wait until the paint dries, and then cover the mistake with white gouache.
Step 5: Allow to Dry

As you can see, glazing is a fairly simple technique that can give you great results. It's particularly suited to cheap, cellulose papers that can't withstand much work. Once you've mastered the basic glaze, you are well on your way to painting your own watercolor pages successfully.
Our Sponsor:

For more beautiful watercolor work, why not pick up a copy of 7" Kara, Volume 1? 7" Kara is a lush watercolor comic the entire family can enjoy, following the adventures of tiny Kara as she discovers humans, explores the backyard, and befriends a kitten. Created by Becca Hillburn, if you enjoy this blog and my art, you'll love 7" Kara. Volume 1 is available in the Natto-shop.
Please consider donating to this blog or purchasing from Natto-shop (http://nattosoup.com/shop) if you want me to continue publishing quality content. All materials tested were purchased from my own pocket. Keep on Truckin' Nattosoup is not under any sponsorship.


January 4, 2017
Watercolor Basics: Step by Step: Adding Details
Now that we've introduced the basics of Watercolor Basics, it's time to take you step by step through some of the most common processes for completing a watercolor illustration. I'm going to take you from start to finish through my 2016 Christmas card illustration, explaining my techniques as I go. I have a series of video tutorials recorded concurrently that should be available on my Youtube channel soon, if you need some live action explanation.
If you enjoy this series, if you have learned something, or if I have inspired you in some way, please take a moment to share this, or any post, with your friends and familiy on your favorite social networking platform. There are handy sharing buttons below this post. If you enjoy art education content, and would like to be part of the process, please visit my Patreon for information on how to join the artnerd community. Backers get early access to popular series, backer exclusive content, and voting rights on upcoming content.

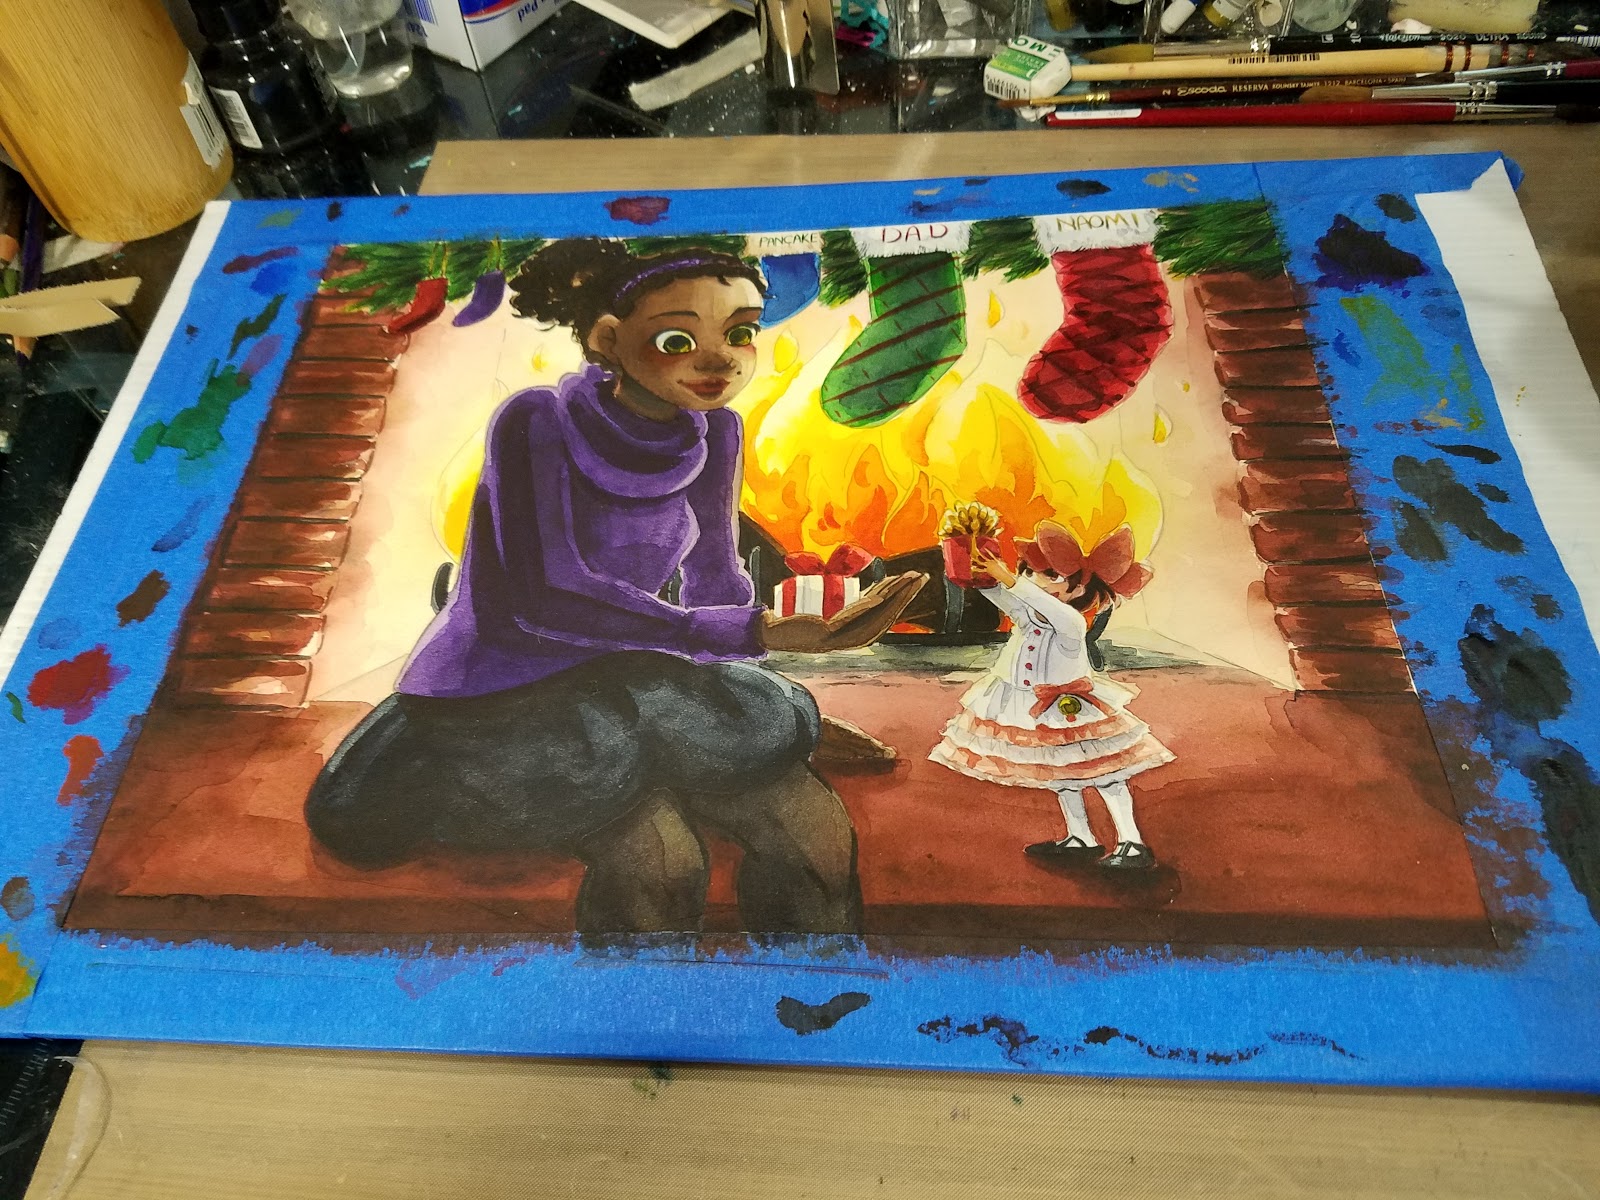
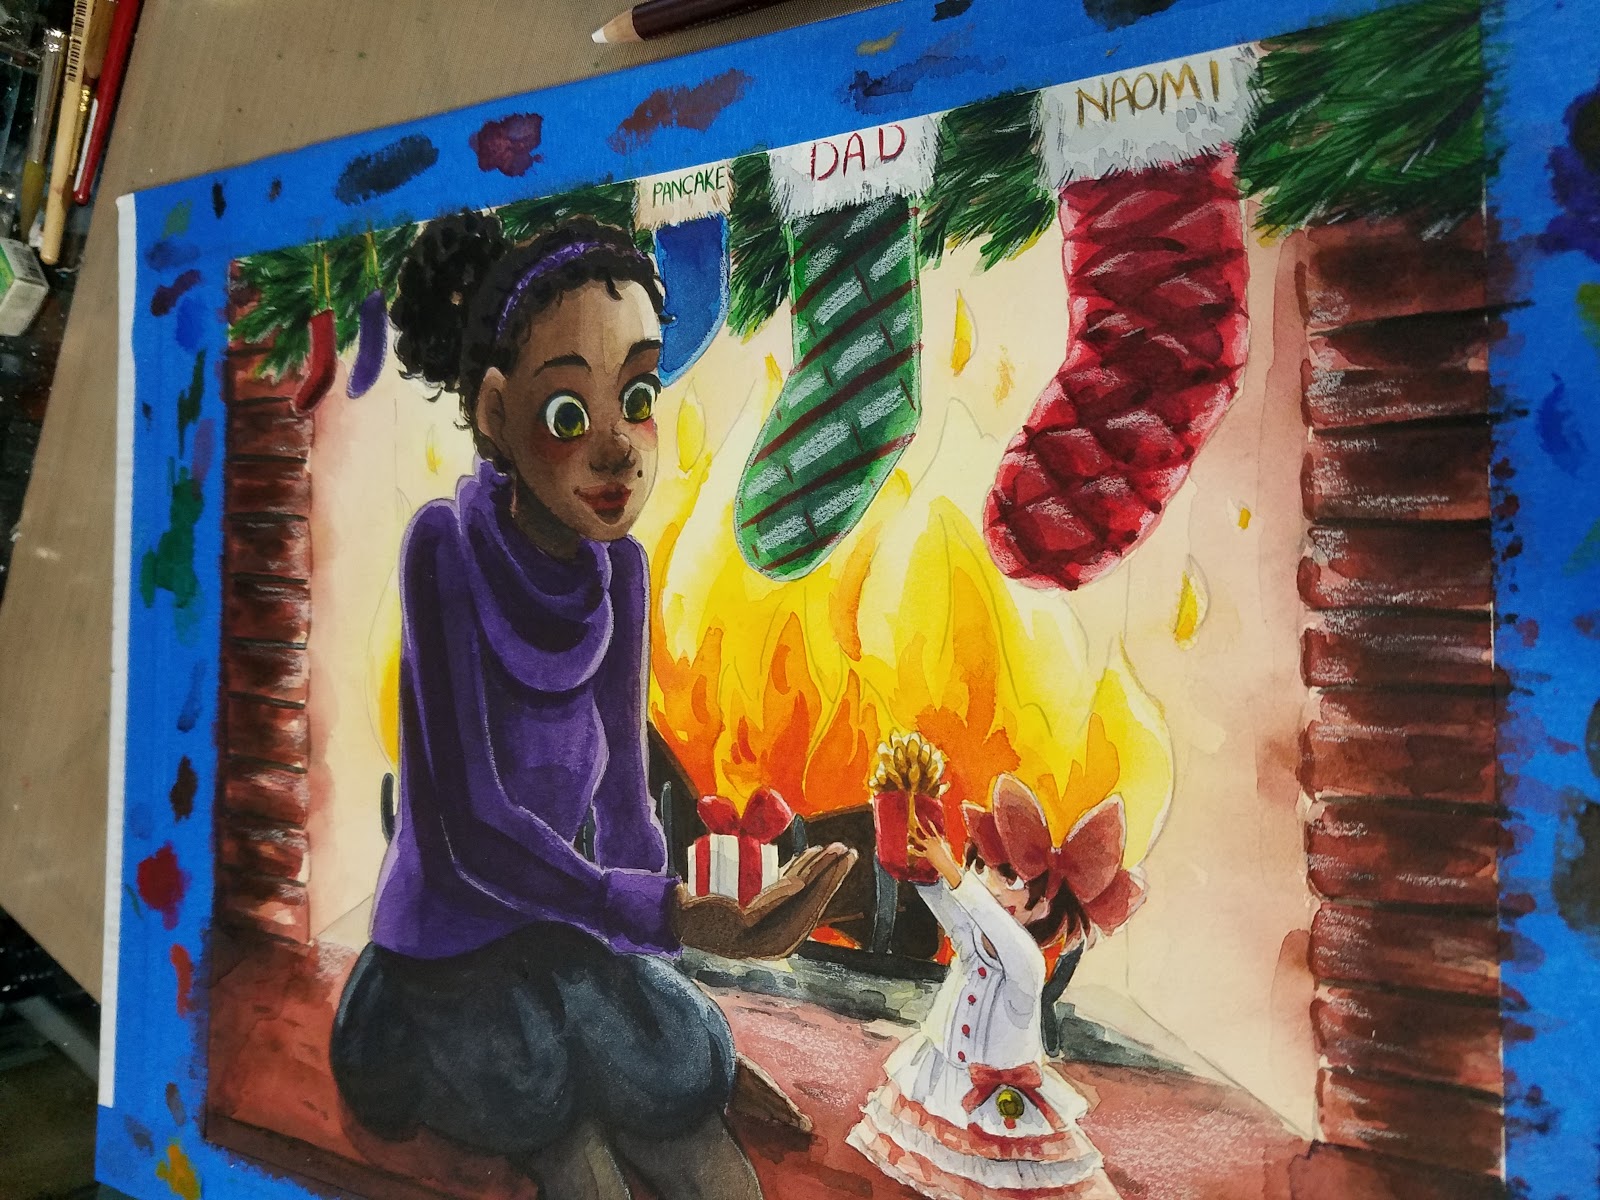
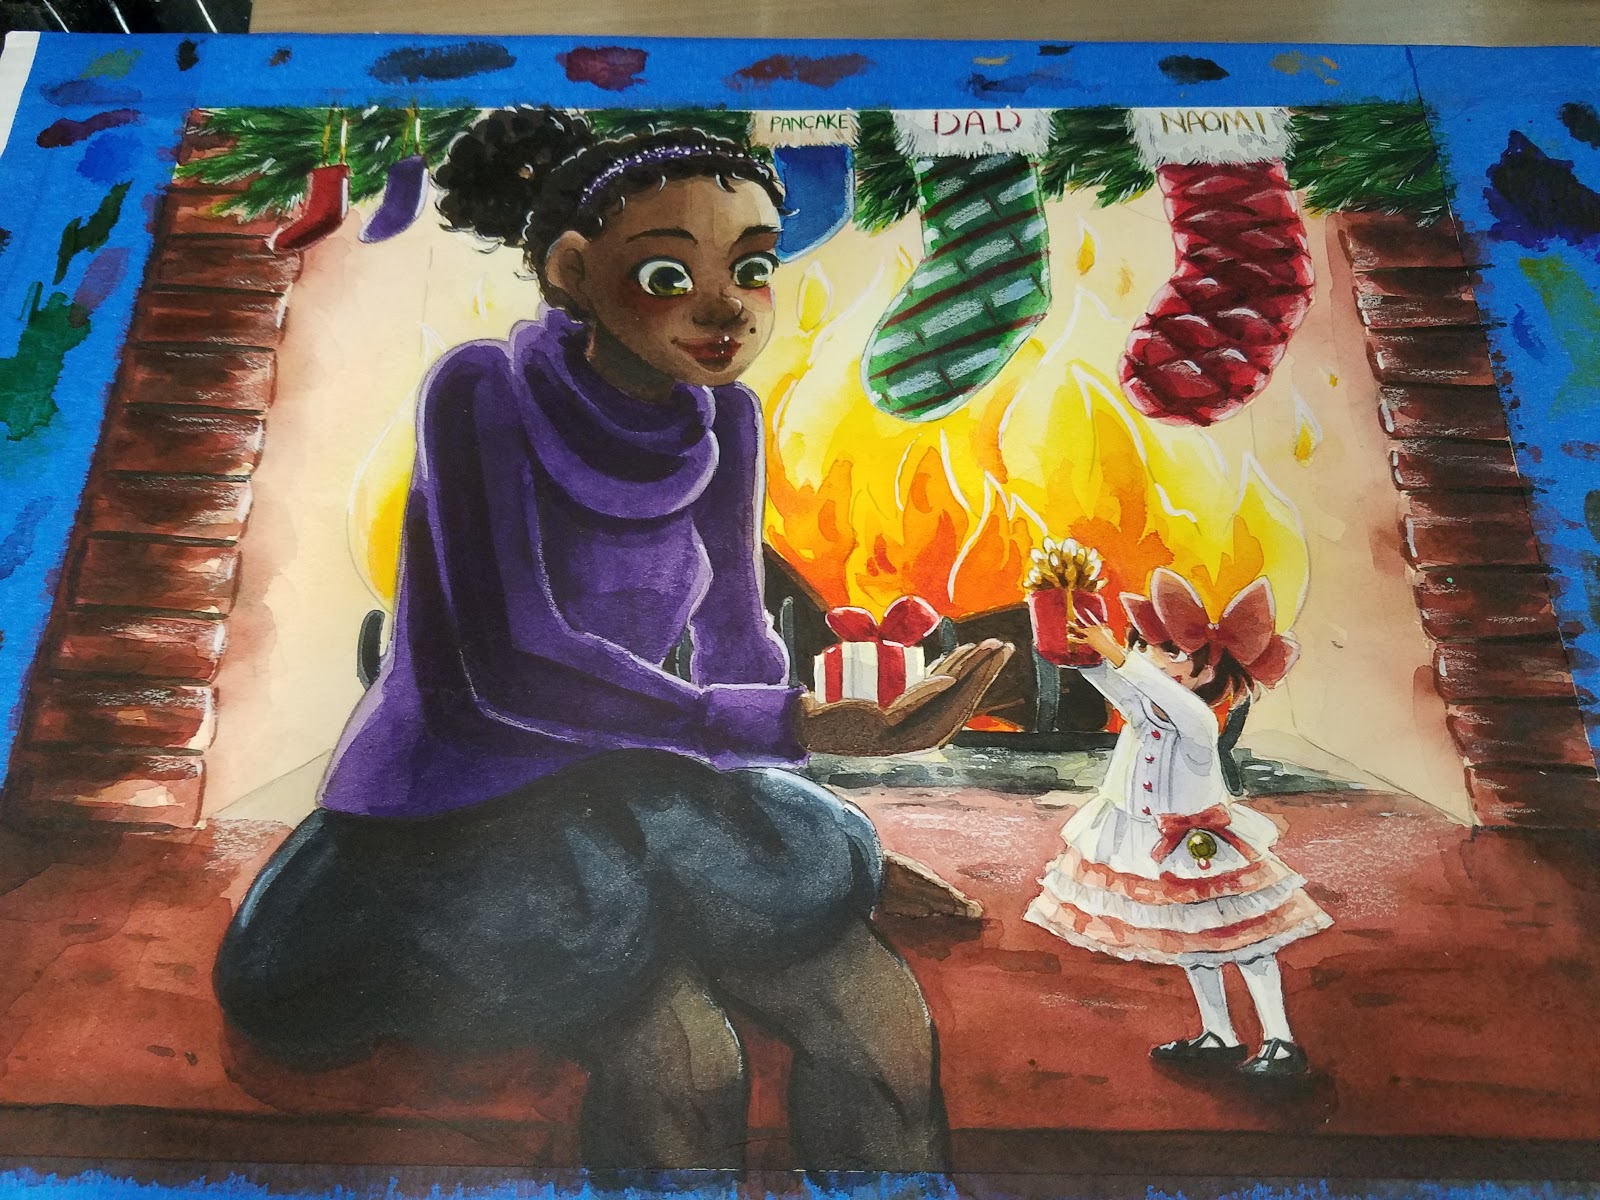
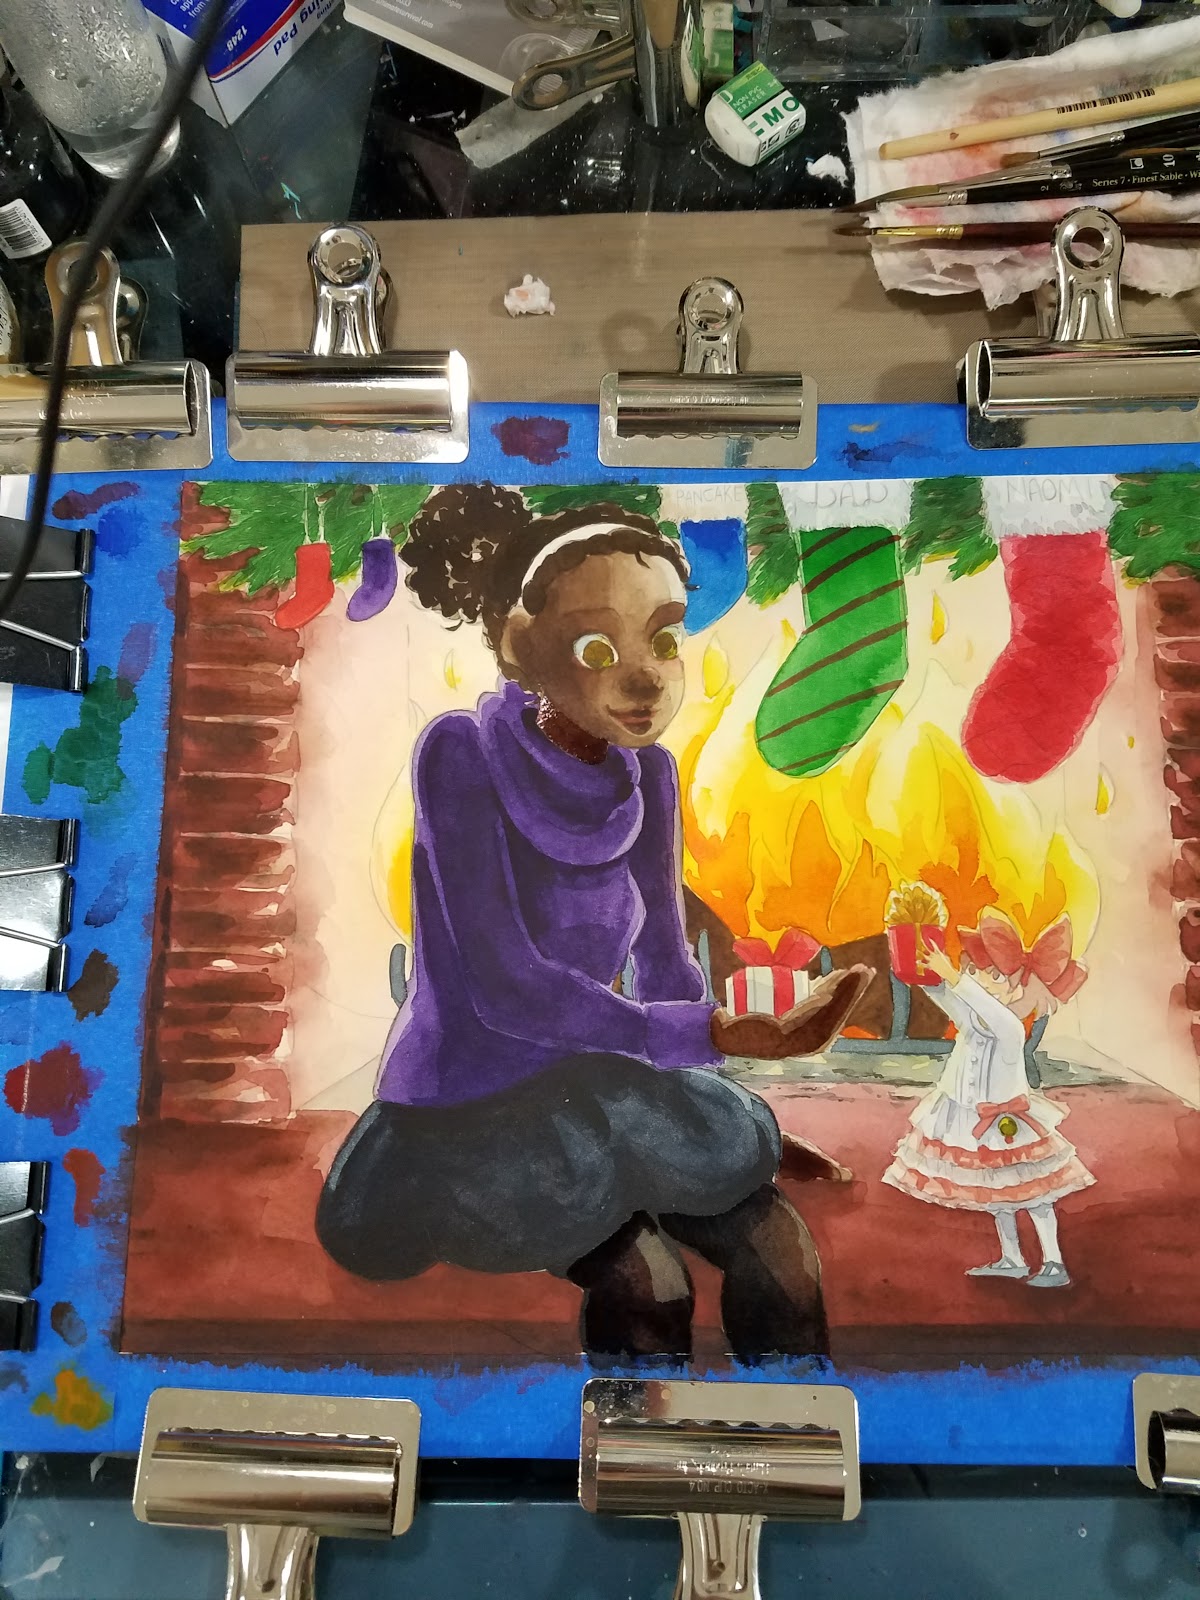
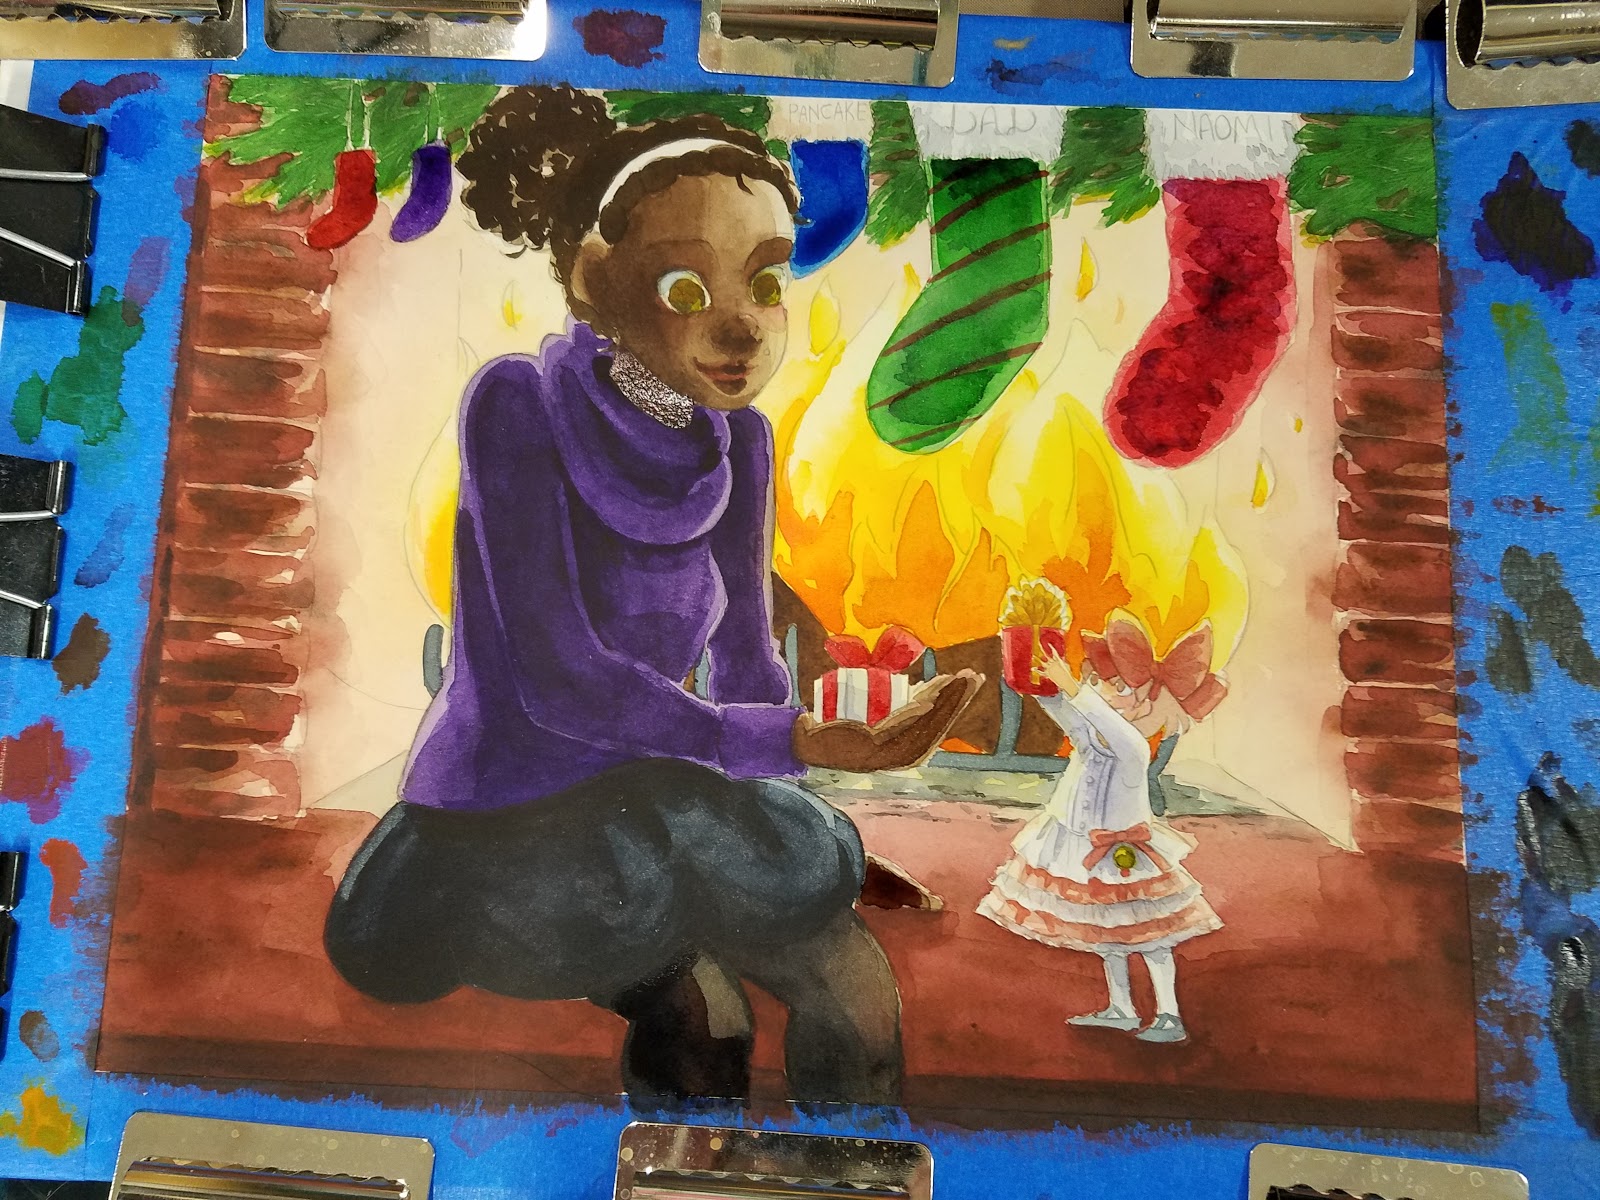
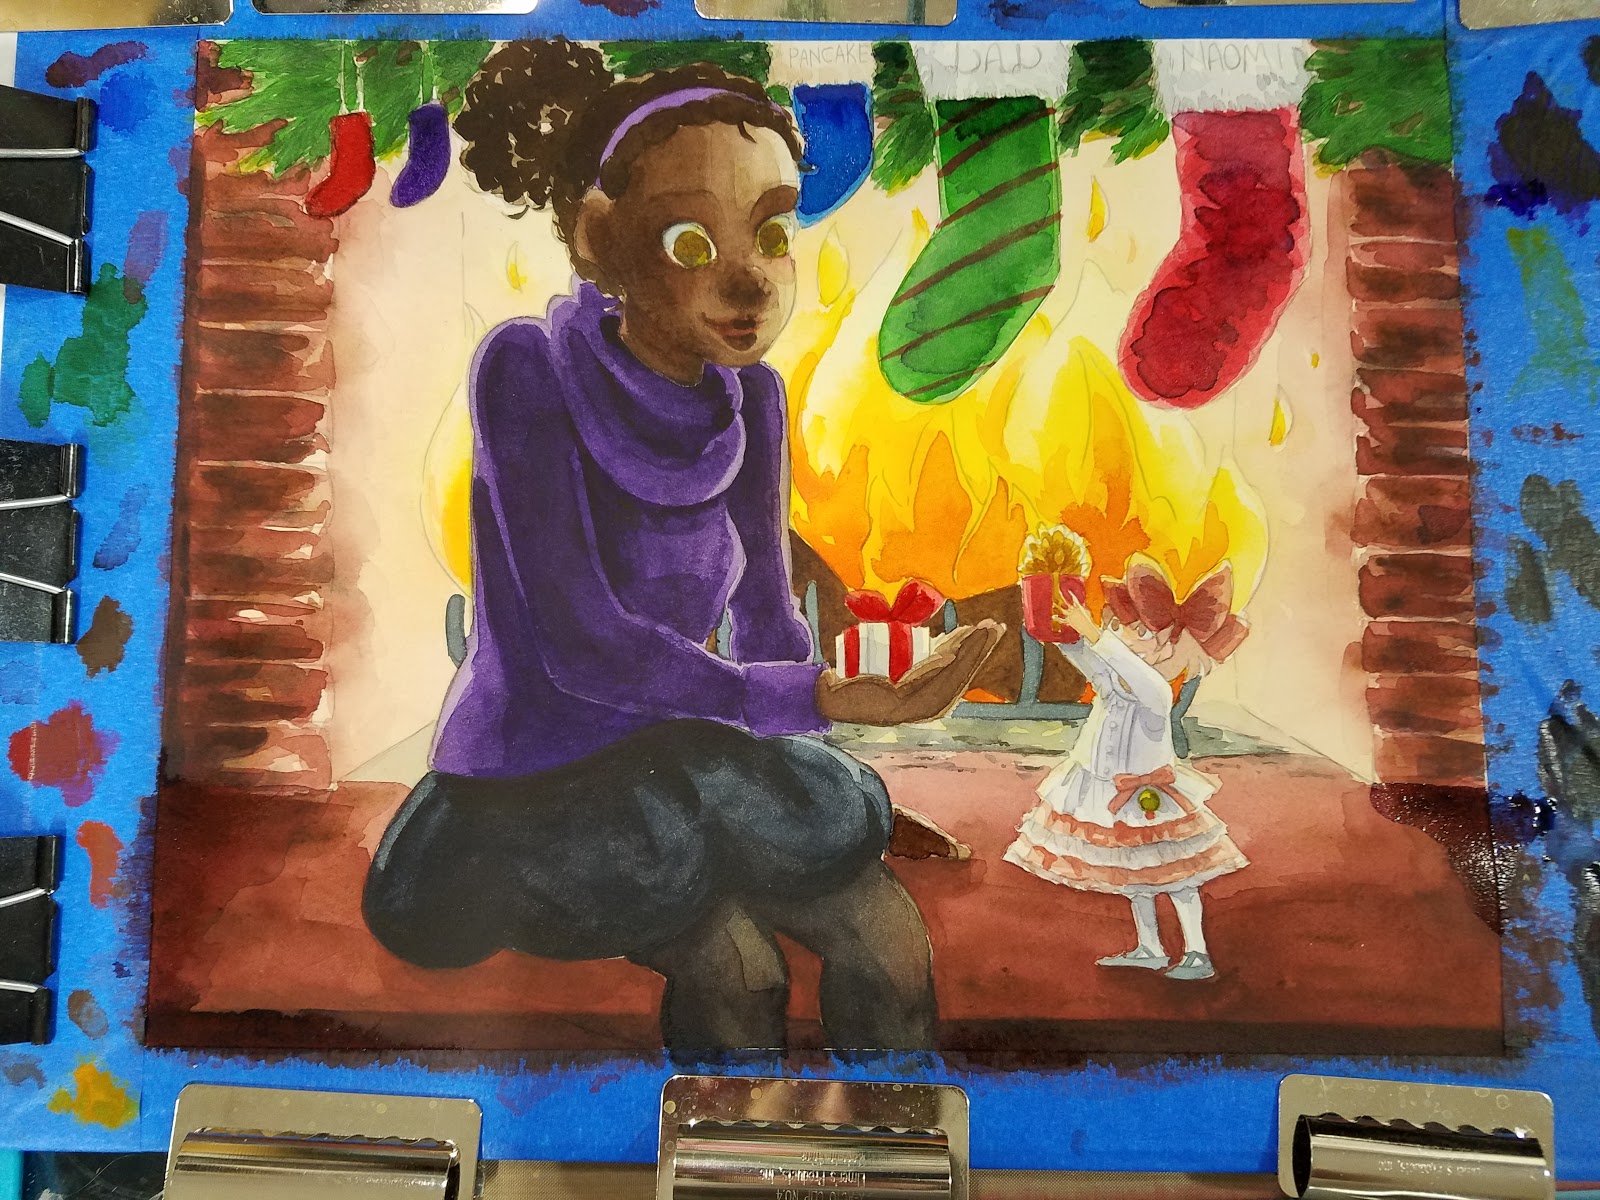
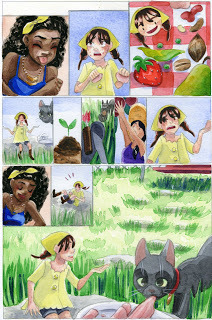
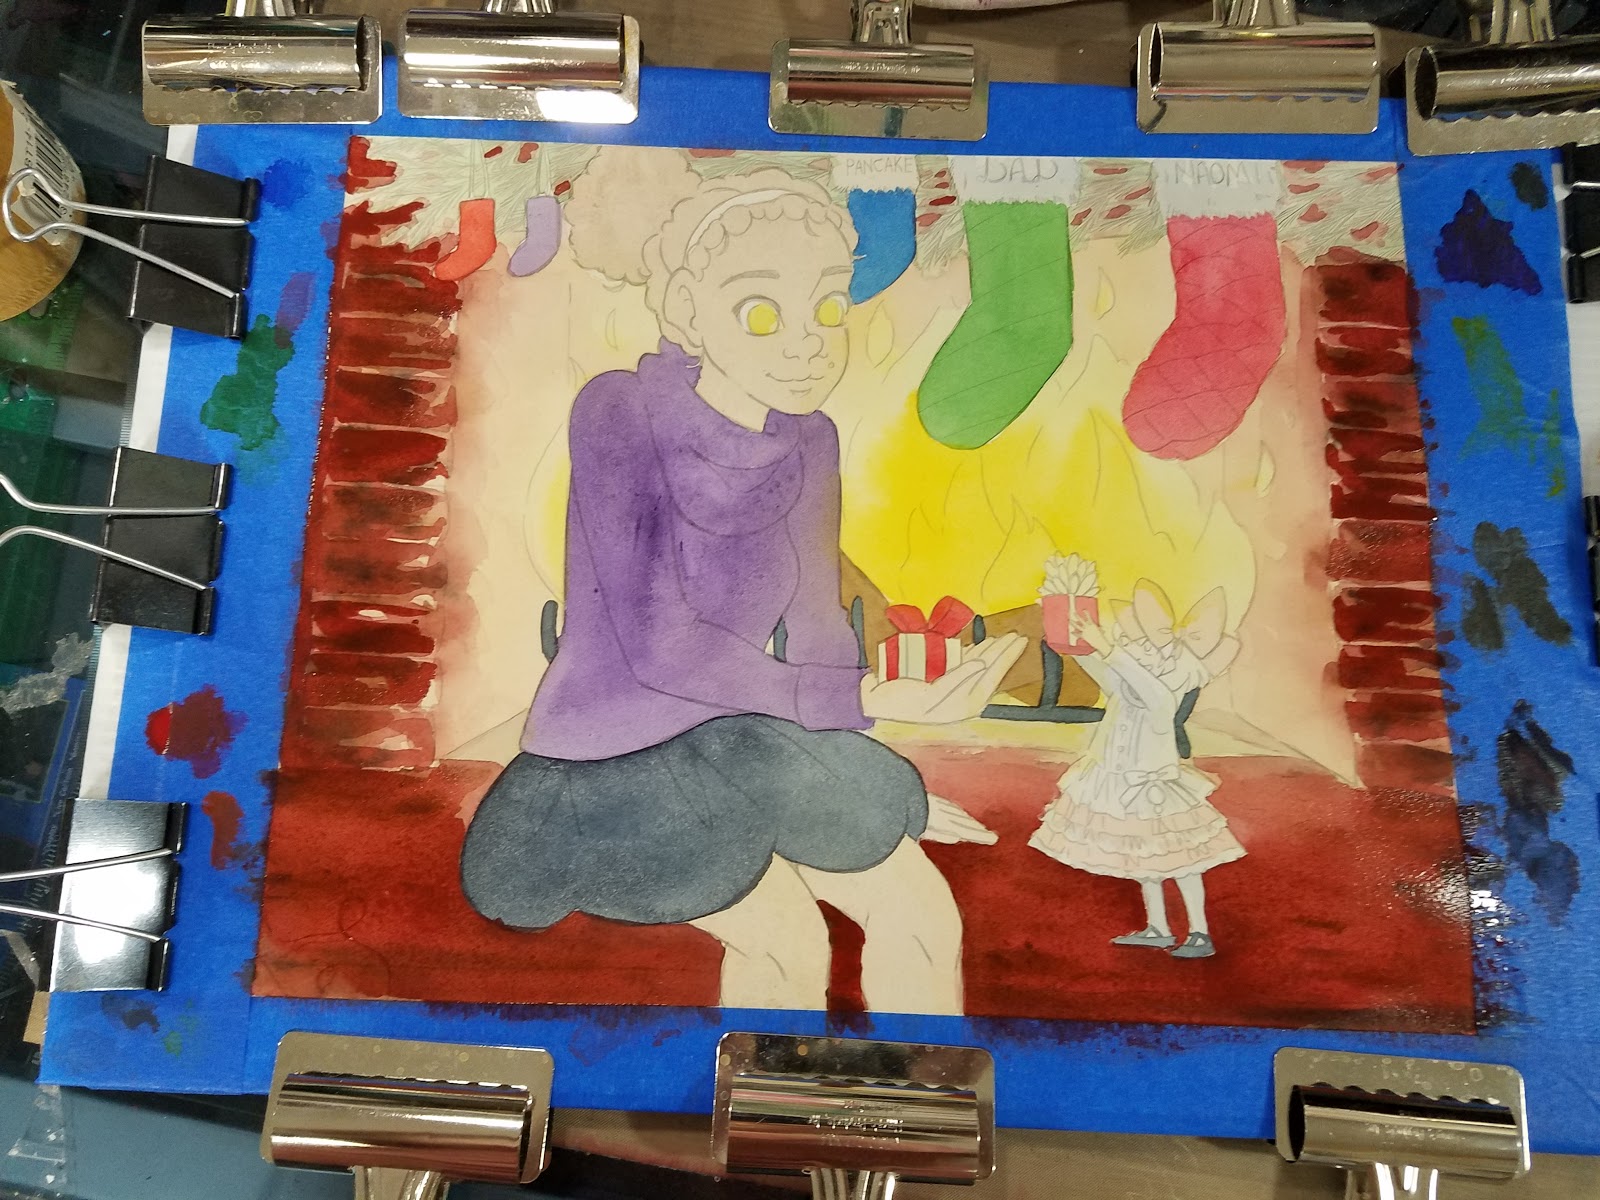
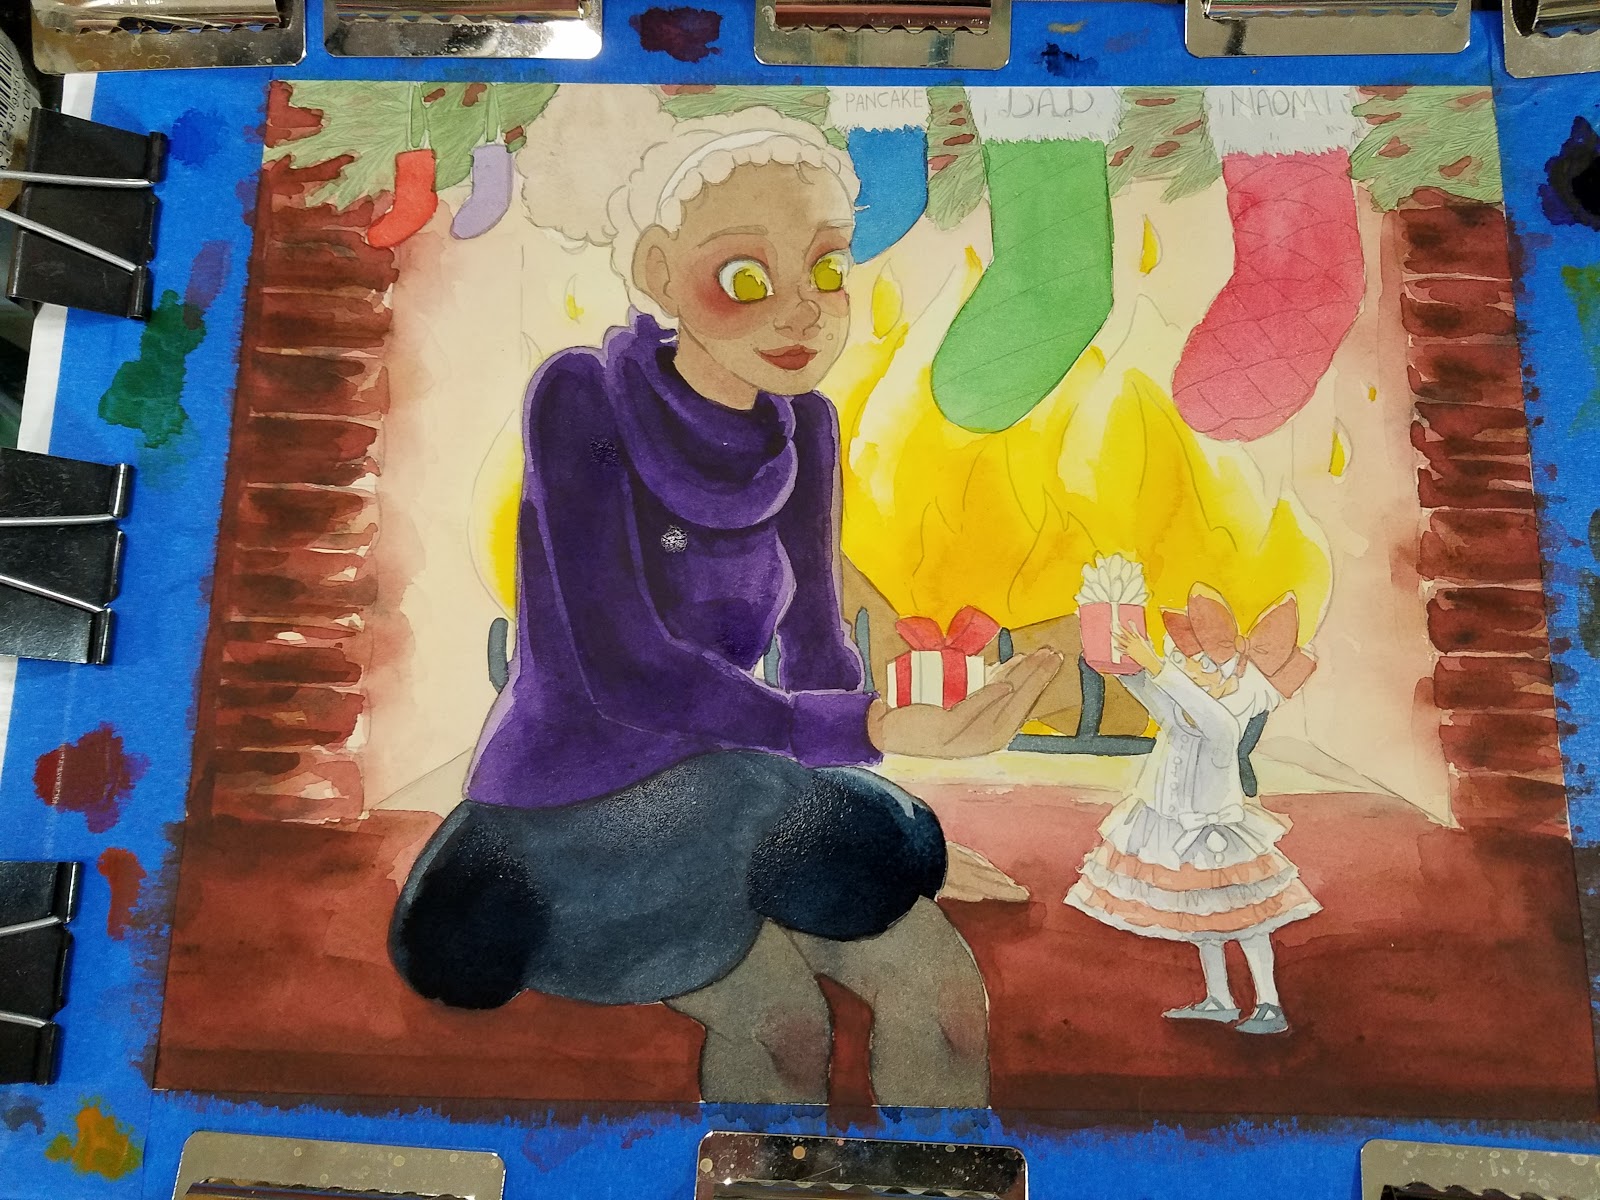
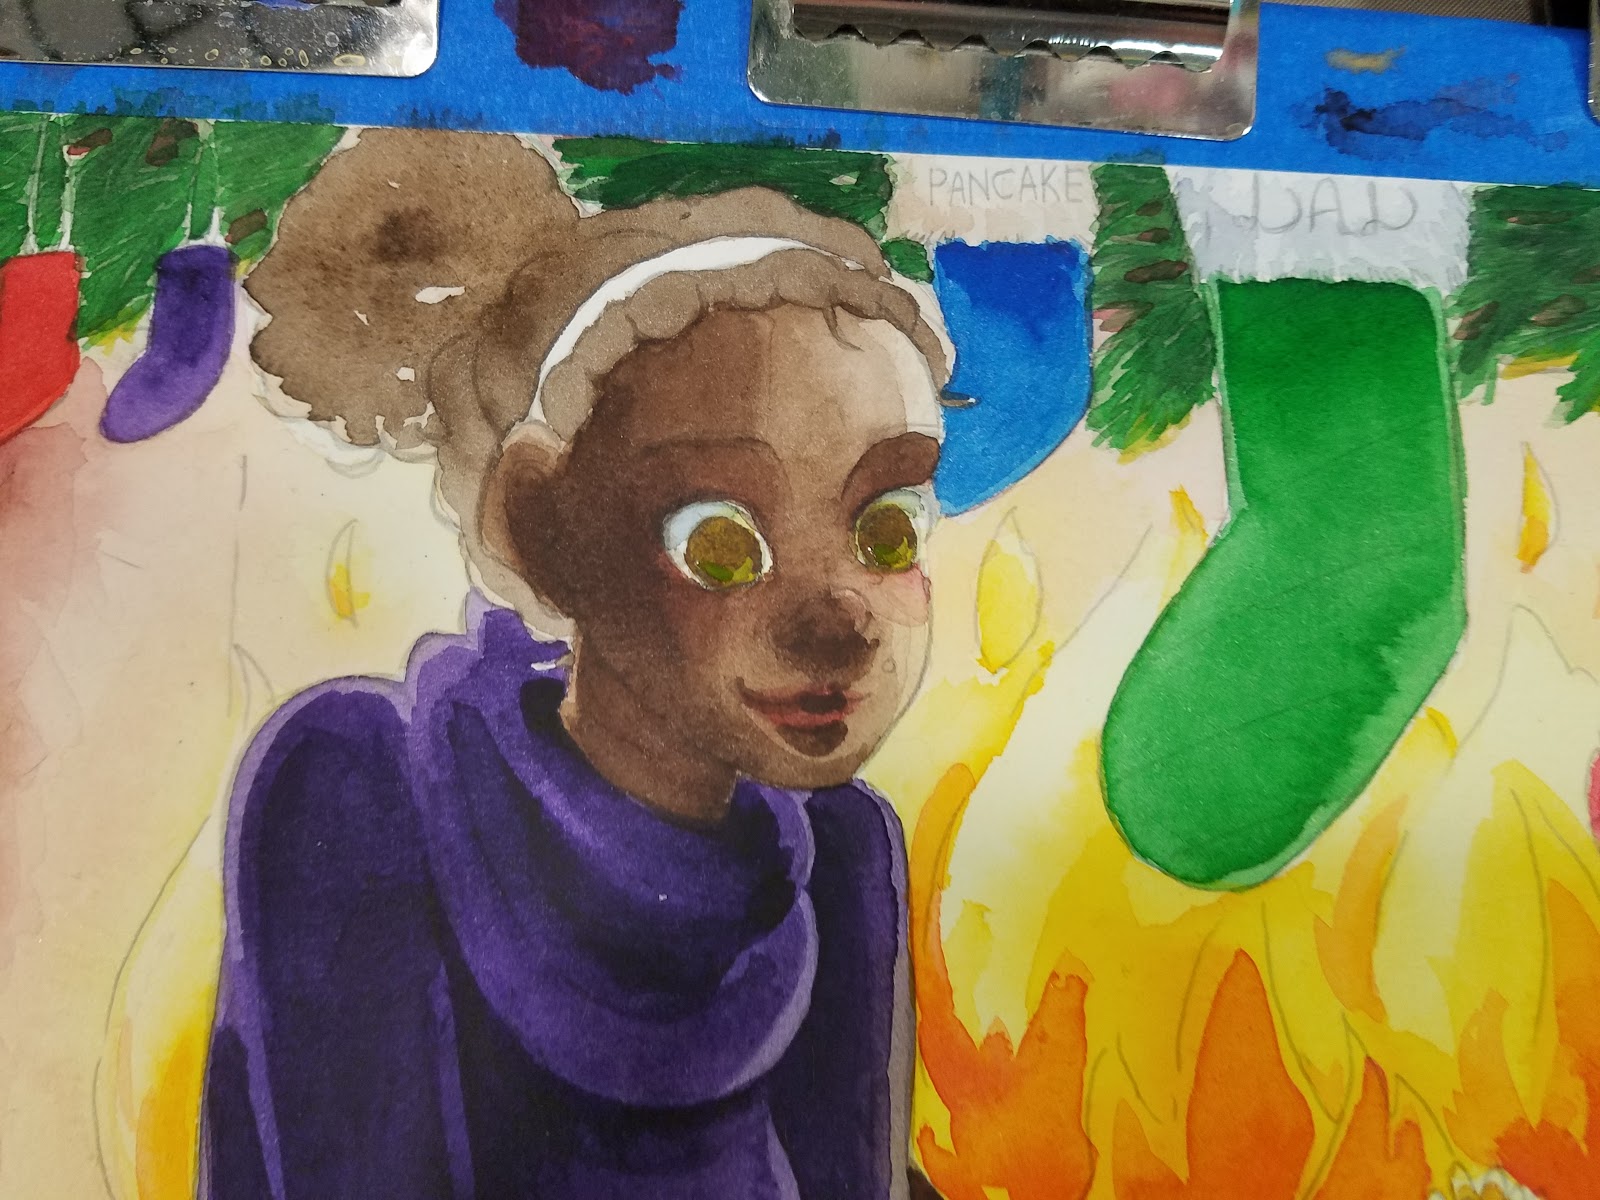
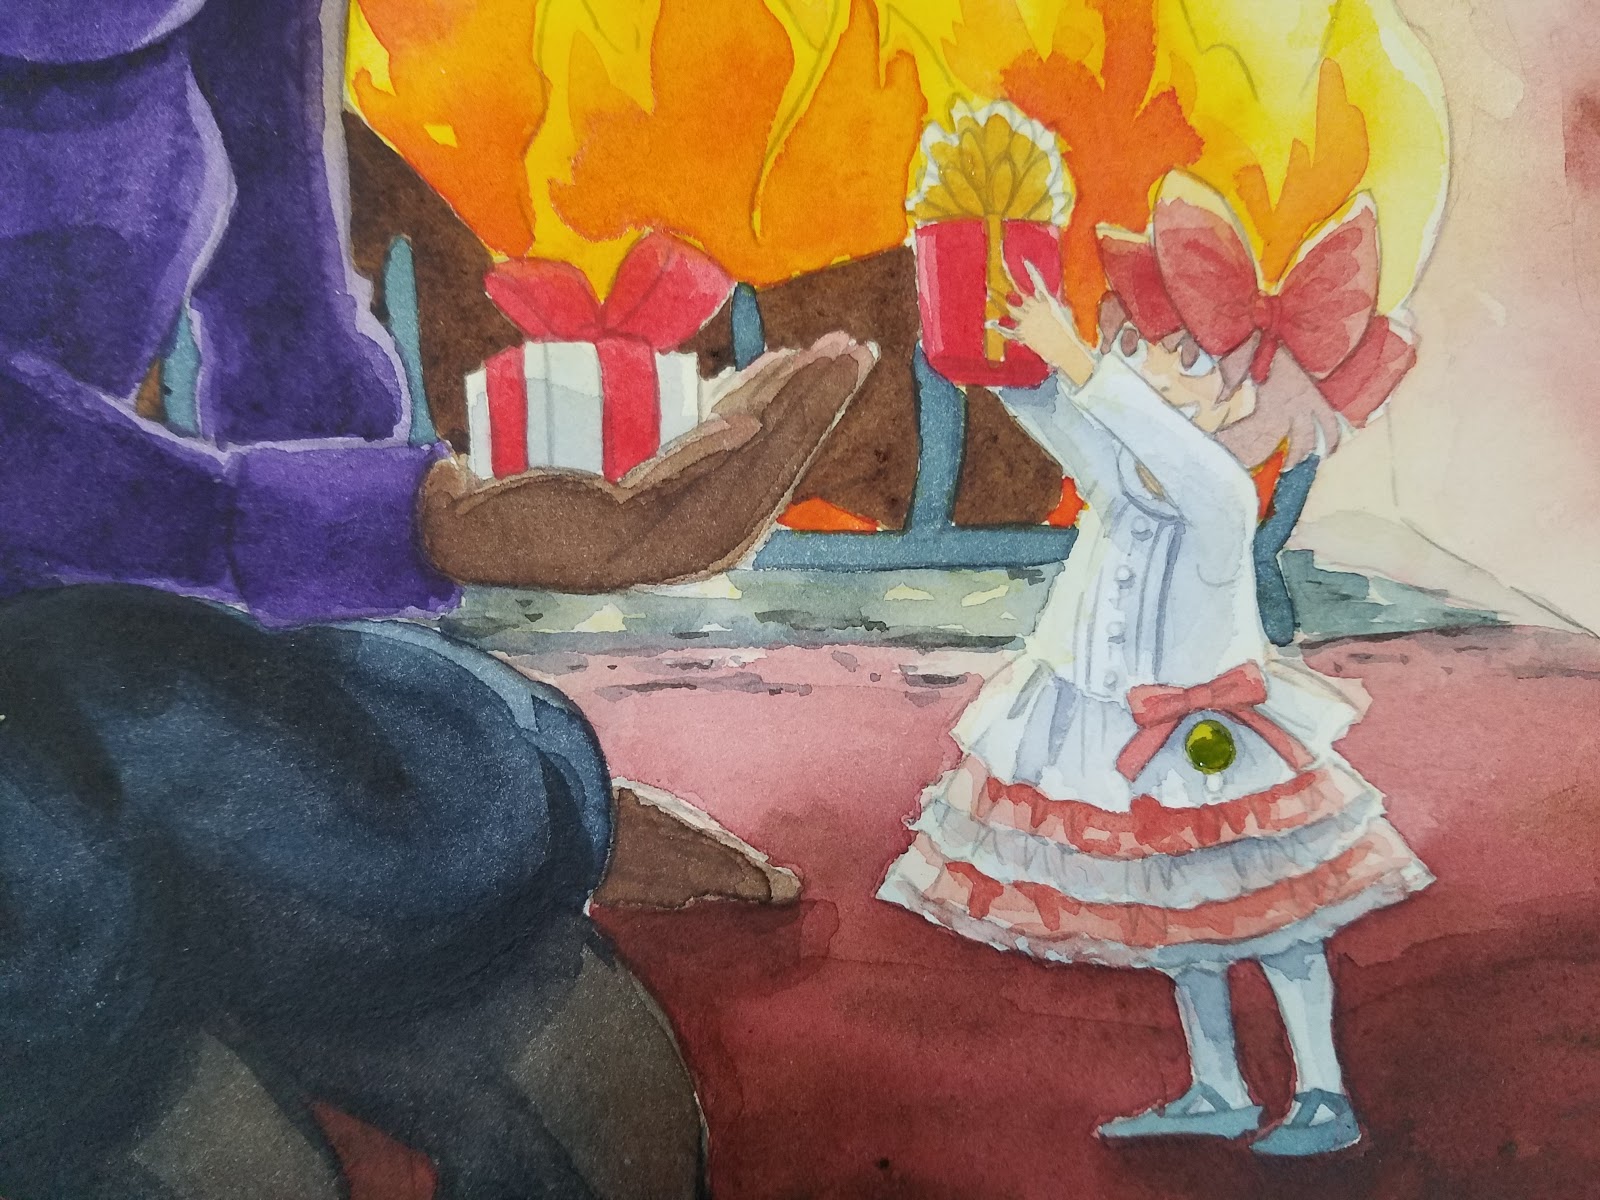
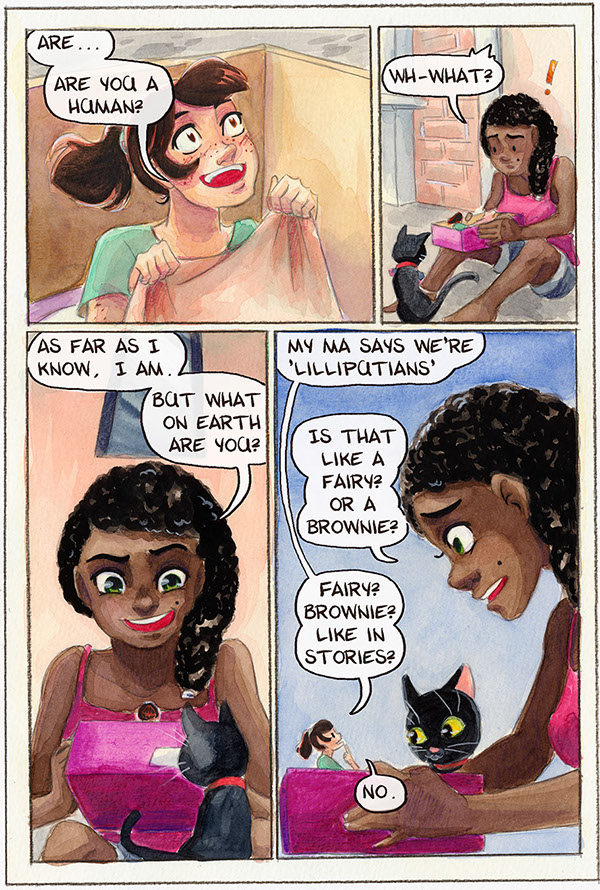
When we've finished these tutorials, this is what the finished illustration will look like! This image was designed and used for my Christmas 2016 cards sent out to friends, family, and Patrons.
This image features Naomi and Kara from my children's watercolor comic, 7" Kara. If you enjoy this blog, and enjoy my art, I highly recommend you order a copy through my shop!
Previously, we went over how to add shadows and shading to your watercolor illustration (link).
Today we're going over how to add final details with watercolor pencils, opaque watercolor, and gouache.
Materials Used in this Tutorial:
Watercolors of your choice (I use Winsor and Newton moist half pans, Daniel Smith, SoHo, and Holbein watercolors)
Daisy watercolor wells or palette of choice- Continue with the colors you have mixed
Watercolor brushes (I use mainly rounds)
2 watercolor cups- 1 clean, 1 dirty- I like the Faber-Castell collapsible cups
Paper towels
Watercolor Pencils (Derwent Inktense)
White Gouache
Grumbacher Opaque Watercolors
Paper used:
Canson Moulin du Roy
Watercolor Brushes Used in this Tutorial:
For rounds larger than 6, I use synthetic brushes. Your preferences may vary from mine- I have several brands, and still have not found a brand I think perform as well as natural hair brushes. Synthetic brushes are much cheaper than natural hair brushes, especially at larger sizes, and are useful for blocking in color, as we will be doing in this tutorial.Creative Mark Rhapsody Kolinsky Sable Brushes- 4, 2, 1, 0Creative Mark Squirrel Brushes- 4, 6Blick Master Studio Squirrel- 4, 6
Step 1: Refining with White Watercolor Pencil


Step 2: Blend some areas out with water if white is too harsh

Step 3: Refine and add small details with the watercolor pencils.

Inktense pencils are some of my favorite water-based pencils. Although they are indelible after water has been added, they are some of the most saturated water-based pencils I've encountered. They blend out with water quite nicely, and can be used both wet and dry.


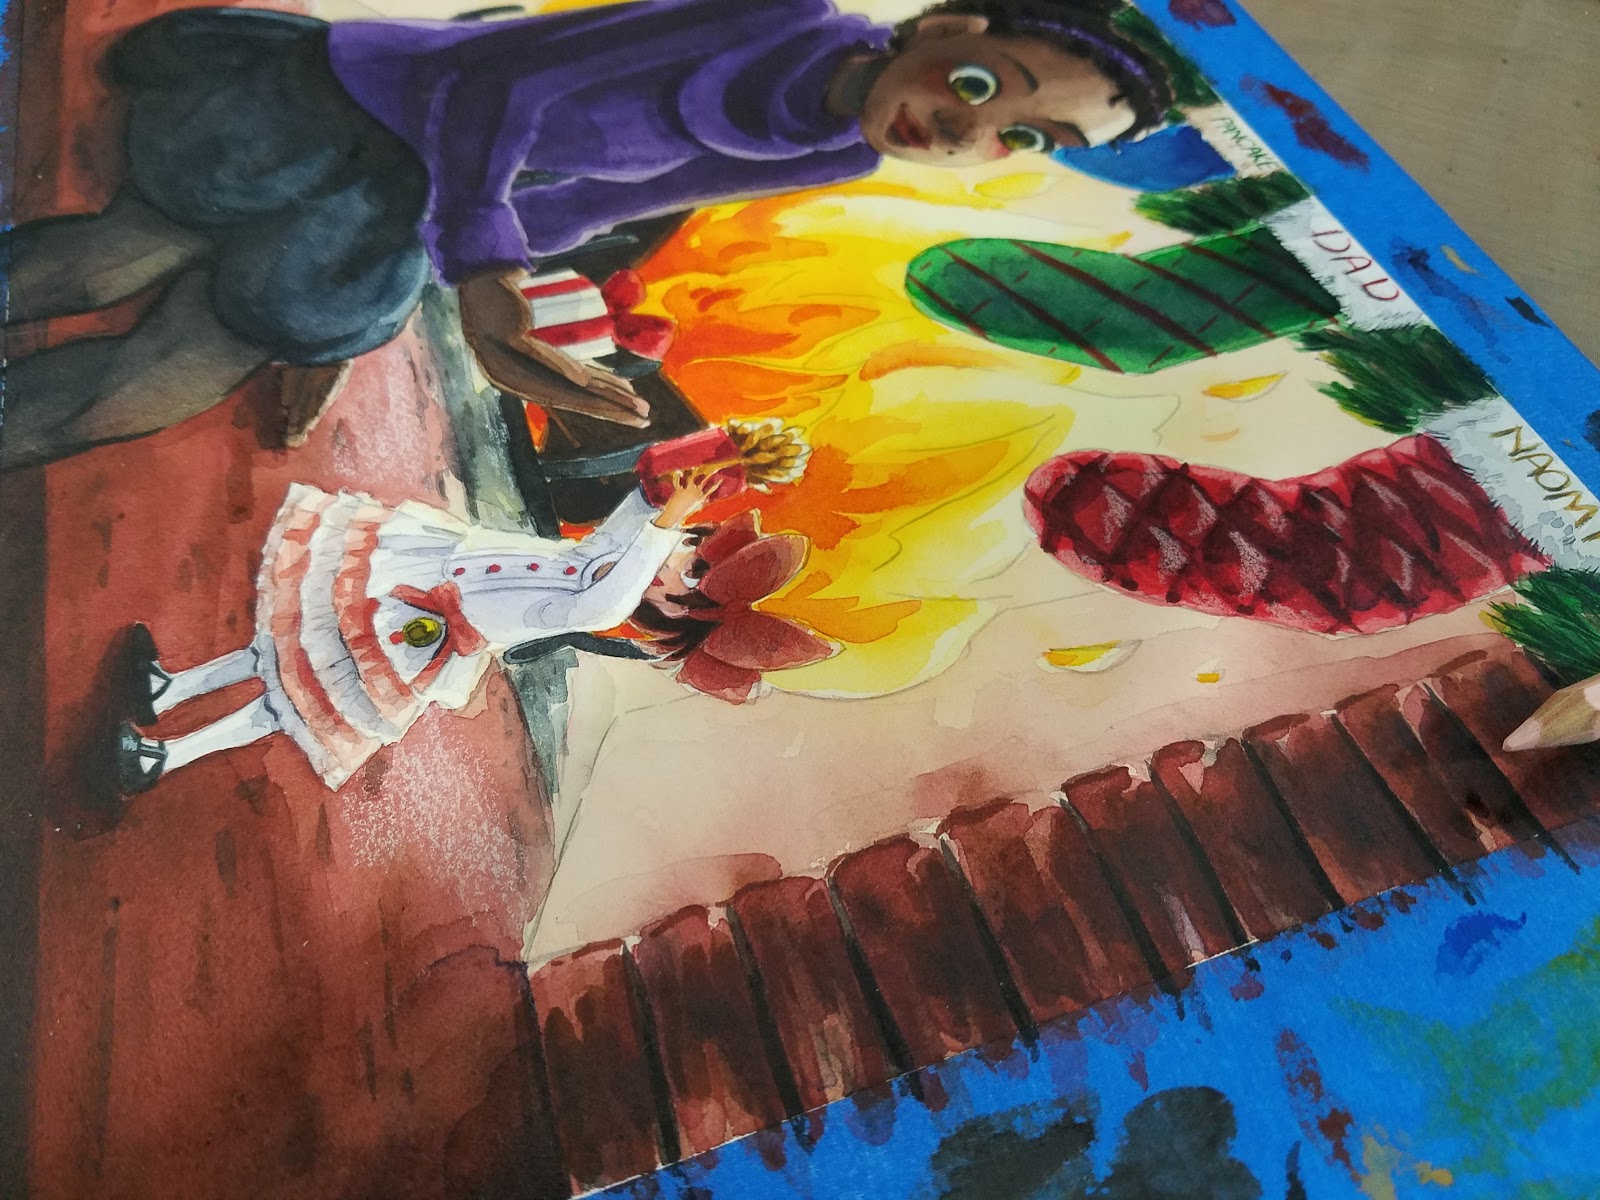
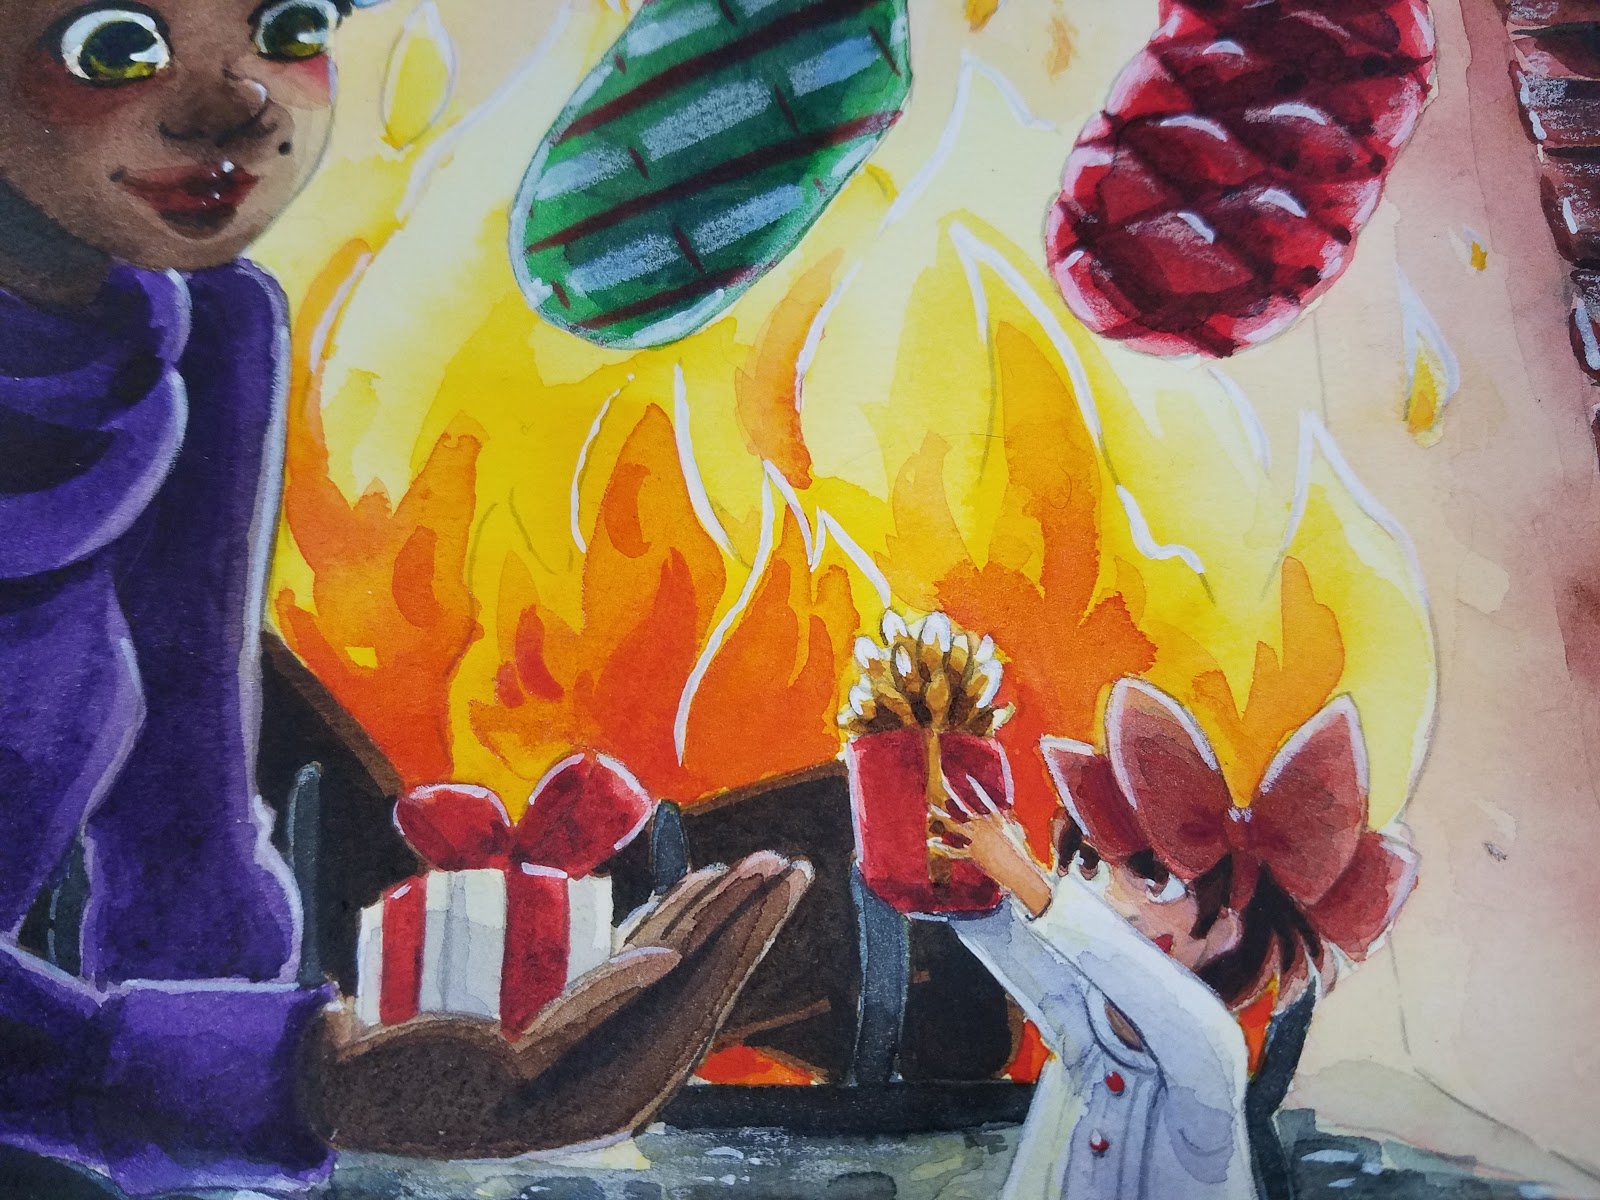
 At this point, I decided that I wanted to remove some of the pencil lines from the fire, so I pulled out my Grumbacher opaque watercolors and activated the light yellow in the bottom right.


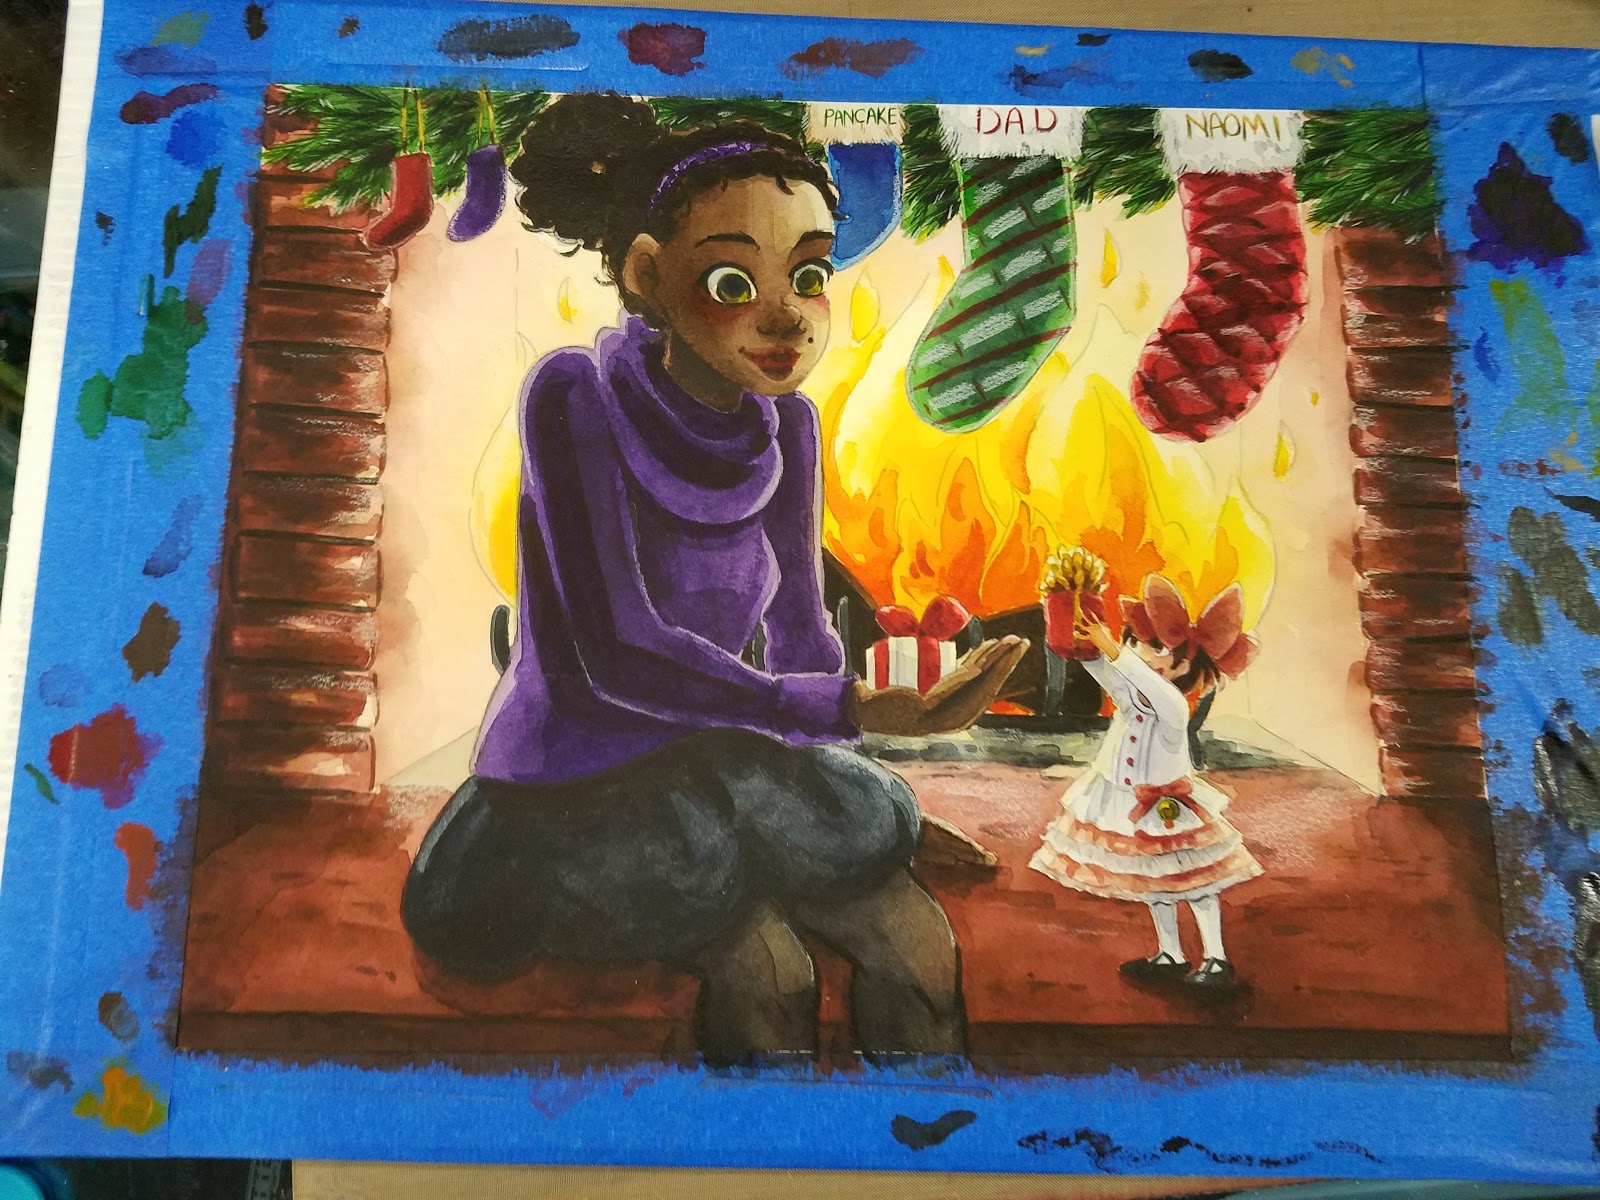
Step 4: Add Details with White Gouache

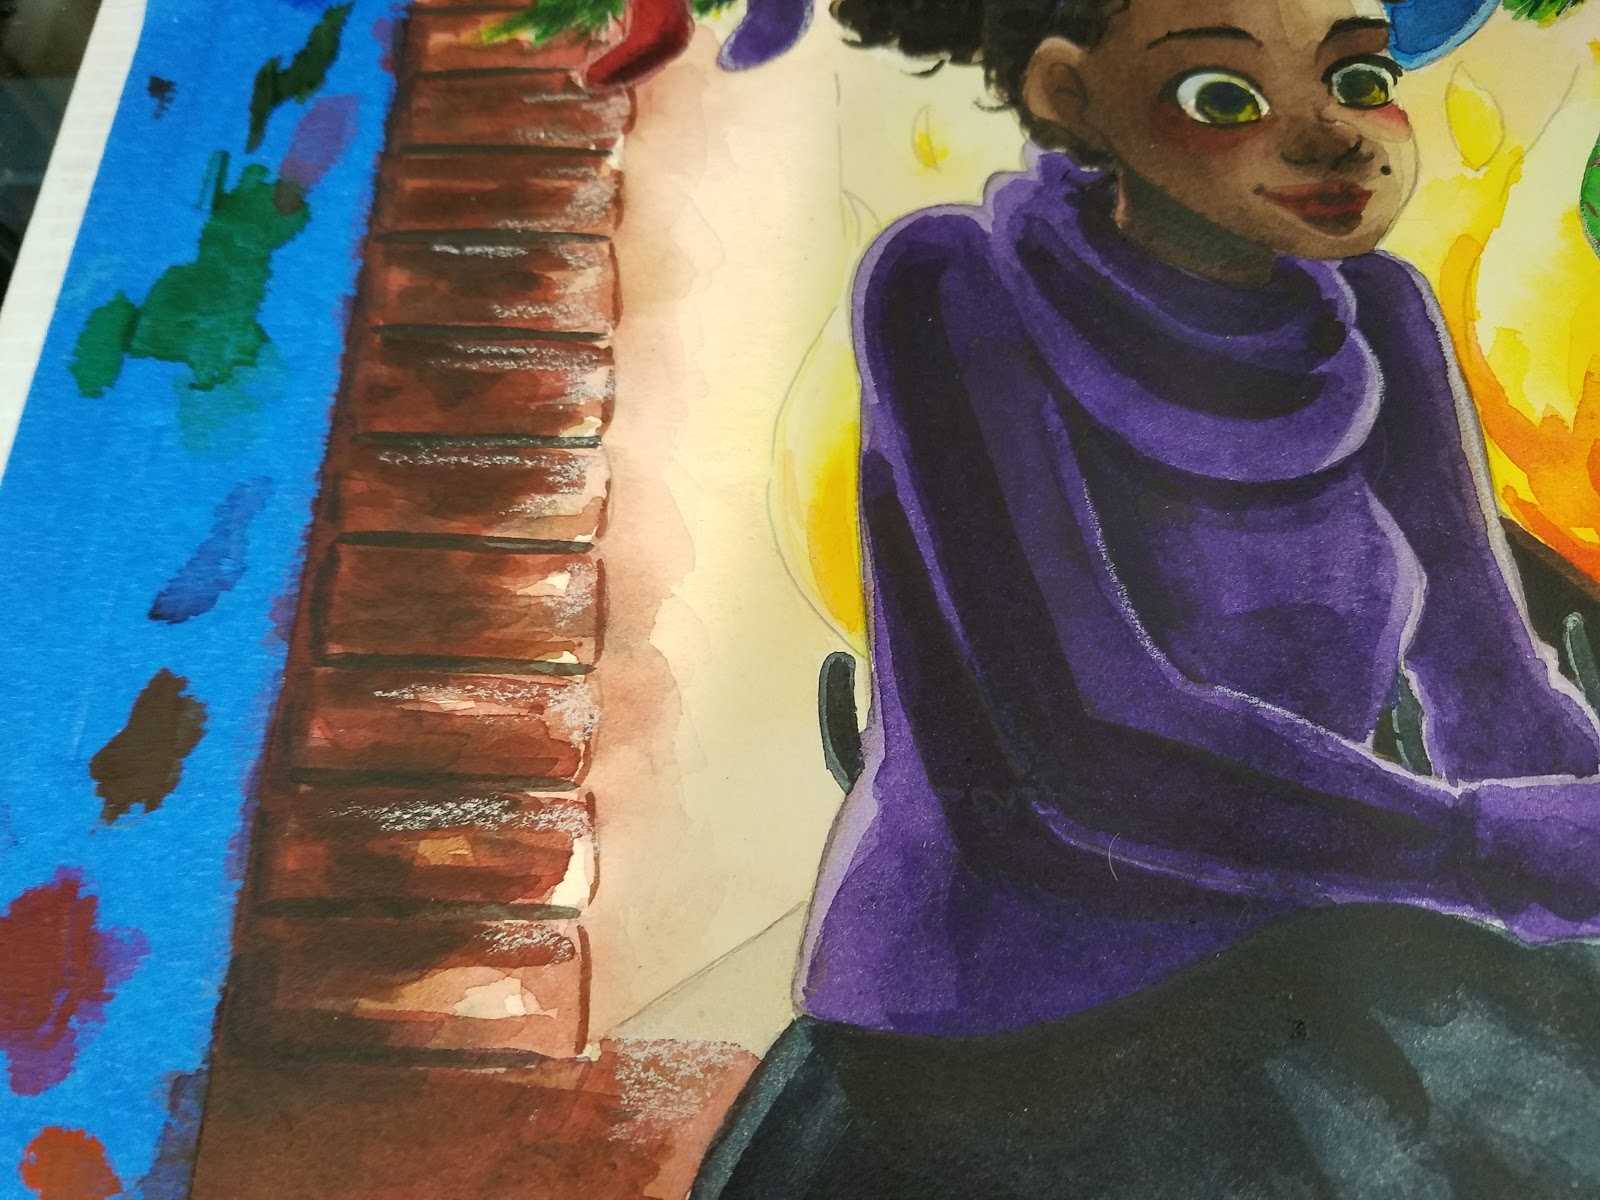
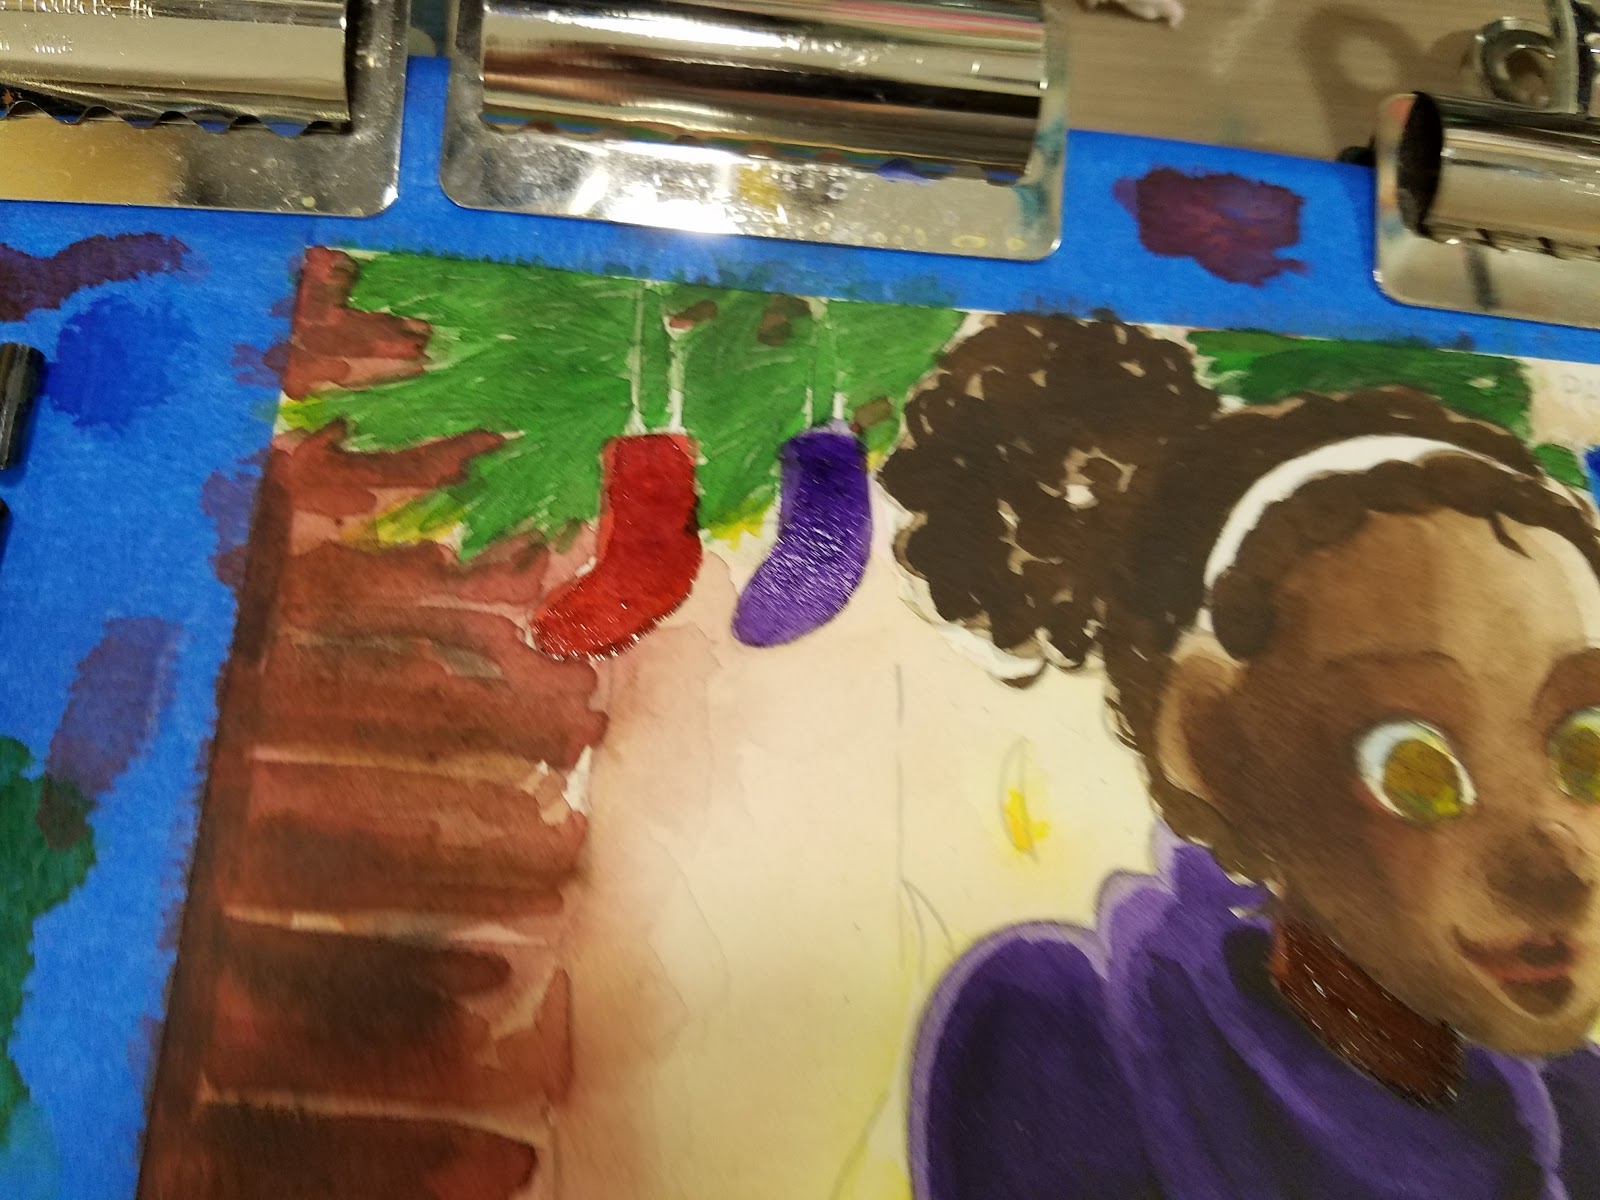
Step 5: Use white Gouache to add outline on objects nearest fire to give the impression of reflected light
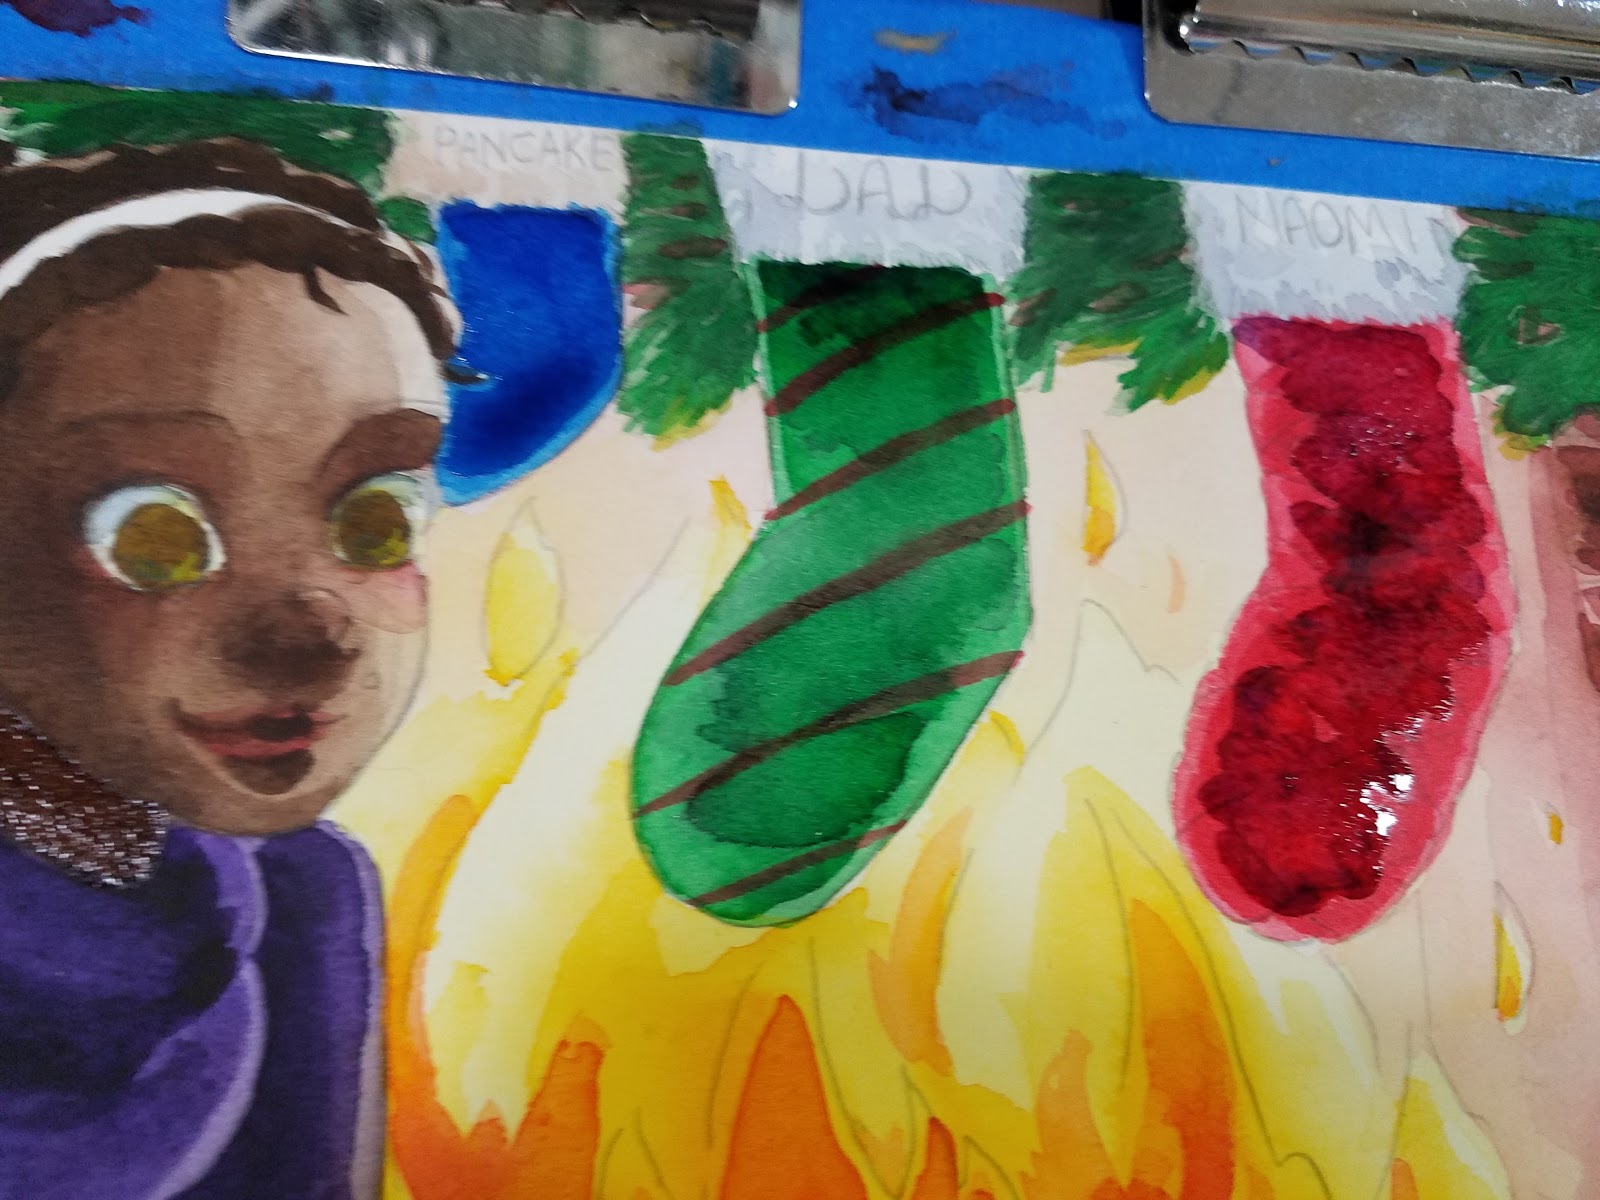
 Step 6: Use Gouche to add stronger white outline to stockings, along fur of stockings, in the garland nearest the fire

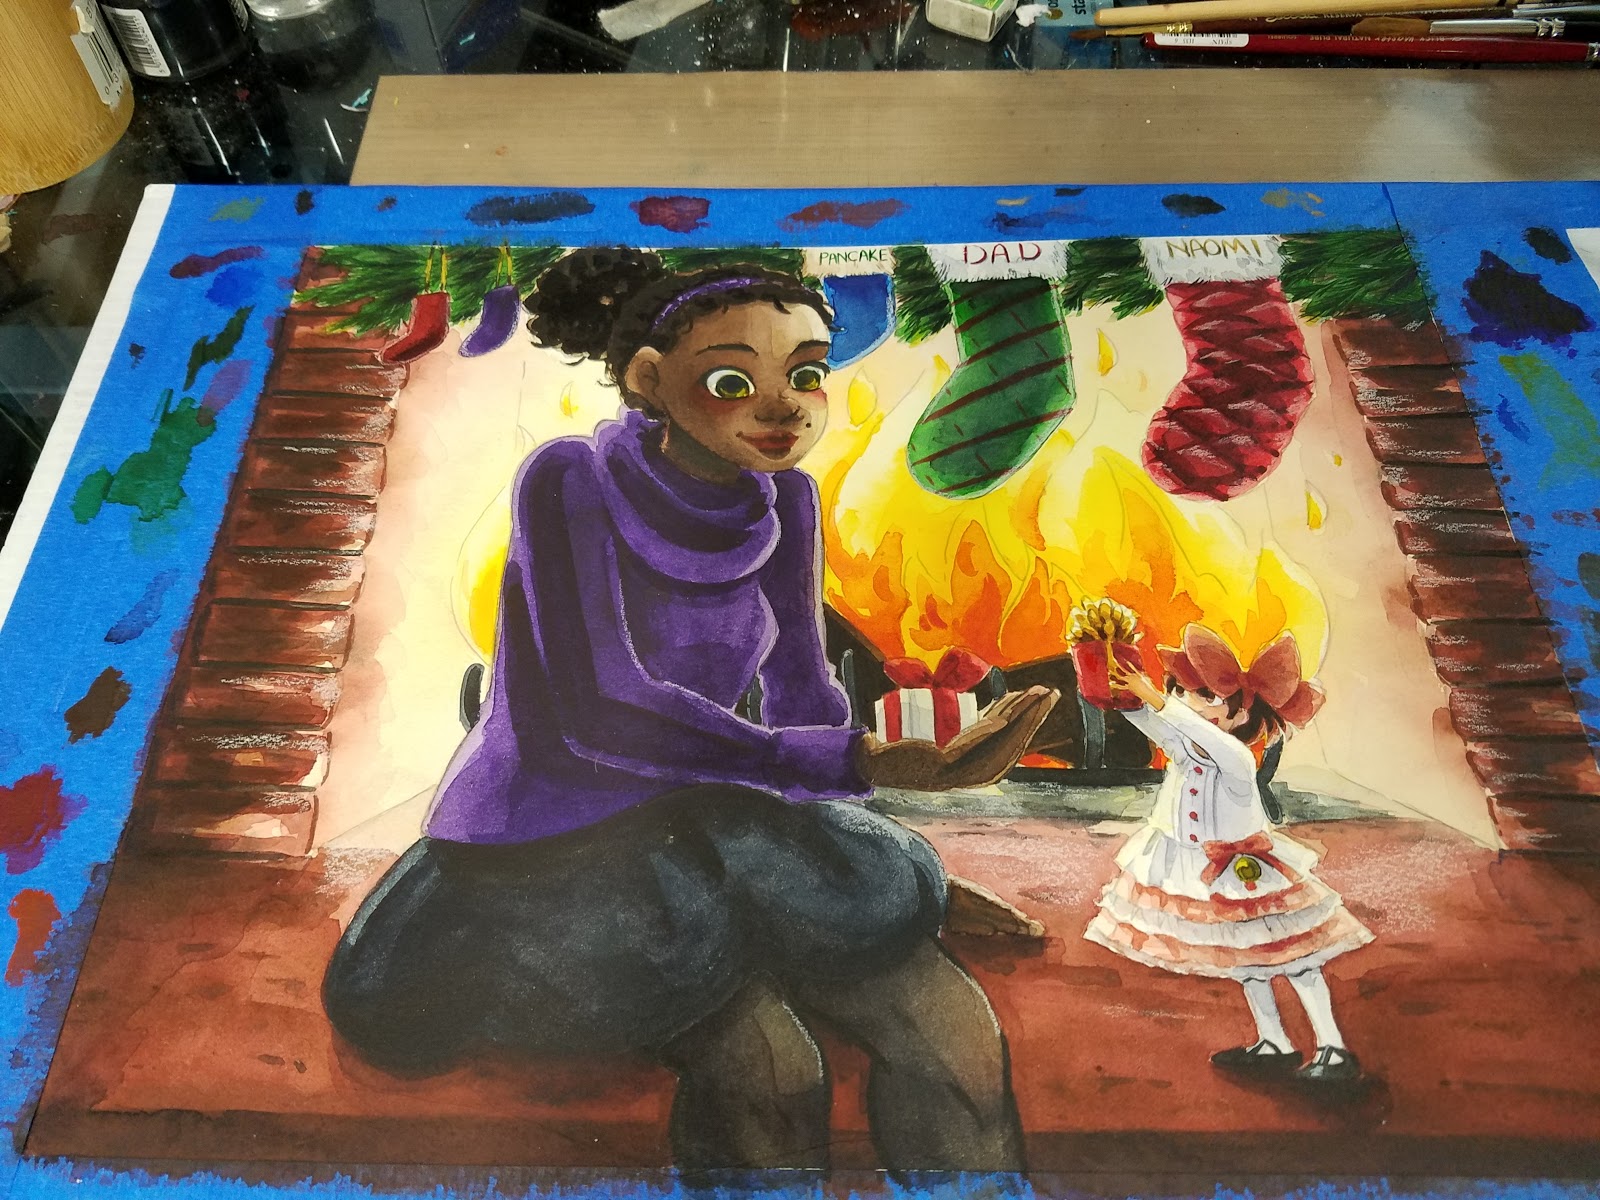
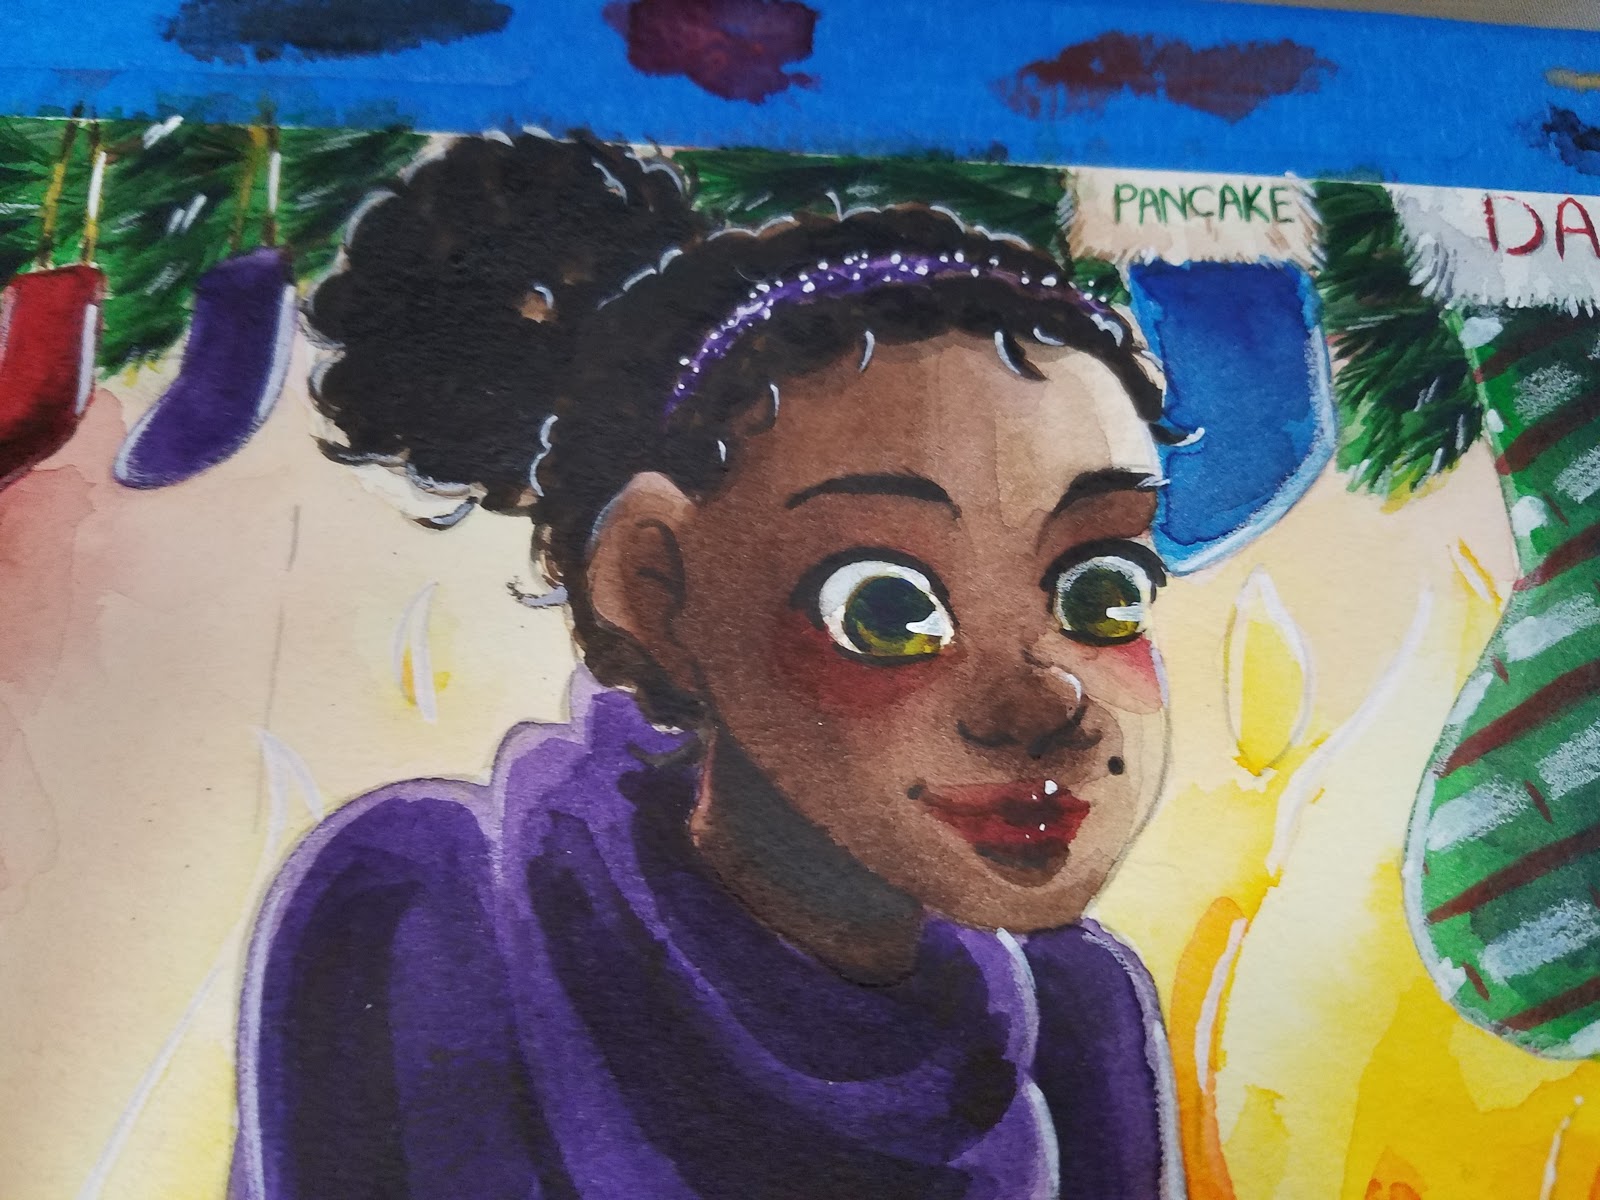
Step 7: Use Gouache to add white highlights to eyes, hair, rhinestones

Step 8: Refine white details with watercolor pencils for a cleaner look.

Step 9: Sparingly use opaque watercolors or colored gouache for toned corrections
(like covering some of the pencil marks in the fire)


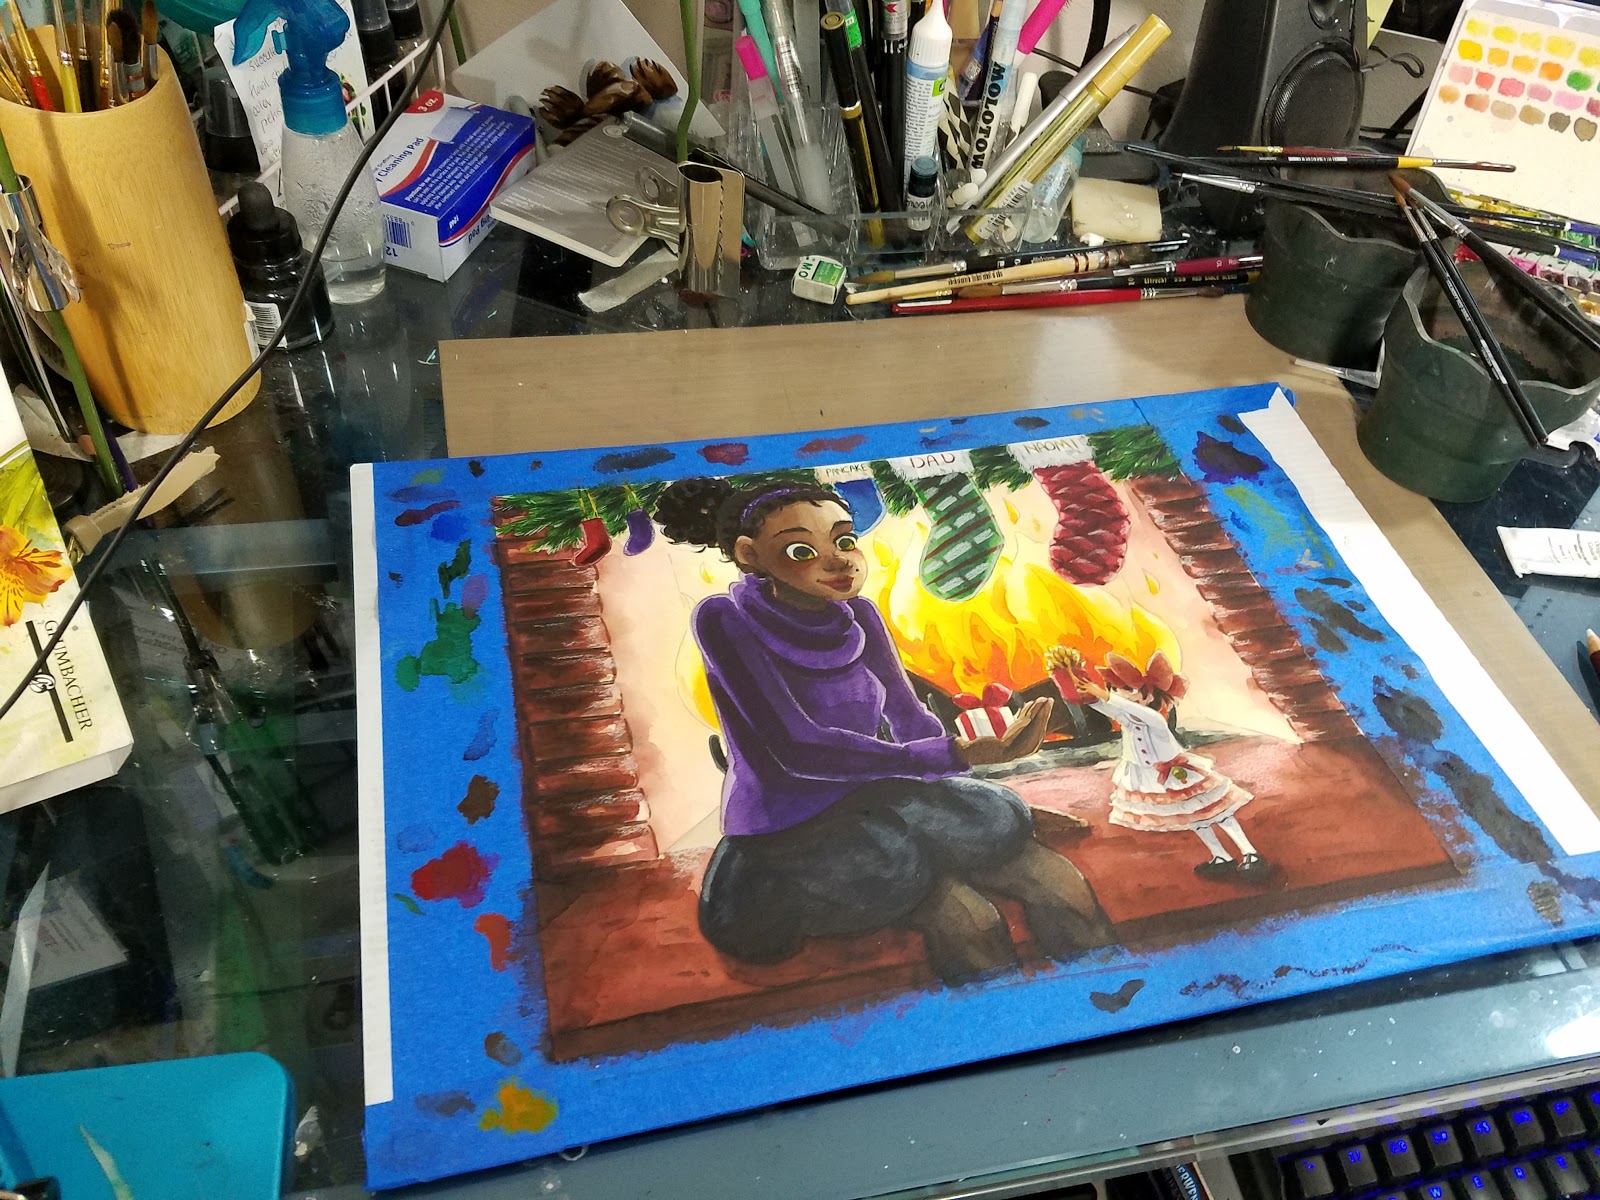
Allow illustration to dry completely before removing watercolor tape. When peeling off watercolor tape, pull away from the board at a 90 degree angle to reduce tearing.
Our finished and scanned piece, corrected digitally for color accuracy:

Our Sponsor

For more beautiful watercolor work, why not pick up a copy of 7" Kara, Volume 1? 7" Kara is a lush watercolor comic the entire family can enjoy, following the adventures of tiny Kara as she discovers humans, explores the backyard, and befriends a kitten. Created by Becca Hillburn, if you enjoy this blog and my art, you'll love 7" Kara. Volume 1 is available in the Natto-shop.
Please consider donating to this blog or purchasing from Natto-shop (http://nattosoup.com/shop) if you want me to continue publishing quality content. All materials tested were purchased from my own pocket. Keep on Truckin' Nattosoup is not under any sponsorship.
If you enjoy this series, if you have learned something, or if I have inspired you in some way, please take a moment to share this, or any post, with your friends and familiy on your favorite social networking platform. There are handy sharing buttons below this post. If you enjoy art education content, and would like to be part of the process, please visit my Patreon for information on how to join the artnerd community. Backers get early access to popular series, backer exclusive content, and voting rights on upcoming content.

When we've finished these tutorials, this is what the finished illustration will look like! This image was designed and used for my Christmas 2016 cards sent out to friends, family, and Patrons.
This image features Naomi and Kara from my children's watercolor comic, 7" Kara. If you enjoy this blog, and enjoy my art, I highly recommend you order a copy through my shop!
Previously, we went over how to add shadows and shading to your watercolor illustration (link).
Today we're going over how to add final details with watercolor pencils, opaque watercolor, and gouache.
Materials Used in this Tutorial:
Watercolors of your choice (I use Winsor and Newton moist half pans, Daniel Smith, SoHo, and Holbein watercolors)
Daisy watercolor wells or palette of choice- Continue with the colors you have mixed
Watercolor brushes (I use mainly rounds)
2 watercolor cups- 1 clean, 1 dirty- I like the Faber-Castell collapsible cups
Paper towels
Watercolor Pencils (Derwent Inktense)
White Gouache
Grumbacher Opaque Watercolors
Paper used:
Canson Moulin du Roy
Watercolor Brushes Used in this Tutorial:
For rounds larger than 6, I use synthetic brushes. Your preferences may vary from mine- I have several brands, and still have not found a brand I think perform as well as natural hair brushes. Synthetic brushes are much cheaper than natural hair brushes, especially at larger sizes, and are useful for blocking in color, as we will be doing in this tutorial.Creative Mark Rhapsody Kolinsky Sable Brushes- 4, 2, 1, 0Creative Mark Squirrel Brushes- 4, 6Blick Master Studio Squirrel- 4, 6
Step 1: Refining with White Watercolor Pencil
Step 2: Blend some areas out with water if white is too harsh

Step 3: Refine and add small details with the watercolor pencils.
Inktense pencils are some of my favorite water-based pencils. Although they are indelible after water has been added, they are some of the most saturated water-based pencils I've encountered. They blend out with water quite nicely, and can be used both wet and dry.

 At this point, I decided that I wanted to remove some of the pencil lines from the fire, so I pulled out my Grumbacher opaque watercolors and activated the light yellow in the bottom right.
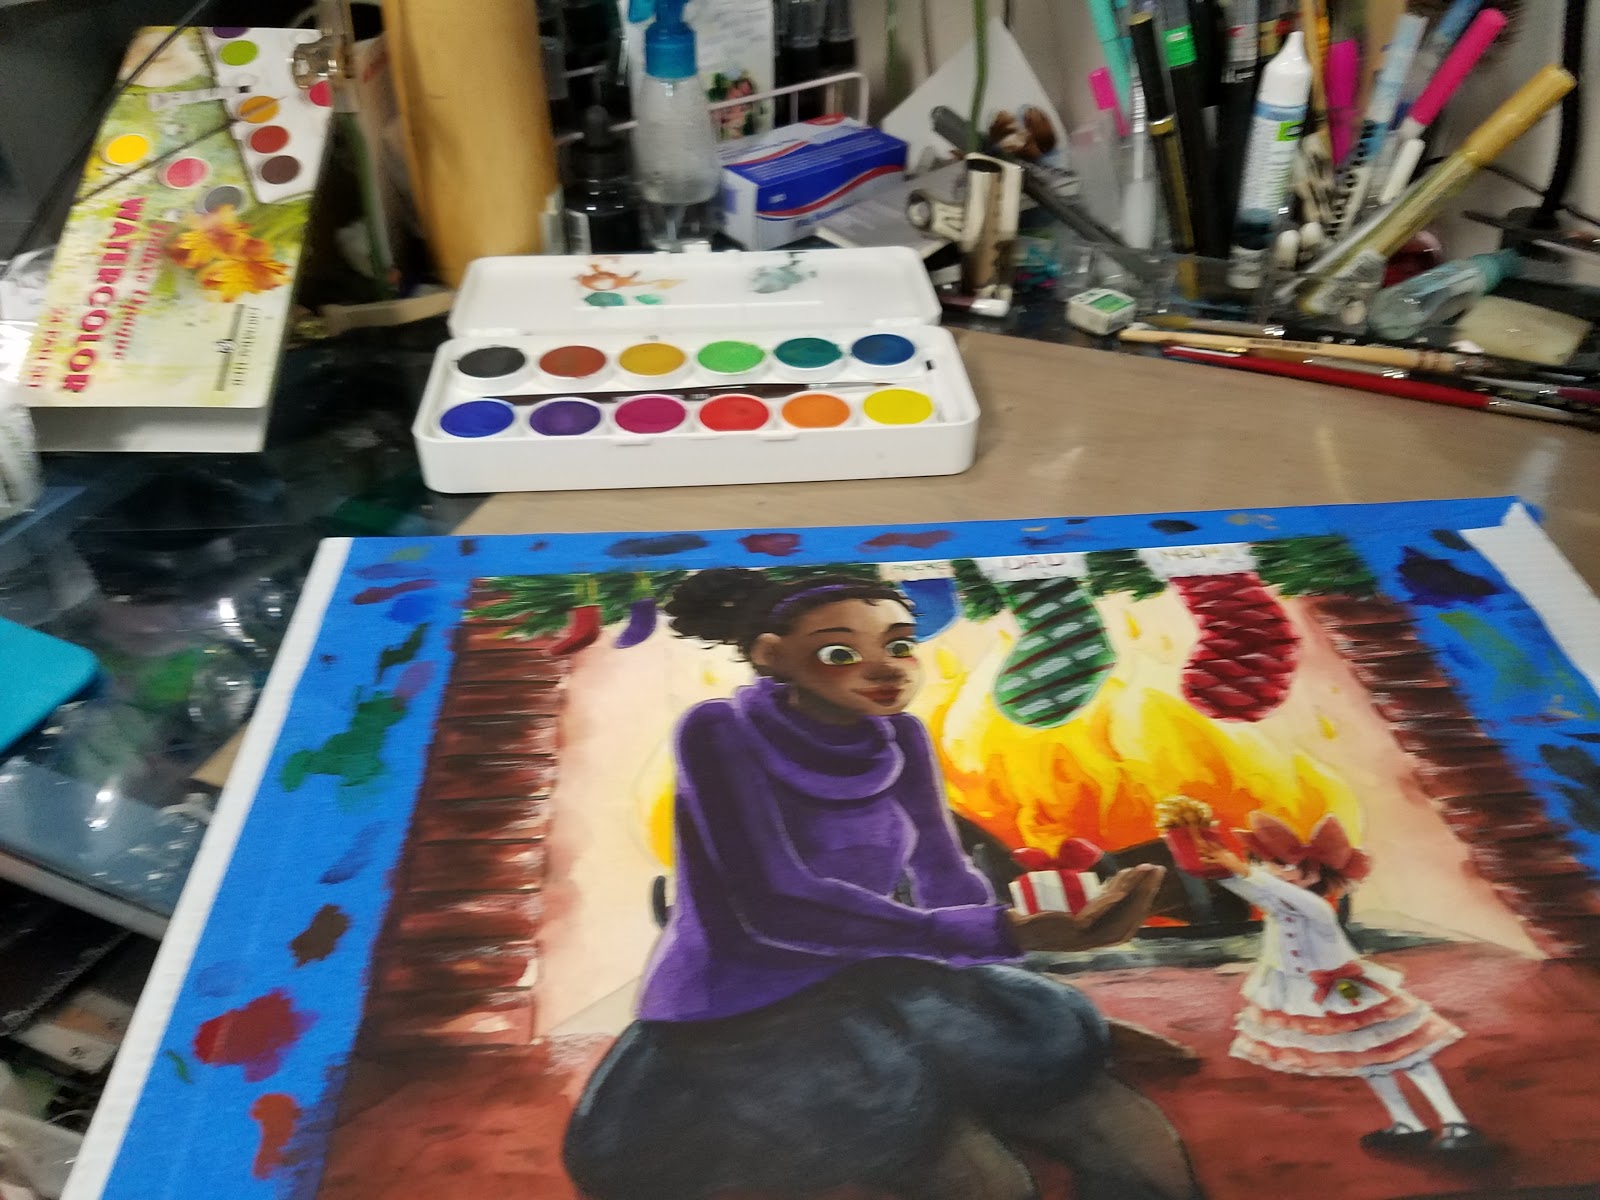

Step 4: Add Details with White Gouache
Step 5: Use white Gouache to add outline on objects nearest fire to give the impression of reflected light
 Step 6: Use Gouche to add stronger white outline to stockings, along fur of stockings, in the garland nearest the fire
Step 7: Use Gouache to add white highlights to eyes, hair, rhinestones
Step 8: Refine white details with watercolor pencils for a cleaner look.

Step 9: Sparingly use opaque watercolors or colored gouache for toned corrections
(like covering some of the pencil marks in the fire)

Allow illustration to dry completely before removing watercolor tape. When peeling off watercolor tape, pull away from the board at a 90 degree angle to reduce tearing.
Our finished and scanned piece, corrected digitally for color accuracy:

Our Sponsor

For more beautiful watercolor work, why not pick up a copy of 7" Kara, Volume 1? 7" Kara is a lush watercolor comic the entire family can enjoy, following the adventures of tiny Kara as she discovers humans, explores the backyard, and befriends a kitten. Created by Becca Hillburn, if you enjoy this blog and my art, you'll love 7" Kara. Volume 1 is available in the Natto-shop.
Please consider donating to this blog or purchasing from Natto-shop (http://nattosoup.com/shop) if you want me to continue publishing quality content. All materials tested were purchased from my own pocket. Keep on Truckin' Nattosoup is not under any sponsorship.
January 1, 2017
Watercolor Basics: Step by Step: Adding Shadows
Now that we've introduced the basics of Watercolor Basics, it's time to take you step by step through some of the most common processes for completing a watercolor illustration. I'm going to take you from start to finish through my 2016 Christmas card illustration, explaining my techniques as I go. I have a series of video tutorials recorded concurrently that should be available on my Youtube channel soon, if you need some live action explanation.
If you enjoy this series, if you have learned something, or if I have inspired you in some way, please take a moment to share this, or any post, with your friends and familiy on your favorite social networking platform. There are handy sharing buttons below this post. If you enjoy art education content, and would like to be part of the process, please visit my Patreon for information on how to join the artnerd community. Backers get early access to popular series, backer exclusive content, and voting rights on upcoming content.
When we've finished these tutorials, this is what the finished illustration will look like! This image was designed and used for my Christmas 2016 cards sent out to friends, family, and Patrons.
This image features Naomi and Kara from my children's watercolor comic, 7" Kara. If you enjoy this blog, and enjoy my art, I highly recommend you order a copy through my shop!
Previously, I showed you guys how to render a watercolor illustration (link).
Today we're going to add shadows and shadow tones to our rendered watercolor illustration. For me, this is the stage where things really start to come together,
Materials Used in this Tutorial:
Watercolors of your choice (I use Winsor and Newton moist half pans, Daniel Smith, SoHo, and Holbein watercolors)
Daisy watercolor wells or palette of choice- For mixing large amounts of color
Deep welled watercolor palette- I used a recycled mochi ice cream carton
Watercolor brushes (I use mainly rounds)
2 watercolor cups- 1 clean, 1 dirty- I like the Faber-Castell collapsible cups
Paper towels
Paper used:
Canson Moulin du Roy
Watercolor Brushes Used in this Tutorial:
For rounds larger than 6, I use synthetic brushes. Your preferences may vary from mine- I have several brands, and still have not found a brand I think perform as well as natural hair brushes. Synthetic brushes are much cheaper than natural hair brushes, especially at larger sizes, and are useful for blocking in color, as we will be doing in this tutorial.Creative Mark Rhapsody Kolinsky Sable Brushes- 4, 2, 1, 0Creative Mark Squirrel Brushes- 4, 6Blick Master Studio Squirrel- 4, 6
Step 1: Mixing shading colors for skintones

Left: Naomi's shadow color (more purple and violent, mixed darker) Right: Kara's shadow color (mauve, napthol red, mixed lighter)


Step 2: Mixing your overall shading color
I apologize that I didn't take a photo of my shadow color. When shading background elements, I usually use a glaze of Holbein's Neutral Tint+Payne's Gray+Dioxene Purple, and mix it darker as necessary.


This looks messy right now, but I'm going to refine my shadows and shapes with further layers of cherry red and napthol red once this shadow has dried. Sometimes it makes sense to add the shadow earlier on in the process, before the colors are too saturated or too thickly painted on.


I added a glaze of blue to Naomi's eyes to help give them definition.


You'll note that we still haven't really delineated fine facial details- we're going to be working dry into wet to do that, and doing that at this stage would mean those fine details are lost or muddied.
Coming Up Next
We're going to add final details to our watercolor illustration!
Our Sponsor

For more beautiful watercolor work, why not pick up a copy of 7" Kara, Volume 1? 7" Kara is a lush watercolor comic the entire family can enjoy, following the adventures of tiny Kara as she discovers humans, explores the backyard, and befriends a kitten. Created by Becca Hillburn, if you enjoy this blog and my art, you'll love 7" Kara. Volume 1 is available in the Natto-shop.
Please consider donating to this blog or purchasing from Natto-shop (http://nattosoup.com/shop) if you want me to continue publishing quality content. All materials tested were purchased from my own pocket. Keep on Truckin' Nattosoup is not under any sponsorship.
If you enjoy this series, if you have learned something, or if I have inspired you in some way, please take a moment to share this, or any post, with your friends and familiy on your favorite social networking platform. There are handy sharing buttons below this post. If you enjoy art education content, and would like to be part of the process, please visit my Patreon for information on how to join the artnerd community. Backers get early access to popular series, backer exclusive content, and voting rights on upcoming content.
When we've finished these tutorials, this is what the finished illustration will look like! This image was designed and used for my Christmas 2016 cards sent out to friends, family, and Patrons.
This image features Naomi and Kara from my children's watercolor comic, 7" Kara. If you enjoy this blog, and enjoy my art, I highly recommend you order a copy through my shop!
Previously, I showed you guys how to render a watercolor illustration (link).
Today we're going to add shadows and shadow tones to our rendered watercolor illustration. For me, this is the stage where things really start to come together,
Materials Used in this Tutorial:
Watercolors of your choice (I use Winsor and Newton moist half pans, Daniel Smith, SoHo, and Holbein watercolors)
Daisy watercolor wells or palette of choice- For mixing large amounts of color
Deep welled watercolor palette- I used a recycled mochi ice cream carton
Watercolor brushes (I use mainly rounds)
2 watercolor cups- 1 clean, 1 dirty- I like the Faber-Castell collapsible cups
Paper towels
Paper used:
Canson Moulin du Roy
Watercolor Brushes Used in this Tutorial:
For rounds larger than 6, I use synthetic brushes. Your preferences may vary from mine- I have several brands, and still have not found a brand I think perform as well as natural hair brushes. Synthetic brushes are much cheaper than natural hair brushes, especially at larger sizes, and are useful for blocking in color, as we will be doing in this tutorial.Creative Mark Rhapsody Kolinsky Sable Brushes- 4, 2, 1, 0Creative Mark Squirrel Brushes- 4, 6Blick Master Studio Squirrel- 4, 6

Step 1: Mixing shading colors for skintones

Left: Naomi's shadow color (more purple and violent, mixed darker) Right: Kara's shadow color (mauve, napthol red, mixed lighter)
Step 2: Mixing your overall shading color
I apologize that I didn't take a photo of my shadow color. When shading background elements, I usually use a glaze of Holbein's Neutral Tint+Payne's Gray+Dioxene Purple, and mix it darker as necessary.
This looks messy right now, but I'm going to refine my shadows and shapes with further layers of cherry red and napthol red once this shadow has dried. Sometimes it makes sense to add the shadow earlier on in the process, before the colors are too saturated or too thickly painted on.

I added a glaze of blue to Naomi's eyes to help give them definition.


You'll note that we still haven't really delineated fine facial details- we're going to be working dry into wet to do that, and doing that at this stage would mean those fine details are lost or muddied.
Coming Up Next
We're going to add final details to our watercolor illustration!
Our Sponsor

For more beautiful watercolor work, why not pick up a copy of 7" Kara, Volume 1? 7" Kara is a lush watercolor comic the entire family can enjoy, following the adventures of tiny Kara as she discovers humans, explores the backyard, and befriends a kitten. Created by Becca Hillburn, if you enjoy this blog and my art, you'll love 7" Kara. Volume 1 is available in the Natto-shop.
Please consider donating to this blog or purchasing from Natto-shop (http://nattosoup.com/shop) if you want me to continue publishing quality content. All materials tested were purchased from my own pocket. Keep on Truckin' Nattosoup is not under any sponsorship.
December 29, 2016
Watercolor Basics: Step by Step: Rendering
Now that we've introduced the basics of Watercolor Basics, it's time to take you step by step through some of the most common processes for completing a watercolor illustration. I'm going to take you from start to finish through my 2016 Christmas card illustration, explaining my techniques as I go. I have a series of video tutorials recorded concurrently that should be available on my Youtube channel soon, if you need some live action explanation.
If you enjoy this series, if you have learned something, or if I have inspired you in some way, please take a moment to share this, or any post, with your friends and familiy on your favorite social networking platform. There are handy sharing buttons below this post. If you enjoy art education content, and would like to be part of the process, please visit my Patreon for information on how to join the artnerd community. Backers get early access to popular series, backer exclusive content, and voting rights on upcoming content.
When we've finished these tutorials, this is what the finished illustration will look like! This image was designed and used for my Christmas 2016 cards sent out to friends, family, and Patrons.
This image features Naomi and Kara from my children's watercolor comic, 7" Kara. If you enjoy this blog, and enjoy my art, I highly recommend you order a copy through my shop!
Previously, I showed you guys how to block your illustration in (link)
In this tutorial, I'm going to demonstrate several methods I use to render a watercolor illustration. This is the stage that takes the longest, and requires the most experience. I highly recommend you watch the accompanying video for step by step explanations. This post will gloss over the topic to give you an overview.
Materials Used in this Tutorial:
Watercolors of your choice (I use Winsor and Newton moist half pans, Daniel Smith, SoHo, and Holbein watercolors)
Daisy watercolor wells or palette of choice- For mixing large amounts of color
Deep welled watercolor palette- I used a recycled mochi ice cream carton
Watercolor brushes (I use mainly rounds)
2 watercolor cups- 1 clean, 1 dirty- I like the Faber-Castell collapsible cups
Paper towels
Paper used:
Canson Moulin du Roy
Watercolor Brushes Used in this Tutorial:
For rounds larger than 6, I use synthetic brushes. Your preferences may vary from mine- I have several brands, and still have not found a brand I think perform as well as natural hair brushes. Synthetic brushes are much cheaper than natural hair brushes, especially at larger sizes, and are useful for blocking in color, as we will be doing in this tutorial.Creative Mark Rhapsody Kolinsky Sable Brushes- 4, 2, 1, 0Creative Mark Squirrel Brushes- 4, 6Blick Master Studio Squirrel- 4, 6
Step 1

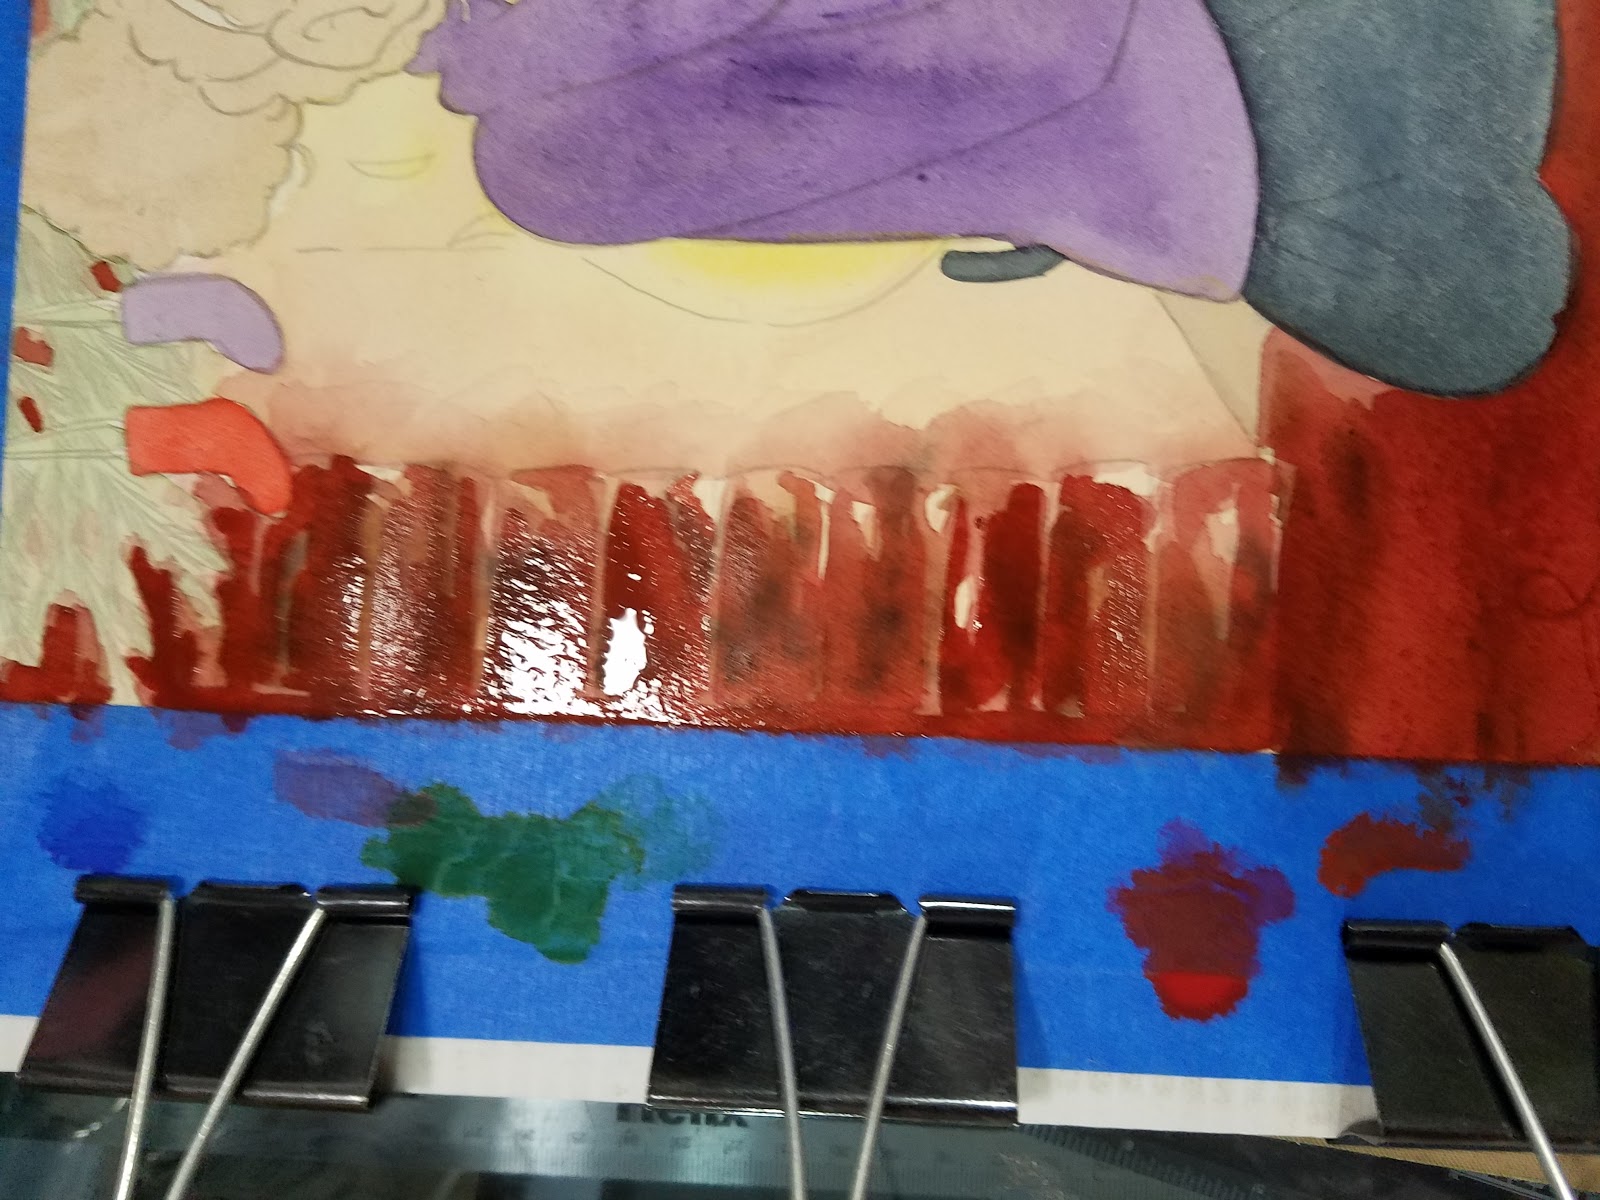
Working quickly and wet into wet, I apply a layer of mixed brick red. While that is still wet, I dab in brown and carbon black.


Watercolor always dries lighter and less saturated than when it is applied, so you may have to apply multiple layers to get the depth of color you want. As you progress through the painting, you can mix your paints thicker and work with more saturated colors, but it's important to start out light, especially if you're new to watercolor.
Step 2: Continue to work on developing colors and layers in the background


Step 3: Work on non-adjacent areas while paint dries.


At this stage, it's time to add blush to Naomi's skin. I like adding blush to darker skintones at various stages of the process- right after the overall tone has been applied, in between layers of skintone, and at the end of the rendering process. I feel that this helps me develop believable skintones. If this doesn't make sense, fear not- I have a tutorial for watercoloring darker skintones coming up, and I cover this in detail in the video tutorial for this image.

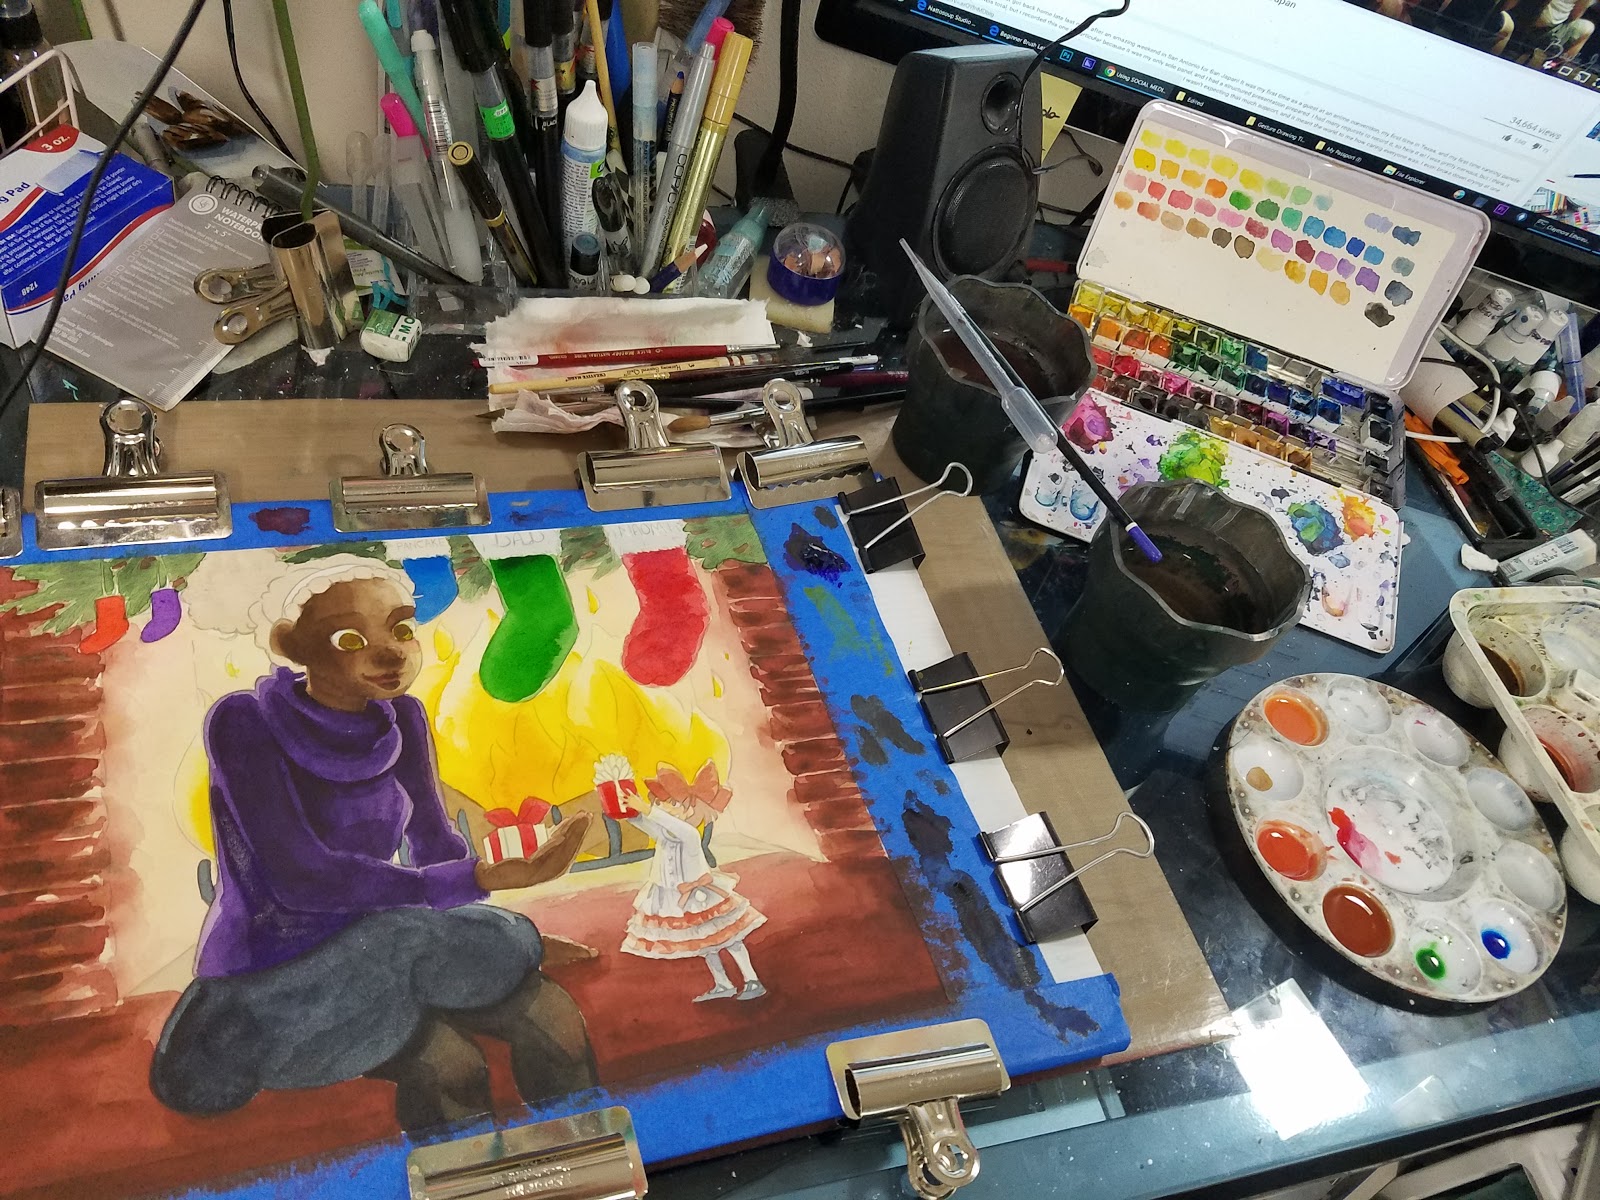
Step 4: When too many adjacent areas are wet, take a break to let everything dry.
I allowed my piece to dry for several hours, and returned when the piece was not only dry to the touch, but no longer cool to the touch.
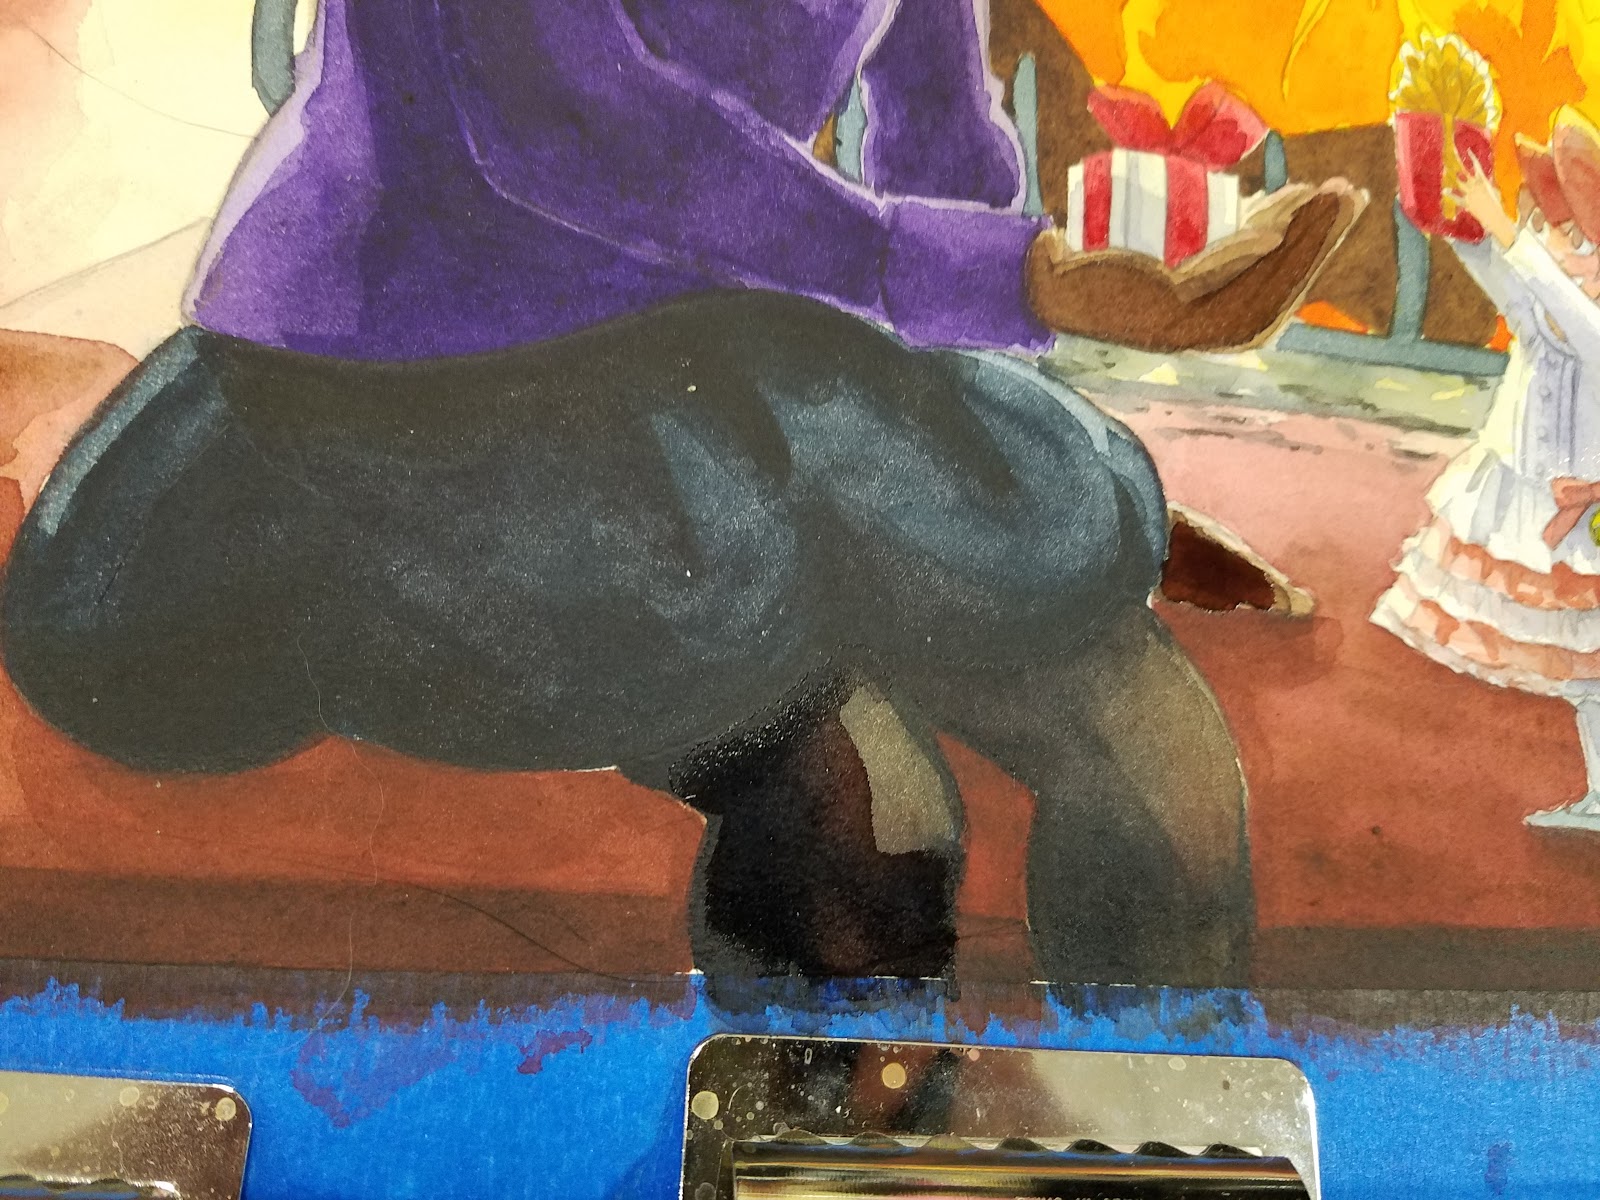
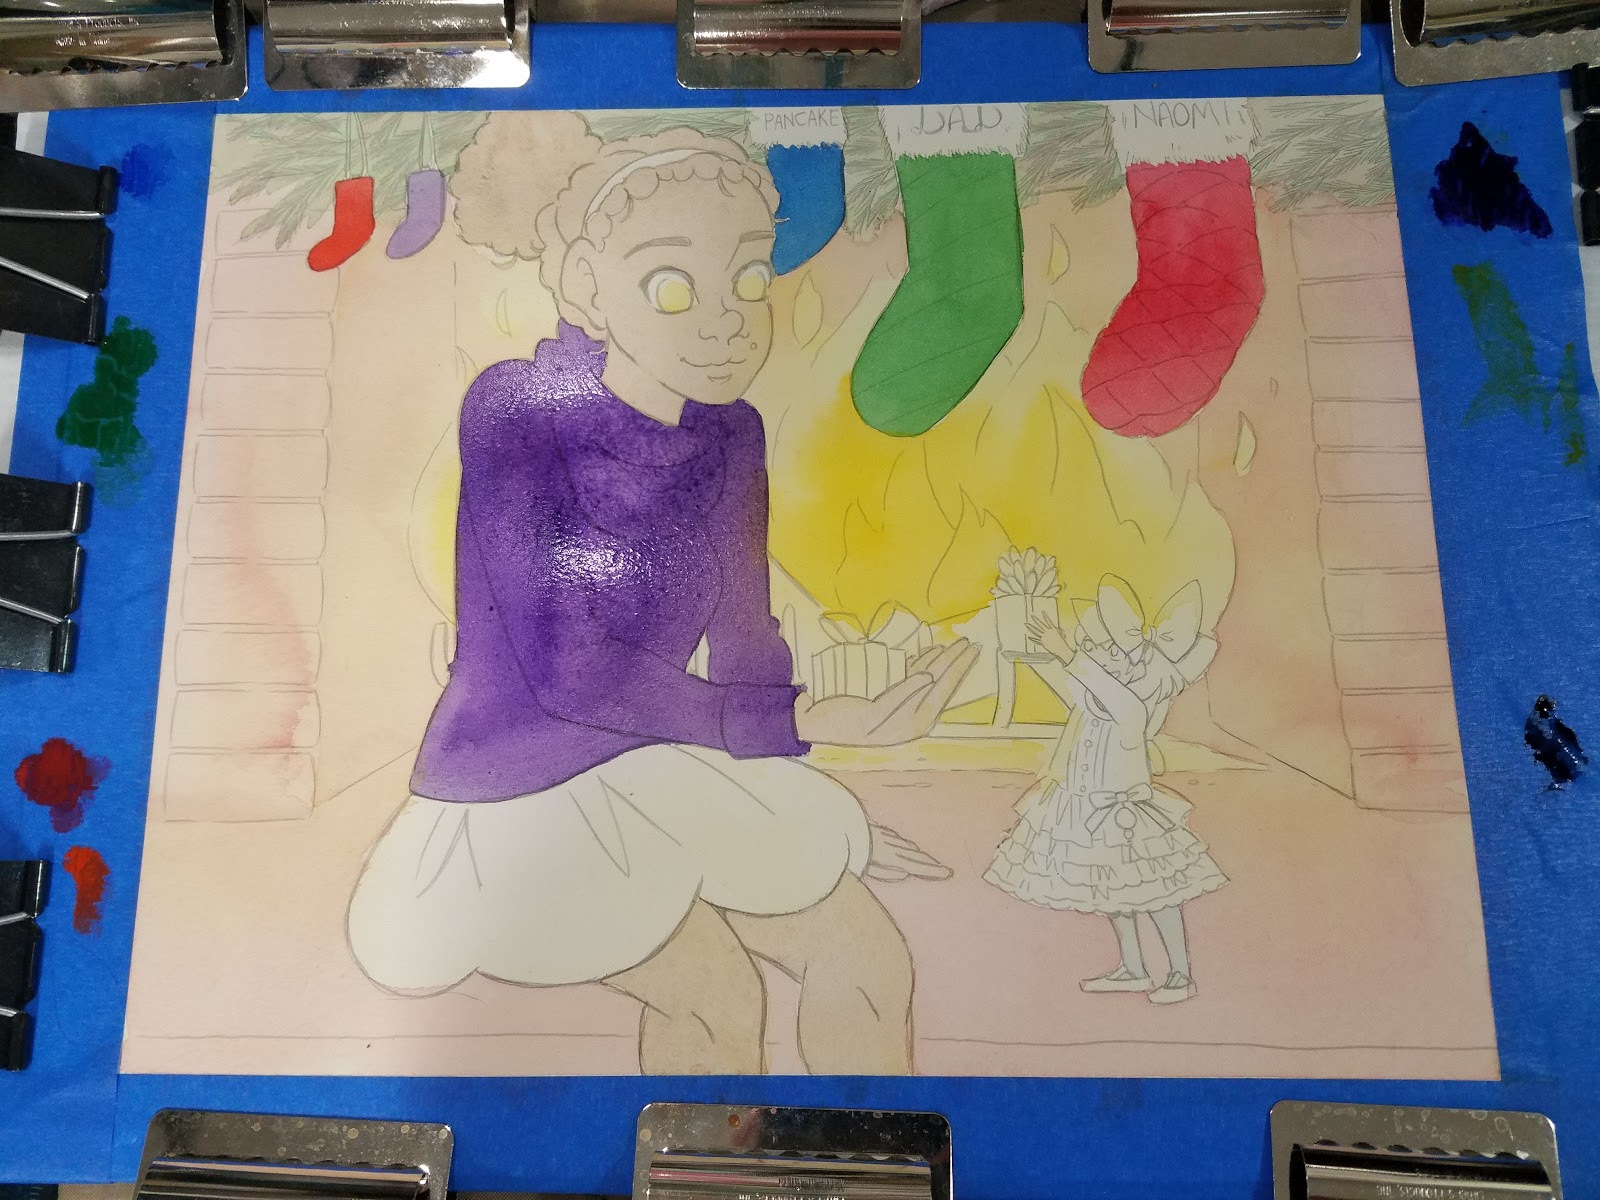
For Naomi's skirt, I wanted to create the impression of black fabric. To do that, you don't begin with black- black is the last color you add. You begin with an indigo, a purple, or a Payne's gray.
Painting Black
Step 1: Tone with a lighter color, in this example, Payne's Gray.
Step 2: Gradually build up your layers of color to black, saving black for last.

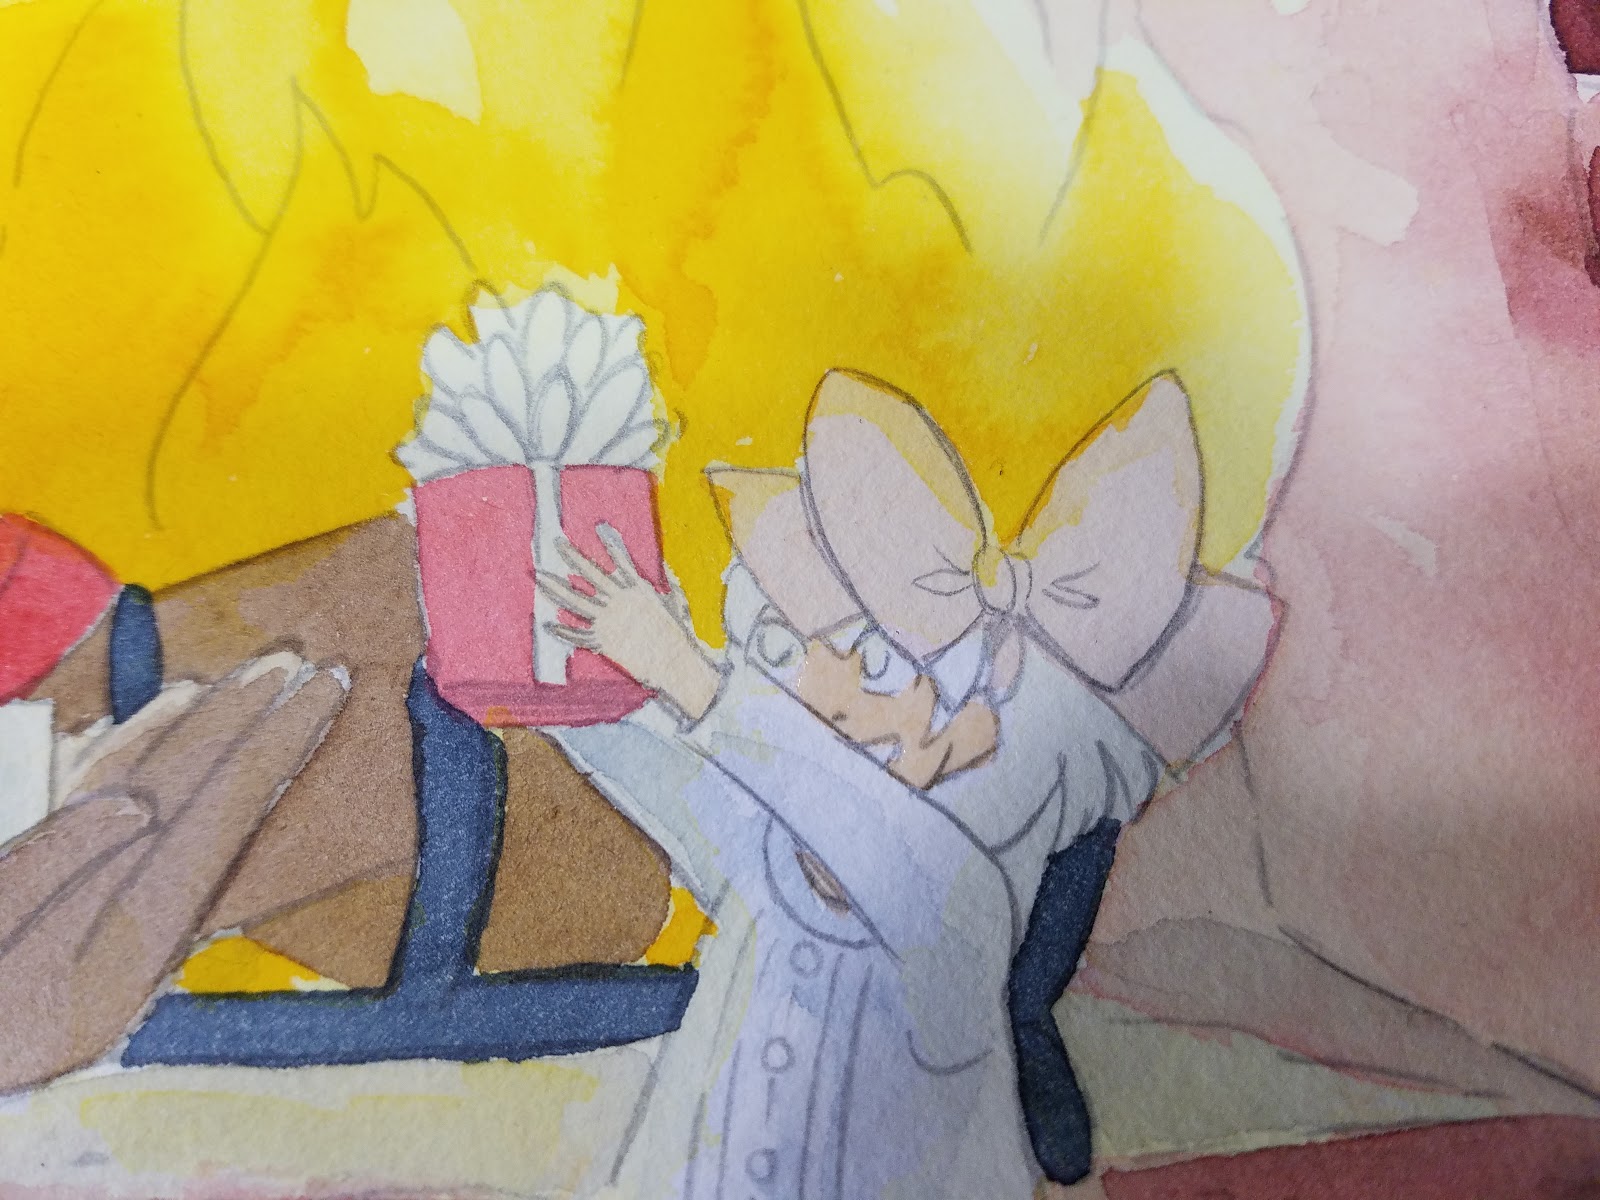
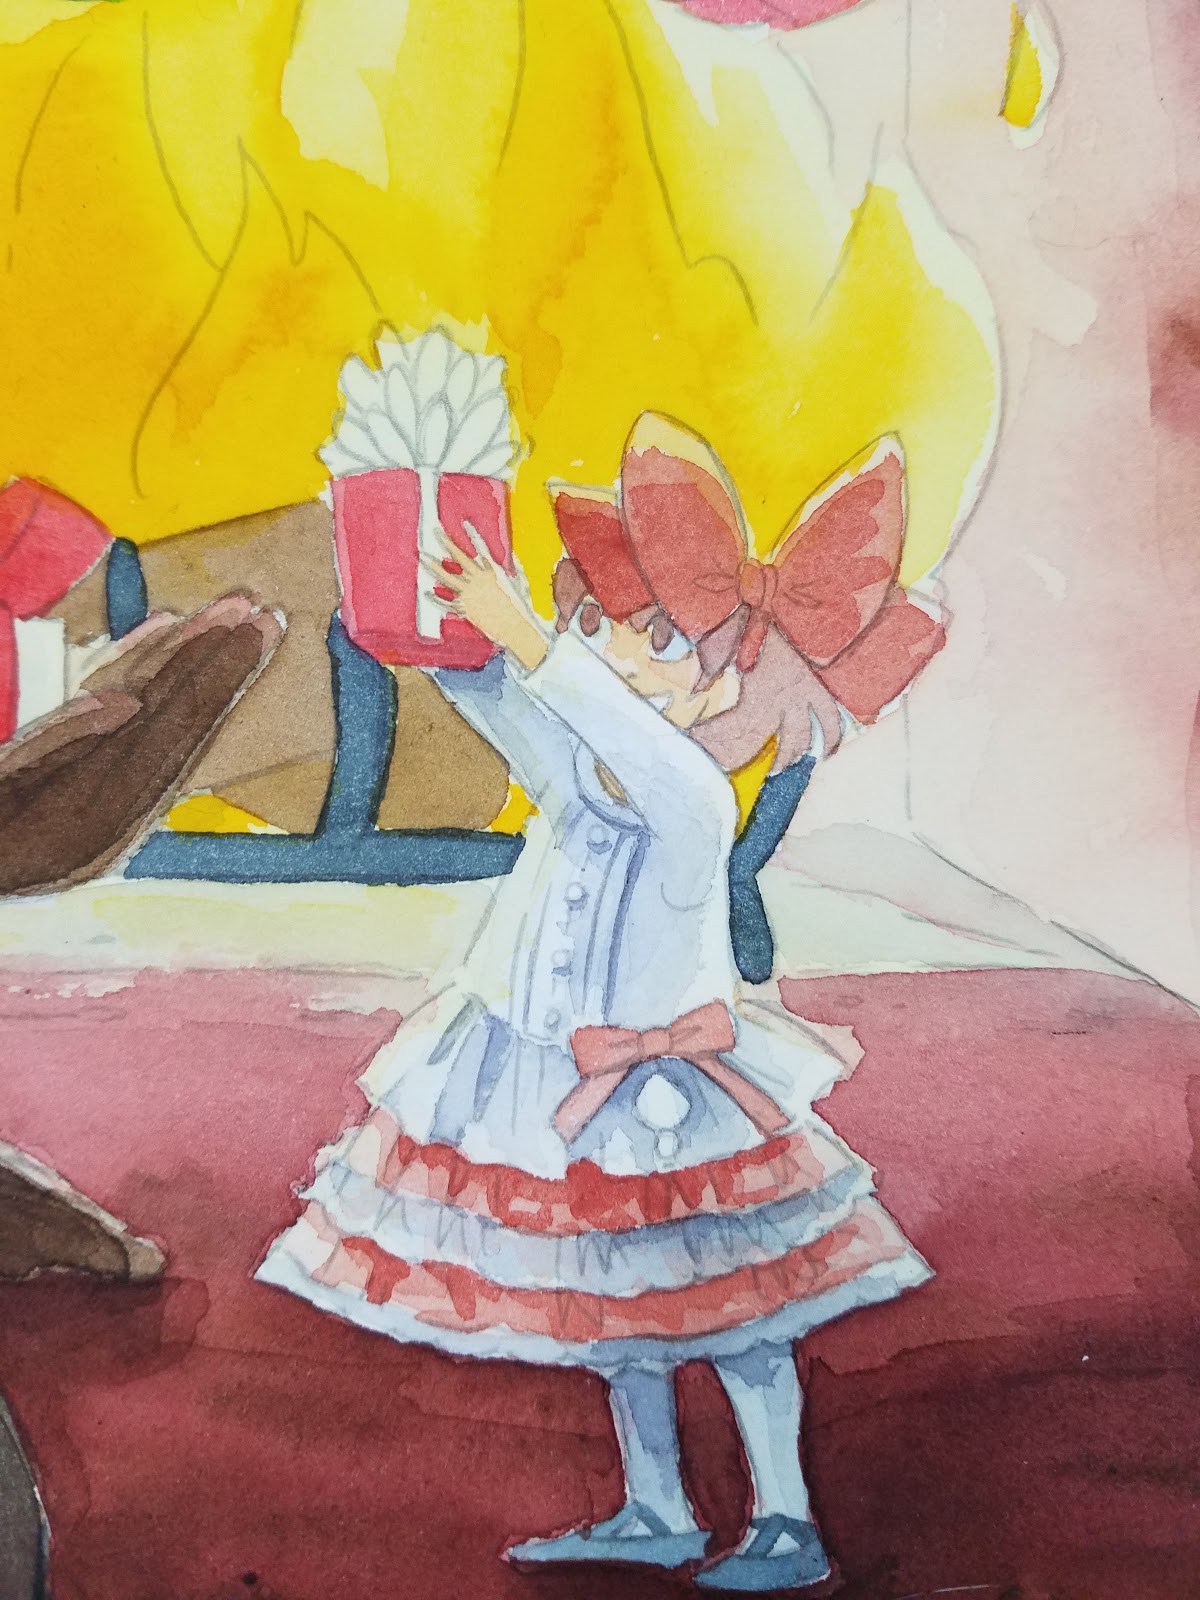
 Painting White
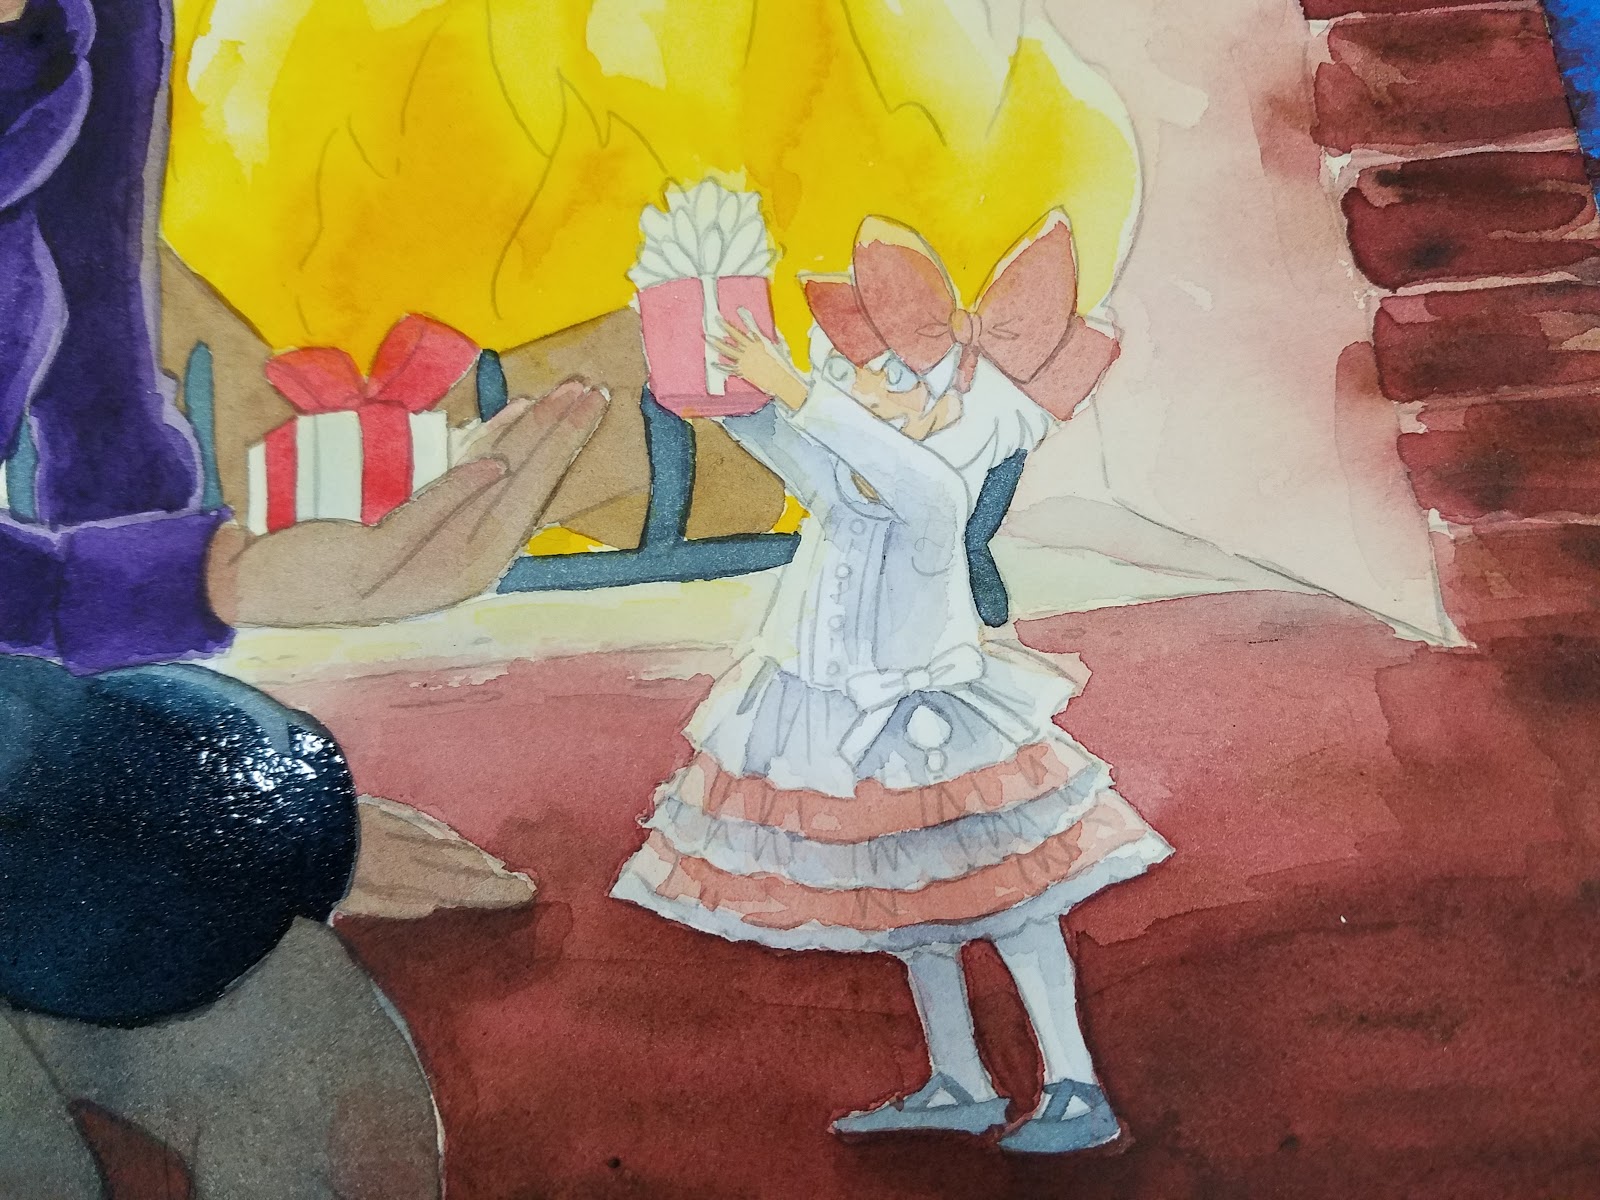
For large areas, you should avoid leaving the paper its natural white. Instead, you want to go for the illusion of white, and white objects do have areas of shadow where the 'white' is darker. For the shadow on Kara's shirt, I used a very light mixture of Holbein's neutral tint, violet, and a little Payne's gray, and slowly built the color up layer after layer.

Step 4: As layers dry, continue to add detail, blending out with clean water.
At this stage, I also darken the blush on Naomi's cheeks, as well as her lips.

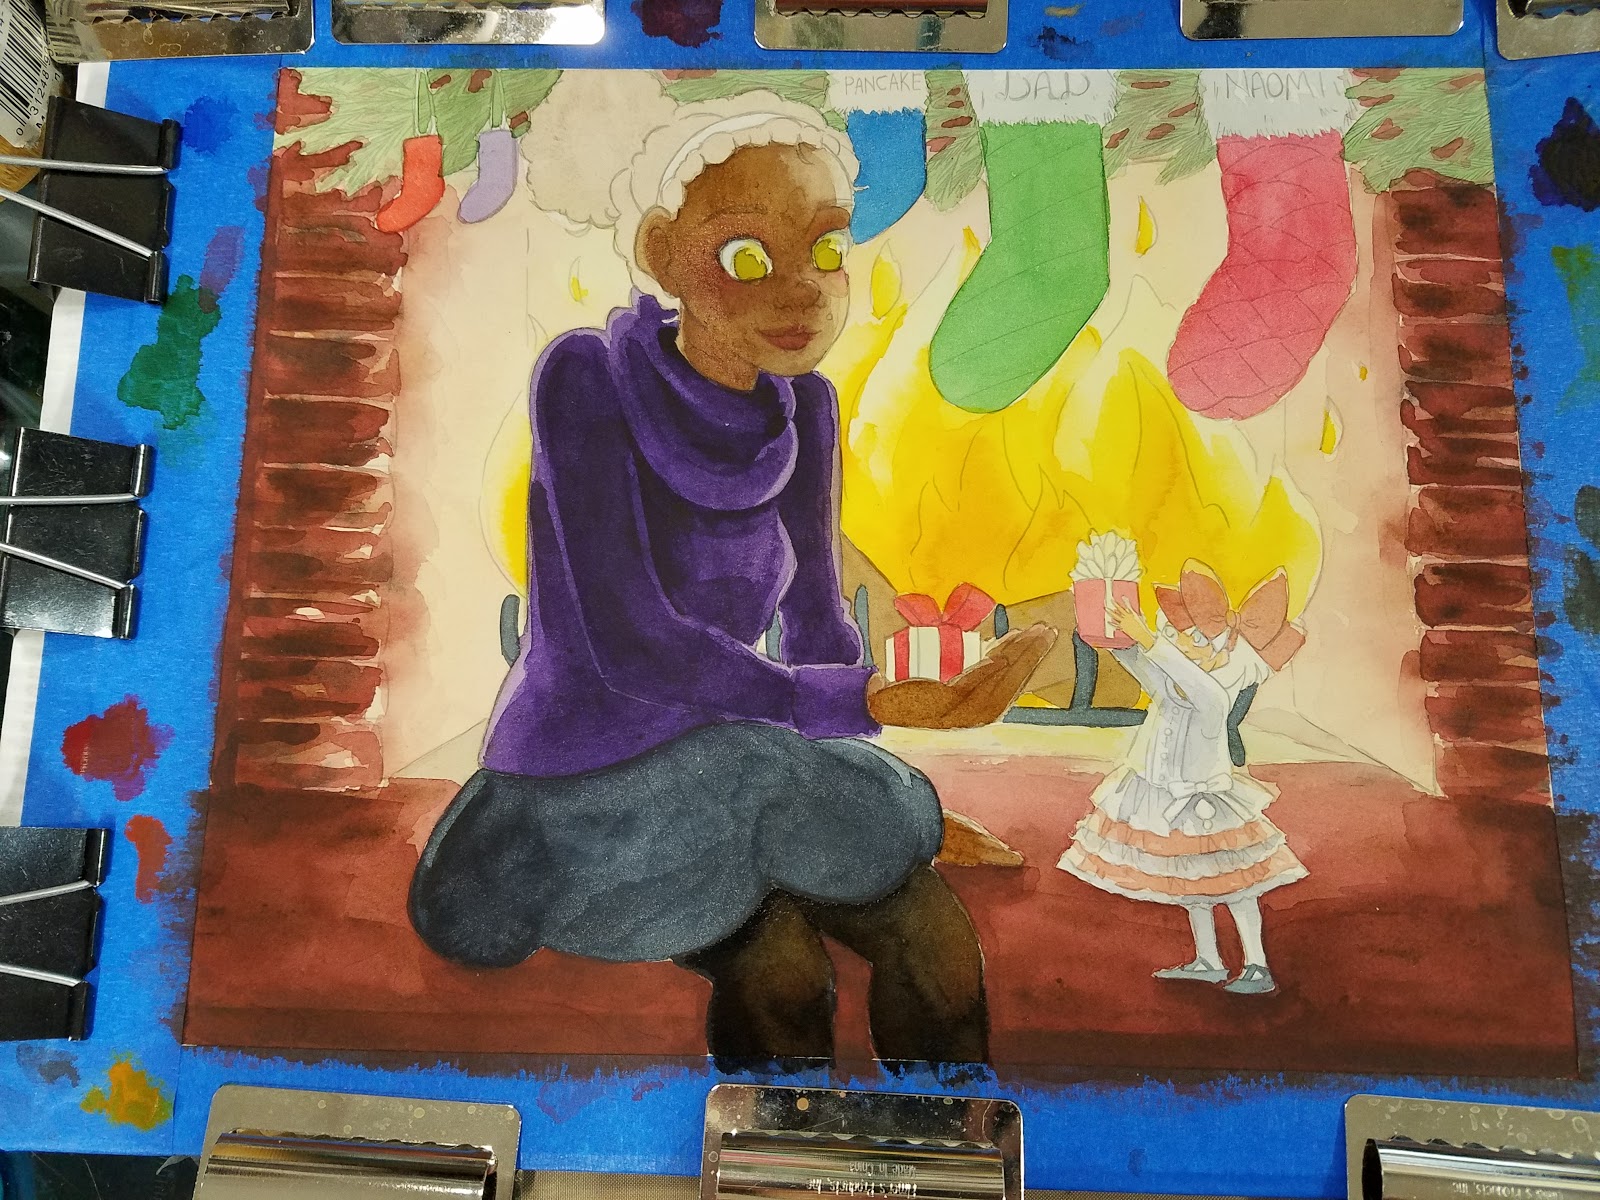
And add another layer of skintone, leaving a rim of unpainted skin closest to the fire, to indicate light.


I want Naomi's stockings to read as sheer fabric, so I painted several layers of skintone (and even blush) before adding a layer of Payne's gray mixed with black, heavily diluted with water.


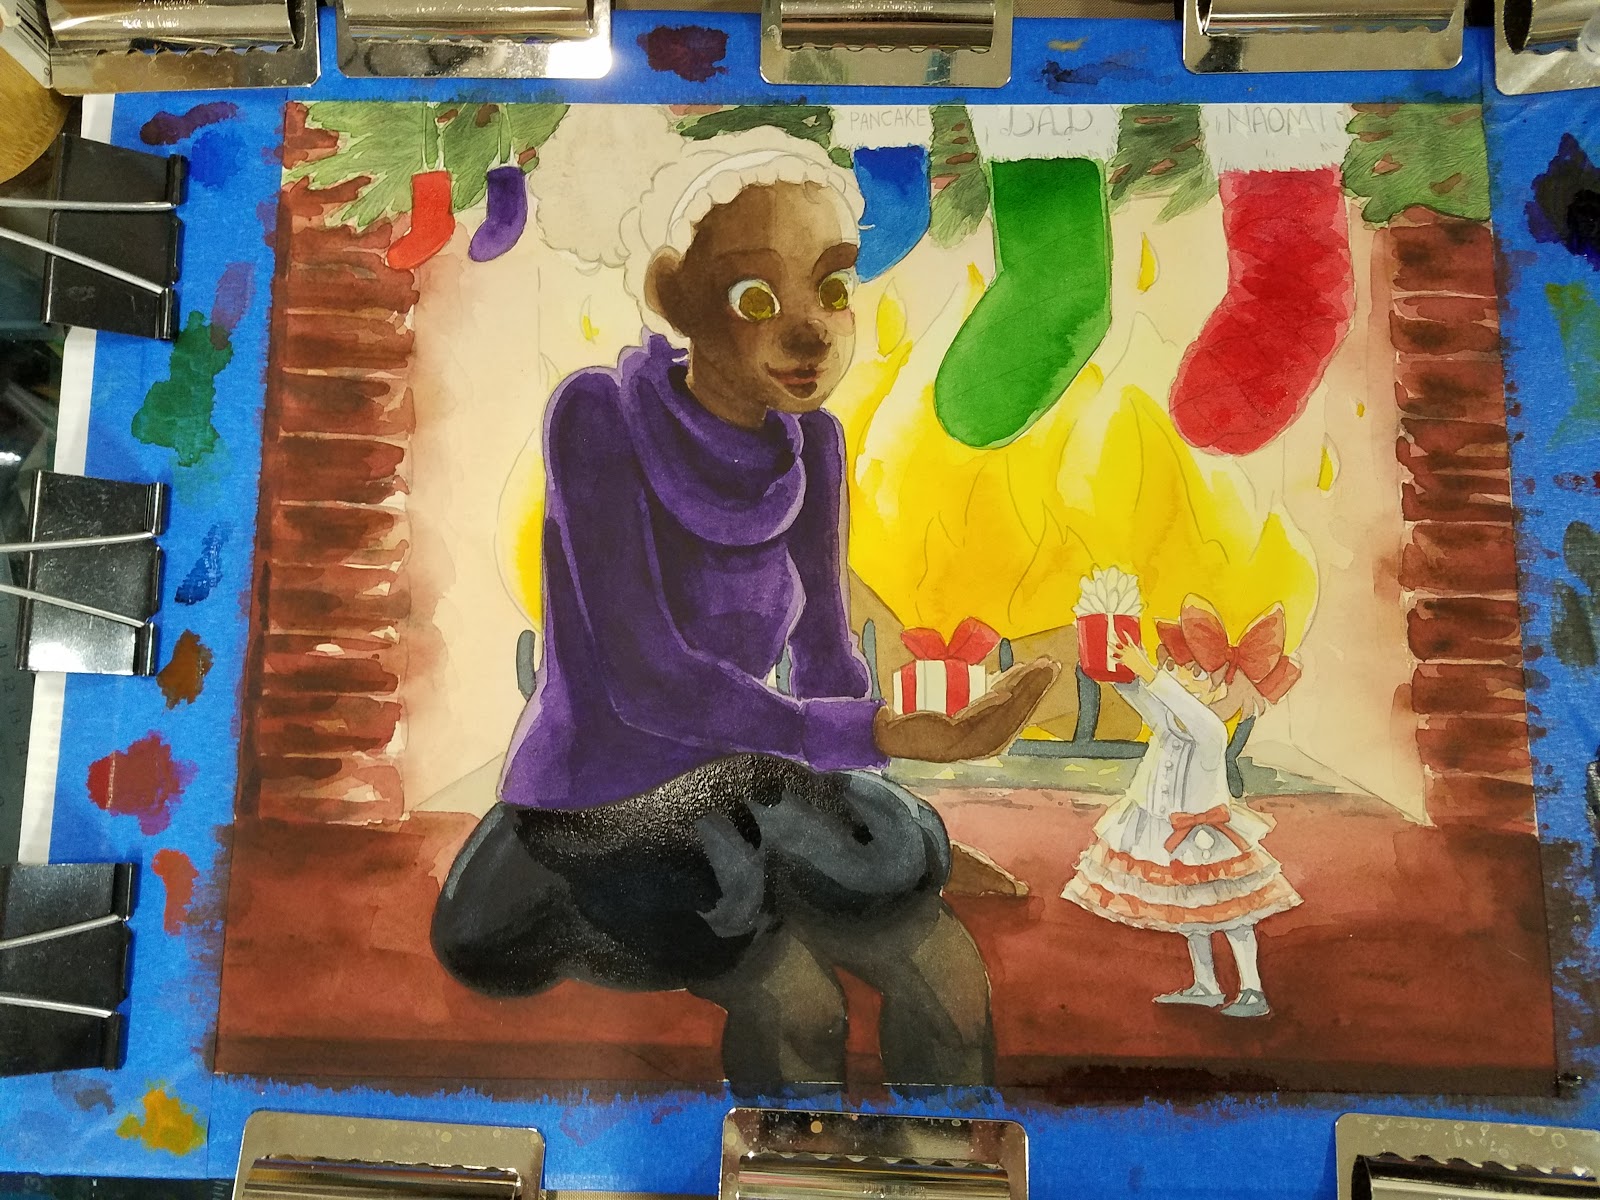
Step 5: I continue to build up layers until things 'feel' right.

I realize this isn't very descriptive, but it's something you develop over time. In 7" Kara Volume 1, my watercolors in Chapter 1 are far less rendered, and have far fewer layers of watercolor, than Chapter 4, and Chapter 4 is less sophisticated in terms of how the watercolor is handled than pages from Chapter 7. Check out the end of this post for those examples, or order your copy of 7" Kara, Volume 1 today and see for yourself!


When you're nearing the end of rendering, you can add your darker layers of color- like Naomi's hair, skirt, and sweater. Adding these saturated colors early on may lead to bleeding when adjacent areas are filled.
Step: Allow your watercolors to dry overnight before applying shadows for best results

Examples

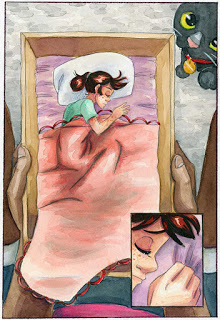
Left: Page from Chapter 1. Right Page from Chapter 4

Left: Page from Chapter 4. Right: Page from Chapter 6.
Notes:
If you have any questions, or would like to see something specific demonstrated, please email me using the form in the left hand sidebar.Be patient- rendering takes time and taste- so allow your paper time to dryEvery painting has an ugly stage- and that's ok! Learn to push past the ugly, try not to be discouraged!Higher quality papers, and cold press papers, can take more layers of watercolor than cheaper papers
Coming up next: Adding Shadows
 For more beautiful watercolor work, why not pick up a copy of 7" Kara, Volume 1? 7" Kara is a lush watercolor comic the entire family can enjoy, following the adventures of tiny Kara as she discovers humans, explores the backyard, and befriends a kitten. Created by Becca Hillburn, if you enjoy this blog and my art, you'll love 7" Kara. Volume 1 is available in the Natto-shop.
Please consider donating to this blog or purchasing from Natto-shop (http://nattosoup.com/shop) if you want me to continue publishing quality content. All materials tested were purchased from my own pocket. Keep on Truckin' Nattosoup is not under any sponsorship.
If you enjoy this series, if you have learned something, or if I have inspired you in some way, please take a moment to share this, or any post, with your friends and familiy on your favorite social networking platform. There are handy sharing buttons below this post. If you enjoy art education content, and would like to be part of the process, please visit my Patreon for information on how to join the artnerd community. Backers get early access to popular series, backer exclusive content, and voting rights on upcoming content.
When we've finished these tutorials, this is what the finished illustration will look like! This image was designed and used for my Christmas 2016 cards sent out to friends, family, and Patrons.
This image features Naomi and Kara from my children's watercolor comic, 7" Kara. If you enjoy this blog, and enjoy my art, I highly recommend you order a copy through my shop!
Previously, I showed you guys how to block your illustration in (link)
In this tutorial, I'm going to demonstrate several methods I use to render a watercolor illustration. This is the stage that takes the longest, and requires the most experience. I highly recommend you watch the accompanying video for step by step explanations. This post will gloss over the topic to give you an overview.
Materials Used in this Tutorial:
Watercolors of your choice (I use Winsor and Newton moist half pans, Daniel Smith, SoHo, and Holbein watercolors)
Daisy watercolor wells or palette of choice- For mixing large amounts of color
Deep welled watercolor palette- I used a recycled mochi ice cream carton
Watercolor brushes (I use mainly rounds)
2 watercolor cups- 1 clean, 1 dirty- I like the Faber-Castell collapsible cups
Paper towels
Paper used:
Canson Moulin du Roy
Watercolor Brushes Used in this Tutorial:
For rounds larger than 6, I use synthetic brushes. Your preferences may vary from mine- I have several brands, and still have not found a brand I think perform as well as natural hair brushes. Synthetic brushes are much cheaper than natural hair brushes, especially at larger sizes, and are useful for blocking in color, as we will be doing in this tutorial.Creative Mark Rhapsody Kolinsky Sable Brushes- 4, 2, 1, 0Creative Mark Squirrel Brushes- 4, 6Blick Master Studio Squirrel- 4, 6
Step 1
Working quickly and wet into wet, I apply a layer of mixed brick red. While that is still wet, I dab in brown and carbon black.


Watercolor always dries lighter and less saturated than when it is applied, so you may have to apply multiple layers to get the depth of color you want. As you progress through the painting, you can mix your paints thicker and work with more saturated colors, but it's important to start out light, especially if you're new to watercolor.
Step 2: Continue to work on developing colors and layers in the background


Step 3: Work on non-adjacent areas while paint dries.

At this stage, it's time to add blush to Naomi's skin. I like adding blush to darker skintones at various stages of the process- right after the overall tone has been applied, in between layers of skintone, and at the end of the rendering process. I feel that this helps me develop believable skintones. If this doesn't make sense, fear not- I have a tutorial for watercoloring darker skintones coming up, and I cover this in detail in the video tutorial for this image.
Step 4: When too many adjacent areas are wet, take a break to let everything dry.
I allowed my piece to dry for several hours, and returned when the piece was not only dry to the touch, but no longer cool to the touch.
For Naomi's skirt, I wanted to create the impression of black fabric. To do that, you don't begin with black- black is the last color you add. You begin with an indigo, a purple, or a Payne's gray.
Painting Black
Step 1: Tone with a lighter color, in this example, Payne's Gray.
Step 2: Gradually build up your layers of color to black, saving black for last.
 Painting White
For large areas, you should avoid leaving the paper its natural white. Instead, you want to go for the illusion of white, and white objects do have areas of shadow where the 'white' is darker. For the shadow on Kara's shirt, I used a very light mixture of Holbein's neutral tint, violet, and a little Payne's gray, and slowly built the color up layer after layer.
Step 4: As layers dry, continue to add detail, blending out with clean water.
At this stage, I also darken the blush on Naomi's cheeks, as well as her lips.

And add another layer of skintone, leaving a rim of unpainted skin closest to the fire, to indicate light.
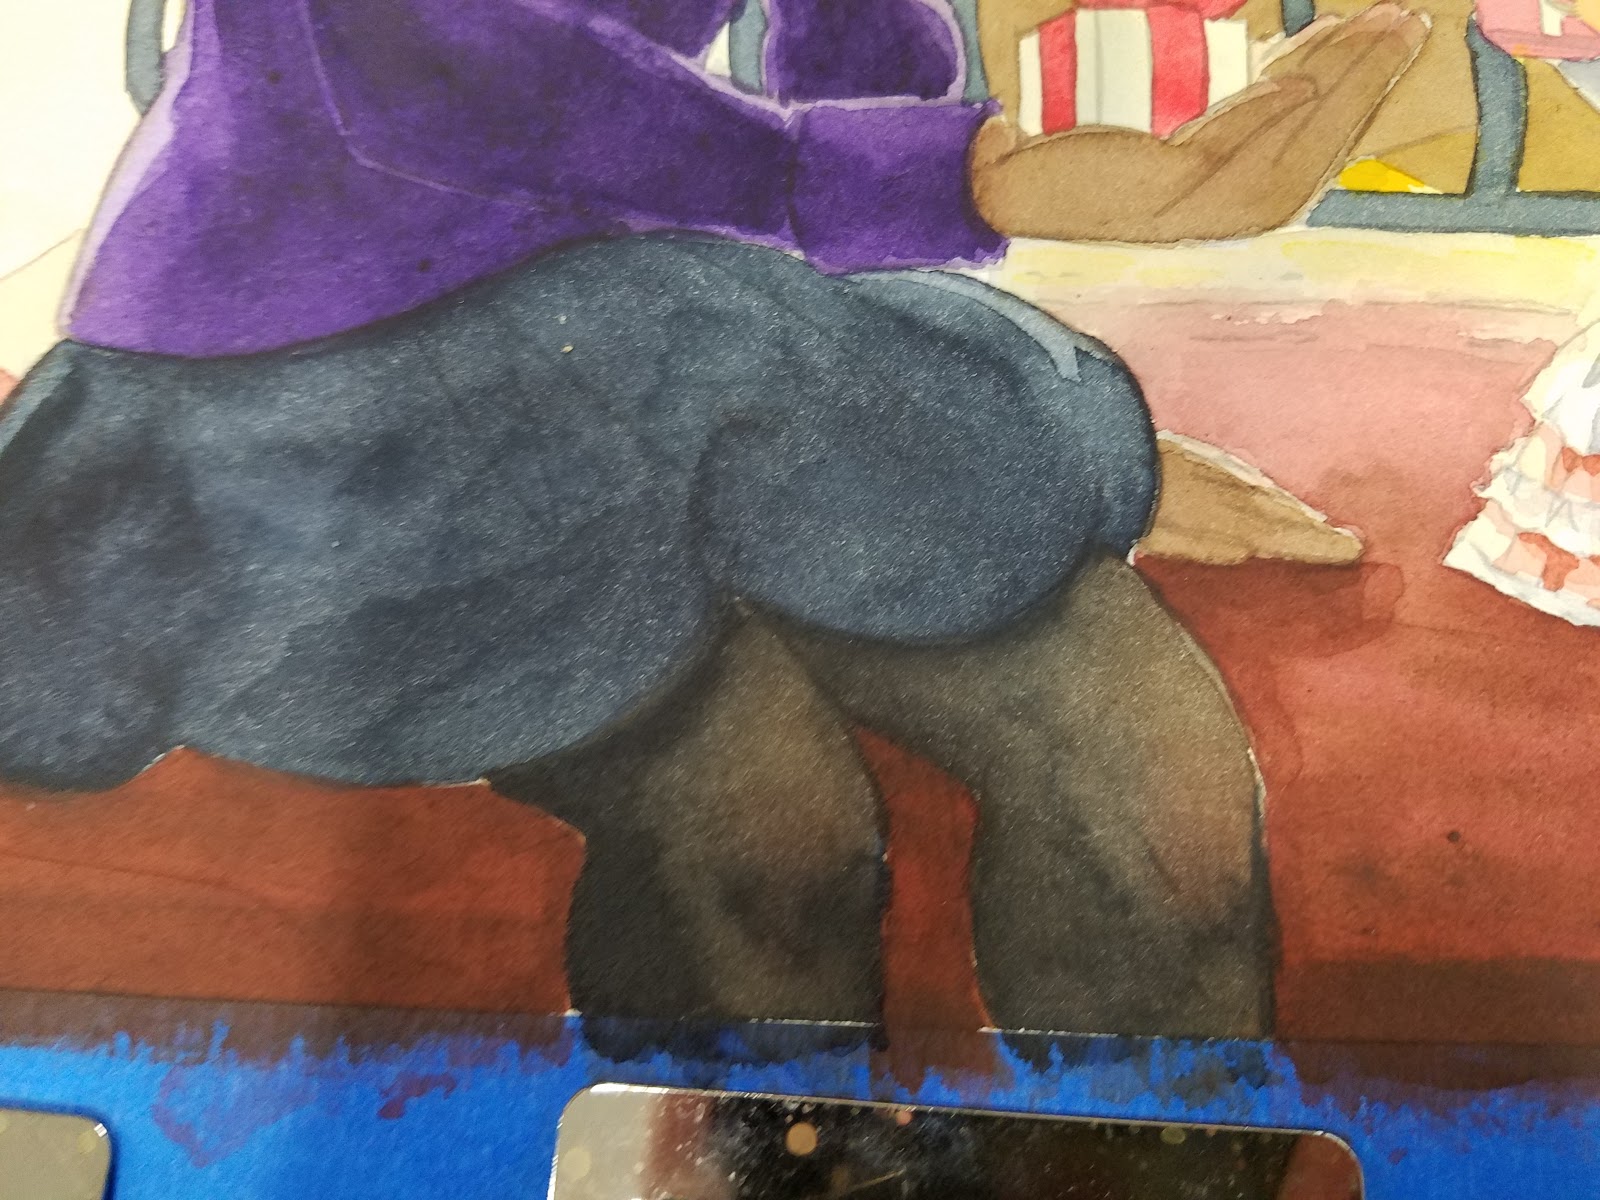
I want Naomi's stockings to read as sheer fabric, so I painted several layers of skintone (and even blush) before adding a layer of Payne's gray mixed with black, heavily diluted with water.


Step 5: I continue to build up layers until things 'feel' right.
I realize this isn't very descriptive, but it's something you develop over time. In 7" Kara Volume 1, my watercolors in Chapter 1 are far less rendered, and have far fewer layers of watercolor, than Chapter 4, and Chapter 4 is less sophisticated in terms of how the watercolor is handled than pages from Chapter 7. Check out the end of this post for those examples, or order your copy of 7" Kara, Volume 1 today and see for yourself!


When you're nearing the end of rendering, you can add your darker layers of color- like Naomi's hair, skirt, and sweater. Adding these saturated colors early on may lead to bleeding when adjacent areas are filled.
Step: Allow your watercolors to dry overnight before applying shadows for best results

Examples
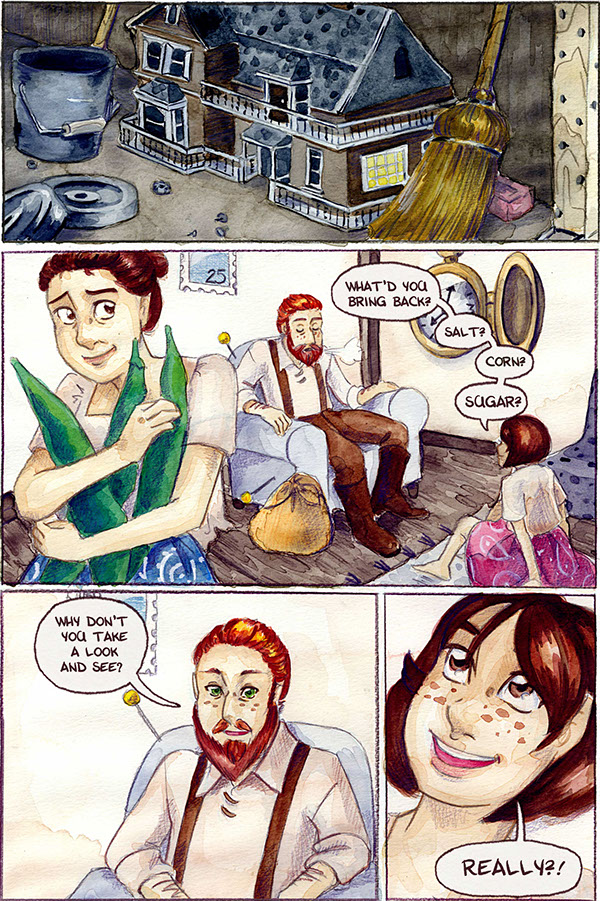
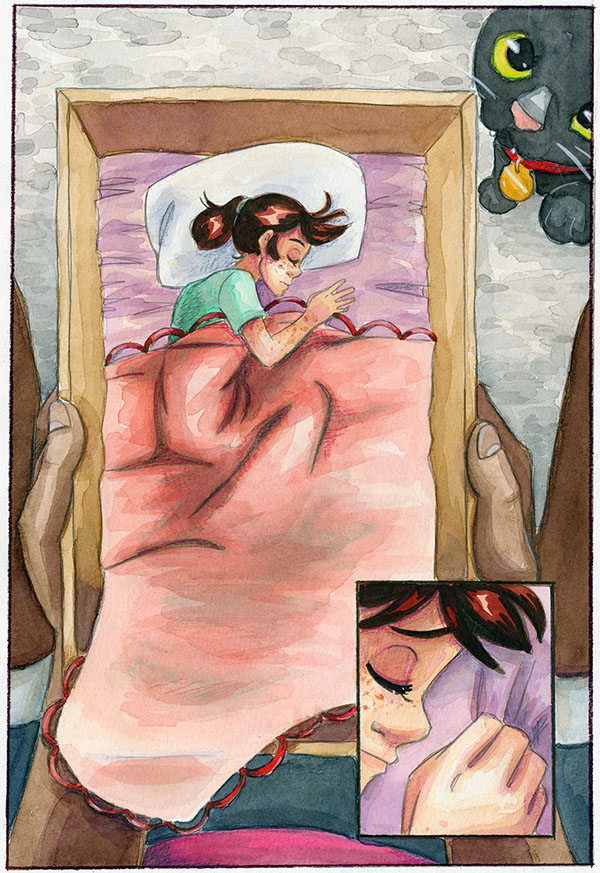
Left: Page from Chapter 1. Right Page from Chapter 4

Left: Page from Chapter 4. Right: Page from Chapter 6.
Notes:
If you have any questions, or would like to see something specific demonstrated, please email me using the form in the left hand sidebar.Be patient- rendering takes time and taste- so allow your paper time to dryEvery painting has an ugly stage- and that's ok! Learn to push past the ugly, try not to be discouraged!Higher quality papers, and cold press papers, can take more layers of watercolor than cheaper papers
Coming up next: Adding Shadows
 For more beautiful watercolor work, why not pick up a copy of 7" Kara, Volume 1? 7" Kara is a lush watercolor comic the entire family can enjoy, following the adventures of tiny Kara as she discovers humans, explores the backyard, and befriends a kitten. Created by Becca Hillburn, if you enjoy this blog and my art, you'll love 7" Kara. Volume 1 is available in the Natto-shop.
Please consider donating to this blog or purchasing from Natto-shop (http://nattosoup.com/shop) if you want me to continue publishing quality content. All materials tested were purchased from my own pocket. Keep on Truckin' Nattosoup is not under any sponsorship.
December 26, 2016
Watercolor Basics: Step by Step: Blocking In
Now that we've introduced the basics of Watercolor Basics, it's time to take you step by step through some of the most common processes for completing a watercolor illustration. I'm going to take you from start to finish through my 2016 Christmas card illustration, explaining my techniques as I go. I have a series of video tutorials recorded concurrently that should be available on my Youtube channel soon, if you need some live action explanation.

If you enjoy this series, if you have learned something, or if I have inspired you in some way, please take a moment to share this, or any post, with your friends and familiy on your favorite social networking platform. There are handy sharing buttons below this post. If you enjoy art education content, and would like to be part of the process, please visit my Patreon for information on how to join the artnerd community. Backers get early access to popular series, backer exclusive content, and voting rights on upcoming content.
When we've finished these tutorials, this is what the finished illustration will look like! This image was designed and used for my Christmas 2016 cards sent out to friends, family, and Patrons.
This image features Naomi and Kara from my children's watercolor comic, 7" Kara. If you enjoy this blog, and enjoy my art, I highly recommend you order a copy through my shop!
Previously, I showed you guys how to apply a watercolor wash (link)
In this tutorial, I will show you guys how to block in the basic colors for your watercolor illustration. This is a very helpful step for those of you who are new to using watercolor, or for people who have trouble with color palettes.
Materials For this Tutorial:
Watercolors of your choice (I use Winsor and Newton moist half pans, Daniel Smith, SoHo, and Holbein watercolors)
Daisy watercolor wells or palette of choice- For mixing large amounts of color
Deep welled watercolor palette- I used a recycled mochi ice cream carton
Watercolor brushes (I use mainly rounds)
2 watercolor cups- 1 clean, 1 dirty- I like the Faber-Castell collapsible cups
Paper towels
Paper used:
Canson Moulin du Roy
Watercolor Brushes Used in this Tutorial:
For rounds larger than 6, I use synthetic brushes. Your preferences may vary from mine- I have several brands, and still have not found a brand I think perform as well as natural hair brushes. Synthetic brushes are much cheaper than natural hair brushes, especially at larger sizes, and are useful for blocking in color, as we will be doing in this tutorial.Creative Mark Rhapsody Kolinsky Sable Brushes- 4, 2, 1, 0Creative Mark Squirrel Brushes- 4, 6Blick Master Studio Squirrel- 4, 6

Step 1: Assemble Your Materials

Step 2: Begin mixing your background colors in a large welled palette
These are not your final colors, just placeholder colors, so it's fine if your first wash seems far too light. It's much better to start too light, and work your way darker, building up contrast and shadow as you add layers.
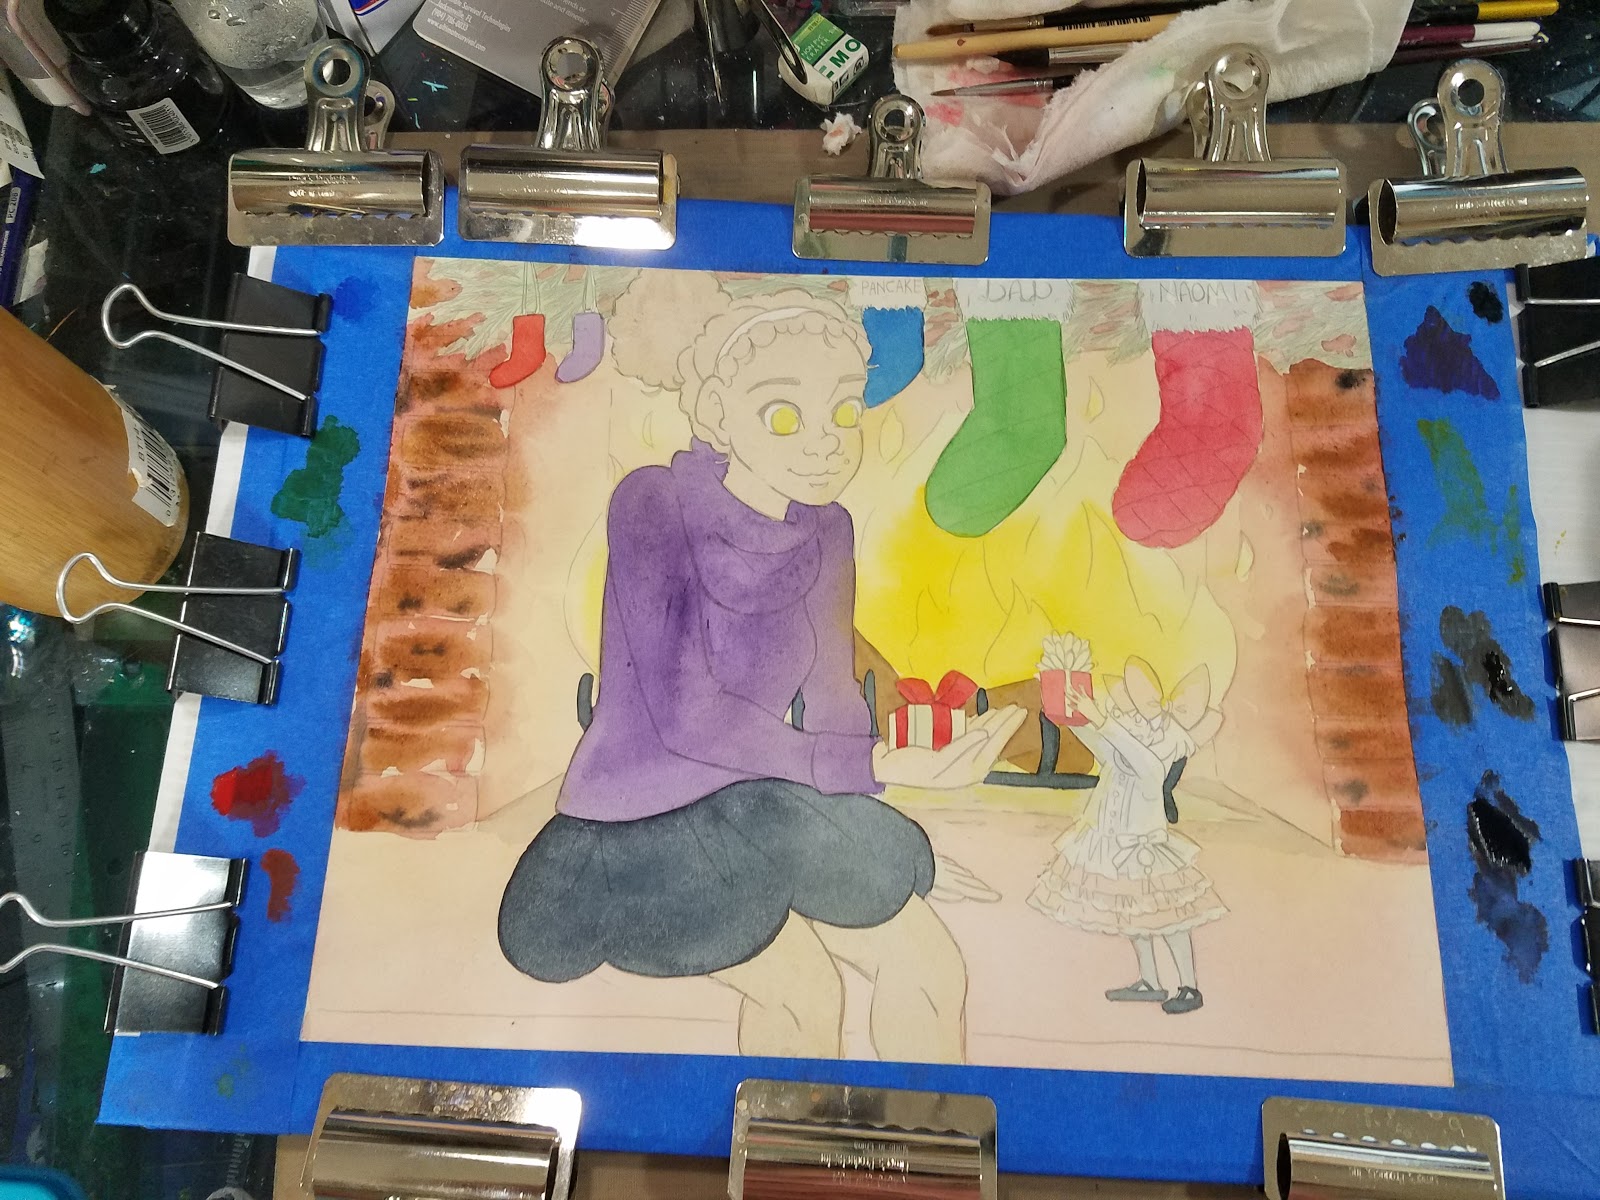
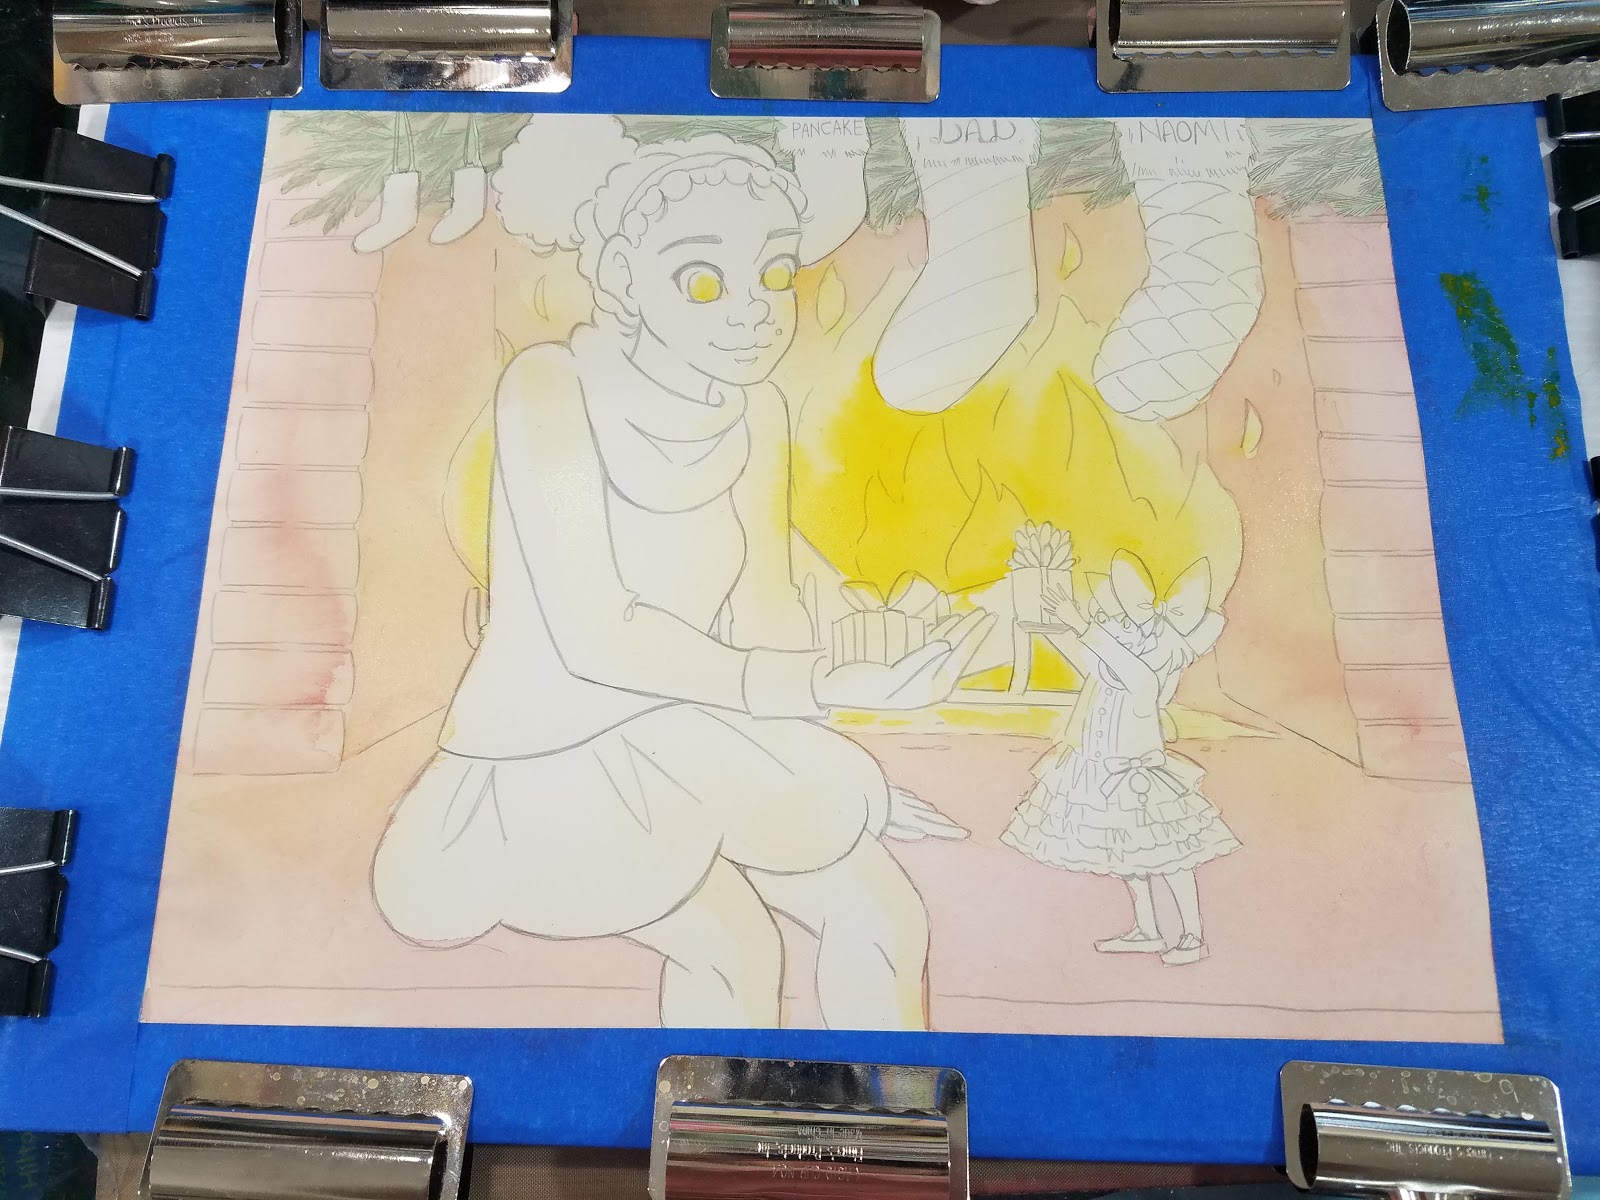
Step 2: Lay in your first layer.

In this case, we're laying down a very light pink to serve as the brick red for the hearth. It's fine that this color is MUCH lighter than the final color- you want to build up your watercolors, so don't begin too dark!
Step 3: As adjacent layers dry, continue to fill in your objects.
This is a bit like coloring in a coloring book, or color by numbers, but blocking in color is an important first step for many illustrators.

When painting, I work in reverse from sketching/inking/penciling- I work from back to front. As you can see here, I'm working on filling in the background. This makes correcting issues easier.
Step 4: If you would like to paint glow effects, add your darker color while first layer of paint or wash is still wet.
In the case of the fire below, I painted a light wash of yellow, then added in undiluted Indian Yellow, which dispersed into the wet paint.

Step 5: Work from large to small, background to foreground, and fill in objects one at a time.
Give yourself time to plan a color palette ahead of time, or time to think while you paint. At this stage, you can still make color corrections later, but art is 80% planning and 20% execution.

After the background has been blocked in, I bein by blocking in Naomi's skin and clothes.
At this stage, I added a bit of yellow glow to Naomi's eyes, as though they're reflecting the fire.

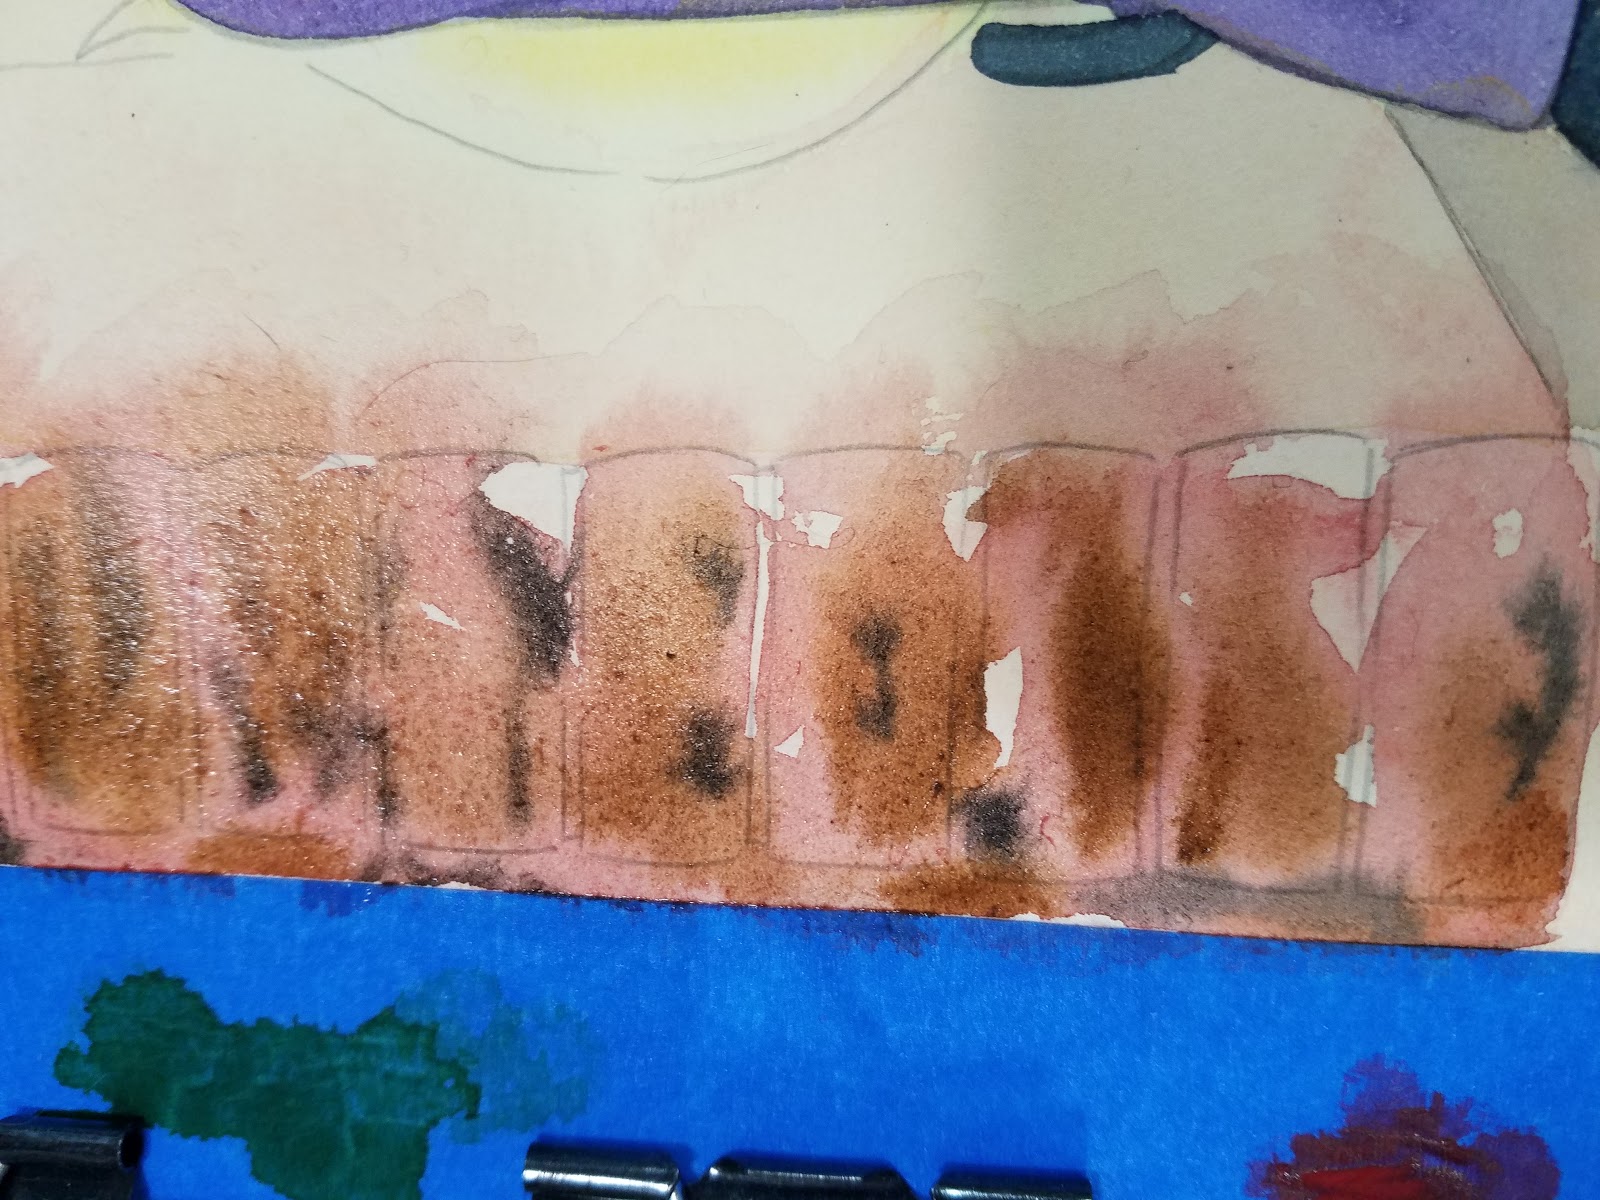
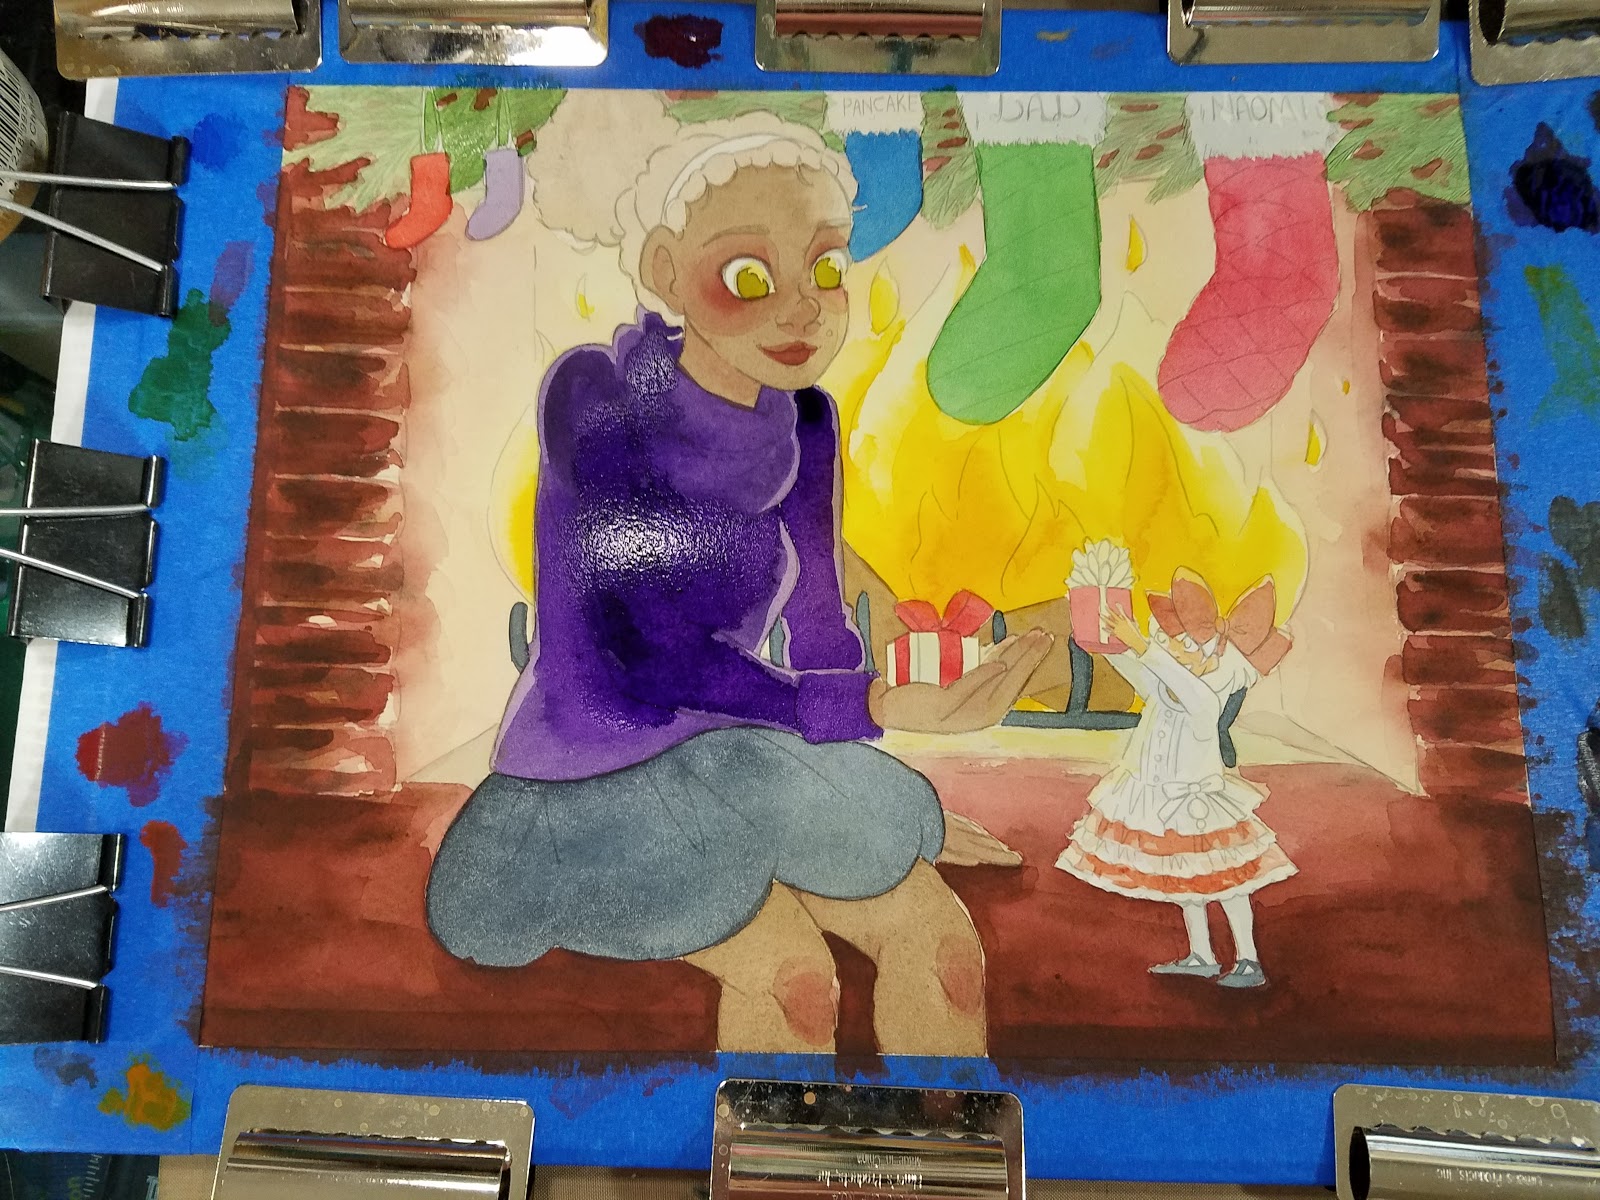
The finished and dried blocked in watercolor painting.

You may have noticed that I did not block everything in- some objects are so small that they aren't worth blocking in at this stage, or so saturated that they may bleed into other colors as details are added.
Key Notes:
Always use the largest brush you are comfortable working with- most of this illustration was laid down with a size 10 synthetic. Working large and loose early on will help prevent the illustration from becoming muddy.Start out light- you can always mix colors darker, but you can't paint colors lighter.Be patient- watercolor takes time!Working on high quality watercolor paper (cotton rag, not cellulose) allows for better blending effectsHigh quality paper is more reworkable
Coming up next: Rendering Our Watercolor Illustration
Our Sponsor

For more beautiful watercolor work, why not pick up a copy of 7" Kara, Volume 1? 7" Kara is a lush watercolor comic the entire family can enjoy, following the adventures of tiny Kara as she discovers humans, explores the backyard, and befriends a kitten. Created by Becca Hillburn, if you enjoy this blog and my art, you'll love 7" Kara. Volume 1 is available in the Natto-shop.
Please consider donating to this blog or purchasing from Natto-shop (http://nattosoup.com/shop) if you want me to continue publishing quality content. All materials tested were purchased from my own pocket. Keep on Truckin' Nattosoup is not under any sponsorship.

If you enjoy this series, if you have learned something, or if I have inspired you in some way, please take a moment to share this, or any post, with your friends and familiy on your favorite social networking platform. There are handy sharing buttons below this post. If you enjoy art education content, and would like to be part of the process, please visit my Patreon for information on how to join the artnerd community. Backers get early access to popular series, backer exclusive content, and voting rights on upcoming content.
When we've finished these tutorials, this is what the finished illustration will look like! This image was designed and used for my Christmas 2016 cards sent out to friends, family, and Patrons.
This image features Naomi and Kara from my children's watercolor comic, 7" Kara. If you enjoy this blog, and enjoy my art, I highly recommend you order a copy through my shop!
Previously, I showed you guys how to apply a watercolor wash (link)
In this tutorial, I will show you guys how to block in the basic colors for your watercolor illustration. This is a very helpful step for those of you who are new to using watercolor, or for people who have trouble with color palettes.
Materials For this Tutorial:
Watercolors of your choice (I use Winsor and Newton moist half pans, Daniel Smith, SoHo, and Holbein watercolors)
Daisy watercolor wells or palette of choice- For mixing large amounts of color
Deep welled watercolor palette- I used a recycled mochi ice cream carton
Watercolor brushes (I use mainly rounds)
2 watercolor cups- 1 clean, 1 dirty- I like the Faber-Castell collapsible cups
Paper towels
Paper used:
Canson Moulin du Roy
Watercolor Brushes Used in this Tutorial:
For rounds larger than 6, I use synthetic brushes. Your preferences may vary from mine- I have several brands, and still have not found a brand I think perform as well as natural hair brushes. Synthetic brushes are much cheaper than natural hair brushes, especially at larger sizes, and are useful for blocking in color, as we will be doing in this tutorial.Creative Mark Rhapsody Kolinsky Sable Brushes- 4, 2, 1, 0Creative Mark Squirrel Brushes- 4, 6Blick Master Studio Squirrel- 4, 6

Step 1: Assemble Your Materials

Step 2: Begin mixing your background colors in a large welled palette
These are not your final colors, just placeholder colors, so it's fine if your first wash seems far too light. It's much better to start too light, and work your way darker, building up contrast and shadow as you add layers.
Step 2: Lay in your first layer.

In this case, we're laying down a very light pink to serve as the brick red for the hearth. It's fine that this color is MUCH lighter than the final color- you want to build up your watercolors, so don't begin too dark!
Step 3: As adjacent layers dry, continue to fill in your objects.
This is a bit like coloring in a coloring book, or color by numbers, but blocking in color is an important first step for many illustrators.

When painting, I work in reverse from sketching/inking/penciling- I work from back to front. As you can see here, I'm working on filling in the background. This makes correcting issues easier.
Step 4: If you would like to paint glow effects, add your darker color while first layer of paint or wash is still wet.
In the case of the fire below, I painted a light wash of yellow, then added in undiluted Indian Yellow, which dispersed into the wet paint.
Step 5: Work from large to small, background to foreground, and fill in objects one at a time.
Give yourself time to plan a color palette ahead of time, or time to think while you paint. At this stage, you can still make color corrections later, but art is 80% planning and 20% execution.
After the background has been blocked in, I bein by blocking in Naomi's skin and clothes.
At this stage, I added a bit of yellow glow to Naomi's eyes, as though they're reflecting the fire.

The finished and dried blocked in watercolor painting.
You may have noticed that I did not block everything in- some objects are so small that they aren't worth blocking in at this stage, or so saturated that they may bleed into other colors as details are added.
Key Notes:
Always use the largest brush you are comfortable working with- most of this illustration was laid down with a size 10 synthetic. Working large and loose early on will help prevent the illustration from becoming muddy.Start out light- you can always mix colors darker, but you can't paint colors lighter.Be patient- watercolor takes time!Working on high quality watercolor paper (cotton rag, not cellulose) allows for better blending effectsHigh quality paper is more reworkable
Coming up next: Rendering Our Watercolor Illustration
Our Sponsor

For more beautiful watercolor work, why not pick up a copy of 7" Kara, Volume 1? 7" Kara is a lush watercolor comic the entire family can enjoy, following the adventures of tiny Kara as she discovers humans, explores the backyard, and befriends a kitten. Created by Becca Hillburn, if you enjoy this blog and my art, you'll love 7" Kara. Volume 1 is available in the Natto-shop.
Please consider donating to this blog or purchasing from Natto-shop (http://nattosoup.com/shop) if you want me to continue publishing quality content. All materials tested were purchased from my own pocket. Keep on Truckin' Nattosoup is not under any sponsorship.
December 23, 2016
Watercolor Basics: Step By Step: Washes
Now that we've introduced the basics of Watercolor Basics, it's time to take you step by step through some of the most common processes for completing a watercolor illustration. I'm going to take you from start to finish through my 2016 Christmas card illustration, explaining my techniques as I go. I have a series of video tutorials recorded concurrently that should be available on my Youtube channel soon, if you need some live action explanation.

If you enjoy this series, if you have learned something, or if I have inspired you in some way, please take a moment to share this, or any post, with your friends and familiy on your favorite social networking platform. There are handy sharing buttons below this post. If you enjoy art education content, and would like to be part of the process, please visit my Patreon for information on how to join the artnerd community. Backers get early access to popular series, backer exclusive content, and voting rights on upcoming content.

When we've finished these tutorials, this is what the finished illustration will look like! This image was designed and used for my Christmas 2016 cards sent out to friends, family, and Patrons.
This image features Naomi and Kara from my children's watercolor comic, 7" Kara. If you enjoy this blog, and enjoy my art, I highly recommend you order a copy through my shop!
Previously: I showed you how to stretch watercolor paper (link)
In this post, I'm going to take you through the first step in almost any watercolor illustration I complete- applying washes. With some images, I need to apply multiple washes, or each panel may require a unique wash. Some illustrations require gradiated washes, or for Brusho to be applied while a wash is still wet. Those washes will be covered at a later date.
Materials Needed for this Tutorial:
1 cup clean water
1 mop brush (you could also use a hake brush if you wish)
1 small cup for your wash-I recycle the yogurt cups from my Blue Apron subscription
Watercolors of choice (I use a mixture of Winsor and Newton moist half pans, Daniel Smith tube watercolors, SoHo watercolors, and Holbein watercolors)
Paper towels (I use Viva)
Watercolor brushes
Pipette
Watercolor Brushes I use in this tutorial:
For anything larger than a 6 round, I use synthetic. Synthetics at larger sizes are much more affordable than natural hair brushes, although they do not perform as well, and tend to be too stiff.I use this Cotman mop to lay down washes. It's an affordable synthetic that performs quite well.
Step 1: Assemble your materials

Step 2: Activate your watercolors
With semi moist half pans, this is done by dropping a drop of water into each pan using your pipette.
Step 3: Add your watercolor to your wash cup
I recommend starting very light- this is a wash afterall. For this illustration, we're going to do an all over tonal wash of warm yellow to simulate firelight, so we'll mix Indian Yellow into our white wash cup shown in the photo above.
Step 4: Apply Wash
Working with your illustration slightly elevated, begin at the top and work your way down with a wet watercolor mop. Once the entire surface has been evenly covered with water, you can soak up excess water using a 'thirsty' brush or by gently dabbing a paper towel into the pooled water.

For A Soft Glow
Working wet into wet, add more color in the area you wish to glow- in this case, the fire.

Step 5: Allow to dry thoroughly, still elevated

If you are rendering a comic page that requires multiple washes, or very different colors in each panel, please allow each wash to dry before applying the next.
Our Sponsor
 For more beautiful watercolor work, why not pick up a copy of 7" Kara, Volume 1? 7" Kara is a lush watercolor comic the entire family can enjoy, following the adventures of tiny Kara as she discovers humans, explores the backyard, and befriends a kitten. Created by Becca Hillburn, if you enjoy this blog and my art, you'll love 7" Kara. Volume 1 is available in the Natto-shop.
Please consider donating to this blog or purchasing from Natto-shop (http://nattosoup.com/shop) if you want me to continue publishing quality content. All materials tested were purchased from my own pocket. Keep on Truckin' Nattosoup is not under any sponsorship.

If you enjoy this series, if you have learned something, or if I have inspired you in some way, please take a moment to share this, or any post, with your friends and familiy on your favorite social networking platform. There are handy sharing buttons below this post. If you enjoy art education content, and would like to be part of the process, please visit my Patreon for information on how to join the artnerd community. Backers get early access to popular series, backer exclusive content, and voting rights on upcoming content.

When we've finished these tutorials, this is what the finished illustration will look like! This image was designed and used for my Christmas 2016 cards sent out to friends, family, and Patrons.
This image features Naomi and Kara from my children's watercolor comic, 7" Kara. If you enjoy this blog, and enjoy my art, I highly recommend you order a copy through my shop!
Previously: I showed you how to stretch watercolor paper (link)
In this post, I'm going to take you through the first step in almost any watercolor illustration I complete- applying washes. With some images, I need to apply multiple washes, or each panel may require a unique wash. Some illustrations require gradiated washes, or for Brusho to be applied while a wash is still wet. Those washes will be covered at a later date.
Materials Needed for this Tutorial:
1 cup clean water
1 mop brush (you could also use a hake brush if you wish)
1 small cup for your wash-I recycle the yogurt cups from my Blue Apron subscription
Watercolors of choice (I use a mixture of Winsor and Newton moist half pans, Daniel Smith tube watercolors, SoHo watercolors, and Holbein watercolors)
Paper towels (I use Viva)
Watercolor brushes
Pipette
Watercolor Brushes I use in this tutorial:
For anything larger than a 6 round, I use synthetic. Synthetics at larger sizes are much more affordable than natural hair brushes, although they do not perform as well, and tend to be too stiff.I use this Cotman mop to lay down washes. It's an affordable synthetic that performs quite well.
Step 1: Assemble your materials

Step 2: Activate your watercolors
With semi moist half pans, this is done by dropping a drop of water into each pan using your pipette.
Step 3: Add your watercolor to your wash cup
I recommend starting very light- this is a wash afterall. For this illustration, we're going to do an all over tonal wash of warm yellow to simulate firelight, so we'll mix Indian Yellow into our white wash cup shown in the photo above.
Step 4: Apply Wash
Working with your illustration slightly elevated, begin at the top and work your way down with a wet watercolor mop. Once the entire surface has been evenly covered with water, you can soak up excess water using a 'thirsty' brush or by gently dabbing a paper towel into the pooled water.
For A Soft Glow
Working wet into wet, add more color in the area you wish to glow- in this case, the fire.

Step 5: Allow to dry thoroughly, still elevated

If you are rendering a comic page that requires multiple washes, or very different colors in each panel, please allow each wash to dry before applying the next.
Our Sponsor
 For more beautiful watercolor work, why not pick up a copy of 7" Kara, Volume 1? 7" Kara is a lush watercolor comic the entire family can enjoy, following the adventures of tiny Kara as she discovers humans, explores the backyard, and befriends a kitten. Created by Becca Hillburn, if you enjoy this blog and my art, you'll love 7" Kara. Volume 1 is available in the Natto-shop.
Please consider donating to this blog or purchasing from Natto-shop (http://nattosoup.com/shop) if you want me to continue publishing quality content. All materials tested were purchased from my own pocket. Keep on Truckin' Nattosoup is not under any sponsorship.
December 21, 2016
Watercolor Basics: Step By Step: Stretching Tutorial
Now that we've introduced the basics of Watercolor Basics, it's time to take you step by step through some of the most common processes for completing a watercolor illustration. I'm going to take you from start to finish through my 2016 Christmas card illustration, explaining my techniques as I go. I have a series of video tutorials recorded concurrently that should be available on my Youtube channel soon, if you need some live action explanation.

If you enjoy this series, if you have learned something, or if I have inspired you in some way, please take a moment to share this, or any post, with your friends and familiy on your favorite social networking platform. There are handy sharing buttons below this post. If you enjoy art education content, and would like to be part of the process, please visit my Patreon for information on how to join the artnerd community. Backers get early access to popular series, backer exclusive content, and voting rights on upcoming content.
When we've finished these tutorials, this is what the finished illustration will look like! This image was designed and used for my Christmas 2016 cards sent out to friends, family, and Patrons.
This image features Naomi and Kara from my children's watercolor comic, 7" Kara. If you enjoy this blog, and enjoy my art, I highly recommend you order a copy through my shop!
Previously: I showed you guys how I pencil my watercolor bluelines (link!)
In this post, I'm going to take you step by step through the process I use to stretch almost any watercolor illustration I complete, from comics to standalone illustrations. I've also provided links for where you can order the materials used in this tutorial.
Materials Used in this Tutorial:
Paper towels (I use Viva)
3M Blue Painters Tape
Gatorboard/Chloroplast
Bulldog Clips
Binder Clips
Cup Clean Water
Spray bottle full of water
Watercolor Mop (I use a synthetic Cotman mop)
Paper used:
Canson Moulin du Roy
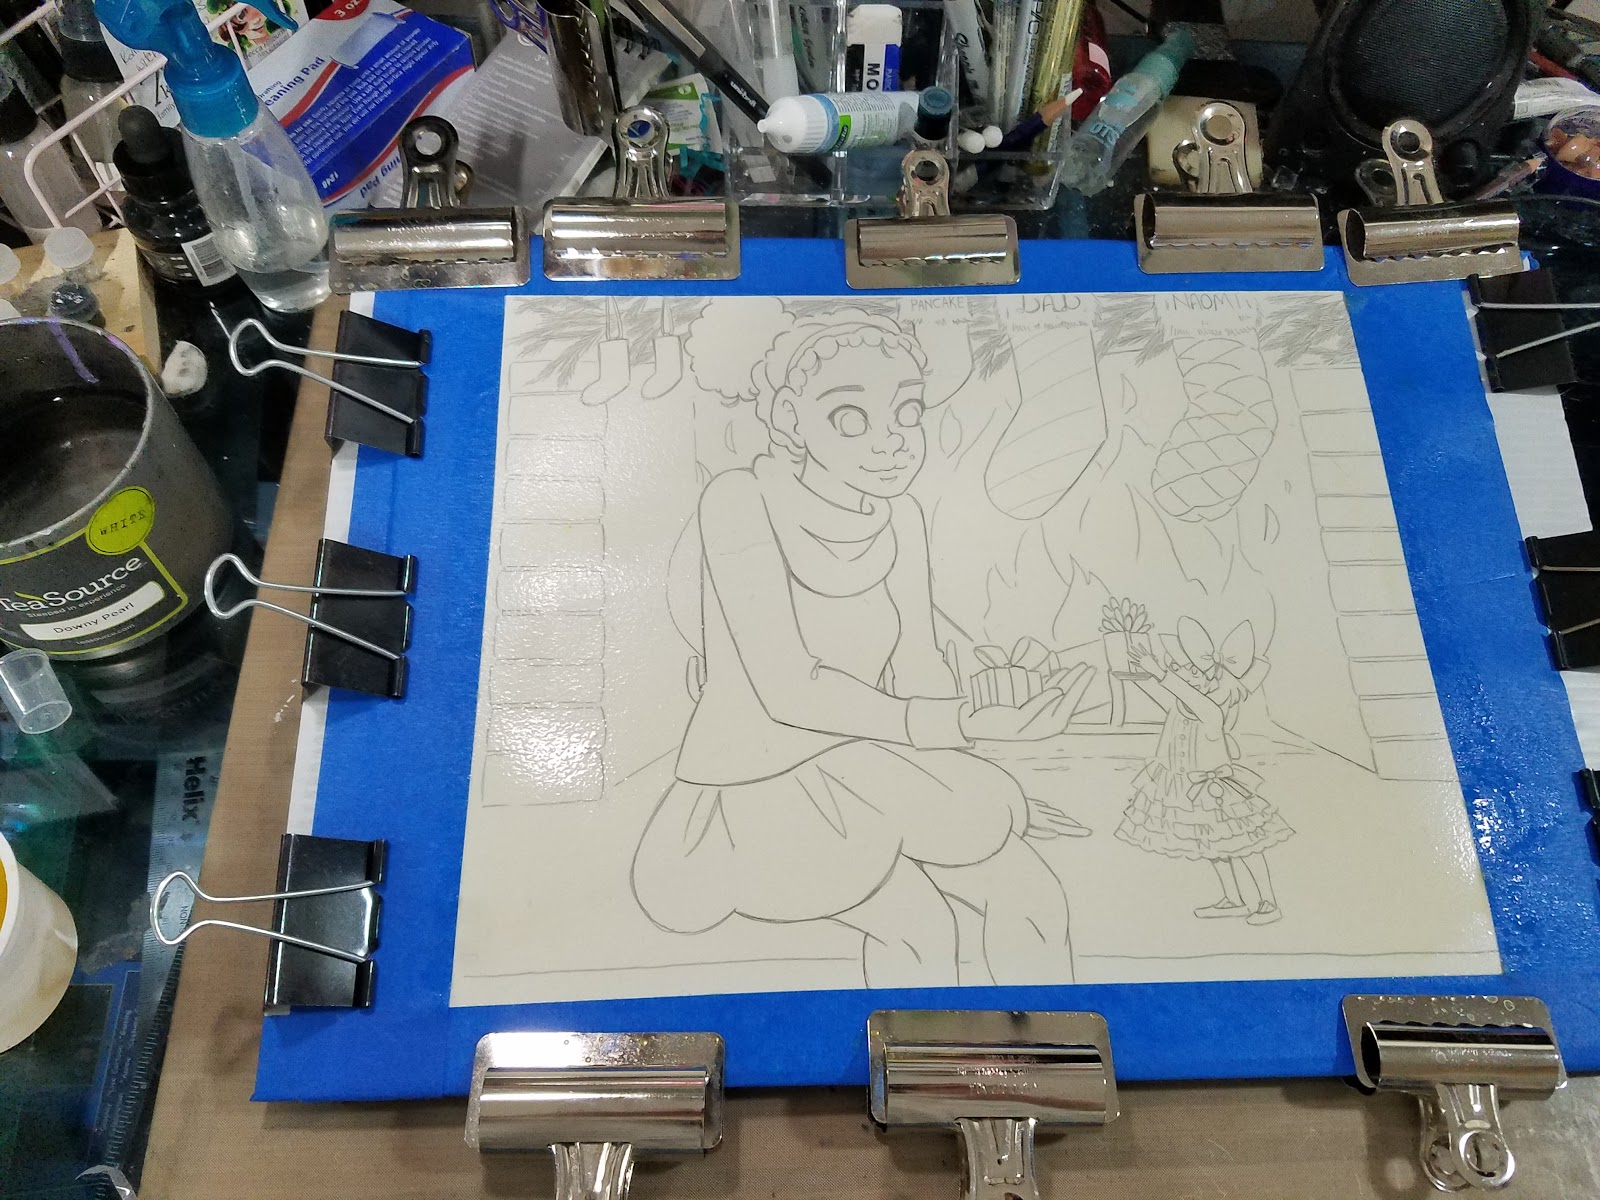
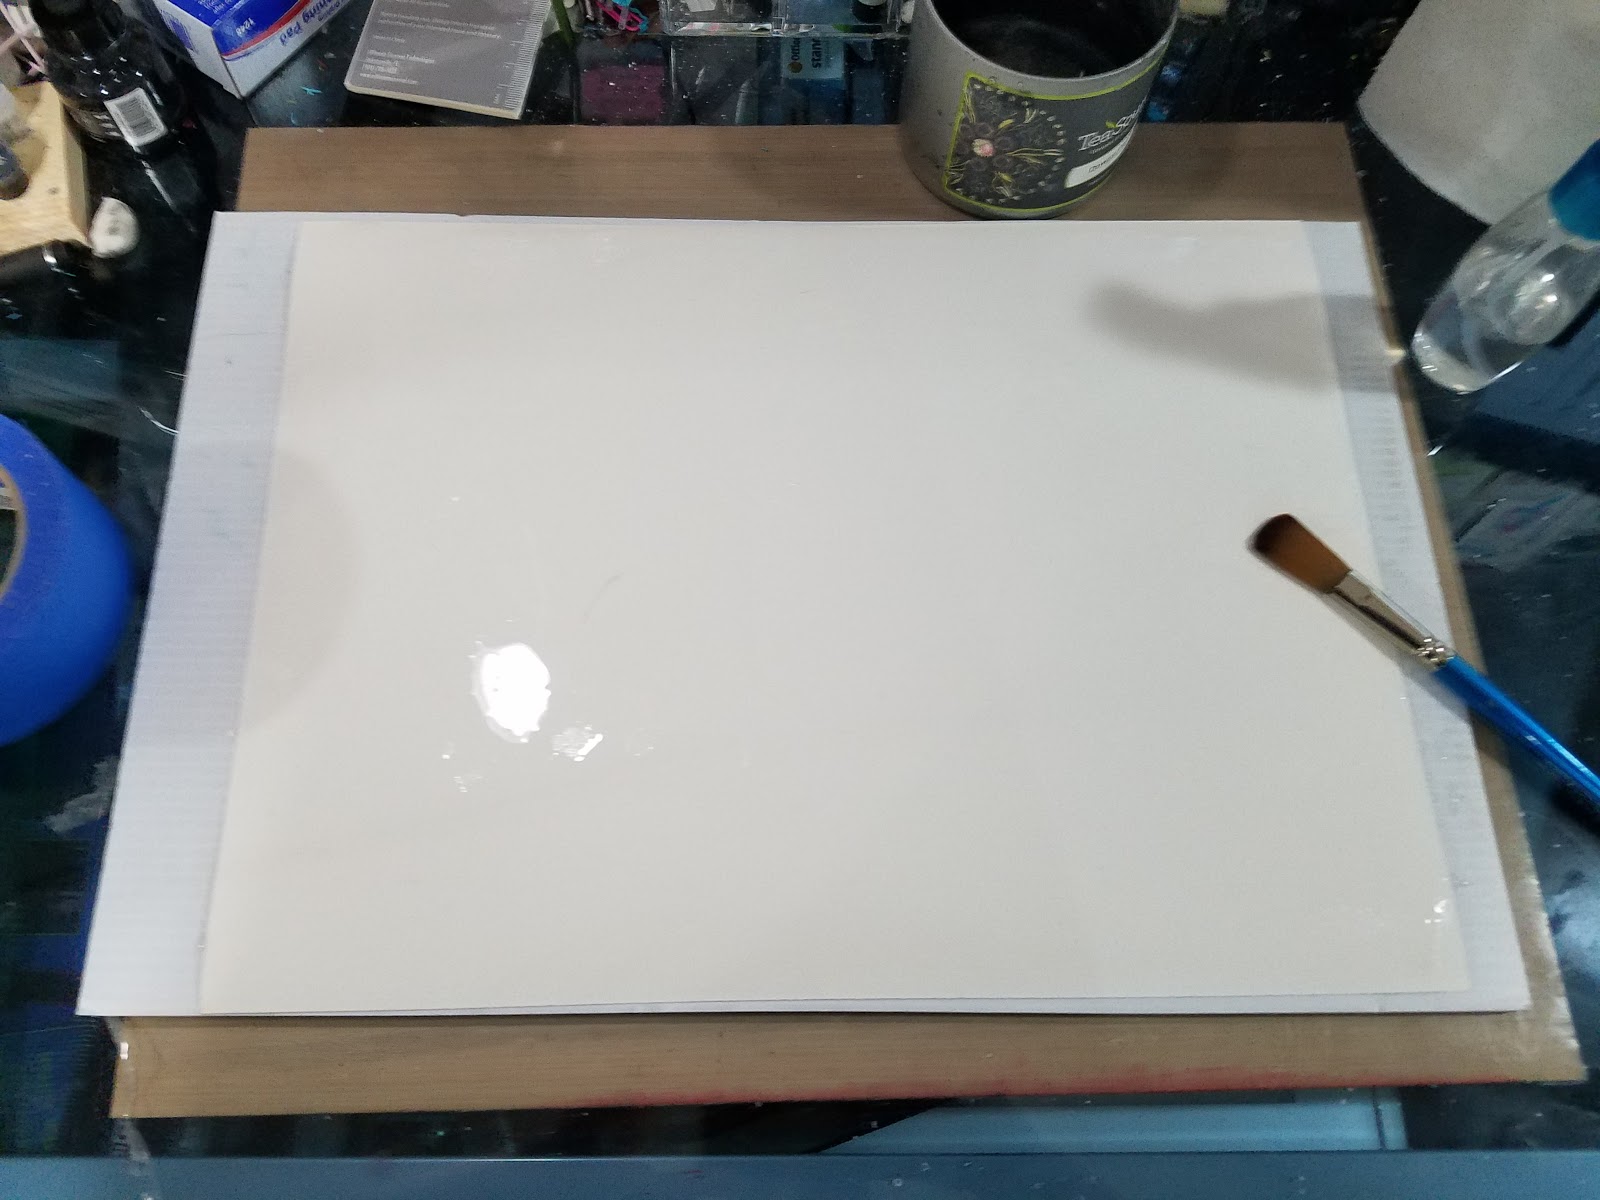
Step 1: Assemble Materials

 Step 2: Flip image over, spritz with water.

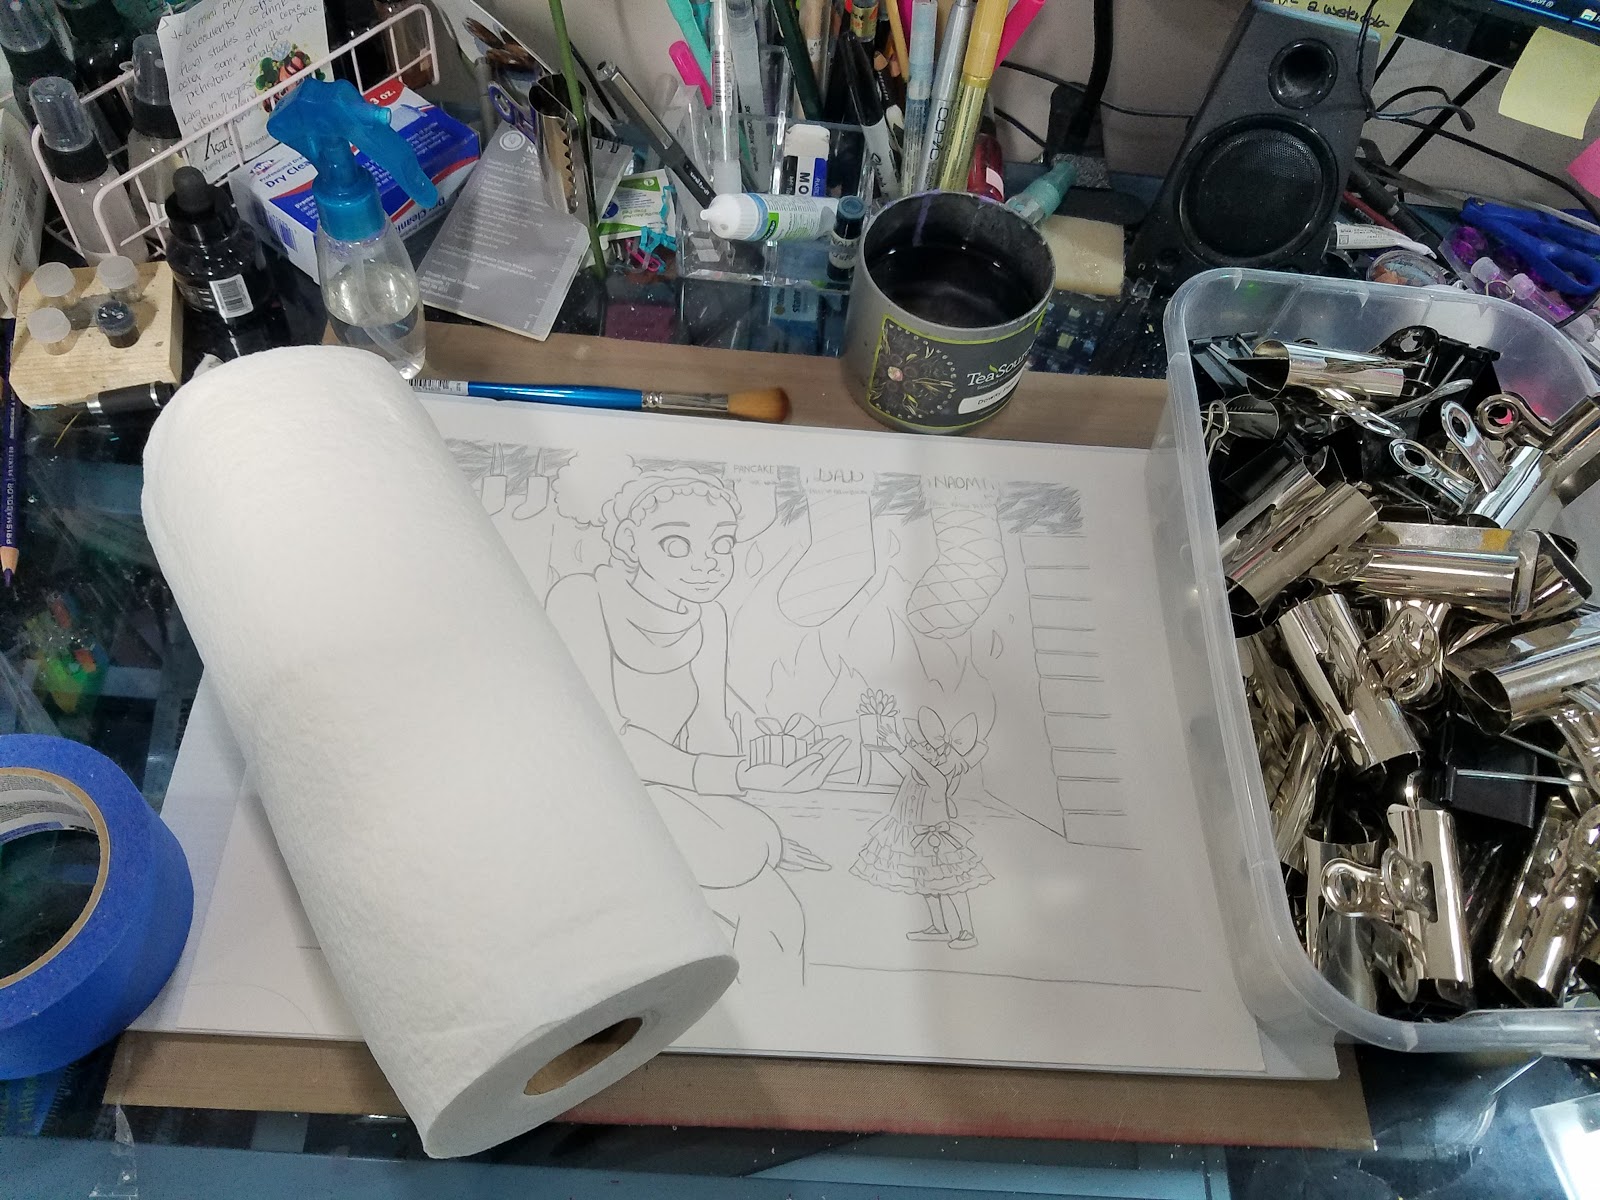
Step 3: Using the mop, apply more water liberally.
 Step 4: Using paper towel roll, roll over image to remove excess water
Step 5: Flip image over and position. This will be your last real opportunity to position your image on the gatorboard.
Step 6: Spritz front of image with water to reactive the blue inkjet ink. Don't worry- this ink is waterbased and will come up.
Step 7: Liberally apply water with mop.

Step 8: Using roll as a whole, roll paper towel roll over image.
Step 9: Spritz again with water.
Step 9: Again liberally apply water with mop. By now inkjet blue should be mostly gone.
Step 10: Using roll as a whole, roll paper towel roll over image to remove excess water and remaining blue ink.
Step 11: Remove strip of blue tape length of long end of illustration
Step 12: Apply to underside of arm (this will remove excess stickness)
Step 13: Brush top with water.

Step 14: Apply tape to paper.
Step 15: Using paper towel, wipe down tape.
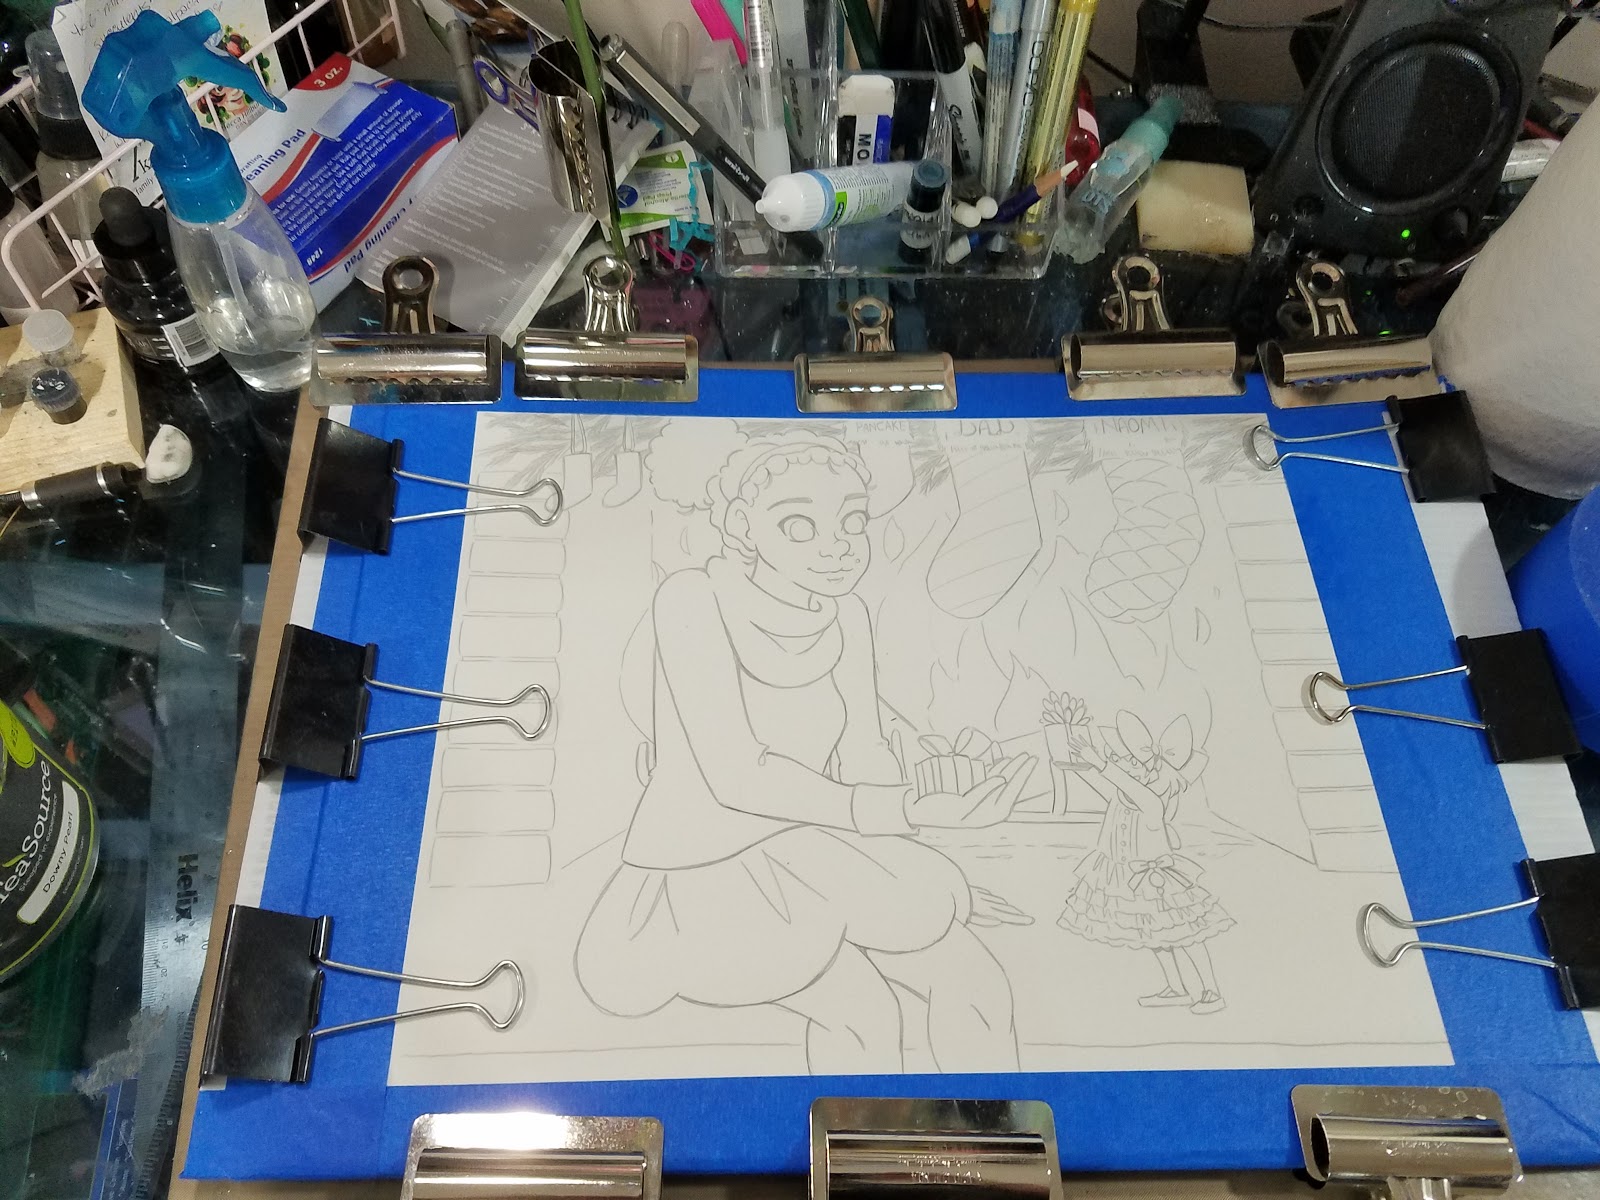
Step 16: Clamp down with bulldog or binder clips
Step 17: Repeat for all sides.

Step 18: Allow your watercolor paper to dry thoroughly before painting.
Coming up next: Applying washes
For more on stretching watercolor paper, check out these posts!
It's Important to Stretch (Your Watercolor Paper)
Stretching Watercolor Paper Revisited
Our Sponsor

For more beautiful watercolor work, why not pick up a copy of 7" Kara, Volume 1? 7" Kara is a lush watercolor comic the entire family can enjoy, following the adventures of tiny Kara as she discovers humans, explores the backyard, and befriends a kitten. Created by Becca Hillburn, if you enjoy this blog and my art, you'll love 7" Kara. Volume 1 is available in the Natto-shop.
Please consider donating to this blog or purchasing from Natto-shop (http://nattosoup.com/shop) if you want me to continue publishing quality content. All materials tested were purchased from my own pocket. Keep on Truckin' Nattosoup is not under any sponsorship.

If you enjoy this series, if you have learned something, or if I have inspired you in some way, please take a moment to share this, or any post, with your friends and familiy on your favorite social networking platform. There are handy sharing buttons below this post. If you enjoy art education content, and would like to be part of the process, please visit my Patreon for information on how to join the artnerd community. Backers get early access to popular series, backer exclusive content, and voting rights on upcoming content.
When we've finished these tutorials, this is what the finished illustration will look like! This image was designed and used for my Christmas 2016 cards sent out to friends, family, and Patrons.
This image features Naomi and Kara from my children's watercolor comic, 7" Kara. If you enjoy this blog, and enjoy my art, I highly recommend you order a copy through my shop!
Previously: I showed you guys how I pencil my watercolor bluelines (link!)
In this post, I'm going to take you step by step through the process I use to stretch almost any watercolor illustration I complete, from comics to standalone illustrations. I've also provided links for where you can order the materials used in this tutorial.
Materials Used in this Tutorial:
Paper towels (I use Viva)
3M Blue Painters Tape
Gatorboard/Chloroplast
Bulldog Clips
Binder Clips
Cup Clean Water
Spray bottle full of water
Watercolor Mop (I use a synthetic Cotman mop)
Paper used:
Canson Moulin du Roy
Step 1: Assemble Materials
 Step 2: Flip image over, spritz with water.
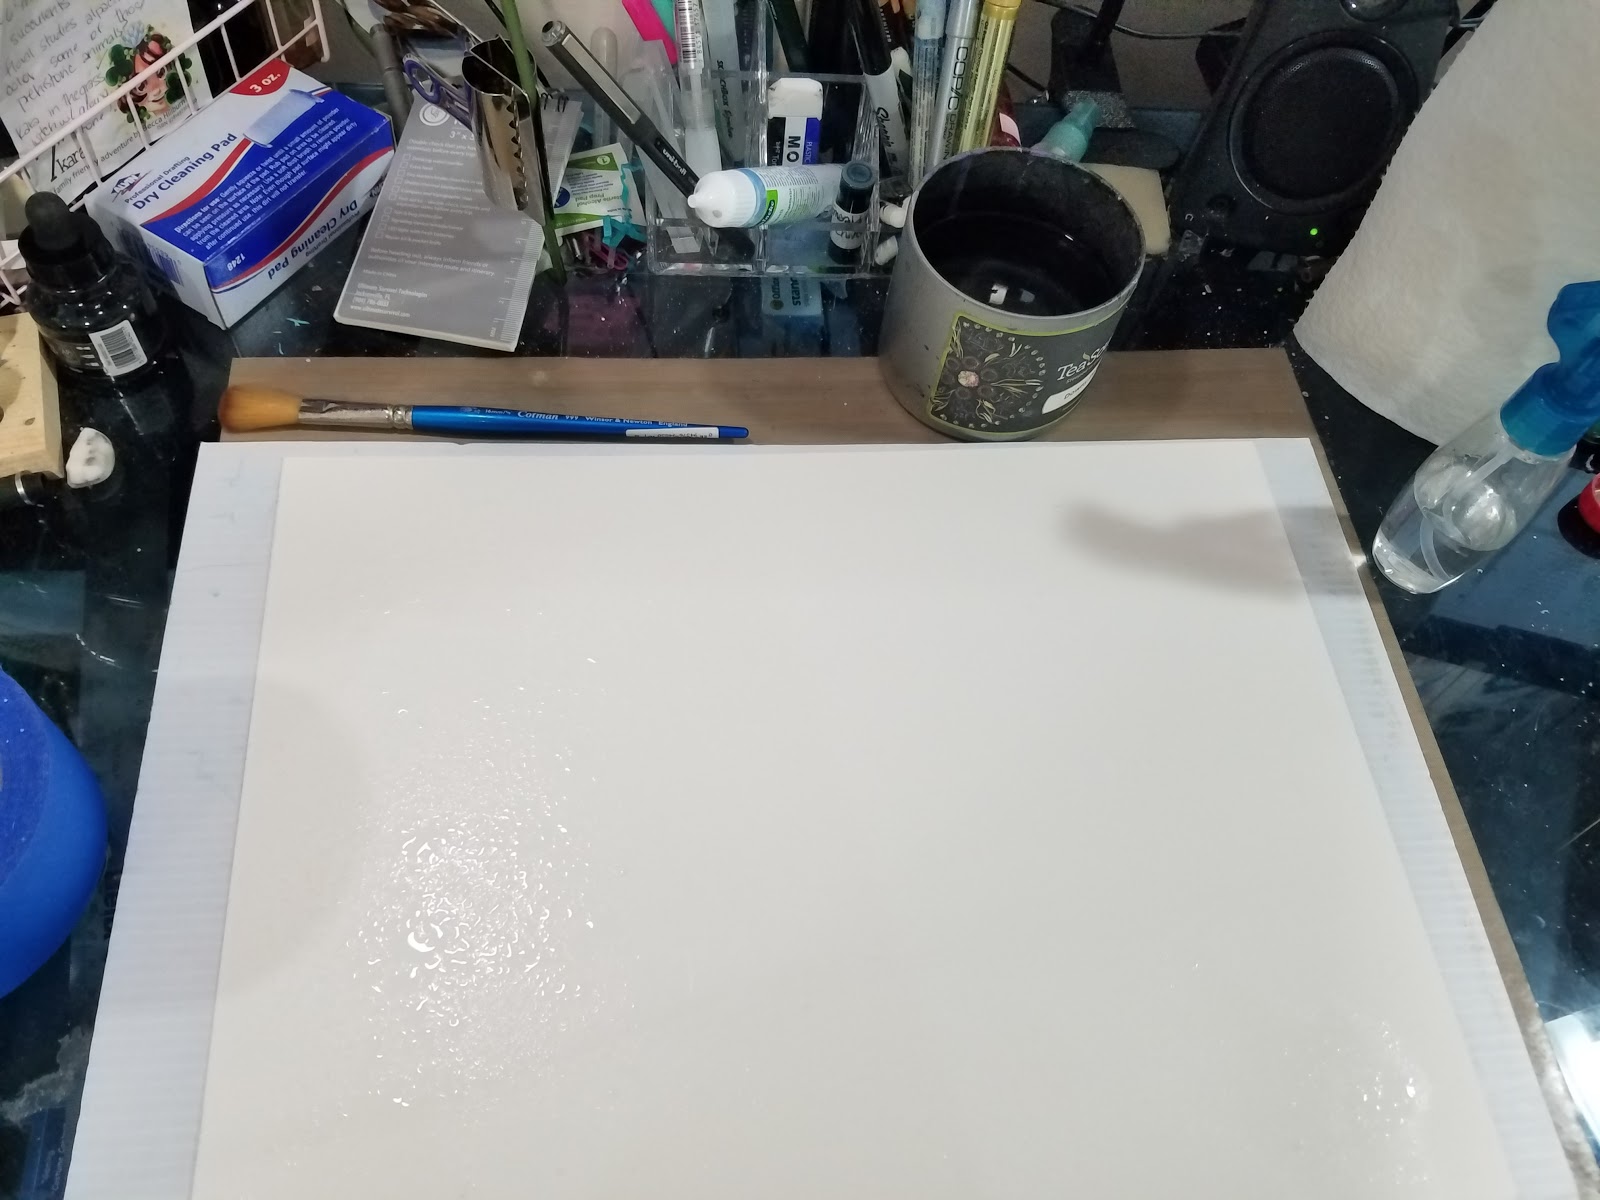
Step 3: Using the mop, apply more water liberally.
 Step 4: Using paper towel roll, roll over image to remove excess water
Step 5: Flip image over and position. This will be your last real opportunity to position your image on the gatorboard.
Step 6: Spritz front of image with water to reactive the blue inkjet ink. Don't worry- this ink is waterbased and will come up.
Step 7: Liberally apply water with mop.
Step 8: Using roll as a whole, roll paper towel roll over image.
Step 9: Spritz again with water.
Step 9: Again liberally apply water with mop. By now inkjet blue should be mostly gone.
Step 10: Using roll as a whole, roll paper towel roll over image to remove excess water and remaining blue ink.
Step 11: Remove strip of blue tape length of long end of illustration
Step 12: Apply to underside of arm (this will remove excess stickness)
Step 13: Brush top with water.
Step 14: Apply tape to paper.
Step 15: Using paper towel, wipe down tape.
Step 16: Clamp down with bulldog or binder clips
Step 17: Repeat for all sides.
Step 18: Allow your watercolor paper to dry thoroughly before painting.
Coming up next: Applying washes
For more on stretching watercolor paper, check out these posts!
It's Important to Stretch (Your Watercolor Paper)
Stretching Watercolor Paper Revisited
Our Sponsor
For more beautiful watercolor work, why not pick up a copy of 7" Kara, Volume 1? 7" Kara is a lush watercolor comic the entire family can enjoy, following the adventures of tiny Kara as she discovers humans, explores the backyard, and befriends a kitten. Created by Becca Hillburn, if you enjoy this blog and my art, you'll love 7" Kara. Volume 1 is available in the Natto-shop.
Please consider donating to this blog or purchasing from Natto-shop (http://nattosoup.com/shop) if you want me to continue publishing quality content. All materials tested were purchased from my own pocket. Keep on Truckin' Nattosoup is not under any sponsorship.
December 19, 2016
Watercolor Basics: Step By Step Penciling
Now that we've introduced the basics of Watercolor Basics, it's time to take you step by step through some of the most common processes for completing a watercolor illustration. I'm going to take you from start to finish through my 2016 Christmas card illustration, explaining my techniques as I go. I have a series of video tutorials recorded concurrently that should be available on my Youtube channel soon, if you need some live action explanation.

If you enjoy this series, if you have learned something, or if I have inspired you in some way, please take a moment to share this, or any post, with your friends and familiy on your favorite social networking platform. There are handy sharing buttons below this post. If you enjoy art education content, and would like to be part of the process, please visit my Patreon for information on how to join the artnerd community. Backers get early access to popular series, backer exclusive content, and voting rights on upcoming content.

When we've finished working through the Step by Step tutorials, our finished image will look like this! This is the illustration for the Christmas card my friends on Patreon will receive.
Before this step:
Check out my tutorial on how to plan your watercolor illustration (link)!
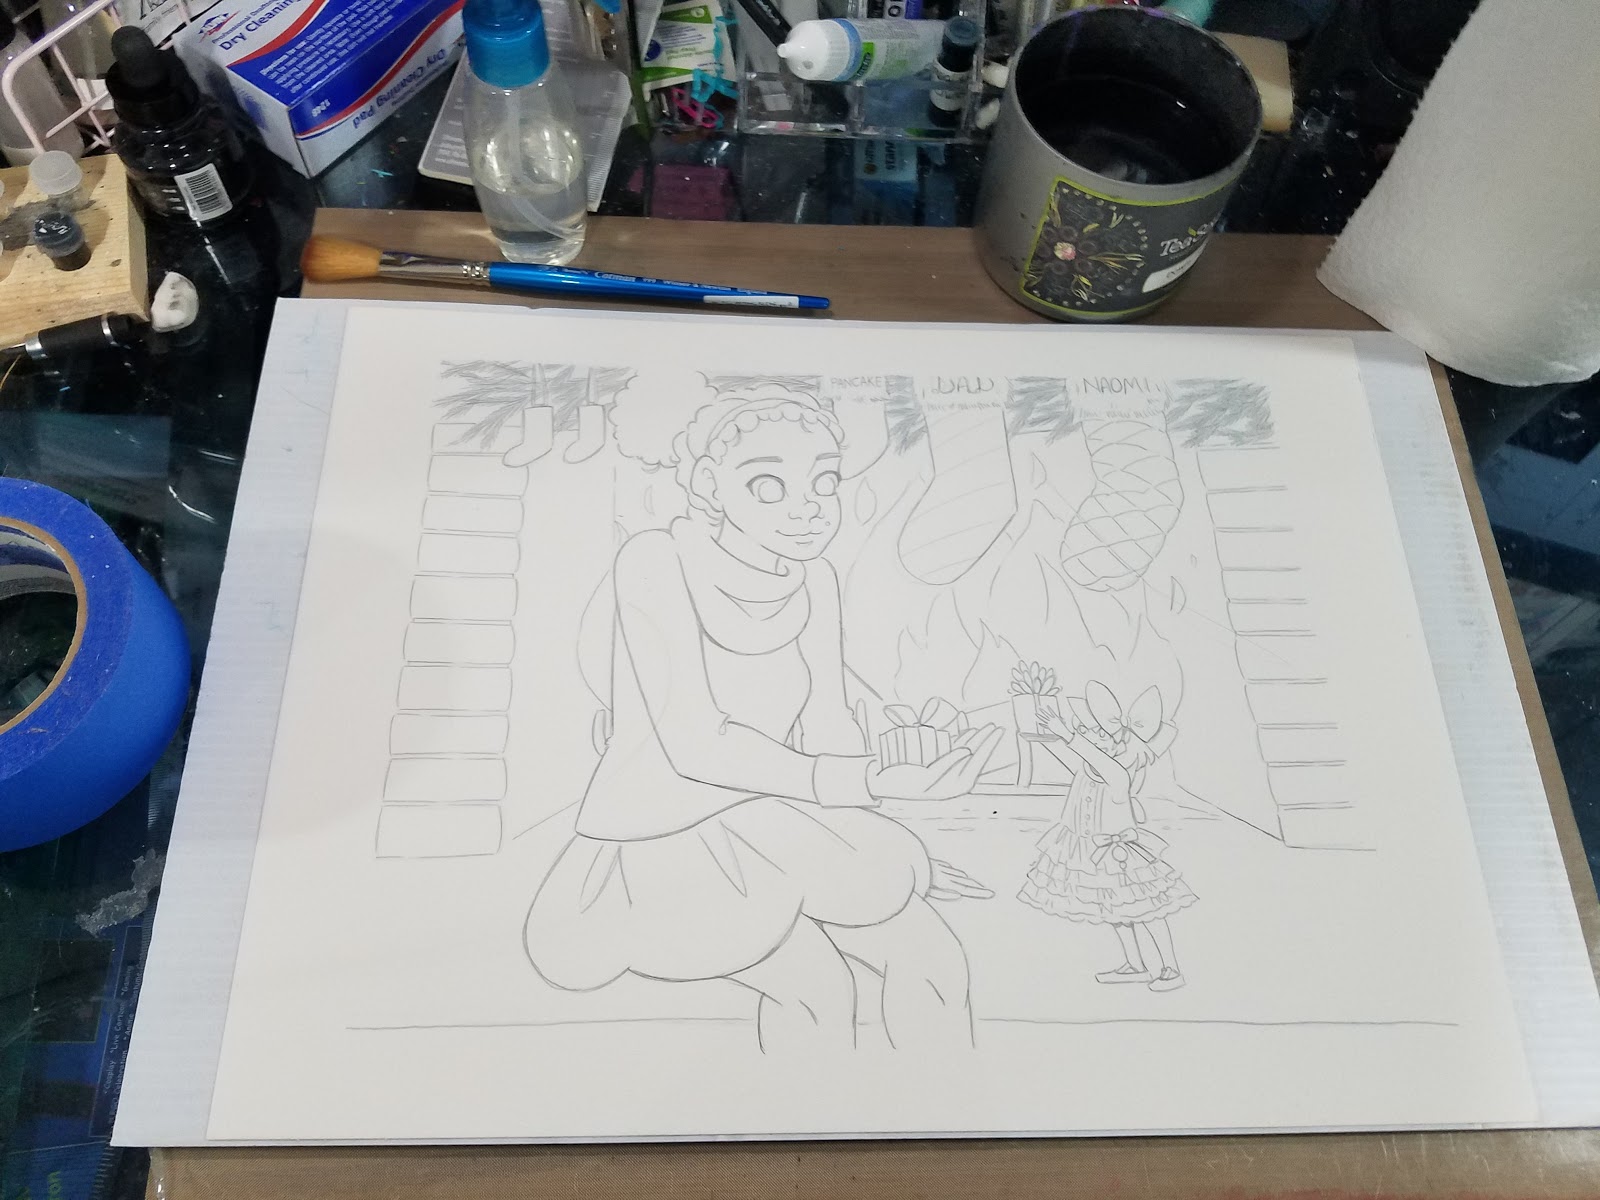
What is Penciling?
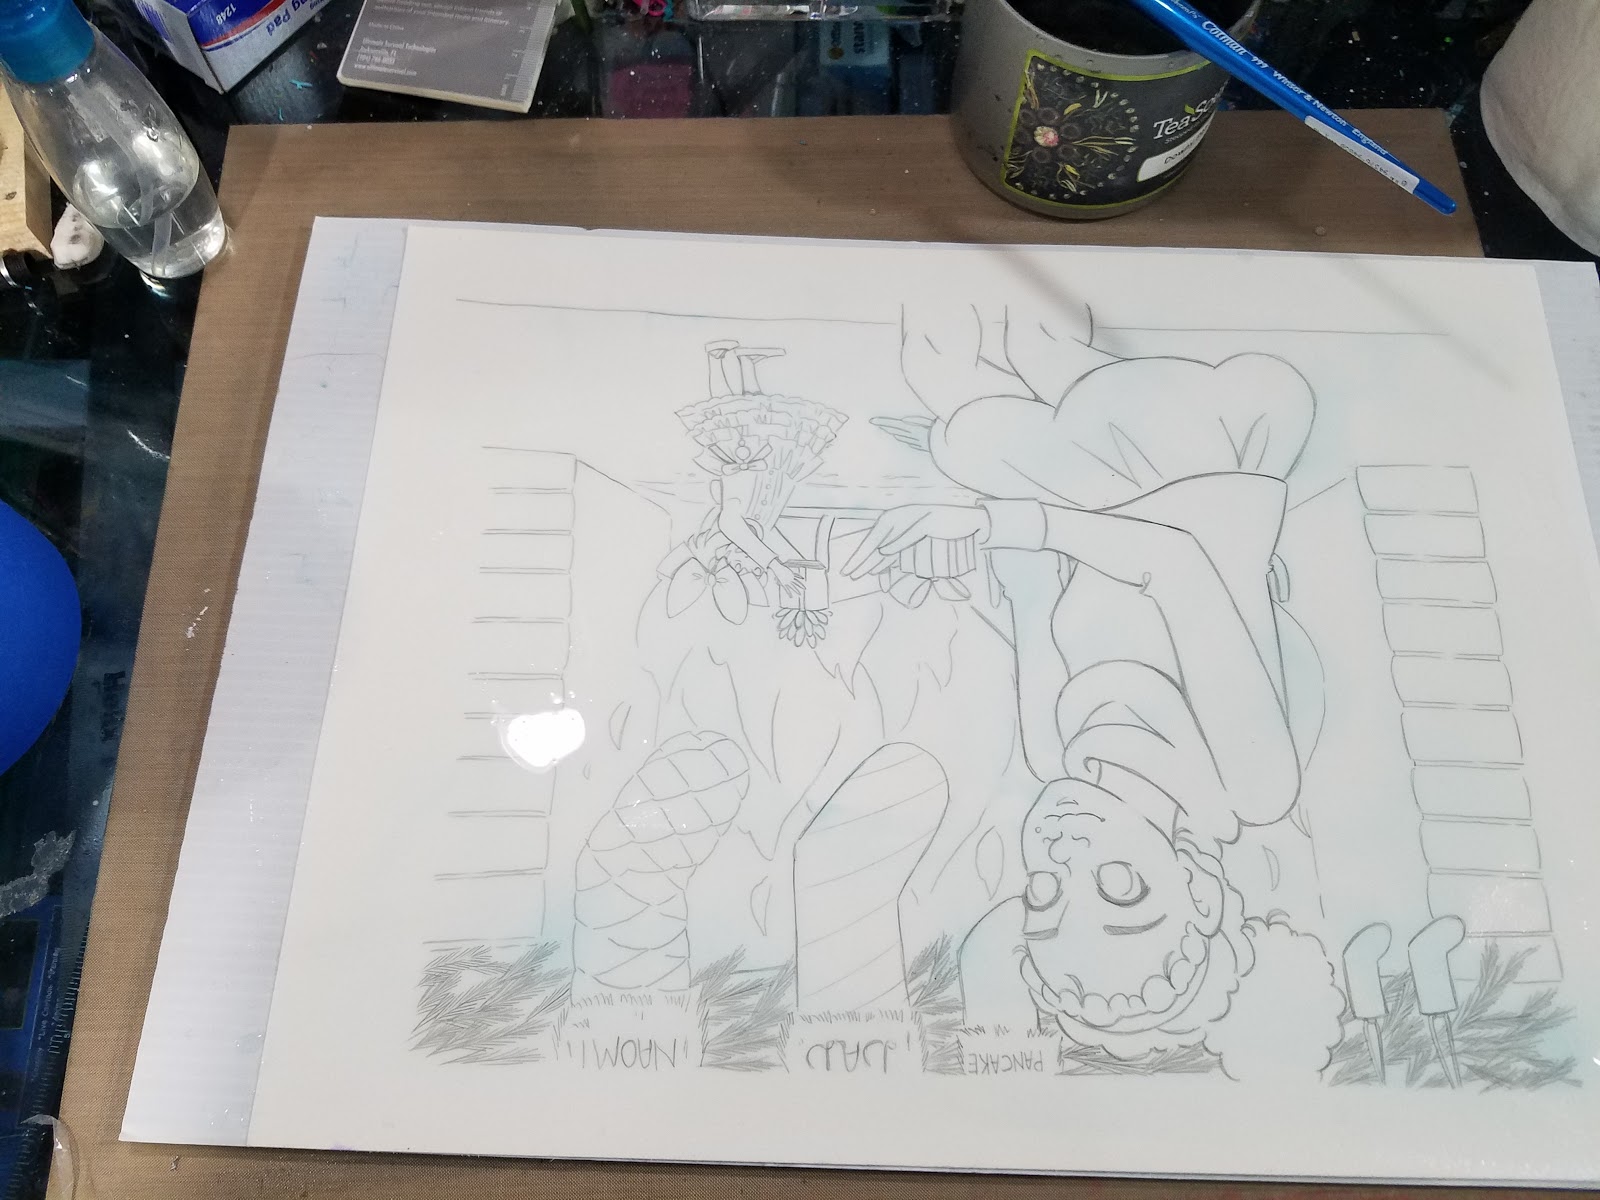
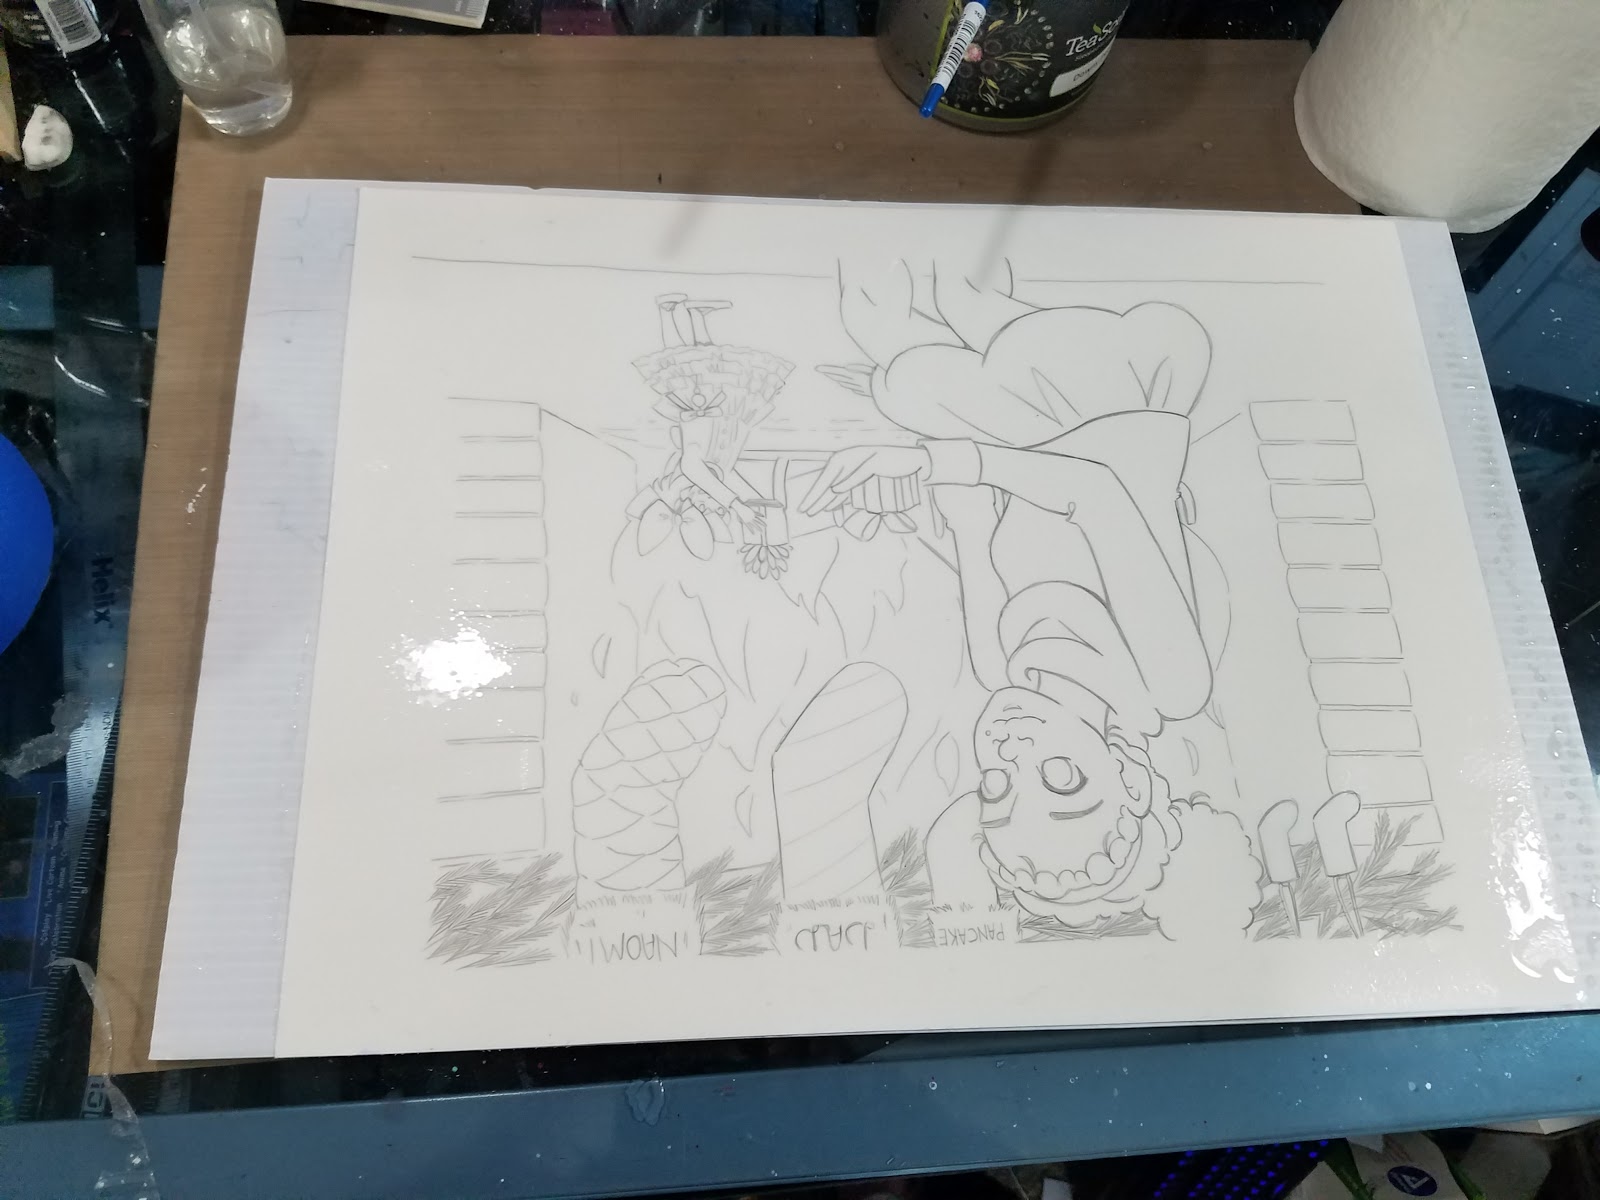
If you paint using the methods I demonstrate, you start with water soluble printed bluelines. Penciling or inking over these bluelines ensures that your image will stay visible while you work, even after the bluelines wash away.
Penciling is simply the act of going over these bluelines with your pencil. I recommend using a harder lead, as softer leads will smear when you stretch your watercolor paper.
Why Pencils over Inks?
Mainly this is an aesthetic choice- I find that inks have their place, but tend to distract from illustration as a watercolor piece. In my instance, this is also a time-based decision- I need to allow inks to 'cure' for 24 hours before adding water, with pencils I can begin right away.
Materials Used in this Tutorial:
HB lead or harder, I'm using 2H
Pencil
Erasers
Step 1: Print Your Bluelines

You're going to want to use an inkjet desktop printer to print your bluelines, as those consumer grade printers use waterbased inks that will dissolve once you stretch your image. I used a large format Canon Pixma Pro 9000 to print my bluelines onto Canson's Moulin du Roy watercolor paper. This is a mould made, cotton rag watercolor paper that is wonderful for larger illustrations.
Step 2: Pencil Foreground Figures


As with sketching and inking, I start with my characters in the foreground, and work my way back in the picture plane. Be careful of smudging- if necessary, work with a clean sheet of paper under your hand. Always work with clean hands- oils from your skin can effect how watercolor and water takes to the paper.
When penciling a watercolor illustration, I'm not overly concerned with lineweight, as I intend on using the watercolor to better describe the forms. The pencils are intended only as a guide for my eyes.
Step 3: Pencil in Background Details


Working backwards in the picture plane, pencil in your background elements. Depending on how comfortable you are with adding detail at the watercolor stage, you can leave some elements only lightly sketched in.
Coming Up Next: Stretching Your Watercolor Paper
Notes:
If you need to make any correction to your sketch, now is a great time to do it! You can still erase your pencil at this stage- the pencil only becomes semi-permanent after you've stretched your watercolor paper. I recommend using a white vinyl eraser for corrections.
If you have a heavily rendered style, you don't really need to worry about lineweight, but if you have a simple style, or if you want your pencil lines to be more apparent, you'll need to spend time making sure they have lineweight.
Our Sponsor

For more beautiful watercolor work, why not pick up a copy of 7" Kara, Volume 1? 7" Kara is a lush watercolor comic the entire family can enjoy, following the adventures of tiny Kara as she discovers humans, explores the backyard, and befriends a kitten. Created by Becca Hillburn, if you enjoy this blog and my art, you'll love 7" Kara. Volume 1 is available in the Natto-shop.
Please consider donating to this blog or purchasing from Natto-shop (http://nattosoup.com/shop) if you want me to continue publishing quality content. All materials tested were purchased from my own pocket. Keep on Truckin' Nattosoup is not under any sponsorship.

If you enjoy this series, if you have learned something, or if I have inspired you in some way, please take a moment to share this, or any post, with your friends and familiy on your favorite social networking platform. There are handy sharing buttons below this post. If you enjoy art education content, and would like to be part of the process, please visit my Patreon for information on how to join the artnerd community. Backers get early access to popular series, backer exclusive content, and voting rights on upcoming content.

When we've finished working through the Step by Step tutorials, our finished image will look like this! This is the illustration for the Christmas card my friends on Patreon will receive.
Before this step:
Check out my tutorial on how to plan your watercolor illustration (link)!
What is Penciling?
If you paint using the methods I demonstrate, you start with water soluble printed bluelines. Penciling or inking over these bluelines ensures that your image will stay visible while you work, even after the bluelines wash away.
Penciling is simply the act of going over these bluelines with your pencil. I recommend using a harder lead, as softer leads will smear when you stretch your watercolor paper.
Why Pencils over Inks?
Mainly this is an aesthetic choice- I find that inks have their place, but tend to distract from illustration as a watercolor piece. In my instance, this is also a time-based decision- I need to allow inks to 'cure' for 24 hours before adding water, with pencils I can begin right away.
Materials Used in this Tutorial:
HB lead or harder, I'm using 2H
Pencil
Erasers
Step 1: Print Your Bluelines

You're going to want to use an inkjet desktop printer to print your bluelines, as those consumer grade printers use waterbased inks that will dissolve once you stretch your image. I used a large format Canon Pixma Pro 9000 to print my bluelines onto Canson's Moulin du Roy watercolor paper. This is a mould made, cotton rag watercolor paper that is wonderful for larger illustrations.
Step 2: Pencil Foreground Figures

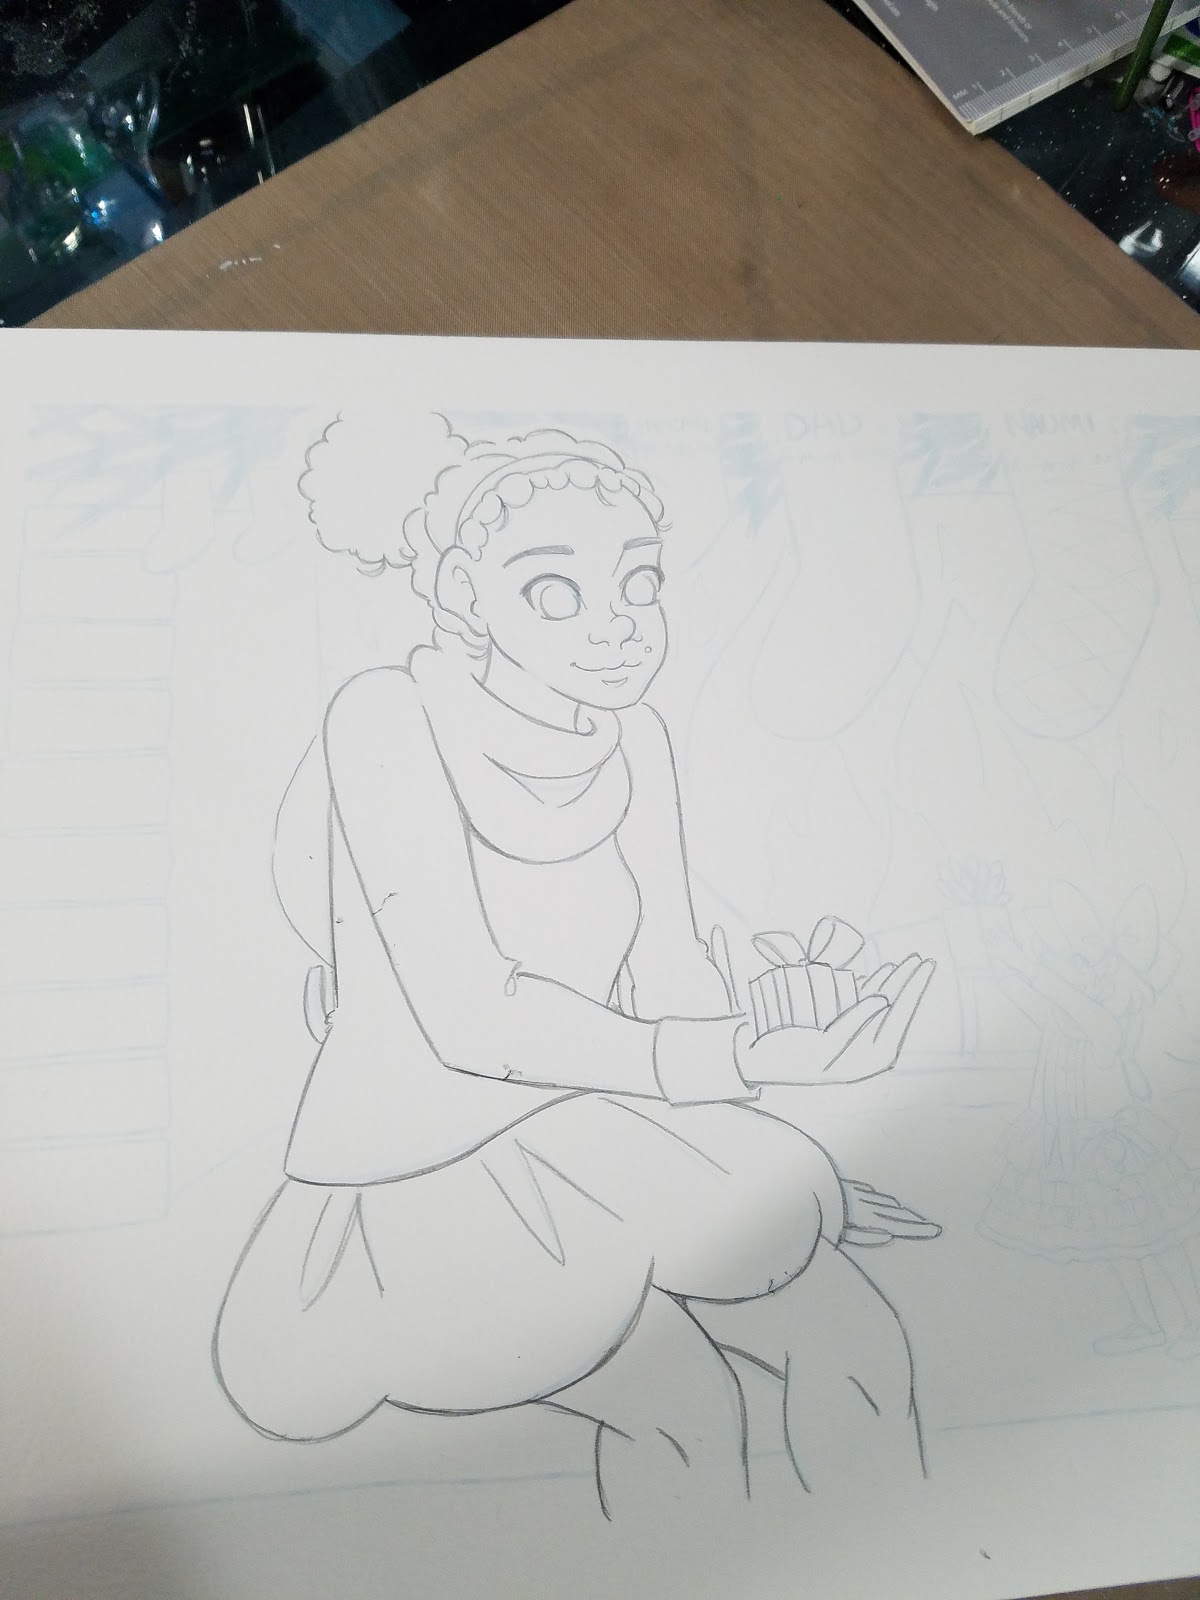
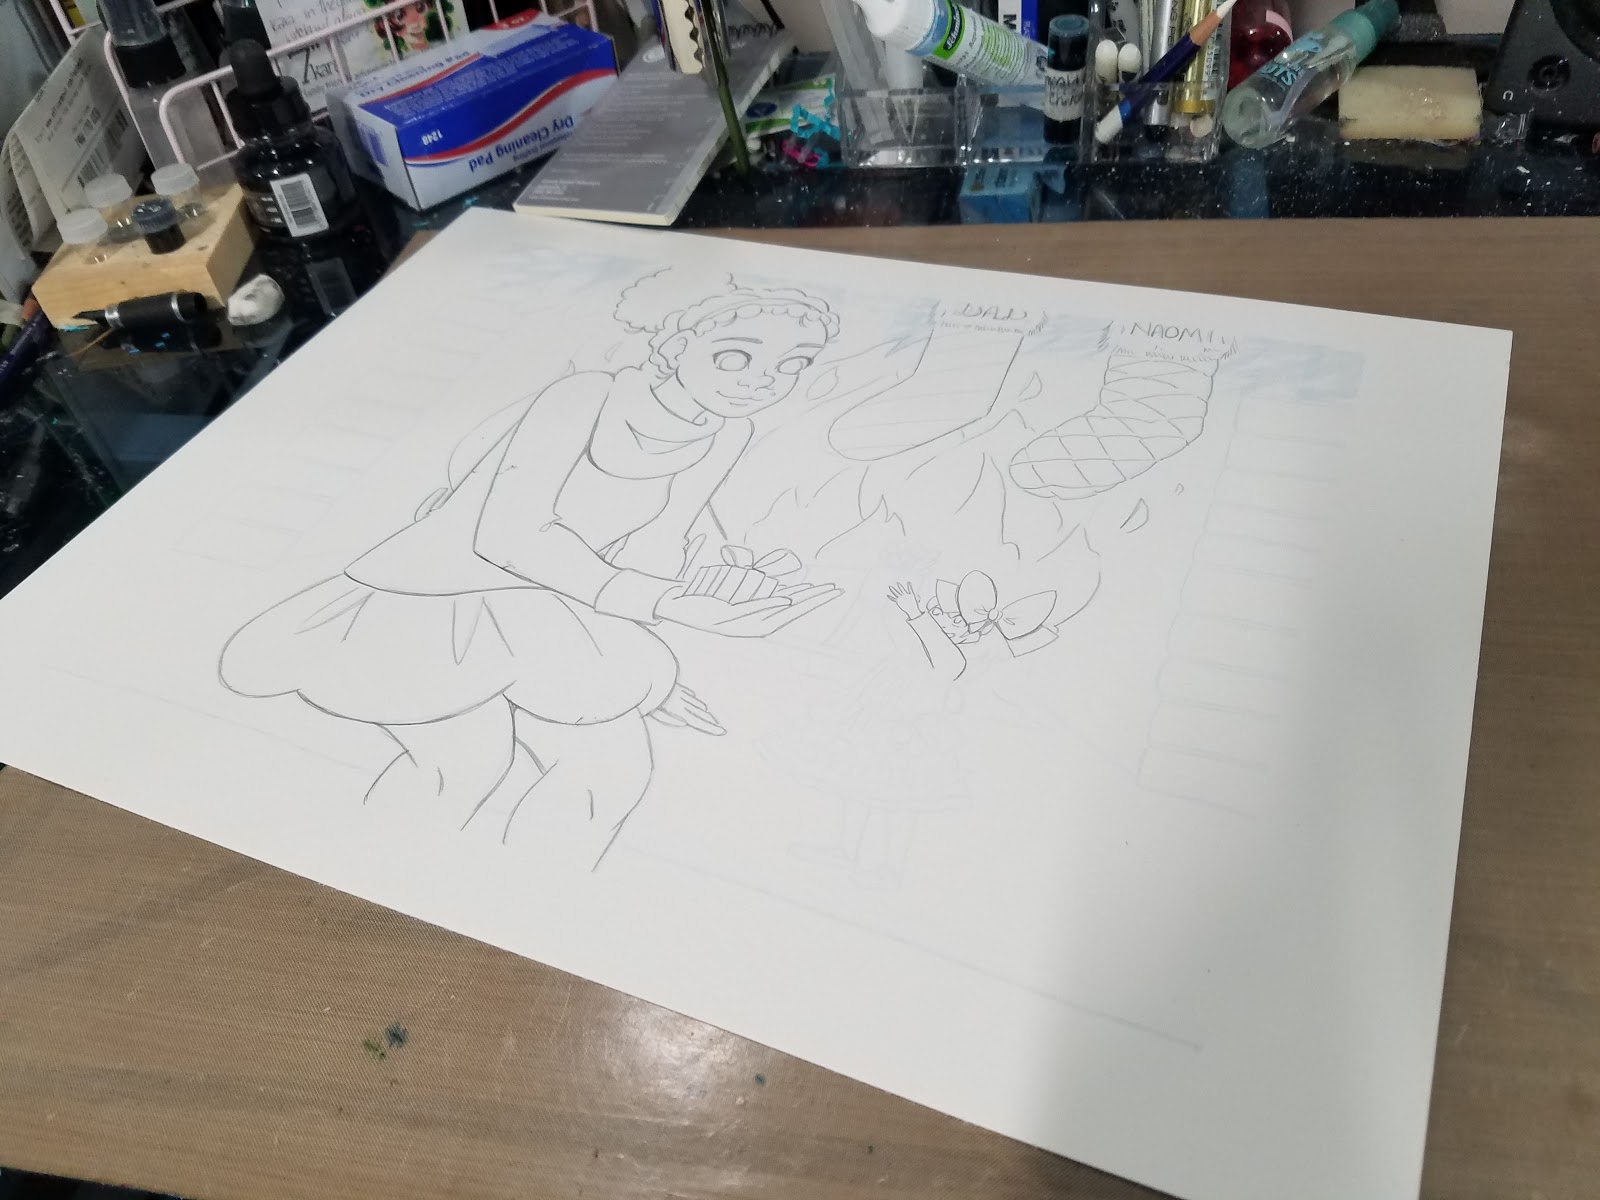
As with sketching and inking, I start with my characters in the foreground, and work my way back in the picture plane. Be careful of smudging- if necessary, work with a clean sheet of paper under your hand. Always work with clean hands- oils from your skin can effect how watercolor and water takes to the paper.
When penciling a watercolor illustration, I'm not overly concerned with lineweight, as I intend on using the watercolor to better describe the forms. The pencils are intended only as a guide for my eyes.
Step 3: Pencil in Background Details
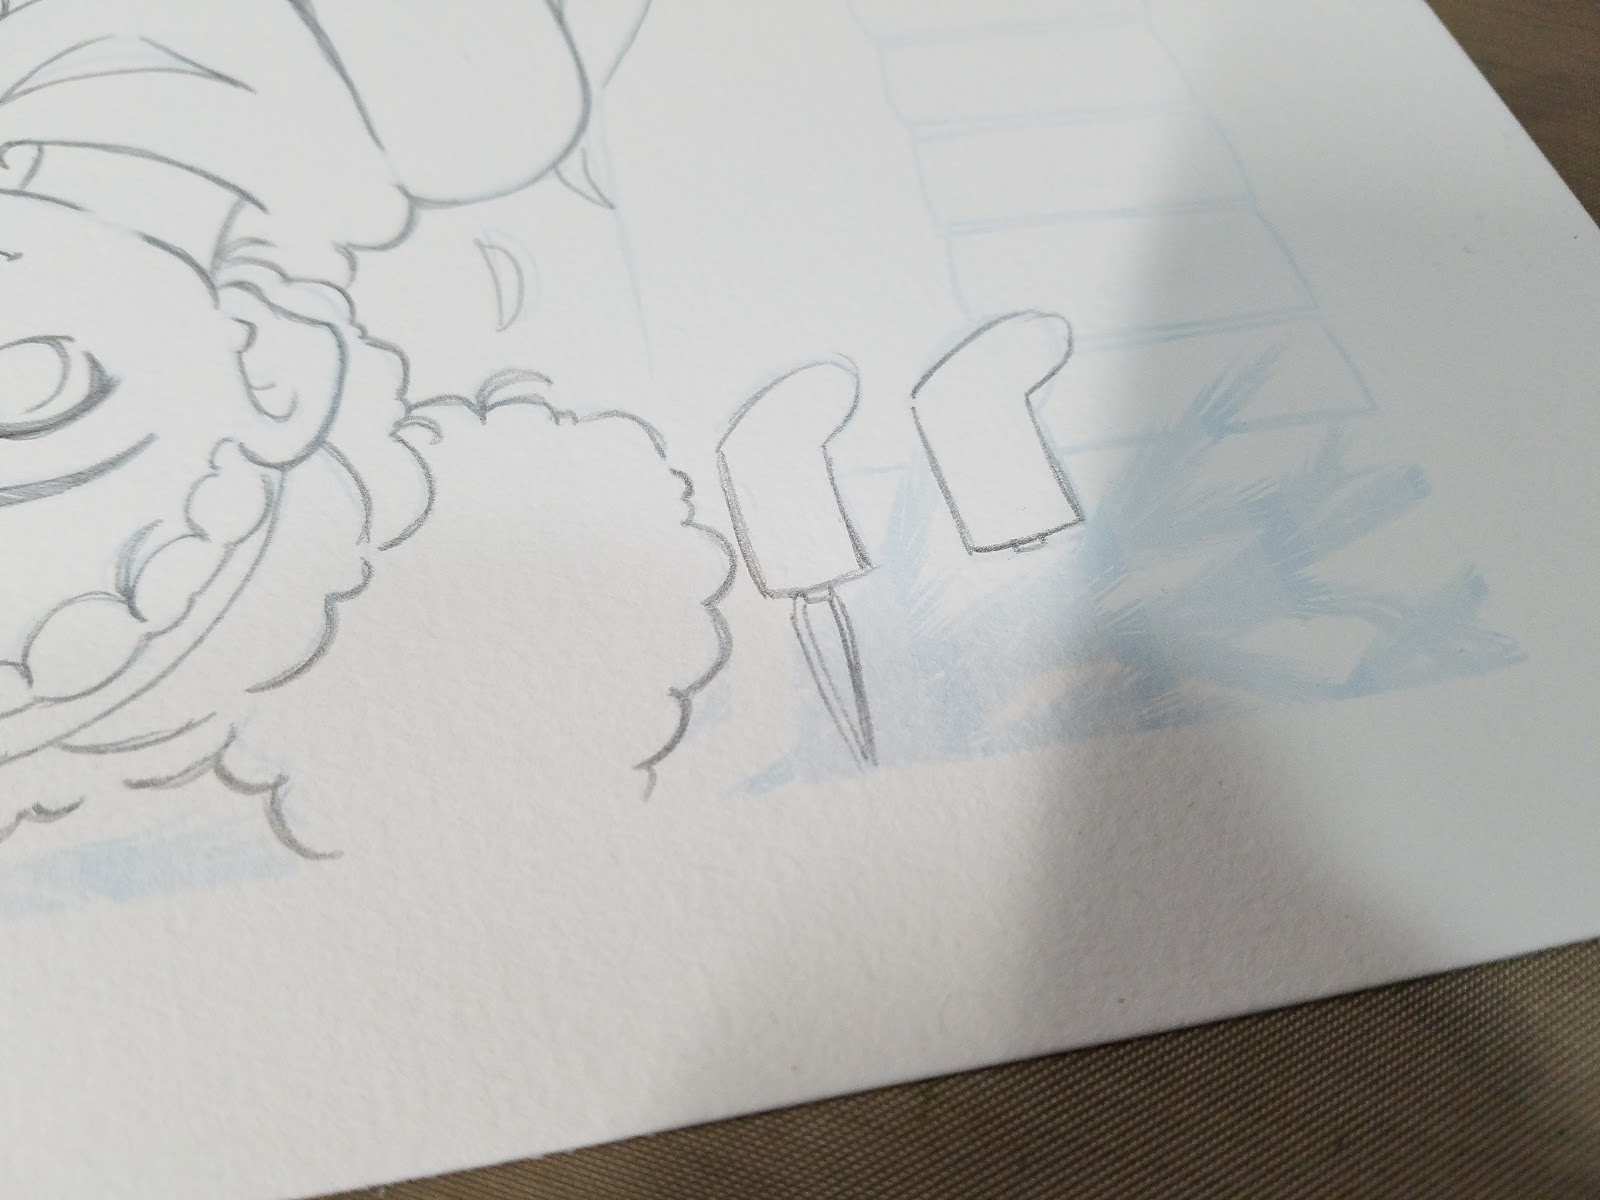

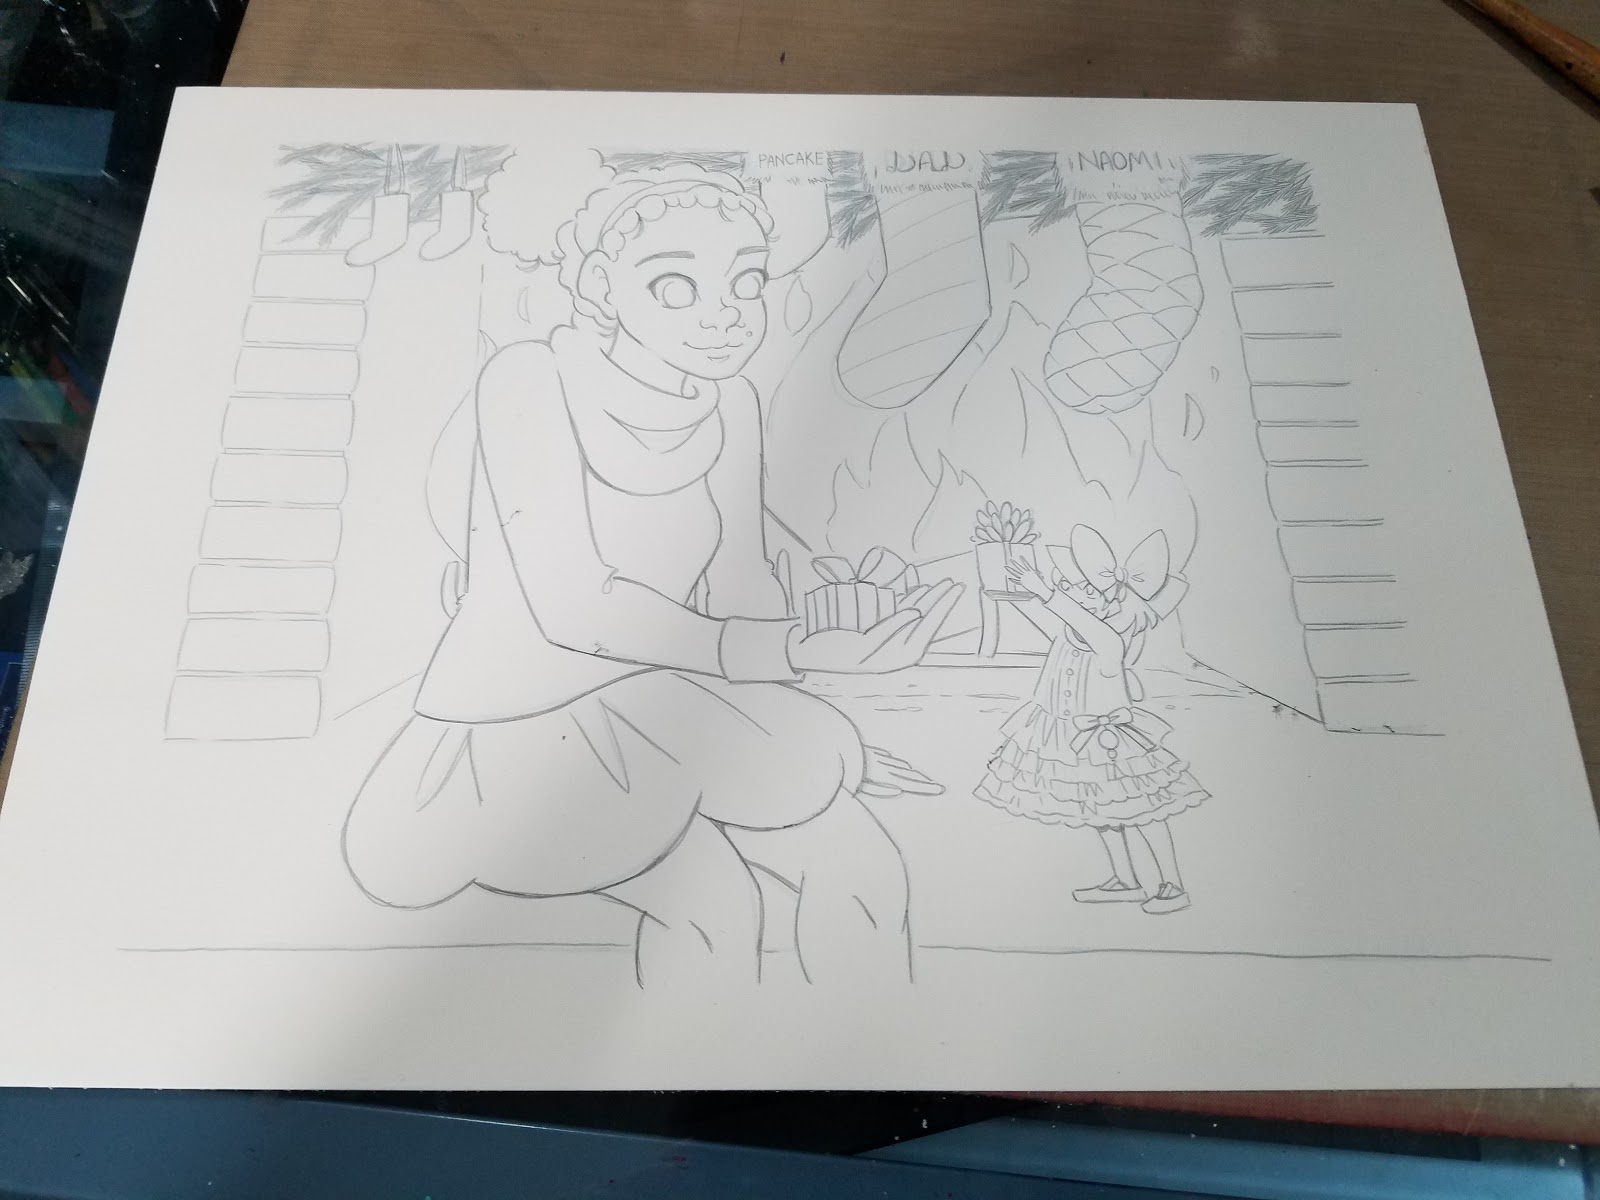
Working backwards in the picture plane, pencil in your background elements. Depending on how comfortable you are with adding detail at the watercolor stage, you can leave some elements only lightly sketched in.
Coming Up Next: Stretching Your Watercolor Paper
Notes:
If you need to make any correction to your sketch, now is a great time to do it! You can still erase your pencil at this stage- the pencil only becomes semi-permanent after you've stretched your watercolor paper. I recommend using a white vinyl eraser for corrections.
If you have a heavily rendered style, you don't really need to worry about lineweight, but if you have a simple style, or if you want your pencil lines to be more apparent, you'll need to spend time making sure they have lineweight.
Our Sponsor

For more beautiful watercolor work, why not pick up a copy of 7" Kara, Volume 1? 7" Kara is a lush watercolor comic the entire family can enjoy, following the adventures of tiny Kara as she discovers humans, explores the backyard, and befriends a kitten. Created by Becca Hillburn, if you enjoy this blog and my art, you'll love 7" Kara. Volume 1 is available in the Natto-shop.
Please consider donating to this blog or purchasing from Natto-shop (http://nattosoup.com/shop) if you want me to continue publishing quality content. All materials tested were purchased from my own pocket. Keep on Truckin' Nattosoup is not under any sponsorship.
December 18, 2016
The Fallow Season
Creativity for me is often seasonal, when it is not tied directly to need or paying work. There's a season, usually springtime, where inspiration just leap forth from every nook and cranny, and everywhere I look, I find reasons to draw, to paint, to think, to dream. Then there's a season where nothing seems to happen- the magic, so heavy in spring air- has fled.
Yet, somehow, I produce things year round. And usually, winter, my fallow season, is when I find time to work on comics again. Holed up in my little apartment, with no conventions and winter travel safely behind me, I can finally write, plot, draw, and create the world of 7" Kara.
In those winter months, iced in my apartment thanks to Nashville's nasty weather, I dream of late summer- full blown August, like a rose a little rotten at the core. Those hot, heavy, tail of the dog summer days, made especially hot and humid due to living in southeastern Louisiana, were days I spent mostly dreaming, and are the days in which 7" Kara is set. Only in the nastiest of February, when winter should be receding to my southern mind, do I dream longingly of those hot days.
That makes December especially barren for me, as creativity has fled with the warm summer days, and travel has me pinned in- a week here, two weeks there, with work to do and no brain to do it. Fortunately during those spring and summer days, redolent of creativity and sunshine, I squirreled away sketches and inks, ideas and notes, just in case December proved fruitless.
This is why, outside of my Christmas card, you rarely see fall and winter seasonal art from me, especially since moving to Nashville. Here, the extra short days and steel gray skies combine to kill any desire I have to doodle or dream. Instead, I'd prefer to escape to warmer, better days, and I tend to render my sunniest sketches when the sky is heavy and the wind is cold.
Some things to do when your creativity is zapped:
Pitch to an anthology- restraints and guidelines often spark my inspirationComplete a 30 day drawing challenge like 31 Days Under the Waves, or Magical Girl MarchPractice from reference- facial studies from Humanae, clothing studies from The Sartorialist, figure studiesRefine and rework an old sketch or drawingPick a sketch from when you were at your creative peak, and render it outOrganize your files, organize your desk, organize your supplies to make room for springTry out a new mediaIf you work traditionally, spend this time to digitize your filesDraw your friends characters as a gift
Please consider donating to this blog or purchasing from Natto-shop (http://nattosoup.com/shop) if you want me to continue publishing quality content. All materials tested were purchased from my own pocket. Keep on Truckin' Nattosoup is not under any sponsorship.
December 16, 2016
Watercolor Basics: Step by Step: Planning Your Watercolor Illustration
Now that we've introduced the basics of Watercolor Basics, it's time to take you step by step through some of the most common processes for completing a watercolor illustration. I'm going to take you from start to finish through my 2016 Christmas card illustration, explaining my techniques as I go. I have a series of video tutorials recorded concurrently that should be available on my Youtube channel soon, if you need some live action explanation.
If you enjoy this series, if you have learned something, or if I have inspired you in some way, please take a moment to share this, or any post, with your friends and familiy on your favorite social networking platform. There are handy sharing buttons below this post. If you enjoy art education content, and would like to be part of the process, please visit my Patreon for information on how to join the artnerd community. Backers get early access to popular series, backer exclusive content, and voting rights on upcoming content.
When we've finished working through the Step by Step tutorials, our finished image will look like this!
Planning for your upcoming illustration can be one of the most vital steps to the success of a watercolor. Having a good idea of what you want your finished illustration to look is one thing, but what's more important is how you want it to feel. For my Christmas Cards, I always want to convey warmth and happiness, so this was a feeling I wanted to carry into this year's card.
Things to consider when planning your illustration:
TimeframeMaterials you wish to useEnd useSubject matterMood
This year was the first year I could confidently introduce Naomi to my Christmas cards without it coming across as a spoiler, so I knew I wanted to include Naomi on this year's card. I've spent a lot of time planning, writing, and illustrating chapters for Volume 2 this year, and I wanted my card to be a reflection of that, as well as a reflection of Naomi and Kara's growing friendship.
Naomi's house is based on the house that my mother grew up in, and in the living room was a large brick fireplace that had been painted white. The brick beneath was a warm red and black, and I decided that for this illustration, I wanted to use that warm brick to help convey a feeling of warmth and security- something many of us long for this year.
So things I considered when planning this year's card:
I wanted to create a nice holiday card to send to Patreon backers, close friends, and familyI wanted the card to feature something I care about- the characters from my comic, 7" Kara (subject matter)I wanted both Kara and Naomi doing something cute (subject matter)I wanted to include a fireplace (mood, subject matter)I wanted a warm feeling (mood)The composition would have to allow for both characters to be clearly visibleI was in Luling, and had no real way to work on a sketch/refinement physically, so I needed to start digitally (materials)I am not entirely comfortable drawing everything digitally (materials)This image needed to be ready to paint as soon as I returned to Nashville, as I had a very small window of time to work with (timeframe)I wanted to work horizontally, and needed to work within a 7"x5" ratio (the size of the finished card) (end use)
Don't know what I'm talking about? Why not pick up a copy of 7" Kara Volume 1 for yourself? If you enjoy my art, then you should definitely check out my comic! Volume 1 features four chapters of lavish watercolor comic, a bonus story in ink and seafoam green, and a concept section that explains how I've created the world of 7" Kara.
Gameplan
Since I'd been working on digital art for my kidlit art portfolio, I'd started using Photoshop and Manga Studio more regularly. Although I'm not entirely comfortable drawing digitally (honestly, I hate how the stylus feels against a slick screen), I'd put in a lot of practice, and had gotten better, so I figured I could do my sketching and refinement digitally. Once I returned to Nashville, I could print my sketch as bluelines on some artist quality watercolor paper (Canson's Moulin du Roy in this instance), and probably finish the painting within three days, giving the cards time to ship to me, and giving me time to write and mail the cards before Christmas.
Sketching/Roughs
Digital (Photoshop)
Breaking up the picture plane to help plan composition

Composition is one of my weakest points, so I usually throw up a grid like the one above, dividing the image in half, then dividing the image into thirds vertically and horizontally.
Initial sketch
 From there, I can quickly sketch in wireform figures and a hasty background. At this point, I'm not really concerned too much about accuracy so much as I am conveying a feeling.
For illustration, sketching and refinement are an important part of the watercolor process. Depending on how tight you work, you may need to do more work and refinement at your sketching stages, so having your drawing fundamentals in place is really key. You are always encouraged to practice skills you wish to develop while learning other skills, so don't be discouraged if your drawing isn't up to snuff just yet.
Refining and blocking in figures

When I sketch, I start big and work small, start loose and work progressively tighter. I try not to be concerned with fine details or sketching in the faces at this point- I'm really trying to capture the whole scene.
Further refinement of figures using constructive anatomy
 It seems that every artist has a preferred method of constructing figures. Mine is a form of constructive anatomy- a combination of Glen Vilppu, Andrew Loomis, and Paul Hudson.
Sketching in clothes and breaking down the faces

Once the figures have been blocked in and refined, I can start refining the head. At this point, I'm just breaking the face into separate regions- no fine detail has been added.
Adding details to the face
 Once the face has been broken down into regions, I can start refining the features. This method is particularly helpful for accurately drawing the face from different views.
Refinement of clothes and facial features. Blocking in more background elements

I try to refine everything at roughly the same pace (it makes corrections much easier), but it's fine if you leave the background rough while you work on the figures. Once the figures and their clothing have been solidified, I start focusing on adding detail to the background.
Further refinement of background elements

Not everything has to be completely filled in- some elements can be detailed at the Tight Roughs stage, or even when painting. Be honest with yourself and work to the level of completion YOU need-there's no shame in working looser or tighter.
Refinement/Tight Roughs
Digital (Manga Studio)
Refining faces first

I have found that I ink better in Manga Studio EX 5 than I do in Photoshop (Manga Studio has line stabilization), so I imported my PSD into Manga Studio. I put all of my sketch layers into one folder, and reduced the opacity of that folder greatly. For 'inks', I used a dark blue.
As recommended in my inking tutorials, I begin with the faces first, as my hand is fresh and able to handle the detail without shaking, and work outward.
Refining figure and clothing details
 Refining other figure

The next session, I inked Kara, from face to clothing.
Inking in Background Details

Once the figures have been inked, I move on to the background. Since details are looser in the background, and most of that can be handled in watercolor, I leave it fairly unrefined.
Editing Image
(Photoshop)
 I open the image in Photoshop as I'm more familiar with it's basic editing tools. Naomi's head was too large in the Tight Rough, so I resized it.
Preparing for Print

For a tutorial on how to create digital bluelines, please check out this post.
Printing
I printed my bluelines on Canson's Moulin du Roy using a Canson Pixma Pro 9000 Inkjet printer. The ink used by this printer is water soluble, and will dissolve when I stretch my watercolor paper.
Coming Up Next: Step By Step: Stretching Your Paper
Our Sponsor
For more beautiful watercolor work, why not pick up a copy of 7" Kara, Volume 1? 7" Kara is a lush watercolor comic the entire family can enjoy, following the adventures of tiny Kara as she discovers humans, explores the backyard, and befriends a kitten. Created by Becca Hillburn, if you enjoy this blog and my art, you'll love 7" Kara. Volume 1 is available in the Natto-shop.
Please consider donating to this blog or purchasing from Natto-shop (http://nattosoup.com/shop) if you want me to continue publishing quality content. All materials tested were purchased from my own pocket. Keep on Truckin' Nattosoup is not under any sponsorship.
If you enjoy this series, if you have learned something, or if I have inspired you in some way, please take a moment to share this, or any post, with your friends and familiy on your favorite social networking platform. There are handy sharing buttons below this post. If you enjoy art education content, and would like to be part of the process, please visit my Patreon for information on how to join the artnerd community. Backers get early access to popular series, backer exclusive content, and voting rights on upcoming content.
When we've finished working through the Step by Step tutorials, our finished image will look like this!
Planning for your upcoming illustration can be one of the most vital steps to the success of a watercolor. Having a good idea of what you want your finished illustration to look is one thing, but what's more important is how you want it to feel. For my Christmas Cards, I always want to convey warmth and happiness, so this was a feeling I wanted to carry into this year's card.
Things to consider when planning your illustration:
TimeframeMaterials you wish to useEnd useSubject matterMood
This year was the first year I could confidently introduce Naomi to my Christmas cards without it coming across as a spoiler, so I knew I wanted to include Naomi on this year's card. I've spent a lot of time planning, writing, and illustrating chapters for Volume 2 this year, and I wanted my card to be a reflection of that, as well as a reflection of Naomi and Kara's growing friendship.
Naomi's house is based on the house that my mother grew up in, and in the living room was a large brick fireplace that had been painted white. The brick beneath was a warm red and black, and I decided that for this illustration, I wanted to use that warm brick to help convey a feeling of warmth and security- something many of us long for this year.
So things I considered when planning this year's card:
I wanted to create a nice holiday card to send to Patreon backers, close friends, and familyI wanted the card to feature something I care about- the characters from my comic, 7" Kara (subject matter)I wanted both Kara and Naomi doing something cute (subject matter)I wanted to include a fireplace (mood, subject matter)I wanted a warm feeling (mood)The composition would have to allow for both characters to be clearly visibleI was in Luling, and had no real way to work on a sketch/refinement physically, so I needed to start digitally (materials)I am not entirely comfortable drawing everything digitally (materials)This image needed to be ready to paint as soon as I returned to Nashville, as I had a very small window of time to work with (timeframe)I wanted to work horizontally, and needed to work within a 7"x5" ratio (the size of the finished card) (end use)
Don't know what I'm talking about? Why not pick up a copy of 7" Kara Volume 1 for yourself? If you enjoy my art, then you should definitely check out my comic! Volume 1 features four chapters of lavish watercolor comic, a bonus story in ink and seafoam green, and a concept section that explains how I've created the world of 7" Kara.
Gameplan
Since I'd been working on digital art for my kidlit art portfolio, I'd started using Photoshop and Manga Studio more regularly. Although I'm not entirely comfortable drawing digitally (honestly, I hate how the stylus feels against a slick screen), I'd put in a lot of practice, and had gotten better, so I figured I could do my sketching and refinement digitally. Once I returned to Nashville, I could print my sketch as bluelines on some artist quality watercolor paper (Canson's Moulin du Roy in this instance), and probably finish the painting within three days, giving the cards time to ship to me, and giving me time to write and mail the cards before Christmas.
Sketching/Roughs
Digital (Photoshop)
Breaking up the picture plane to help plan composition
Composition is one of my weakest points, so I usually throw up a grid like the one above, dividing the image in half, then dividing the image into thirds vertically and horizontally.
Initial sketch
 From there, I can quickly sketch in wireform figures and a hasty background. At this point, I'm not really concerned too much about accuracy so much as I am conveying a feeling.
For illustration, sketching and refinement are an important part of the watercolor process. Depending on how tight you work, you may need to do more work and refinement at your sketching stages, so having your drawing fundamentals in place is really key. You are always encouraged to practice skills you wish to develop while learning other skills, so don't be discouraged if your drawing isn't up to snuff just yet.
Refining and blocking in figures
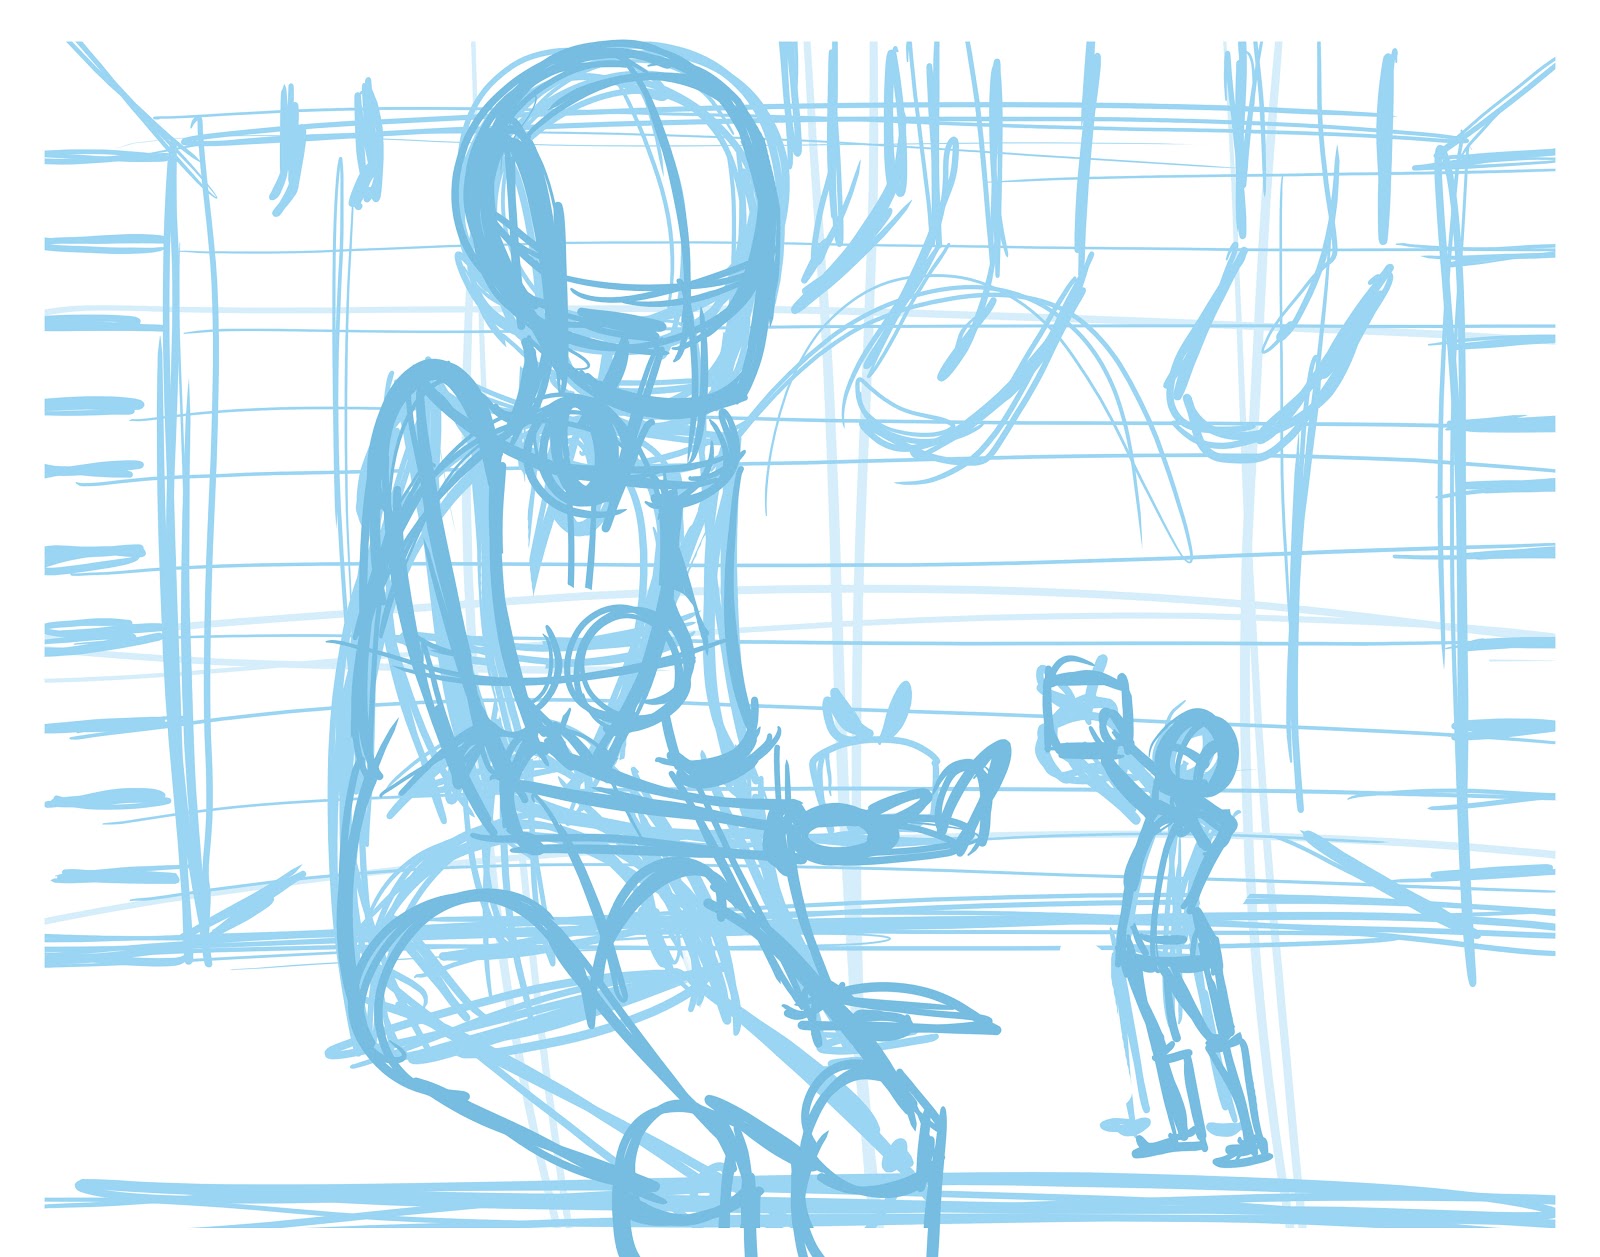
When I sketch, I start big and work small, start loose and work progressively tighter. I try not to be concerned with fine details or sketching in the faces at this point- I'm really trying to capture the whole scene.
Further refinement of figures using constructive anatomy
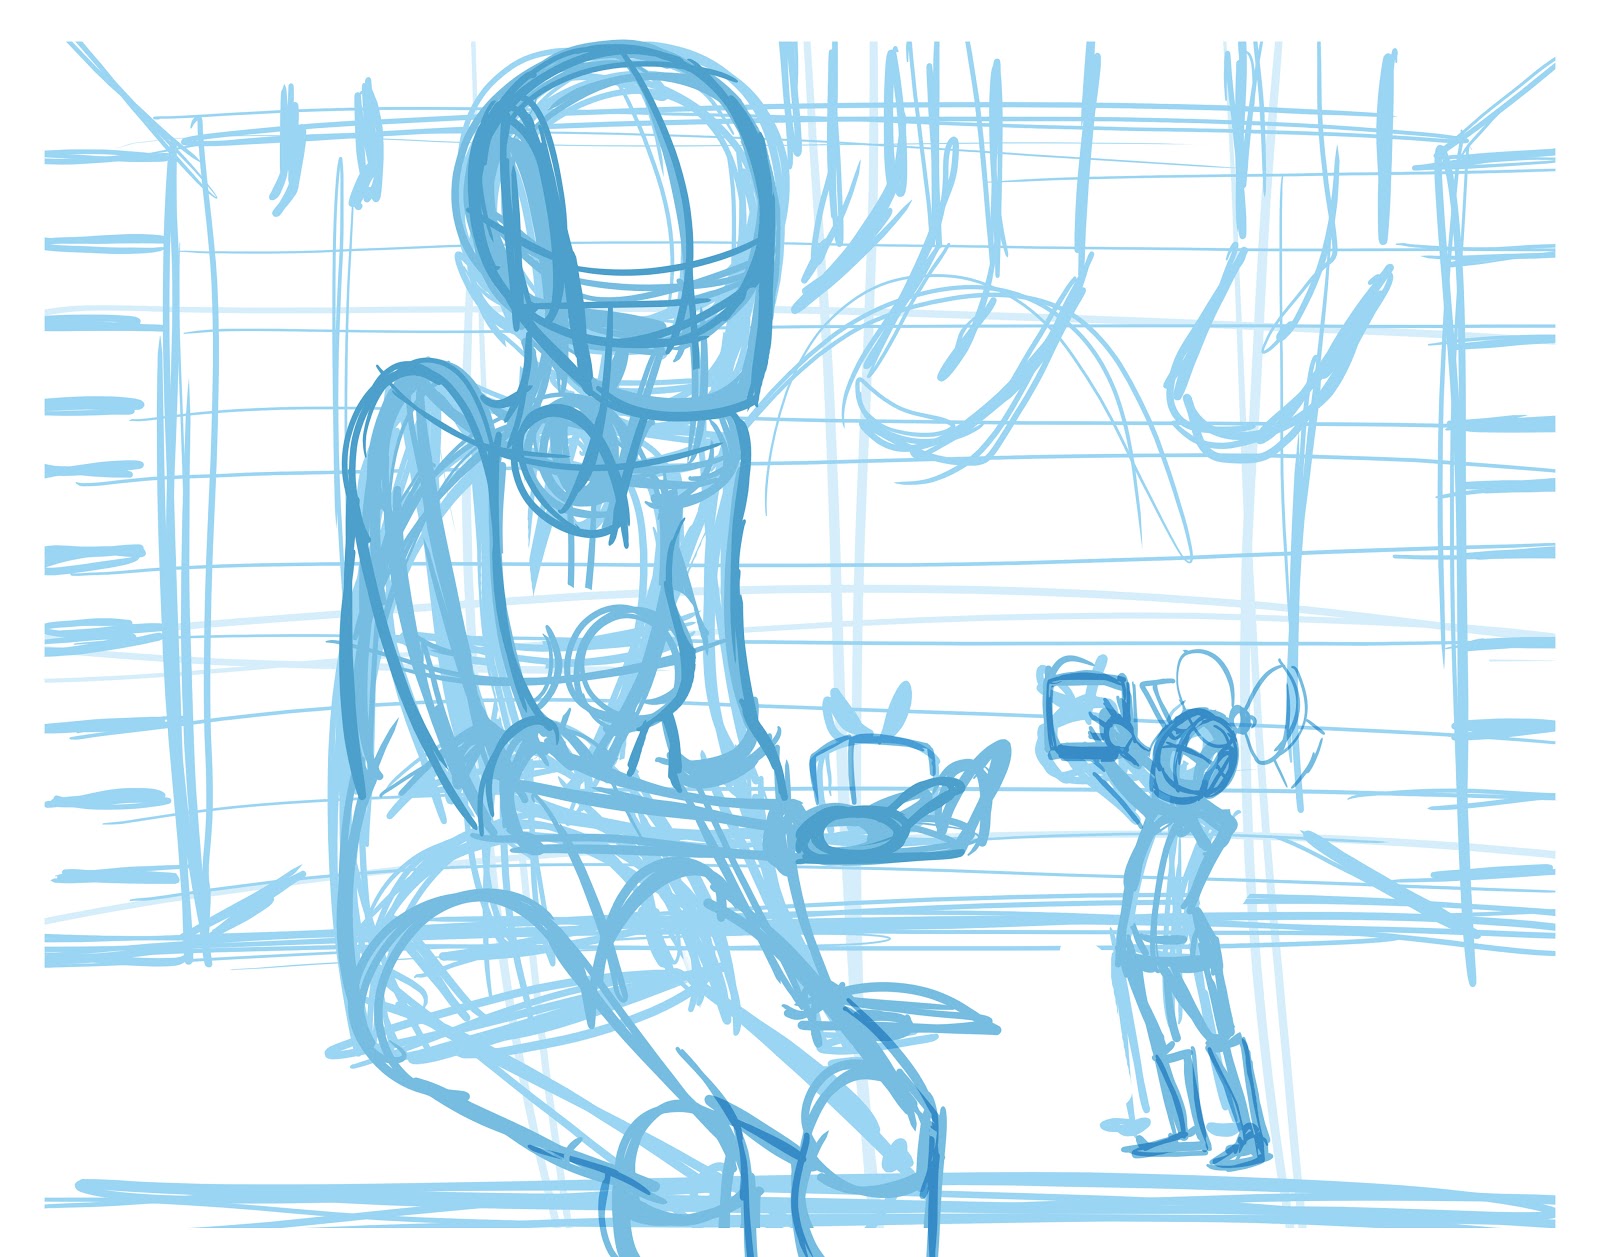 It seems that every artist has a preferred method of constructing figures. Mine is a form of constructive anatomy- a combination of Glen Vilppu, Andrew Loomis, and Paul Hudson.
Sketching in clothes and breaking down the faces
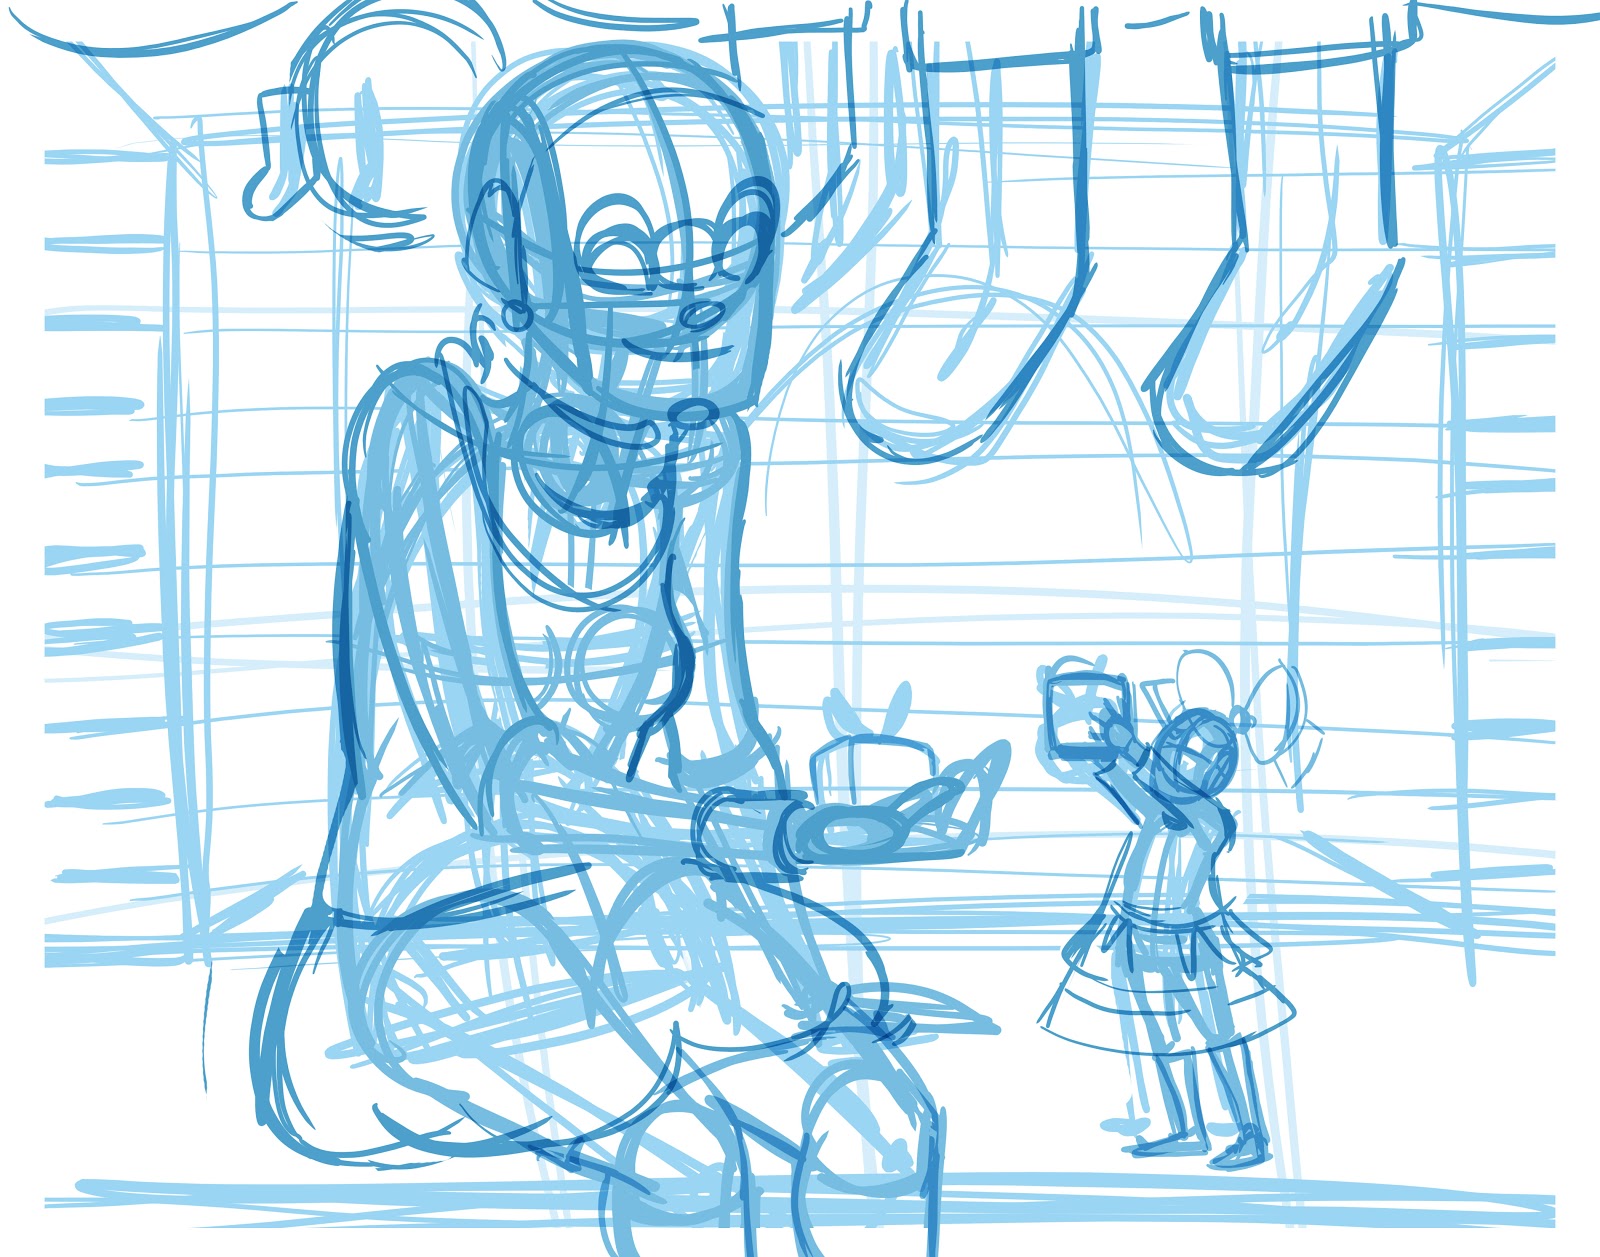
Once the figures have been blocked in and refined, I can start refining the head. At this point, I'm just breaking the face into separate regions- no fine detail has been added.
Adding details to the face
 Once the face has been broken down into regions, I can start refining the features. This method is particularly helpful for accurately drawing the face from different views.
Refinement of clothes and facial features. Blocking in more background elements
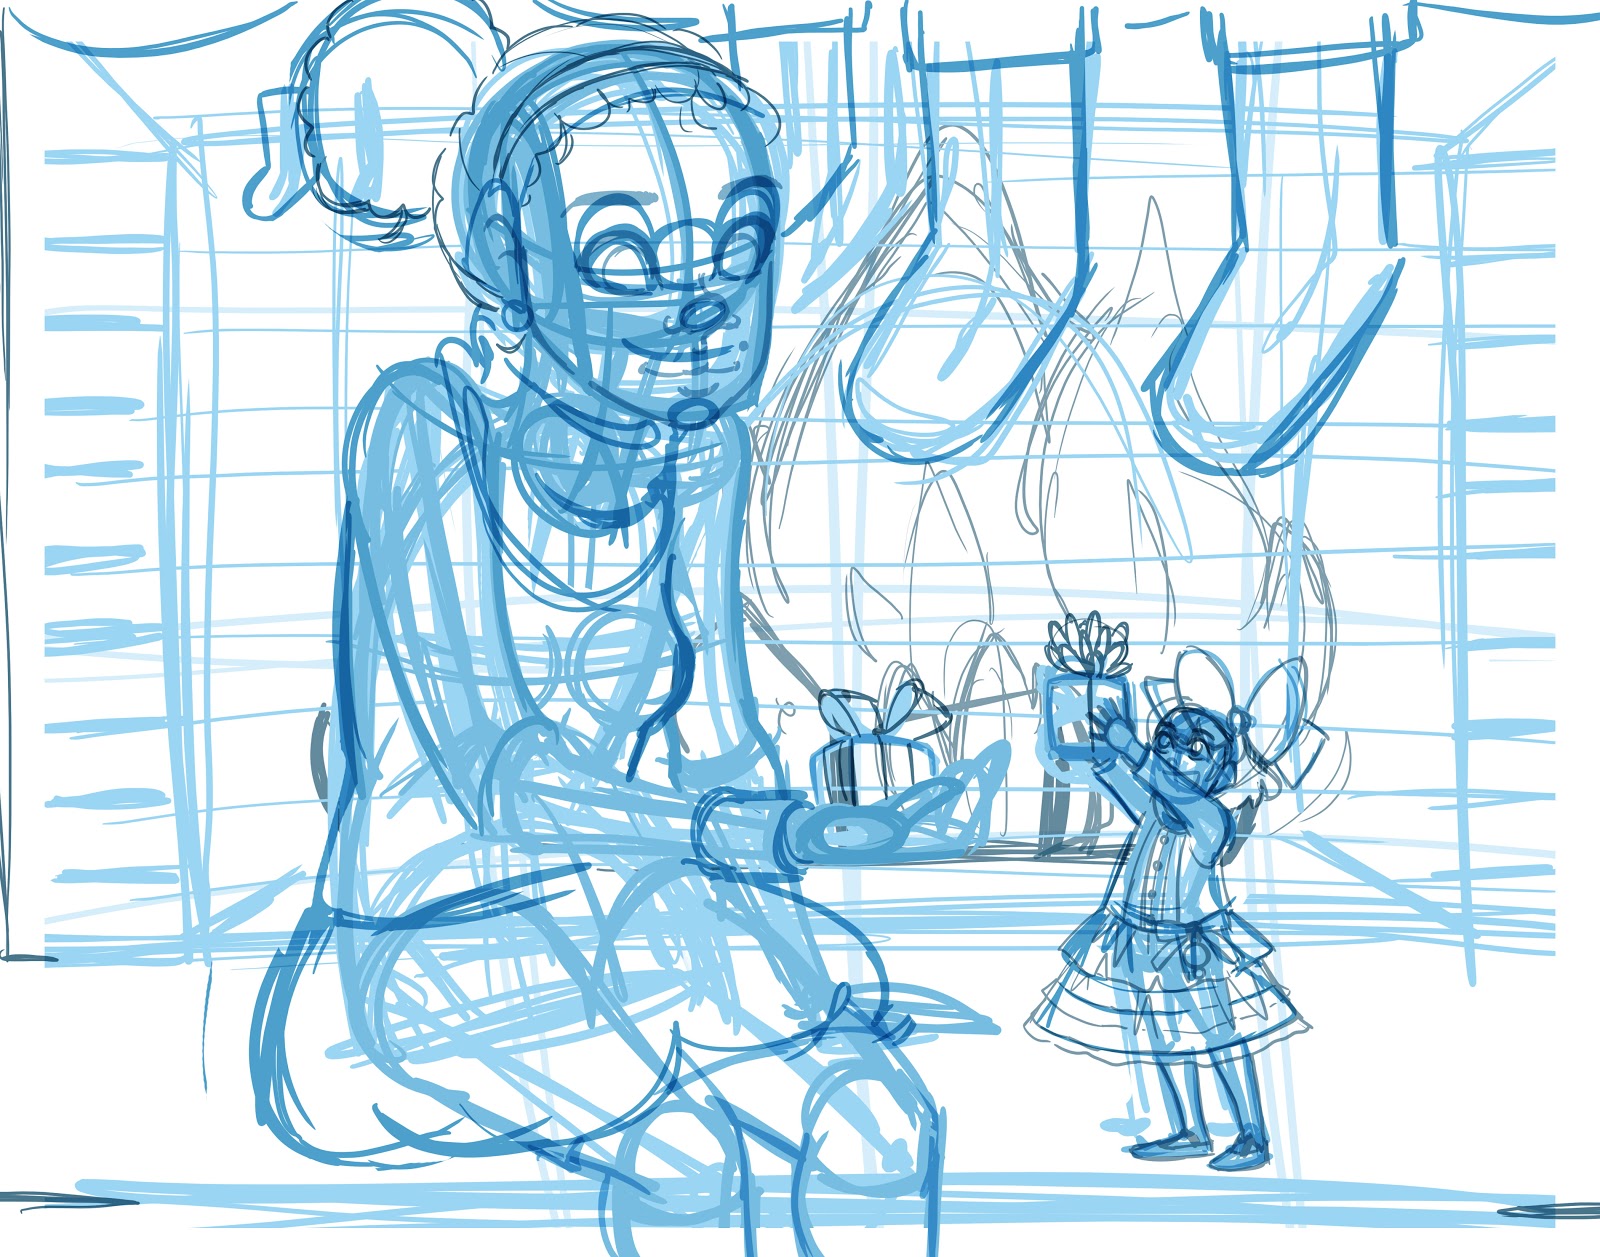
I try to refine everything at roughly the same pace (it makes corrections much easier), but it's fine if you leave the background rough while you work on the figures. Once the figures and their clothing have been solidified, I start focusing on adding detail to the background.
Further refinement of background elements
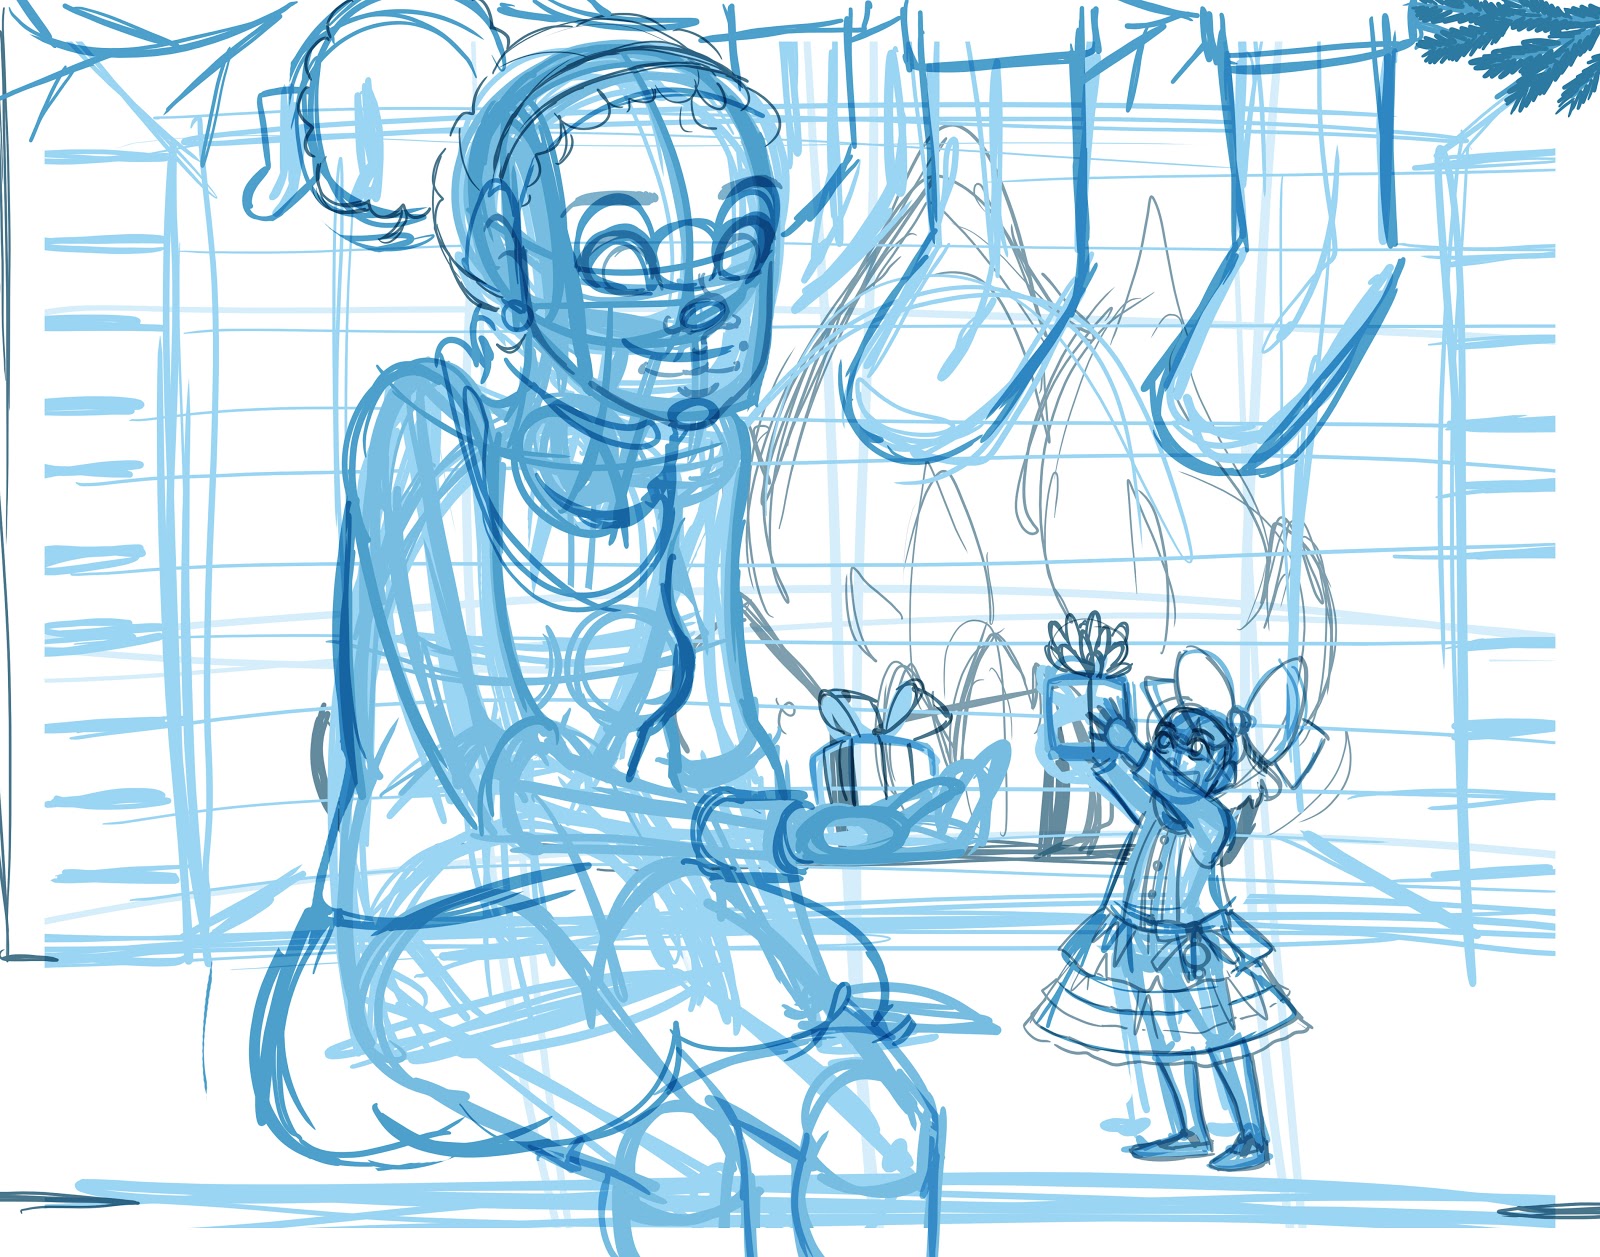
Not everything has to be completely filled in- some elements can be detailed at the Tight Roughs stage, or even when painting. Be honest with yourself and work to the level of completion YOU need-there's no shame in working looser or tighter.
Refinement/Tight Roughs
Digital (Manga Studio)
Refining faces first
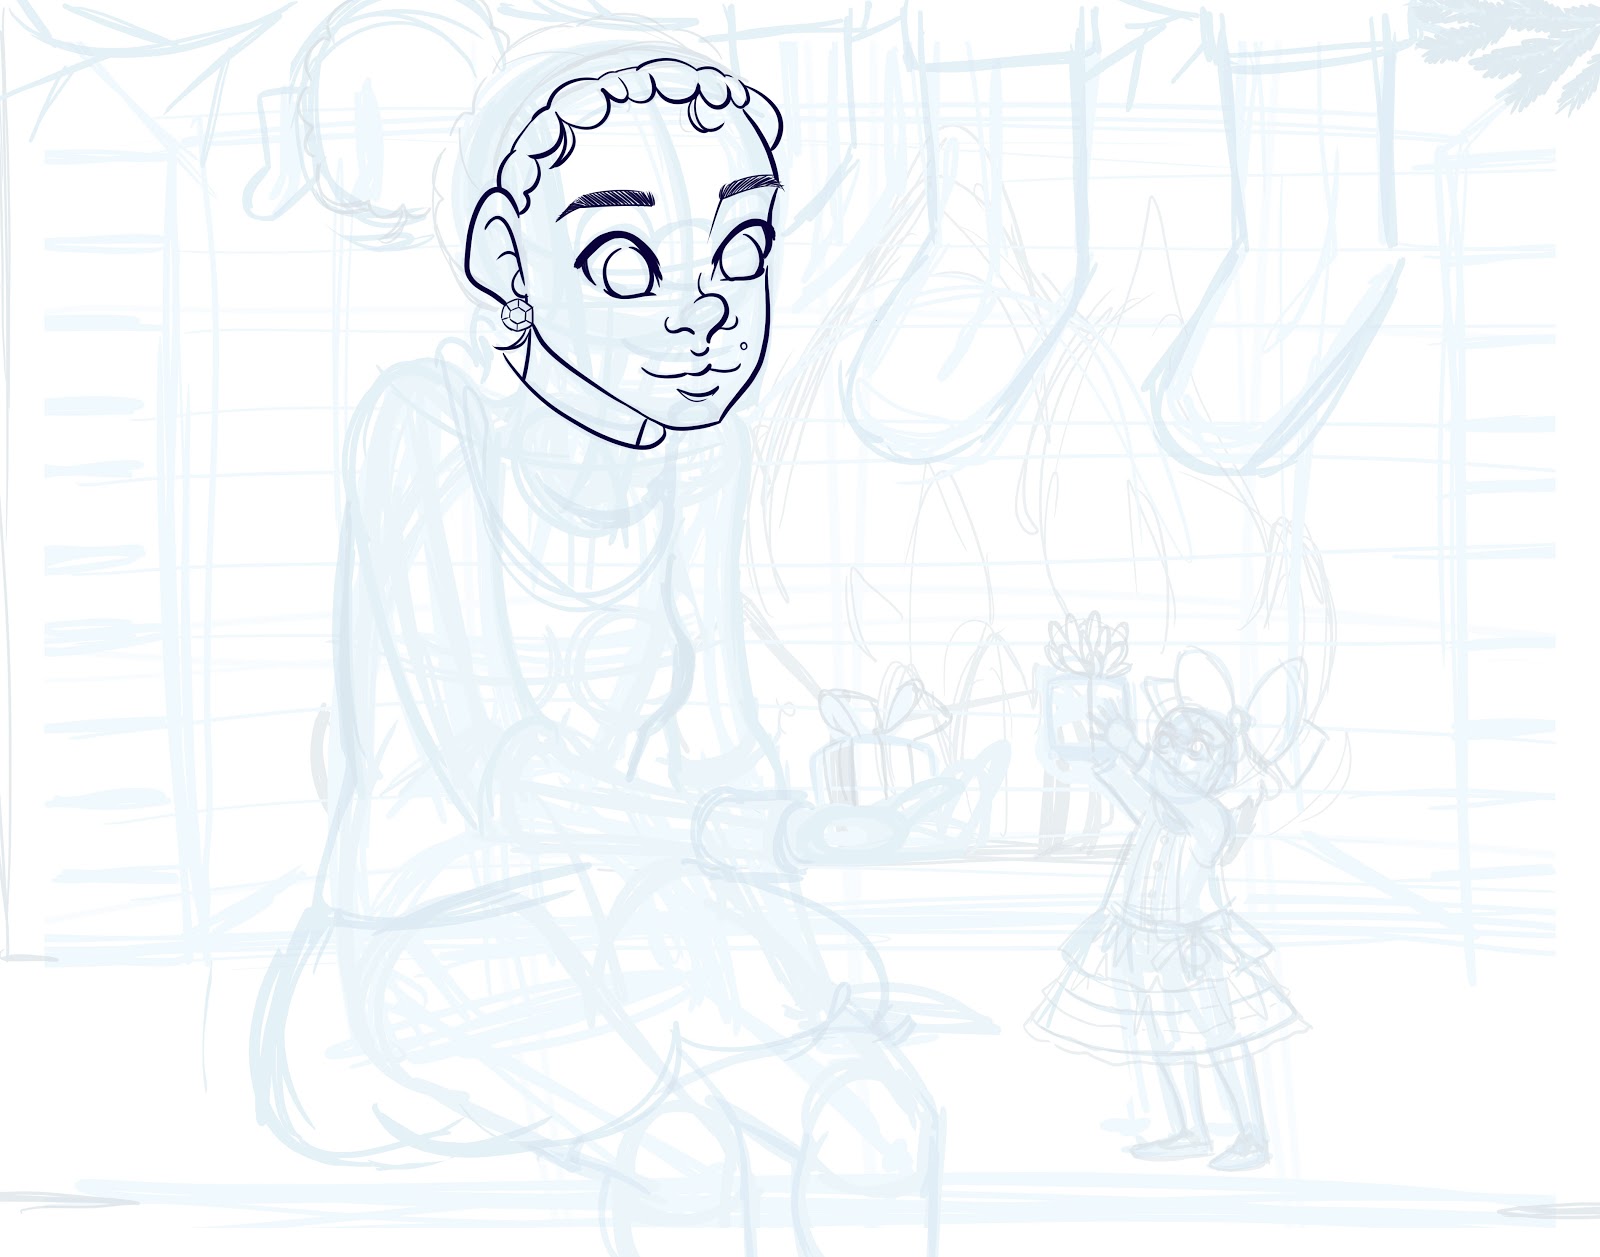
I have found that I ink better in Manga Studio EX 5 than I do in Photoshop (Manga Studio has line stabilization), so I imported my PSD into Manga Studio. I put all of my sketch layers into one folder, and reduced the opacity of that folder greatly. For 'inks', I used a dark blue.
As recommended in my inking tutorials, I begin with the faces first, as my hand is fresh and able to handle the detail without shaking, and work outward.
Refining figure and clothing details
 Refining other figure
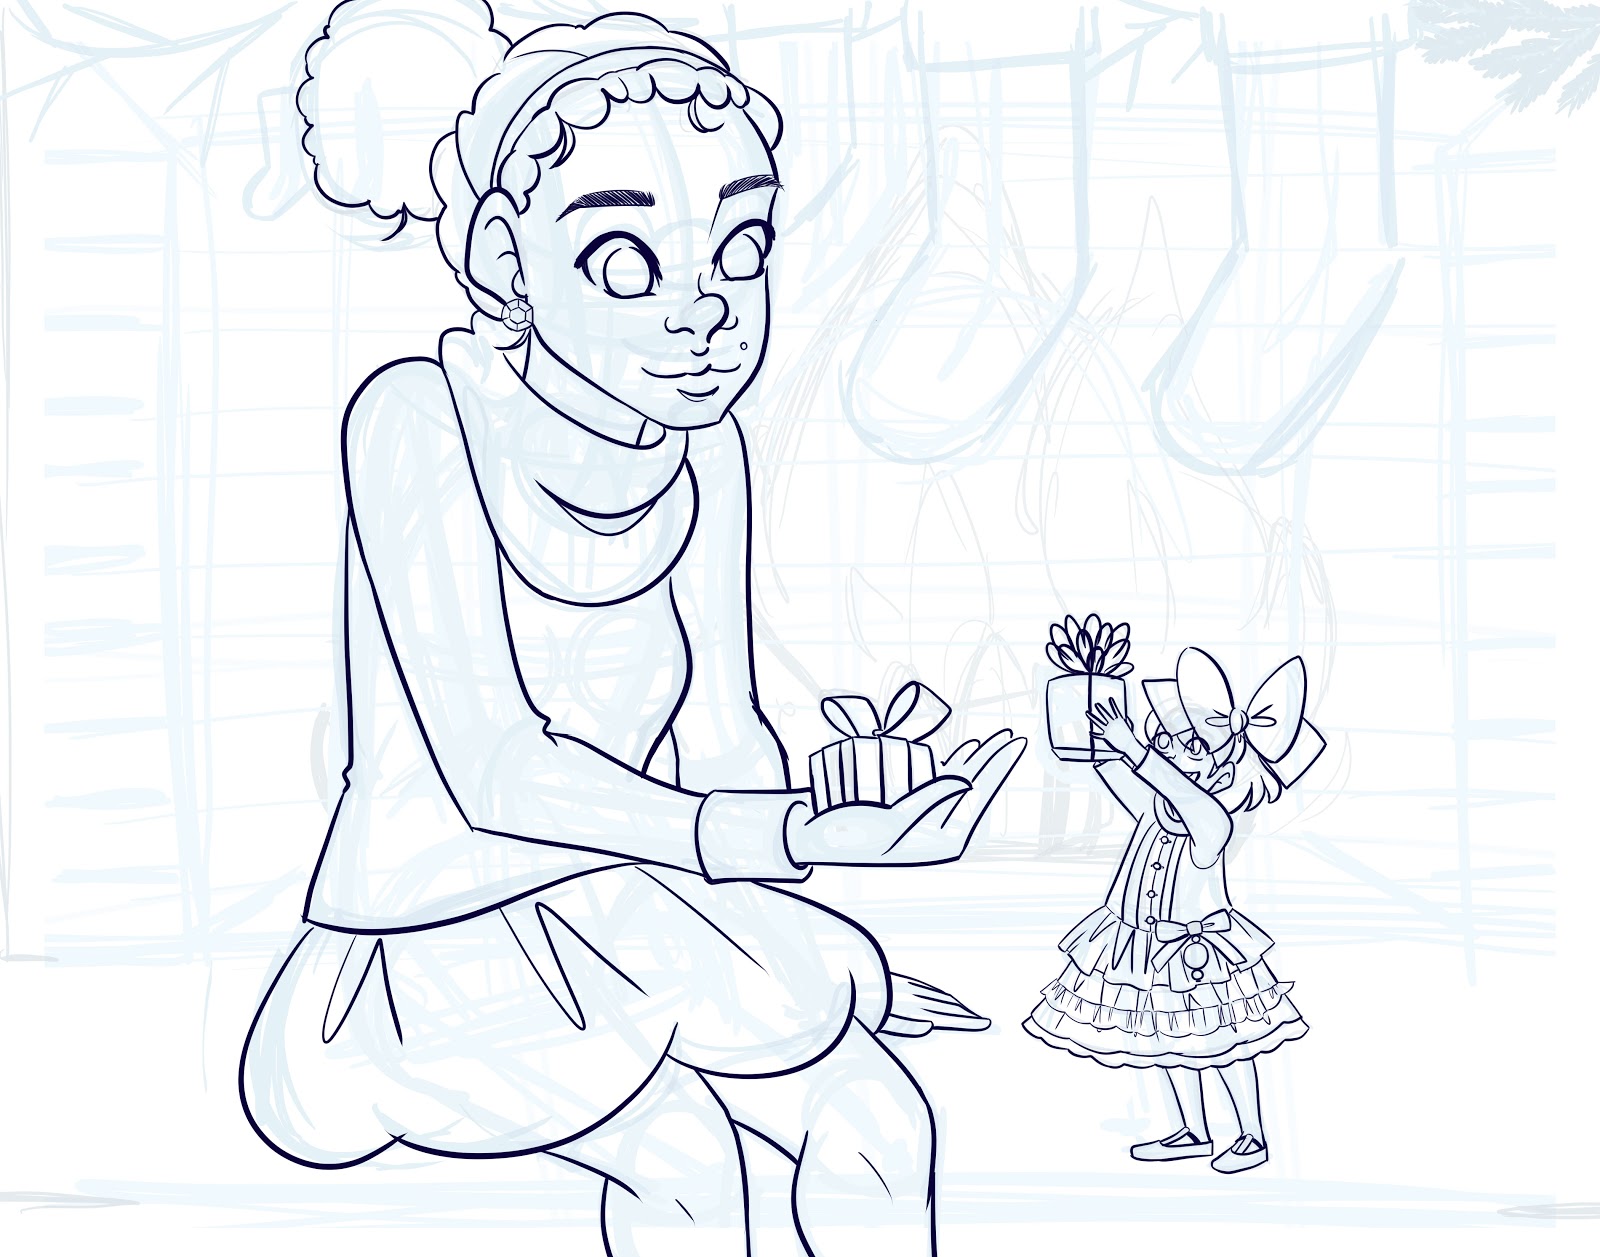
The next session, I inked Kara, from face to clothing.
Inking in Background Details

Once the figures have been inked, I move on to the background. Since details are looser in the background, and most of that can be handled in watercolor, I leave it fairly unrefined.
Editing Image
(Photoshop)
 I open the image in Photoshop as I'm more familiar with it's basic editing tools. Naomi's head was too large in the Tight Rough, so I resized it.
Preparing for Print
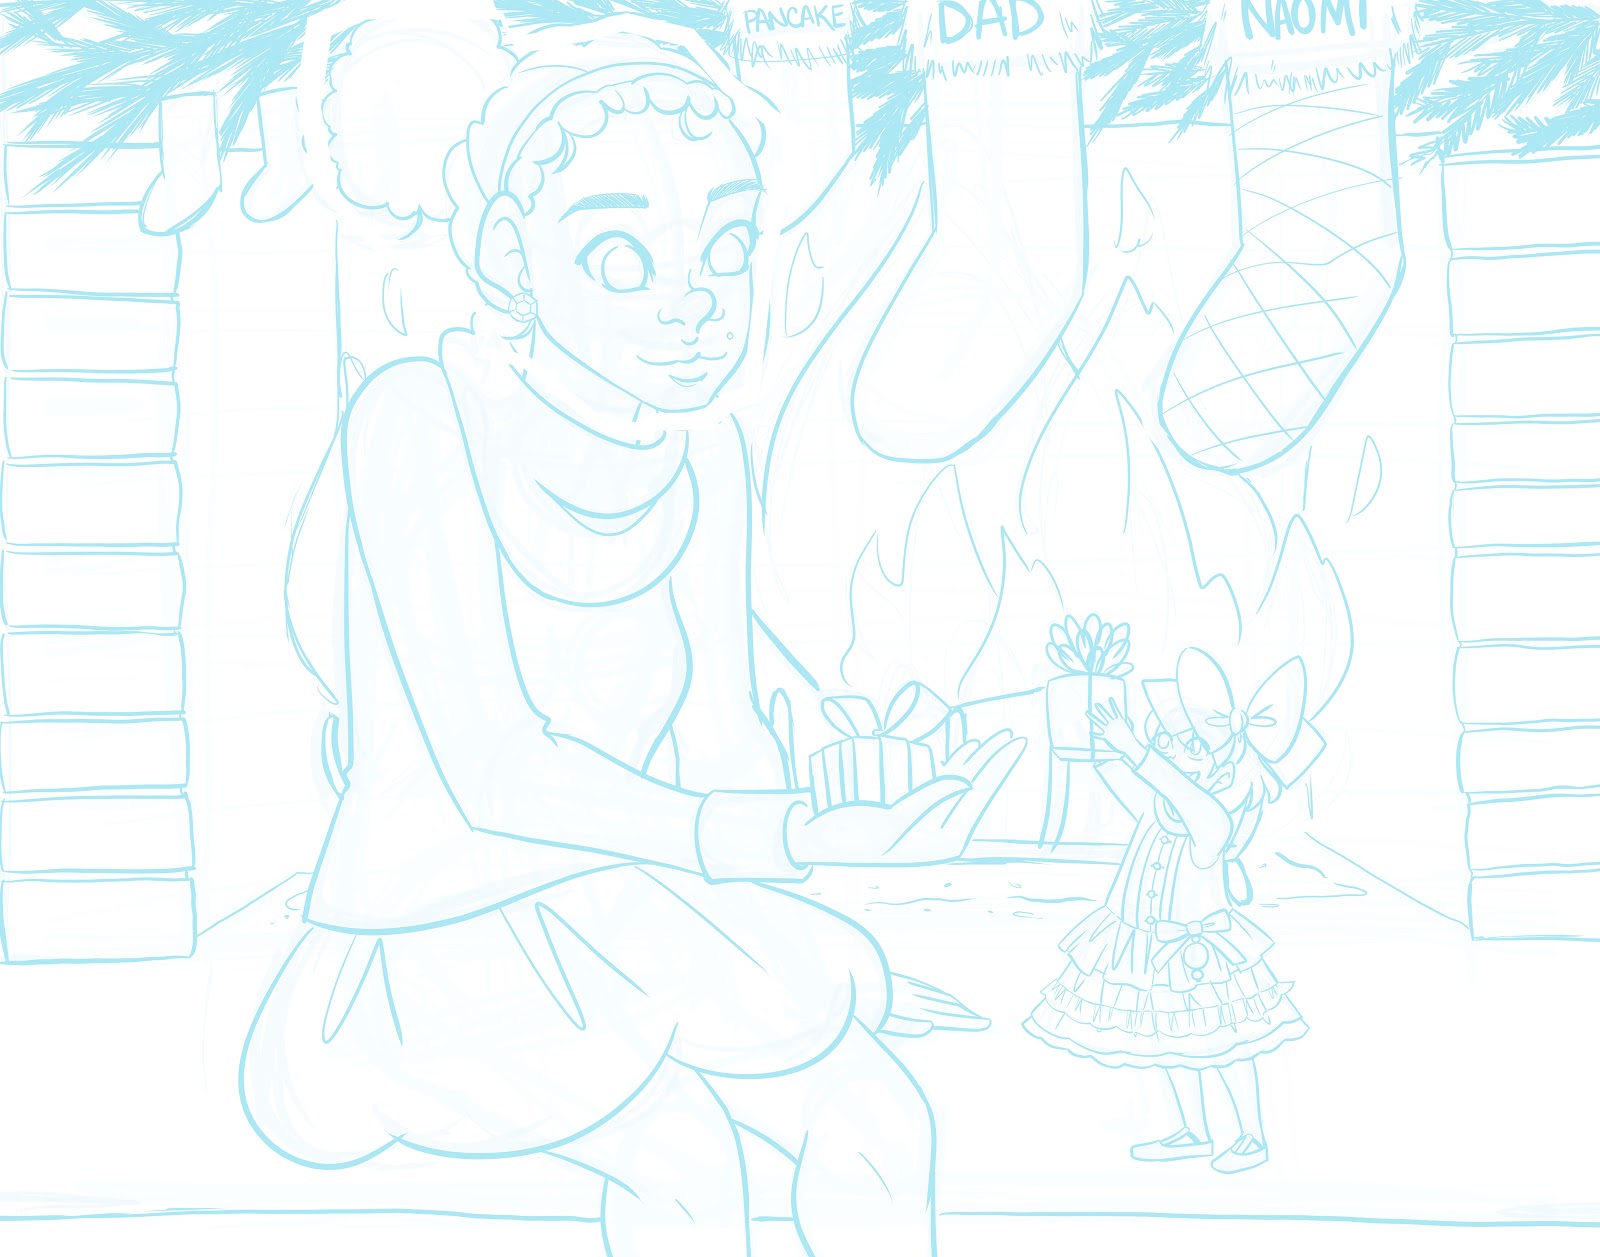
For a tutorial on how to create digital bluelines, please check out this post.
Printing
I printed my bluelines on Canson's Moulin du Roy using a Canson Pixma Pro 9000 Inkjet printer. The ink used by this printer is water soluble, and will dissolve when I stretch my watercolor paper.
Coming Up Next: Step By Step: Stretching Your Paper
Our Sponsor

For more beautiful watercolor work, why not pick up a copy of 7" Kara, Volume 1? 7" Kara is a lush watercolor comic the entire family can enjoy, following the adventures of tiny Kara as she discovers humans, explores the backyard, and befriends a kitten. Created by Becca Hillburn, if you enjoy this blog and my art, you'll love 7" Kara. Volume 1 is available in the Natto-shop.
Please consider donating to this blog or purchasing from Natto-shop (http://nattosoup.com/shop) if you want me to continue publishing quality content. All materials tested were purchased from my own pocket. Keep on Truckin' Nattosoup is not under any sponsorship.


