
Becca Hillburn's Blog, page 28
June 5, 2017
Character Expression: Intro to Comic Craft, Step by Step
 Read 7" Kara as a webcomic!
In our last Intro to Comic Craft: Step by Step: Roughs, we explored body language and character acting. While body language and character acting are important, and a vital part of storytelling, body language is half the equation. Expression is a vital part of storytelling that should be explored, and it's often the aspect that is the most fun for artists.
This post was brought to you by Ink Drop Cafe, a creator's collective! Swing by to sample our wonderful selection of comics (including 7" Kara!), as well as our fantastic artist resources such as Kabocha's Photoshop and Clip Studio Paint Brushes

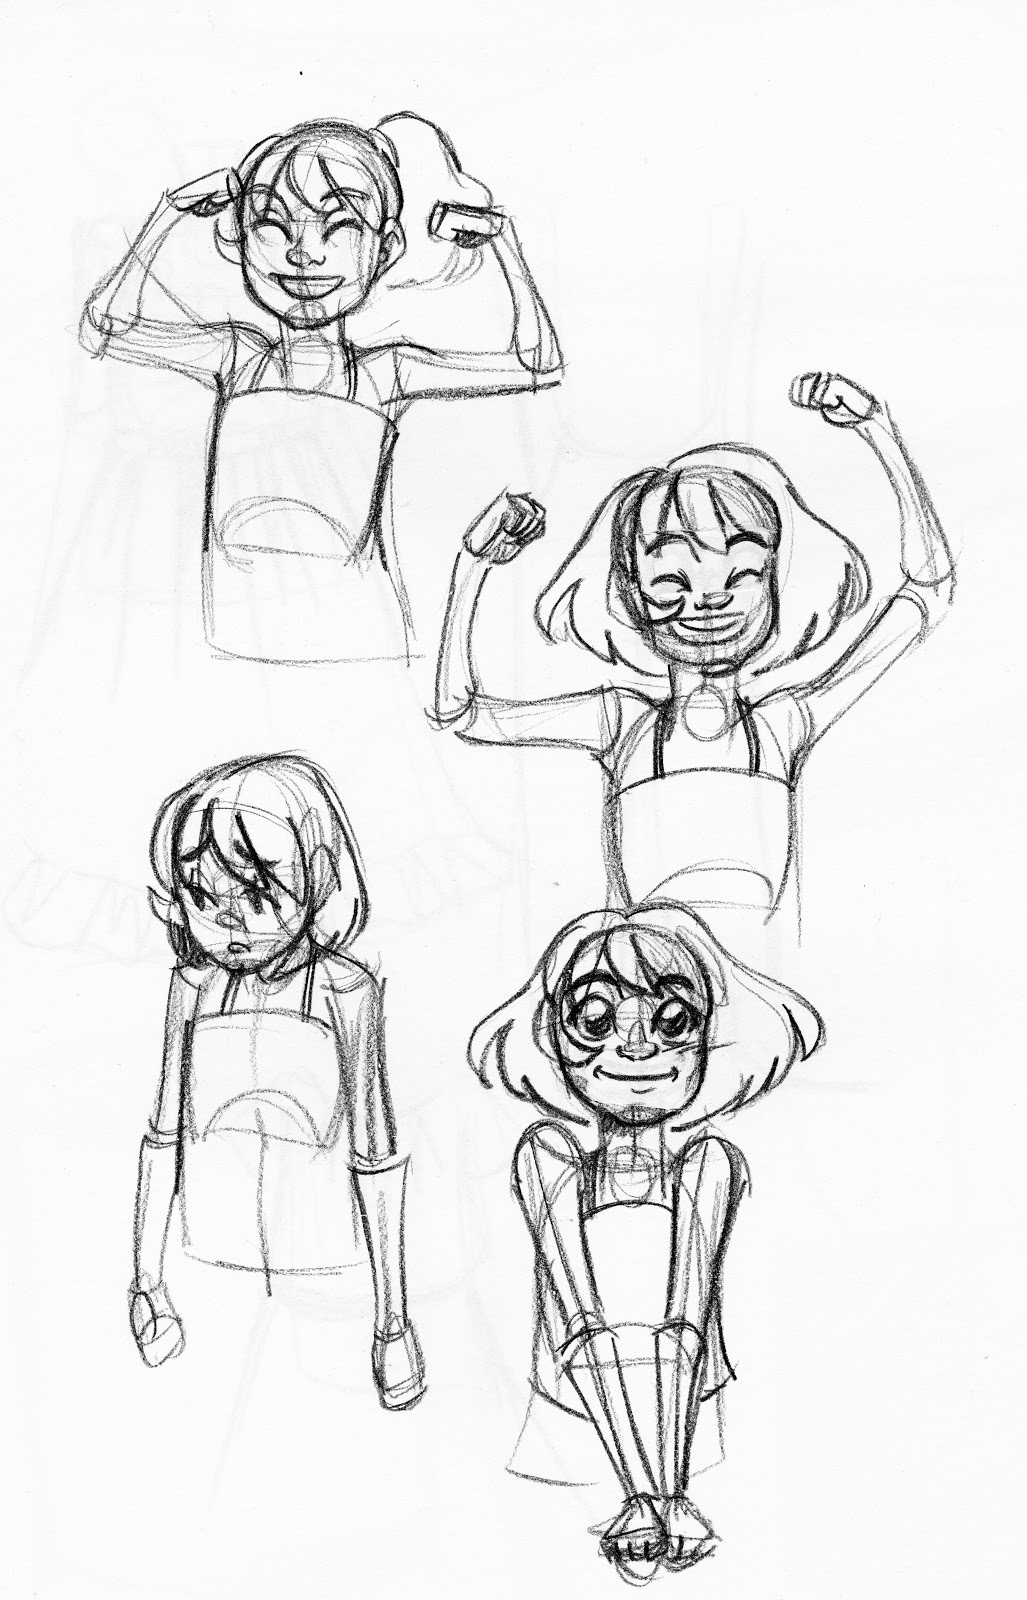
Although body language/character acting and expression are similar, they are not the same. Think of expression as a micro-action in body language- the icing on the cake.

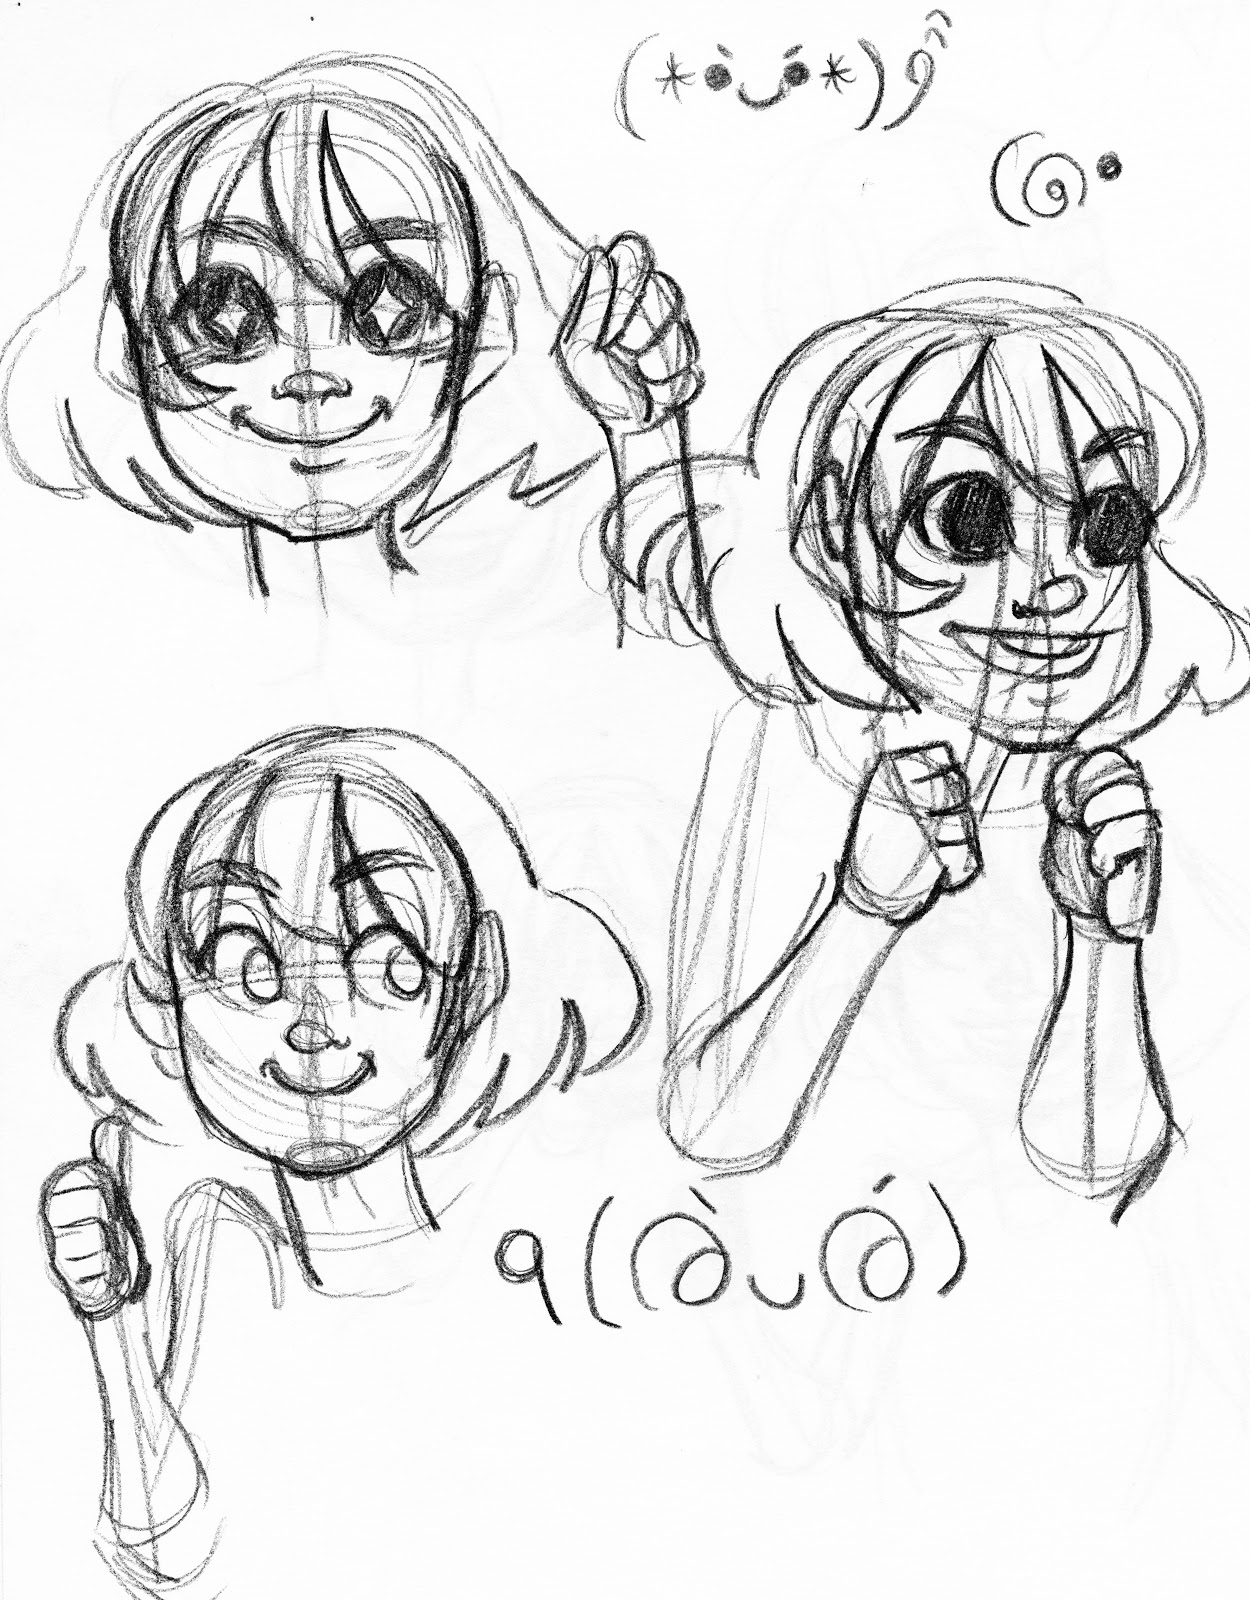
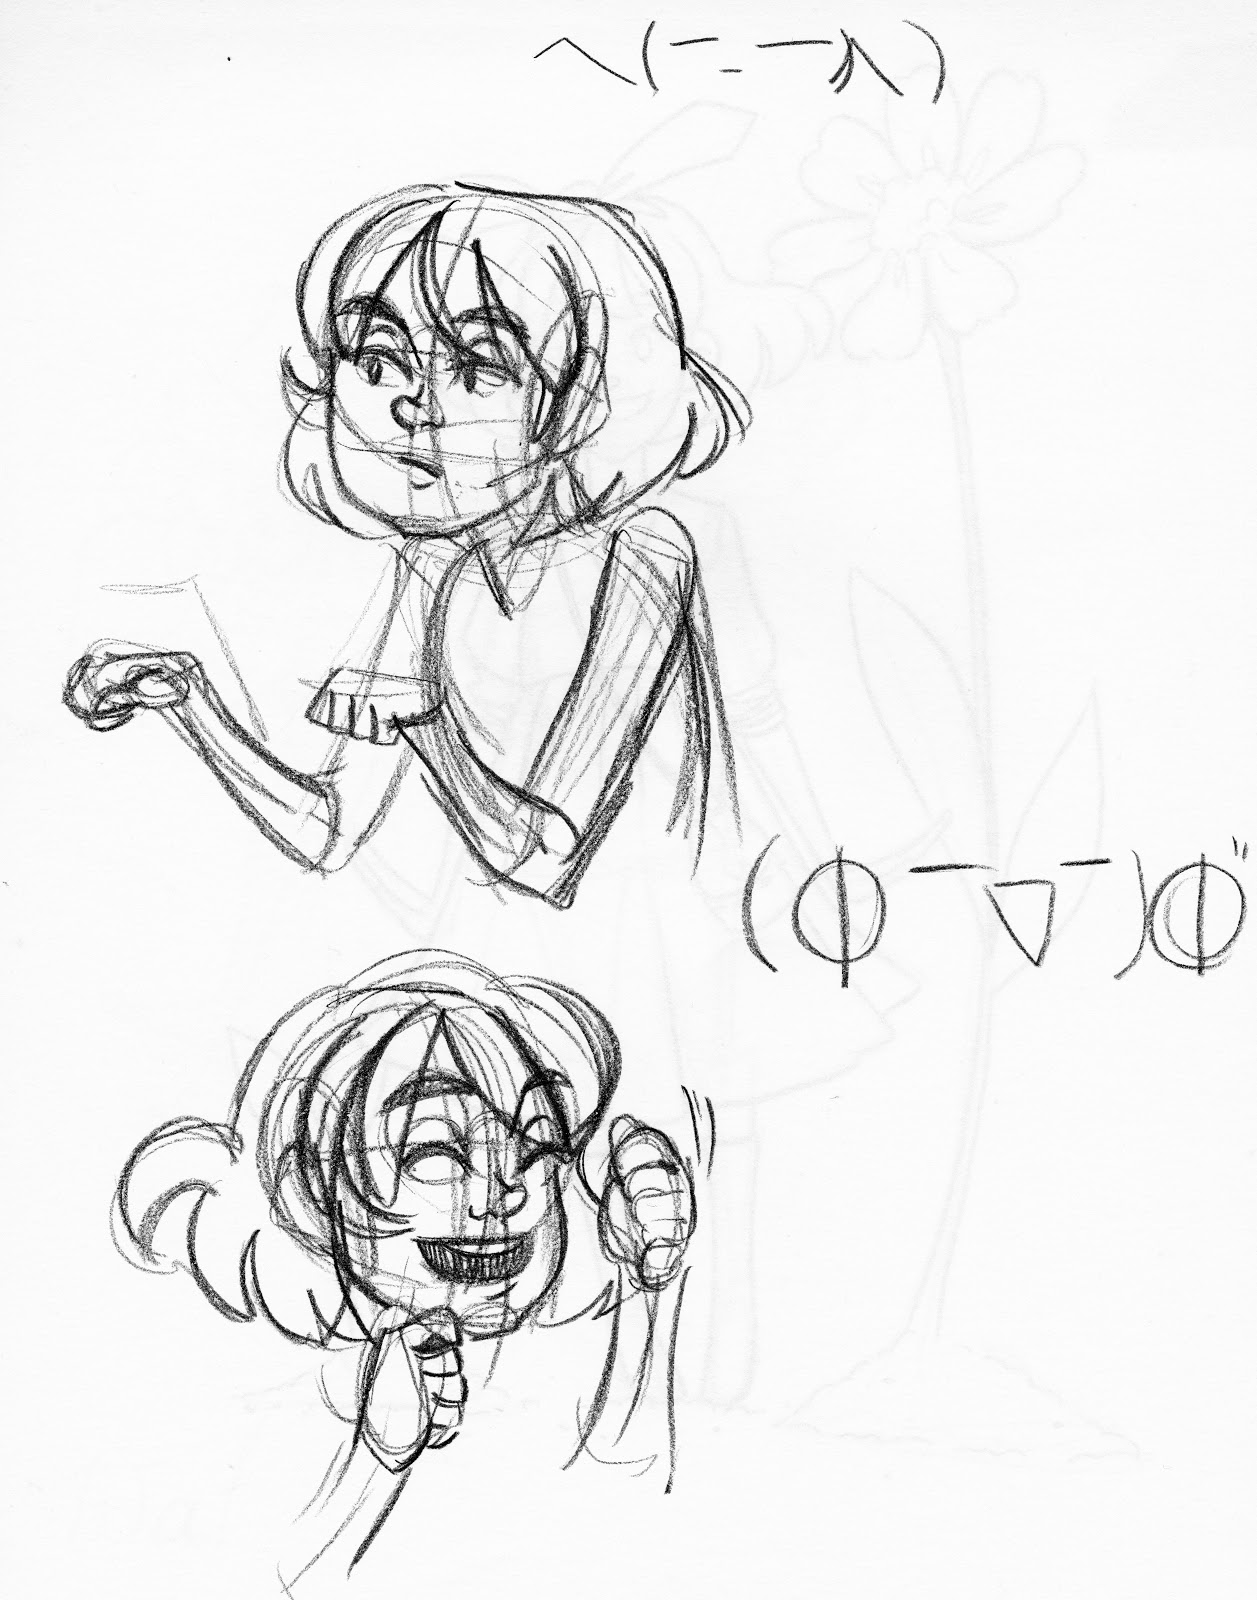
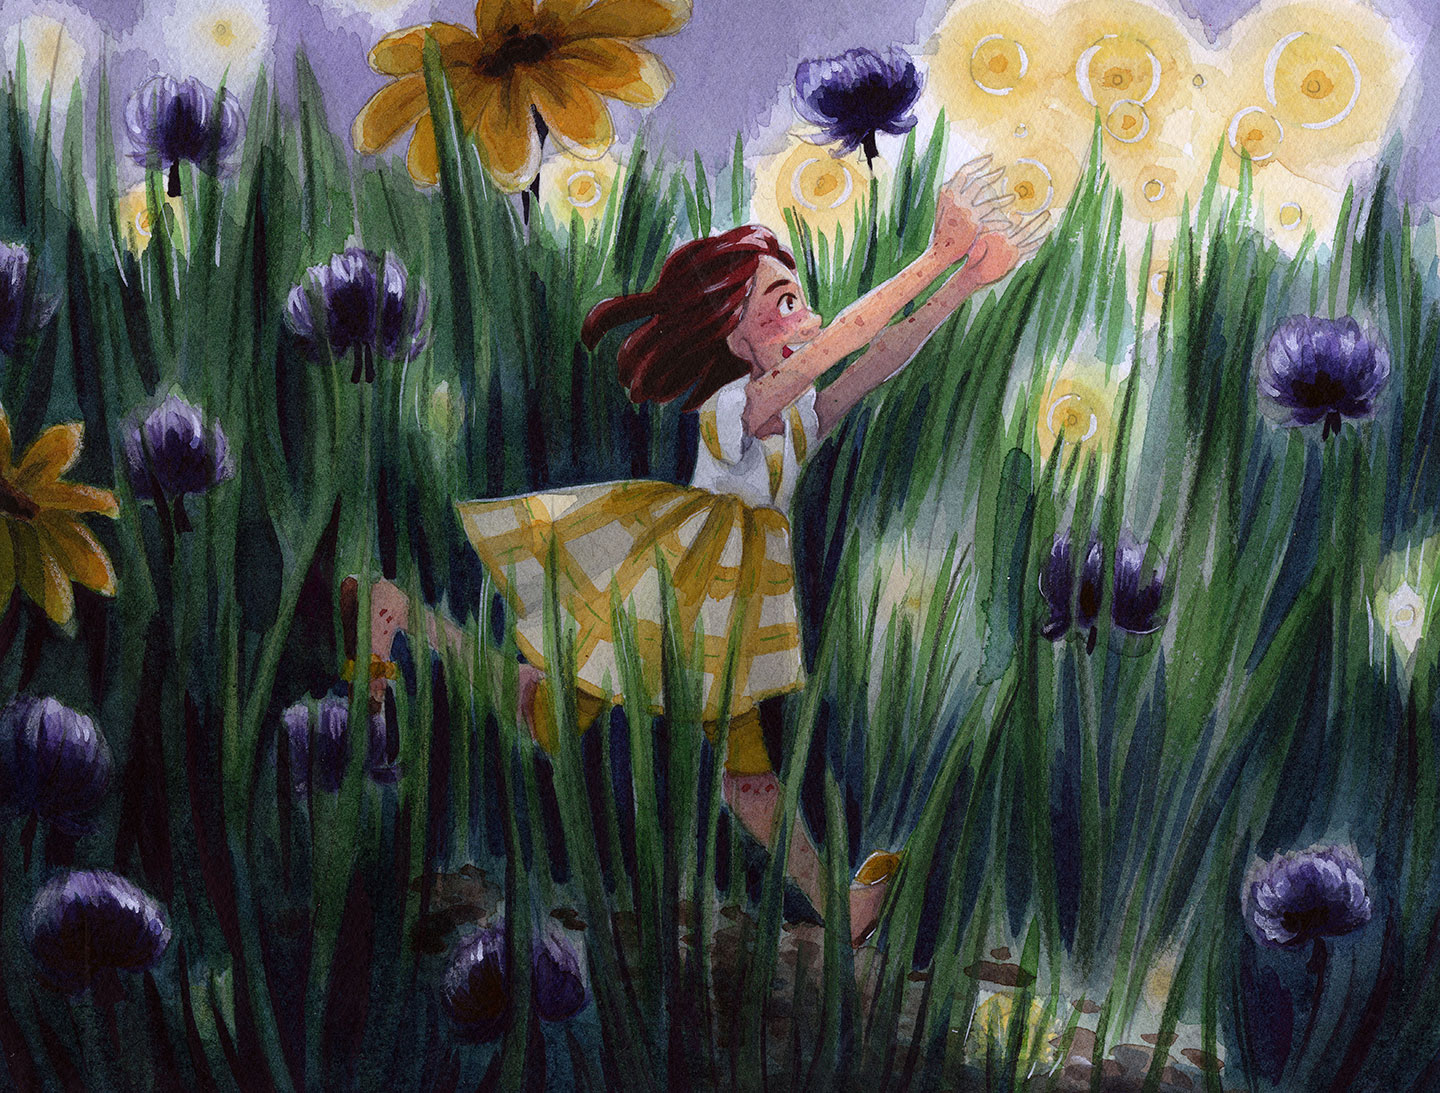
In the above example, the top illustration of Kara shows character acting that only involves expression and the hands. While the expression is readable, it isn't nearly as clear as the bottom illustration, which utilizes the arms and hair, in addition to the face and hands to push the expression.
While body expression focuses on the entire body (or as much body as is shown in the pane), expression focuses mainly on the head- the eyes, ears, nose, mouth, eyebrows, and even hair. Expression can also include neck and shoulders, but I consider those to be more body acting.
We discussed expression and body movement earlier in the Intro to Comic Craft: Step by Step series in the Brainstorming post, so some of these exercises may be familiar to you. These are helpful to keep on hand, because many will work well for your characters, and they're a great reference when you're feeling a bit tapped for ideas.
Check out the Brainstorming post for more character development exercises!
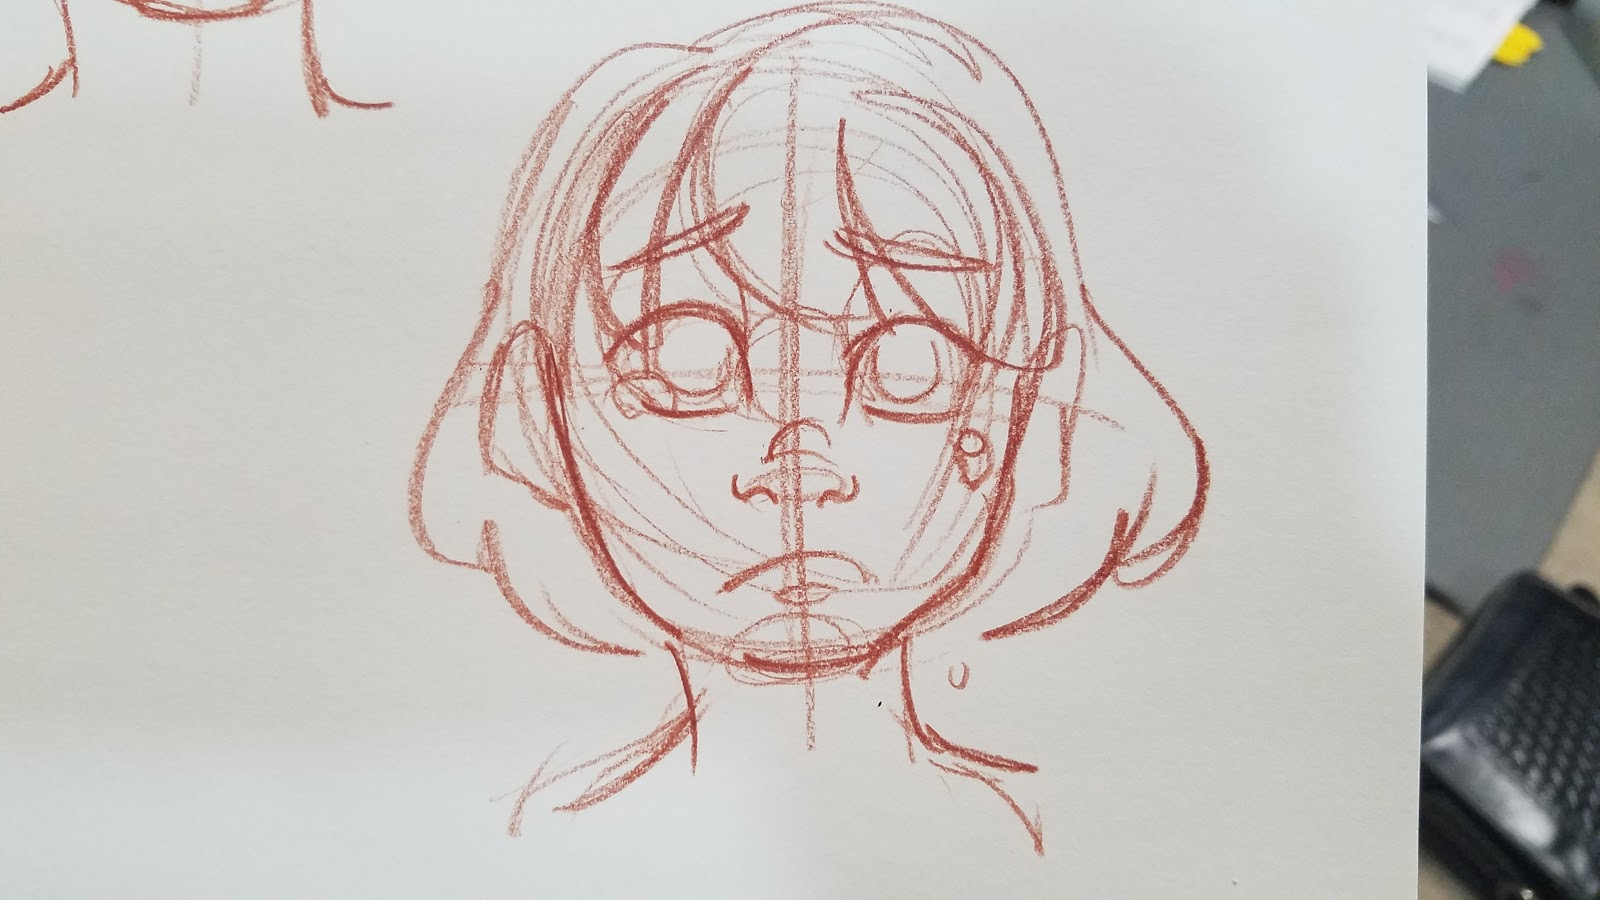
Blank Face Template
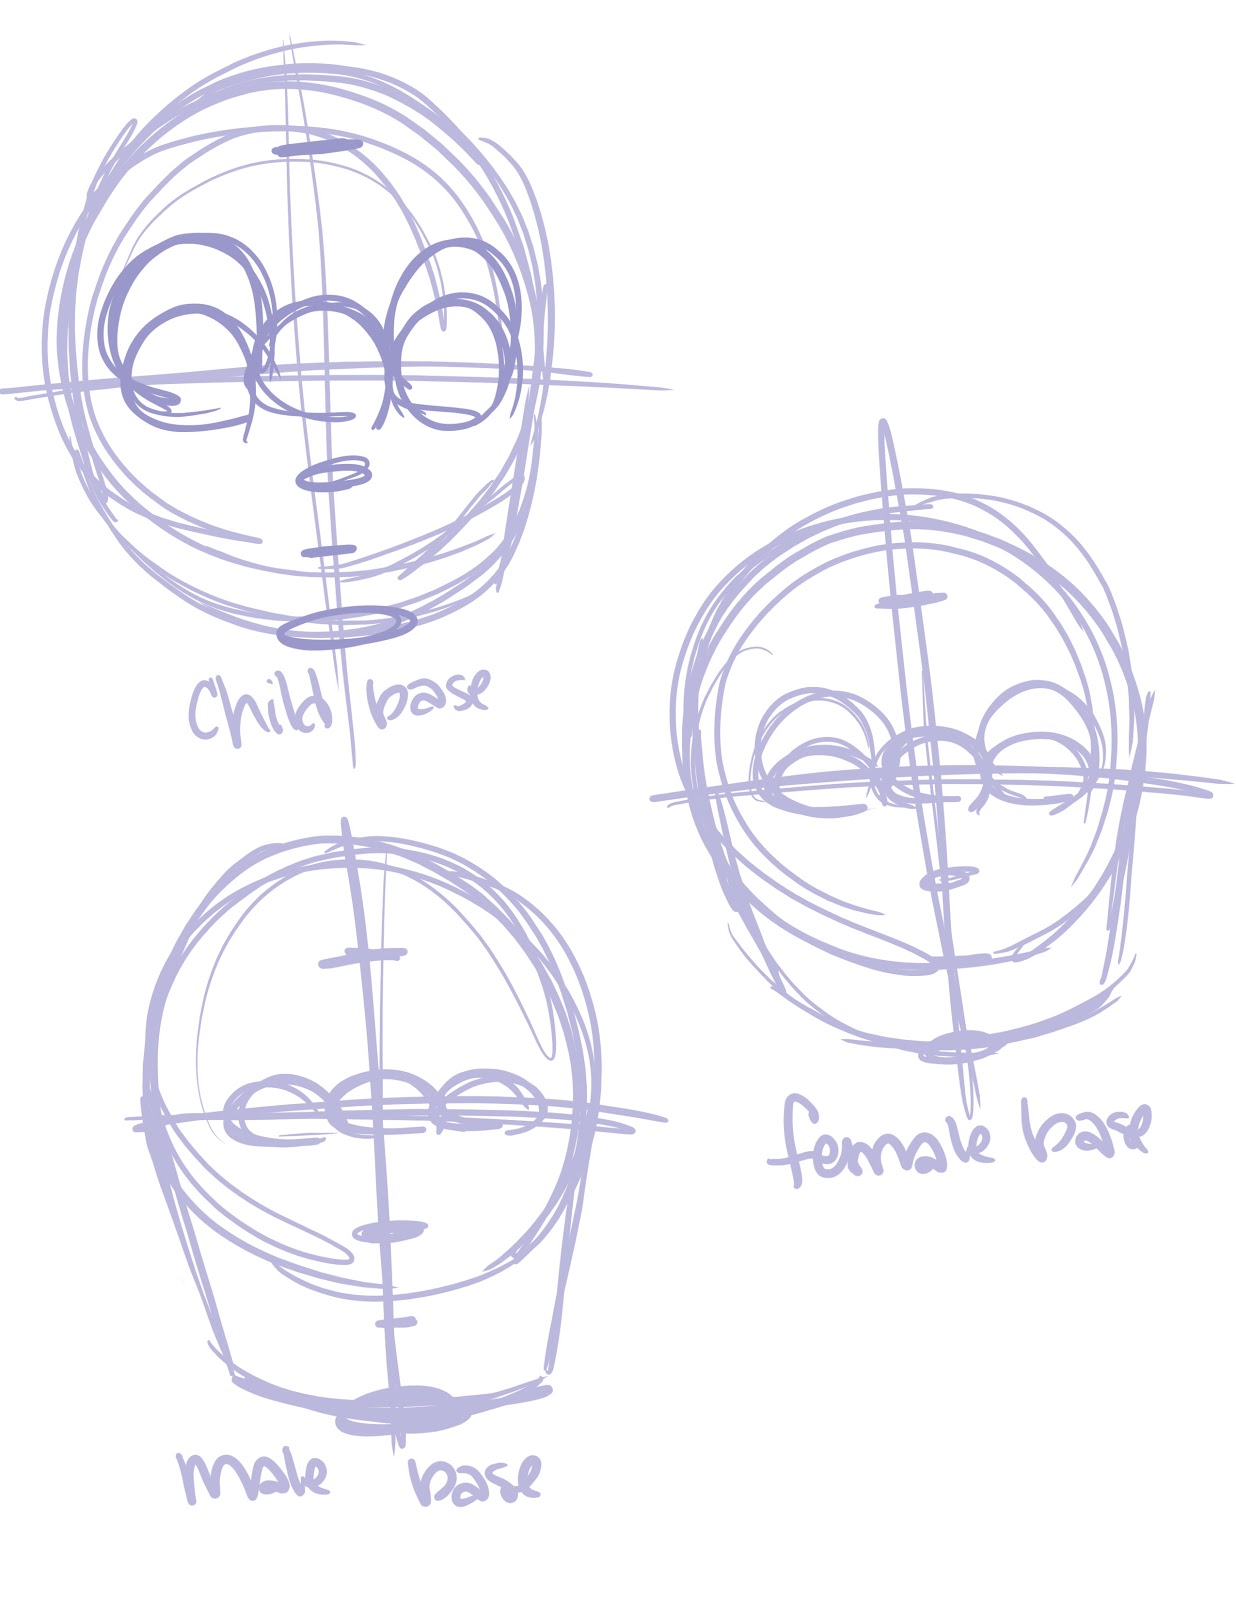
Patrons have access not only to the PSD of this file, but also have access to my Chibi drawing templates, as well as practice sheets for Child, Female, and Male head bases.
Templates like this are a great way to practice drawing facial expressions.
The Basics of Facial Expression
Neutral Face:
Happiness:
Anger:

Scared/Surprised:
Sadness:
Source: Cartoon Fundamentals: Create Emotions from Simple Changes in the Face
Below are a few of my favorite examples from various kaomoji exercises.
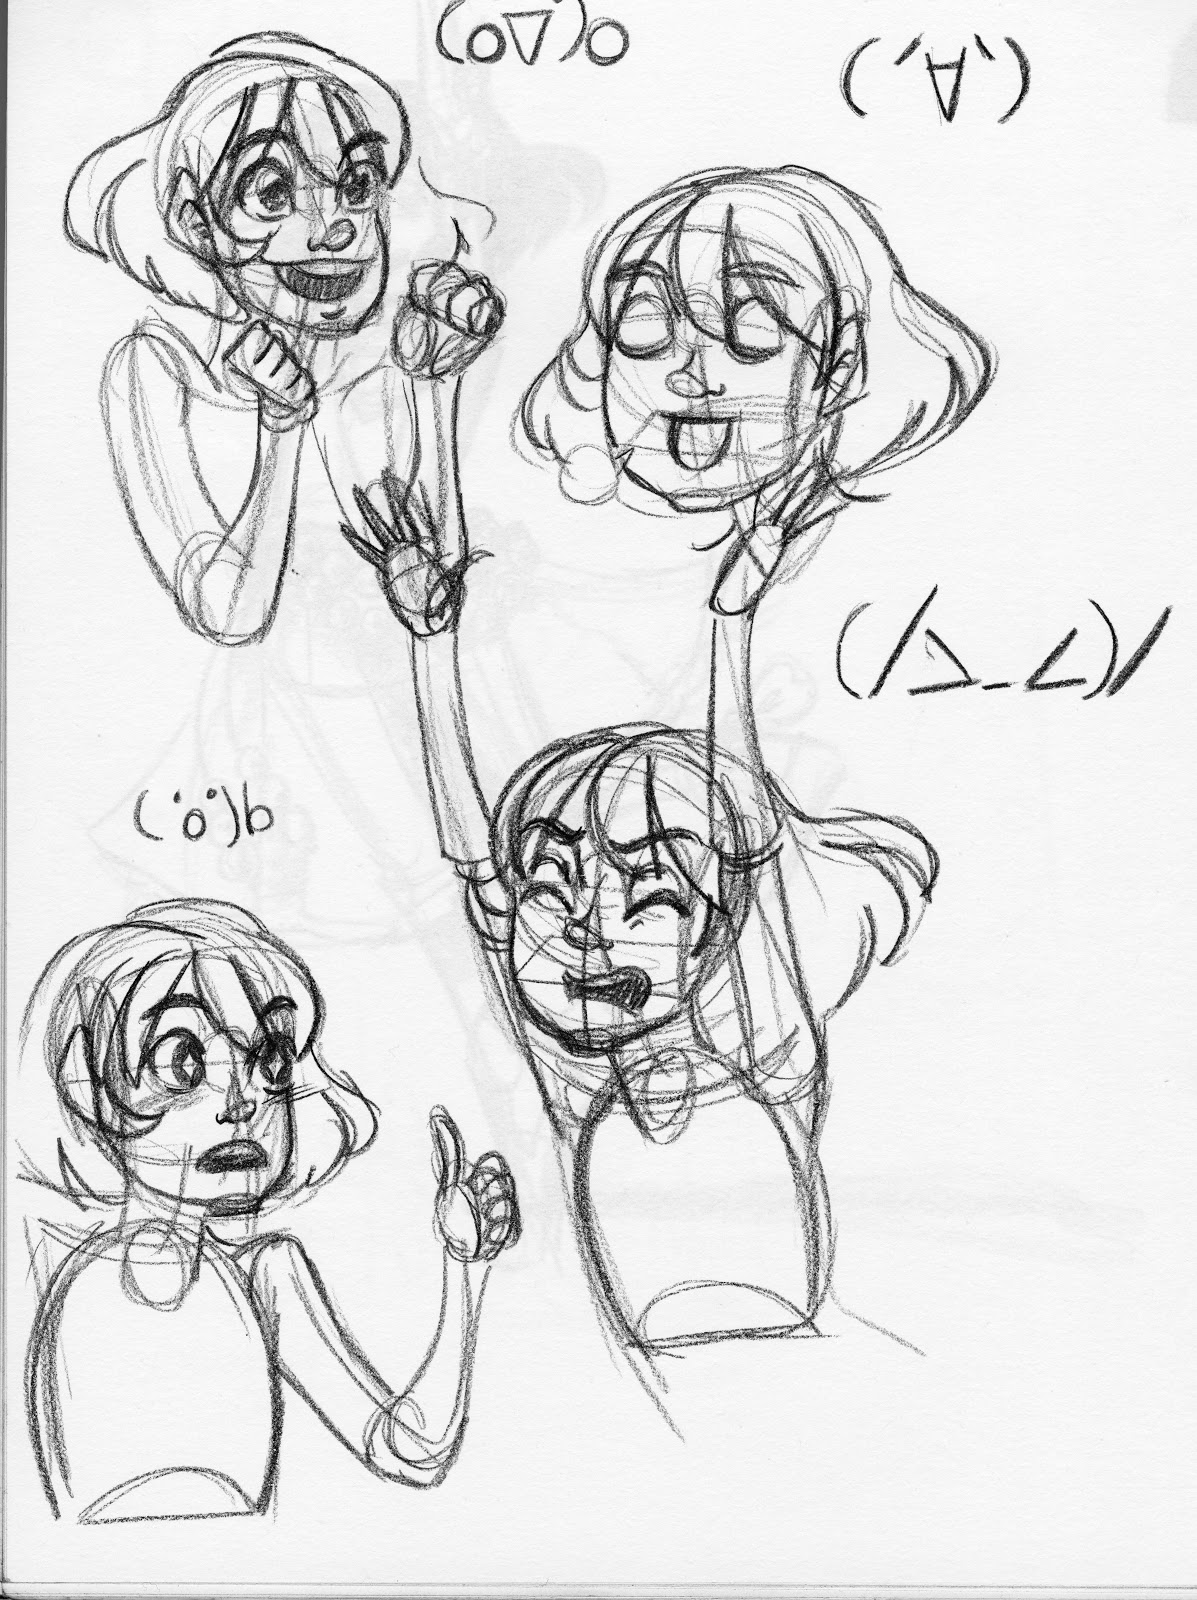

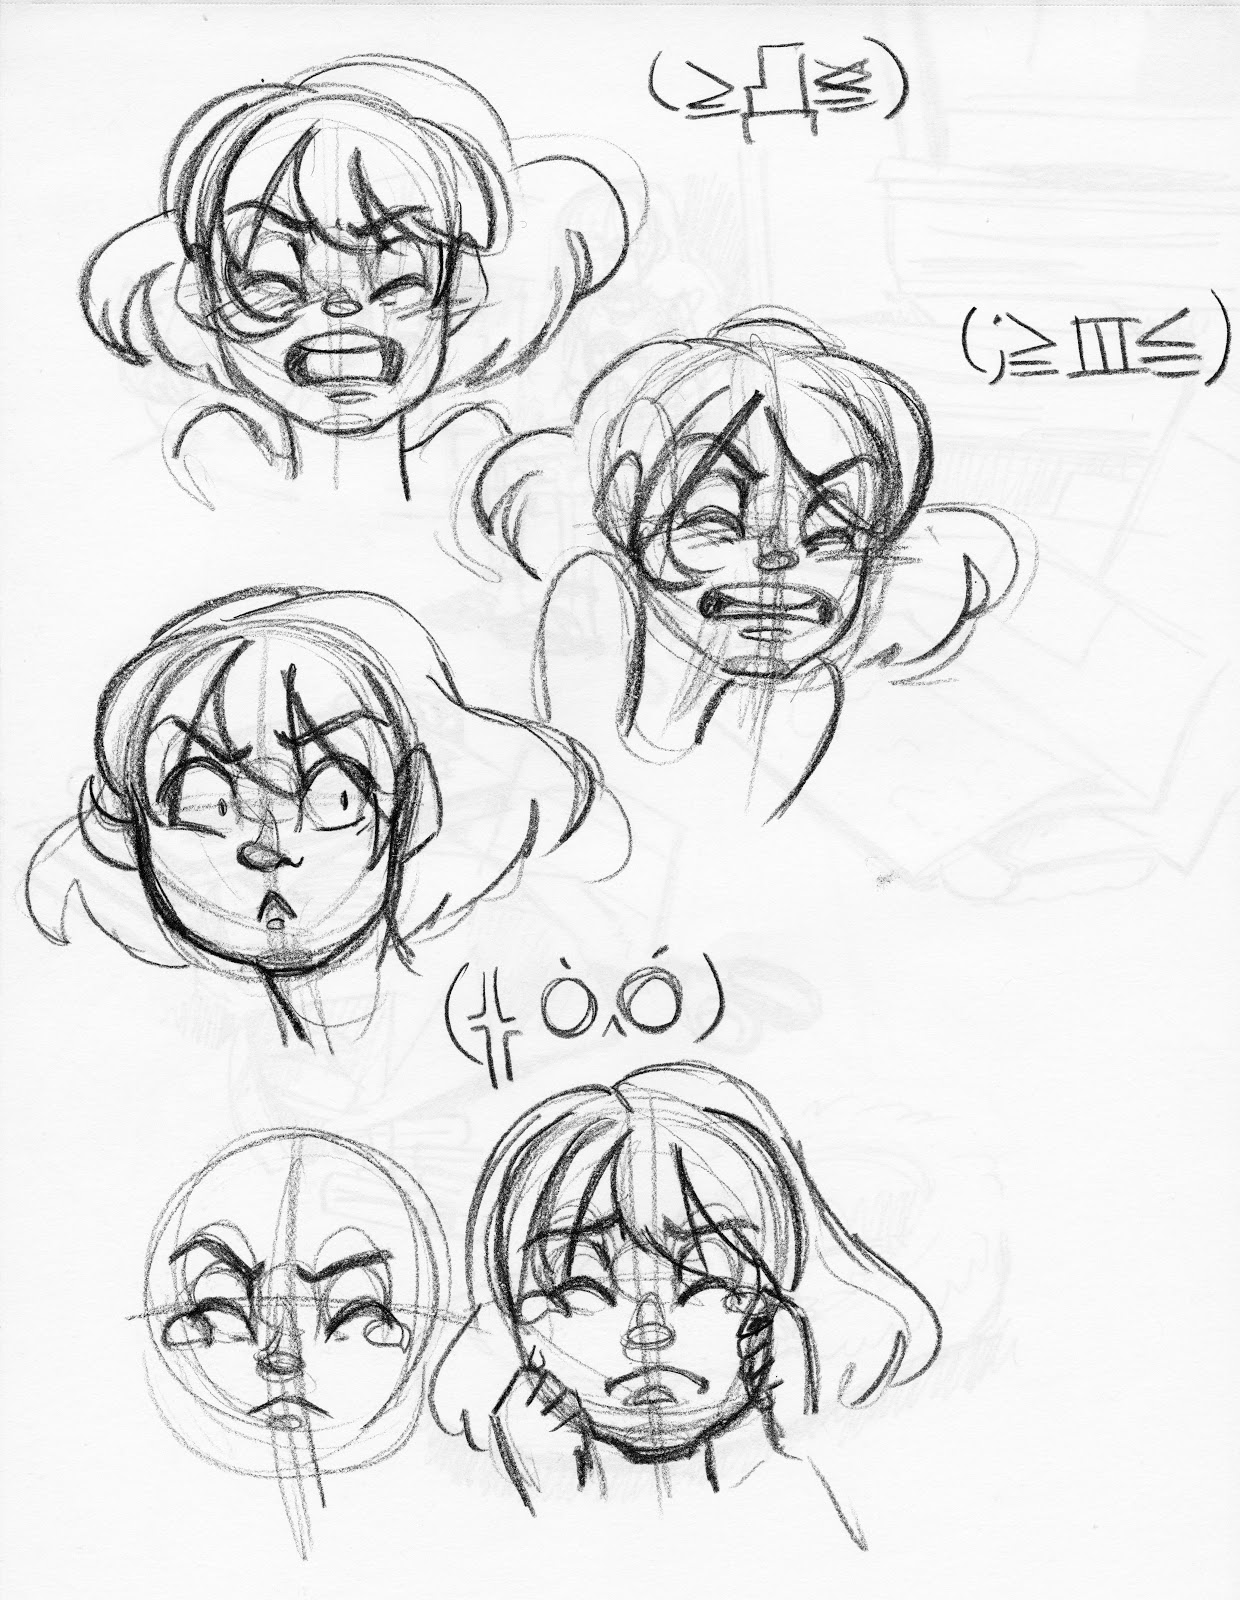


I tried to use a mix of comic shorthand and realistic interpretation in my exercises, to find expressions that felt real, if they didn't necessarily look realistic.
In the Body Language and character acting post, I mention using hands as part of your character acting. As you can see in the expression studies above, I really tried to push hand action whenever possible.
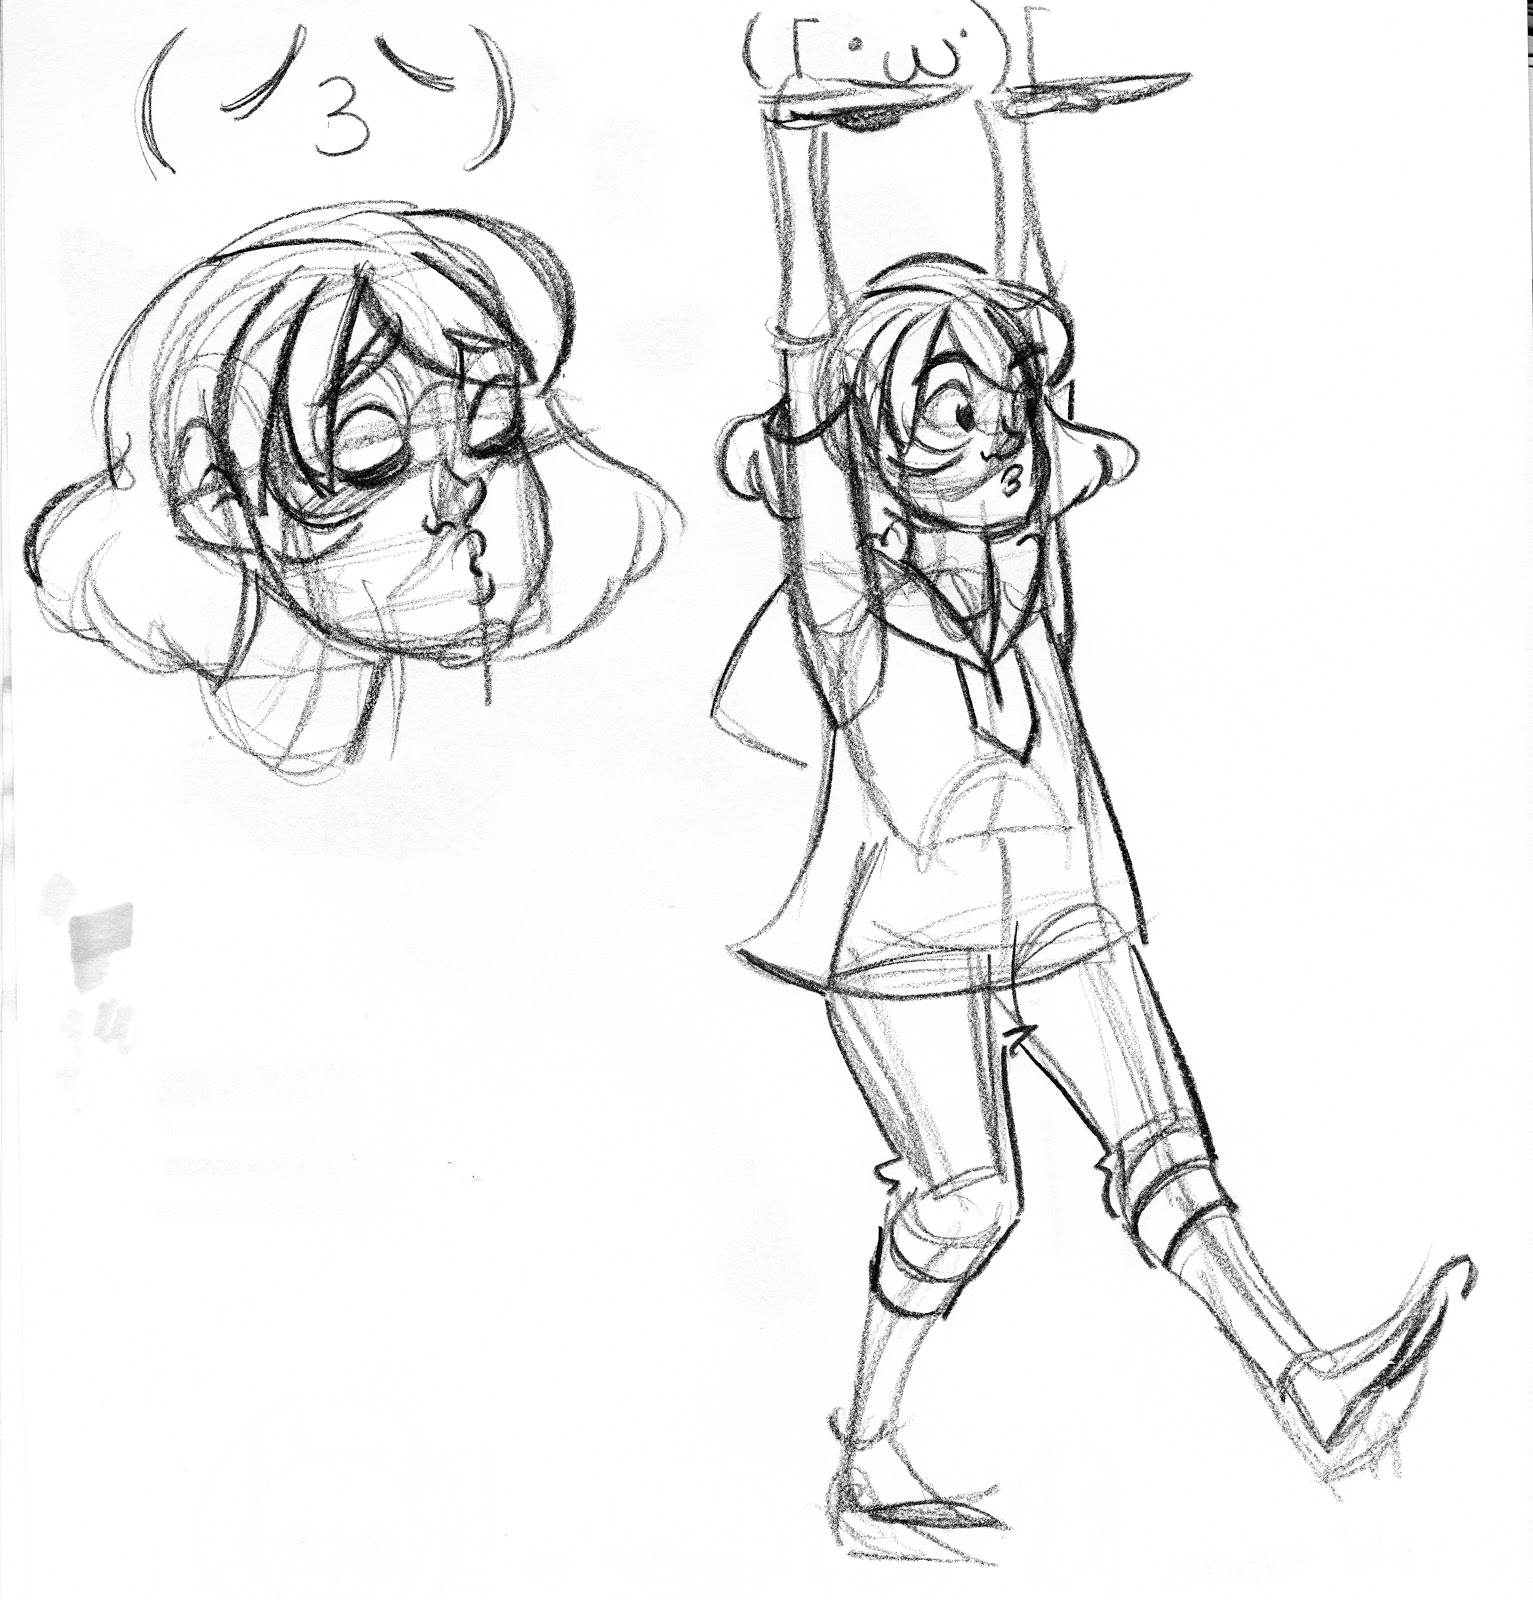
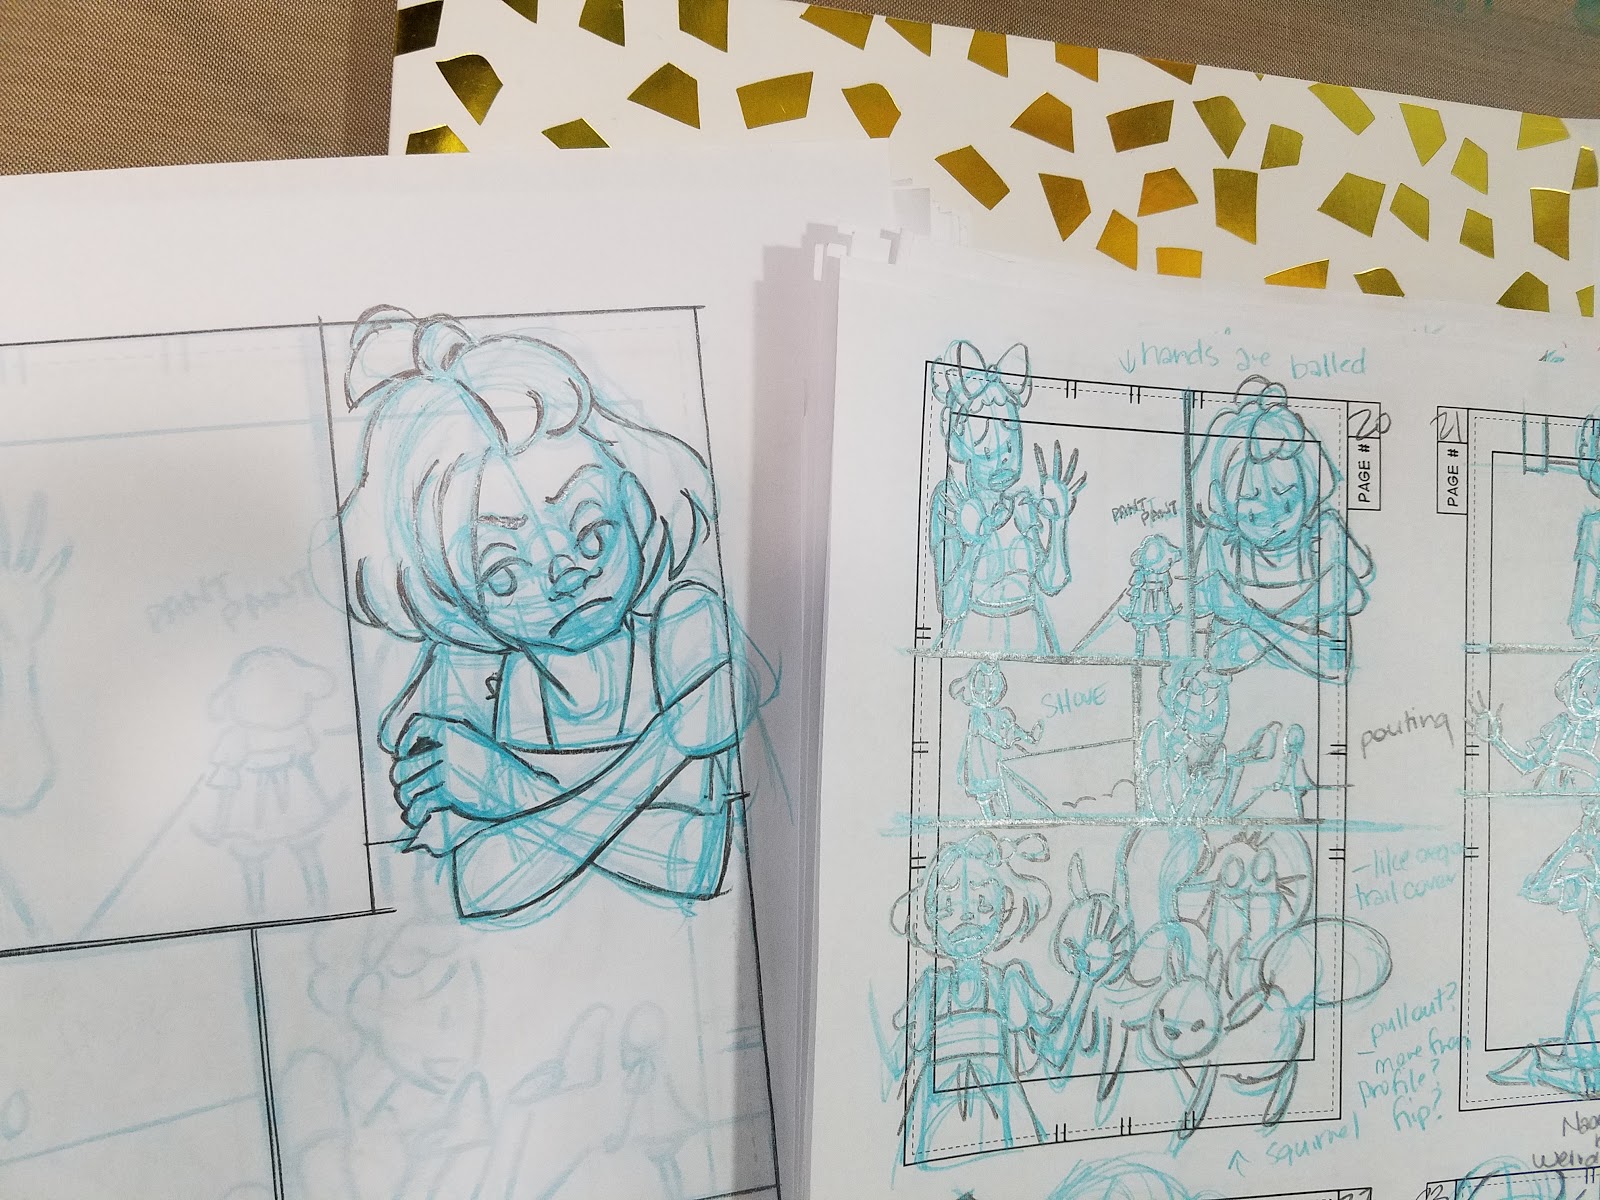
In roughs and thumbnails:


Expression is important for animals, especially in cartoony comics, or comics aimed at kids.
 Whenever reasonable, I try to use over exaggerated expressions for humor, as in this shot of Kara daydreaming about sweets from Chapter 7.
Since 7" Kara is aimed at kids, I wanted to make sure expression and body language were clear enough that a non-reader could follow the main beats of the story, even if they didn't understand the finer details.

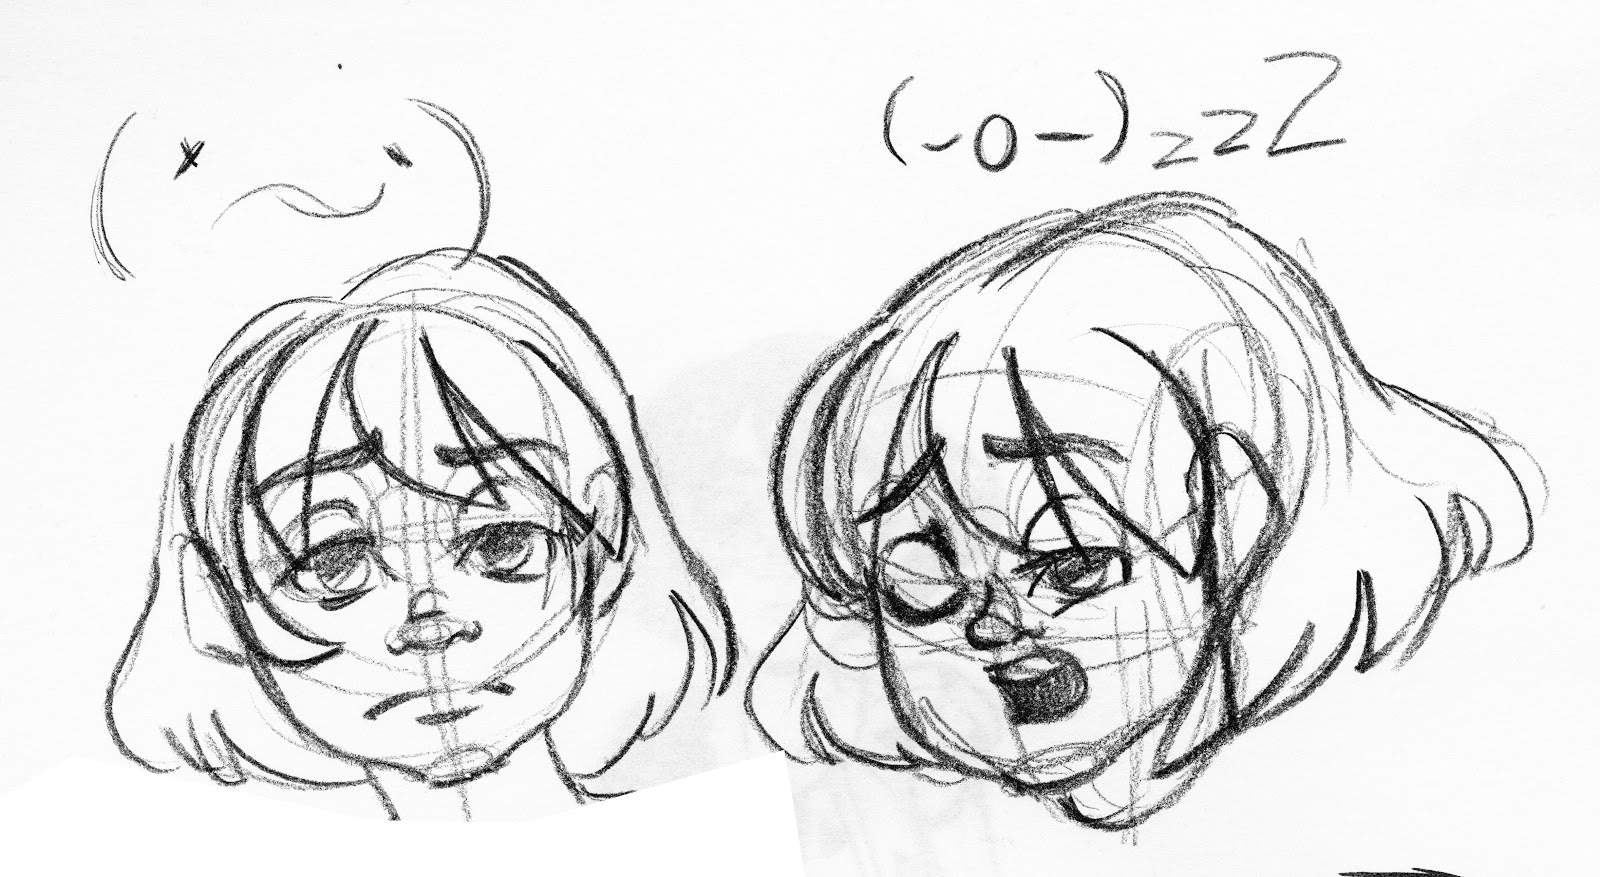
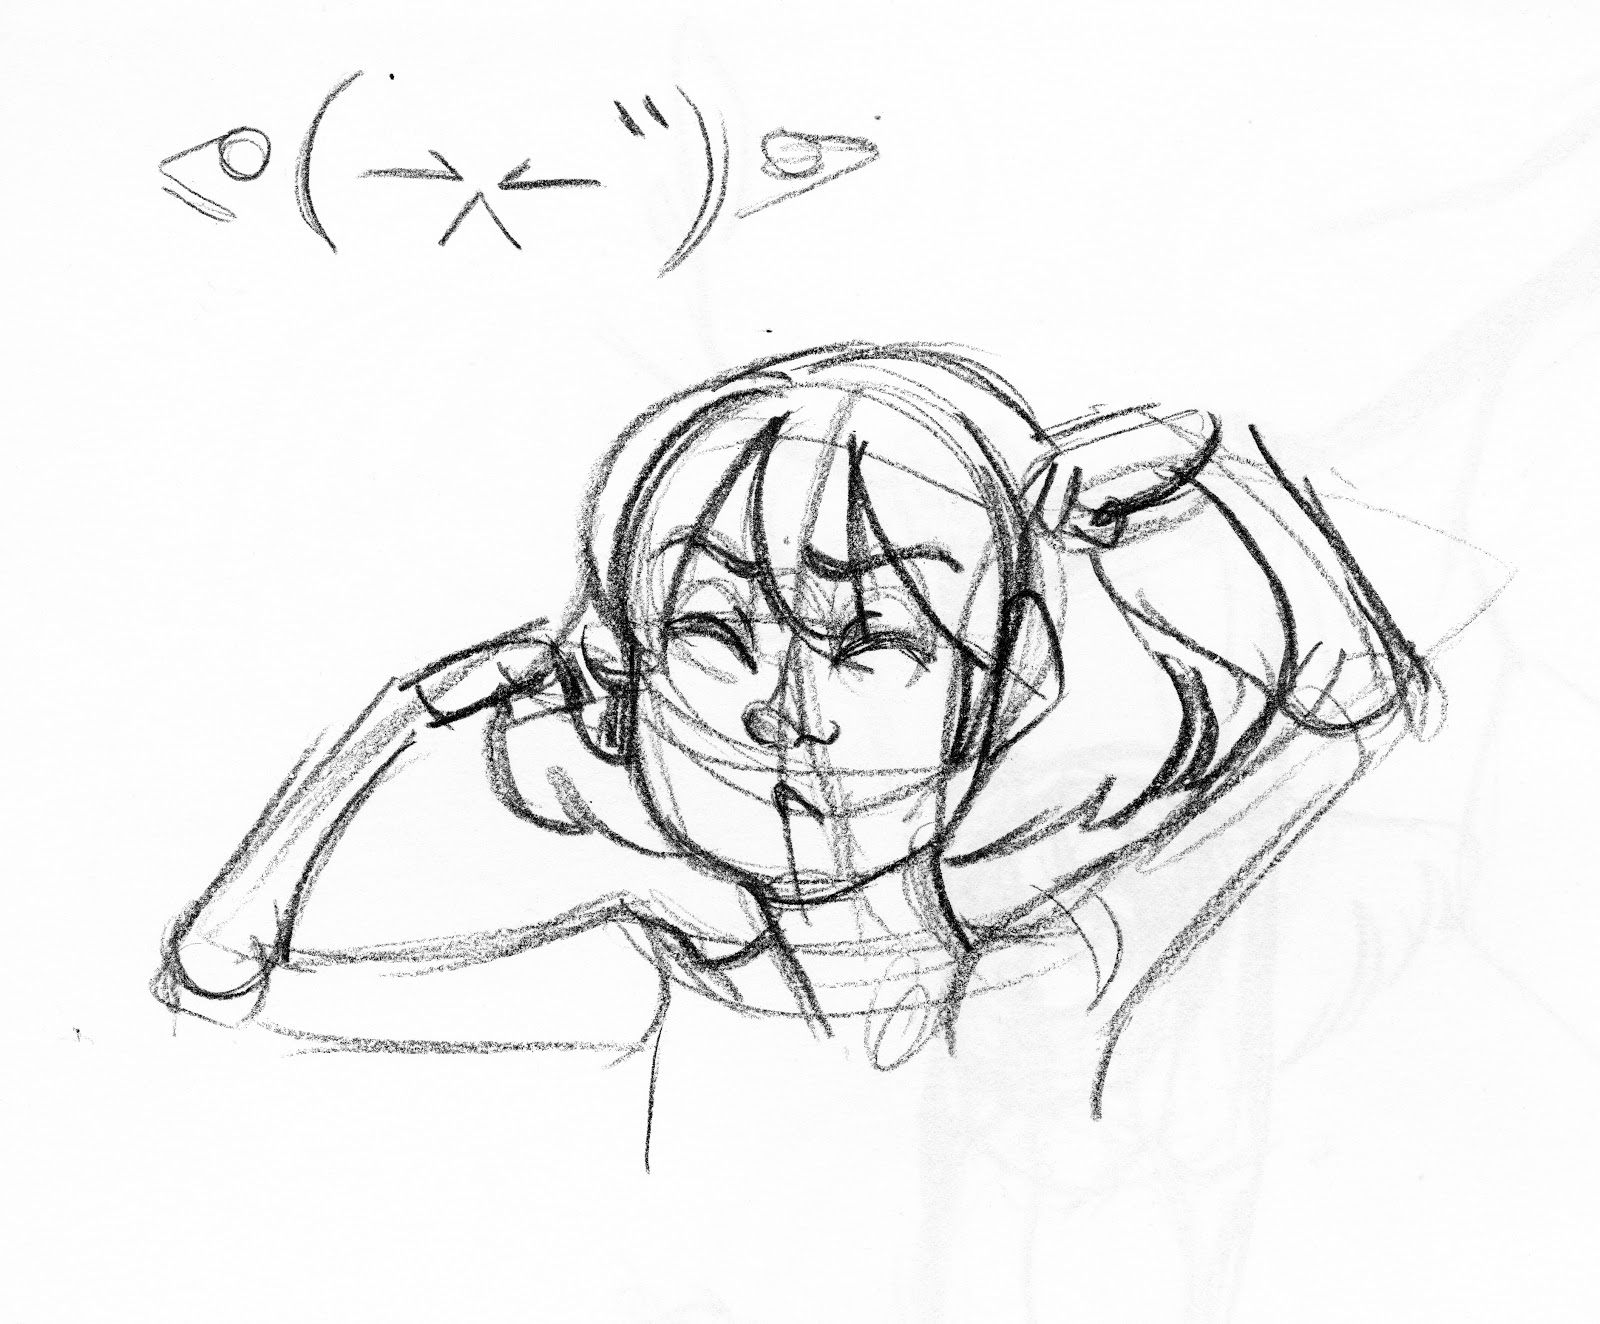
Expression and Emotion on Simplified Characters
Even with simplified features, expression can be clearly conveyed. It may be necessary to push the expression further, but this can be a fun exercise as well.
These little watercolor expressions were inspired by Line-Tool emoji stickers, and were a fun exercise.

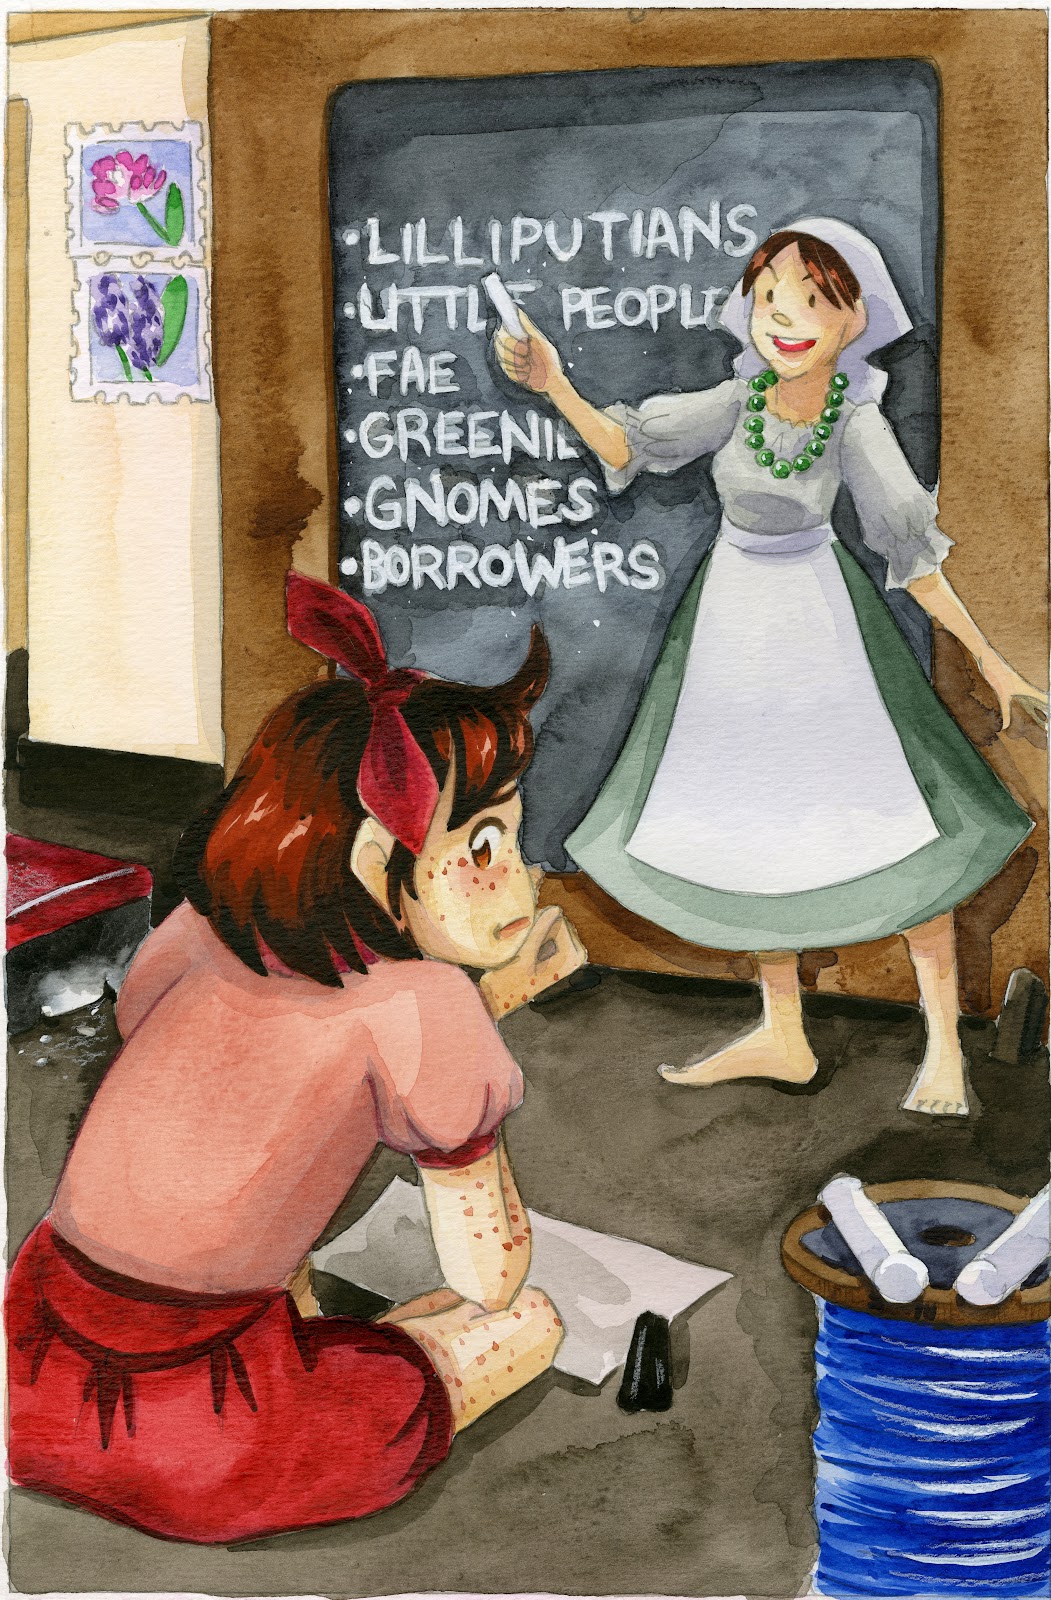
Expression Demonstrated in Finished 7" Kara Pages


Outside Resources:
Chris Oatley- The Secret to Drawing Characters Consistently and ExpressivelyDani Draws- 50 Facial Expressions and How to Draw ThemCartoon Fundamentals: Create Emotions from Simple Changes in the Face
Love sequential art? Want to make comics, animation, or children's books? Interested in pursuing your art education? Check out the NATTO scholarship!

Please consider donating to this blog or purchasing from Natto-shop (http://nattosoup.com/shop) if you want me to continue publishing quality content. All materials tested were purchased from my own pocket. Keep on Truckin' Nattosoup is not under any sponsorship.


June 2, 2017
New Service! Convention Consultation
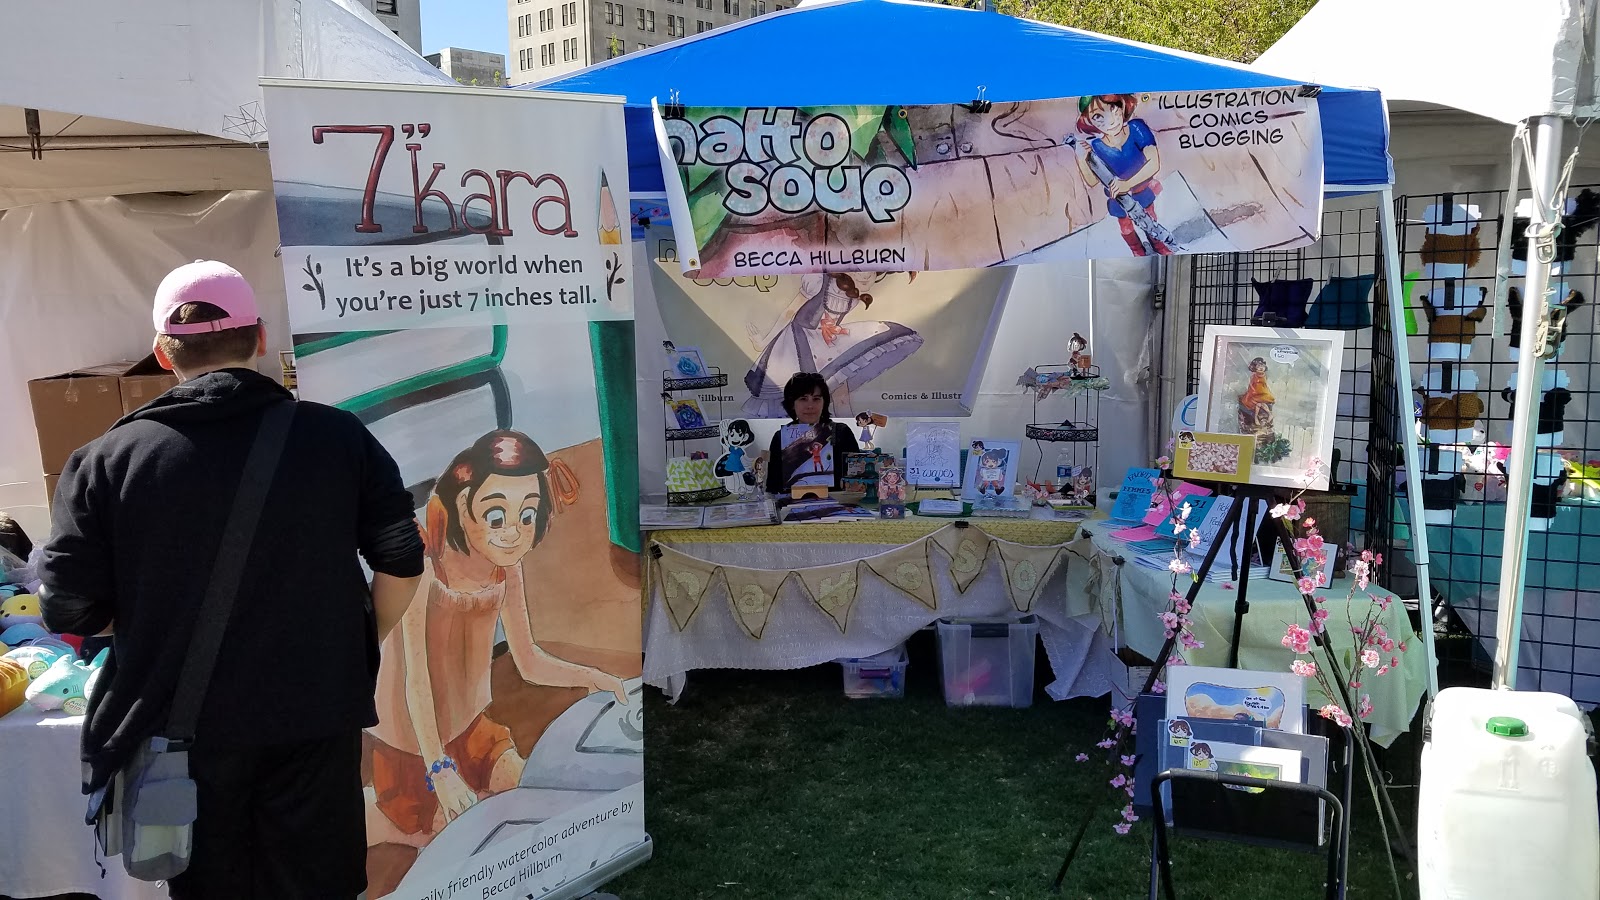
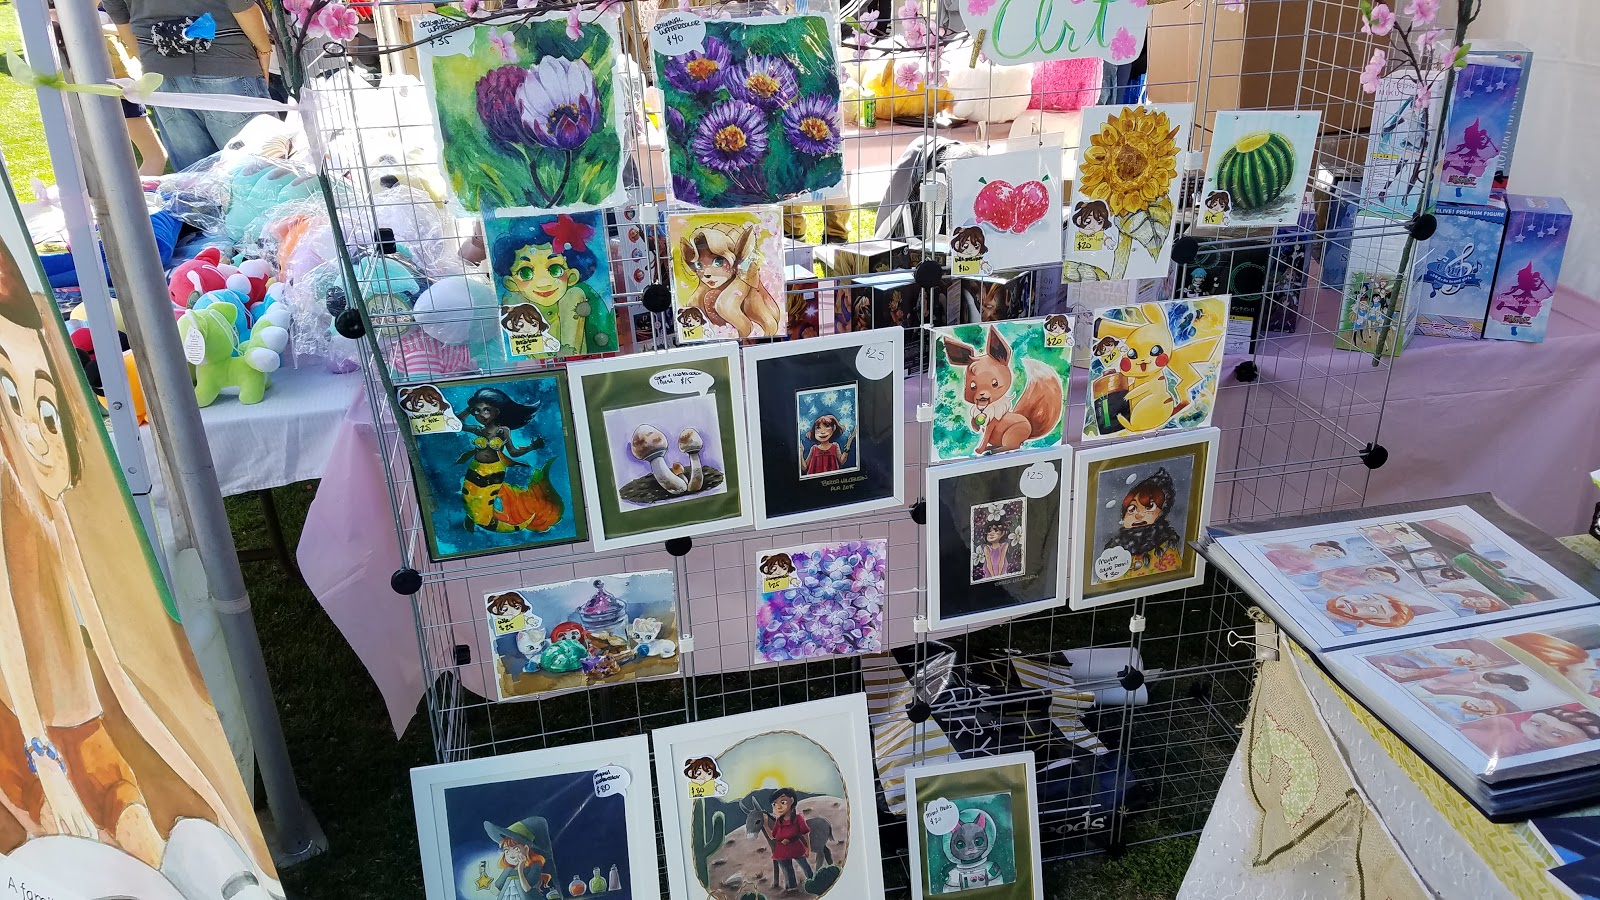
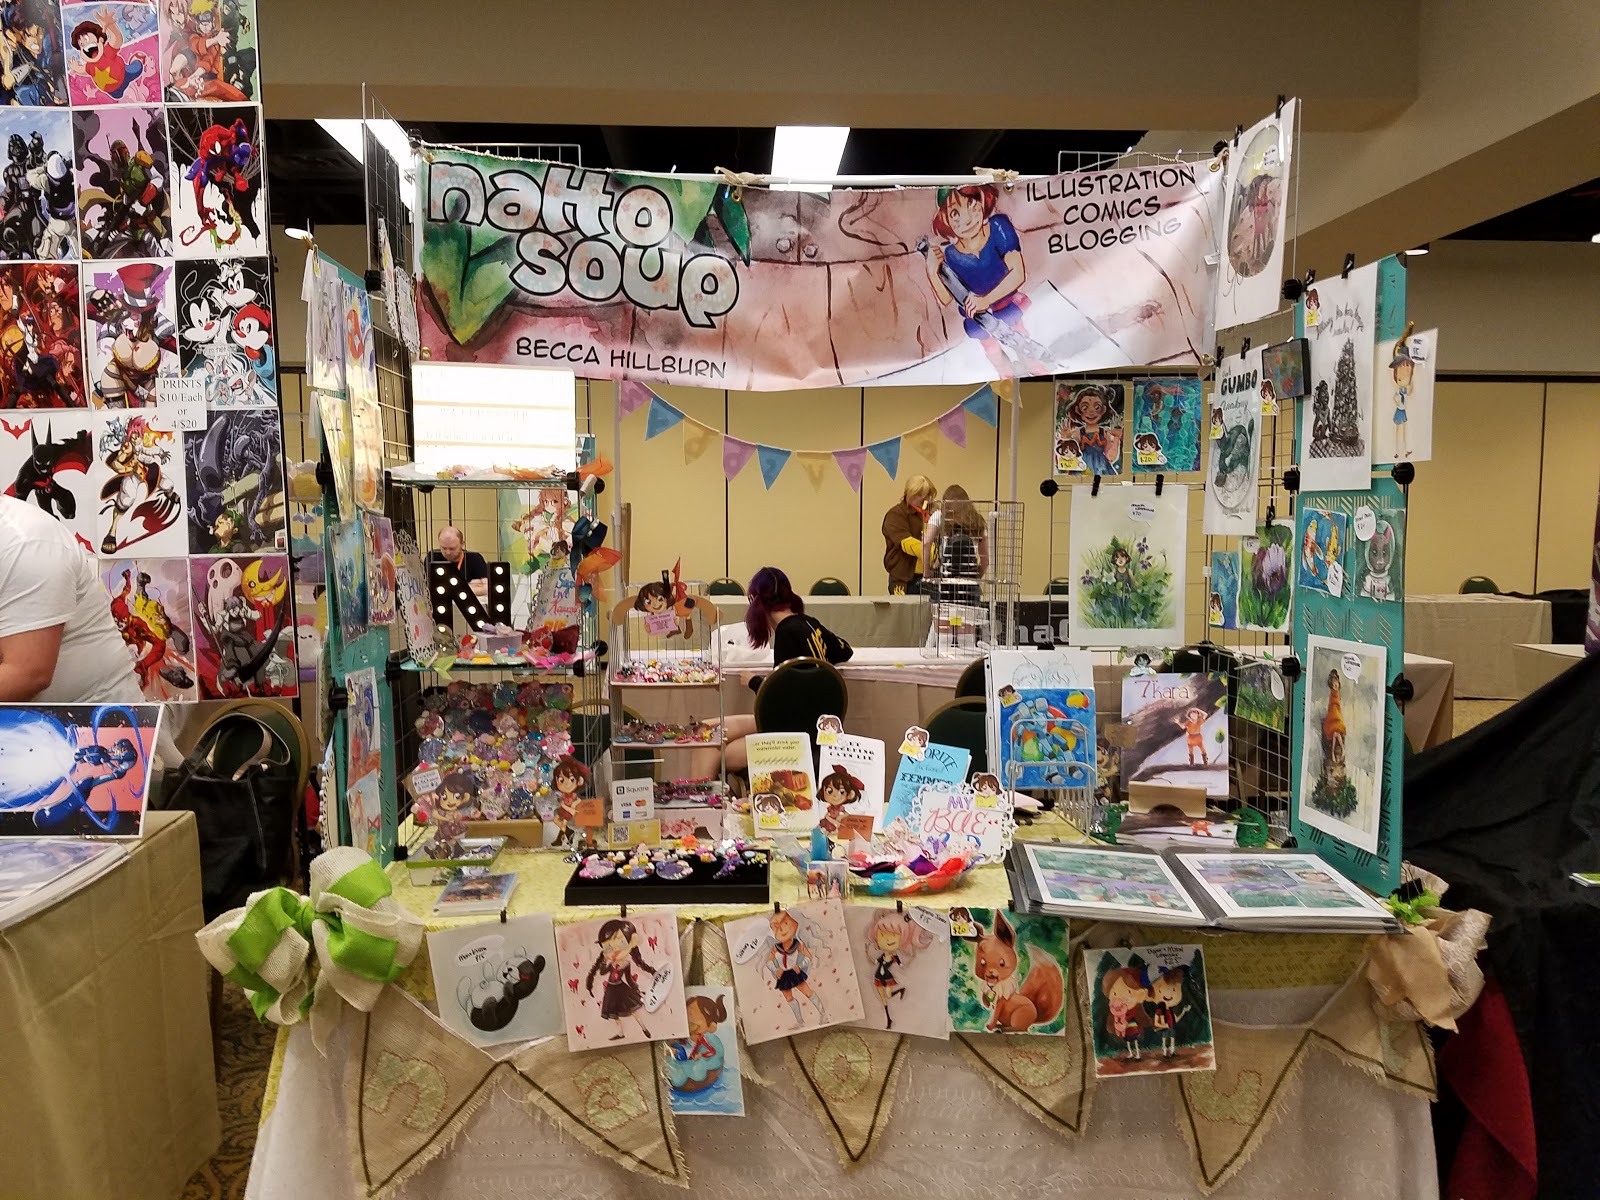
 MTAC 2017Ready to start tabling at conventions? Or maybe you'd like to up your game! Let me use my 7 years of convention experience+4 years of experience co-running How To Be A Con Artist to help you get your table top-notch, help you design stellar, crowd pleasing merchandise, and help cast a whole new light on your art and comics.
My convention consultation tier is just $50, and will include personalized recommendations and advice on everything from table design to banner production to merchandise recommendations catered to your needs. We can meet in person (Nashville area only), or via Skype/Google Hangout (video consultation) or through Discord (images/chat/voice) to help you prep for your first convention, or to help you up your game. My advice will set you on the path towards continued growth as you progress through your convention year.
 Cherry Blossom Fest 2016
This tier includes:
Customized recommendations (and links!) to table display solutions to promote your art One on one help putting together a convention portfolio for juried showsMerchandise advice, and solutions as to where to get it made for a fair priceConsultation in person (Nashville area only), via Skype, Google Hangouts, or Discord- whatever you're most comfortable withCustom links to help you get your display and merchandise at the right priceCustom branding recommendations to help your products stand out in the crowdCustomized advice on promotion and advertising that is affordable and really works!Access to everything other backers receive including comics, art assets, early access videos, and backer only contentCustomized recommendations on which conventions may be a great fit for your work without breaking the bank
 Mechacon 2016
My Credentials:
Several very popular panels co hosted with convention artist Heidi Black at SCAD (Spring 2012), AWA (Fall 2012), Mechacon (Summer 2014), and MTAC (Spring 2015)Co founder of How To Be a Con Artist , one of the two remaining moderators who consistently answers questions (4 years running)Founder of Nattosoup Studio Art and Process Blog , where How To Be a Con Artist started (8 years running)Won best table design with Heidi Black at APE 20168+ conventions (anime, gaming, general interests, comics, anthro) per year for 7 years runningInterviewed over 100 convention artists, available on our Youtube channel3 years of experience selling and marketing a self published, perfect bound kid lit graphic novel (7" Kara)My convention portfolio is a jury and curated con pleaser, gaining me access to MTAC, AWA (when it was juried), TCAF, and more!Experience with a wide variety of events including craft shows, anime cons, general interest geek cons, and indie comic showsMake the $50 investment in your convention education back quickly- my strategies are time tested and will help you increase your profits while improving your convention presence!
If you have any general questions about this tier, don't hesistate to email me. For a taste of my work, please visit How to be a Con Artist, watch my convention recaps, or check out my convention recaps at Nattosoup Studio Art and Process Blog
Love sequential art? Interested in pursuing your art education? Check out the NATTO scholarship!
Please consider donating to this blog or purchasing from Natto-shop (http://nattosoup.com/shop) if you want me to continue publishing quality content. All materials tested were purchased from my own pocket. Keep on Truckin' Nattosoup is not under any sponsorship.

May 31, 2017
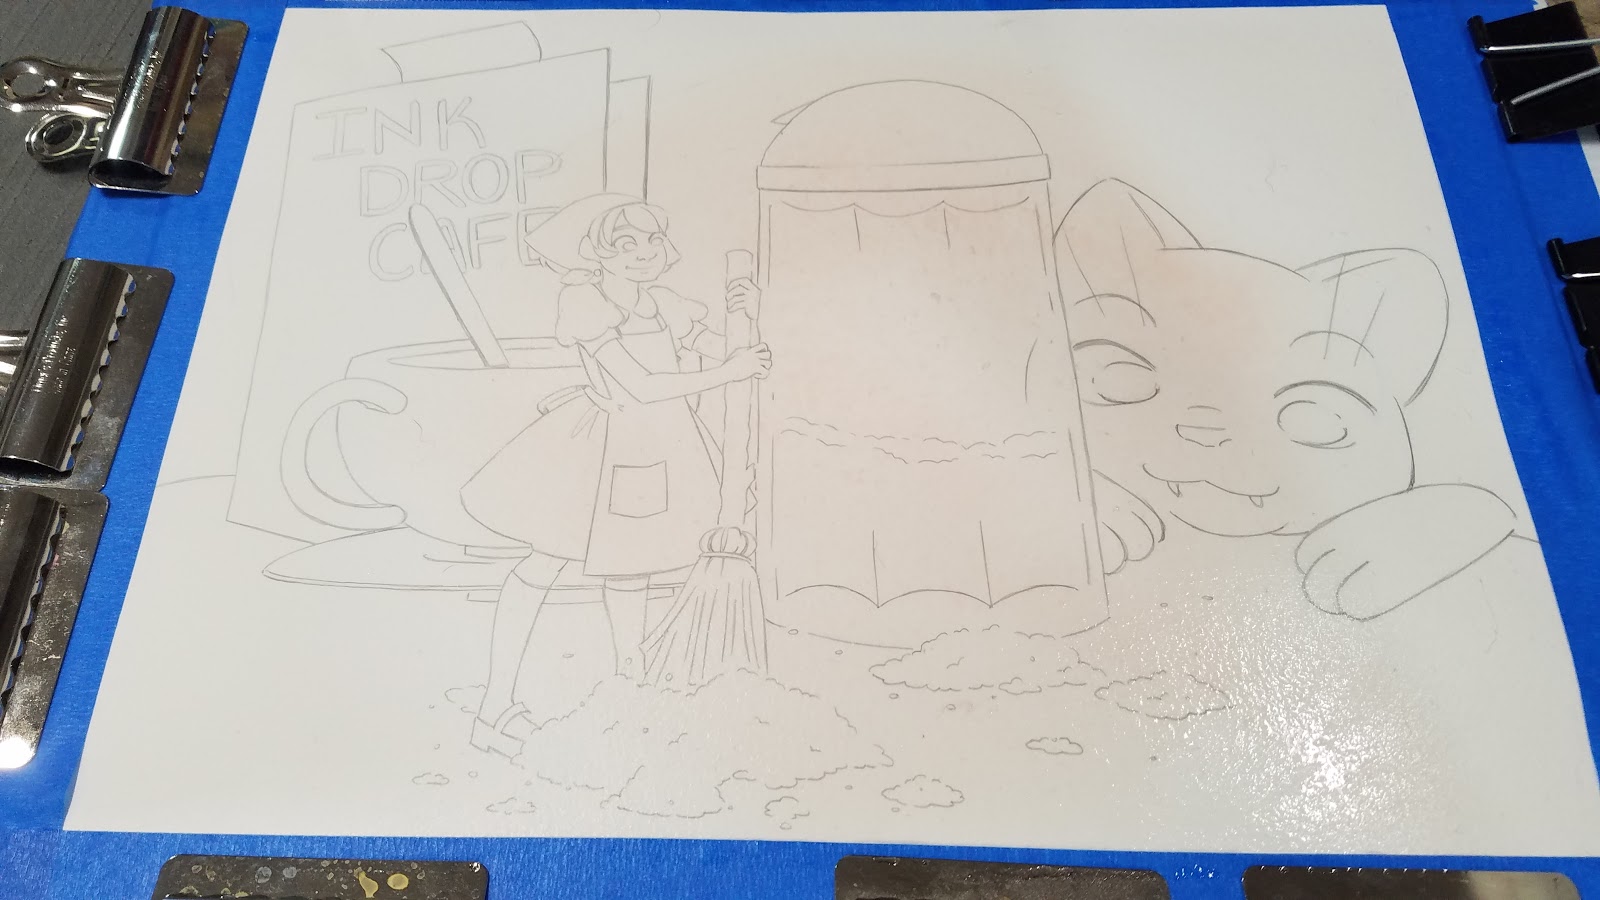
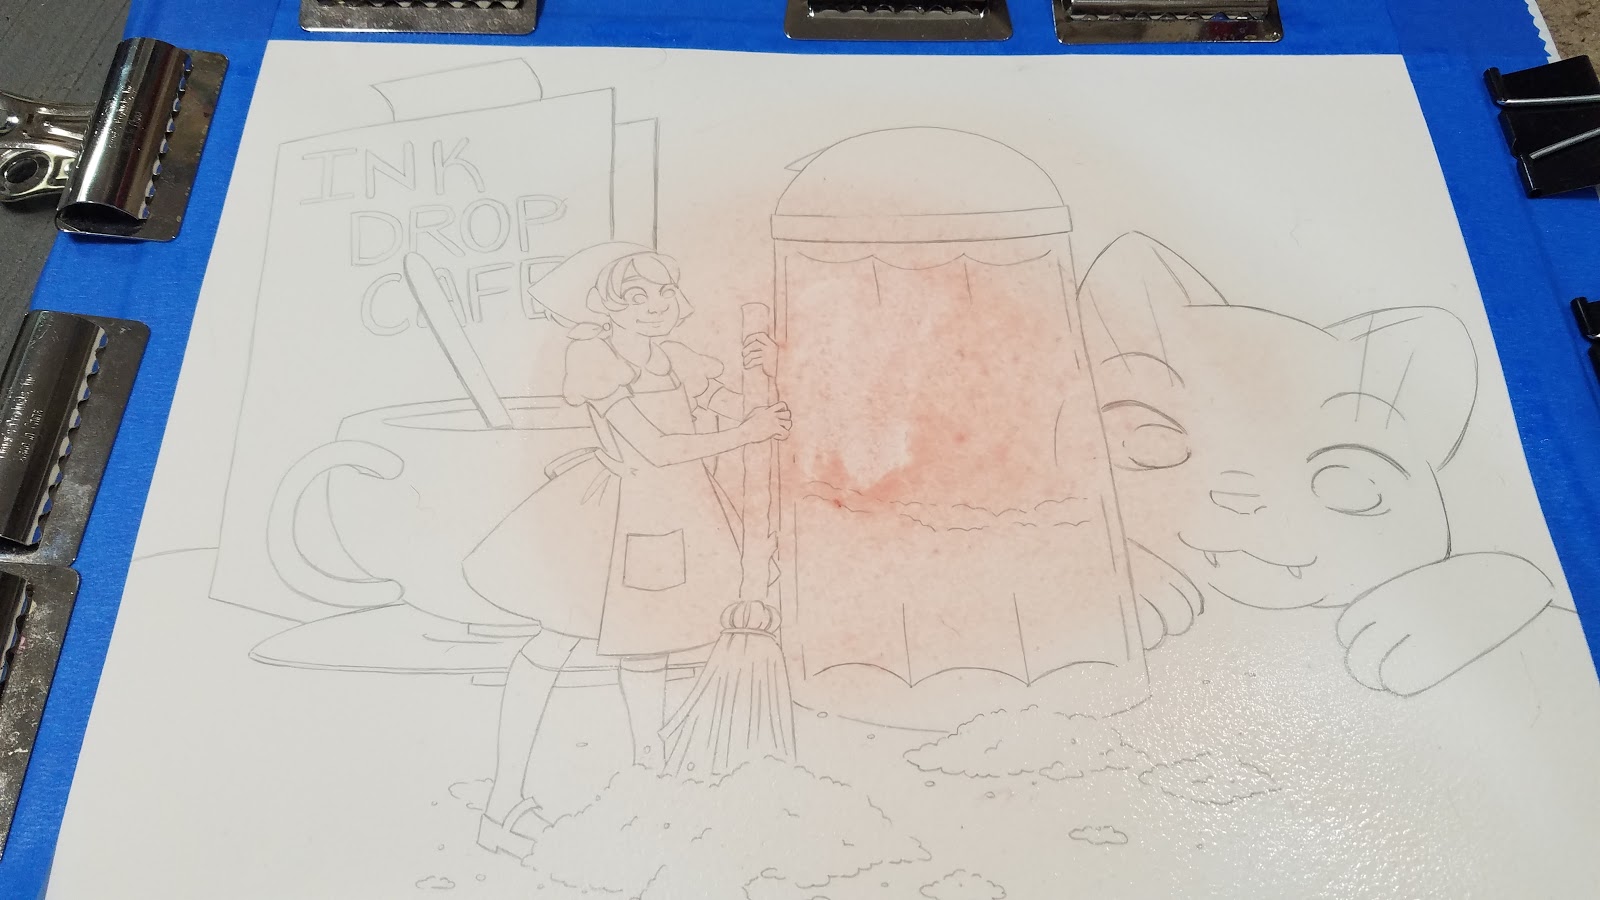
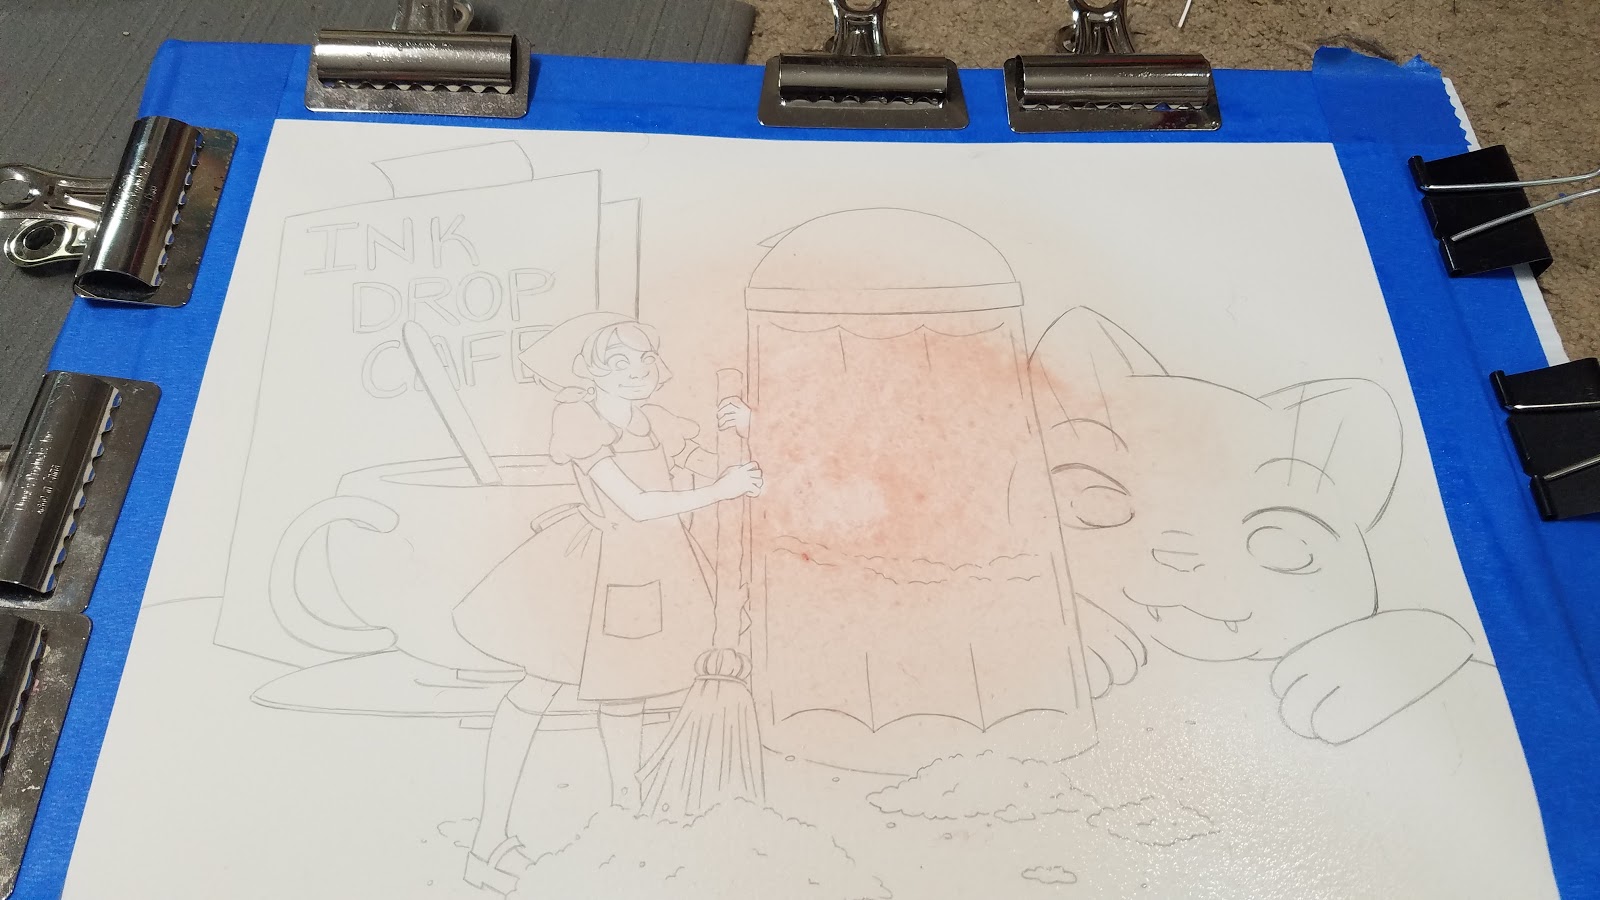
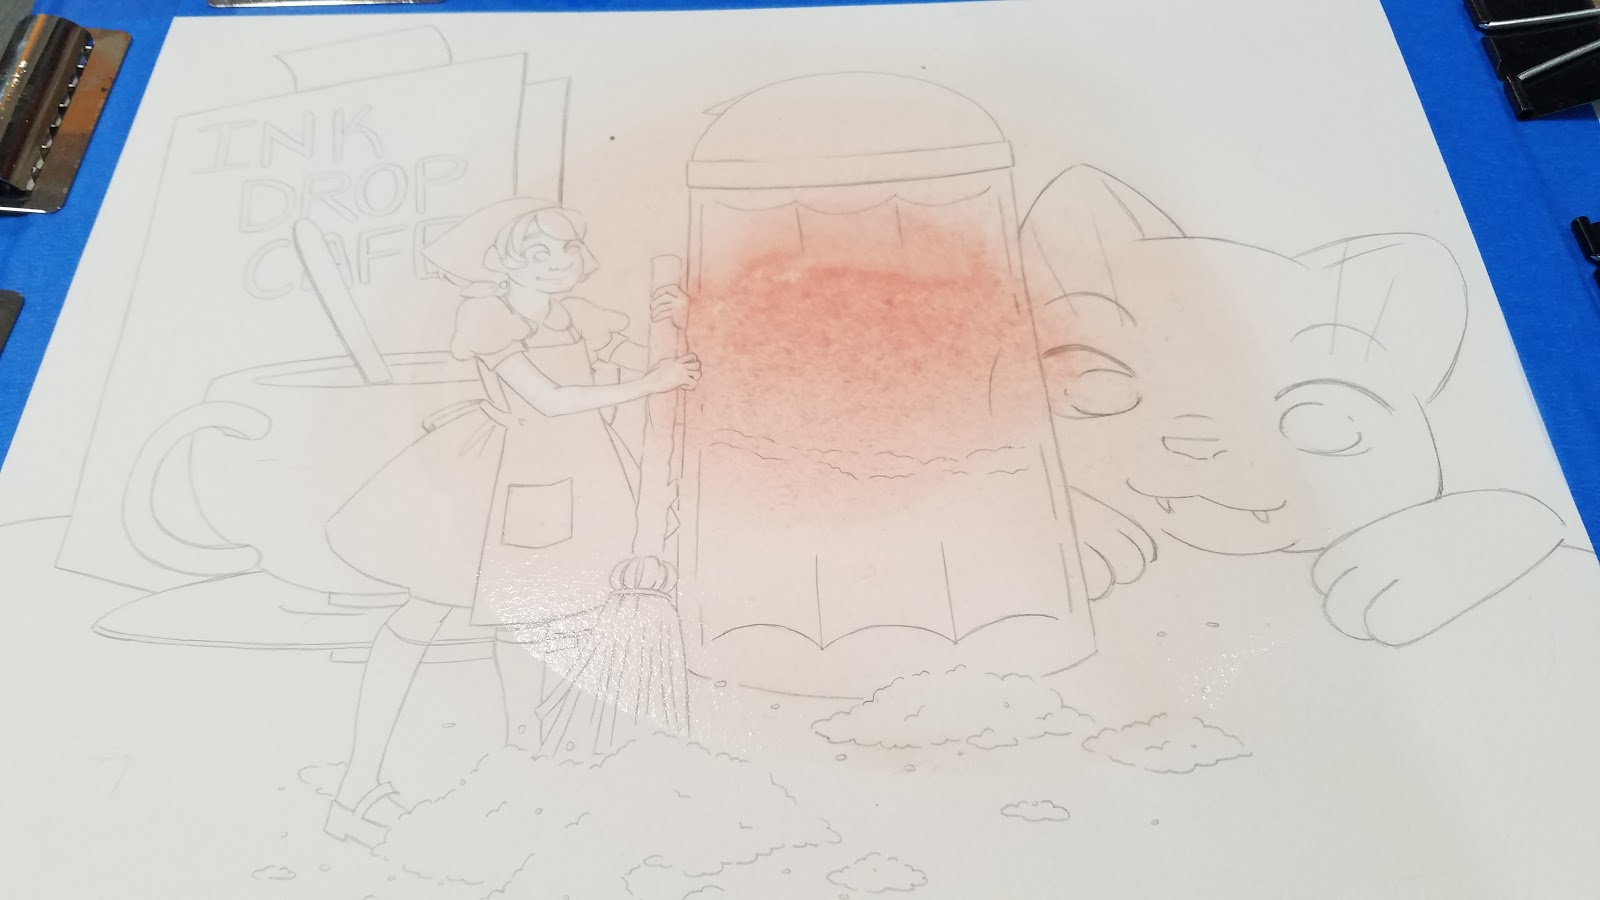
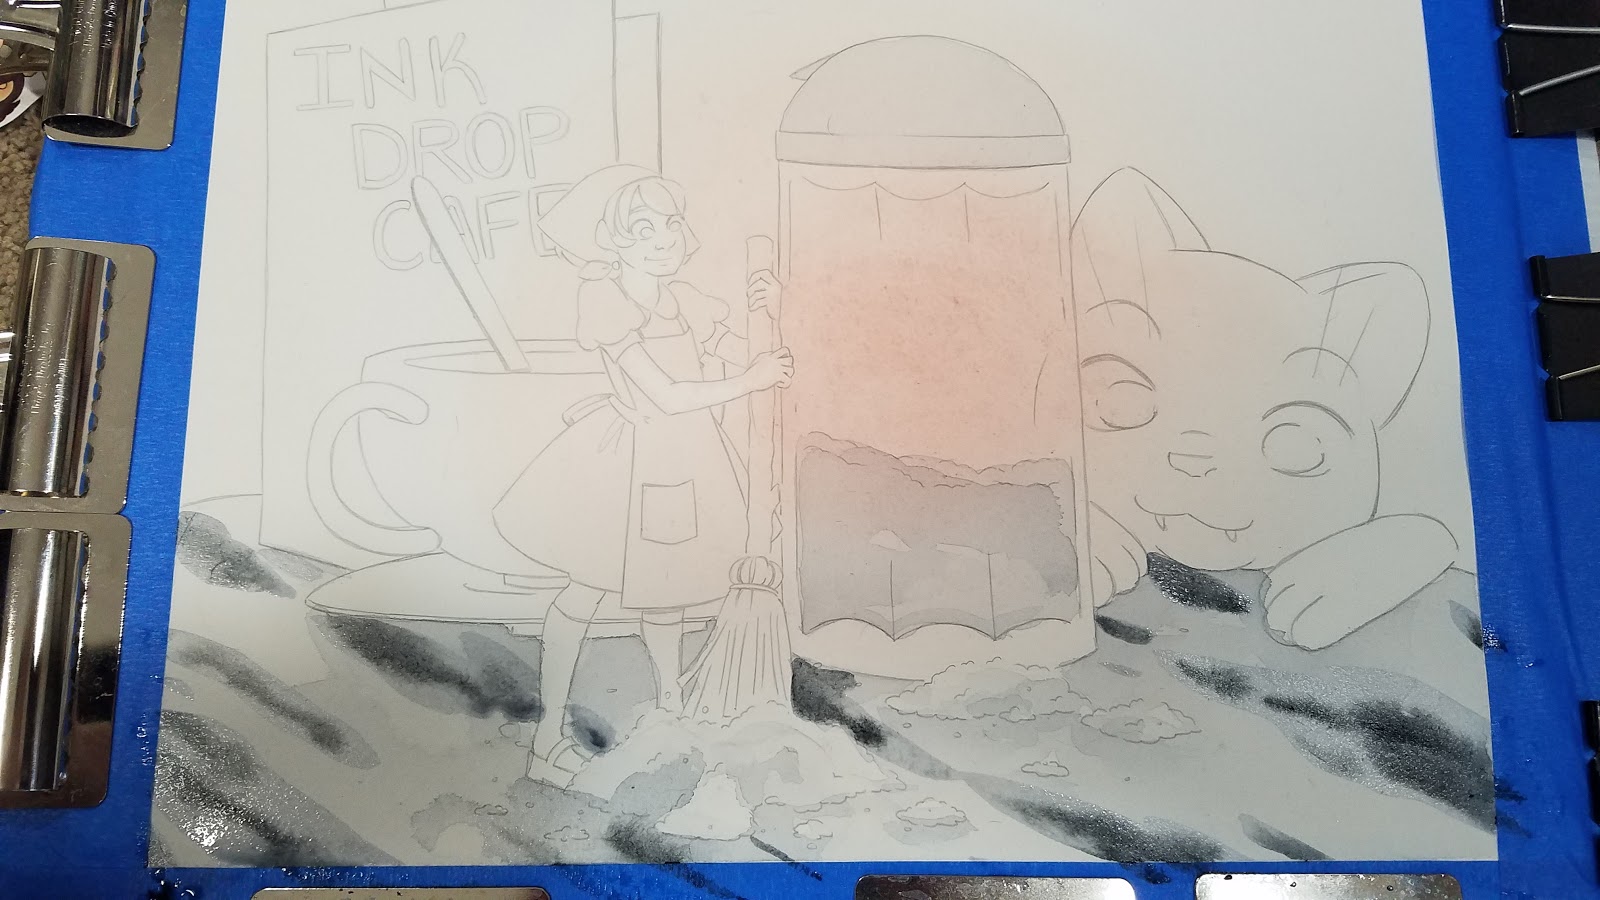
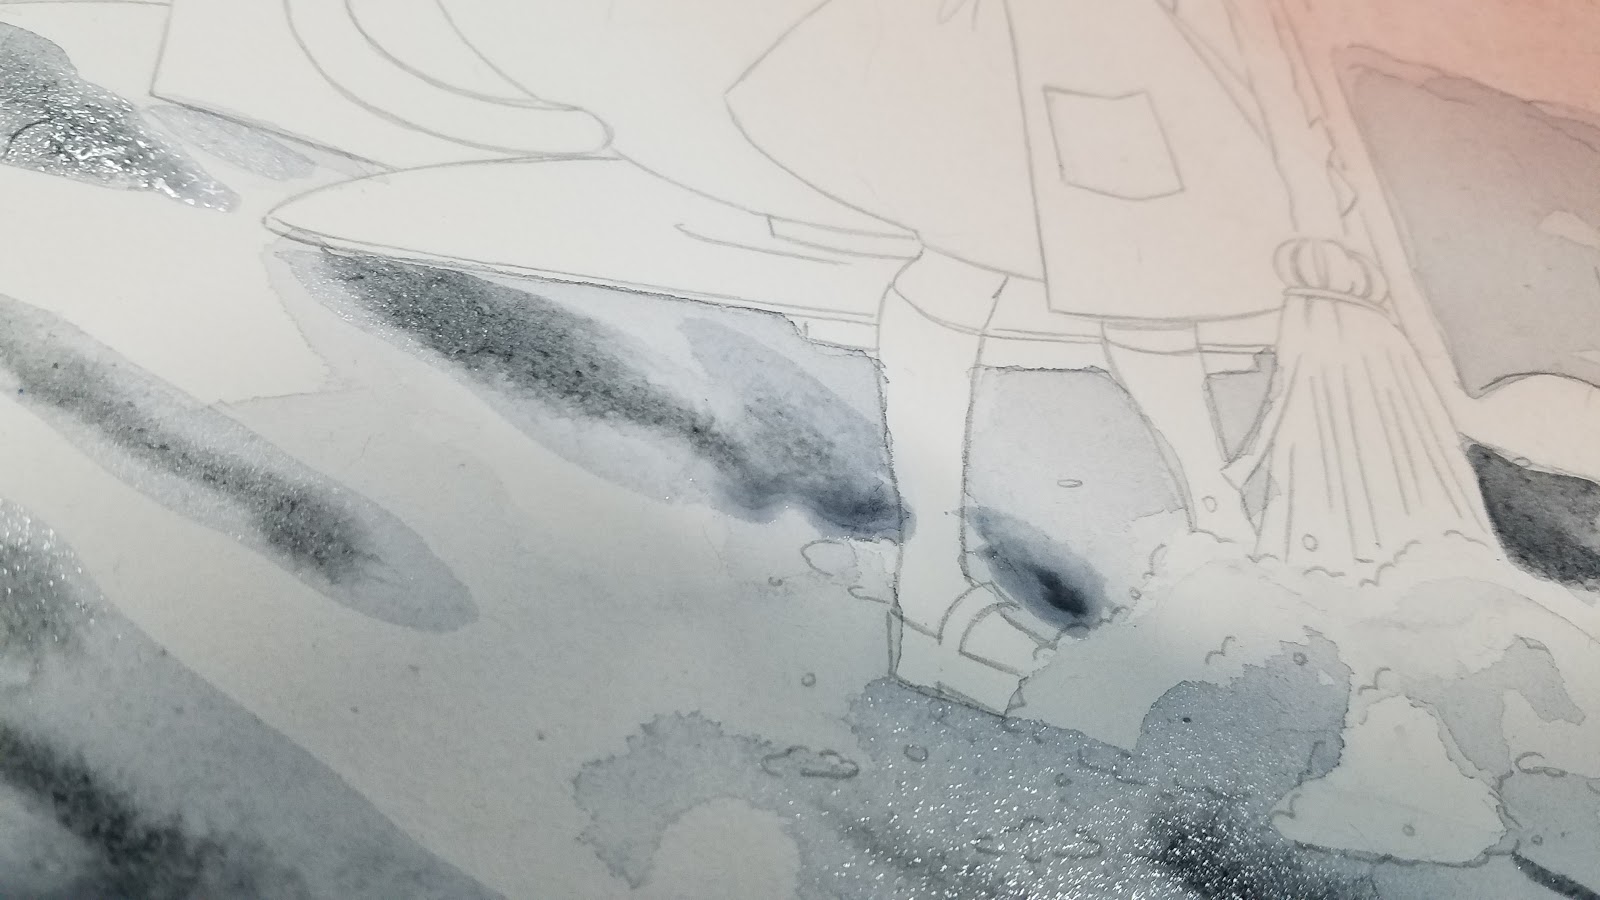
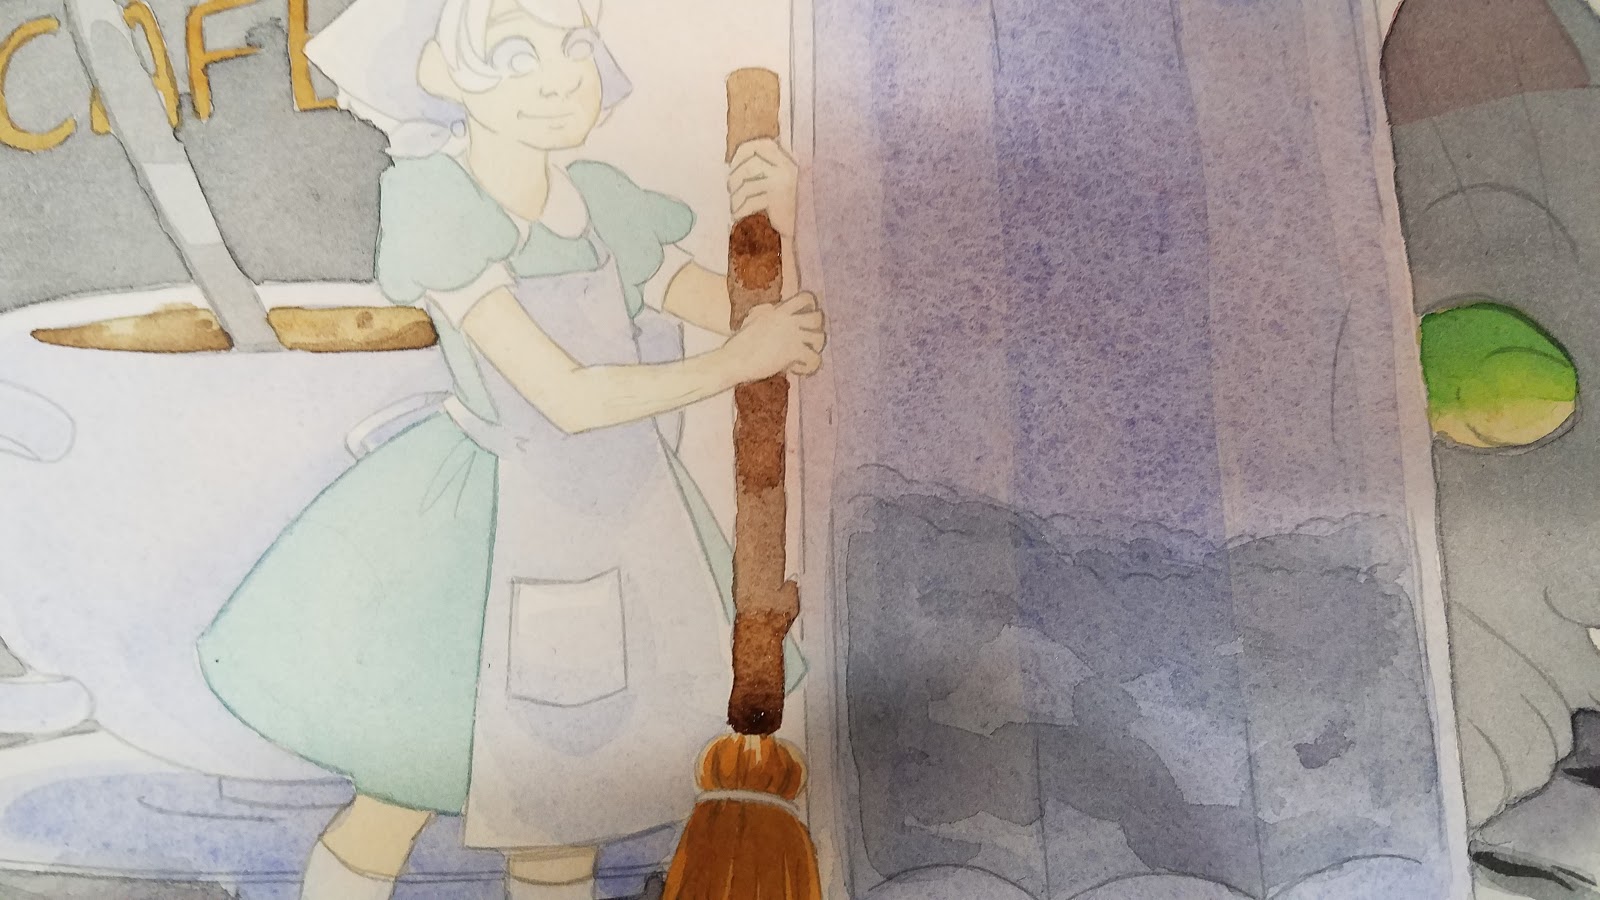
Pushing Through the Ugly: Watercolor Basics
 Read the comic online now!
The Ugly Phase: Noun. When a piece is still unfinished, but looks incredibly ugly, causing the creator serious career doubts. The ugly phase is necessary for truly great pieces to exist.
When: Happens generally midway through a piece- before things really start to come together, or before everything's even filled in all the way.
What: Many newer artists will give up at this point. But experienced artists know to keep pushing

Causes:
Lack of definition
Lack of contrast
Inexperience with materials
Piece is underdeveloped
Artist needs to step away from the piece
Piece is oversaturated with water and needs to dry
The cure:
A second opinion or fresh perspective
Time spent away to think
Stepping away (literally- about ten feet- it allows you to get a better overall view)
Increasing contrast
Tightening up details in area of focus
Continuing to work on the piece-push through the ugly and embrace the suck

If symptoms persist:
Take a longer break- 2-3 days- and return with fresh eyes
Consider restarting the piece and learning from your mistakes
Try another medium
This post was brought to you by Ink Drop Cafe- a creator's collective! Nattosoup Studio Art and Process Blog is an affiliate of Ink Drop Cafe- so swing by and see what's on our menu!
Ink Drop Cafe is a collective of webcomic creators, online art educators, and so much more! If you enjoy comics or illustration, you should definitely check out the main site- browse our members and check out our amazing update calendar!
Interested in pursuing an education in art? Love sequential art like comics, animation, and children's books? Check out the NATTO scholarship!
Please consider donating to this blog or purchasing from Natto-shop (http://nattosoup.com/shop) if you want me to continue publishing quality content. All materials tested were purchased from my own pocket. Keep on Truckin' Nattosoup is not under any sponsorship.

May 25, 2017
Recent Kid-Lit Illustrations
Read the comic online now!Right now, I'm in the long and arduous process of finding a kid-lit agent or agency that's the right fit for my work. My fellow artists knows that this means generating a huge amount of new work- for every piece that's portfolio worthy, there are several that just don't make the cut. After all, we want to include the best of our best work when applying to kid lit illustration agencies, right?
Below are a few samples of my most recent works
 Medium: Watercolor on Canson Moulin du Roy watercolor paperCompleted for: Ink Drop Cafe collective launchFeaturing: Kara and Pancake from the children's comic, 7" Kara
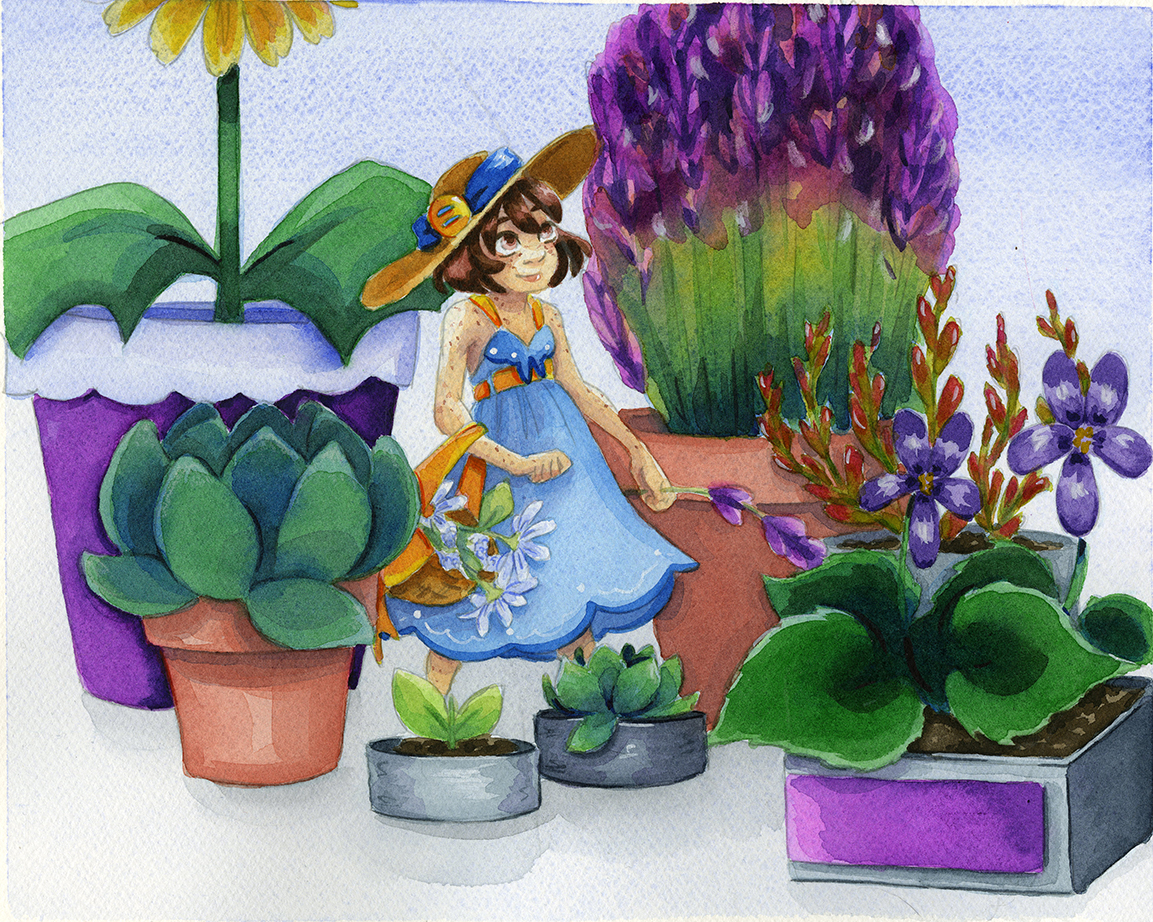 Medium: Watercolor on Canson's L'Aquarelle watercolor paperCompleted for: addition to my ongoing kid lit/ children's book illustration portfolioFeaturing: Kara from the comic, 7" Kara
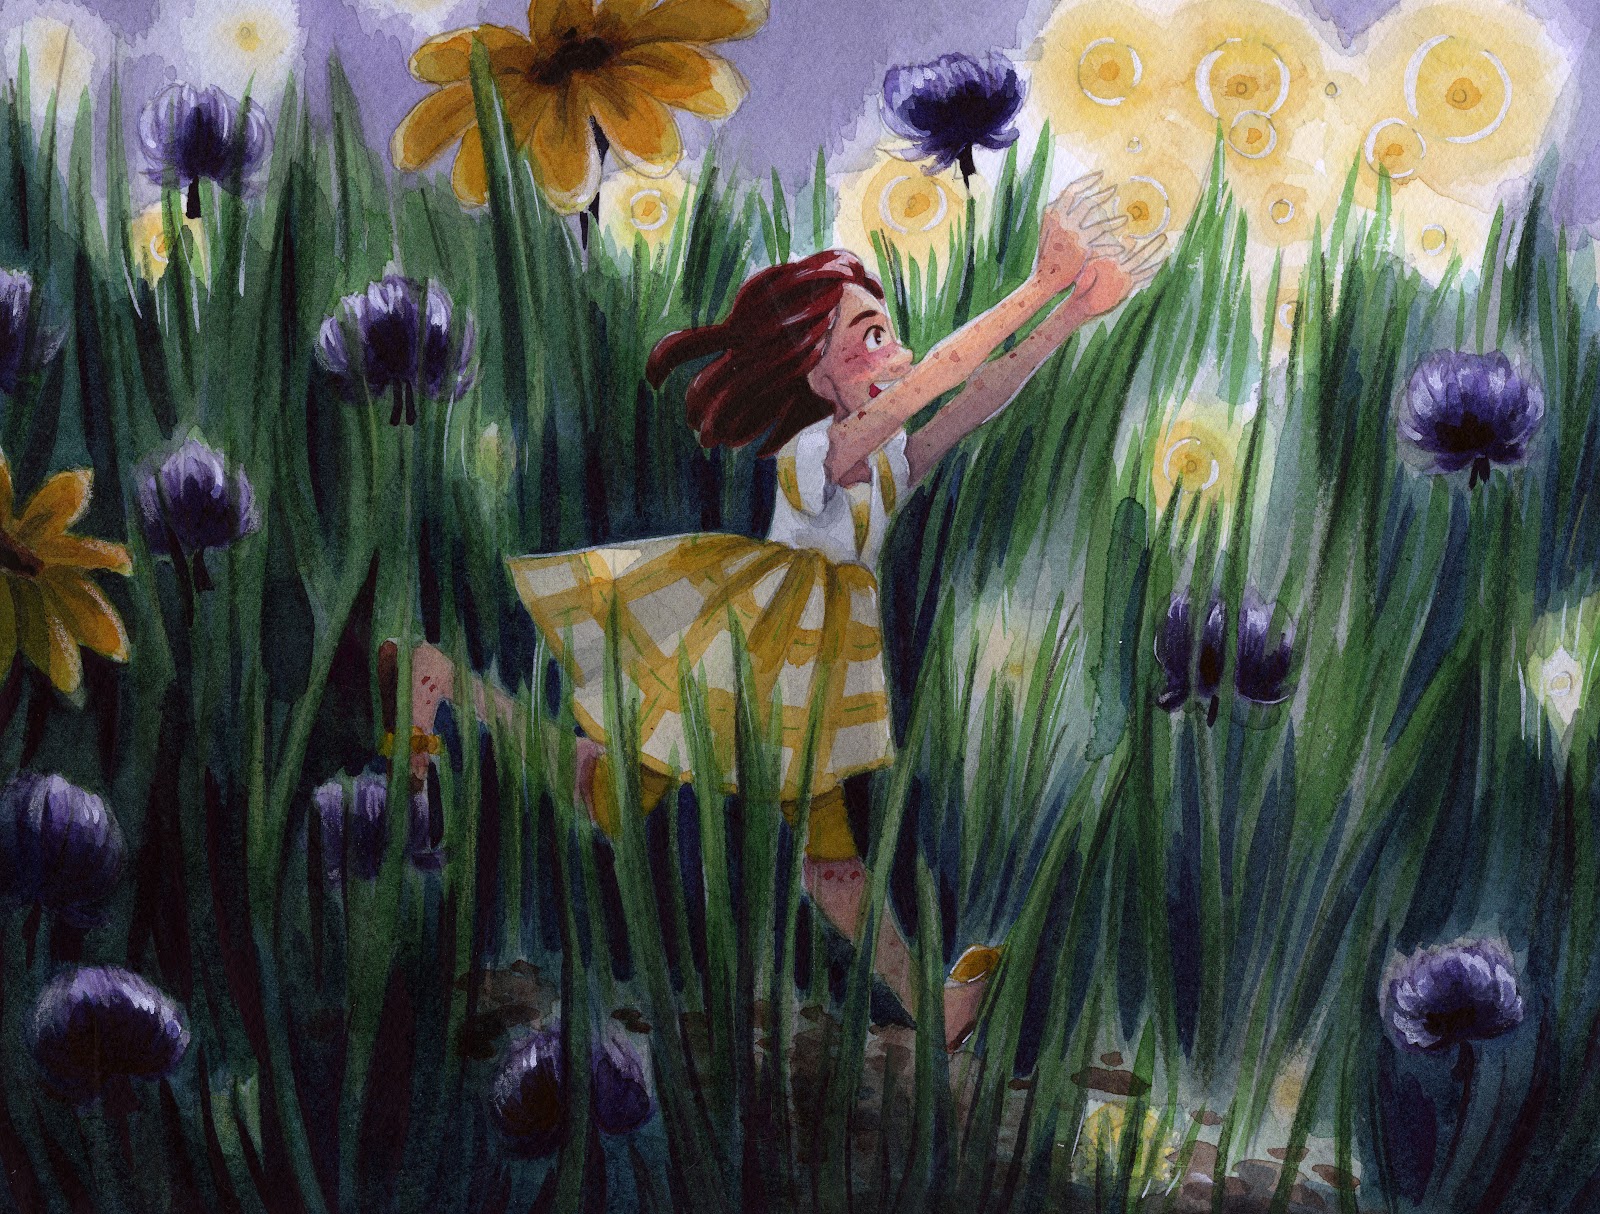 Medium: Watercolor on Canson's L'Aquarelle watercolor paperCompleted for: Firefly Artisan Fair in Nashville, TNFeaturing: Kara from the comic, 7" Kara
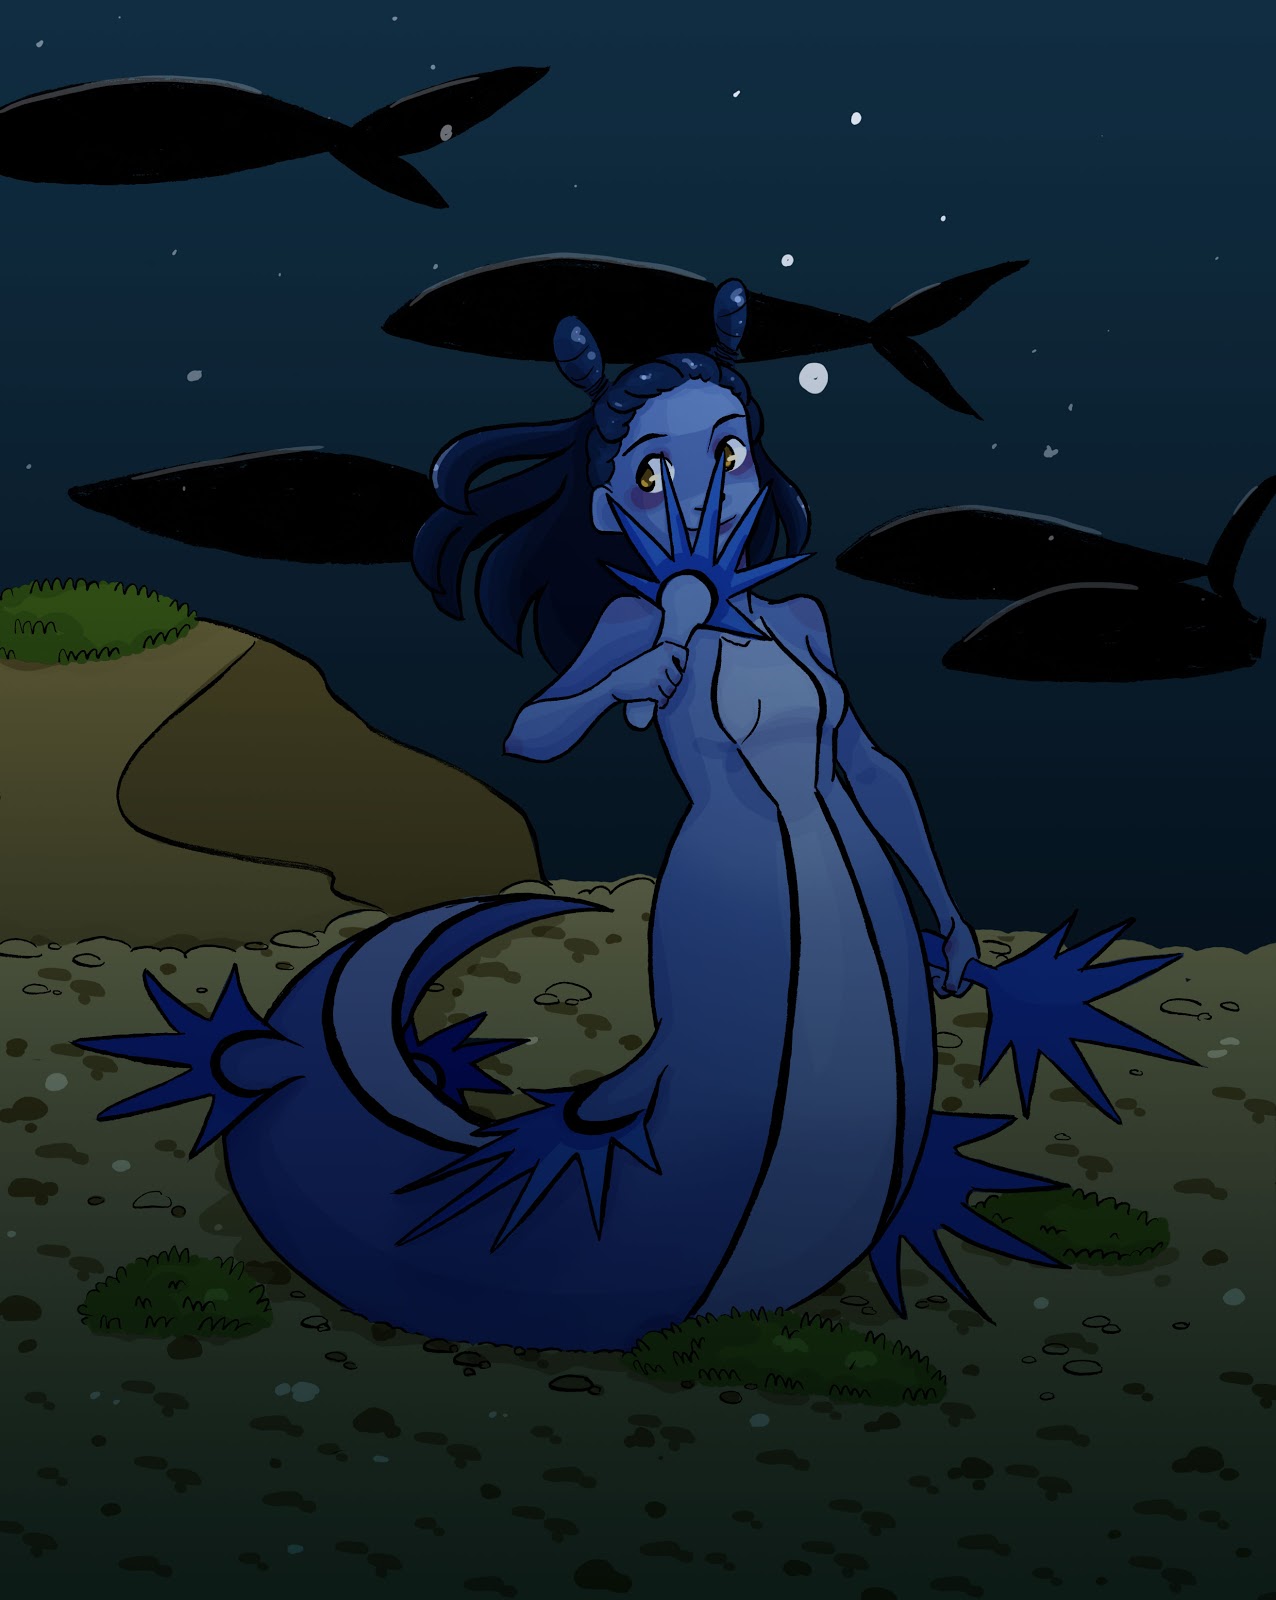
Medium: Traditional Inks and PhotoshopCompleted For: Inks were for Inktober 2016, colors for Mermay 2017Featuring: Nurse Shark Mermaid (own design)
 Medium: Traditional Inks and PhotoshopCompleted For: Inks were for Inktober 2016, colors for Mermay 2017Featuring: Sea Slug Mermaid (own design)
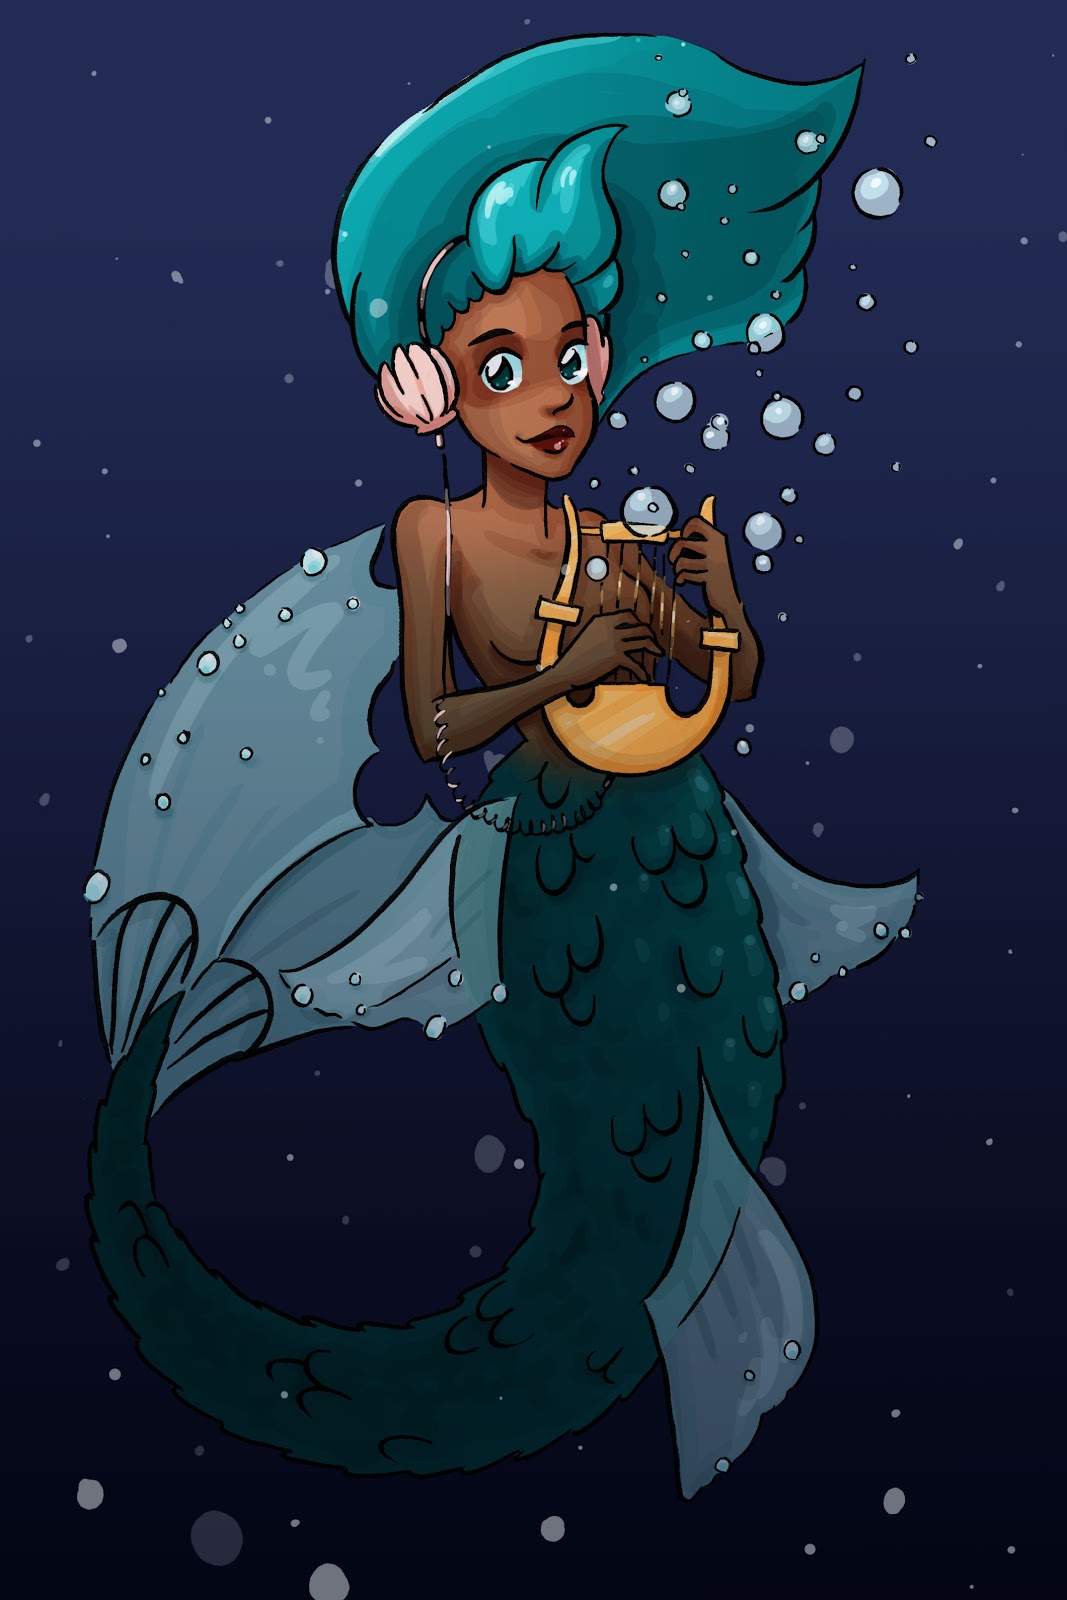
Medium: Traditional Inks and PhotoshopCompleted For: Inks were for Inktober 2016, colors for Mermay 2017Featuring: Musical Mermaid (own design)
These may not end up in my children's book illustration portfolio, but it's important to have variety to choose from when putting together a portfolio. Working on interim pieces also allows me to maintain a daily presence on Instagram and Twitter.
Don't forget! If you're interested in pursuing art education to further your sequential art dreams, apply for the NATTO scholarship this month!

Please consider donating to this blog or purchasing from Natto-shop (http://nattosoup.com/shop) if you want me to continue publishing quality content. All materials tested were purchased from my own pocket. Keep on Truckin' Nattosoup is not under any sponsorship.

May 23, 2017
NATTO- National Art & Trade Tuition Opportunity Scholarship
In keeping with our goal to provide egalitarian art education, we're pleased to announce the National Art & Trade Tuition Opportunity scholarship.
NATTO is designed to give one aspiring art student—high school, college graduate looking for further education, or returning college—additional funds to help pay for tuition, materials, or books. This scholarship is applicable to both in-person and online art education.
The funds for this scholarship were kindly donated by Joseph Coco, who also handled the arrangements with Going Merry. Promotion, portfolio, and essay assessment will be handled primarily by me, Becca Hillburn.
Joseph
What is Going Merry? GoingMerry is a new company which hopes to not only simplify and aggregate the process of applying for scholarships, but also to allow individuals and corporations to easily create scholarships. Its founders are courteous people who were fed up with the existing hunt-and-peck system of applying for scholarships and saddened by the number of students required to reject college acceptance letters due to financial concerns.
Who can apply? Anyone looking to return to school or resume education with a strong interest in sequential art—comics, children's books, animation, storyboarding.
What schools are eligible? Any school with an art program, including online art courses such as Schoolism.
However, this is not for one off, inexpensive online education services like Skillshare. As an example of eligible schools, check this list. Applicable MoMa classes and SVA classes, as well as Watts Atelier would also be acceptable, as well as local community college classes.
What we're looking for:
A portfolio of work (hosted through a website, do not send us images) with up to 12 pieces of art. Portfolio should include examples of sequential work, but this is not necessary for submission. Some example free portfolio sites include: DA Portfolio; Webflow; Tumblr.
A short essay on the type of sequential art you hope to make or to continue making in the future. Please mind spelling and grammatical errors when submitting through GoingMerry.
Deadline: June 30th, 2017
How to apply:
Go to https://www.goingmerry.com/browse/national-art-and-trade-tuition-opportunity-scholarship/flights/summer-2017Click "Apply Now", enter your e-mail address and click "Notify Me"You will receive an e-mail shortly after from our host site, Going Merry. Please click on the invitation link in the e-mail.This will take you to a sign up page. Complete the information on there and click "Sign Up"Go to "Qualified Awards" and select the National Art and Trade Tuition Opportunity Scholarship.
Please consider donating to this blog or purchasing from Natto-shop (http://nattosoup.com/shop) if you want me to continue publishing quality content. All materials tested were purchased from my own pocket. Keep on Truckin' Nattosoup is not under any sponsorship.
NATTO is designed to give one aspiring art student—high school, college graduate looking for further education, or returning college—additional funds to help pay for tuition, materials, or books. This scholarship is applicable to both in-person and online art education.
The funds for this scholarship were kindly donated by Joseph Coco, who also handled the arrangements with Going Merry. Promotion, portfolio, and essay assessment will be handled primarily by me, Becca Hillburn.
"I set up a small scholarship fund (on behalf of +Becca Hillburn) called the National Art & Trade Tuition Opportunity. It's for any artist interested in sequential art (comics, animation, storyboards) who wants to study art in college (undergrad or grad). You can apply if you have an online portfolio before July 1st, and should expect to hear back sometime in July. You don't need to be the best to win, so if you're on the fence about submitting, please do and help spread the word if you have any artists in your life. College is too expensive, so here's hoping I can help an artist not go into too much debt."
Joseph
What is Going Merry? GoingMerry is a new company which hopes to not only simplify and aggregate the process of applying for scholarships, but also to allow individuals and corporations to easily create scholarships. Its founders are courteous people who were fed up with the existing hunt-and-peck system of applying for scholarships and saddened by the number of students required to reject college acceptance letters due to financial concerns.
Who can apply? Anyone looking to return to school or resume education with a strong interest in sequential art—comics, children's books, animation, storyboarding.
What schools are eligible? Any school with an art program, including online art courses such as Schoolism.
However, this is not for one off, inexpensive online education services like Skillshare. As an example of eligible schools, check this list. Applicable MoMa classes and SVA classes, as well as Watts Atelier would also be acceptable, as well as local community college classes.
What we're looking for:
A portfolio of work (hosted through a website, do not send us images) with up to 12 pieces of art. Portfolio should include examples of sequential work, but this is not necessary for submission. Some example free portfolio sites include: DA Portfolio; Webflow; Tumblr.
A short essay on the type of sequential art you hope to make or to continue making in the future. Please mind spelling and grammatical errors when submitting through GoingMerry.
Deadline: June 30th, 2017
How to apply:
Go to https://www.goingmerry.com/browse/national-art-and-trade-tuition-opportunity-scholarship/flights/summer-2017Click "Apply Now", enter your e-mail address and click "Notify Me"You will receive an e-mail shortly after from our host site, Going Merry. Please click on the invitation link in the e-mail.This will take you to a sign up page. Complete the information on there and click "Sign Up"Go to "Qualified Awards" and select the National Art and Trade Tuition Opportunity Scholarship.
Please consider donating to this blog or purchasing from Natto-shop (http://nattosoup.com/shop) if you want me to continue publishing quality content. All materials tested were purchased from my own pocket. Keep on Truckin' Nattosoup is not under any sponsorship.
May 22, 2017
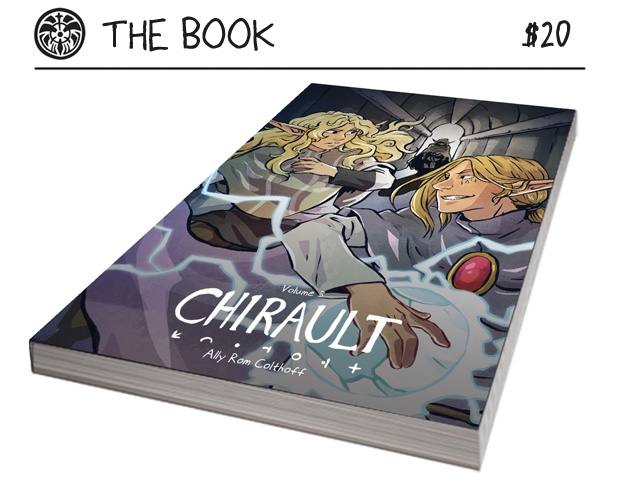
Guest Post: Ally Rom Colthoff of Chirault and Prepping for Print
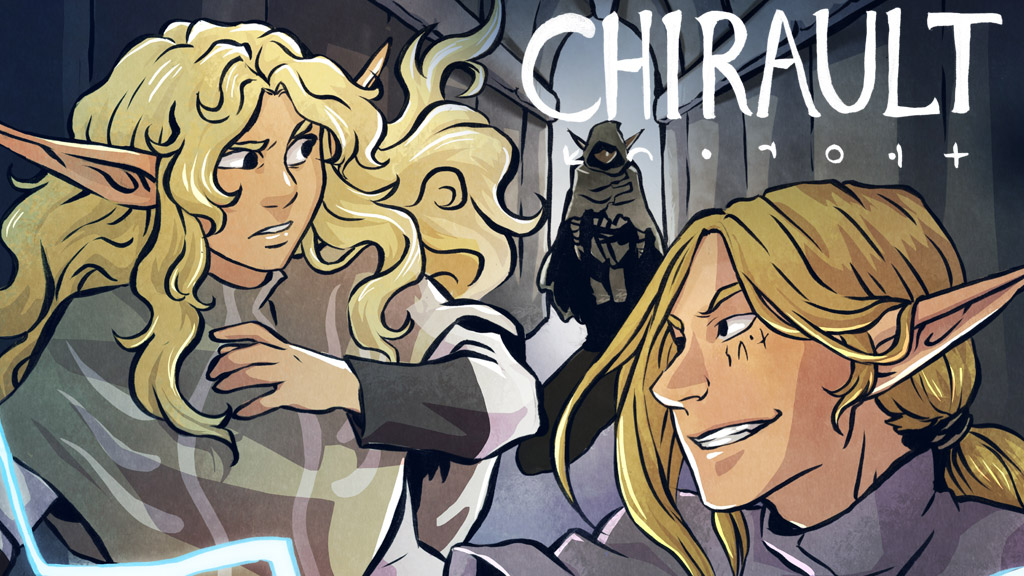
Hello! My name is Ally Rom Colthoff and for the last 10 years I’ve been working on a webcomic called Chirault-- a high fantasy adventure story with lots of magic and monster battles. I’m currently in the process of bringing the third collected volume of the story in the print (there’s a Kickstarter running here for anyone interested), and it’s been an interesting path making sure the pages are ready.
At the time I started, I had no notion of eventually printing it; the story was meant to be a fast practice run for ‘something bigger’ (lol), but it quickly took on a life of its own as I became attached to the characters and world. Seven years after first launching it, after some interest from my readers and the arrival of Kickstarter as a fundraising tool, I decided to try taking it to print… but those early pages desperately needed to be updated.
(for several reasons)
There are four major issues that tend to hit webcomic artists bringing their work to print; this article will cover the ones that affected me in particular, and how I dealt with them.
◾Page layout
◾Lettering
◾Colour conversion
◾Resolution
I will disclaim that for the processes I outline below, I use Adobe Photoshop CS5. The steps may be replicable in other software such as Clip Studio, but for this article I’ll be sticking to my own approach, which is admittedly idiosyncratic. This article is also dealing with how to retro-fit an existing body of work for print, rather than how to make it compatible from the outset-- really, on my next project I’m going to do my best to make sure I compensate for these things BEFORE I start work on my pages, which will save me a lot of work going forward. There are almost certainly more efficient ways to streamline the process that I haven’t discovered yet, so I welcome input on it! I hope that by writing about the issues I faced, I can help others who may end up dealing with similar ones.
My comic is monochromatic and mostly neutral earth-tones, which are easy to convert, so that wasn’t an aspect that gave me trouble. The conversion process is a concern for most digital artists, so I’ll link to a couple of articles: here’s one by Print Ninja outlining the basics of colour conversion and giving some tips, and here’s another by Christianne Goudreau with some more advanced advice on optimizing digital artwork for print.
I also managed to dodge problems with resolution (that is, the pixels per inch and size of the files), in large part because as my comic is illustrated traditionally and then scanned in; my pages were already at 300DPI. Saving pages at low-res is an unfortunately common issue for a lot of digital web-cartoonists working on their first comic; for this reason, even for artists who have no intention of bringing their story to print, I strongly encourage everyone to draw their pages at 300DPI. If you change your mind later, you won’t want to yell at your past self!
...Well, that’s a lie, I still wanted to yell at my past self sometimes too for the potholes I DID step into. Here’s what I faced:
LAYOUT
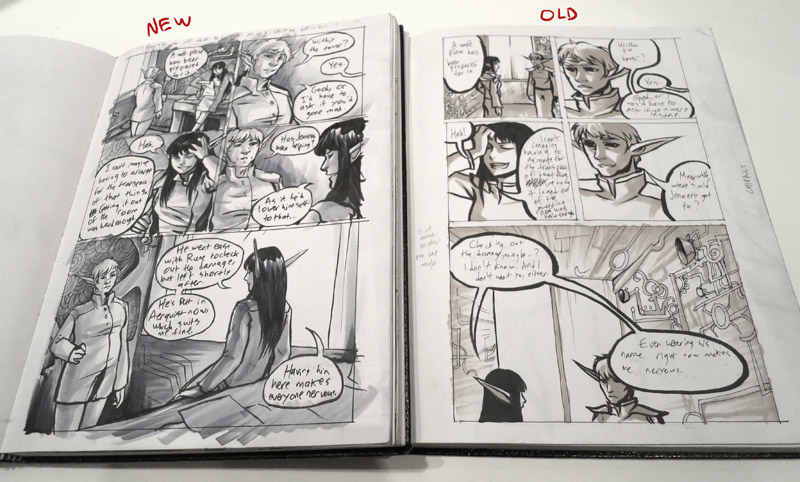
 photo of open sketchbook with bleed page, beside a PS screencap with guides
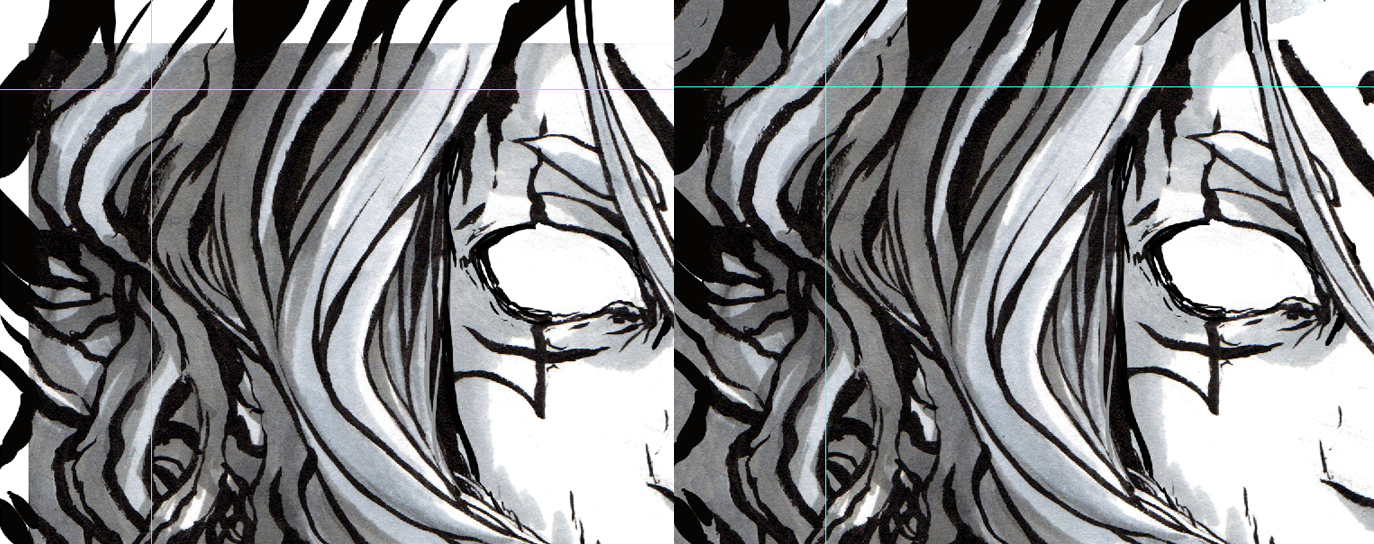
I made a very basic error when drawing my early pages: I didn’t keep my page margins (the amount of white space between the edge of my panels and the edge of the page) consistent from page to page. Not only that, but the shape the panels took up slowly morphed over time; initially I had wide white margins on both sides, but as I drew them in an 8x11 sketchbook the panel borders slowly expanded until by page 400 I was using more horizontal space.
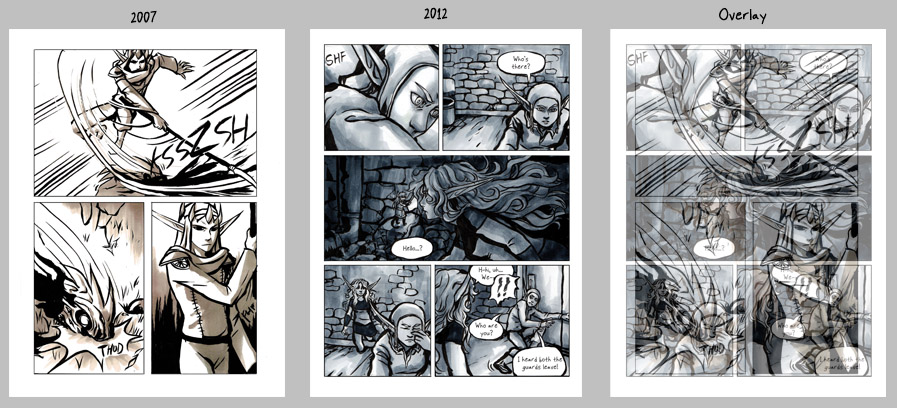
two pages side by side, and then overlaid at 50% opacity
I did not want to redraw all of the pages (as there are over 1000 pages total in the story that would be a monumental task), but I did have to find a way to balance the pages so that they were consistent. So the first step was to choose the dimensions that the physical book would be printed at.
I ended up going with 6”x8”; a nonstandard (but roughly manga-sized) book that could accommodate both my narrowest and my widest pages without looking too unbalanced. With that in mind, knowing the exact pixel dimensions my files needed to be saved at (2550x3500 pixels, to be precise), I created an Action in Photoshop so that I could reproduce the same steps on every single page.
Here are the steps in my Action:

◾Converting the file to CMYK. As my colours are very neutral and monochromatic, and my scans are a single layer, this was generally the only colour-related step I needed to take. For digitally-coloured artwork, it’s a good idea to flatten the layers before converting-- CMYK will change the way layer blend modes work, particularly Multiply and Overlay layers.
◾Set Background Colour. In this case, it was making sure my background colour was set to white.
◾Canvas Size. I didn’t use Image Size because that will resize the entire image (possibly distorting it vertically or horizontally if the aspect ratio was not already the same as the new dimensions); instead I used Canvas Size, which will extend the edges of the page or crop into it in the event that the new size is smaller. In every case I was adding to the pages, because I hadn’t accounted for Bleed in my working files-- more on that later. The Photoshop Action will remember the exact numbers you plug into the dialogue box, so they’ll all be the same.
◾Make. The 4 ‘Make’ commands refer to creating guides (the blue lines visible in the screencap below)-- these help me make sure my panels are staying a consistent distance from the edge of the page. The area within the guides is known as the Safe Zone-- most comic page printing templates will include some notation on this, and Making Comics has a breakdown of it here.
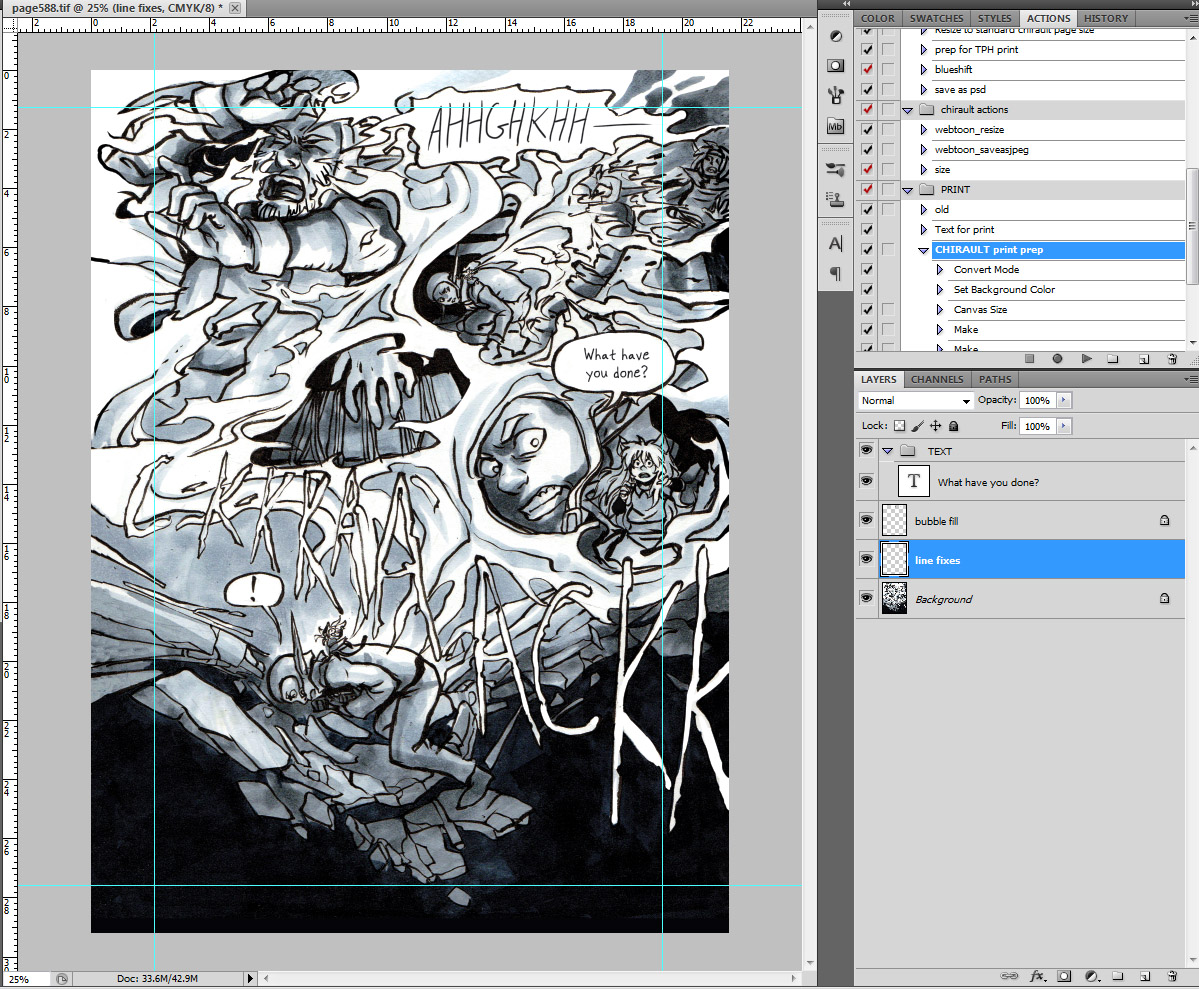
screencap of page with guides
With all of these steps done, I can start to identify problem cases. Pages whose panels extend too far outside of the guides may need to be shrunk slightly; pages whose panels are too far inside may need to be expanded so that the margins aren’t noticeably different if two such cases were to be laid side by side.
This is also where I can address bleed. That’s the term for the buffer of space allotted to the very edge of the page, outside of the trim line (where the page will be cut, the final size of the book). Whenever there’s artwork that expands all the way to the very edge of the page it’s important to add about 1/8th of an inch (0.125”) to the edges of the page and continue the artwork into this zone. This is because of the way books are created: the art is printed, and then cut down to size, and then assembled. If the artwork ends at the point that the page is cut, the machinery may leave a thin white line at the very edge of the page, which will not look very good.
For pages where all the panels are nearly contained and the margins are all left empty, Bleed isn’t a worry; however, I did have a number of sequences with art extending to the edge of the page, and I had to address it there.
[insert picture 008]- a shot of that one page with the branches in v3 (yes that one)-- showing white edges
My strategy, after the page had been resized with bleed added, was to use the regular brush tool to supplement the lineart or any structure that was needed, and then to fill in the rest with the Clone Brush. Because the art is all traditional, matching the texture and tonality was very important-- so I’d use the Clone Brush on a section close to the blank space and try to match it as seamlessly as possible, to give the impression that it was a continuation of the same art.
Where there was detailed lineart, I created a layer over top and sketched in the extensions of the lineart, as it’s very finnicky trying to continue precise angles or curves with the Clone Brush.
 closeup of one of the edges, screencap including the layer structure
It’s a time-consuming and finnicky process to repeat these steps for every page that needs it, but it pays off once the book is in print; inconsistent formatting can be distracting.
LETTERING
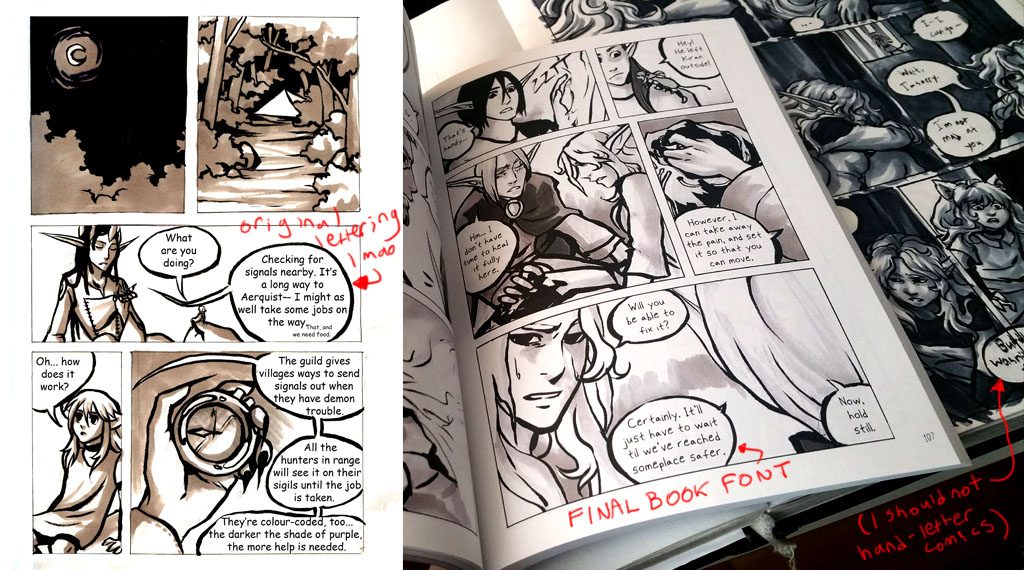
When I started my comic, I didn’t know very much about lettering, and I used Comic Sans for all of the text. A year or two later, I started hanging out more with other webcomic artists, and learned that Comic Sans is terrible, so I found another font and switched to it. Then, I found out how to make a font of my own handwriting, and started using that. And THEN I decided (I thought it was faster, or something) to try to actually really hand-letter right on the page itself-- after 100 pages or so, with decreasing legibility, I switched back to the font based on my handwriting, and that is what stuck.
I wanted the print volume to be as consistent as possible, so of course addressing the inconsistent lettering was one of my first priorities when I started work on Volume 1. I had saved all my original files as flattened JPEGs (do not do this), so updating the lettering required me to access every single page, erase the text, and re-type it in full with the new font. To ensure it was a consistent size across every page, it was important to do this AFTER I had done all the layout steps above, so that the text wouldn’t be scaled in any way.
I had an additional concern with the text: because I had chosen to print with a 4-colour (offset) process instead of a digital process (here is an article explaining the differences between them), I had to ensure that the black colour of my type was True Black rather than Rich Black. This means, if you pull up the colour swatch in the Colour Picker, the CMYK value will be expressed as 0, 0, 0, 100. In other words, it only uses black ink, rather than being built up from all 4 inks.
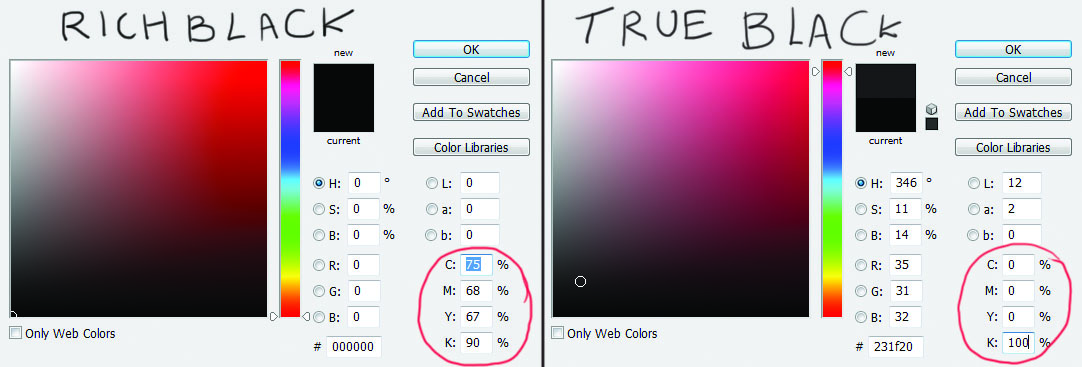
On the screen true black tends to look a little greyish and can have a reddish tint, but it will print using black ink in the 4-colour process, and so will come out fine on the page. I should note that for people who intend to use a digital printer this step is less important-- thanks to the way the equipment works, the issues that using true black is intended to prevent (notably, a ‘halo’ or fog of ink around text or fine lineart) don’t tend to appear in digital prints. Most artists doing a short run of books (less than 500 copies) will be using a Print-On-Demand service, and those tend to be digital only.
There are other steps to take in printing a book-- using InDesign for layout, adding page numbering, or design basics like creating a cover. But I wanted to cover these two parts of the process, as I haven’t seen many other tutorials talking about these steps.
That’s all for now, thanks for your time! If you’re interested in checking out my books, Chirault’s Volume 3 Kickstarter is live until the 24th of May, and you can buy one or two or all three of the books, as well as a short full-colour minicomic set in the same universe.
You can also find me on Twitter, Tumblr, or via the Chirault webcomic main page
Please consider donating to this blog or purchasing from Natto-shop (http://nattosoup.com/shop) if you want me to continue publishing quality content. All materials tested were purchased from my own pocket. Keep on Truckin' Nattosoup is not under any sponsorship.

May 19, 2017
Tabling at Your First FCBD
Read the comic online now!
This was my second Free Comic Book Day as a tabling artist, you can read about my first experience with FBCD here.
What is Free Comic Book Day:
For Retailers:
On Free Comic Book Day, participating comic book store retailers give away specially printed copies of free comic books, and some offer special deals and creator signings to those visiting their establishments.[9] However, retailers do not receive the issues for free; they pay 12–50 cents per copy for the comics they give away during the event.[10][11] In addition to comic books, some stores also give away other merchandise, such as mini posters and other movie tie-in memorabilia.[Source: Wikipedia: Free Comic Book Day
For Artists:
Free Comic Book Day is an opportunity to table at your local comic shop, and sell comics, commissions, and originals. Many comic shops offer this space free of charge, so this is a great opportunity for your first table experience. Most Free Comic Book Day events tend to be low key with an initial rush early in the day that peters off.
This is primarily aimed at local comic creators, but your local shop may also be interested in your work if you have novels, children's books, a video game to demo, board games, or other geeky media for sale.
My Setup:

For a recap of Free Comic Book Day 2017, and a look at what I had for sale, check out this video:
My local store:
This year, my local comic shop, Rick's Comic City, rented out the large empty storefront next door for FBCD. This seemed like a great change- there is plenty of room to grow, and I know there are many Nashville-area artists who are interested in tabling at local events.
The people in the back are digging through the stacks- 50cent issues of old Marvel, DC, Vertigo titles.

Tabling at Free Comic Book Day
Ok, so you've decided you want to give Free Comic Book Day a shot. Here's what you'll need to do:
Before the show: Check the Free Comic Book Day site to see if stores in your area are participatingCall or email your local store to request a table approx 2 weeks ahead of time Decide what you want to bring and what you'll need to preparePromote your appearance on your favorite social networks- Twitter, Tumblr, Instagram, even YouTube- make sure you tag Free Comic Book Day, FBCD, and your city to help people find you!Check out this post on my top asked questions about tabling at conventions for a primer on what you'll need to get started.
At the show:Show up on time Be prepared to engage the crowd Design an engaging setup. You can check out How to be a Con Artist for advice!Keep in mind:
Your venue may not have bathroom facilities- we had to leave the premises and drive over to a McDonald's to use the bathroom.Your venue may have terrible lighting- if this is something you're sensitive to, make sure to take frequent breaks to rest your eyes.There's a huge rush initially to grab the best 'free' comics, this tapers off as the day goes on if the shop doesn't have events planned to keep people around.If FCBD is new to your area, people may not realize artists are selling their wares there, and may not bring money.Retailers have to pay for their Free Comic Book Day samples, so try to purchase something from the store, and make sure you thank the owner for hosting.
Things that sell well at Free Comic Book Day:
Perfect bound, professionally printed comicsMini comicsSmall things for kids- charms, stickers, mini printsOriginal artIf you're a comic artist, and you can't participate at a physical store location, there are still ways you can celebrate Free Comic Book Day
Use Free Comic Book Day to promote your webcomic on Twitter and Instagram! Make sure you use the hashtag #freecomicbookday and #fcbd when plugging your comic- and don't forget to include a link and a visualConsider putting your mini comics up on Gumroad or Itch.io for Pay What You Want. You can then promote this using the #FreeComicBookDay and #fcbd tags.
More about Free Comic Book DayFree Comic Book Day- Official SiteFree Comic Book Day Facebook PageWikipedia
Please consider donating to this blog or purchasing from Natto-shop (http://nattosoup.com/shop) if you want me to continue publishing quality content. All materials tested were purchased from my own pocket. Keep on Truckin' Nattosoup is not under any sponsorship.

Tabeling at Your First FCBD
Read the comic online now!
This was my second Free Comic Book Day as a tabling artist, you can read about my first experience with FBCD here.
What is Free Comic Book Day:
For Retailers:
On Free Comic Book Day, participating comic book store retailers give away specially printed copies of free comic books, and some offer special deals and creator signings to those visiting their establishments.[9] However, retailers do not receive the issues for free; they pay 12–50 cents per copy for the comics they give away during the event.[10][11] In addition to comic books, some stores also give away other merchandise, such as mini posters and other movie tie-in memorabilia.[Source: Wikipedia: Free Comic Book Day
For Artists:
Free Comic Book Day is an opportunity to table at your local comic shop, and sell comics, commissions, and originals. Many comic shops offer this space free of charge, so this is a great opportunity for your first table experience. Most Free Comic Book Day events tend to be low key with an initial rush early in the day that peters off.
This is primarily aimed at local comic creators, but your local shop may also be interested in your work if you have novels, children's books, a video game to demo, board games, or other geeky media for sale.
My Setup:
For a recap of Free Comic Book Day 2017, and a look at what I had for sale, check out this video:
My local store:
This year, my local comic shop, Rick's Comic City, rented out the large empty storefront next door for FBCD. This seemed like a great change- there is plenty of room to grow, and I know there are many Nashville-area artists who are interested in tabling at local events.
The people in the back are digging through the stacks- 50cent issues of old Marvel, DC, Vertigo titles.
Tabling at Free Comic Book Day
Ok, so you've decided you want to give Free Comic Book Day a shot. Here's what you'll need to do:
Before the show: Check the Free Comic Book Day site to see if stores in your area are participatingCall or email your local store to request a table approx 2 weeks ahead of time Decide what you want to bring and what you'll need to preparePromote your appearance on your favorite social networks- Twitter, Tumblr, Instagram, even YouTube- make sure you tag Free Comic Book Day, FBCD, and your city to help people find you!Check out this post on my top asked questions about tabling at conventions for a primer on what you'll need to get started.
At the show:Show up on time Be prepared to engage the crowd Design an engaging setup. You can check out How to be a Con Artist for advice!Keep in mind:
Your venue may not have bathroom facilities- we had to leave the premises and drive over to a McDonald's to use the bathroom.Your venue may have terrible lighting- if this is something you're sensitive to, make sure to take frequent breaks to rest your eyes.There's a huge rush initially to grab the best 'free' comics, this tapers off as the day goes on if the shop doesn't have events planned to keep people around.If FCBD is new to your area, people may not realize artists are selling their wares there, and may not bring money.Retailers have to pay for their Free Comic Book Day samples, so try to purchase something from the store, and make sure you thank the owner for hosting.
Things that sell well at Free Comic Book Day:
Perfect bound, professionally printed comicsMini comicsSmall things for kids- charms, stickers, mini printsOriginal artIf you're a comic artist, and you can't participate at a physical store location, there are still ways you can celebrate Free Comic Book Day
Use Free Comic Book Day to promote your webcomic on Twitter and Instagram! Make sure you use the hashtag #freecomicbookday and #fcbd when plugging your comic- and don't forget to include a link and a visualConsider putting your mini comics up on Gumroad or Itch.io for Pay What You Want. You can then promote this using the #FreeComicBookDay and #fcbd tags.
More about Free Comic Book DayFree Comic Book Day- Official SiteFree Comic Book Day Facebook PageWikipedia
Please consider donating to this blog or purchasing from Natto-shop (http://nattosoup.com/shop) if you want me to continue publishing quality content. All materials tested were purchased from my own pocket. Keep on Truckin' Nattosoup is not under any sponsorship.
May 16, 2017
Running a Patreon (Artist Edition)
Lately I've been getting a string of artists asking me how to run a Patreon. While I'm not sure why they picked me (my numbers are under $100 a month- I am not what you'd call a shining success on Patreon), I'll do my best to answer honestly, in hopes that it can help some of you.
The number one question I'm asked, and usually the ONLY question I'm asked is:
How do you do it?
Just. Do. It.
Just do the thing.
I launched my Patreon after YEARS of trying to court sponsorships with online shops that had a similar niche interest, and years of getting belittled and shot down. Given my blog audience at the time (zombies), I figured the Patreon would crash and burn as well- I even asked my partner, Joseph, to pitch in $15 a month just so I could release the ArtSnacks Vs SketchBox videos and not appear a failure. Fortunately, a couple friends helped me hit that mark quickly (thank you so much, Candace!), and I never had to actually recruit my boyfriend as a backer, but I really launched my Patreon on a whim and a prayer.
If you're interested in the history of my Patreon, and more behind the scenes info, check out this vlog:
So brainstorming off that, I've come up with some other relevant questions that should help you get started on your Patreon:
Note: Some things have changed drastically since March, when that video was recorded:
1. I have lost several Patrons, I'm at 23 Patrons, and $83 a month
2. My Youtube ad revenue has gone down significantly due to Youtube sitewide changes, so at most I now make $17 a month
So now would be a great time for you to consider financially supporting my content
What do I need to start?
An existing product that has value, that is worth supporting. This can be a webcomic, a resource of some type, or even just a popular commission option.
It helps to also have a mission statement, an outline of how your work benefits others, and how the Patreon money is spent.
An idea of the sort of tiers you want to offer (you can edit these to suit your audience at any time)
Do your research! Check out Patreons by creators you respect, whose work is similar to yours- NOT just the popular Patreons. There's a follow option that sends you notifications without charging you, so if you're interested in a Patreon, but don't yet have the funds, that's a great way to stay on top of things.
Why Launch a Patreon?
This is really up to you. If you don't think you need to launch one- don't. It's not an easy money tree, but it is a way for people who enjoy your content to help you make more of it, and to gain access to things you might not otherwise make available.
Examples of such exclusive content:
Monthly digital sketchbooks (I would release one, but we haven't hit $125 a month yet)Backer only tutorialsBacker only process postsBacker only Q&A sessionsBacker only bonus comics
When do I start to make lots of money?
When you're super popular, and your fanbase is willing to throw money at you for what you have to offer. That doesn't mean you shouldn't launch, it just means don't expect to make big bucks in the first month- that's just not reaslistic.
All of the mega Patreons you see have been YEARS in the building. That creator has spent years building an audience- on DeviantArt, on their webcomic, on their Youtube channel, on Twitter or Tumblr, and they have a longterm audience willing to back them.
You can be super popular, or at least, have the pageviews, and still not make a decent amount per project or per month. That isn't an indication of your quality, just an indication of what your audience is willing to spend for your content. You may have to find sneakier ways to monetize (ads) but even that's an uphill battle, as the majority of Western internet users feel all ads are evil, and adblockers should be used at all times.
Types of Patreon campaigns (for artists)
Funding:
Per Project: Backers are charged per project released. This can be per Patreon post, per blog post, per video, per comic page, ect.
Monthly: Backers are charged a once monthly pledge amount.
Types of Campaigns:
To fund an art education resource that is already free to readers- Nattosoup Studio Art and Process BlogTo fund a webcomic that is already free to readers- Questionable ContentTo fund web resources that are already free for use- Shooting-StarsTo fund web assets that benefit other artists, that is free to consume- Paper Cat PressTo sell commissions- Kelly Leigh Miller To sell fanart- Sakimichan (note: Sakimichan is the outlier for most Patreons- do not expect this result)To sell art tips behind a paywallTo sell comic pages behind a paywall (generally used by creators of adult only content, furry artists)
Types of rewards:
The good feels- the knowledge that your pledge enables an artist to continue to offer their work free of chargeThe good feels- the knowledge that your pledge keeps a roof over someone's head, and cat food in some cat's mouthPhysical- post cards, mini prints, sketches, charms, commissionsAccess to information- Backer only tutorials, backer exclusive content, early access contentVoting rights- backer rights to decide on the content the creator focuses onBacker exclusive LivestreamsBacker exclusive Q&A's
What My (Nattosoup) Patreon is for:
To fund this blog, to fund the Youtube channel, to offset HTBACA time costs
So think of my Patreon like a PBS fundraising drive- my work is only made possible thanks to support of readers (and viewers) like you.
What My Patreon is NOT for:
To sell art
To put education behind a paywall
To sell comics
To sell charms and other small merch
To fund 7" Kara (I would launch a separate Patreon campaign for that)
These are all viable options for funding your work, but not the way I wanted to run my own Patreon campaign, as I felt they greatly detracted from the fact that I'm already providing something of great quality, free of charge.
How do you entice Patrons?
The answer will vary greatly based on what you have to offer. I've noticed a couple things about my Patrons, which led me to shift my tiers to try and best serve them:
1. My Patrons are almost all artists or artsy minded
2. Many of my Patrons have webcomics
So I changed my $15 a month tier to a sponsorship tier, where I would promote their projects on the YouTube channel or the blog, to help get more eyes on their work.
How do you promote your Patreon:
Here on the blog
Sometimes on HTBACA (it's not always appropriate, so I don't mention it every ask, but it is on the about page)
In most YouTube videos as a verbal request
In most YouTube videos as an endcard
Linked on my Twitter
Linked on my Instagram
When I post my weekly link roundups (which are helpful, and well worth at least following my Patreon for), I cross post to Facebook, and remind them that this is made possible due to the generosity of my Patrons.
Why Won't Anyone Back My Patreon? It's just a buck!
First off, take a moment to check out how many Patreons YOU back, and what sort. Think about why you back those Patreons, and what you feel they have to offer vs what they actually offer.
People tend to be impulsive, visual creatures. That's why the impulse items are at the checkout line- you're standing around, sorta bored, waiting to check out, getting hungry- and there are all the chocolate bars. You have a long time to think about those chocolate bars in front of you- how good they'd taste, how hungry you are, how it's only a buck. You are a captive audience.
Now think about the internet. You aren't captive ANYWHERE. Even loading screens on games are becoming a thing of the past- everything is immediate for you. No one is forcing you to spend a moment to think about what you value, or what helps you achieve your goals. No one is forcing you to think about repaying those artists who helped you, or tipping a couple bucks a month for a webcomic you enjoy. And even if you did have to think about those things, going to Patreon is a separate step away from the product you're already consuming. Once the chain is broken, its that much harder to get someone to commit, even if it's only a dollar.
People also assume that support is someone else's job- someone else is doing it. Systems like Patreon really work best when everyone contributes a little bit- all those $1 and $2 add up when its done en masse. Unfortunately ALL of those people assume its someone else's job to contribute- someone else has you covered. Or they're busy. Or they're broke. Or they forget. There's loads of reasons why someone might enjoy your work, but not be able to support it financially.
I believe that once Patreon has better in-site integration, we'll solve one half of this problem, but until then, you're really going to have to fight for those bucks. It would also help if there were a unified system of tipping and payment apps that could all pull from the same source- once you make an account, you never have to add your info again.
Other tips:
Be persistent in promotion- it takes people around 7 views to even click on a link, much less commitBelieve in yourself and your work- people will naysay itStrive to produce work WORTH backingTry to remain confident, or at least, appear confident online
If you're already providing a product for free, don't remove it's presence due to lack of Patreon support. I know it's super tempting, but it also appears childish. If you must, give your readers a chance- explain that this is a financial situation, and that you cannot afford to run it without support on their end.
Patreon isn't a get rich quick scheme, and literally every other artist online thinks they're ready to have a Patreon. There is a LOT of competition, especially among webcomic and commission based Patreons. Try to find something worthwhile that makes yours worth backing, and try to find an audience outside of the fished out barrel of webcomics.
The Verdict:
Keep in mind that while it may seem like my Patreon is a success, it's funding three art education endeavors that require the same amount of work as a full time job. My Patreon funds this blog, my YouTube channel, and my efforts on How to be a Con Artist, which also includes convention outreach and sales lost due to answering convention questions. How to be a Con Artist hit it's fourth birthday last week, this blog will hit its eighth birthday around September, and my YouTube channel will hit it's eighth birthday soon as well (and it's third birthday in November for frequent updates). None of these endeavors have achieved the level of recognition or reward that I had hoped, and the Patreon is an attempt to recoup some of those losses. Although you may not have heard of me or my work before, I am not new to the comics and art education scene, and my Patreon is by no means an overnight success. I have only hit the number I've hit due to the generosity of my friends.
Other Patreons to Check Out
Shooting-Stars (Photoshop brushes, digital resources)
Paper Cat Press (webcomic news, comic opportunities, artist interviews)
Alakotila (creator of Spider Silk webcomic)
Loom (sketchbook exclusives, tutorials)
Lean Into Art (art education, podcasts, comic educations)
Respheal (Galebound webcomic)
StArt Faire (webcomic magazine)
TriaElf9 (webcomics)
Dojo G webcomics)
Riko (City of Blank webcomic)
Kate Slinger (creator of West webcomic)
Keii4ii (creator of Heart of Keol webcomic)
Phenylketonurics (creator of There's No Such Thing as Jason- I.T)
SareSai (creator of FireWire webcomic)
Neila (creator of Magic Remains)
The Diva Lea (various comics and webcomics)
Cosmic Fish (creator of the webcomic, Cosmic Fish)
Speaking of bucks, let me remind you that if you're reading this post, if you benefitted from the information shared here, you can show that appreciation by joining my artnerd community on Patreon. Why yes, I have one too! And yes, I surely would love your contribution, the same as you'd probably love mine.
Please consider donating to this blog or purchasing from Natto-shop (http://nattosoup.com/shop) if you want me to continue publishing quality content. All materials tested were purchased from my own pocket. Keep on Truckin' Nattosoup is not under any sponsorship.
May 15, 2017
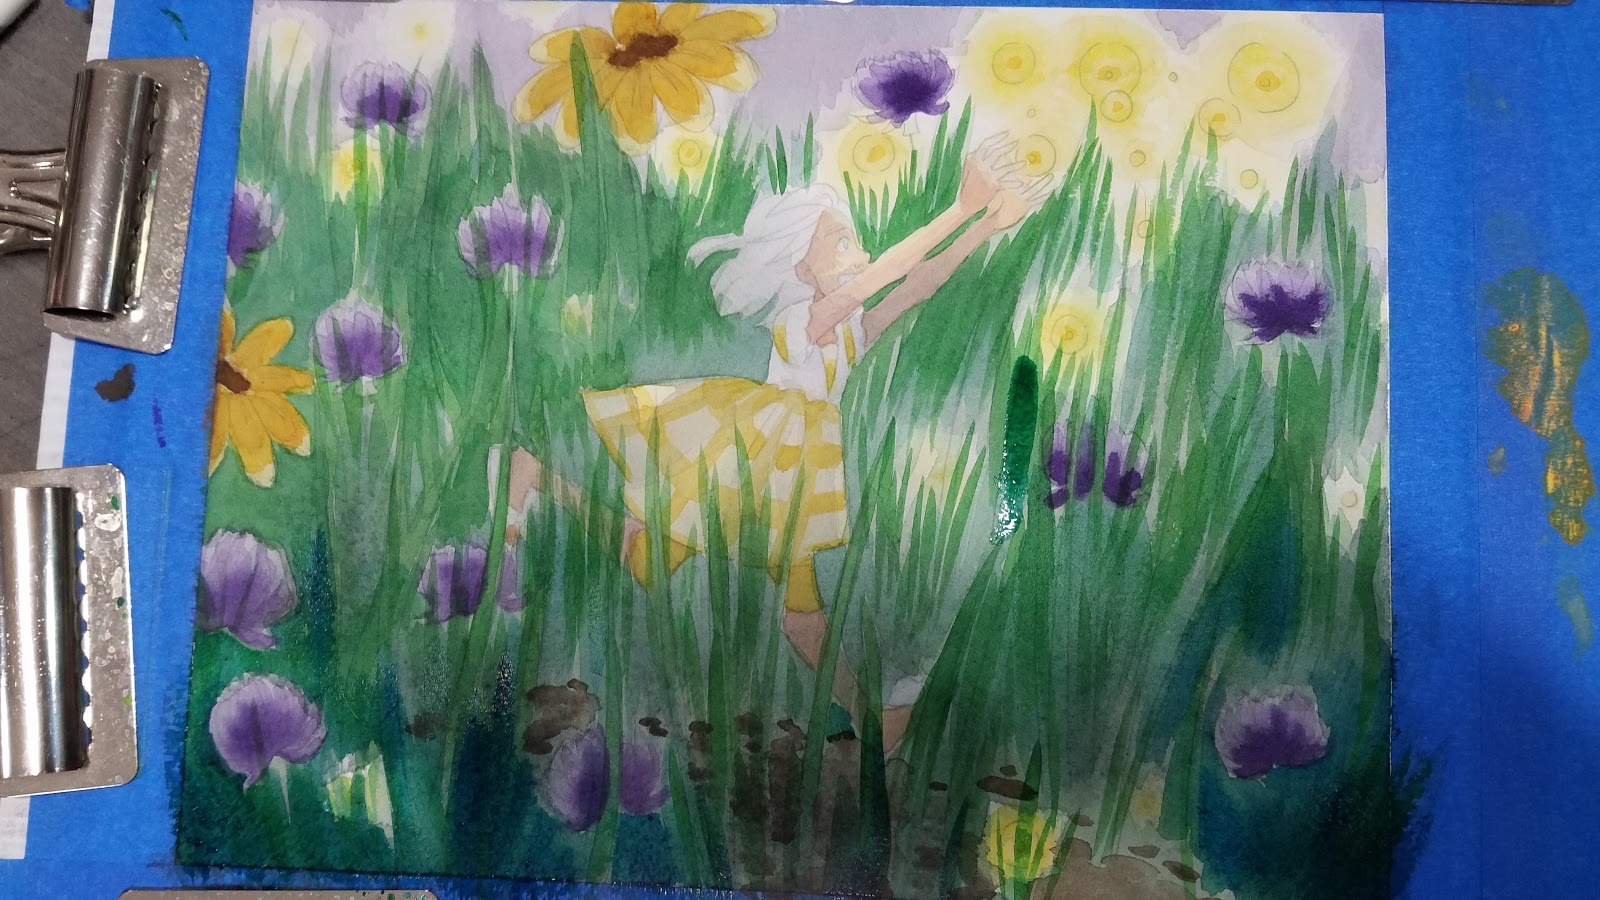
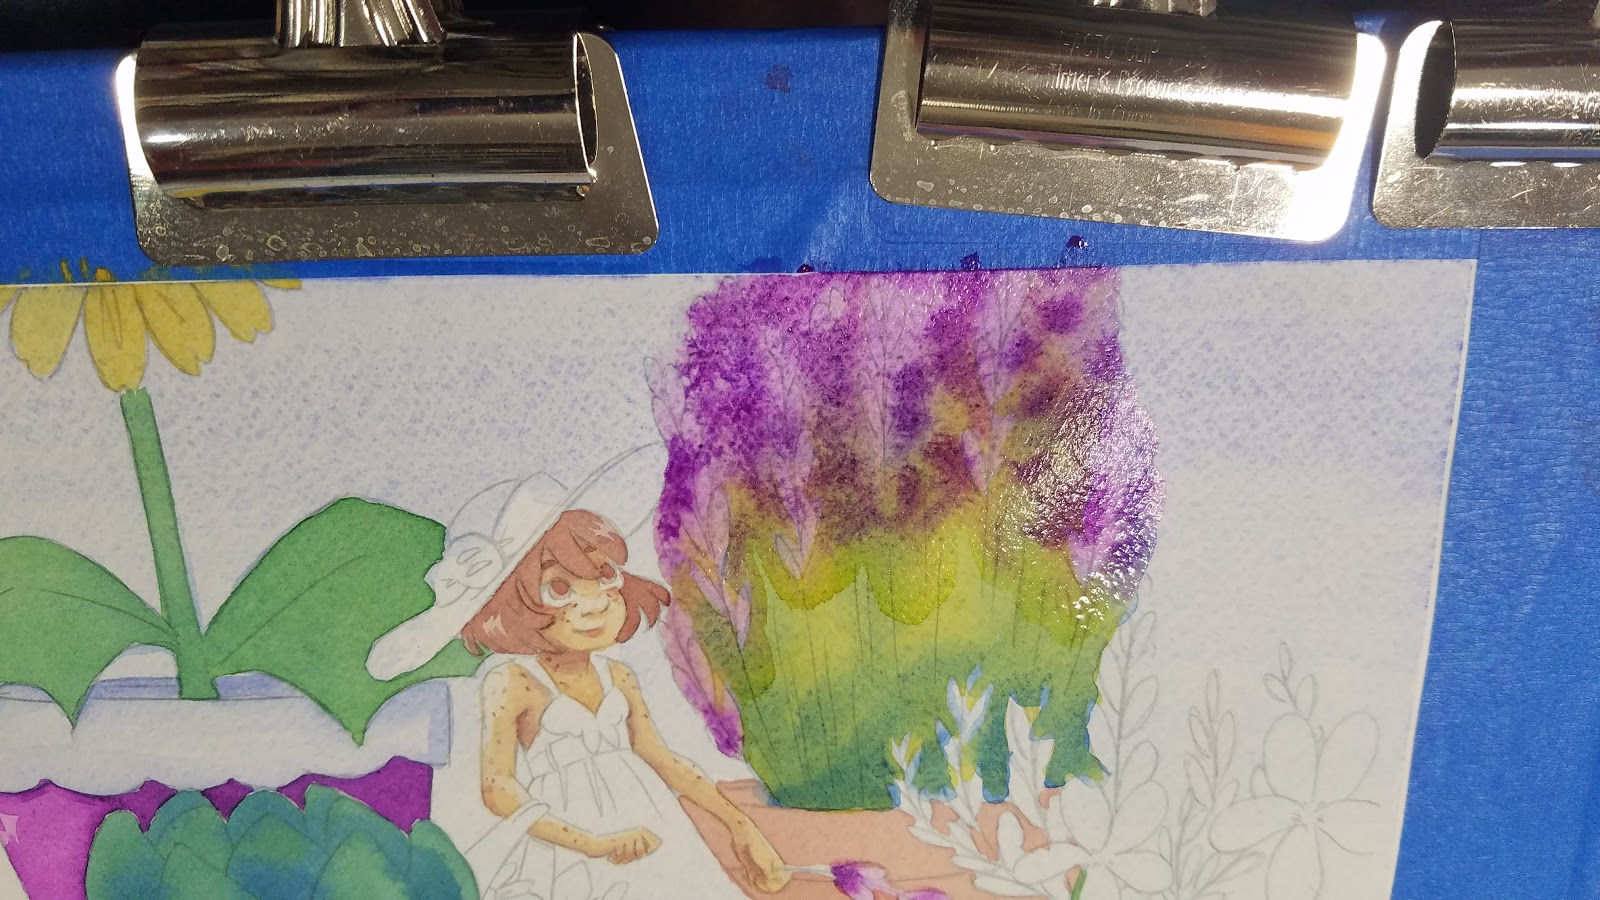
Easy Blends and Fades: Watercolor Basics
Blending, fading, and gradation are all wet into wet techniques best applied early in the painting process. These often require saturating the paper with water or paint, then floating paint on top of that.
These techniques tend to work best on cotton rag papers. In my examples I am using Canson's Moulin du Roy and Canson's L'Aquarelle Heritage watercolor papers- both of which are mould made, cotton rag papers with a cold press finish. It seems like L'Aquarelle is the replacement for Moulin du Roy. Both papers are capable of handling A LOT of water, and are not prone to muddiness- making them ideal for blends.
For blending techniques that rely on wet into wet diffusion, I highly recommend you go with a cotton rag based paper. These techniques really do not work well on cellulose papers- believe me, I've tried over the years with 7" Kara pages. I discuss paper types in the post All About That Paper.
This post was brought to you by Ink Drop Cafe, a creator's collective. Nattosoup Studio Art and Process Blog is a proud affiliate of Ink Drop Cafe.

If you enjoy comics and art resources, you should definitely check Ink Drop Cafe out!
The blends covered in today's tutorials are all fairly easy blends to accomplish, and require no special tools- just a little bit of patience!
Types of Blends
Blends are usually achieved with wet into wet or dry into wet. Blends can also be somewhat achieved by adding water after the fact, but this is not a reliable method.
Recommended Papers:
Almost anything that is cotton rag should blend nicely.
Papers I've used:
Canson Moulin du RoyCanson L'Aquarelle HeritageArches Cold PressFabriano ArtisticoShizen Handmade Paper
Wet into Wet- Soft Diffused Blend:
Great for glows
Useful for toning
Useful for creating an area of focus
How to achieve this: Apply a wash of clean water (or background color). Remove pools using a 'thirsty' brush. Apply color in circular motions, starting in the middle of the area you wish to highlight and working your way outward.


Dry into Wet: Diffused Blends Within A Small Area:
Useful for:
Creating softer textures, like streaks in marble or woodgrain
Creating diffused shadows
How to achieve this: Apply your initial color- the color you want to blend your dry color into. Pick up any pooling using a paper towel or a 'thirsty' brush. Heavily mix your next color, working directly from the pan if necessarily. Gently glide into the first color while first color is still wet.


Small, Soft Blends in limited areas:
Useful For:
Painting Blends to Render Glass
How to achieve this: Blend wet paint out with water, or dab excess paint up with a paper towel, then blend with water.


Wet into Wet: Simple Sky Gradient
Useful for:
Skies
Soft transitions
How to Achieve This:
There are three methods for achieving single color gradient transitions.
The first:
Apply a wash of color to half of the area, blend out using water for the rest. Prop up so that the color area will run into the water area.
The second: Apply a wash of color with a single brush dip into paint, allowing the gradual decrease in paint to create the gradation.
The third:
Apply wash all over area. Allow to dry. Apply another wash, blending out with water about 1/3 of the way to the end. Allow to dry. Apply another wash to about 2/3 of the way to the end. Allow to dry.

Wet into Wet: Extreme Color GradientsUseful for :SunsetsExtreme color changes in plants
How to achieve this: Paint half the area in one color, absorbing excess color with a thirsty brush or a paper towel. Starting at the other end, repeat with other color. Soak up excess water to prevent pooling.
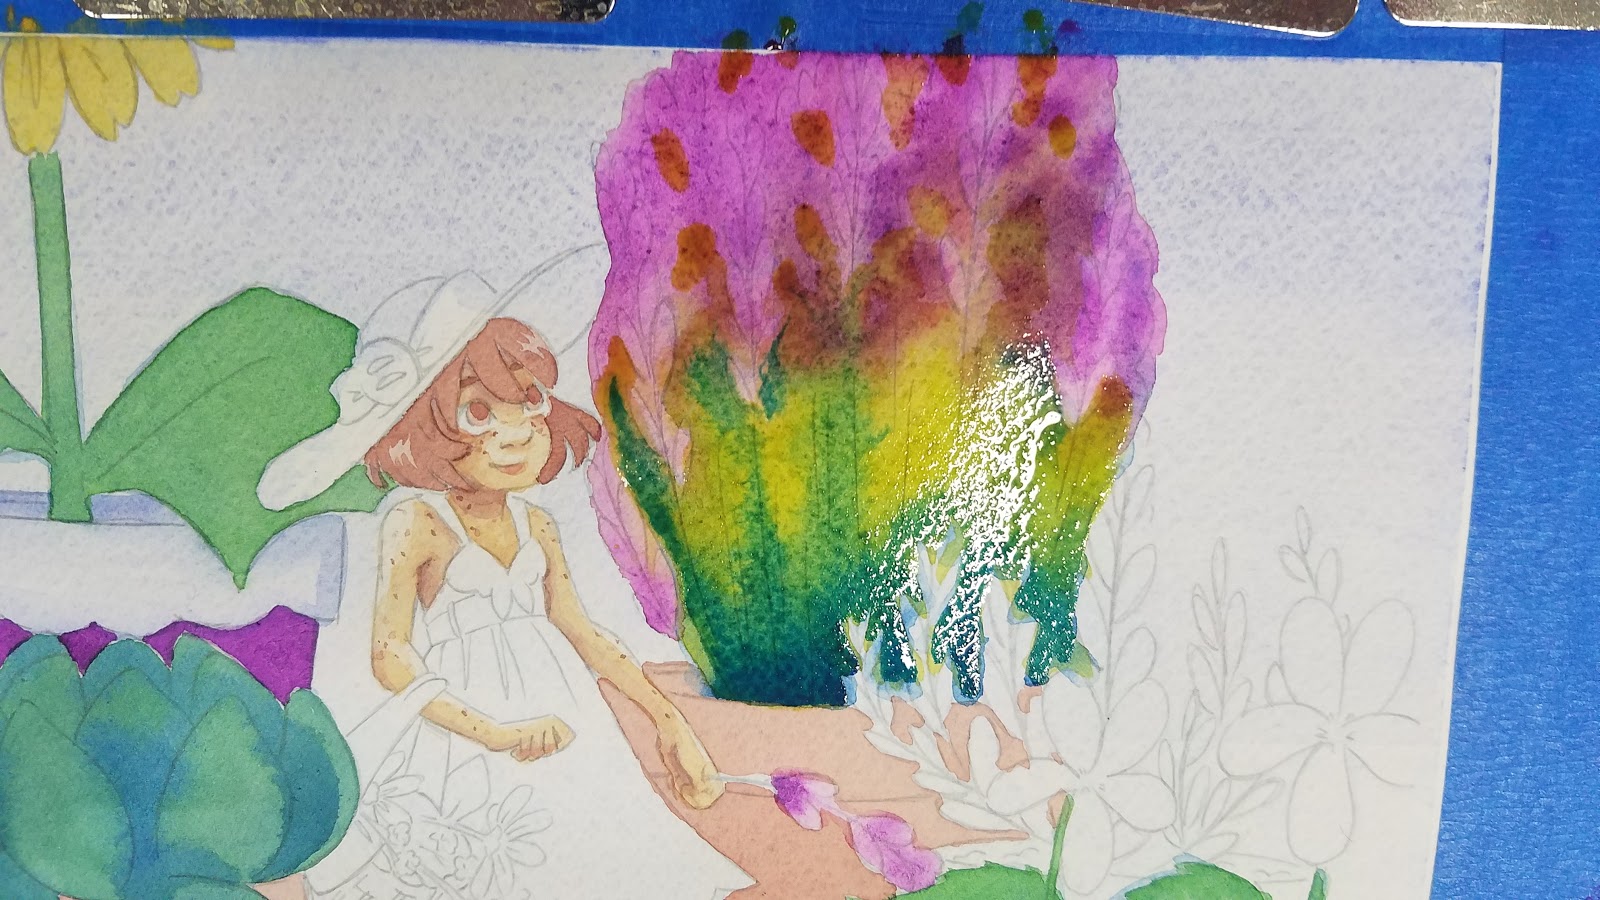
From Fuschia to Green Gold


Dabbing Color in to Gently Diffuse:
Useful for:
Reinforcing certain colors
Gently adding accent colors
How to achieve this:
Simply dab your dry-mixed color onto your wet paper.


If you enjoyed this Watercolor Basics tutorial, don't be shy! Please share it to your favorite social media! Your good word on Twitter, Tumblr, Facebook, or Pinterest goes a long way to keeping this blog going! If you're feeling particularly generous, or want access to Backer Exclusive goodies, wooden charms, mini prints, and more, join the Artnerd community on Patreon!
Please consider donating to this blog or purchasing from Natto-shop (http://nattosoup.com/shop) if you want me to continue publishing quality content. All materials tested were purchased from my own pocket. Keep on Truckin' Nattosoup is not under any sponsorship.
These techniques tend to work best on cotton rag papers. In my examples I am using Canson's Moulin du Roy and Canson's L'Aquarelle Heritage watercolor papers- both of which are mould made, cotton rag papers with a cold press finish. It seems like L'Aquarelle is the replacement for Moulin du Roy. Both papers are capable of handling A LOT of water, and are not prone to muddiness- making them ideal for blends.
For blending techniques that rely on wet into wet diffusion, I highly recommend you go with a cotton rag based paper. These techniques really do not work well on cellulose papers- believe me, I've tried over the years with 7" Kara pages. I discuss paper types in the post All About That Paper.
This post was brought to you by Ink Drop Cafe, a creator's collective. Nattosoup Studio Art and Process Blog is a proud affiliate of Ink Drop Cafe.

If you enjoy comics and art resources, you should definitely check Ink Drop Cafe out!
The blends covered in today's tutorials are all fairly easy blends to accomplish, and require no special tools- just a little bit of patience!
Types of Blends
Blends are usually achieved with wet into wet or dry into wet. Blends can also be somewhat achieved by adding water after the fact, but this is not a reliable method.
Recommended Papers:
Almost anything that is cotton rag should blend nicely.
Papers I've used:
Canson Moulin du RoyCanson L'Aquarelle HeritageArches Cold PressFabriano ArtisticoShizen Handmade Paper
Wet into Wet- Soft Diffused Blend:
Great for glows
Useful for toning
Useful for creating an area of focus
How to achieve this: Apply a wash of clean water (or background color). Remove pools using a 'thirsty' brush. Apply color in circular motions, starting in the middle of the area you wish to highlight and working your way outward.

Dry into Wet: Diffused Blends Within A Small Area:
Useful for:
Creating softer textures, like streaks in marble or woodgrain
Creating diffused shadows
How to achieve this: Apply your initial color- the color you want to blend your dry color into. Pick up any pooling using a paper towel or a 'thirsty' brush. Heavily mix your next color, working directly from the pan if necessarily. Gently glide into the first color while first color is still wet.
Small, Soft Blends in limited areas:
Useful For:
Painting Blends to Render Glass
How to achieve this: Blend wet paint out with water, or dab excess paint up with a paper towel, then blend with water.

Wet into Wet: Simple Sky Gradient
Useful for:
Skies
Soft transitions
How to Achieve This:
There are three methods for achieving single color gradient transitions.
The first:
Apply a wash of color to half of the area, blend out using water for the rest. Prop up so that the color area will run into the water area.
The second: Apply a wash of color with a single brush dip into paint, allowing the gradual decrease in paint to create the gradation.
The third:
Apply wash all over area. Allow to dry. Apply another wash, blending out with water about 1/3 of the way to the end. Allow to dry. Apply another wash to about 2/3 of the way to the end. Allow to dry.

Wet into Wet: Extreme Color GradientsUseful for :SunsetsExtreme color changes in plants
How to achieve this: Paint half the area in one color, absorbing excess color with a thirsty brush or a paper towel. Starting at the other end, repeat with other color. Soak up excess water to prevent pooling.
From Fuschia to Green Gold


Dabbing Color in to Gently Diffuse:
Useful for:
Reinforcing certain colors
Gently adding accent colors
How to achieve this:
Simply dab your dry-mixed color onto your wet paper.


If you enjoyed this Watercolor Basics tutorial, don't be shy! Please share it to your favorite social media! Your good word on Twitter, Tumblr, Facebook, or Pinterest goes a long way to keeping this blog going! If you're feeling particularly generous, or want access to Backer Exclusive goodies, wooden charms, mini prints, and more, join the Artnerd community on Patreon!
Please consider donating to this blog or purchasing from Natto-shop (http://nattosoup.com/shop) if you want me to continue publishing quality content. All materials tested were purchased from my own pocket. Keep on Truckin' Nattosoup is not under any sponsorship.


