
Becca Hillburn's Blog, page 26
July 17, 2017
Con Announcement: At Home Con
When: Saturday, July 22nd. I plan to begin around 12PM CST, but may be a bit later.
What: A live streaming event through Youtube or IBM Cloud Video (formarly UStream)! I plan on doing a couple tests this week, and will make sure to definitively announce where the stream is taking place by Friday.
Where: Your living room, studio, kitchen, bedroom- or coffee shop of your choice. Basically anywhere you want to be!
Why: This is the first year in seven that I did not make it into the Mechacon Artist Alley as an artist. Mechacon is a huge source of income for me, and I've spent years developing that audience. So rather than rolling over and giving up, I'm taking the con online!
This is the perfect opportunity for those of you who enjoy this blog, but have no intention of patronizing my work at a convention. Now you can enjoy the show at home!
What's for sale?
Commissions- of all types, will work on them as they come in. If you've ever wanted to watch me do markers or watercolor, here's your chance!New Wooden charms for 2017!7" Kara Volume 1- both regular and with sketchesMini ComicsSassy ButtonsCute accessoriesOriginal Art
Who's Invited?
Anyone who'd like to attend! Everyone is invited to come hang out and chat, request to see items, and purchase items. This is a great opportunity if you live far away, but always wanted to see me at a con!
What if I can't afford to buy anything?
You're still very welcome to come hang out!
So how does this work?
I'm going to set up my artist alley table in my living room- the whole magilla! From original pieces to mini prints, from books to bows, it's all going out on the table.
We're going to set up a couple cameras- one at the front of my table, one behind the table, to try and capture a bit of the Artist Alley experience.
There'll be a chat room, and you're welcome to hang out, ask me questions, or request to see specific items close up. If you see something you like, let me know! You place your order through the chat, wait for confirmation, then pay through Paypal or my shop. If paying through Paypal, please include your mailing address in the comment. I set your item, commission, or book aside for mailing at the end of the show.
For commissions, I will have examples set up on a few sites (here, my Tumblr, my Instagram) with prices. Orders will be placed through chat- Username- what you'd like- what level of commission you wish to purchase. Commissions will be filled (as much as possible) that Saturday, then mailed out to customers, along with product orders. Commissions not filled during At Home Con will be filled after and mailed out.
Not comfortable with chat? You can also reach me through Twitter DM or email to place your order.
Pre Orders Starting Today
You can also pre-order commissions starting now through email, comment form, or Twitter DM. If you'd like me to do a portrait (pet, kids, self, or an original character) please include links to your reference. Once you get the OK, you can send your payment to my Paypal (same address as my email).
Where can I find examples of what to expect?
You can check out some examples of my various commission tiers here!
You can check out various examples of what I sell at conventions here!
How does this differ from an online sale or shop?
In some aspects, it doesn't. But neither does a convention table really differ from a pop up shop. Sure, the table is in my living room, and no, you can't actively pick up the items to check them out, but we're going to have a camera at the ready to help facilitate the visual aspect of shopping. And an At Home con has benefits that a real convention lacks- no lines, no need for badges, no registration, no travel, no con fatigue, and hopefully no social anxiety. I will address the camera just as I would address you in person, for that personalized feel, and you can watch commission progress from the second camera behind me. In a lot of ways, an At Home con is a better convention experience if you love cons for the Artist Alley.
If At Home Con goes well, I may be able to organize larger streamed events with other artists in the future!
As a bonus:
I plan on starting At Home con early for Artnerds, with an exclusive look at how I set up for cons, step by step! So if you want some inside information on how I prep and set up for cons, head on over to my Patreon to join the Artnerd community!
Please consider donating to this blog or purchasing from Natto-shop (http://nattosoup.com/shop) if you want me to continue publishing quality content. All materials tested were purchased from my own pocket. Keep on Truckin' Nattosoup is not under any sponsorship.


July 16, 2017
Cicada Summer Inking: Intro to Comic Craft
 Love comics? Make sure you check out mine, 7" Kara, now a webcomic!
In today's tutorial, we're going to talk about inking! I've written so much about inking over the years- reviewing dozens of fude pens, discussing brush and nib care, and sharing so many demonstrations and reviews on the YouTube channel. Therefore, I highly recommend you check out the wonderful resources listed at the end of the post- there's something unique about WATCHING someone ink, rather than reading about someone inking. For Cicada Summer, I've listed the materials used for these pages below.
For a penciling AND inking demonstration, please check out
Cicada Summer: Pencils and Inks
Materials:
For Borders:
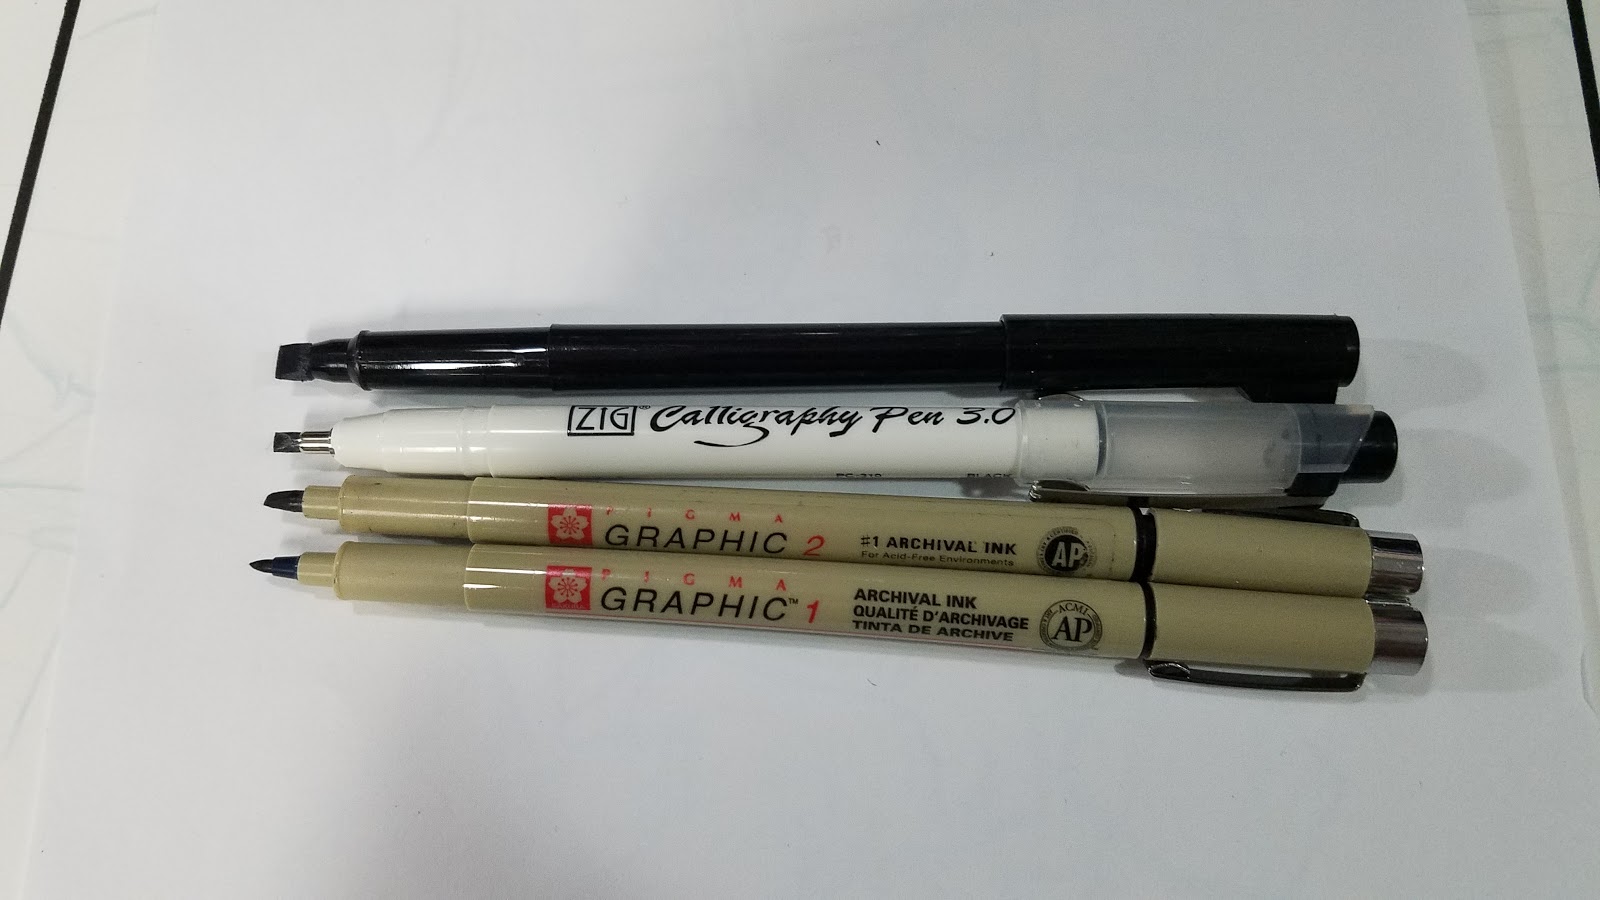
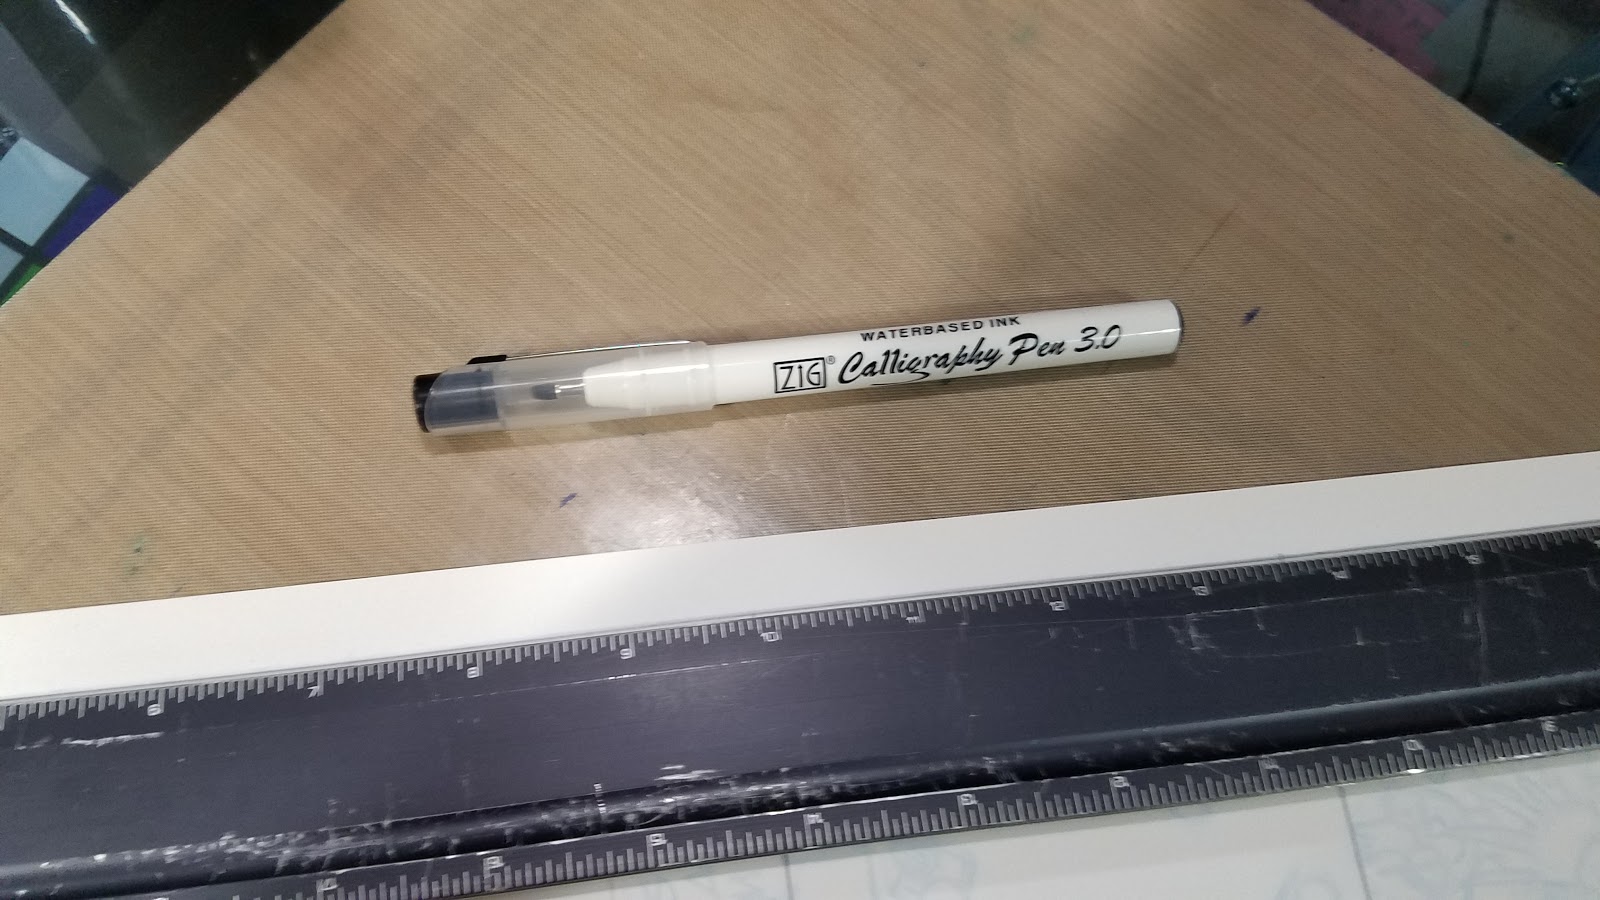
Calligraphy Pens
Rulers
For Pencils:
Erasers (I recommend white vinyl erasers)
Pencils (I prefer a mechanical pencil with a 2H lead- less smearing)
For Inks:
Fude Pens (I used these: )
Kuretake Fudegokochi
Zebra
Sakura Pigma MB
Looking for further reviews and recommendations? Make sure you check out my Brushpens hub page!
For Corrections:
Copic Opaque White (or white gouache of choice)
Cup of water
White Signo Gel Pen

Love art and comic tutorials? Why not show your appreciation by joining the Artnerd community on Patreon? Your financial support allows me to dedicate time and resources to providing tutorials like today's!
Borders and Balloons
For a complete borders tutorial, please check out Using Calligraphy Pens for Inking Borders, which went live July 5th.


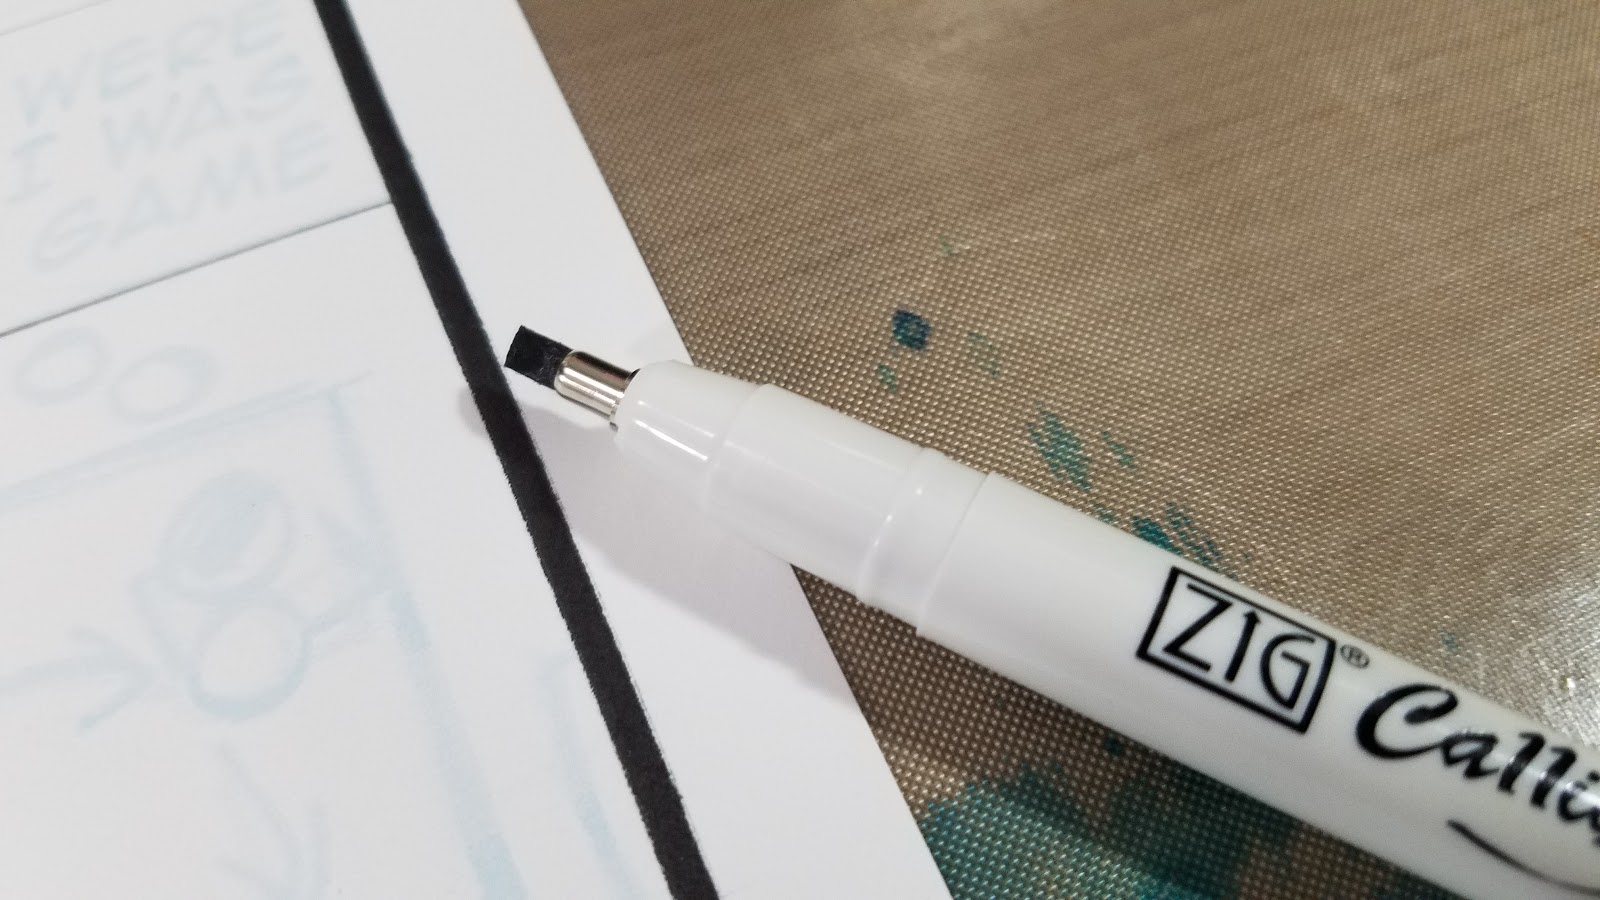


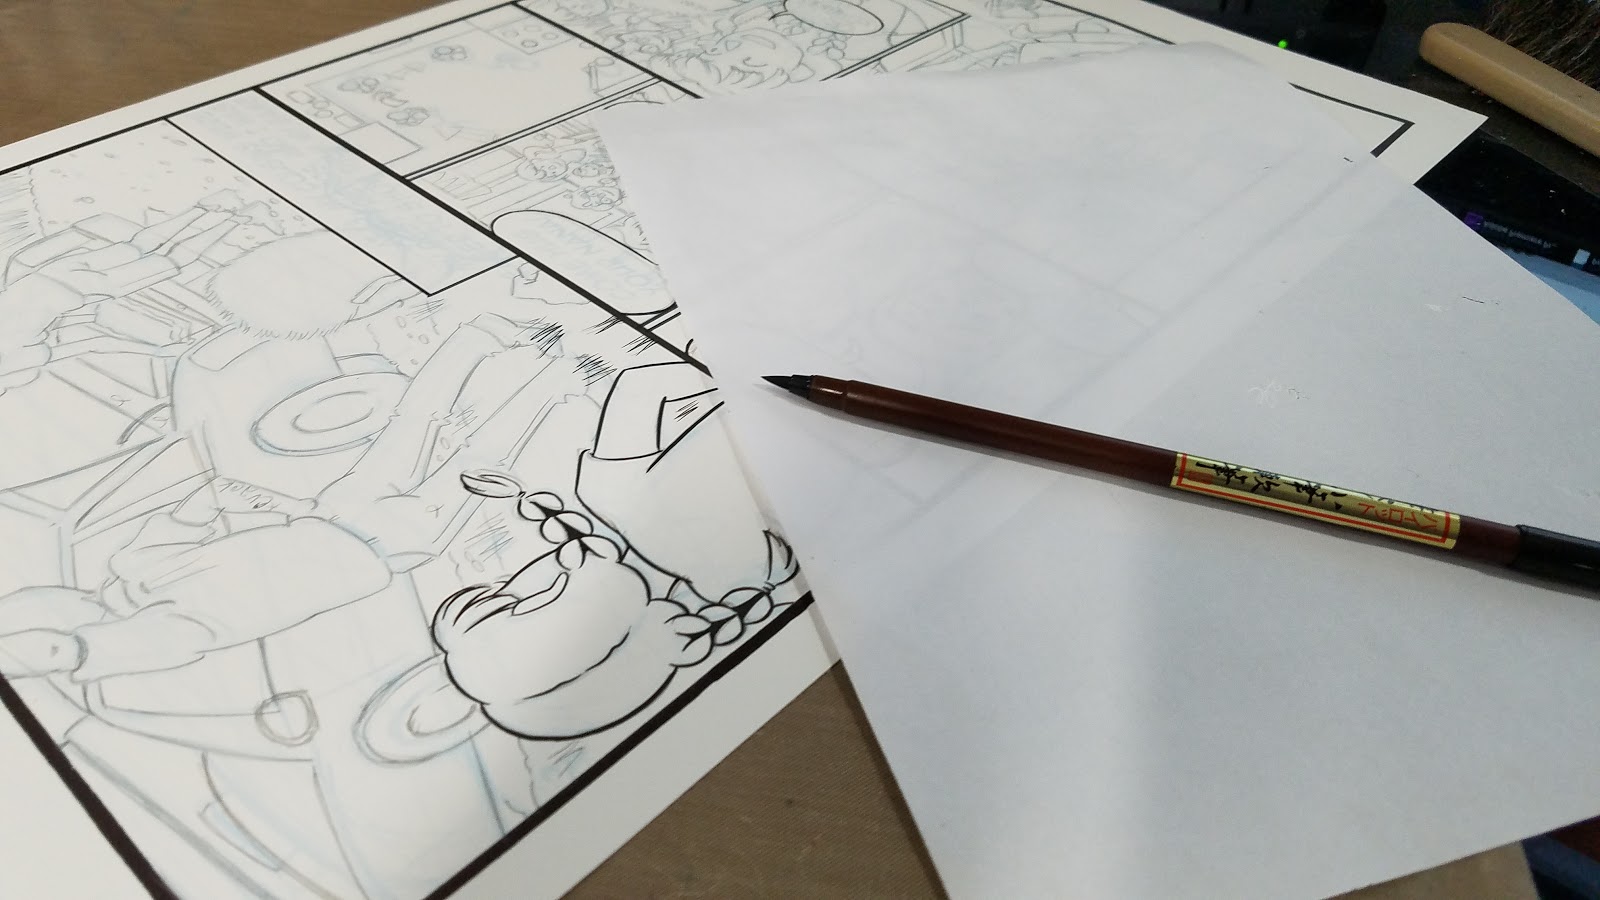
For word balloons, I use a Kuretake Fudegokochi fude pen- it's flexible rubbery nib allows for organic word balloons.

Pencils
Pencils are in some ways optional if you are working on top of printed bluelines. They present an opportunity to tighten your work and add details. Some artists are comfortable, and some prefer, to do this directly in ink, but as I work primarily in watercolor at this point, I wanted the opportunity to erase and correct some of the mistakes from my roughs.
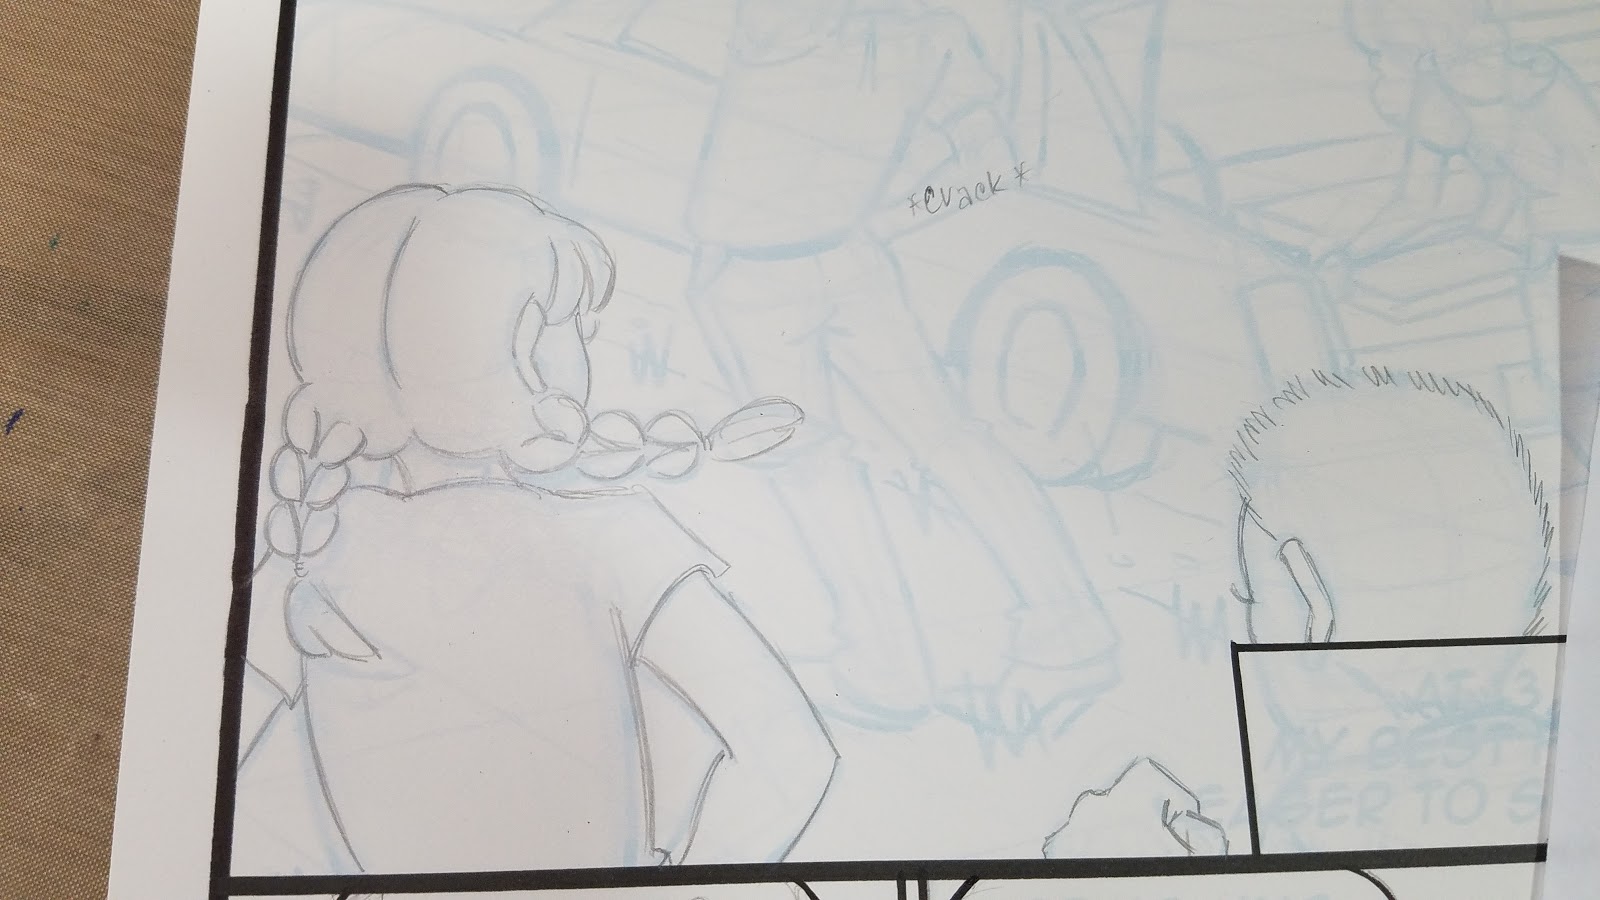

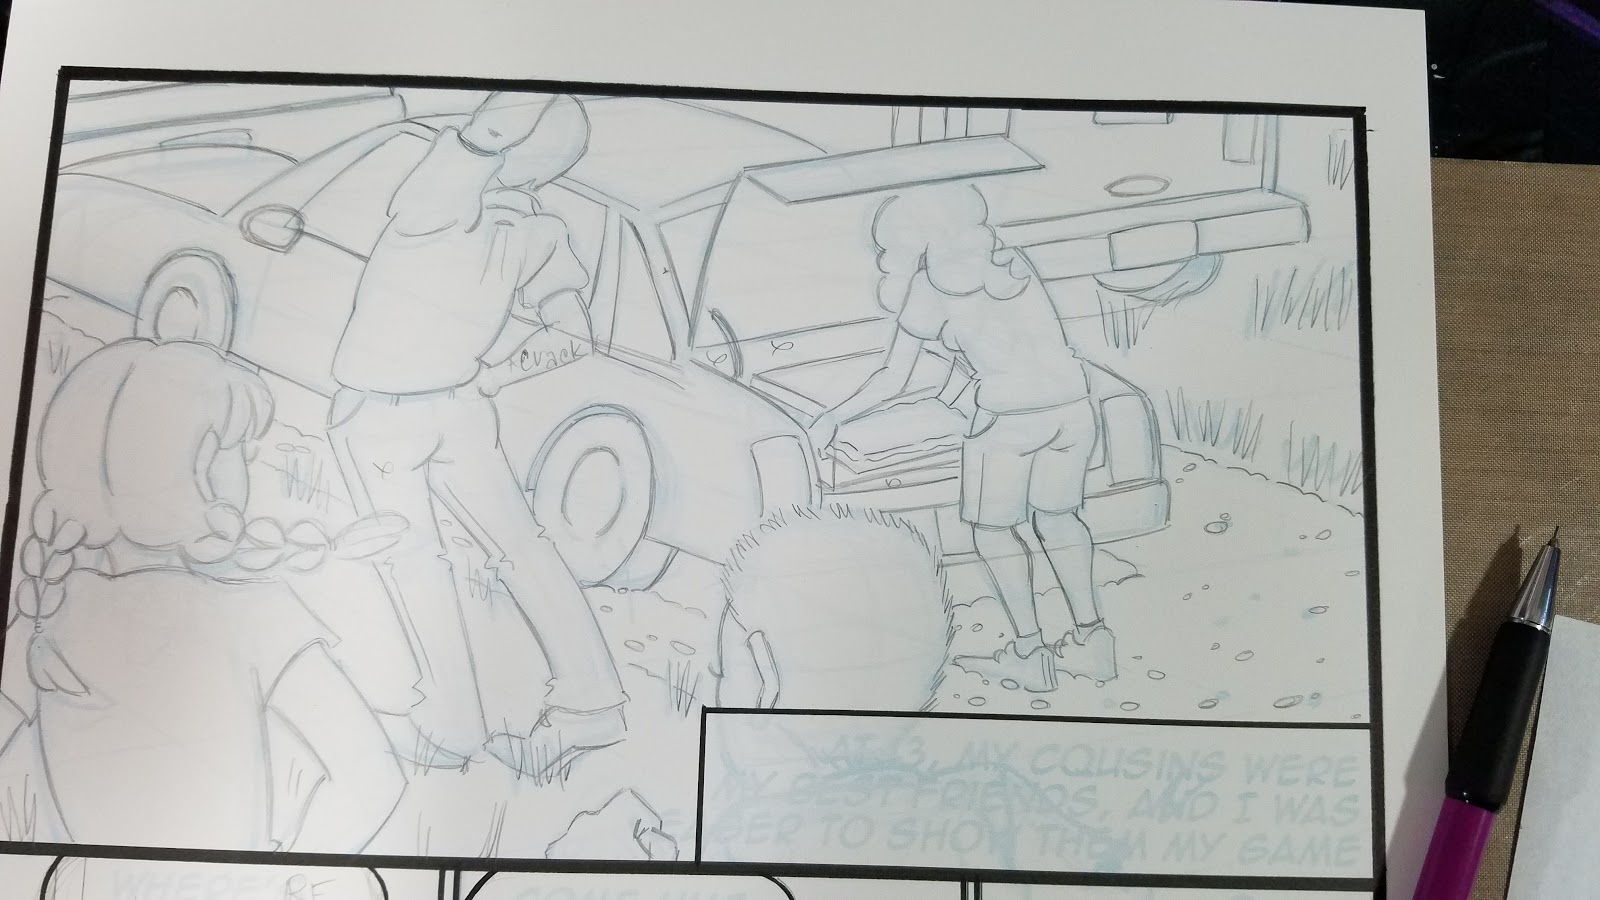
When penciling, you can opt to do it one panel at a time, or the entire page- whatever you are most comfortable with. While working on Cicada Summer, I found that starting my morning with inks, and then penciling the next page in the afternoon helped stave off fatigue.
I recommend you use a harder lead that leaves a lighter line- it will be easier to erase. Don't bear down with your pencil- the graphite can knick the paper and leave fragments of graphite behind that are impossible to erase.
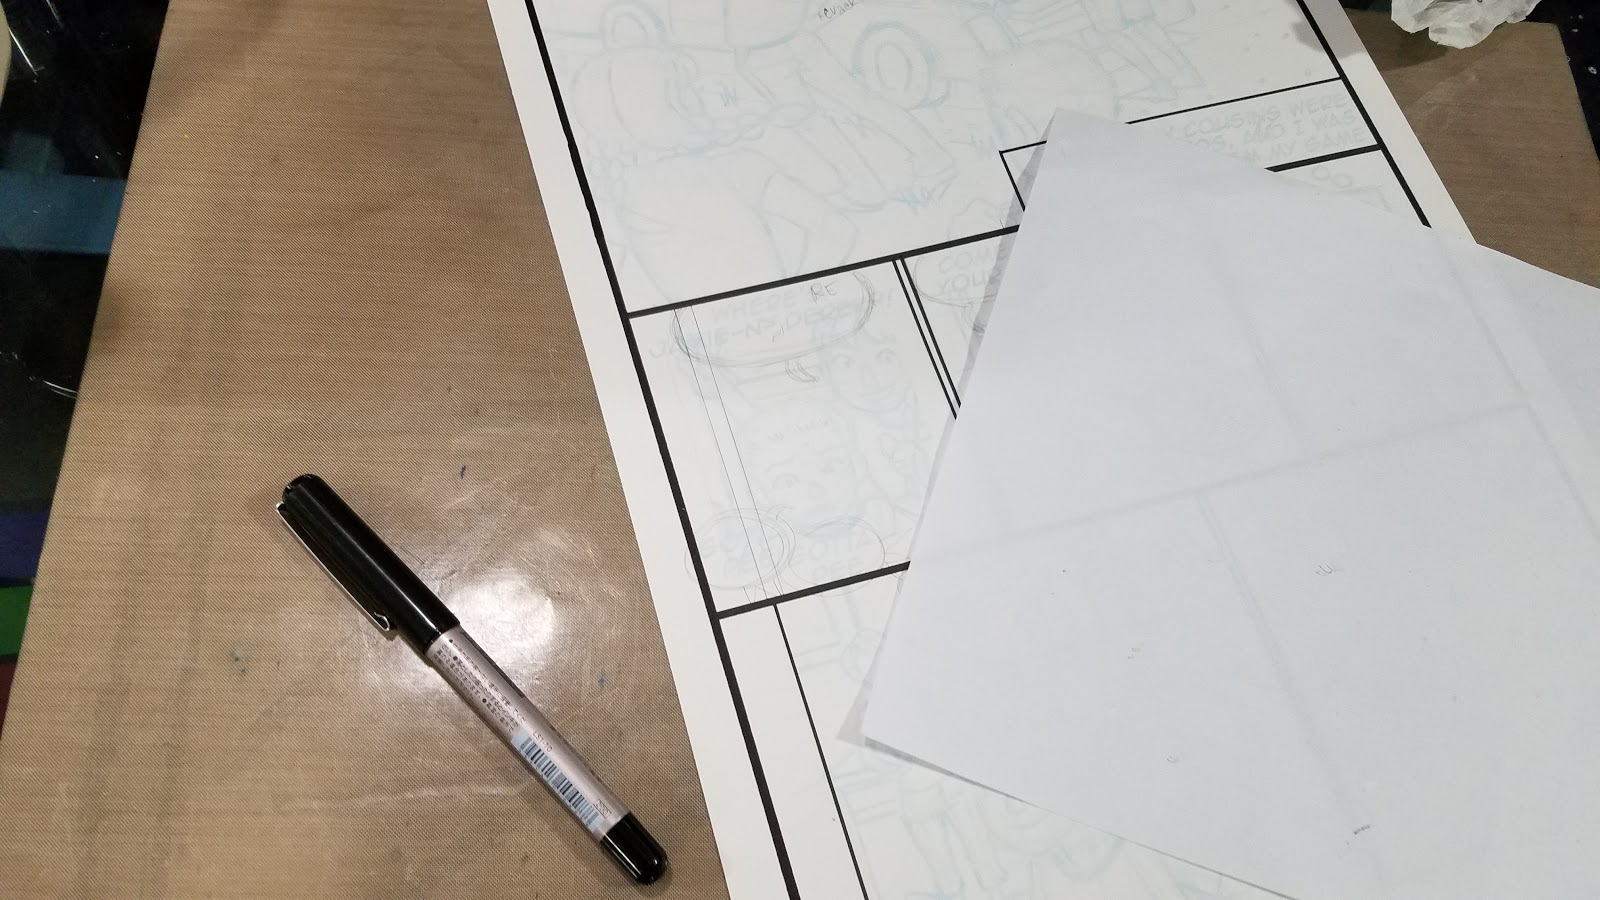
Inking
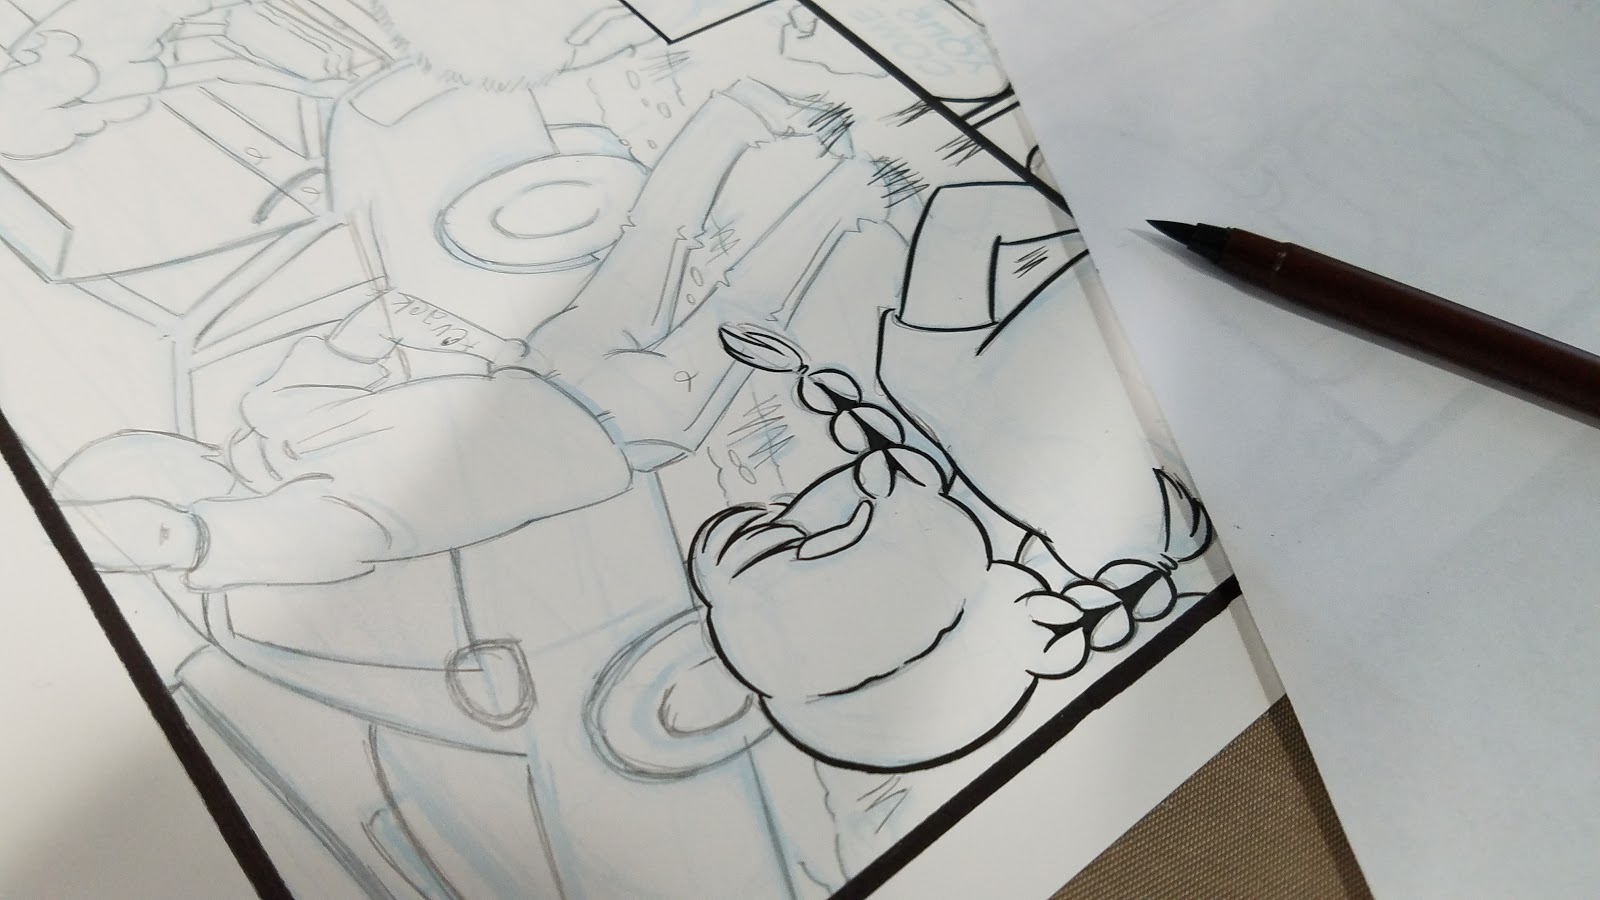
For this project, I decided to ink with something I'm very comfortable with- fude pens. I use fude pens for my inked con commissions, so while I don't do many inked comics anymore, I am still in practice with fude pens.
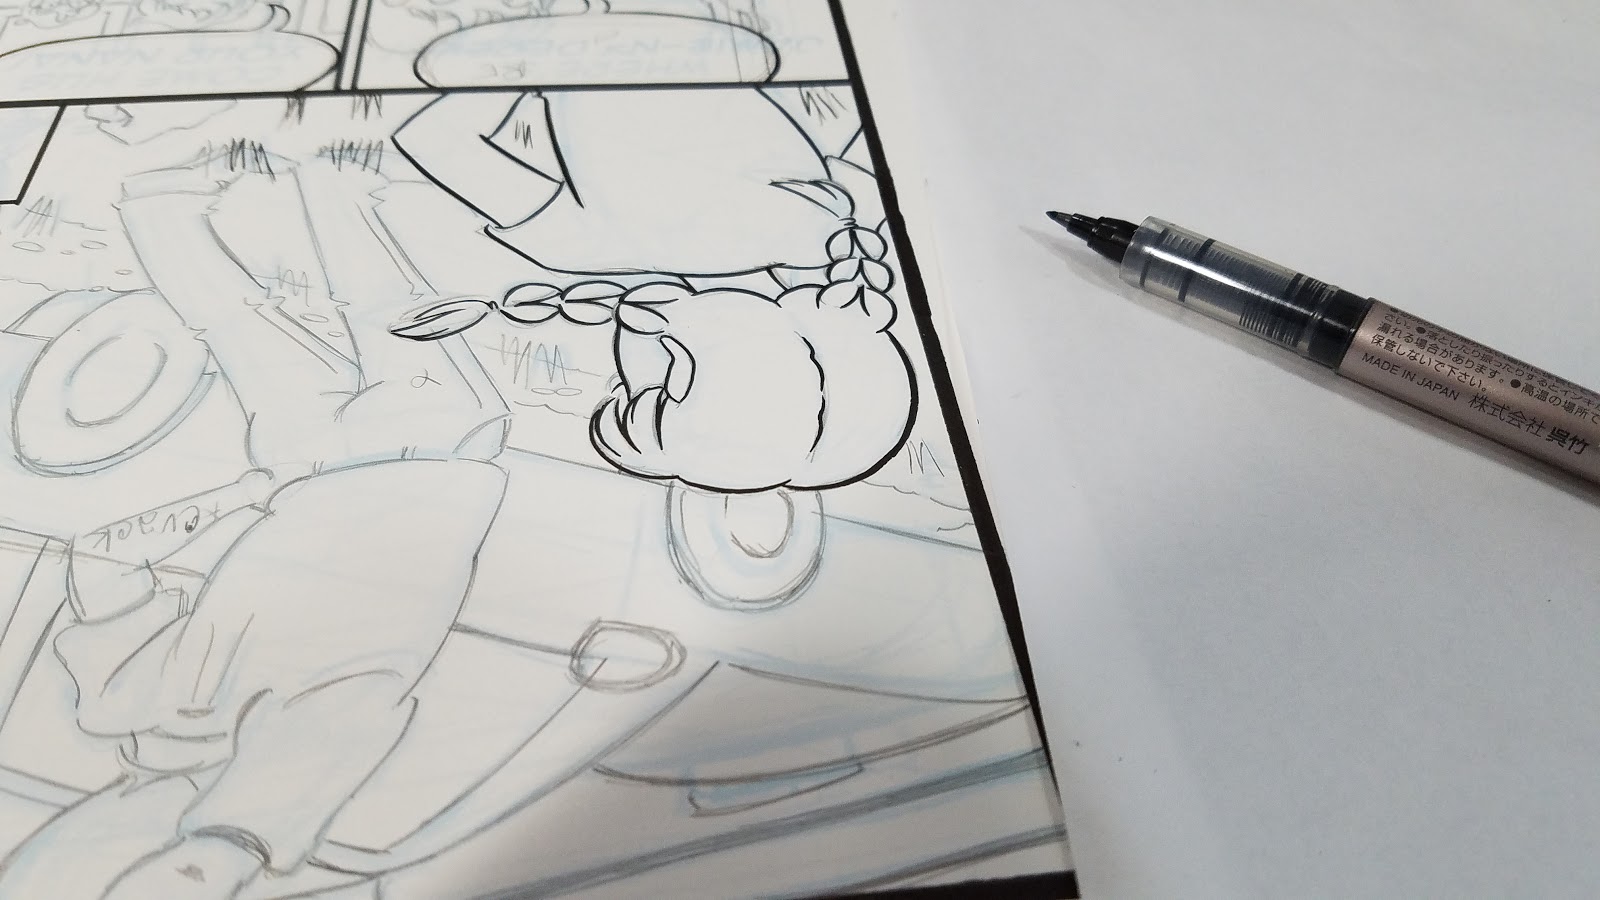
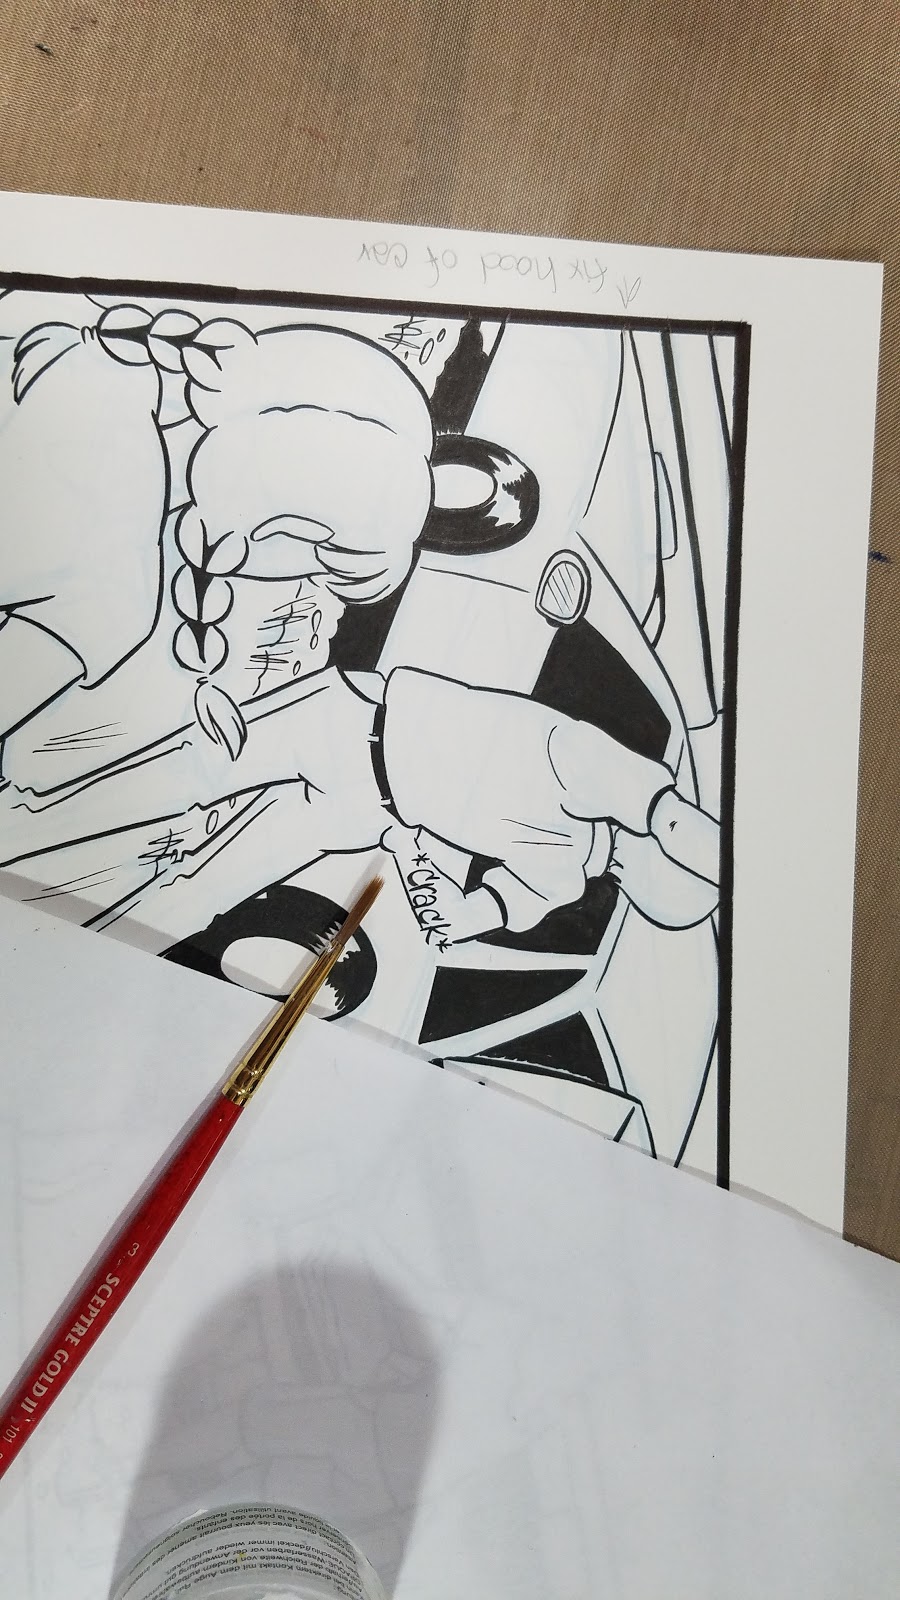
The majority of my pages were inked with a Kuretake Fudegokochi, with larger fills completed with a Kuretake No. 55 (or No. 33, depending on what you have), a Sakura Pigma BB brushpen, and a Zebra brushpen. You can also use a Pentel Pocket Brush for larger fills.

 Inking with any tool requires practice, concentration, and a steady hand. I recommend inking AFTER you've eaten- low blood sugar can make your hand shake. If you're used to using a technical pen to ink your comics, I highly recommend you try out one of the dozens of fude pens I've reviewed over the years. Most are available on Amazon with a quick search using the correct name, at a lower price and with Prime shipping. If you want to support this blog without spending extra money, begin all of your Amazon shopping sprees with this link. I think you'll find the flexible yet firm nib to be quite an upgrade to solid line technical pens- it's capable of fine and bold lines with just an adjustment of pressure.
I often work with a cover sheet to help prevent smearing or oils from my hands getting onto the paper's surface. The oils your skin naturally produces can cause resist effects, or effect the drying time of inks. so a cheap cover sheet of copy paper is an inexpensive insurance plan.
Feel free to rotate your paper as needed in order to get the best angle for your lines.
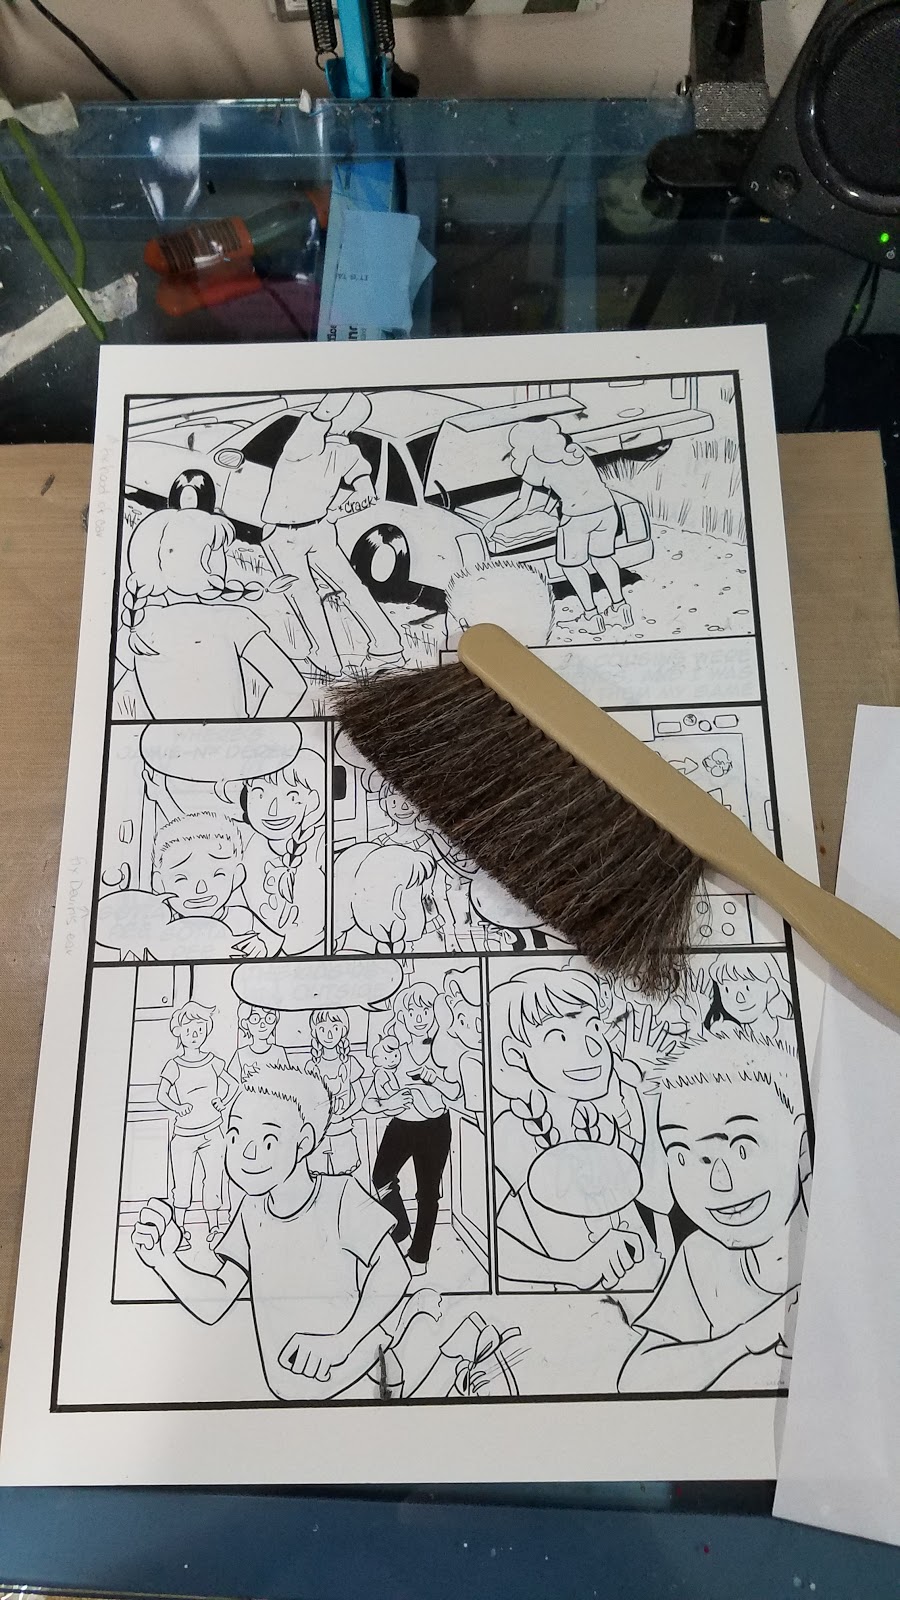
Switching over to a Sakura Pigma MB for filling in black areas.
And a Zebra brushpen.

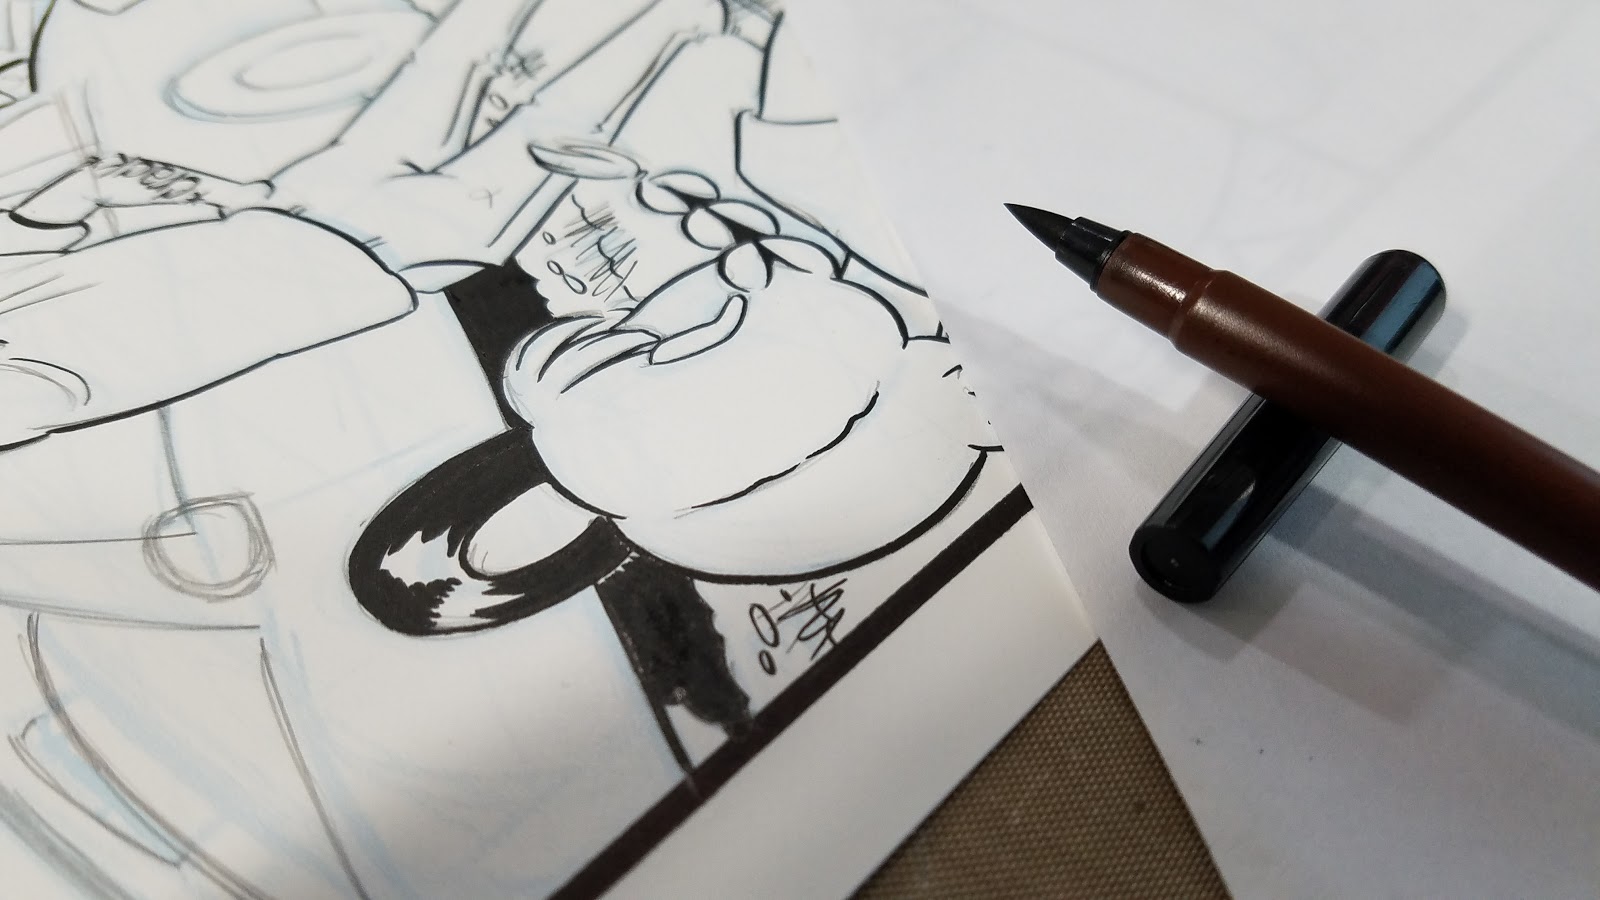
Using larger brushpens can be helpful for filling in spot blacks and shadows. They're also useful for inking larger or foreground objects with a heavier lineweight to help give scale.
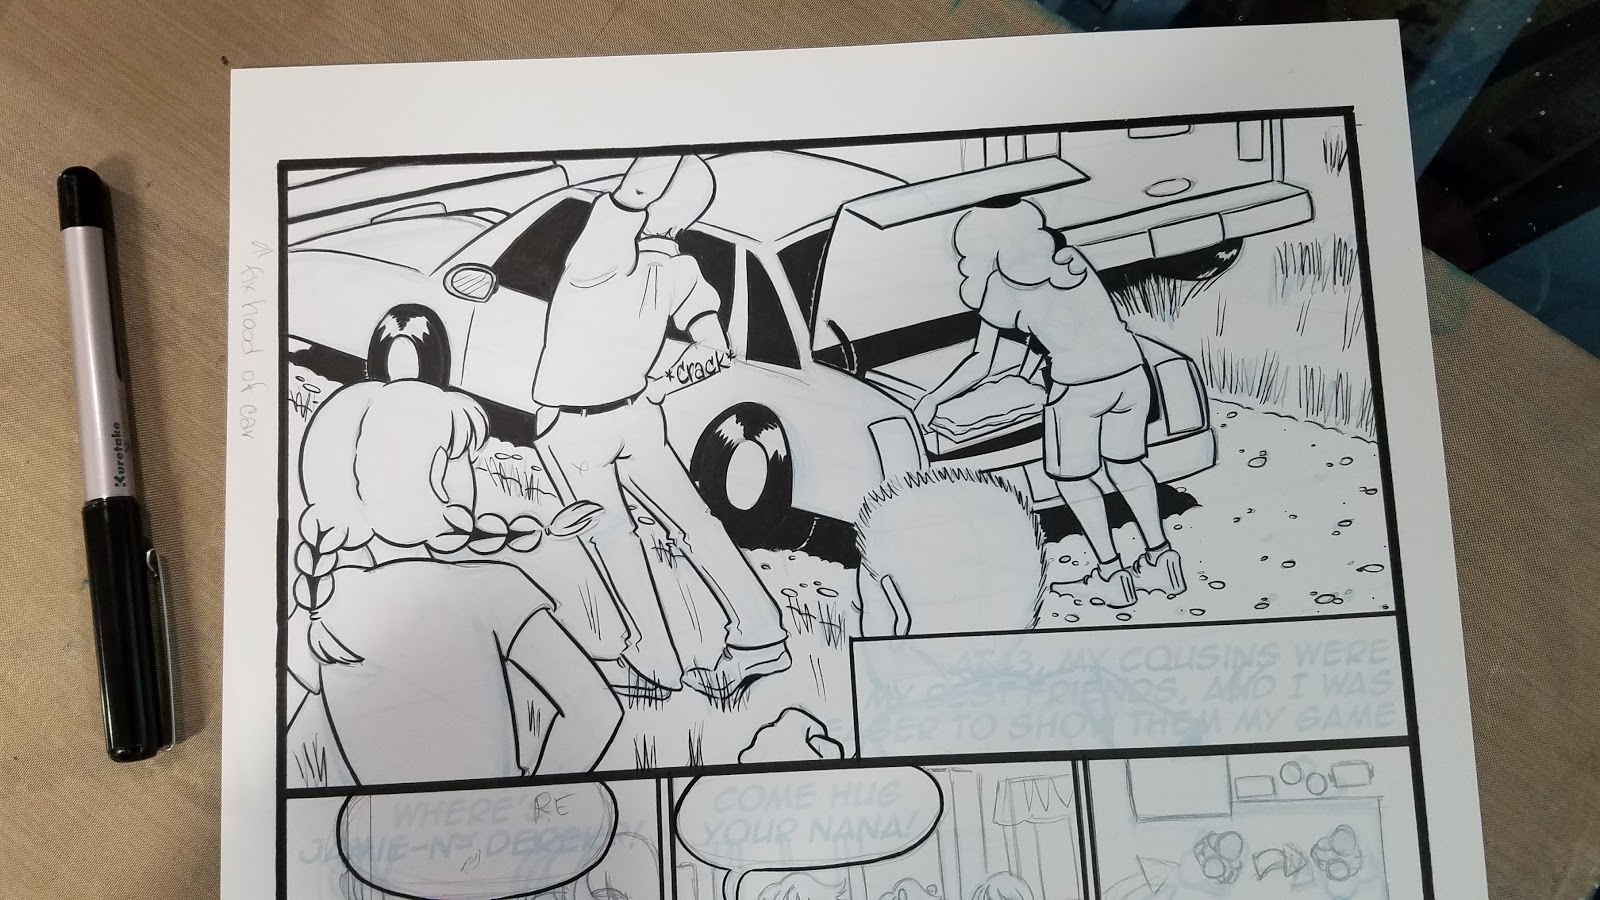

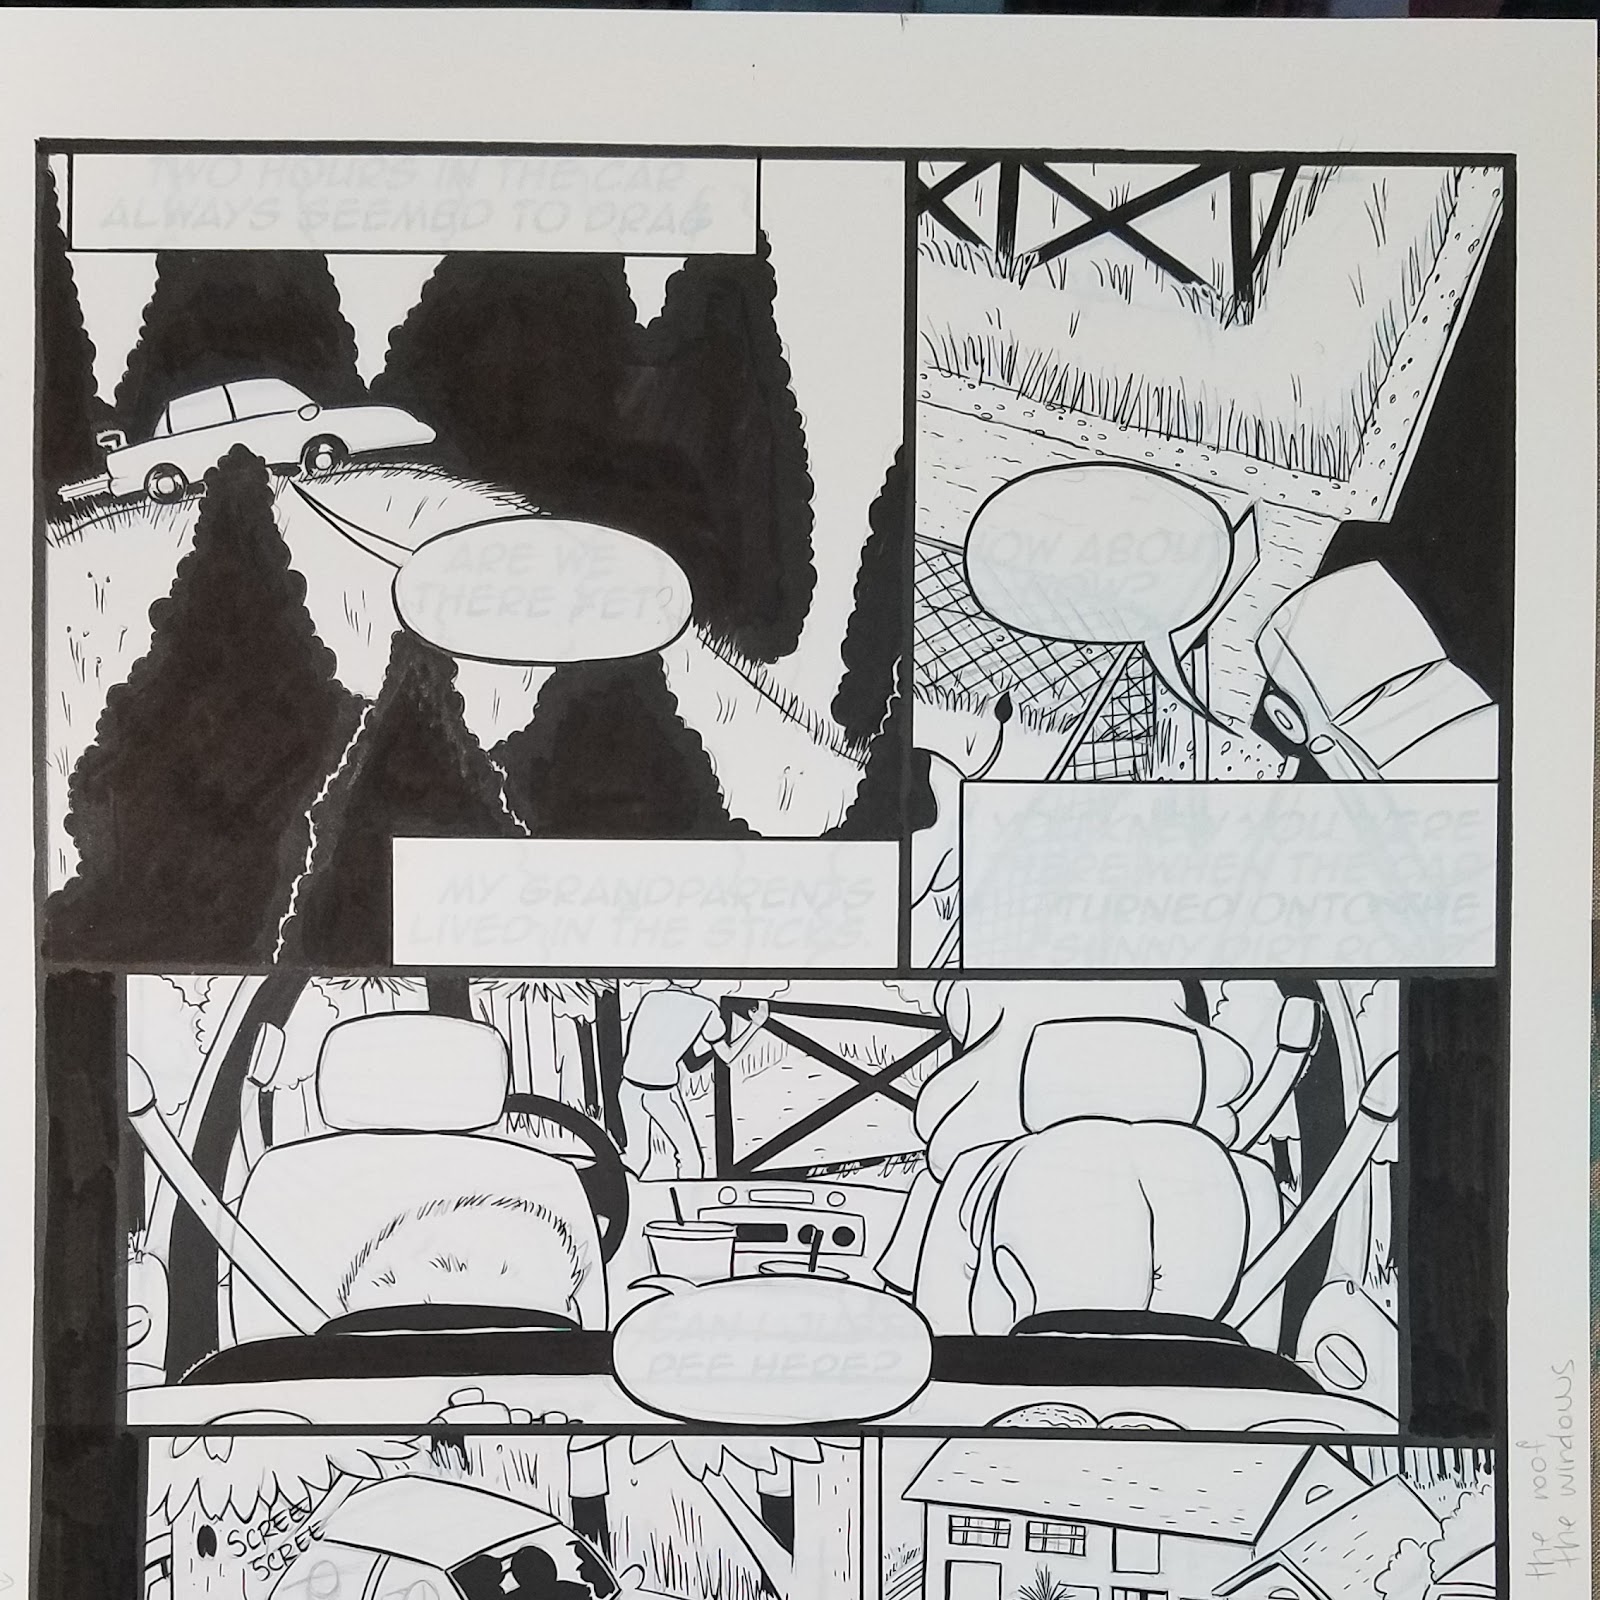
I tend to work fairly systematically- from the foreground to the background, top of page to bottom, but different artists have different methods of approaching inks. Some go for the objects they enjoy inking most, some save those for last- experiment to find the methods that keep you inking!

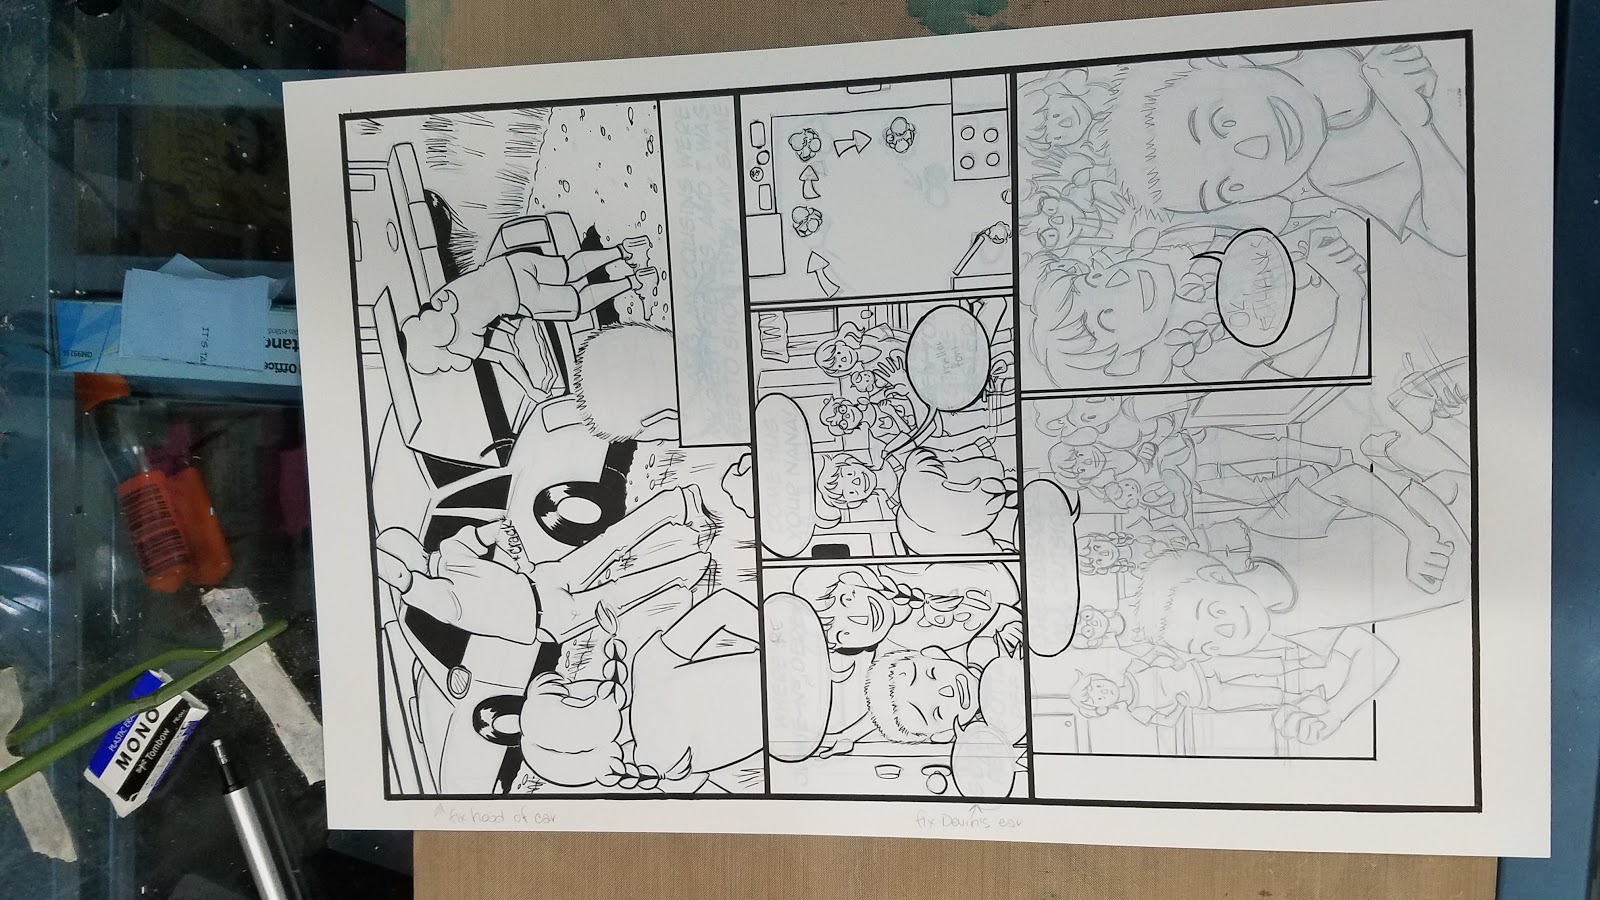


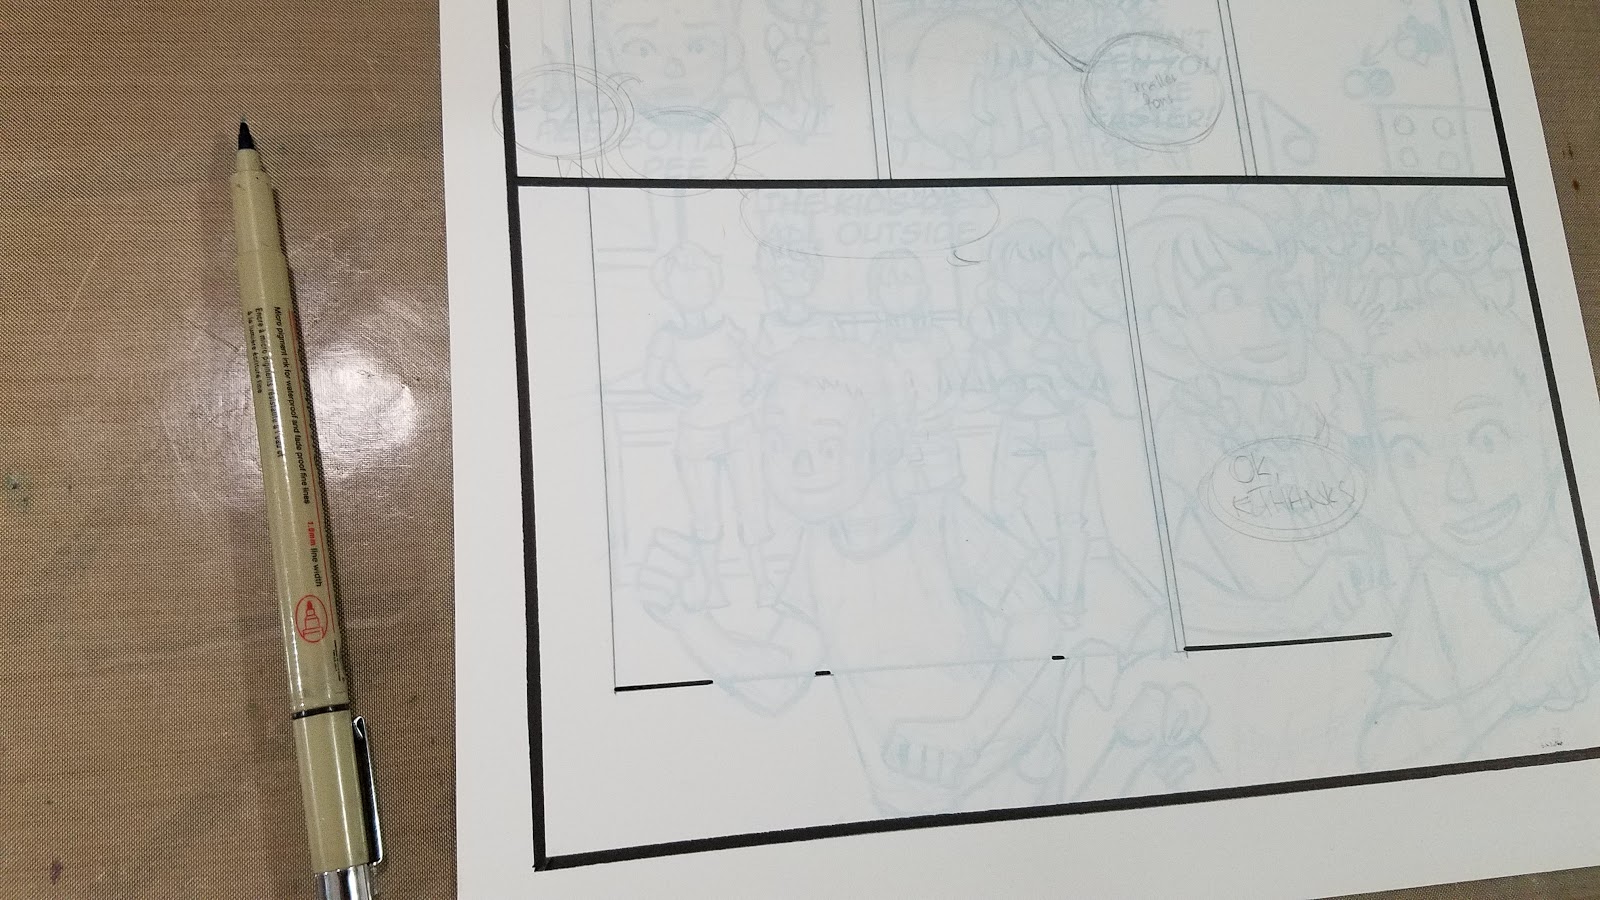
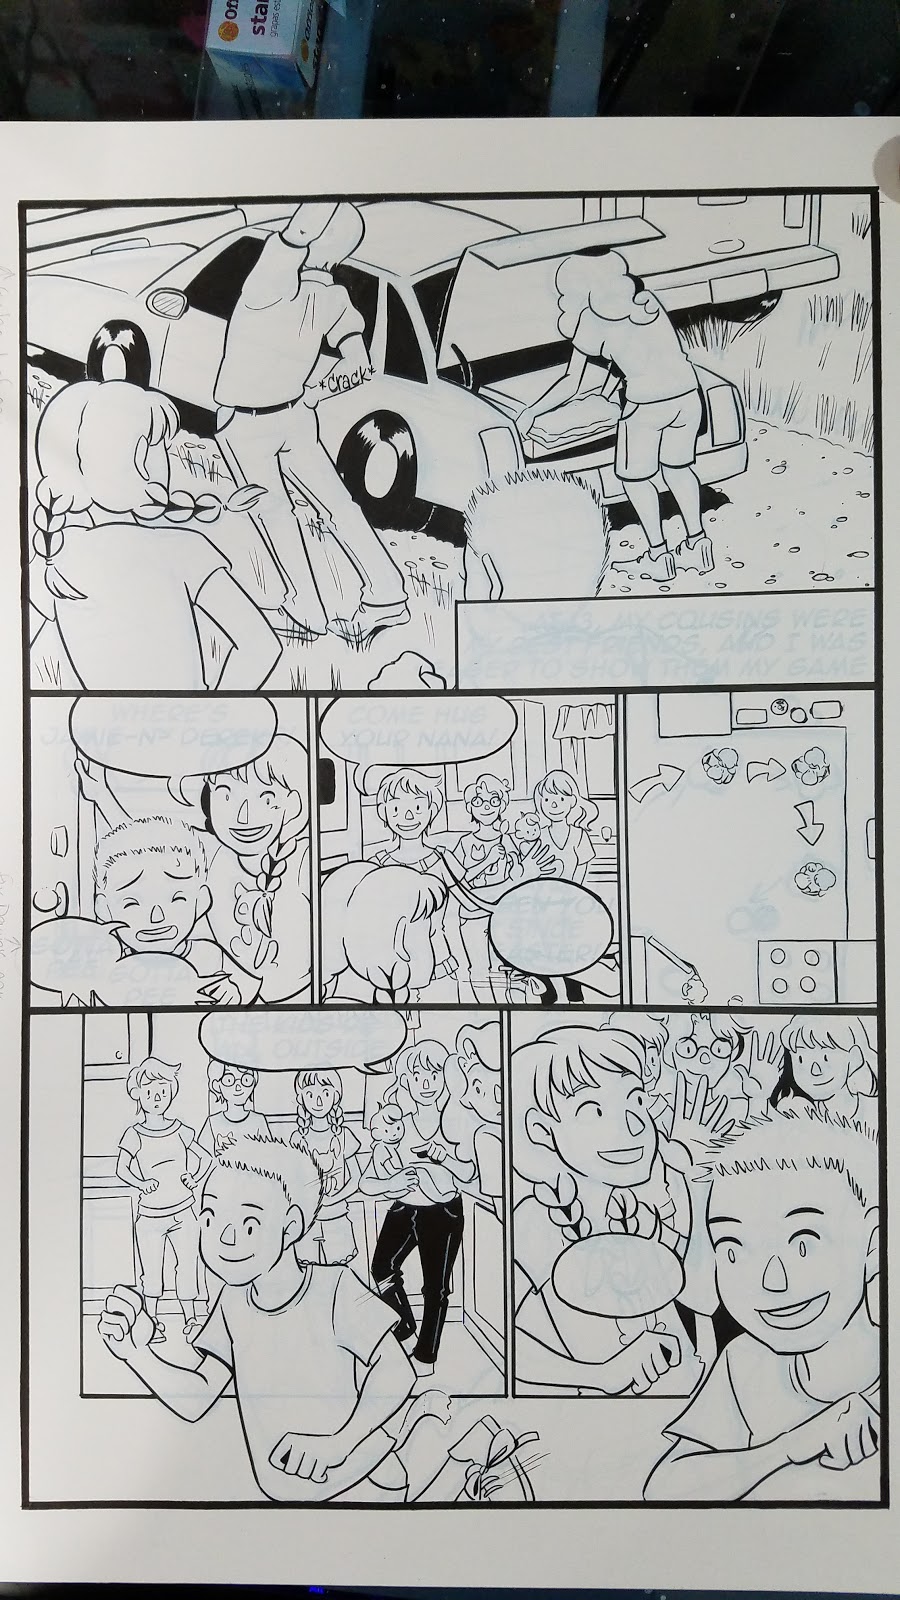
Finally inking the panel with the broken border. The border was left broken to accommodate for the figure running into the foreground, and can be tightened up once the final inks are in place.

The inked page is still not finished- I save my corrections for the end, when everything has been inked. This gives the ink an opportunity to dry, and it gives me an opportunity to really think about what needs correcting.
Erasing and Corrections
Materials Used:
Drafting BrushErasersSigno White Gel Pen (or gel pen of choice, but I recommend the Signo)Copic Opaque White (or white gouache)Synthetic watercolor brush
Once the page is inked, I step away for the evening- it's best to allow your ink to dry for 1-24 hours before erasing.

The next morning, I begin by erasing the graphite with a soft white vinyl eraser. Over the years, I've used and enjoyed:
Mono erasers (both non PVC and PVC work well enough)
White Stroke Erasers
Moo erasers
Pentel Hi Polymer Erasers
All of the above erasers are soft enough not to scratch your inks, but will remove your graphite with gentle, persistent erasing.

And I use a drafting brush to remove the eraser schmutz. I highly recommend an inexpensive Alvin drafting brush as part of your traditional art arsenal- I use this thing for just about everything, and have had it for 10 years with no signs of damage. Using your hand to brush away eraser crumbs can leave hand oils on your paper (even if your hands are clean), which can cause a resist for the ink or encourage ink smearing.

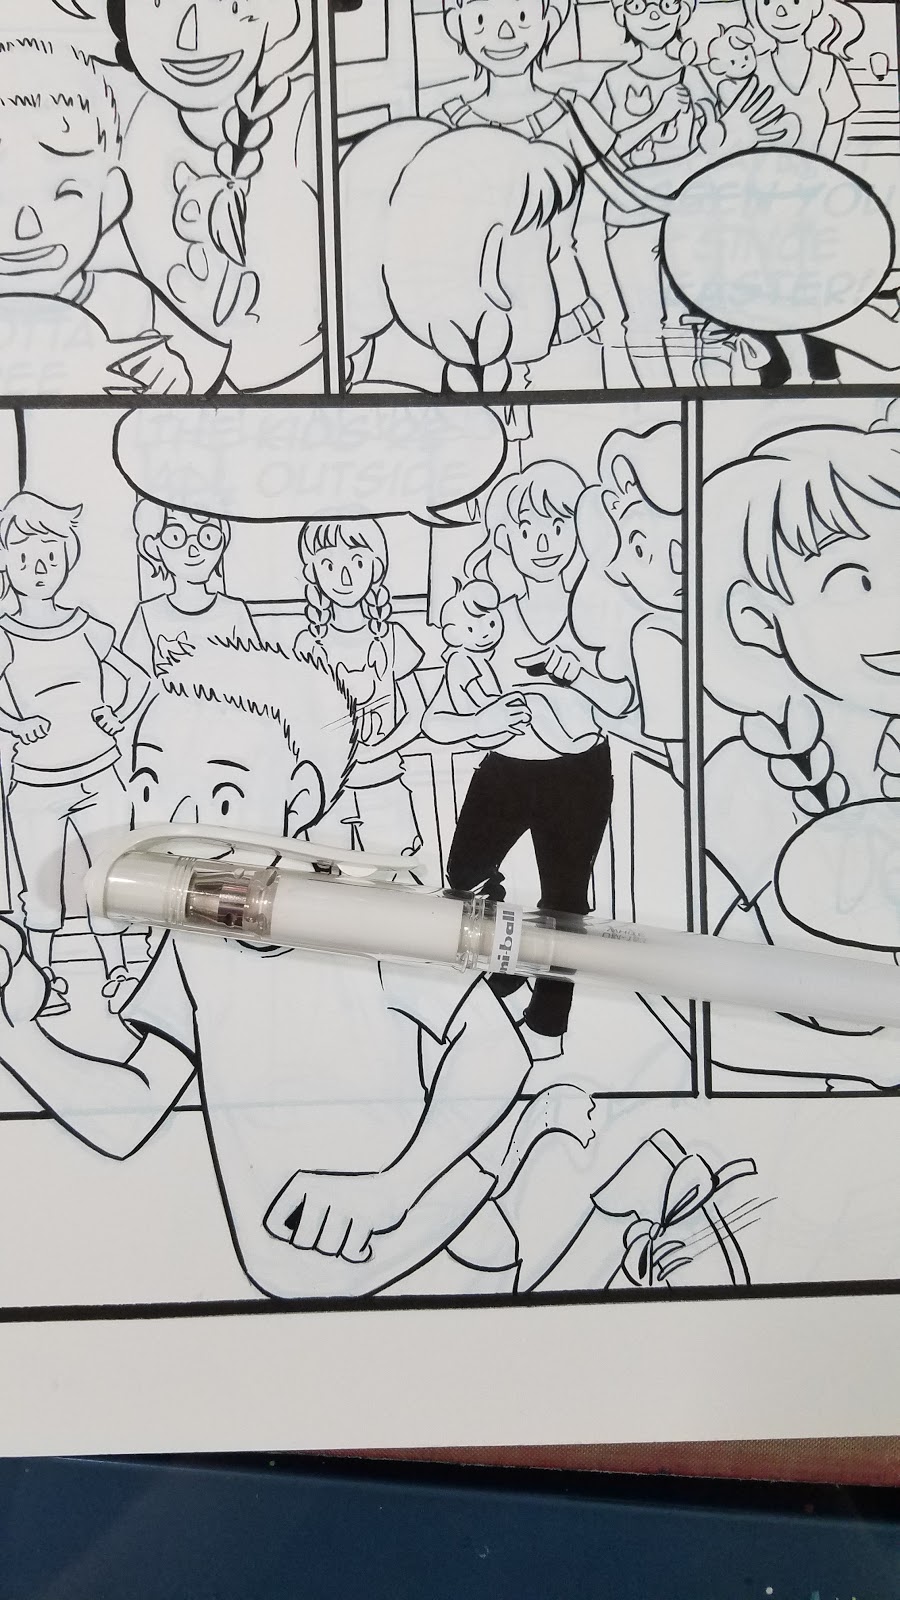
I use a white Signo Gel pen to add small white details to things like jeans.

And then use a fude pen to tighten those lines up.

For larger corrections, I use Copic Opaque White, or white gouache and a synthetic bristled watercolor brush. The synthetic bristles are able to stand up to the thick gouache better than natural hair bristles.


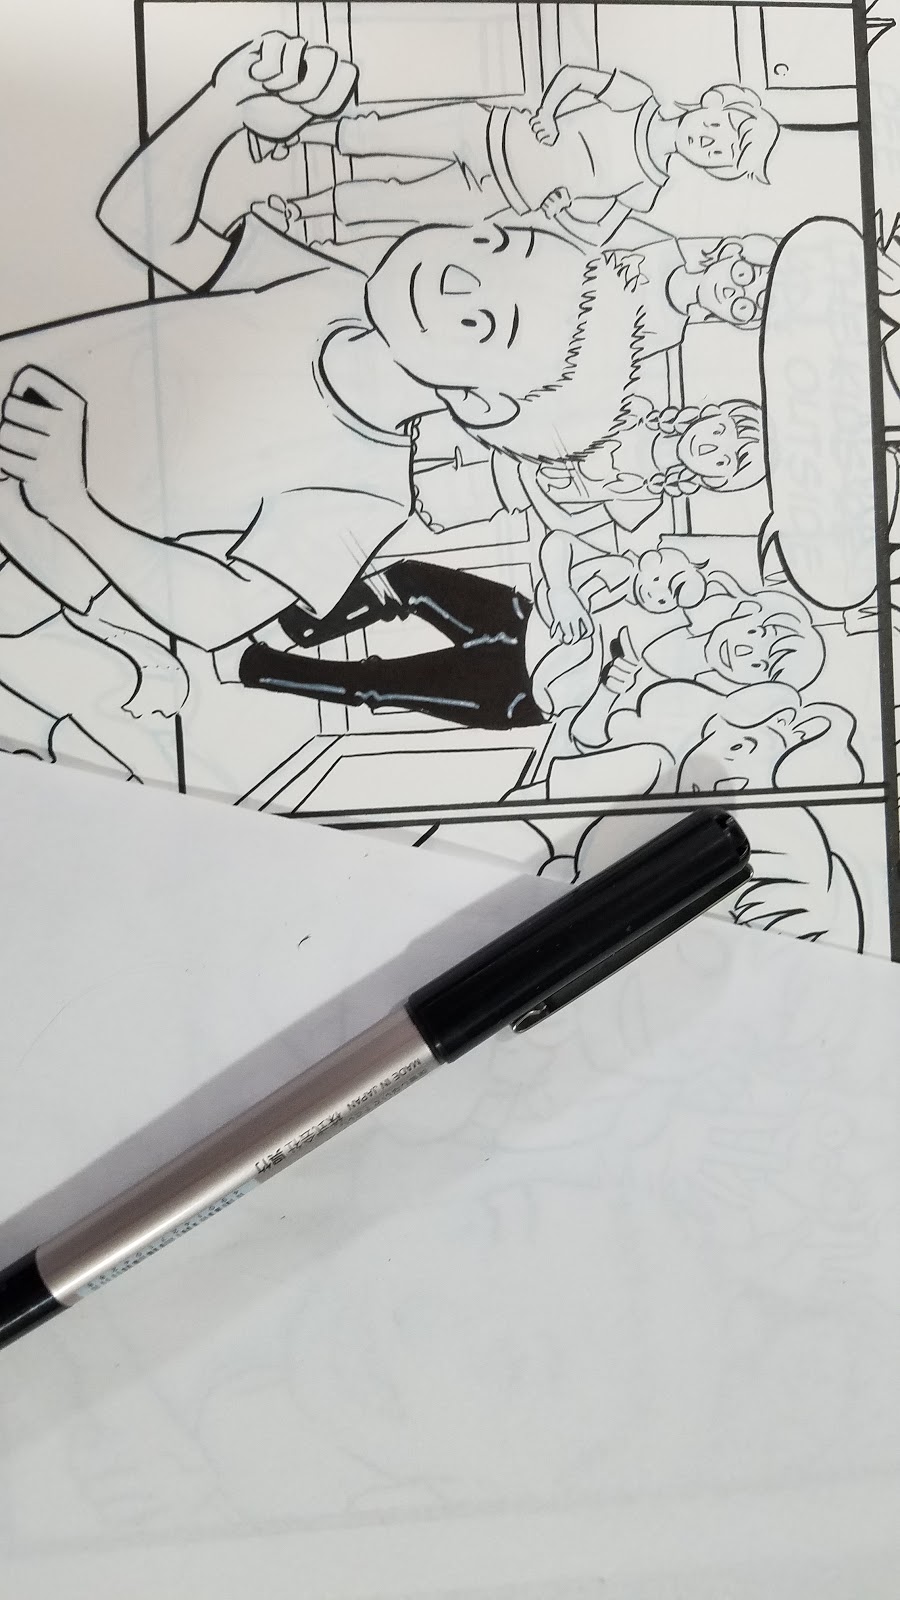
 The finished page
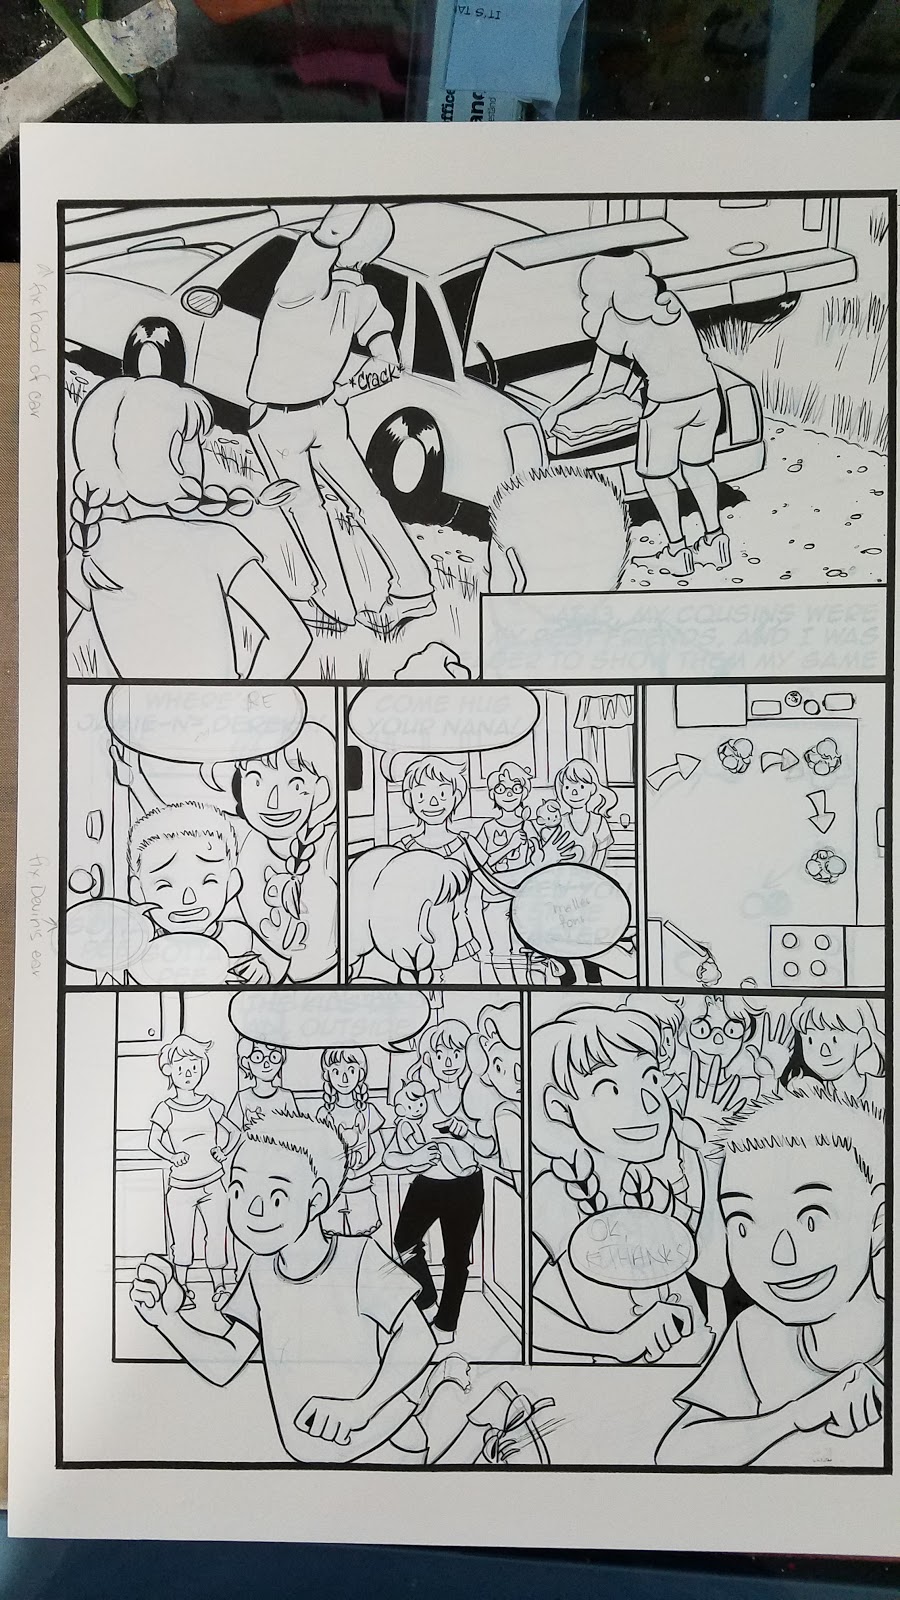
And here's the finished, inked page!
Now just repeat this process every day until your chapter has been inked.
When starting Cicada Summer inks, I made the mistake of starting my day with pencils, ending it with inks- which meant I inked when tired (which is bad news). I recommend you pencil your page ahead of time (say the evening before), and begin inking right after you've done your drawing warm up- that way you're inking fresh!
Additional Inking Resources:
The Inking Compendium
Inking Process for Foiled Page
7" Kara Cover Process
Materials and Techniques- Inking
Sarah Benkin and Textures
Using a Fude Pen to Ink
8 Ways You Can Make Your First Inktober a Success
Mark Shultz Workshop (Inking with a Brush)
Things to Ink About
Advanced Inking Techniques Playlist
Brushpen Reviews
Please consider donating to this blog or purchasing from Natto-shop (http://nattosoup.com/shop) if you want me to continue publishing quality content. All materials tested were purchased from my own pocket. Keep on Truckin' Nattosoup is not under any sponsorship.

July 13, 2017
Ecoline Markers and Liquid Watercolors- Review and Tutorial
 Enjoy my art and my reviews? Check out the comic, free!
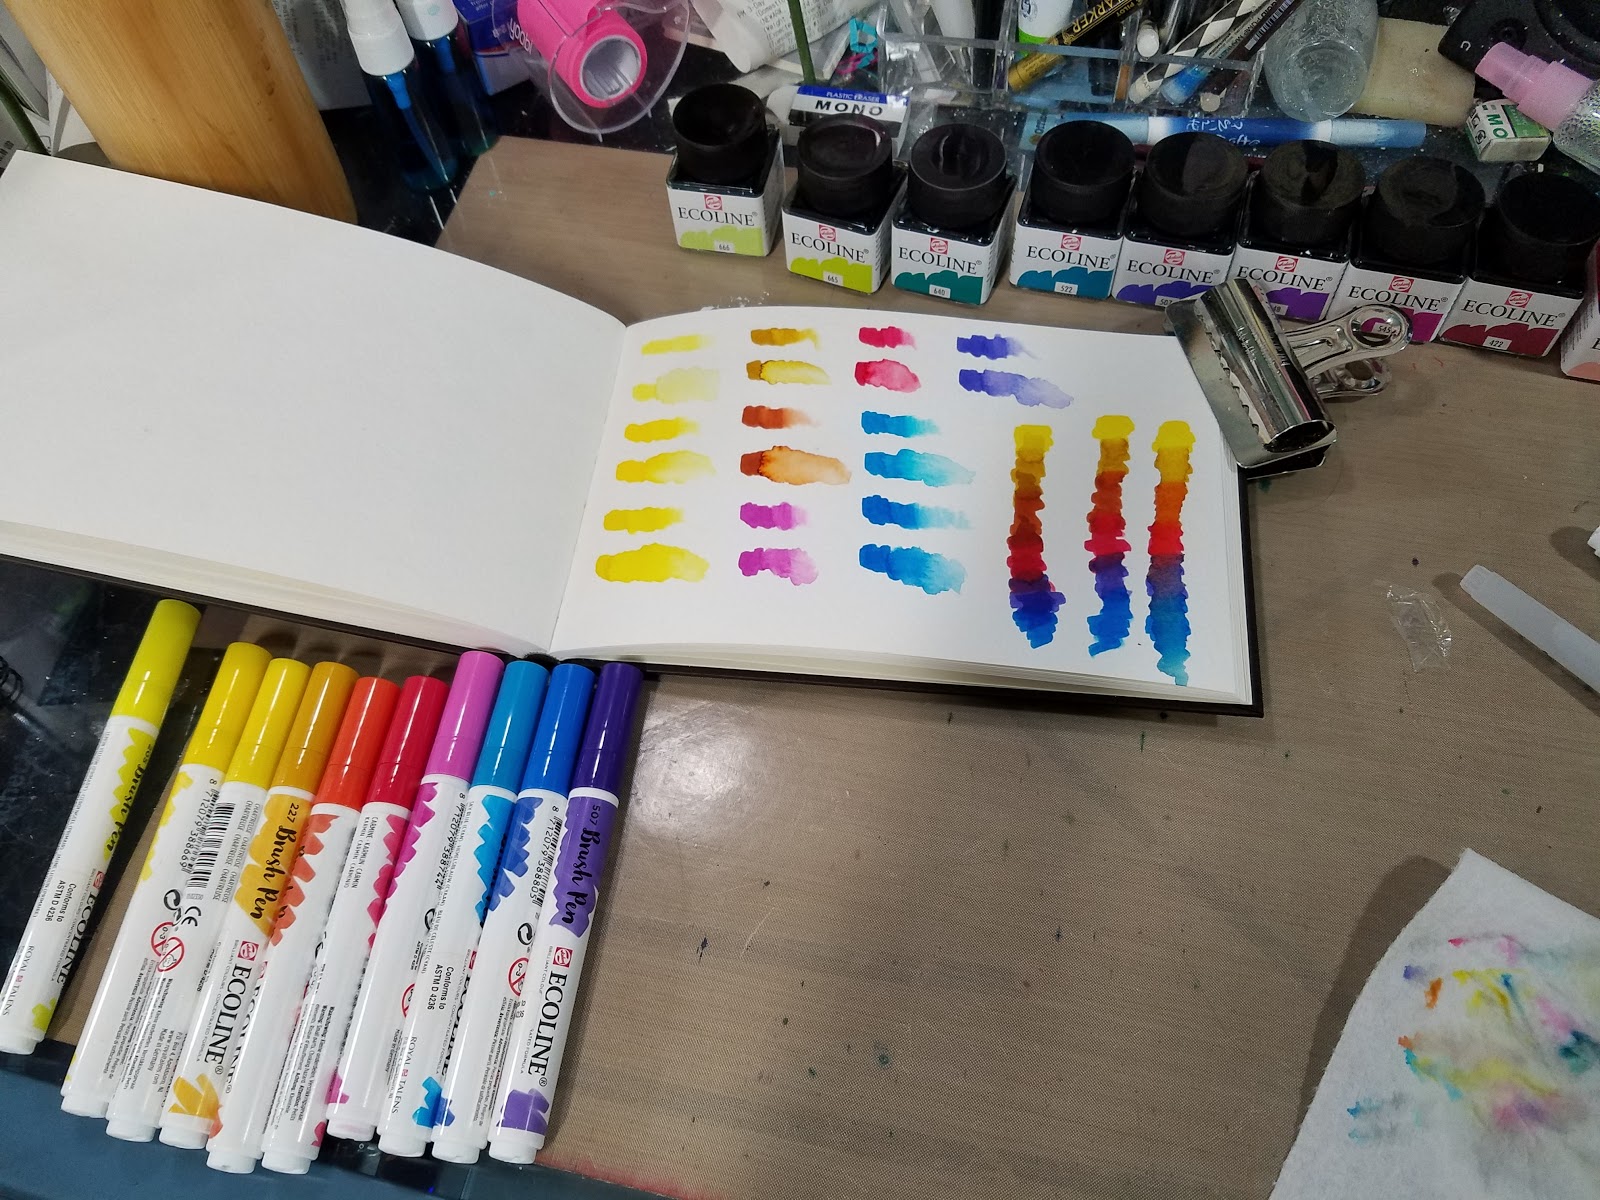
Over the years, I've had the pleasure of handling, reviewing, and exploring a variety of waterbased and watercolor markers both here on the Nattosoup Studio Blog and on my Youtube Channel. Some major standouts include Spectrum Aqua watercolor markers, Winsor and Newton watercolor markers, and today's review, Ecoline watercolor markers and liquid watercolors.
This review and tutorial is part of my Watercolor Basics series- a collection of reviews and tutorials designed to teach you how to watercolor comics and illustration, and introduce you to a wide variety of watercolor media on the market. My desire is to empower you so that you feel confident selecting the materials that will work for you, and the techniques that will deliver the art you desire.
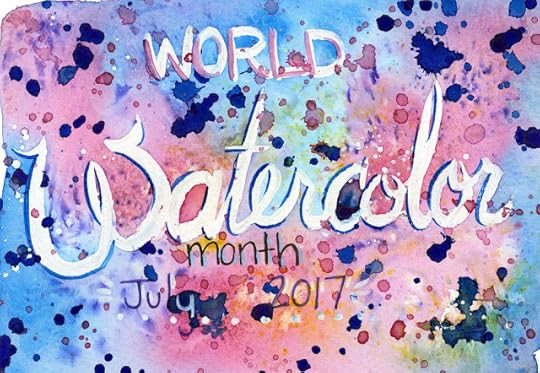
July is World Watercolor Month! This review and tutorial will hopefully inspire you to play around with watercolor, or to try a new material or technique.

If you enjoyed this post, please share it with a few friends on your favorite social media platform! Make sure to tag it #worldwatercolormonth!~
About Ecoline
Ecoline watercolors are produced by Royal Talens. Talens is a Dutch company founded in 1899 to make paints, lacquers, and inks, and launched with oil paints and watercolors. Royal Talens brands include Rembrandt, Cobra, van Gogh, Amsterdam, Art Creation, Talens, Bruynzeel, Sakura of America, Schjerning, and Strathmore. The Ecoline line of products includes watercolor markers, liquid watercolors, papers, and blending markers.
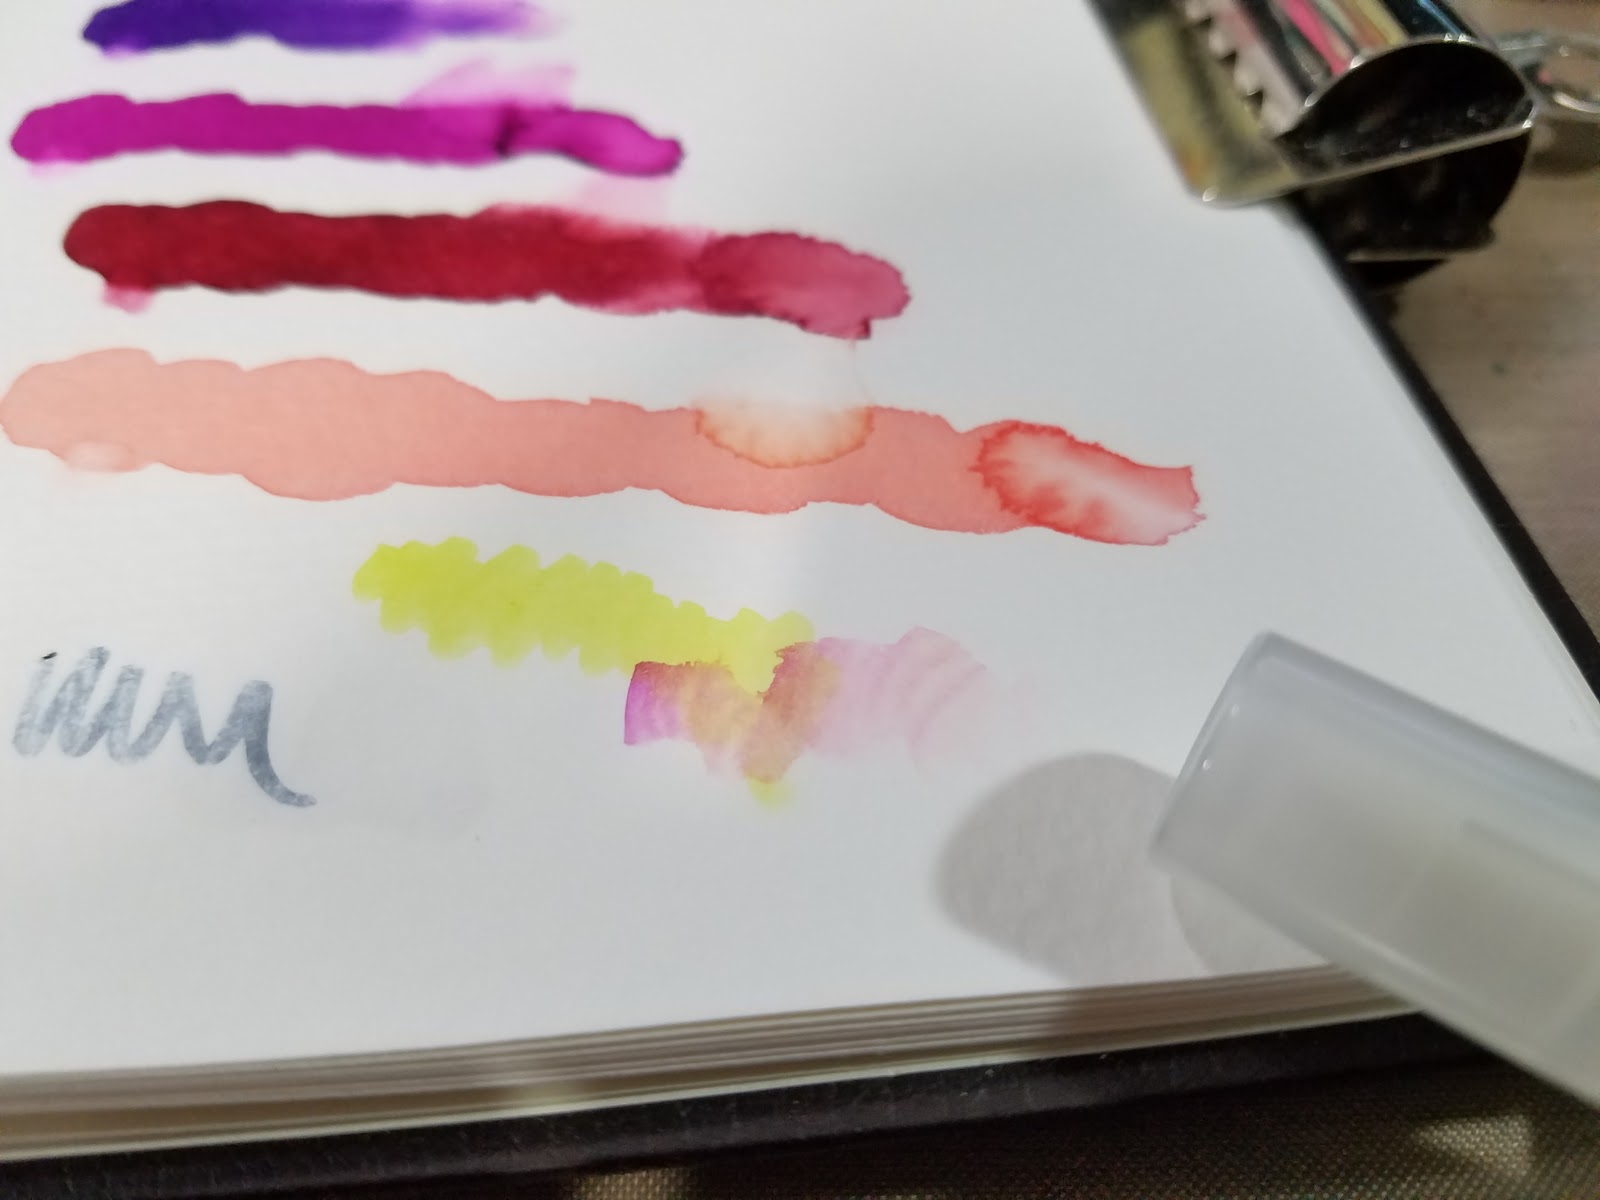
Ecoline watercolor markers and liquid watercolors are primarily dye based, although the White liquid watercolor does appear to have some pigment in it. Dye based watercolors tend to be light fugitive and not entirely waterfast, so you may have to adjust your watercolor technique to best suit these markers.
The Ecoline watercolor markers appear to have a removable nib, and seem to be refillable straight from the Ecoline liquid watercolor bottle, making these watercolor markers some of the few that are refillable.
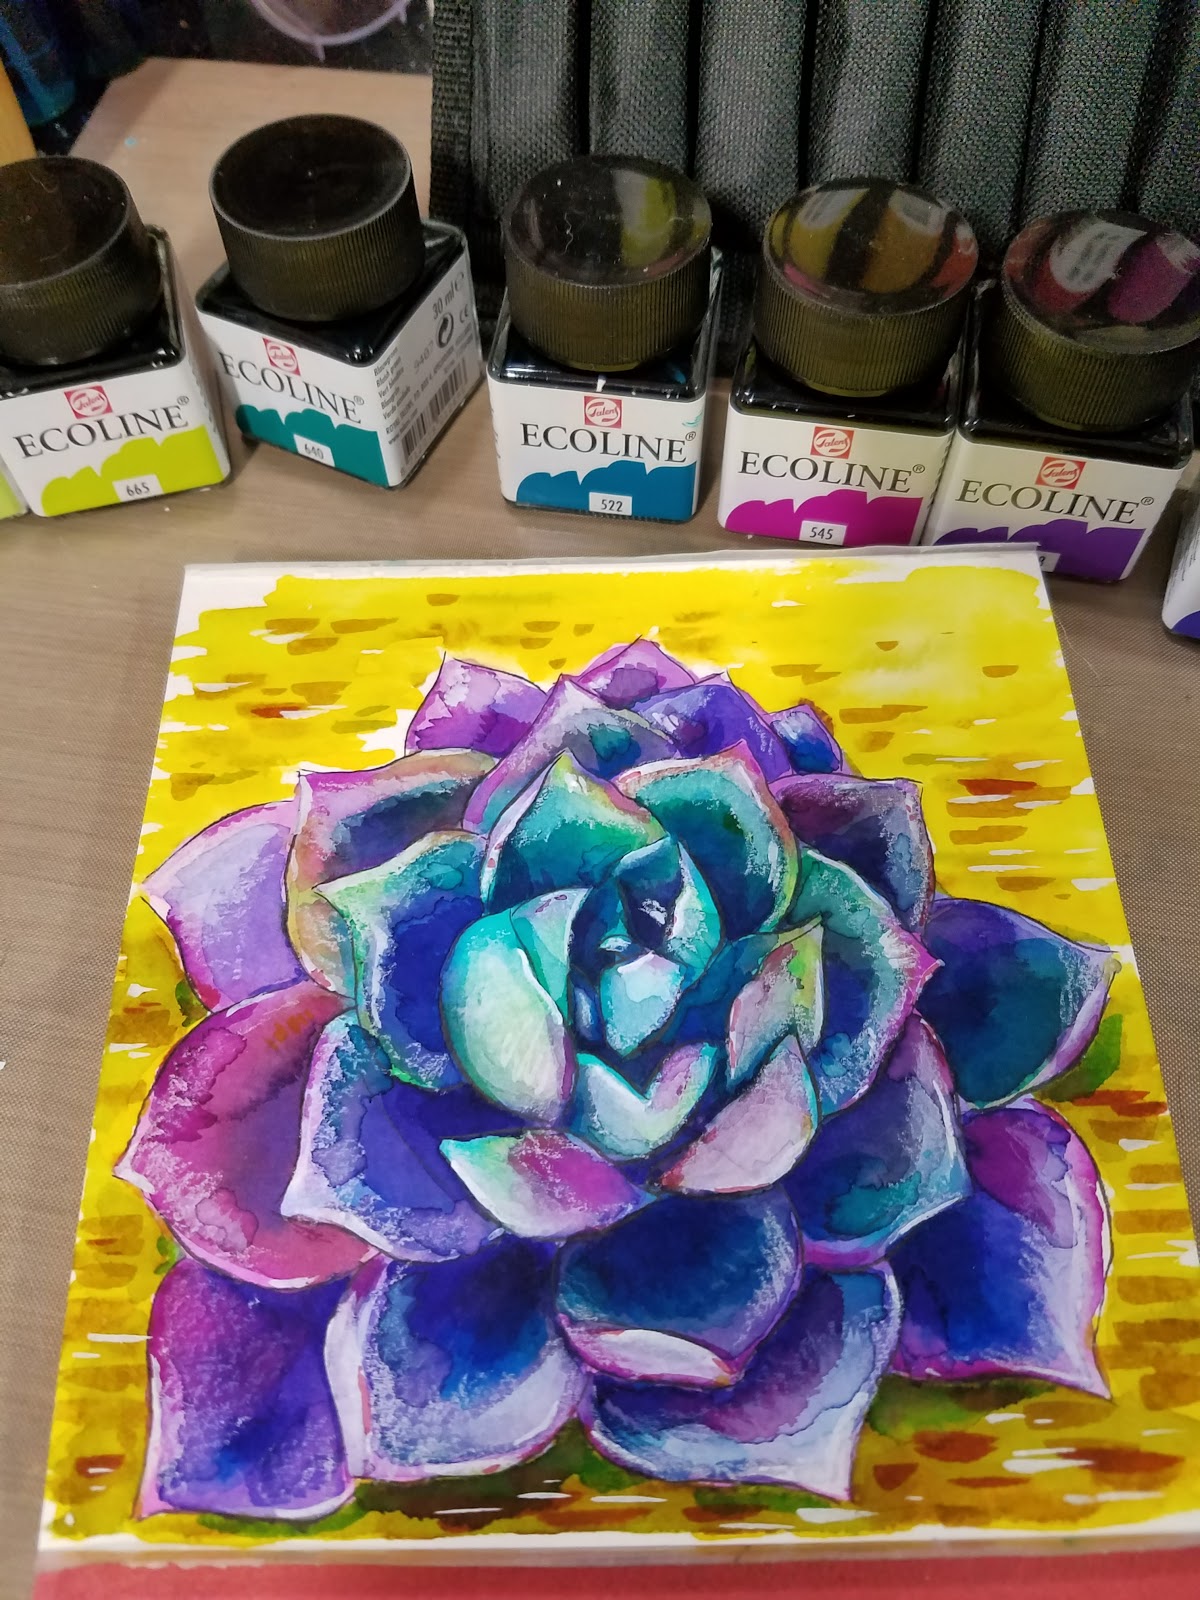
Number of Colors in the Ecoline Marker Line: 30Number of Colors in the Ecoline Liquid watercolor line: 48
 Image Source
Where to Buy:
Watercolor Markers:
AmazonOpenstock: $9.36 eachSet of 5: $15.15 Set of 10: 36.88
DickBlickOpenstock: $3.19 eachIn Sets: 5- $16.2510-$24.66
Liquid Watercolors:
AmazonSet of 6: $29.87 Set of 10- $46.96Openstock: $11.66 eachIn Sets:
DickBlickOpenstock: $4.99 eachIn Sets:
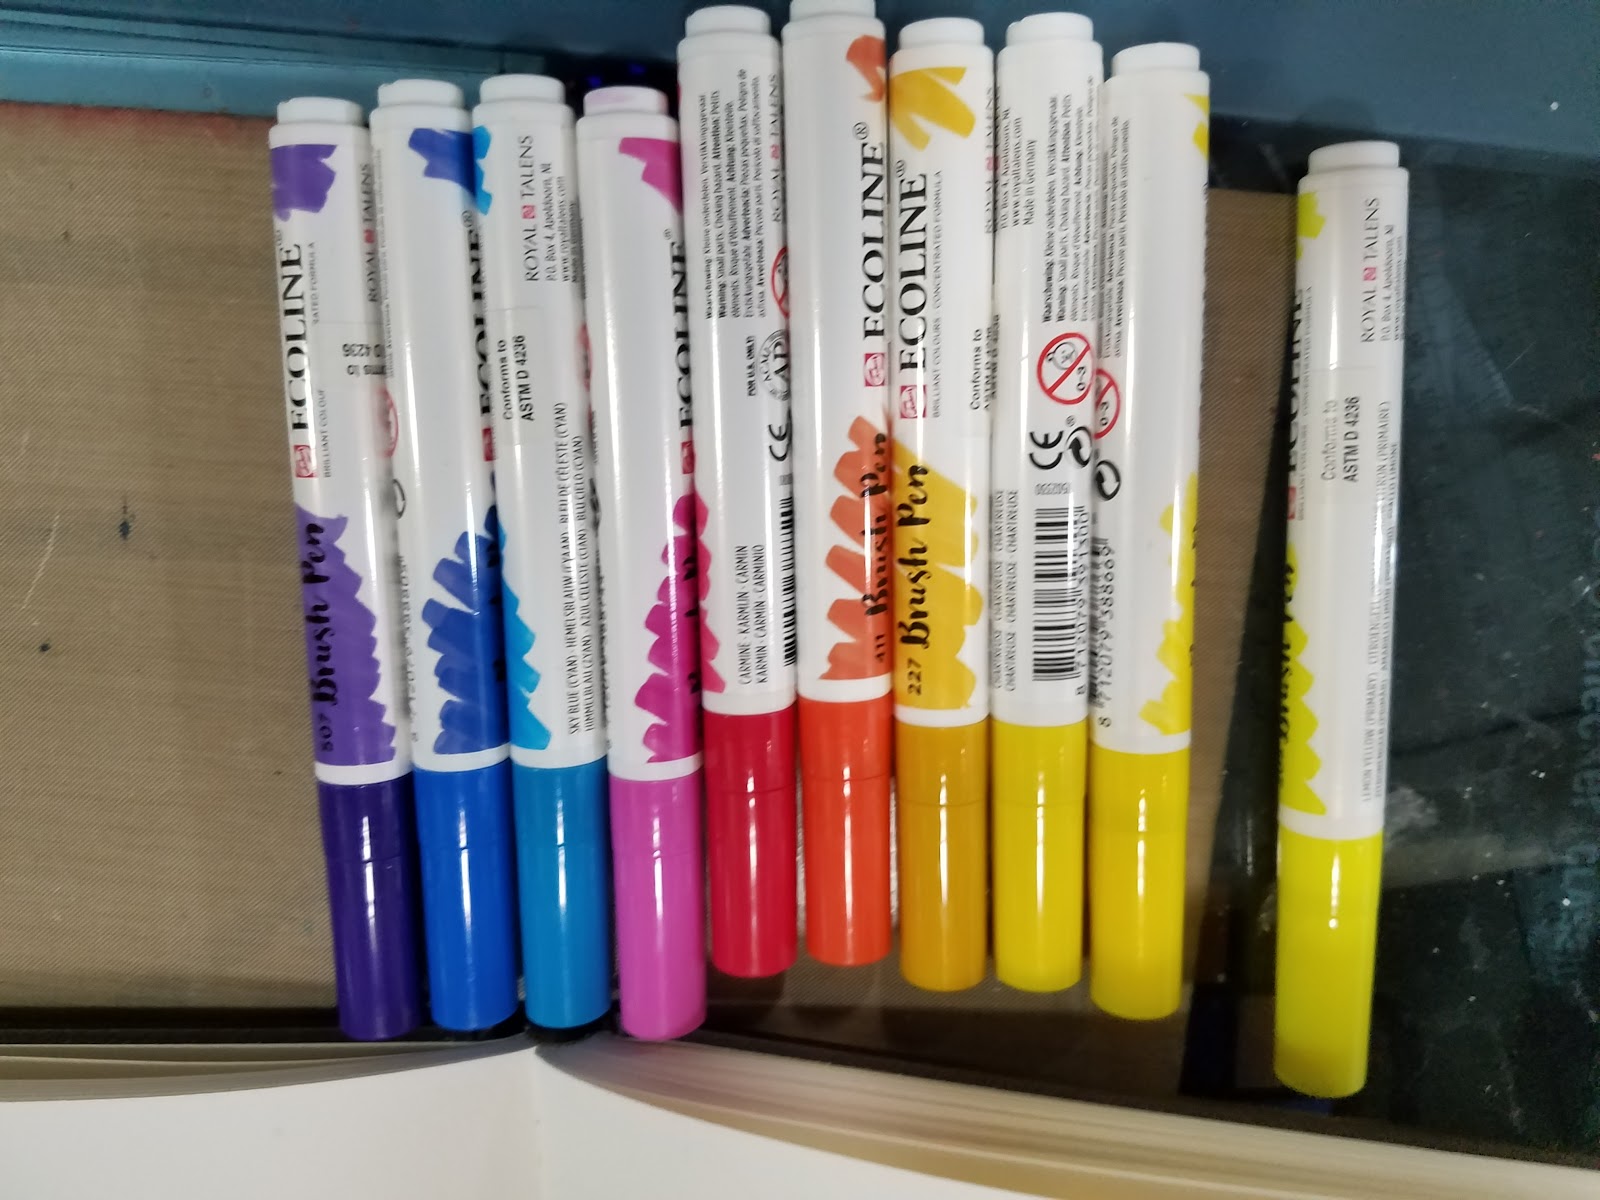
Ecoline Markers:
Ecoline Markers have a very similar body to Crayola washable markers- fairly stock with a straightforward color indicative cap that posts on the back of the marker. Although Ecoline watercolor markers are not marketed as refillable, nor are their nibs billed as replacable, the nib is removable with a little care and caution, and one can assume that you could refill your empty marker with the Ecoline liquid watercolor that corresponds. Given this, it would be nice to see Ecoline release not only replcaement nibs, but also empty markers, in the same vein as Copic.
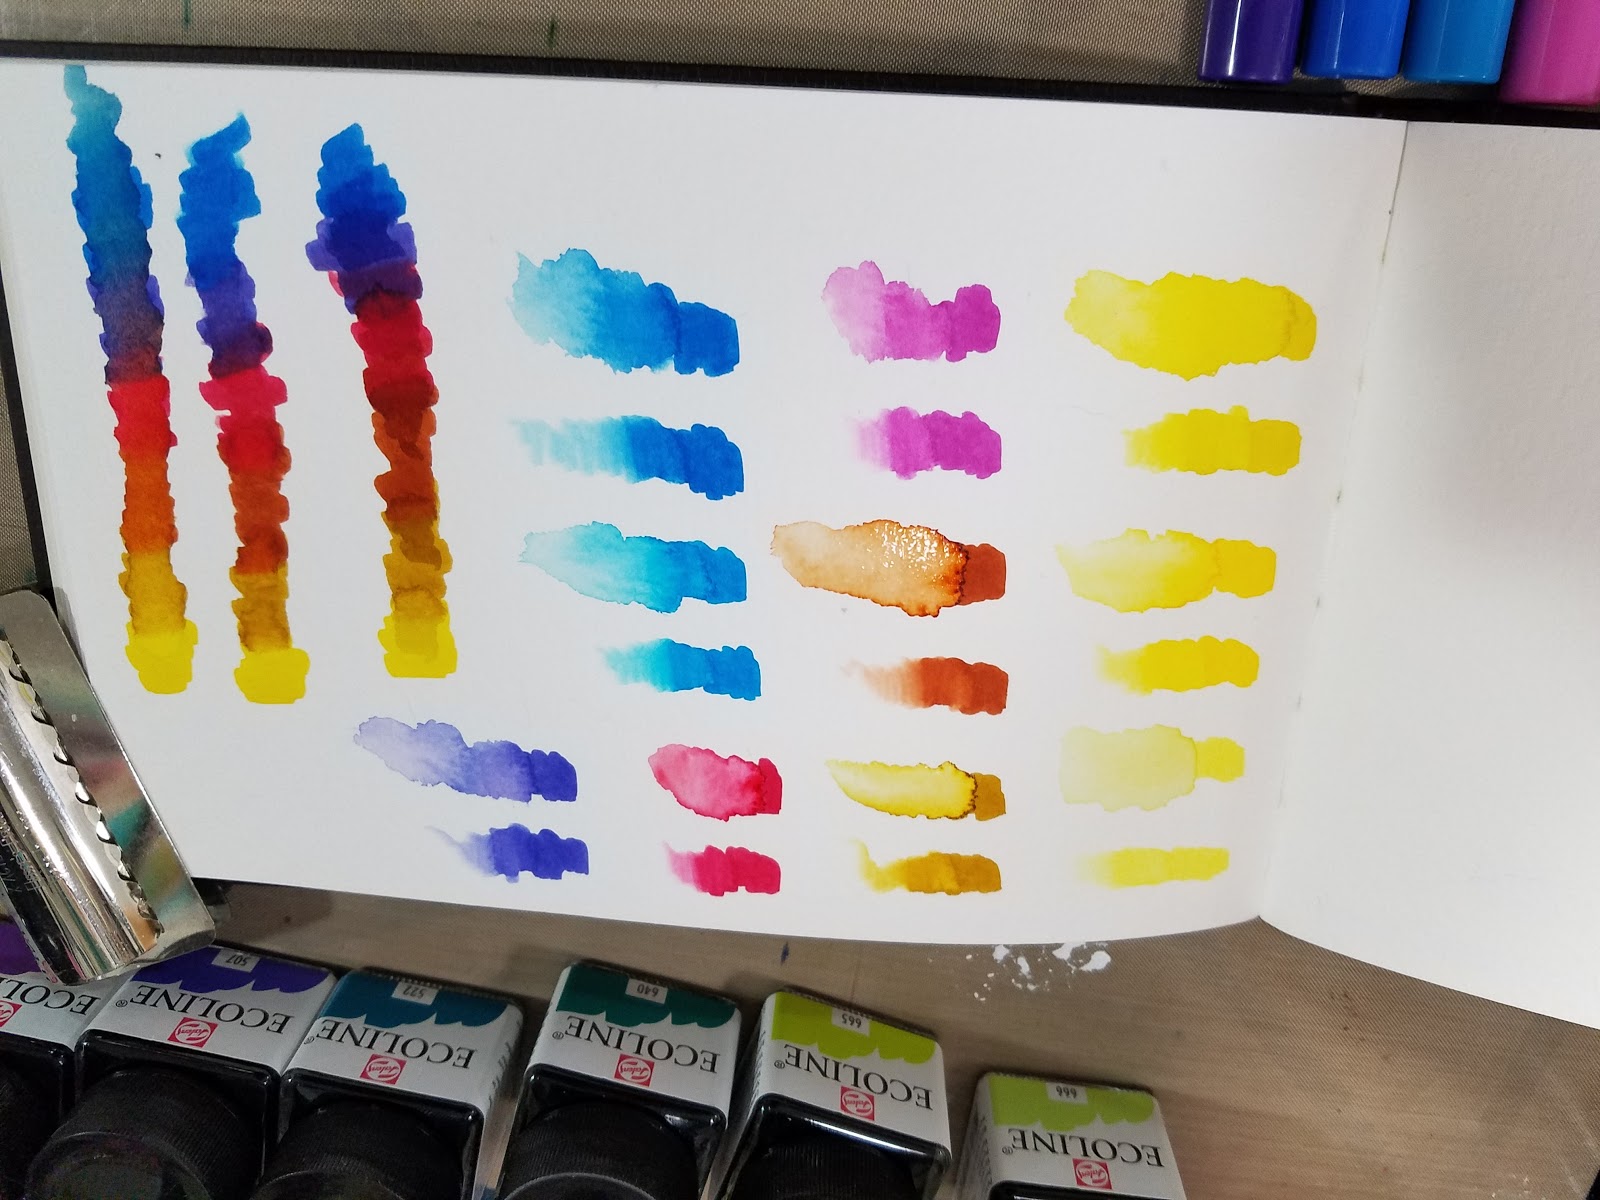
Ecoline Watercolor Markers and Liquid Watercolor Review
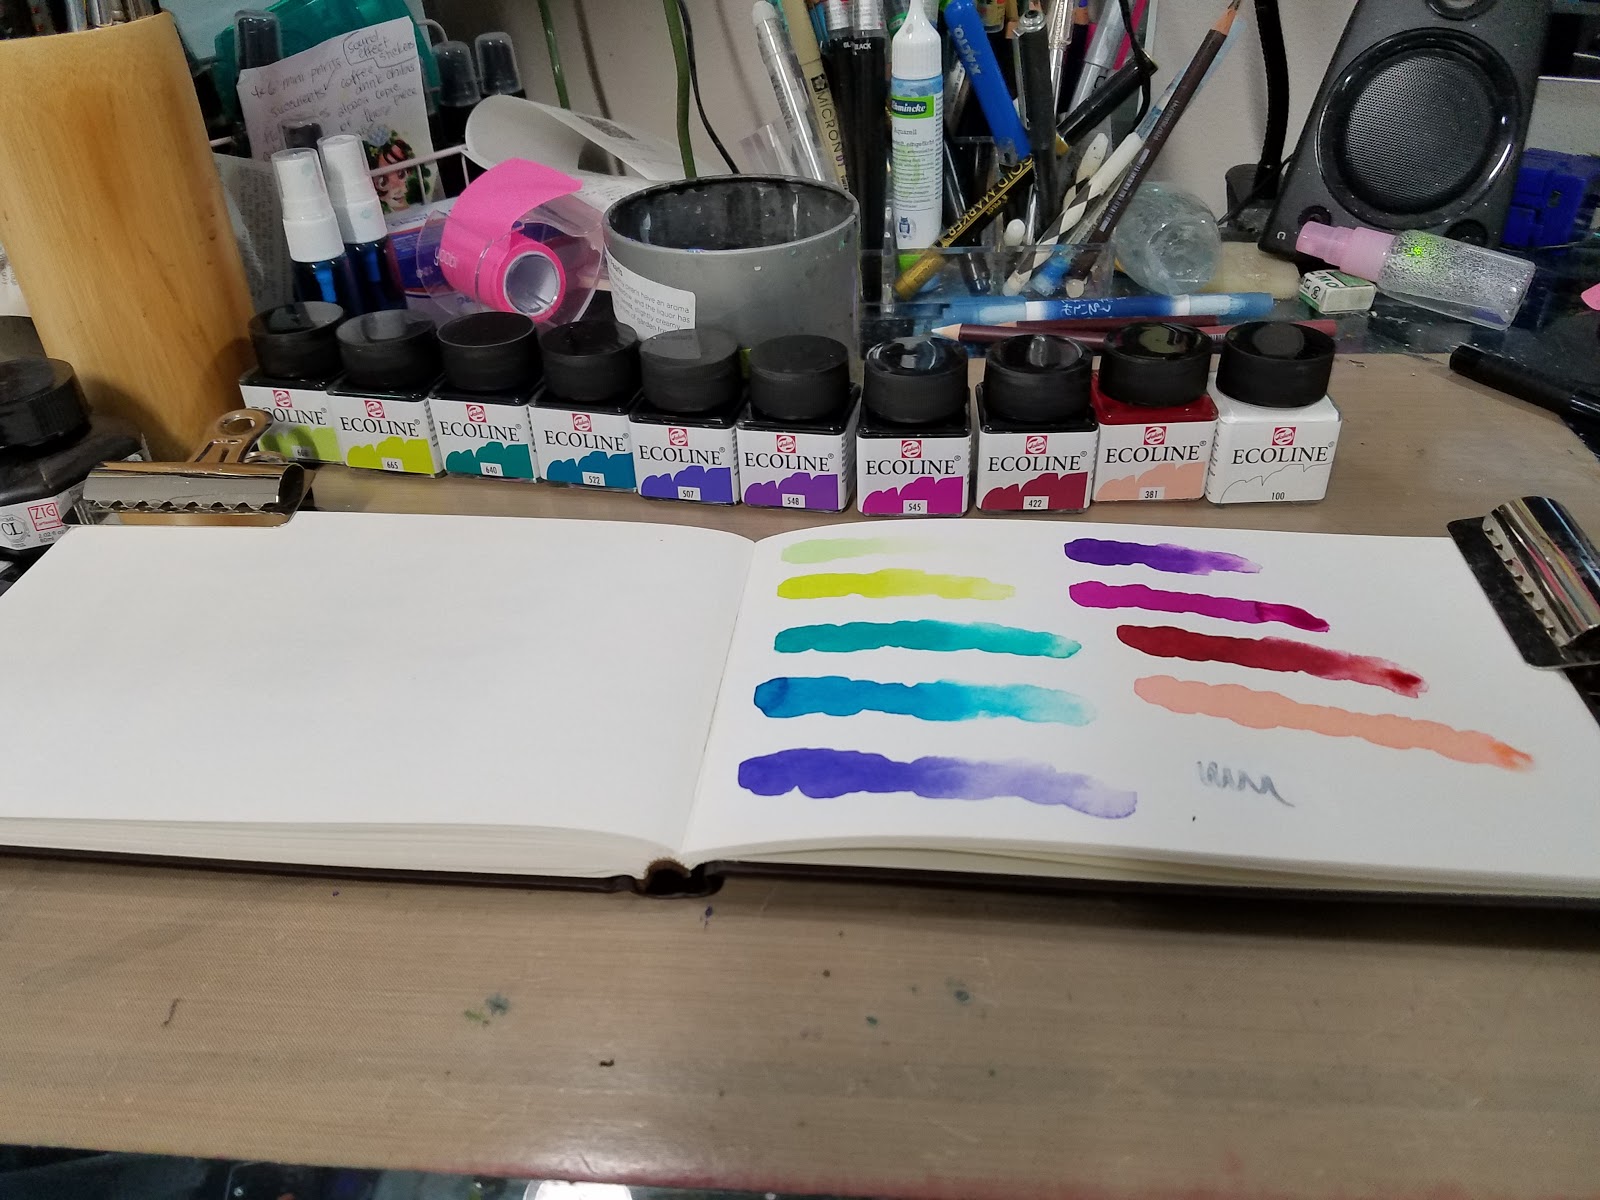
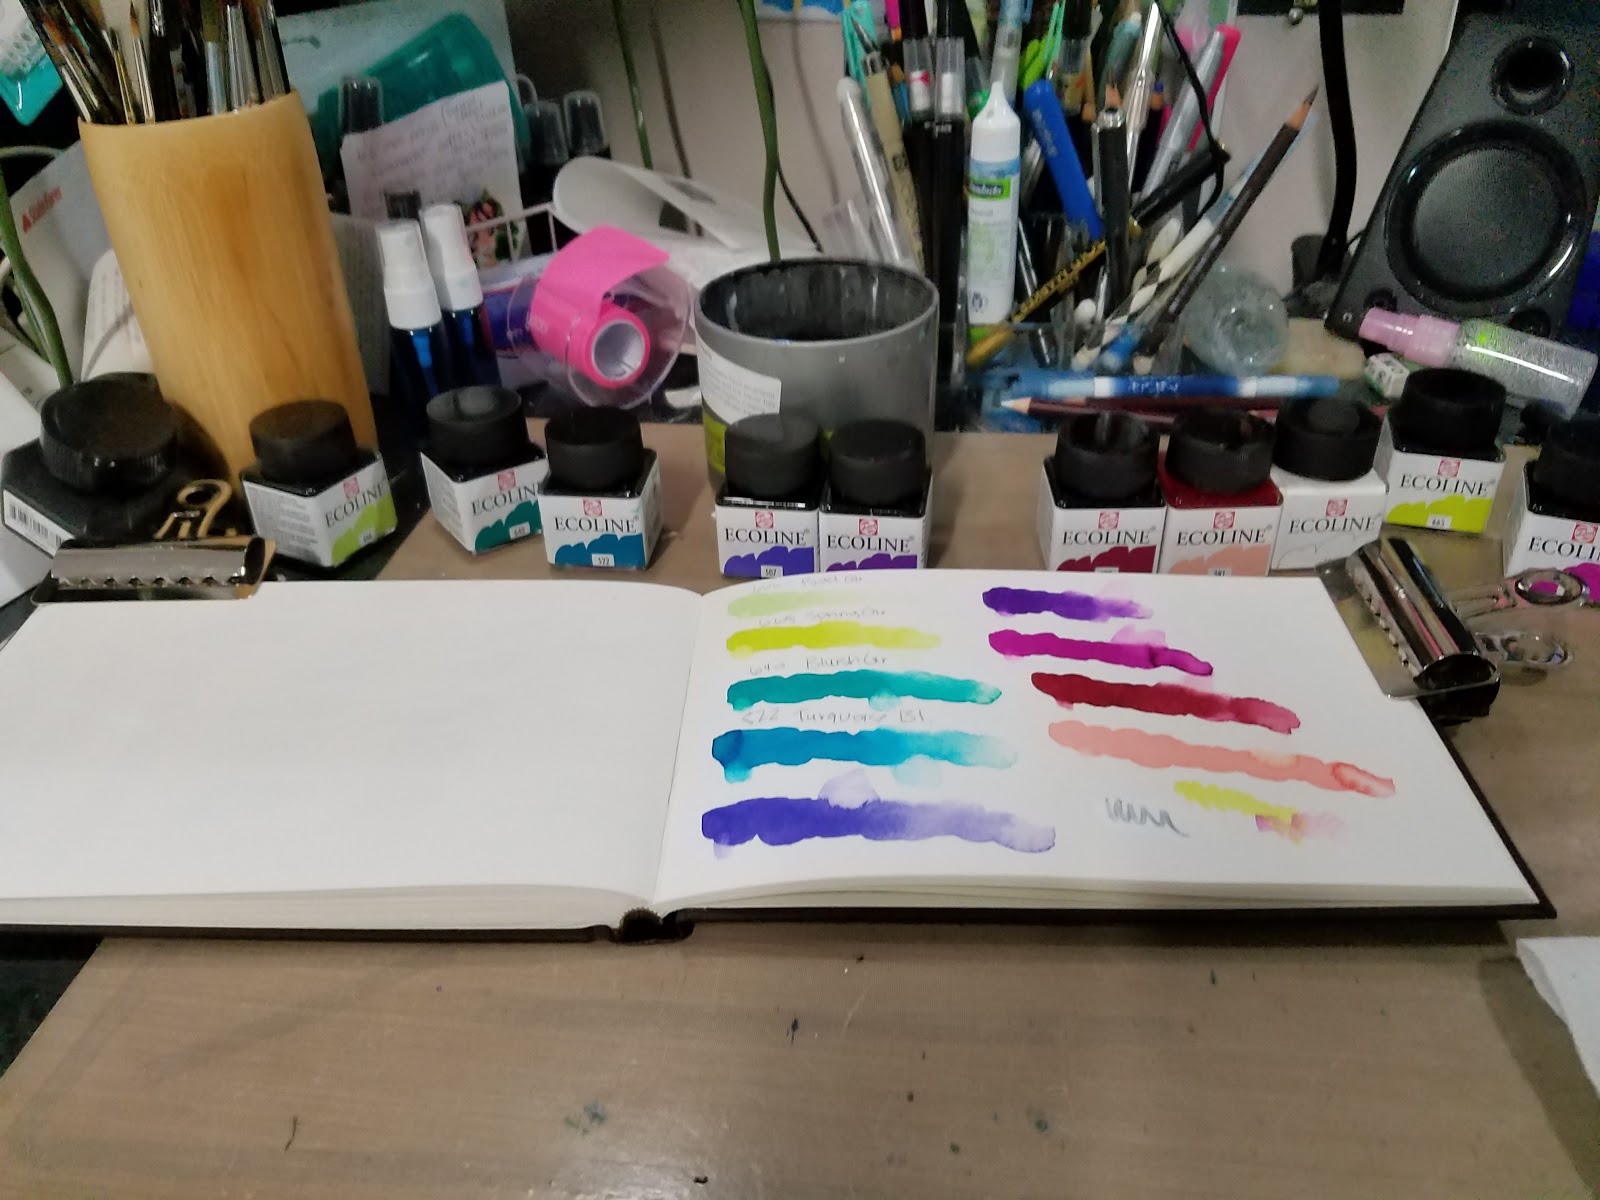
Photos from the review:
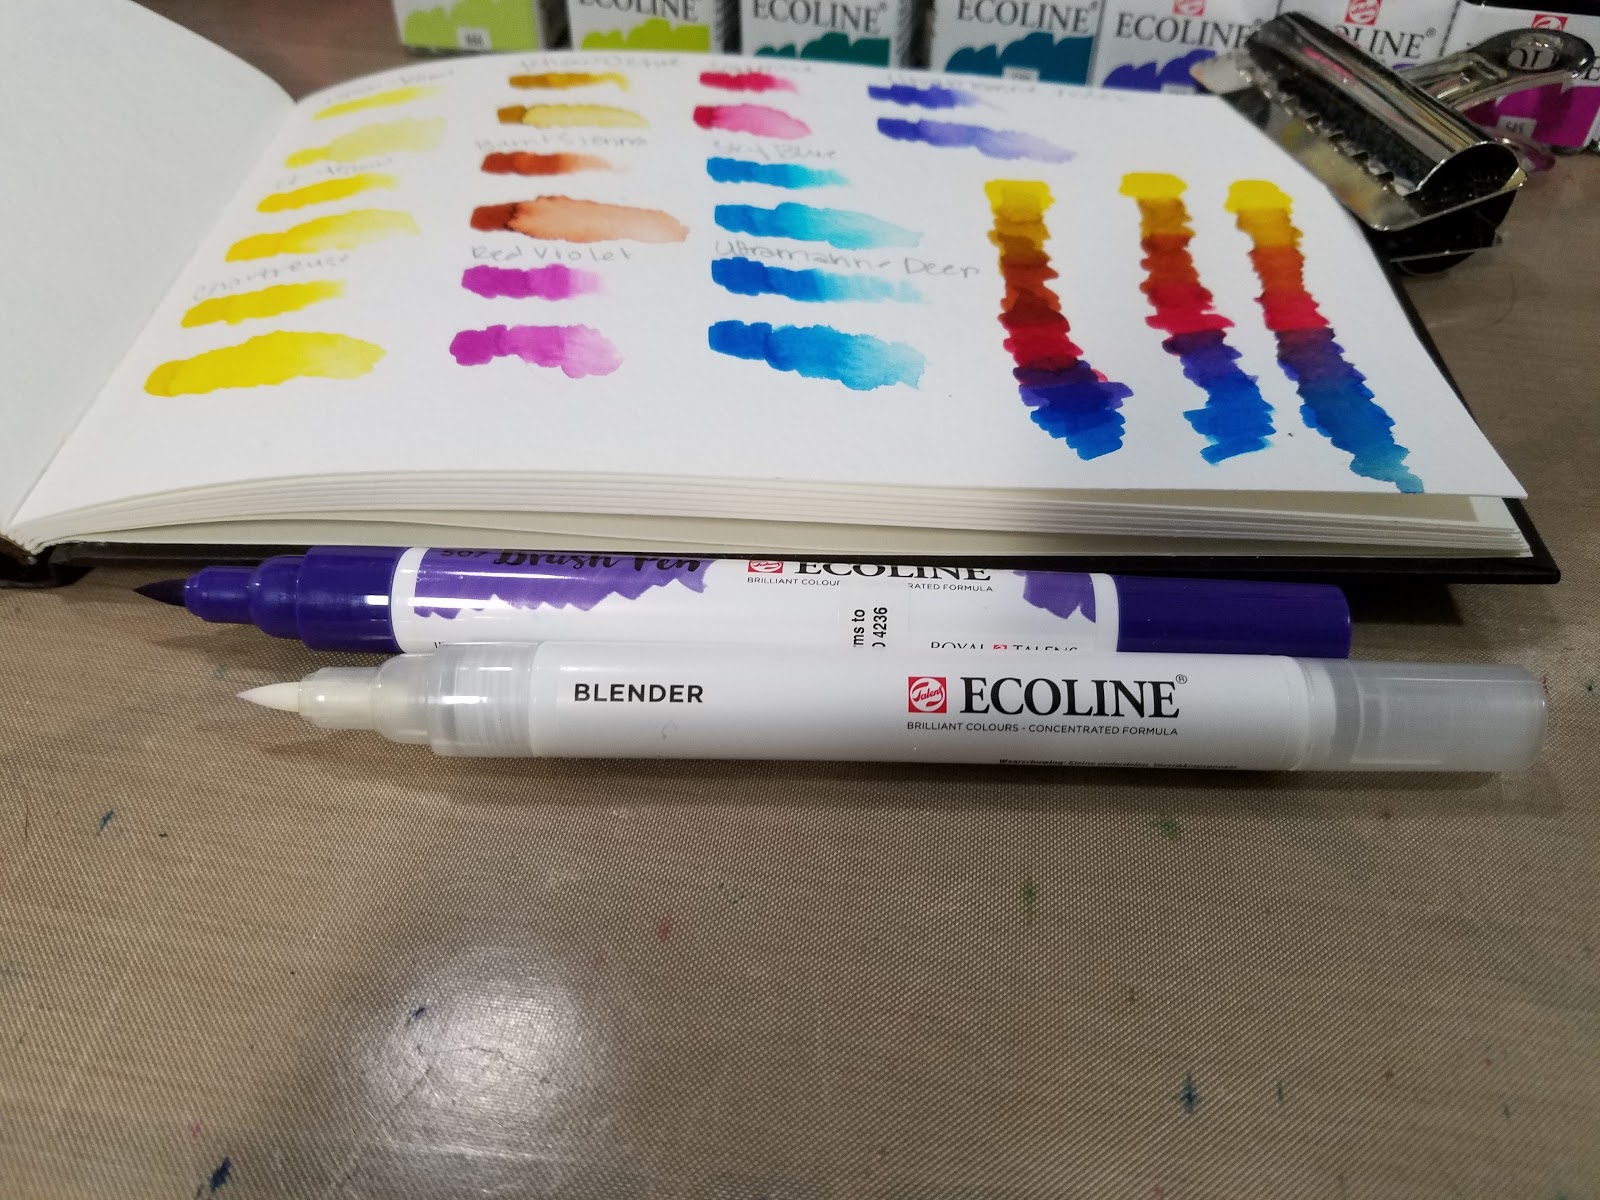
Ecoline Liquid Watercolors:
Large mouthed jars with no eyedropper, unlike many of the other liquid watercolors on the market such as Hydrus and Radiant Watercolors. Ecoline liquid watercolors come in 1 ounce glass bottles with a plastic screw on lid. These bottles do not come with an eyedropper.
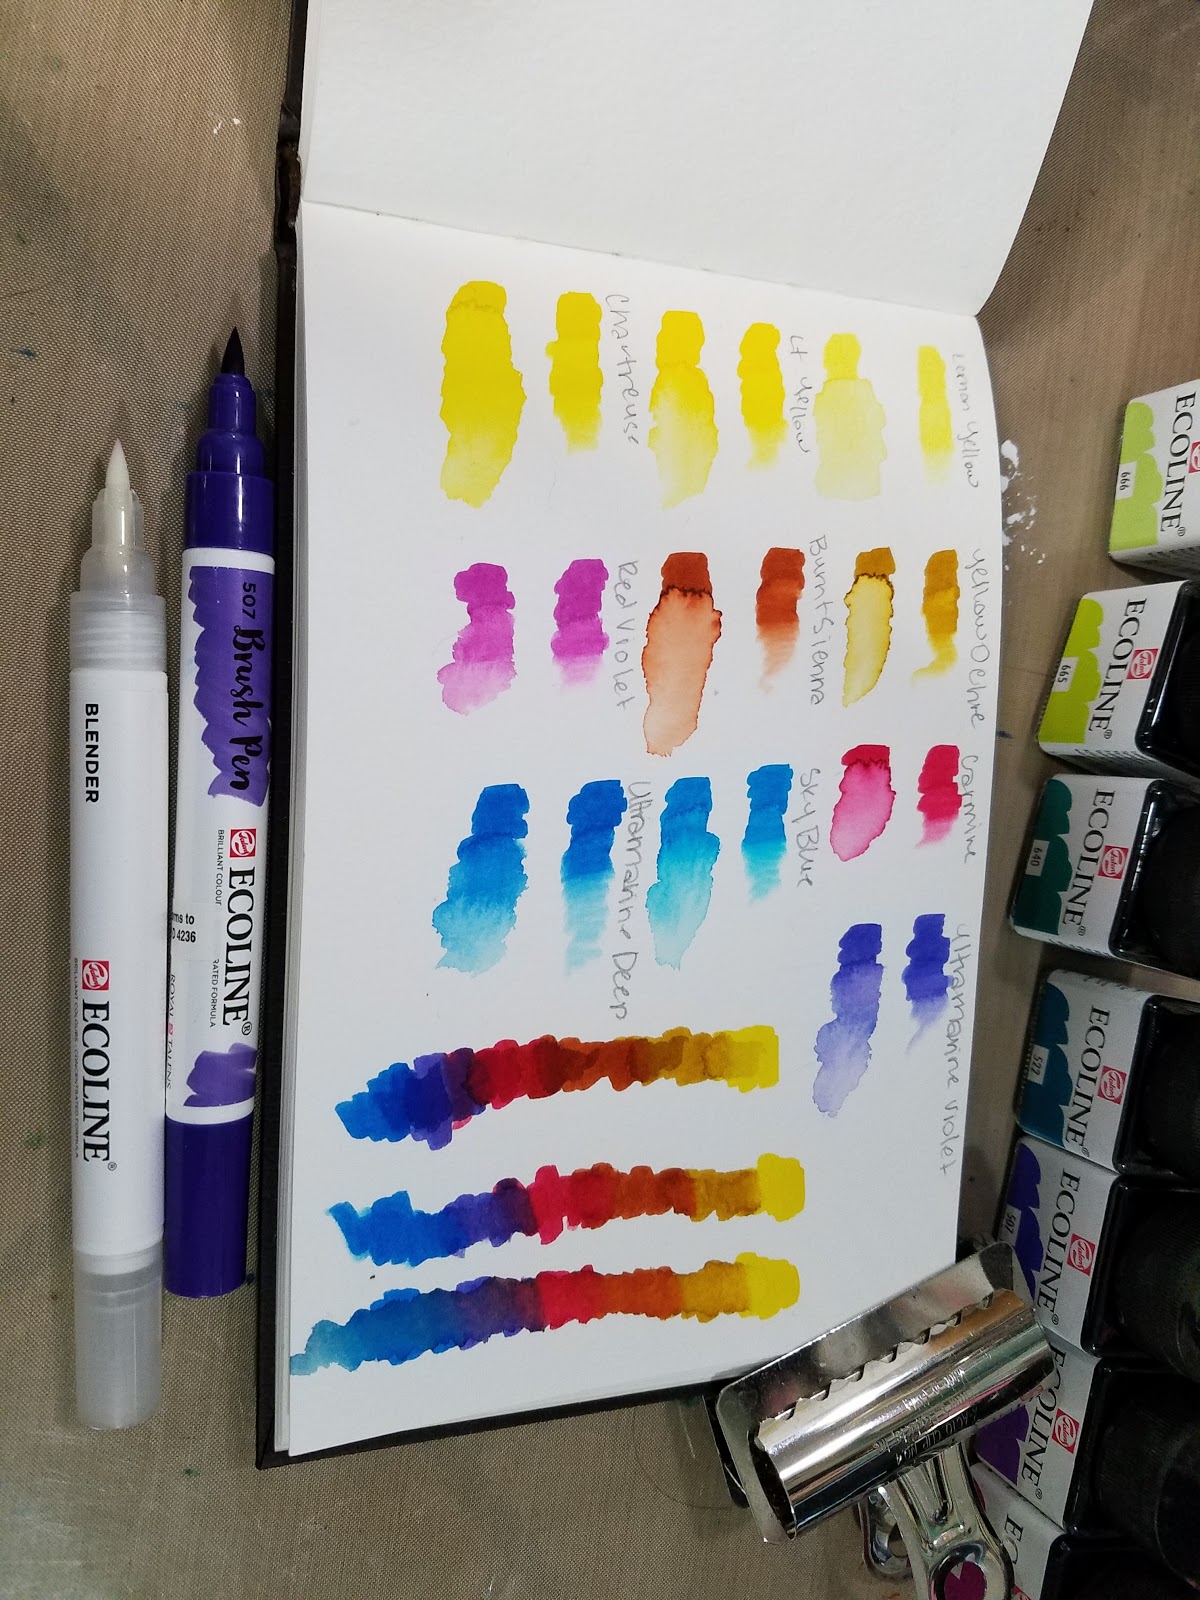
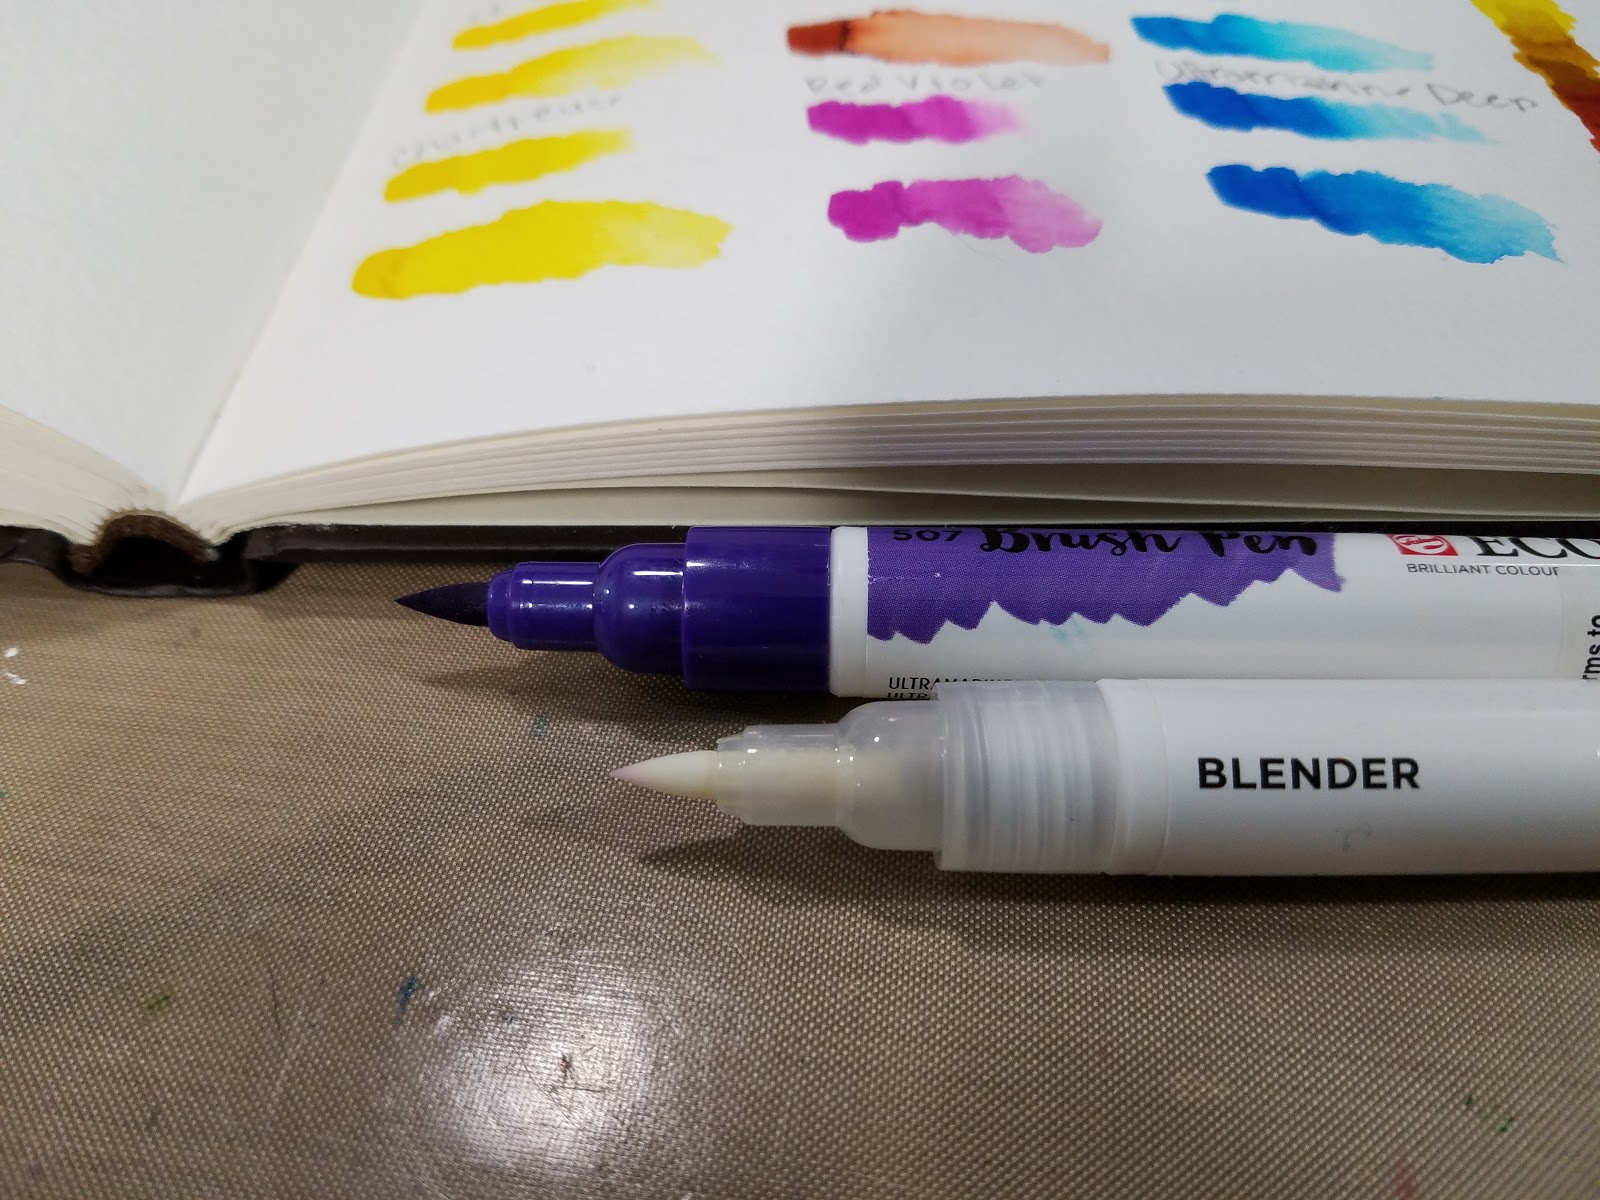
The Blender
The blender is probably filled with a mixture of water and glycerin- common solvents for waterbased and watercolor markers. There doesn't appear to be an overabundance of glycerin, as the blender marker does not dry slightly glossy. Ecoline watercolors work well with either the blender or water- but don't mix, as this can lead to muddiness.
This tutorial was made possible thanks to the generosity of my Patrons on Patreon.
 If you enjoy reviews and tutorials such as this one, please consider joining the Artnerd community on Patreon.
The Field Test and Tutorial:
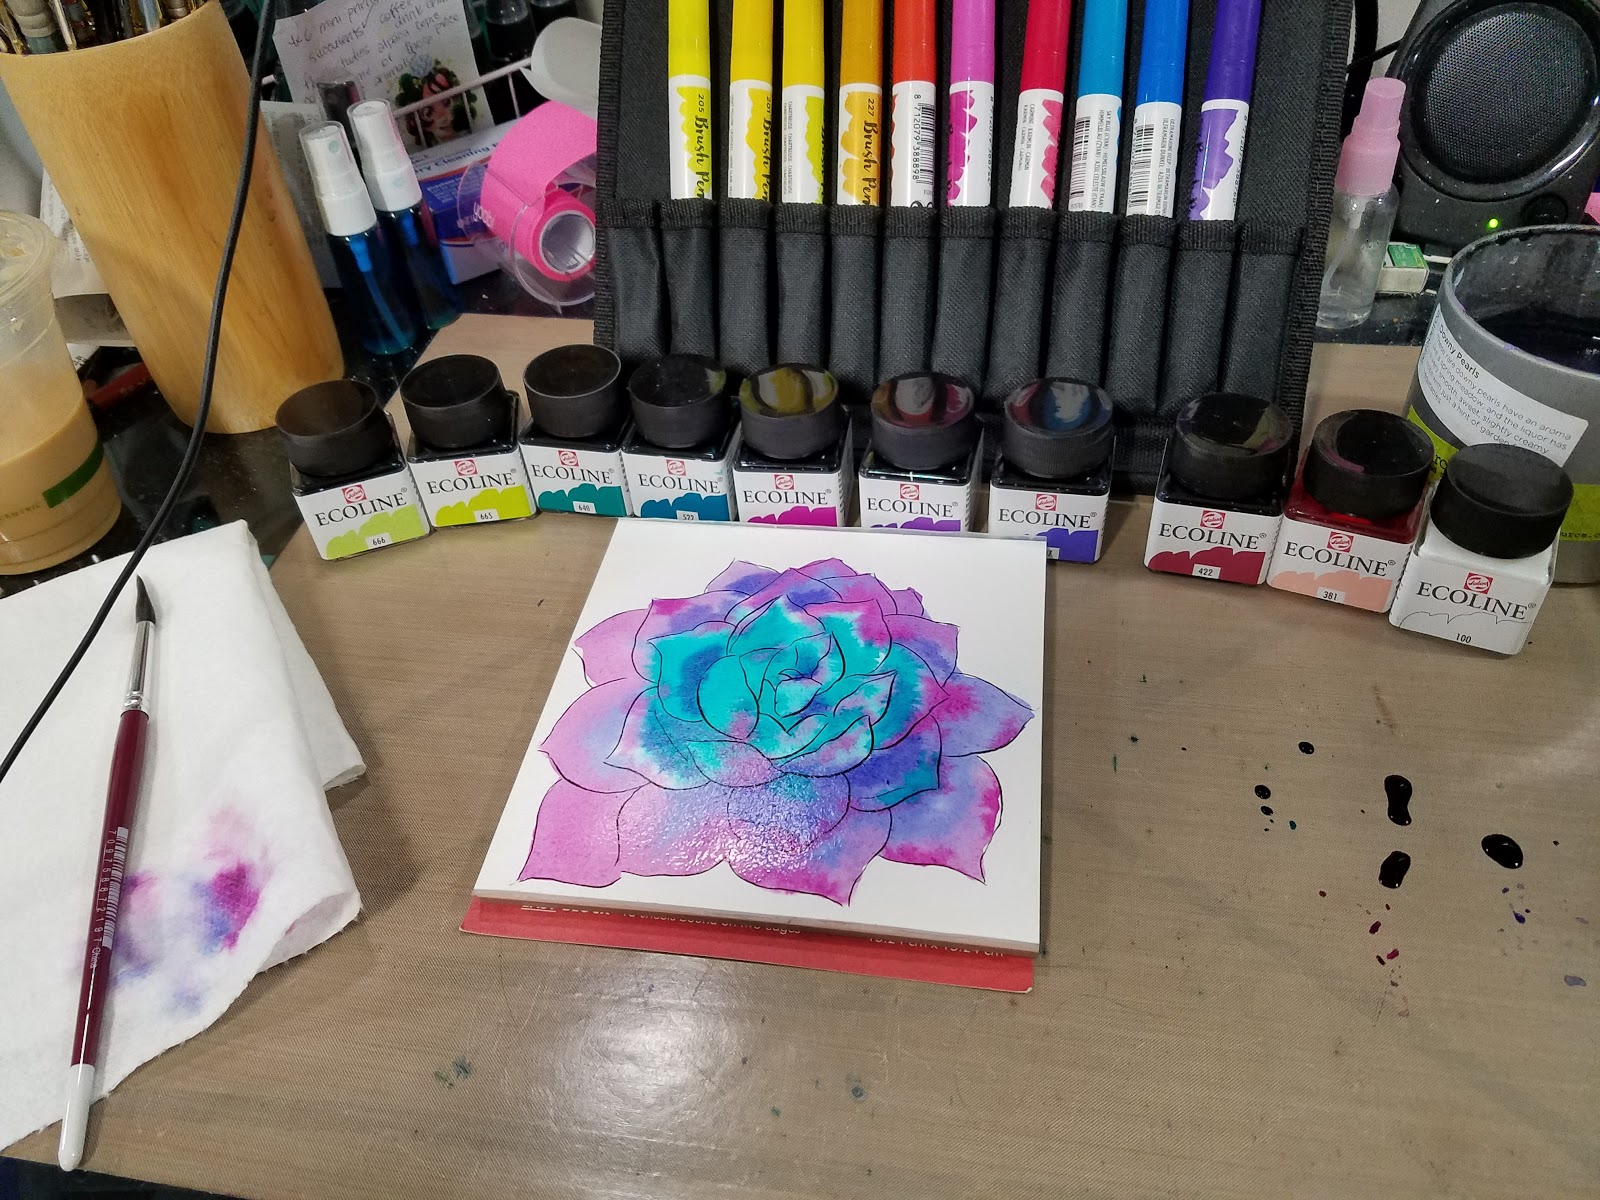
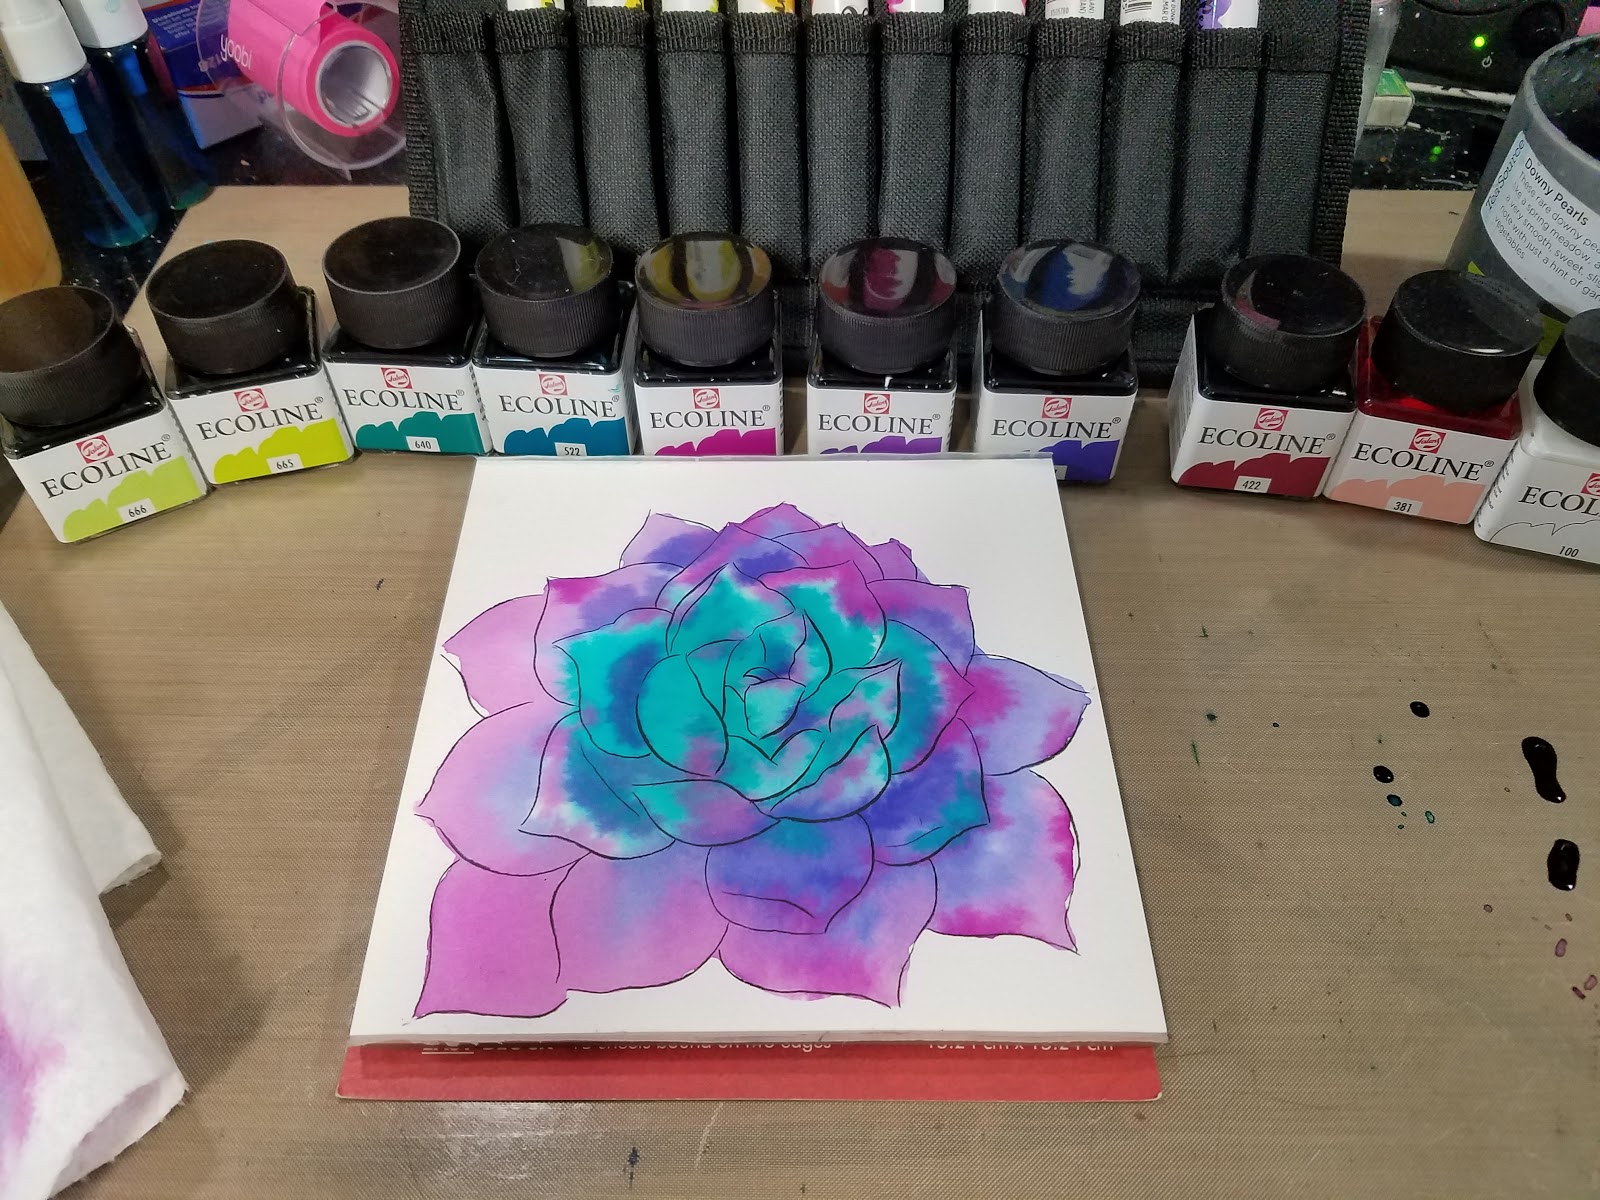
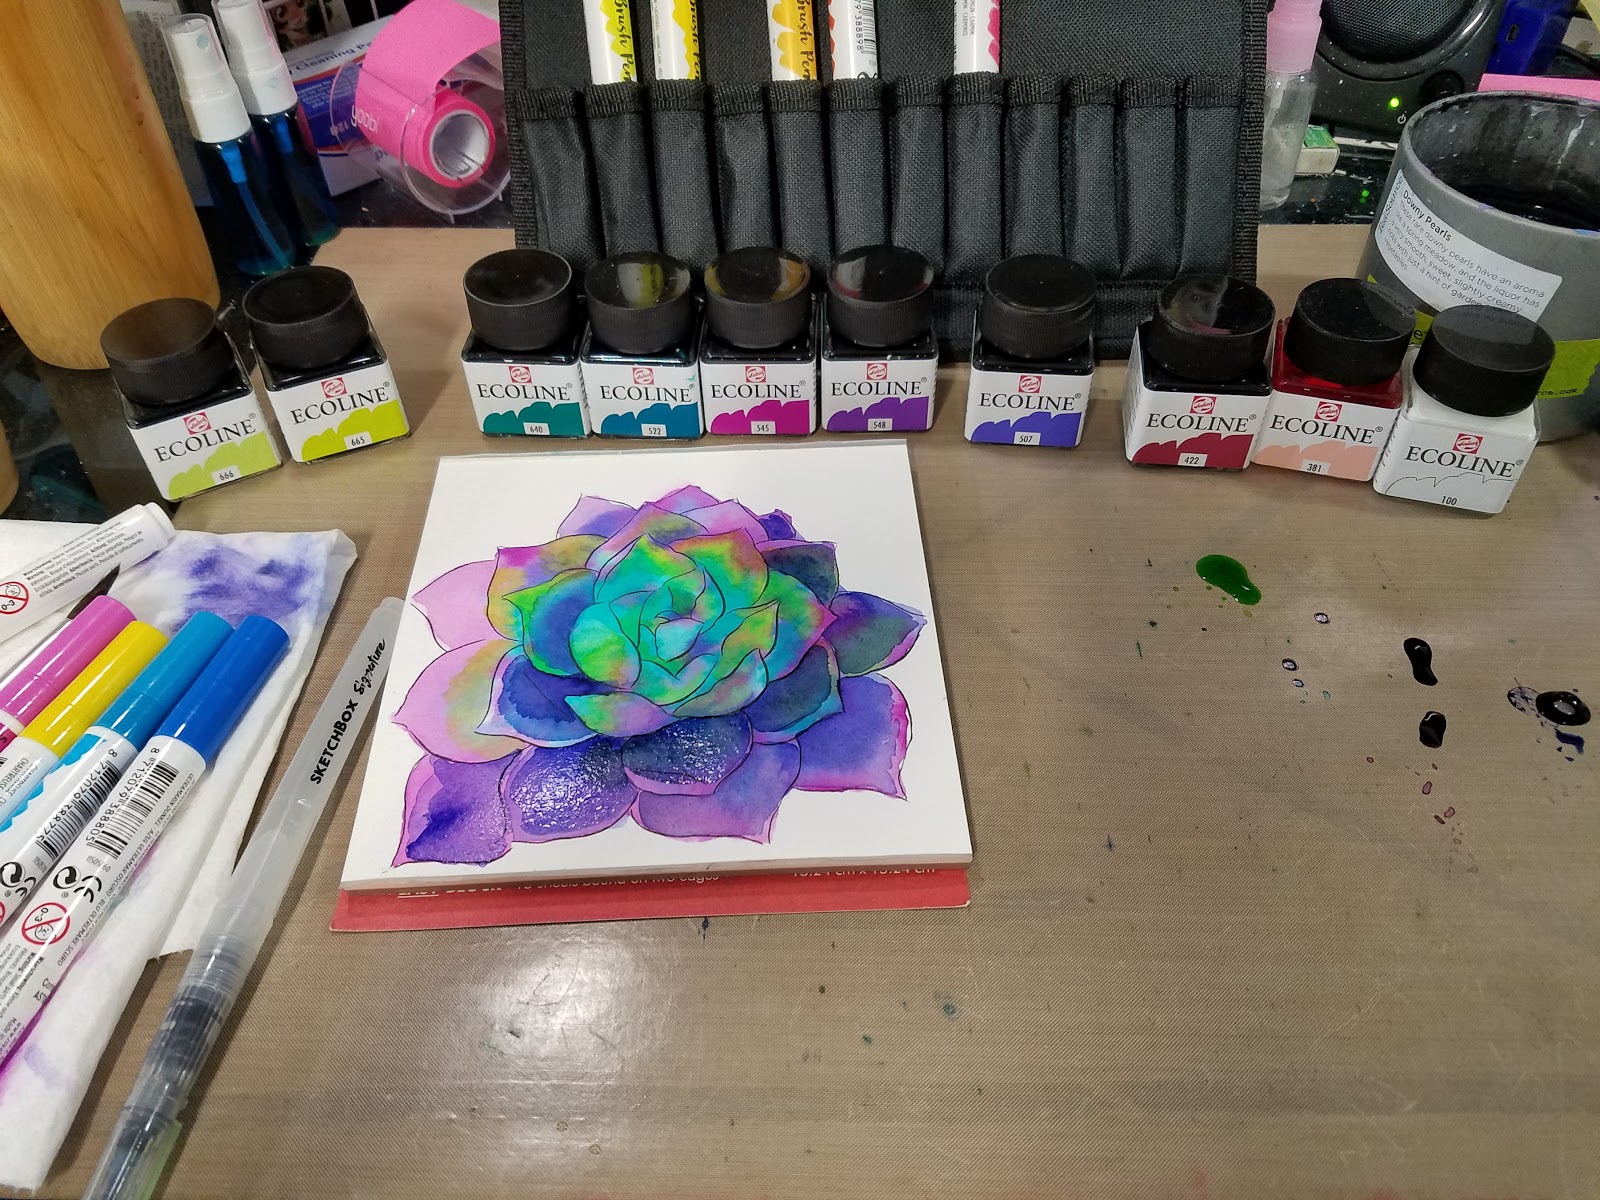
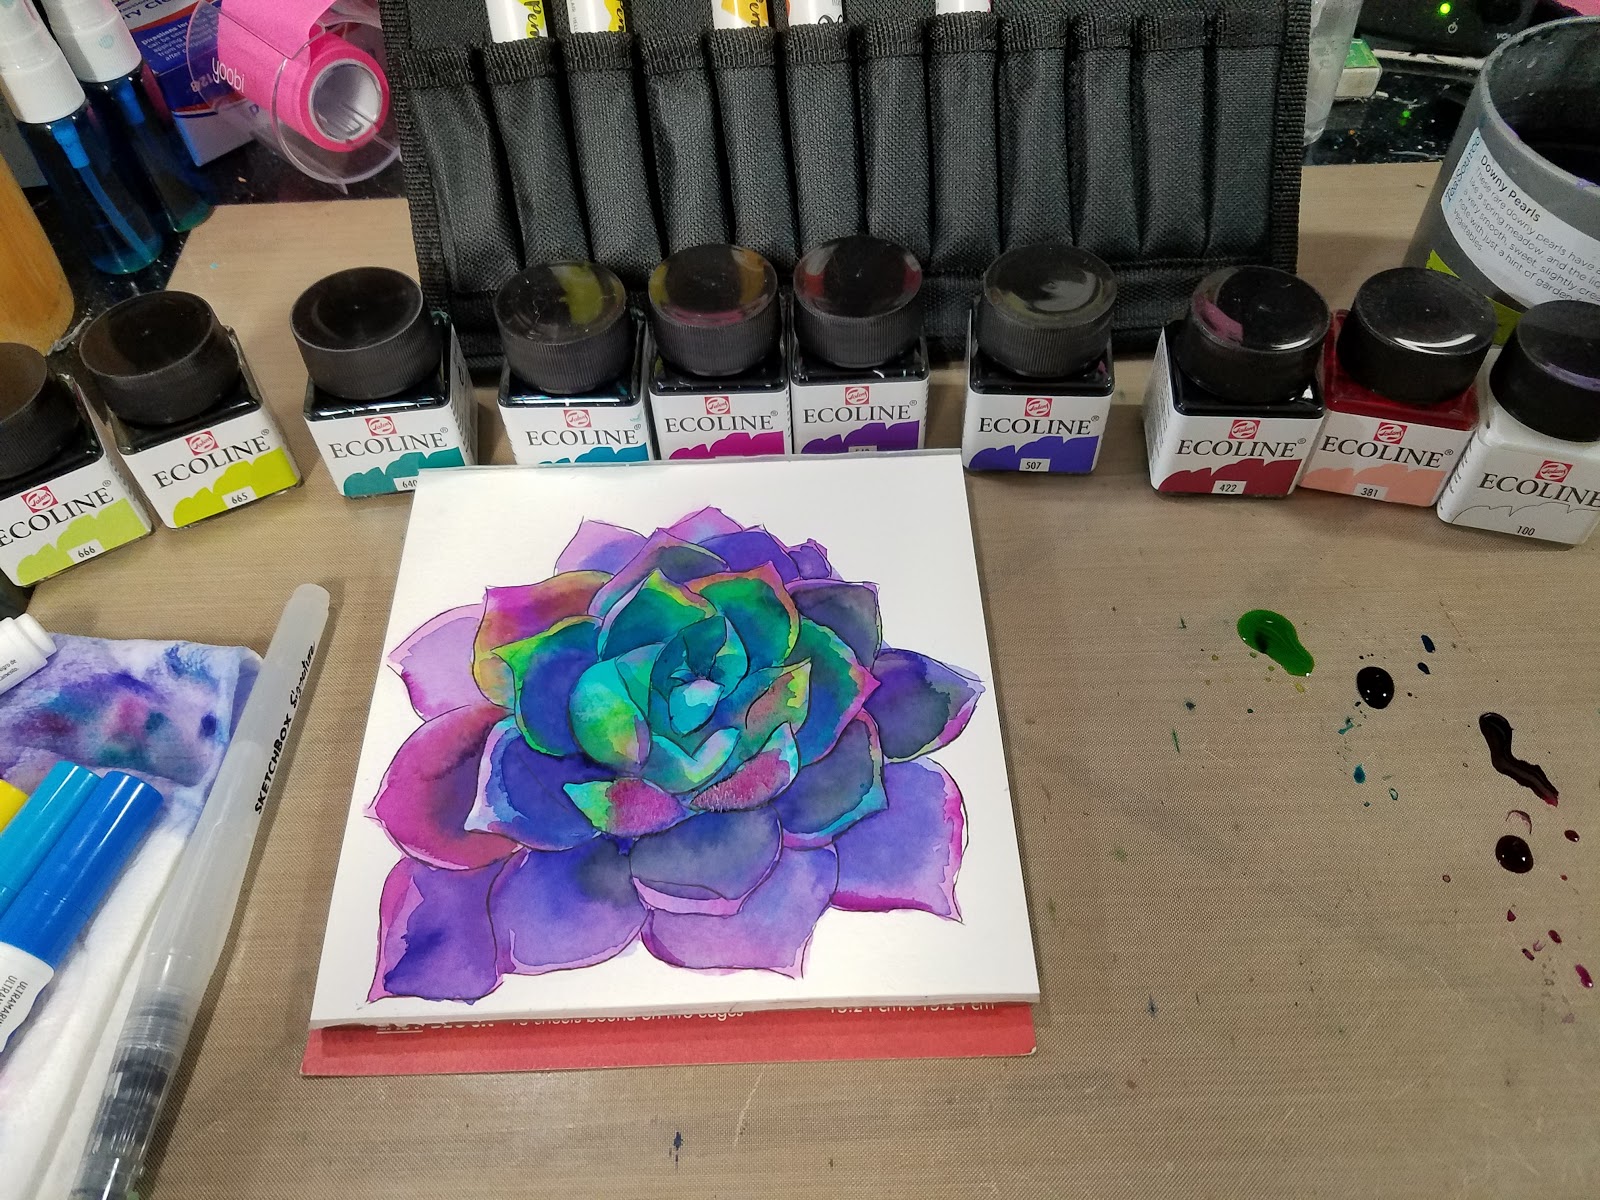
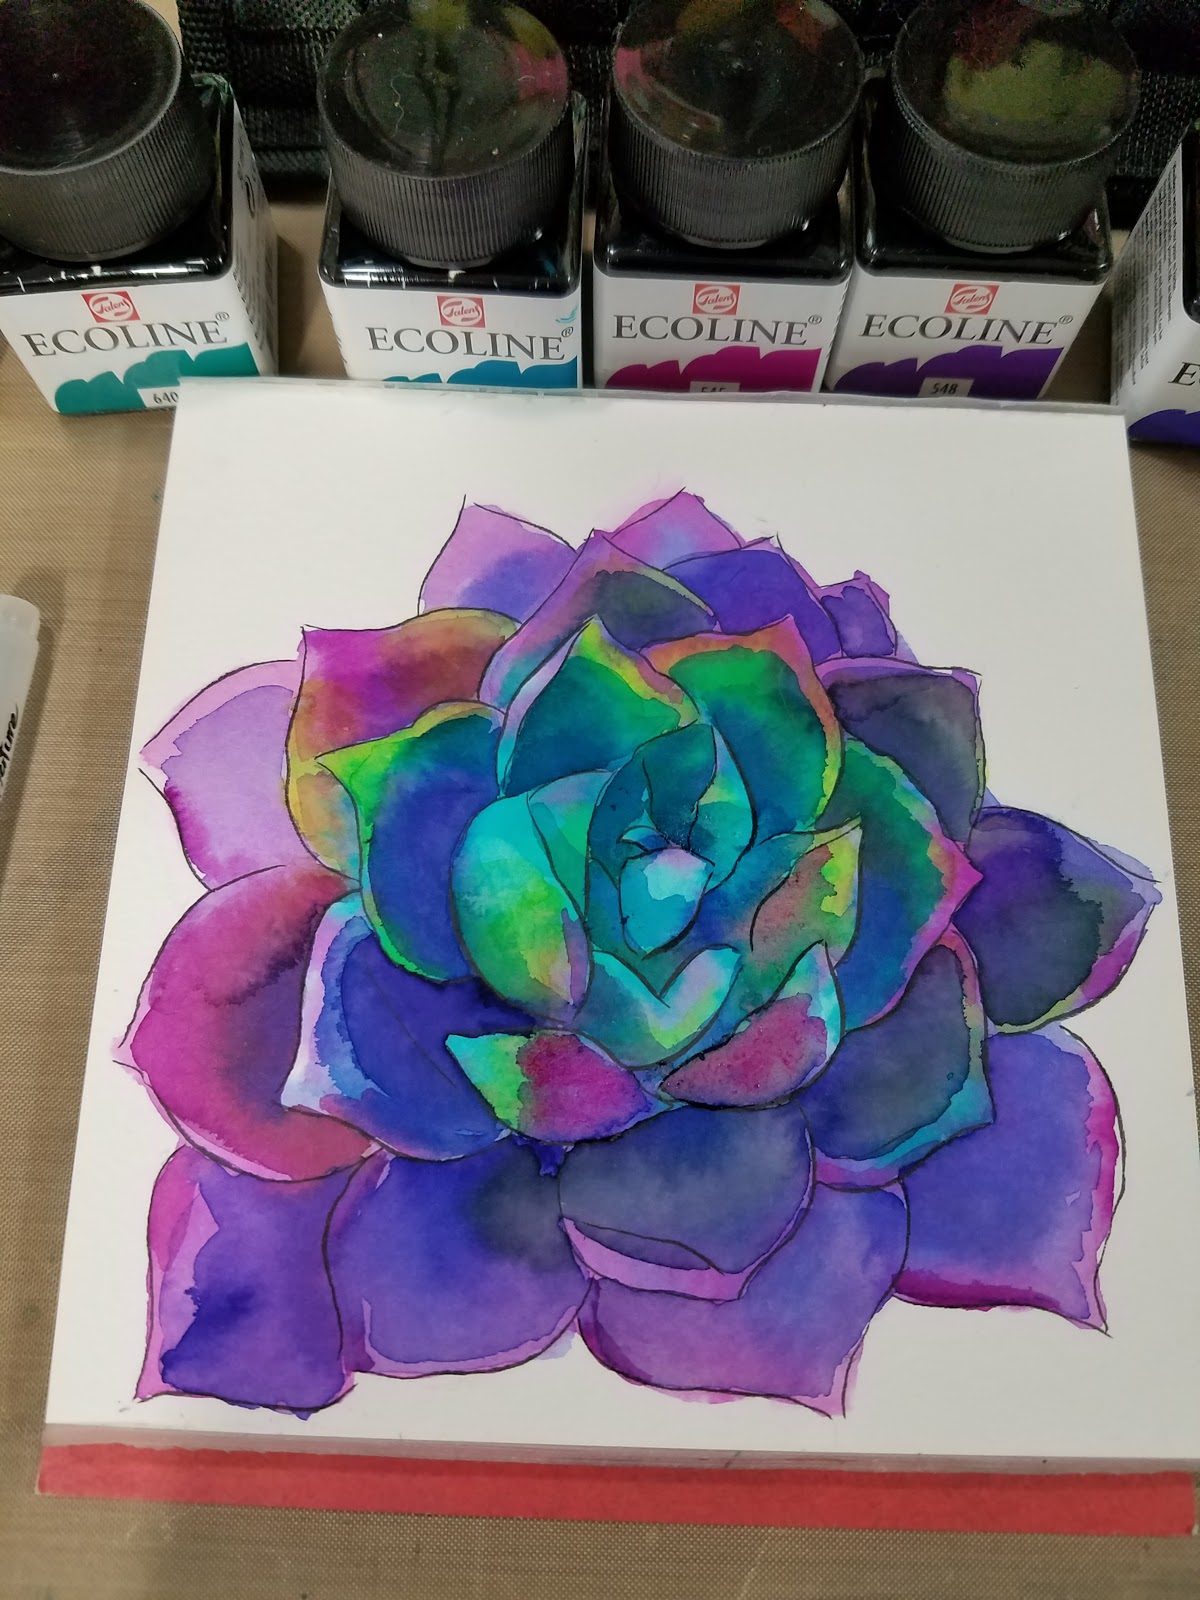
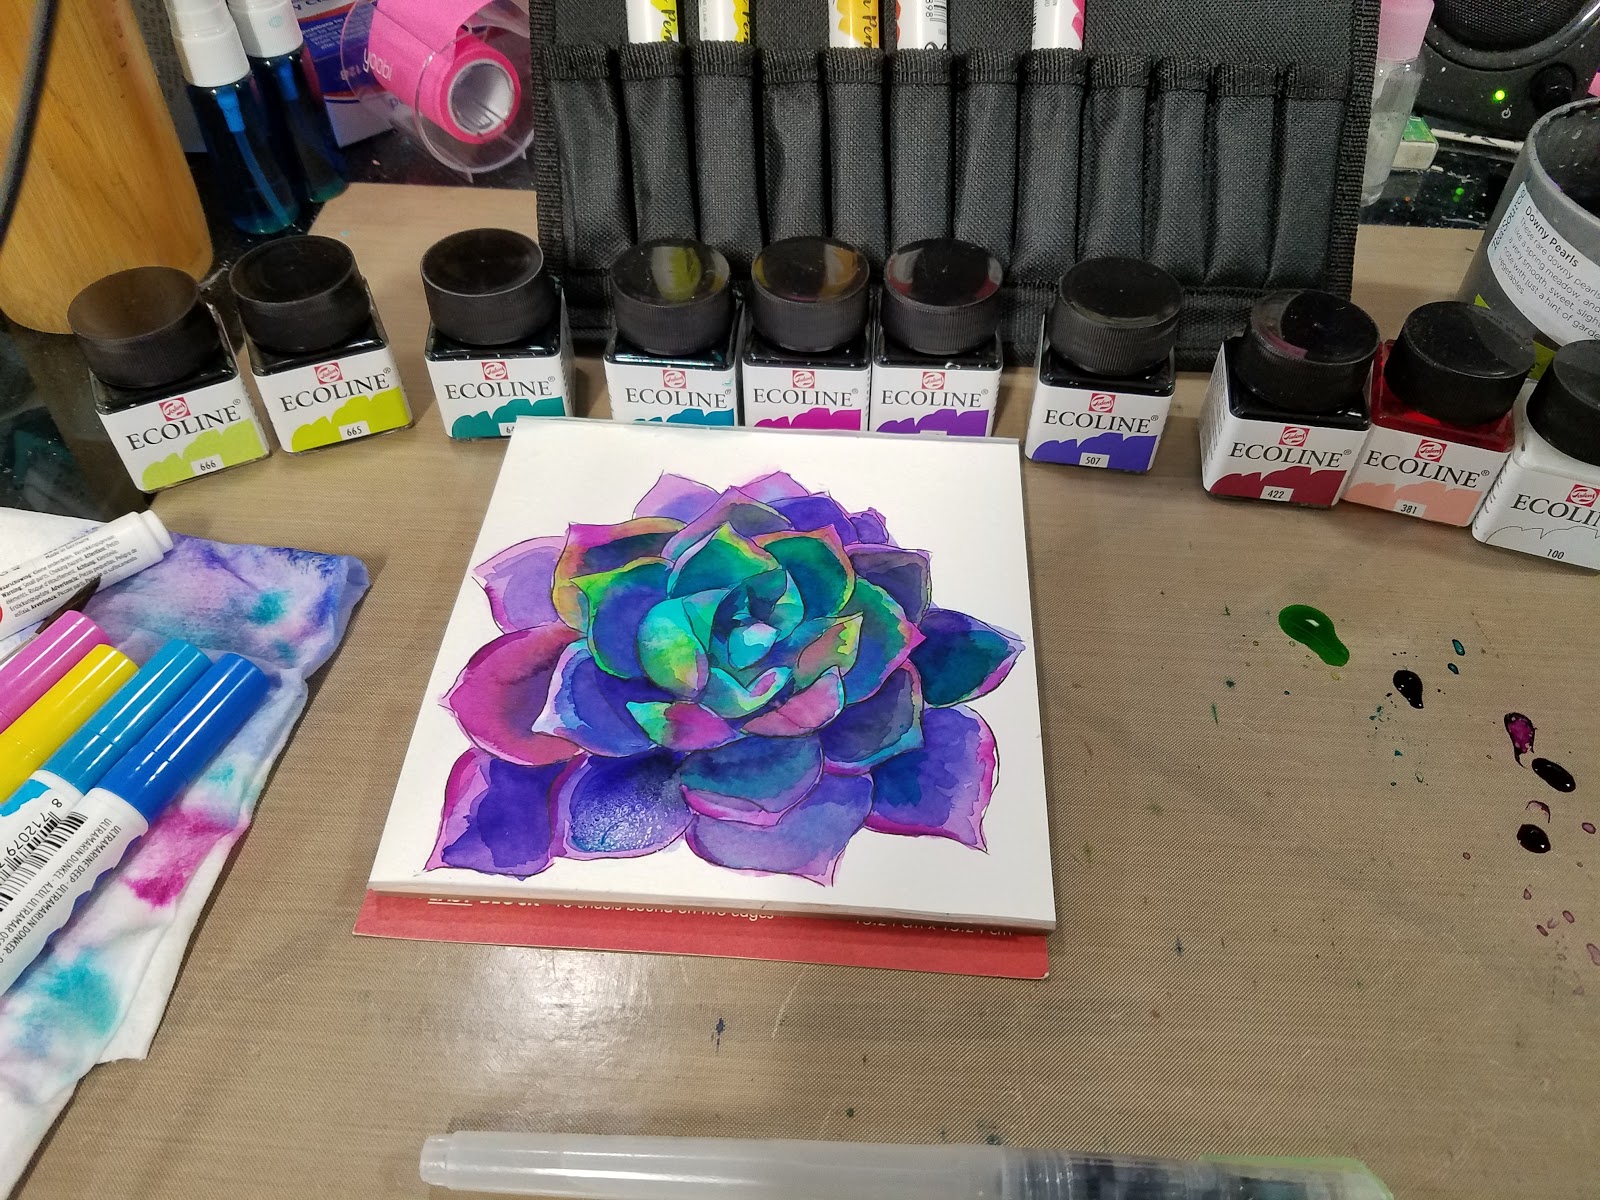
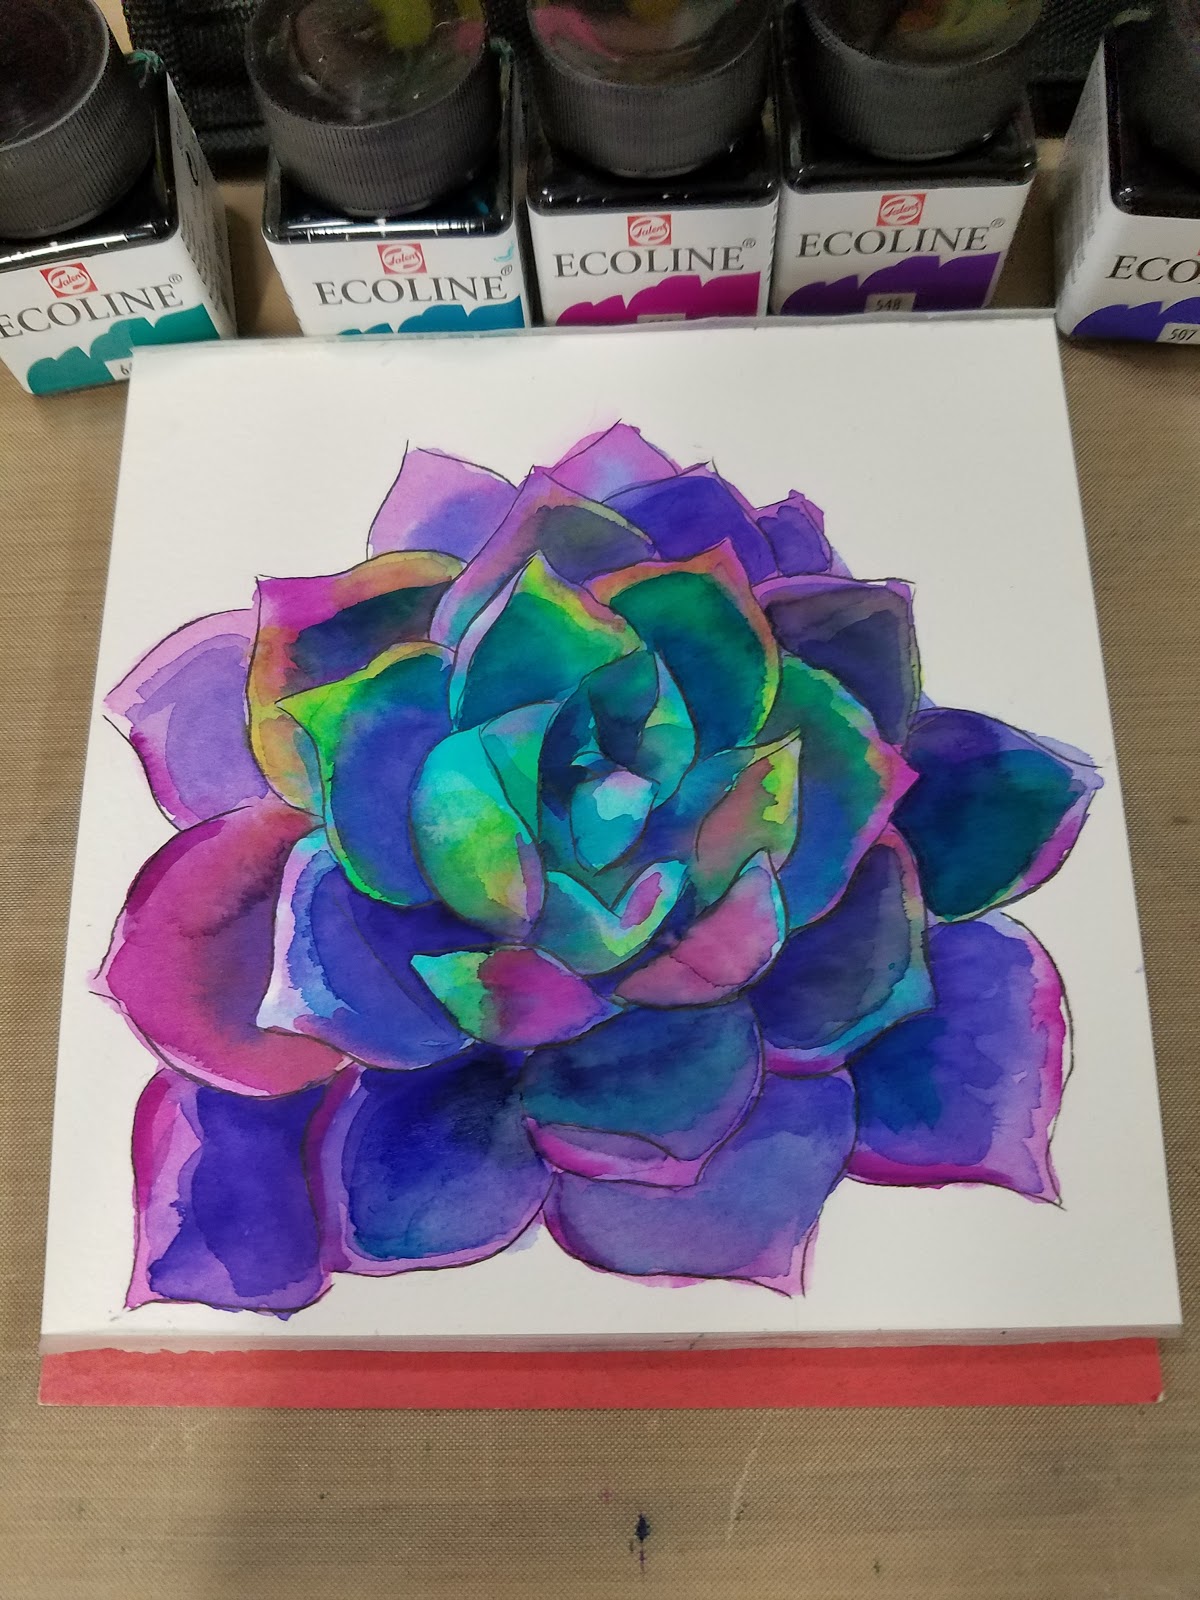
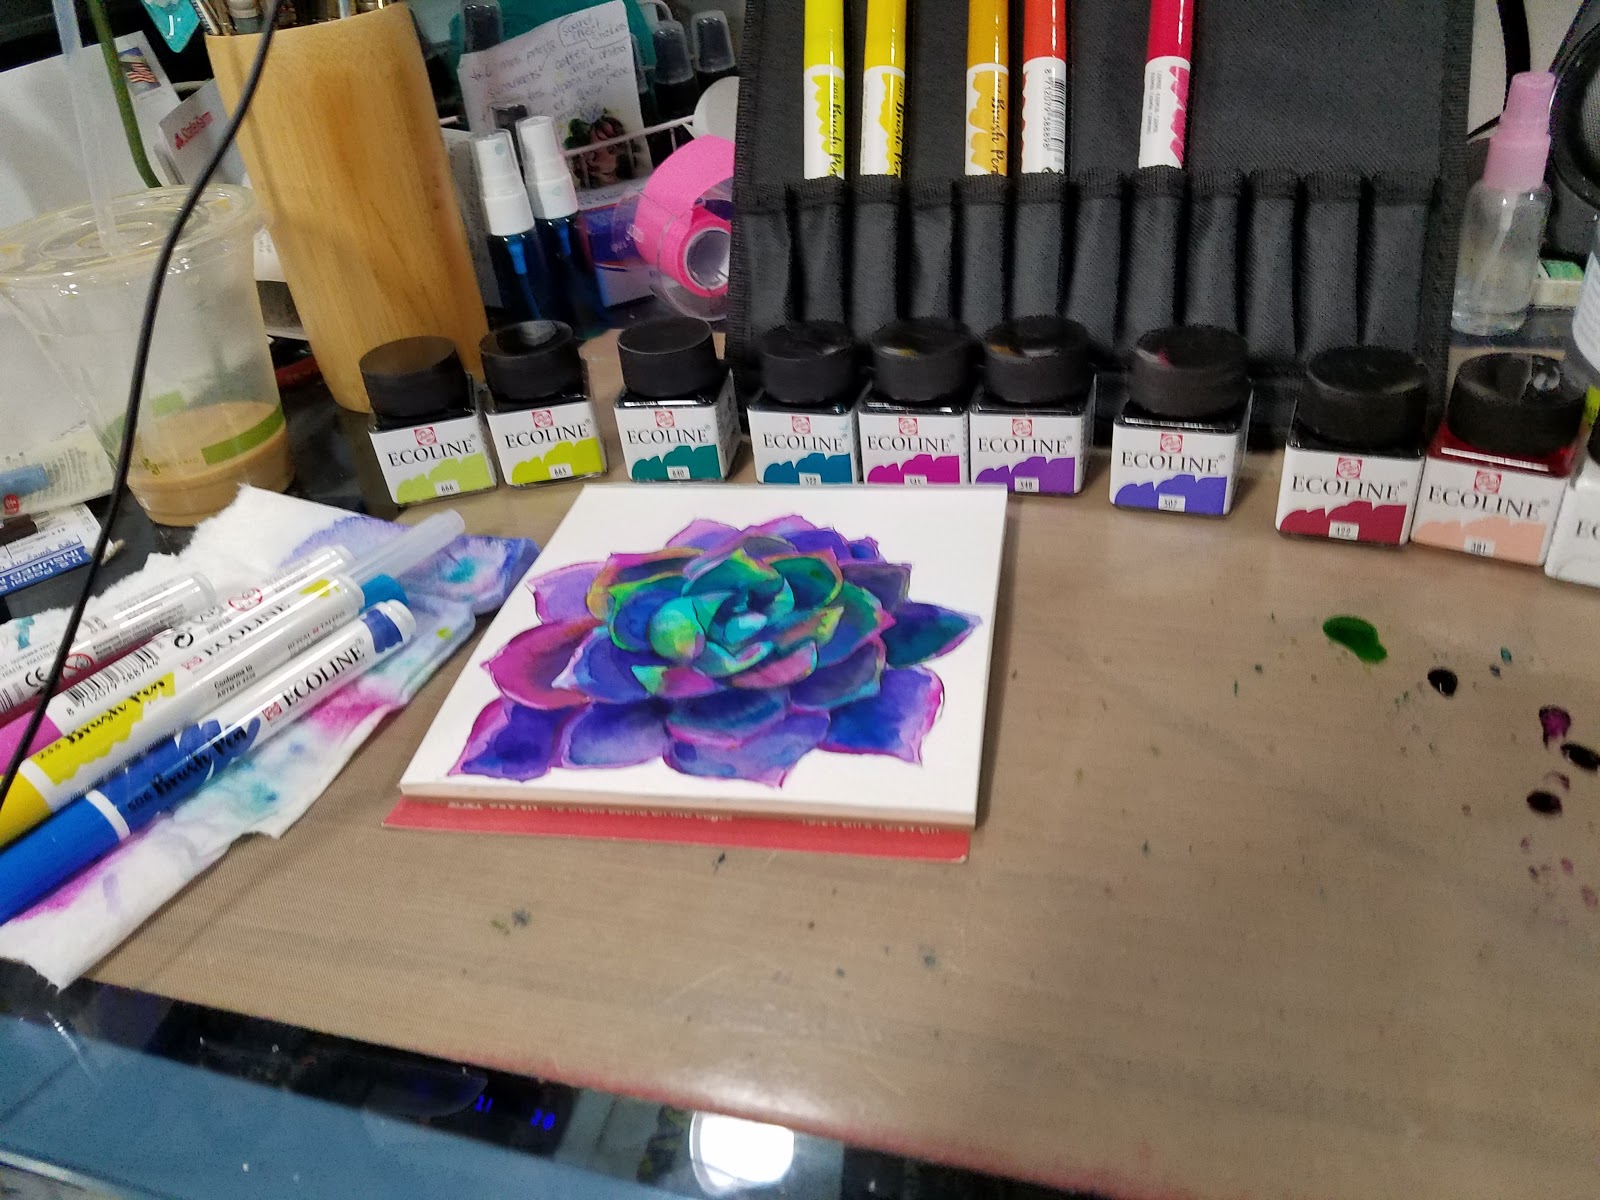
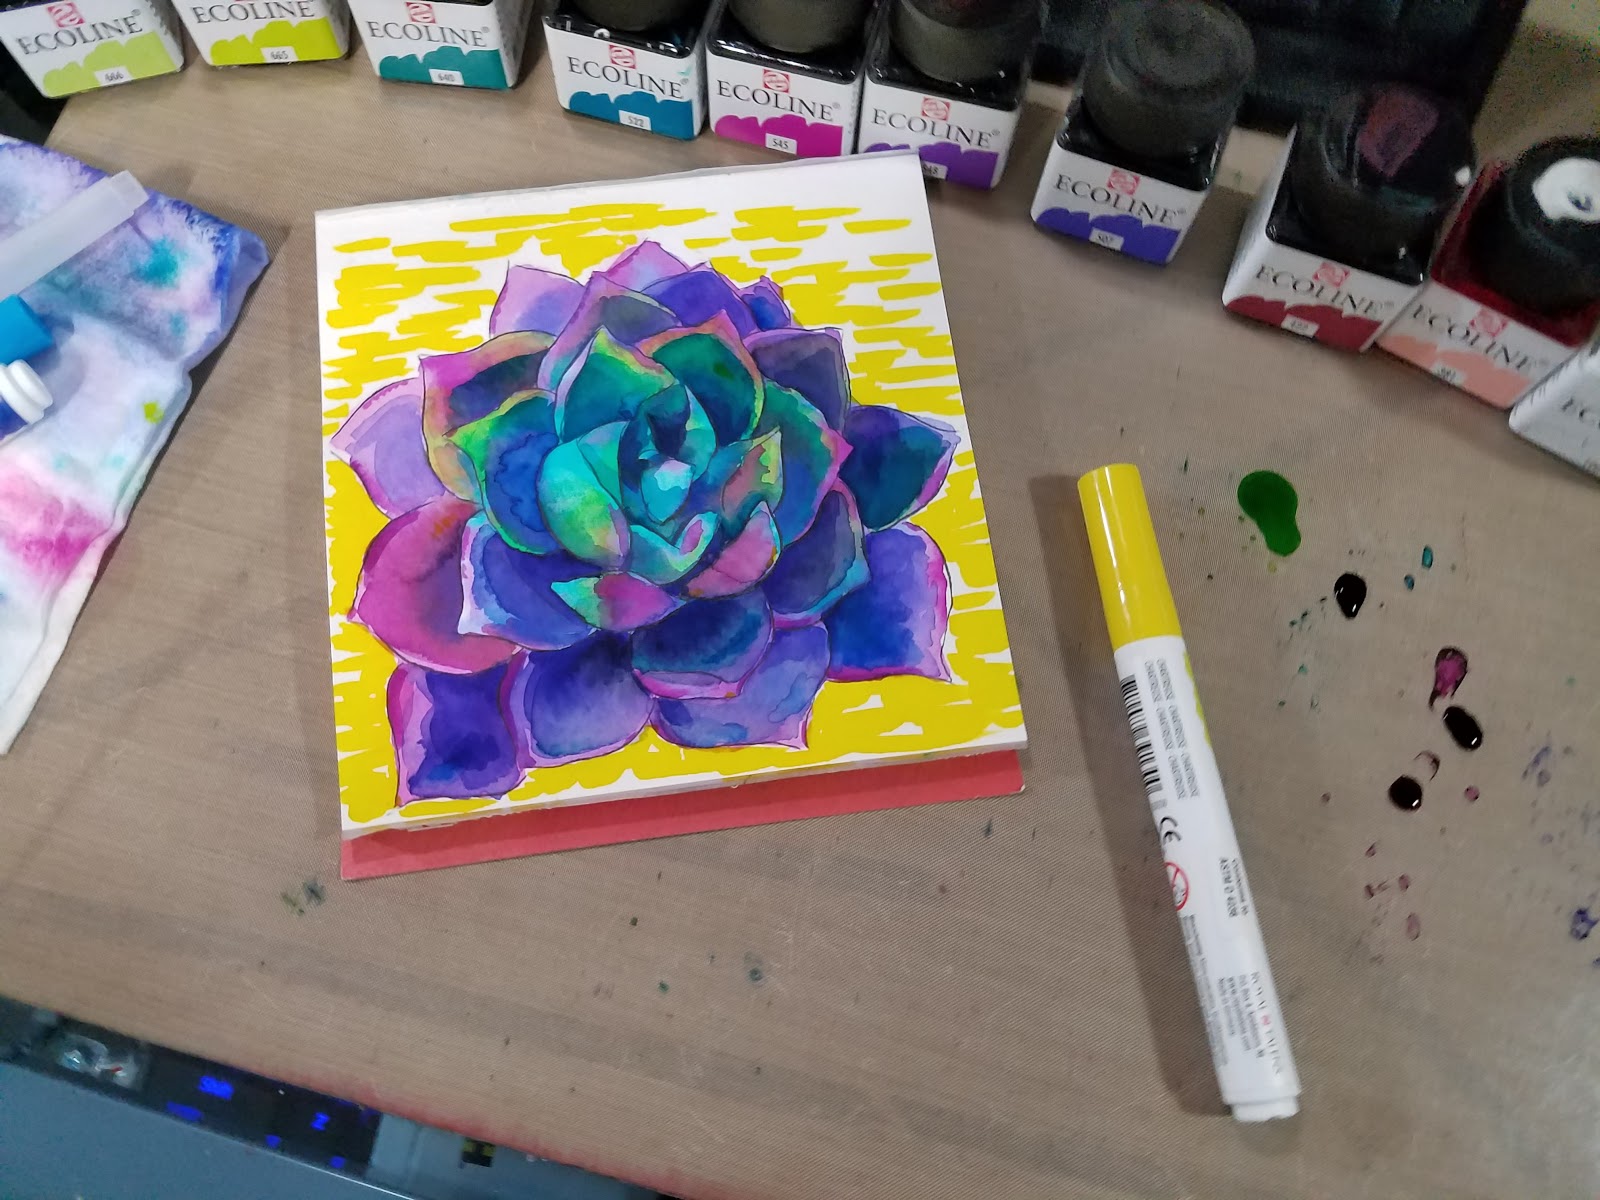
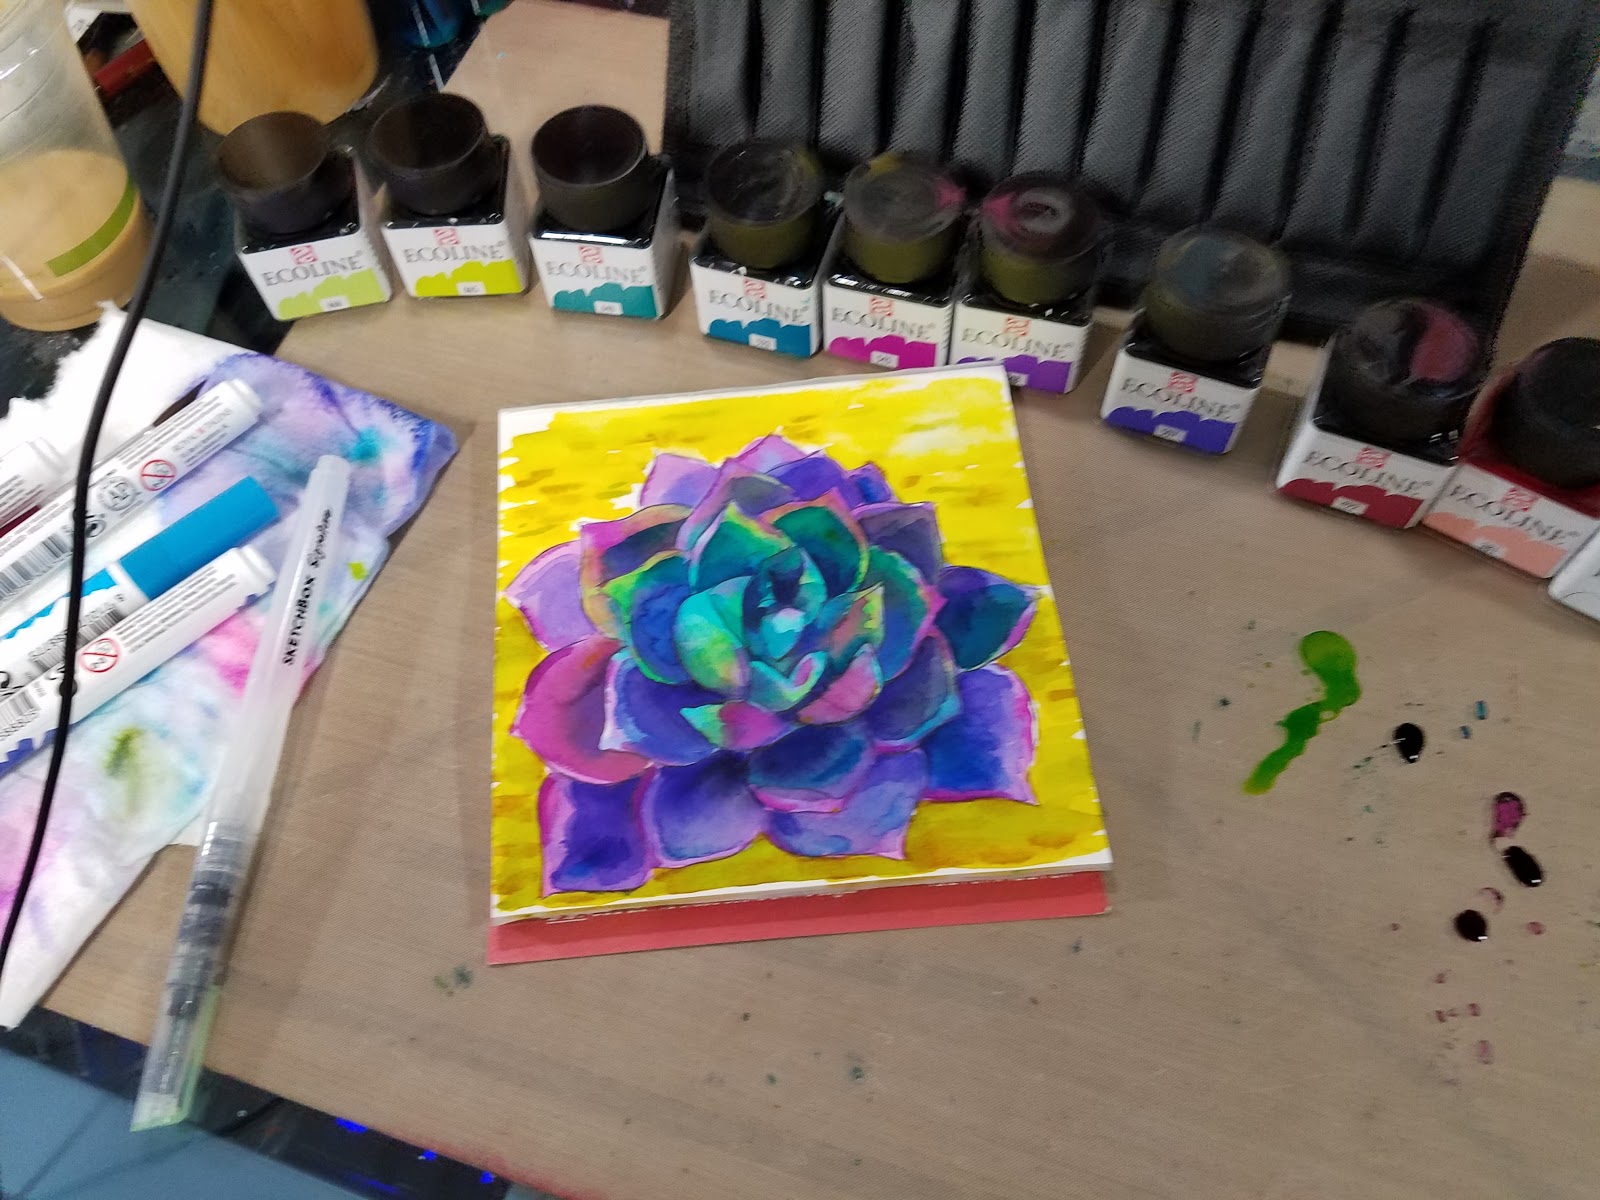
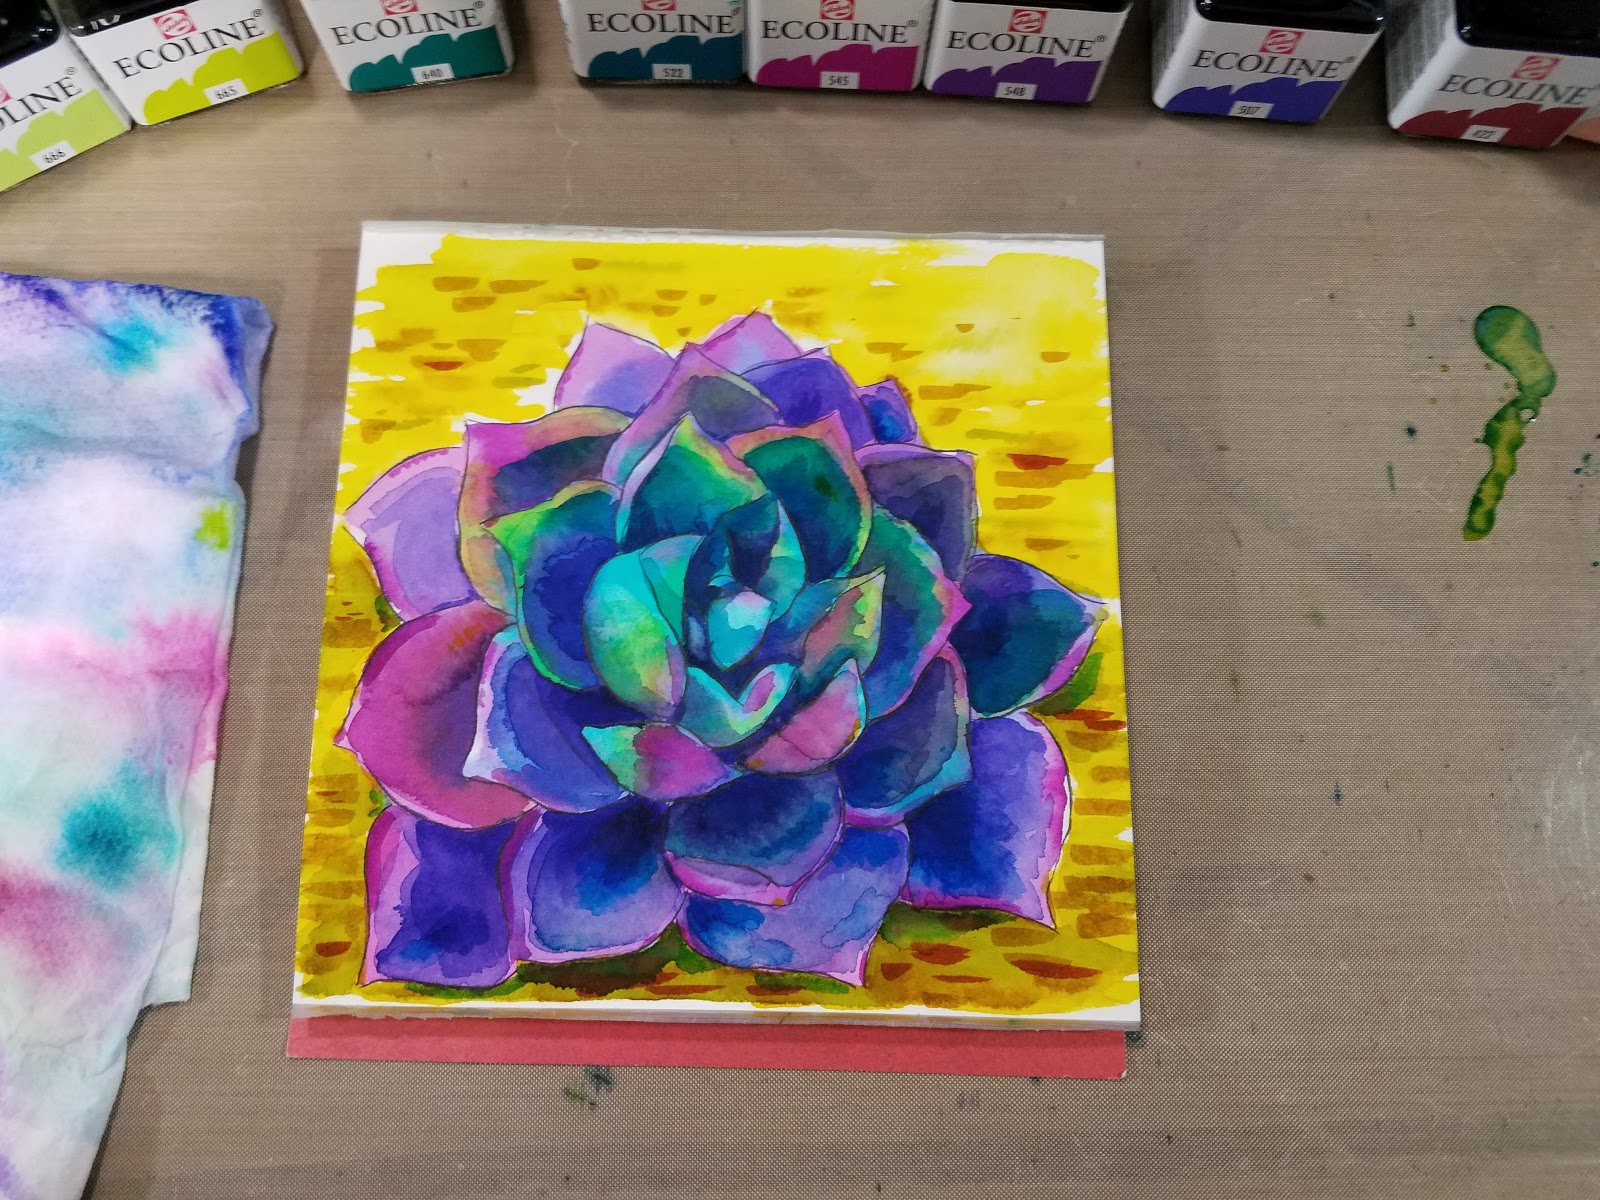
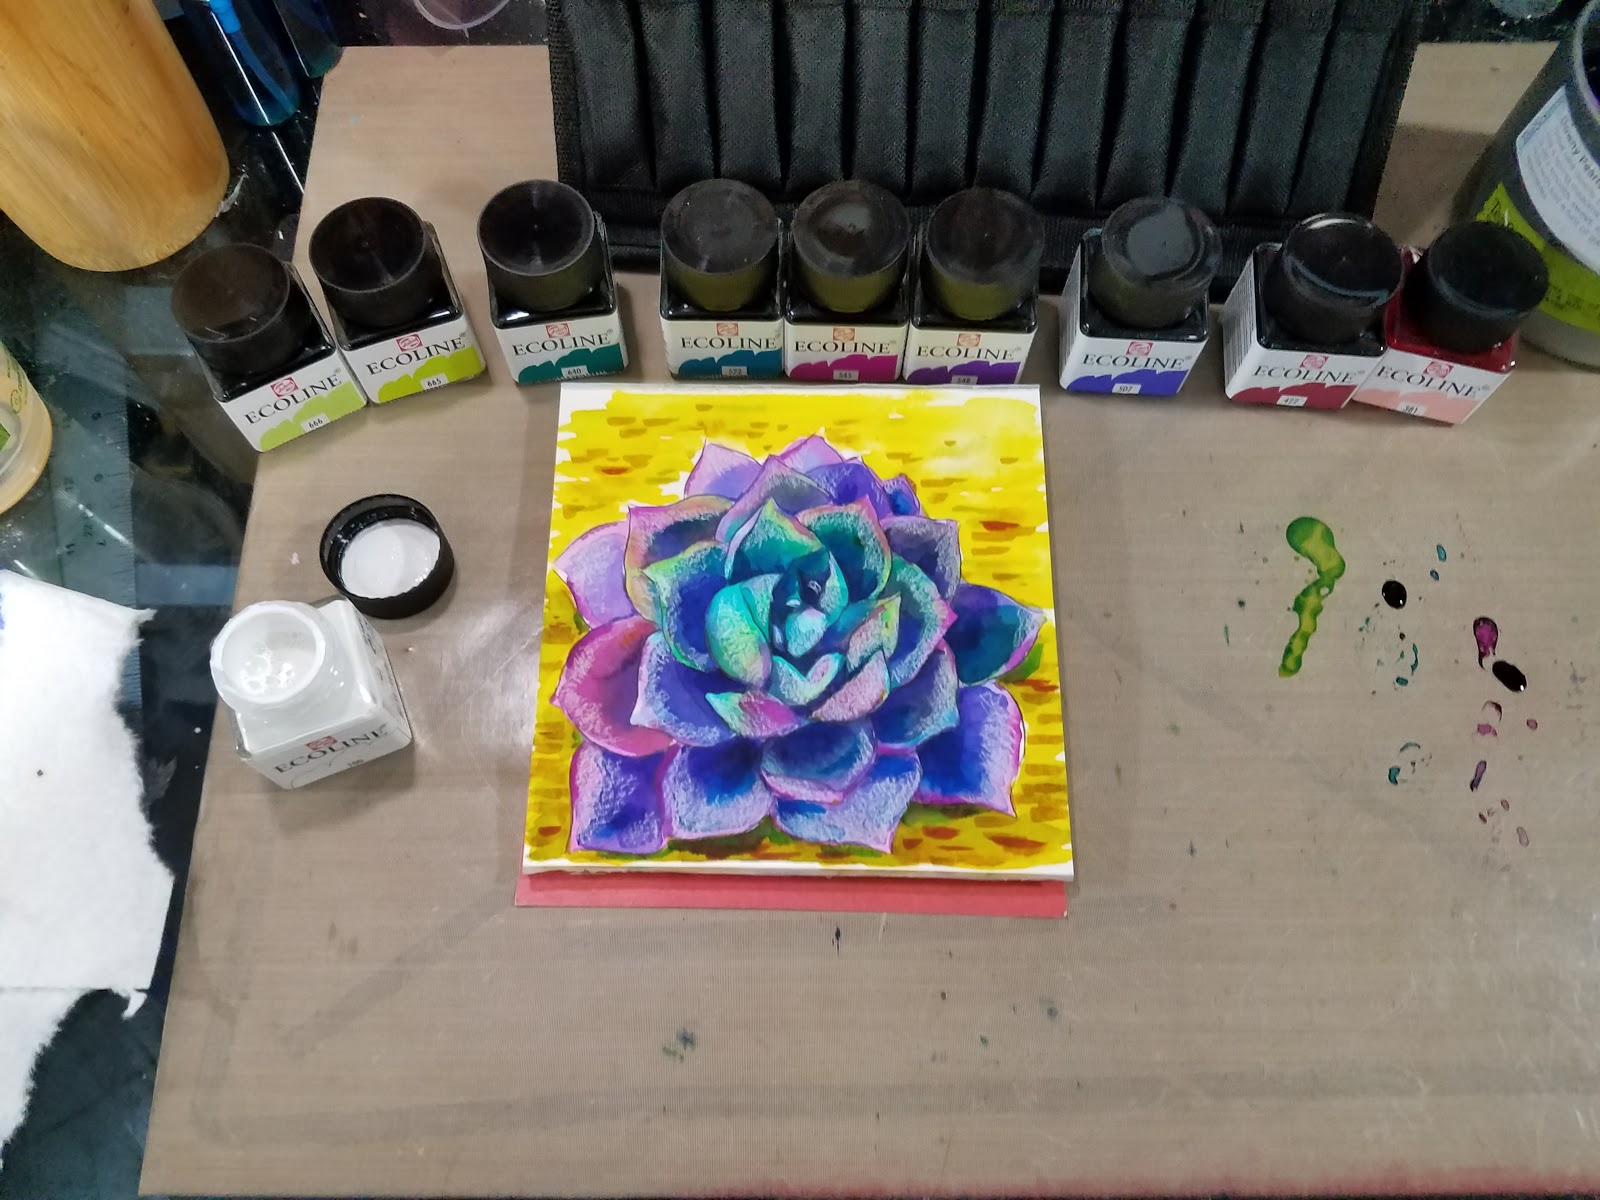
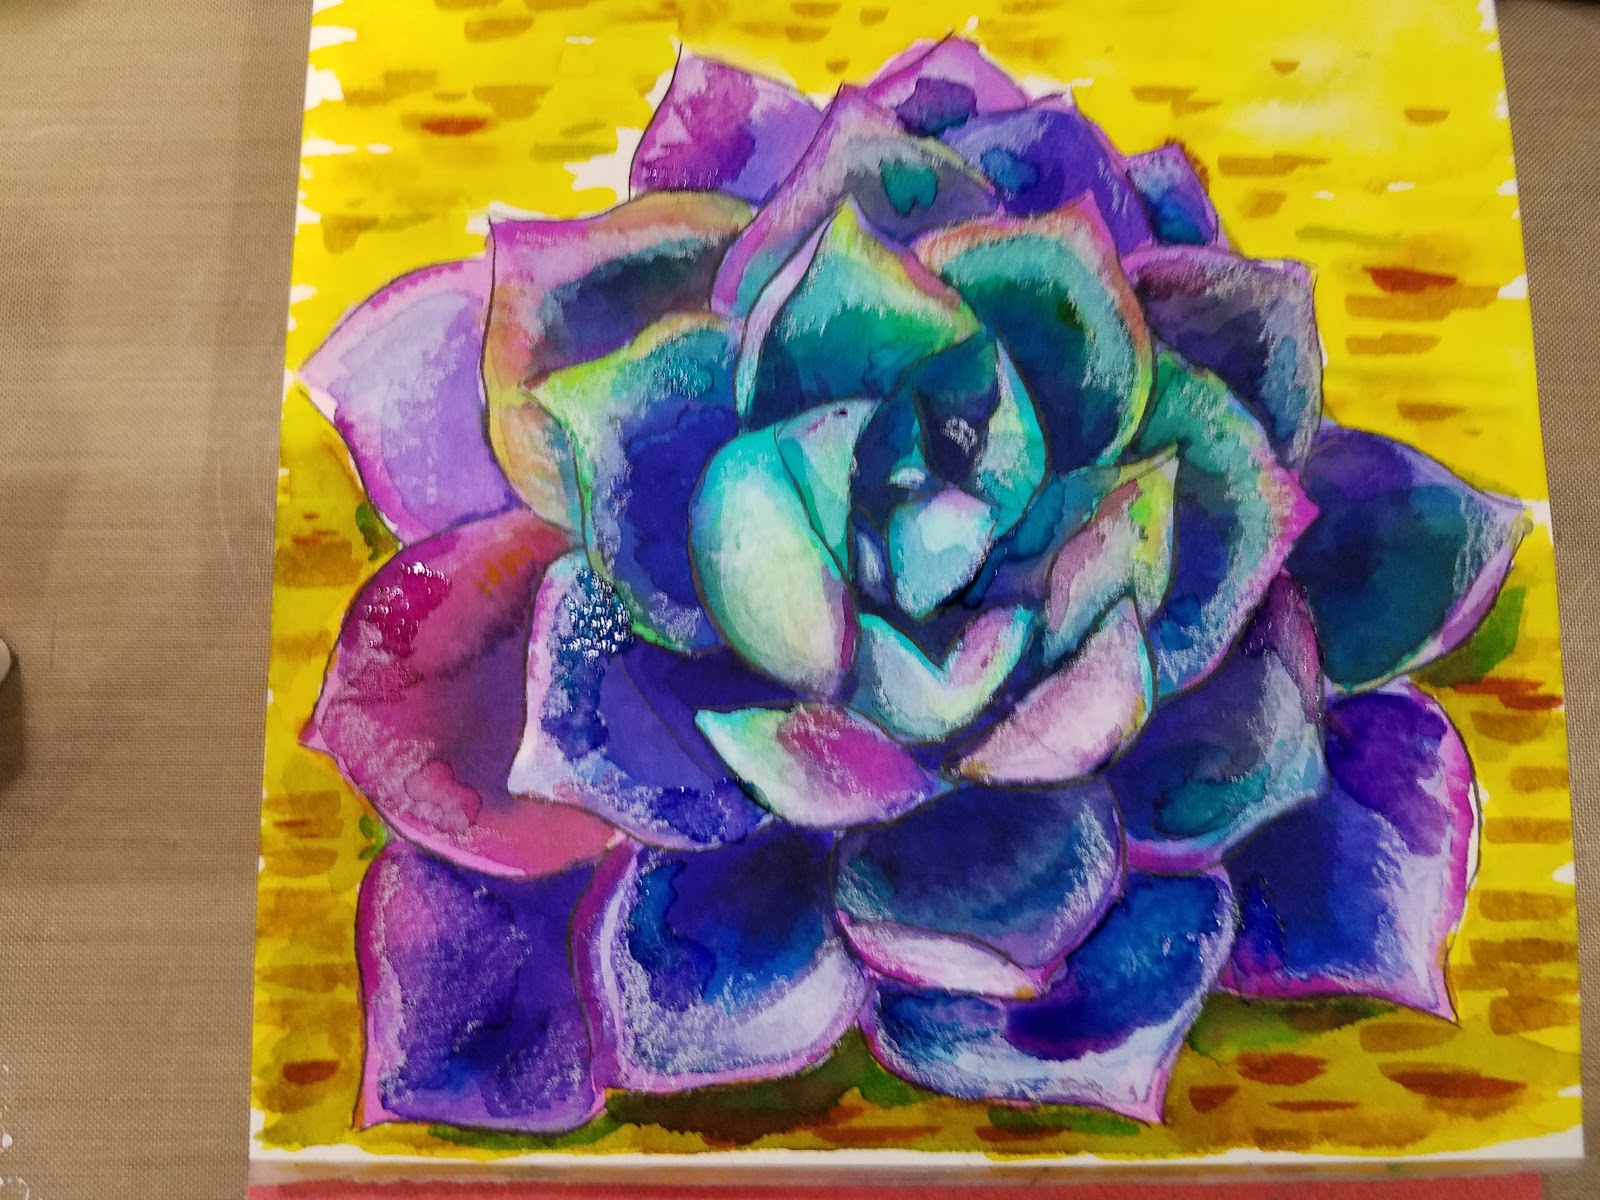
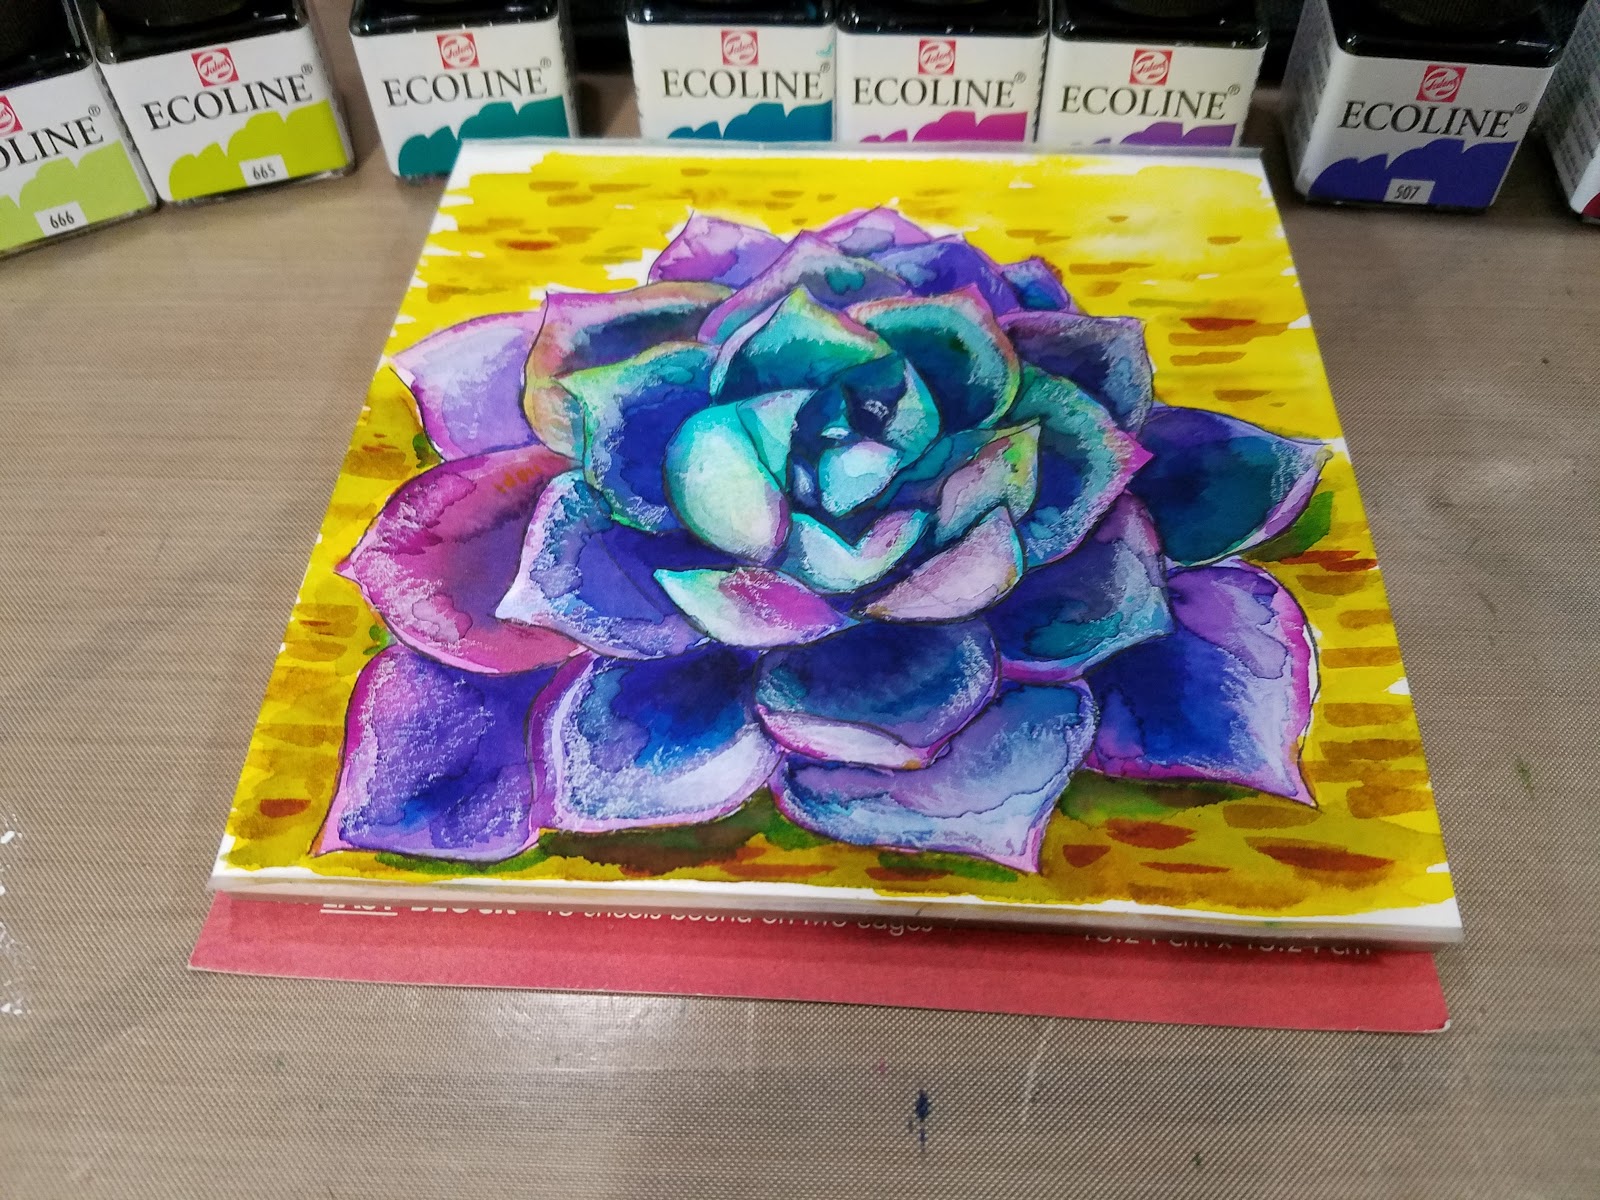
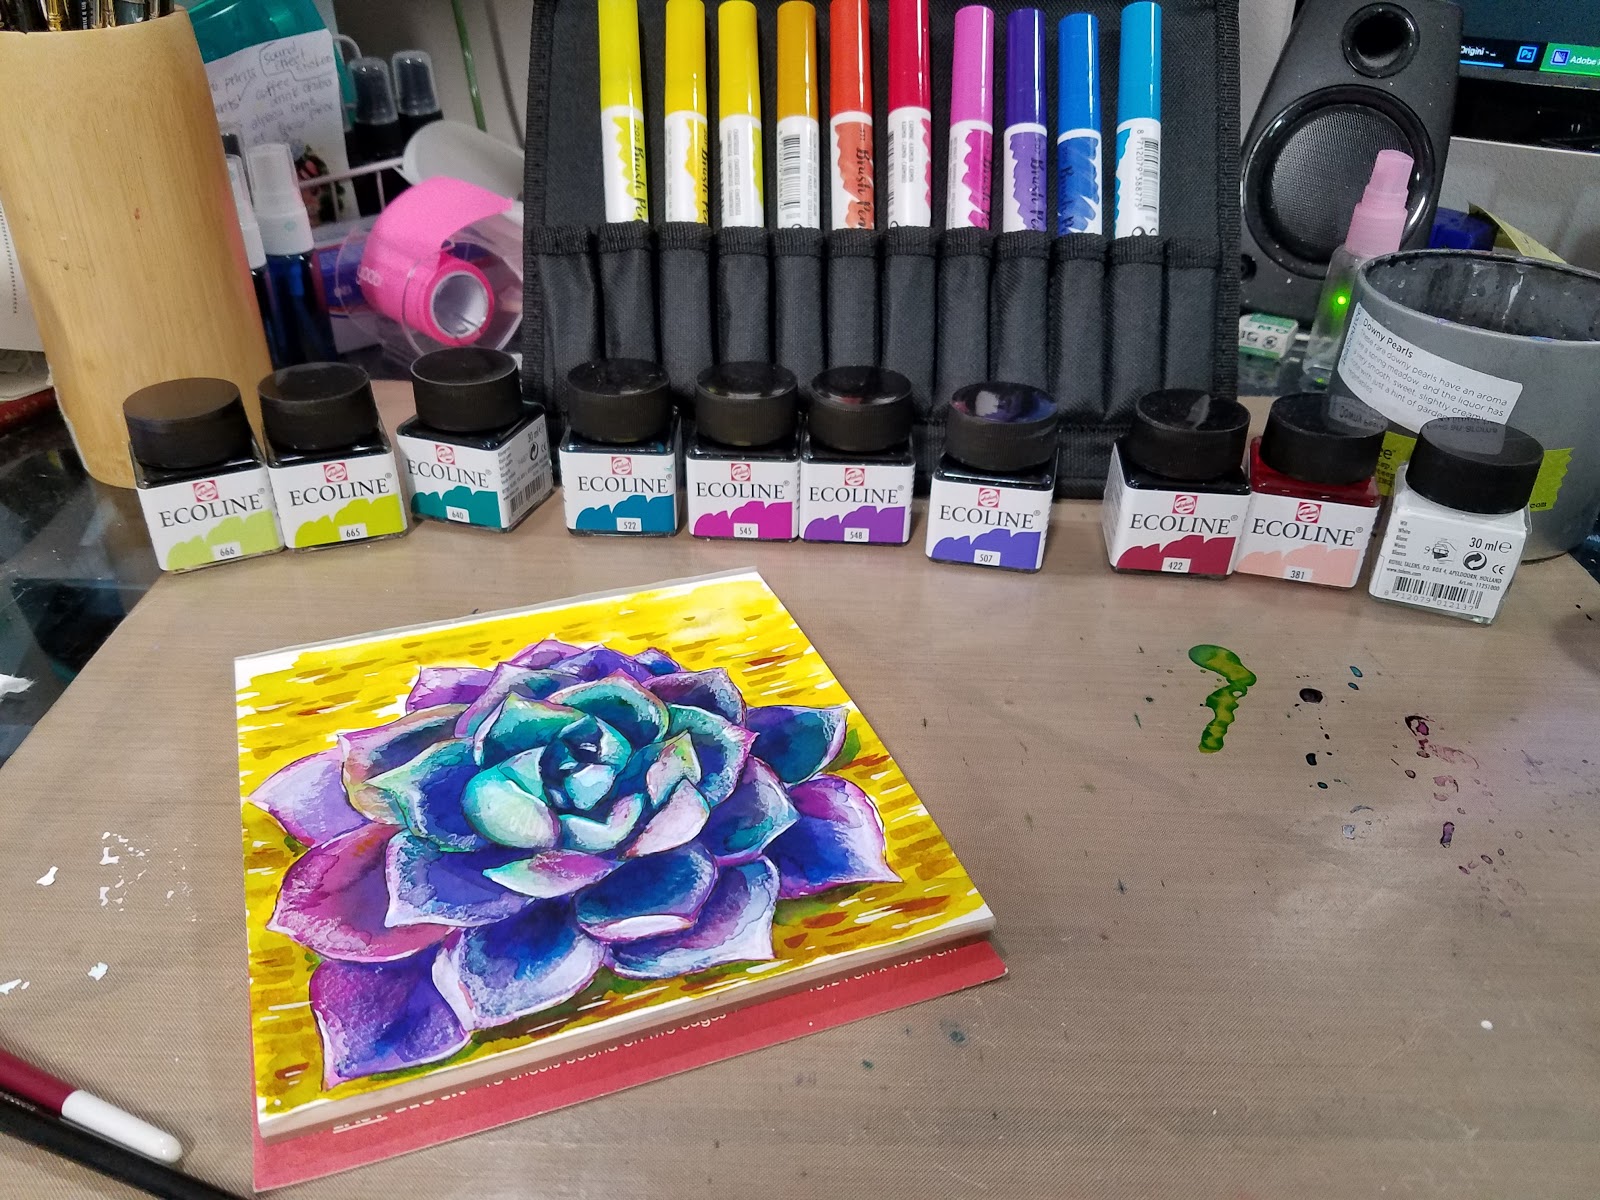
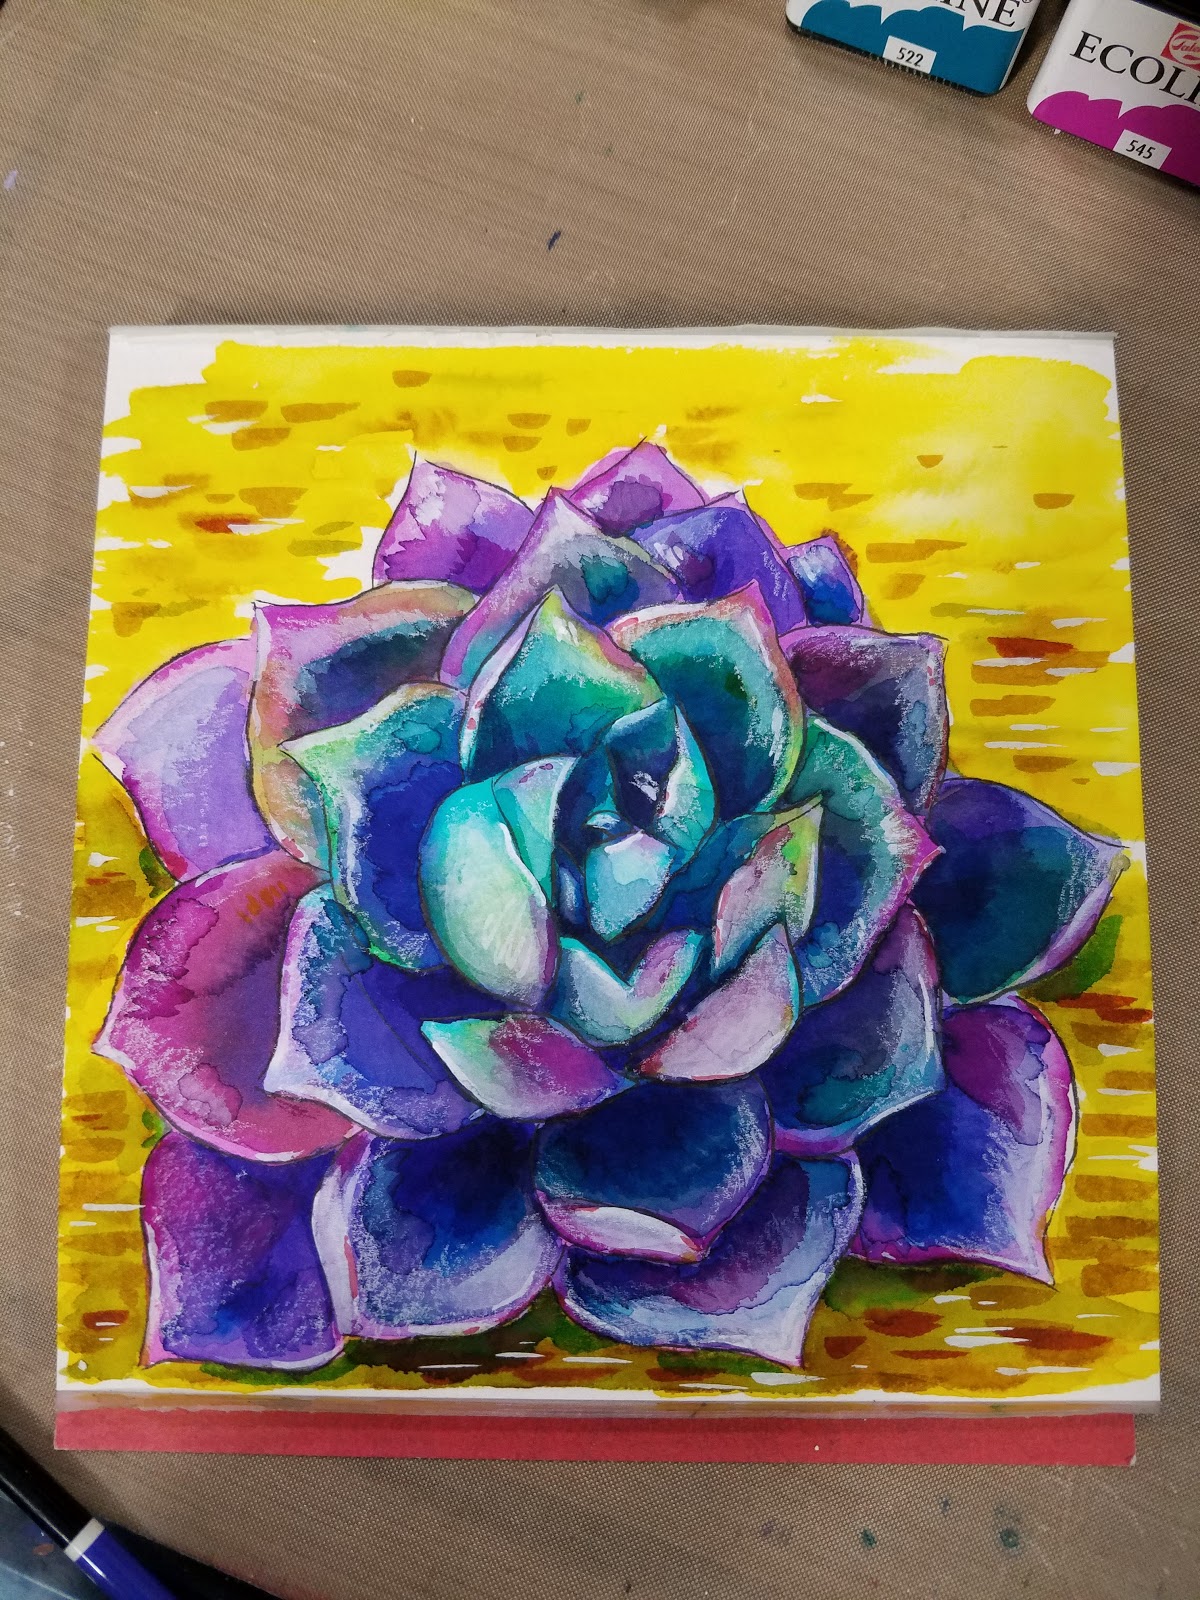
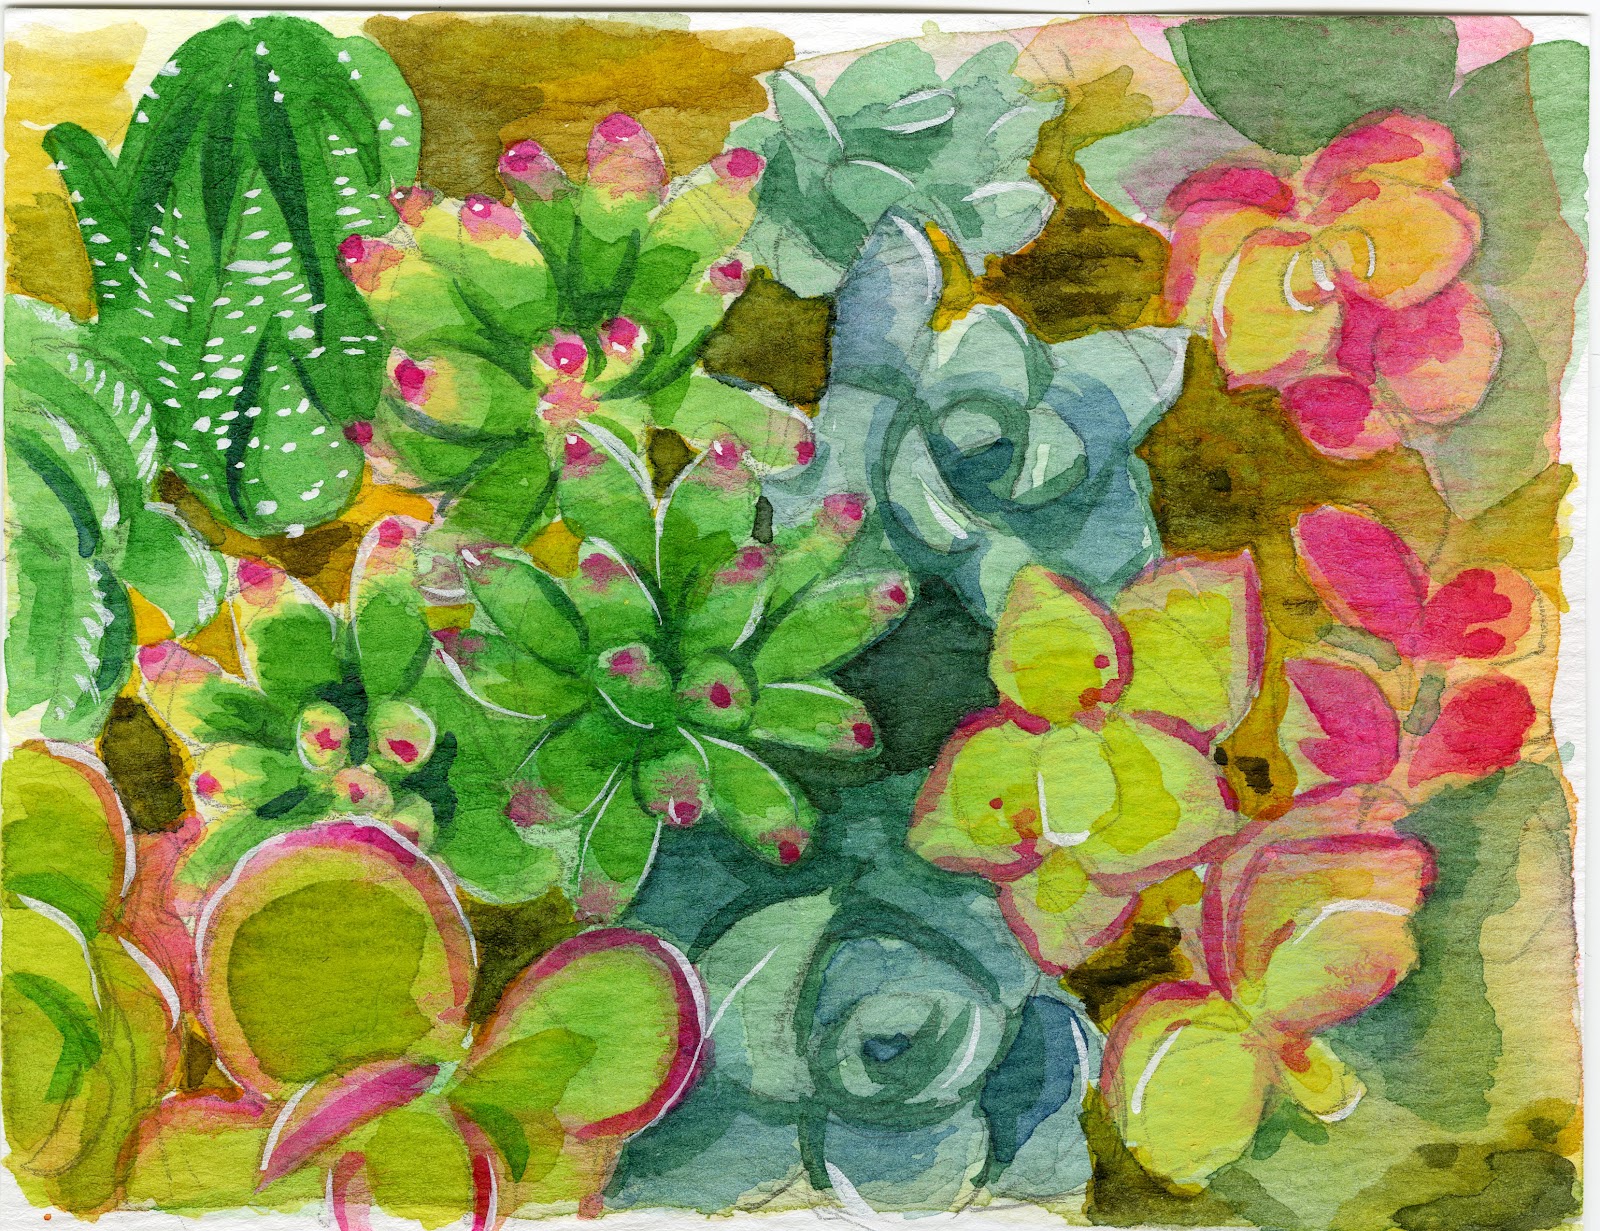
Succulents Step by Step with Ecoline
Still Photos from the Field Test

This field test was completed on Fluid Cold Press watercolor paper.


The Verdict:
Ecoline watercolor markers are fun and fairly easy to use. They are single sided, dye based watercolor markers that utilize a foam rubber brush nib. This nib has plenty of flex and bounce, making it great for hand lettering artists, or artists who are used to alcohol markers such as Copic.
The foam rubber nib seems to be replaceable, and the markers seem like they're refillable-the nib is easily removable from the body, and the marker colors are coordinated with liquid watercolors, giving me this impression.
These markers play quite well with the Ecoline liquid watercolors, which are also dye based, and are available in vibrant colors. Between the markers and the bottled liquid watercolors, there's a huge variety of ways to play with and utilize this watercolor system.
Compared to other dye based watercolor markers on the market, such as Spectrum Aqua watercolor markers, or the DoCrafts Artiste watercolor markers, these markers offer a wide array of advantages. Refillable, customizable colors, a blender marker that actually blends, the ability to work with liquid inks for blending techniques, open stock availability, vibrant colors- the Ecoline watercolor markers seem like an excellent choice for a calligrapher's studio, an illustrator's drafting table, or for vibrant watercolor work.
Because these markers are DYE BASED, they should not be trusted as entirely light fast, and should not be stored or displayed in sunlight.
Outside Resources and Second Opinions
Ink and Watercolor Review
TurboTabbyAA: Ecoline Brushpen Review
Marielle Stolp: How I Use My Ecoline Brush Pens
kellycreates: Brush Lettering: My Top Picks for Brush Pens
JenW Fine Arts: Trying the ecoline paint and brush pens, hold on to your hats!
Fran Meneses: Ecoline liquid watercolour review plus demo!~ Frannerd
Other watercolor marker reviews by Nattosoup Studio:
Hobbyist:
Zig Clean Color Real BrushMarvy LePlume IIRanger Distress Watercolor MarkersUp and Up Washable Paintbrush MarkersSakura Koi Watercolor Brushpens
Artist Grade:
Winsor and Newton:Winsor and Newton Watercolor MarkersWinsor and Newton Watercolor Marker Field TestList of Individual Markers and How Well They Work
Please consider donating to this blog or purchasing from Natto-shop (http://nattosoup.com/shop) if you want me to continue publishing quality content. All materials tested were purchased from my own pocket. Keep on Truckin' Nattosoup is not under any sponsorship.

July 11, 2017
Printing Your Bluelines: Watercolor Basics

Love watercolor? Check out my wonderful watercolor comic, 7" Kara, now available as a webcomic!
One of my secret ingredients for whipping out watercolor illustrations and comic pages so quickly is that I rely heavily on multiple stages to help me solve my problems.
I rarely draw directly on my watercolor paper, rather I sketch in my sketchbook, then scan it, convert that sketch to bluelines, and print that onto my watercolor paper. From there, I pencil it, then stretch it.
Tight Sketch To Finished Watercolor:
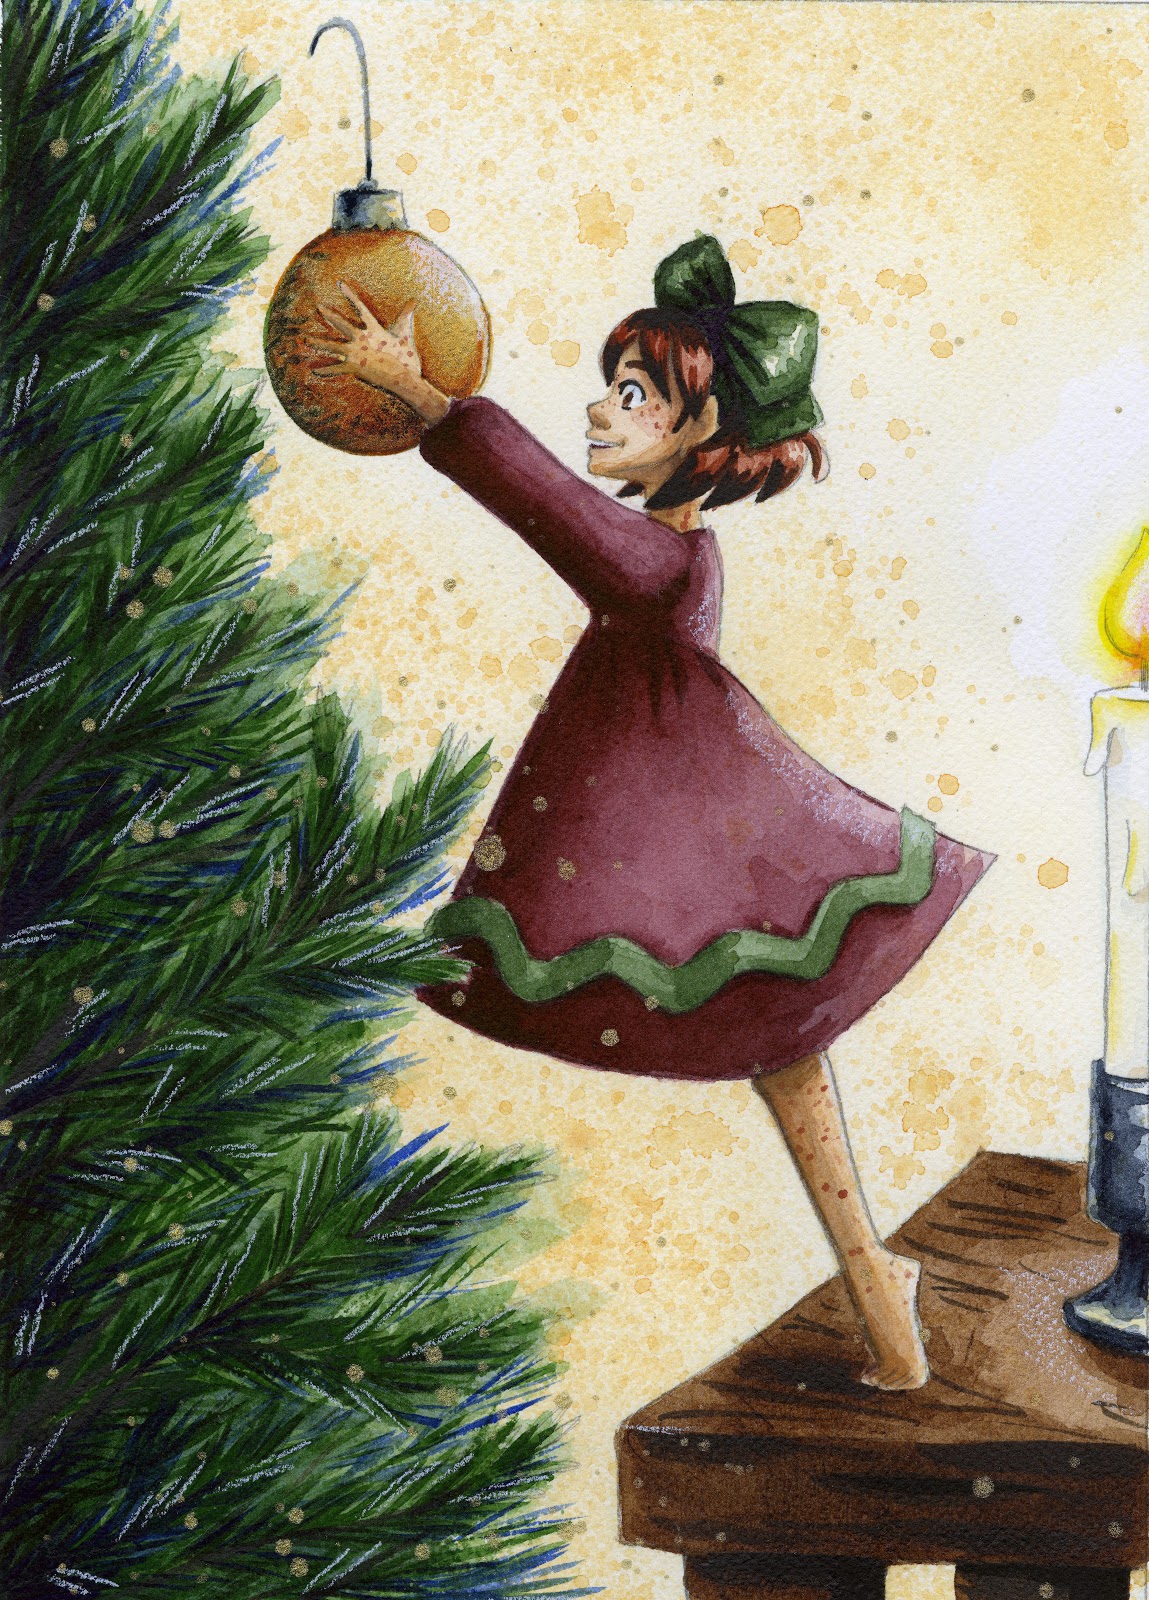
Bluelines to Watercolors:


Ok, so why bluelines for watercolors?
Printing out bluelines means that I can sketch where I'm most comfortable- my sketchbook, whenever I choose to, and then select a sketch for further refinement. I find that doing illustrations directly on watercolor paper can be stressful (although churning out so many tests and demonstrations for Youtube has certainly reduced that), and being able to work in my sketchbook, or in stages, is much less so. This technique is particularly important to comics, which tends to be a multi stage process anyway and allows me to create multi-panel, detailed pages with minimal effort.
We touched on this the week prior with printing out comic pages. The process does not differ much- what does differ is that your paper options are slightly larger. Please refer to this post on necessary print settings and setup, as well as for recommended papers for printing watercolor comics.
Additional Papers:
Cotton rag papers that are mould and machine made, such as:
Canson Heritage
Arches
Langton Prestige
 Painted on Arches Coldpress
Painted on Canson Heritage coldpress
 Painted on Canson Moulin du Roy (defunct but great, similar to Arches)
Again, go for tape bound, not block bound, and avoid printer papers. While hotpress will run through your printer, it is more suitable for gouache techniques or black and white inks, as it's not recommended that you stretch hot press watercolor paper.
When printing your bluelines onto watercolor paper, you want to be SURE you are using a waterbased ink. Most home printers do- just avoid using a toner printer. You can test this by printing out a test piece on cheap paper, and spritzing it with water- if it runs, it's water-soluble, and you're good to go.
Stretching Your Paper:
I'm not going to go over stretching your watercolor paper again, you can read all about that here. I am going to stress the importance of doing so- it will remove the printer ink from the paper once you've penciled your image.
Demonstration of Printed Bluelines
In our next update, I'm going to discuss penciling your pages- the step you should do before stretching your watercolors.
Please consider donating to this blog or purchasing from Natto-shop (http://nattosoup.com/shop) if you want me to continue publishing quality content. All materials tested were purchased from my own pocket. Keep on Truckin' Nattosoup is not under any sponsorship.

July 9, 2017
Review: Union Square Cold Press Watercolor Paper: Watercolor Basics
Over the years, I've privately tested a lot of watercolor papers in order to find the right papers for me. Price has always been a factor for me, and my mother taught me not to snub store brands. I've tried Blick Studio watercolor paper (not bad- decent for simple watercolor illustrations with minimal blending and washes), Cheap Joe's Killamanjaro (fantastic paper, would love to continue working with it), and now Jerry's Artarama's Union Square.
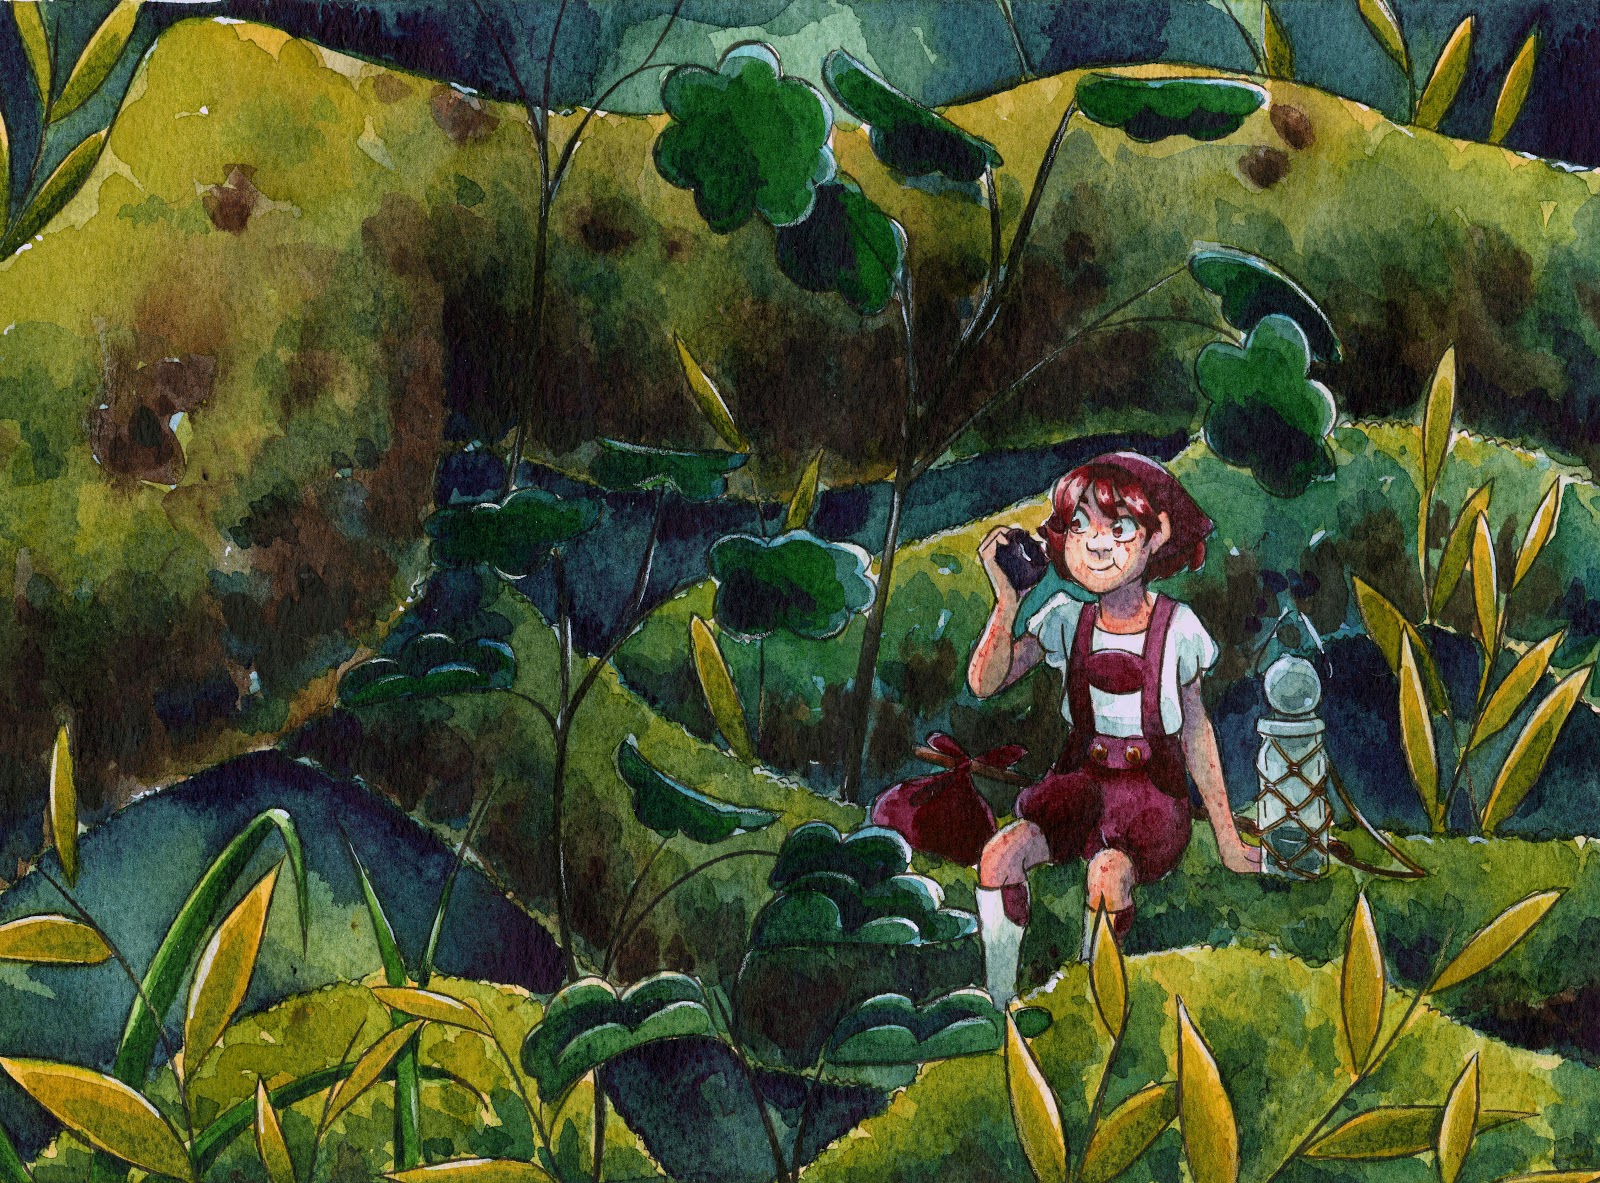
I picked up a pad from my local Jerry's about a year ago, sketched an illustration in it about nine months ago, inked that illustration six months ago, and finally, FINALLY! got around to painting it recently. At the time, Union Square was a fairly recent release, and I was excited to try a new watercolor paper, as I'd already tested out several while working on additional illustrations for 7" Kara Volume 1.
There are a number of papers produced by Jerry's Artarama under the Union Square label- Mixed Media, Layout Bond, Tracing Vellum, Smooth Cartridge, Heavyweight Drawing, Hot Press Watercolor, and Watercolor (cold press).
Union Square is available in tape bound and gum bound packages, both available in hot press and cold press, giving you a total of four options for your watercolor paper.
The Stats:
140lb watercolor paper
10 sheets per padAvailable in hot and cold pressAcid FreeAccepts watercolor and mixed media applicationsNatural White surfaceAvailable in blocks, pads or packs of sheetsDurable, 1.75pt backer boardSource
This watercolor paper is available in just two sizes- 9"x12" and 11"x14". Generally when testing papers, I prefer to purchase a small pad- say 5"x8", which leads to a lot of my test illustrations being smaller pieces. I opted for the 9"x12" pad, although 11"x14" is also commonly used in my studio.
Given that this is a Jerry's house brand, you can only find Union Square watercolor Paper at Jerry's Artarama. Both their online store and their brick and mortar locations carry this paper, although it seems like the site is closing them out for $7 a pad- quite a steal if you're interested in affordable watercolor paper.
The site doesn't say whether or not Union Square is cotton rag or cellulose based, but my guess would be cellulose given the price.
Hey friends! Don't forget it's #WorldWatercolorMonth! This post is part of my month long watercolor celebration that includes, tutorials, reviews, and more! For more watercolor goodness, don't forget to check out my Watercolor Basics hubpage here on the blog, and my Watercolor playlist on Youtube!
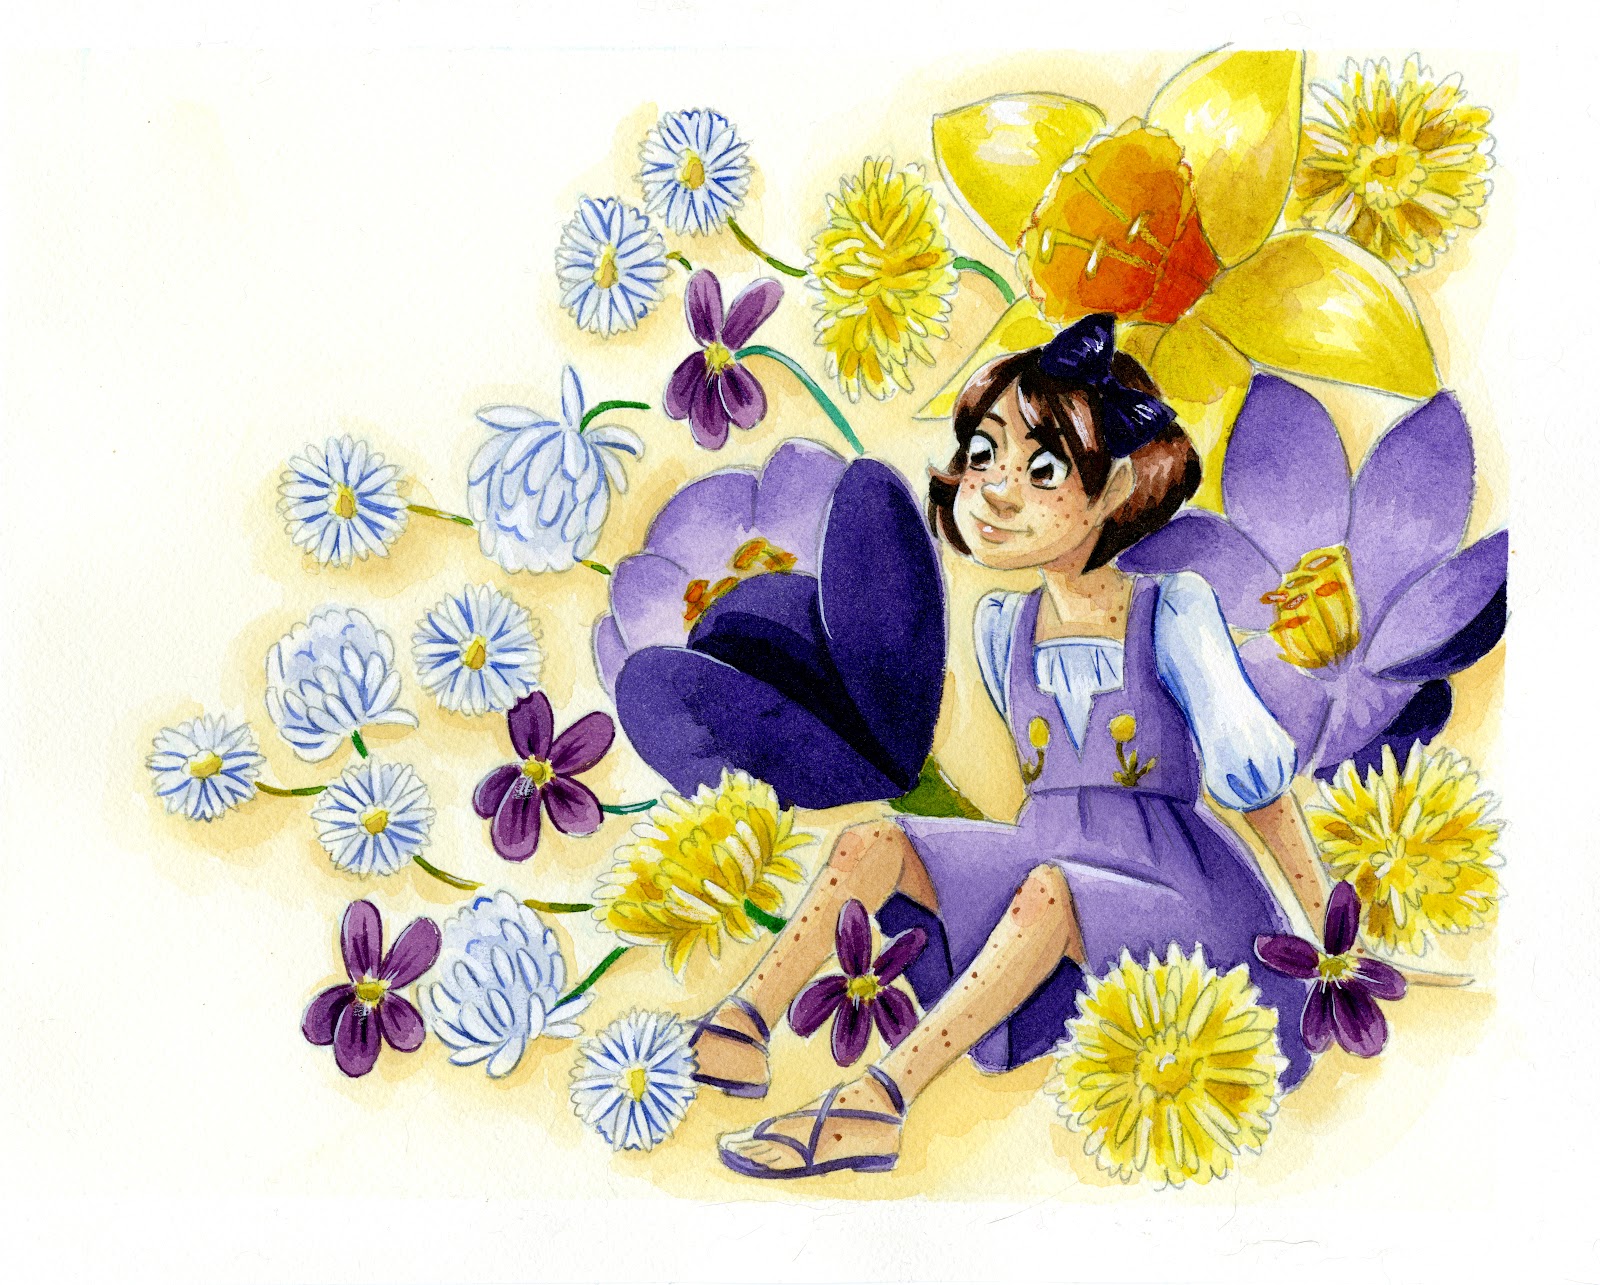
For even more great watercolor art and illustration, head on over to my beautiful watercolor webcomic, 7" Kara, which is fantastic to share with the little ones in your life.

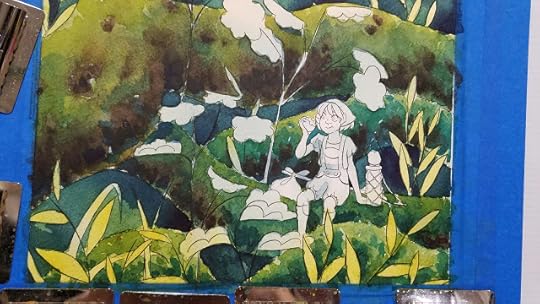
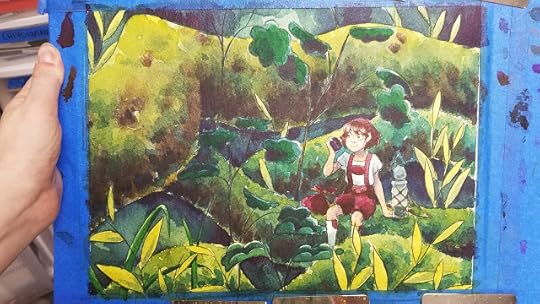
The Field Test
Since I'd purchased a tape bound pad, I removed my inked illustration from the pad, and went ahead and stretched it like I would my other watercolor illustrations on Gatorboard. I proceeded to do a tonal wash, as well as some wet into wet color (sadly, not photographed)- the Union Square watercolor paper handled wet into wet with aplomb. Cheap papers like Canson Montval, Blick Studio watercolor, Fabriano Studio can't handle wet into wet well- the paper tends to dry too quickly to allow for color diffusion. The Union Square paper takes awhile to dry, like many cotton rag papers and like Winsor and Newton's watercolor paper, but this allows for color blending and wet into wet techniques.
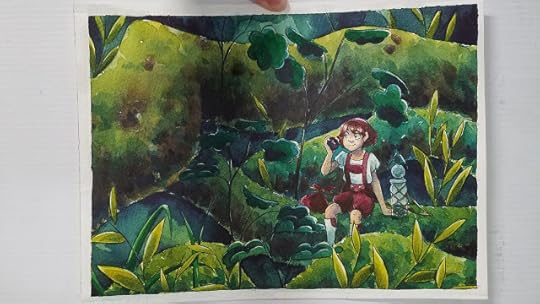
At this point, my Union Square paper has seen multiple washes and many layers of watercolor- holding all with aplomb. Cheaper papers often shed layers of watercolor if too much water has been applied, but the Union Square pad not only held the color well, layer after layer, but the color was fairly brilliant and deep on the paper, reminiscent of more expensive watercolor papers.
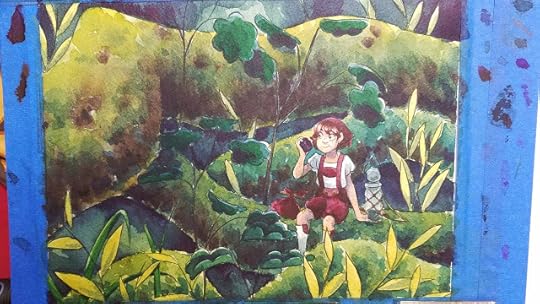
This paper was also great at not sucking areas of color into areas left reserved. I was able to keep Kara's skin fairly 'clean' from the green surrounding her without using a mask.
Once I finished, I removed my illustration from the gator board and used white gouache to clean up the edges.
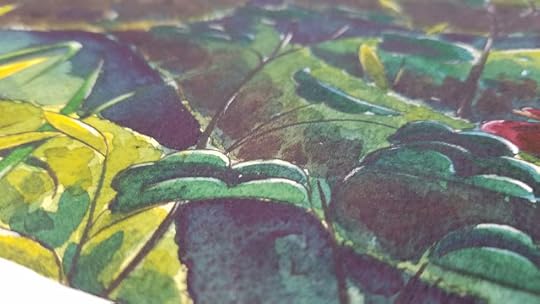
The color depth is fairly good for an inexpensive paper (colors tend to go muddy or chalky when layered on cheap papers), the paper texture is still visible (a plus for me, I love coldpress papers), and there wasn't excessive sheen from paint buildup on the paper surface.

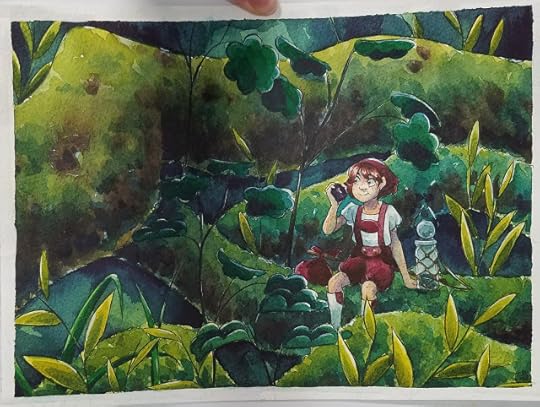
Scanned and Cleaned Final
The Verdict
Handles like Winsor and Newton Watercolor paperStrong textureholds water well- allows for blendingminimal pickup/minimal mudThick paperInexpensiveJerry's Artarama Store BrandWould recommendUnion Square watercolor paper is a tough 140lb watercolor paper that's slightly thicker than most 140lb watercolor papers- about as thick as the Winsor and Newton watercolor paper. It handles color beautifully, has a cold press texture, and is perfect for practice and illustration. Right now, it's on discount through the Jerry's Artarama site, so grab it while it's still available.
If you enjoyed this review, help support and fund future reviews like this by joining the Artnerd community on Patreon!
Second Opinions and Outside Resources:
JerrysArtarama-Union Square Watercolor Paper- Product Review with MichaelJerrysArtarama- Union Square Paper Pads
Please consider donating to this blog or purchasing from Natto-shop (http://nattosoup.com/shop) if you want me to continue publishing quality content. All materials tested were purchased from my own pocket. Keep on Truckin' Nattosoup is not under any sponsorship.
I picked up a pad from my local Jerry's about a year ago, sketched an illustration in it about nine months ago, inked that illustration six months ago, and finally, FINALLY! got around to painting it recently. At the time, Union Square was a fairly recent release, and I was excited to try a new watercolor paper, as I'd already tested out several while working on additional illustrations for 7" Kara Volume 1.
There are a number of papers produced by Jerry's Artarama under the Union Square label- Mixed Media, Layout Bond, Tracing Vellum, Smooth Cartridge, Heavyweight Drawing, Hot Press Watercolor, and Watercolor (cold press).
Union Square is available in tape bound and gum bound packages, both available in hot press and cold press, giving you a total of four options for your watercolor paper.
The Stats:
140lb watercolor paper
10 sheets per padAvailable in hot and cold pressAcid FreeAccepts watercolor and mixed media applicationsNatural White surfaceAvailable in blocks, pads or packs of sheetsDurable, 1.75pt backer boardSource
This watercolor paper is available in just two sizes- 9"x12" and 11"x14". Generally when testing papers, I prefer to purchase a small pad- say 5"x8", which leads to a lot of my test illustrations being smaller pieces. I opted for the 9"x12" pad, although 11"x14" is also commonly used in my studio.
Given that this is a Jerry's house brand, you can only find Union Square watercolor Paper at Jerry's Artarama. Both their online store and their brick and mortar locations carry this paper, although it seems like the site is closing them out for $7 a pad- quite a steal if you're interested in affordable watercolor paper.
The site doesn't say whether or not Union Square is cotton rag or cellulose based, but my guess would be cellulose given the price.
Hey friends! Don't forget it's #WorldWatercolorMonth! This post is part of my month long watercolor celebration that includes, tutorials, reviews, and more! For more watercolor goodness, don't forget to check out my Watercolor Basics hubpage here on the blog, and my Watercolor playlist on Youtube!

For even more great watercolor art and illustration, head on over to my beautiful watercolor webcomic, 7" Kara, which is fantastic to share with the little ones in your life.

The Field Test
Since I'd purchased a tape bound pad, I removed my inked illustration from the pad, and went ahead and stretched it like I would my other watercolor illustrations on Gatorboard. I proceeded to do a tonal wash, as well as some wet into wet color (sadly, not photographed)- the Union Square watercolor paper handled wet into wet with aplomb. Cheap papers like Canson Montval, Blick Studio watercolor, Fabriano Studio can't handle wet into wet well- the paper tends to dry too quickly to allow for color diffusion. The Union Square paper takes awhile to dry, like many cotton rag papers and like Winsor and Newton's watercolor paper, but this allows for color blending and wet into wet techniques.

At this point, my Union Square paper has seen multiple washes and many layers of watercolor- holding all with aplomb. Cheaper papers often shed layers of watercolor if too much water has been applied, but the Union Square pad not only held the color well, layer after layer, but the color was fairly brilliant and deep on the paper, reminiscent of more expensive watercolor papers.

This paper was also great at not sucking areas of color into areas left reserved. I was able to keep Kara's skin fairly 'clean' from the green surrounding her without using a mask.


Once I finished, I removed my illustration from the gator board and used white gouache to clean up the edges.

The color depth is fairly good for an inexpensive paper (colors tend to go muddy or chalky when layered on cheap papers), the paper texture is still visible (a plus for me, I love coldpress papers), and there wasn't excessive sheen from paint buildup on the paper surface.


Scanned and Cleaned Final
The Verdict
Handles like Winsor and Newton Watercolor paperStrong textureholds water well- allows for blendingminimal pickup/minimal mudThick paperInexpensiveJerry's Artarama Store BrandWould recommendUnion Square watercolor paper is a tough 140lb watercolor paper that's slightly thicker than most 140lb watercolor papers- about as thick as the Winsor and Newton watercolor paper. It handles color beautifully, has a cold press texture, and is perfect for practice and illustration. Right now, it's on discount through the Jerry's Artarama site, so grab it while it's still available.
If you enjoyed this review, help support and fund future reviews like this by joining the Artnerd community on Patreon!

Second Opinions and Outside Resources:
JerrysArtarama-Union Square Watercolor Paper- Product Review with MichaelJerrysArtarama- Union Square Paper Pads
Please consider donating to this blog or purchasing from Natto-shop (http://nattosoup.com/shop) if you want me to continue publishing quality content. All materials tested were purchased from my own pocket. Keep on Truckin' Nattosoup is not under any sponsorship.
July 7, 2017
Intro to Comic Craft: Step by Step: Prelettering Pages
 Love comics? Why not check out my comic, 7" Kara, now a webcomic?
When? After you've drawn your roughs, and you're preparing them for pencils
Why? To make sure you leave enough space for letter.
How: In the graphics program with lettering capabilities of your choice. In this post, I'm using Photoshop.
Begin with your rough open in the program. It's also beneficial to have your script with dialogue handy, rather than trying to recall it from memory.
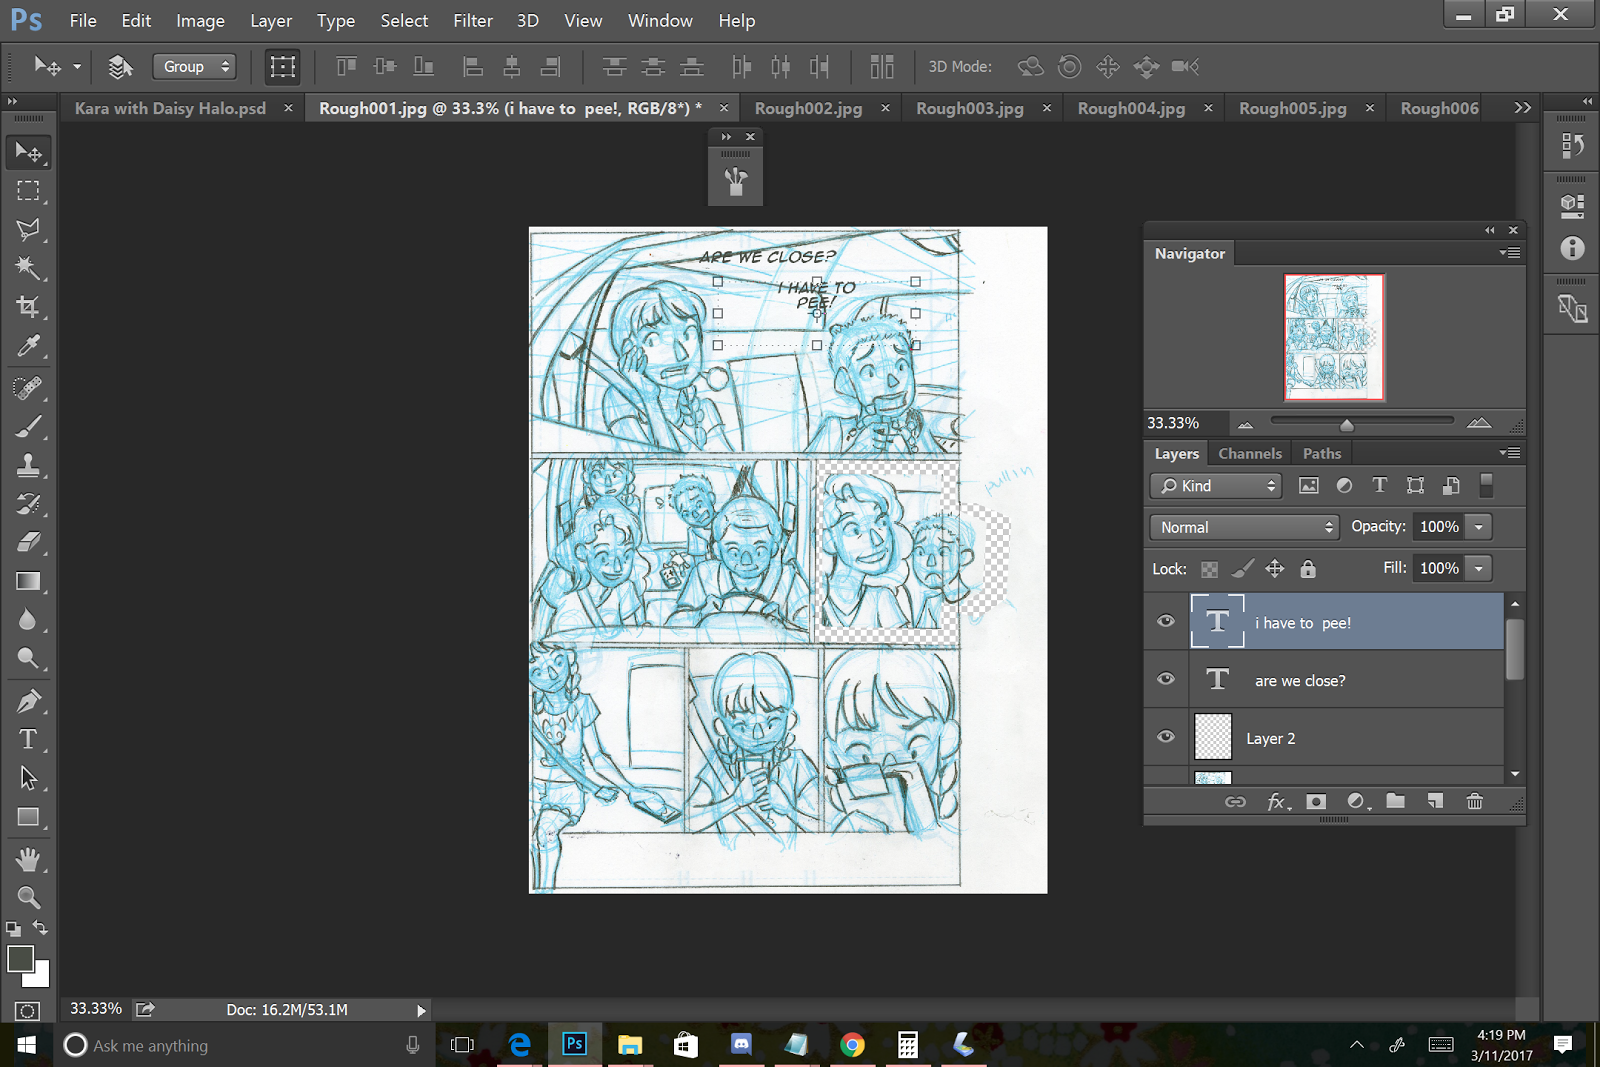
Begin lettering your comic- making adjustments when the dialogue or narration gets too wordy. At this stage, play around with text placement, and make sure you aren't covering anything important.
Things to keep in mind:
Use the font you plan on using in the final- in this comic, I'm using Blambot's Anime Ace 2.0READ THE LICENSE- Not all fonts allow for commercial distribution, for print, or for display on web.Work at size- adjust your rough to the print size or to the final size, depending on which will allow you to better judge how the text works on the page.
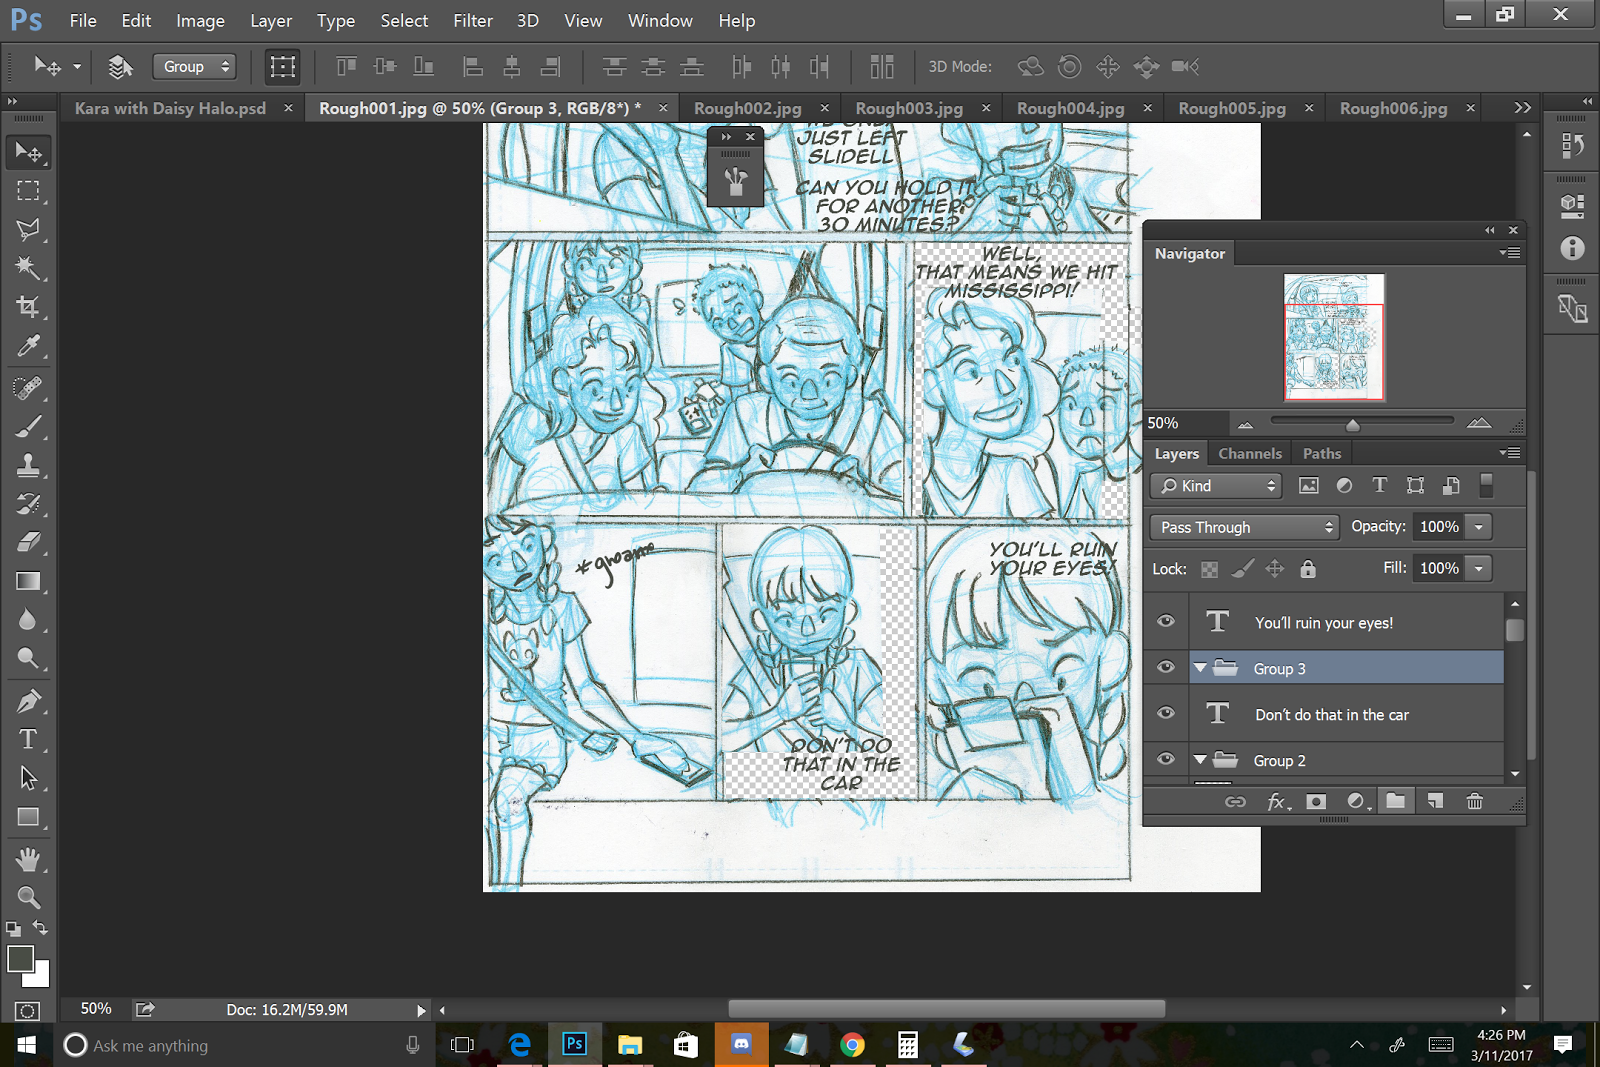
Once your page is lettered, save your file, and continue on towards converting these to bluelines for print!

Enjoy the Intro to Comic Craft series? Why not show your appreciation by joining my community of Artnerds on Patreon? Your financially support allows me to dedicate time and resources towards providing art education for the online community.
Please consider donating to this blog or purchasing from Natto-shop (http://nattosoup.com/shop) if you want me to continue publishing quality content. All materials tested were purchased from my own pocket. Keep on Truckin' Nattosoup is not under any sponsorship.

July 5, 2017
Using Calligraphy Pens for Inking Borders: Intro to Comic Craft
 Love comics? Check out mine! 7" Kara is now a webcomic!
For this tutorial, we're using the technical pen style calligraphy pen- technical pen body with a large chisel tip ranging from 1mm to 3mm.
Two Type Types: BulletChisel
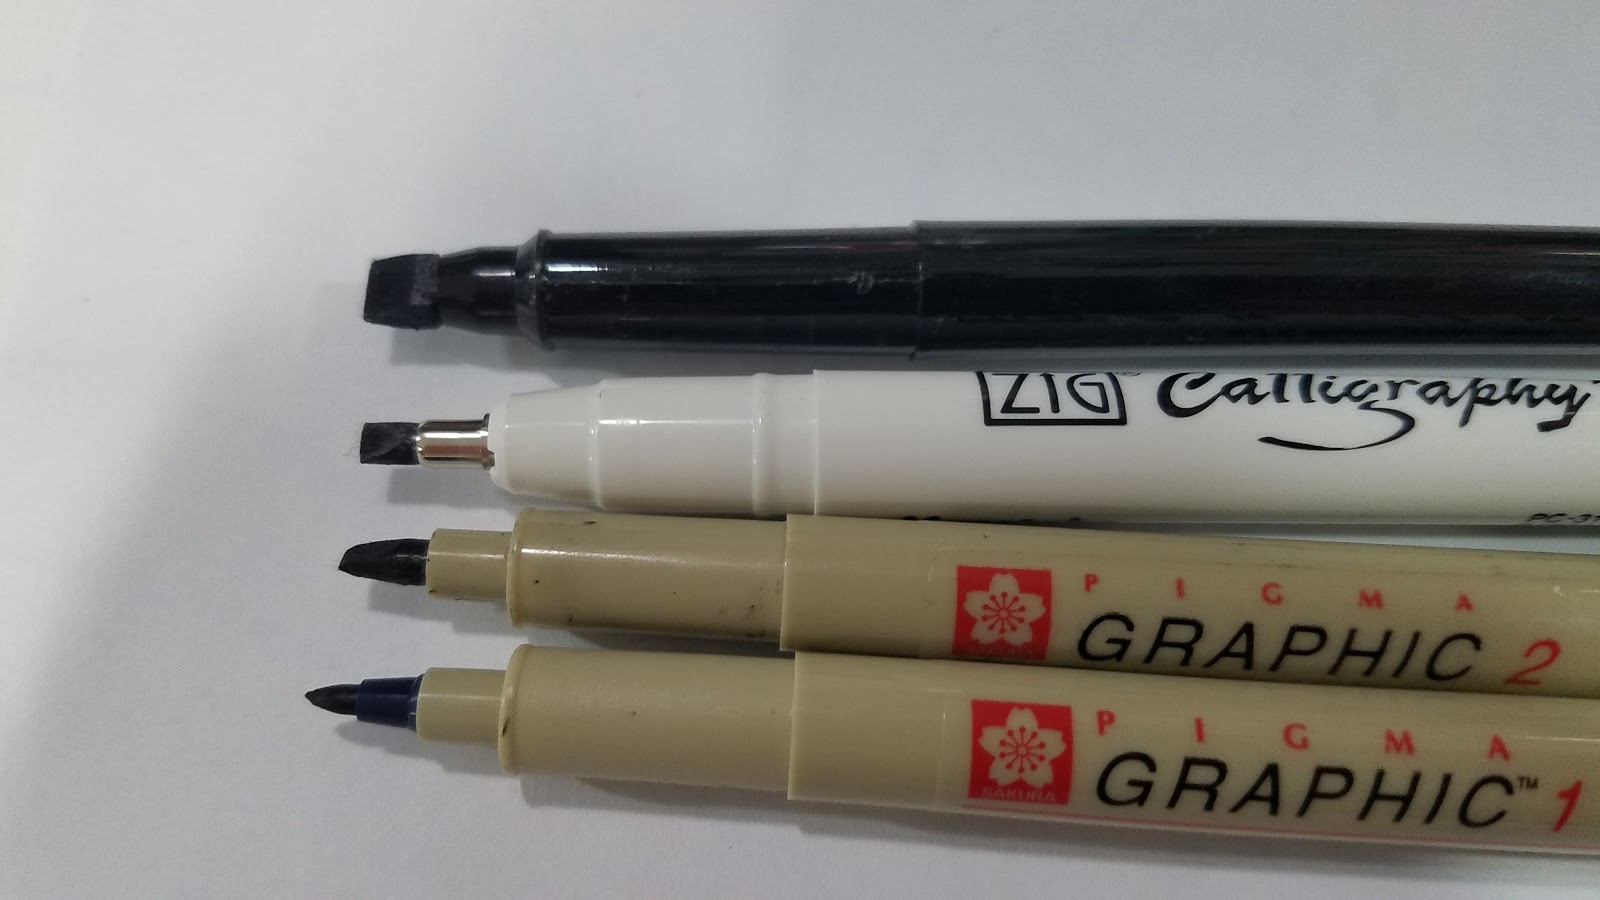
Two Ink TypesPigment (Micron)Dye Based (Marvy, Kuretake)
Finding pigment based calligraphy pens can be somewhat difficult, especially in larger sizes like 5mm.
Sakura makes some Calligraphy pens, but the sizes are a bit deceptive- the 3mm is smaller than 3mm.
Materials:
Calligraphy pens:I recommend sizes 1mm-3mmRuler- I recommend a clear rulerPencil- I recommend a harder lead, 2H or so
I'm using: Zig Calligraphy PensSakura Pigma 1mm bullet tipSakura Pigma 2 mm chisel nib
The process:
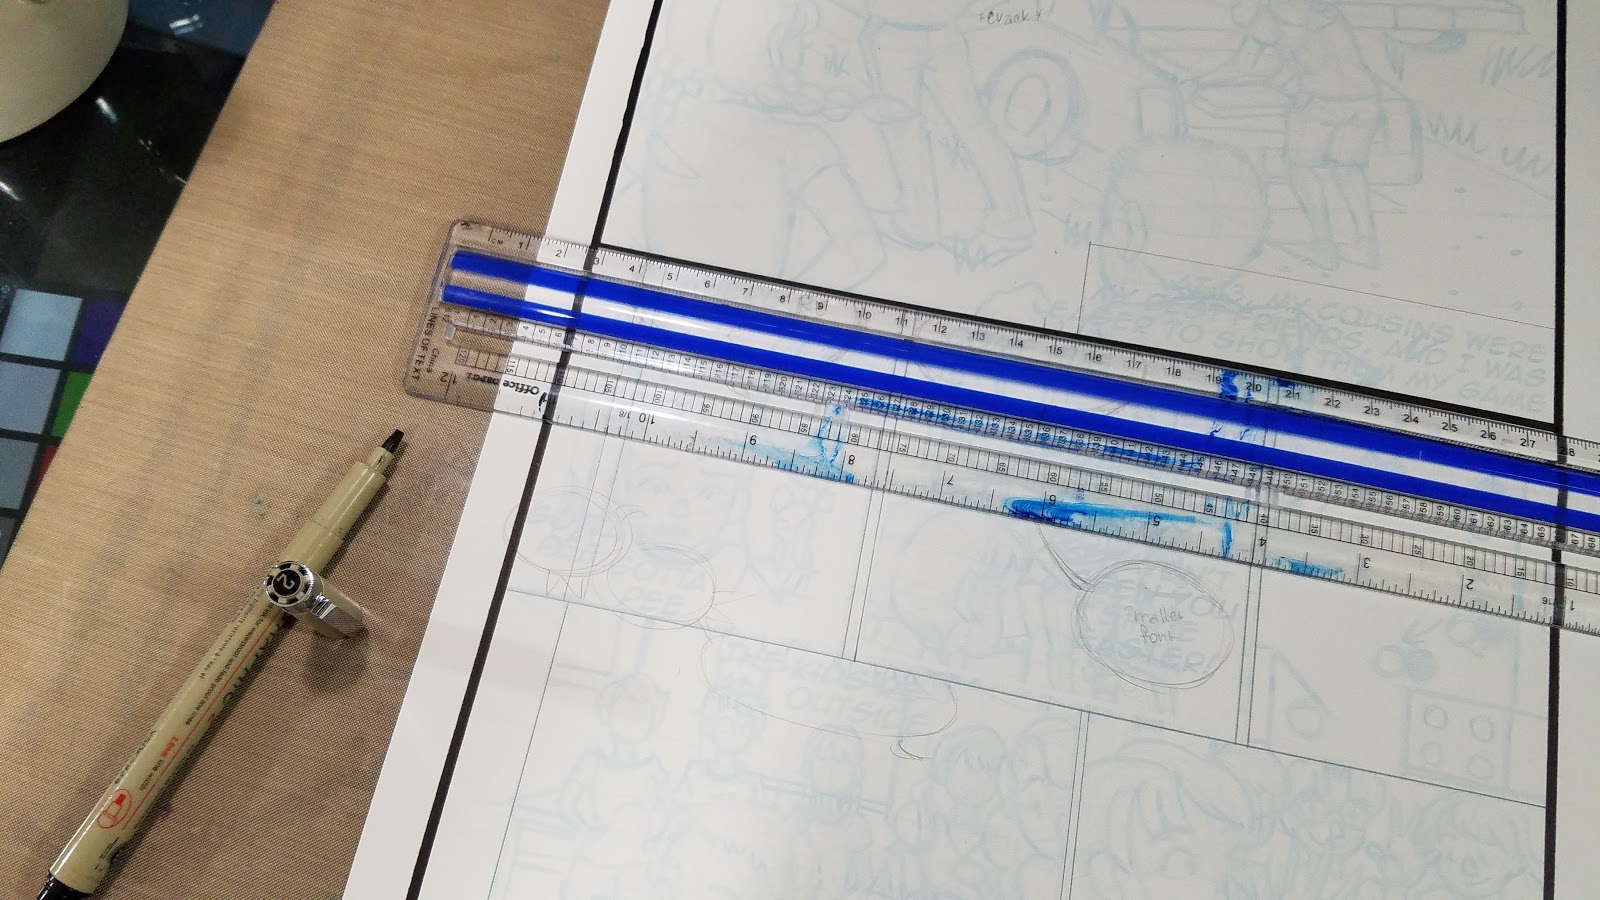
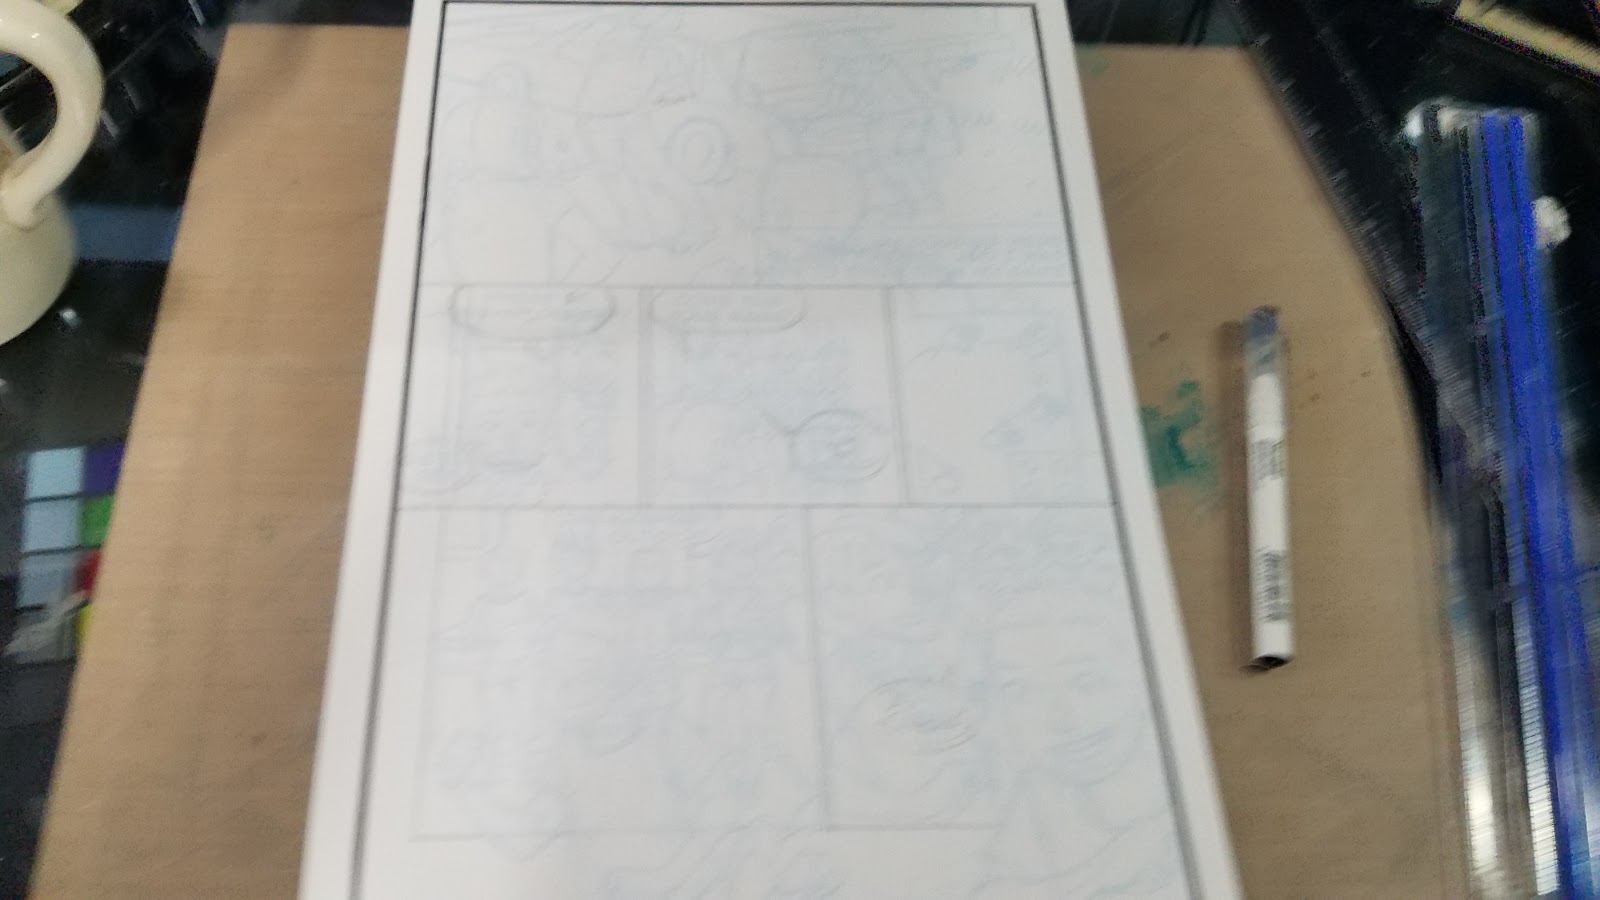
Before I put things into (sometimes indelible) ink, I like to draw my borders in pencil first. I begin with the exterior page borders, then work my way in to pencil the panel borders, then finally narration borders and word balloons (word balloons in Cicada Summer are inked with a fude pen).
Once my page's borders have been pencilled, I go over everything with ink.
When inking in panel borders, line up your inking edge towards the OUTSIDE of the paper. Should you slip up, your mistake will be outside of your panels, and thus easier to correct.
After you ink a border, I highly recommend you wipe down your straight edge with a paper towel to remove excess ink and prevent smearing.
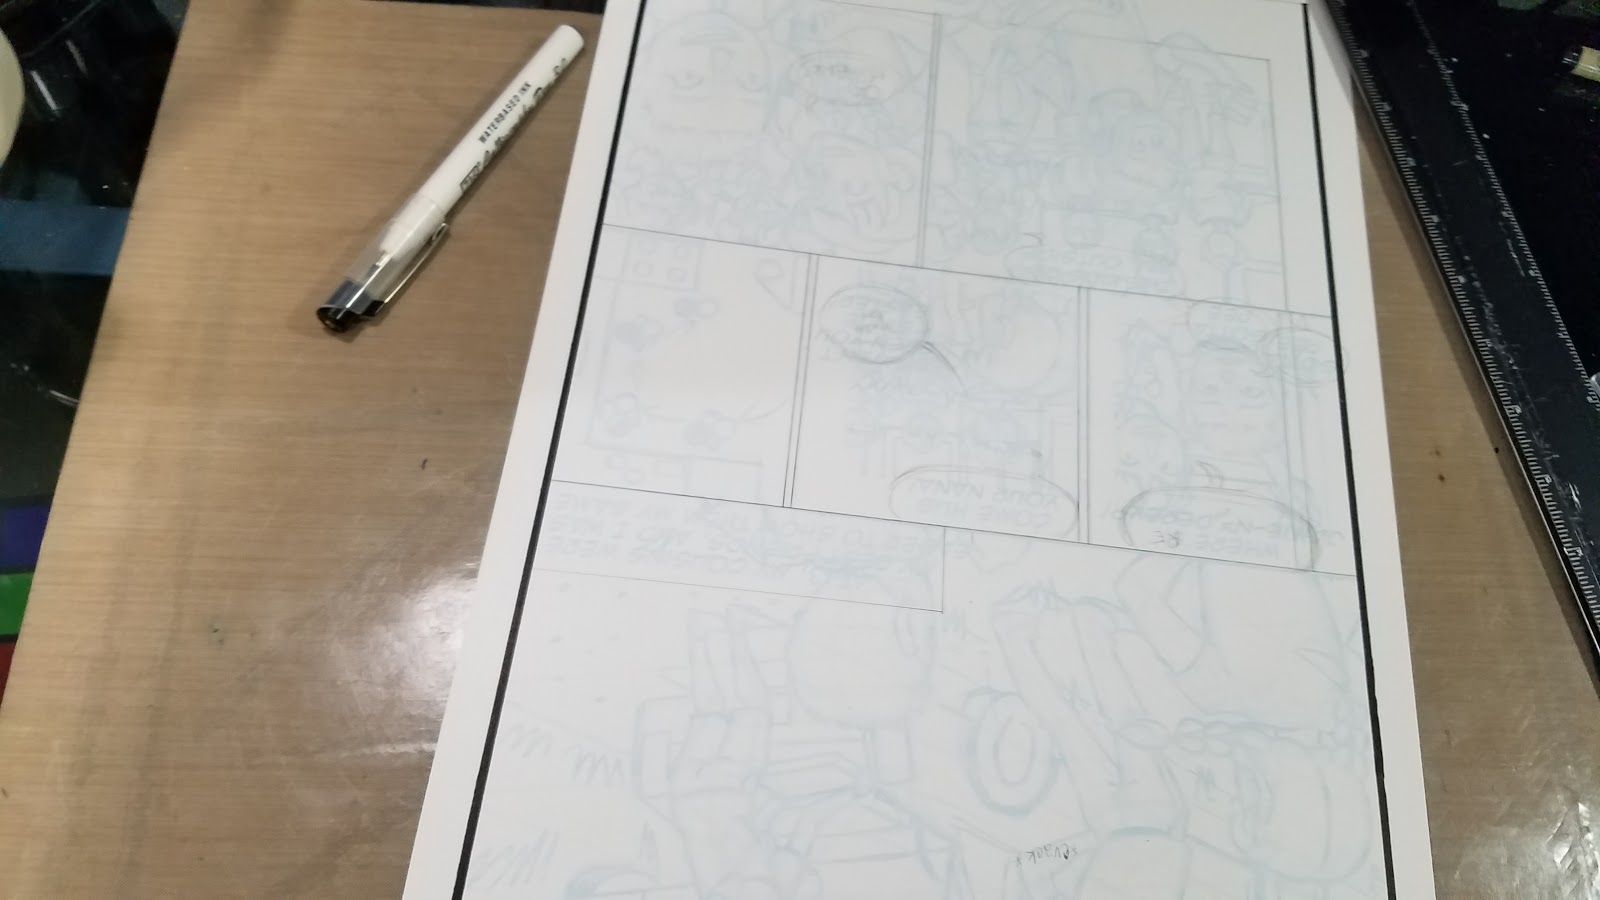

For the interior of the page, I can switch to my smaller clear ruler, which allows me to better line up my borders. For the majority of panel borders, I use a 1mm bullet nib Pigma, as these borders are less important. Larger borders should be reserved for emphasis.
As with the exterior borders, every time I pull a line, I wipe down my ruler to prevent smearing.


When drawing in borders, I make sure to leave gaps where the figure breaks the border. Once the figure is penciled and inked, I can go back and tighten the borders so the lines match up.


In the future, I'd love to experiment with a Pilot Parallel filled with pigment ink (like Platinum Carbon Black) or used as a dip pen, or a wide tape nib. For now though, calligraphy technical pens are great- no seeping under the ruler, very little mess, inexpensive, and I recommend you try them for your panel borders! My preference are pigment based, as they're less prone to smearing once dry, so if you can find some, pick them up and give them a shot!
This topic is demonstrated in the video:
Cicada Summer: Pencils and Inks
Please consider donating to this blog or purchasing from Natto-shop (http://nattosoup.com/shop) if you want me to continue publishing quality content. All materials tested were purchased from my own pocket. Keep on Truckin' Nattosoup is not under any sponsorship.

July 2, 2017
Turning Your Sketches and Lineart into Printable Bluelines: Watercolor Basics
I've covered blueline conversion a few times in this blog- from dropping your bluelines to turning your roughs into bluelines. This is a pretty common process in my comic creation, and my comic pages go through dropping and turning into bluelines several times before we reach the finished page. Just last week, I covered creating and printing bluelines for your comic work, so if you're missing a step, check out that post.
You can also use this process to help you create watercolor illustrations. This is a particularly appealing idea to digital artists who are interested in practicing traditional techniques. Rather than struggle with completing the entirely process traditionally, you can do your sketching digitally, and only worry about handling the final stages in watercolor.
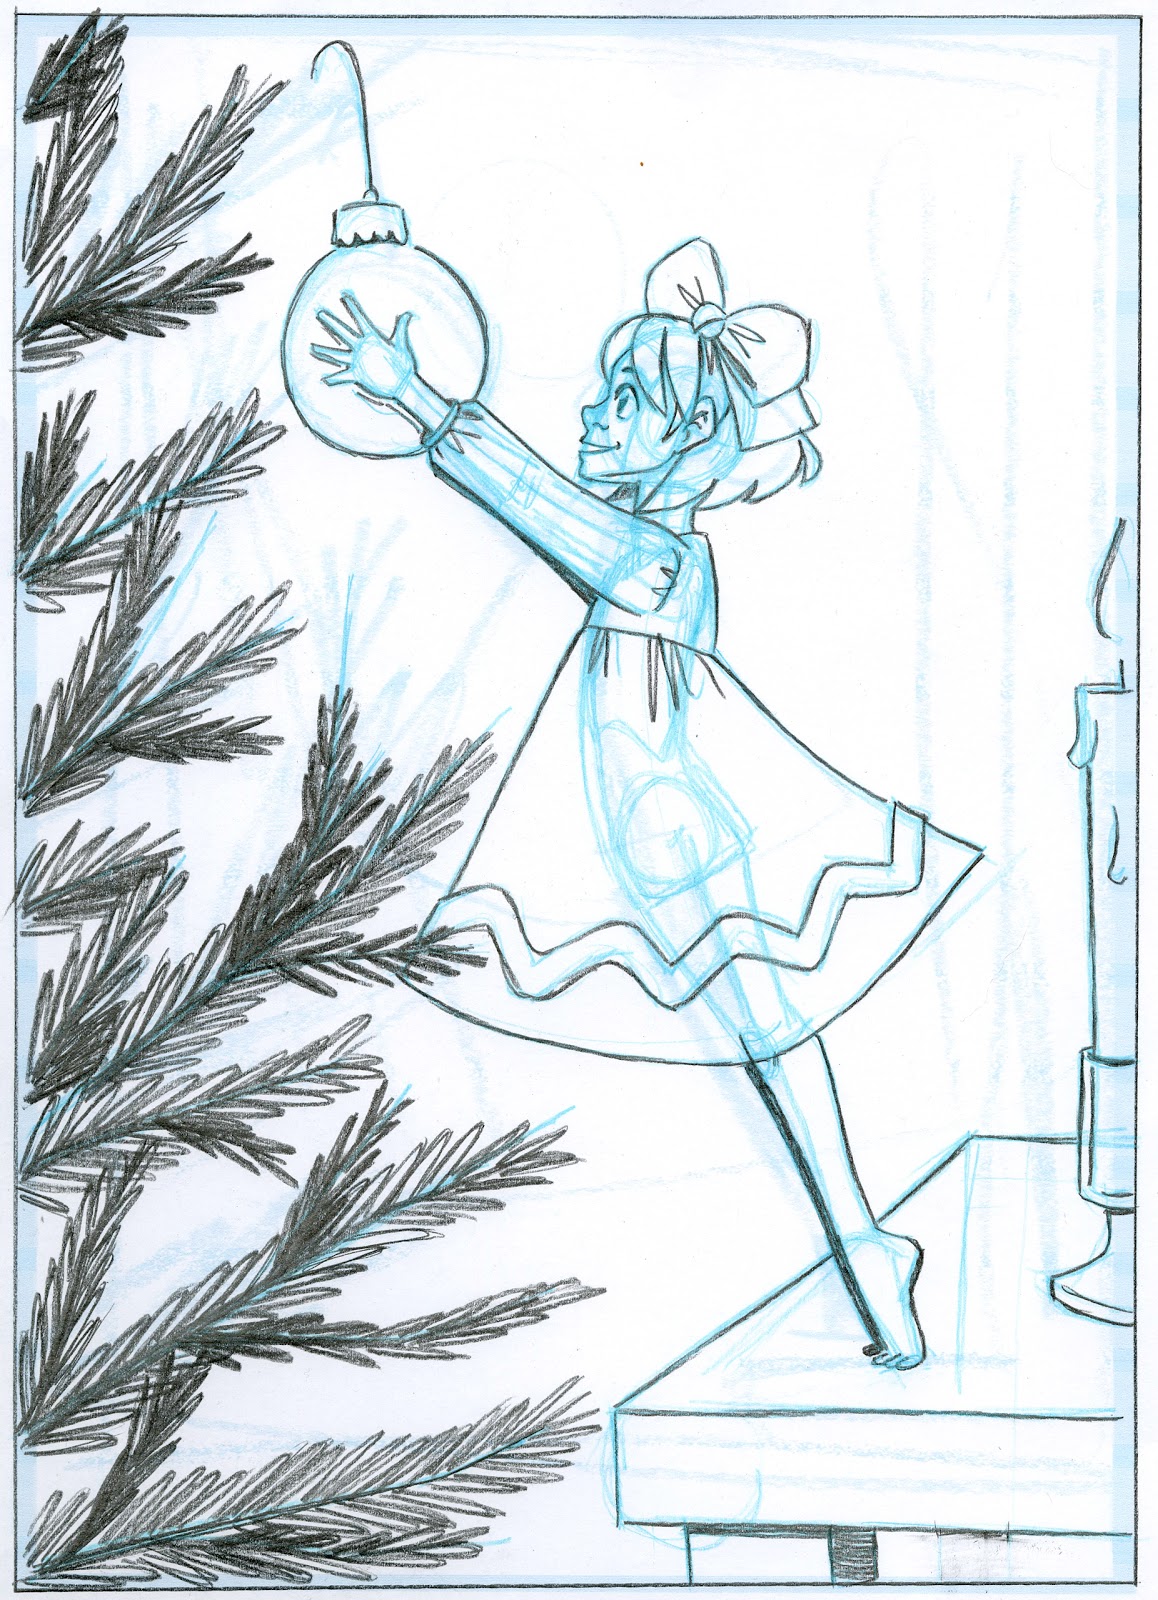
You can start with a digital sketch like this:
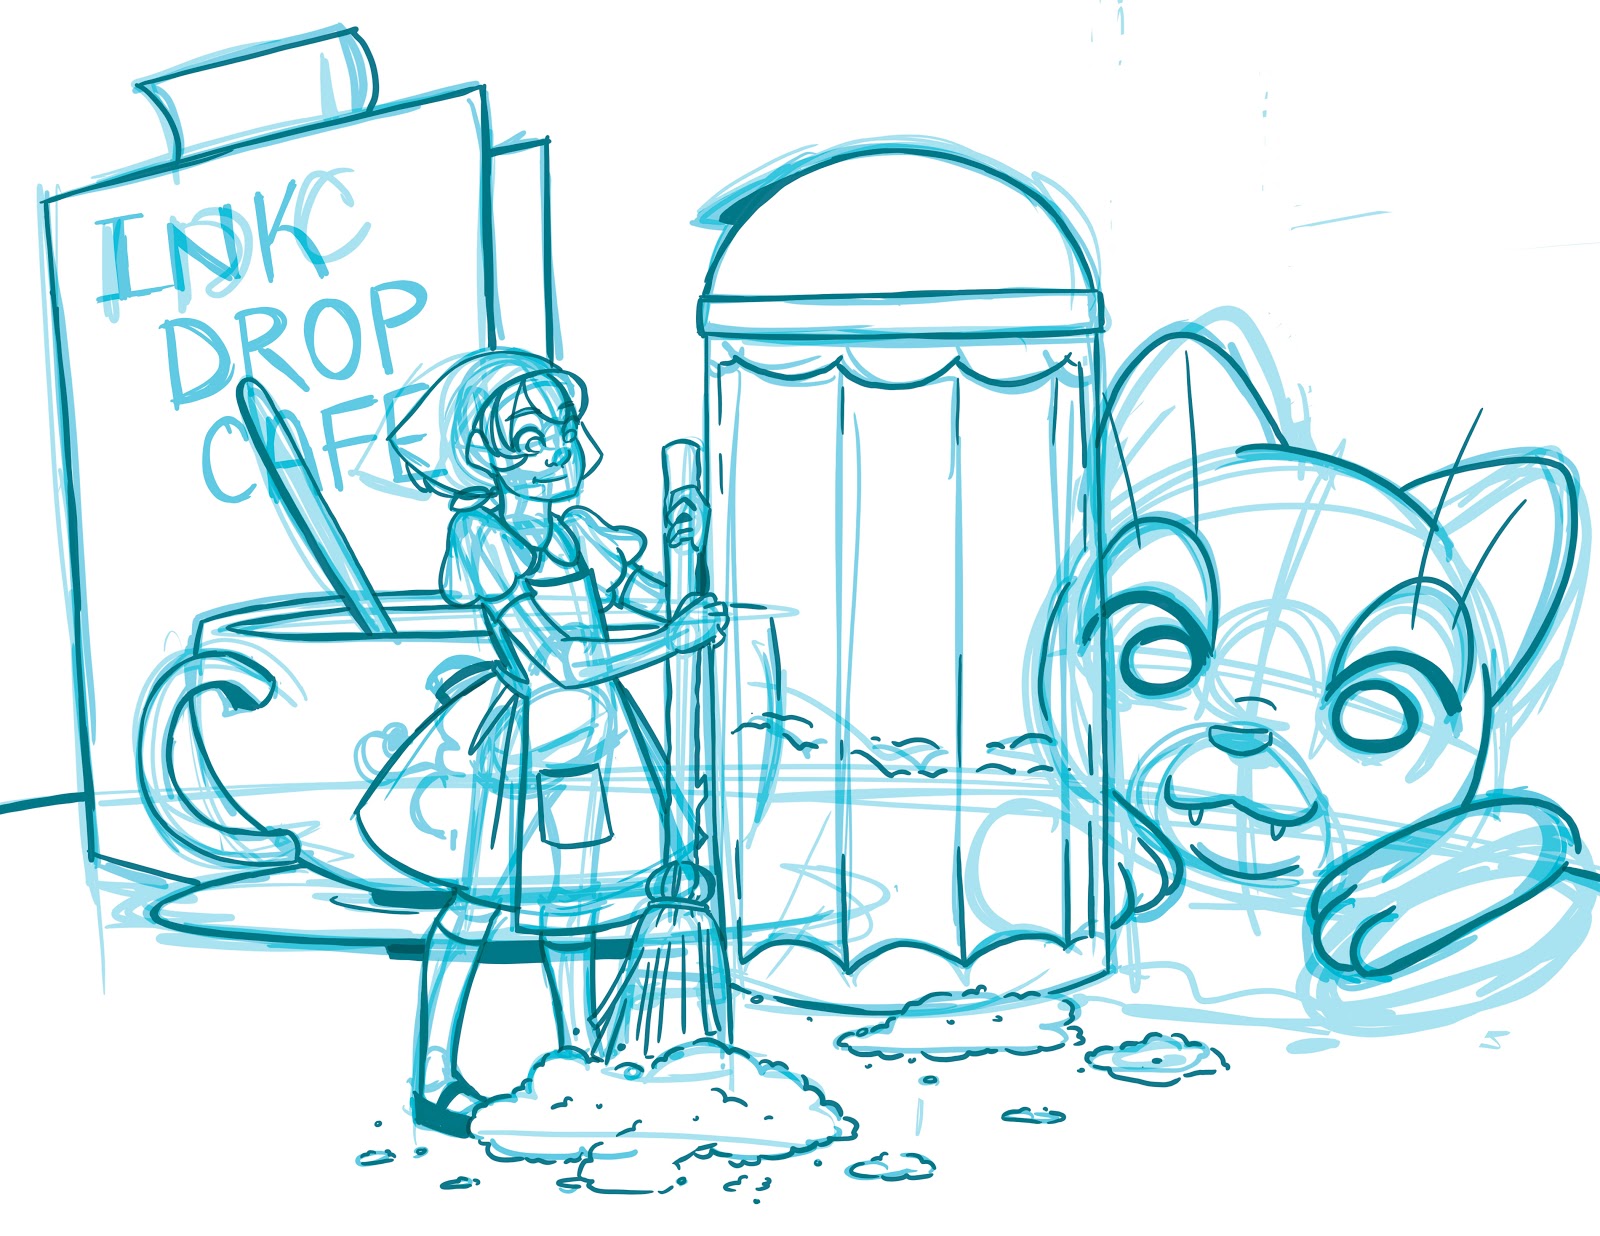
And after a few clicks, end up with printable bluelines like this:
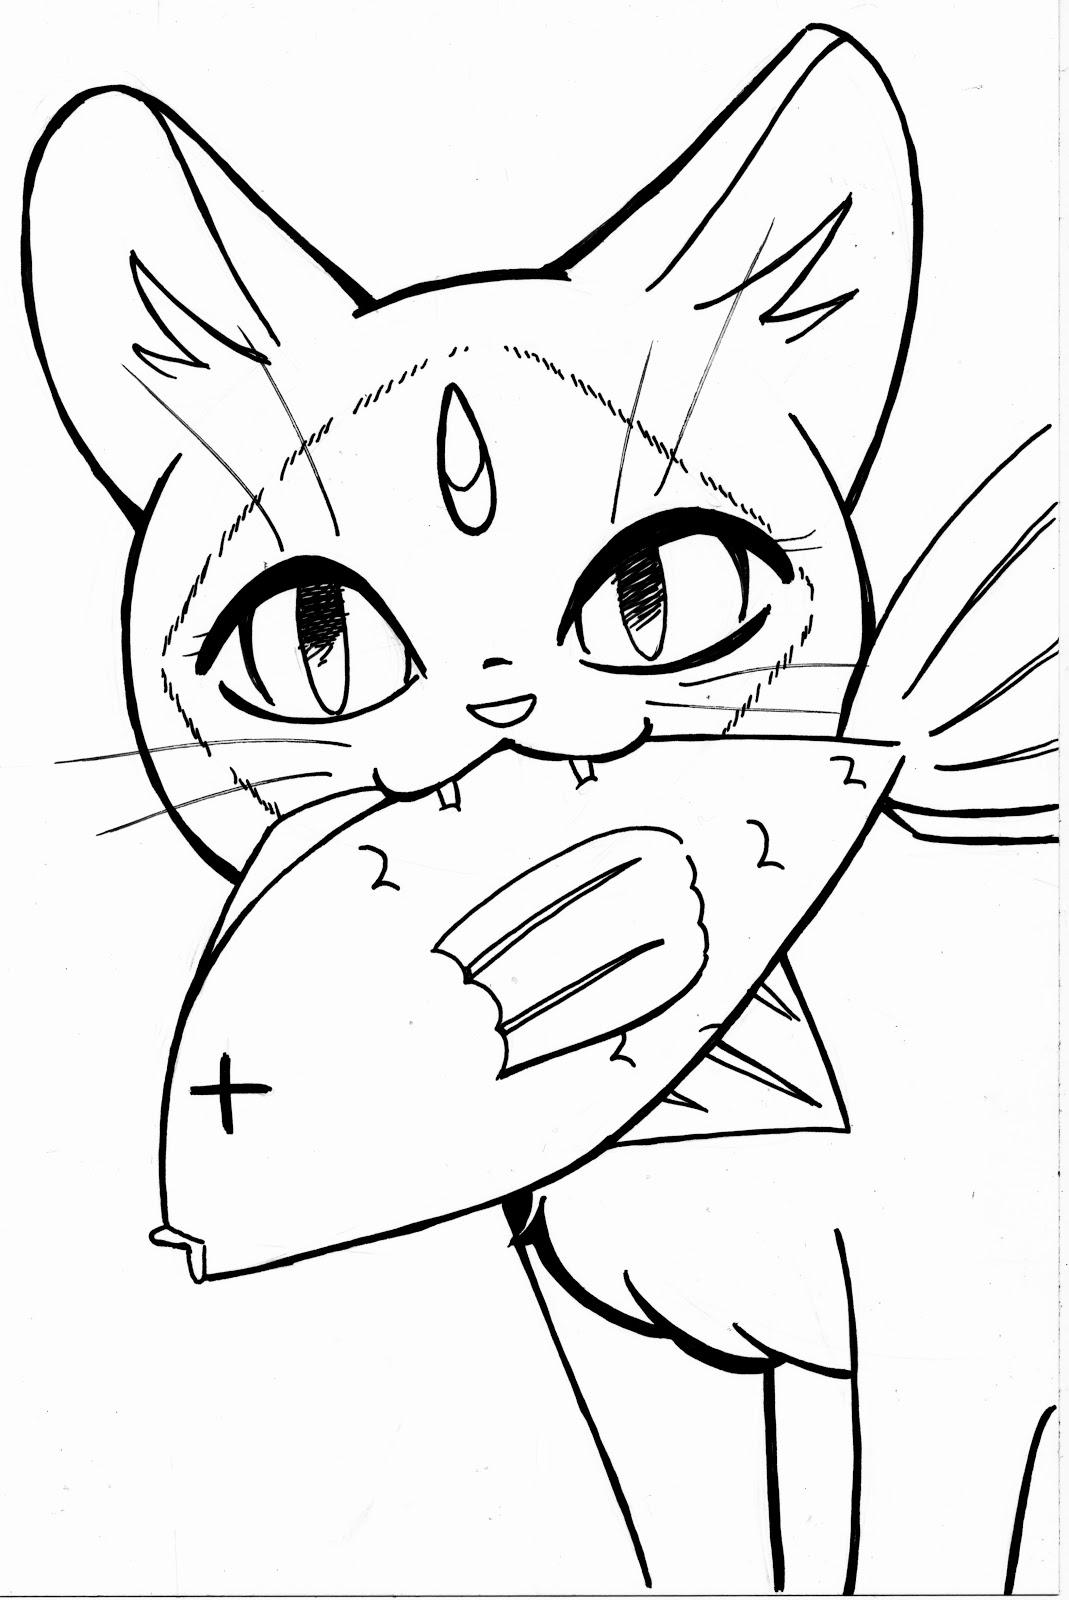
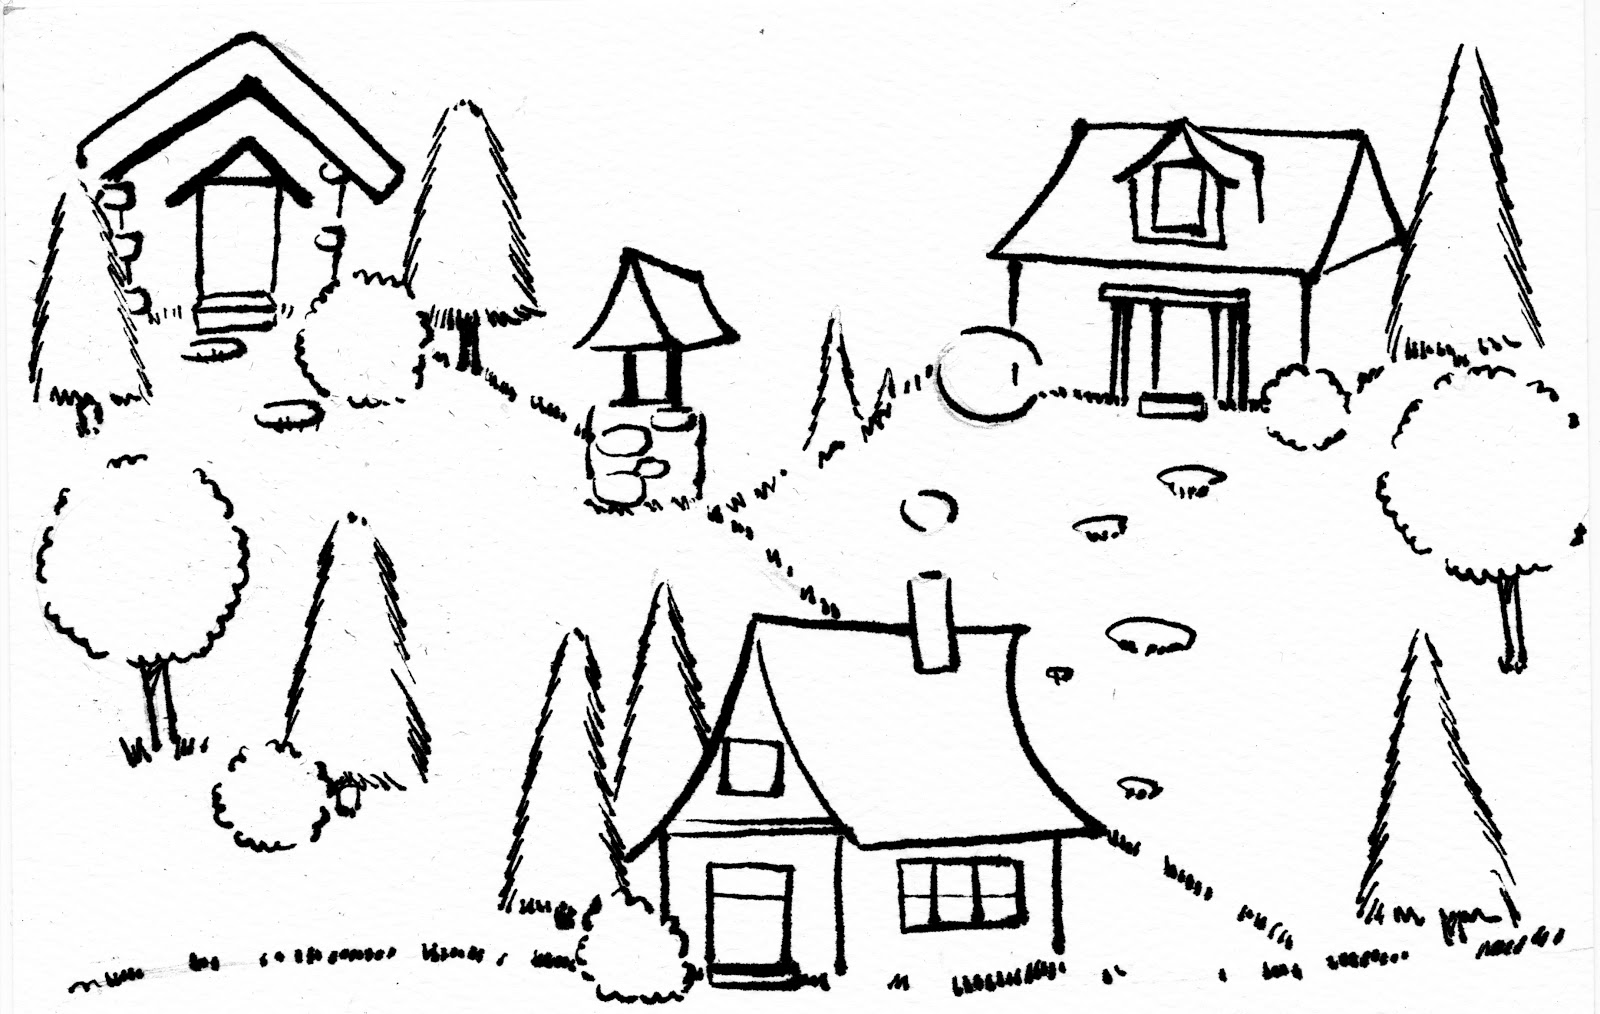
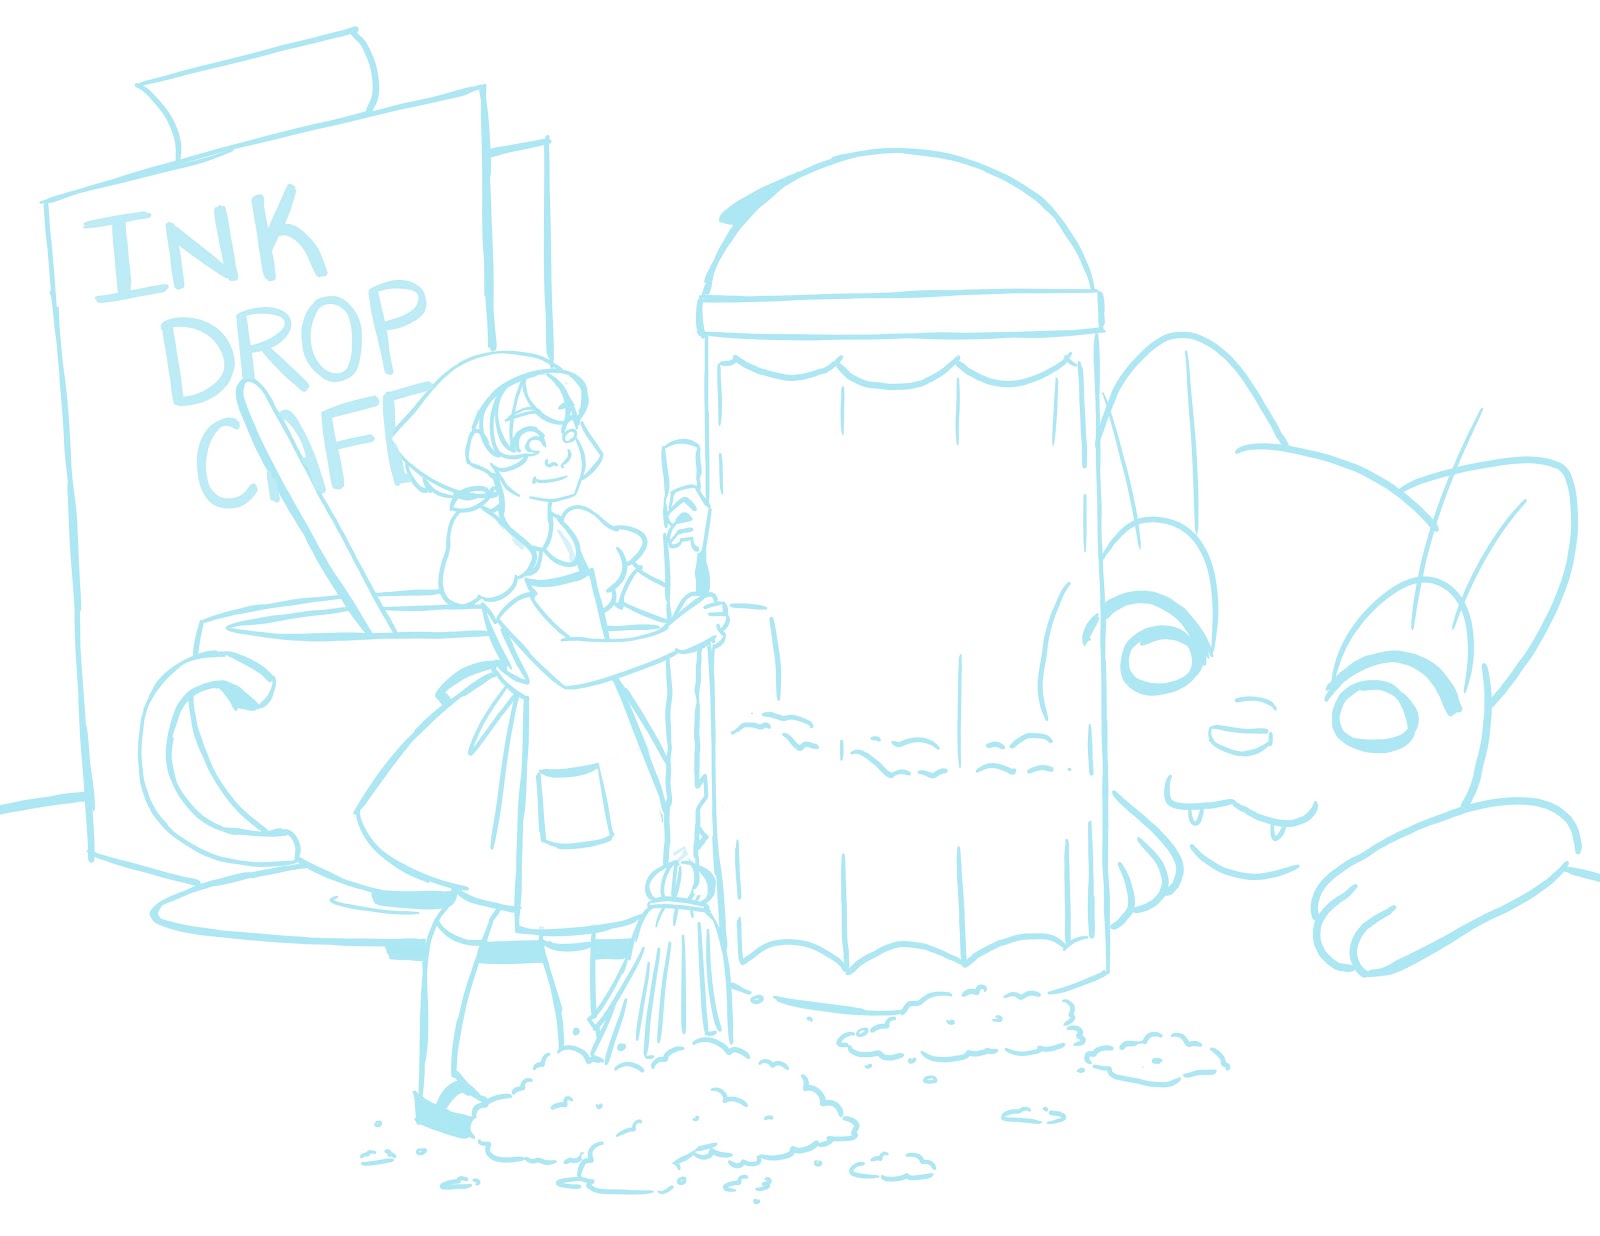 Or start out with a traditional sketch like this:
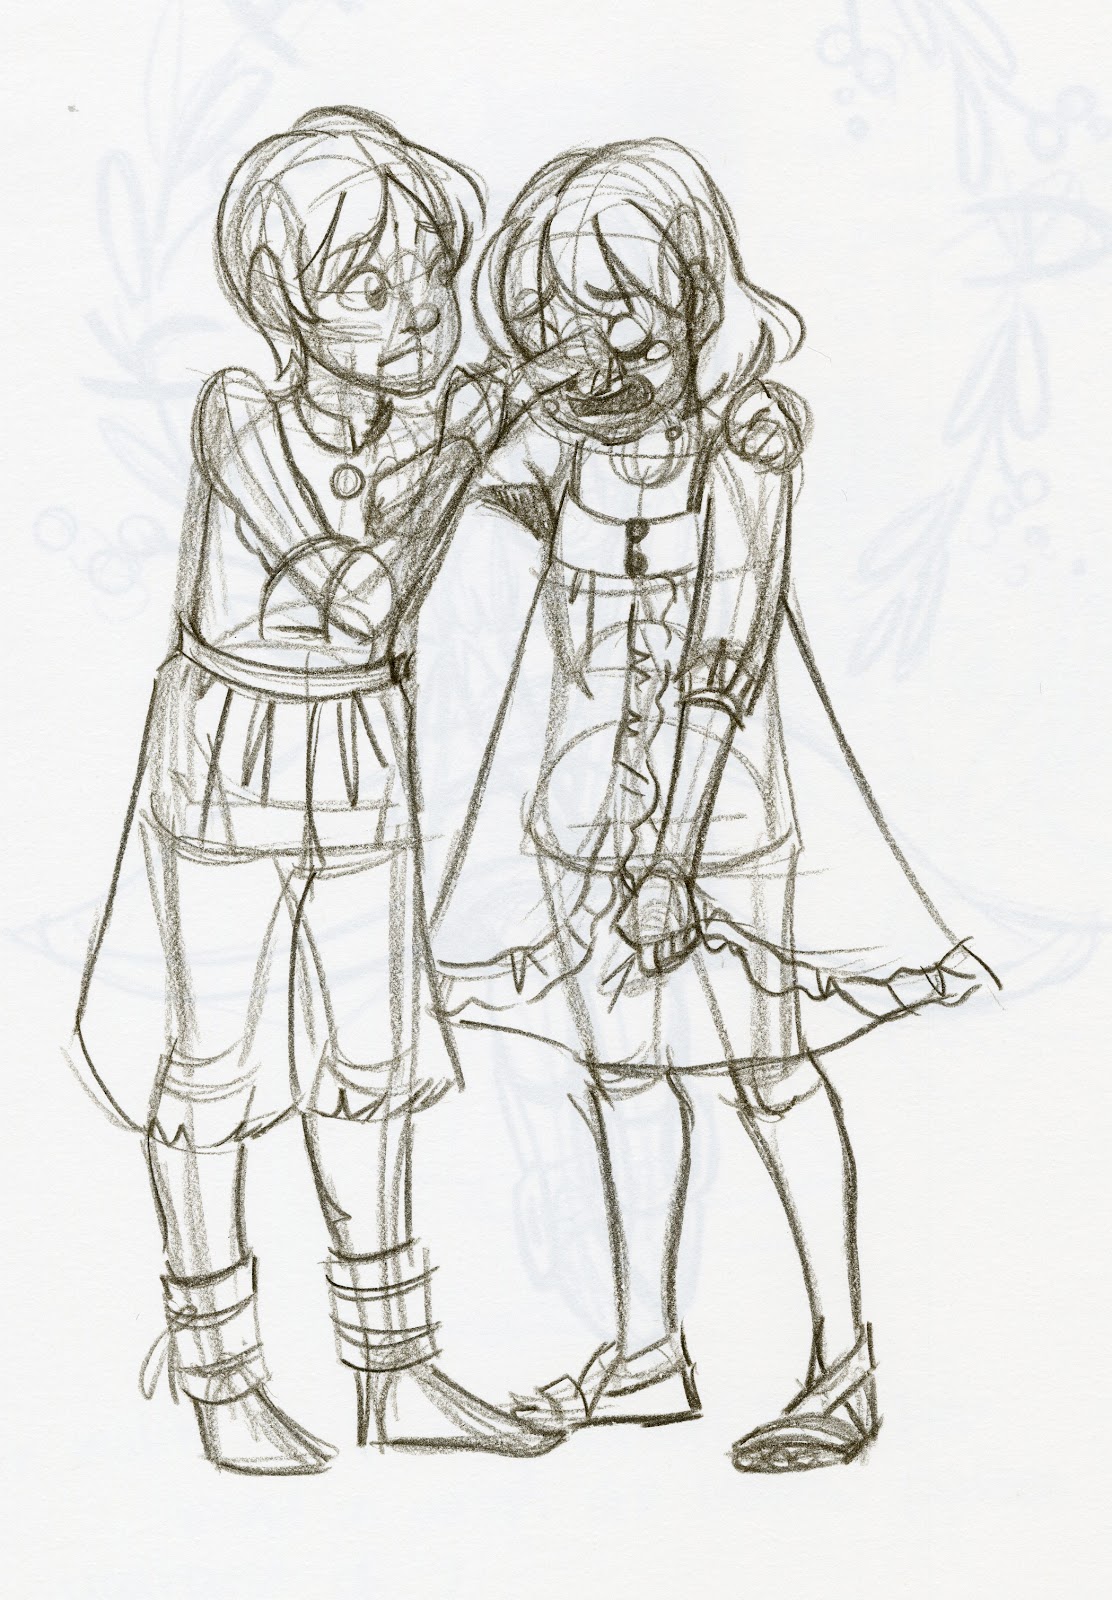
And after a few clicks, end up with this:

Why would you want to convert your lineart to bluelines?
Inkjet inks are water soluble, which means they'll dissolve as soon as you stretch your watercolor paper. To prevent the blue from leaving a cast to the paper, I add an additional wash and wipe off step to my paper stretching, but otherwise it does not alter my watercolor process.
Yes, with a toner based printer, you CAN print your lineart onto watercolor paper
But this comes with several caveats. Most home toner printers can't handle heavier paper stocks- not even 90lb student grade watercolor paper. Even most professional machines can't handle heavier stocks- the machines at Office Depot can only handle 90lb watercolor paper, and it requires someone who's quite familiar with the machines to figure out the right settings. Goodluck getting that.
Toner based ink is waterproof- great if you want to print 'inks' onto your paper, terrible if you're hoping the dye based printer ink will wash away leaving just pencil lines behind.
Converting Your Sketches to Bluelines:
Begin with the file you want to print.
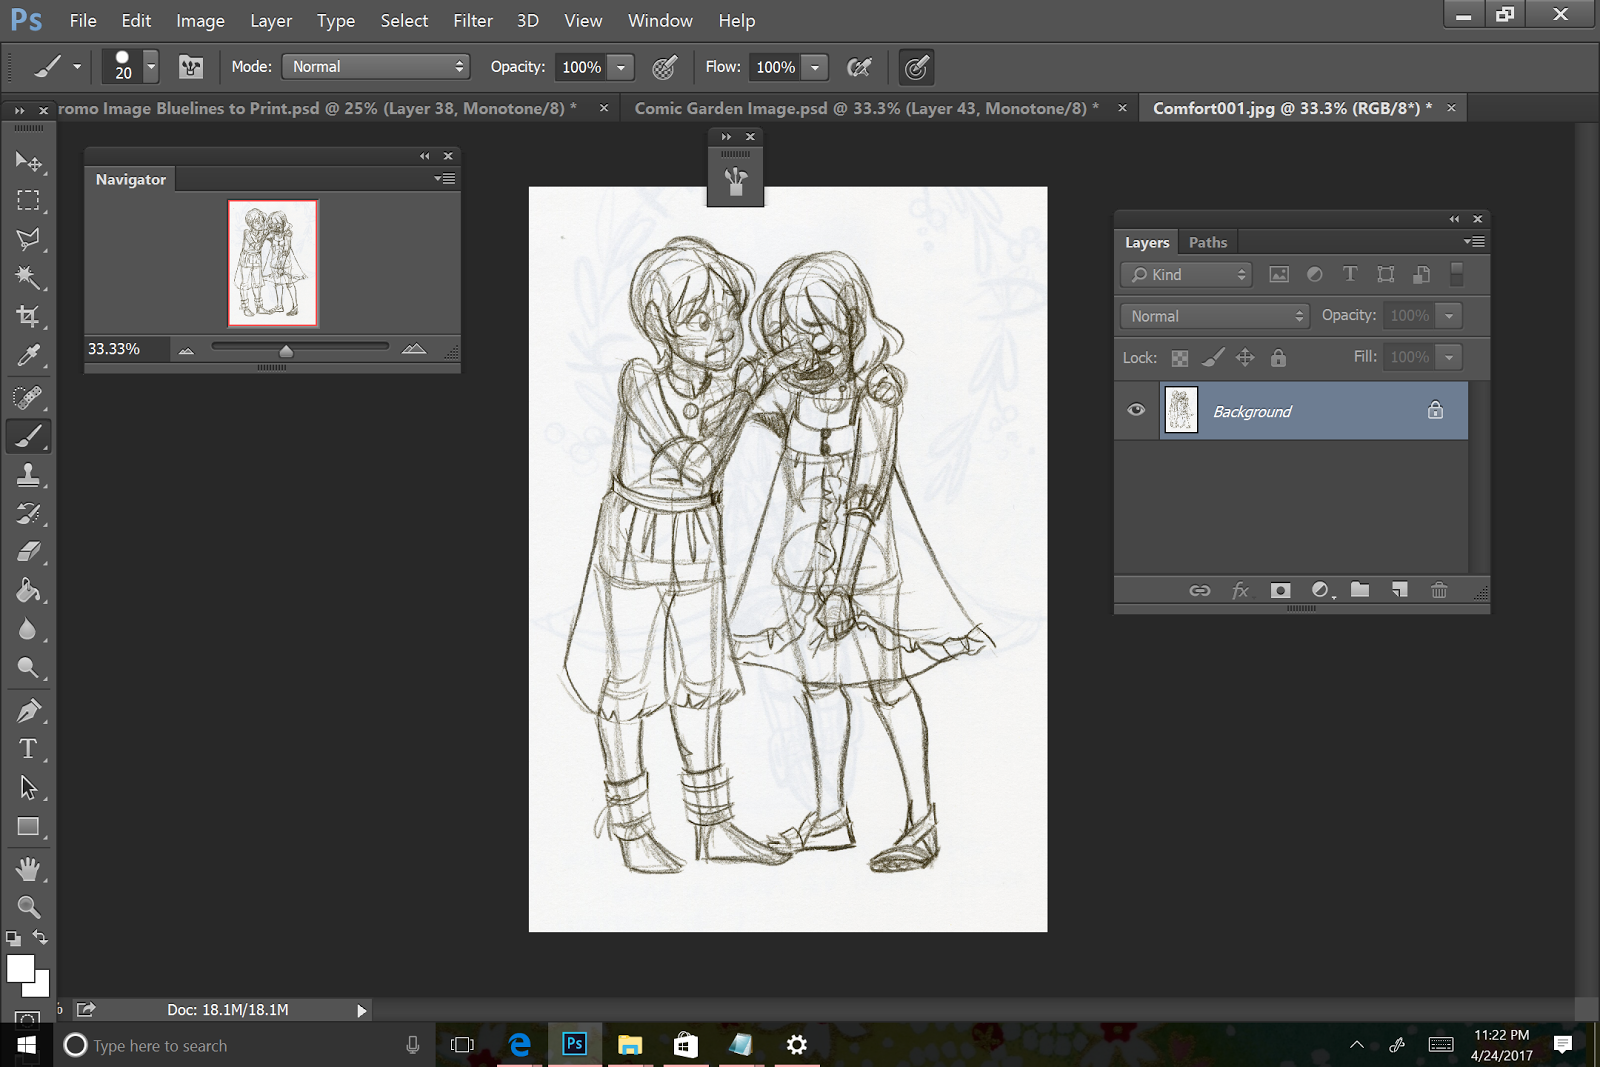
Convert your image to Grayscale by going to Image-Mode-Grayscale.


Then, to drop all the extra lines, go to Adjustments-Curves.
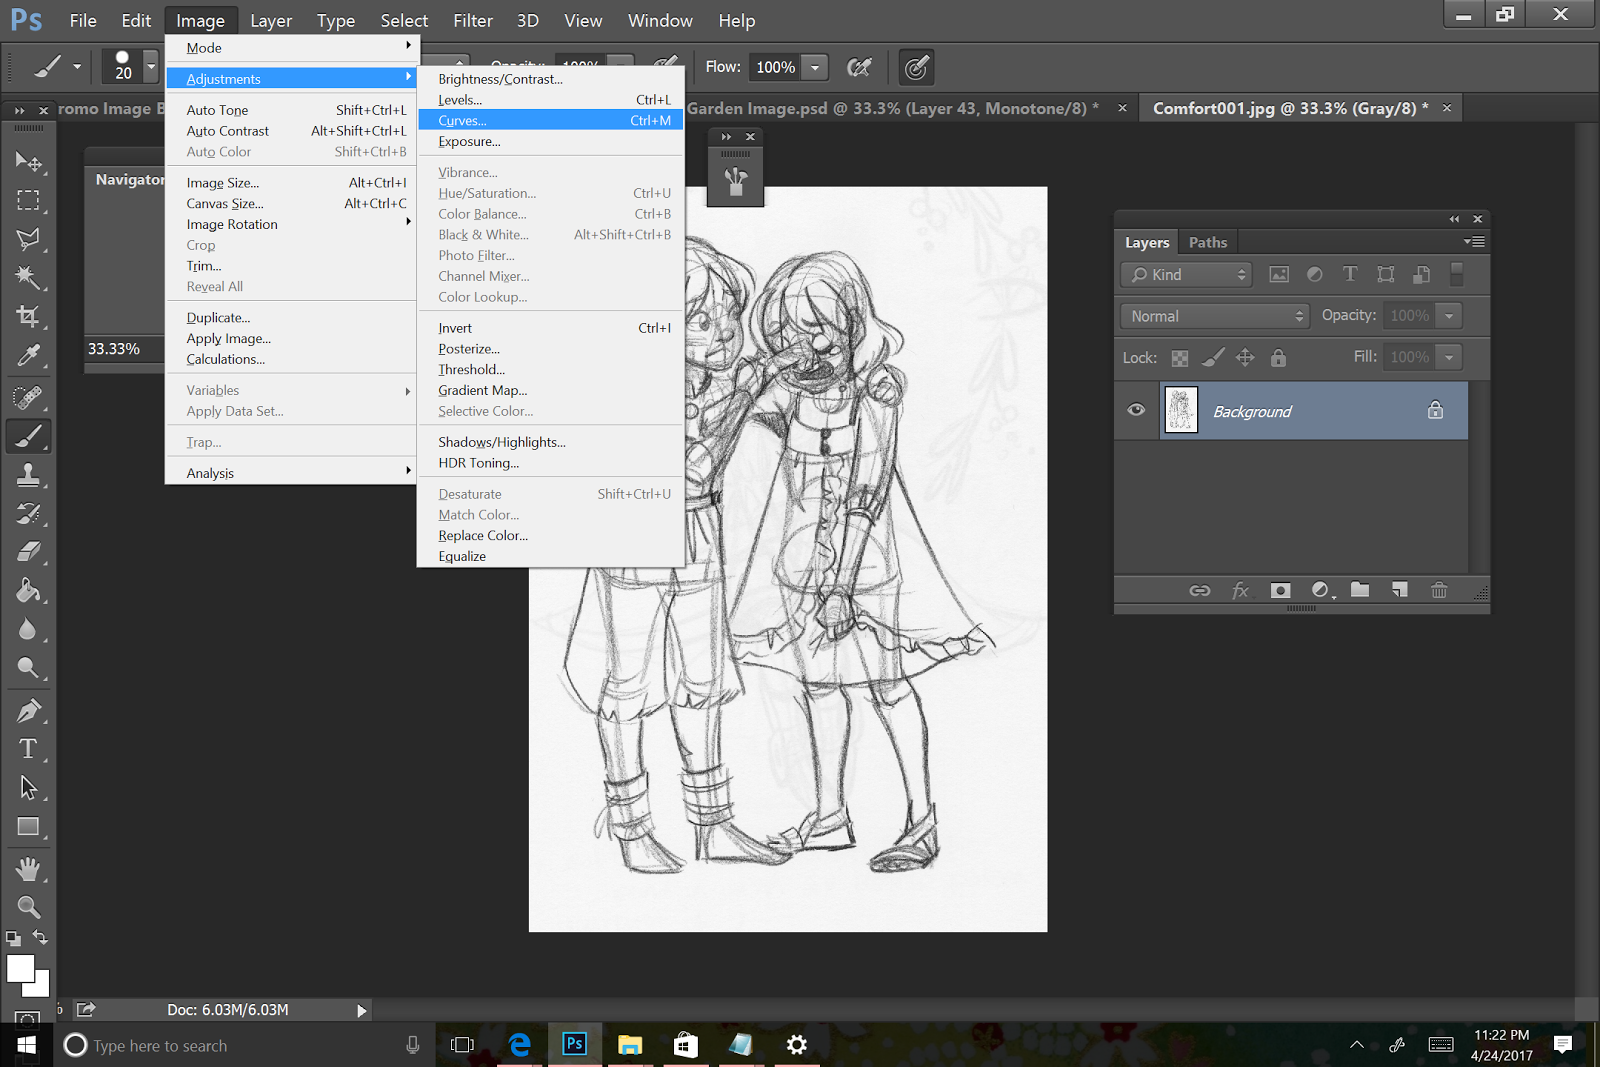
And it will bring up a graph. Bring the front of the graph all the way down, and the back of the graph all the way up. Adjust until you find a setting that drops out most of the extra, lighter lines and darkens your remaining lines.


Then go Image-Mode-Duotone
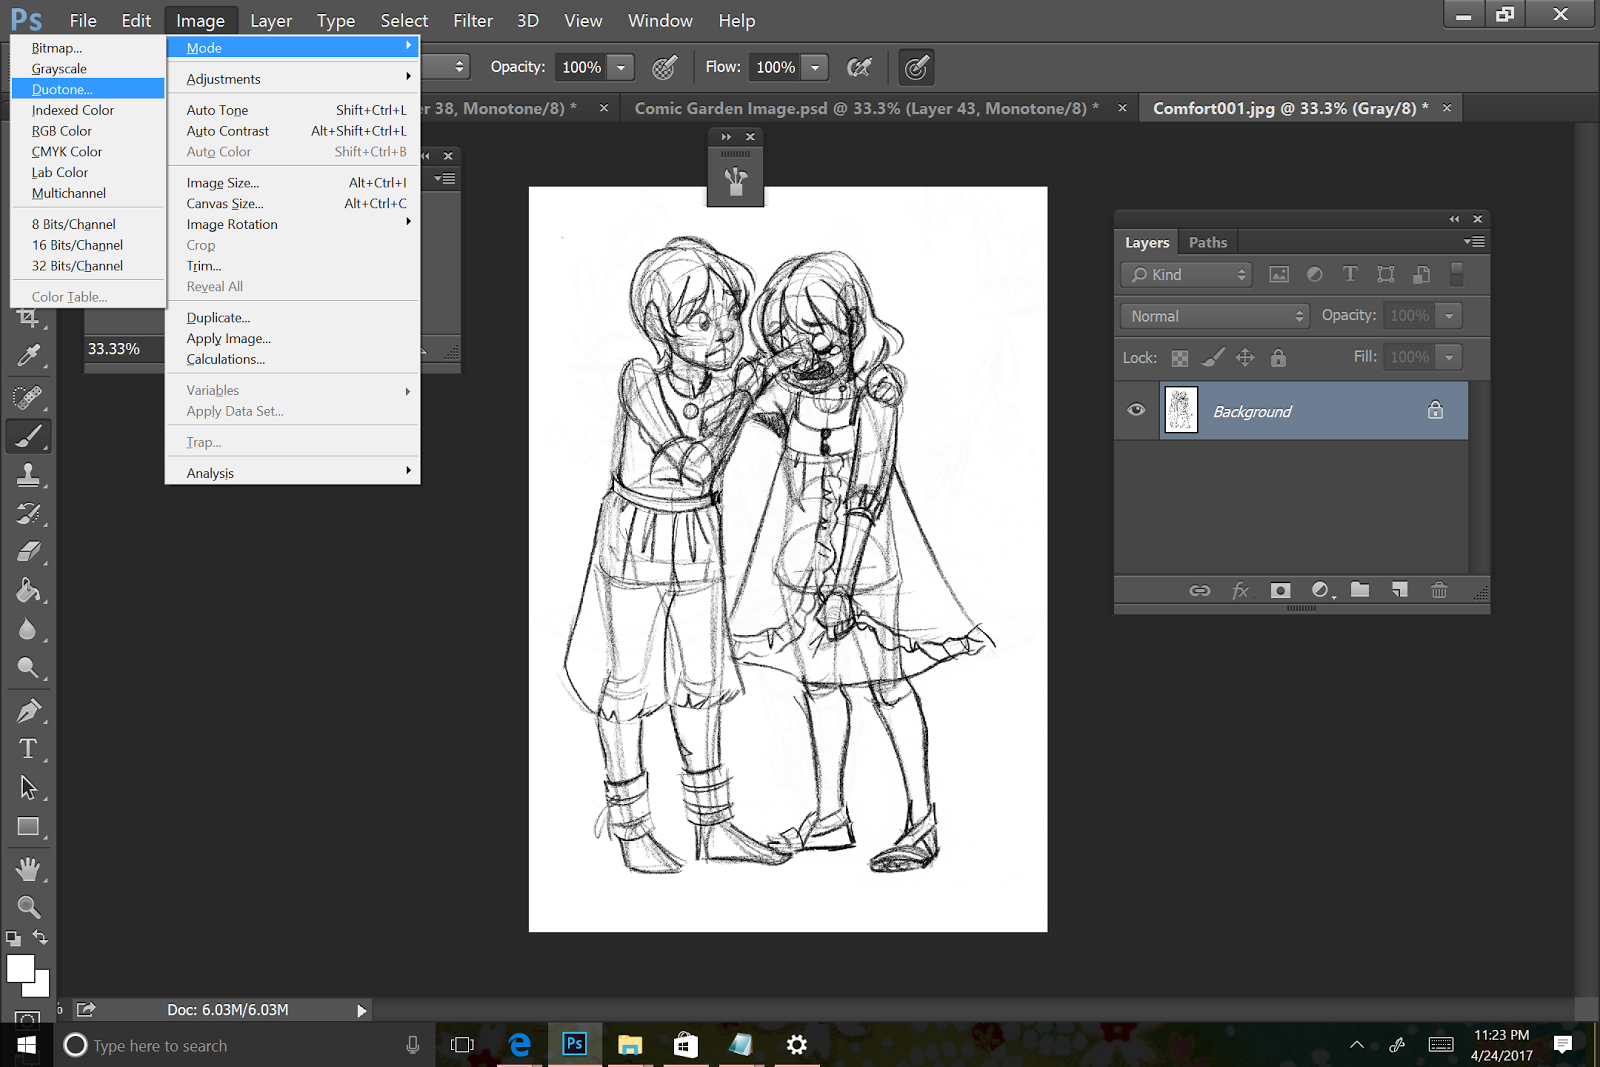
And follow these settings to create bluelines.
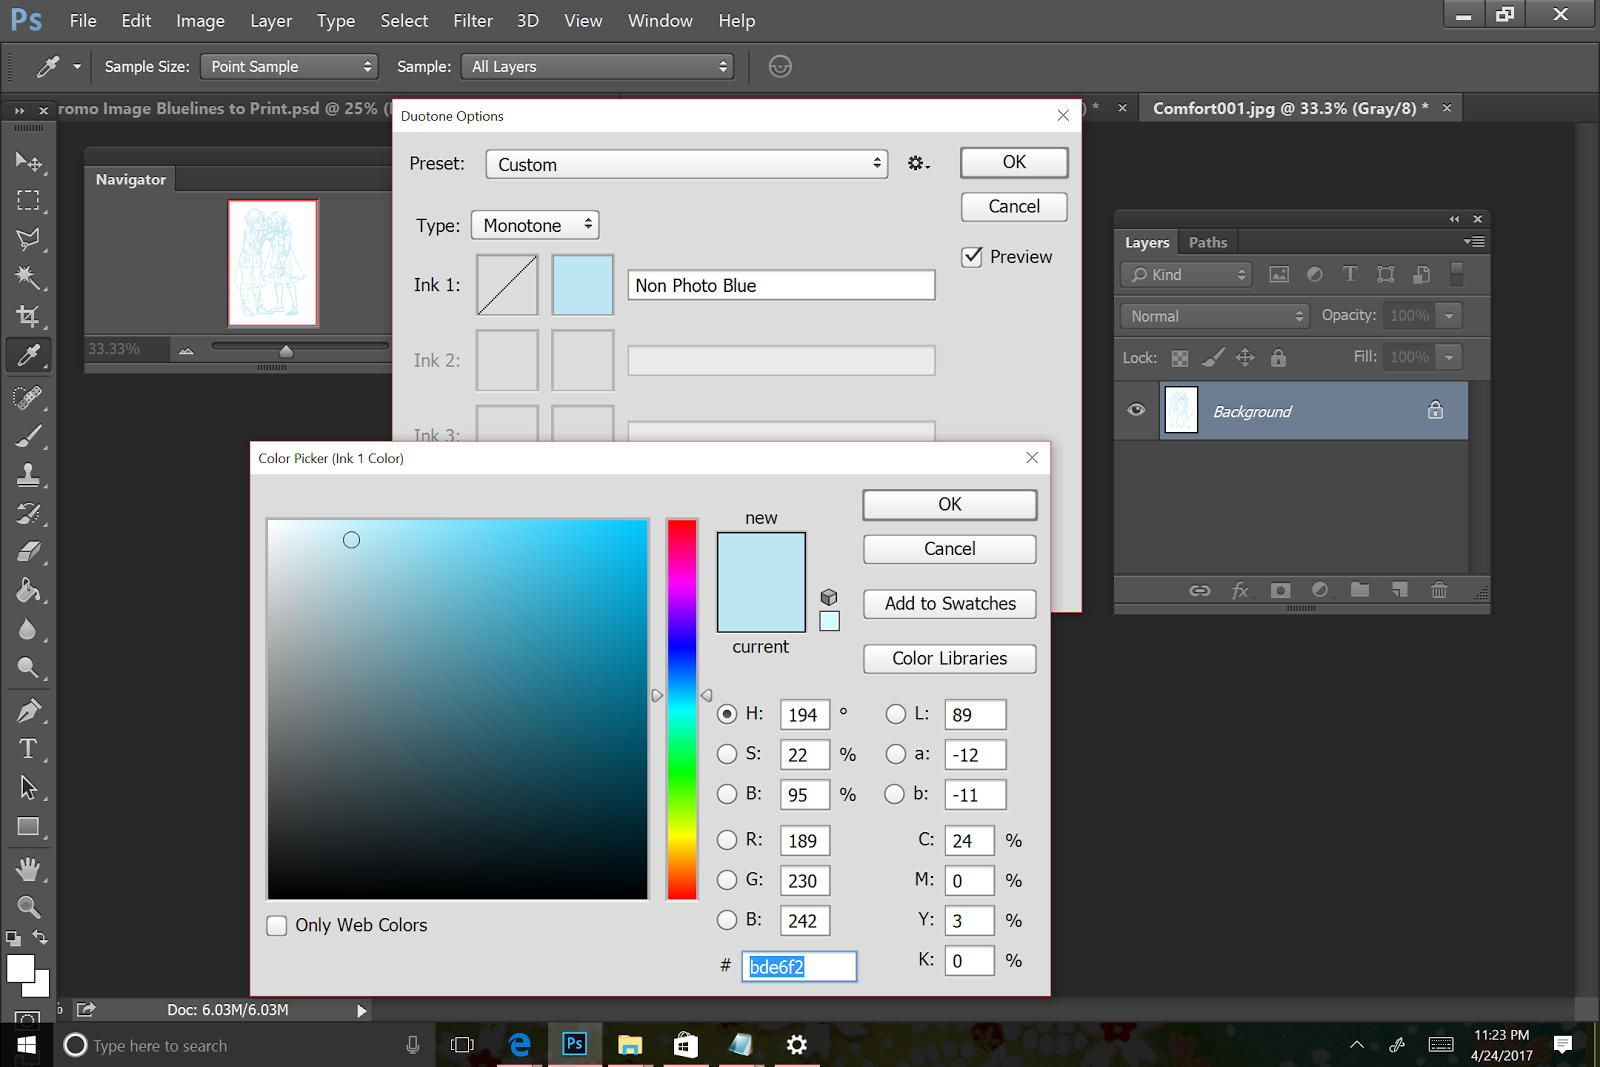
And voila! We have our bluelines, ready to print.
 In my next installment of Watercolor Basics, I'll show you how to print these bluelines out onto watercolor paper using a printer you probably already own!
Please consider donating to this blog or purchasing from Natto-shop (http://nattosoup.com/shop) if you want me to continue publishing quality content. All materials tested were purchased from my own pocket. Keep on Truckin' Nattosoup is not under any sponsorship.

July 1, 2017
Divin into Watercolor with a Splash-World Watercolor Month

July is World Watercolor Month! It's a month to inspire people to paint with watercolor while raising awareness for the importance of art and creativity in the world. Join us in celebrating by donating watercolor supplies to support underprivileged young artists worldwide!- Blick Art Supplies
World Watercolor Month was founded by Charlie O'Shields, the creator of Doodlewash. Doodlewash has some great tips for how you can celebrate World Watercolor Month this year:
Ways To CelebrateJOIN THE FUN!Grab some watercolors and make a watercolor painting or sketch each day during the month (or whenever you can join in), and share your work online for others around the world to enjoy! Use the hashtag #WorldWatercolorMonth when posting your art and use it to meet other watercolor artists around the globe!TAKE THE ULTIMATE CHALLENGE: 31 Watercolor Paintings in 31 Days!It’s even more fun to paint with friends, so plan a picnic or sketch walk in your local city and paint outside togetherHaven’t tried watercolor before? Give it try for the first time this month!Have your kids try watercolor painting (and paint with them, of course!)Support a watercolor artist you enjoy by purchasing one of their beautiful paintings or products for your homeShare the watercolor work of other artists you loveAnd please consider making a donation to our charitable partner The Dreaming Zebra Foundation!Source: Doodlewash
I want to make sure you guys get started with a big splash! For over a year, I've worked hard on the Watercolor Basics series , with the hopes of helping readers feel confident in picking up a paintbrush and beginning their watercolor journey, especially creators who are interested in watercolor illustration or watercolor comics. This series was inspired by my own comic, 7" Kara, as well as the myriad of watercolor questions I've answered over the years.

Recommended posts to get you started:
Assembling Your Supplies:
The Great Brush Off
Materials You'll Need to get Started
All About that Paper
Pick a Palette (paints)
Selecting a Paper for Your Comics
Basic Techniques:
Top Techniques in Watercolor
One Layer Watercolor
Glazing Techniques
Step by Step Tutorials:
Planning Your Watercolor Illustration
Penciling
Stretching Tutorial
Washes
Blocking In
Rendering
Adding Shadows
Adding Details
For more watercolor tutorials, check out my Watercolor Basics hubpage !
Recommended videos:
Introduction to Watercolor- 2014 Mechacon Panel
Selecting Brushes for Watercoloring Comics
Prepping New Watercolor Brushes for First Use
Wax Resist Tutorial
Perfecting a Travel Watercolor Palette
Dots for Eyes Chibi Watercolor
Removing a Watercolor from a Block
The vast majority of my work is currently in watercolor- from my comic, 7" Kara to the commissions I fill at cons. If you enjoy my art, why not let July inspire you to begin your painting adventure?
Tips to Participate if You're Just Starting Out:
1. Work from reference!
Take the pressure of creation off, and get some studying in! When I'm tapped from ideas, I find it relaxing to work from reference- and I always end up learning something new!
2. Work from an existing lineart
I have lineart available for sale through my Gumroad. Just print it onto your watercolor paper using a toner printer (Office Max or Office Depot should be able to help you with larger sizes), and begin painting! Now you can practice without stress.
Favorite Fictional Femmes coloring pack
31 Days Under the Waves Coloring Pack
Cuckoo Clock Kara
 Here are a couple to get you started! If you share them, please make sure you credit me, Becca Hillburn (Nattosoup) and share this link.
3. Follow along with a tutorial

I have so many step by step tutorials designed to get you painting- load one up, and get started! There are tutorials that demonstrate certain techniques which can be practiced on scrap paper, tutorials that go from sketch to finished piece that you can work along to, and even written tutorials that allow you to work at your own pace. When you're done, share it to your favorite social media site, and make sure you tag me, so I can see it!
Here are some tutorials to work along to!
Succulents Step by Step with Ecoline
Awfully Faun'd of You P1
Awfully Faun'd of You P2
Watercolor Basics-Glazes
Detailed Chibi Commission Tutorial
4. Commission a watercolor artist who's work you enjoy

Commissioning an original piece of watercolor illustration is a wonderful way to celebrate and enjoy World Watercolor Month. Not only is it an opportunity to support a watercolor artist you admire, but you end up with a beautiful piece or original art to display in your home.
My watercolor commissions are available in a wide range of styles, from very cartoony to realistic, and can cover a wide variety of subject matter. If you have something in mind, email me for a quote.
5. Create a masterstudy

It's a practice as old as student and master- replicating the work of an artist you admire. You can either do a direct study, where you copy the work as closely as possible to learn their techniques, or you can use their work to inspire a new piece- often called style studies. When sharing master studies, make sure you credit the original artist, and not just with 'credit goes to original artist', but with a tag and a link, so others may enjoy their work.
I hope I've inspired you guys to pick up your brushes and paints and start painting this July! Watercolor is fairly simple once you've gotten a feel for the paint and paper, so please don't be intimidated, and experiment freely!
If you'd like to participate in World Watercolor Month, please remember to use hashtags like #worldwatercolormonth to make sure other artists see your work, and please remember to share my Watercolor Basics posts and video tutorials with anyone who might benefit from a lesson in watercolor. Throughout July, I'll continue to share watercolor illustrations, tutorials, and more here and on my Youtube channel. If you want more of my art, make sure you add me on Instagram for daily updates, and check out 7" Kara, now available as a webcomic!
Please consider donating to this blog or purchasing from Natto-shop (http://nattosoup.com/shop) if you want me to continue publishing quality content. All materials tested were purchased from my own pocket. Keep on Truckin' Nattosoup is not under any sponsorship.

June 30, 2017
Intro to Comic Craft: Scanning Your Blueline Roughs
Intro to Comic Craft: Scanning Your Comic Roughs
Scanner used in this demonstration: Epson Expression 10000XL
Note: You don't need a large format scanner to scan your roughs- just about any scanner will work just fine. If you're looking for a recommendation on a good quality small format scanner, the Canoscan 9000F MK II will not only scan your roughs and pencils, but also small watercolor pieces quite adequately.
Please consider donating to this blog or purchasing from Natto-shop (http://nattosoup.com/shop) if you want me to continue publishing quality content. All materials tested were purchased from my own pocket. Keep on Truckin' Nattosoup is not under any sponsorship.


