Shawna Coronado's Blog, page 12
January 6, 2018
Best Chocolate Avocado Smoothie Recipe

This is a New Year and a NEW YOU! Eating a lower sugar anti-inflammatory diet to help reduce chronic pain, arthritis, and asthma symptoms is easy when we add delicious chocolate smoothies to the kitchen arsenal. Super thick, rich, and perfect for breakfast or a snack; my recipe is simply the BEST Chocolate Avocado Smoothie Recipe ever and you must whip out your cocoa and avocado and try it. When I created this baby, it was SO THICK that I had to get a fatter straw in order to suck it up. It tastes like dark chocolate heaven! Below the recipe learn how to grow Swiss Chard – it’s easy to grow and a great plant to add to your garden design in containers or in ground this season.

Making the Smoothie Recipe
Start by growing or finding some amazingly fresh Swiss chard and avocado for your Chocolate Avocado Smoothie Recipe. I like to use frozen berries because it gives my smoothies a cool twist that tastes sweet even though the sugar content for this smoothie is extremely low. While you could use traditional dairy, my recommendation is to keep it anti-inflammatory and vegan with almond or coconut milk.
Low Sugar Vegan Chocolate Avocado Smoothie Recipe Print Prep time 5 mins Cook time 2 mins Total time 7 mins This is simply the BEST Chocolate Avocado Smoothie Recipe ever - super thick, extremely rich, non-dairy, vegan, with a note of decadent chocolate love and ALL healthy. Try it today! Author: Shawna Coronado at www.shawnacoronado.com Recipe type: Vegan Smoothie Ingredients 1 cup frozen berries ½ ripe avocado 1 handful shredded Swiss chard (or spinach) 2 T cocoa powder 1 ½ cup almond or coconut milk ½ t vanilla 1 t raw honey (optional) Instructions Throw it all in a blender. Blend'er up. DONE! BEST Chocolate Avocado Smoothie Recipe -- super super thick and delicious! 3.4.3177
Growing Swiss Chard
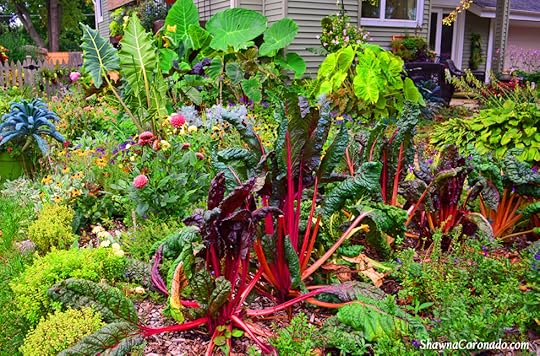
Want to know how to grow the marvelously ornamental Swiss Chard? The crinkly leaves and colorful stems are a standout in the garden. Swiss chard can be planted in spring for summer interest or early fall for a fall display. Grow from seeds or transplants in well drained soil that is richly amended with rotted manure or compost for sturdy growth. Transplants can be planted 3-4 weeks before the last frost free date. Seeds are planted 1/4 to 3/4 inch deep and require 5-6 weeks to reach a good planting size.
 Growing Tips
Growing Swiss chard for your chocolate avocado smoothie or favorite salad is fairly easy in that it requires an organically rich, well-drained soil, part-shade to full-sun conditions, and consistent watering. Kellogg Garden Organics All Natural Garden Soil for Flowers & Vegetables is a good choice that I used last summer (right and soil below). Freshen up your ground soil by adding several parts organic All Natural Garden Soil from Kellogg. Then mulch well after planting; mulching the area around Swiss chard enables better moisture retention and protects against weeds. If Swiss chard bolts, simply cut off the flowering stem at the base of the plant as the flower can get quite tall, but is not attractive. Cut stems off at the base of the plant in fall and you might be surprised by returning plants in the spring.
 Advice and Care
Plants are typically problem free, but can be attacked by mites, aphids, and caterpillars. Treat the pests organically by spraying or picking them off. Spray with soapy water dependent upon the pest. Swiss chard can get cercospora leaf spot, a disease that disfigures the leaves with ash-gray spots that have purple edges or fungal issues.
Truly, chard is as ornamental as it is tasty. Chard will wilt at a hard freeze below 30 degrees, so it is one of the cold season crops that will be the quickest to close up for the season. Planting from seed would require at least 6 weeks of growth before putting it in the ground, so starting seeds in the winter makes sense, or pick up a plant or two at the local garden center.

Special thanks to Kellogg Garden Organics for providing soil to me this season – the soil worked very well with my vegetables, particularly Swiss chard. Those beautiful bamboo cutting boards were provided by Totally Bamboo. The featured board is the ‘Pro Board Long’ and I love the cross-hatch design. Glassware is from the beautiful La Rochere bee series. Thrilled for all your help in putting together the BEST Chocolate Avocado Smoothie Recipe ever.

The post Best Chocolate Avocado Smoothie Recipe appeared first on Shawna Coronado.


January 1, 2018
Best Coleus Growing Tips

New Years Resolution – PLANT MORE COLEUS! Here is a quick guide for growing this delightful annual. For years, coleus were used exclusively as a vigorous shade annual, adored for their amazing variety of leaf colors and textures. New hybrids are particularly sun tolerant and have expanded the landscape design potential of coleus. While the leaves—which can be rounded, elongated, puckered, frilly, dissected, tiny, large, or any combination therein—are what makes coleus famous, if it’s left to flower, it will be smothered with pollinators and hummingbirds. Coleus foliage colors are equally exciting, ranging from chartreuse to hot magenta to yellow to rust and every tint in between. It’s excellent planted en masse for a wave of fabulous groundcover color in the landscape. Coleus are equally wonderful as filler foliage or a feature plant in container designs, making them a remarkably colorful garden statement plant. Below is an excerpt from the Indiana Getting Started Gardening Guide which can help you get started with this particularly colorful addition to your garden.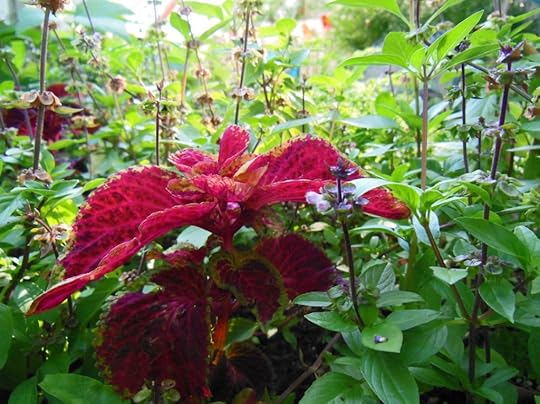
Botanical name — Solenostemon scutellarioides
Bloom Period and Seasonal Color — Blooms very late summer; foliage is colorful
and varied
Mature Height × Spread — 6 to 36 inches × 10 to 24 inches
Added Benefits – Attracts beneficials, attracts hummingbirds
Sun Requirements – Sun, Part Sun, Part Shade, Shade
When, Where, and How to Plant – Preferring fertile, well-drained soil, coleus need to be planted according to its sunlight preferences. Be sure to research the specific variety when purchasing seeds or plants. Start seeds indoors six weeks before the last frost date or sow seeds directly in the ground after the last danger of frost. Propagating coleus is simple and can be easily accomplished for overwintering indoors by taking tip cuttings in early. Cut a 3-inch section from a stem without a flower. Remove the lower leaves, leaving the top leaves intact, and place in a small pot with soil. Move the container to a warm location with bright light exposure and keep consistently moist. Cuttings develop roots within four to five weeks and can be transplanted for overwintering as a houseplant.
Growing Tips – Coleus prefers consistent watering and regular fertilization. Container plants like to be fertilized with an organic fertilizer every two weeks; ground plantings can go every four weeks.
Regional Advice and Care – To improve branching and a full habit, pinch off flowers. However, if you are trying to attract pollinators and hummingbirds, or want to collect seeds later in the season, be sure to leave the flowers. There are no serious insect or disease problems. Overwatering in shady conditions can sometimes encourage powdery mildew or root rot. These fungus issues can be treated with an organic fungicide.
Companion Planting and Design – Companion plants that work very well are ornamental edibles, sweet potato vine, begonias, fountain grass, and cannas. Each coleus has a unique growing habit—trailing, miniature, bushy, tall, sun loving, or shade loving—so companion planting is totally dependent on the size and nature of the specific coleus.
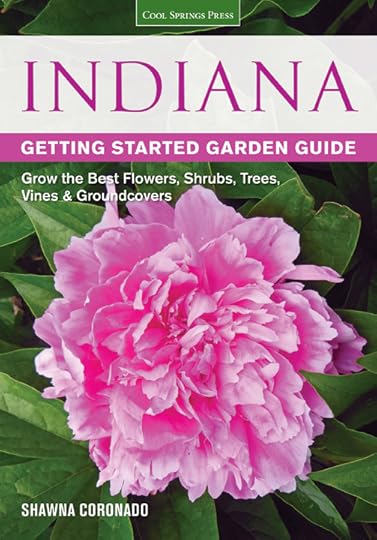
If you would like more ideas on how to grow many different trees and plants for your landscape, particularly in the Midwest, please pick up my book, the Indiana Getting Started Garden Guide.
Save
The post Best Coleus Growing Tips appeared first on Shawna Coronado.
December 18, 2017
Houseplant Living Wall Garden

Growing a houseplant living wall garden that is super easy to maintain is an amazing way to bring oxygen and beauty into your work or kitchen environment. You can easily begin growing this living wall design now inside in an office or kitchen, then transfer it outside in the early spring in order to expand the beauty so that you can work outside next to your own little bit of inspiring nature. My book, Grow A Living Wall ~ How to Create Vertical Gardens with a Purpose: Attract 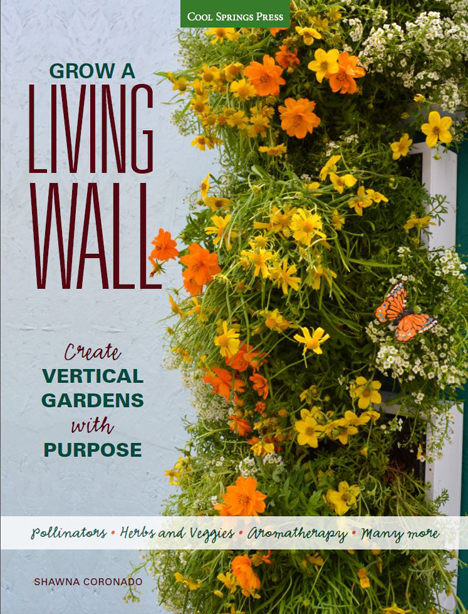 Pollinators • Grow Vegetables & Herbs • Aromatherapy and more, will teach you how all about living wall gardening and how easy it is.
Years ago I left a dramatic and hated job to begin a new life working out of my home office. While it might seem terrifying to some, it was a miracle for me—it allowed me to step away from the pain and drama of a closed-in, unhealthy environment and transform my office into something healthier. In the United States alone, Forrester Research has forecasted that 34 million Americans currently work at home, and the number is projected to increase to over 65 million by 2016. Working in the home saves large companies time and money. Best yet, it increases the happiness levels of many of the workers that participate in this type of working arrangement. Create a living wall with houseplants, vegetables, or herbs—whatever your favorite plants might be—on your balcony or patio. Keep the living wall on the balcony or patio close to your work zone [or inside the house next to your desk] to enable the most benefits from the experience. Using houseplants might give you the added benefit of moving the wall garden inside to your primary office area during the winter as well.

HOW TO PLANT A HOME OFFICE LIVING WALL GARDEN
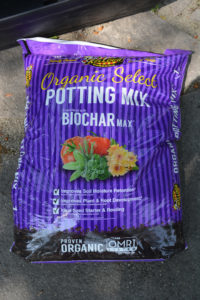 Once you receive your Bright Green GroVert Living Wall Planter Kit, fill it with your favorite soil mix. My favorite homemade mix for traditional houseplants this season is to add two parts potting soil with biochar to one part compost or composted manure.Try Kellogg Garden Organics Organic Select Potting Mix formulated with BioCharMax, which is an excellent moisture retentive potting soil filled with nutrients. Plant it up, back fill with soil, water well while it’s laying flat, dry the back of the unit off, then hang on the wall. Once it is hung regularly on the wall, I prefer to pull the unit down and water it in the shower, then let the unit dry before hanging it again. If you move the unit outside in the future, simply water from the top irrigator bin. This planting design uses a mix of tropical house plants selected for their color and attractiveness. They include arrowhead, croton, hypoestes, ivy, schefflera, and spider plant – you can order them through Schaefer Greenhouses where this living wall was assembled. This is particularly easy and effective to plant up in the fall and hang inside, then move outside in the spring in order to have an outdoor balcony or patio home office living wall.
Top Houseplants for a Living Wall Garden with Dim or Low-Light Exposure
• Arrowhead vine
• Cast iron plant
• Chinese evergreen
• Dracaneas
• Peace lily
• Peperomia
• Philodendron
• Pothos
• Snake plant
• Spider plant
• Zee Zee plant
Light is very important when growing on an interior wall. Add a grow light if you hang the unit in a dark interior area or place it near a bright window. Build your own home office living wall garden for an interior “houseplant” experience in winter, then bring it outside on your patio, deck, or balcony in the spring to expand the healthy home office experience outside. If you want to learn more about how you can grow your very own living wall garden, please order my book. Grow A Living Wall ~ How to Create Vertical Gardens with a Purpose: Attract Pollinators • Grow Vegetables & Herbs • Aromatherapy and more.
Special thanks to Kellogg Garden Organics for the soil to grow my houseplants this season – I appreciate the support sharing all the houseplant love I can. Happy indoor gardening my peeps!


The post Houseplant Living Wall Garden appeared first on Shawna Coronado.
December 2, 2017
3 Travel Tips to Help with Chronic Pain and Arthritis

This is a view of Via Degli Angeli, a street in Lucca, Italy in front of the Hotel Alla Corte degli Angeli, where I was hosted during my stay. I love the color and light here and was charmed by the morning light and warmth of this ancient city. I cannot wait to return for another visit soon so I can walk the streets at dawn.
Twilight in the Tuscan city of Lucca Italy is an enchanting moment in time. I was up at dawn every day of my press-junket this fall in order to capture that beautiful moment of clarity. The light is just beginning to kiss the ancient buildings with warmth, the sky is pink, the cobbles and tiles of the streets are damp with morning dew, and the air smells clean and fresh as if the wind has drifted down from the surrounding mountains. This lovely city of Lucca is somewhere you must visit; it is historically rich, exquisitely beautiful, and passionately timeless. Lucca is a gloriously exquisite city filled with secret gardens and quaint cobbled streets which has captured my heart. Surrounded by a wall that has become a pedestrian promenade where visitors and residents bike, stroll, and exercise, Lucca offers beauty as well as historical importance to the traveler.

Appetizers in Lucca at the restaurant at Hotel Alla Corte degli Angeli were magnificent. Above you see lovely slices of cured bacon and fresh olives were delicious fuel for the evening from Chef Leonardo Calò. He spent time with me to help choose grain-free diet-conscious bites.
One of the challenges I often have with my wellness lifestyle and traveling is trying to find foods that will fit my very specialized anti-inflammatory diet, particularly when overseas. The requirements: no dairy, no grain, and no sugar. When I travel I sometimes “cheat” and have “gluten-free” if it’s available, but generally speaking I try to stay faithful to the no grain as it reduces my chronic pain immensely. When I was in Lucca Provence I found it easy – all I had to do was ask, and as you can see by the delicious photos, the local restaurants jumped to help me find a solution on their menu. Regional foods in Italy are often picked fresh and come in straight from the field to be prepared. This helps food taste better, of course, and helped enabled me to have a delicious experience even with my special diet.

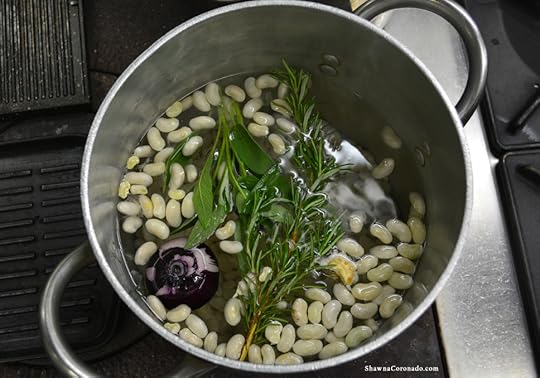

Above is a Tuscan Ribollita soup made of beans, vegetables, and gluten-free bread instead of the traditional wheat. This deliciousness came at lunch while we visited Fattoria Borgo La Torre in Montecarlo village in the Tuscan hills of Lucca Provence. Ribollita literally means “reboiled” and is a soup built from leftovers; using the vegetable soup from yesterday to make a fresh soup today. Below you see another dish from Fattoria Borgo La Torre; Pork in Squash Sauce with Walnuts. This tasted delicious and the sauce was wonderfully mild. Note to oneself — use squash instead of cream sauce and you won’t miss the cream at all.
Traveling with food allergies or chronic pain can be made a lot easier by bringing a written list of local language-specific foods that you cannot consume. Speaking in the same language as the locals makes it clear what your special requirements are when you order. For example, the following words were on my travel list as inflammatory foods I needed to avoid while in Italy; milk (latte) or dairy (latteria), wheat (grano) and gluten (glutine), peanuts (arachide), and soy (soia). Almond milk was not readily found in Italian restaurants, so I generally did without a dairy-substitute since I cannot consume soy.

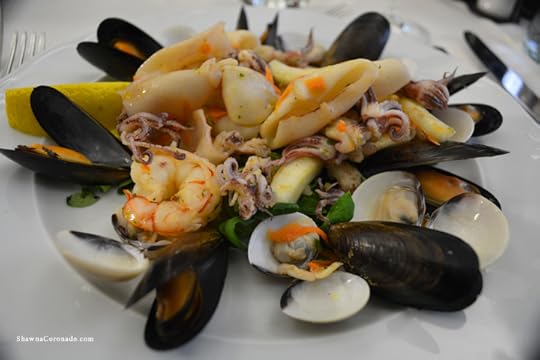
Ristorante Ciccarelli Esplanade in the Lucca Provence of Viareggio on the Versilia Coast served a magnificent seafood salad. A lovely beach town filled with tourists, cafes, and restaurants, Viareggio is gorgeous and sunny. This restaurant truly had one of the best meals of my Italian experience as the seafood salad is filled with freshness from the sea and delicious flavors. Shellfish can be inflammatory to some people, but I do not have a reaction, so consumed it with delight.
My trip to Italy was AMAZING and filled with delicious food THAT I COULD EAT WITH ABANDON because I took the time to ask the restaurants for something that would work for me. Ask when you travel and you shall receive. If you’re traveling for the holidays and beyond, be sure to plan in advance for what you need for your diet and traveling conditions. It’s easy to shoot an email out if you have a question if you give yourself enough planning time. Meanwhile, I’ve created a handy-dandy travel list for you (above) which features three tips to help you with chronic pain and arthritis when you travel.

Special thanks to LuccaPromos and the Italian National Tourist Board for their generous trip to The Lands of Giacomo Puccini; Lucca and Lucca Provence in Tuscany. Above you see the view from my rooms at the Hotel Alla Corte Degli Angeli in Lucca Italy – wow! My astounding visit of Lucca city centre, Garfagnana Valley, and the Versilia Coast will be covered in more upcoming posts and publications. #LandofPuccini #ad #Lucca #LuccaPromos
The post 3 Travel Tips to Help with Chronic Pain and Arthritis appeared first on Shawna Coronado.
November 20, 2017
Pine Trees for Winter Interest Landscaping

Pine trees are shallow-rooted conifers that offer gorgeous evergreen color year-round and a delicious pine scent. More important, they are a food source and residence for native wildlife. Birds, squirrels, pine martens, chipmunks, and mice are just a few of the creatures known to eat the pine nuts found in the pine cone. Pine trees grown in the proper conditions can live to be hundreds of years old. Pines are known as a needled forest tree and can be planted in stands, as windbreaks and hedges, or used as erosion control when planted en masse on large hillsides. Pines are notorious, however, for not tolerating urban pollution and inner city situations. They prefer open air and large growing areas that will fit their expansive girth. Below is an excerpt from the Indiana Getting Started Gardening Guide which can help you get started with this long-lived tree.
Botanical name — Pinus spp.

Bloom Period and Seasonal Color — Evergreen foliage
Mature Height × Spread — 50 to 80 feet × 20 to 35 feet
Added Benefits – Year round color and interest – attracts birds
Sun Requirements – Sun, Part Sun
When, Where, and How to Plant – Most pines are easily grown in full sun with fertile, moist, well-drained soil. Some pines suffer from harsh winter sun and wind; research varieties for the specific area where you will plant. Trees can be grown from seed but will take years to develop. Nursery-grown trees are preferable. Plants that are balled and burlapped should have as much of the burlap and wire basket removed as possible. Backfill around the rootball until it is about half filled. Water the rootball and backfill well. Place the rest of the soil around the rootball, forming a “well” at the base of the plant.
Growing Tips – Young pine trees are particularly susceptible to sunburn and dehydration. Water the pine tree consistently until well established. Mulch the tree out to the drip line to help hold moisture. Consider installing a windbreak or screen to help protect the tree in its infancy. Once it is well established, the pine tree should be strong enough to tolerate sun and wind. Prune out dead branches and shape the tree in late winter.
Advice and Care – Protect young trees from foraging deer. Depending upon your location, pine trees can be used for erosion control. Virginia pine, jack pine, and shortleaf pine are all species of pine trees that tolerate challenging erosion areas. Trees overcrowded or planted in shadier conditions are vulnerable to many diseases including blight and other fungal issues.
Companion Planting and Design – Young white pines, Scotch pines, and Austrian pines are all used as Christmas trees because of their fragrance and strong form. In landscapes, their large size makes them challenging to manage in a small garden once they have grown to maturity, so they are better in larger landscape plantings.
Try These – White pine makes an excellent shade tree, growing to 60 feet tall. ‘Glauca’ or Japanese blue pine grows to 40 feet and has interesting blue-green needles. Dragon’s eye Japanese red pine is a variety that has unusual emerald green needles with yellow stripes that turn chartreuse in fall; it grows to 30 feet high.
If you would like more ideas on how to grow many different trees and plants for your landscape, particularly in the Midwest, please pick up my book, the Indiana Getting Started Garden Guide.
Save
The post Pine Trees for Winter Interest Landscaping appeared first on Shawna Coronado.
November 15, 2017
Thanksgiving Crockpot Butternut Squash Side-Dish

Last season I made an insanely yummy-for-the-tummy One Pot Meal Recipe featuring Pork and Butternut Squash in my crockpot that is so easy to make anyone can do it (see video below). Butternut squash is a perfect paleo or vegetarian solution for your Thanksgiving guests – you don’t have to cook it with pork as you can cook it by itself – and I wanted to show you a hands-free side dish to make your Thanksgiving day cooking less stressful.
Below is a quick Thanksgiving crockpot butternut squash side-dish recipe for cooking butternut squash in your crockpot. The reason I like it; cooking this way means you do not have to wrestle with the squash to try to cut it before it’s cooked. Once it’s cooked in the crockpot, the squash cuts like butter and tastes delicious (see video as a reference on how you pull the butternut squash out and cut it open).
Crockpot Butternut Squash Cooking Recipe –
Harvest squash or pumpkin.
Cut slits in skin with knife.
Place in a crockpot on low for 6 hours with a little water in the bottom.
Remove from crockpot when tender (see below).
Cut in half and remove seeds and outer peel.
Mash well. Mix in salt and pepper then drizzle with olive oil or butter and serve.

How to Grow a Butternut Squash
 This season I grew Honeynut butternut squash in my VegTrug elevated garden bed unit. This helps my osteoarthritis by offering much less strain and it is very easy and convenient to take care of my garden when it is lifted up above the ground. I was lucky to grow the miniature Honeynut Squash from PanAm Seed and Wave Petunia as it is so delicious and adorably cute.
Growing any size butternut squash is super easy. Here’s what you do – if you have an in-ground garden, amend your soil with Kellogg Garden Organics All Natural Garden Soil. I planted my squash in containers and used the Kellogg Garden Organic Select Garden Soil Formulated With BiocharMax soil in my elevated beds. I mix in one part rotted manure with the bagged soil. Then I fertilizer following the package directions on the Kellogg Garden Organics Organic Plus Tomato, Vegetable & Herb Fertilizer. One advantage to the Organic Plus fertilizer is that it contains kelp meal which is a great source of micro- and macro-nutrients which will help give your plants a boost.

Special thanks to Kellogg Garden Organics, VegTrug, and Wave Petunia for sponsoring this Thanksgiving crockpot butternut squash side-dish recipe. Happy Thanksgiving to all my friends and family – Happy Holiday Cooking!
The post Thanksgiving Crockpot Butternut Squash Side-Dish appeared first on Shawna Coronado.
October 23, 2017
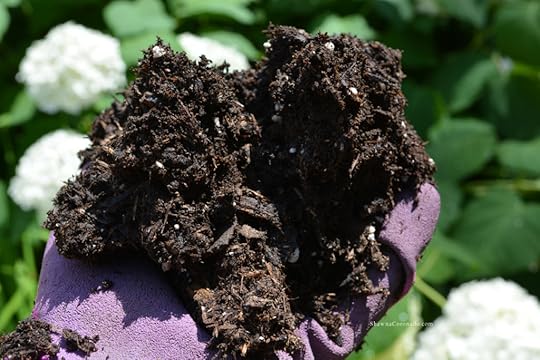
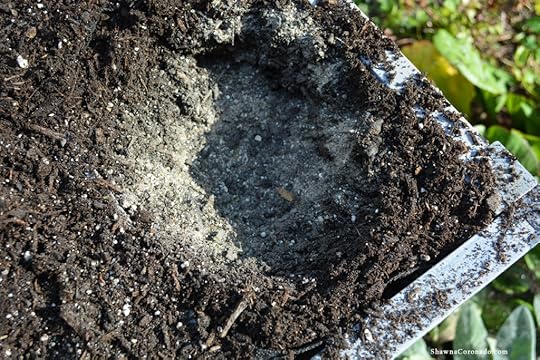
Fall Compost Layering Tips

In the heat of summer we gardeners can compost, compost, compost like mad. It is easy to build, turn, and water the compost regularly to create a super soil amendment that is full of nutritious benefits for the garden because of the heat. I’ve been building compost and adding compost to my soil for more than 10 years now and my garden is filled with micronutrients and amazing energy for all these plants. One of my fall chores every year is to prime my compost bin for the winter season. Below are some of my favorite fall compost layering tips.
Successful composting is all about a balance in the bin between nitrogen and carbon materials. Healthy piles or bins usually have about one-third green (nitrogen) materials and two-thirds brown (carbon) materials. Aerating your compost bin can speed the process of decomposition and is easy to do in the heat of summer. In the winter the temperatures cool down and so does your compost pile. While it is absolutely still possible to compost over winter, the process changes because those of us who live in the garden zone 5b or colder arctic tundra like I do are unable to get out to turn a frozen block of compost material.
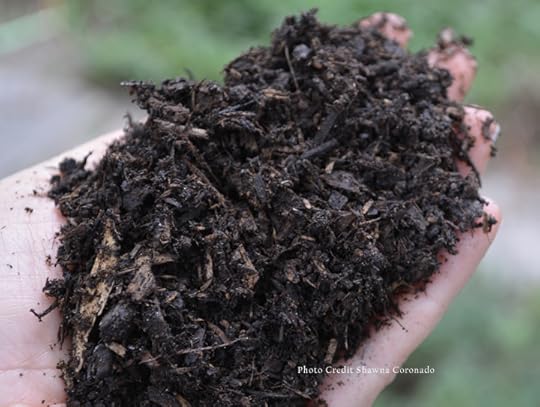
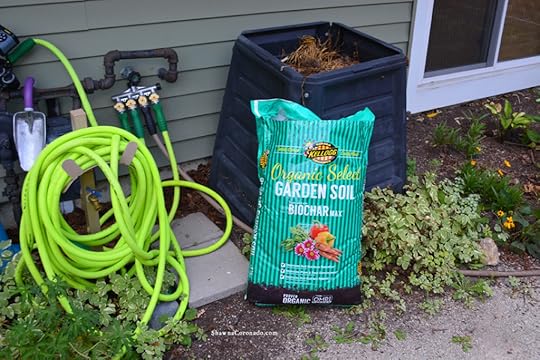
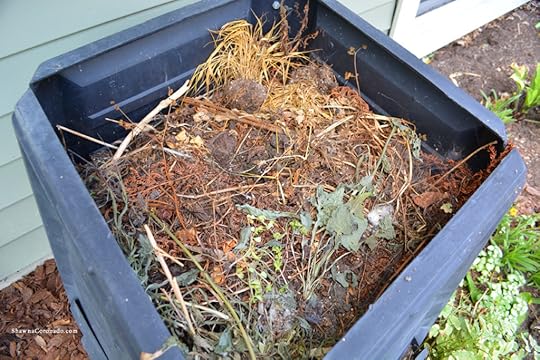
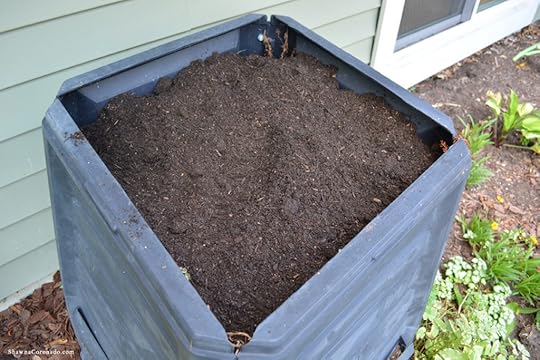
I like to prepare my compost bin for fall and winter by adding the last of the detritus from the garden beds – crushed or chopped if I am able – then turning the bin well. I top the bin off after turning (see photos below) with a layer of bagged soil which has some beneficial ingredients for the pile. Then I water the whole thing in and try to keep the lid off of the bin in order to encourage water and snow to enter the mixture over the winter season. This fall I’m using Kellogg Garden Organic Organic Select Garden Soil Formulated With BiocharMax. Because this bagged garden soil contains bark fines, peat moss, sand, dehydrated poultry litter, and wood biochar (see top photo), it helps add some special magic to the composting process. We all need a little fall magic, don’t we?
3 Awesome Compost Layering Amendments
Leaf Mold – We’ve discussed leaf mold in the past (here’s a LINK to a quick how to). Leaf mold is crushed leaves which have been left outside to decompose and makes a lovely addition to your compost bin.
Grass Clippings – This is a hot nitrogen-rich ingredient and helps encourage compost heat even on cooler days. Be cautious about layering grass clippings on too thickly because too many clippings can create a water proof matted barrier.
Bagged Soil – My favorites include soils that have a mix of manure, biochar, and other ingredients which will help the compost develop as a complex microbial filled creation. Building a complex organic structure helps the compost break down and work well in the garden. This season I used Kellogg Garden Organic Organic Select Garden Soil Formulated With BiocharMax.
Compost is a delightfully rich ingredient to add every spring to your new garden beds. Updating your compost pile and preparing for winter can give those compost piles a little help over the fall and winter season. Special thanks to Kellogg Garden Organics for sponsoring this year’s winter compost bin and fall compost layering bin story. Try adding a few extra layers to kick-start your cold weather composting and Happy Fall Gardening!
The post Fall Compost Layering Tips appeared first on Shawna Coronado.
October 2, 2017
How to Grow Tulip Bulbs

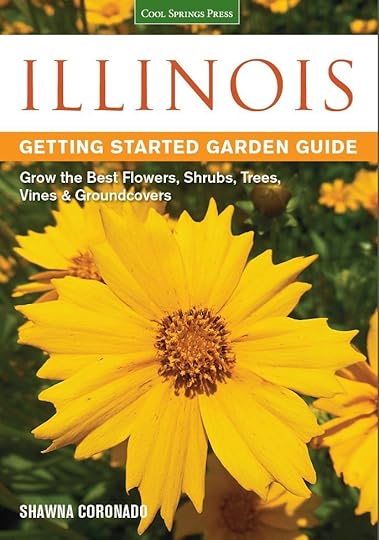
Of all the bulbs, tulips are the most popular of the spring flowers. With unbelievable variety in color, form, and shape, tulip bulbs offer gardeners an interesting landscape solution that blends well with groundcovers, perennials, and annuals alike. Some tulips are excellent for naturalizing, but many need to be replanted every season as they are short-lived. Heavy soils and hot summers make it difficult for tulips to retain their vigor; they prefer cool weather and consistent moisture to flower brilliantly every season [so be sure to check with your local garden center to make sure your zone is good for the variety of tulip you would like to plant]. There are early-, middle-, and late-spring blooming varieties to choose from. Do research when planning the landscape so you can be assured the tulips will bloom when you plan for them to perform. Below is an excerpt on tulip bulbs from the Illinois Getting Started Garden Guide.
Botanical name — Tulipa spp. and hybrids
Bloom Period and Seasonal Color — Spring; red, yellow, white, pink, peach, orange, purple, white, striped, blended, and variegated flowers
Mature Height × Spread — 4 to 36 inches × 6 to 12 inches
Added Benefits – Attracts Beneficial Insects
Sun Requirements – Sun, Part Sun
When, Where, and How to Plant – Drainage is the most important consideration for tulip planting. Plant tulips in a fertile, organically amended soil in a very well-drained bed. Standing water will drown the bulbs. Plant about two weeks before the ground freezes hard, usually after the first frost. Mix organic bulb fertilizer in the planting holes, but do not over fertilize as that can overproduce green stems and lessen flower development. Plant the bulbs 6 inches deep and about 8 inches apart, pointy end up.
Advice and Care – Deadhead the spent flower heads, but leave the foliage on the plants until it turns brown and withers to encourage the energy for future growth to go back to the bulb. After flowers fade in the spring, fertilize with an organic fertilizer. Not too much water! Plant bulbs in cages or use chicken wire to surround the bulbs if rabbits, squirrels, or voles become an issue. Because tulips often decrease production within one to two years, particularly a zone where hot summers have an effect on tulip performance, some gardeners dig up the bulbs after their initial bloom, refrigerate them for the summer to keep them cool, then replanted again in the fall.
Companion Planting and Design – When tulips leaves begin to fade and look gnarly in the garden, plant foliage-rich annuals around the spent leaves to hide them. Tulips work perfectly with other spring bulbs; try orange, red, and yellow tulips mixed with white daffodils to make a bold statement.
Tulip bulbs are terrific blooming flowers. Want more advice on plants, particularly varieties that do well in the Midwest, please get my book – the Illinois Getting Started Garden Guide.
The post How to Grow Tulip Bulbs appeared first on Shawna Coronado.
September 18, 2017
Tomato Tuna Salad Recipe

Tuna salad is my all-time-favorite dish from my childhood as it reminds me of my grandmother. She used to make tuna salad for me for Sunday dinner in my hometown, Kokomo, Indiana, because she knew it was my favorite. This tomato tuna salad is a modern update from my memory and adds tomatoes and basil for a flavorful dish that will blow your socks off with freshness. I’m using deliciously yummy tomatoes I grew in my very own garden. With only a few weeks left of Indian Summer, I want to get the most from my remaining garden vegetables. This recipe is a delicious contribution to your late summer menu and is super easy to make.
Tomato Tuna Salad Recipe Print Prep time 10 mins Total time 10 mins Tuna salad is my all-time-favorite dish from my childhood as it reminds me of my grandmother. She used to make tuna salad for me because she knew it was my favorite. This tomato tuna salad is a modern update from my memory and adds tomatoes and basil for a flavorful dish that will blow your socks off with freshness. Author: Shawna Coronado at www.shawnacoronado.com Recipe type: Salad Serves: 2 servings Ingredients 7 oz can of tuna ¼ cup soy-free mayo Salt & pepper to taste 3 tomatoes, sliced or diced 1 tablespoon Thai basil, sliced thin Instructions Combine tuna and mayo together. Add salt and pepper to taste. Place tuna and mayo combination in center of plate. Surround tuna mixture with tomatoes and sprinkle with sliced basil. 3.4.3177 
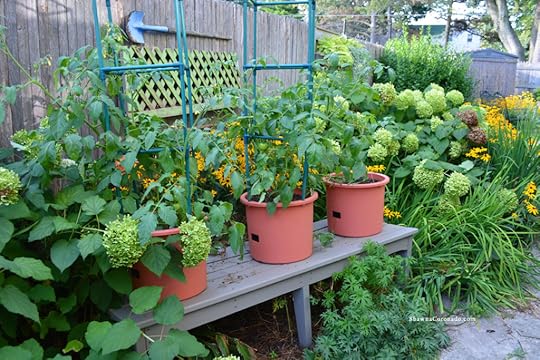
 How I Grew the Tomatoes –
These tomatoes were grown in my new Hydrofarm GCTB Tomato Barrel with Four Foot Tower. I used 2 parts Kellogg Garden Organics All Natural Raised Bed & Potting Mix then mixed in 1 part rotted composted manure, and a cup of worm castings to every container. Once I had the soil all ready, I followed the directions for the Kellogg Garden Organics Tomato, Vegetable & Herb Fertilizer and added in an appropriate amount of fertilizer for every tomato barrel. This fertilizer is a granular fertilizer for all your vegetable and herb gardening needs. This special formula is an organic mix of beneficial microbes, and mycorrhizae, a beneficial fungus that works with a plant’s root system to help it effectively take up nutrients from the soil. After these steps, I planted the tomatoes in the container and watered them in well.
Kellogg Garden Organics All Natural Raised Bed & Potting Mix is filled with all kinds of good ingredients; Processed Forest Products, Recycled Forest Products, Arbor Fines, Peat Humus or Compost, Horticultural Perlite, Coir, Composted Poultry Manure, Sphagnum Peat Moss, Sand, Ground Dolomitic Limestone (pH-adjuster), Gypsum, Worm Castings, Bat Guano, Kelp Meal, and Organic Fertilizer. All great gardening starts with the soil and my tomatoes had a definite advantage with the fantastic soil combination I used in my containers for this tomato adventure.
Tomato tuna salad is just the beginning of all the delicious recipes you can create by growing your own tomatoes. Plan your raised beds and container gardens well for the upcoming seasons by using organic soil such as Kellogg Garden Organics so that you are consuming less toxic chemicals and growing healthier plants.
The post Tomato Tuna Salad Recipe appeared first on Shawna Coronado.
September 13, 2017
How to Build a Fall Elevated Herb Garden
Fall is a time when a lot of our gardens are winding down. I’ve cleaned up the beds and have stopped watering my Chicagoland Zone 5 garden beyond a few elevated beds and container gardens. I was thinking of slowing down for the season because the hosta leaves are browning and my garden is signaling me that it is time for a rest. My friends at the VegTrug company called me this week and challenged me to plant a fall herb garden in the Herb Garden VegTrug. Imagine all the potential for flavoring up my favorite fall soups and dishes with fresh herbs? Who says fall is the end of the season? Let’s speed’er up and bring on the flavor.
 How to Plant Herbs
Planting herbs is pretty simple – get the soil right and the whole garden will be growing brilliantly. My secret soil formula is one part potting soil, one part compost, and one part rotted manure. Throw in a handful of worm castings while humming a round of “Parsley, Sage, Rosemary, and Thyme” and you’ve got some serious magic working for your herbs.
Dig a hole, add organic fertilizer (following package directions), then plant the herb. Water in well and lickety-split you will have some beautiful deliciousness just in time for your favorite fall cooking adventures. My herb selections for this garden are basil, parsley, lemon thyme, mint, curry, rosemary, thyme, and silver sage.
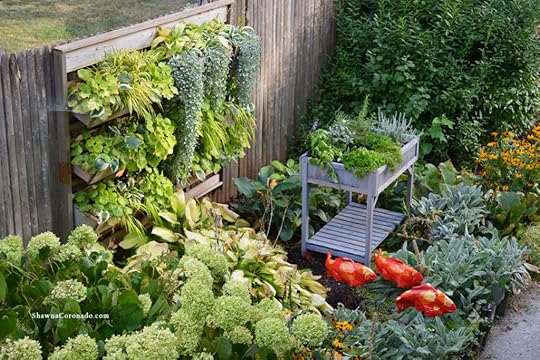
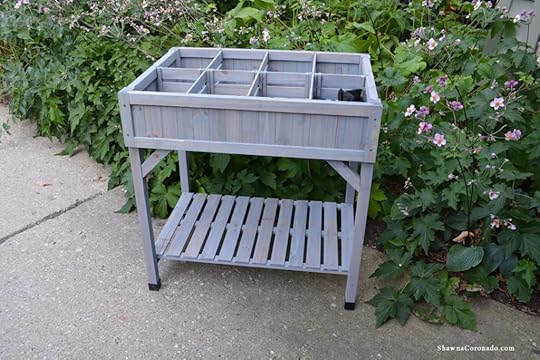
Product Review and a Touch of Silver
Building an herb garden can be a true delight and this elevated Herb Garden planter bed by VegTrug makes it easier to do because there is no bending when you plant. You will need a screwdriver or a battery-powered screw tool. My hope is that they develop a unit in the future that requires no screws and just locks together, that would make it even easier for someone with arthritis or another condition to assemble the bed. I assembled the entire unit in less than 20 minutes after I received it in the mail.
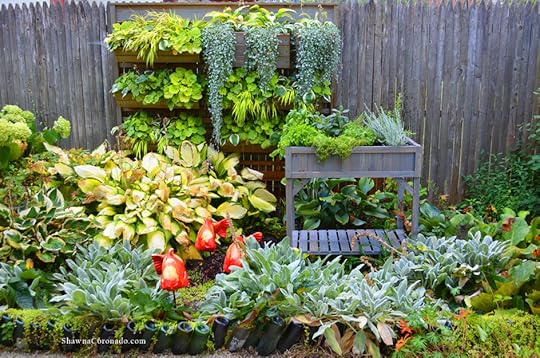
I LOVE the gray color of the elevated bed and placed it in an unlikely area in front of my living wall garden and behind a large group of Lamb’s Ears because both the fuzzy Lamb’s Ears and plants in the living wall unit are silver toned. Curry and sage are also silver, so the combo gives a nice SILVER PUNCH to the side garden for fall. Building a fall elevated herb garden is a great idea to help you extend your herb season. Be sure to cover the herbs with a row cover or sheet for the first few frosts in hopes of extending the season even further. Happy Fall Gardening!
The post How to Build a Fall Elevated Herb Garden appeared first on Shawna Coronado.