Shawna Coronado's Blog, page 23
May 1, 2016
Best Succulent Container Garden Soil Mix
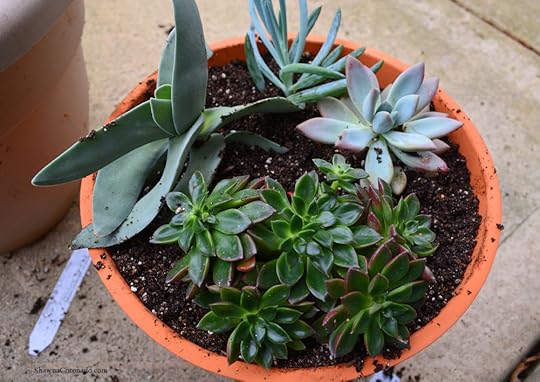
Succulent garden soil mix is a magical thing that have mystified container gardeners through the ages. On a recent trip to the San Francisco Flower and Garden Show I was able to meet up with Debra Lee Baldwin, who is world renowned as the Succulent Garden Queen. I went to all her workshops and met with her personally to get the best advice I possibly could on a fantastic soil mix. One of the best things about planting succulents is that they are far more sustainable than other plants due to their drought tolerant nature – definitely a win for gardeners.
Debra Baldwin’s Succulent Soil Mix Recipe for Container Gardens
Most Succulents –
Half Pumice
Half Potting Soil
Fine Leaved Succulents –
40% Pumice
60% Potting Soil

 Above you see a photo of me with the famous garden writers Susan Morrison (middle) and Debra Lee Baldwin (right) having cocktails post garden event – please link through and follow them as they are filled with amazing garden knowledge and advice. While I was at the show I was faced with massive booths filled with succulents to buy and could not decide which plant would the best choice. I grabbed Dan Heims’ arm and drug him to a succulent seller to help sort me out. If Debra is the Succulent Queen, Dan Heims of Terra Nova Nurseries (right) is the Plant Collecting King. He recommended three succulents that he considered unique and “must-have’s” for the season; Crassula falcata ‘Scarlet Paint Brush’, Graptoveria ‘Opalina’, and Taciveria ‘Victor Reiter’ (see below).

Once I got back to my home near Chicago in March, I had a bunch of succulents and could not plant them outdoors yet. Our planting season begins once the last of the frosts hit, which is usually sometime in mid to late May. I needed to get the succulents into a temporary container until I could find a more permanent and creatively designed solution.
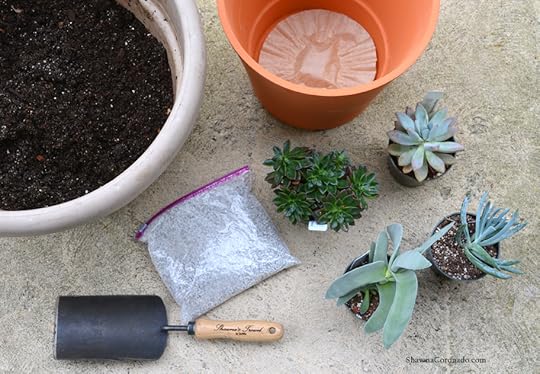
Debra gave me a bag of pumice. Using her super easy planting formula, I pulled the last of the cactus soil I made from last seasons Succulent Wok Project and combined it with her pumice with a half and half ratio. Placing an unbleached coffee filter over the container hole at the base of the pot, I filled the soil. Very carefully I placed the succulents in the container (see top photo). According to Debra, the succulent garden garden soil mix is so easy that every gardener should try it. When summer comes and I find the perfect container or planting bed for the succulents, I’ll show you my final results. Happy Succulent Gardening!

The post Best Succulent Container Garden Soil Mix appeared first on Shawna Coronado.


April 27, 2016
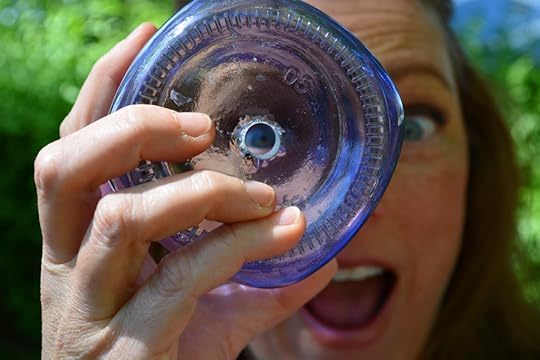
Stainless Steel Straws Versus Plastic Straws
Stainless steel straws are better for the environment since they are reused and not thrown away in landfills and the ocean. There are a host of reasons why, but the bottom line is that we are producing over 500 million straws annually, yet very few of these straws are ever recycled because they are made of polypropylene which is an oil-based product that does not biodegrade. This type of plastic “photo degrades”, which means that it breaks apart into smaller and smaller hunks until it becomes small enough for fish to eat. According to ChooseToBeStrawFree.com, straws are among the top 10 items found in marine debris. 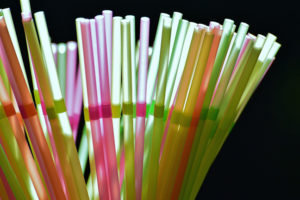
In a 2011 study done by Scripps Institute of Oceanography, the incidence of plastic in fish stomachs was 9.2% of what they collected. According to findings, “The ingestion rate of plastic debris by mesopelagic fishes in the North Pacific is estimated to be from 12000 to 24000 tons yr.” We are eating the fish that have these plastic pieces in them which is contributing to the bioaccumulation of plastics in humans. What causes cancer? We don’t know for the most part, yet I have no interest in being the human that ingests these toxins which might contribute. It’s strange to imagine that such a tiny bit of plastic could harm us, but these imaginings can contribute to the 500 million dollar question: “Are plastics killing us?”
Where to find Stainless Steel Straws online – ECOJARZ STRAWS and ACESSORIES LINK.
And so there I was at a Mother Earth News Fair event standing at my publishers booth staring across the aisle contemplating that very question while I watched the EcoJarz team selling stainless steel straws like they were going out of style. There were long lines of people waiting to buy the lids and straws. I walked over to talk with them about the plastic situation in the environment and they explained their product in simple terms, “No: BPA, phthalates, or chemical leach. More glass and stainless.” That’s it. Simple. I could get rid of the plastic straws we use at home and start something new right there. Washing the straws is made super-easy by the little brushes EcoJarz sells with the straws. I asked them if they would send out some samples to review and I fell in love with them as they are easy to use and definitely help me feel like I am a step closer to making a difference for the environment as well as my family’s health.
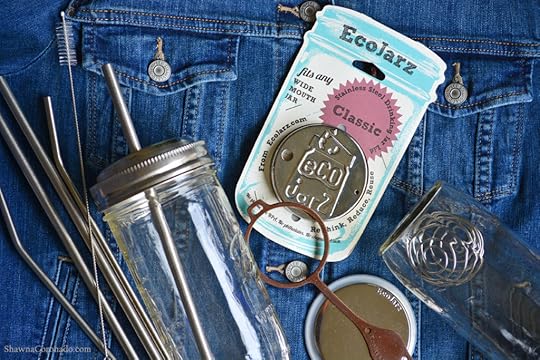
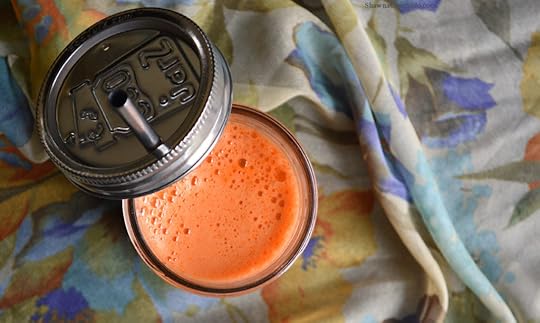
Ecojarz recommends using the 24 ounce mason jars which are for green bean or asparagus canning as drink glasses (see my carrot and ginger juice in the top photo). Take their super cool drinking lids, add in their stainless steel straws, pour your drink in the mason jar, and screw on the lid. It’s that easy. Stop using those plastic straws and set yourself up with a more sustainable drinking system at home that has stainless steel straws and makes a difference
These stainless steel straws and Ecojarz lids have been given to me at no cost to review, but I want to be clear that they have not paid me and my opinion is not swayed because of their giving me product – after reviewing the products I have found them easy to use and a better solution for the environment – this is my own opinion. Thanks EcoJarz!
The post Stainless Steel Straws Versus Plastic Straws appeared first on Shawna Coronado.
April 25, 2016
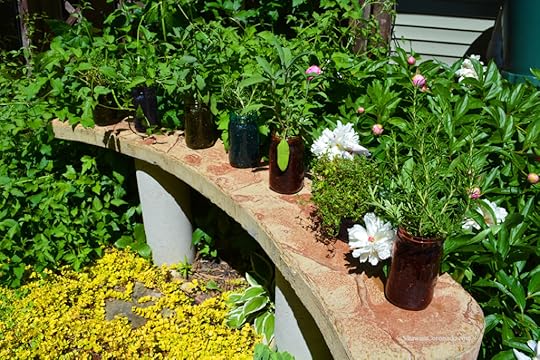
How To Plant Herbs in a Mason Jar Garden
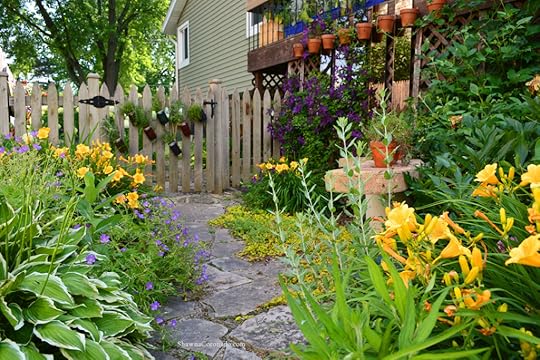
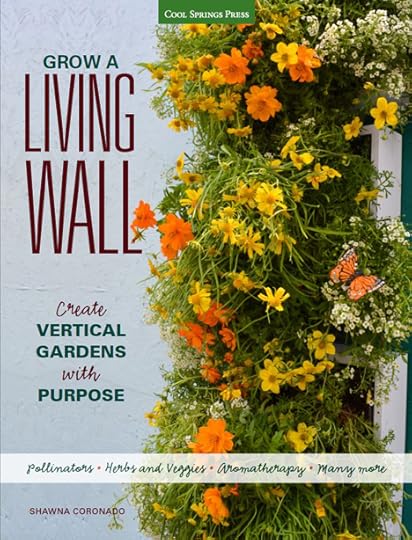 One of my favorite things to do in the garden is create a bit of whimsy and fun with my container gardens. Hacking a mason jar garden is easy to do and works for hanging living wall gardens (see my book Grow a Living Wall right) as well as a small traditional container garden. Mason jars of any kind or style can be used, it is preferable to find a larger sized jar in order to have more soil in the container garden to support the growth of the plants.
To enable strong drainage, it is necessary to carefully drill holes in the jars. Then be sure to utilize an organic, moisture retentive soil mix in order to help the plants hold and retain moisture in a tight-rooted growing situation. My favorite container soil mix is 1 part organic soil with worm castings, 1 part rotted manure, and 1 part compost. Plant up the mason jars using a spoon to help back fill the soil within the container. Special thanks to Jung Seeds for supplying the beautiful GMO-free herb plants for my test garden – they worked well in the mason jar container gardens.
Tools needed –
Mason jars
Drill
Drillbit – ½” diamond tip hole drill bit
Container soil
Organic Fertilizer
Herb plants or seeds such as basil, rosemary, and winter thyme
Trowel or spoon
Project How To –
Drill a hole in the bottom of the mason jars using the ½” diamond tip hole drill bit.
Measure in an appropriate amount of organic fertilizer into the soil; mix well.
Fill mason jars with planting soil.
Plant scented herbs and flowers in the jars.
Water well.
The post How To Plant Herbs in a Mason Jar Garden appeared first on Shawna Coronado.
April 18, 2016
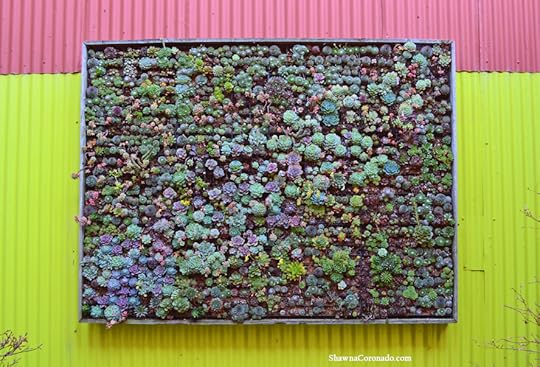
Flora Grubb Garden Center Tour
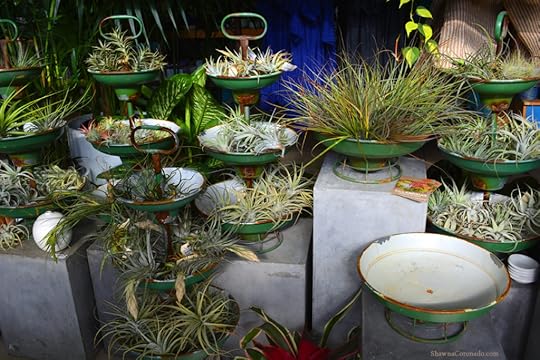
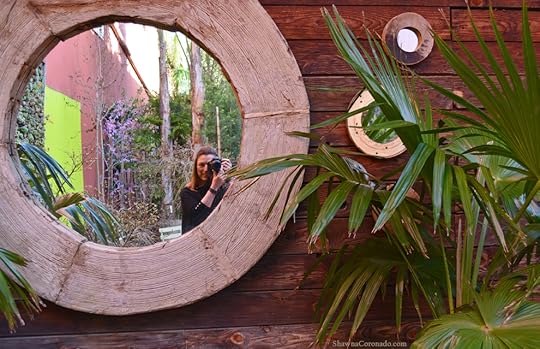
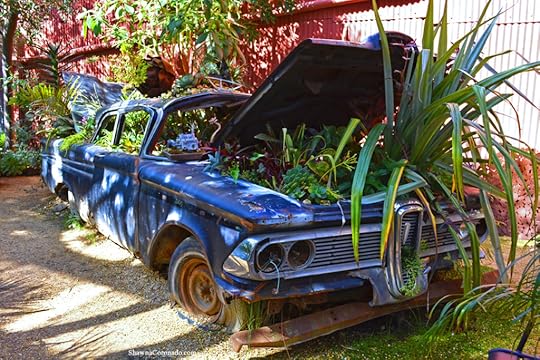
One of my garden bucket list adventures has been to visit the very creative Flora Grubb Garden Center and meet Flora Grubb in person. During a recent trip to California for the San Francisco Flower and Garden Show, I spent a morning with Flora in her astounding San Francisco garden shop – it was everything I dreamed it would be.
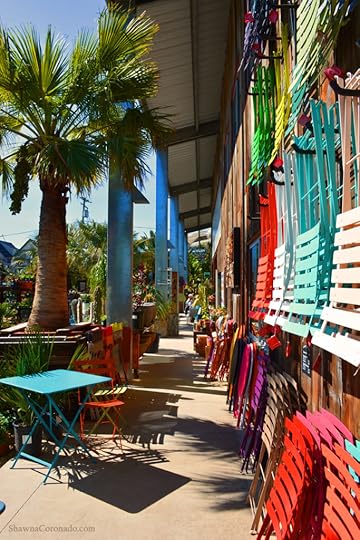
Flora’s personal message is one of kindness for her neighbors and concern for living well in a hyper local shopping environment. She says, “The practice of growing anything and connecting with a living thing is a meaningful experience, we want to celebrate that experience and share it with our community.” Her style, instead of simply planting and growing plants, is more about creating places “to be”. Designing an experiential place to sit and relax on your balcony or in your garden where you can live mindfully in the moment instead of forever rushing to the next stressful destination. This is seen in the sitting areas around her shop filled with Fermob bistro sets and seating areas – she wants to teach locals how to find rest and beauty.
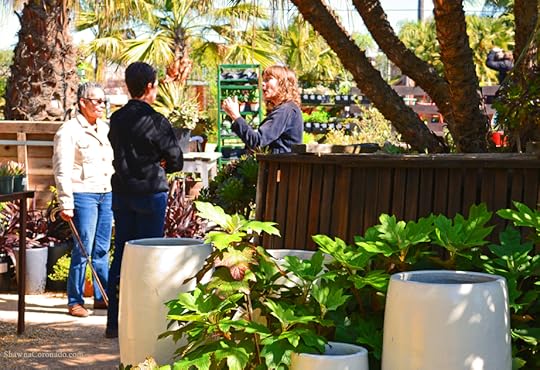
With a garden center which focuses on the hyper local community, Flora is concerned about her neighbors (Flora is working on the right in the above photo). “We exist in a region that has an unprecedented income inequality,” says Flora. “Therefore, having Flora Grubb Gardens help schools and neighborhood non-profits serving vulnerable local communities is something I am very interested in pursuing. We often work to hire locals and the children of employees in order to build an emotionally sound work structure that encourages job training as well as emotional and financial stability within the families that live in surrounding community.”
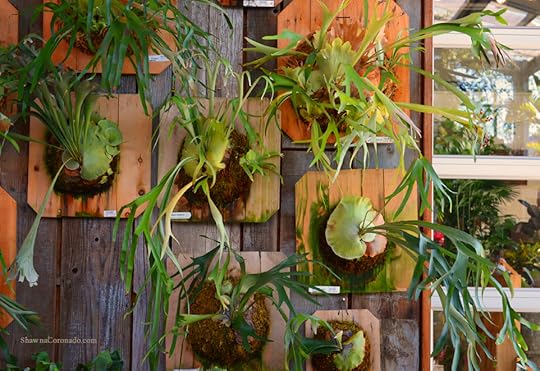
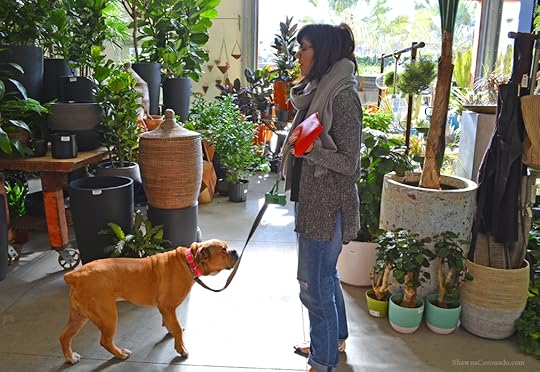
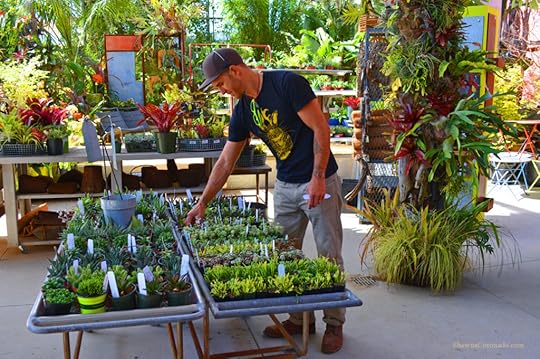
As you can see by the photo tour of her garden center, Flora Grubb Gardens is also filled with some amazingly well-versed employees and quality plants. Palms, tillandsias, staghorn ferns, and succulents abound with a strong regional herb and vegetable selection. Get yourself to Flora Grubb Gardens when you are in town and find a creative and interesting solution for almost any growing scenario. Have a coffee from her shop (below), walk for hours, and fall in love with this heavenly niche like I did.

The post Flora Grubb Garden Center Tour appeared first on Shawna Coronado.
April 16, 2016
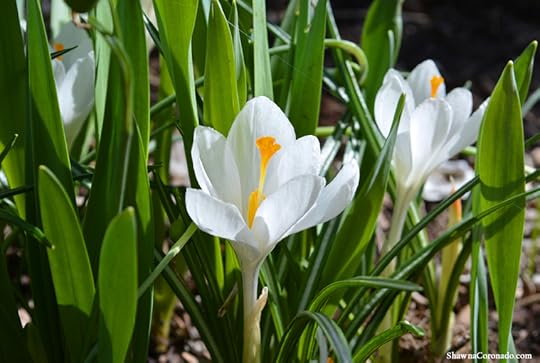
Beautiful Crocus Jeanne d Arc Flowers
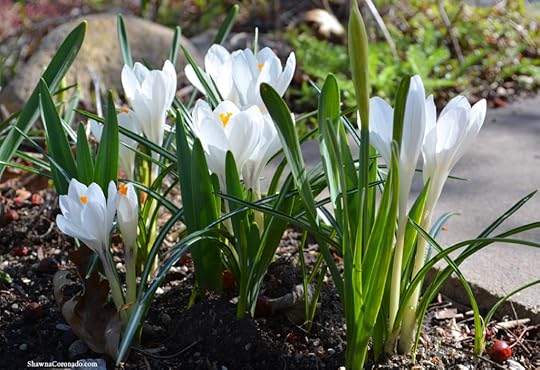
Crocus vernus Jeanne d’Arc flowers are blooming in my garden today and they are glorious! Only four to six inches high, these happy little flowers make a lovely statement when planted around pathways in masses. Early blooming, these delights will shoot up just as the first daffodils are opening. In my zone 5b beds they have bloomed for several weeks; white flowers contrasting nicely with their thin white-striped grassy leaf.
This is the first season I have grown the Jeanne d’Arc Crocus in my test gardens with special thanks to Jung Seed who sent the corms out last fall as an experiment. This is a tough little crocus and will naturalize as the years go on. While squirrels sometimes dig this corm up, most other animals and pests leave them alone.
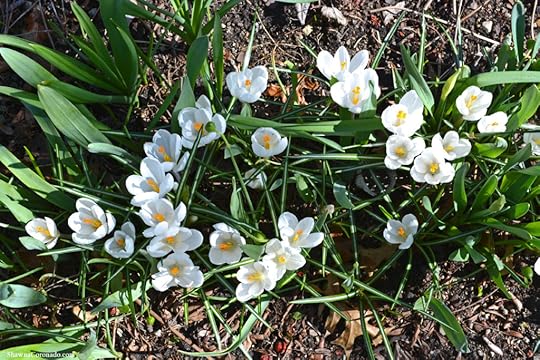
How To Grow Crocus vernus Jeanne d’Arc
To grow Crocus vernus Jeanne d’Arc, simply order the corms and plant in a well draining soil in the late fall. These corms do not like wet conditions, so consider what will be planted near them after blooming so you can keep a relatively dry environment for the corms. You can see by all the various foliage in the photo below, that I have mixed them in with daffodils and snowdrops for successive seasonal blooming. If you have clay soil, be sure to amend during bulb planting with lots of organic matter. Plant between two and three inches deep in random groupings. Once the blooms dry up, it will take about six weeks until the foliage withers. Once foliage turns yellow and dries, you can then mow the area or gently cut the grassy foliage down.
The post Beautiful Crocus Jeanne d Arc Flowers appeared first on Shawna Coronado.
April 13, 2016
See How the Biltmore Estate Grows Micro Greens

One of the amazing experiences I had this week was meeting Eli Herman, the perpetually smiling Field-to-Table Manager at the Biltmore Estate in Asheville, North Carolina on a sunny morning. Driving out one of the winding and beautiful roads on the Biltmore property, we discovered Eli on a cool, quiet, morning bent over a row of broccoli seedlings with a spade in hand. He and his assistant had a rhythm going of dig-dig-plop, dig-dig-plop, dig-dig-plop and when we pulled up, he straightened with the big stretch back that all gardeners recognize as relief from our passion.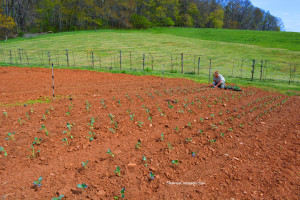
Eli has worked on the Biltmore Estate for most of his life, and his father before him, focused on tending and growing hyper-local foods for the visitors that come to the property. Broccoli was being planted that day (right), but many other vegetables would be shared out among the various kitchens throughout the summer.
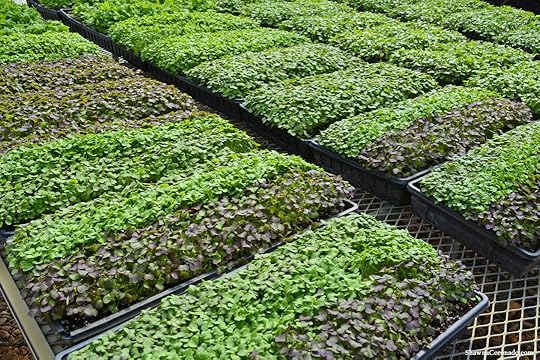
One delicious crop Eli grows is micro-greens – no bare hand is permitted to touch the plants as they go fresh from the nursery directly to the kitchens without being soaked in water. Differing from sprouts, which are consumed root and all, micro greens are the top growth of various leafy plants which are immature. Common micro green plants include herbs, salad greens, beets, broccoli, radish, chia, and sunflower. Eli and his team grow hundreds of pounds of micro greens annually – you can grow them at home as well.
How to Grow Micro Greens
Order your favorite plant seeds for micro greens
In a shallow container with drainage, place two inches of moistened soil
Follow package planting directions to plant the seeds in soil
Place in a sunny window and keep lightly moist but not soaking wet (I prefer a gentle squirt bottle to mist)
Once leaves develop, harvest with scissors in two to three weeks

After a very full day of touring and walking the gardens at the Biltmore Estate, I sat down at a bar on property called the “Village Social” and was presented with the most delicious red snapper and Swiss chard with micro greens dancing across the top of the dish. What a fantastic end to a perfect day meeting Eli in the fields. By seeing his micro greens on my food after I saw them in his nursery I felt that, if only for a day, I was a part of the Biltmore family.
The post See How the Biltmore Estate Grows Micro Greens appeared first on Shawna Coronado.
April 11, 2016
Anti-Inflammatory Ginger Tea for Cold Season
Here we are starting the annual spring cold season. This is the perfect time to learn how to make a hot ginger tea which is helpful if you have cold or allergy symptoms and also perfect if you have rheumatoid arthritis, osteoarthritis, or another chronic pain condition which requires a more anti-inflammatory diet. Consuming ginger regularly has been known to decrease inflammation. Therefore, having fresh ginger in your diet regularly can truly help those suffering with certain types of chronic pain triggered by inflammation.
Ginger has many benefits; it reduces tummy upset, helps boost immunity, and reduces inflammation. One of my favorite afternoon treats is a cup of iced Tazo Green Ginger Tea steeped with freshly sliced ginger. Below is the easy recipe and a video (above) to watch which shows you my fool proof ginger peel hack. (If you can’t see the video, please click through on the blog title to go to the website.) Make some ginger tea today and kick off the spring season with a tasty anti-inflammatory treat.
Anti-Inflammatory Ginger Tea 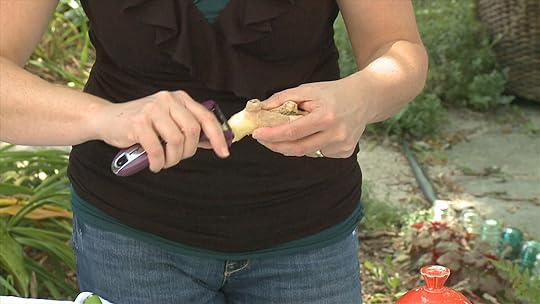 Print Addition of fresh ginger to hot tea. Author: Shawna Coronado at www.shawnacoronado.com Recipe type: Tea Ingredients Tazo Green Ginger Tea bags (or your personal favorite) Fresh ginger, peeled and sliced Hot water Instructions Place tea bags and freshly sliced ginger into teapot. Pour hot water over the tea bags and sliced ginger. Serve hot or iced. 3.4.3177
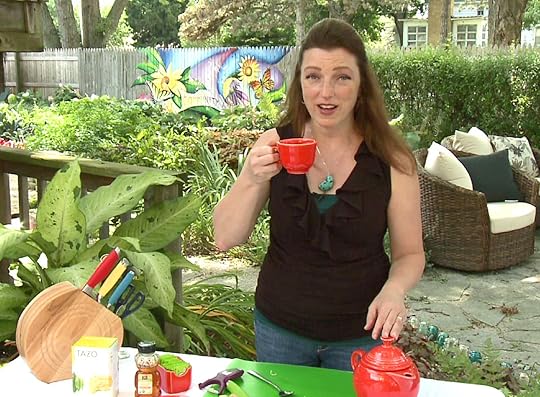
Special thank you to the Homer Laughlin Company for supplying the bold poppy Fiestaware teapot, cup, and sugar packet caddy that I served the hot ginger tea in and the lovely cutlery set I used in the garden this season for all my food videos.
The post Anti-Inflammatory Ginger Tea for Cold Season appeared first on Shawna Coronado.
April 4, 2016
Arthritis Solution for Moving Heavy Things
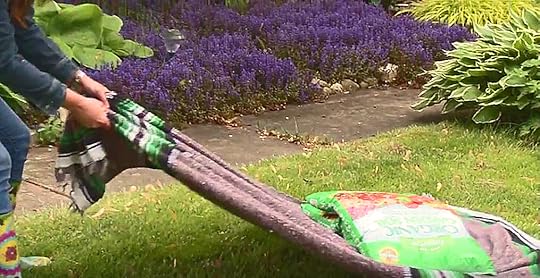
Here is a hack for moving heavy things if you suffer from arthritis, rheumatoid arthritis, osteoarthritis, or any number of other conditions. Whether you are outside in the garden or inside your home, it can sometimes be difficult for you when moving heavy things. Watch the video above and you will see how I have learned to move heavier items without hurting myself — it involves spreading the weight of the item out by pulling it on a tarp or cloth.
Be very careful when you are lifting the heavy items on to the tarp or blanket — holding the heavy item very closely to your body and carefully raising and lowering the item when needed. If you cannot grip with your hands, wrap the loose end of the blanket or tarp around a broom stick and use your arm to pull the broom stick. No matter what exercise you do, be sure to get your doctor’s approval before attempting heavier lifting and moving heavy things with caution in mind.
The post Arthritis Solution for Moving Heavy Things appeared first on Shawna Coronado.
March 28, 2016
Can LED Lights Improve Mood?

Without a doubt, the fastest way to deflate your day is to be stabbed harshly and uncontrollably with osteoarthritis pain. Maintaining a positive outlook and keeping your mood lifted becomes increasingly difficult when faced with chronic pain. When I was diagnosed last season I decided I would #nevergiveup and conducted several experiments to see what the most effective way is to improve mood and help my spinal osteoarthritis pain. Here’s what I did to help improve chronic pain; switched to an anti-inflammatory diet, walked one hour daily, gardened therapeutically, and increased the lumin output of the lights in my Chicagoland home.
Dr. David Edelberg, M.D., confirms in his book, The Triple Whammy Cure that when we increase serotonin levels, we are better at tolerating all types of physical and emotional stress. Sunlight exposure is the number one drug-free way our bodies create additional serotonin according to Dr. Edelberg, but exercise, diet, and laughter can also stimulate increased levels of serotonin. With Dr. Edelberg’s theory in mind, I increased exercise, switched up my diet, and experimented with light. Sunlight is best, of course, but when we live in the light-deprived Northern part of the country we are more light-deprived than most, therefore any type of light exposure in the daylight range will give a much needed emotional boost.
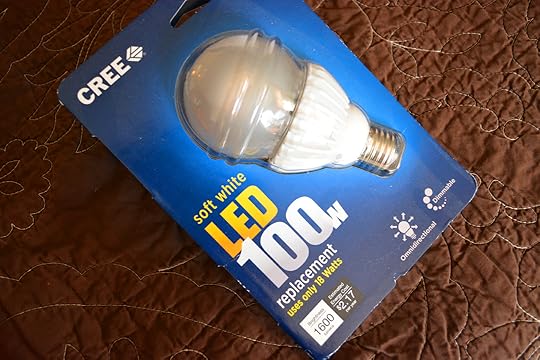
When I was diagnosed I contacted CREE Light Bulbs to see if they would help me with a non-scientific experiment; if we switched out the lower lumen Compact Fluorescent Bulbs (CFL) in my home with the much higher lumen CREE LED bulbs would it truly increase the brightness exposure level and would it help me along with my other therapy to improve my mood in order to assist with chronic pain? LED’s are better for the environment because they do not have toxic mercury in their structure. CREE sent bulbs out for my kitchen (below), living room (top), and bedroom and I tested my theory.
My goal was to conduct the non-scientific experiment for more than six months over fall and winter and see what would happen. I switched the old mercury-filled CFL’s out and immediately noticed a huge increase in the light exposure in the areas of the house I frequent the most; almost double what the exposure was before. I also made a huge effort to get outside as often as I could on sunny days for even more light exposure. Normally, in the cold months of December, January, and February I suffer from a condition known as Seasonal Affective Disorder (S.A.D.). During these months I often feel depressed and sad, anxious, unable to cope, and I suffer from insomnia. This year, for the first time in 20 years, I did not suffer from S.A.D. – I’m sure it was a combination of better diet, exercise, and increased light exposure.
My pain is down by 75% without addictive prescription pain medications and now I have far more good days than bad thanks to diet, exercise, and light exposure. This combination has helped me survive winter in a positive way. What does this experiment mean for you and your chronic pain? It could mean a significant lifestyle change for the better. My suggestion is to conduct your own experiment and see what works best. Switch to an anti-inflammatory diet with your doctor and nutritionist’s guidance, move your body as much as possible to get exercise, and expose yourself to light in the daylight range as often as possible. Conduct the experiment for at least six months and document the results. You are the only person who can help make a difference for yourself so #nevergiveup and get up every morning with the mindset that you are going to make an effort.

The post Can LED Lights Improve Mood? appeared first on Shawna Coronado.
March 23, 2016
Crocus Chrysanthus Gypsy Girl Blooming This Week
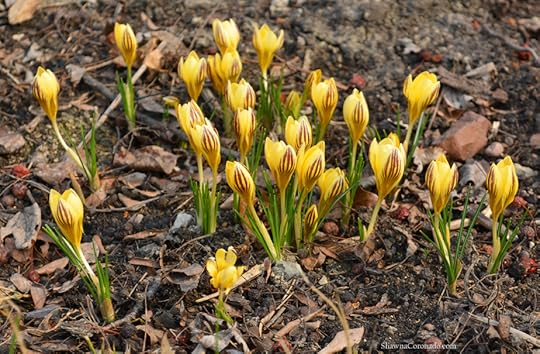
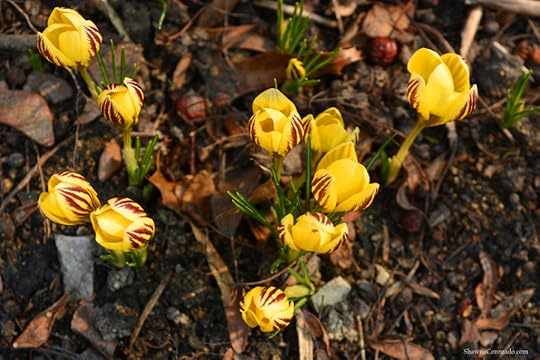 Madly in love with the Crocus chrysanthus ‘Gypsy Girl’ bulbs blooming their little heads off in my zone 5 garden this week. Bold, yellow, and happy – these early blooming snow crocus defy winter (and the first day of spring) with a laugh and a smile. These bulbs were sent to me from Jung Seed last season and I adore their joyous little faces and maroon flames up the sides of the flower. Because they are an early snow crocus, they have bloomed before nearly everything else in the beds.
Gypsy Girl loves poor, well-drained soils, and will handle alkaline soils well. Definitely a must have in garden zones 4 to 8. Write this variety down in your garden notes and look for these bulbs to appear in the fall catalogs end of season. Special thanks to Jung Seed for sending these adorable crocus out to my test garden – I adore them.
The post Crocus Chrysanthus Gypsy Girl Blooming This Week appeared first on Shawna Coronado.