Shawna Coronado's Blog, page 10
May 30, 2018
What are Beneficial Insects
 Beneficial Insects
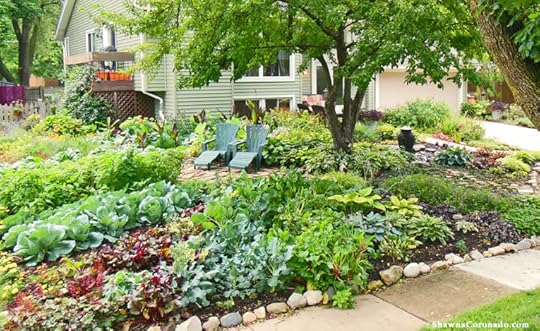
Beneficial insects help you by pollinating or controlling pests in your garden. They can hunt and kill bad bugs for you, for example. They are saving you the hassle of having to pollinate by hand or take care of pests yourself, thereby enabling your garden to grow stronger as Mother Nature intended. We all need beneficial insects in our gardens.
The trick to a smart garden filled with beneficial insects is to first attract beneficial insects with companion plants and living conditions that the insects might like. If you see that a group of bugs is eating one of your plants, do not spray ALL the bugs willy-nilly with a pest control agent. First identify the specific bug that is causing the damage you are concerned about and determine if it is a bad bug or a beneficial bug. Then target that specific pest. This enables the beneficial insects to go on living the high life in your organic garden beds, which in turn saves you a lot of work.
List of 4 Fantastically Beneficial Insects
Below is a list of four wonderfully beneficial insects. Practicing Integrated Pest Management utilizing beneficial insects takes a bit of patience because sometimes it takes a while for a pest to be attacked by a beneficial.
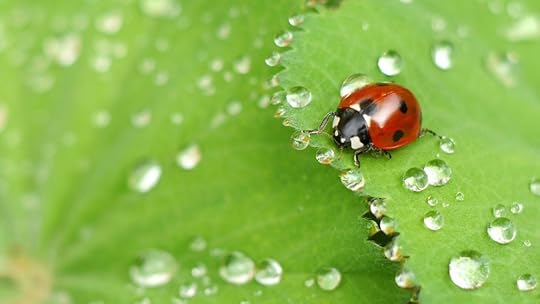
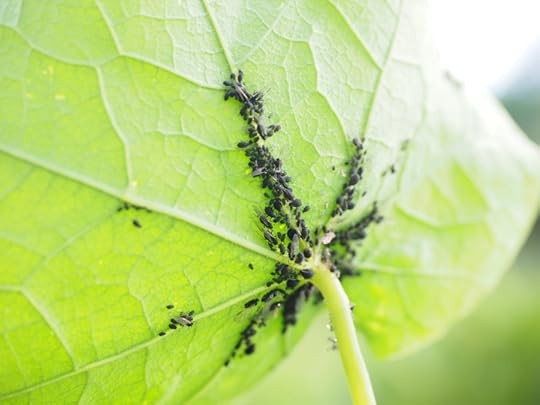
Ladybugs – While there are several different varieties of ladybugs across the country, the one thing they all have in common is that they love plant lice – also known as aphids. Soft bodied insects do not stand a chance against the voracious and beautifully deadly ladybug. Plants such as fennel, dill, yarrow, butterfly weed, marigold, and scented geraniums seem to attract ladybugs.
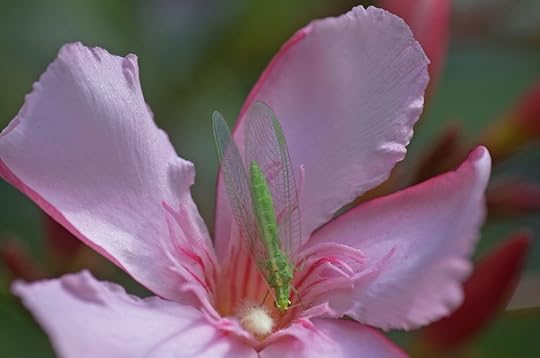
Lacewings – Feed on all types of insects including aphids, thrips, mites, caterpillars, scales, and mealybugs. Lacewings larvae are sometimes called aphid lions because they consume such large quantities of aphids. In my experience, a great companion plant to bring in lacewings is sweet alyssum.
Spiders – While spiders are not attracted with the typical flowering companion plant, they do love straw mulch and perennial plants and shrubs that will support their spider webs. Some spiders use webs and others literally hunt their prey down and capture their food. Spiders survive by consuming their prey after they catch them. While spiders are necessary for keeping the insect population down, they typically kill indiscriminately, taking both good bugs and bad bugs.
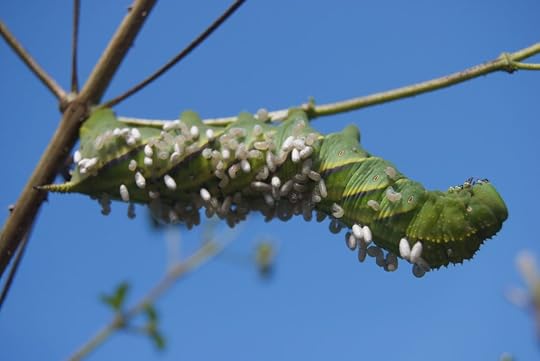
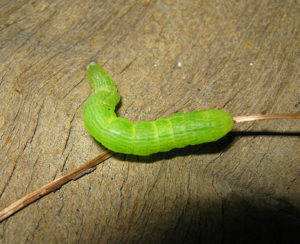
Parasitic Wasps – Predatory wasps lay their eggs on the backs of caterpillars, larvae, and other creatures. If you see a caterpillar with a lot of white capsules on its back, leave it alone – they’re eggs about to hatch. This process kills the caterpillar and births more wasps. These wasps control moth, beetle, and fly larvae populations and are also fine pollinators. Plants that attract wasps include coriander, fennel, sweet alyssum, parsley, tansy, yarrow, and zinnia.
What To Use Against the Non-Beneficial Bugs?
If you have identified that the insects in your garden are NOT beneficial and they are waging war against your herb and vegetable garden, then it might be prudent to take the next step. I am partnering with McLaughlin Gormley King Insect Solutions (MGK) in my garden this season for organic pest control. Azera Gardening for organic gardens is an OMRI listed pesticide product that you can use in your organic garden beds. Azera quickly knocks down hard-to-kill insects including aphids, beetles, caterpillars, whiteflies, and leafminers. Apply the product as soon as an infestation is noticed, when target insects are active, making direct contact to the bug with the application.
Special thanks to with McLaughlin Gormley King Insect Solutions (MGK) for sending an OMRI® listed botanical insecticides derived from chrysanthemums Azera Gardening at no cost so that I can show you how to get rid of bad bugs and keep beneficial insects in the organic garden. Get product at www.MGK.com.
The post What are Beneficial Insects appeared first on Shawna Coronado.


May 14, 2018
How I Built a Till-Free Vegetable Garden
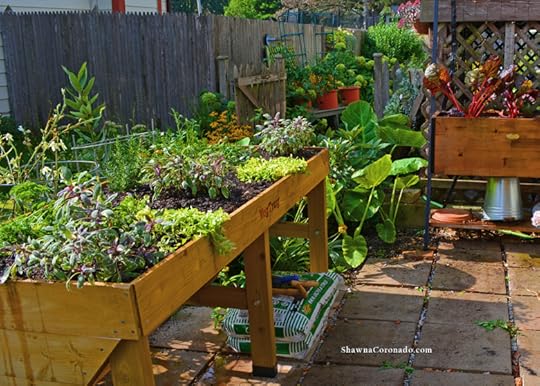
When I tell people that I built a till-free vegetable garden in my front lawn and that it is entirely till-free they seem surprised and ask how I have growing success. For generations, traditional garden beds have been turned over in order to loosen the soil. Yet from an ecological perspective turning the soil over is bad because all the millions of bacteria and micro life are killed when they are exposed to air and life. It is this amazing tiny life in your soil – an entire ecosystem – that enables your plants to grow strong and happy. When you turn soil over it loses fertility and viability. Using a no-till or till-free gardening method can enable better success with plants and growing.
Till-Free Layering Technique
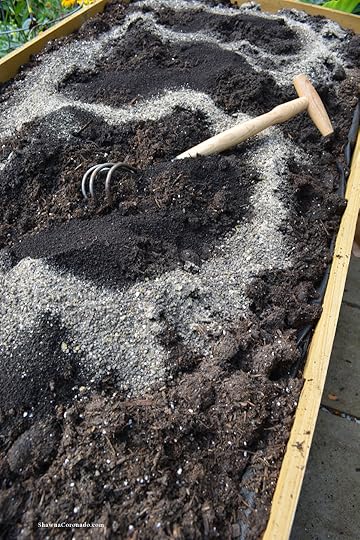
As a part of my till-free gardening technique, I first removed the grass. Some people choose to keep it and simply solarize the grass or lay down a kill mulch such as cardboard over the top to kill it naturally. Once the grass was gone and I removed any debris, then I began layering organic ingredients. This is easy to do – just add a new layer every season. The first season I laid out a layer of rotted manure and dried leaves. Next season I added a one inch layer of organic bagged soil. Then the next season I added a layer of mulch. Then the next season I added another layer of organic bagged soil. This technique of consistently adding new layers of soil, manure, and mulch without turning over the soil (see photos below) encouraged the microbial growth beneath the soil’s surface.

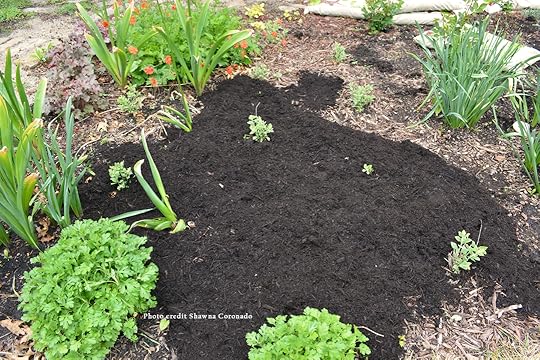
 Benefits of a till-free garden include less watering, less weeding, and less need for fertilizer. All of this is better for the environment and better for you because it saves you time and money. My front lawn garden is loose to the touch and very rich after ten years of building it up with natural organic ingredients.
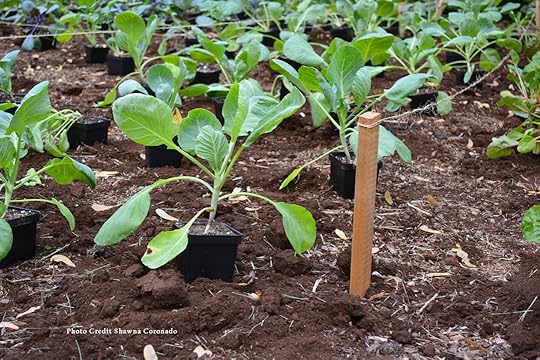
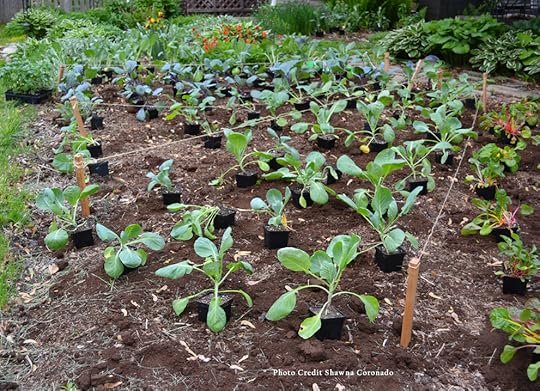
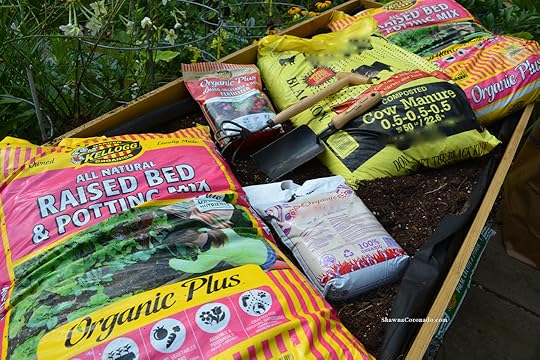
This season I added a 2 inch layer of Kellogg Garden Organics All Natural Garden Soil, which was very beneficial because the natural ingredients in this soil include processed and recycled forest products, arbor fines, peat humus, sphagnum peat moss or compost, composted poultry manure, and organic fertilizer (see below). All very good because the all natural composition of these products encourages the microbes in a till-free environment to grow and thrive.
I built a till-free vegetable garden and you can too – simply start the layering process with natural ingredients and build a fantastic foundation for your vegetables to produce gloriously.


The post How I Built a Till-Free Vegetable Garden appeared first on Shawna Coronado.
May 1, 2018
How to Get Rid of Bugs in the Organic Garden
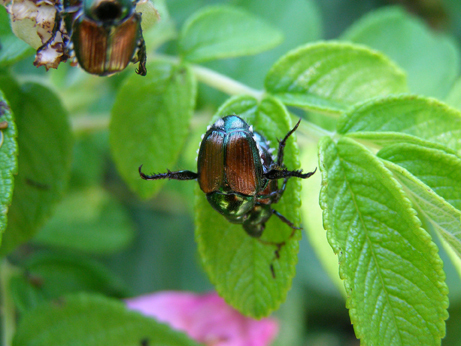
Watching bugs in your organic garden is like watching a soap opera. There are good bugs and bad bugs, drama queens and sneaky culprits. Your garden is dripping with romance, excitement, and of course murder on a daily basis – what a show! In the past I have essentially ignored pests and bugs or occasionally spot sprayed them with soapy water. Last season I noticed I had an overly prolific Cabbage Worm (below right) and Japanese Beetle (above) population, that means I can probably expect a similar situation this season. I have decided to take action and explore some ideas for more aggressive pest control so I can get rid of bugs in the organic garden.
First Steps
Controlling the bad bugs without eliminating the good bugs is, without a doubt, the most important goal in organic garden pest management. Below are a few basic ideas for preventing bug invasion.
 Flowers –– Companion plant flowering plants around your herb and vegetable garden that will attract the bad bugs and pull them away from your good plants. Research and plant companion plants such as dill, fennel, carrot, and parsley that function as hosts for braconid wasps and butterflies.
Row covers — Use floating row covers to prevent butterflies or moths from laying their eggs on your crops
Eyeball it — Inspect your herbs and vegetables for eggs and aphids regularly. Look closely at the stems and leaves. If you spot bad bugs, build a plan immediately for their management.
Know your soil – having a strong organic soil with a lot of wonderful microbes and natural ingredients means that your plant will be stronger. In my experience, a strong plant means it is less likely to be attacked by a bug, but a weak plant is more likely to be attacked.
Additionally, selectively treating bugs like aphids has worked. I’ve sprayed bugs with soapy water in the past, but last season my soap spray mixture was too strong and the residue stripped away several of my prize plant’s protective leaf cuticle. This caused sun damage on the leaves and the plants died, so this year I’m seeking another solution.
An Eco-Friendly Over-the-Counter Pest Prescription
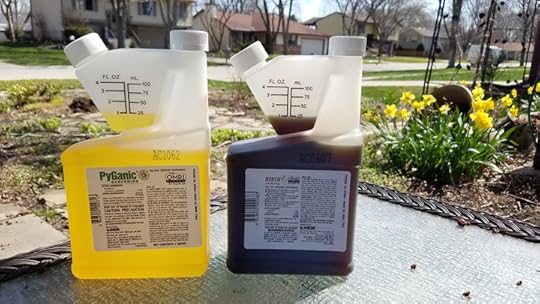
 This season I am partnering with McLaughlin Gormley King Insect Solutions (MGK) experimenting with a new attack-the-bug plan for my garden. I will be using two OMRI® listed botanical insecticides derived from chrysanthemums; Pyganic Gardening and Azera Gardening for organic gardens. Both products can be purchased over-the-counter and kill more than 200 types of crop-damaging insects on virtually all growing crops, is OMRI® listed, meets the USDA’s National Organic Program (NOP) requirements, and it’s possible to harvest of fruits and vegetables can take place immediately after application – there’s no need to wait for the product to dissipate. Azera, in particular, focuses on quick knockdown, kill of hard-to-kill insects including aphids, beetles, caterpillars, whiteflies and leafminers.
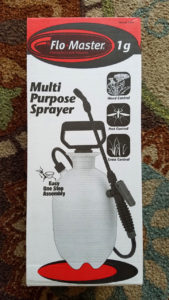
According to MGK, the key to controlling insects is to apply the product as soon as an infestation is noticed, when target insects are active, making direct contact with the application. Applying in the early morning or late evening, when there is reduced UV exposure is more effective. I found an inexpensive sprayer for the products and reviewed the list of bad bugs I normally have during the garden season; Japanese Beetles, cabbage worms, aphids, leafminers, squash beetles, and potato bugs are just a few of my regulars. I am all prepared for the pest control experiment and will show you how simple it is to use and how it works in my garden.
Special thanks to with McLaughlin Gormley King Insect Solutions (MGK) for sending me the two
OMRI® listed botanical insecticides derived from chrysanthemums; Pyganic Gardening and Azera Gardening at no cost so that I can show you how
to get rid of bugs in the organic garden.
The post How to Get Rid of Bugs in the Organic Garden appeared first on Shawna Coronado.
How to Plant a Tomato with a Trench Technique
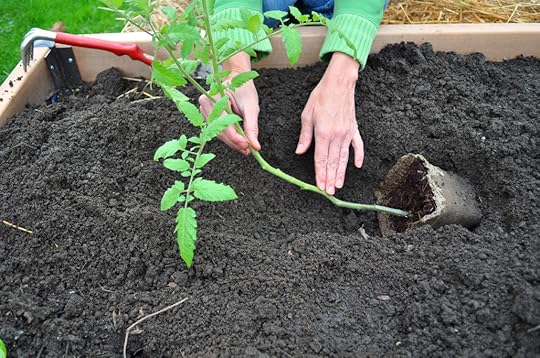
For years I struggled with tomato drama. My tomatoes performed poorly, caught diseases, had issue after issue and I could not figure out what I was doing wrong. Then one day a very successful tomato growing friend of mine asked me HOW I was planting the tomatoes. My response, “Uhh.. dig a hole, add some fertilizer, throw in the plant.” Her reply was a vehement, “NO NO NO NO NO NO! You must nurture the roots. In order to nurture the roots, you need to grow more of them so that the plant is stronger.”
Turns out her theory was correct and this technique really helped; growing more roots is indeed very possible. When any part of a tomato plant touches the ground, particularly a stem, it will often take root. What if we kick-start that process by burying MORE of the stem in order to grow MORE roots? This is the idea behind trench planting and it truly makes for a stronger tomato plant. Watch the video below, sponsored by the Wave Petunia company and filmed in my front garden to learn easy tips and tricks for trench planting.
Video here – https://youtu.be/2B-dKSsCu-c
Special thanks to Wave Petunias for providing the herbs, vegetables, tomatoes, and flowers used in this How to Plant a Tomato with a Trench Technique video. Visit www.wave-rave.com to learn more. Of course special thanks to Organic Mechanics Soil for that yummy soil filled with worm castings and VegTrug for their amazing elevated bed with cold frame.

The post How to Plant a Tomato with a Trench Technique appeared first on Shawna Coronado.
April 23, 2018
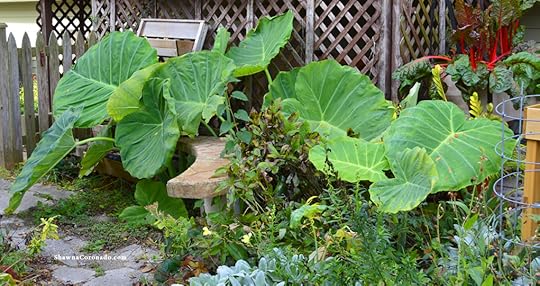
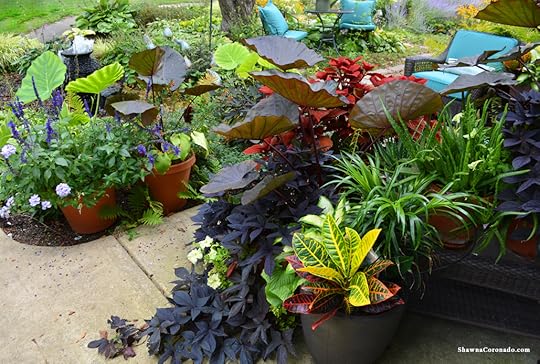
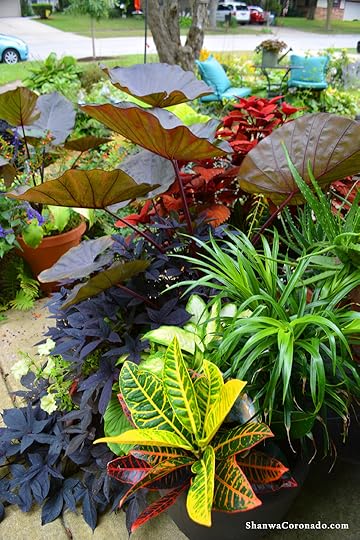
Growing Colocasia ‘Thailand Giant’ in a Northern Garden
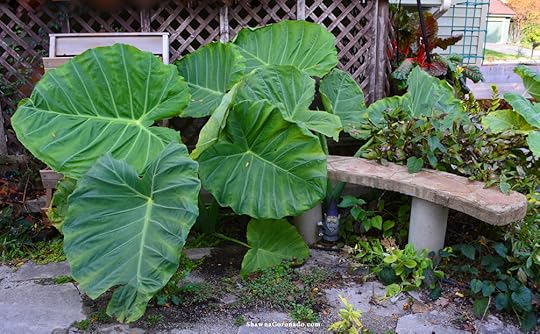
Growing Elephant Ears or Colocasia ‘Thailand Giant’ in a northern garden means you must have a bit of patience. This variety of colocasia can reach nine feet high with leaves that are four feet wide and five feet tall. However, I’ve found it takes almost all my northern garden growing season to develop the larger leaves. Thailand Giant made a great show in my September garden (see above and below). It is definitely possible to grow colocasia in your northern garden and bring it back year-after-year if you plan to overwinter the rhizome of the plant.
Colocasia are fast growers in tropical climates, hardy to Zone 8 (10°F), and adore warm humid weather. Water and heat are friends to the colocasia and encourage stronger growth. While sun needs are disputed, I’ve found Colocasia ‘Thailand Giant’ does well in part-shade to full-sun. Plant your colocasia after all danger of frost is done and you are experiencing warm evenings. Temperatures must remain above 50°F for Thailand Giant to find success in the beds. Thailand Giant does well in a “rain garden” or damp or wet area in the garden. Some ponders even plant the colocasia in shallow water.
Once planted, fertilize regularly with organic fertilizer. When the weather starts to cool, store the plant bareroot in your basement or a cool, dark storage area. Dig up before the first frost, wash off the soil, then store in peat moss. Colocasia ‘Thailand Giant’ can be started again in a container next to a bright or sunny window in order to kick start the planting season. Put out in the garden after temperatures warm-up again over 50°F in the early summer.
Special thanks to Walters Gardens for providing the Colocasia ‘Thailand Giant’ plants for my garden and the Organic Mechanics Soil company for providing my organic worm-castings for the garden bed.
The post Growing Colocasia ‘Thailand Giant’ in a Northern Garden appeared first on Shawna Coronado.
April 16, 2018
How to Plant a Light Weight Container Garden
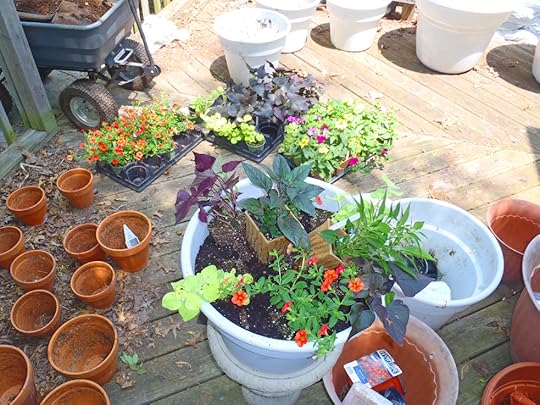
Every year I’m plagued with the same seasonal drama — from early spring to late summer I see a significant sun positioning change within my garden. I often have to move my container gardens around to find the best light or they suffer from too little or too much sun. While the in-ground gardens and elevated beds must suffer the sun changes, the container gardens can be moved around with a little advance planning. As a person who suffers from severe osteoarthritis, I find it immensely difficult to move my container gardens around to a cooler location when they are completely full of soil. How to plant a light weight container garden? Fill your container only half way full of soil.
Watch the video below, sponsored by the Wave Petunia company and filmed in my front garden to learn the tips and tricks for lightening your container garden load. Plants in this garden include: Helenium Sneezeweed ‘Dakota Gold’, Wave Petunia ‘Easy Wave White’, French Marigold ‘Bonanza Yellow’, Hypoestes ‘Splash White’, and Juncus ‘Twister’.
Video here – https://youtu.be/lodJzNIObcc
Special thanks to Wave Petunias for providing the herbs and flowers used in this How to Plant a Light Weight Container Garden video. Visit www.wave-rave.com to learn more.

The post How to Plant a Light Weight Container Garden appeared first on Shawna Coronado.
April 9, 2018
Vegan Cauliflower Steak Flavor Swap Recipe

One of my favorite dishes ever – as a side dish or as a main vegan dish – is Cauliflower Steak. This yummy bit of heaven is not steak at all, but cauliflower heads which are sliced thick and sprinkled with your favorite spices. In this post I teach you how to make your own custom flavor of cauliflower steak by using a swapping method that keeps your taste-buds and dinner partners equally happy. Try this vegan cauliflower steak flavor swap recipe and fall in love with how easy it is to bring delicious flavor and this anti-inflammatory dish to your family.
The Spice Swap-o-Rama
I love flavor – all kinds of flavor. Tons of flavor. There are two ways I get more flavor in cooking vegetables: 1) Roast your vegetables. Roasting helps caramelize and release flavors so that foods taste delicious, and 2) Add herbs and spices. Growing up on a small farm in Indiana, I learned to flavor my foods with salt and pepper only. Rarely did we add garlic or heavy doses of other spices. Once I learned that adding a tablespoon or two of my favorite seasoning mixes to vegetables, my whole taste world changed and I really began to love food. So go ahead – add some spices – I give you my whole-hearted permission to experiment.
Swapping flavors is another cooking secret I use and it is easy to do. I wanted to go natural and organic where ever possible, so started mixing up my own seasoning combinations using organic herbs and spices. The swap happens with the seasoning mixes. For example, let’s say you’re craving Italian, then use a couple tablespoons of Italian Seasoning on your vegetables. Tired of Italian? No problem. SWAP IT OUT. Next time use Curry Seasoning or another favorite on your vegetables. This time I used Taco Seasoning – below is the seasoning recipe I created using Simply Organic Spices and Herbs.
Homemade Taco Seasoning (see photo below) –
1 T Ancho Chili Powder
1 T Cumin Powder
1 t Garlic Powder
1 t Onion Powder
1/4 t Dried Oregano
1/2 t Paprika
1 T Himalayan Salt
1 t Ground Pepper

 The Vegan Cauliflower Steak Recipe
Vegan Cauliflower Steak Flavor Swap Recipe Print Prep time 10 mins Cook time 1 hour Total time 1 hour 10 mins This yummy bit of heaven is not steak at all, but cauliflower heads which are sliced thick and sprinkled with your favorite spices. Absolutely perfect as a main vegan course or a side dish with meat. Author: Shawna Coronado at www.shawnacoronado.com Recipe type: Vegan Ingredients Whole head of cauliflower Olive oil 2 Tablespoons of your favorite spice seasoning (Italian, taco, curry, ranch - whatever you love) Salt and pepper to taste Instructions Slice whole heads of cauliflower so that the cauliflower remains intact in "steaks". Place the steaks on a baking sheet and drizzle with the olive oil. Sprinkle the spices on to taste - use a heavier hand for strong flavor or lighter sprinkling for a lighter flavor. Bake at 350 degrees for one hour or until steaks are soft and cooked through. Pull out of the oven and serve. 3.4.3177 
 How to Grow Cauliflower
Growing cauliflower in your garden is easy. It is a cool season crop and does best when planted in spring or early fall. First select a spot that might be best for your cauliflower garden. Typically this vegetable needs at least 6 hours of sun per day, but prefers 8 hours of sun. Cauliflower likes a well drained, fertile, soil filled with organic matter. Have your soil tested to know what amendments you might add to increase your success in growing this vegetable. Cauliflower prefers a specific soil pH – between 6.5 and 6.8 – in order to prevent the dreaded clubroot disease. Your soil tests should help confirm soil pH.
I amend my soil with Kellogg Garden Organics All Natural Garden Soil , worm castings, and some rotted manure. Add fertilizer following the package directions on the Kellogg Garden Organics Organic Plus Tomato, Vegetable & Herb Fertilizer before you plant your baby cauliflower plant. One advantage to the Organic Plus fertilizer is that it contains kelp meal which is a great source of micro- and macro-nutrients which will help give your plants a boost.
Fertilize regularly according to package directions throughout the season. It is important to set your plants out in the spring early enough that they do not get hit by the full heat of summer, an estimated 3 to 4 weeks before the last frost will work well, placing the plants 18″ to 20″ apart. If a hard frost does hit, simply cover the plants with a sheet or newspaper the evening before the expected cold temperatures.

Special thanks to Kellogg Garden Organics for providing soil to me this season – the soil worked very well with my vegetables. Those beautiful bamboo cutting boards used to make this vegan cauliflower steak flavor swap recipe were provided by Totally Bamboo. The featured board is the ‘Pro Board Long’ – so elegant. Spices are from Simply Organic. Appreciative for all your help in putting together this delicious cauliflower steak recipe.
The post Vegan Cauliflower Steak Flavor Swap Recipe appeared first on Shawna Coronado.
April 5, 2018
Easy as 1 2 3 Container Garden Planting Technique
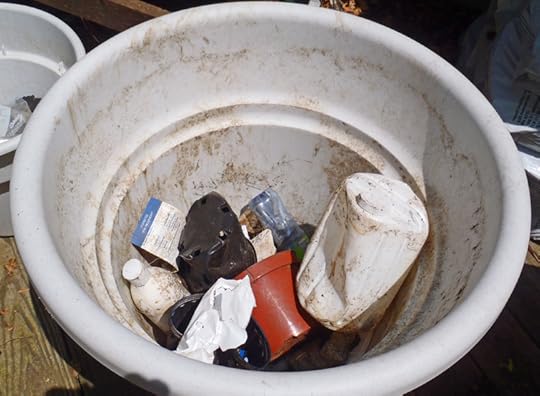
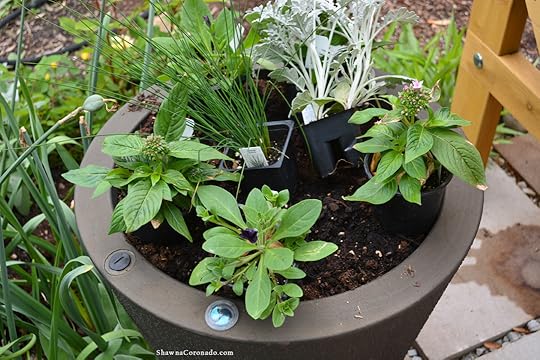
 One of the questions I get the most from readers is, “How do I plant up a container?” There are endless variations on planting designs and techniques we can go over, but I like to keep it simple. Originally coined “Thriller, Filler, Spiller”, this Easy as 1 2 3 Container Garden Planting Technique is a super basic look at filling a planter and it works every time.
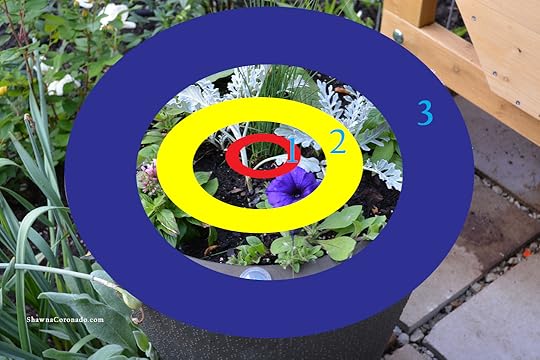
Easy as 1 2 3 Container Garden Planting Technique –
Tall plants in the center
Full plants in the middle layer
Vining or spilling plants in the outer layer
There are those that claim this technique is boring or unimaginative. My answer to that is the technique is easy and keeps more people growing – anything to inspire gardening and healthy growing helps us to stay healthy. So give it a try!
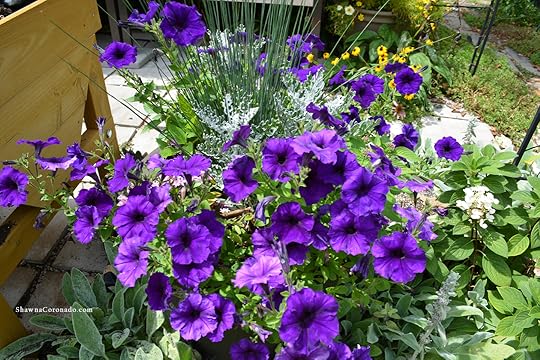
Watch the video below filmed at my patio garden to learn how you can put together a great container garden using the easy as 1 2 3 container garden planting technique. Plants featured on the video include Juncus ‘Blue Dart’, Dusty Miller ‘Silver Dust’, Pentas ‘Lucky Star’, and Petunia ‘Combo Blue’.
Video here – https://youtu.be/0J95mQofo00
Special thanks to Wave Petunias for providing the pretty flowers used in this Easy as 1 2 3 Container Garden Planting Technique video. Visit www.wave-rave.com to learn more. Thanks to Crescent Garden for the TruDrop container – it’s a water saver that enables you to water less and grow more. Organic Mechanics Soil provided the worm casting filled organic soil.
The post Easy as 1 2 3 Container Garden Planting Technique appeared first on Shawna Coronado.
March 26, 2018
Design Container Gardens with Colocasia ‘Distant Memory’
Colocasia ‘Distant Memory’ is a beautiful tropical plant and works very well in container gardens. Leaves on the plant are a dark mahogany (almost black when exposed to stronger sun), the plant clumps which is particularly great in containers, and this tropical leafed plant truly adds an incredible boost to container gardens and garden beds alike.
This plant is more than beautiful, it’s very special to the people from Walters Gardens. Here is the story of Colocasia ‘Distant Memory’ from their website, “For many of the early years of Walters Gardens, Harriet Walters was the lifeblood of the family business. She’s remembered fondly for her incredible cheerfulness, kindness, and optimism, but especially for her infectious laugh and sense of humor. Even through all her years after being diagnosed with Alzheimer’s, Harriet still maintained her sunny personality and silliness, as well as a deep sense of care and concern for each member of her family, even as she lost her mental function and memories. Harriet passed away in 2008, and it is in her honor that we will donate $0.25 per [Colocasia ‘Distant Memory’] plant sold to Alzheimer’s research. The Elephant is a symbol for Alzheimer’s Disease (“an elephant never forgets”), which is why we selected an Elephant Ear to be our cause plant.”
Colocasia loves warm weather, sunshine, and water. Plant your Colocasia ‘Distant Memory’ in a moisture retentive soil combination. I like to mix up traditional potting soil with this formula – one part potting soil, one part rotted manure, and one part compost. Throw in some worm castings and organic fertilizer as well and you will have an amazing growing medium for this very special plant.

Special thanks to Walters Gardens and Proven Winners for providing many of the annual plants seen in this garden. Fish art was created by FishintheGarden.net, the rain water cistern and fountain is from Aquascape Inc., and the bold blue chair cushions are from Target. Thanks to the Organic Mechanics Soil company for providing my organic worm-casting filled soil for my container gardens.
The post Design Container Gardens with Colocasia ‘Distant Memory’ appeared first on Shawna Coronado.
March 19, 2018
How to Build an Herb Garden Elevated Bed
Planting an herb garden elevated bed and having great growing success is easy if you plan the proper soil mix. I love growing herbs all season long in my garden so that I can add them at a moment’s notice to one of my yummy smoothies or wellness dishes. Be sure to grow anything edible in the garden organically so your family will have healthier foods. When I plant my herb garden up I know that I’ll be notoriously lax in watering regularly, yet herbs require consistent watering. The best solution for my lazy watering situation is to make the soil moisture retentive so that I don’t have to water as much. Below is my secret.
Secret Soil Mix
My secret formula for moisture retentive soil which will give you a bit of leeway in watering frequency is made from four primary ingredients – organic soil, compost, worm castings, and fertilizer. The goal is to hold as much moisture as possible around the root area while still allowing easy drainage.
Kellogg Garden Organics All Natural Raised Bed & Potting Mix is an earthy mix that is great to fill your raised beds and container gardens. Mix one part of it in with another part of composted manure; stir well. Then if you are able, mix in another part of compost from your compost bin with a couple handfuls of worm castings. Finally, add in Kellogg Garden Organics Organic Fertilizer of choice, being careful to follow directions. If you are able to mulch your garden with a natural product, I recommend adding mulch to help hold moisture and protect your herb’s roots.
Once you mix the soil up in your elevated beds, it is time to plant the plants. This elevated garden is filled with Parsley ‘Giant of Italy’, Thyme ‘Red Creeping’, Sage ‘Tricolor’, Oregano ‘Golden’, and Rosemary ‘Tuscan Blue’. Simply loosen the roots then tuck them into your fresh soil mix. Water in well and you are ready to grow. It is simple to build an herb garden elevated bed when you start out with a good soil mix. Roots need nutrition and moisture, giving the roots these things from the very beginning of growing the elevated garden bed will help ensure success. Happy Herb Gardening!
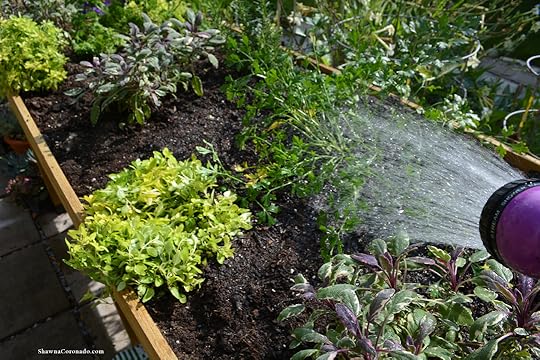
Special thanks to Kellogg Garden Organics for providing soil to me this season to build an herb garden elevated bed – the soil worked very well with my herbs. VegTrug provided the elevated bed planter. The One Touch Revolution Spray Gun is from Dramm. Thrilled for all your help in putting together this garden!
The post How to Build an Herb Garden Elevated Bed appeared first on Shawna Coronado.