Shawna Coronado's Blog, page 15
March 6, 2017
Phenomenal Lavender Salmon Rub Recipe from Peace Tree Farm
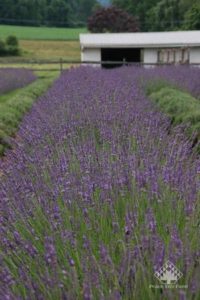
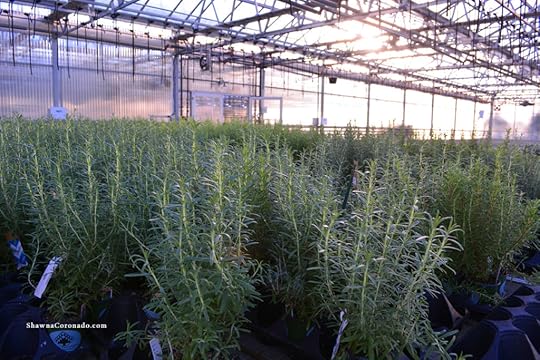
My dear friends, Lloyd and Candy Traven are the owners of Peace Tree Farm, a haven of professional environmentally-friendly greenhouses on a historic 25-acre farm, based in Kintnersville, Pennsylvania. They have an amazing wholesale operation – plants from Peace Tree Farm have been seen at the Philadelphia Flower and Garden Show, Longwood Gardens, Chanticleer, New York Botanical Garden, Winterthur Museum, Washington National Cathedral, the Smithsonian Institution, and hundreds of independent garden centers. While they grow many herbs, begonias, and starter plants, Peace Tree is truly known for their world famous lavender – “Phenomenal” (see right photo credit Peace Tree).
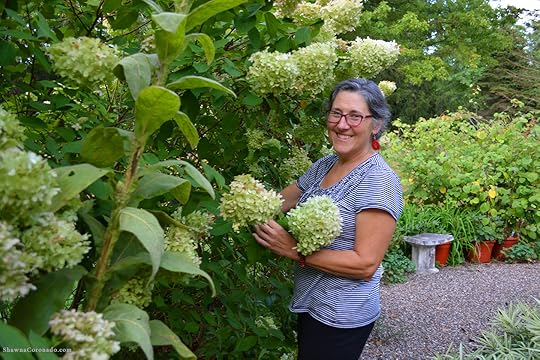
Last time I visited their Pennsylvania home, Candy toured me around their extensive flower and herb gardens (see Candy above). Lloyd gave me a tour of their wholesale nurseries – brimming with thousands of plants and flowers – pointing out every plant and telling the story of how his operation recycles water and uses environmentally friendly practices to make a difference for the earth (see Lloyd below).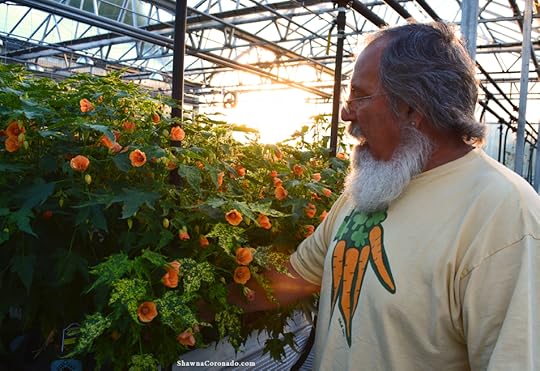
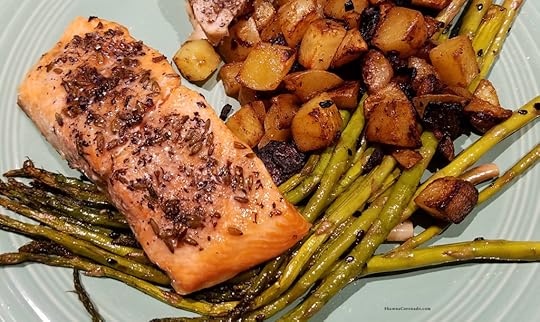
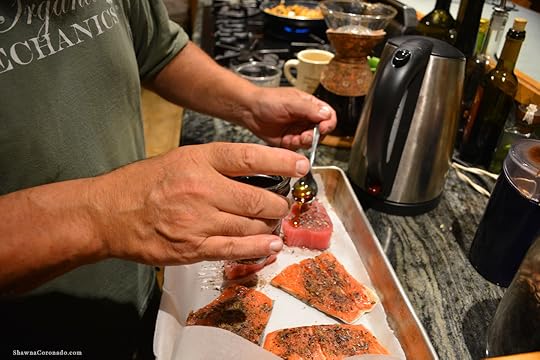
Then they swept me off my feet by preparing a to-die-for dinner featuring a lavender salmon rub recipe (below). Lloyd and Candy always have dried lavender around the kitchen and wanted to show me something special you can do with culinary lavender. This is a unique recipe which originally came from our fellow horticultural friend, Christina Salwitz . Lloyd prepared the rub recipe, then added his own touch by drizzling a bit of maple syrup hand collected from our friend Kylee Baumle’s maple trees. While I sat at their counter drinking vodka and wondering at how we are all connected in the world with friendship, plants, and food; I watched Lloyd put together this delightful salmon dish and delighted in how he incorporated lavender. While we tend to think of lavender as only a scent, Lloyd showed how it needs to be used in cooking more often because it adds a delicious aromatic flavor to your dishes.
 Christina Salwitz's Lavender Salmon Dry Rub
 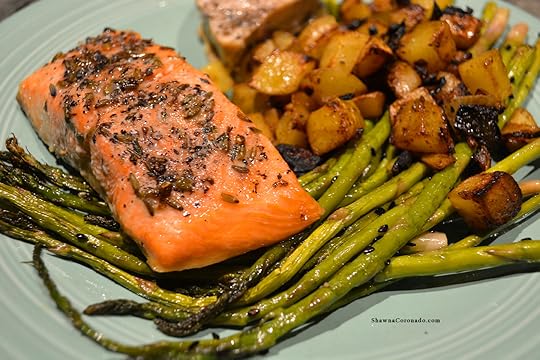 Print Prep time 15 mins Cook time 12 mins Total time 27 mins This insanely delicious salmon rub is sweet and savory with a hint of lavender. Absolutely delicious served for dinner or over a luncheon salad. Author: Shawna Coronado at www.shawnacoronado.com Recipe type: Dinner Cuisine: Fish Ingredients 1 part Grains of Paradise 1 part Applewood Smoked Sea Salt 1 part Brown Sugar ⅓ part Lavender Salt & Pepper to taste Maple syrup for drizzling Salmon fillets, sliced in portions and deskinned Instructions Heat oven to 450 degrees F. Mix all dry ingredients together. Coat both sides of salmon fillets with dry rub. Drizzle with maple syrup Oil pan. Bake fillets in pan for 10 to 12 minutes or until done. 3.4.3177
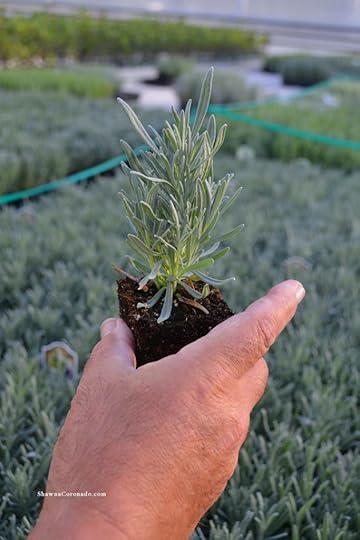
Growing lavender is surprisingly easy in the home garden because lavender thrives in Mediterranean conditions – hot, dry, with challenging soil conditions. If you would like to grow lavender seek a hot and dry location, then link to this previous post featuring growing instructions – http://shawnacoronado.com/how-to-grow-lavender. Meanwhile, plan to grow Phenomenal Lavender in your garden this year as a culinary lavender because it is known as exceptionally hardy in zones 5 – 10 and overwinters very well. Search online to find many places to purchase the plant in it’s vegetative form enabling you to plop it right into your garden bed or container garden.
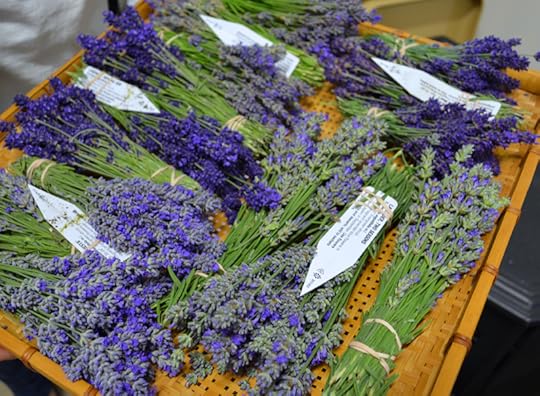
To harvest lavender, wait until the flowers are at their absolute height of color and scent, then cut the flower stems near their base and tie together with rubber bands in bunches. Hang upside down to dry in a warm spot out of the way of direct sunlight. You can keep the dried lavender stems in this for or after several weeks of drying, rub the flower buds onto a tray, then gather and store in a dry glass jar. Use this dried culinary lavender for crafts and adding to culinary dishes like Christina Salwitz’s Lavender Dry Rub Salmon recipe .

Save
Save
Save
Save
Save
Save
Save
The post Phenomenal Lavender Salmon Rub Recipe from Peace Tree Farm appeared first on Shawna Coronado.


March 1, 2017
Chai Protein Powder Smoothie Product Review
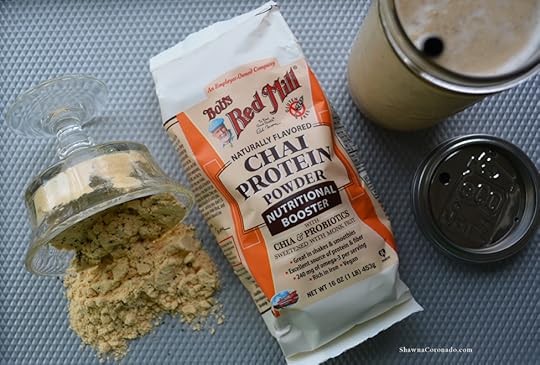
Earlier this year I did a write up on my experience in meeting Bob from Bob’s Red Mill. They have a super-cool vegan food product out I wanted to try; nutritional boosters. These products are essentially protein powders with additional products like chia and probiotics added to enhance the benefit to your system. There are unflavored items which are simply various forms of protein you can add to your morning cereal or favorite smoothie formula like Pea Protein, Hemp Protein, or Soy Protein. Additionally, there are several flavor combinations such as chai, chocolate, and vanilla. I’m partial to chai, so chose to do a chai protein powder smoothie review.
Why do you want extra fiber or protein? Perhaps you need more protein because you are consuming a vegan diet and would like to find another type of protein to eat. Dietary fiber aids digestion and makes you feel full faster, so it can help you maintain a healthy weight. These items are kosher and gluten-free too. Depending on the product you choose you can add significant vitamins to your diet as well. The Chai Protein Powder, for instance, has 35% of your daily iron needs in one serving plus probiotics to aid in digestion.
My first try using the products began with sampling one of my flavor favorites. I opened the Chai Protein Powder Nutritional Booster with Chia & Probiotics and was immediately struck with a delicious scent of cinnamon and chai. Who knew that probiotics can smell so good? I tried shaking one cup of almond milk with 1/3 cup of the powder and tentatively sipped. It was sweeter than I expected because of the addition of Monk Fruit Extract in the ingredients and it definitely tasted like chai, but I felt it needed adjusting. Then I put the mixture in a blender with a few cups of ice and blended it into a smoothie. WOW!! That’s the ticket — the powder is absolutely delicious in smoothies (see below).
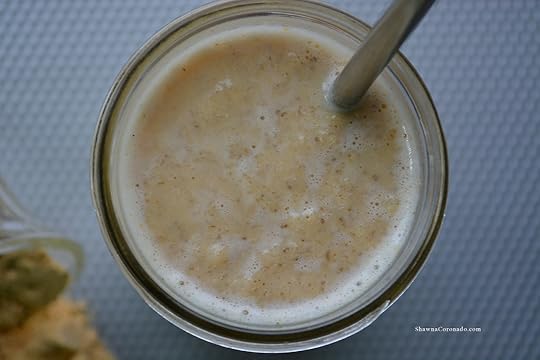
Featured in the top photo is my absolute favorite smoothie drinking tools; Eco-Jars with Eco-Jars Metal Straws served in an asparagus ball jar. Drinking anything in glass instead of plastic or styrofoam prevents residues from getting into your drinks. The little dessert cup is one of my favorites from the LaRochere – it’s the LaRochere Perigord Ice Cream Cup. Isn’t it cute? I would call the chai protein powder smoothie review a big success. I will be trying many of the other protein powders as a way to contribute to my anti-inflammatory diet. Give them a try yourself by ordering directly from the Bob’s Red Mill website.
Save
Save
Save
The post Chai Protein Powder Smoothie Product Review appeared first on Shawna Coronado.
February 27, 2017
How to Plant Herbs
Love that it is coming up on planting time in the northern states – I cannot wait for the garden to be exploding with color and scent and awesomeness! Learn how to plant herbs organically by following the steps below. Watch the How to Plant Rosemary and Herbs video to see how easy it is to toss them into the ground and get’em going.
How to Plant Herbs
Decide what herbs will work best in your garden dependent upon the garden zone, light exposure, and seasonal growing conditions
Find a good location with an organically amended soil that is well drained
Layout the design of your garden keeping herbs grouped together with similar sun and water requirements
Dig a hole (unless you have herb seeds, then follow package directions)
Add organic fertilizer to the hole following instructions on the package
Plant the vegetative herb in the hole
Gently cover the root ball up
Water regularly at the base of the plant
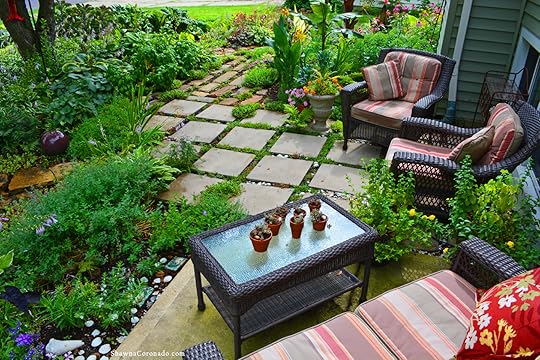
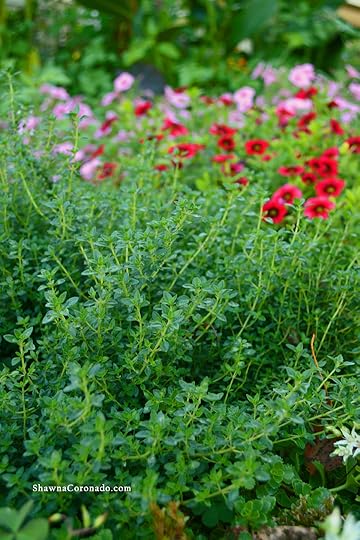
In the top photo see my front patio that is surrounded by a mix of herbs and perennials. Bottom photo is the delicious smelling lemon thyme in my front garden. Learn how to plant herbs in the garden and enjoy wonderful smells and tastes all season long!
Save
The post How to Plant Herbs appeared first on Shawna Coronado.
February 20, 2017
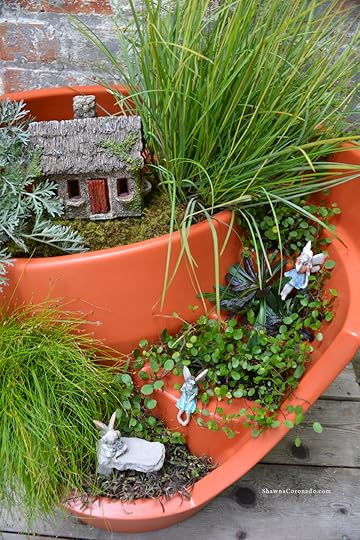
Spectacular Fairy Garden Planting Container
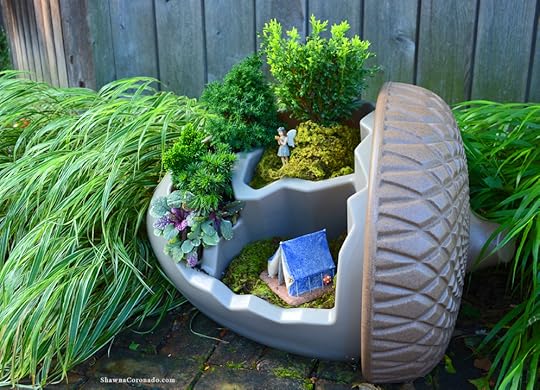
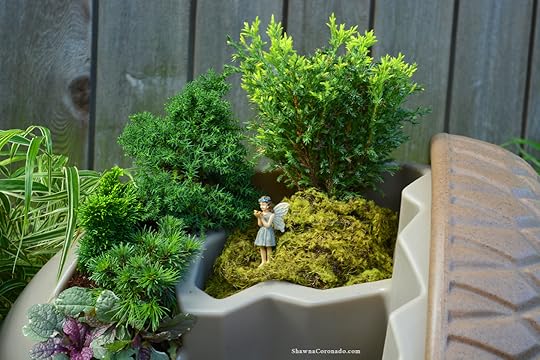
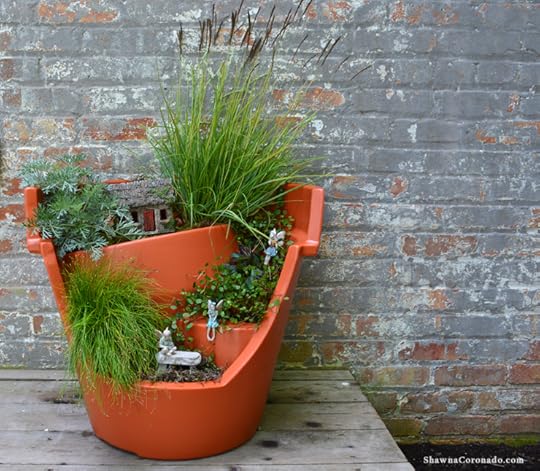
When I met Denise English from Eco Personal Garden at the Independent Garden Center Show in Chicago and she had such passion about a creative product idea she had – making a pre-made broken pot fairy garden container based on the big fairy-garden trend of breaking apart clay pots and reassembling them in artistic designs, I knew I had to show you her cool products. The Eco Personal Garden team uses a molding process and makes several types of fun and creative fairy garden containers. Right now that includes a broken pot, an acorn, and a walnut utilizing little pockets within the container to create your fairy magic. Last season I created a nifty Halloween Broken Pot Container Fairy Garden using a bright orange broken pot, and you can see how the acorn (above) and spring broken pot turned out (below).
How to Create a Pocket Container Garden
Drainage holes are in the containers, however, if you want a few extra drainage holes you will need to drill them yourself with a drill and drill-bit
Place potting soil in the bottom of each pocket within the garden container
Add plants, putting the tall plants in back and the groundcovers in front.
Focal point works best in the front bottom pocket, although this is your creative adventure – so let your creativity take over
Water regularly.
If you want to get your own super cool pocket container to get started container gardening for the season, I recommend reaching out to Planters Palette in Winfield, Illinois for some fairy supplies. They have camping fairies, garden fairies, and flying fairies – ALL the fairies. To order the creative containers go to Denise’s online Eco Personal Garden store – LINK HERE.

Save
Save
The post Spectacular Fairy Garden Planting Container appeared first on Shawna Coronado.
February 13, 2017
Seared Tuna Recipe

This seared tuna recipe is a healthy dietary choice, particularly for anti-inflammatory diets which require no dairy and no grains. Soy is a grain, so when preparing tuna steaks or fish of any kind, I pass on the soy and use citrus or other flavorings. Having a no grain diet has been a challenge, but has truly helped my severe degenerative osteoarthritis – my pain is now down by about 85%. I feel walking daily helps, but it’s the diet that contributes tremendously.
According to the American Dietetic Association, Omega-3 fat is a highly recommended nutritious component of our diets and the ADA recommends we consume 500 mg per day of Omega-3 food. Tuna is filled with Omega-3 fats, with Blue-Fin tuna having the highest amount of Omega-3’s. Tuna contains strong protein content and vitamins B-6, B-12, D, Niacin, and Phosophorus. One caution about tuna is that it can sometimes contain mercury. Therefore the recommendation is to consume fresh tuna occasionally and only up to 6 ounces of canned Albacore tuna per week.
A recent visit to Biltmore Estate in Asheville, North Carolina had me drooling over the seared tuna – Tuna Sashimi with Red Wakame [seaweed] Salad that the chefs prepared at the Library Lounge at The Inn at Biltmore – a light and perfect lunch or delicious dinner – extremely low in fat, high in protein, and filled with flavor. If you have a special dietary concern, just ask your waiter to see if the restaurant can help. During my visit at the Library Lounge was amazing – the chef came up to ask me details on my food allergies and made me feel very comfortable. Below is a seared tuna recipe without soy sauce so you can try it at home.
Seared Tuna Recipe Print Prep time 1 hour Cook time 2 mins Total time 1 hour 2 mins Delicious marinated tuna with NO SOY and lots of delicious citrus and sesame flavor. Excellent for lunch, dinner, and leftovers. Author: Shawna Coronado at www.shawnacoronado.com Recipe type: Dinner Cuisine: Seafood Ingredients Tuna steaks Cooking oil Marinade Ingredients - ½ cup orange juice ¼ cup lemon juice 3 Tablespoons olive oil 1 teaspoon ginger, finely chopped 1 garlic clove, crushed and chopped Topping - Sesame Seeds Black pepper Instructions Wash and dry tuna steaks thoroughly. Mix all marinade ingredients together. Marinate tuna steaks in marinade mixture for one hour. Pull steaks out of marinade, pepper and deep all sides in sesame seeds. Heat cooking oil in a frying pan on high until just below smoking point - a very hot pan. Place sesame seed crusted tuna in pan for one minute each side. Watch carefully to make sure you do not burn the seeds. Slice tuna in ¼ inch slices on a cutting board. Serve immediately. 3.4.3177 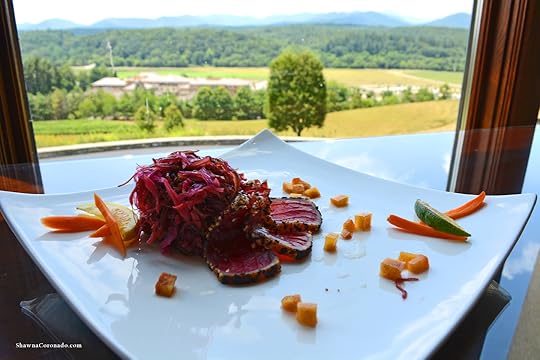
Save
Save
Save
Save
Save
The post Seared Tuna Recipe appeared first on Shawna Coronado.
February 6, 2017
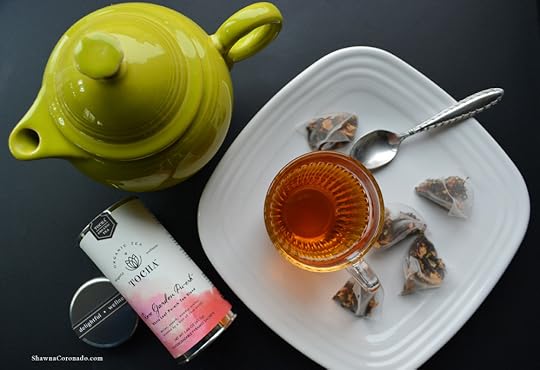
Why You Should Drink Organic Tea
It’s tea season! While cold outside, millions of people across the globe drink tea in order to stay warm and cozy inside. Tea represents a morning indulgence for me as I usually take a break from writing mid-morning in the winter to stretch and sip something flavorful.
Why You Should Drink Organic
Many professionals from around the world recommend that you drink tea for the “claimed” anti-oxidant health benefits, yet many teas have artificial flavorings, colorings, and can have chemicals and pesticide content. The Canadian Broadcast Company did an investigative probe on tea contents and found several varieties of non-organic teas which have shocking chemical ingredients, some have more than 16 pesticides in a tea brand and many of these chemicals are considered toxic and are actually restricted in Canada. Here is a link to the study results – LINK (watch the video linked in the blog post to learn more). Organic teas generally offer you a less-chemical additives and pesticides, therefore providing you with a more beneficial result when you consume the teas.
When brewing tea, the longer you steep tea, the more things that are in or on the tea are released into the tea water. Therefore, do not over-steep your tea. Besides a bitter taste, you might also be getting additional chemicals in your cup.
How Long to Steep Tea
Green and white teas – 2 to 3 minutes (do not boil water)
Black and Pu-reh teas – 3 to 5 minutes (water to boiling)
Oolong teas – 4 to 7 minutes (water to boiling)
Herbal teas – 5 to 7 minutes (depending on the strength you desire – water to boiling)
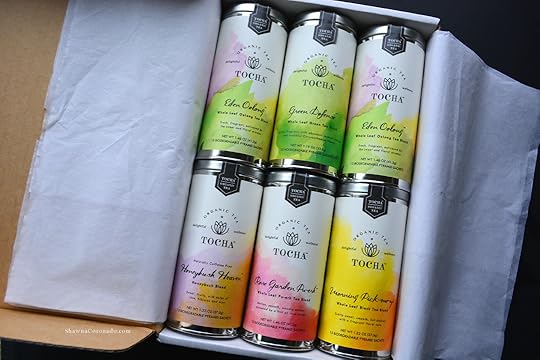
I did this research when Tocha Organic Tea sent me a box full of organic teas to try at home. I love roses, so brewed the Rose Garden Pu-erh tea first. It tastes very mild and has a beautiful rose scent from the rose petals mixed in with the tea. The aroma when brewing was quite beautiful. Tocha whole-leaf tea sachets can brew multiple cups. I used two sachets in my lemongrass Fiestaware teapot in the morning, then brewed a second pot later in the day. You can see the light shining through the organic tea in the LaRochere Oeussant Coffee Mug, which is obviously gorgeous with tea or coffee (see top photo). Want to be healthier when drinking tea? Try drinking it in organic form instead of drinking tea with inadequate labeling. Find foods that have less toxic chemicals because they are safer to consume.
Save
Save
Save
Save
Save
Save
Save
Save
Save
Save
Save
The post Why You Should Drink Organic Tea appeared first on Shawna Coronado.
January 30, 2017
Winter Garden Art Installation
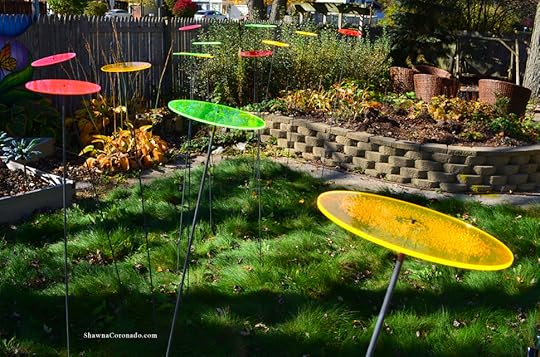
Winter. It’s killing me. Beyond hurting my osteoarthritis and making me cold, winter is dark and dank in the northern states. We need some creativity, some love, some color. That’s it – COLOR! Lots of creative color! How about weird and wonderful glowing disk garden art which makes people stop and stare with curiosity? Last summer I met the team from Cazador-del-sol, a company that has created a very unique art display for gardeners around the world. The creative art sculpture is a single glowing disk which is placed atop a long pole. The Cazadores-del-sol are inspiring and fascinating whether as a single suncatcher or as sunfield.
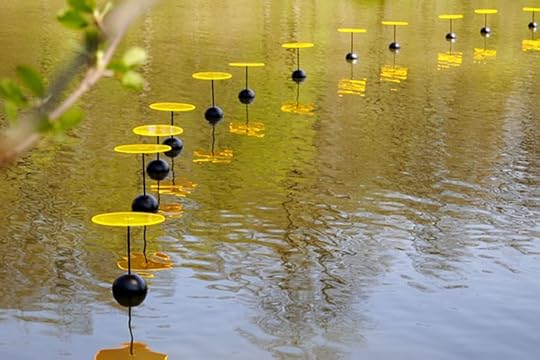

Cazador-del-sol Sunfields are a collection of the special suncatcher art disks put together in close proximity to create a large field of display. When I saw the above two photos [credit Cazador-del-sol.com] of Cazador-del-sol Sunfields in Europe, I became fascinated and ordered several different sizes from the manufacturer. What if we could put a display up like this in an ordinary gardeners backyard or vegetable garden? Would winter be transformed by the display? Would vegetable gardens look interesting and different and… well… creative?

First I wanted to start with a winter backyard art installation of the glowing disks with the hopes of capturing snow and glow together. In order to do this, I had to set a sunfield up on a warm day in late fall on my no mow grass backyard. I chose a multi-color disk sunfield using the Suncatcher-Disks (diameter 8”) with the swinging rod (length: 5′ 7”) (see top and middle photos). Each disk is mailed flat, so it is easy to order and install from Cazador del sol.
Next I had to wait for snow. I live in a suburb of Chicago, so it didn’t take long before we were covered in several inches of the white stuff (see below). The effect is interesting and strange – if you stand next to the field the glowing disks tend to be at my eye level, so I see color strangely glowing in a place that it is not typical to see a glow and it is interesting to observe. I considered the garden art a true success when truckers who could see the glowing art above the fence line from the street behind my home started ringing my doorbell and asking me “What the heck are those glowy-thingamajigs in your backyard?”. I will post in the spring how the taller disks survive outside all winter and will actively be devising my next garden art goal: to place different size disks in varying garden beds in order to see how the colors transform the beds artistically. Wish me luck!


Save
Save
The post Winter Garden Art Installation appeared first on Shawna Coronado.
January 23, 2017
Winter Conservatory Tour Biltmore Estate

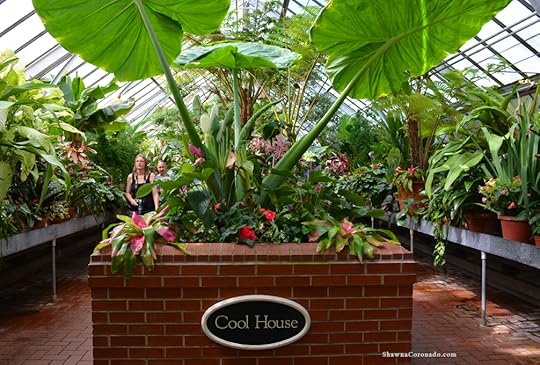
In the cold silence of winter, when we feel isolated from one another and arthritis pain and depression are pulling you down, there is still a way to become enveloped in the passion of plants: go to your local conservatory. Biltmore Estate in Asheville, North Carolina, has one of the most fabulous conservatory’s in the nation and a winter conservatory tour at Biltmore Estate is just what you need to pull out of the winter blues. Below are some photos of my recent visit at the conservatory I’m posting just for you.

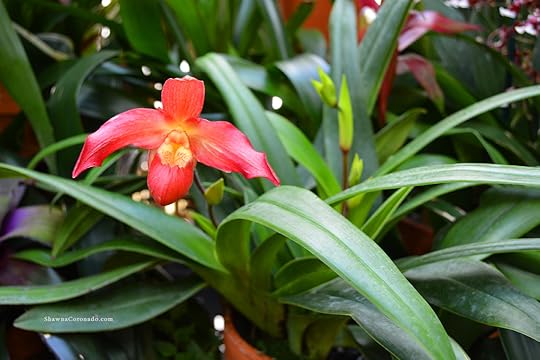

When you arrive Biltmore Estate, you will spot the conservatory at the back of the Walled Garden below the mansion (see top photo). It is a Victorian delight featuring all manor of exotic plants and completed in 1895. Tall arching windows let light stream in the sides of the brick building and multiple glass houses and a pointed glass roof lets in more sunshine. Even in the winter, the interior of the conservatory is tropical and filled with the scents and colors of vibrant plants. Discover the winter conservatory tour at Biltmore Estate or walk – no RUN – to your nearest conservatory for a breath of fresh tropical air.


Save
Save
Save
The post Winter Conservatory Tour Biltmore Estate appeared first on Shawna Coronado.
January 22, 2017
Using a Ricer to Make Paleo Cauliflower Rice
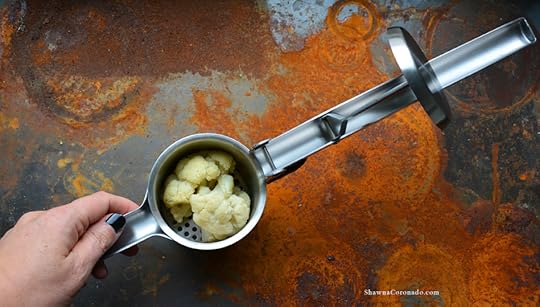
Paleo cauliflower rice is a big trend right now – it’s super healthy and can be used as a substitute for everything from pizza crust to rice and is an amazing filler in soups. Most recipes for cauliflower rice involve a food processor, but it’s just as easy to use a “ricer” to make cauliflower rice if you happen to have one handy. I tested out the Trudeau Stainless Steel Ricer this winter and have fallen in love with how easy it is to use. Great for mashing turnips and sweet potatoes as well.
 Prepare the Paleo Cauliflower Rice –
Break the cauliflower up into one inch pieces.
Drizzle with olive oil or sunflower oil, then roast the cauliflower at 400°F for about 15 minutes or until the vegetable is soft. (Hard pieces will not fit through the ricer, so it must be thoroughly cooked.)
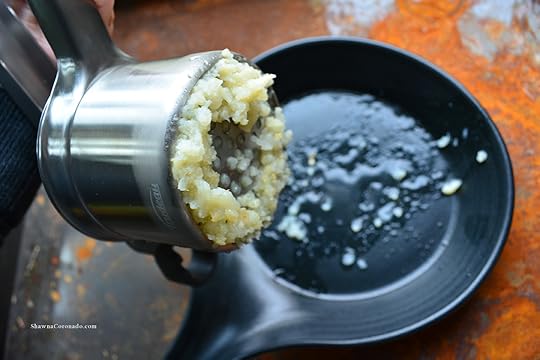
Place the pieces in the ricer and push through.
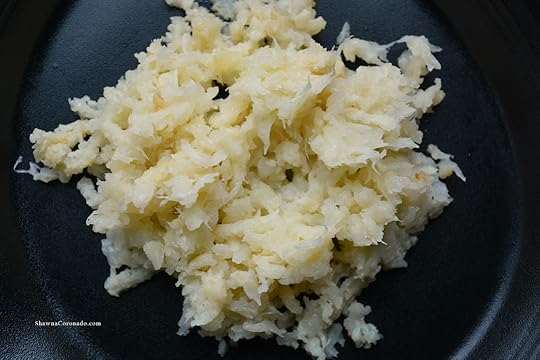
Use in recipes or eat as a side dish adding a little oil with salt and pepper (see below).
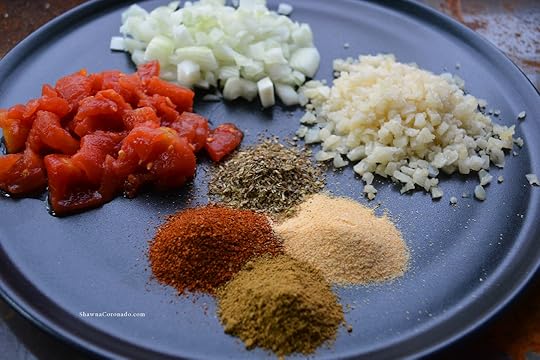
One of my favorite things to do with cauliflower rice is to turn it into a hearty winter chili (recipe below). I throw all the ingredients in a crockpot before work and have dinner waiting for me and prepared with a minimum of fuss when I am done with work.
Paleo Cauliflower Rice Chili 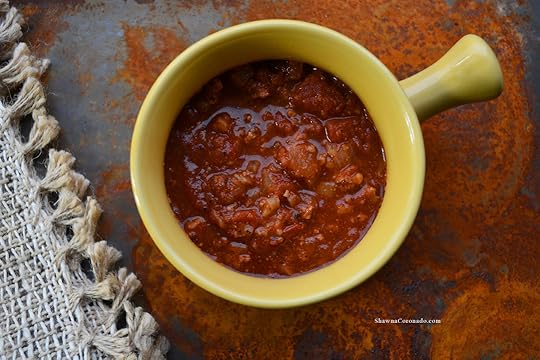 Print Prep time 30 mins Total time 30 mins This delicious chili is largely improvisational - put in whatever you have from the pantry and let it cook all day in the crockpot for an easy dinner. Author: Shawna Coronado at www.shawnacoronado.com Recipe type: Dinner Cuisine: TexMex Ingredients 1 pound ground turkey 1 head of cauliflower, riced 1 onion chopped 1 can of crushed tomatoes, 28 oz 1 can of diced tomatoes, 14.5 oz 1 tablespoon oregano 1 tablespoon garlic powder 1 tablespoon chili powder (or more to taste) 1 tablespoon cumin cayenne pepper to taste salt and pepper to taste vegetable or chicken broth to desired soup consistency Instructions Throw everything in a crockpot. Cook on high 4 to 6 hours, adding more liquid if needed. 3.4.3177
Try making your own paleo cauliflower rice with a ricer like the Trudeau Stainless Steel Ricer, it worked for me and offered a great solution for the challenge of mashing up vegetables. Next on my culinary agenda with the ricer – mashed turnips. If you have any creative ideas for ricing recipes, please leave them in the comment stream below. Let’s start ricing some deliciousness.
Save
Save
Save
The post Using a Ricer to Make Paleo Cauliflower Rice appeared first on Shawna Coronado.
January 20, 2017
Cooking Oil for a Grain Free Diet
I’m sitting in a restaurant – it could be any of the dozens of restaurants I’ve traveled to around the country – and ask what oil is used in the salad dressing. Nearly every time I get a reaction that is a mix of “stunned inability to answer” and “eyeroll for the crazy lady” and “who cares anyway?!?!”. I care. Since my severe degenerative osteoarthritis diagnosis in 2015, I have been consuming a no grain, no dairy, no sugar diet. Certain grains increase my pain. This is not about being gluten-free or participating in a “fad” diet, this is fundamentally about my ability to reduce my pain with my diet. Grain oils effect me the same way eating bread does – pain caused by inflammation in my joints. This post features some tips for which oils are grain free.
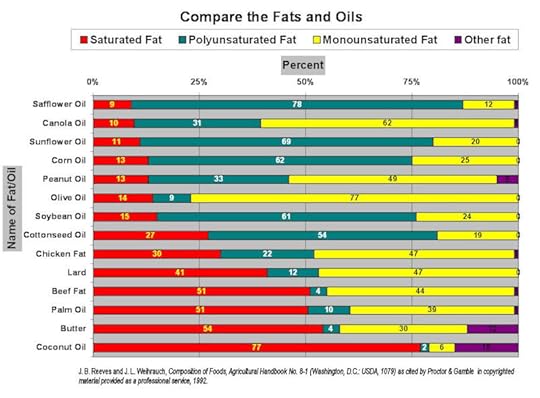
Oils are made and processed from many different products – meat, seeds, nuts, vegetables, and fruits – and vary in their benefits to our health. Types of fat make a difference when considering what oils are best for you (see below list).
Bad Fat
Saturated Fat – Is solid at room temperature. According to the American Heart Association, “From a chemical standpoint, saturated fats are simply fat molecules that have no double bonds between carbon molecules because they are saturated with hydrogen molecules.” Dairy, chicken with skin, pork, and fatty beef products often have quantities of saturated fats. Coconut oil also has saturated fat.
Trans Fat – Is typically solid at room temperature. Trans fats are mostly artificially created with partial hydrogenation, which is a way of converting liquids to solids. Common products with trans fats include margarine and shortening.
Good Fat
Polyunsaturated Fat – Is liquid at room temperature. This fat is naturally occurring in many foods such as sunflower seeds, flax seeds, and tuna or salmon.
Monounsaturated Fat – Is liquid at room temperature. This fat is naturally occurring in many foods such as olives, nuts, nut butters, and avocado.
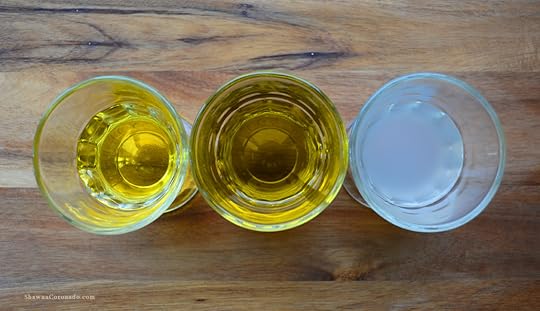
Add to this concern – GRAINS – and we have several oils that we might consider using over others. In the chart (above) you can see a comparison of oils and fat content which might guide you when considering which oils to cook with in your kitchen. For me — I’m allergic to peanuts, so eliminating peanut oil is first on my list. Then grain oils include corn and soy. Dairy is butter, so that must be eliminated because of my diet. If you are a vegetarian you might eliminate animal fats as well. This leaves several choices for my own kitchen which might work in your kitchen also. Choosing my favorite tasting oils out of the healthier common choices in the chart above makes sense. I prefer sunflower seed oil, olive oil, and coconut oil (see the oils from left to right in the top photo seen in the beautiful Perigord Tumblers from LaRochere).
Sunflower and light olive oil are great for cooking because they have a high smoking point. I primarily use coconut oil for cooking onions and cruciferous vegetables that appreciate a bit of a flavor kick, but I do not use it as the main oil in my diet. Virgin olive oil and sunflower are great flavor enhancers for salad dressings and vegetable drizzling, plus they tick off the lower saturated fat content requirement. Avocado oil is not listed in the chart above, yet it is another one I really enjoy.
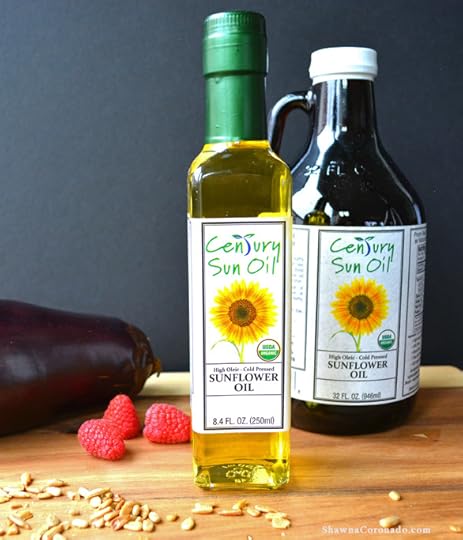
With all this knowledge secured tightly in my “healthy backpack of information”, we must jump to an event in my memory where I am walking to my speaking stage at one of the Mother Earth News Fairs and I run into the Century Sun Oil people at a booth. When I think of fields of sunflowers growing to produce the oil, I feel happy (see below). They have samples of a high oleic, cold pressed, GMO-free, certified organic, and locally grown sunflower oil to try. I’m absolutely mad for sunflower seeds so expect the oil to taste like seeds, but it does not. The flavor is fresh, light, and neutral – absolutely perfect for salads and cooking. I have been testing the oil out all season in dozens of recipes and like it best simply whisked with vinegar, thyme, and a little salt and pepper to be used as a chicken marinade or salad dressing. I give it two thumbs up and if you want to try it, you can order this cooking oil for a grain free diet at www.centurysunoil.com.

Save
Save
Save
Save
Save
Save
The post Cooking Oil for a Grain Free Diet appeared first on Shawna Coronado.