Shawna Coronado's Blog, page 18
October 14, 2016
Pork Tenderloin Roast with Herbs Recipe

It’s fall and I’m craving pork roast. This delicious pork roast with herbs recipe is a whole lot of wonderfulness all simmered together with apples and love. Definitely mind-blowing and the pork roast is simple to throw together for a quick dinner. That means if you are a busy person who likes to eat – this is the roast for you.
Here’s how you make it my friends – first, get yourself a good pork tenderloin roast. Place it on a pan or tray so you can work with it. I use my Fiestaware Baking Tray from HomerLaughlin.com for working with roasts and fish because it is such a large plate and very easy to wash. I don’t have to worry about cutting board juices dripping on my table because the plate captures all of that.


Once you get the pork all herbed up, simply put it in a baking pan and dependent upon it’s weight, bake that baby up on top of some apples and it will turn out more tender than ever (see recipe below). This season I have been reviewing the Fiestaware Foundry Bakeware line in my test kitchen (bottom) and have been thrilled with the results — when I bake meat on the bakeware, particularly when I cover the baking item with foil, I have noticed that the meat comes out more tender. Use this pork as a main dish then save it for lunch the next day – I love the slices of pork on top of a salad with mustard vinaigrette dressing.
Pork Tenderloin Roast with Herbs Print Prep time 10 mins Cook time 60 mins Total time 1 hour 10 mins This delicious pork loin roast is amazingly flavorful and very moist. Author: Shawna Coronado at www.shawnacoronado.com Recipe type: Dinner Cuisine: Traditional Ingredients Pork Tenderloin Roast - 1 to 2 pounds 2 Apples, peeled and sliced Olive Oil One Tablespoon Thyme One Tablespoon Basil One Tablespoon Onion Granules Salt and Pepper Instructions Preheat oven to 375 F degrees Drizzle pork tenderloin roast with olive oil Rub oiled roast with herbs and onion, sprinkle with salt and pepper Drizzle olive oil in baking pan Place apple slices on pan Place roast in baking pan on top of apple slices Cover with foil Roast for 40 minutes (roast approximately 25 minutes per pound, checking with a meat thermometer regularly) Take foil off and finish roasting the last 10 minutes Let rest for 15 minutes before slicing 3.4.3177 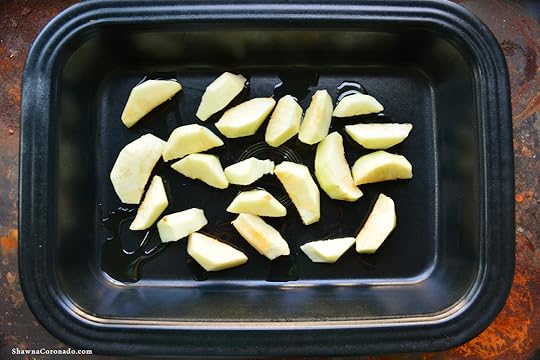

 Save
Save
Save
Save
The post Pork Tenderloin Roast with Herbs Recipe appeared first on Shawna Coronado.


October 10, 2016
Fall Landscaping with Shirley Bovshow
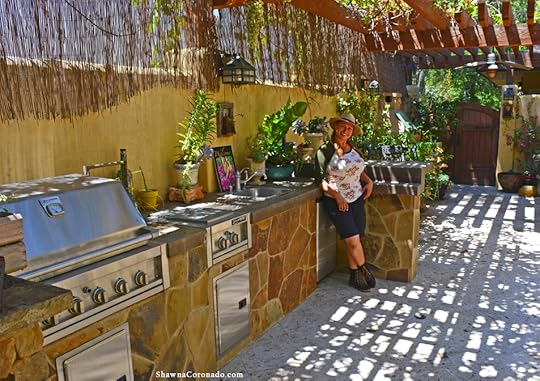
On a recent #takeadaynow tour through the Los Angeles, California region, I met up with beautiful and inspiring landscape designer, Shirley Bovshow for a tour around her garden. Shirley is a garden television personality and has been seen on Discovery Home Channel, HGTV, and is the garden expert on her current show; Home & Family on The Hallmark Channel. Her creative how to gardening tips have inspired thousands of people to jump into gardening and give it a try. Shirley and I are good friends and I have wanted to see her home garden ever since we met – this trip was my opportunity to explore more of her world.
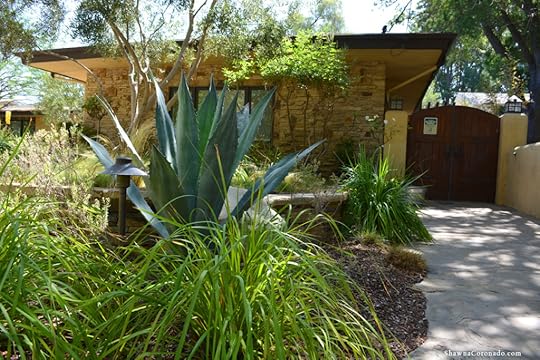
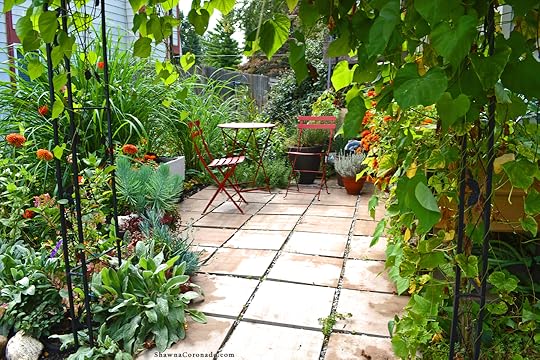
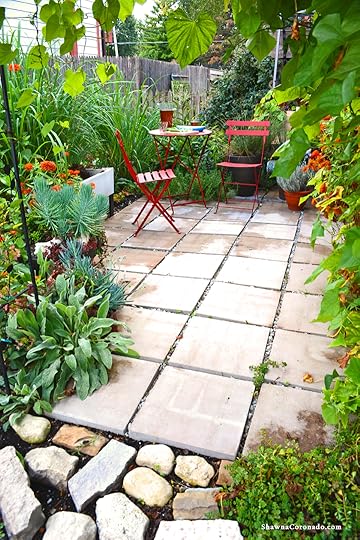
When Shirley inherited her garden it was flat and unremarkable. She worked to landscape with a thoughtful eye to elevations – lowering a small side yard kitchen garden below grade to make it appear larger (see top photo) and elevating other areas of the garden to enhance the depth of field and add interest for visitors (above). Visiting Shirley’s garden is a reflection of her caring and thoughtfulness. Installing a pond, for instance, added an extra sensory experience for whoever comes to the garden – the sound of water falling. Every inch of landscaping in her garden – from her husband’s private hammock spot to her family fire pit with seating area – is all designed with her friends and family’s needs in mind (below).
According to Shirley, while it is important to stay connected with nature through all seasons of the year, fall is a fantastic time to landscape your property. Below are three reasons she suggests landscaping in the fall.
3 Reasons to Landscape in Fall
In most parts of the country there are less watering demands and cooler climactic conditions in the fall. This makes planting trees, shrubs, and perennials easier in the fall as there is a stronger chance for their root establishment in cooler, more water friendly weather conditions.
A perfect time to clear an older landscape and replant is in the fall. Any plants that are suffering from drought or hot conditions can easily be spotted and replaced. Additionally, clearing areas can also enable installations of a green manure cover or easier bulb planting in autumn.
If you are a food gardener or ornamental edible gardener, fall is the excellent time to plant cool weather crops and ornamental edibles in the landscape.


Shirley’s evening garden is even more beautiful than her daytime garden due to creative placement of lighting. She has down-lighting along the major seating and entertaining areas and up-lighting throughout the garden itself. Below is a photo of Shirley with our friend Robin Horton, the editor behind the Urban Gardens website, on her dining patio just as the sun set. I adore the warmth of the area and can imagine Shirley and her family having dinner and cocktails out in this gorgeous patio, which is perfect for entertaining.
If you want to learn some creative ideas about gardening, landscaping, and green living, definitely tune in to Shirley’s adventures on her tv show, Home & Family on the Hallmark Channel. Learn more about Shirley on her website – www.shirleybovshow.com.

*Special thanks to the Visit California team that helped me with a rental car for my #takeadaynow trip so that I was able to come tour Shirley Bovshow and her amazing California garden. #landscaping #gardening #discoverla #visitcalifornia
Save
Save
Save
Save
Save
Save
Save
Save
Save
Save
Save
Save
Save
The post Fall Landscaping with Shirley Bovshow appeared first on Shawna Coronado.
October 4, 2016
Antiinflammatory Lifestyle in the Garden
This garden season has been full of change for me, but change is good, right? If you remember, I rebuilt part of my front garden to help garden with lower pain because of my osteoarthritis condition. Surprisingly I got far more than easier garden conditions – I also enjoyed spending time out there living the life. Many of us were brought up to believe that a garden is only about vegetables and raising your home value, but this year I discovered more than ever that it is about LIFESTYLE. Anti-inflammatory Lifestyle. Living healthier. Living with less pain. Feeling better. Gardens can do that.

I walk every day and think that is critical to my improved health and less pain with no medication experience. However, I believe even more valuable is the time spent outside simply sitting and breathing. Touching the plants. Connecting with fresh air and sunshine. A critically valuable part of lifestyle is eating properly. This year I have gone through a dramatic diet change and have focused on an elimination diet which is dairy-free, grain-free, and sugar-free.
One of my favorite things to do in the garden is to go out on my little patio with the red Fermob bistro set and take a break from my afternoon work load for a snack. Below you see something I snack on regularly which is entirely anti-inflammatory and very healthy – sliced cucumbers, pecans, and dried fruit with iced tea. There is no fancy recipe to making this, simply pick a cucumber off your vine (this season I grew a lovely powdery-mildew resistant variety called Roccker F1 from Clause Home Garden) and slice it up on a cutting board. I drink tea unsweetened. At first it was really challenging because I craved the sweet taste, but now I’ve gotten used to drinking lots of water and an iced tea or two daily and think it has helped me feel significantly better. When I take my snacks outside, I often use non-breakable serving dishes so that I don’t break anything on the cement patio should I drop (I’m a dropper and a spiller). Below you see the snacks with the Jojo Chopping Board, Coco Oval Serving Tray, Diamond Pitcher and Glasses from Crescent Garden for Home.
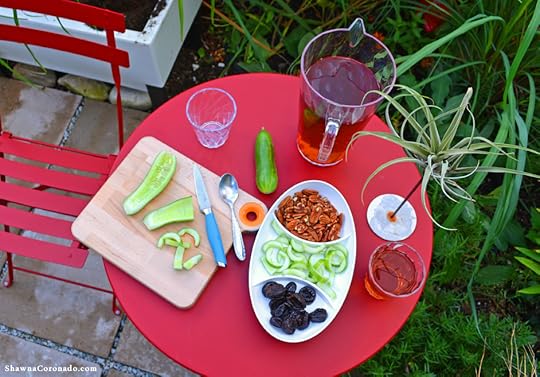
Perched on the Fermob bistro set is a tillandsia I discovered from Flora Grubb in San Francisco that last time I was in town. I leave it outside in the spring and summer, then bring it in for winter. I feel particularly attached to the tillandsia because I touch it often. In order to water the tillandsia, I gently place it in a bucket of rain water and let him soak for a few hours. When I pull him out again it is like I am hugging the little guy; I dry him off, place him on his stand, and he makes me smile. Wellness is more than sweating at the gym – it is connecting with an individual plant, sitting outside in the fresh air, and eating things you have planted and grown yourself. Need a title for this sort of living? Let’s call it an Anti-inflammatory Lifestyle. Or call it happy. Because for me HAPPY is healthy.
Save
Save
Save
Save
Save
Save
The post Antiinflammatory Lifestyle in the Garden appeared first on Shawna Coronado.
October 3, 2016
Blackout Curtains Can Save Energy

Over the last decade, my husband and I have worked to reduce the amount of energy consumption by our household. For example, we’ve done some of this by replacing light bulbs and converting them to LED’s, replacing our homes ancient windows, and insulating our attic. Now that the season is cooling down, I have tested another idea – blackout curtains. Benefits of blackout curtains include blocking light, insulating a window to prevent heat or cold loss depending on the season, and reducing noise issues. Consider blackout curtains a coat for your windows that provide an extra barrier of energy-saving insulation.
Blackout curtains are not “pitch black” typically – you can find pitch black insulated curtains easily – but I wanted just enough light to sneak through the edges that you could tell it was daylight outside but still provide a strong insulation factor (see photo right). I tested the Eclipse Brand Patricia Blackout Grommet Curtain in 63″ in my guest bedroom. While I didn’t study my energy readings to determine if one room caused a noticeable cost difference, I did notice a HUGE difference this summer in the rooms air temperature. Normally our guest bedroom is sweltering in the summer, even with the new window. This summer I tested the blackout curtains and the room has been consistently cooler.
Obviously, this will work in reverse with the upcoming winter — providing a warmer room when it is cold outside and the furnace has kicked in. One of the things I have noticed is that my severe degenerative osteoarthritis is really affected by variations in heat and cold. Keeping the house consistently warm through winter has become more important for me than ever from a wellness perspective. My recommendation is to try your own blackout curtain insulation experiment. If you would like to try an Eclipse Brand blackout curtain you can find them at these retailers – LINK – or to find the particular style I reviewed (see below), get them here at this LINK. Bundle up people – winter is coming!

Save
Save
Save
The post Blackout Curtains Can Save Energy appeared first on Shawna Coronado.
September 28, 2016

September 26, 2016
How To Dry Herbs
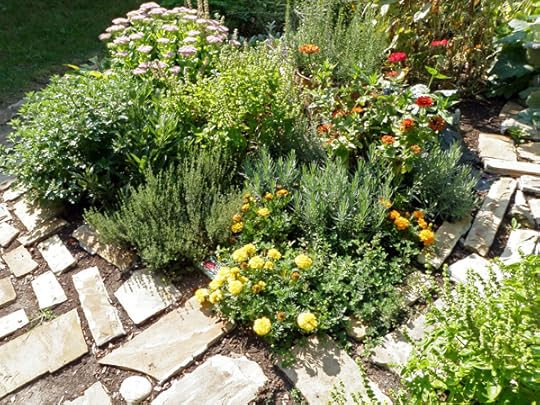
An herb garden is a reflection of beauty and is intricately tied to food and family, it seems a good day to talk about an herb garden. One of the most rewarding and special places in my garden has been the little herb garden I built a few seasons ago. It has been filled with Rosemary, Thyme, Oregano, Basil, Sage, Lavender, and is mixed in with perennials and annuals. It has given me a lot of joy. I have experimented with cooking the herbs, but really, the joy has come from the immeasurably wonderful smells that lift to my nose every time I brush by. To keep the herb love moving forward, I am going to dry them for winter.
HOW TO DRY HERBS
Step 1 – Cut off the tops of the leafy varieties and wash gently with cold water. Air Dry.
Step 2 – Tie stem bases together. Place in a paper bag with stem ends at the opening and close the bag with a rubber band.
Step 3 – Feed a paper clip through the rubber band and hook the clip on a string or line where you are going to hang the herbs indoors to dry.
Step 4 – Wait. Patiently for about a month.
Step 5 – Remove herbs from paper bags, crumble leaves, place on a shallow pan and dry out in the oven with the setting at “warm” or lower than 100 degrees until completely dry.
Step 6 – Store herbs in glass jars or other airtight containers in a cool place.
What do you do with your herbs? Leave a comment and let me know if you dry herbs and how you use those dried herbs at the end of the season. Happy Fall!
Save
Save
The post How To Dry Herbs appeared first on Shawna Coronado.
September 23, 2016
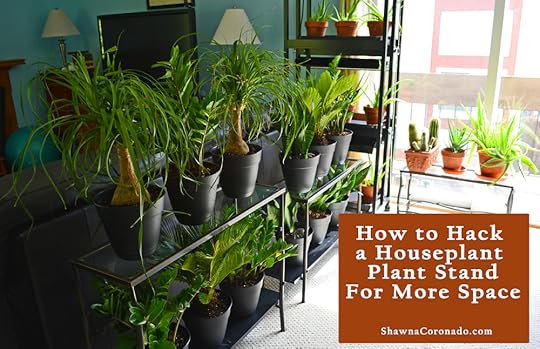
Houseplant Plant Stand Hack
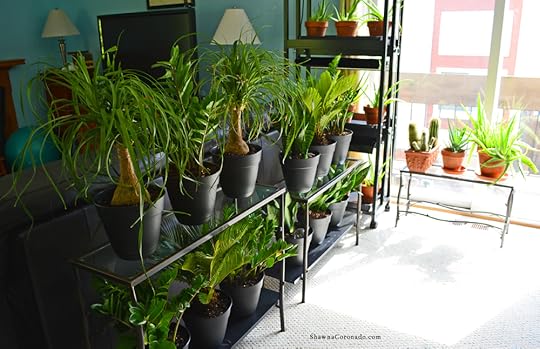
This season I had several houseplants hanging in the garden. One of my favorite displays was the Living Wall Cone Container Garden (right) and the idea of giving these drought tolerant, low-light loving Plants of Steel houseplants away or tossing them in the composter at the end of this season is simply heart crushing. Bringing houseplants in for the fall season seems like the smart way to hang on to my beloved babies. 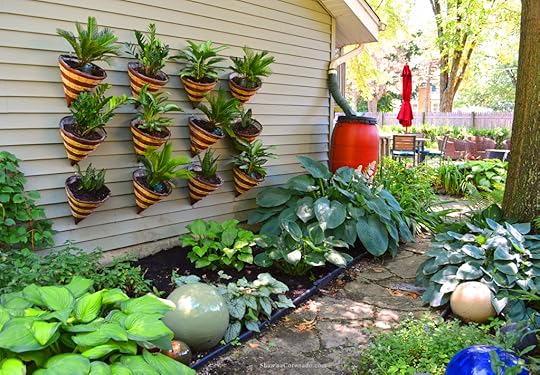
In past years I have had to give away my outdoor container plants or compost them because I have had severe mold allergies for most of my life. Something interesting has happened this season to change my mind and attempt houseplants once again: two weeks ago I had a skin test done which revealed I am no longer as severely allergic to molds as I was before. What has precipitated this change?
When I was diagnosed with severe degenerative osteoarthritis I went on an anti-inflammatory diet which is very similar to a Paleo or Whole30 diet — essentially no grains, no dairy, no-or-low sugars and more healthy fats. I am now over one year into the diet. My pain is down by more than 75%, I have more energy, I went off high blood-pressure medications, I rarely take pain medications, my asthma has improved, and now my allergies are improving significantly. I plan on staying on the diet and while I cannot run out and buy a cat or roll in a moldy pile of leaves, I think I am ready to try more than a few houseplants inside this season.

Bringing Houseplants in for Fall – How To
When to Bring In – Plan to bring your plants in for the fall while the weather is cool, but not frosty, say 50 to 60 degrees Fahrenheit. Check out the First Frost Date Chart above to help you determine a time about a week to two weeks before your first fall frost.
Choose Which Plants – Leave heavily diseased or bug infested plants for the rubbish bin. Do not bring them in as they will be more likely to spread disease and bugs indoors during less than optimal living conditions. Houseplants usually have less light and sometimes dryer conditions in the winter, therefore diseased plants will be more challenged to perform as well as they did outdoors.
Prepare Plants – Prepare plants by spraying off any bugs or webs with a sharp spray of water and removing yellowing leaves and stems. Transplant any plants that are showing signs of being root bound, have insect eggs in the soil, or that have old soil. Do not fertilize heavily in the fall as this will be the dormant growth period for the plants. Transplanting into rich, organic, soil with worm castings such as Organic Mechanics Soil will be enough to help the plants get a kick start to living inside.
Organic Insecticidal Soap – Water well, then leave the newly potted plants in a shady spot and spray a few days before you bring the plants inside with an insecticidal soap. This soap will not harm humans, but will be the last step to preventing outdoor bugs from coming into the home.
Sun – Keep in mind the conditions your plant was living in during it’s summer vacation. If it was a full sun spot, then the plant is going to have a more difficult time adjusting to full shade. Prepare an area near a sunny window or under grow lights for plants that rely on more sun exposure.
Watering – Each plant variety has different types of watering needs. Research and be prepared for varying water concerns. Plants of Steel can go extended times without water, but still perform best with consistent water.
Houseplant Plant Stand Hack
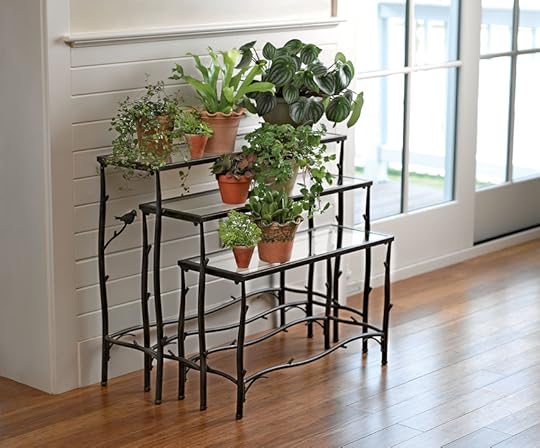
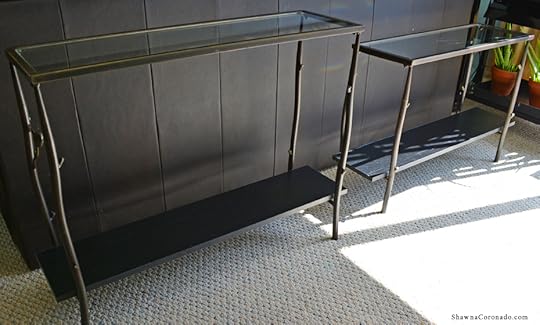
Late this summer I spotted the Nesting Plant Stands from Gardeners.com (right) and I knew this was an excellent solution for my plant rescue. With a unique stack and store feature, these plant stands can easily be placed out of the way during the summer season, then used again in the fall to bring the plants in from their summer vacation. I needed even more space than the plant stands hold, so I came up with a hack to store more plants on the units.
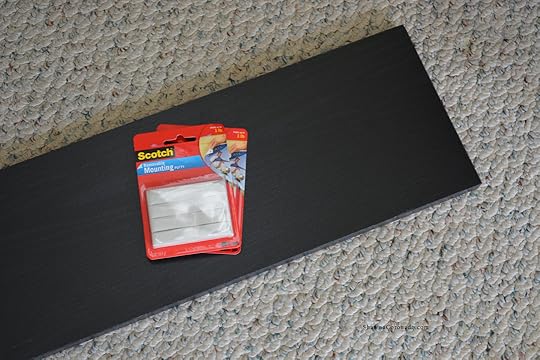
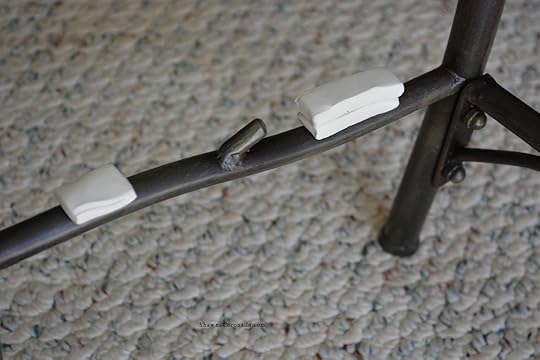
The nesting plant stands are beautiful and have twig-like legs and cross-pieces. My idea was to rest a black shelf on each one – you can find shelving units in the hardware and storage department of most big box stores. These cross-pieces are a tad uneven. To even up the shelving unit and help hold the shelf in place, I layered mounting putty on top of the cross-pieces (above), then rested the shelf on top of the putty (above). Easy-peasy. When it is time to disassemble in the spring, I can take the putty off and nest the units all together again.
Use these adorable Nesting Plant Stands from Gardeners.com as is, or hack them with a twist with my houseplant plant stand hack. One way or another, bring those garden babies in for the fall and save them to brighten up your home over winter. I’ll let you know how my allergies react in a future post – happy house planting!
Save
Save
Save
Save
Save
Save
Save
Save
The post Houseplant Plant Stand Hack appeared first on Shawna Coronado.
September 19, 2016
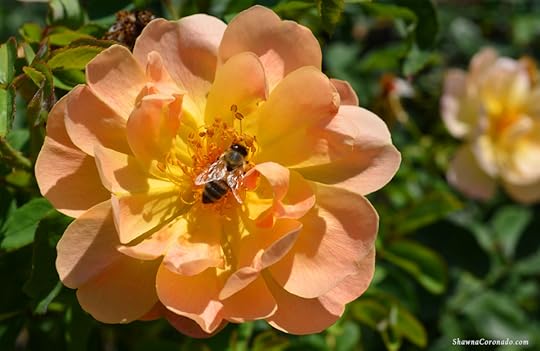
Rose Trials at Biltmore

One of the highlights of my visit this summer at Biltmore Estate was being toured around the gardens by the knowledgeable Director of Horticulture, Parker Andes (above). Parker and his team maintain Biltmore Estate’s 75 acres of manicured gardens and the 3-mile Approach Road, Andes manages the property’s extensive woodlands and pastoral landscapes. In this capacity, he directs the forestry, grounds maintenance, landscape and gardens crews – a total of 50 expert horticulturalists, groundskeepers, arborists and equipment operators.
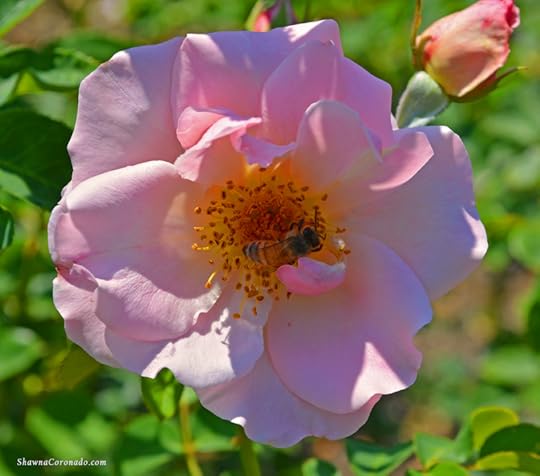
Although Biltmore and roses share a 120-year history that began with the prestigious designer, Fredrick Law Olmsted, Parker Ande’s modern-day leadership has helped the garden and landscaping teams build and keep a world class presence in the garden world. Biltmore’s rose gardens (see below photo credit Christopher Shane) are particularly beautiful and serve a useful purpose – they function as a national rose trialing testing ground. More than 150 varieties are planted by Biltmore’s expert horticulturalists and judged annually at the rose trials.
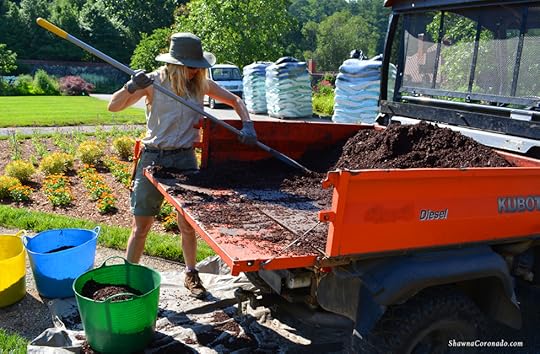
Biltmore’s on site rosarian Emily Wilson gave me a few tips for fall rose care (see Emily mulching in the garden above and tips below).
Autumn Rose Care Quick Tips
Mulch around the base of the rose plant with natural mulch such as leaf mold compost to hold in moisture and protect the root system. However, do not amend the soil heavily as too much non-native soil amendment can create an over-fertile environment for the roses root systems and later create growth concerns.
Clean up ground clutter and cut diseased or injured stems back in fall.
Late fall cut most modern full-sized roses back to 1/3 to 1/2 their normal height. Do not do this with climbers and shrubs; cut them back in the spring.
Starting in early fall, stop deadheading your rose bushes and simply pull off spent petal blooms, reserving any rosehips for winter interest.

This year the 2016 Biltmore International Rose Trials will be selecting winning roses in 12 categories next week – definitely plan to attend in if you are near Asheville, NC. Each trial lasts two years and a permanent jury judges the roses four times per year. This year’s final round of competition started with 31 entries planted in 2014 from Canada, the U.S., France, Ireland, Great Britain and Germany. The international jury will be judging the final round starting at 9 a.m. on Sept. 24 at Biltmore; plan a visit and see the fall roses making their show.
Save
Save
Save
Save
Save
The post Rose Trials at Biltmore appeared first on Shawna Coronado.
September 16, 2016
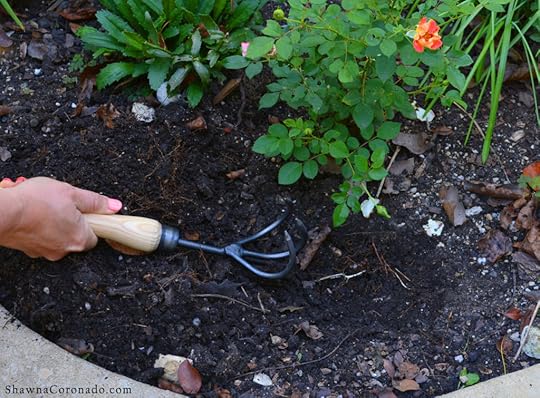
Gleaning Garden Containers for Fall

This year has been an amazing season for my elevated gardens. Since the spring I have been testing a garden tool from Gardeners Supply called the Lifetime Raised Bed Cultivator – it is a swan-neck hoe on one side and a three-prong cultivator on the other side – and is super strong. I have been testing it all season long and have found it is excellent for projects outside of the elevated beds as well.
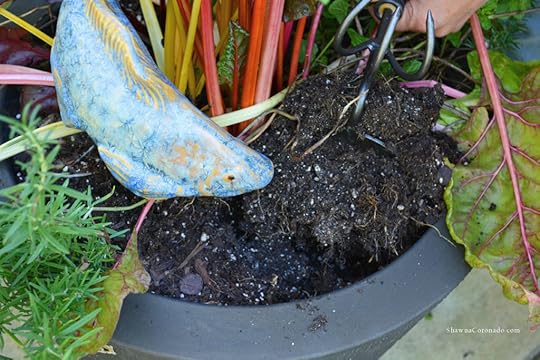
Gleaning Garden Containers in Fall
One of the things I do late summer is pull out a few plants that are not performing well in the various outdoor elevated beds and containers I have around the garden. Below you see me using the swan-neck hoe side to dig beneath the roots of a mint plant that has become invested into the containers soil. I’ll pull the mint, which has a bit of fungus and has stopped performing well, and let the garden container continue through the end of fall. This extends the growing season.
Gleaning garden containers of ill-performing plant materials leaves more space for growing plants, prevents disease by increasing aeration, and enables plant replacement by creating an open space. Many containers can become soil compacted and root bound by the end of the garden season and loosening the soil a bit with the three-prong cultivator side of the tool helps increase aeration as well.
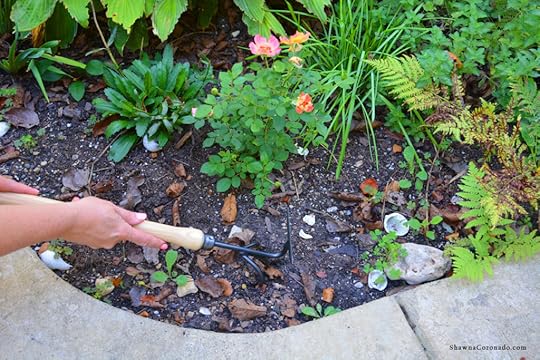
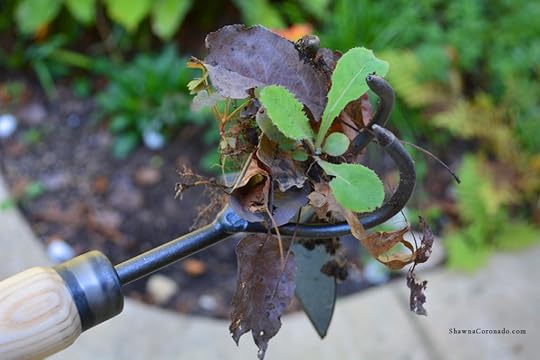
Weeding and Digging with the Cultivator
Additionally I tried weeding with the three-prong side of the tool and found it great for getting small weeds and debris from the garden up in one scoop (above and below). Flip the tool over to the swan neck hoe side and it works well to dig holes and do deeper in-ground cultivation (bottom).
Overall I review this versatile Lifetime Raised Bed Cultivator garden tool as a 4 thumbs up because of its lifetime guarantee, plus it has this a sustainably grown ash handle with an 18 inch reach that enables me to get all the way across the garden bed and helps me loosen soil and pull any debris out of the elevated beds. A great tool with many uses.
Save
Save
The post Gleaning Garden Containers for Fall appeared first on Shawna Coronado.
September 12, 2016
Pear Salad with Cinnamon Apple Cider Vinaigrette Recipe

Recently I spent a few days at Resort at the Mountain in Welches, Oregon, in the Mount Hood Territory room views were delightful (below) and I went ecstatic over the delicious Pear Salad with Apple Cider Vinaigrette dressing the Altitude Restaurant team served me (top). I had them take off the Bleu Cheese Crumbles so that it fit my anti-inflammatory dairy-free diet needs and was thrilled with the result.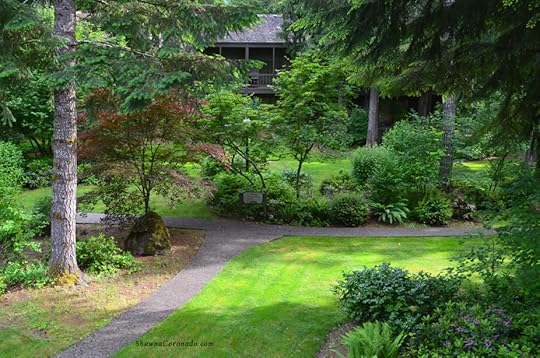
Late summer is pear season and it is time to make your own imitation of the Altitude Restaurant's house salad with the below dressing recipe. Throw your own salad ingredients together. There's consisted of mixed greens, dried cranberries, walnuts, salt, pepper, topped with a poached pear, and apple cider vinaigrette. I twisted the recipe a bit by adding cinnamon in the dressing. Poached pears or extra fresh and juicy pears both work equally well. Serve it as a side salad or as the entire dinner and know it is a healthy, anti-inflammatory choice for the whole family.
Cinnamon Apple Cider Vinaigrette Recipe Print Prep time 5 mins Cook time 1 min Total time 6 mins Apple cider vinaigrette with a hint of cinnamon - perfect for a late season pear salad or it makes an amazing marinade for pork. Author: Shawna Coronado at www.shawnacoronado.com Recipe type: Dressing Serves: 1⅓ cup Ingredients 1 cup exta virgin olive oil ⅓ cup apple cider vinegar 2 Tablespoons honey 1 teaspoon cinnamon 1 teaspoon salt pepper to taste Instructions Combine all ingredients, whip together with a whisk or blender. Serve over salad. Works particularly well with pear salad or also as a marinade for pork. 3.4.3177
Save
Save
Save
Save
The post Pear Salad with Cinnamon Apple Cider Vinaigrette Recipe appeared first on Shawna Coronado.