
Laura Strutt's Blog, page 8
June 22, 2015
DIY Macramé Hanging Pots
Bringing the outdoors inside with a collection of glorious greenery is a great way to lift your spirits and give your interiors a fresh and welcoming feel. I can’t get enough of scrumptious succulents and am rapidly running out of suitably shady with just the right amount of sunshine window ledges to stow all these little beauties! So, How about creating your own Little DIY Hanging Pots to house and display your collection of luscious houseplants?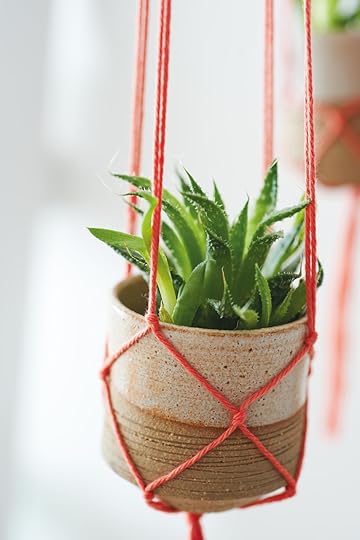 Macramé is back! For lovers of vintage crafts and the style of the I am a great collector of 1970s will love this surprisingly simple, yet stunning craft! Work with brightly coloured cords to bring this retro craft bang up-to-date! Look out for suitable pots in thrift stores or at yard sales. This set has a lovely Japanese look to it. If your pots are different sizes, simply adjust the positions of the knots to fit.
Grab your Supplies…
String
Tape measure
Scissors
Small plant pots—these measure 21⁄3 x 2 1⁄3 in. (6 x 6 cm)
Small plants
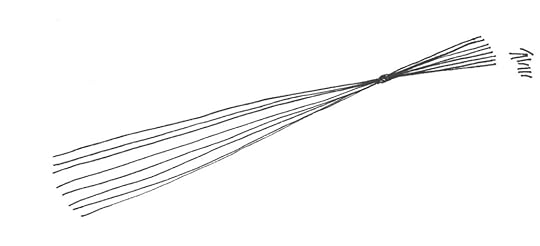 1 Cut eight lengths of string measuring 30 in. (75 cm). Gather the lengths together and tie a knot 6 in. (14 cm) in from one end. Trim off any uneven ends to make a neat tassel.
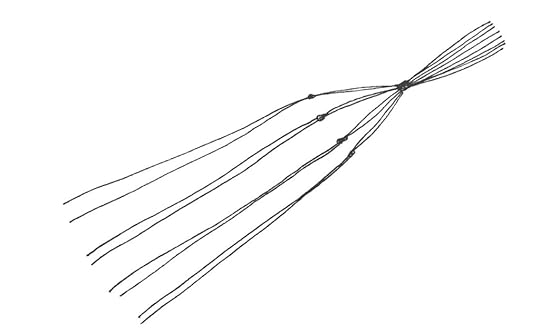 2 Divide the eight strands into four groups of two. Tie a knot in each pair of strands, 1 1⁄4 in. (3 cm) along from the top knot.
 3 Now take one strand from each of two adjacent pairs and tie a knot 11⁄2 in. (4 cm) along from the knot made in Step 2.
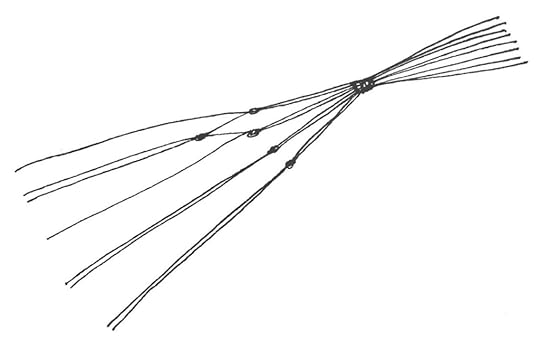
 4 Repeat until all pairs of strands have been divided and knotted.
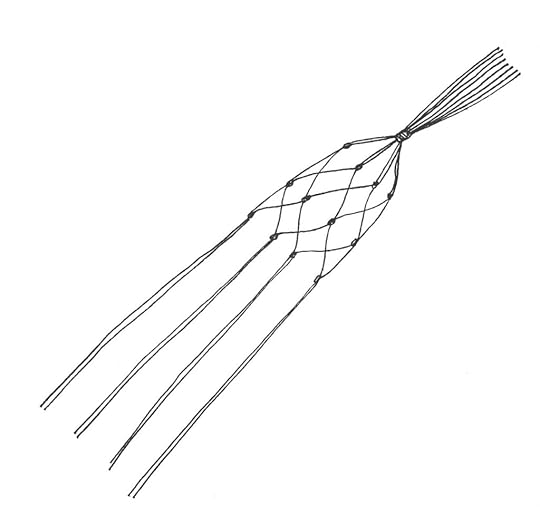 5 Repeat Steps 3 & 4, placing the knots 1 in. (2.5 cm) along from the last knots made.
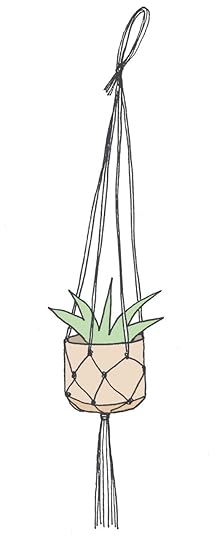 6 Tie a final knot to join all of the strands together, as you did in Step 1. Place the pot and its plant into the holder and adjust the string to center the tassel underneath.
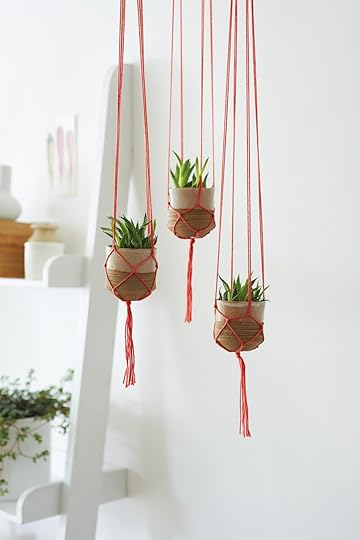 Tah Dah! Now you can hang your sweet little plants in true style. Go for maximum impact with a collection for three or more Macramé hanging post to really make a statement!
♥ – ♥ – ♥

This fabulous hanging pot design is just one of many of the innovative and creative ideas featured in Mobile Art by Clare Youngs, £12.99, photography by James Gardiner, published by CICO Books
The post DIY Macramé Hanging Pots appeared first on Made Peachy.


June 18, 2015
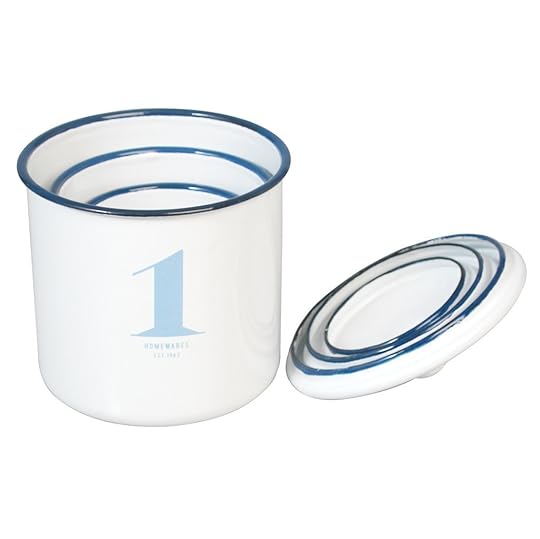
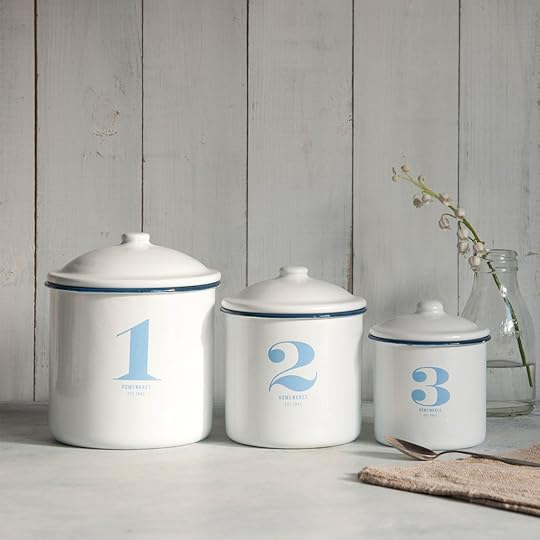
DotComGiftShop Homeware Giveaway
It’s FriYay!
The working week always seems to run just that little bit slower when the sun is shining and all we want to do is kick back, chill in the garden with a cool beverage and a good book, or fire up that BBQ.
The rad folks over at DotComGiftShop have launched their summer sale – perfect for stocking up on fun picnic essentials, cute garden decorations, excellent travel goodies for your upcoming holiday and ideal for those stunning little additions if you’re planning a summer wedding this year – so, to celebrate all that is summer how about a fun homewards giveaway? 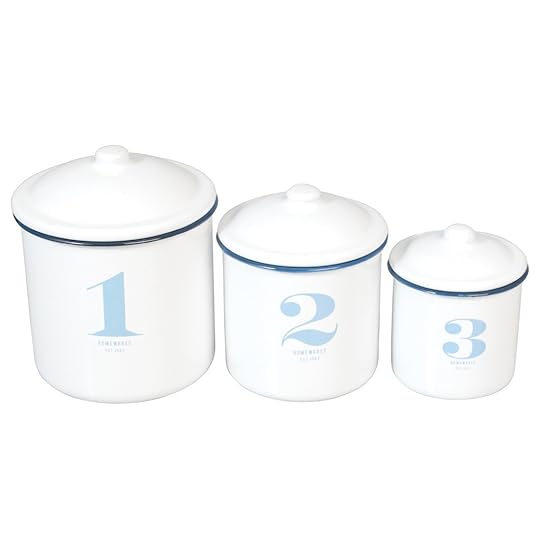
Then today is your lucky day! I have one full set of 3 – worth £15 – c/o DotComGiftShop to give away to one lucky Made Peachy Reader!
 So, how do you enter?
Easy! So that y’all get a fair whack at it, there are a number of ways you can enter this giveaway – and the best part is each one will be counted as 1 entry…so, do all three and you will be entered three times my friend!
1 Please leave a comment below sharing why you want to get your mitts on this awesome set of vintage-style storage containers
2 Share this post on Twitter, tagging @madepeachy and using the hashtag #DCGSMadePeachy
3 Give the MadePeachy Facebook page a like, share the giveaway post and leave a comment on why you’d love to win!
Want a bonus entry? Then head over to the MadePeachy Instagram , follow and give the DotComGiftShop Giveaway post a like & comment!
 The giveaway is open to UK readers only – sorry international friends! The winner will be picked at random and announced on the 26 June – Good Luck!
The post DotComGiftShop Homeware Giveaway appeared first on Made Peachy.
June 15, 2015
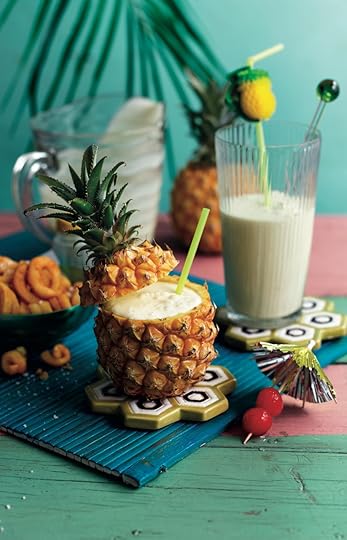
Totally Tropical Piña Colada Recipe
If you are not already singing Rupert Holmes’ Escape in your head, then I’m not sure we can be friends! This is one of my fave summertime recipes – you can be sat in your back garden and sipping on one of these will instantly transport you to exotic locations and give you that happy holiday vibe!
This delicious recipe is not only one if the finest I ever tasted, but it is also super easy to make and I’m sure will become your favourite drink this summer! Dance along to the Piña Colada Song, while slurping from hollowed out pineapples filled with these kitsch cocktail shakes. Fresh, sweet and tropical, you won’t even need to get caught in the rain to enjoy them!
So, folks, let’s dive into this Totally Tropical Piña Colada recipe!
 Grab your ingredients…
2 small pineapples
1 tablespoon coconut oil
4 scoops Coconut Ice Cream (see below)
200 ml coconut cream
150 ml golden rum
50 ml coconut liqueur, such as Malibu
Maraschino cherries, to serve
A pineapple corer
Coconut Ice Cream
1 quantity Vanilla Ice Cream made without the vanilla pod/bean (see below)
50 ml coconut liqueur, such as Malibu
175 ml coconut cream
Makes 800 ml and serves 2
Begin by making the Coconut Ice Cream or use a good-quality store-bought ice cream. Follow the instructions for making Vanilla Ice Cream below, omitting the vanilla pod and swap half of the cream for coconut cream and add the coconut liqueur.
Slice the top off each pineapple and reserve to make lids. Use a pineapple corer to remove the flesh of each fruit and pop your pineapple cups in the fridge until needed.
Place the pineapple flesh in a food processor and liquidize.
Push the pineapple purée through a fine mesh sieve/strainer and discard any pulp. Blend 250 ml of the resulting pineapple juice with the coconut oil, coconut ice cream, coconut cream, rum and coconut liqueur together, until thick and smooth.
Divide the milkshake between the chilled pineapple cups. Garnish the edge of each pineapple with 2 maraschino cherries pushed onto a cocktail umbrella.
Feeling super fancy? Then make your own Vanilla Ice Cream
Grab your ingredients…
350 ml double cream
4 egg yolks
100 g caster sugar
An ice cream maker (optional)
Makes 500 ml
Put the cream in a saucepan or pot set over a gentle heat. While the cream heats, whisk together the egg yolks and sugar in a heatproof bowl until pale and creamy.
Rest a fine mesh sieve/strainer over the bowl.
Once the cream has come to the boil, remove it from the heat and pour through the sieve/strainer set over the egg mixture. Discard the vanilla. Whisk the egg and hot cream mixture together and pour back into the pan. Return to a gentle heat and whisk constantly until the custard thickens enough so that it coats the back of a spoon. Immediately remove from the heat and pour the custard into a jug/pitcher. Cover the top with clingfilm to prevent a skin forming and leave to cool completely before transferring to the fridge to chill for at least 2 hours. If using an ice cream maker, follow the manufacturer’s instructions. If making by hand, simply pour the custard into an airtight container and freeze for about 4 hours or until set, giving the mixture a vigorous whisk every 30 minutes to prevent ice crystals from forming.
Here’s to a great Piña Colada filled summer – Cheers!
♥ – ♥ – ♥

This delicious summer cocktail is just one of the scrummy selection from Boozy Shakes by Victoria Glass, £9.99.
Photography by Gareth Morgans, published by Ryland Peters & Small
The post Totally Tropical Piña Colada Recipe appeared first on Made Peachy.
June 14, 2015
The Week That Was: 8-14 June 2015
Time seems to be the the watchword for me right now. We are part way through the year, which in in itself is scary and time seems to be truly racing!
 See more of this weeks snaps over on Instagram!
The last week has seem me working on my very first Christmas design commissions, in June, now that has to be a world record, am I right? I love Christmas, the decorations, the festivities, the seasonal foods and the all round merriment, but on a glorious sunny afternoon it is pretty hard to get your head into the winter wonderland headspace! But, this has certainly made me realise that this year is flying past.
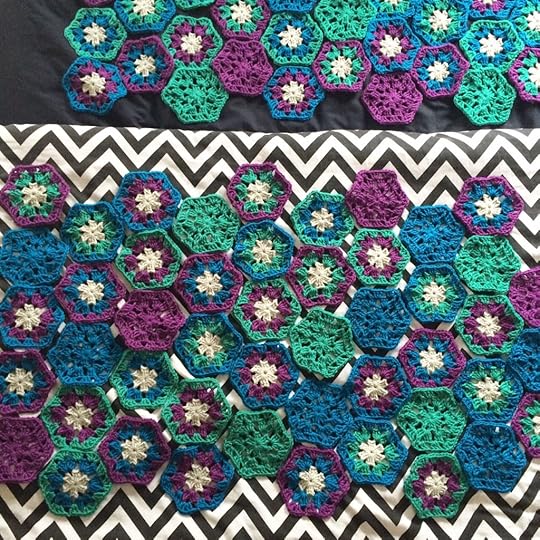 In some ways I feel as though I have achieved very little this year, as you’ve probably noticed (and thank you for sticking about, coming back and visiting still!) I’ve not had the time to work on new makes and tutorials to share here for a few months. As you’ve probably guessed the reason behind this is quite simply down to time. There doesn’t seem to be enough hours in the day. I’m working on a large scale crochet project, which is a fantastic challenge, but at the same time, when you are continually working on new designs, getting makes completed in a very tight turn around time and focusing solidly on a single medium it is very hard to draw on the extra energy reserves that you need to work on other creative endeavours. One of the most frustrating aspects of working on a project like this is not being able to share my makes, not posting them here and letting you see them and giving you the opportunity to try them for yourself. I have to keep remaining myself that this is the long game and that all in good time I’ll be able to share all of this exciting project with you. Roll on that day!
Aside from getting Christmassy in June (!) I’ve finished up another past of this huge crochet deadline and am starting on the third and final part, the final furlong, the end is in sight and that thought alone is boosting my spirits. Despite the fact that I love my job and take great pleasure from the challenges it brings and the lessons that come my way, keeping motivated is a tricky, tricky beast – something that I have been pondering (a little too incoherently to share just yet, but I’m working on formulating that into an other post just as soon as I can!) One thing that has certainly kept my spirits up is the sunshine that we’ve been having. Yes, its a fact that getting out in the fresh air and sunshine issn instant mood lifter, and I’ve been making the most of the great outdoors – with that fizzy little companion of mine is the best hiking companion!
Our lives are busy and it is all too easy to get stuck in a rut of working and keeping so busy that you don’t get to really enjoy those simple pleasures – so whatever your week has in store for you, take five minutes to step outside each day, break from your schedule and take a moment to relax and enjoy!
 Have a great week folks!
The post The Week That Was: 8-14 June 2015 appeared first on Made Peachy.
June 10, 2015
DIY Twine Accent Planters
I might not be the most green fingered gal in the land, but I sure do love to be surrounded by luscious plants both in our home and in our garden.
I have a soft spot for succulents and, when your stuck indoors working there is nothing more cheering than looking at a blooming potted plant to brighter your work day!
 How about creating some fun custom planters to add a little bit of personality to an everyday plant pot? With just a few simple supplies – like twine, glue and brightly coloured paint pens, you can make your own unique planters that will no doubt bring a little bit more joy to your interiors!
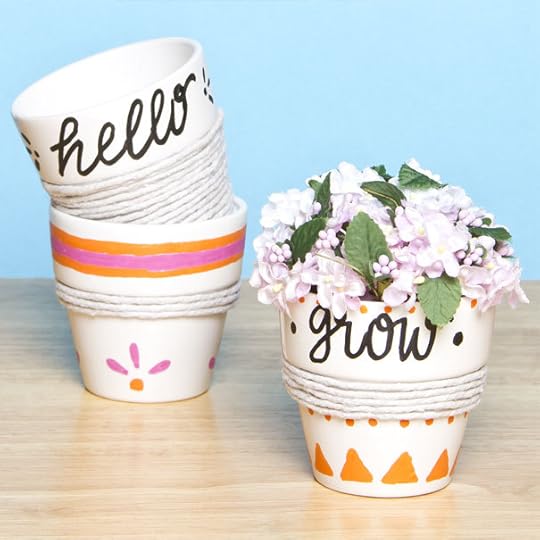 Check out the full step-by-step guide for making your own set of these cute & colourful twine accent planters over on Baker Ross!
The post DIY Twine Accent Planters appeared first on Made Peachy.
June 9, 2015
Pinterest: What They Did With Air Dry Clay
How stunning are these Wall Planter Pockets from Design Love Fest?!
I had so much fun working with air dry clay to make the DIY Trinket Dish I shared yesterday that I wondered what else folks have been making with this super-versatile material. So, I headed over to Pinterest and I was not disappointed! From Jewellery to candles holders, planter to homewards…and almost everything in-between, the possibilities are endless!
So, here are my favourite Air Dry Clay Makes from Pinterest!
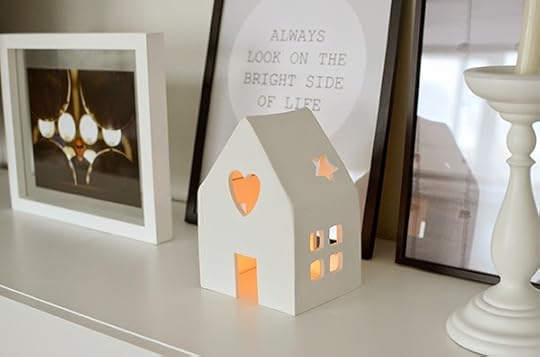 1 House-Shaped Candle Holder ⇒ La Chica De La Casa Caramelo
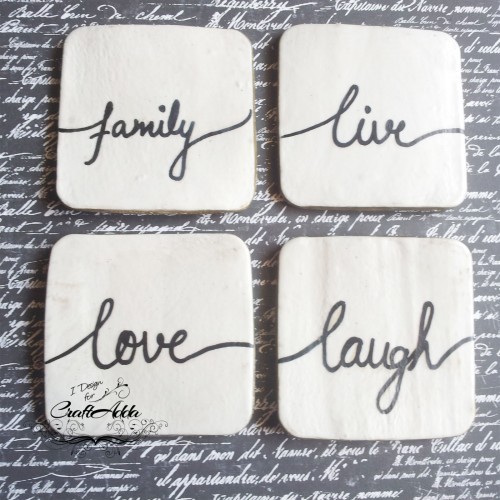 2 Custom Coasters ⇒ Craft Adda
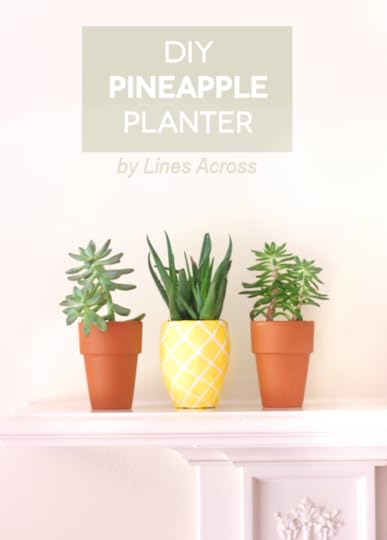 3 Pineapple Planter ⇒ Lines Across
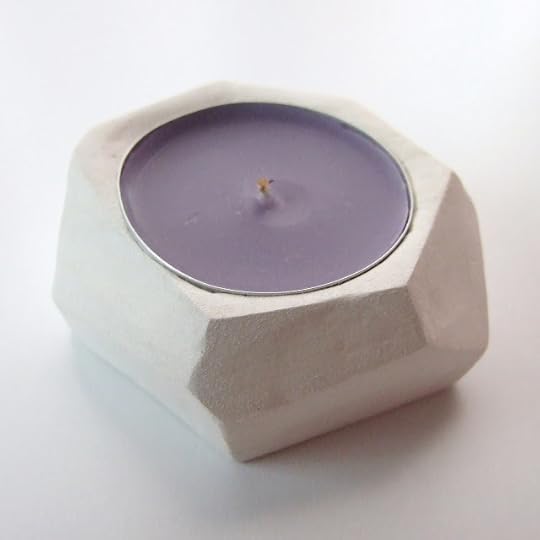 4 Faceted Tea Light Holders ⇒ Gathering Beauty
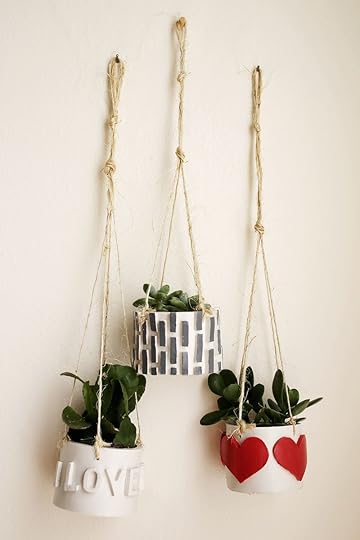 5 Hanging Mini Planters ⇒ A Beautiful Mess
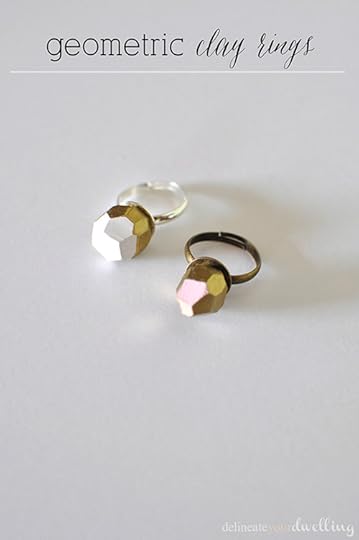 6 Geometric Clay Rings ⇒ Delineate Your Dwelling
How inspiring are these? I’m looking forward to trying out more designs with air dry clay – which is your favourite?
See what other things are hitting my boards and check out I’m pinning right now!
The post Pinterest: What They Did With Air Dry Clay appeared first on Made Peachy.
June 8, 2015
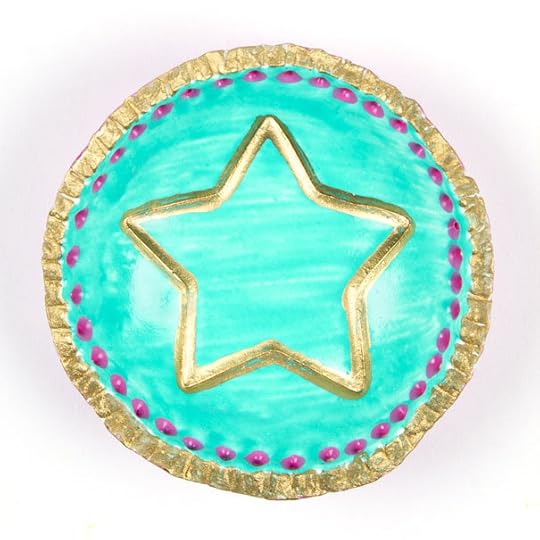
DIY Air Dry Clay Trinket Dish
It doesn’t take much before your nightstand or dressing table is awash with jewellery, gems and accessories, so how about a quick and colourful mini-make to stash and stow your treasures in style?
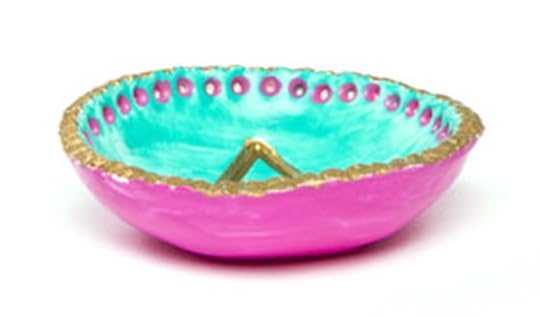 Air dry clay is great for shaping and moulding into custom designs and with the addition of some bright coloured pain pens and metallic accents you can transform it into something really special.
 Check out the full step-by-step guide to create your own air dry clay trinket dish over on Baker Ross today!
The post DIY Air Dry Clay Trinket Dish appeared first on Made Peachy.
June 1, 2015
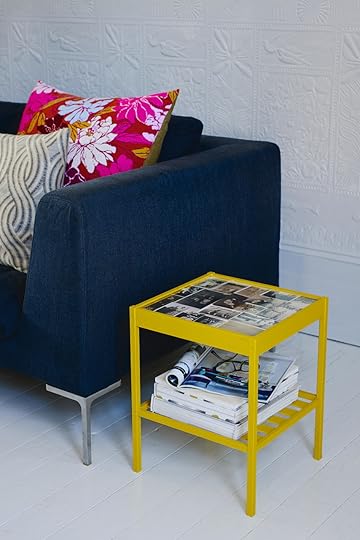
DIY Glass Top Table Photo Display
Digital photography is great, I don’t think that we’ve ever been able to take photographs and capture memories as easily as we can now – whether it is with our cameras or our phones. last week I shared a few neat ideas for getting those images out of the digital world and bringing them into the physical world to create stunning visual displays and personal artworks for your home. Y’all seem to really love these ideas and this post was sure a popular one, so I thought I’d bring you a fresh new idea to try! So, why not make your own DIY Glass Top Table Photo Display?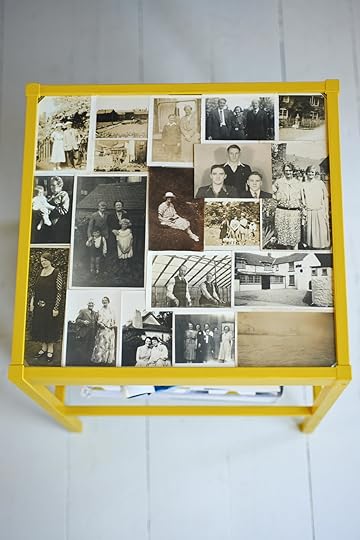 Perfect for those who live in small spaces, have run out of walls to hang art on, or just like their furniture to be that bit more interesting, this project converts a basic glass-topped table into a custom photo-gallery-come-picture-frame. Celebrate your family history by dusting off those old snapshots languishing in a shoebox somewhere and displaying them for all to see. The contents of the display can be easily changed and the photos remain protected from dust and scratches. Give the rest of the table a lick of paint to complete the look.
Grab your supplies…
Self-assembly glass-topped table
Paint for wood
Clear acrylic sheet 1⁄16 in. (1 mm) thick
Selection of photographs or copies
Photo mounts or low-tack double-sided tape
Paintbrush
Sandpaper
Marker pen
Metal rule, craft knife, and cutting mat
1 Assemble the table (without the glass) and give it a coat of paint all over, except for the grooves where the glass slides in. Leave to dry. Apply a second coat of paint if required and leave to dry.
2 Now remove one side of the table. Sand the grooves for the glass with sandpaper to remove any errant paint and to make them slightly larger.
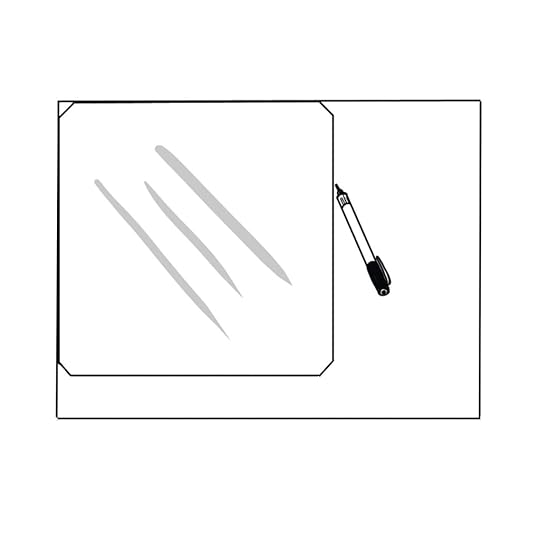 3 Lay the acrylic sheet out flat. Place the glass from the table on top of the acrylic, lining up two edges. Using a marker pen, draw around the remaining edges to copy the shape of the glass onto the acrylic.
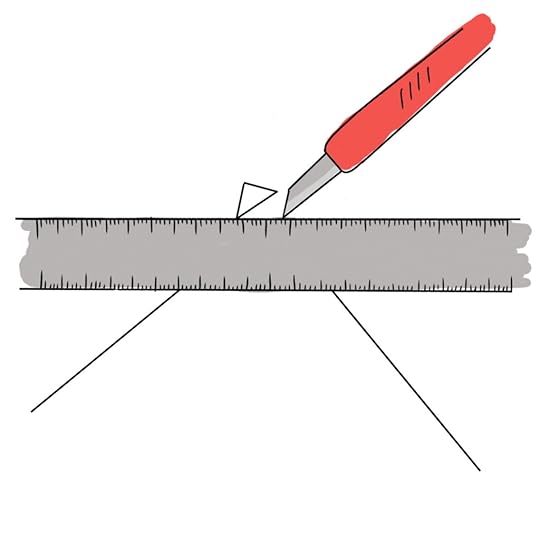 4 Set the glass to one side. Using a metal rule and craft knife on a cutting mat, cut along your marks to cut out the acrylic. Lay the acrylic over the glass to check that they are exactly the same size. If they are not, re-mark and re-cut. Set the acrylic aside.
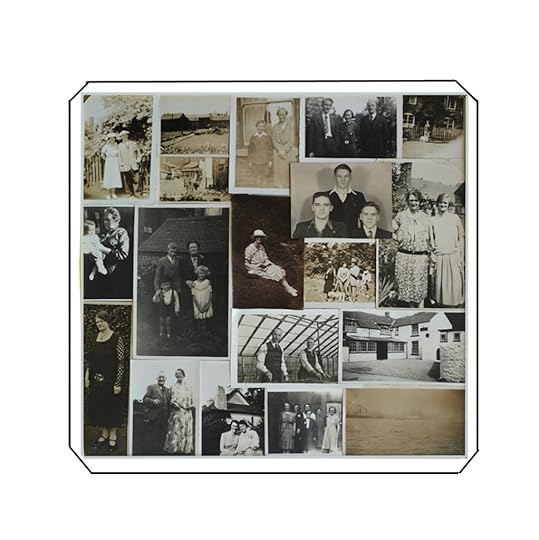 5 Start to arrange the photos around the edge of the glass, lining the straight edges up with the straight edges of the glass, but leaving a border of roughly 1⁄8 in. (3 mm) all the way around (which will help the glass fit in later). Leave a larger border if you want a frame of clear glass to be visible around your photo collection. Then fill in the center with photos until the whole area is covered. Take a digital photo for reference, if required.
 6 Working from one corner to another, lift off one photo, apply photo mounts or low-tack double-sided tape to the back, and stick the photograph back down on the glass. Use extra mounts for old photos that have curled edges.
7 Remove the protective film from one side of the acrylic sheet (if present) and place that side down over the photographs, keeping the area free from dust. Peel back the protective film from the other side by about 3⁄4 in. (2 cm) all the way around.
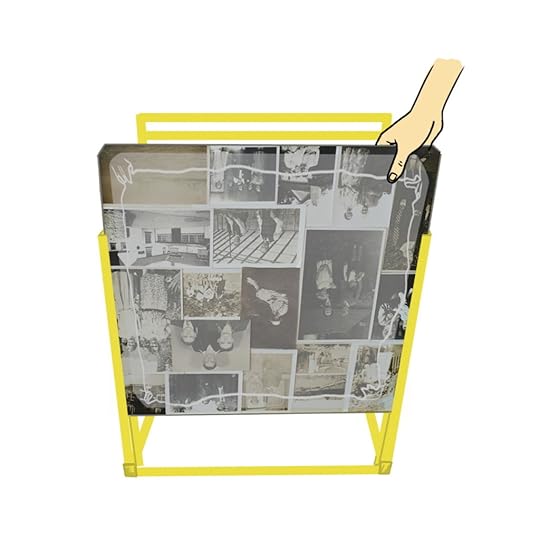 8 Holding the acrylic and the glass together in your hands, begin to feed it into the grooves of the table, photo side up. Slide it in all the way. (If there’s esistance, slide the acrylic in first and then the glass. If it still resists, sand the grooves a bit more.)
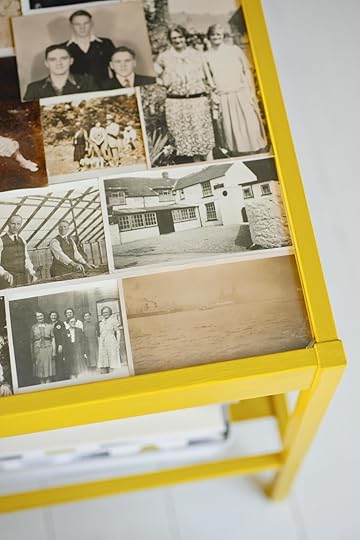 9 Replace the last side of the table, making sure that the acrylic and glass fit inside the groove. Gently screw the section in place. Once the table is assembled, you can remove the remaining protective film from the acrylic to reveal your completed project.
Quick Tip!
This project uses an inexpensive self-assembly glass-topped table, which comes with glass and fixings included. For the acrylic sheet that covers the photos, use a dismantled a cheap picture frame and use the acrylic “glass.” Alternatively, you can buy acrylic sheets from craft stores and online.
 Make it your own…
• Replace the photographs with slides or other transparency-based prints and place a light source on the table shelf below for an impromptu lightbox display.
• Select one favorite photograph for the center and use a decorative paper or film for a border.
• Enlarge a single photograph to fill the entire top.
♥ – ♥ – ♥
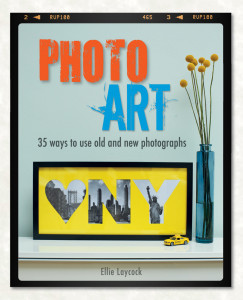
This stunning home display idea is just one of many of the innovative and creative ideas featured in Photo Art: 35 Ways to use old and new photographs by Ellie Laycock, photography by James Gardiner, published by CICO Books
The post DIY Glass Top Table Photo Display appeared first on Made Peachy.
May 21, 2015
Fab Fabric: First Light by Eloise Renouf for Cloud 9
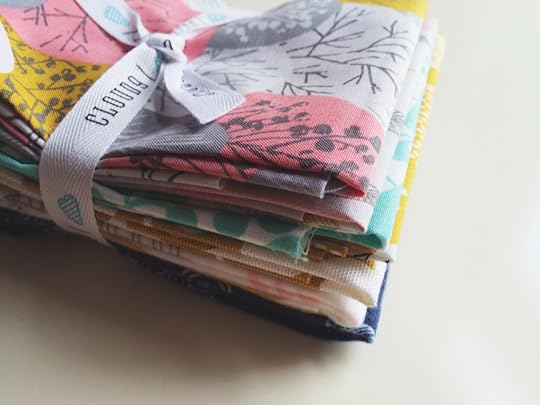
Finally Friday! Phew! Its been a loooong week of working on crochet deadlines (no change there for me!) and no doubt there will be a lot of crochet time over the weekend too! When a fabric bundle arrives here at Peachy HQ it is always a happy day, even more so when I up to my eyeballs in yarn!
The latest collection, First Light by Eloise Renouf for Cloud9 Fabrics is a real treat!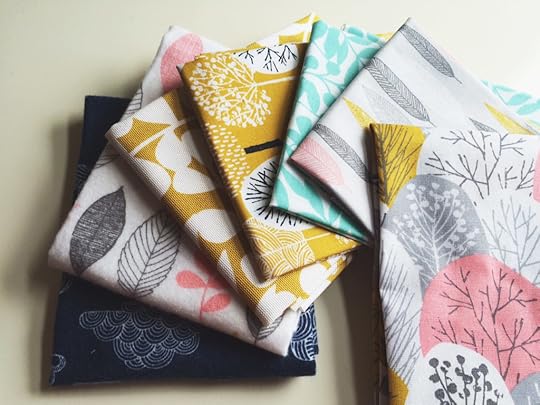 A wash of fresh colours that is full of the joys of spring packed with sophisticated motifs inspired by nature.
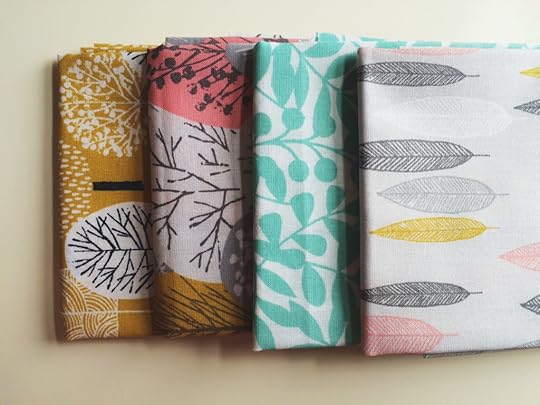 These are just the right amount of fun and fancy that they will be perfect for quilts, cot blankets and even baby clothes- yet the contemporary images are grown up enough to be a striking addition to adult closets too!
 Not only are these perfect prints available in a luxurious soft quilter’s weight cotton, 8 of these prints will also be available from 30 May 2015 in a glorious canvas – just the thing for whipping up your next favourite tote bag!
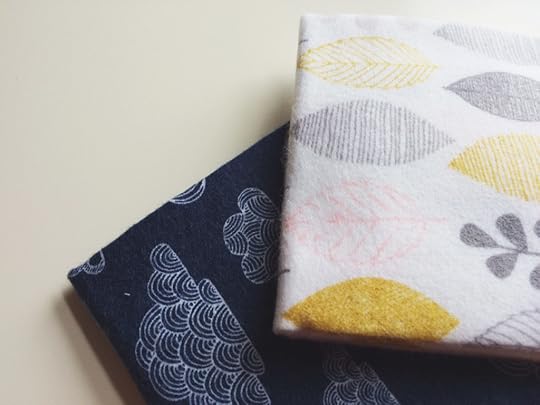 If that’s not enough, here’s the cherry on the top! From June 2015 four of these fabulous prints from this collection are going to be available in a super-soft and snuggly flannel. These ultra touchable fabrics demand to be stitched into adorable makes for new babies, cuddly quilt backings or super comfy PJ pants!
 The temptation to get stitching with these is almost unbearable – but I must step away from the sewing machine…at least until I have finished up this crochet work!
♥ – ♥ – ♥
Quilter’s weight cottons RRP £14.75 per metre
Flannel RRP £14.75 per metre
Canvas RRP £16.50
View the collection and find your local stockist over at Hantex!
The post Fab Fabric: First Light by Eloise Renouf for Cloud 9 appeared first on Made Peachy.
May 20, 2015
Sew-in Box Corners Tutorial
Sometimes its the littlest sewing trick that can really transform a quick project. One of my favourite stitching techniques for bags and purses is to add in box corners – not only does this completely alter the finished make and transform it into something truly wonderful, it is also surprisingly easy to create!
These neat little box corners can be stitched into almost any finished bag or purse project and will alter the shaping to create a strong and sturdy base. Just the think for pencil cases, cosmetic purses, coin purses, and those general stash-all-those-odds-and-ends pouches!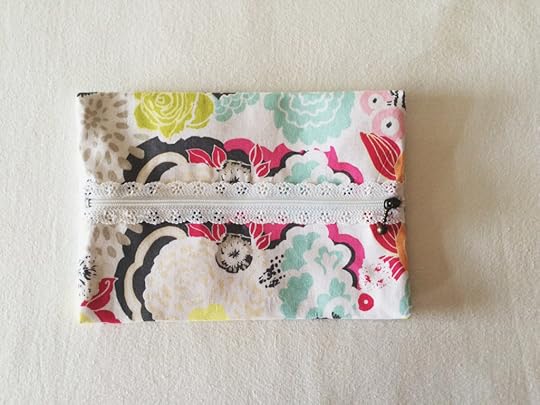 Remember that sweet lace zip purse project tutorial that I shared from the Vilene Sewing Club Workshops? Well, that is the perfect mini make to transform with these easy box corners.
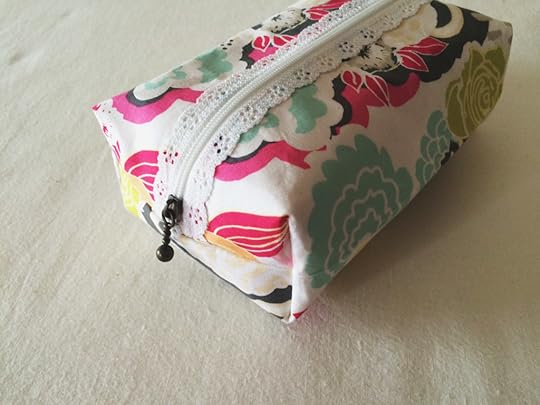 So, let’s create some Sew-In Box Corners!
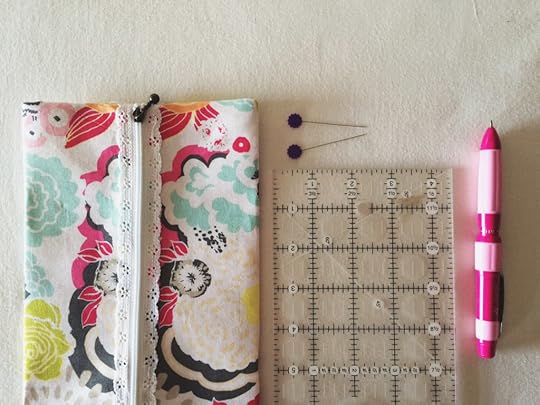 Grab your supplies…
Finished purse – like this laze zip cosmetic purse
Ruler – I prefer a solid quilting ruler over a flexible dressmakers tape measure, but both will work just fine!
Fabric pencil or tailor’s chalk
Pins
Sewing machine
Pinking shears The corners are stitched on the inside of the purse, so begin by turning the purse inside out, so that the wrong side or the lining is outermost. Be sure to push out the corners really neatly.
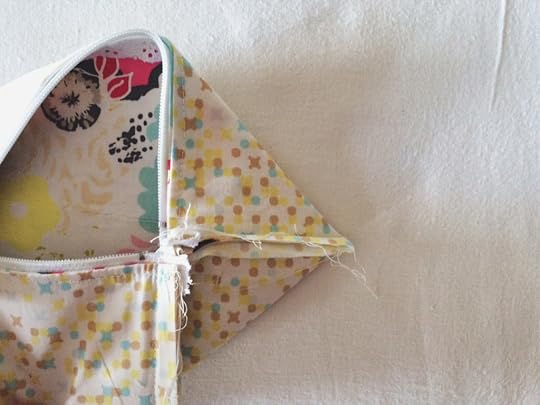 Each seam for the box corners are stitched in turn. Begin with one corner by sliding the fabric of the purse so that the end seam and the side seam or side fold (as with this purse) are aligned. Take your time positing these seams together as the neater these are the neater the finish will be. Once the sections are aligned, pin them together to hold them neatly in place.
Place the ruler over the pointed section of the corner to mark out the stitching line of the box corners.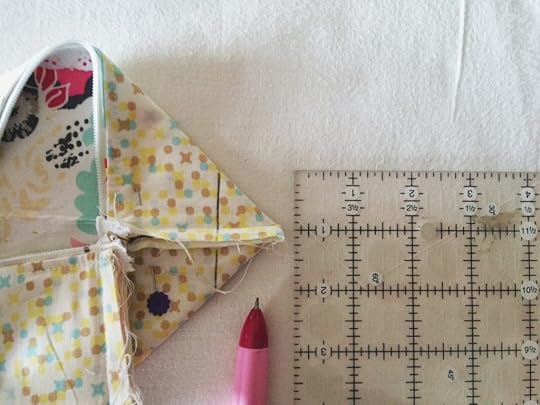 The length of this seam will determine the size of the box corner. to ensure that all of the corners are equal measurements, position the ruler to mark out a 2in seam that runs parallel across the point of the corner. Mark out with the fabric pencil or tailor’s chalk.
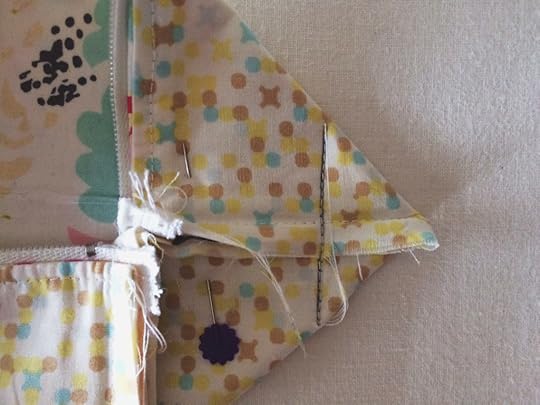 With a straight machine stitch, work a line of stitching along the marked line. Be sure to work a couple of reverse stitches at the beginning and end of the seam to lock the stitches firmly in place.
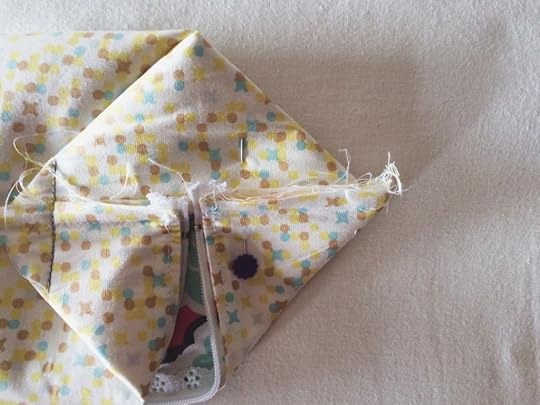 The first box corner is created – easy, huh?! Now, turn the purse and work on the second corner in the same manner. Folding the completed the corner out of the way, aligning the seam at the end and the seam at the side seam or side fold neatly. Pin in place and mark out with the ruler to indicate the 2in parallel seam at the corner.
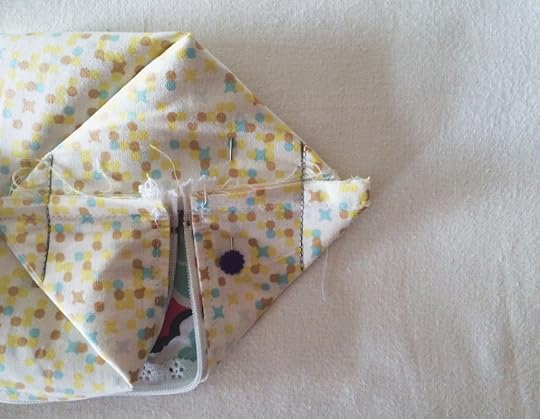 Secure the corner with a straight machine stitch, locking the stitches at the start and end of the seam.
 Repeat to add the box corner seams to the two remaining corners in the same manner. The purse will now that little ‘ears’ at the corners with the seams have been worked.
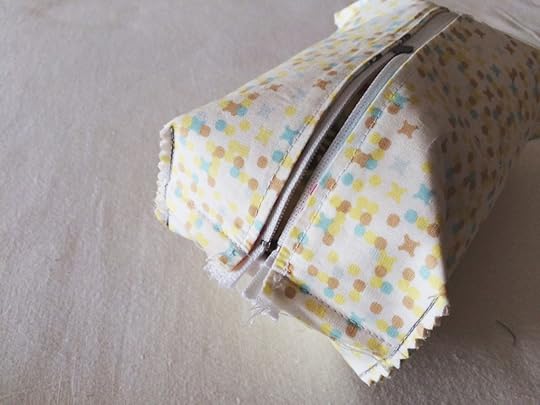 Trim away the excess – those little corner ‘ears’ – with pinking shears to prevent fraying. Be sure not to snip through the line of stitching! These little seams will be visible on the inside of the purse, if you prefer you can work a line of zig zag stitching or overlock the raw edges – but pinked edges will prevent the ends from fraying.
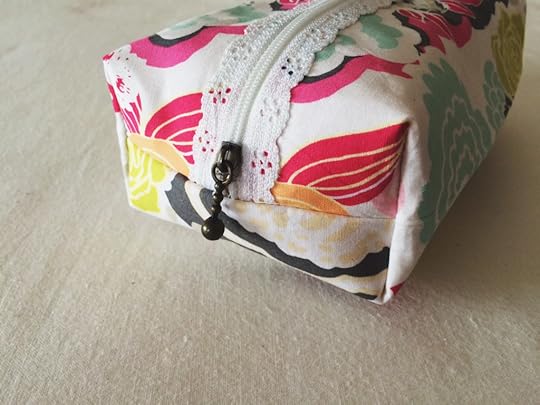 Turn the purse through to the right side to reveal the neat little box corners!Push out the little box corner seams fully and tah dah! one sweet little boxy purse really to fill with all your essentials!
I adore little box corners – have you tired this sweet little technique yet?
The post Sew-in Box Corners Tutorial appeared first on Made Peachy.


