
Laura Strutt's Blog, page 9
May 19, 2015
Pinterest: What They Did With Iced Beverages
I’m going to go ahead and assume that summer is right around the corner…as I’m writing this the sun is shining, although there are some rather ominous dark clouds creeping in! The weekend was glorious – we managed to spend the day hiking the dog and beach combing for seaglass at our favourite beach, and I also had a day lazing in the garden catching up on some crochet and supping on some sweet iced tea!
Which got me to thinking, if the hot weather is right around the corner, then it is about time I armed myself with a few tasty recipes for delicious cold beverages. So, sunshine loving friends, here are a few of my favourites DIY Iced Beverage Recipes from Pinterest!
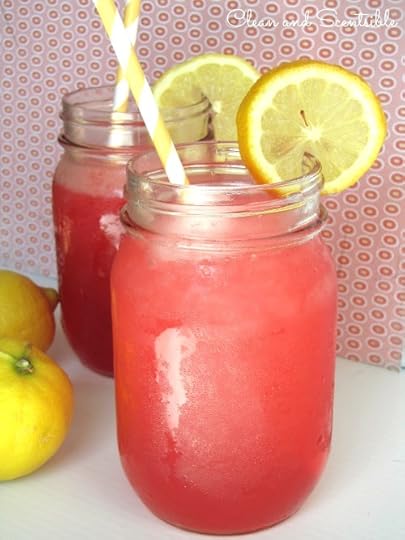 1 Cherry Lemonade Raspberry Slushie ⇒ Clean and Scentsible
 2 Iced Peach Green Tea ⇒ Made Peachy Archive
 3 Sparkling Strawberry Lemonade ⇒ Eat Drink Love
 4 Creme Caramel Rooibos Iced Tea ⇒ Made Peachy Archive
 5 Cold Brew Iced Coffee ⇒ Made Peachy Archive
 6 Fresh Pressed Lemon-Limeade ⇒ Made Peachy Archive
Do you have a favourite iced drink for sunny days – I’d love to hear your fave recipes!
Be sure to check out I’m pinning right now!
The post Pinterest: What They Did With Iced Beverages appeared first on Made Peachy.


May 12, 2015
Pinterest: What They Did With The Ikea Bekväm Stool
The Bekväm Stool, £13, Ikea, is a household staple – I mean seriously, who doesn’t own one (or more of these?!)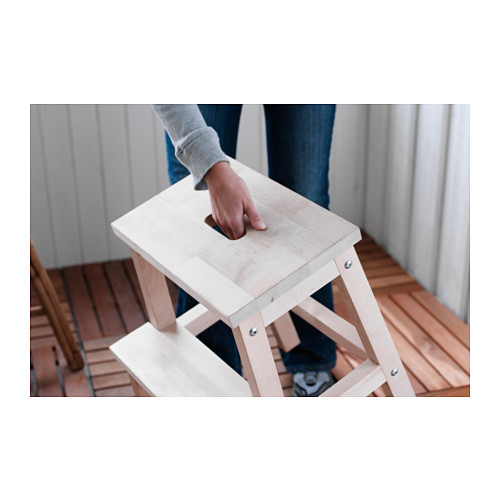 As a less than tall girl this stool is one of the most used pieces of furniture in out home- it is perfect for reaching to those way-too-high kitchen cabinets, its portable enough to be handy for every DIY project, its ideal for quick-grab extra seating when guests come over. Basically this is one of the most simple and yet essential items I’ve ever owned.
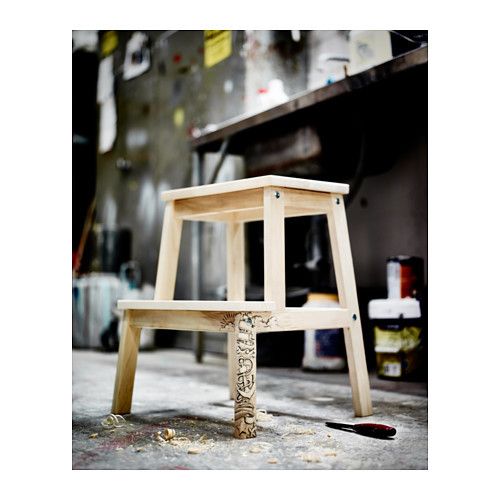 What’s more, this stool is the perfect blank canvas for adding your own personal style. So, here are just some of my fave DIY Bekväm Stool Makeovers from Pinterest!
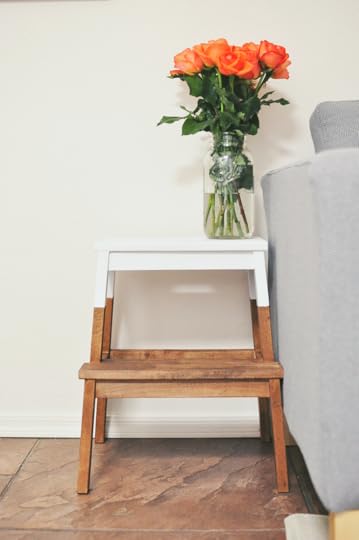 1 Walnut Stain & Colour-Dip ⇒ Yesterday’s Sweetheart
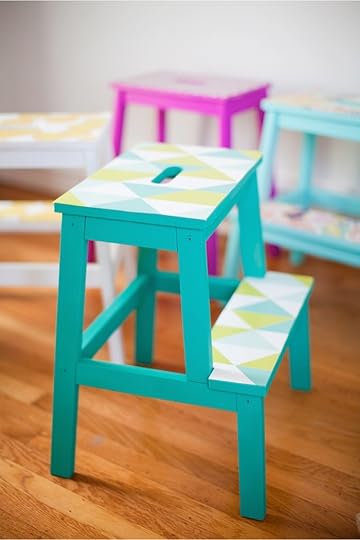 2 Paint & Wall Paper Accent⇒ This Little Street
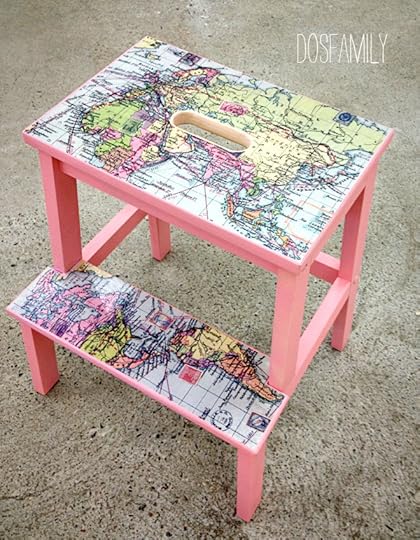 3 Decoupage Map ⇒ DosFamily
 4 Milk Paint Shabby Chic ⇒ Liz Marie Blog
 5 Paint Dipped Fur Topped ⇒ Shift Ctrl Art
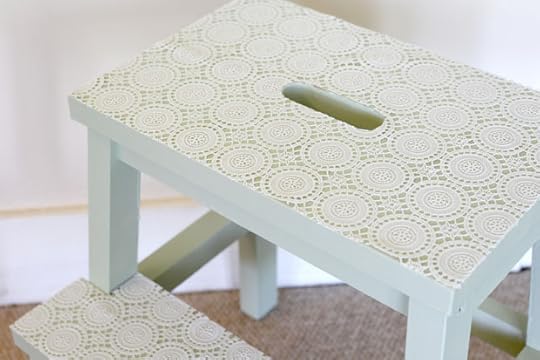 6 Lace Accent ⇒ She Sows Seeds psst! This lace covering is actually a rubbery non-slip table cloth, so not only is it cute but its got added grip for little feet!
There is really no end to the looks and styling options for this household staple – which is your favourite?
Be sure to check out what else I’m pinning right now!
The post Pinterest: What They Did With The Ikea Bekväm Stool appeared first on Made Peachy.
May 11, 2015
Top Tips for Restoring & Altering Vintage Clothing
If standing out from the crowd and radiating your own unique style is a priority for you it is highly likely that your closet will be full to bursting with handmade garments and vintage pieces. The benefits of creating your own clothing is that you can get that made-to-measure fit that will falter your unique figure. But, when it comes to vintage clothing many of them need a bit of TLC to repair the damage form years of wear and tear, or simply need to be adjusted to fit your figure. When you bring home that fabulous vintage treasure it can be a little daunting to get get busy with the scissors, needle and threads for essential repairs and adjustments.
So, vintage lovers, to give you a bit of a helping hand when it comes to your much loved vintage pieces the in-house seamstress at Mela Mela Vintage has complied this must-read Guide to Restoring & Altering Vintage Clothing!
Have you ever fallen in love with a piece of clothing in a vintage shop or website, only to find something about it just isn’t quite right? We’re not talking simple things like the garment being too small or too large, (although watch out for vintage size tags – a vintage UK size UK 16 label may correspond to something more like a modern size UK 12), but perhaps the neck seems too tight, the armholes too small, or you find it hard to squeeze into it at all!
If you’re a fan of vintage clothing you’ll notice this quite often because the way clothes were cut back then is slightly different to now, and body shapes and underwear have altered quite a bit. But there’s no need to leave the coveted item on the rail, because it only takes a few simple tweaks to get it look good and fitting well.
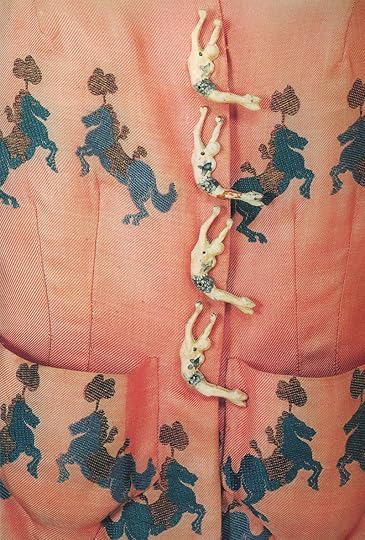
Not only that, but small details like buttons and other notions can crack, look shabby or even go missing entirely. That’s an easy fix!
 To get an idea of what to look for, we’ve asked for the top tips from a team that works with vintage clothes on a daily basis.
Without further ado, here are the tips from our seamstress:
1 Replace vintage buttons with new buttons (vintage style) as the original ones are often missing or become brittle over time.
2 40s dresses – we usually replace the small original zip with a new underarm zip to make it easy to get in and out of.
3 60s dresses – we often increase the size of the arm holes as they are typically very small.
4 High necklines – we often reshape high necklines to be slightly less extreme and thus more comfortable to wear.
5 Pre-50s dresses – sequins turn to jelly so you need to test them before making any updates.
 You can combine these changes with altering a garment to suit your personal taste too. Vintage skirts that are an unflattering length can become a little shorter (although very short skirts make most vintage dresses look unbalanced, so stick with knee length or just above in most cases). A very loose shirt can be given bust darts to fit a bit better.
To make a garment look pristine, have it professionally dry-cleaned. A gentle hand wash is enough for some items, such as lambs wool twinsets, but be careful with anything with structure, i.e. suit jackets and coats, as they will have interfacings and padding that may lose stiffness or simply disintegrate on contact with water. Leave it to the experts.
Some vintage clothes, however, can’t easily be altered without spoiling the whole look and intention of the design. For these we say: leave them on the rail for someone else to enjoy, or buy them for your personal collection just to admire and take inspiration from!
♥ – ♥ – ♥
This handy tips are from the talents team at Mela Mela Vintage, a vintage boutique in South West London. Mela Mela stock a wide variety of original vintage clothes and accessories.
The post Top Tips for Restoring & Altering Vintage Clothing appeared first on Made Peachy.
May 5, 2015
Pinterest: What The Did With Crochet Borders
Right now my world is wall-to-wall crochet! You might think that I would not want to see any more crochet, but when it comes to yarn crafts, I have to confess that crochet is one of the most moreish. I mean, when it gets to the point that my hands are aching too much to hold my crochet hook (the downside of working to crochet deadlines!) I find myself looking over the world of amazing creations on Instagram & Pinterest!
It has to be said that the finishing touches are what really make a crochet project great. I’m fanatical about blocking my crochet projects and, while its setting into its beautiful form, I love to plan and dream about the finishing touches that I’ll be adding. So, I thought that I would share with y’all a round up of some of my favourite Crochet Border & Edging Tutorials from Pinterest!
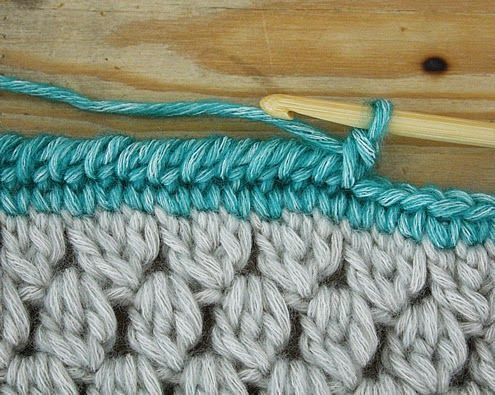
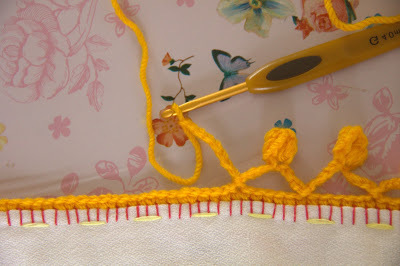 1 Bobble Edging ⇒ The Heartfelt Company
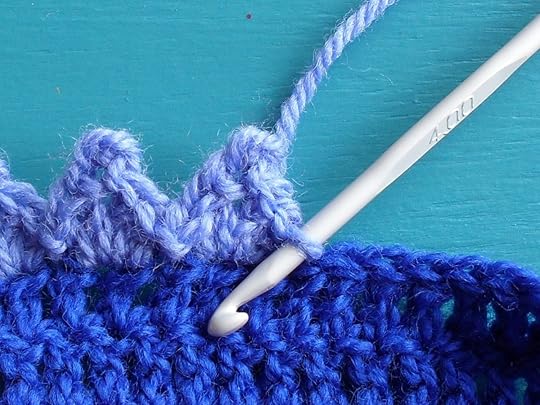 2 Triangle Border ⇒ Crochet With Raymond
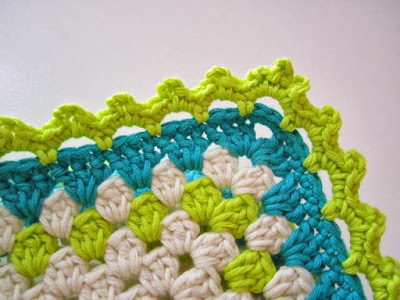
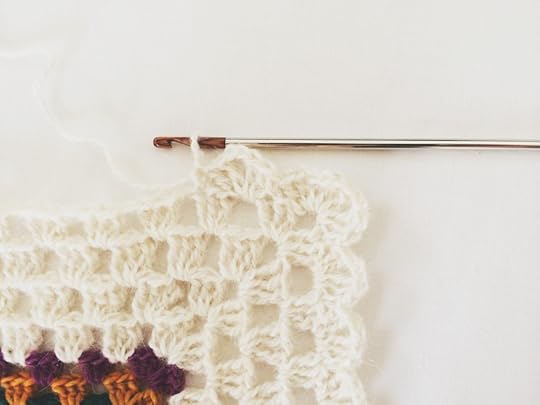 3 Scalloped Crochet Border ⇒ Made Peachy Archive
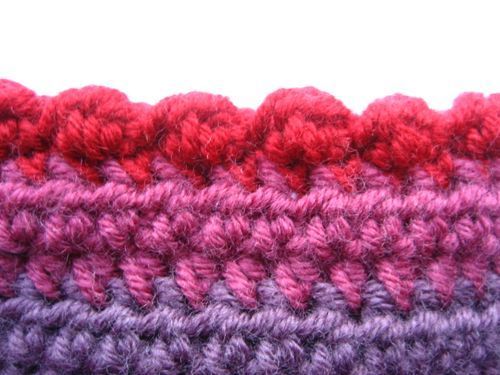 4 Bobble Shell Border ⇒ Attic24
 5 Pretty Picot ⇒ Color ‘n Cream
 6 Crab Stitch ⇒ Happy In Red
This collection of fancy finishing touches will be sure to inject a some enthusiasm into your latest crochet makes. Do you have a fave go-to crochet border? Or do you like to try out new techniques with each make?
Be sure to check out the other crochet goodies I’m pinning right now!
The post Pinterest: What The Did With Crochet Borders appeared first on Made Peachy.
April 29, 2015
Vilene Sewing Club: Lace Zip Cosmetic Purse
This cosmetic purse was by far the most popular project of the whole series of workshops at this years Vilene Sewing Club – I know that mots of people were disappointed that they didn’t manage to get onto one of the limited spaces during the shows.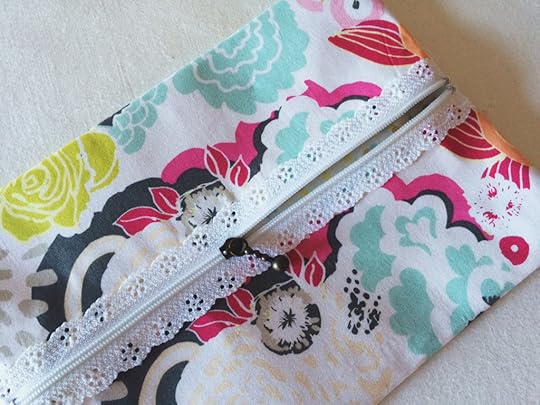 So, I’m delighted to be able to share with you the step-by-step guide for stitching up your own Lace Zip Cosmetic Purse!
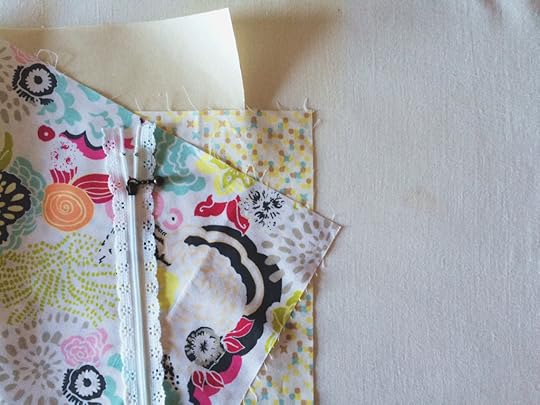 Grab your supplies…
Print Cottons, 23cm x 30cm – select two contrasting designs, for the main fabric and the lining
Vilene Decovil 1 Light fusible interfacing, 23cm x 30cm
Lace Zip, 23cm
Pins
Scissors
Sewing Machine
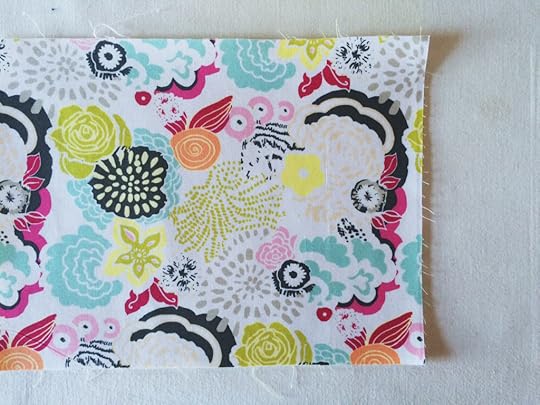 Begin by placing the piece of Decovil 1 Light, adhesive side down on to the wrong side of the piece of fabric – select the one that you would like outermost as this will become the main fabric. Cover with a slightly damp pressing cloth and using a wool setting on the iron bond in place.
Pro Tip! Once the Decovil 1 Light has been bonded to the wrong side of the fabric, remove from the ironing board and transfer on a cool flat surface – like a table – and leave for up to 30 minutes to cool. This allows the adhesive to fully cool and bond the pieces together firmly.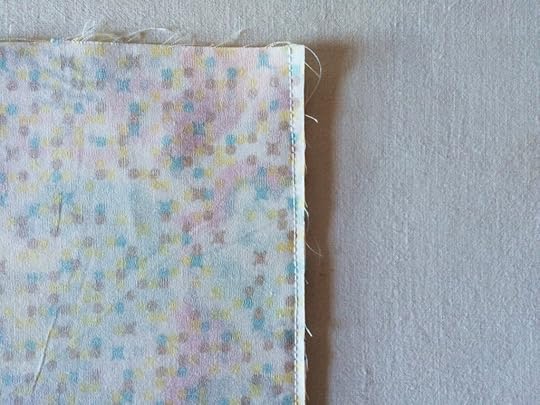 Place the main fabric – backed with Decovil 1 Light- and the remaining fabric – the lining- together with right sides facing and pin neatly together. With a straight machine stitch, work two seams, taking a 5mm seam allowance, at each of the short edges in turn to join the two fabrics together.
 Turn the fabrics through to the right sides, folding the seam allowance down and press with the iron to neaten.
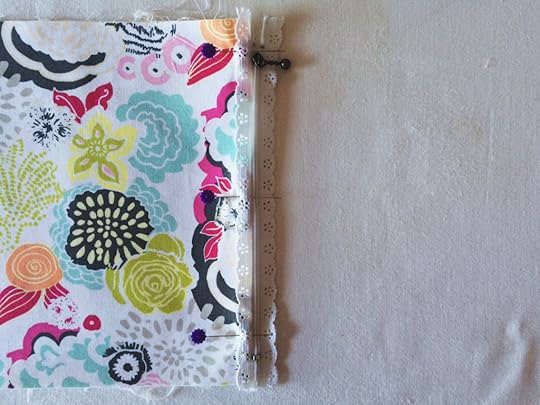 Place the sip along one of the seamed edges. Align the zip so that the lace tab is positioned flat with the fabric and so that the teeth of the sip are snuggly positioned along the folded edge of the fabric. Pin in place.
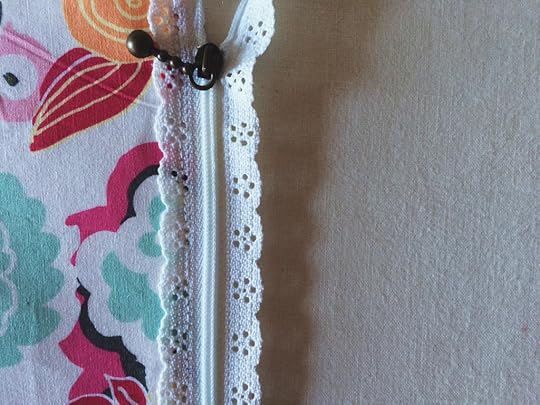 With a straight machine stitch work a line of stitching down the lace panel of the zip to secure it to the fabric. It is not essential to switch to a zipper foot for sewing the sip into place, simply ensure that the stitches are positioned neatly down the centre of the lace strip.
Remember that the sip has metal parts at each end and also the large metal zip tab – it is important not to sew over these sections as this will most like break the needle and can result in damaging the machine. When the line of stitching gets close to the zip tab, stop the machine with the needle down through the fabric, and simply lift the presser food and slide the zip tab past the sewing foot before lowering it and continuing along the stitching line.
Pro Tip! The lace is visible on the front of the project, so selecting a thread that best matches the colour of the zip is the best way to create a neat and even finish.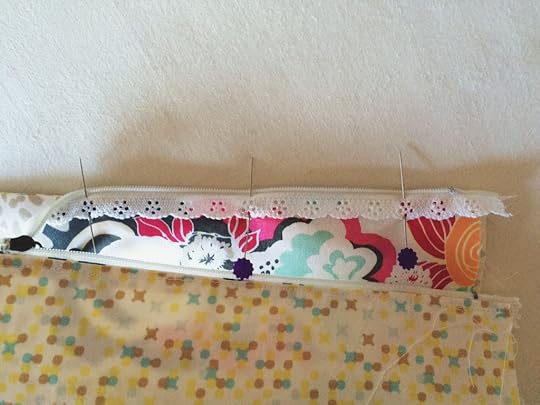 The second side of the zip needs to be stitched onto the main fabric – so roll the purse so that the lining fabric is outermost and align the zip on the right side of the main fabric in the same way as the first side. Opening the zip will allow you access to position the pins to secure the zip into place.
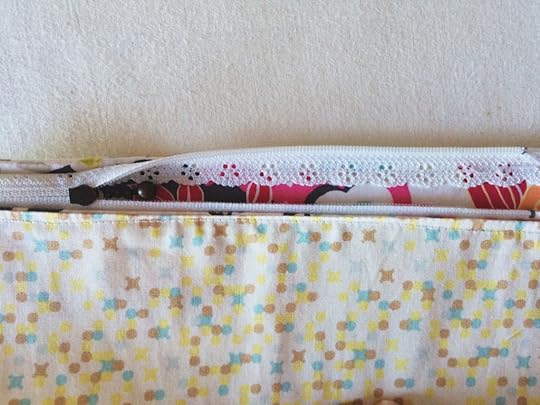 The zip is again secured with a straight machine stitch. Position the project with the right side of the main fabric and lace zip uppermost, this will allow you to position the stitches neatly down the centre of the zip. Fold the remaining section of the purse out of the way of the machine as you stitch. Ensure that you keep the stitches away from the metal section of the zip, raising and moving the zip tab as needed. You wont be able to stitch right to the end of the lace zip, no problem! Simply stitch to 1-2cm from the end of the zip, secure the stitches, remove the project and reposition the purse – lace zip facing upwards – and work the seam from the other direction to meet the line of stitching. Don’t worry about folding the fabric of the purse out of the way as you stitch.
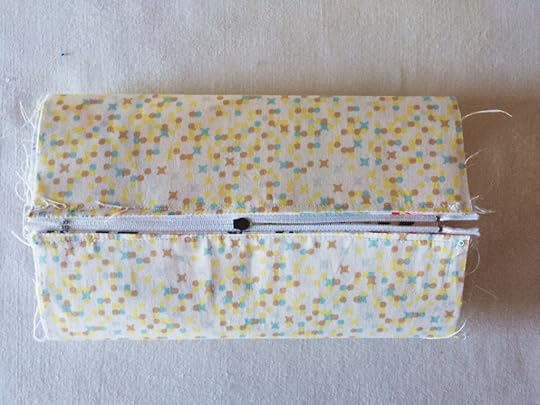 With the lining side outermost, roll the zip to the centre of the purse and finger press the sides neatly and align the two short ends. Pin in place neatly. Now, heres for the most important past…open the zip half way! Let me say that again, open the zip! The next stage will be joining the two seams along the short ends, if the zip is closed you’ll end up with a purse that is inside out and can’t be opened…and you’ll be surprised at home many times this happens!
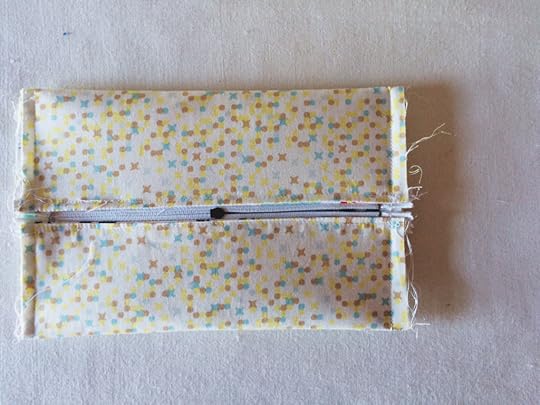 With a straight machine stitch, work each of the end seams in turn- remember to position the stitches to avoid those two metal sections at either end of the zip. Because the zip is open half way (you opened it right?!) the tab is in the centre of the project and wont be in any danger of being stitched over! Neaten the seams by trimming them down and snip the corners to remove the bulk for turning through.
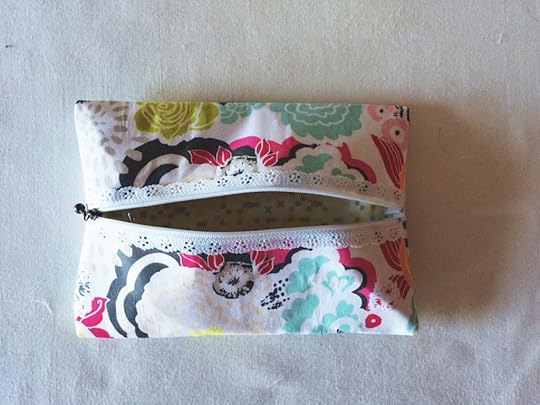 Through the part open zip, draw the purse through to the right side and neatly press out the corners.
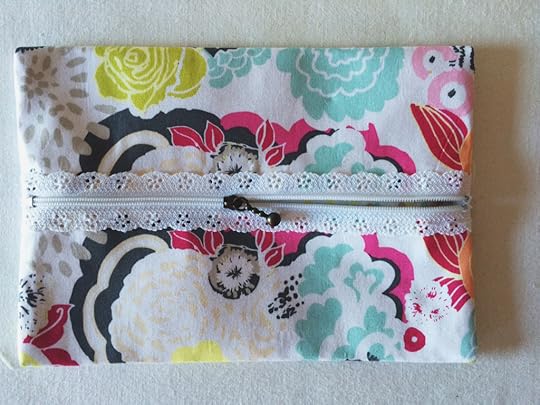 Tah Dah! You can give the purse a quick press to neaten the fabric and you have a sweet little lace zip cosmetic purse ready to stow all your goodies!
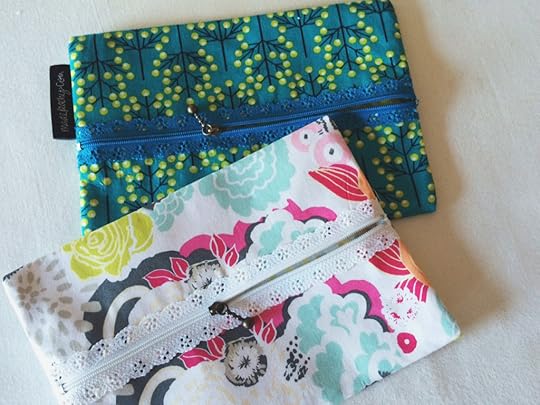
Fancy adding box corners to your purse? Check back next week for a quick step-by-step guide!
♥ – ♥ – ♥
 Many thanks to all the companies that supported The Vilene Sewing Club workshops with materials and supplies –
Be sure to check for the next workshop project how-to guide!
The post Vilene Sewing Club: Lace Zip Cosmetic Purse appeared first on Made Peachy.
April 28, 2015
Pinterest: What They Did With…DIY Photo Displays
Custom Instagram Photo Locket Necklace • £24.18 • Strangely Yours
You only have to take a look over my Instagram feed to realise that I love to take photographs, but finding new ways to display them all is a bit of a challenge!
So, I’ve been spending some time hunting our some new creative ways to enjoy photographs around the home, here are some of my favourite DIY Photo Displays from Pinterest!
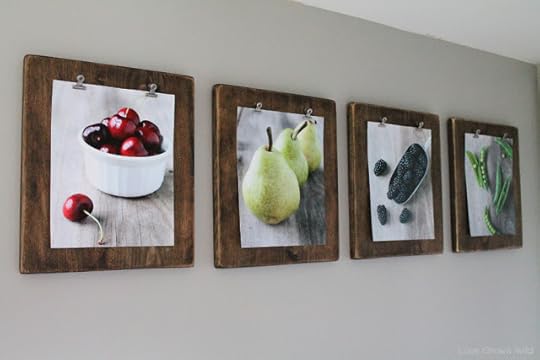 1 Photo Clip Boards ⇒ Love Grows Wild
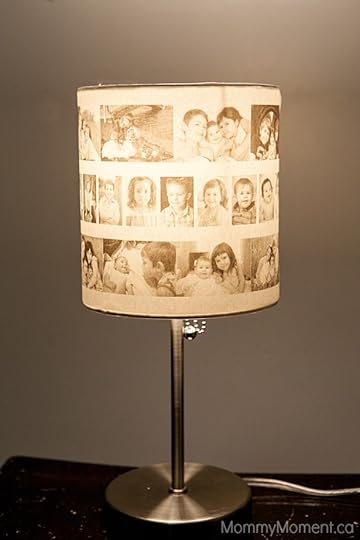 2 Photo Lamp ⇒ Mommy Moment
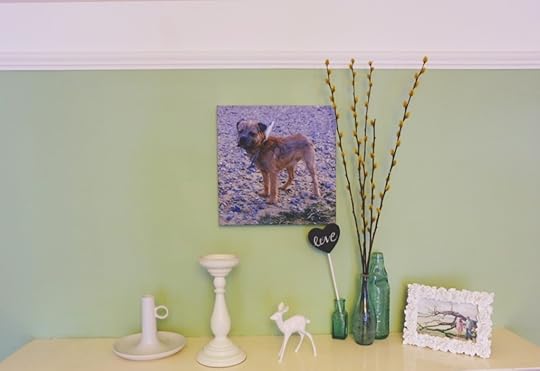 3 Instacanvas Wall Art ⇒ Made Peachy Archives
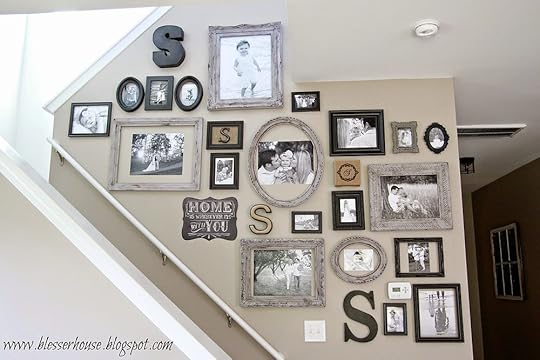 4 Gallery Wall ⇒ Blesser House
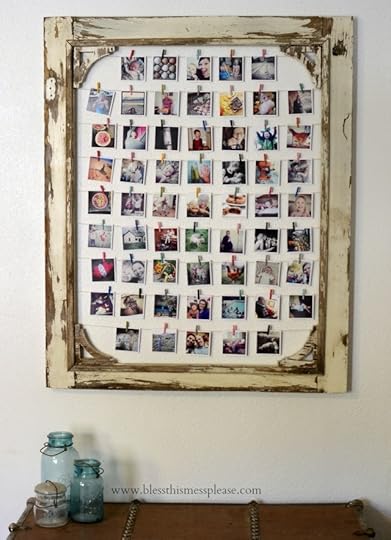 5 Instagram Photo Display Frame ⇒ Bless This Mess Please
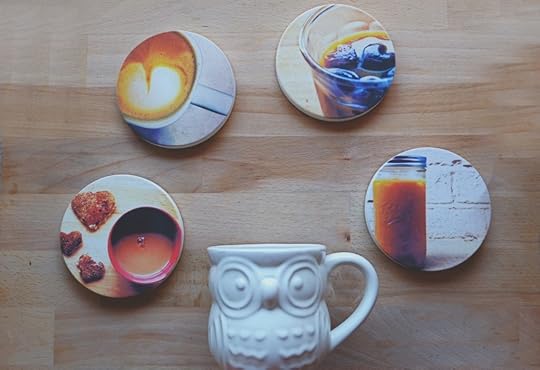 6 Custom Coasters ⇒ Made Peachy Archive
Inspiring stuff, right? Do you have a favourite way to display photographs in your home?
Be sure to check out what else I’m pinning right now!
The post Pinterest: What They Did With…DIY Photo Displays appeared first on Made Peachy.
April 27, 2015
#CraftBlogClub – Guest Hosting & Giveaway!
Hello Friends!
The week is whizzing past as the speed of light while I’m working like a machine to meet another big deadline. Tonight, however, I’m looking forward to taking some time out to chill out and have a (Twitter) chat with a group of energetic and inspiring creative folks!
Fancy joining in the fun?![]() You’ll find us over on Twitter from 7-8:30pm – be sure to follow CraftBlogClub on Twitter & Facebook – where we’ll be talking about Craft Books & Craft Publishing along side a Q&A Session…so, if you’ve got a question for me about crafts, or book or magazine publishing be sure to join in! Follow the chat with #CraftBlogClub
You’ll find us over on Twitter from 7-8:30pm – be sure to follow CraftBlogClub on Twitter & Facebook – where we’ll be talking about Craft Books & Craft Publishing along side a Q&A Session…so, if you’ve got a question for me about crafts, or book or magazine publishing be sure to join in! Follow the chat with #CraftBlogClub
So, you want to find out more about the special giveaway? Well #CraftBlogClub Friends, I have a copy of my books The Sewing Manual and Arm & Finger Knitting up for grabs to one lucky #CraftBlogClub participant!
Here’s how to enter…
So, how do you enter? So that y’all get a fair whack at it, there are a number of ways you can enter this giveaway – and the best part is each one will be counted as 1 entry…so, do all three and you will be entered three times my friend!
1 Please leave a comment below sharing what it is you love about the #CraftBlogCommunity & why you’d like to win these books
2 Share this post on Twitter, tagging @madepeachy and using the hashtag #CraftBlogClubGiveaway
3 Give the MadePeachy Facebook page a like, share the giveaway post and leave a comment on why you’d love to win!
Want a bonus entry? Then head over to the MadePeachy Instagram , follow and give the #CraftBlogClub post a like & comment on why you’d like to win the giveaway!
The giveaway is open to everyone – if you have a postal address, no matter where in the world, you can enter! The winner will be pick at random and announced on the 5 May at the next #CraftBlogClub chat - Good Luck!
The post #CraftBlogClub – Guest Hosting & Giveaway! appeared first on Made Peachy.
April 23, 2015
Pattern Talk
Making your own clothes is one of the most satisfying things about stitching – being pintsized (that’s 5ft 1in, for those that work in imperial) making skirts that don’t swamp me, dresses that don’t drown me and trousers that don’t leave me looking like a clown, is a huge plus. If you aren’t designing your own garments, you’ll be working with a sewing pattern and, let’s be honest, these can be rather daunting!
While I can’t help you choose a specific pattern for your dream dress, I can share a few pointers that I use when picking out a sewing pattern. Check out my guest post over at Abakhan for hints & tips on understanding the information on a sewing pattern envelope and how to use this to help you select your next dressmaking project.
The post Pattern Talk appeared first on Made Peachy.
April 15, 2015
Vilene Sewing Club: Fabric Key Fob
I love to make things that are fun and practical at the same time. Not only are they satisfying to make, but if they are object or items that you use every day the will make daily life just a touch more colourful! This cute fabric key fob project is just that – fun and practical!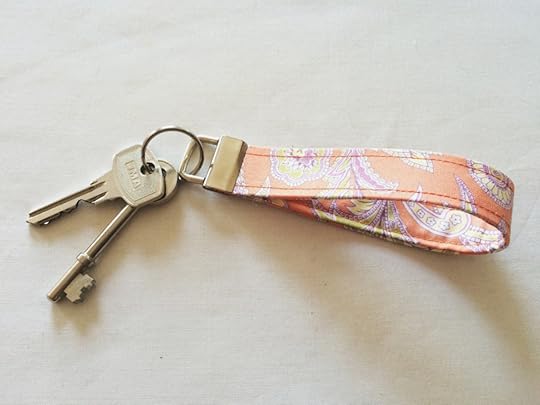 This week I’m sharing the how to guide to make this colourful accessory from The Vilene Sewing Club Workshops, so let’s make a Fabric Key Fob!
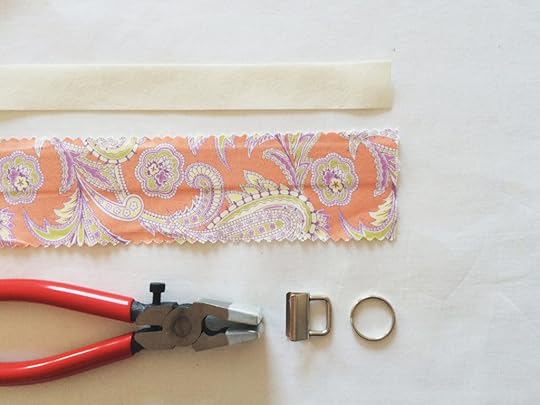 Grab your supplies…
Print Cotton, 6cm x 26cm – a slice of a Jelly Roll is just perfect for this make!
Vilene Decovil 1 Light fusible interfacing, 2.5cm x 26cm
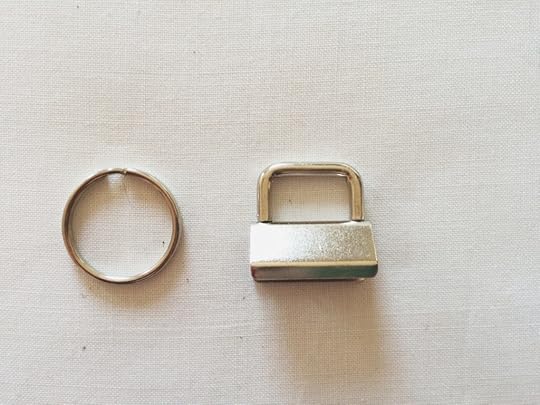
Key Fob Hardware 2.5cm
Key Fob Pilers
Pins
Scissors
Sewing Machine
 Begin by placing the strip of Decovil 1 Light, adhesive side down on to the wrong side of the strip of fabric. Position the strip so that it runs down the centre of the strip 0.5cm from the raw edge of the fabric. Cover with a slightly damp pressing cloth and using a wool setting on the iron bond in place.
Pro Tip! Once the Decovil 1 Light has been bonded to the wrong side of the fabric, remove from the ironing board and transfer on a cool flat surface – like a table – and leave for up to 30 minutes to cool. This allows the adhesive to fully cool and bond the pieces together firmly. Fold the fabric, with right sides outermost, in half along the strip of Decovil 1 Light and press neatly in place.
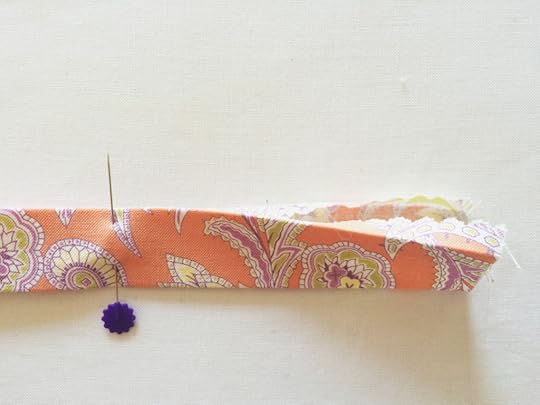 Conceal the raw edges by neatly folding in 0.5cm along each raw edge inwards. Using an iron to press the folds will create a reply neat finish. Pin in place.
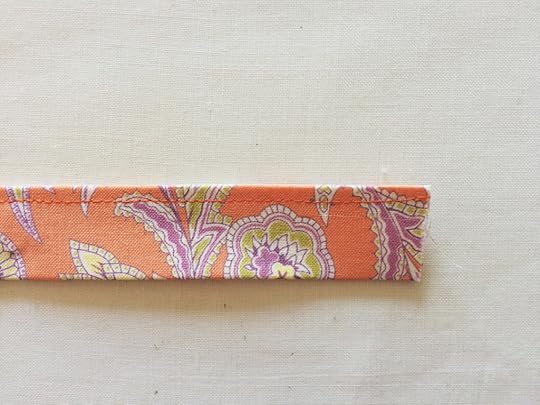 With a straight machine stitch, work a neat seam along the edge of the fabric, the stitchines need to be positioned close to the edge – 3-4mm – to ensure that the raw edges that are folded inwards are fully secured.
 Work a second line of stitching long the other raw edge, these is purely decorative so sim to position the stitches the same distance from the edge as on the previous side. Press neatly.
Fancy being fancy? If you want to customise your fey fob you can add a strip a ribbon or trimming to the front – simple pin in desired position along the front of the strip and stitch in place – or work a row of decorative stitching along the length!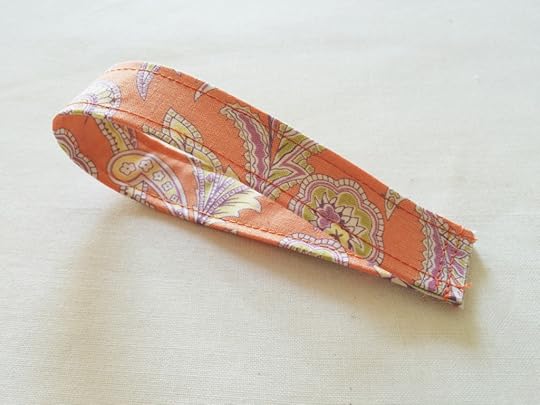 Fold the fabric strip neatly in half aligning the two short edges – trim the ends to neaten if necessary. Work two lines of stitches across the top of the loop, this will hold the pieces neatly in position while securing the hardware – ensure that you position the stitches with in the section of the key fob that will be concealed by the metal portion of the hardware.
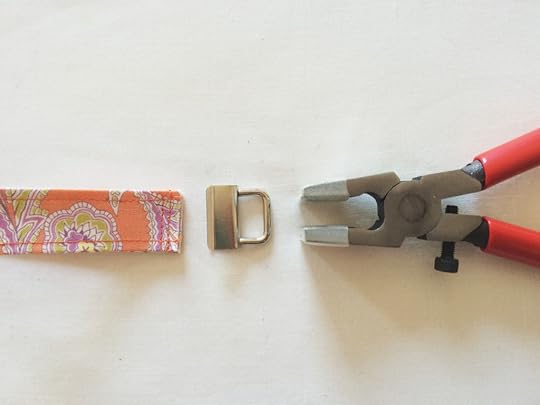 Slip the hardware over the stitched end of the loop and firmly secure by pressing the hardware shut using key fob pilers.
Why Key Fob Pilers? Good question! These clever pilers can be adjusted to ensure that you apply the correct pressure to the hardware to close it, so no more crimping on the surface of the finished make due to over pressure. The tips of the pilers are covered in rubber, preventing scratching the surface of the hardware. If you don’t have Key Fob Pilers, simply wrap the tips of the pilers with small pieces of quilt batting to prevent scraping the metal and work slowly applying the pressure to ensure that you don’t scratch the metal.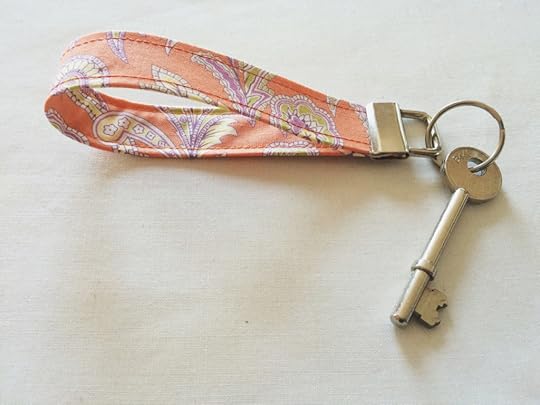 Twist on the ring and secure your keys – neat huh?Tah Dah! Now you can carry your house keys in true style – the loop will slip over your hand – perfect for when hiking the dog – and makes snatching them quickly out of your handbag super easy!
Looking to stock up on Key Fob Supplies?
 Get you hands on these 1in Key Fob hardware tabs with ring £3.74 for set of 20 from StefanelBeadwork
Fastening your key fobs needn’t be a stress with these rubber tipped pilers £8.68 from 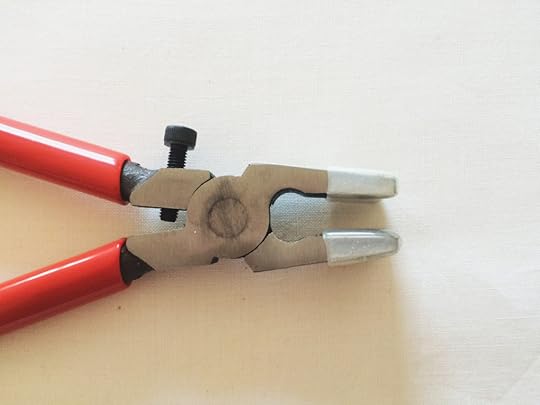 Everything Ribbons
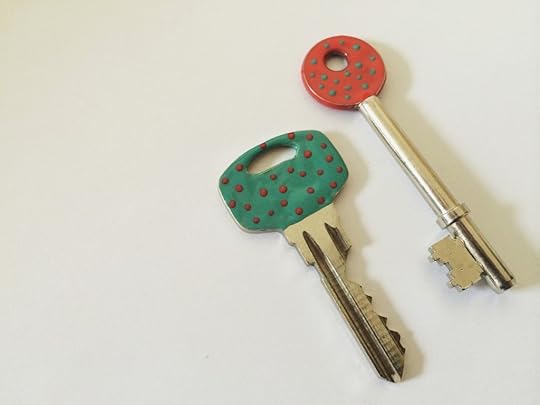 Hey! While your busy making your keys all fancy, check out this quick and easy Colour Pop Custom Key project!
♥ – ♥ – ♥
 Many thanks to all the companies that supported The Vilene Sewing Club workshops with materials and supplies –
Be sure to check for the next workshop project how-to guide!
The post Vilene Sewing Club: Fabric Key Fob appeared first on Made Peachy.
April 14, 2015
Pinterest: What they did with Springtime Salads
Hello Springtime!
The sunshine that we’ve been enjoying the last few days has been a fabulous mood lifter! Starting the day with dog hike that doesn’t involve wearing boots, coat and bobble hat, tea breaks in the garden and long leisurely evenings certainly does agree with me! I don’t know if it is the impending summer time – and the array of floaty frocks that heralds – or just the sunshine itself, but this time of year inspires me to clean up my eating act. Ok…so I wont be ditching the donuts anytime soon, but more often than not I find myself reaching out for fresh and colourful, more healthful, foods!
So I thought I would share some Delicious Springtime Salad Recipes from Pinterest!
 1 Grilled Pear & Prosciutto Salad ⇒ Culinary Ginger
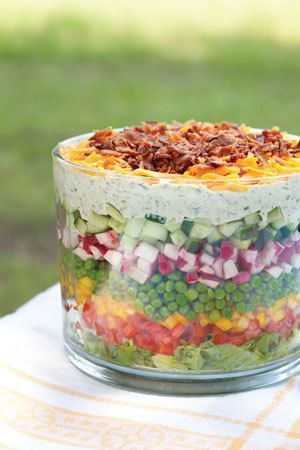 2 Seven Layer Salad ⇒ Tastebook
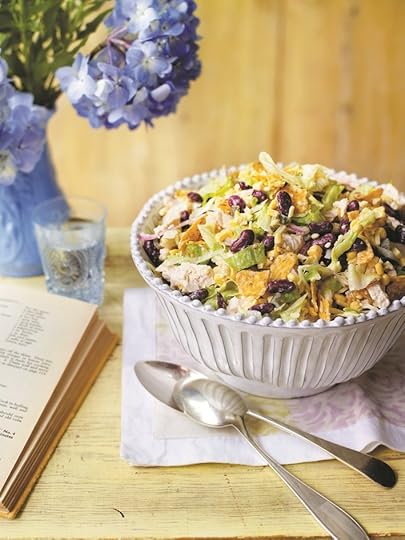 3 Mexican Chicken Salad ⇒ Made Peachy Archive
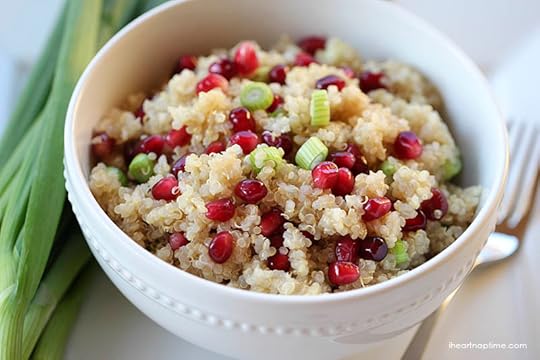 4 Pomegranate Salad with Quinoa ⇒ I Heart Naptime
 5 Bacon Pea Salad ⇒ Foodie With Family
 6 Balsamic Glaze Spring Salad ⇒ Pebbles And Piggy Tails
Now if that delicious round up doesn’t make your tummy call our for something tasty then nothing will! What are your springtime favourites?
Be sure to check out what else I’m pinning right now!
The post Pinterest: What they did with Springtime Salads appeared first on Made Peachy.


