
Laura Strutt's Blog, page 10
April 8, 2015
Vilene Sewing Club: DIY Bow Belt
Hello stitching friends! Today is the second in the series of how-to guides for the projects from the Vilene Sewing Club Workshops that I hosted last month! So, today you can discover how to make your own DIY Bow Belt!
 Grab your supplies…
Print Cotton, 10cm x 10cm, 13cm x 30cm, 2.5cm x 112cm
Vilene Devovil 1 Light fusible interfacing
Pins
Scissors
Sewing Machine
Create The Belt
Begin by placing the strip of Decovil 1 Light, adhesive side down on to the wrong side of the longest strip of fabric. Position the strip so that it runs down the centre of the strip 1cm from the lower edge of the fabric. Cover with a slightly damp pressing cloth and using a wool setting on the iron bond in place.
Pro Tip! Once the Decovil 1 Light has been bonded to the wrong side of the fabric, remove from the ironing board and transfer on a cool flat surface – like a table – and leave for up to 30 minutes to cool. This allows the adhesive to fully cool and bond the pieces together firmly.
 Trim away 1cm of Decovil 1 Light from each end of the fabric strip, and with the wrong side uppermost, fold the fabric over the end of the strip and press neatly in place.
 Using the strip of Decovil 1 Light as a guide, fold the fabric in half neatly along the strip and press in place. Conceal all the raw edges along the entire length of the belt by folding in towards the centre and pin in place.
Pro Tip! The neater the fold when concealing the raw edges the neater the finished belt will be – press each section as you would along the length with the iron to make a neat finish. While it is simple to pin through Decovil 1 Light, Clover Wonder Clips are great for holding the fold of fabric on projects like this! Secure the folded edges by working a neat line of top stitching with the sewing machine down each of the short ends and along the long side of the belt strip. be sure to position the line of top stitching close enough to the edge of the belt to ensure that it secures the raw edges in place.
Set the belt strip aside…
 Create a Fixed Bow
Take the remaining rectangle of fabric and fold in half with right sides facing and aligning the two long sides. With a straight machine stitch work a line of stitching across the long side to join together taking a 5mm seam allowance.
Turn the stitched tube through to the right side and centre the seam along the back of the tube and press neatly in place. Keeping the centred seam outermost, align the two short ends and join together with a straight machine stitch taking a 5mm seam allowance.
 Turn the stitched loop through to the right side, centring the seam and pressing. Both of the seams will now be innermost. Set aside this ‘bow’ section…
 Fold the small square of fabric in half with right sides facing and, with a straight machine stitch and a 5mm seam allowance, join together.
 Turn the small tube through to the right side and centre the seam neatly and press in place.
  Fold the strip in half with the centred seam outermost and aligning the two short ends. With a straight machine stitch and a 5mm seam allowance, join together.
 Turn the small tube through to the right side, so that all of the seams are concealed in the inside to create the centre section of the bow. Slide the ‘Bow’ section into the tube and position it in the centre to create the fixed bow!
The great thing about these fixed bows is that they are so easy and fun to customise! Why not make a second, larger bow section (like I’ve done here) and add it in to the bow to create a layered effect? Or, pick out contrast fabrics or prints to switch up the look? All that is left to do is to slide the belt strip through the back of the centre of the fixed bow! Tah Dah! Secure a press stud, button or hook & eye fastener to the ends to complete your very own custom bow belt!
♥ – ♥ – ♥
 Many thanks to all the companies that supported The Vilene Sewing Club workshops with materials and supplies –
Be sure to check for the next workshop project how-to guide – plus, make your own Vilene Sewing Club DIY Fabric Headband!
The post Vilene Sewing Club: DIY Bow Belt appeared first on Made Peachy.


April 4, 2015
Pattern Talk
Making your own clothes is one of the most satisfying things about stitching – being pintsized (that’s 5ft 1in, for those that work in imperial) making skirts that don’t swamp me, dresses that don’t drown me and trousers that don’t leave me looking like a clown, is a huge plus. If you aren’t designing your own garments, you’ll be working with a sewing pattern and, let’s be honest, these can be rather daunting!
While I can’t help you choose a specific pattern for your dream dress, I can share a few pointers that I use when picking out a sewing pattern. Check out my guest post over at Abakhan for hints & tips on understanding the information on a sewing pattern envelope and how to use this to help you select your next dressmaking project.
The post Pattern Talk appeared first on Made Peachy.
April 3, 2015
Maker Spaces – Emily Quinton Book Tour
There is nothing more fascinating and inspiring to us creative folks than to take a peek into an artists or maker’s studio. Maker Spaces by Emily Quinton allows us to do just that – so, I was delighted to be asked to take part in this fantastic blog tour to celebrate the publication of this fabulous new book. With a carefully curated collection of artists, makers and creatives, Emily has brought together an inspiring slice into the lives of those that create for a living. I don’t know about you, but there is something wonderfully privileged about being given the opportunity to sneak a peek into someones work space. Getting the chance to see how they work, the way they organise their materials, how they surround themselves with inspiration – or cut off distraction.
 This is not only a chance to get supreme decor envy and pick up a few interiors ideas along the way, this is also a fantastic way to get a glimpse into the creative mind of others. Not only can you see how materials and supplies are stored and displayed from the practical get-my-hands-on-them-quick sense to the catch-my-eye-and-inspire-me sense! But you can get a feel for the ways each of the makers collects, absorbs and uses the inspiration around them.
 Awash with glorious photography this book shares not only the physical spaces but also the personality and spirit of each of the featured designer makers – giving you the opportunity to ‘meet’ them and get to know them and their works a little better!
 I don’t know if this is a real saying, or just something my mum taught me to inspire a clean working space, but the phrase “Work in, Work is” resounds strongly with every turn of the page. Whilst we might not all be able to have a separate studio or workroom, a creative space will no doubt breed creativity…and on the flip side, a messy cluttered space, well, we all know how that works out! If you’re thinking of setting up your own studio, or looking for ideas to make a tiny crafting nook a little more inspired, then there is a wealth of inspiration within these pages that will encourage you to go forth and forge a Maker’s Space that suite your personality, your work and your style!
Five Maker’s Spaces Must Haves!
Whether you have a luxurious studio space in which to work or a cozy little crafty nook – these stylish additions might just make the perfect addition to your Maker’s Space!
 1 Ribbon Storage House • £32 • The Contemporary Home
2 Block Medium Peg Board in yellow • £40 • Red Candy
3 Den Desk • £495 • Loaf
4 Colours Markham Desk Lamp • £16 • B&Q
5 Rodney Wood Storage Chest • £695 • Oliver Bonas
So, what’s on your maker space wish list?
♥ – ♥ – ♥
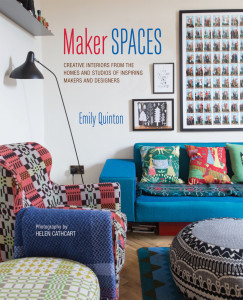
This collection of stunning and wildly inspiring images are taken from Maker Spaces by Emily Quinton, photography by Helen Cathcart, Ryland Peters & Small rrp £19.99.
Be sure to catch the next stop on this glorious tour for Maker Spaces as it head over to more wonderful creative blogs over the next few days!
The post Maker Spaces – Emily Quinton Book Tour appeared first on Made Peachy.
April 2, 2015
Fab Fabrics – Sew Yummy Cloud9
The whole of March has been a month of sewing with The Vilene Sewing Club – and what better way to really show off your love for all things stitching than with a cute bundle of stitchers themed prints? I know, there really is nothing better!
Well, Fabric Enthusiasts, when these killer cute prints arrived here at Peachy HQ I just knew y’all would swoon for them!
Sew Yummy by Monica Solorio-Snow for Cloud9 The name – Sew Yummy – literally says it all, doesn’t it?! This collection is a sugar rush of bright and bold colours with brilliant pops of cute stitching themed motifs. Pins and bobbins, seam rippers and zips – this is a collection that will undoubtedly bring a smile to your face!
 I love the bright topper prints that are the ideal mixer for this collection to bring it together to in a crescendo of cute overload! The only real trouble with this collection is that it looks so perfect as a bundle that it make me want to hold off cutting in to it…but who am i kidding, this would make a glorious collection for a bright and fun hexi quilt!
 These fabulous print cottons retail from £3.50 per quarter metre – check out your local stockist!
Do you go all gooey for stitchy themed prints?
The post Fab Fabrics – Sew Yummy Cloud9 appeared first on Made Peachy.
April 1, 2015
Vilene Sewing Club: DIY Fabric Headband
There is nothing more cute than a custom-made accessory and this fabric headband is quick and easy to make – even for stitching beginners!
It made me so happy that so many of the folks attending the Fabric Headband Workshop at the Vilene Sewing Club this year walked away wearing a handmade headband, many of these folks hadn’t used a sewing machine before!
Over the coming weeks I will be sharing the how-to guides for each of the projects that we made in the Vilene Sewing Club Workshops – first up, this fun hair accessory! So, let’s make a Fabric Headband!
 Grab your supplies…
Print Cottons, 110cm x 10cm in two prints – these glorious prints are by Tanya Whelan
Vilene F220 fusible interfacing
Fabric marker, pencil or tailor chalk
Pins
Scissors
Sewing Machine Cut the two print cottons into strips measuring 110cm x 10cm
 Cut a piece of Vilene F220 to 110cm x 10cm. With an iron set to ‘cotton/wool’ position the adhesive side onto the wrong side of one of the strips of cotton, cover with a slightly damp pressing cloth and use the iron to bond to the fabric. To avoid creating wrinkles, press and hold the iron in place and hold for 10 seconds before lifting and moving to press the next section.
Pro-Tip When bonding interfacing onto fabrics, remove the bonded fabric form the ironing board after fusing and place on a table or flat surface and allow to cool for 20-30 minutes. This allows the adhesive to cool and bond securely to the fabrics, so you wont risk it peeling off as you prepare to stitch! Position the two pieces together with right sides facing and pin in place. This project is made with nice simple straight seams, so you can work with pins running down the centre of the strip, making it quicker to stitch as you wont have to worry about removing the pins as you work .
 With the fabric marker draw on the shaping onto one short end of the strip. Here I have worked ‘bunny ears’ style, but you could mark out an angled point or even a diagonal line if to change the finished look of the headband.
 Place the two short ends on top of each other and, using the marked lines as a guide, cut out the shaping on to both ends at one time.
 With a straight stitch selected on the sewing machine join the two pieces with a 6mm seam allowance. Begin sewing half way down one of the long sides, working up to the tip of the headband. To create the neat shaping follow the seam allowance to the point of the shaping and stop stitching with the needle down through the fabric, lift the presser foot and pivot the fabric on the needle to position in place to follow the next section of the seam with the same seam allowance. Continue stitching around to the other point in the same manner and down the first side, stop stitching 5-10cm from the start of the seam to leave a gap for turning through.
 Neaten the seams around the shaping on to the two short ends by clipping off the point and making small ‘v’ shaped cuts into the seam allowance along the curved sections.
Why ‘v’ shaped cuts? Good question! When turned through the fabric that lies around the seam allowance will become crumpled to follow the line of the curve, which can make the seams bulky. Making small ‘v’ shaped cuts removes some of this excess fabric allows the seam allowance to sit neatly around the interior of the curve, no bulk, no lumps, just neat tidy seams! Through the small gap in the side seam, draw the headband through to the right side, being careful to neatly press out the points and seam lines fully.
Pro-Tip A knitting needle or a pencil is great for easing out those tricky pointed sections that are too small to get your fingers into – just go steady, you don’t want to break the seams with the point of the knitting needle!
Press neatly ensuring all the seams are set neatly around the sides of the headband. Press the seam allowance along the gap neatly to the inside. With a straight top stitch, work along the entire length of the headband with top stitching positioned 5mm from the outer edge of the project. The top stitching not only adds a decorative feature to the headband, it also serves the purpose of joining up the gap in the seam, start the line of stitching at the section where the seam allowance is tucked into the gap, starting here will help you to gauge the position of the stitches as this will need to hold the gap closed and secure. Continue top stitching around the entire headband, carefully pivoting on the points for a neat line of stitching.
 Tah Dah! Press the headband and it is ready to knot around your head and wear with pride!
♥ – ♥ – ♥
Many thanks to all the companies that supported The Vilene Sewing Club workshops with materials and supplies –
Be sure to check for the next workshop project how-to guide!
The post Vilene Sewing Club: DIY Fabric Headband appeared first on Made Peachy.
March 31, 2015
Hello April 2015: Quick Catch Up
So, that was March then! It has been and gone a blur of busy over here! I have been travelling around the country hosting The 2015 Vilene Sewing Club Workshops, which has been a complete blast. But, the only thing about being on the road is that I feel as though I haven’t spent any time at home…which is probably because I have actually been away from home as much as I have been at home. April is certainly going to be a month for staying home…and working on another huge crochet deadline [Crochet fans – watch this space!]To say that I am shattered is something of an understatement. But it is a very happy shattered, it has been great to get on the road and spend some time with some of my very favourite creative folks, it has also been brilliant to get busy with the workshops meeting new people and teaching some fun sewing skills. The workshops were a huge hit again this year, with most days the places being booked up with in the first half hour of the shows opening! It is a shame that not everyone wanting to take part could get a spot on their chosen workshop, so starting this week I will be sharing the How To Guides to make the projects all the projects from the workshops – so whether you missed out, couldn’t come along or just fancy making a few more – be sure to stay tuned to get the guides for making your own Fabric Headband, Retro Bow Belt, Fabric Key Fob, Bandana Baby Bib and Quick-Make Lace Zip Purse!
 The very best part of hosting these mini make workshops is watching people learn a new skill, seeing their confidence building and watching them (especially those that turn up saying, “I’ve never used a sewing machine, so I’m sorry I wont be able to do this!”) walk away with their very own finished make – sometimes it is their first ever finished make. Now that is rad!
It is also brilliant to meet so many new people – and, as there has been a whole host of new readers over here, I thought I would take this opportunity for a little-to-know-you and share a few fun facts about myself!
Fact: I am a journalist and writer by trade, I have a BA (Hons) Degree in English & Creative Studies (for those interested, ‘Creative Studies’ covered theatre, creative writing, dance, photography and film making) and a Post Grad Dip in Journalism. I have worked on a number of different UK craft magazines including Craft Business, Let’s Knit & Sew.
Fact: After graduating from university and being one of those that struggled to get that awesome first job, I headed off on a global backpacking adventure for two years. I still have to stop myself from starting every other sentence with, “When I was backpacking…” because, let’s face it, no one loves a backpacking bore…nor do they want to see any more than four photographs of that “rad beach at sunset!” ← steep learning curve right there!
Fact: The only UFOs (Unfinished Objects) in my workroom are makes for me – or as I like to call them Selfish Makes! These are project and makes that are not subject to a brief or a deadline, or as a gift for friends or family, and (sadly) always take a back seat to work makes. The oldest UFOs include a quilt that was started 18 months ago and a tapestry that I’m pretty sure has been untouched for at least three years! Shocking I know!
Fact: Alongside running this creative journal, I am a Creative Consultant for Vilene, craft demonstrator, workshop tutor, designer/maker for a number of online and print publications and the author of a number of craft books.
Fact: My favourite colour varies almost daily – but combinations of peach & navy, grey & yellow, and mustard & teal are what’s getting my pulse racing right now…and don’t even get me started on geometric prints!
Fact: I live in a sweet little home – which we are slowly but surely renovating – with my lovely (and endlessly supportive!) husband and our funny little Border Terrier mutt, Waffle. In the first year of running my own business I have learnt that renovating a home while using it as a base for a new work venture is super tricky. That you can train a puppy so sit on your lap for a cuddle while you’re working and he won’t try to chew your yarn, but he will always believe that any finished knitting, sewing or quilted project should become his new bed!
Fact: When I’m working on deadlines I love to listen to audiobooks, binge watch Nexflix and drink a gallon of tea – pretty much like all y’all, am I right?!
Fact: I love working on new ideas and projects for this journal and sharing them is one of my favourite aspects of my working life – it blows my mind that y’all stop by and read this journal, try the makes and recipes or check out the techniques tutorials. It makes me happy every day – so Thank You for taking the time to swing on by!
Now, over to you! Are you a new reader or have you been following this creative journal for a while? What’s your favourite thing to make or do? What do you most like reading on Made Peachy? Leave me a little comment, introduce yourself and share some fun facts all about you too!
♥ – ♥ – ♥
Many thanks to all the companies that supported The Vilene Sewing Club workshops with materials and supplies –
Be sure to check out the upcoming How-To Guides for the step-by-step projects and a full listing of all the materials and supplies used in each one!
Photography: Charles Budd
The post Hello April 2015: Quick Catch Up appeared first on Made Peachy.
March 20, 2015
Quilts for a Cause: Project Linus UK
Happy Saturday you guys!
Today I’m busy teaching workshops at The Vilene Sewing Club at the Sewing For Pleasure Show at the NEC and – if the last couple of days are anything to go by – it is likely to be a crazy busy day for me!
So, today I thought that I would share with you a very special charity project, hosted by the lovely Toria from Little Squish. After hearing about all the good work that Project Linus UK do to provide support and a sense of security in troubled times for babies, children and teenagers with the gift of handmade quilts and knitted or crochet blankets, Toria knew that she wanted to get involved.
Not only is stitching super woman Toria vowing to save up all her scraps as she worked on her designs throughout the year and gradually create glorious custom quilts to pass over to the team of volunteers at Projet Linus UK, but is also rallying the troops! Toria is calling on you awesome stitchers to create a single 6in x 6in square, which you can send off to her and she will transform into a beautiful and thoughtful quilt to be sent over to Project Linus. You can register your interest here and she will be in touch with you by 20 April to update you on the details of the quilt – this is open to stitchers the world over, as long as you are happy to create a 6in x 6in square and cover the (UK) postage costs!
 Looking for some block inspiration? How about this cute mini flying geese block?
So…what are you all waiting for?
The post Quilts for a Cause: Project Linus UK appeared first on Made Peachy.
March 19, 2015
Fab Fabric: September Blue by Susan Driscoll Dashwood Studio
How about some fabric due candy to get your Friday off to a fabulous start?
Many of the recent projects, makes and commissions over here at PeachyHQ have been made with some of the most glorious fabrics from UK-based design house, Dashwood Studio.
I have been crushing pretty hard on so many of the collections so I thought now would be a great time to share with you one of the one that will be featured in one of my upcoming designs in Sewing World magazine.
So, friends, let me introduce you to…
September Blue by Susan Driscoll Susan Driscoll is a renowned illustrator and surface designer with a passion for colours and a talent for creating illustrations and patterns that are packed with appeal. I love these mix of sweet pinks and neutral greys to create this collection that is just the right amount of girly with a generous pinch of modern style.
 These stunning print cottons retail at around £3 per quarter metre, which means that I can afford to stock up on heaps and heaps of these glorious prints.
 Have you got a favourite print from this Dashwood Studio collection?
The post Fab Fabric: September Blue by Susan Driscoll Dashwood Studio appeared first on Made Peachy.
March 18, 2015
Crochet Scalloped Border Tutorial
Over the last few months I have been crocheting like woman possessed for an epic deadline for my new crochet book that will be on sale later this year (Psst! You can pre-order this here!), so I thought that it was about time I shared a crochet tutorial.
 This Scalloped Border is just the thing to transform a simple make in to something really special in no time! I love to use to a a fancy finish to a super-sized granny square blanket – which can be made by working a granny square until it is super-sized or by working lots of granny squares then blocking and seaming them together to create a blanket – either way, this Crochet Scalloped Border is a fabulous finishing touch!
 Once you’ve completed your granny square to your desired size, you can continue in the same yarn to create the border or you can fasten in a new colour to create a contrast.
 Begin by working a sl st into the last stitch in a cluster of trs.
 Work 2trs into the chain space.
 Ch1
Ch1 Work 2trs into the same chain space.
 Sl st into the last stitch in the cluster of trs.
 Continue working in this pattern as set, 2tr, 1ch, 2tr in each chain space, sl st into the last st in the next cluster of yrs – this creates the scalloped design.
 The corners are worked in a similar way, work 2tr into the chain s
 Ch1
Ch1 Work 3tr in same chain space.
 Ch1
Ch1 Work 2trs in the same chain space.
 Sl St into the last stitch in the next cluster of trs.
 Continue working in the pattern as set along the straight sides and around the corners of the blanket.
 Once you have worked the entire way around the blanket adding the scalloped border, simply work a sl st to secure the yarn and fasten off.
These instructions are in standard crochet abbreviations – which you can check out here!
As a side note, because I know someone is going to ask, the crochet hook used in this tutorial is from this beautiful collection of hooks in the Boye Artisan Crochet Tool set. You can find out more about them in my Tried & Tested review – spoiler: they are as beautiful to work with as they are to look at!
I hope that you love this simple yet really striking scalloped crochet border as much as I do – let me know if you give it a try and be sure to share photos of your finished makes too!
The post Crochet Scalloped Border Tutorial appeared first on Made Peachy.
March 17, 2015
Pinterest: What They Did With…Spring Flowers
Hello Spring! Cheerful Spring Printable, £2.89, from Design Claud
There is one thing that I have noticed from our daily dog hikes is that spring is finally on its way! We don’t have to walk very far before we spot carpets of blooming crocuses and bright sunny flashes of daffodils.
Don’t get me wrong, I love the winter – the long cosy evenings drinking hot chocolate by the fire, but boy am I ever ready for the springtime! The longer days make me feel like there are endless possibilities, getting outside is less of an ordeal – gradually losing the layers of knitted accessories and soon (please soon) ditching the winter boots!
I love the flowers of spring, but suffer from a severe case of sucky-at-flower-arranging syndrome – so am always in need of inspiration for beautiful bouquets to adorn our home, so check out my DIY Spring Flower Ideas from Pinterest!
 1 Simple Teapot Flower Centrepiece ⇒ Creature Comforts
 2 Birch Wrapped Basket ⇒ Martha Stewart
 3 Citrus & Tulips ⇒ Home Stories A to Z
 4 Tea Cup Flower Arrangement ⇒ Valley and Co Lifestyle
 5 Tulip Wreath ⇒ The Frugal Homemaker
 6 Mason Jar Spring Arrangement ⇒ Perry Casa
Springtime is making a major feature on my Pinterest boards right now so, be sure to check out I’m pinning right now!
The post Pinterest: What They Did With…Spring Flowers appeared first on Made Peachy.


