
Laura Strutt's Blog
September 8, 2017
Yarn Bundle Giveaway Winner!
Friends!
This week has flown by, I had thought that I would be spending some time leisurely working up some crochet mandalas with this delicious PaintBox yarn bundle…But, some how all of baby Wolfie’s nap times have resulted in chores or sewing. I find that when the machine is out and has a full bobbin, it is next to impossible for me to pass by the opportunity to get some sewing done!

However, I can’t wait to get stuck in and work on some crochet…Just as soon as I get some time. Although- I have noticed that Wolfie has outgrown the newborn knits I made for him! Can you believe that?! These babies sure do grow fast! So, I may have to knit a couple of sweaters for him before I can get to these!
Now, it’s time to announce the yarn bundle giveaway! Thanks so much to all that entered – here, over on Facebook, Twitter & Instagram!
 It has taken me a while to collect all your entries together to add to the hat – but Im happy to announce that the winner is….
Janet
Congratulations!
Please do send over your postal address so that we can get this shipped out to you!
 Thanks again to all that entered!
Have a great weekend Friends!
The post Yarn Bundle Giveaway Winner! appeared first on Made Peachy.


August 31, 2017
Yarn Bundle Giveaway!
Hello Friends!
It’s September- one of my fave times of year!
The last four weeks have been amazing- looking back over my Instagram I realised that so much has happened!
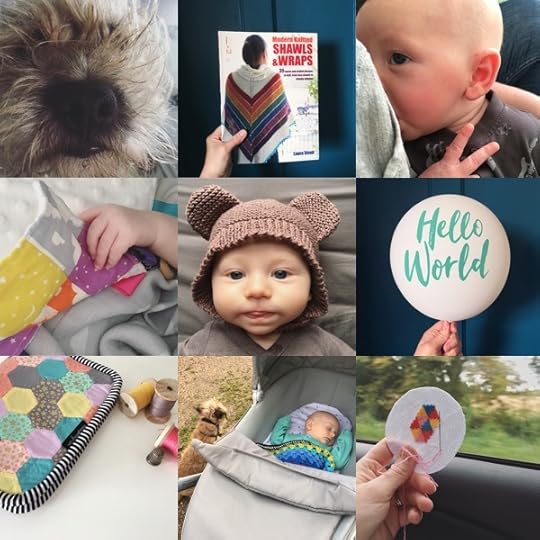 One of the most exciting things is that I got to see a copy of my latest book Modern Knitted Shawls which goes on sale in November – but is available to pre order over on Amazon!
Speaking go knitting, I’ve knitted my first project of the season…little Wolf now has his very own Bearly Bonnet.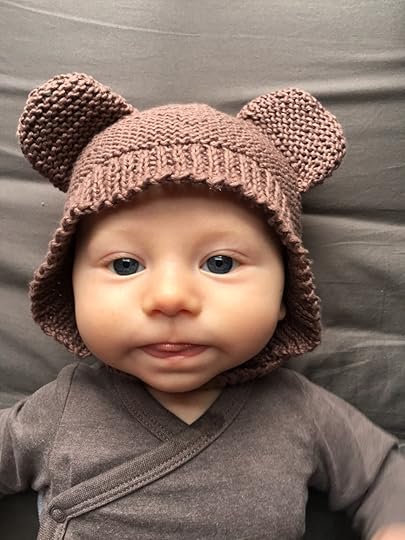 oh. my. heart!
When I look at this picture, it makes me want to grab yarn and knit and crochet all the things…then the other part of me thinks, “why knit anything every again, nothing could be more perfect that this!” Then (thankfully!) I remember that I can’t sit still and have to be making something, so never knitting or crocheting again is impossible!
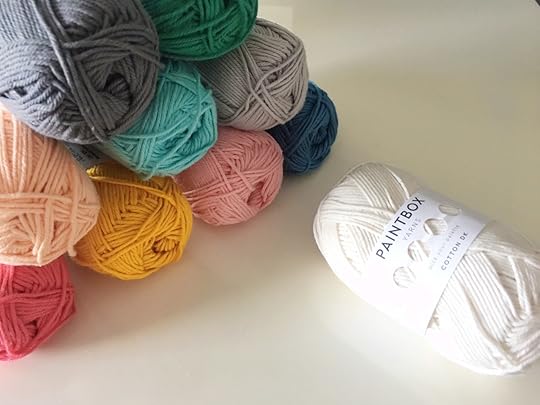
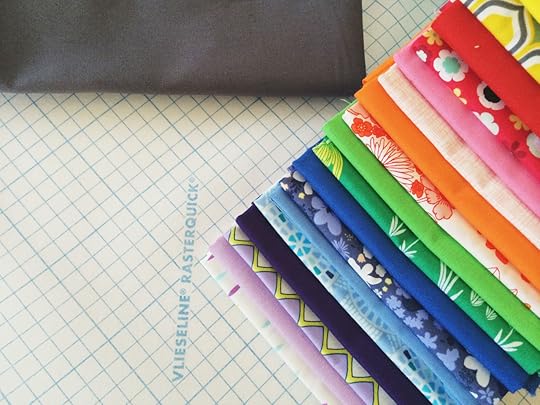
Which is a very good thing because the awesome folks over at LoveKnitting, have sent me this BEAUTIFUL bundle of Paintbox Yarns – be still my heart!
This selection of ten colourful yarns is part of a Designer Bundle of 100% cotton DK – and with each ball being 50g (1.5oz) and 125m (137yds) that’s a whole heap of possible makes just screaming out to be made!
I’m pretty sure that Im going to be making up an crochet Mandala blanket!
Here’s some great news, thanks to the ace team at LoveKnitting I have another whole bundle of these 10 designer selected Paintbox yarns worth £24 to give away to one lucky reader!
I know, awesome, right?
So, how do you be in with the chance of winning?
Easy! So that y’all get a fair whack at it, there are a number of ways you can enter this giveaway – and the best part is each one will be counted as 1 entry…so, do all three and you will be entered three times my friend!
1 Please leave a comment below sharing what you would create with this awesome Paintbox yarn bundle
2 Share this post on Twitter, tagging @madepeachy and using the hashtag #PaintboxYarnMadePeachy
3 Give the MadePeachy Facebook page a like, share the giveaway post and leave a comment on why you’d love to win!
Want a bonus entry? Then head over to the MadePeachy Instagram , follow and re-post the giveaway photo
The giveaway is open to UK residents and the winner will be pick at random and announced on the 8 September – Good Luck!
The post Yarn Bundle Giveaway! appeared first on Made Peachy.
July 4, 2017
Calling All Modern Quilters!
Hello Quilters, Hello Modern Quilters, Hello Fabric Enthusiasts That Dream of Being Quilters! (Specifically those folks local to Essex – sorry!)
 Do modern quilts make your heart race?
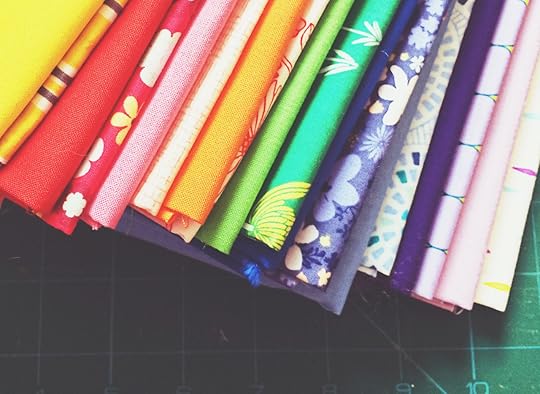
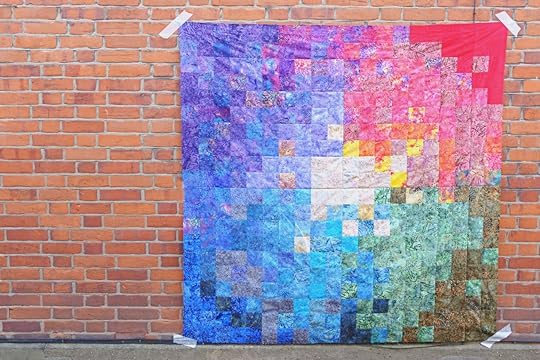
Do you love dramatic modern designs? Bold colours? Striking use of prints? Minimalist designs? High contrast elements? Graphic styles? Inprov piecing?
If the answer is YES to any (or all!) of the above, you my friend are a Modern Quilting fanatic – and that’s a great thing to be!
 What you see before you is a girl on a quest! For as long as I can remember (OK for as long as Instagram has existed, which feels like forever!) I have been avidly following MQG around the the country, in fact around the World, and have been wistfully hoping that someone would set up a lovely, fun, friendly, inspiring and informative Modern Quilt Guild right here on my doorstep. And, guess what, after years of wishing, hoping and daydreaming about this magical MQG just appearing one day to brighten my stitching life, I realised…that if I wanted to be part of a MQG, then perhaps I should go about setting one up.
This, my friends, is where I am today! Standing up, shouting out and hoping to set up a MQG in Essex that we can be really proud of!
 “What is a MQG & Why would I want to join any way?”
Well, I’m glad that you asked!
Modern Quilt Guilds were born out to the desire for those of us that love the modern aesthetic of quilts and quilting to join together as a community IRL (not just online!) to inspire and encourage the passion for modern quilting.
So many of us quilters stitch alone at home, occasionally talking part in online swaps and challenges, but joining a group like MQG a fantastic opportunity to regularly meet AND STITCH with like minded folks. We can share tips and expertise, we can destash and restash together, we can work on a group project, host education talks, attend quilting events together, inspire each other hold swaps and generally have a total blast together!
 So, are you based in or near Essex, UK?
Is you passion for quilting off the charts?
Then now is your chance to get involved and be part of something really special, rewarding and inspiring!
Do you want to get involved? Simply drop me an email with MQG Essex in the subject line and we can get this show on the road!
Fabric Friends who are not local to Essex, maybe you know someone who is, do a gal a favour and give this a shout out on your chums on social media! xox
The post Calling All Modern Quilters! appeared first on Made Peachy.
May 15, 2017
Nursery Tour!
Yay! I can’t believe that I finally get to share our Nursery with y’all!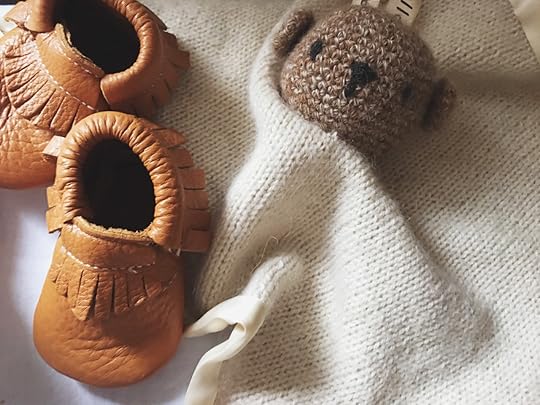
This room started out as a spare/work/junk room – but, let me tell you, the main thing you would have noticed about it was that it was U G L Y! We had some pretty big issues to fix before we could think about starting the way more fun job of decorating – and that’s not even mentioning the gross shade of pink and super prickly (seriously, it caused injuries!) Artex-covered walls! So, after a stud wall was built and the whole room re-plastered, it was starting to look a lot more inviting!
Fortunately, this room – which looks out over our beautiful (thanks to my husband’s hard work!) garden – is a peaceful and sunny spot, and we wanted to make sure that this room was beautiful, restful and gender-netural for when our Little arrives. I am so so pleased with how it turned out!
We are not big on Disney-style motifs or crazy loud ‘nursery’ patterns – there is plenty of time for our Kid to decide exactly what she or he loves, and no doubt our whole house will be filled with dinosaurs/zoo animals/trucks/fairies/all of the above – so we opted for a scrummy shade of truffle with white accents and allowed the little details to do the talking!
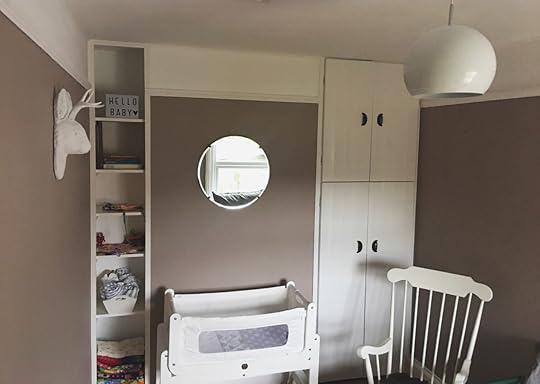 Mounted Jackaloupe • £38/$50 • White Faux Taxidermy
Gloss White Pendant • £48.64 – currently on sale, super easy to install & classic design • First Choice Lighting
SunzPod 3-in-1 Bedside Crib, EcoWhite • £199.95 • Sunz
Rocking Chair & Circle Mirror • Thrifted
Our Little will actually be resident in our room at first, so ensuring that we had the option for this room to double as a guest room (you know, for when a Granny comes to visit!) was also a priority – enter my single bed from when I was growing up!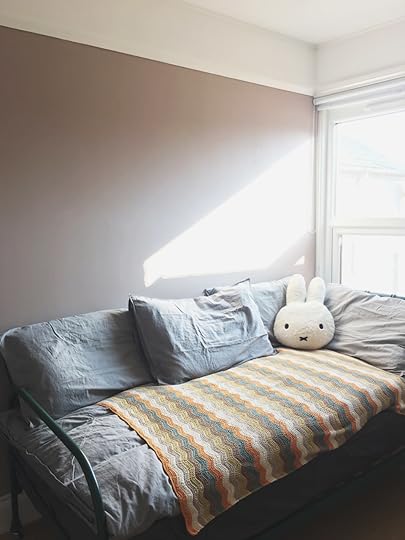 It might be over two decades old, but thank you Habitat for making a design classic that, with a couple of plush pillows and a crochet throw, becomes the perfect day bed!
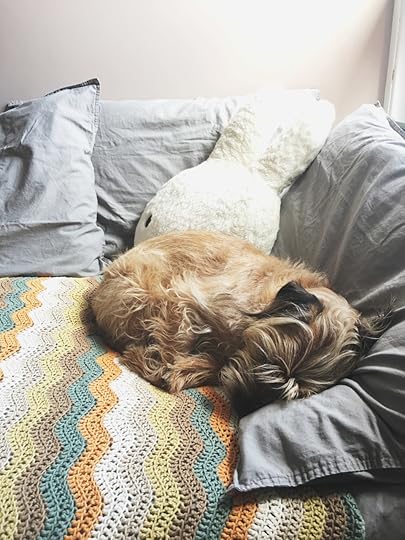 I can see this as the perfect reading, snuggling, snoozing spot…and, clearly Waffle has already claimed this as his own sunbeam nap-space!
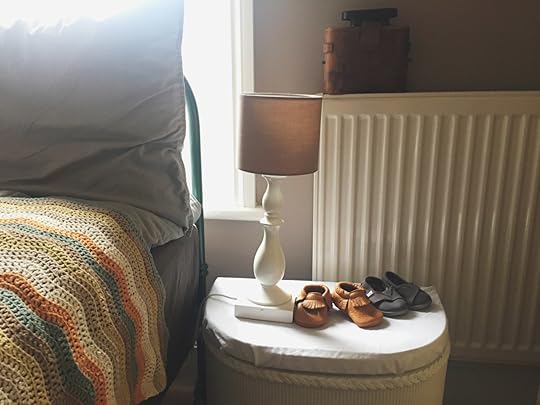 I just love how this room will work as a guest room and nursery…although as we still have a bit of a wait on our hands for the Little, I think it will be used as a guest room first!
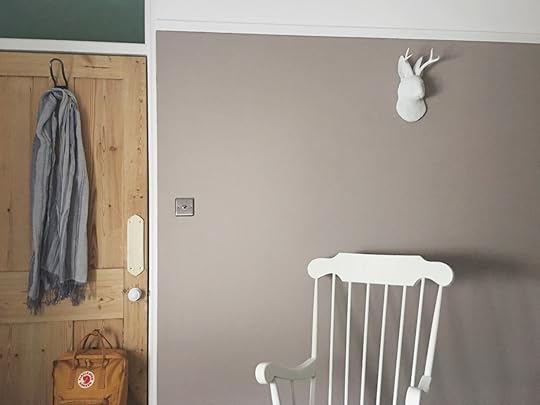 But, the hospital bag & rebozo are ready and waiting…you know, just in case the Little need to any reassurance that we are ready & excited!
As there will be times when this will be a guest room, I decided to switch out a conventional change table and make up a change station instead…so it can be easily moved to a different room so that not everyone in the house needs to be woken up for a 3am poopy nappy!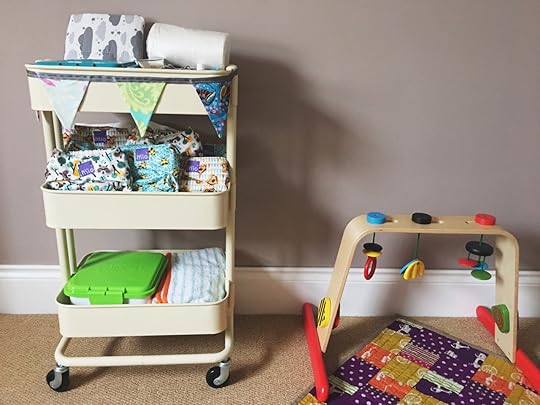
Leka birch baby gym • £20 • Ikea & handmade Quilted Baby Layette
If I’m honest I had always envisioned using the Raskog • £49 • Ikea as a drinks cart…but, who knew it would be the perfect place to stow cute nappies & change time essentials?
(And, yes, for the eagle-eyed – the string of bunting is indeed the bunting that was hanging on my husband’s wedding BMX!) I know, I’m all about the little things..but details are important, am I right?!
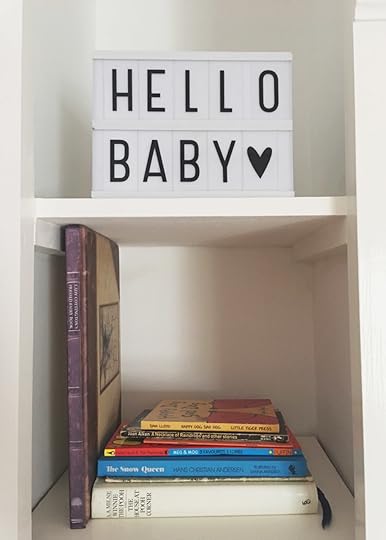 Books are a big deal in this house – and I’m not just because I’ve written a couple! So, we are gradually starting to build up a collection of our favourite reads to fill these custom handmade shelves that we can wait to share with this Little future bookworm!
 I’m a little slow stocking up on the handmade toys…I keep telling myself that there is plenty of time left to still make some!
 But, when it comes to quilts, blankets, layettes, wraps and throws we certainly don’t have a shortage – I can confidently say that this Little shall never go cold!
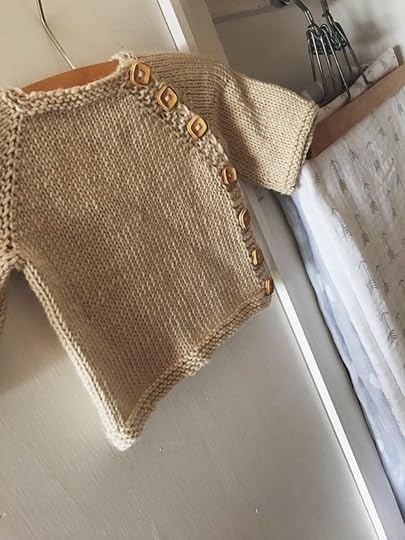 Alongside the custom bookshelves, neatly fitted into the other side of the chimney alcove, we have a custom closet for hanging up all the tiny little clothes! It must be some sort of mama-to-be right of passage to hang up all the teeny weeny baby things onto mini hangers in the wardrobe – it makes your heart pop. And, yes, I know in a month’s time, operating on zero sleep and fuelled by the strongest coffee known to man, I will just be happy if I can find clean baby onesie that isn’t covered in poop and neatly hanging clothes will be a distant memory – so, yup, taken photos so I can know that it least it happened once!
Aside from this hand knitted Puerperium Cardigan, we are yet to pick out what we will be bringing the Little home in…really must get that packed or we will be raising a nudist! It’s all the quirky, thrifted, handmade things that really make me happy!
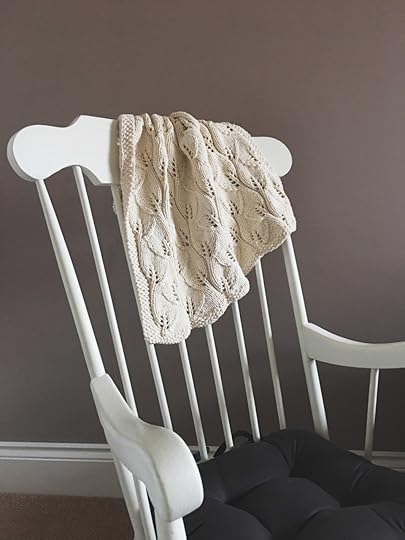 I know that this Leafy Baby Blanket knitted by my mum is going to be a firm fave. I’ve not handmade as many things as I had wanted to what with still working and trying to be as helpful as is possible with these renovations when you are as wide as you are tall! But luckily I’ve lots of folks helping me out! My sweet, sweet sister-in-law has shared a couple of the gifts I handmade for her wee twins when they were newborns, which is about the kindest thing ever and yes, made me do a little sob!
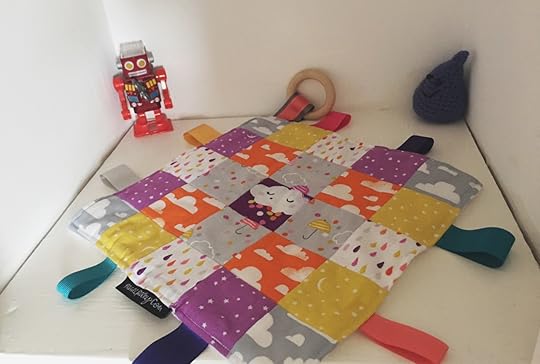
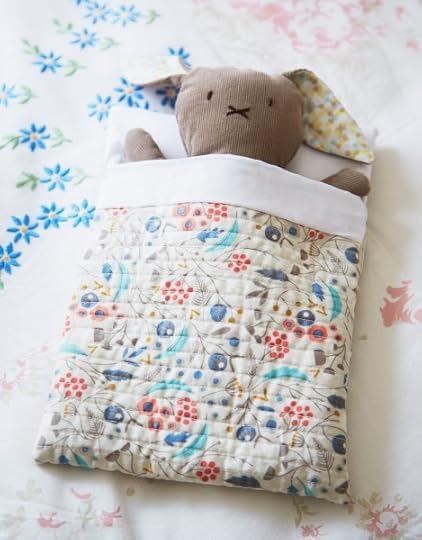
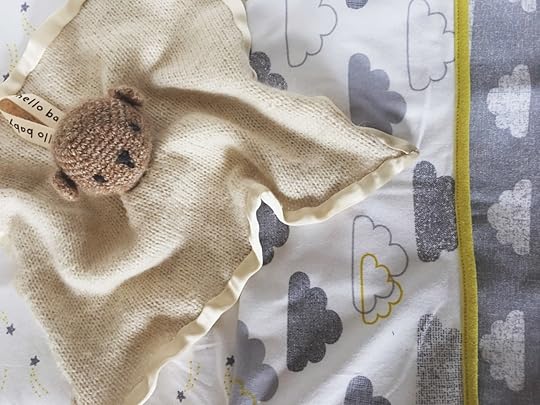 I had actually forgotten about this little Bear Lovie Comforter, to-date, our Kid has no teddies, plushes or cuddle toys at all, so this is gonna be getting all the action!
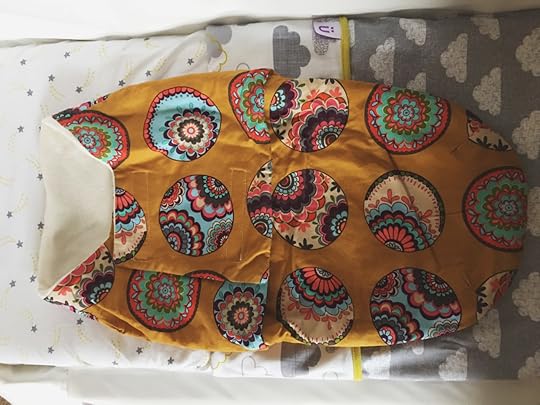 And, a cozy little Swaddle-Pod because it is my understanding that all babies should look like burritos!
I know that was hugely photo-heavy – but I’m just so proud of all the hard work my talented and dedicated husband has done. You can put money on the fact that from now until the Little arrives I will most likely be in this room just blessing out on love lush it all is!
The post Nursery Tour! appeared first on Made Peachy.
April 26, 2017
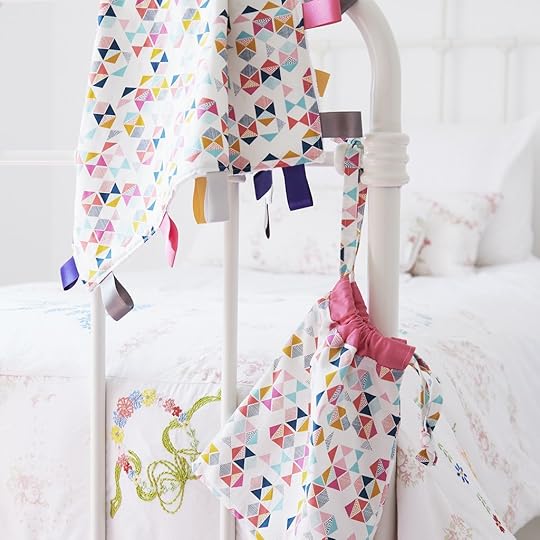
DIY Taggy comfort blanket & drawstring bag
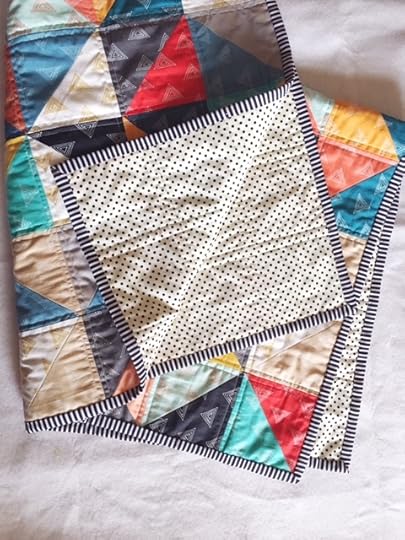
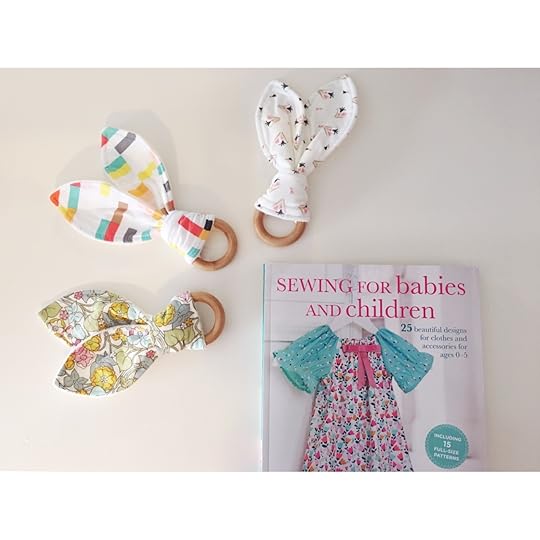
I’m so stoked with the response to my new book Sewing For Babies & Children – that I wanted to share one of my fave mini makes with y’all…so, here’s a step-by-step guide to make your own Taggy comfort blanket and drawstring bag!
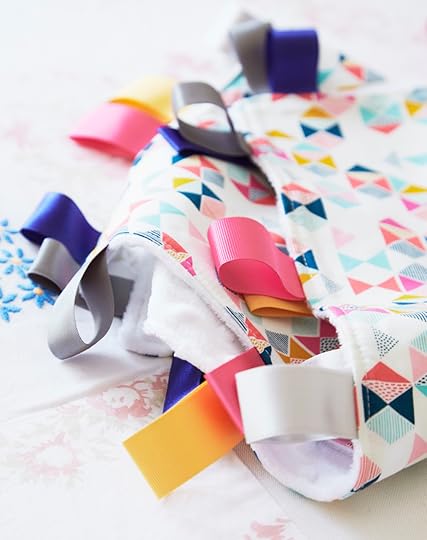
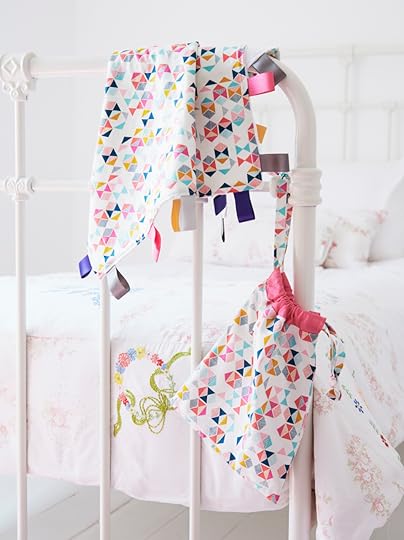 Babies love the tactile feel of ribbon tags, and teamed with the ultra-snuggly textured backing this makes the perfect comfort blanket. Complete with its own mini drawstring bag, it is ready to tote or to gift!
YOU WILL NEED
For the blanket
• 21-in. (52-cm) square of cotton print fabric
• 21-in. (52-cm) square of textured minky or “cuddle” fleece
• Five 20-in. (50-cm) lengths of ribbon in different finishes and colors
For the drawstring bag
• Two 9½ x 10¼ -in. (24.5 x 27-cm) pieces of main fabric
• Two 3 x 10-½ in. (8 x 24.5-cm) strips of contrast fabric in a solid color
• Two 2 x 21-in. (5 x 52-cm) strips of fabric or two 21-in. (52-cm) lengths of ribbon for the ties
• Coordinating thread
• Sewing machine
• Iron
• Dressmaking scissors or rotary cutter, cutting mat, and ruler
• Pins
• Hand sewing needle
• Safety pin
SIZES
Taggie Blanket: 20 in. (50 cm) square
Drawstring bag: 8½ x 10¾ in. (22.5 x 28 cm)
PATTERN NOTE
Take a 3⁄8-in. (1-cm) seam allowance throughout unless otherwise stated.
 TAGGIE COMFORT BLANKET
1 Zig-zag stitch all around the cotton print and fleece fabrics to secure the raw edges. Press each piece.
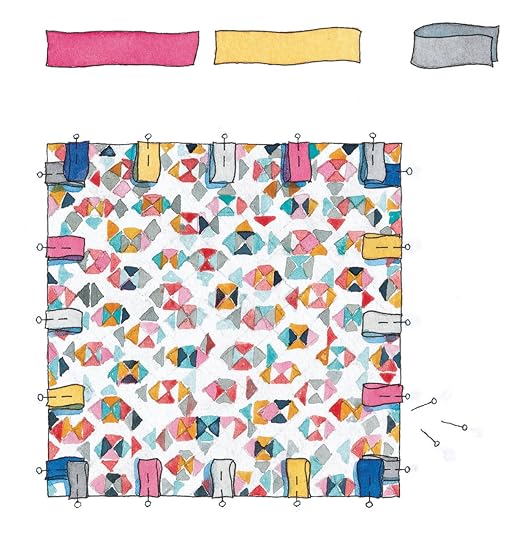
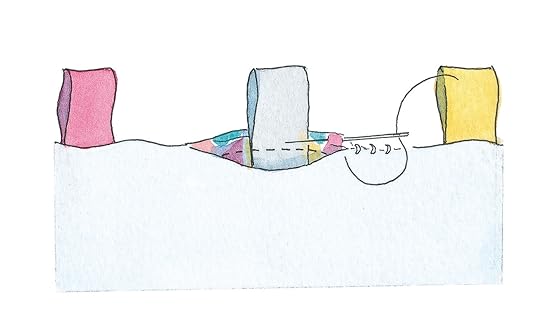
2 Cut each of the ribbons into four 4¾ in. (12-cm) lengths, so that you have 20 pieces in total. Fold each ribbon in half. Aligning the raw edges, pin five pieces (one of each ribbon) along each edge of the right side of the cotton print fabric, spacing them evenly. Set your machine to a straight stitch and stitch all around the print fabric ¼ in. (5 mm) from the edge to secure the ribbons in place. Remove the pins.
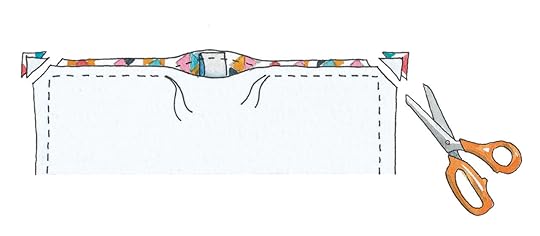
3 With right sides together and aligning the raw edges, pin the fleece backing fabric to the print fabric; the ribbons will be sandwiched in between. Machine stitch around the edge of the fabrics, leaving a 2-in. (5-cm) gap in the center of one side. Snip off the corners to reduce the bulk and trim any bulky seams.
TIP Using a rotary cutter and ruler is a great way to cut very exact straight lines, so it is ideal for items like this that need to be precise.
4 Turn the blanket right side out through the gap and use a knitting needle to ease out the four corners. Fold in the seam allowance around the gap in the seam, press, and pin in place. Slipstitch the gap closed.
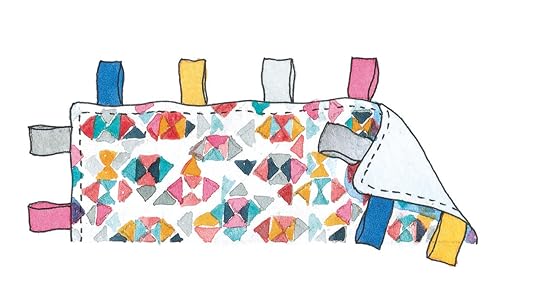
5 Set your machine to a longer stitch (1⁄8 in./3 mm) and topstitch around the blanket ¼ in. (5 mm) from the edge, taking care to pivot at the corners.
MAKE IT YOURS
Add in more ribbons or other tactile elements such as a pom-pom trim to make a more sensory blanket.
DRAWSTRING BAG
1 Zig-zag stitch all around the main and contrast fabrics to secure the raw edges. Press each piece.
2 Pin the main fabrics right sides together, aligning the raw edges. Set your machine to a straight stitch. Stitch from the upper edge down one long side, across the base, and up the second long side, leaving the top edge unstitched.
TIP Sewing the ribbons in place before stitching the main and backing fabrics together prevents the ribbons from sliding apart and helps to create a neat finish.
3 On each short end of the solid color strips, fold over 3⁄8 in. (1 cm) to the wrong side and press. Select a longer stitch (1⁄8 in./3 mm) on your sewing machine and topstitch across each end ¼ in. (5 mm) from the fold to secure.
 4 Turn the bag right side out. Fold the contrast strips in half widthwise, wrong sides together, and press to set the folds. Aligning the raw edges, pin one strip to the top edge of each side of the bag. If possible, remove the extension part of the machine and work with the free arm. Set your stitch length back to normal and stitch the contrast strips to the top of the bag.
5 Press the contrast strips up and press the seam allowances down, toward the bag. Select a longer stitch (1⁄8 in./3 mm) on your sewing machine and topstitch around the top edge of the main fabric, ¼ in. (5 mm) from the seam.
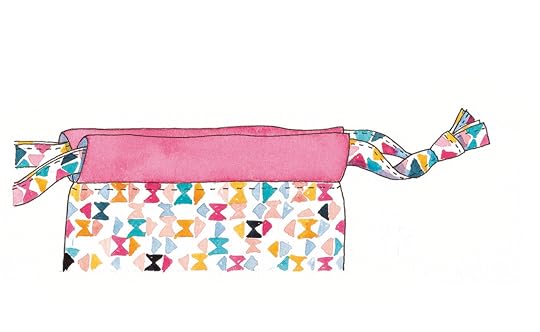 6 If you’re making the ties from the contrast fabric, fold and press each strip in the same way as you would when making bias binding. Set your stitch length back to normal and stitch along the long unfolded edge to secure. Feed one tie through each casing and knot at the sides to secure.
Finishing
Snip away all remaining thread ends to neaten. Fold the blanket neatly into thirds, slip it into the bag, and draw up the ties.
This project is from my new book Sewing for Babies and Children by Laura Strutt, published by CICO Books (£12.99) Photography by Emma Mitchell © CICO Books, available from the new website Make Etc!
The post DIY Taggy comfort blanket & drawstring bag appeared first on Made Peachy.
Sewing For Babies Winner!
Wow! Y’all have been so kind about my new book – thank you so much!
CONGRATULATIONS…
Gemma
Gill
Andi
Please do email over your postal details so that we can arrange for these to be sent out to you!
If you didn’t win a copy, you can grab one over on CICO’s new website – MakeETC… also be sure to check out the new site and follow them over on Facebook & Instagram to stay up-to-date with all the exciting new book releases, news and events, author interviews and lots of inspiration!
 While I’m yammering away about books…I wonder if might ask you guys a wee favour?! If you own, borrowed from a friend or the library or have read any on my books I would be super stoked if you would leave me a review over on Amazon!
 Thank you kind folks!
 ps…pop back tomorrow when I’ll share this exclusive extract from the book so that you can make your own Taggie Blanket!
The post Sewing For Babies Winner! appeared first on Made Peachy.
April 19, 2017
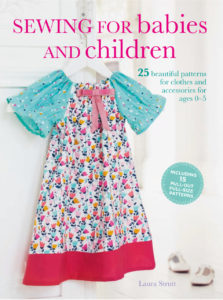
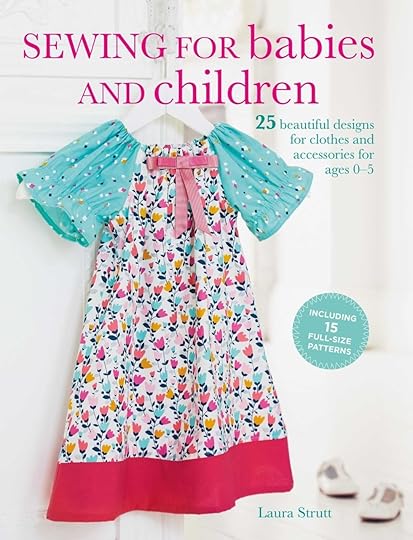
Sewing For Babies & Children is On Sale Now!!
This has been a super happy month for me – not only did I finished up a large and exciting deadline but my latest book went on sale too! Happy Days!!!
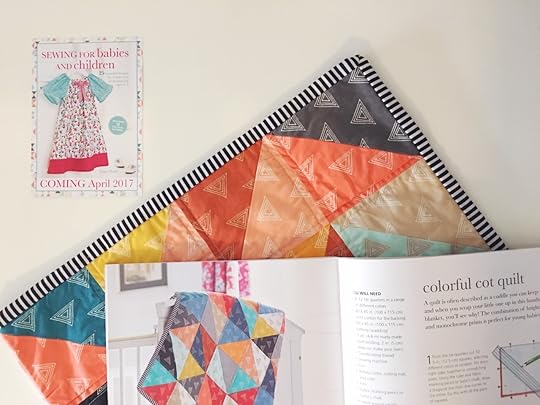 Last summer I spent some time working on a collection of modern, fun and easy-make sewing projects for babies & children for a new book…and finally, I am so happy to share that the book is already on sale!
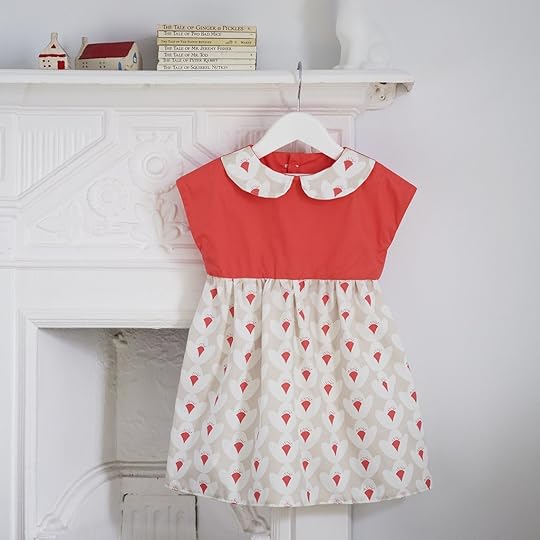
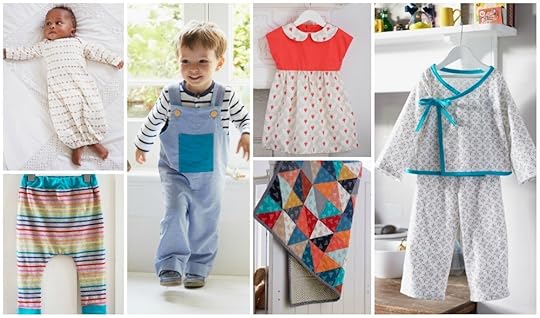
 I adore making clothing and accessories for Littles (and that was before we had our mini person on the way!) Children’s clothing is just more fun to make – I mean the projects are smaller, more manageable even if you are working with materials or new techniques that take you out of your comfort zone, but also you can go wild with fun prints and colours! Most makes are usually pretty quick – so are ideal for those toddlers that seem to be shooting up overnight or to make as a last minute gift for new arrivals!
I had such a blast making these designs & I really hope that y’all enjoy making them!
Of course, I am going to tell you this book is ace (I wrote it!) but you don’t have to take my word for it…you can check our this review over on The Sewing Directory!
 And, even try out one of the projects and make your on Bring-Along-Bunny Toy!
Or, take a read of that Toria had to say over on Thimble End and see her mini make from the book!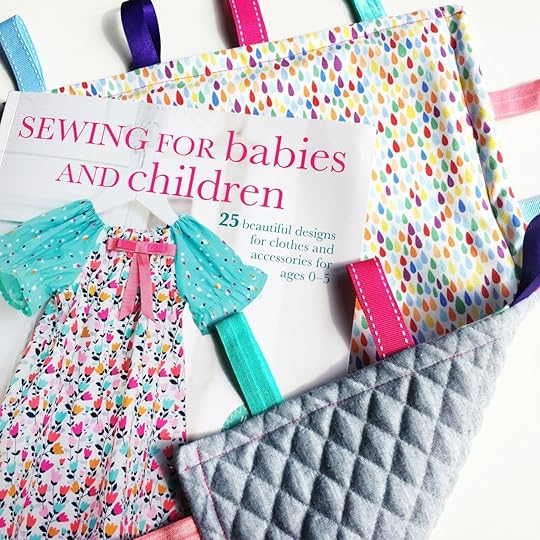
To celebrate this book hitting the shelves this month – I have copies to giveaway to three lucky Made Peachy Readers!
To enter, simply leave a comment sharing why you’d love to win this book! Winners will be picked at random and announced on the 26 April – Good Luck!
Pssssttt! Be sure to check back next week when I will share an exclusive project from the book!
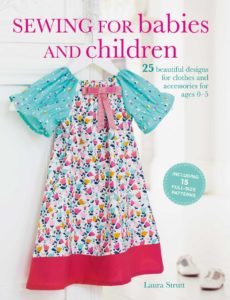
Sewing for Babies and Children by Laura Strutt, published by CICO Books (£12.99) Photography by Emma Mitchell © CICO Books, available from the new website Make Etc!
The post Sewing For Babies & Children is On Sale Now!! appeared first on Made Peachy.
April 13, 2017
Sew Your Own Dolls- Giveaway Winner!
Thank you all so much for entering!
 This truly is a fantastic book…and you don’t just have to take my word for it, there are loads of five star reviews popping up over on Amazon too!
I’m delighted to announce that the winner is…
Carol Wilson
Congratulations – please do email over your postal address and we can arrange for a copy to be sent out to you!
I’m sorry that there can’t be more winners, this is a fantastic book an I know you would all make the greatest characters using it!
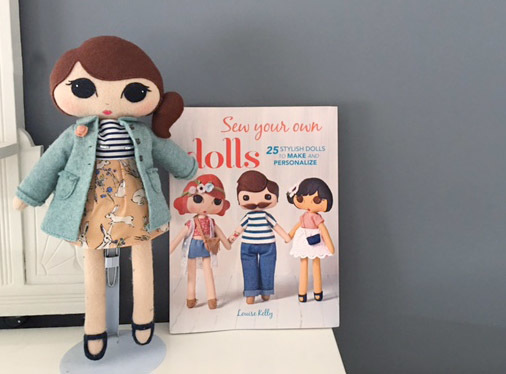
Sew Your Own Dolls by Louise Kelly, £12.99, published by CICO books is available to order over on Amazon!
Happy Easter Friends!
The post Sew Your Own Dolls- Giveaway Winner! appeared first on Made Peachy.
April 4, 2017
Sew Your Own Dolls – Book review!
You guys! I can’t even begin to tell you how much I have been looking forward to sharing this!
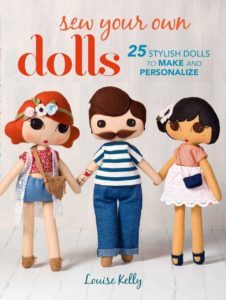
This week my darling friend and super talented stitcher, Louise Kelly’s book went on sale…and SPOILER ALERT it is amazing & y’all are going to love it!!
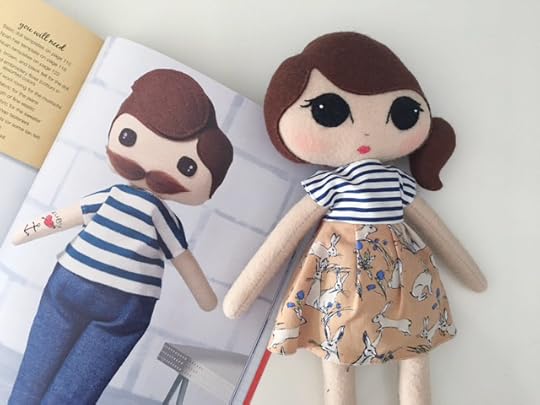
Now, I am a super lucky gal to already have a custom-made Lou Loves This Doll all of my very own, so when anticipating this book, I already knew that this collection of wee felt characters would be utterly brilliant, and WOW this book does not disappoint!
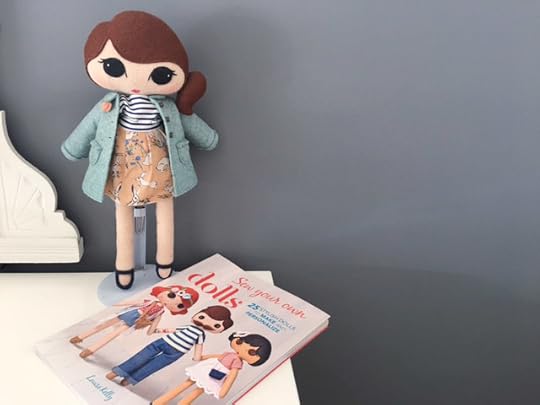 There are 25 dolls to make each one more delightful than the last! If you are new to doll making, or indeed even stitching, then fret not my friend! The first section of the book gives a full overview to all the supplies and tools that you will need to create your own dolls, and not only that there is a full rundown of the techniques that are used in each of the dolls with clear step-by-step illustrations to help you along the way. Even down to how to embroider your dolls name onto her wee dolly pants – because, yes, that is important!
The next section is dedicated to the construction of the doll, which will see even the most novice stitcher through the process, and more experienced stitch folks and dressmakers will be able use this basic body construction to go off and create a whole tribe of their very own bespoke characters!
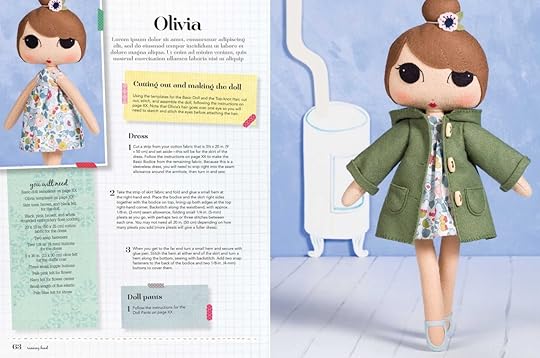 My very favourite thing about the whole book is that it captures Louise’s wonderful imagination and inside are a whole world of characters just jumping off the pages ready to be made! Each doll has a very vivid character from Edie with her boho style and Mia set for a day at the seaside to Haloween-ready Maeve, and artist Zara…you will be hard pressed to pick a favourite.
Although, someone might want to mention to sweet Ruby that my wee Laura doll has her eye on handsome sailor Noah!
You guys, this is one amazing book and I just know that you are going to love it!
 To celebrate the book hitting the shelves I have one copy to giveaway to a lucky Made Peachy Reader…all you have to do is leave a comment below sharing why you’d love to win this book! Winners will be picked at random and announced on the 12 April! Good Luck!
Sew Your Own Dolls by Louise Kelly, £12.99, published by CICO books is available to order over on Amazon!
The post Sew Your Own Dolls – Book review! appeared first on Made Peachy.
March 30, 2017
Modern Weaving Giveaway Winners
Hello Friends!
I can’t tell you how much I love that y’all love weaving! As a fibre fanatic I find this to be one of the most relaxing and almost meditative pastimes going!
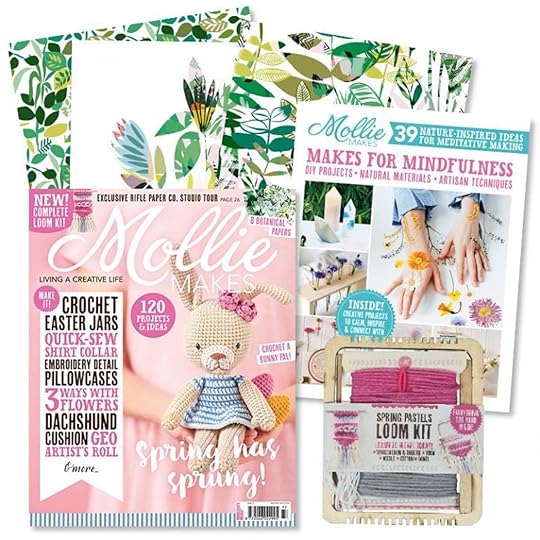
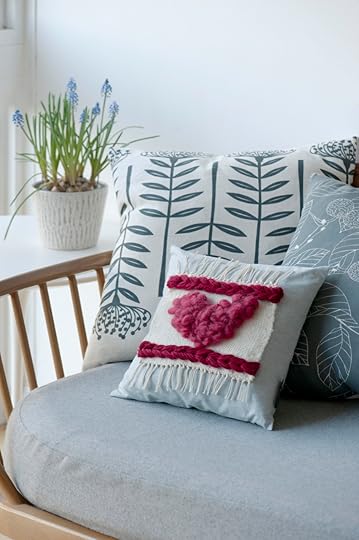
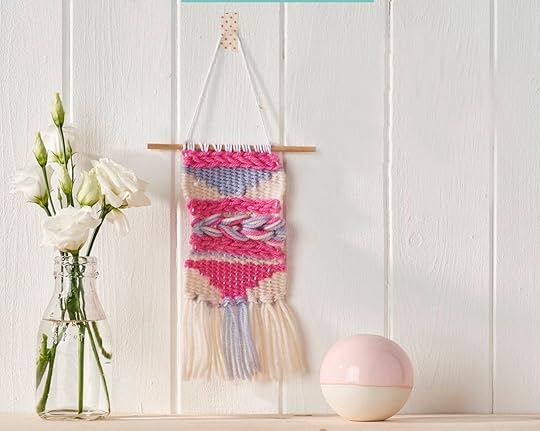 There is still time to pick up the latest Mollie Makes to have a go at your own weaving with my mini make cover gift!
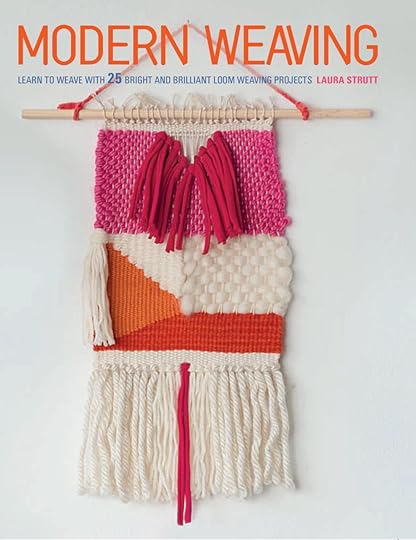
 I was blown away by all your kind words and support, both of this MM project and also my weaving book – you guys really know how to make a gal feel special – thank you x
OK- without further ado, now is the time to announce the winners in the giveaway…
 CONGRATULATIONS!!
TAMSIN
KENSIE
TARA
Please do email over your postal addresses and I will get these shipped out to you…hey- these are signed copies, so if you want a personalised message added to this let me know in your email!
 Thank you all for entering!
Have as great day!
The post Modern Weaving Giveaway Winners appeared first on Made Peachy.


