
Laura Strutt's Blog, page 14
January 4, 2015
The Week That Was: Hello 2015
The now is the start of the first full week (aka first working week) of 2015, how are we all feeling about it?
The last few weeks have been a blast, I love Christmas – it is one of my very favourite times of the year. I mean whats not to love? There are all the gift to buy and wrap, there is all the delicious food, there are the lazy evenings hanging out with folks and friends and then there are all the things that you simply don’t have time to do through out the year – you know, like working on jigsaw puzzles, reading books and generally taking life a little slower. Slowing down has been a real blessing for me this year, I don’t think that I realised how worn out I was till the pace suddenly got a whole lot slower. I don’t know about you, but when life has been really, really busy, the first opportunity to slow down often finds me getting sick. Its the grim reality of not really knowing your limits and being ambitious to the point of exhaustion. Don’t get me wrong, no regrets here, not in the least – but I have realised that rest and relaxation (throughout the year, and not just for Christmas!) is very important.
It is this time of year that New Year Resolutions are top of the agenda – getting fitter, getting healthier, setting business goals, personal achievements that we want to nail this year. Well, I’m no different. But this year the pace is going to be a little different. Once the fireworks of New Years Eve (and the hangovers, if you suffer from them!) are faded and gone, it is all too easy to get caught up in the motivation of the year ahead – the excitement of all the things that you want to do and achieve. I’m all for jumping in both feet first and giving things my all, but this year I intend to think of things more as a slow burn, build on things gradually, day-by-day work on the things that I want to achieve, and hopefully the passion and enthusiasm wont be burning out as quickly as it started.
You’d be forgiven if you think that this means that I’m not really doing Resolutions this year. Not the case, my friends! There are lots of goals that I will be working towards. In the wake of three stinking colds in the last couple of months, health is a top priority! Work is very important to me, I have lots of new plans and projects in the pipeline ready to work on and roll out over the coming weeks and months. Y’all probably know that I’m a bit of a home bird- I love our little home and am excited for the renovations projects that we are working on and spending time with our families and dear friends.
I guess that list of Health, Work, Home and Family is sounding much like the Resolutions Lists the whole world over, am I right? So, how do I intend to stick to it? Well, little by little, day by day. Big dreams and big plans can be daunting, no matter how motivated or enthusiastic you are about them. Setting out to smash one of your resolutions within this first month of the year might be a little insane (although, kudos to you if you can make that work!) but, dedicating a little time to one or more of your goals each day, and little by little you’re going to see results, am I right? Patience is not one of my virtues, not by a long shot. If I want something, I usually want to go out there and get it or make it happen right away. So, trying to stay focused on the bigger picture is tricky and best, crazy-making at worst. In a bid to keep the bigger picture in focus, I’m setting myself the resolution of Journaling everyday.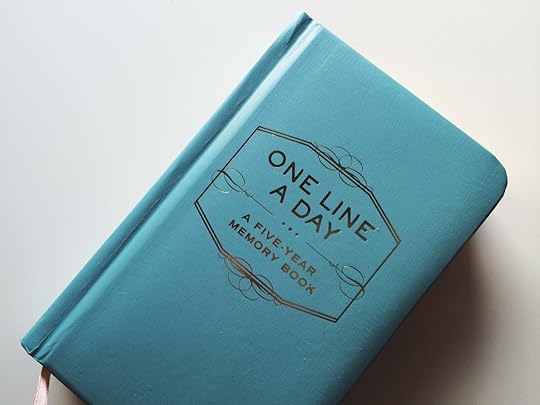 To bring my thoughts back to my aims and goals, to keep myself on track, to hold things in perspective. (Yes friends, that is a 5 Year Journal – so, that’s a lot of perspective right there!)
What resolutions have you made this year and what are your secrets for successfully keeping and achieving your New Year goals?
The post The Week That Was: Hello 2015 appeared first on Made Peachy.


January 2, 2015
Easy-Make Churros
There are still an abundance of delicious food and treats in the house, and we all know that you have to finish up all of these before you can get started on your New Year January Health Kick. So, why not go out in style with a delicious blow out? These Churros are easier to make than you might think, and are the perfect final fling with a sugar high before the detox and healthy regime begins!
A churro dunked in thick hot chocolate is one of my all time favourite treats. Perfect churros come with practice. The exterior should be crisp and the inside chewy but light with air pockets. If you do not have a thermometer, make up 200 ml water with cold water and 50 ml boiling water.
 Grab your ingredients…
1⁄2 teaspoon salt
200 g strong white flour
1⁄4 teaspoon bicarbonate of soda
260 ml water at around 70°C (160°F)
400 ml sunflower, for frying
For the dipping sauce
100 g dark (70%) chocolate, chopped
120 ml double cream
A thermometer
A piping bag
Makes 30 approx.
Whisk the salt, flour and bicarbonate of soda in a bowl. Add the water and whisk quite vigorously so that there are no lumps.
Leave to sit in the bowl while you prepare the oil.
Heat the oil in a small saucepan and bring to 180°C (350°F).
Spoon the dough into a piping bag (use a star nozzle if you want ridges). Twist the piping bag and hold with one hand. Gently squeeze out the dough to a 5-cm piece and snip with scissors into the oil, frying in small batches.
Fry for a couple of minutes and then turn over with tongs and cook until golden brown. Drain on paper towels and keep the churros in a warm oven.
There is no strict shape for churros. Snipping them into the hot oil in lines is the easiest way to get started. Once you get the hang of it, you can try piping them into other shapes, such as the horseshoes shown.
For the dipping sauce, place the chopped chocolate in a heatproof bowl. Bring the double cream to a simmer in a saucepan, then pour over the chocolate. Let it sit for 1 minute, then stir to combine. Serve the churros immediately, accompanied by the dipping sauce.
Delicious!
♥ – ♥ – ♥
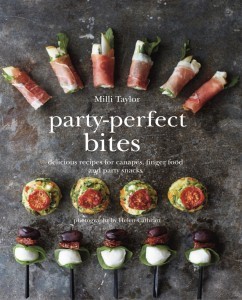
These heavenly Churros are just one of the many delicious recipes from Party Perfect Bites by Milli Taylor, £16.99, published by Ryland, Peters & Small!
The post Easy-Make Churros appeared first on Made Peachy.
December 31, 2014
Arm & Finger Knitting Book Winners
Happy New Year Friends!
I hope that you have all had an amazing festive holiday – for us its been one of hangs with family & friends, eating and getting merry. Now, there ain’t much in life that is better then that!
I’m feeling a little slow to get started with the New Year, the good times over the last couple of weeks have left me feeling a little under the weather and pretty worn out – so, I intend on spending the last remaining holiday weekend, resting, recovering and getting things back to ship-shape! I’ve not even thought about resolutions yet – which is so unlike me – usually I have a list (as long as my arm!) of things I want to change, achieve and do in the New Year…so, if you’ve made resolutions be sure to share them – I’d love a bit of inspiration! Or, if like me, you are taking the first few days of 2015 with a sleepy head, then be sure to check back in a couple of days to see how my resolutions and plans are shaping up!
Well, I may be taking a rather laid back approach to this year, but I can start it out with something a little rad! Remember that giveaway that I ran in December to win one of the Five early copies of my new Arm & Finger Knitting book? Well, friends, now is the time to announce the winners!
 It has taken me an age to work though all the entries, here, over on Facebook, Twitter and Instagram – but, the names have been added to the hat and the lucky folks have been picked out!
 Congratulations!
Fiona
Melissa
Charles Budd
Ellie Rowe-Parratt
Zeta
Be sure to email over your postal address so that we can get these early copies out to you as soon as possible!
 I’m sorry that there can’t be more winners – however, over the coming weeks there will be lots of opportunities for seeing more makes from this book, so be sure to watch this space!
Have a happy Friday y’all!
The post Arm & Finger Knitting Book Winners appeared first on Made Peachy.
December 29, 2014
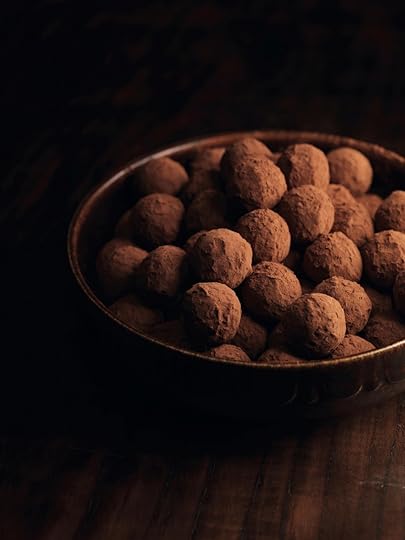
Salted Brown Sugar Caramel Truffles
OK if your going to indulge, these you might as well just go all out! These salted brown sugar caramel truffles make a great last minute New Years gift for foodie folks and will be a real talking point to festive dinner parties and soirees!
I love dark brown sugar, especially muscovado. When boiled with cream and poured over a sticky toffee pudding, it is my idea of food heaven. And, mixed with dark and smoky chocolate it gives you a completely different taste experience. Here, instead of a traditional salted caramel recipe, these Salted Brown Sugar Caramel Truffles use the flavour of deep, rich and treacly muscovado with cream and make it into a ganache with dark chocolate – a little bit different, but a new experience for all you legions of salted caramel lovers out there!
 Grab your ingredients…
Ganache
100 g dark muscovado sugar
25 g unsalted butter
250 ml whipping cream
Seeds from 1⁄2 vanilla pod or 1 teaspoon pure vanilla extract
250 g dark chocolate, chopped
1⁄2 teaspoon sea salt flakes
To finish
50 dark or milk chocolate spheres
250 g dark chocolate, tempered
4 tablespoons cocoa powder
A disposable piping bag
2 baking sheets, 1 lined with baking parchment
Makes about 50 truffles
To make the ganache, put the sugar into a small saucepan or pot set over a low heat. Add the butter and when the sugar begins to melt, add the cream and vanilla. Bring the mixture to the boil slowly, stirring until smooth.
Tip the chopped chocolate into a bowl, add the salt and pour over the hot cream. Set aside for 30 seconds to allow the chocolate to melt in the heat of the hot cream, then stir until smooth. Set aside to cool at room temperature for about 15 minutes before scooping into a disposable piping bag. Snip the end to create a nozzle/tip, pipe ganache into each truffle sphere.
Chill the truffles in the fridge for about 30 minutes to set firm.
Temper the dark chocolate according to the instructions below.
Sift the cocoa powder onto the unlined baking sheet, ready for rolling.
To finish, dip each of the filled truffles in the tempered chocolate to coat. Remove them using a dipping fork, tapping the fork on the side of the bowl to allow any excess chocolate to drip back into the bowl. Drop each truffle into the cocoa powder and roll to coat. Repeat with the remaining truffles, then transfer the coated truffles to the lined baking sheet to set firm before serving.
Are you besotted with salted caramel?
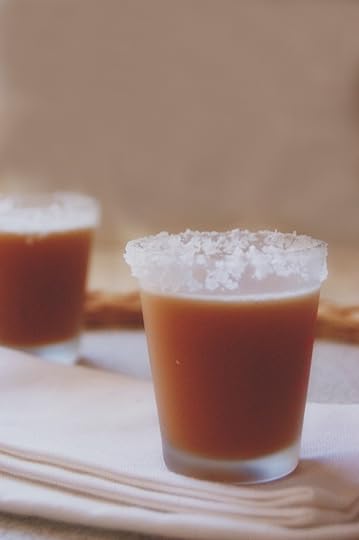 How about making your own Salted Caramel Shooters?!
New to making truffles?
Check out this handy guide to get you off to a flying start!
Tempering
You may have heard this term banded around by chefs and chocolatiers and not have a clue what it means. Without going into the science of re-crystallizing the crystals in the cocoa butter, it’s basically the way the chocolate becomes shiny and glossy, and hardens with a crisp snap, not soft or bloomed. ‘Blooming’ is when the cocoa butter re-crystallizes on the surface of the chocolate often leaving a white residue. These steps are for tempering dark/bittersweet chocolate. For milk or white, the technique is exactly the same but the temperatures are slightly different.
A preferred method of tempering is to use a marble slab, palette knife, scraper and an electric probe. It’s important to say at this point to either use chocolate in button or callet form, or from a bar, chopped up finely – this will help melt the chocolate easier.
Tempering on the marble is the preferred method for many chocolatiers. However, there are other methods that are simpler and easy to master, so try the one that appeals to you most.
The ‘marble’ technique
Melt the chocolate pieces, buttons (callets) to 45°C (110°F) for 30-second bursts in the microwave on a low heat.
Pour out two thirds of the chocolate onto the clean, marble slab – it must be completely dry as any moisture on the marble will cause the chocolate to seize up.
Begin to spread the chocolate thinly across the marble using a palette knife. This applies a shearing force to the chocolate, which along with temperature, is also critical to the tempering process.
Bring the spread chocolate back together using a scraper, keep it moving and continue to shear and cool the chocolate.
Continue to do so until the chocolate starts to thicken – you will see peaks form when the chocolate is dropped from the spatula. The cocoa butter within the chocolate is beginning to crystallize and the cooled mass should be 25°C (50°F).
Working quickly, place the thickened, crystallized chocolate into the remaining chocolate in the bowl and stir thoroughly until the chocolate is smooth again, taking care to stir out any lumps.
For dark chocolate, it should now be 32°C (90°F) and will be perfectly tempered. Milk chocolate should be 29°C (85°F) and white should be 30°C (86°F).
To make sure the chocolate is well tempered (and it’s always best to make sure), dip a little bit of torn baking parchment into the chocolate and place on your work surface to set a little. It should set hard within a few minutes at an ambient temperature.
The chocolate is now ready to use for moulding, dipping and decorating. Remember to work quickly and confidently with it to avoid further re-crystallization at room temperature.
The ‘seeding’ technique (or adding more chocolate)
This is a good way to start your journey of mastering the art of tempering chocolate.
Weigh out the total amount of chocolate you need for the recipe, then remove one third of it and set aside. Melt the remaining two thirds of chocolate for 30-second bursts in the microwave on a low heat to 45°C (110°F). Then stir through the third you have reserved. Because the unmelted chocolate is already tempered, by adding it to the melted chocolate 45°C (110°F), you are stirring in the crystallized cocoa butter that you need to complete the tempering process.
Continue to stir until all the chocolate has melted.
Check the temperature of the chocolate. For dark chocolate, it should now be 32°C (90°F) and will be perfectly tempered. Milk chocolate should be 29°C (85°F) and white should be 30°C (86°F).
Tempering in the microwave
For small batches of chocolate, tempering in the microwave is best as it’s so quick and doesn’t make as much mess. Just like how we melted the chocolate for the marble technique, warm the chocolate for 30-second bursts in the microwave on a low heat, stirring between bursts.
It is important not to heat the chocolate too quickly as you want to crystallize the cocoa butter slowly, so reduce your microwave power to its lowest heat setting.
Once the chocolate is three quarters melted, stop heating. Stir the chocolate instead until all the remaining lumps have melted. Just like the marble method be sure to check the chocolate is tempered by dipping a little bit of torn baking parchment into the chocolate and place on your work surface to set a little. It should set within a few minutes.
The chocolate is now ready to use. Remember to work quickly and confidently with it.
Enjoy!
♥ – ♥ – ♥

This sweet treat is just one of the many delicious recipes from Chocolate At Home by Will Torrent, £19.99, published by Ryland, Peters & Small!
The post Salted Brown Sugar Caramel Truffles appeared first on Made Peachy.
December 26, 2014
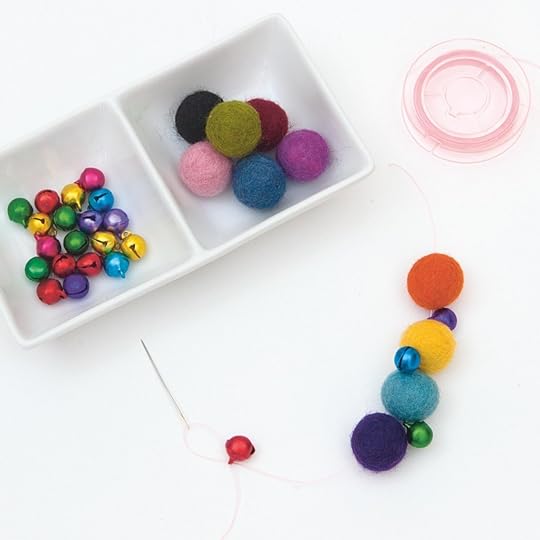
Make Your Own Jingle Bells Bracelet
 Grab your supplies
Embroidery needle with eye large enough to accommodate the thread
10in (25cm) stretchy nylon jewellery thread
10 felt balls, each ¾ inch (2cm) in diameter
10 tiny bells, each ⅜ inch (1cm) in diameter
Scissors
 1 Thread the needle with the nylon jewelry thread.
2 Start threading felt balls and bells onto the thread, alternating them as you go.
Here 10 of each colour were perfect for a teen wrists but you might want to use more or less.
3 Tie the ends together and trim any excess thread.

♥ – ♥ – ♥
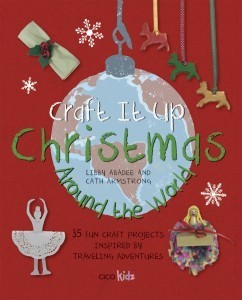
This fun-make bangle is from Craft it Up Christmas Around the World by Libby Abadee and Cath Armstrong, £9.99, published by CICO Books!
The post Make Your Own Jingle Bells Bracelet appeared first on Made Peachy.
December 25, 2014
Fab Fabrics – Cleta
Happy Boxing Day Friends! By now you will have been completed showered with festive love – which is a great and brilliant thing. But, if like me a tiny little part of you will be itching to get back to the sewing machine – I know, bit there is really only so much turkey that a gal can take – am I right?!
So, Fabric Fanatics, I thought I would share some delicious and fun prints that arrived at Peachy HQ just before the holidays. I just know that you are going to love these modern and bold designs!
Cleta by AGF Studio

Cleta – short for Bicycleta, or bike – is a modern collection of bold modern prints featuring graphic bike motifs and teamed with monochrome and vibrant mustard, navy and teal shades. Just the thing for capturing the sprite of adventure and and a glimpse of the world as seen from the saddle of a bike.
Bicycles are a fun motif that will give your makes a quirky touch – and the bold modern colour ways is sure to make a real statement! Looking for more inspiration? be sure to check out the inspiring designs in the Cleta LookBook!
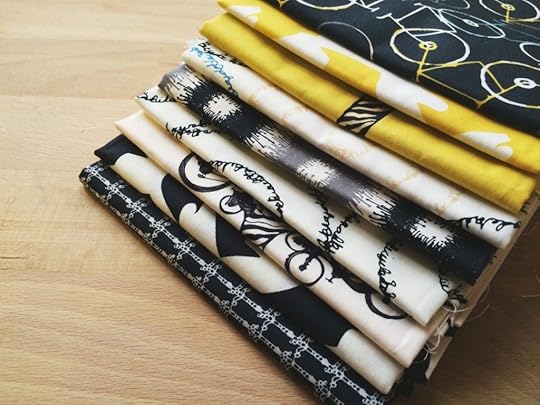 These fabulous print cottons retail at around £12.50 per metre – check out your local stockist!
These are the perfect antidote to all the festive prints that we are surrounded by at the moment – so, what would you make with this striking collection?
The post Fab Fabrics – Cleta appeared first on Made Peachy.
December 24, 2014
Merry Christmas Y’all
Today is a day for family and festive fun, but I wanted to just stop in to wish you all a wonderful, wonderful Christmas.

It’s super hard not to get very soppy at this time of the year, so I will keep this short and sweet, the last 12 months have been a complete joy, and I feel blessed that you, sweet readers, have joined me on this exciting journey.
So, thank you for coming along, for reading this creative journal, leaving your lovely comments, checking out the makes and recipes and most of all for being out and out rad!
So, friends, wishing you the very happiest of holidays!
With lots of love for a very Happy Christmas!
xox
 ps I’d love to be able to give you all a little gift for Christmas…so, while I can’t whizz around the globe scattering gifts like Father Christmas (although that would be pretty awesome!) I’d love for you to get a copy of my new book (on sale March 2015!) Be sure to check out this giveaway – international entries are welcome!
The post Merry Christmas Y’all appeared first on Made Peachy.
December 22, 2014
Scallops in Pancetta Party Bites
Hosting a festive dinner party or gathering for friends and family this Christmas Eve? Then this Scallops in pancetta makes the perfect appetizer to really wow your guests!
 Grab your ingredients…
30 small scallops
15 pancetta slices, cut in half crossways
For the marinade
2 sprigs of fresh rosemary
5 fresh basil leaves
Freshly squeezed juice and grated zest of 1⁄2 a lemon
2 tablespoons olive oil
Salt and freshly ground black pepper
1 garlic clove, crushed
Mini wooden skewers
Makes 30
Put the marinade ingredients together in a bowl.
Marinate the scallops for 30–60 minutes.
Wrap each pancetta half around a scallop and skewer through the side.
Heat a frying pan and cook the scallops for just under 1 minute on each side. Then, for the last 10 seconds, add any leftover marinade to the pan. Serve.
♥ – ♥ – ♥
This delicious recipes is just one of the many delicious ideas from Party Perfect Bites by Milli Taylor, £16.99, published by Ryland, Peters & Small!
The post Scallops in Pancetta Party Bites appeared first on Made Peachy.
December 19, 2014
Gluten-Free Mince Pies with Pistachio Mincemeat
Mince pies are a festive staple, making them are something of a christmas tradition in our hours. I may or many not [Read: definitely did] win a trophy in primary school for my mince pieces…and there was a professional chef in the running too! Yes! That’s a festive fact and one that I’m pretty proud of…still to this day! Fancy making some mince pice with a delicious twist? How about trying these Mince Pies with Pistachio Mincemeat?
Although mincemeat is readily available in the supermarkets it can often contain wheat, so if you have time before Christmas, why not make your own gluten-free version? Check the packets of dried mixed fruit and suet carefully, to ensure they are gluten-free.
Grab your Ingredients…
Pistachio Mincemeat
500g dried mixed fruit
50g crystallized ginger, finely chopped
Grated zest and freshly squeezed juice of 2 oranges and 2 lemons
2 apples, grated
150g caster sugar
300ml brandy
125g gluten-free suet
100g unsalted pistachios, chopped
1 teaspoon ground cinnamon
1 teaspoon ground mixed spice
For the pastry
50g butter
190g gluten-free plain flour, plus extra for dusting
60g plus 1 tablespoon caster sugar, plus extra for sprinkling
1 egg yolk
50g cream cheese
1 teaspoon ground cinnamon
To assemble
3 tablespoons cream cheese
Grated zest of 1 orange
Milk, for glazing
Icing sugar, for dusting
3 sterilized glass jars with lids
8-cm round cookie cutter
12-hole muffin tin, greased
Makes 12
 First make the mincemeat. Place all the ingredients in a large bowl and stir well with
a spoon to make sure everything is mixed. Cover the bowl with a kitchen towel, then leave to stand for 1 hour to allow the flavours to develop. Transfer the mincemeat
to a saucepan, and warm over low heat, until the suet has melted and the apple is cooked. Decant into sterilized jars, and seal with airtight lids. The mincemeat will keep for up to 1 year. You will need 1 jar for this recipe.
Preheat the oven to 180°C (350°F) Gas 4.
To make the pastry, cut the butter into small cubes, and rub it into the flour with your fingertips, until the mixture resembles fine breadcrumbs. Add the sugar, egg yolk, cream cheese and cinnamon, and mix together to a soft dough, adding a little cold water if the mixture is too dry.
On a flour-dusted surface, roll out the pastry to a 3 mm thickness. Stamp out 24 pastry rounds using the cookie cutter, and press half of the rounds into the holes of the muffin tin. Do not worry if the pastry cracks; simply patch with pastry trimmings. If you like, press the remaining rounds on to a star-shaped mould, to create a decorative imprint. These will be the tops. Fill each pastry case with a spoonful of mincemeat, top with a teaspoon of cream cheese and a little orange zest, then add the tops, pressing the pastry down gently. Using a pastry brush, brush the top of each pie with milk, and sprinkle with a little caster sugar.
Bake for 10–15 minutes in the preheated oven, until the pastry is golden brown. Remove the pies from the tin while still warm. It is easiest to do this by pushing
a teaspoon down the side of each pie. Transfer the pies to a wire rack to cool. Dust with icing sugar to serve. These pies will keep for up to 3 days in an airtight container.
 Now, go grab yourself a glass of Mulled Cider or Chocolate Mulled Wine and have a festive afternoon!
♥ – ♥ – ♥

These delicious mince pies are one of the tasty recipes from Gluten-Free Christmas by Hannah Miles, £9.99, photography by William Reavell, published by Ryland Peters & Small!
The post Gluten-Free Mince Pies with Pistachio Mincemeat appeared first on Made Peachy.
December 18, 2014
Obsessed With…Snow Globes
Let It Snow, Snow Globe card, £2.30, Lily And Val
We’re starting to walk up to a kiss of frost ion the mornings, making the early morning dog hike very chilly and quite magical.
This time of year is pretty hard to beat – everything seems so still and sparkling when its cold and wintery. Ok, I am a lot more in love with this weather since we have (finally) had fully functioning heating in our home – this will be the first winter in nearly four years that we have happily had heat. So, because the house is cosy and comfy, all I can seem to think about is snow! I wishing hard for a white Christmas…or a white New Years Eve…in fact, I’d settle for just one white Friday this winter, you know, just to be able to peek out the window and squeal, “It’s snooooowing!”
As if somehow this will cement my wish and make it a reality, I have been obsessed with Snow Globes – I mean these are all the magic of a winter wonderland in the palm of your hand – what could be better than that? Here are some of the incredible snow globes on Etsy that have stole my heart this winter!
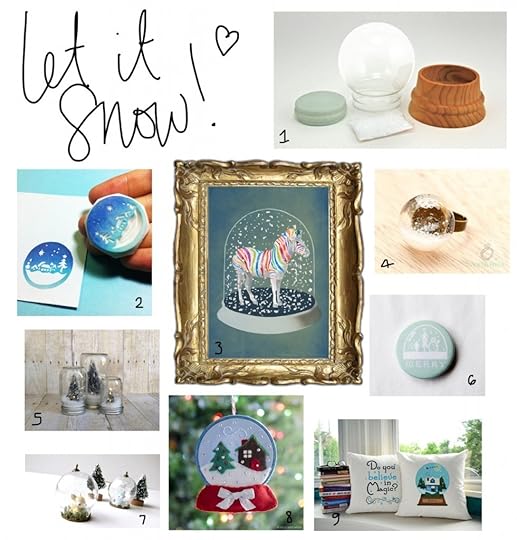 1 Make Your Own Snow Globe Kit • £17.70 • GlobalShakeUp
2 Snow Globe Rubber Stamp • £6.24 • theKeris
3 Zebra Snow Globe Print • £6.57 • CocktailZoo
4 Snow Globe Ring • £18.51 • Viviannaschmuk
5 Mason Jar Snow Globe • £15.76 • CityGoose
6 Snow Globe Button Badge • £1 • bymelimelo
7 Fawn Snow Globe Pendant • £6.57 • BellaMiaDesign
8 Snow Globe Ornament Pattern • £3.94 – instant download •
9 Snow Globe Pillow Set • £17.07 • CraftRoom
Is it just me or do snow globes make you even more excited about wintertime and the prospect of a white Christmas?
♥ – ♥ – ♥
See more of my handmade favourites in my column in the latests issue of Sewing World magazine – on sale now!
The post Obsessed With…Snow Globes appeared first on Made Peachy.


