
Laura Strutt's Blog, page 16
November 26, 2014
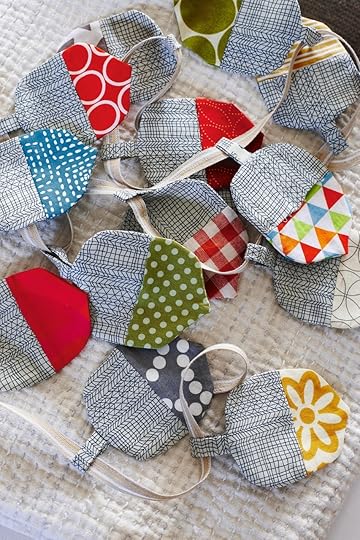
DIY Fabric Acorn Garland
Let’s be honest, garlands are one of the greatest ways to fancy up your decor, so it makes sense that we should have styles for all seasons. So, how about making your own Fabric Acorn Garland?
Made from small scraps of brightly colored fabrics, these cheery little acorns make a pretty autumnal garland. I have used the same fabric for all of the acorn cups, while mixing and matching a seasonal pallet of greens, blues, oranges, and yellows for the nuts. The materials listed below will make a garland that measures approximately 6 1/2 ft. (2 m) long.
 Grab your supplies…
Acorn Template
Tracing paper
Pencil
Scissors
Fabric for the acorn cups, measuring 48 x 12 in. (120 x 30 cm)
Pins
Small scraps of different coloured fabrics for the acorn nuts
Iron (optional, but y’all know how I feel about ironing and pressing seams!)
Sewing needle and thread in colours to match the fabrics
Small paintbrush
Ribbon measuring 8 ft. x 1/2 in. (250 x 1 cm)
 1 Place the templates on a piece of tracing paper and draw around them using pencil. Cut them out.
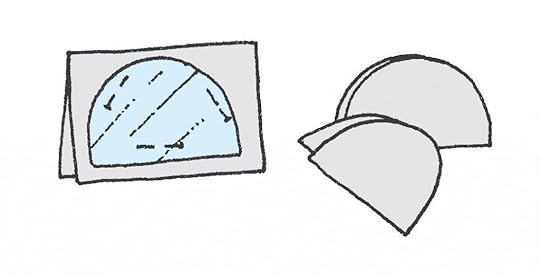 2 Cut a piece of fabric for the acorn cup that is twice the finished size and fold it in half. Pin the cup template to one side, draw around the shape and cut it out. This will provide you with the front and back of one cup. Repeat 14 times more. Make up 15 pairs of acorn nuts in the same way.
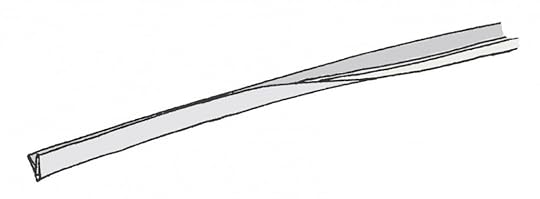 3 Cut a strip from the acorn cup fabric that measures 48 x 1½ in. (120 x 4 cm). Place the strip on your work surface, right side down. Fold each long edge to meet in the middle and press. Fold the strip in half, so that the folded bits are on the inside. Press the strip again.
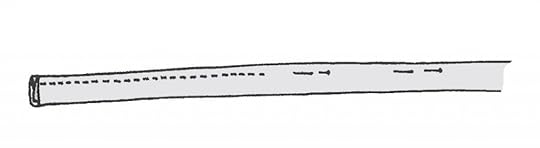 4 You will have made a strip measuring 48 x 3/8 in. (120 x 1 cm). Pin and sew a seam close to the long open edge. Cut the strip into 3 in. (8 cm) sections—fifteen in total.
 5 Make the acorn front. Align the straight edge of a fabric acorn cup with the straight edge of a fabric nut, right sides facing. Pin and sew together with a ¼ in. (6 mm) seam allowance. Repeat to make the acorn back, leaving a gap of 1¼ in. (3 cm) at the center of the seam.
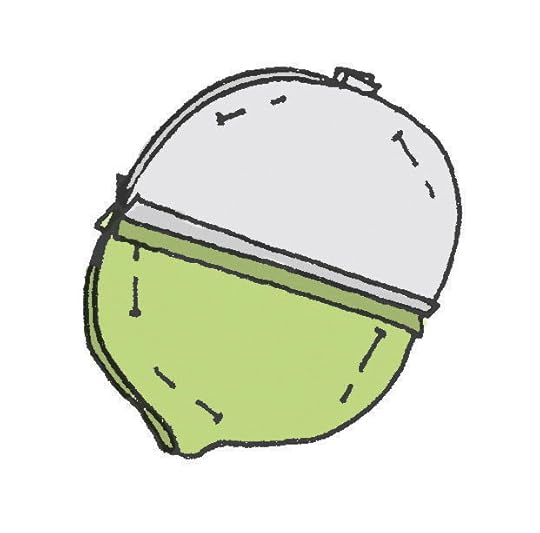 6 Place the front and back acorn pieces together, right sides facing. Take one of the strips you made in Step 4, fold it in half and tuck it between the two acorn pieces. Position it centrally at the top of the cup, so that the raw edges stick out approximately 1/4 in. (6 mm) from the top. Pin and sew all around the edge of the acorn.
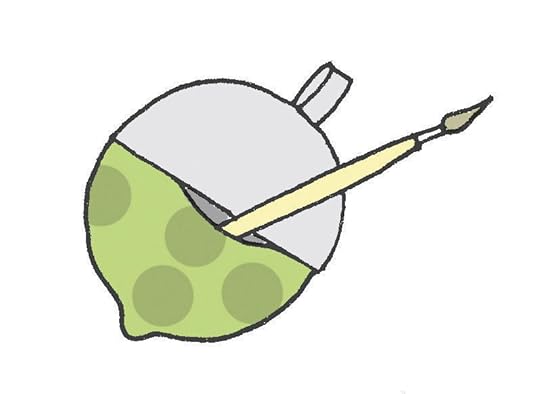 7 Turn the acorn the right way out through the gap you left in the seam in Step 5. Use the handle end of a small paintbrush to poke down into the point of the acorn.
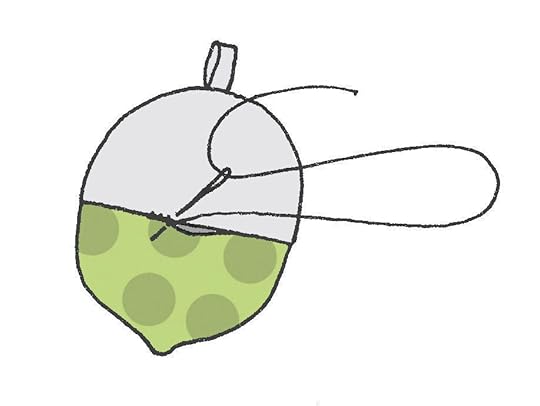 8 Use small stitches to close up the gap. Repeat Steps 5 to 7 to make the remaining 14 acorns.
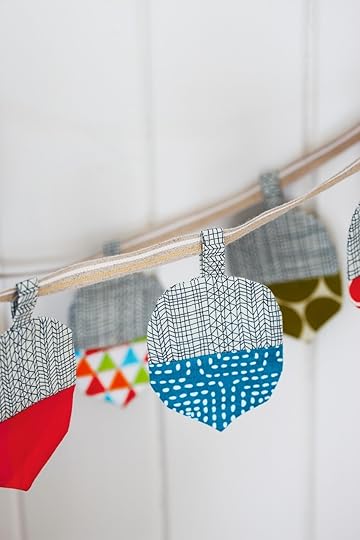 9 Thread the acorns onto ribbon, securing each with a couple of stitches. Space them out evenly along the length of the ribbon, leaving long enough ends for hanging the finished garland.
 Handy Tip!
You can use an air-erasable pen to draw shapes on fabric. It will disappear without the need for washing!
♥ – ♥ – ♥
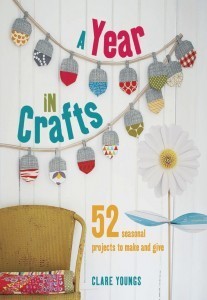
This project is just one of the many amazing makes from A Year in Crafts by Clare Youngs, photography by Joanna Henderson, £14.99, published by CICO Books!
The post DIY Fabric Acorn Garland appeared first on Made Peachy.


November 25, 2014
Pinterest: What They Did With…Baubles
How stunning are these hand painted Faberge inspired Christmas baubles, £16.95, ?!
Last week I shared some of the rad Advent Calendar DIYs I found on Pinterest and since then I can’t (wont!) stop pinning festive ideas! So, for the foreseeable future, prepare yourself for a barrage of all things Christmas! Here is a round up of some amazing DIY Christmas Bauble Projects from Pinterest!
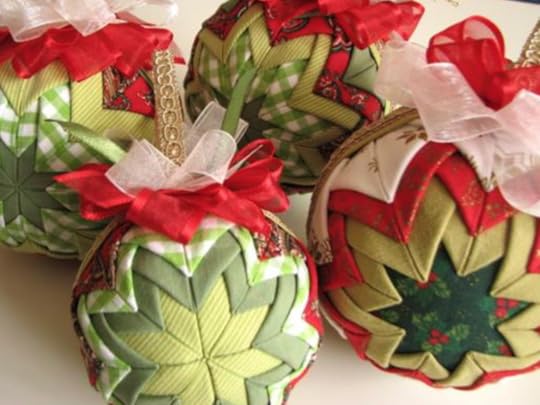 1 Patchwork Baubles ⇒ UsefulDIY
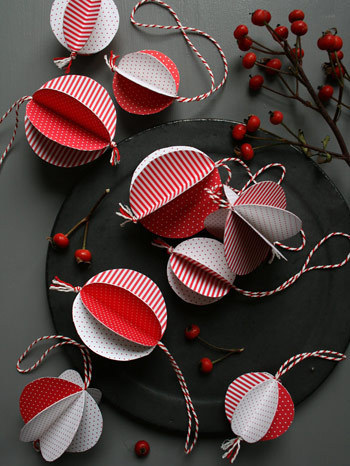 2 Paper Baubles ⇒ Brigitte
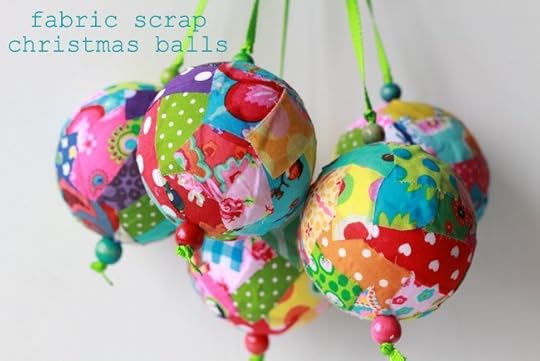 3 Fabric Scrap Baubles ⇒ Jillian In Italy
 4 Sprinkle Filled Baubles ⇒ Little Gray Fox
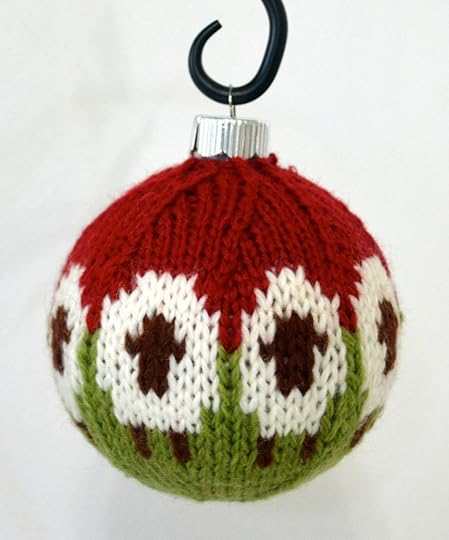 5 Sheep Knitted Baubles ⇒ Creative Country Life
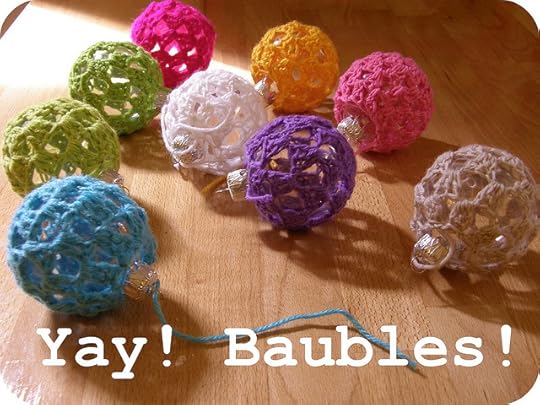 6 Crochet Christmas Baubles ⇒ Meet Me At Mikes
When it comes to decorating our tree, we are the kind of folks where we love a little bit of everything. We are all about the mismatched decorations – how about you? Do you decorate with a set style and colour scheme in mind? Or, do you add decorations in wild abandon?
Christmas is just exploding on my Pinterest Boards right now so, see what other festive treats I’m pinning right now!
The post Pinterest: What They Did With…Baubles appeared first on Made Peachy.
November 24, 2014
Banoffee Oat Dessert Recipe
It’s dinner party and entertaining season, so what are you going to serve to your guests to finish up delicious meal? How about this tasty twist on a classic Banoffe Dessert? Oats are not just for breakfast – they’re a nutritious wholegrain that add flavour and texture to lots of dishes throughout the day. This scrummy dessert uses rolled oats and is surprisingly easy to make!
 Ingredients…
100g rolled oats, reserve 25g, toasted, to decorate
2 tbsp clear honey
1 large banana, sliced
4 scoops low fat vanilla ice cream
4 dessert spoons salted caramel sauce
4 tbsp low fat Greek-style yoghurt or wholegrain yoghurt
To serve: a dusting of cocoa
To Make…
Preheat the oven to 180oC, gas mark 4.
Mix together the 75g rolled oats and honey, spread evenly on a small baking tray and bake for 5 minutes turning the mixture over a few times. Put aside to cool.
Divide the oat mixture equally between 4 sundae dishes. Top with sliced banana, and a scoop of ice cream. Spoon over the caramel sauce.
Add a dollop of yoghurt and finish with a dusting of cocoa powder and sprinkle over the reserved toasted oats.
Why not try…
Swap bananas for raspberries and salted caramel sauce for chocolate sauce.
♥ – ♥ – ♥
Find more delicious and healthful recipe over at Wholegrain Goodness!
The post Banoffee Oat Dessert Recipe appeared first on Made Peachy.
November 21, 2014
Cavolo Nero Tuscan Fish Stew Recipe
How about something tasty for dinner this weekend?
Y’all may know that I’m crushing on Kale right now – I mean Kale is tasty and so good for you, if you’ve tried these Kale Crisps or this Orzo with Kale and Chorizo you’ll know where i’m coming from when I say this food is super! But what about cacolo nero? Yup this is a tasty member of the kale family and has just as many health benefits as our friend kale!
Cavolo nero originates from the fields of Tuscany where it was first believed to be grown in 600BC, its nearly black leaves make it a dramatic addition to many recipes and is growing in popular like it’s super-star cousin, kale.
How about trying out this Cavolo Nero Tuscan Fish Stew Recipe to give this brilliant brassica a try?

Grab your ingredients…
1 tbsp rapeseed oil
1 yellow pepper, diced
100ml red wine
400g can chopped tomatoes
1 tbsp tomato puree
½ x 200g bag shredded cavolo nero
250g cod fillets, diced
150g pack cooked tiger prawns
Method
Heat the oil in a large saucepan and fry the pepper for 3-4 minutes. Add the wine and then the chopped tomatoes, tomato puree and cavolo nero, cover and cook for 4-5 minutes.
Add the fish and prawns and cook for 2-3 minutes until the fish is just cooked.
Quick Tip!
Make this dish your own, by adding in any of your favourite white fish or seafood!
♥ – ♥ – ♥
Find more ways to use cavolo nero (and yummy kale!) in the deliciously inspiring recipes over on Discover Kale!
The post Cavolo Nero Tuscan Fish Stew Recipe appeared first on Made Peachy.
November 19, 2014
Festive Mini Makes Washi Tape Candles
When it comes to Christmas I never seem to have quite enough time to make all the handmade gifts that I want to make. So, when the lovely folks over at FW Media & Stitch Create Craft asked if I’d like to take part in their Festive Blog Hop and pick a seasonal make from one of their stunning collection of Christmas books I couldn’t wait to get stuck in!
 I love washi tape- this is by far the best way in the world to make something look super cute in no time…and is just the thing for festive makes!
Kami Bigler’s Washi Tape Christmas is one for me – this book is just packed with ideas for getting festive with washi tape – not that we all need any kind of excuse to stock up on yet more rolls of this pretty crafting essential! From cards and gift tags, to wreaths and decorations, there are plenty of fresh new ideas to try and great new techniques for using washi tape.
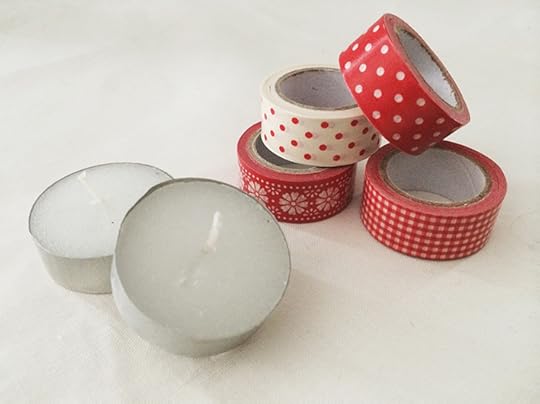 Washi tape accented tea lights is a quick Christmas crafting fix that we can all manage to fit in to our busy pre-Chrimbo schedule. With only a couple of supplies, which chances are you already have at home, you can make these pretty little candles that are perfect for fancying up your mantlepiece to dinner table, or make a sweet little last-minute gift!
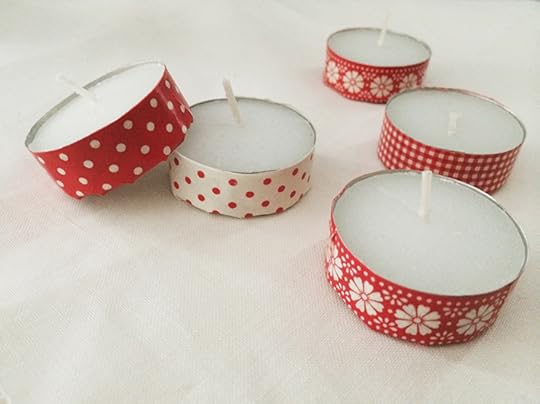 This simple make is everything I love about washi tapes – you can make something very ordinary and every day, look special in no time.
 As Kami suggest in her book, you can package these up in neat little bundles – with some matches – and give as gifts. I don’t know about you, but I hate that feeling when a friend or house guest presents you with a gift and you have nothing, not even a sweet little token to give to them in return, these little treats could well save you from those, “Oh Thank you! I didn’t know we were giving gifts this year!” moments!
 Mix and match colourful prints from your collection, or pick a selection of different designs in the same shade for a chic festive style. I adore this cute set of 4 co-ordinating Scandi Washi Tapes, £3.95 from DotComGiftShop – is there anything more festive than this collection?
Let’s just go ahead and assume that you are going to be crafting something festive with washi tape (because we all know that you will!) so, what are you planning on making?
Psst! Share a picture of your own handmade Christmas decoration with the lovely folks at Stitch Craft Create and you could win £100 to spend at SCC! Just add your photo to their share board or use the hashtag #SCCXmas on Twitter or Instagram to enter – Good Luck!
♥ – ♥ – ♥

Washi Tape Christmas is Kami’s fist book, published by David & Charles – available as an eBook for £9.99 from Stitch Craft Create! For more creative inspiration for recipes, crafts, activities and much more be sure to visit Kami’s blog, No Biggie!
The post Festive Mini Makes Washi Tape Candles appeared first on Made Peachy.
November 18, 2014
Pinterest: What They Did With…DIY Advent Calendars
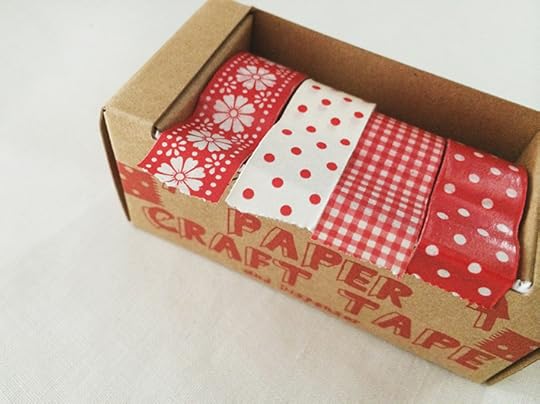
How cute is this nostalgic vintage-style box advent calendar, £18.74, milchundhonig
In our home, the countdown to Christmas is a big deal! I love it, its the perfect way to build the excitement and get in the mood for the feature celebrations ahead – here are some awesome DIY Advent Calendars on Pinterest to get you into the festive spirit!
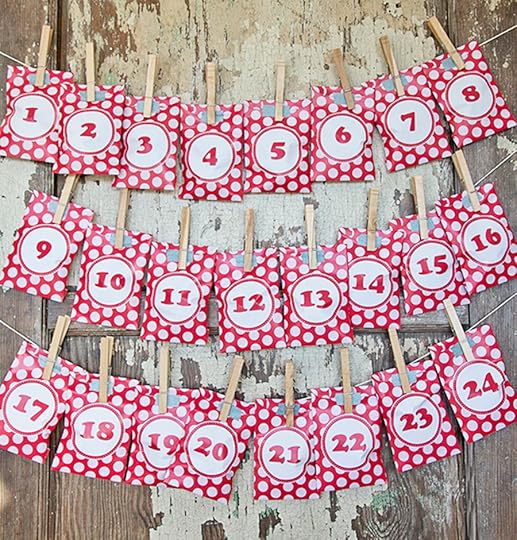 1 DIY Envelope Treat Bag – FREE Printable! ⇒ Yellow Bliss Road
 2 Robot Advent Calendar ⇒ Next To Nickx
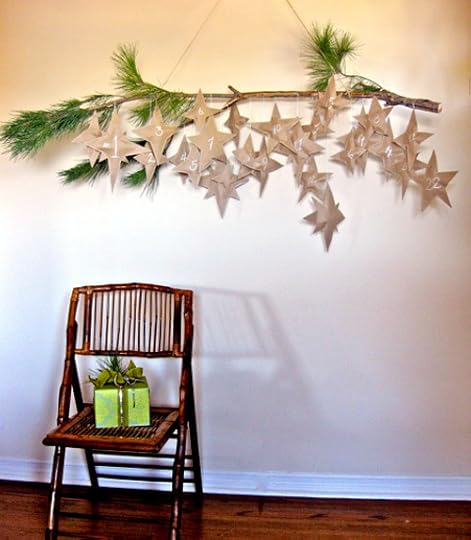 3 Falling Start Advent Calendar ⇒ Design Sponge
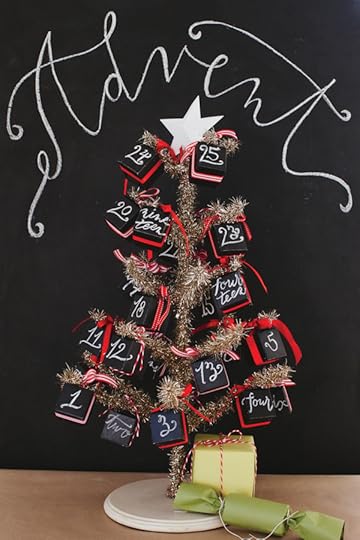 4 Chalk Board Advent Calendar ⇒ Oh Happy Day
 5 Mason Jar Activity Advent Calendar – FREE Printables! ⇒ One Little Minute
 6 Scratch Off Activity Advent Calendar ⇒ Minted
Advent candles are a tradition in our house for counting down to the big day, that’s not to say that we don’t enjoy chocolate calendars too, how do you like to count down to the seasonal celebrations?
Christmas is one of my fave times of year – there are some many fun things to make and do, so many recipes to try, and so many activities to enjoy – so it wont come as any surprise that I’ll be hanging out on Pinterest quite bait at the moment, looking for more festive inspiration – see what other festive treats I’m pinning right now!
The post Pinterest: What They Did With…DIY Advent Calendars appeared first on Made Peachy.
November 17, 2014
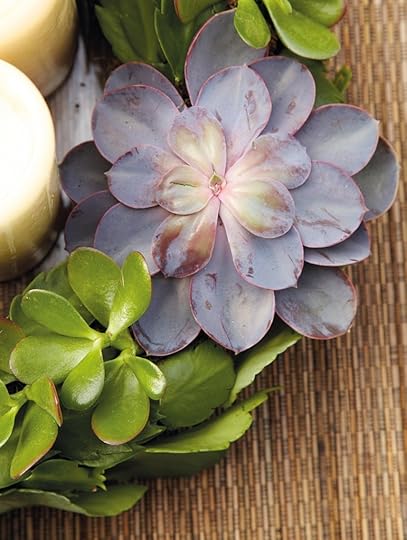
Stunning DIY Succulent Wreath
This is the season for entertaining, from Friendsgiving and Thanksgiving, to festive parties and Christmas. Gedorating your table is a brilliant way to set the scene for entertaining, creating a stunning centrepiece and for making your guests feel extra special. Succulents are by far my most favourite plant – and as a girl that really struggles with houseplants (ours are perpetually looking cripsy and as though they need to be taken into care)- a beautiful plant based centre piece that is actually easy to make really gets my vote!
So, let’s create a Succulent Candle Wreath! This architectural wreath makes a striking centerpiece for a table. The waxy leaved succulents will also remain lush and vibrant, even when you have the heating on!
 Grab your supplies…
Piece of poultry netting (chicken wire), approximately 8 x 12in (20 x 30cm)
Wire cutters
Damp moss
Latex (rubber) gloves
Florist’s wire
German pins (for pinning the pieces of moss)
Selection of succulent plants, including Crassula ovata (money plant), Echeveria, and Schlumbergera (Christmas cactus)
Pillar candles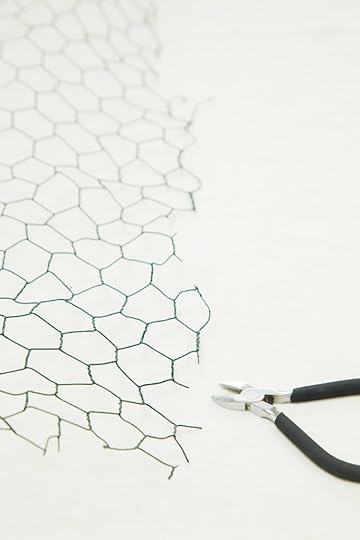 1 Lay the poultry netting (chicken wire) on a flat surface and cut to the required size—approximately 8 x 12in (20 x 30cm)—using the wire cutters.
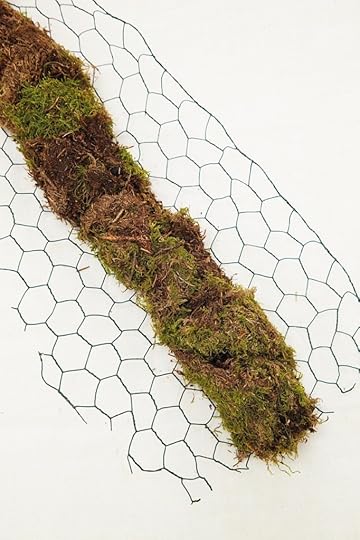 2 Lay the moss on top of the netting and squeeze it into a sausage shape. Continue to add more pieces of moss along the netting and squeeze them into shape. (You may prefer to wear a pair of gloves to do this because it can be a messy job.)
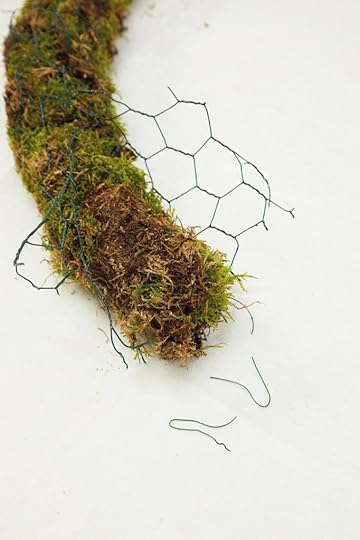 3 Wrap the netting around the moss sausage shape and pull it tightly to form a tube. Use small lengths of florist’s wire to hold the netting in place and twist the ends of the wire several times to secure them.
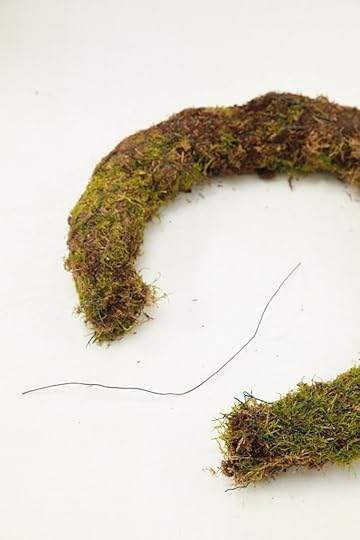 4 Bend the moss sausage into a circular shape and then use more wire to join the ends together. Twist the wire around the shape to ensure it is fixed securely. Trim the ends of the wire with the wire cutters.
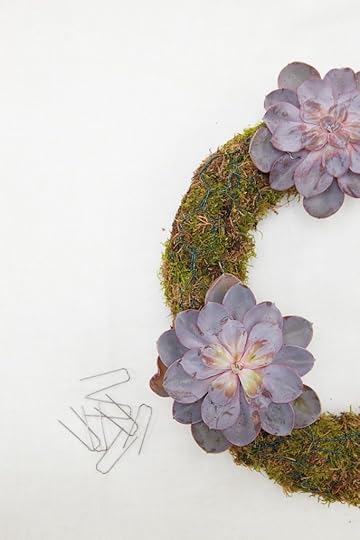 5 Carefully remove the leaves and rosettes from the succulent plants, and use German pins to fix them to the moss ring.
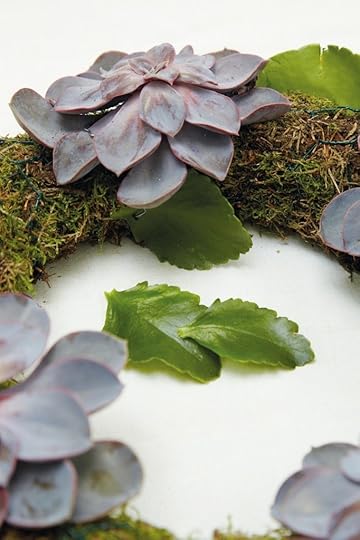 6 Gently lift the leaves of the succulent rosettes and insert the pins beneath the leaves so that they do not show.
 7 Attach the leaves all around the moss ring, using German pins to hold them in place, and continue to add more leaves to ensure the whole ring is covered.
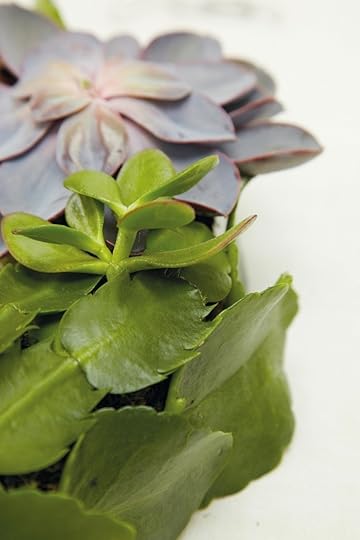 8 Continue to cover the top, outside, and inside of the wreath with leaves and rosettes, fixing them in place with German pins. Lay the finished wreath on a table and fill with pillar candles to finish.
Guys! Be safe y’all, and don’t leave lit candles unattended!
♥ – ♥ – ♥
This stunning table accent is just one of the amazing creations in Beautiful Wreaths and Garlands by Catherine Woram, photography © CICO Books , £12.99.
The post Stunning DIY Succulent Wreath appeared first on Made Peachy.
November 16, 2014
The Week That Was: Crochet For Days
Happy Monday Friends!
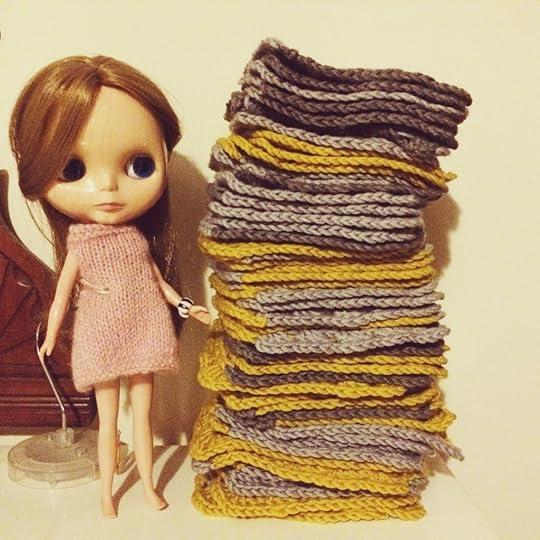 When you’re working on a huge project it feels as though you are starting to sound like a stuck record. And this record plays crochet, and only crochet! Not that I’m complaining! I love crochet (good thing really) and I love the challenge of designing to brief, and I love working on substantial commissions that you can really get your teeth stuck into.
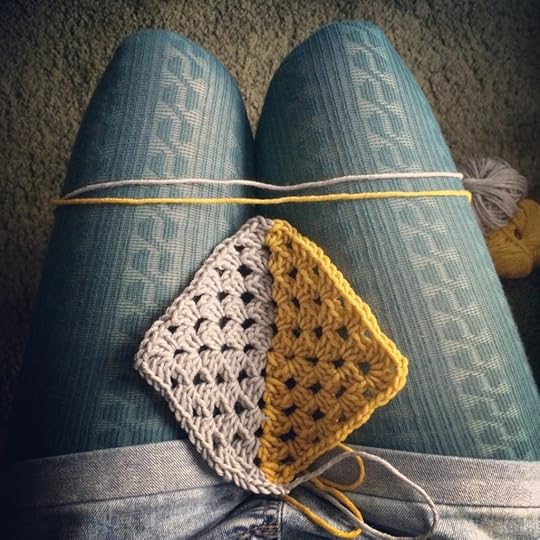 But, I do understand that I am now starting to sound like a scratched record, playing the same lyrics over and over. What’s worse, is when it is a Top Secret project and you are dying to talk about it but you just can’t, not just yet!
So, how about you? Do you love to crochet?
Then friends, check out some of these rad crochet projects from the Made Peachy archive!
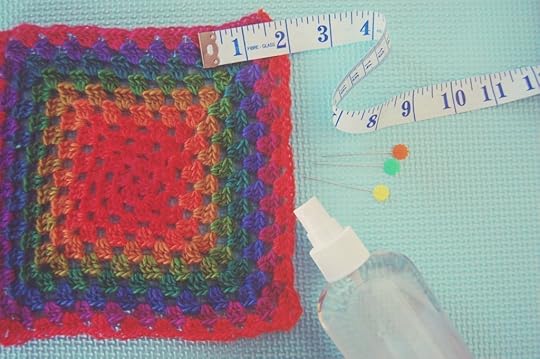
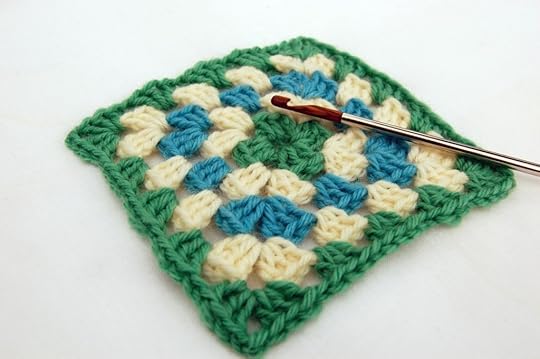 How to crochet a Granny Square
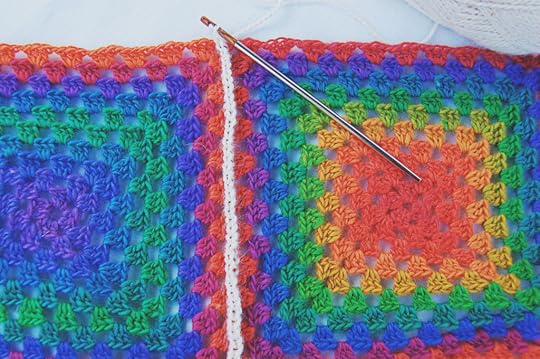 Seaming Crochet Granny Squares

So, if crochet is going to be on repeat in my head, I guess it will be in yours now too!
The post The Week That Was: Crochet For Days appeared first on Made Peachy.
Style Sunday: Chunky Ribbed Scarf
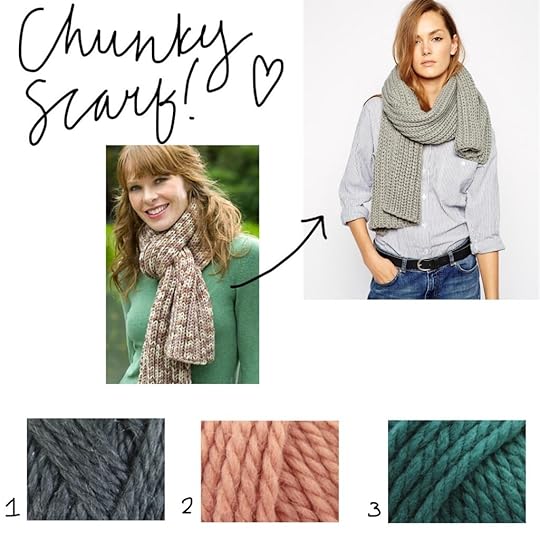
If its going to be chilly you may as well layer on the knits! There is nothing more warming and comforting that wrapping yourself up in a super chunky ribbed scarf.
 I love the simple design of these Clef Scarf, £20, ASOS. It is clearly a must have for the season – not only will you stay stylish, you’ll be staying warm too – what could be better on these blustery and chilly autumn days? Fancy making your own scarf? Check out this Style Sunday Chunky Ribbed Scarf Moodboard for more inspiration!
 The Pattern
Ribbed Scarf Pattern, By Read Heart – available for FREE!
This simple cosy scarf is a great project for beginners – and makes the perfect addition to warm up your autumn-time wardrobe!
The Yarns
1 Bergere de France – Galaxie, Orbite, £3.99
2 Debbie Bliss – Roma, Rose, £8.95
3 Katia – Big Merino, Jade, £6.69
There is nothing that a cosy scarf can’t fix – the only really question is, what colour will you knit your in?
The post Style Sunday: Chunky Ribbed Scarf appeared first on Made Peachy.
November 14, 2014
Hitting the Road: Knitting & Stitching Show Harrogate
It feels like I’ve only just touched down from Dublin and again I’m packing up my bags and getting read to hit the road again – Destination Harrogate for the Knitting & Stitching Show!
This is the last show of the season for me, and it has a kind of Final Fling feel to it. I love Harrogate, I had such a wonderful time there at the show last year – what an incredible venue, what fabulous people and what a brilliant show. I’m really looking forward to getting back there and having me some good old fashioned fun!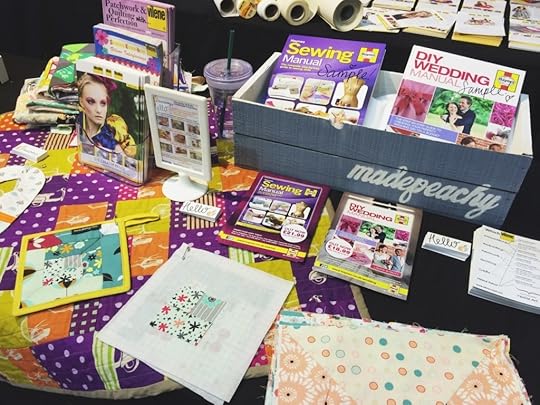 Since returning from Dublin I have had my head down in a bundle of yarn and have been working, working, working trying to get to the right side of a huge deadline, so the prospect of sitting at a sewing machine and sharing some pretty rad quilting techniques is right up my street.
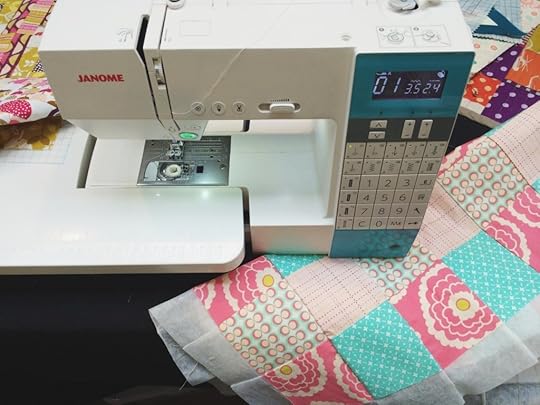 During the summer I have been demonstrating some of the amazing things that you can do with Vilene projects, showcasing some of the clever tips and tricks for quick and super-precise quilting. I have loved it…I also have a whole heap of mini quilt tops that are finished and ready to be quilted – now that really is exciting! I sure have missed sewing these last couple of weeks!
Are you heading to the Knitting & Stitching Show in Harrogate? The Show runs from the 20-23 November at the Harrogate International Centre – there are heaps of workshops for building your skills, loads of the finest retailers to help you stock up on those essential supplies – tickets are available online too!
If you are coming along to the show, I will be on the Vilene Stand TG540 chatting about all things sewing, sharing tips and techniques and heaping out with your stitching woes – so please come along and say Hi!
The post Hitting the Road: Knitting & Stitching Show Harrogate appeared first on Made Peachy.


