
Laura Strutt's Blog, page 19
October 12, 2014
The Week That Was: Knitting & Stitching Show, London
Hello World! I’m finally home and is it ever good to be back to all those comforts and readily available wifi!
Last week was amazing and exhausting all at the same time. Last week I headed on over to Alexandra Palace to the Knitting and Stitching show – and was it ever a blast!
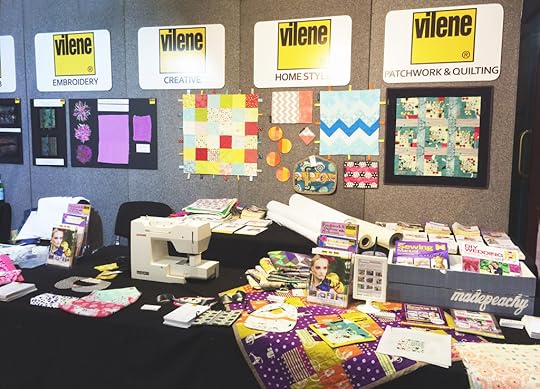 I spent most of my time at the show sharing some fun quilting techniques and meeting lots of wonderful people – if your a new reader from the show be sure to leave a comment to introduce yourself and say Hi! It’s awesome to be able to catch up with friends – giving a little wave to Laura, Caroline & Joanne – hope you all had a fantastic time!
Working on a stand located in the Textile Gallery is a fantastic way to get to explore all of the incredible and inspiring exhibits in the early hours before the show – selfish I know, but it does feel like a private view! If you get the opportunity to visit the event in Dublin or Harrogate – I would strongly recommend it! There were some many fantastic, inspiring and striking textile exhibitions crossing all genres, styles and disciples – I don’t want to share too many spoilers…but here are a few quick peeks of my very favourite exhibitions!
 Precious Memories – Jo Beattie
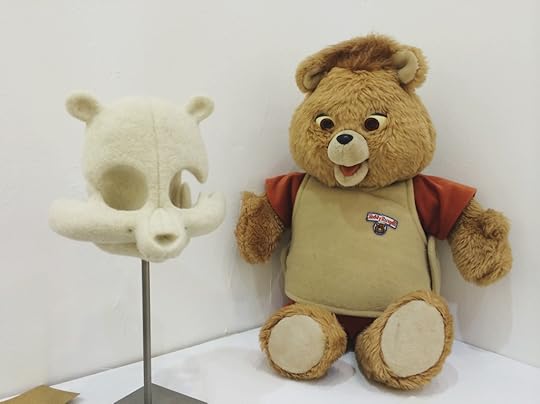 Black Sheep – The Dark Side of Felt Curated By Laura Mabbut.
Pictured Ursulus Teodorus Ruxpinus by Stephanie Metz
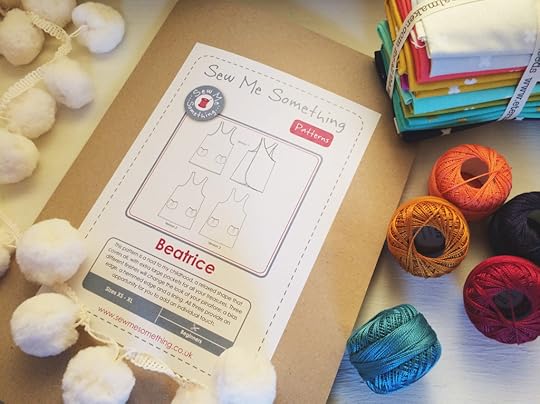 And, for once I actually managed to squeeze in some all important shopping time -which is an indulgence that I don’t normally get time for at these shows. But, finally I have my hands of a wonderful bundle of Cotton & Steel, the Beatrice Dress Pattern I have been coveting forever and some ‘essentials’ in the form of jumbo pom pom trim and pearle cottons. Most of these are part of a work shopping list, but sure is a satisfying indulgence!
So, did you come along to the show? What was your favourite part of the event? Or what is your favourite purchase?
The post The Week That Was: Knitting & Stitching Show, London appeared first on Made Peachy.


October 11, 2014
Style Sunday: Customised Cardigan
All I can think about now is making more clothes for myself. But, finding the time to dedicate to this pursuit is a little tricky at the moment, so I’m always on the look out for other creative ways to add personal; touch to my clothing.
 So, imagine my joy when I found this Love/Hate Elbow Patch Cardigan, £25, ASOS! I mean, who doesn’t have a plain grey cardigan in their closet just crying out for a little bit of customisation and fun!
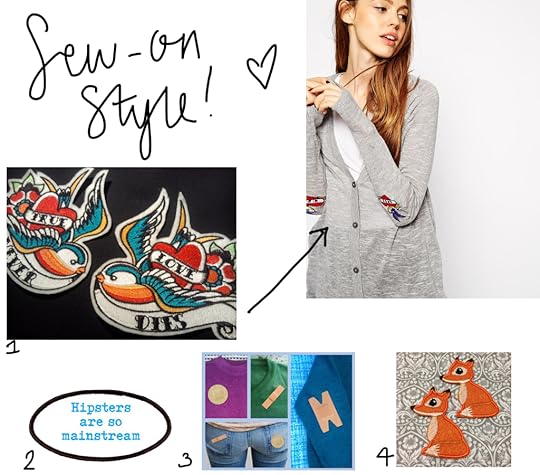 The Patches
1 True Love Never Dies Swallow Tattoo Patches, £9.59 per pair, lizmiera
2 Hipsters Are So Mainstream, £6, CafePress
3 Plaster Patches, £6 per set of 6 designs, TwistedTwee
4 Fox Motif, £1.06 each, MacCulloch & Wallis
Sew on patches are cool – there is no denying that! I love this cool idea for customisation but I also love sew-on patches in general. I mean they are a whole lot of fun, perhaps its nostalgia for working toward those badges in the Brownies – which of course, was my favourite part!
But, I recently discovered that just because I’m a grown up and no longer in the Brownies or Girl Guides doesn’t mean that I can’t earn super-rad badges!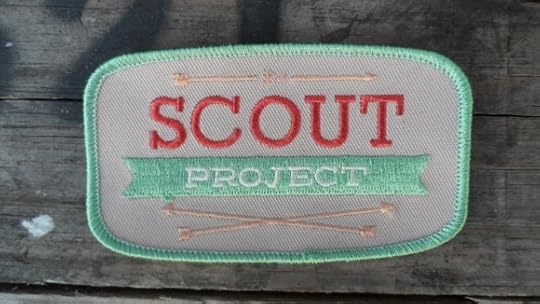 Go check out The Scout Project – which is a merit badge program that guides and rewards those who want to learn life skills at any age, you can see why this appeal to me already right?! I’m totally behind this kind of adventure – you can find out more about the program on The Scout Project Field Log
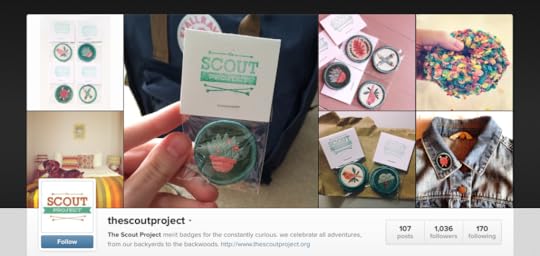 or check them out over on Instagram!
The post Style Sunday: Customised Cardigan appeared first on Made Peachy.
October 10, 2014
Cooking With Kale: Kale Crisps Recipe
Kale is a super food. Bake, steam, stir fry or boil, however you choose to cook it, kale adds flavour, colour and texture to any dish. Its robust taste and versatility means kale is suited for many dishes from soups, snacks and salads, to casseroles and even smoothies.
Quick and easy to cook, packed with vitamins and important nutrients kale is great value too. No wonder kale has become the nation’s favourite brassica and applauded by foodies, celebrity chefs and home cooks. So, how about trying your hand at this tasty Kale Crisps recipe?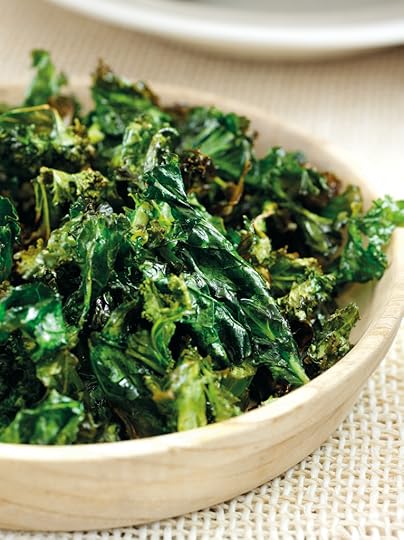 These crisp are the healthy alternative to potato crisps as they’re low calorie and low saturated fat.
Prep: 5 minutes
Cook: 15-20 minutes
Serves 4
Ingredients
200g bag shredded kale
2 tbsp rapeseed oil
Salt and pepper
Kale Crisps
Preheat the oven to 200oC, gas mark 6.
Toss the kale with oil, season with salt and pepper. Spread out onto 2 large baking trays and bake for 15-20 minutes, swapping the trays over half way through, until crispy.
Quick Tip!
Add a kick to your Kale Crisps with a touch of seasoning – try a smoky Cajun or a spicy Jerk seasoning.
♥ – ♥ – ♥
The main kale season has now kicked off, it’s most plentiful between October and March, although its widely available all year round. Find out more recipes and fresh tasty ideas at Discover Kale
The post Cooking With Kale: Kale Crisps Recipe appeared first on Made Peachy.
October 9, 2014
How to Select a Sewing Pattern
One thing that I have noticed while I’m at the Knitting & Stitching Show this week is that I do not make enough of my own clothes.
Seriously, I can’t even tell you how many super stylish folks that I have spotted wearing handmade creations – and the show isn’t even at the half way point yet! I have a stash of wonderful patterns at home, more than enough fabrics (although It wouldn’t be a surprise if I do come home with a few more metres!) So, it is high time I made some of my own clothes again. If any of you are feeling inspired, I thought that I would share some tips for picking out a great new sewing pattern!
Using a sewing pattern is a great way to create your own unique and stylish wardrobe. You can select your preferred fabrics and colours, along with garment designs that suit your style. There is a wide range of sewing patterns to choose from, so if you are new to making your own clothes, here are a few handy tips to help you select the right pattern.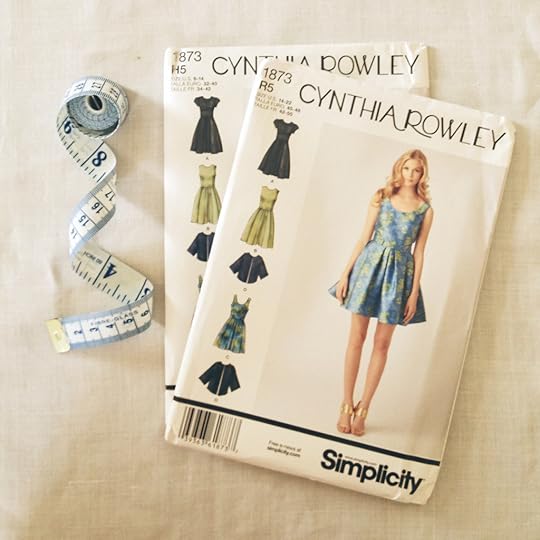 The pattern envelope does a lot more than just hold the tissue paper pieces for the garment, it also shares a lot of information, which will give you an idea of what to expect from the design inside. Beginners might find it easier to select a pattern with a limited number of designs, as those with more variations may have more pattern pieces, which can be confusing.
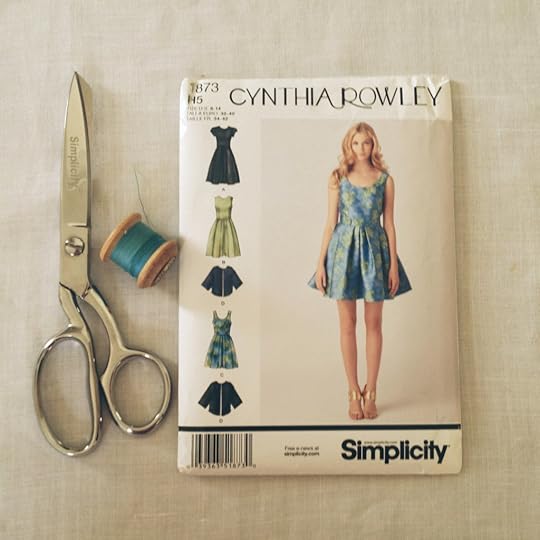 The photographs or illustrations on the cover of the envelope will show you the garment, or garments, that can be made from the pattern. The more images there are the greater the number of designs you can make using the pattern.
 Patterns will come in a range of sizes, commonly centred around dress sizes 6 – 22. The tissue paper will be printed with a series of different lines that will correspond to each size. As there is a considerable difference between the smallest and the largest size, the pattern will be offered in two different size blocks – for example, sizes 6-14 and sizes 14-22 – ensure that you select the correct pattern envelope for your size.
 Each pattern will include a sizing chart, use this to cross reference your own body measurements against those used in the design. Even if you know your dress size when buying clothes on the high street, checking your individual measurements against the pattern will ensure that you create the best fit for your figure.
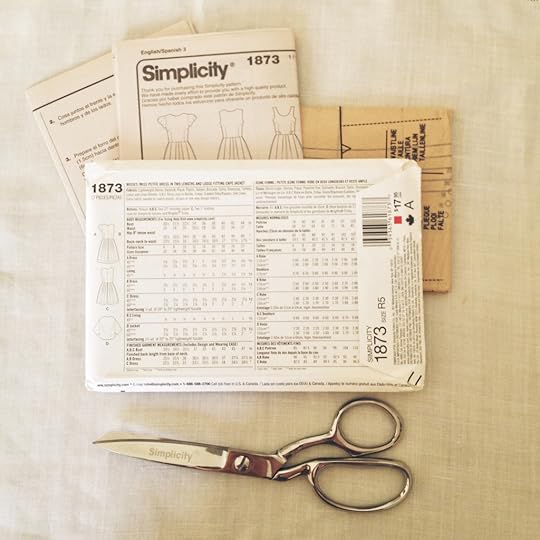 The back of the envelope holds a lot of information about the pattern, here you will see what materials you will require. The types of fabrics used can also be an indication of the skill required, for example, working with fabrics that require very careful piecing like those with nap (velvet) might be off-putting to a novice dressmaker.
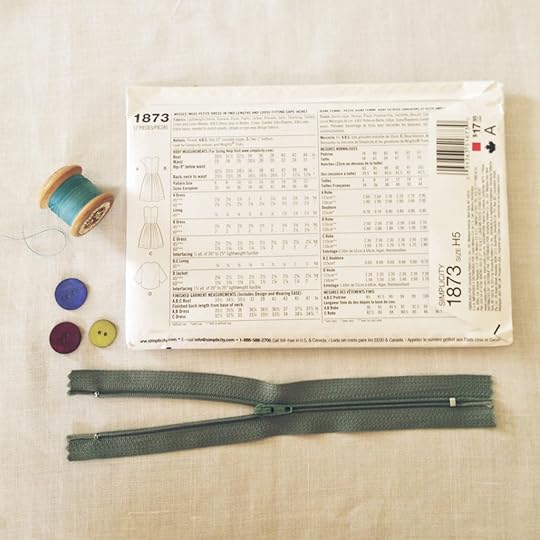 Along with the fabric requirements, there will also be a selection of other notions required for making the garments. This will also give you an indication of the sewing techniques used. Fastenings, like zips and buttons, require specific sewing techniques to insert. Not only will you be checking that you have the supplies needed, you can also ensure that you have the confidence in using the different techniques involved.
 Most sewing patterns will feature line drawings included either on the envelope or in the making up instruction included in the pattern. Where possible, it is a good idea to look over the instruction sheets or illustrations as this will indicate other sewing techniques you will come across – pleats, darts and sleeve styles – allowing you to assess the pattern most suited to your sewing ability.
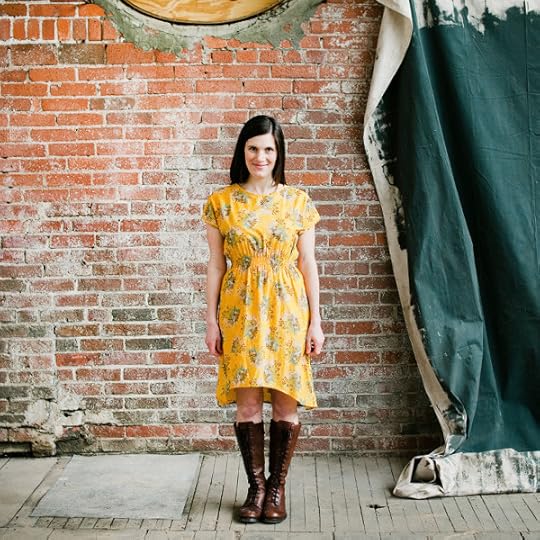 I’m pretty sure that April Rhodes’ Staple Dress is top of my To Stitch List…What dress do you want to make next?
The post How to Select a Sewing Pattern appeared first on Made Peachy.
October 8, 2014
Make Your Own Gifts Bookazine- on Sale Now!
Did you know that it is only 76 Days till Christmas? I know, this year has literally flown past and it is crazy to think that the festive season is little over 10 weeks away!
I love Christmas, but suddenly hearing that has made me woefully underprepared! I had huge plans for making lots of cards and gifts this year and really had better get a started if I don’t want to be frantically finishing up gifts on Christmas Eve!
Way back at the start of the year I was asked to contribute to a new bookazine specially for Christmas gifts and makes, the project that I worked on was so much fun I’ve been desperate to share it with you ever since…and now, finally, I can!
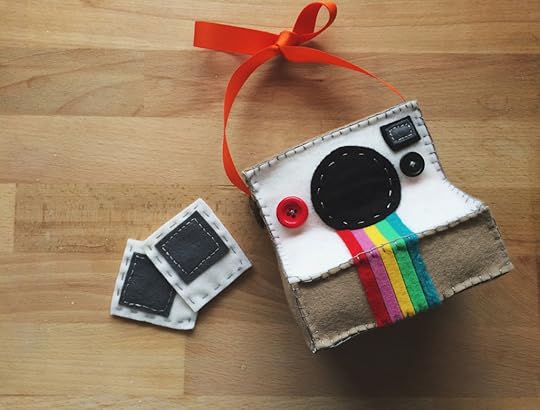
If you follow my Instagram feed you’ll notice that it is one of my very favourite social media, sharing sites – yes, Im that person who checks their feed last thing at night before bed and then again first think in the morning. So, when I was commissioned to create a felt Instagram-style camera, I couldn’t be happier!
 I love working on projects that are quirky, that are fun and that are a bit of a challenge – and this was all of those things and more!
Friends, here is the new Make Your Own Gifts Bookazine, on sale now, and check out my felt polaroid camera – right there on the cover!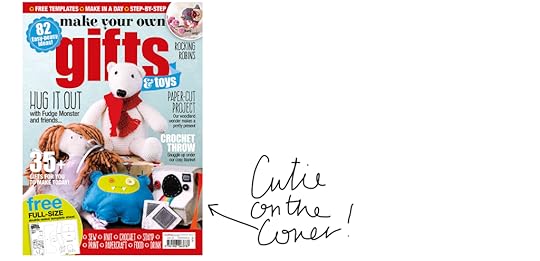 There are over 35 different projects to make – including Christmas puddings, fingerless gloves, cute rag doll, chunky blanket (to name but a few!) complete with full illustrated instructions and a full-size pattern sheet! How rad?
♥ – ♥ – ♥
Make Your Own Gifts Bookazine, £6.99, is published by Mytime Media and edited by Victoria Guthrie.
The post Make Your Own Gifts Bookazine- on Sale Now! appeared first on Made Peachy.
October 7, 2014
Pinterest: What They Did With…Autumn Leaves
Autumn and nature inspired handmade jewellery starting from £12.13 from
Things are getting a little colourful out there. The turing and falling leaves are changing my early morning hikes with the dog, each day the colours get richer and each day the shades become more and more bewitching. And, each day I return home with pockets full of crispy or soggy leaves in abundance.
If, like me, you can’t help but bring home handfuls of fallen leaves every time you leave the house, then look at these awesome DIY Ideas for Autumn Leaves from Pinterest!
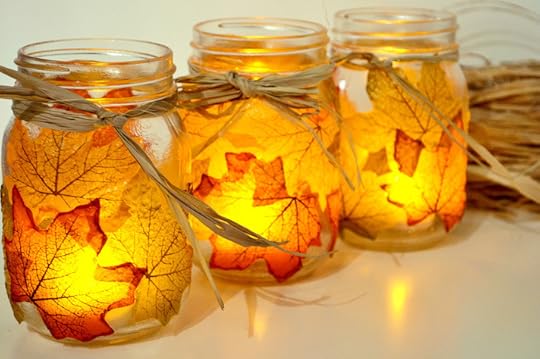 1 Maple Leaf Mason Jars ⇒ Spark And Chemistry
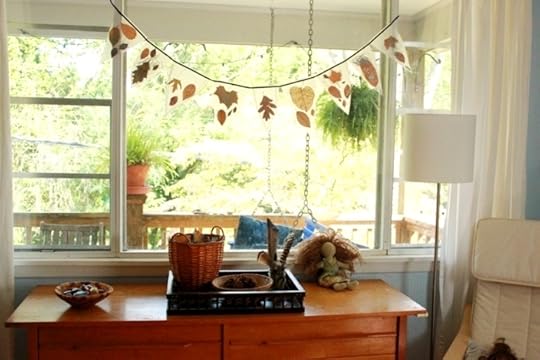 2 Leaf Bunting ⇒ Artful Parent
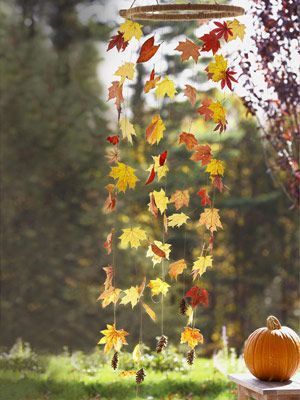 3 Autumn Leaf Decoration ⇒ Good Housekeeping
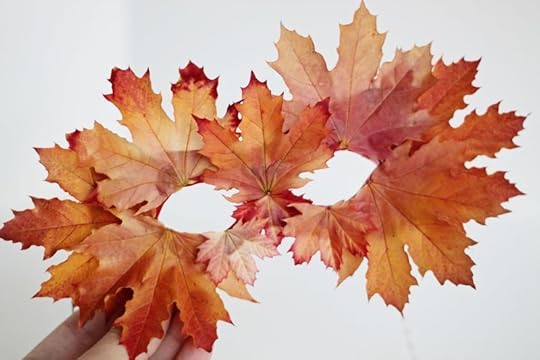 4 Leaf Mask ⇒ Small Friendly
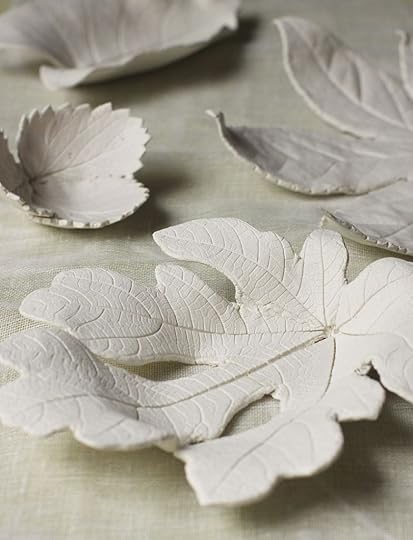 5 Clay Leaf Bowls ⇒ Urban Comfort
 6 Maple Leaf Roses ⇒ Solar Powered Kate
So, do you have a new found love for humble copper pipe too? What would you make?
Do you love Pinterest too? Be sure to swing in and all the things I’m pinning right now!
The post Pinterest: What They Did With…Autumn Leaves appeared first on Made Peachy.
October 6, 2014
How to Make Bias Binding
For the next week I will be sat at my sewing machine at the Knitting & Stitching Show demonstrating some fun sewing techniques and sharing some inspiration for new stitching projects. So I thought, why not share a quick and easy (but oh so handy!) sewing tutorial. So, let’s make Bias Binding!
Bias binding or bias tape is used in a wide range of sewing projects from finishing the neckline or armholes on garments, or concealing the raw edges when finishing a quilt. Bias tape is available in a whole range of widths, colours and finishes, but you can make this quickly and easily at home, with this easy-to-follow guide.
Grab your supplies…
Cotton Fabric
Rotary cutter
Cutting mat
Ruler
Iron
Bias Tape Maker (optional)
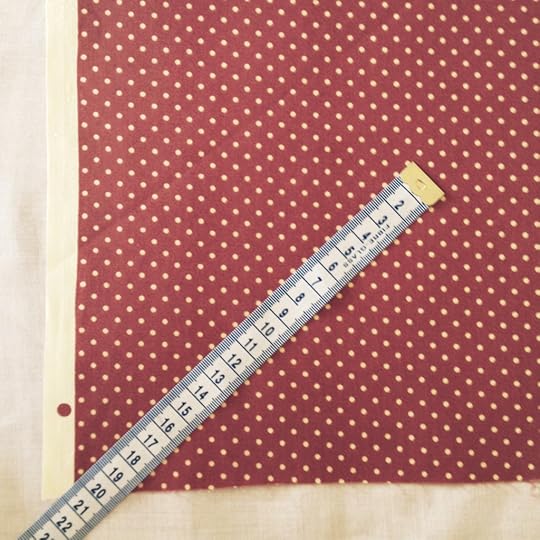 Locate the bias of your chosen fabric. This will be at a 45 degree angle to the warp and the weft threads.
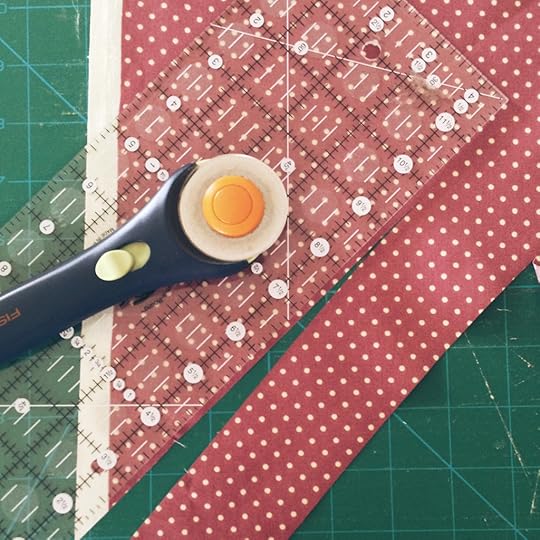 Using the rotary cutter, ruler and mat, cut a strip of fabric across the bias. The strip of fabric will need to be four times the width required of the finished bias. Here the strip is 4cm wide and will create 1cm finished bias tape.
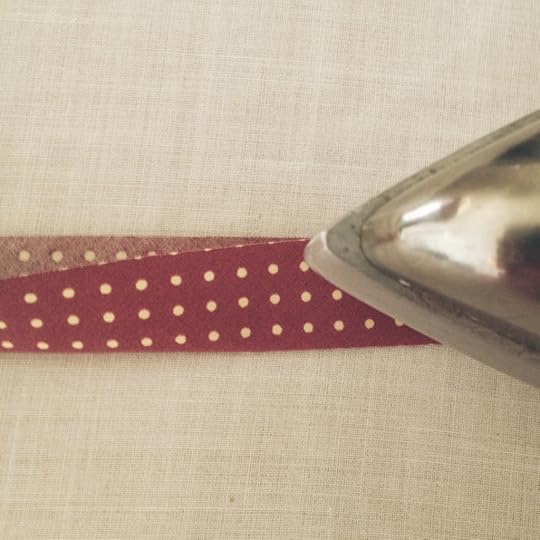 With the right side outermost, fold the strip of fabric in half aligning the two long raw edges. Press in place, working along the entire length of the strip.
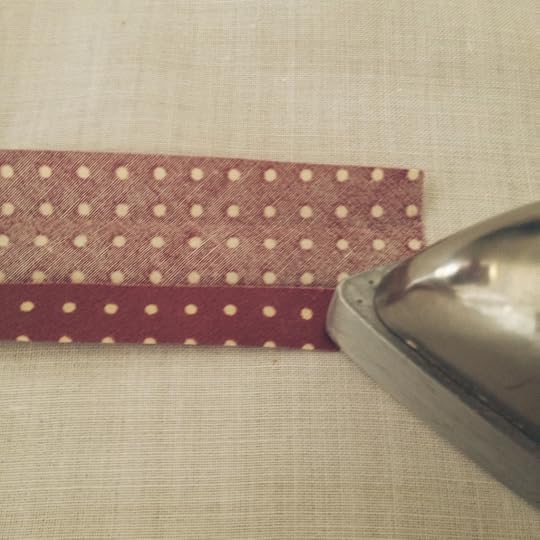 Unfold the bias strip and re-fold, this time aligning the lower raw edge with the creased line that runs down the centre of the strip. Press carefully in place along the entire length.
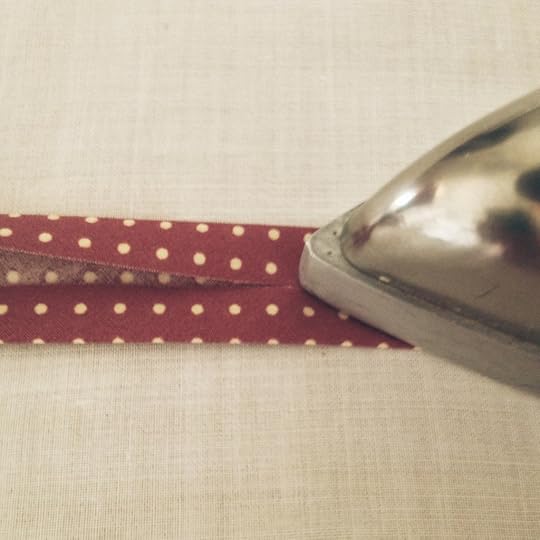 Fold the upper raw edge of the strip down, aligning it with the creased centre line. Press in place along the entire length.
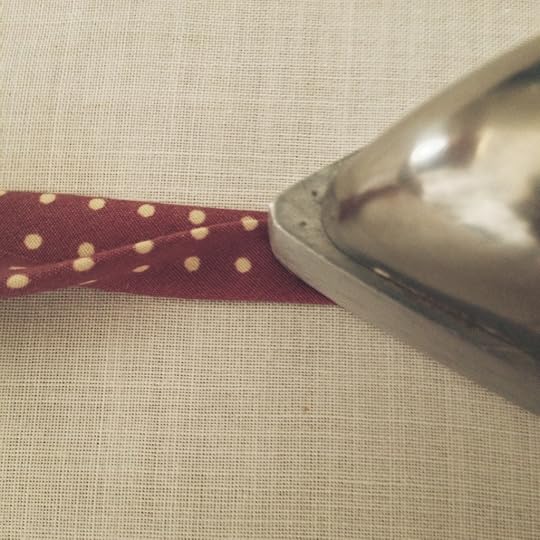 Complete the bias tape by re-folding the strip along the centre line, aligning the two long folded edges. Press in place along the entire length, the raw edges of the fabric are now concealed and the bias tape is ready to use.
 A Bias Tool can make light work of creating your own bias tape, especially if you have lots to make. Select the desired size bias tool for your required width of bias and cut a strip of fabric along the bias to the specified width.
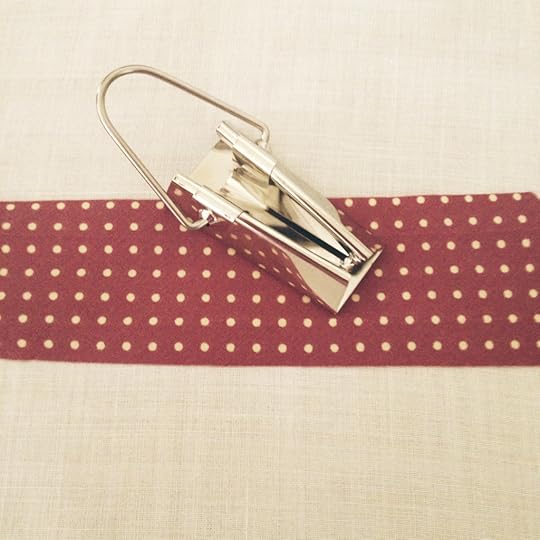
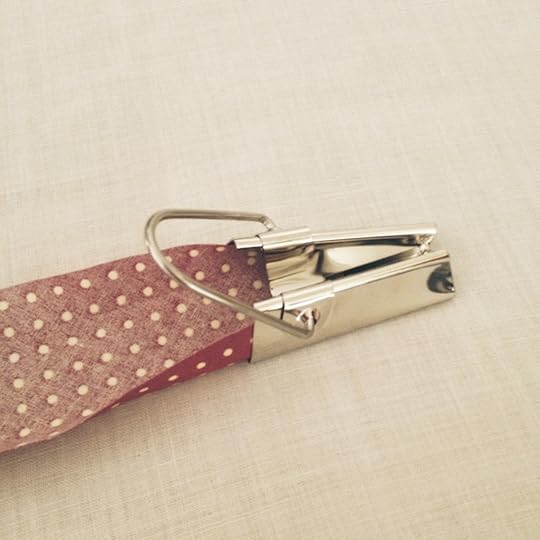 With the wrong side of the fabric strip uppermost, insert into the wide end of the bias tool and carefully feed it though.
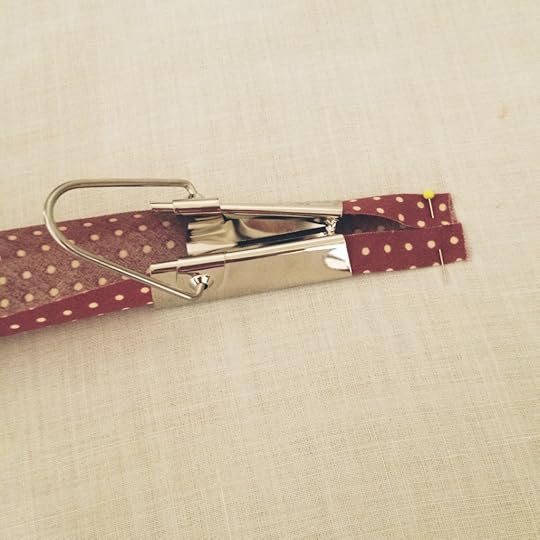 Draw 2cm of fabric through the bias tool. The angled sides of the tool will push the fabric edges inwards to create the bias tape. Finger press these to the centre of the tape and use a pin to hold in position on the ironing board.
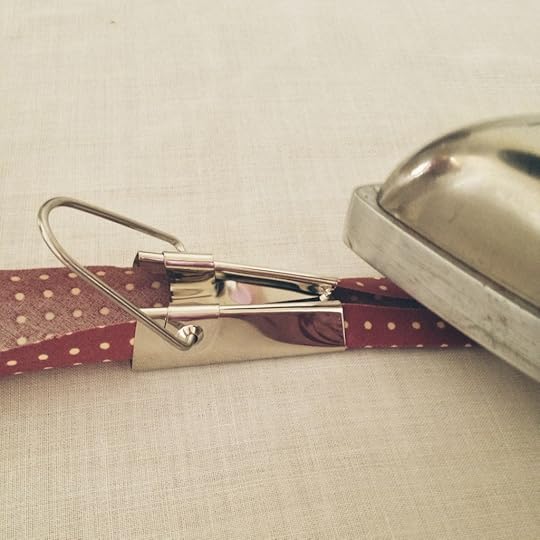 Position the tip of the iron at the tip of the bias tool. Gradually move the bias tool to the left as you press the iron towards it. Working along the entire length to press the folded edges of the tape in place.
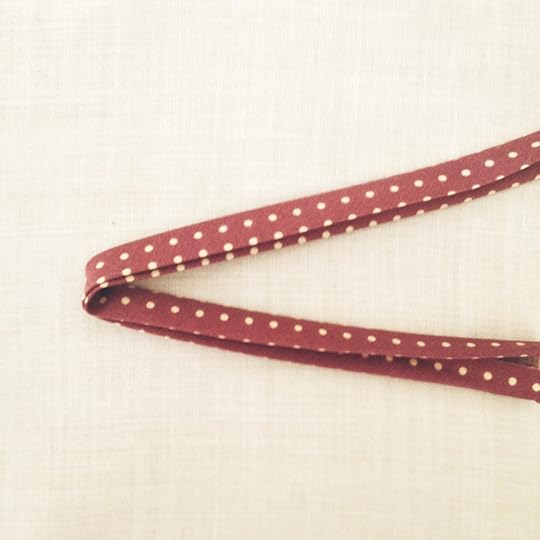 Remove the bias tool and the pin and fold the strip in half, aligning the two folded edges. Press the tape along the centre, ready for use.
How simple is that to create your own custom bias binding?
The post How to Make Bias Binding appeared first on Made Peachy.
October 5, 2014
The Week That Was: Teaching Knitting & Embracing Autumn
Autumn is here, there is no two ways about it. Or as I like to think of it Knitting Season!
OK, Yes, so you can knit the entire way through the year, and I’d happily do that (hours int eh day permitting) but there is something far more satisfying about knitting during the colder months. Its one of this things that makes you just feel cosy just to think about it.
Last week I was invited along to the Crafty Goat Ice Cream Parlour to get busy with some lovely people to share an introduction to knitting – I know what a great way to spend the afternoon! Not only was I on hand to teach knitting and share some skills, but the wonderful Kirsty from KirstyMCDesigns was present demonstrating and sharing tester sessions of spinning.
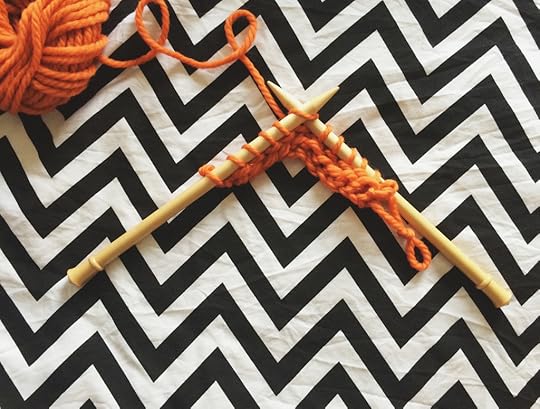 One of my favourite parts of teaching is being a witness to a person learning something new. The process is different for everyone – and each and every time it is a fantastic feeling watching them accomplish something completely new.
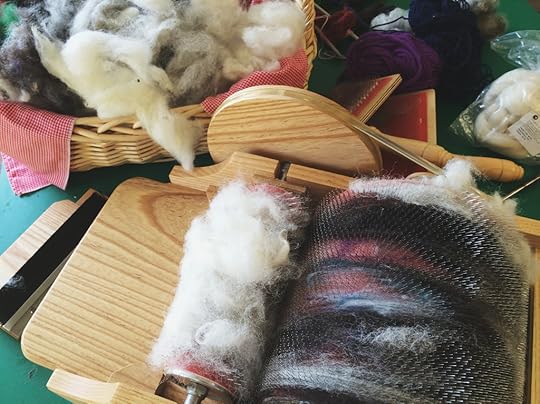 After the session I was lucky enough to spend some time with Kirsty having a little taster session of my own on the spinning wheel. Having never even sat at a spinning wheel this was a pretty steep learning curve for me. And, by steep I mean, wow do those spinners ever make this look easy! It is surprisingly difficult to get to hands and feet to work independently – and that’s coming from a girl who is usually driving a sewing machine! I would most certainly love to spend some more time trying my hand at this incredible craft.
It has been fun spending some time knitting, and getting wrapped up in cosy handkints for the chilly morning dog walks. I’ve enjoyed it so much that I’ve promised to dedicate a lot more time with yarn (knitting and crocheting) over the coming weeks!
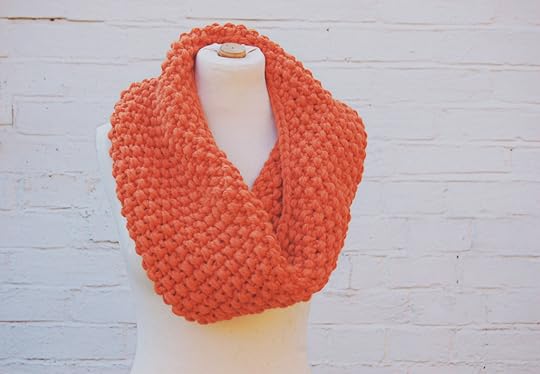 But, if you are looking for something cozy to knit right now…how about checking out this Cosy Autumn Cowl or as it is October – or Socktober - how about making your own handknit socks?
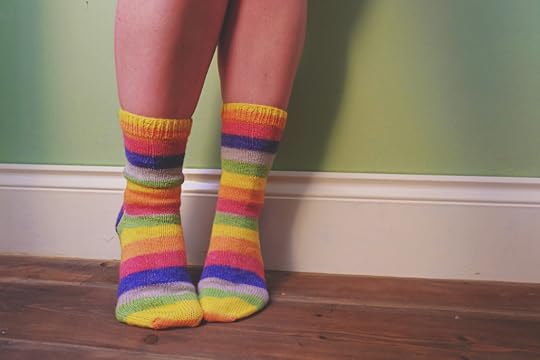 Do you find that the change in season has an impact on the projects that you make or the crafts that you want to work on? What are you working on right now?
The post The Week That Was: Teaching Knitting & Embracing Autumn appeared first on Made Peachy.
October 2, 2014
Pinterest: What They Did With…Copper Pipe
How amazing are these copper pipe custom book shelves? Made to order, £826.07 by Nomad General Store!
If I told you that coper pipe was rad I would, of course, expect you to think me a little crazy. I would, of course, expect you to tell me to shhh and come back once I’d had some more coffee. But, friends, I honestly think that coper pipe is rad. On a normal day I don’t go around thinking about copper pipe, in fact I don’t think that I have ever thought about copper pipe before now. But, and here is just one of the many wonders of Pinterest…I stumbled on an awesome DIY projects featuring coper pipe, and then lo and behold there is an plethora of unbelievably cool makes that you can create using copper pipe!
Don’t believe me then check out this round up of just some of my fave Copper Pipe Projects on Pinterest!
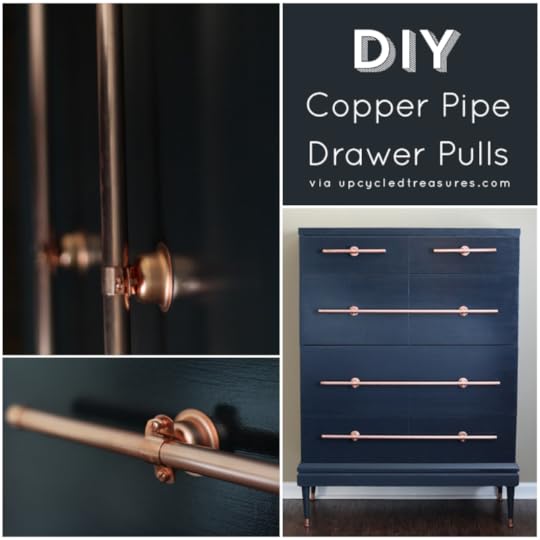 1 Copper Pipe Drawer Pulls ⇒ Upcycled Treasures
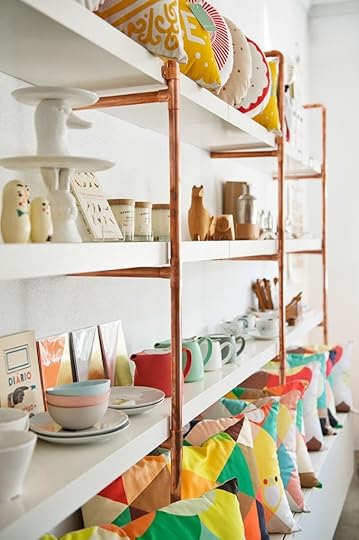 2 Copper Pipe Shelving ⇒ Jelanie
 3 Copper Pipe Pendant Light ⇒ The Gathered Home
 4 Copper Pipe Side Table ⇒ Paul Loebach
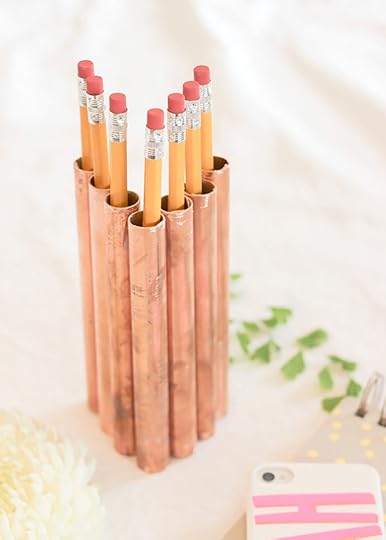 5 Copper Pipe Pen Tidy ⇒ A Fabulous Fete
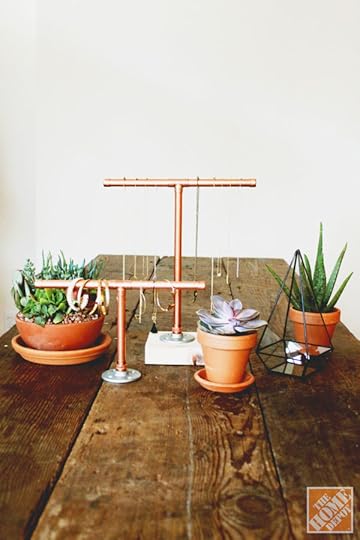 6 Copper Pipe Jewellery Display ⇒ Home Depot
So, do you have a new found love for humble copper pipe too? What would you make?
Do you love Pinterest too? Be sure to swing in and all the things I’m pinning right now!
Happy Friday Y’all!
The post Pinterest: What They Did With…Copper Pipe appeared first on Made Peachy.
October 1, 2014
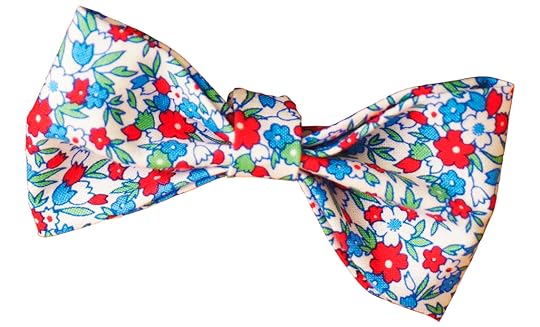
Quick & Cute DIY Fabric Bows!
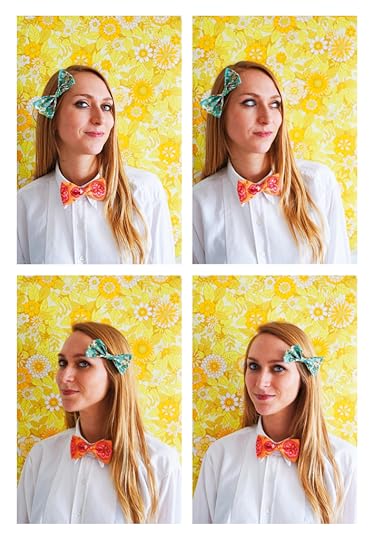
When it comes to adorable accents and adornments the fabric bow is king. It is a brilliant addition to any outfit to give it a little lift. Pick ditzy floral prints for a feminine touch, or rock some bold geometric prints for a statement style.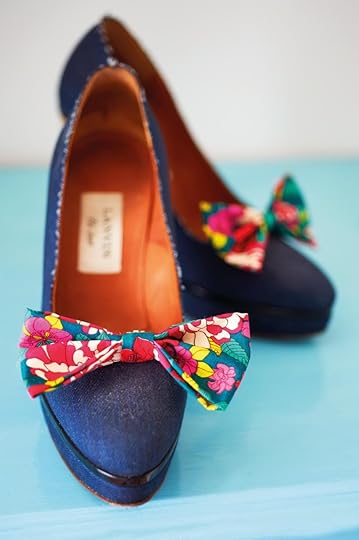 Making your own multi-purpose fabric bows is a quick and easy afternoon make that will make the most of your fabric scraps to make awesome accessories in minutes! So, let’s make some Quick & Cute DIY Fabric Bows!
 Grab your supplies…
Fabric
Crocodile clips or shoe clips (optional)
Hot glue gun (optional)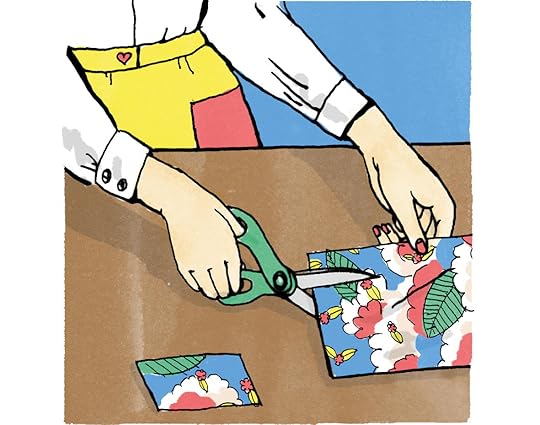 Cut fabric to the size you require. (The height will be half the length of the width.) For a standard-sized bow, cut a piece measuring 9 x 4½ in (24 x 12 cm) then cut a smaller piece for the middle measuring 1¼ x 2½ in (3 x 6 cm).
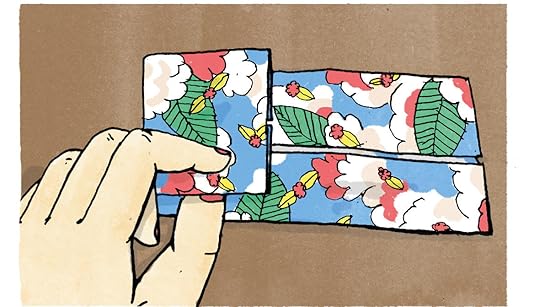 Fold the long edges of the larger piece in to meet in the center and press. Then fold the short edges in to meet in the center and press.
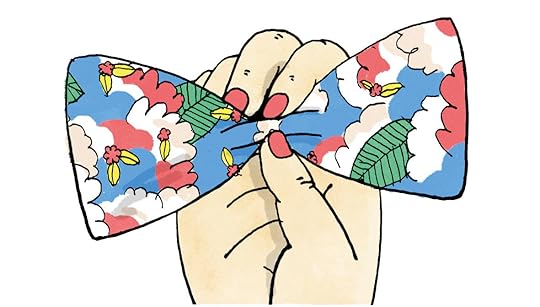 Next, pinch in the middle as if you are bringing the long edges together, so that the sides with the folds are facing inward.
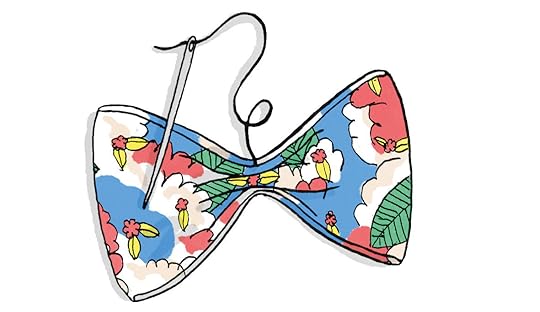 Then fold the long edges up to the middle so that you can see three folded “lips.” stitch in place, using matching thread.
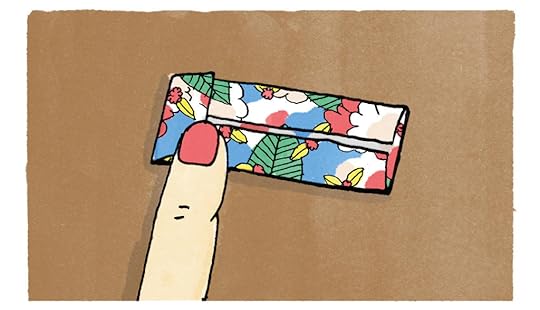 Fold over the long edges of the smaller fabric piece in the same way as in step 2, then fold the short ends over by 3⁄8 in. (1 cm) and press.
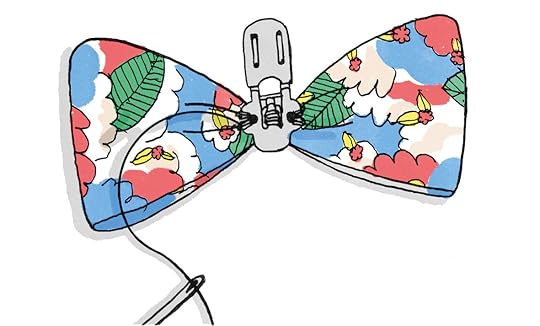 To attach the bow to a shoe clip, open up the clip and stitch or glue it to the middle of the bow. Then fold the shorter central section of the bow over the clip and slipstitch the ends together.To attach the bow to a crocodile clip, sew the shorter central section of the bow over the middle of the bow, slipstitch the ends together, and clip the crocodile clip through the middle fold.
♥ – ♥ – ♥

This cute mini make is just one of the fabulous projects in Chloë Tells You How to…Sew by Chloë Owens, photography by Claire Richardson, illustration © Sarah McNeil, published by CICO Books rrp £14.99
The post Quick & Cute DIY Fabric Bows! appeared first on Made Peachy.


