
Laura Strutt's Blog, page 18
October 28, 2014
Pinterest: What They Did With…Pumpkin Recipes
If ever there was a shirt made just for me, it is this Pumpkin Pie T-Shirt, £9.56, apericots is clearly the one!
It’s that time of year again when pumpkin carving is everywhere…I’m away from home so, sadly there is no pumpkin carving for me, but I’m living vicariously through those of you sharing photos on Instagram, blogs, Twitter, Facebook and every other corner of the internets.
I don’t know about you, but pumpkins are a seasonal favourite – they taste of everything Autumn and I love it, so while I’m on the road and craving carving and eating pumpkins I thought that I would share some Delicious Pumpkin Recipes from Pinterest!
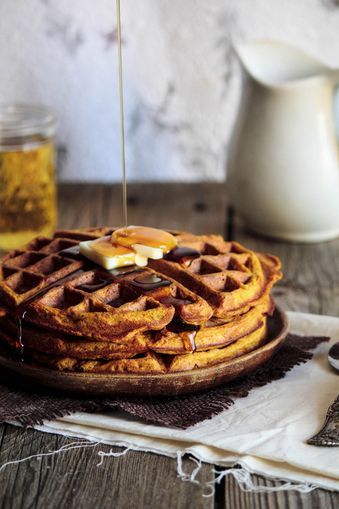 1 Pumpkin Waffles ⇒ Pastry Affair
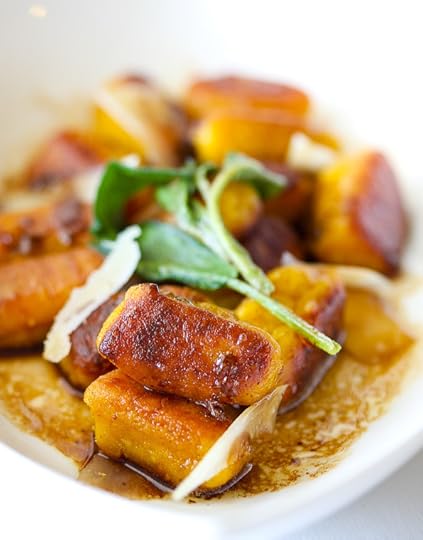 2 Pan Fried Pumpkin Gnocchi ⇒ Steamy Kitchen
 3 Pumpkin Spice Turtles ⇒ Tastes of Lizzy T
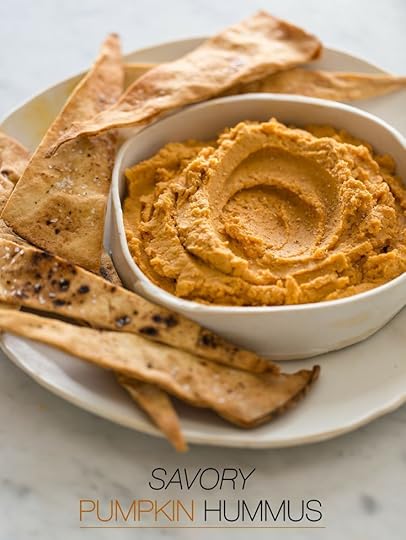 4 Savory Pumpkin Hummus ⇒ Spoon Fork Bacon
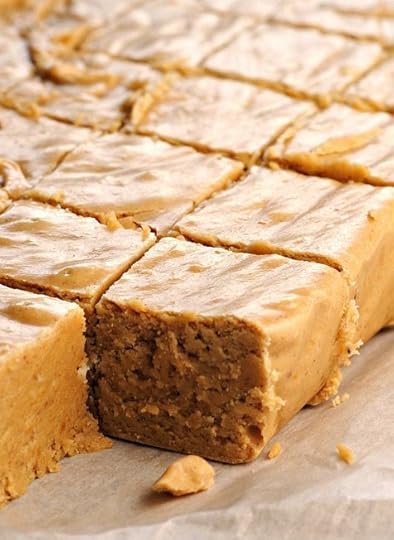 5 Pumpkin Pie Fudge ⇒ Holiday Cottage
 6 Pumpkin Puppy Chow ⇒ Sweet Pennies From Heaven
I’m not even sorry that y’all are probably craving pumpkin right now…I know I am, so if anyone knows where I can get a PSL in Dublin, be sure to share!
Ok…I’ll admit it, I do have something of a Pinterest addiction – but, I’m betting you probably do too…so, be sure to check out I’m pinning right now!
The post Pinterest: What They Did With…Pumpkin Recipes appeared first on Made Peachy.


October 27, 2014
Start Knitting: How to Cast On
Knitting is one of my first loves. It is one of those creative pastimes that is good for my soul. For a really long time after I first learnt to knit I could knit really well, whizz out scarfs like they were going out of style. But, I always had to get someone (usually my mum!) to cast on and cast off for me. I couldn’t get my head round these essential skills, yet could knit the cast on stitches with ease once they were there ready on the needle. Learning to cast on for myself was great for opening up a whole world of knitting projects – sounds obvious right, but I have since discovered that so many folks can knit, and really enjoy it, but feel stumped by getting started!
This week I’m heading over to Dublin for the Knitting & Stitching Show and for the next few days I’ll be sharing lots and lots if techniques, skills and inspiration for stitchers attending the show. But, what about all you knitters, or wannabe knitters? Well, I thought why not share a few of the basics for getting started with knitting?
So, if you’re new to knitting, or it’s been a while since you picked up the needles, be sure to check out my step-by-step guide to Casting On!
Casting on is the very first thing that you will need to do for nearly all knitting projects. This provides the foundation of stitches from which you will work on to create your project. There are a number of different techniques and methods for casting on, many of which will have different uses and applications. One of the quickest and easiest methods for casting on is a knit cast on, here you will be working in a similar way to knitting the stitches to create the foundation row for your project.
Follow these simple steps to get your knitting project under way…
Grab Your Supplies…
You’re going to need yarn & needles (duh!) – a chunkier yarn is easier to learn with, as you’ll be able to see the stitching you’re making more clearly, so pick out a yarn and set of needles that suit the yarn (psst! the recommended needle size will be listed on the ball band of the yarn!)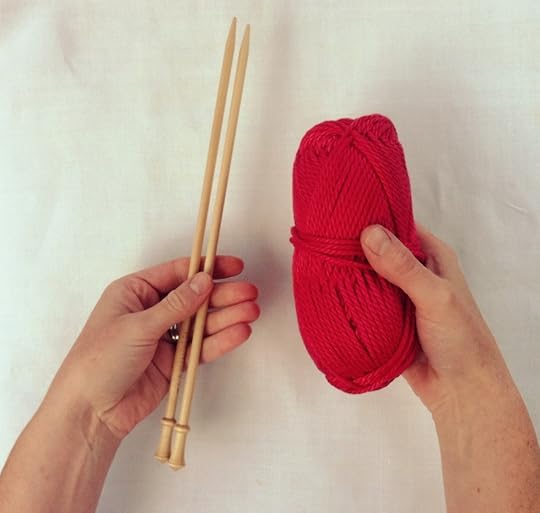 You will need your knitting needles and yarn for your chosen project. If your tension when knitting is a little bit tight, try working with a needle one size larger than suggested for your project, but be sure to switch back to the correct size after the cast on row.
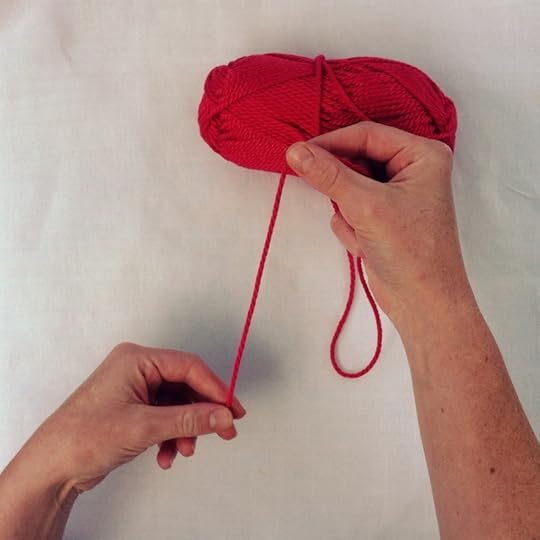 Draw the yarn from the ball up to 10cm in length. This is the tail end of the yarn.
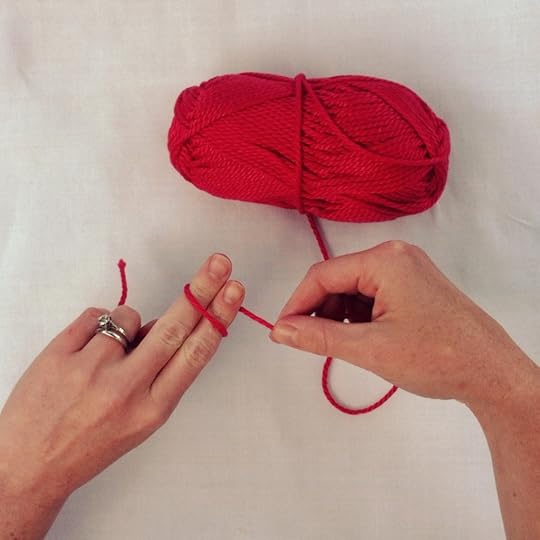 Holding the tail end of the yarn in your left hand, take the yarn from the ball and wrap it around your extended first and middle finger on your left hand to create a loop.
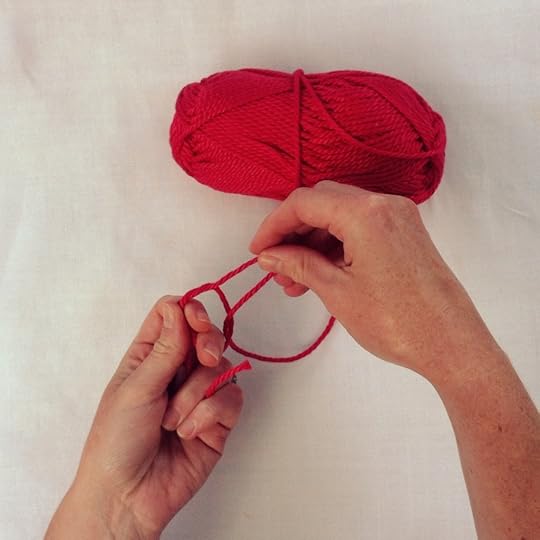 Turn your left hand over and catch the ball end of the yarn and draw through the loop.
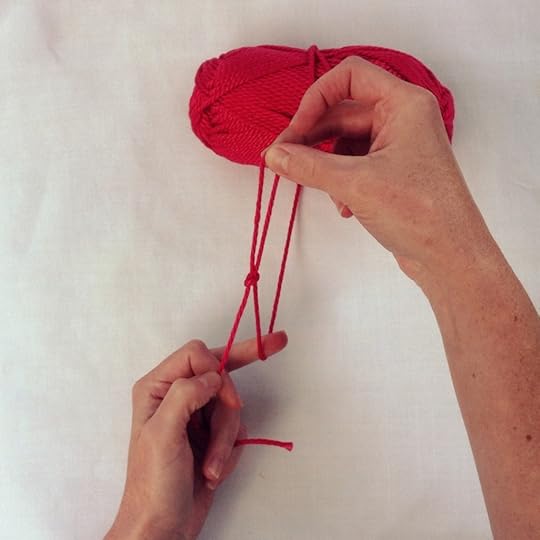 Holding both the tail end and the loop of the sip knot secure, carefully pull on the ball end of yarn, this will tighten up the loop of the slip knot and make it smaller – don’t make the loop too small, you can adjust it later if needed.
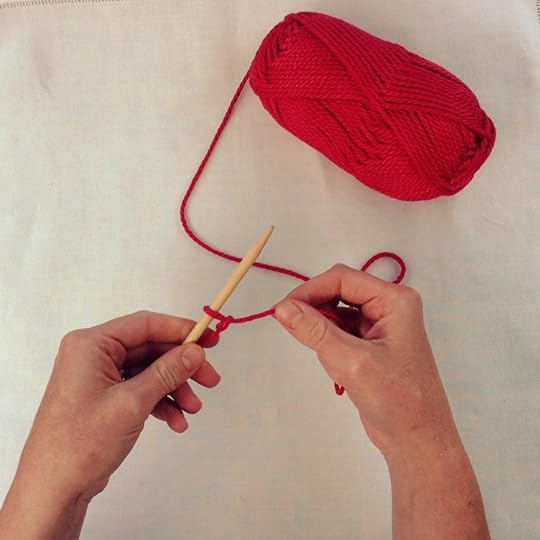 With the knitting needle held in your left hand, slide the slip knot onto the needle. The tail end will be to the left and the ball end will be to the right, pull these gently to adjust the slip knot. Make sure that the slip knot isn’t too tight, you will need to pass a knitting needle though the knot.
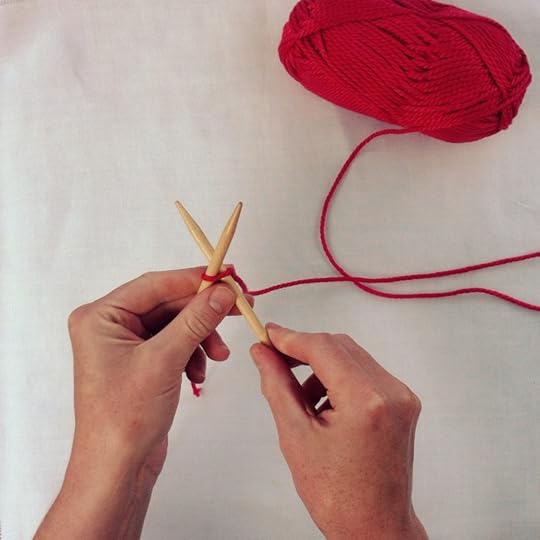 Holding the knitting needle with the slip knot in your left hand, take the other knitting needle in your right hand and pass the tip through the slip knot working from the front to the back.
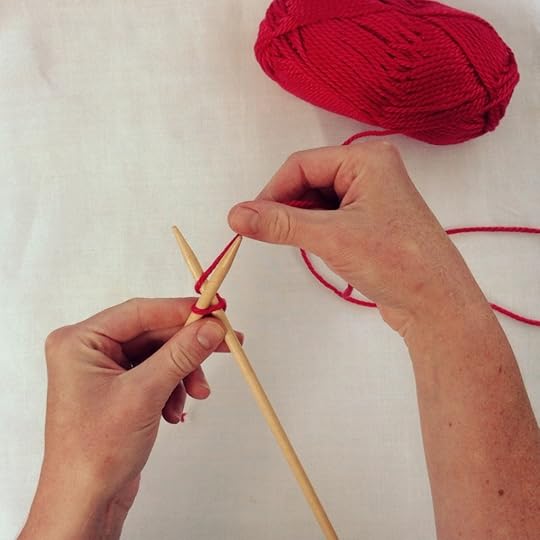 Take the ball end of the yarn and bring it around the tip of the needle, so that the yarn comes over the top of the needle, as though you were creating a knit stitch.
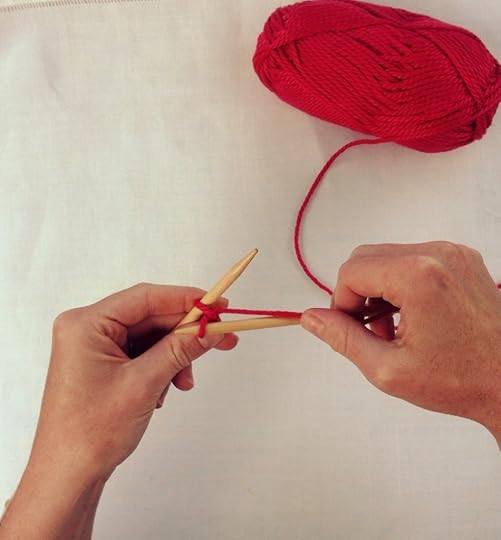 Take the knitting needle back through the loop of the slip knot, carefully drawing the yarn through the loop as though you were creating a knit stitch.
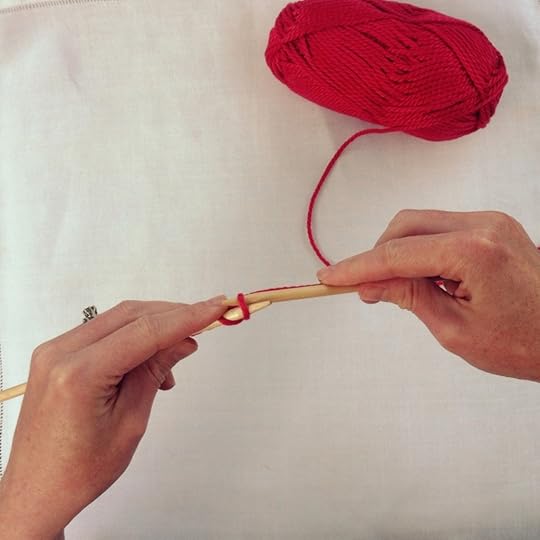 Pass the loop of yarn that has just been created from the right-hand needle on to the tip of the left-hand needle, be careful not to twist the loop. This will create the stitch.
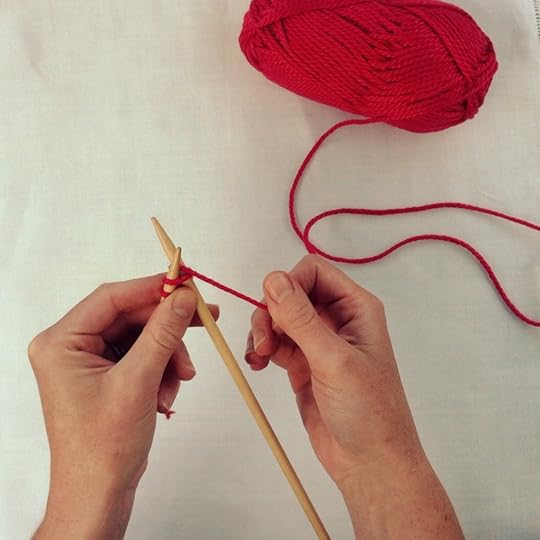 Working in the same manner, insert the right-hand needle into the stitch just created on the left hand needle. Wrap with yarn and draw through before placing the new stitch onto the left-hand needle.
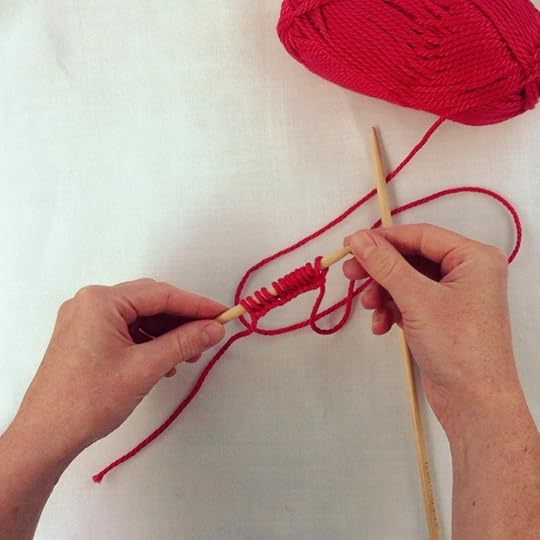 Continue working in the same manner, creating a new stitch from the last one added to the left-hand needle until the number of stitch has been cast on for your project.
Tah Dah! You’ve just cast on! I know, not as tricky as you thought, right?
The post Start Knitting: How to Cast On appeared first on Made Peachy.
October 26, 2014
The Week That Was: Catching Up & Packing Up
Happy Monday Y’all!
Today is a day fit to bursting with To Do Lists for me. In fact, the last few days/weeks/months seem to have been To Do List driven. So much so that I’ve just about worked my way through an entire notebook – I know, that’s crazy right? I’ve been sticking to the Bullet Journal system and, I’m happy to say that it seems to be working. I’m not spending my time clicking between different apps trying to keep up with work, my schedule, home projects, family engagements, I’ve no longer got Sharpie notes on the back of my hands, and there isn’t avalanche of Post-It notes every time I get up from my desk! I’m working on another huge project (and yes, it is another Secret Project – sorry, I can’t share more about this yet, and I’m so looking forward to telling y’all about it!).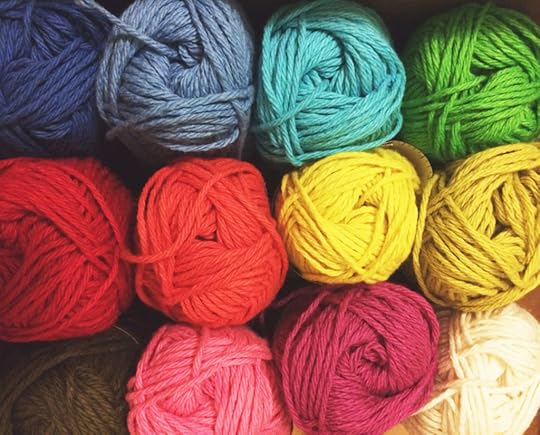 I’m a big fan of the Bullet Journal method – its certainly keeping me sane and helping me to look more like a fully functioning adult to the outside world, and that’s all the matters, right? Do you Bullet Journal? I love that this system can be customised – even day-to-day – to help you get the most form your time, keep your priorities in check and ensure that you have time for the things that really matter while achieving all those very important goals – how have you customised your Bullet Journal System?
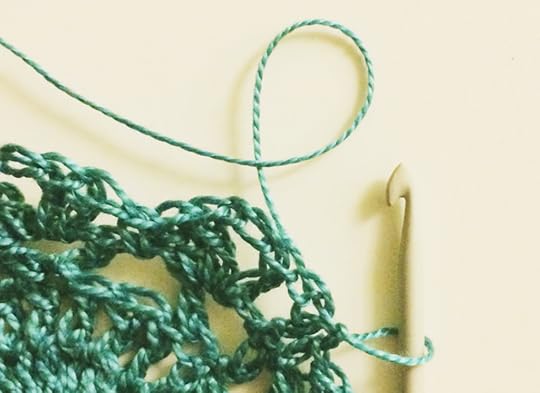 During the last week I’ve been working hard towards a deadline at the end of the month and the finish line is now in sight. Which is a pretty good thing as now that I have caught up with myself, my family, the house and the pup…I’m packing my bags to head off to Dublin for the next Knitting and Stitching Show!
The Knitting & Stitching show will be running from 30 October to the 2 November at Simmonscourt, RDS Dublin – are you heading to this amazing event? if you are be sure to swing over at say Hi! I’ll be on the Vilene Stand A40 with my very good friend & world renowned textile artist, Kim Thittichai, sharing inspirations, answering stitching questions and sharing a few new and exciting techniques!
Not got your tickets yet? You can book them online now – hope to see you there!
The post The Week That Was: Catching Up & Packing Up appeared first on Made Peachy.
October 23, 2014
DotComGiftShop Deluxe Sewing Kit Giveaway!
Happy Friday Y’all!
It will probably come as no real surprise to you that I’m up to my eyeballs in a huge deadline (I know, starting to sound like a broken record over here!) When life gets busy it seems more important than ever to stack up things that are good for the soul – whether its something sweet to eat, a delicious seasonal coffee (yes, PSLs are ruling my universe right now!), or planning an evening of movies, or lovely long weekend hike. These are all the things on my wish list right now – its the little things that really get you through the crazy busy times right?
While I’m on the subject of chasing down all the happy to make my worklife a little sweeter – something that is making me happy is the huge wave of new readers that have been dropping by. You guys! I’m so stoked that y’all are visiting, commenting, sharing and (hopefully) enjoying this little creative haven! If you are a new reader be sure to leave a comment to introduce yourself and say Hi – if you have your own blog do leave a link, I’m always looking for new sites to add to my blog reader!
By way of a thank you for all you sweet folks that have been visiting Made Peachy I thought it was about time to run a cute giveaway – and my friends at DotComGiftShop have just the treat for you!
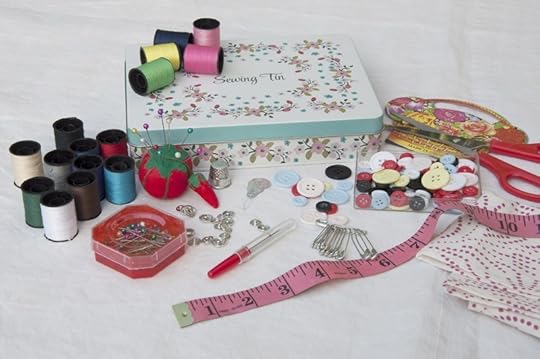 I have one of these awesome Rose Hip Deluxe Sewing Kits – worth over £12 – c/o DotComGiftShop to give away to one lucky Made Peachy Reader!
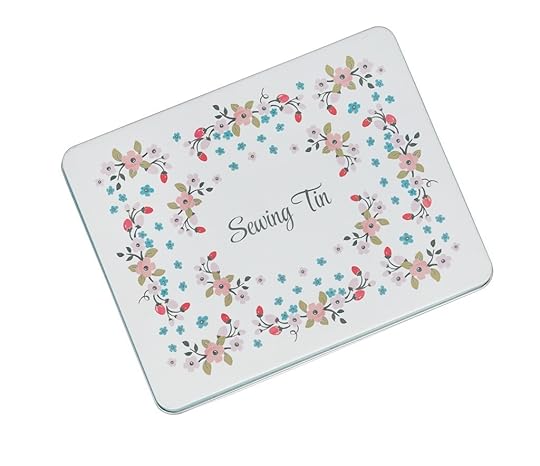 Stowed away in this adorable vintage-style tin is everything you could need for your next sewing project – whether you want to boost your supplies in your sewing room, or are looking for a neat little on-the-go set, this is perfect for you!
The set includes…
15 x 20 m cotton reels.
Metal thimble
Thread picker
Metal safety pins
Scissors
Pink tape measure
Bobble head pins in pin box
100 approx. buttons in box
Mini pin cushion
Needle book with sewing needles and needle threader
Neat, huh?
So, how do you enter?
Easy! So that y’all get a fair whack at it, there are a number of ways you can enter this giveaway – and the best part is each one will be counted as 1 entry…so, do all three and you will be entered three times chums!
1 Please leave a comment below sharing why you want to get your mitts on this adorable Rose Hip Deluxe Sewing Kit
2 Share this post on Twitter, tagging @madepeachy and using the hashtag #DCGSMadePeachy
3 Give the MadePeachy Facebook page a like, share the giveaway post and leave a comment on why you’d love to win!
Want a bonus entry? Then head over to the MadePeachy Instagram , follow and like the Rose Hip Deluxe Sewing Kit photo and share it to your followers with a repost to your own feed with #DCGSMadePeachy Psst! Reposting to Instagram is easier than you think! You can screen grab the photo and repost it to your account or use a neat reposting app!
The giveaway is open to UK folks only (sorry international friends) The winner will be picked at random and announced on the 31 October - Good Luck!
The post DotComGiftShop Deluxe Sewing Kit Giveaway! appeared first on Made Peachy.
October 22, 2014
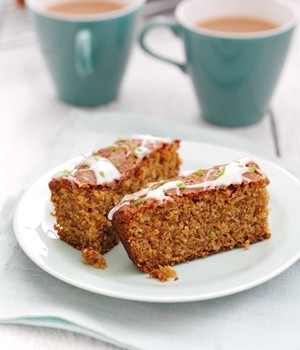
Ginger & Lime Slice Recipe
Heathy eating is a top priority for me at the moment – this month (and some of next) is all about hitting the road and trekking around the country for Show Season. While this is great, I love to get out and about a meet lots of new people and share inspiration, skills and techniques, hotel living is not the healthiest. Don’t get me wrong, I love dining out in restaurants as much as the next gal, but if your watching what you eat it can be a little tricky (read: impossible!) so while I am at home, I’m trying to make the most of healthy recipes to keep the goodness going in – after all, you are what you eat right?
Wholegrains are good for you, thats a fact. They are heart healthy, low GI and tasty carbohydrates, so getting them added into your daily intake is always a good plan. These delicious Ginger & Lime Slices, with one whole grain serving pre slice, are a a brilliant way to have a treat that is more healthful! Plus, these slices make use of rapeseed oil as a substitute for butter making this a much healthier choice, just one of the many benefits of rapeseed oil!
 Ingredients:
100g oatmeal
125g wholemeal plain flour
5 tsp ground ginger
2 tsp baking powder
Zest and juice of a lime
150g soft brown sugar
175ml rapeseed oil
2 medium eggs, lightly beaten
1 tbsp golden syrup
50ml semi skimmed milk
To decorate: 25g icing sugar + lime zest
Method:
Preheat the oven to 160oC, gas mark 3. Lightly grease a 16cm square cake tin and line with baking parchment.
Mix together the oatmeal, flour, ginger, baking powder and lime zest then stir in the sugar.
Place the oil, eggs, syrup and milk into a small bowl and lightly whisk.
Make a well in the centre of the flour then pour in the oil mixture and gently fold in.
Pour into the cake tin and bake for 45-50 minutes or until the cake feels firm. Test with a skewer to be sure, the skewer should come out clean.
Allow to cool slightly in the tin before turning out onto a cooling rack.
Once cooled mix together the icing sugar with enough lime juice to form a glace icing. Drizzle the icing over the cake and finish with extra lime zest if required.
Serve cut into 12 slices.
Quick Tip!
Add some drained and finely chopped stem ginger to the cake mix before baking.
♥ – ♥ – ♥
Wholegrains are a tasty way add a neatly kick to your cuisine – find out more about the many benefits and more delicious ideas for including them in your diet at Wholegrain Goodness!
The post Ginger & Lime Slice Recipe appeared first on Made Peachy.
October 21, 2014
Pinterest: What They Did With…Halloween DIYs
Scare your homies with this brilliant Psycho Serial Killer Shower Curtain, £31.75, CrazyDogTShirts
OK October, you are flying past and show no real sings of letting up or slowing down. Which means that Halloween is right around the corner. It seems to me that this spooky celebration is getting bigger and bigger by the year, with more and more folks getting involved.
I have always had a huge soft spot for Day of the Dead celebrations, sugar skulls, zombies and all things that go bump in the night, so I always love this time of year for seeing all the creative ideas that folks have for DIY Halloween celebrations from costumes and decorations, to foods, cakes and even tricks! If you love Halloween too, be sure to check out this round up of just some of the awesome Halloween DIYs over on Pinterest!
 1 DIY Calavera de Azúcar (Sugar Skulls) ⇒ Tablespoon
 2 Blood Spatter & Glass Shard Cupcakes ⇒ Bakernaut
 3 Fanged Mini Pumpkins ⇒ Martha Stewart
 4 Vampire Cocktails ⇒ Self Proclaimed Foodie
 5 Walking Dead Zombie Make Up Tutorial ⇒ Fairest’s Favourites
 6 Edible Pumpkin Candy Cups ⇒ Oh Nuts
This year I’ll be over in Dublin for the Knitting & Stitching Show – which means I wont be able to get into the real swing of the celebrations (although I will be enjoying all the costumes of those fun Dubliners!) I’m just going to have to live vicariously through y’all (and Pinterest, of course!) – so, tell me what fun DIY projects have you got planned for this spooky season?
The post Pinterest: What They Did With…Halloween DIYs appeared first on Made Peachy.
October 20, 2014
Understanding Sewing Patterns
While I’m on a bit of a dressmaking kick I thought I’d share a little bit of the Making-Your-Own-Clothes love with y’all. There is nothing quite as lovely as being able to step out in a dress you made yourself. Not only because you will have picked out the exact fabric and the prefect pattern but you will have spent a little time creating, and that is a good thing – both for the soul and for looking that extra bit lush!
I get that for some people dress patterns can feel like huge deal – and in many ways they are, well, they certainly are huge, and they are also pretty clever, with lots of information,lines and markings, so it is no wonder that some folks find them a bit mind boggling.
However, creating clothing using a sewing pattern is a rewarding hobby, as well as a useful skill to have. But, when you are just starting out, the whole process can seem rather confusing. Whilst the pieces that are used to make the garments on each sewing pattern will seem very different to each other, there are a number of elements that most sewing patterns will have in common- so, I thought I would put together this handy little guide will help to demystify some of the information found on sewing patterns and help you to Understand Sewing Patterns!
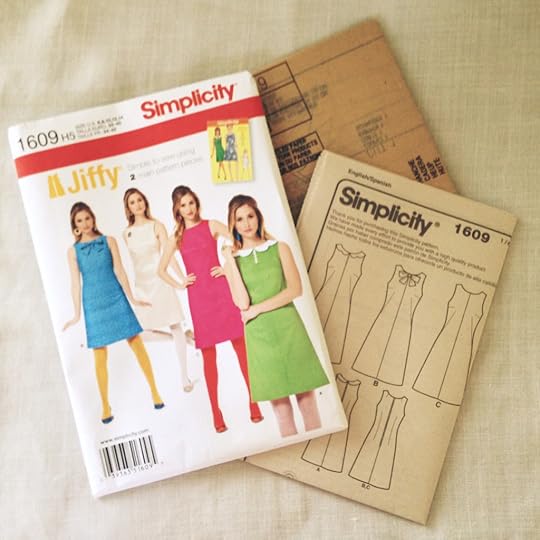 Sewing patterns will be housed in an envelope, alongside the information regarding the pattern sizes, this will contain the pattern pieces printed on the tissue paper and printed sheets containing the information for making up the individual garments.
In some instances, these information sheets will provide illustrated steps to help with the construction of the garment.
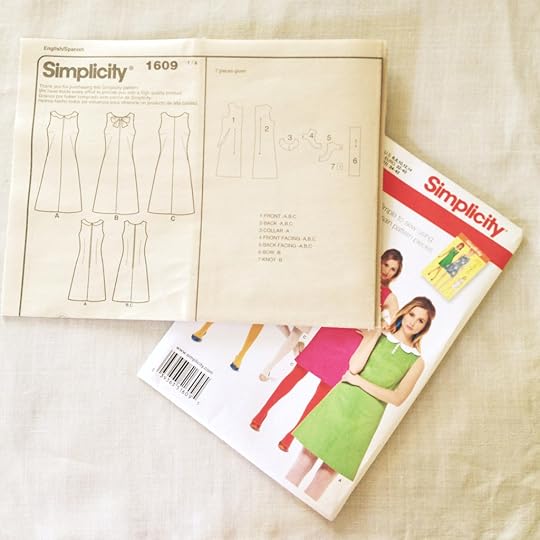 The first step is to look over the information sheets and familiarise yourself with the pattern – making sure that you have all the materials and understand the basic sewing techniques that are used.
Many patterns offer a number of garments on the printed tissue paper sheets, so it is important to identify the pattern pieces that correspond to the garment that you want to make. A chart is often included showing the illustrated pieces – along with a numbered key – to identify the different elements that will need to be cut for each garment.
 After the required pieces have been identified, the information that is included on them is also used to aid the construction of the garment.
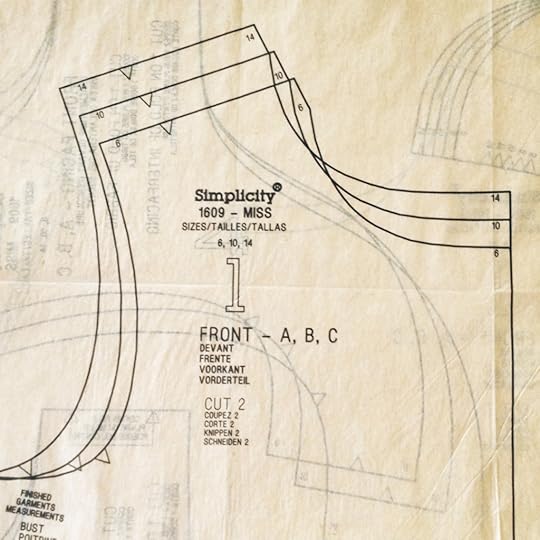
Multi sized patterns will offer the a series of different cutting lines for each pattern piece- these will be recognised by the use of a different printed line, a key on the pattern instruction will help to identify which style of line corresponds to which garment size.
The pattern piece will have a number printed on it alongside the text that identifies which part of the garment the piece is used for. There will also be information about how this piece is used when cutting the fabrics – here you will be told how many times this needs to be cut, whether it needs to be used to cut any required lining pieces and also how to orientate the pattern piece on to the chosen fabrics.
This printed information is used in conjunction with illustrated guides – called cutting lays – that indicate how to position the tissue paper pieces onto the fabrics for cutting. This is very important as it will show which pieces are placed onto a fold, so that once cut will open out to reveal a larger fabric section.
There are a number of illustrated guides that will feature on the cut pattern pieces that will aid with the construction of the garment. A key will be included in the pattern instructions. As you work with sewing patterns you will quickly be able to identify these icons and what information they are providing about the pattern.
Here are some common icons that feature in a number of sewing patterns:
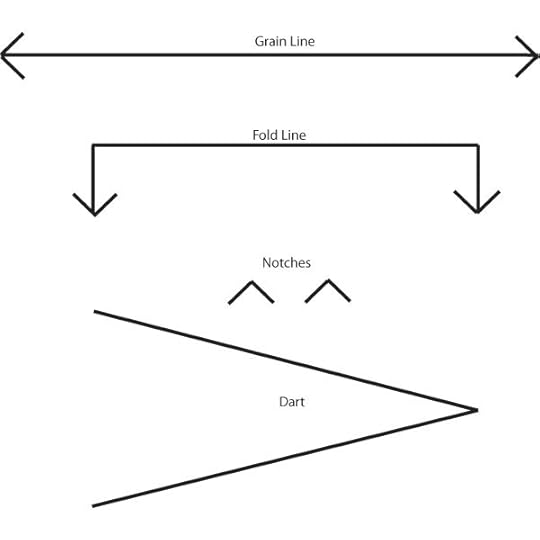 Grain Line: This indicates how to position the pattern piece on the fabric for cutting – the length of the line is set along the grain of the fabric.
Fold Line: This will be on the side of a piece and indicates that it should be set on the fold of fabric for cutting, to create a larger cut piece of fabric.
Notches: Small markings that are used to assist in the alignment of two separate pieces.
Dart: These angled lines indicate the section of fabrics that needs to be incorporated into a dart for shaping a garment – these are not cutting lines!
See, it’s not some mystical code that requires the help of the Enigma Machine to master! Start out by looking over the patterns, checking that you understand the symbols and cutting lines and before you know it ‘reading’ a dress making patterns will come as easily as reading a book or a recipe! So, what are you waiting for?!
The post Understanding Sewing Patterns appeared first on Made Peachy.
October 17, 2014
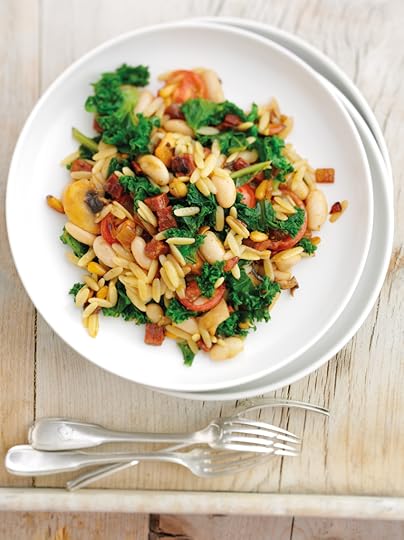
Cooking With Kale: Orzo with Kale and Chorizo Recipe
Kale is a super food. Its one of my favourite dinnertime staples at the moment – not only because you can bake, stewm, stir fry or even transform into smoothies, but also because it tastes delicious!
So, how about giving this tasty Orzo with Kale and Chorizo recipe a try?
This quick and easy meal will brighten up any evening. Full of flavour, it’s low calorie and low saturated fat too!
 Prep: 10 minutes
Cook: 15 minutes
Serves 4
Ingredients
1 tbsp rapeseed oil
1 onion, chopped
120g diced chorizo
50g pine nuts
250g mushrooms, sliced
250g cherry tomatoes, halved
400g can cannellini beans, drained and rinsed
200g pack shredded kale
150g orzo pasta
Orzo with Kale and Chorizo
Heat the oil in a large frying pan and fry the onion, chorizo and pine nuts for 3-4 minutes. Add the mushrooms, tomatoes and beans and cook for 2-3 minutes.
Meanwhile, cook the kale in boiling water for 2-3 minutes, drain and add to the pan.
Cook the orzo pasta in boiling water for 7 minutes, stirring occasionally to prevent sticking, drain and add to the kale mixture. Season to taste.
Try using any shape pasta that you have in the cupboard or remove the chorizo for a vegetarian option.
♥ – ♥ – ♥
The main kale season has now kicked off, it’s most plentiful between October and March, although its widely available all year round. Find out more recipes and fresh tasty ideas at Discover Kale
The post Cooking With Kale: Orzo with Kale and Chorizo Recipe appeared first on Made Peachy.
October 14, 2014
Pinterest: What They Did With…Rugs
I’ve been coveting ‘that’ rug from Ikea. You know the one, Lappljung Ruta, £75, the one that is spotted in the back ground of every single blogger’s photos posted on Instagram. I love it because it is a real statement piece, dramatic but also being low pile – which I think with a mutt under foot would be a very good thing! However, before jumping in and buying the a rug I thought it was time I shopped around – and by shopped around I clearly mean spend the day on Pinterest filling boards with Dream Rugs!
For the most part, unless you are picking out this Ikea staple, rugs can be quite costly additions to your home – yet they are a super quick and effective way to freshen up interiors or change the look of a room. So, I’ve collected together a few of my favourite DIY Rug Inspiration over on Pinterest!

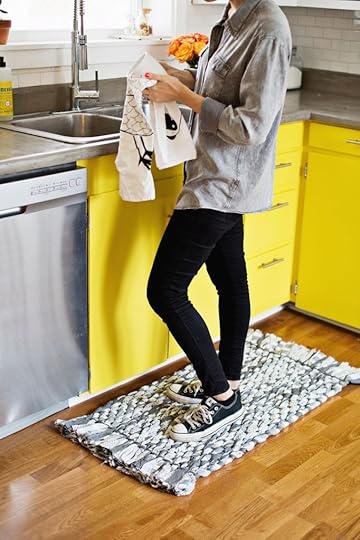 1 DIY Woven Rag Rug ⇒ A Beautiful Mess
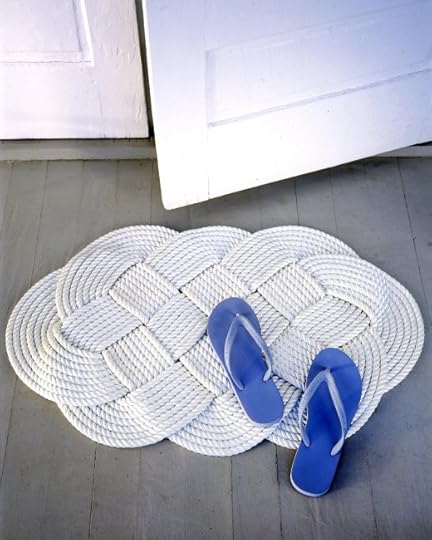 2 Braided Mat ⇒ Martha Stewart
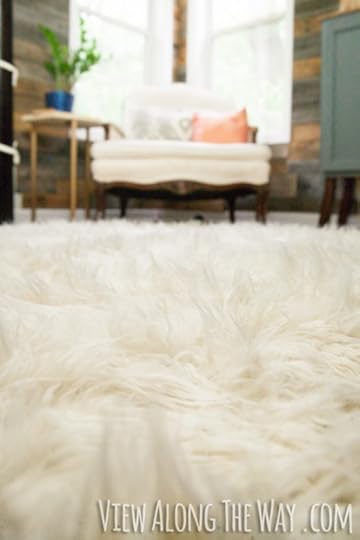 3 DIY Faux Fur Rug ⇒ The View Along The Way
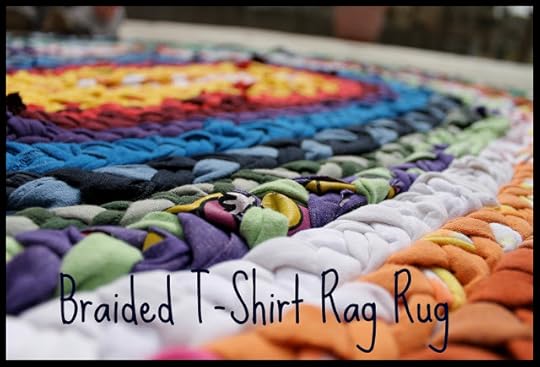 4 Braided T-Shirt Rag Rug ⇒ Do Small Things With Love
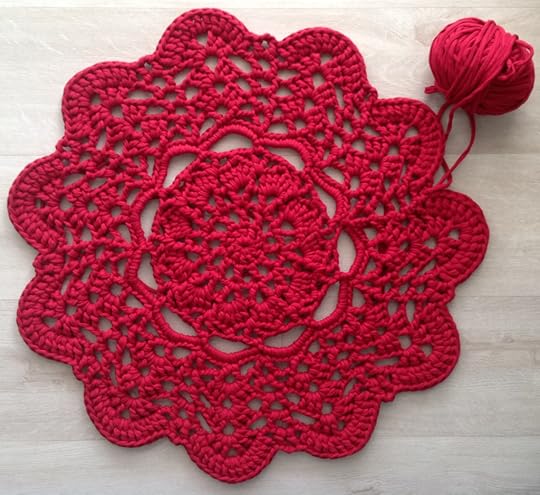 5 Crochet Doily Rug ⇒ Crochet in Paternoster
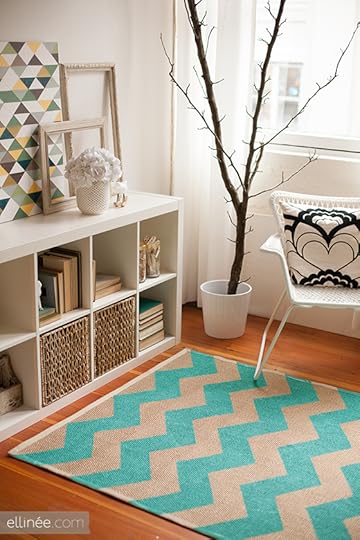 6 Painted Chevron Rug ⇒ Ellinee (Check out this rad video tutorial!)
When it comes to fancy DIY rug tutorials on Pinterest, this is just a taste of the amazing inspiration out there – I’m pretty sure that the rest of my day will now be spent dreaming about interiors and home makeovers!
Are you on Pinterest? Check out what I’m pinning right now!
The post Pinterest: What They Did With…Rugs appeared first on Made Peachy.
October 13, 2014
How to Take Body Measurements for Sewing Patterns
Now that I have a lovely new sewing pattern in my possession – and hopefully some free time in the not too distant with which to spend cutting, stitching and finished this lovely dress- I thought I would share a few pointers that I have learnt for getting the best from a sewing pattern. If you’re trying to pick out a pattern – be sure to check out this one-stop guide to selecting a sewing pattern!
Getting the right fit for garments is the key to looking stylish – this is as true when shopping for making your own clothes as it is when shopping for items on the high street. Taking accurate body measurements is essential in avoiding ill-fitting garments. Here are a few tips for Taking Better Body Measurements…
 Taking your own body measurements for dressmaking is a tricky task – it’s hard to hold the tape measure accurately whilst recording the information. If possible, asking a friend to help is always the best option.
A dressmaker’s tape measure is often a lot longer than a standard sewing tape measure, I’m not suggesting that you’re going to need the extra length for measuring around your middle, but it comes in handy when you’re measuring for special occasion garments, that might have long and flowing skirts.
Prepare to take your measurements by removing your shoes and wearing only well fitting underwear. If you take your measurements over your clothing you’ll find that you end up with bunched up fabrics under the tape measure, which will affect the accuracy.
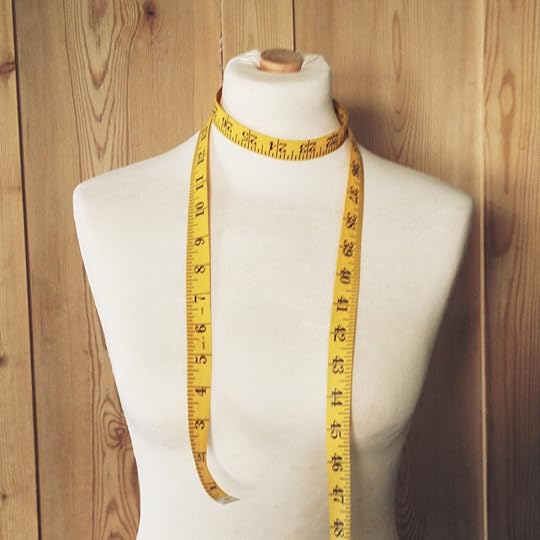
There are three common areas that every dress pattern will require measurements for, these are the bust, the waist and the hips.
The measurements are taken by looping the tape measure around the body in each of those areas so that the tape is flat against the skin; the tape should not be pulling in or draping against the skin. If you’re taking the measurements yourself, try standing in front of a mirror to record them – if the tape measure is positioned correctly, it will be level at the front of your body and the back, this will give an even measurement and greater accuracy.
The bust measurement is taken around the fullest part of the body, the waist is at the narrowest part of your torso and the hip measurement is taken with the tape measure on your hip bones – for most body shapes this is 15-20cm below the waist measurement.
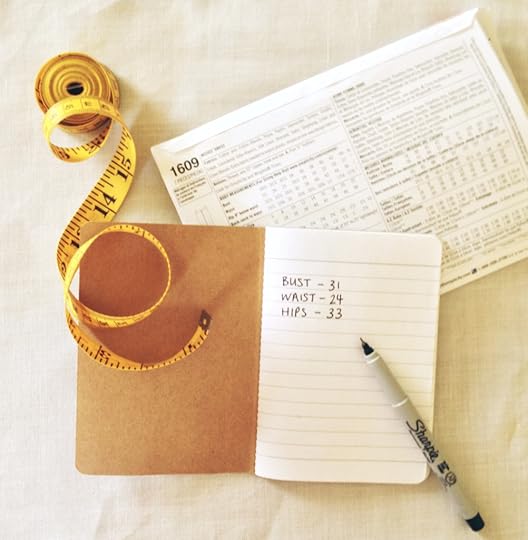
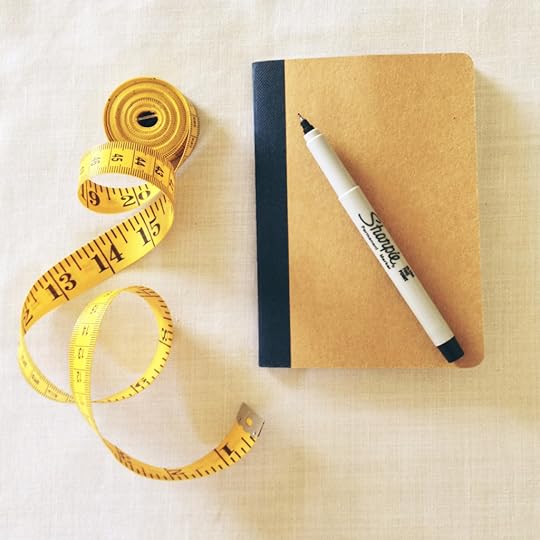 Make a note of these measurements in a notebook, as this will give you a clear record which you can accurately compare to the to sizing chart located on the back of the sewing pattern envelope.
A common mistake when selecting a garment size from the sewing pattern is to assume that the dress size usually picked when buying ready-made clothing on the high street will be the same as the pattern guide. However, this isn’t always the case, using your measurements, select the pattern that best corresponds to your body shape.
It is not uncommon for body measurements to fall across a couple of different pattern sizes. For example the bust measurement might fit the size 12 pattern where and the waist and hips fall into the sizing for the 10. In these cases, it is best to select the larger of the two sizes, as it is easier to tailor the pattern pieces to make the required areas smaller, than try to make the section that is too small accommodate larger measurements. Whilst this might sound like a lot of fuss, this is the perfect opportunity for you to tailor the garments to your exact body shape and achieve well fitting garments.
 Depending on the style of the garment you may be required to take additional measurements these can include:
Neck measurement – commonly required for shirts and coats with collars. Take this by looping the tape around your neck at the base holding the tape no tighter than a buttoned up collar would feel comfortable and take the measurement.
Inside leg – this will be required for trousers. Here the tape measure is positioned at the crotch and the measurement is taken when the hemline will sit at the lower part of the leg. This can be tricky to take on your own, if no one is able to help you, try taking a measurement of the inside leg seam on a favourite and well fitting pair of trousers as a guide.
Outside leg measurement – again, this is required for making trousers. Position the end of the tape measure on your waist or hip – depending on the style of waistband on the trousers that you are making, and measure to the point where the hemline will fall.
So, grab that tape measure and get started – remember the more accurate you measure, more more awesome your finessed garment will be!
The post How to Take Body Measurements for Sewing Patterns appeared first on Made Peachy.


