
Laura Strutt's Blog, page 21
September 19, 2014
Super Easy Bunting with Sizzix
When it comes to bunting there are two universal truths…
1 Bunting never goes out of style
2 You can never have enough bunting
In light of this, finding a super quick and easy way to whizz up lashing and lashings of this pretty fabric decoration will be sure to make your stitch soul rather happy.
The process of making bunting is really as easy as 1, 2, 3…Cut the pennants, stitch the pennants, join to create a garland. Easy, right? Yes – but, if you can quickly and accurately speed up this process then you’ll be well on your way to making some fantastic lengths of pretty decorations!

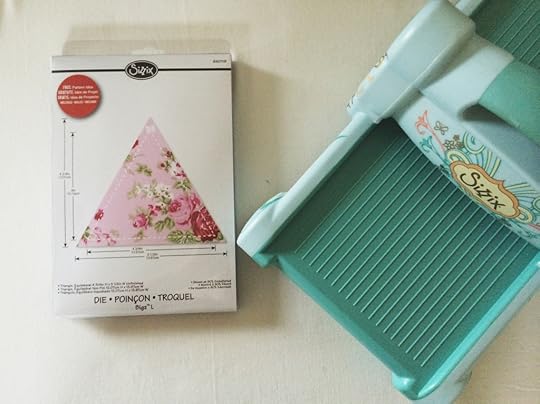 The Sizzix Big Shot is great for cutting fabrics – be sure to check out this beginner’s guide to getting started – and when teamed with the Equilateral Triangle (#658663) Die it makes whipping up bunting fast and fun!
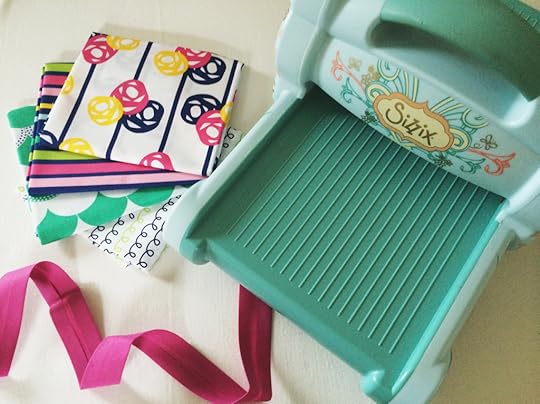 Grab your supplies…
Sizzix Big Shot
Equilateral Triangle Die
Collection of print cottons
Length of bias tape
Sewing machine
Scissors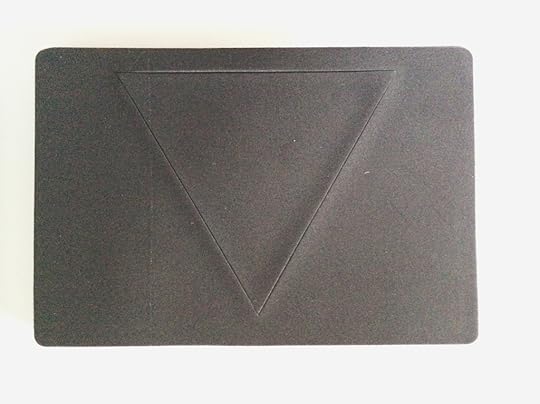 When working with dies the cutting surface is placed uppermost and you will be able to see the outline of the blade through the surface – you can use this as a guide to get really economical placement of your fabrics when cutting, just be sure not to press your fingers down onto the blade!
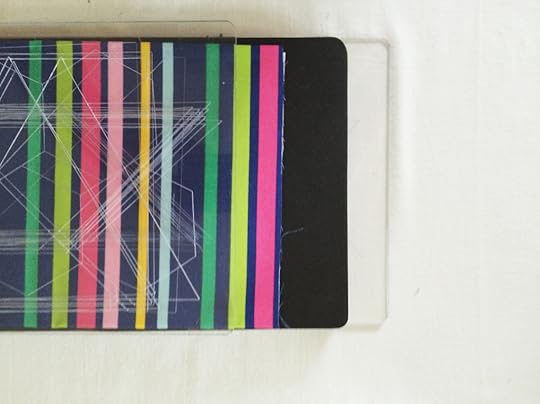 Fold the fabrics and place them onto the die – you will be able to cut through between 6-8 layers of fabric (depending on its weight) at a time with the Big Shot, so be sure that the folded fabrics are positioned neatly over the cutting surface. Sandwich the die and fabric between two cutting pads.
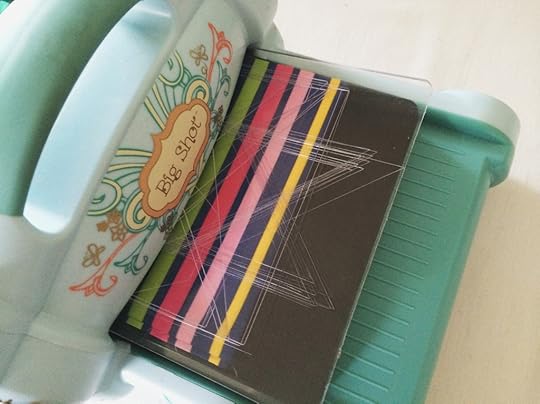 Insert the sandwich of cutting pads, die and fabric into the Big Shot and crank the handle to draw it through the machine and cut through the fabrics.
 Once removed, you will have a neat bundle of precision cut fabrics for bunting pennants!
Here’s a handy tip!
When removing the cut pieces, hold the cut sections with your finger tips and carefully lift the fabric bordering it. Occasionally, you may find that there are a few uncut threads – often on corners or more intricate sections of the shape – resist the urge to tug the pieces free as this will snag the fabrics, just clip the threads with a small pair of scissors!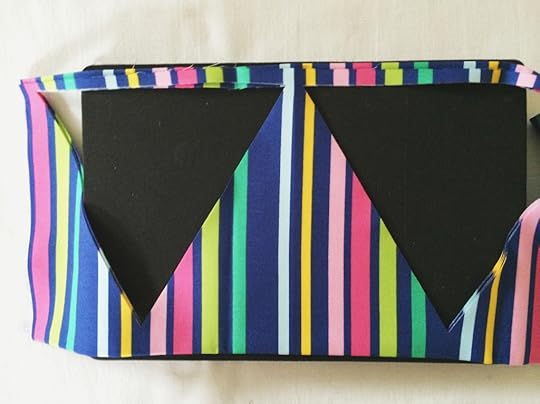 To get the most economical cuts from your fabric, you can open out the remaining fabric and reposition it to cut additional pieces. Repeat the process until you have cut the desired number of pennants form all the chosen print cottons. Remember – you will need a pair of cut shapes for each pennant!
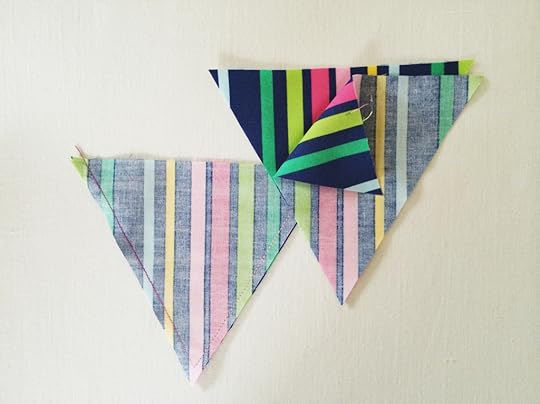 Once the pieces have been cut, work in pairs and position right sides together and, with a straight machine stitch, join the two side sections taking a 1/4in seam. Leave the upper section open to turn through.
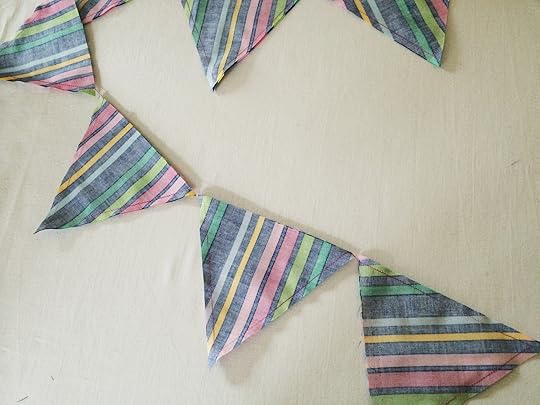 If you fancy being super speedy with your stitching- try chain piecing when jointing the pairs of pennants together. To do this, joint one pair together along the sides and, without stopping the machine or cutting the threads, allow the machine to work a stitches before positing the next pair onto the machine to be stitched. This will create a bunting-style effect with the joined pieces all joined together with small sections of loose stitches.
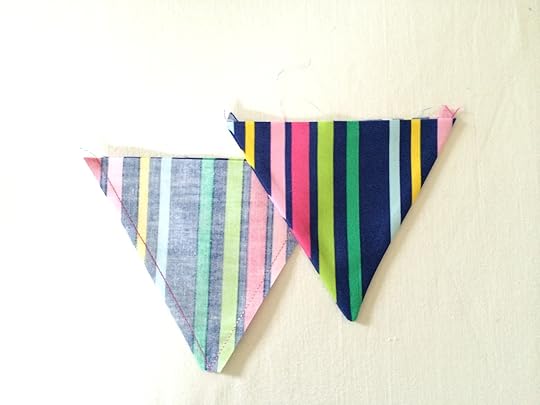 When all the pairs of pennants have been stitched, clip seam at the point and thrum through to the right side. Press out the sides and point as neatly as possible and press.
 Decide on the arrangement of the different coloured pennants and press the length of bias tape in half, so that the raw edges are neatly concealed towards the inside.
 Leaving a few inches of binding at either end, position the unstitched edges of the pennants into the fold in the binding. Space the pennants out evenly along the length of the bias tape and pin in place. Work along the entire length of the bias tape with a straight machine stitch to secure the flag in place and complete the bunting!
How quick and easy was that? I’m pretty sure that this gives us no excuse for not having the prefect bunting for every single occasion!
The post Super Easy Bunting with Sizzix appeared first on Made Peachy.


September 18, 2014
Obsessed with…Autumn
This autumn quote wall art £5.50 from Samantha Harvey pretty much sums up my feels for this glorious new season!
There is no denying that the seasons are changing – I love the first signs of autumn, chilly mornings, long lazy evenings and the warming glow of new colours.
I know that some of y’all might find the approaching colder months a little gloomy, so here I am to share a few Autumn Inspired Handmade Treats from Etsy to get you in the mood for the new season!
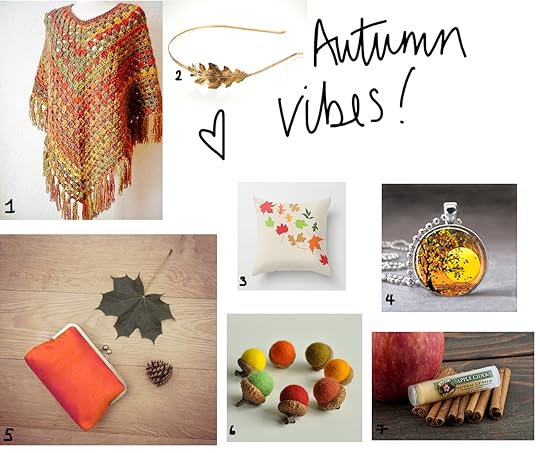 1 Autumn Colour Crochet Poncho • £44 • Aalexi
2 Oak Leaf Headband • £13.21 • mylavaliere
3 Fall Leaves Pillow • £21.38 • Things That Sing
4 Autumn Tree Pendant • £6.26 • The Pendant Gallery
5 Orange Silk Evening Clutch • £32.70 • Constance Handmade
6 Felted Acorns • £4.40 per set of 7 • Mellsva
7 Apple Cider & Cinnamon Lip Balm • £2.48 • Wild Rose Herbs
All we need now is to curl up by the fire with a mug of tea and a good book, am I right?!
♥ – ♥ – ♥
Want to see some more of my handmade favourties? Be sure to check out my Creative Clippings column in the October issue of Sewing World – on sale now!
The post Obsessed with…Autumn appeared first on Made Peachy.
September 17, 2014
Heading to the Handmade Fair
I can’t believe that it is finally time for the Handmade Fair – I’m so excited to be heading off there tomorrow and to be part of this pretty cool event!
If you’re coming along to the show you’ll be able to find me on the Lady Sew And Sew stand A17/A25 in the East Tent where I will be sharing a few fun tips for quick and easy fabric cutting with the Sizzix Big Shot!
Do you have a Big Shot in your craft stash?
Is this essential tool on your Christmas wish list this year?
Well – it really should be! You’d be forgiven in thinking that this handy gadget is a staple for the carmakers and paper crafters of this world – far from it, quilters and stitchers are firm fans of this cutting system for creating accurate pieces in high volumes at great speed!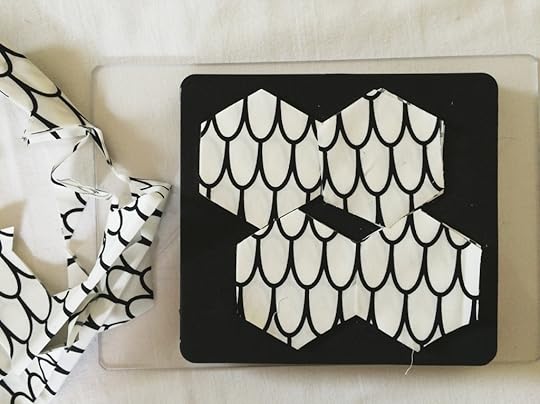 If you’ve not seen the Big Shot in action for cutting fabrics be sure to swing in past this easy to follow step-by-step tutorial for getting started cutting fabrics with your Big Shot!Whilst at the Handmade Fair I will be sharing how to make wonderfully simple bunting and a clever way to quick-make hexagon patchwork – you’ll be able to find the tutorials here over the next couple of days, if you aren’t able to come to the show or if you need a little refresh after the event!
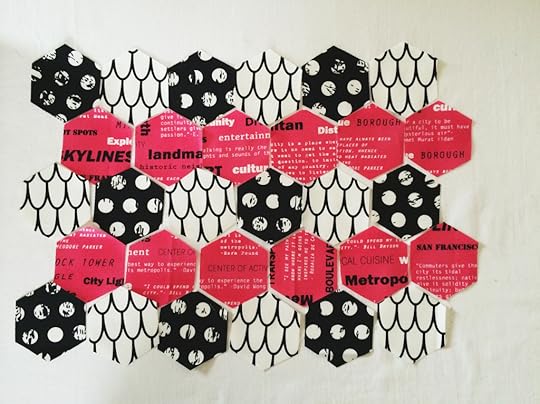 Are you heading to the show? Be sure to stop by and say Hello!
See you there!
The post Heading to the Handmade Fair appeared first on Made Peachy.
September 16, 2014
Pinterest: What They Did With…Tights
How rad are these Love Text Print Tights, £21.96 ZaharaTights?
It is safe to say that the temperature has dropped. While I’m adamant that I wont be putting the heat on in our home just yet, I am going to start thinking about adapting my summer wardrobe for the cooler days of the approaching autumn. The cutest way to transition sunny day dresses into the new season is with cute cardigans and even cuter tights.
Hosiery might not instantly jump out as being a really fun fashion piece, but those clever folks on Pinterest know just to to make a statement with stockings! Check out my favourite DIY Tights Inspirations from Pinterest!
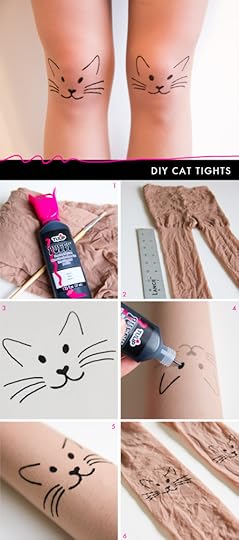 1 DIY Cat Tights ⇒ Sprinkles of Spring
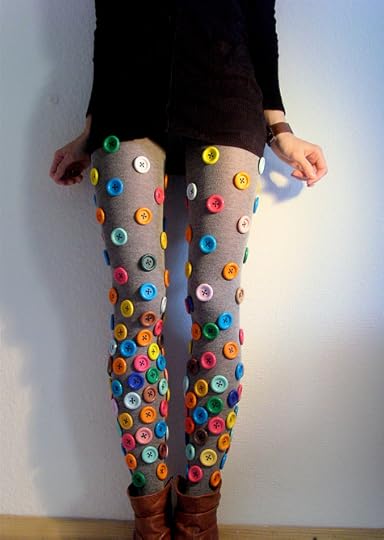 2 Button Accent Tights ⇒ Burda Style
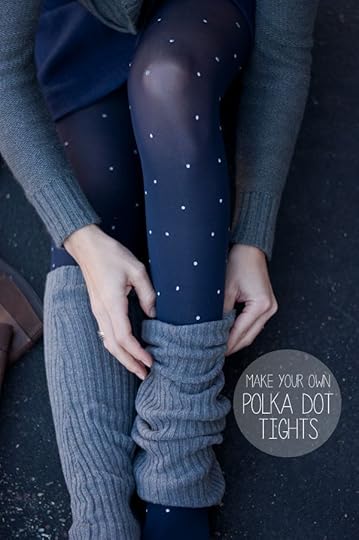 3 Polka Dot Tights ⇒ This Heart Of Mine
 4 DIY Ombre Tights ⇒ Pretty Ditty
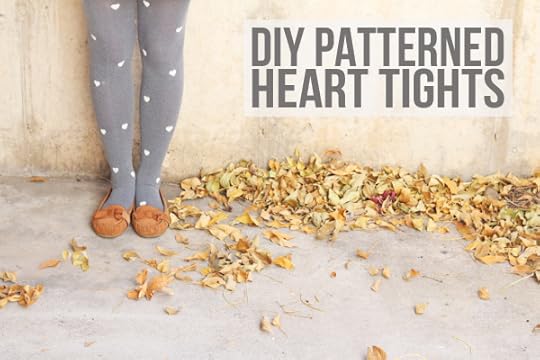 5 Heart Print Tights ⇒ Lemon Jitters
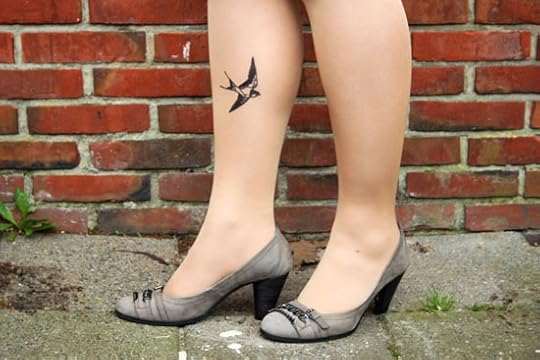 6 DIY Tattoo Tights ⇒ By Wilma
Now those little beauties make it all the more easy to say a sweet farewell to the summer, don’t they?
Are you a Pinterest addict too? Be sure to swing in and all the things I’m pinning right now!
The post Pinterest: What They Did With…Tights appeared first on Made Peachy.
September 15, 2014
Red Velvet Whoopie Pies
If there is one cake that makes me literally go weak at the knees it is Red Velvet Cake - it is as good to look at as it is to eat! In fact, we love it so much my sister made us Red Velvet Wedding Cake, and as this week marks our second wedding anniversary this week, what better way to celebrate than to share a fun new take on this scrum my recipe?
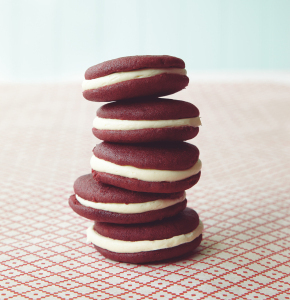
Friends, let’s all bake Red velvet whoopie pies!
[image error]Moist red velvet cake whoopie pies sandwiched together with vanilla cream cheese frosting. These colourful sweet treats are easy to make and even easier to eat. One is rarely enough…
For the whoopie pies
110g unsalted butter, softened
150g caster/granulated sugar
2 eggs
2 teaspoons pure vanilla extract
2 teaspoons red extra paste colour food dye
120ml buttermilk
220g plain/all-purpose flour
20g unsweetened cocoa powder
½ teaspoons baking powder
1 teaspoon cider vinegar
1 teaspoon bicarbonate of/baking soda
For the cream cheese filling
100g unsalted butter, softened
400g icing sugar, sifted
2 teaspoons pure vanilla extract
150g cream cheese, softened
2 x baking sheets, greased and lined with baking parchment
a large piping bag fitted with a plain nozzle/tip
Makes 15
Preheat the oven to 180°C (350°F) Gas 4.
Cream together the butter and sugar until light and fluffy. Beat in the eggs and the vanilla extract. Add food colouring into the buttermilk. Sift together the flour, cocoa and baking powder into a large bowl.
Mix half of the flour mixture into butter mixture. Stir in half of the buttermilk. Repeat with the remaining flour mixture and buttermilk until just combined. Stir the vinegar into the bicarbonate of soda and fold into the cake batter.
Spoon the mixture into a large piping bag fitted with a plain nozzle/tip. Pipe 30 even rounds (about 1 level tablespoon of batter) on to the prepared baking sheets, about 5 cm/2 inches apart, to allow room for spreading. Bake for 8–10 minutes or until the cakes spring back when gently pressed.
Leave the cakes on the baking sheets for a few minutes before transferring them to a wire rack to cool completely.
To make the filling, whisk together the cream cheese and butter until smooth, before sifting over the icing sugar in two stages, whisking thoroughly between each addition. Whisk in the vanilla extract. Sandwich the red velvet whoopie pies together with a generous smear or piping of cream cheese filling and serve.
 Enjoy!
♥ – ♥ – ♥
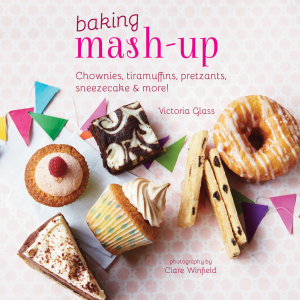
This divine recipe is just one of the incredible recipes from Baking Mash-Up by Victoria Glass, photography by Clare Winfield, published by Ryland, Peters and Small rrp: £9.99
The post Red Velvet Whoopie Pies appeared first on Made Peachy.
September 14, 2014
The Week That Was: Exciting Projects
Every time I get a new commission or project to work on I instantly proclaim that this is, “the most exciting, most fun, most creative challenge of my life!” Perhaps this means that I am something of a fickle creature, or perhaps it means that I really do get some of the most amazing projects to work on. I’m going with the latter on this one!
The project I worked on last week will definitely be one of my all-time favourite makes! I love working on unusual requests, there is something magical about being asked to turn someones idea or concept into a reality. So, when I was contacted about creating a super-sized plushie to be taken on a book tour for a beautiful new children’s book – I just about popped!
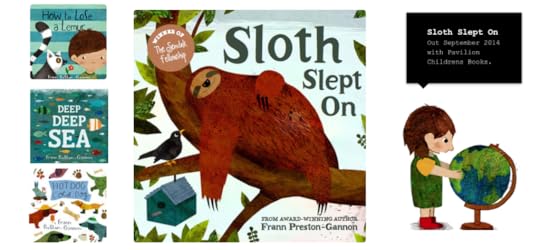 Frann Preston-Gannon is a much celebrated illustrator and designer based in South London, with a wealth of award-winning illustrated children’s books already under her belt, her much anticipated new book – Sloth Slept On – is due to hit the book stores this month! To celebrate the launch, while taking this wonderful book on a tour of book shops up and down the country it would be fitting that a ‘real-life’ sloth (well, plushie!) should be joining the fun!
Frann’s illustrated books are not only adored by children, her incredible characters, glorious illustrations and warming tales are loved by parents and grown ups in equal measures. So, being asked to create a super-sized sloth character from the book is nothing short of a huge honour!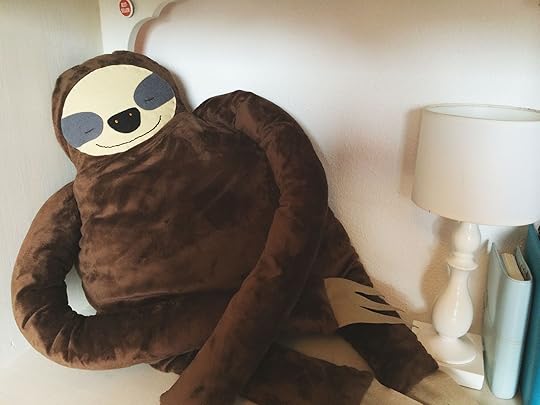 This was of course a brilliant project to work on, I mean, who doesn’t want too spent their work day making a large, huggable, snoozing sloth? But, with that also comes a whole heap of pressure. I mean, this is the work of a much celebrated illustrator, with such a unique identifiable style – hell, this talented woman was the first UK recipient of the Sendak Fellowship, studying under the legendary Maurice Sendak - who we all love for his creation of Where The Wild Things Are! So, yes – just a touch of pressure!
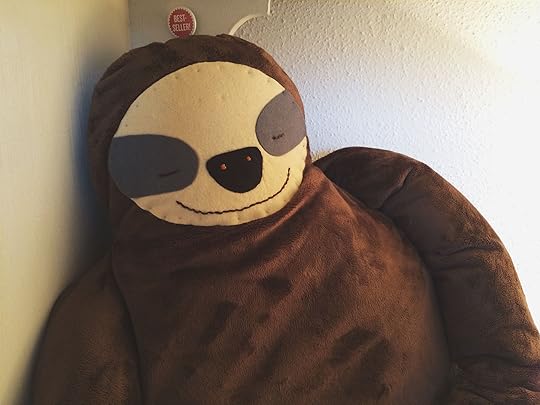 But, I’m pleased to say that this snugly, snoozing fellow has made it safe to his new home and is about to head off on a wonderful adventure of his own! Be sure to check out Frann’s website and Facebook page to find out the details of the upcoming author events and appearances to celebrate this amazing new book!
The post The Week That Was: Exciting Projects appeared first on Made Peachy.
September 11, 2014
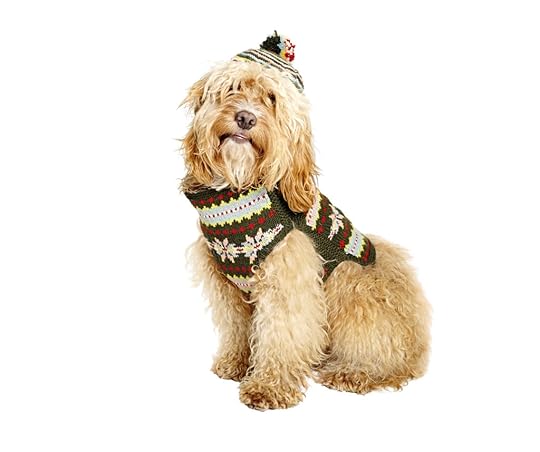
Fair Isle Furbaby Jacket- Woolly Woofers by Debbie Bliss
If this doesn’t make your heart do a little dance then nothing will! I am so taken with Debbie Bliss’s new book, Woolly Woofers that I just had to share an exclusive pattern with y’all!
So, let’s all knit our little furry friends this adorable Fair Isle Furbaby Jacket!
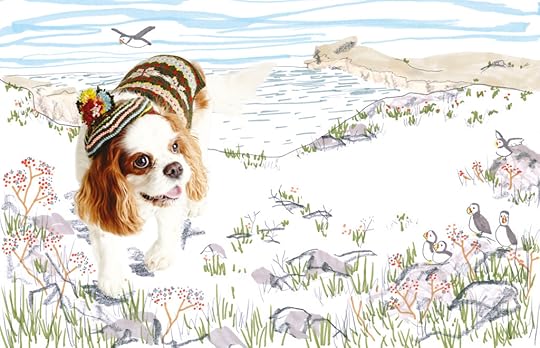
 With its origins in the remote Shetland Isles beyond the north of Scotland, this Fair Isle colourwork coat will keep country dogs cosy even in the coldest of weather. Topped off with a matching bonnet, known as a Tam o’Shanter, your dog sure will look bonnie.
SIZES
Two sizes small/medium (medium/large) – see coat measurements below
Measurements of knitted coat
Length measured along back 38(43.5)cm/15(171/4)in
Width measured around chest 45(57.5)cm/173/4(223/4)in
MATERIALS
One 50g (13/4oz) ball of Debbie Bliss Baby Cashmerino in each of forest green (A), red (B), yellow (C), light green (D), duck egg (E), grey (F), ecru (G) and pale pink (H)
Pair each of 3mm (US 2–3) and 3.25mm (US 3) knitting needles
Set of four 3.25mm (US 3) double-pointed needles
Length of black shirring elastic
TENSION
25 sts and 30 rows to 10cm/4in over patt using 3.25mm (US 3) needles.
NOTES
Shirring elastic can be threaded around the neck edge of the coat for a snug fit. If you make the coat you should have sufficient yarn remaining to work the beret. When working the beret, carry A up the side edge rather than cutting the yarn.
 BACK of coat
With 3mm (US 2–3) needles and A, cast on 57(73) sts.
K 6 rows.
P 1 row.
Change to 3.25mm (US 3) needles and work from chart as follows:
1st row (right side) K3A, [k across 1st row of 16-st patt rep] 3(4) times, work last 3 sts of chart, k3A.
2nd row K3A, p first 3 sts of chart, [p across 2nd row of 16-st patt rep] 3(4) times, k3A.
These 2 rows set the patt with garter st edging.
Work to end of 80th chart row, then work chart rows 1 to 25(41) again.
Change to 3mm (US 2–3) needles and work in A only.
Next row K3, p to last 3 sts, k3.
K 5 rows. Cast off.
FRONT of coat
Work as given for Back until 34(42) rows have been worked in patt.
Shape for legholes
Cast off 12(16) sts at beg of next 2 rows. 33(41) sts.
Work a further 18(24) rows.
Cast on 12(16) sts at beg of next 2 rows. 57(73) sts.
Cont in patt to end of 80th chart row, then work chart rows 1 to 3(19) again.
Change to 3mm (US 2–3) needles and work in A only.
Next row K3, p to last 3 sts, k3.
K 5 rows. Cast off.
Leghole edgings
Join side seams, leaving leghole edges open.
With right side facing, 3.25mm (US 3) double pointed needles and A, pick up and k48(60) sts around each leghole edge. Arrange sts over 3 of the needles.
1st round [K1, p1] to end.
Work a further 3(5) rounds.
Cast off loosely in rib.
 BERET
BERETWith 3.25mm (US 3) needles and A, cast on 64 sts.
K 3 rows.
Next row (right side) K5, [m1, k1, m1, k8] 6 times, m1, k1, m1, k4. 78 sts.
K 1 row.
With B, k 1 row.
Next row (wrong side) With B, k6, [m1, k1, m1, k10] 6 times, m1, k1, m1, k5. 92 sts.
With A, k 2 rows.
With C, k 1 row.
Next row With C, k7, [m1, k1, m1, k12] 6 times, m1, k1, m1, k6. 106 sts.
With E, k 2 rows.
With A, k 2 rows.
With H, k 1 row.
Next row With H, k6, [k2tog, k1, skpo, k10] 6 times, k2tog, k1, skpo, k5. 92 sts.
With A, k 2 rows.
With F, k 1 row.
Next row With F, k5, [k2tog, k1, skpo, k8] 6 times, k2tog, k1, skpo, k4. 78 sts.
With A, k 2 rows.
With D, k 1 row.
Next row With D, k4, [k2tog, k1, skpo, k6] 6 times, k2tog, k1, skpo, k3. 64 sts.
With A, k 2 rows.
With B, k 1 row.
Next row With B, k3, [k2tog, k1, skpo, k4] 6 times, k2tog, k1, skpo, k2. 50 sts.
With A, k 2 rows.
With C, k 1 row.
Next row With C, k2, [k2tog, k1, skpo, k2] 6 times, k2tog, k1, skpo, k1. 36 sts.
With A, k 2 rows.
With E, k 1 row.
Next row K1, [k2tog, k1, skpo] 6 times, k2tog k1, skpo. 22 sts.
With A, k 1 row.
Next row With A, k1, [k3tog] 7 times. 8 sts.
Break yarn, thread through rem sts, pull up and secure.
Join seam.
Make a pompon 5cm/2in in diameter from remaining yarn and sew to top of beret. Attach a length of shirring elastic to the beret to keep in place on your dog’s head.
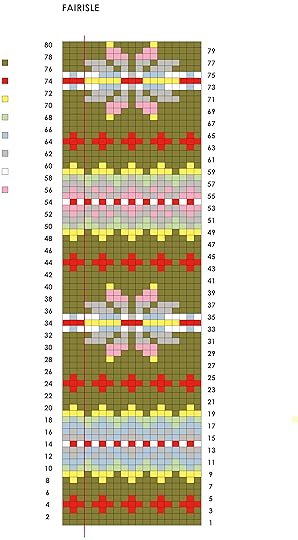 CHART NOTES
When working from this chart, work all odd-numbered right side rows from right to left in knit stitch and work all even-numbered wrong side rows from left to right in purl stitch; when knitting from this chart, work the stitches in either yarn A, B, C, D, E, F, G or H as appropriate. This colour motif is worked using the stranding method. Carry the yarn not in use across the wrong side of the work, weaving in where it crosses more than 3 sts.
♥ – ♥ – ♥
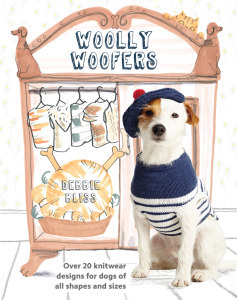
This fabulous design is an exclusive extract from Woolly Woofers by Debbie Bliss (Quadrille, £14.99) Photography: Richard Burns / Illustration: Jo Clark On sale now and readers of Made Peachy can get a copy of this awesome new book Woolly Woofers at the special price of £9.99 (normally £14.99), with free p&p. To order, please call direct on 01256 302699 quoting reference BK5 and your credit card details.
The post Fair Isle Furbaby Jacket- Woolly Woofers by Debbie Bliss appeared first on Made Peachy.
September 10, 2014
Guest Post: Debbie Bliss
We all know that my little hound, Waffle is the love of my life. So, when Debbie Bliss’s new book Woolly Woofers, with over 20 knitwear designs for dogs of all shapes and sizes, arrived here at PeachyHQ I did a happy dance. The kind that involved dashing about for yarn and trying to get the dog to stay still long enough to take his measurements!
Debbie Bliss is renowned the world over for her fabulous and contemporary knitwear designs – with garments and accessories for babies, women, men, children and now dogs. I adore the fun designs in this book, with not only a range of styles to suit a whole host of different breeds and sizes of dogs, but with a wide range of different techniques that are sure to tempt you to work on something adorable for your little pup!
I couldn’t wait to catch up with Debbie and find out a little more about the cretion of this fantastic book, so with out further ado, guest posting today is the wonderful Debbie Bliss talking about her new book Woolly Woofers!
♥ – ♥ – ♥
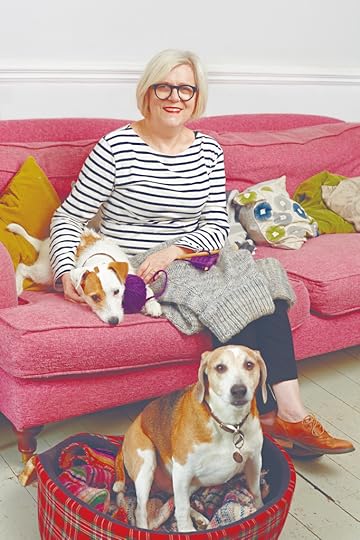 It is really difficult to continually find fresh inspiration but now I have my daughter Nell and assistant Teresa working in the studio with me so there is a lot of brain storming going on.They have now formed a design team of their own called Conway and Bliss. It is good to have input from the younger generation in order to keep ideas fresh.My editor at Quadrille, Lisa Pendreigh, is as dog mad as I am so we tend to spend a lot of time looking at pictures of puppies. It seemed a good idea to combine my love of dogs and knitting and produce a book of dog knits. We have two dogs Monty the Beagle and Smiffy, the Parsons Jack Russell. Smiffy is on the cover of the book, proudly wearing a Breton striped top and a beret. Well, I was proud, he was possible humiliated! Monty couldn’t model as he had had a operation on his legs but he would probably have been rubbish anyway!
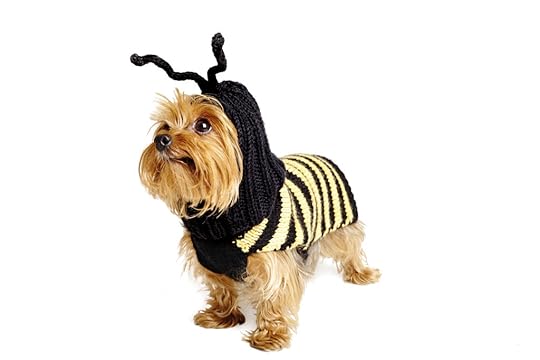 My favourite part of working on this book was the photography shoot. I felt huge relief that they fitted all the different sizes and breeds but also I don’t think I have ever laughed so much on a shoot. Some of the dogs looked adorable, others obviously loved all the attention they were getting, all the owners looked very proud apart from me as Smiffy has the attention span of a flea.
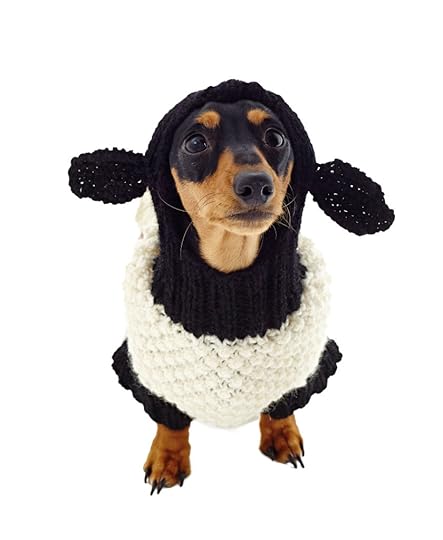 If you have a passion for knitwear design, be sure to check out sites like Ravelry anyone one can put up their own designs and get feedback, with custom made designs under you belt it would be good if you can create your own dedicated website.
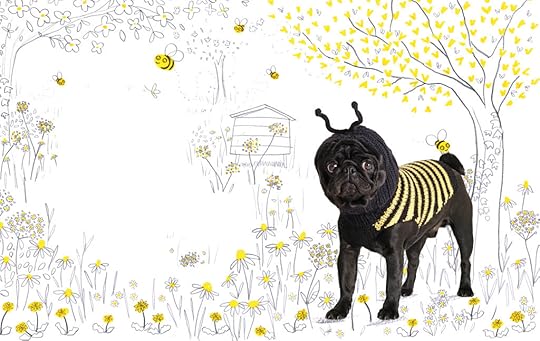
♥ – ♥ – ♥
Woolly Woofers by Debbie Bliss (Quadrille, £14.99) Photography: Richard Burns / Illustration: Jo Clark On sale now and readers of Made Peachy can get a copy of this fantastic new book Woolly Woofers at the special price of £9.99 (normally £14.99), with free p&p. To order, please call direct on 01256 302699 quoting reference BK5 and your credit card details.
Pssst! Be sure to check back tomorrow for an exclusive design from the book, just for you!
The post Guest Post: Debbie Bliss appeared first on Made Peachy.
September 9, 2014
Pinterest: What They Did With…Sharpies
Sharpie markers are a stationery staple in my world. They are my go-to for the functional tasks in my workday like addressing packages, making To Do Lists and drawing out patterns. They are also my top choice for some of my favourite creative daily activities like doodling, journaling and lettering!
There is nothing that this humble marker pen can’t do – or so it seem judging by all the awesome makes I spotted on Pinterest! So, check out just a few of this rad ideas for a little Sharpie Inspiration over on Pinterest!
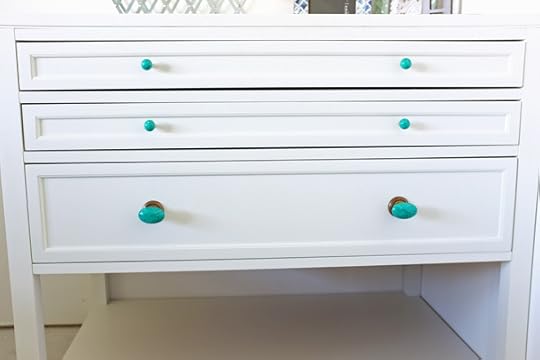 1 Faux Malachite Knobs ⇒ TealandLime
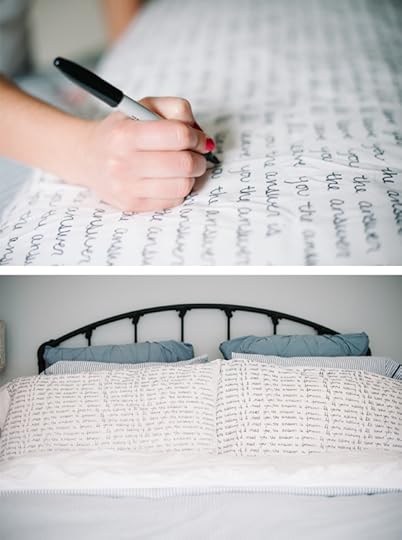 2 Script Bed Linen ⇒ A Subtle Revelry
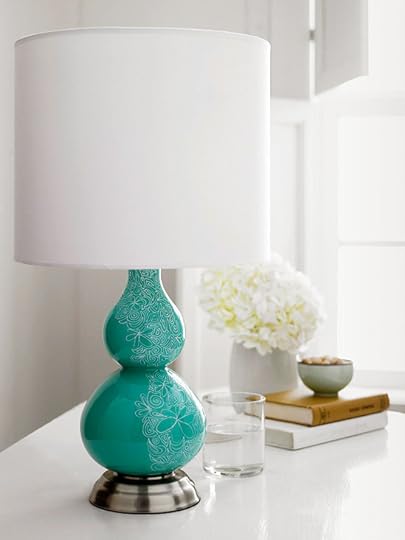 3 Doodle Accent Lamp ⇒ Better Homes and Gardens
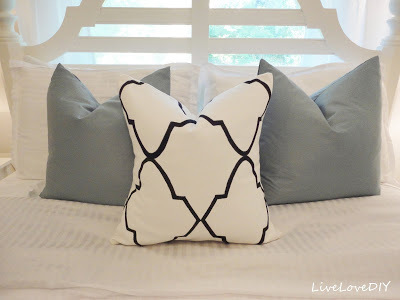 4 Stencil Pillow ⇒ Live Love DIY
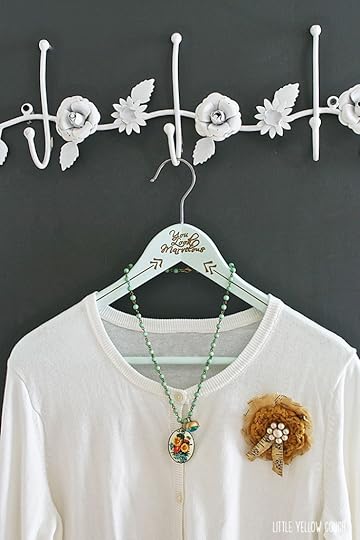 5 Metallic Hanger Makeover ⇒ Little Yellow Couch
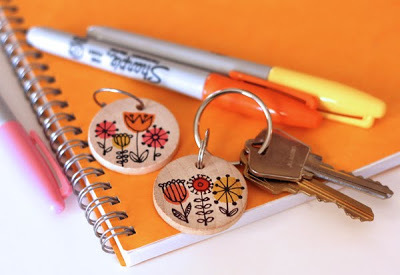 6 Wooden Key Fobs ⇒ How About Orange
This is only the tip of the iceberg when it comes to creative ideas with a Sharpie marker, but it is all the justification I need to continue with my ever-growing collection of markers and pens! What is your fave Sharpie project?
Do you love Pinterest too? Be sure to swing in and all the things I’m pinning right now!
The post Pinterest: What They Did With…Sharpies appeared first on Made Peachy.
September 8, 2014
Treat Time: Cocoa Runners & Discount Code!
It’s beginning to feel a lot like autumn. Yes, I love the summer as much as the next girl, all those extra freckles and gallons of iced tea. But, I also adore autumn and it is really starting to feel as though the new season is on its way. Autumn is for crisp morning dog walks, its about pumpkin spice lattes and, as the evenings start to draw in, curling up with a good book and a little tasty treat!
When it comes to chocolate my answer is always a resounding Yes. Love it, can’t get enough of the stuff. I prefer rich milk chocolates over super sweet white to sometimes-bitter darks, but all-in-all I’m an equal opportunity chocolate lover.
So, when the amazing folks over at Cocoa Runners asked if I might fancy one of their boxes of award winning chocolate selections carefully collected from around the globe, I politely declined. Kidding. Of course, I said, ‘yes, please! Thank you very much! I love you!”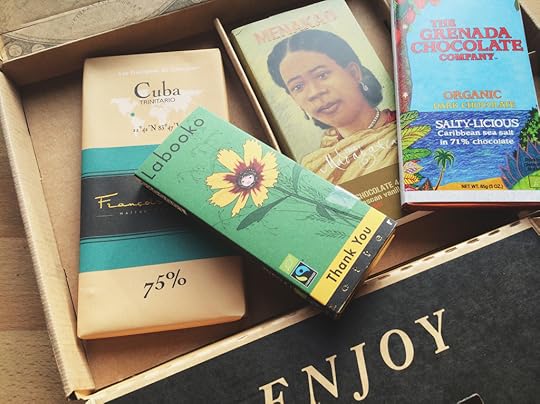 Who are Cocoa Runners? Well my friends, it is chocolate heaven, pure and simple. Remember way way back when we used to just order a coffee? Not a latte, not a double macchiato, not a skinny mocha – just a coffee. At first we all thought it was a bit bonkers, ordering a coffee should be just ordering a coffee, right? No, now we order the exact type of coffee that we like, that suit our particular mood or our taste. Basically, ask any barista, coffee is not just coffee.
Can you see where I’m going with this? In exactly the same way, chocolate is not just chocolate. What we have come to know as one of the simplest and most favoured confections, actually has a rich heritage, a wealth of different origins and countless artisan created recipes. The folks at Cocoa Runners aim to bring the world of fine chocolates right to you. Literally, delivered right to you!
 There is something about opening a package and instantly smelling the rich, heart warming aromas of chocolate! Trust me, you’ll have already fallen in love with the selection before you have even uncovered the bars.
 Each box comes with tasting notes, to help you get the best from the selection, to take you on a journey of flavours – think elegant sampling over out-and-out guzzling when it comes to these fine chocolate bars!
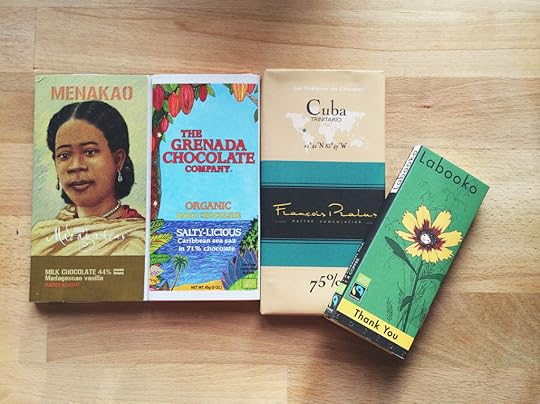
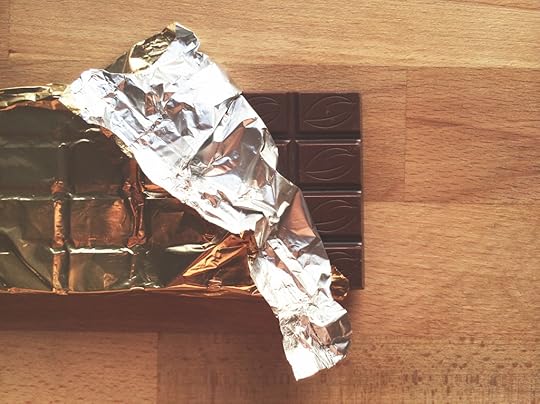 So, really all you want to know is are they as good as they look? This isn’t your common-or-garden chocolate selection box, nope this is an array of chocolates from around the world carefully curated to take you on a taste experience. With this collection including flavours like Madagascan vanilla, coffee, caramel, orange and Caribbean sea salt – it was clear right from the start that this was going to win my heart! If this is how autumn is going to taste, then I say autumn starts today!
♥ – ♥ – ♥
Cocoa Runners not only offer scrumptious Gift Boxes of selected fine chocolates, starting from £14.95, you can refine your chocolate appreciation with a 3 Month Taster Course – £44.85 – or, even join the Chocolate Club – from £14.95 per month – to have the finest quality artisan chocolates delivered to your door each and every month!
How about a little treat for all you lovely Made Peachy readers? Use the code MADEPEACHY at the check out to get an exclusive £5 discount on your first subscription or £5 discount on a gift box over £15! Enjoy!
The post Treat Time: Cocoa Runners & Discount Code! appeared first on Made Peachy.


