
Laura Strutt's Blog, page 24
August 13, 2014
DIY Twined Tidies by Elyse Major from Tinkered Treasures
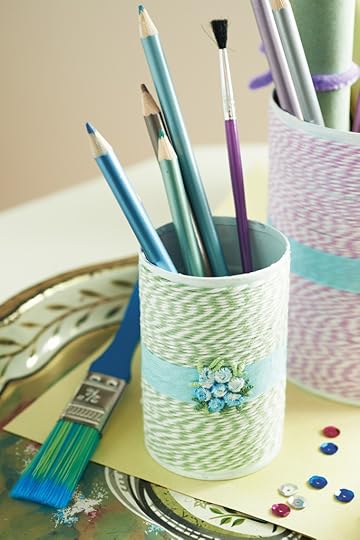
Brighten and organise any room by spinning simple tin cans into shanty-chic caddies designed by Elyse Major from Tinkered Treasures. Wrap cans in baker’s twine in a plethora of summery shades, from sunset to citrus to salt water taffy, and further embellish with ribbon and rosebuds. Make and group tidies in related shades to keep supplies cheerfully within reach.

 Grab your supplies…
Striped baker’s twine
Short length of seam (bias) binding or ribbon
Rosebud appliqué or other embellishment
Small hammer
Paint or spray paint (optional)
Paintbrush (optional)
Craft glue
1 Prepare the cans by removing labels and washing them thoroughly. Allow the cans to dry completely both inside and out to avoid any rusting later, which would spoil your work. Carefully tap down any jagged edges at the open top of the can with a small hammer.
2 Paint the can using a craft paint meant for metal, latex paint, or spray paint. Apply as many coats of paint as desired, allowing the can to dry thoroughly between each coat. Painting the bottom and inside of the can is also optional.
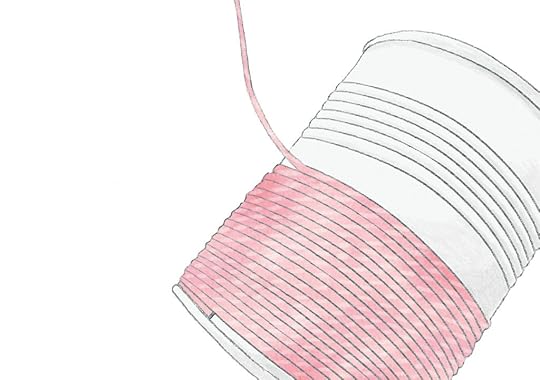 3 Dab a bit of glue onto a small section of the twine and, starting from either the top or the bottom, carefully wrap the twine around the can, holding the glued end in place with your thumb to secure. Keep wrapping the twine tightly round the can—occasionally you might need to push the forming bands closer together and even unwrap and re-wrap a bit until the pattern suits you.
 4 When you reach the other end of the can trim the twine and secure the end with another dab of glue. You can conceal the glue by rubbing it gently in the direction of the twine.
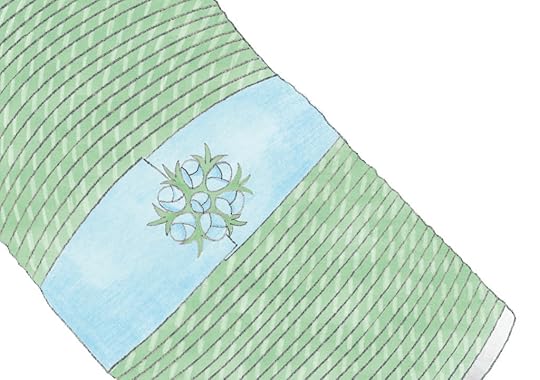 5 Measure around the can and cut a length of seam (bias) binding or ribbon to fit; secure with craft glue. Add another dab of glue and stick on a rosebud appliqué or other embellishment.
Quick Tip!
To help wrap the cans evenly, set up a small barrier, such as a book, to hold the spool in place so that as you pull the twine it stays taut. Why not try this technique to add texture and colour to other barrel shaped objects, such as bottles and jars?
♥ – ♥ – ♥
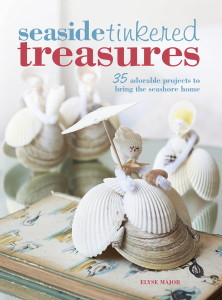
This adorable rustic recycled project is just one of the 35 fabulous makes in Elyse Major‘s new book Seaside Tinkered Treasures – £12.99, CICO Books
The post DIY Twined Tidies by Elyse Major from Tinkered Treasures appeared first on Made Peachy.


DIY Twined Tidies by Elyse Major from Tinker Treasures
Brighten and organise any room by spinning simple tin cans into shanty-chic caddies designed by Elyse Major from Tinkered Treasures. Wrap cans in baker’s twine in a plethora of summery shades, from sunset to citrus to salt water taffy, and further embellish with ribbon and rosebuds. Make and group tidies in related shades to keep supplies cheerfully within reach.
Grab your supplies…
Striped baker’s twine
Short length of seam (bias) binding or ribbon
Rosebud appliqué or other embellishment
Small hammer
Paint or spray paint (optional)
Paintbrush (optional)
Craft glue
1 Prepare the cans by removing labels and washing them thoroughly. Allow the cans to dry completely both inside and out to avoid any rusting later, which would spoil your work. Carefully tap down any jagged edges at the open top of the can with a small hammer.
2 Paint the can using a craft paint meant for metal, latex paint, or spray paint. Apply as many coats of paint as desired, allowing the can to dry thoroughly between each coat. Painting the bottom and inside of the can is also optional.
3 Dab a bit of glue onto a small section of the twine and, starting from either the top or the bottom, carefully wrap the twine around the can, holding the glued end in place with your thumb to secure. Keep wrapping the twine tightly round the can—occasionally you might need to push the forming bands closer together and even unwrap and re-wrap a bit until the pattern suits you.
4 When you reach the other end of the can trim the twine and secure the end with another dab of glue. You can conceal the glue by rubbing it gently in the direction of the twine.
5 Measure around the can and cut a length of seam (bias) binding or ribbon to fit; secure with craft glue. Add another dab of glue and stick on a rosebud appliqué or other embellishment.
Quick Tip!
To help wrap the cans evenly, set up a small barrier, such as a book, to hold the spool in place so that as you pull the twine it stays taut. Why not try this technique to add texture and colour to other barrel shaped objects, such as bottles and jars?
♥ – ♥ – ♥
This adorable rustic recycled project is just one of the 35 fabulous makes in Elyse Major‘s new book Seaside Tinkered Treasures – £12.99, CICO Books
The post DIY Twined Tidies by Elyse Major from Tinker Treasures appeared first on Made Peachy.
August 12, 2014
Pinterest: What They Did With Loom Bands
Loom band bracelets are big news – mainly because they are fun to make and you can create really rad designs, but also because they are highly addictive! Seriously once you get started you wont want to stop!
In fact, some of the designs and style that folks over on Pinterest are making are just so rad – here are some of my favourites!
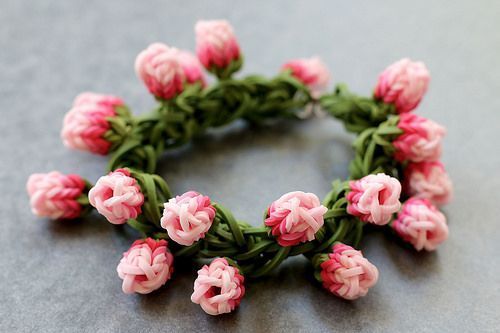 1 Rose Bud Loom Band Bracelet ⇒ Yarn Journey
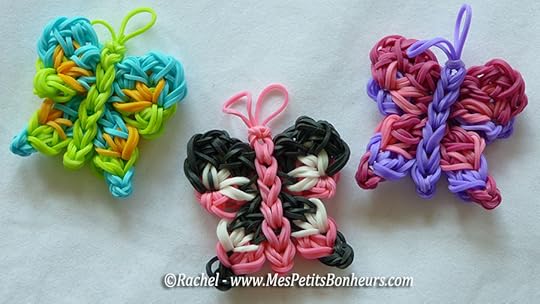 2 Loom Band Butterfly Charms ⇒ Mes Petits Bonheurs
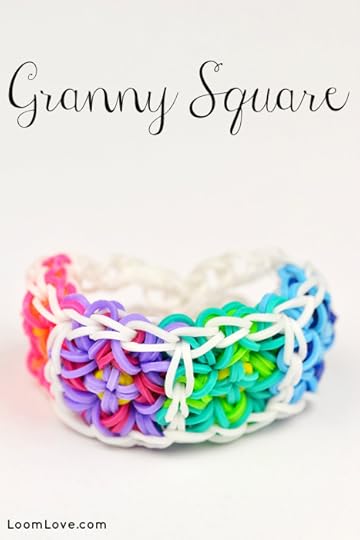 3 Granny Square Loom Band Bracelet ⇒ Loom Love
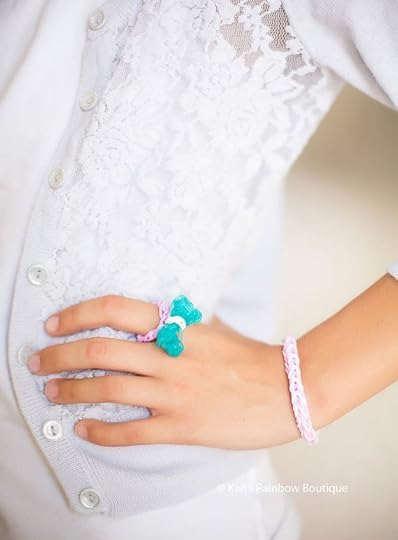 4 Loom Band Bow Ring ⇒ KaitsRainbowBoutique
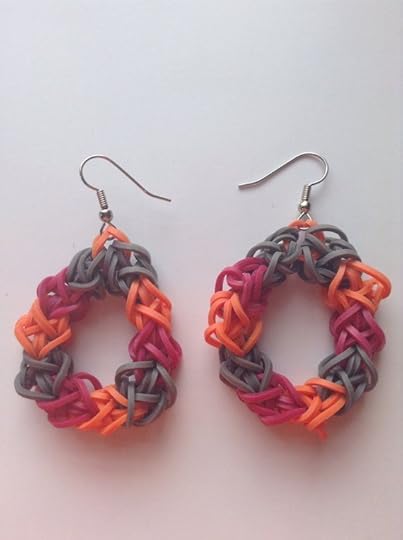 5 Loom Band Hoop Earings ⇒ Cutie Pie Bracelet
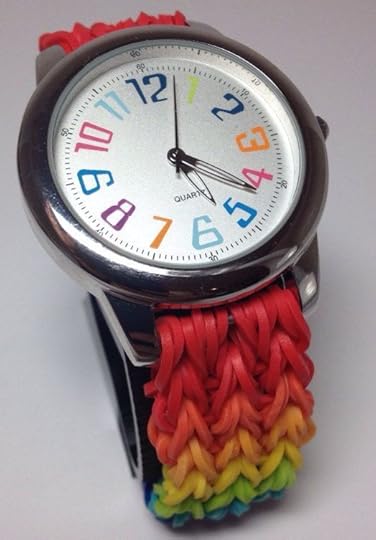 6 Loom Band Wrist Watch ⇒ JJJCrafts
If you’ve not made your own loom band then you will need to check out my super quick and easy guide to getting started making your own rubber band loom bracelet!
Looking for more fresh ideas for Loom Bands?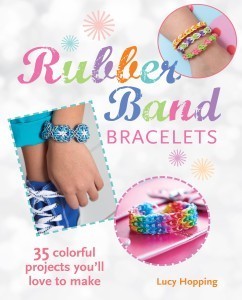 Be sure to check out the new book Rubber Band Bracelets by Lucy Hopping, £9.99, CICO Books for 35 awesome designs to try!
Are you a fellow Pinterest Addict? Be sure to swing in and see what else I’m pinning right now!
The post Pinterest: What They Did With Loom Bands appeared first on Made Peachy.
August 11, 2014
Tried & Tested: The Clover Pom Pom Maker
Pom poms are rad- that’s a fact! I recently shared a selection of amazing makes found on Pinterest featuring these little yarn delights and now, I have to make some for some projects of my very own!
Here’s a little known fact about me. I can’t make pom poms. I know. I’m a grown woman, who runs a business, manages a home, I can sew, bake, knit and generally considers myself to be a fabulously functioning adult. Yet, the pom pom is my nemesis.
Yes! I know the principle, cutting circles of card, neatly wrapping the yarn, snipping and tying tight. Yet my results are always rather lacking. At worst I have a carpet covered with itty bits of useless shippings of yarn and at best I have a very feeble, wilted looking pom pom. Well, friends, not any more. Puffy voluminous pom poms are now well within my grasp!
If, like me, your pom pom attempts always leave you feeling a little deflated, or your project or make requires a vast quantities of these little woolly wonders then the folks at Clover have the perfect solution for you! Friends, I give you The Clover Pom Pom Maker! You might not be sure what all the fuss is about, so I’ve Tried & Tested The Clover Pom Pom Maker to show you that the perfect pom pom is quick & easy…even for a pom pom failure like myself!
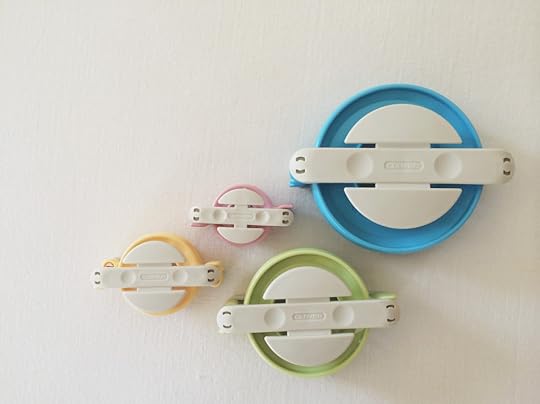 The Clover Pom Pom maker comes in a range of different sizes, meaning that you can create thiese woolly accents in any size you need to suit your project!
Using them couldn’t be simpler, ball of yarn to puffy pom pom in under 5 minutes flat – check this out!
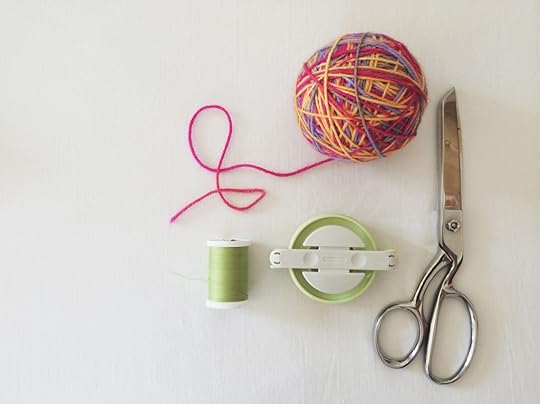 Grab your supplies…
Clover Pom Pom Maker in chosen size
Ball of yarn
Scissors
Cotton or waste yarn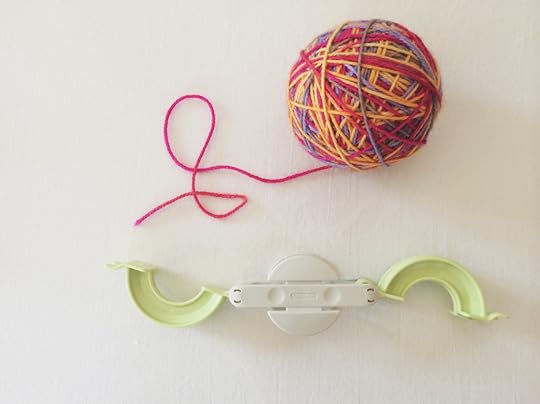 Begin by opening up the hinged sections of the Clover Pom Pom Maker – this will create two half moon shapes at either side.
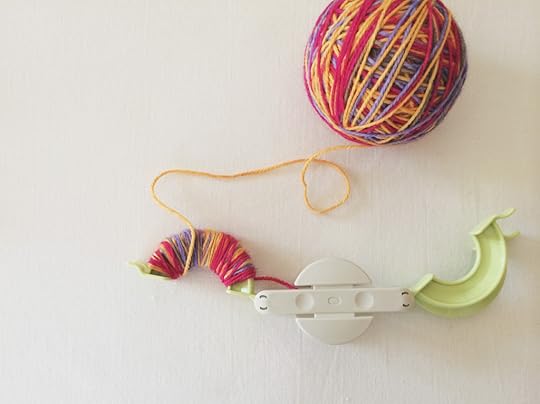 With these moved outwards away from the centre you can get wrapping the yarn…with ease! You don’t have to try and navigate around a cardboard shape, you can simply wrap, wrap, wrap! And, once you’ve finished wrapping one side, you just move on to the second side and wrap that in just the same way.
 When both of the side have been wrapped, fold the hinged sections back in towards the centre. As with any pom pom, the more you wrap the yarn the more puffy and voluminous the finished pom pom will be – this is why the Clover Pom Pom Maker is ace – you can keep on wrapping to your hearts content, it never gets tricky and you can fold the side in and check your progress…so you can always open it up and add even more yarn if you feel it needs to be even more woolly!
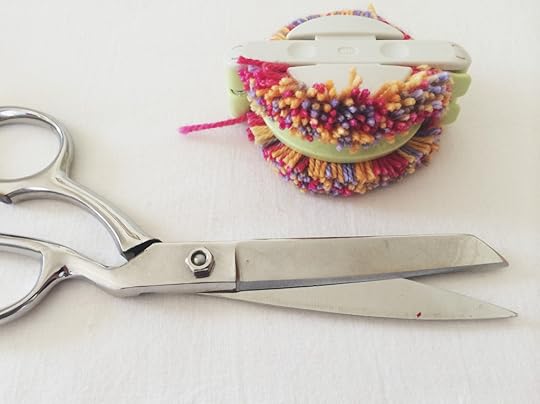 Now to the snipping part, my prior experiences with making pom poms usually end badly from this point! With the two sides of the Pom Pom Maker folded in a neat guide is create along which to slide the tips of your scissors to cut the yarn.
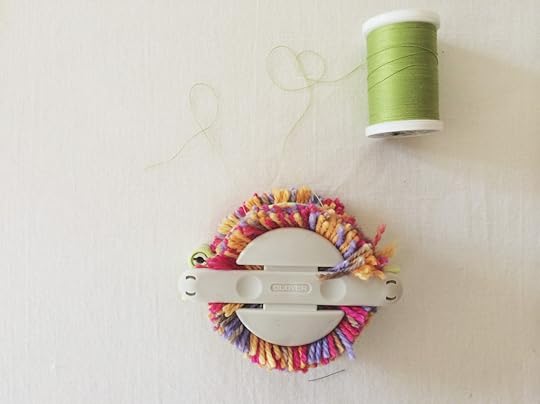 Once the yarn has all been cut the Pom Pom maker holds it all securely in place allowing you to wrap a length of cotton or waste yarn tightly around the centre of the snipped strands…without the pom pom falling apart into a hopeless bundle of fluff!
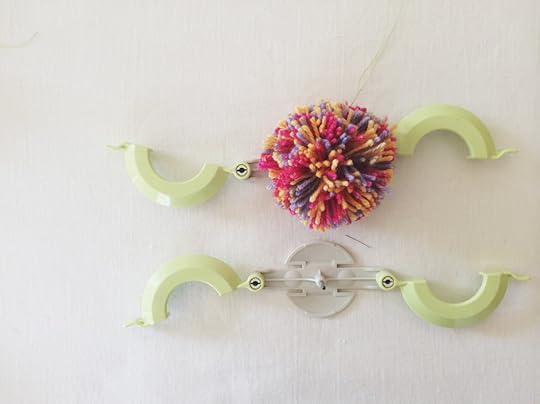 Once snipped and tied your pom pom is ready to be release into the wild. And, that’s easy too! The centre part of the Pom Pom Maker can be easy pulled apart – so no more wrestling with bits of cardboard, trying not to rip them and trying not to pull the pom pom apart in your efforts.
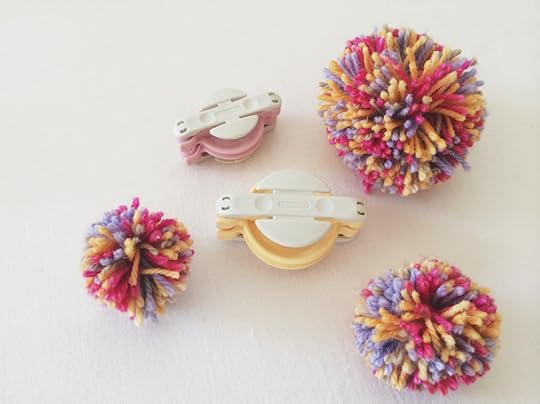 Then when your done and your pom pom is free, you just clip the two parts back together and it’s ready to use again…and again…and again!
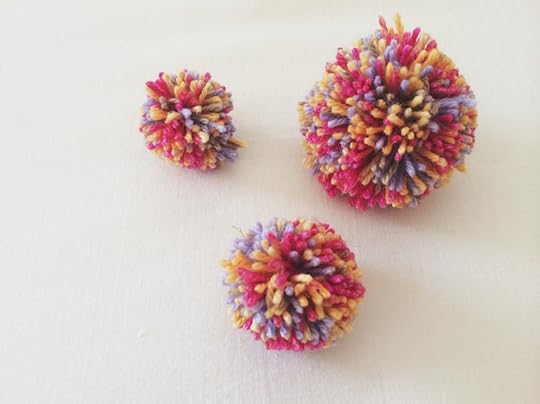 My very favourite thing about the Clover Pom Pom Maker is not only that it makes the perfect pom pom every time, but that you can make pom poms in a whole host of different sizes. Now, is there anything more cute that a cluster of these woolly wonders?
♥ – ♥ – ♥
Clover Pom-Pom Maker RRP£ 6.60 available in a range of sizes including Large (65 & 85mm), Small (35 & 45mm) and Extra Small (20 & 25mm).
Clover products are available nationwide from all good craft, knitting and hobby shops. For stockist information, contact Clover clover@stockistenquiries.co.uk or call 01453 883581.
The post Tried & Tested: The Clover Pom Pom Maker appeared first on Made Peachy.
August 10, 2014
The Week That Was: The Festival of Quilts 2014
Holy Quilts Batman!
For the last week I have been living the dream at the Festival of Quilts at the NEC. If you have any interests in fabric, quilts, stitching, art or crafts in general, you will appreciate just how exciting this is. I mean, I have literally been surrounded by some of the most talented quilters and stitchers the world over – it doesn’t get much better than that! 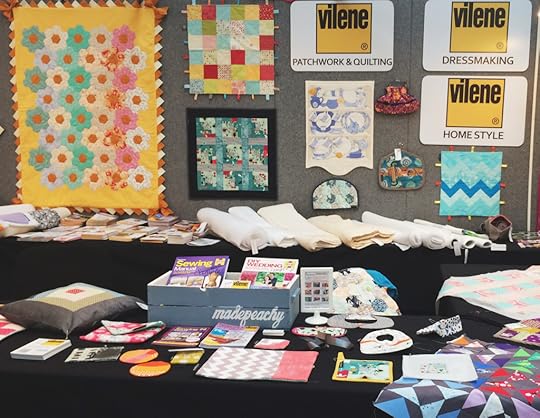 For the most part I have been demonstrating some clever quilting techniques on the Vilene stand – sharing a few quick tips, answering some stitching questions and generally chatting about all things handmade with a collection of the most enthusiastic folks I have ever met at a stitching show! Seriously, this was one rad crowd!
One of the things that people were most interested in was a clever technique for foundation piecing using Quickscreen Square – which I’ve used to stitch flying geese blocks and for making super neat log cabin blocks. One of the best things about sharing and demonstrating this stitching style means that I now have a super cute mini quilt top ready to finish up – not bad going for a week of demonstrating, huh?!
Also – let’s just take a moment to appreciate how rad these cute Retro Orchard prints by Wendy Kendall for Dashwood Studio are!
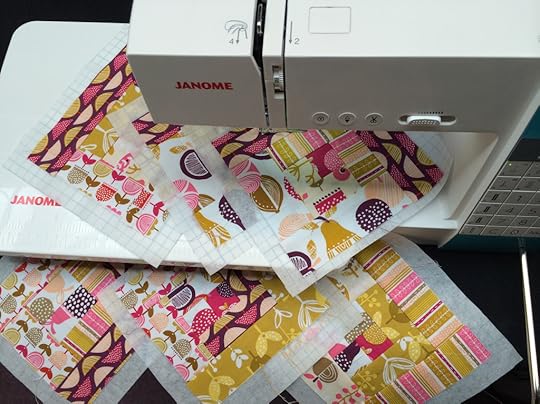 This also meant that I got to spend some quality time with the Janome DSK100 - this is billed as being one of the easiest to use machines that Janome have ever produced, and I have to admit, this is a total dream to stitch with! While I’m really not in the market for a new machine, this one could could quite easily turn a girls head!
Working on a stand at the show does (sadly) mean that it is a little tricky to get out and about and enjoy the show – but I did make a real priority of checking out the Contemporary Quilts – by far my favourite section of the quits on show – and trust me, these didn’t disappoint! I have a huge crush on the bold dramatic combinations of shape and colour that are synonymous with modern quilts and this design named Guantanamo created by Louise Donovan was one that I couldn’t help but return to look at again and again!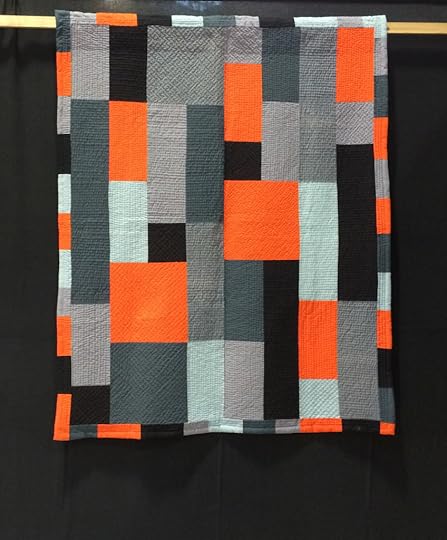 There were so many amazing quilts to enjoy that picking out a favourite is almost impossible – but for me this was certainly a highlight of the show. Closely followed by these extremely fun and clever creations…
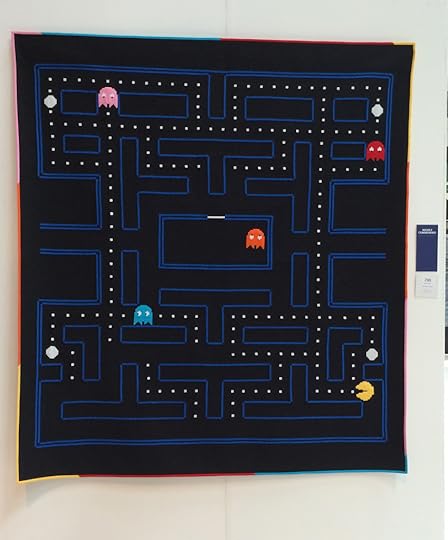 Binky Pinky Inky Clyde by Zsuzui Bettison in the My First Quilt Category
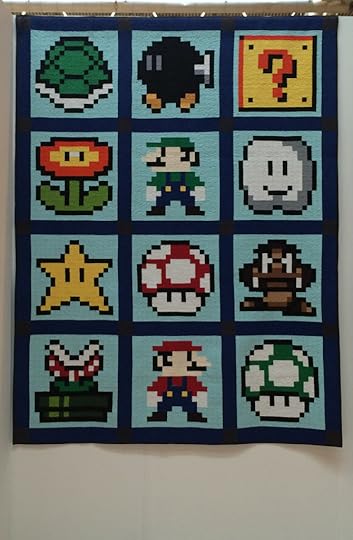 Mario Madness by Joanna Hobson in the Art Quilts Category
It’s been an amazing week – I’ve caught up with lots of lovely friends, made heaps of new friends, and now I feel pretty inspired to get back behind the sewing machine and work on some exciting new projects and some fun new makes.
Did you head over to FOQ this year – what was your favourite part of the show?
The post The Week That Was: The Festival of Quilts 2014 appeared first on Made Peachy.
August 9, 2014
Style Sunday: Graphic Print Shift Dress
The shift dress is a wardrobe classic – I love to see that it is making another appearance on the high street and this time it is making the most of bold graphic prints to really make the most of the simple elegant shaping.
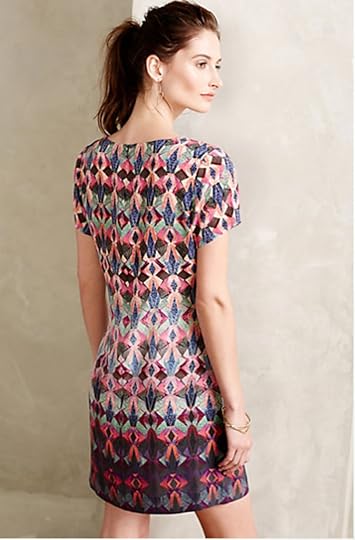 I can’t get enough of this Kaleidoscope Shift dress £148 from Anthropologie - but, you know that the shaping of the shift dress is one of the easiest designs to master, even for novice dressmakers, right? So, I see this as the perfect opportunity to hone those frock making skills and to get on this graphic print style wagon and right it all the way to fashionista town! Check out this Style Sunday Graphic Print Shift Dress Moodboard…
 The Pattern
McCalls 6465, sizes 8 -24, £8.25, SewDirect
This loose fitting, pullover dress features bust darting for shaping – select design B (omitting the contrast colour block panel on the lower hemline) to re-create this stunning shift dress.
The Fabrics
1 Purple Geometric Print, £6.50 per metre, CroftMill
2 Royal & Lime Zig Zag, £7.50 per metre, DittoFabrics
3 Blue Shard Print, £14.50 per meter, TruroFabrics
4 Keysasri Monochrome, £18.95 per metre, MyFabrics
I have to confess, it has been a while since I stitched myself something lovely to wear – and this shift is surely on the top of my Must Make List!
The post Style Sunday: Graphic Print Shift Dress appeared first on Made Peachy.
August 8, 2014
Annie Sloan Paints: Klee-coloured Chest of Drawers with Dots
For those that follow my Instagram you’ll knw that I have been working on a couple of renovation projects in recent weeks, many of which have included Annie Sloan Paint. I was quick to become a convert to this amazing (and most importantly, idiot-proof paint!) and wanted to share a few other ideas from Annie Sloan to give you a little inspiration to add to your homes – so, here is the first in a three part inspiration series from Annie Sloan – Klee-coloured Chest of Drawers with Dots!
Following a recent visit to an exhibition of the work of Paul Klee – German water colourist, painter and etcher of fantastic works, mostly small in scale; one of the most inventive artists of the 20th century, Annie Sloan was inspired to paint a Klee-coloured Chest of Drawers.
“What can I say about avant garde artist Paul Klee except he really knocks my socks off! I’d forgotten how much he has influenced me until a recent visit to the Making Visible Exhibition at Tate Modern, on London’s South Bank,” says Annie Sloan, “So, seeing the Klee show spurred to me to produce new pieces and to think about the nature of colour. So, what is the key to Klee? To my mind Klee was a great colourist and colour has always made a huge impact on me. He was a very measured artist, very thorough – though when you first see his work you think he is (oddly) lyrical and light, and quite slight. In fact when he gets into something he’ll do it again and again really understanding it. He’s actually quite a mathematical artist, which I really appreciate as I love the mix of art and science.
 The watercolour that impacted the most for me was Polyphony (1932) and on seeing it I knew I had to get home and work something up from this. In this work, he creates layers and layers of colour using a pattern of squares overlaid with different coloured dots. It’s all about how colours are affected by the colours underneath them…how colour works and I’m tremendously interested in that. This piece made me think I want to do something like that, so I went to work when I got back to the studio.”
 Here’s how to do it yourself, at home…
1 Find a fairly modern chest of drawers to upcycle.
2 Paint the entire chest with Chalk Paint™ Decorative Paint by Annie Sloan in Paris Grey to provide a good neutral background.
3 Rip off large flaps from cardboard boxes and paint onto them. Annie used a limited number of colours from the Chalk Paint™ range to keep the effect similar in tone.
4 Press the cardboard squares onto the cabinet to give a slightly uneven effect.
5 When the entire area is covered, roughly apply the same colours onto some bubble wrap.
6 Finally press the ‘tips’ of the bubble wrap onto the surface of the chest of drawers to create the dot effects.

♥ – ♥ – ♥
Chalk Paint™ Decorative Paint by Annie Sloan are £5.95 for 100ml tester pots and £18.95 per 1 litre pot. Available in over 30 historic, mixable, colours are available, which produce a beautiful, velvety matt finish that can be applied to numerous surfaces including wood, concrete, metal, glass, plastic, brick, stone and even fabric. Chalk Paint™ is the favourite choice for upcycling furniture as, due to its incredible unique sticking power, no priming or sanding is necessary – just paint over existing surfaces to create great, durable, results. Lead free and completely non-toxic Chalk Paint™ is naturally as low in VOCs as you can get and is virtually odour free – making it ideal for those who are sensitive to traditional paints.
Annie Sloan Soft Wax is available in Clear and Dark, priced at £7.95 for 500ml tins and Clear Wax is also available in an extra value 5 litre tin at £58.95.
To read more about this project read Annie Sloan’s story The eye-catchy colours of Paul Klee on her blog - be sure to watch for the next in the Annie Sloan Furniture Painting Project Inspiration next week! You can find the entire range of Annie Sloan paints on her website or look for tutorials on YouTube!
Find Annie Sloan on Facebook, Twitter & Pinterest too!
The post Annie Sloan Paints: Klee-coloured Chest of Drawers with Dots appeared first on Made Peachy.
August 7, 2014
How to Sew Flying Geese Blocks with Vilene Quickscreen Square
Happy friday friends! Festival of Quilts is in full swing and one of the projects that has been really attracting attention is a quilt top that I have been working on featuring Flying Geese blocks – so I thought that I’d share a tutorial for y’all for Sewing Flying Geese Blocks With Vilene Quickscreen Square!
The Flying Geese motif is a simple and highly dramatic quoting block. There are so many different variations and designs that can be created from these stunning blocks. Due to the nature of those blocks precision is key to ensuring that the elements come together accurately to give the crisp sharp points of the corners and points of the placed triangles.
Many quilters will turn to paper piecing to achieve this super neat finish to their blocks. Here’s where things get a bit clever folks! Switching out the paper for Vilene Quickscreen Square, offers a neat and precise grid to follow when you are stitching – you can mark out your lines or simply follow the guides for the placement of the stitches. because Vilene Quickscreen Square doesn’t warp, shrink or fray, you don’t have to remove it from the finished project – one less thing to worry about! So, without further ado, here’s how to create perfectly neat Flying Geese Blocks!
 Grab your supplies…
Selection of fabrics – I have worked with a background fabric, and a selection of prints and plain cottons for the geese
Vilene Quickscreen square
Fabric marker & Ruler Trim the Vilene Quickscreen Square to create the books for the foundation piecing. Here I have cut the Quickscreen Square into 12cm x 12cm (following the grid) blocks.
 Using the grid lines as a guide, mark out the stitching lines as shown here, for the flying geese. These are created by first marking out the border one grid box in from the cut edge of the Quickscreen Square the entire way around the edge. Next mark out the centre line that intersects that marked out box. From this line, mark out the upper and lower triangles, using the grid to place them centrally and evenly with in the upper and lower marked sections. To help with the placement of the fabrics the letter A indicated the placement of the Geese fabrics (plain and prints) and the Letter B indicated the placement of the background colour.
 The flying geese motive when pieced in this fashion can be worked with scraps of fabrics, here however, in order to get the most from the fabrics I have cut the background fabrics to half square triangles measure 5in along the longer side (Triangle B) and fabrics for the geese to half square triangles that measure 6 3/4in along the longer side (Triangle A). Each pre-cut block of Vilene Quickscreen Square will require two x Triangle A and four x Triangle B.
 Once the pieces are cut you can begin to sew them together to create the Flying Geese design. Place the first Triangle A onto the Quickscreen Square following the marked out guide.
 The second piece to be added is Triangle B – aligning the raw edges with the right sides facing.
 Turn the block over and using the guides on the back of the Quickscreen Square, sew the first two pieces into place with a straight machine stitch. When pressed open on the right side the first of side of the lower geese section is complete.
 Working in the same manner, align the second Triangle B onto the second side of Triangle A and using the guides on the back of the square stitch in place with a straight machine stitch.
 Pressing open on the right side will reveal the completed, neat lower section of the block!
 The upper section is worked in much the same way, the first part that needs to be secured is the second Triangle A which will form the second part of the geese motif. Place the second Triangle A on to the lower section with the right sides facing, the long straight edge will align with the centre line marked out on the back of the block.
 Once secured in place the piece can be pressed out on the right side and the remaining sections can be aligned and stitched. Working in the same order, position one of the remaining Triangle B pieces onto the upper section and using the guide on the back of the block secure in place with a straight machine stitch.
 Press open on the right side before securing and stitching the final remaining piece to the block.
 Press the block neatly and using the rotary cutter, ruler and mat neatly trim up to neaten – the you can create more in the exact same way and stitch together to create your own designs!
 There are so many rad ways to use these blocks – work them in vertical or horizontal lines, create you own designs using them. I love this striking motif and can’t wait to work this up into a finished quilt!
♥ – ♥ – ♥
Quickscreen Square, Vilene For stockist contact: 01453 883581 or crafts@stockestenquiries.co.uk
The fabrics featured in this tutorial are a range of prints from the Art Gallery Fabrics collection and a wonderful bundle of solids from Simply Solids!
The post How to Sew Flying Geese Blocks with Vilene Quickscreen Square appeared first on Made Peachy.
August 6, 2014
Guest Post: Helen Rogers from MisHelenEous
Selling your own hand crafted goodies is a dream for so many of us creative folks. Today, Helen Rogers creator of successful Etsy store MisHelenEous shares her journey!
♥ – ♥ – ♥
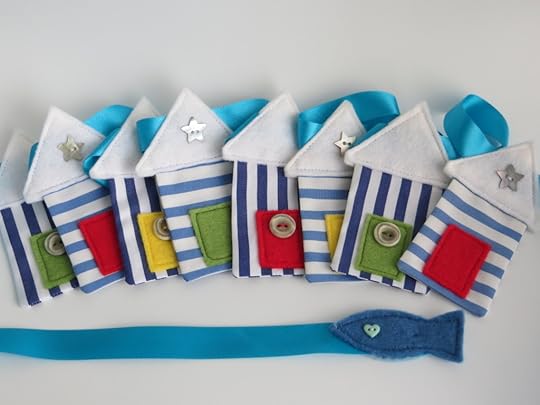
 My name is Helen Rogers and I make Handmade, Made In Britain gifts for you, your home and your dog. I am a multi-crafter with special interest in hand sewn felt, hand knitting and machine sewn products. I make a wide range of products and its that fact that gave me the idea for my business name, MisHelenEous (miscellaneous). I’m a Punny Business but not everyone gets it first time! I also undertake custom orders and have also completed several small trade orders to the pet product industry in this country. Mainly an online business I do attend Craft Fairs and Events in the Manchester area and am a member of the Manchester Craft Mafia I am also a proud member of the Made In Britain campaign 2014 which means I was approved to use the logo on my products and advertising.
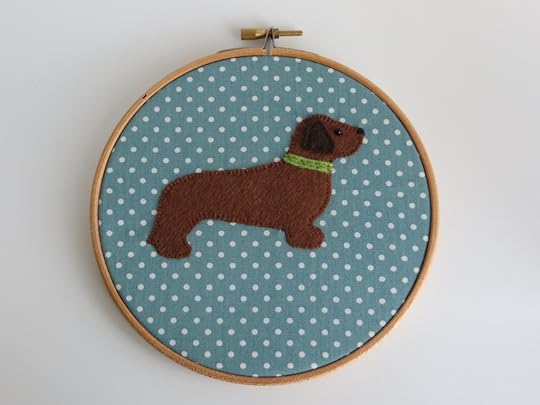 Although I don’t just make gifts for dogs or dog lovers I have to say that my main inspiration for my business is my own dog, Border Terrier Whiskey. She was born on St. Georges day and this was the perfect creative excuse for the Patriotic range of dog bandanas I make. She is also my part time model and work day companion as I work from home in Manchester. I became a self employed Designer Maker in June 2013 after years of serious long term illness meant holding down a conventional job was impossible. I graduated with a BA Hons Degree in Fine Art in 1995 but have always had crafty genes!
 Getting Stuck In!
The most challenging aspects for me so far have included, finding out the legal basics of becoming self employed and setting up an online business, learning many social media and IT skills that I didn’t have, to basic accounting and book keeping, time and energy management due to the on-going nature of my health problems, and discovering if you make a wide variety of different sized, shaped and weighted goods then the worldwide shipping rates will vary just as much! This is something everyone should do their homework on. But, the most rewarding aspects are the customers themselves. So far I’ve sent gifts to 18 different countries and talked to people from all over the world, which I’ve been marking on a map with pins! Often customers become friends as well, and I’ve even met some of them now and chat regularly to many others on social media. There are lovely supportive Crafty and Doggy Communities online which makes the isolation of working on your own from home non-existent.
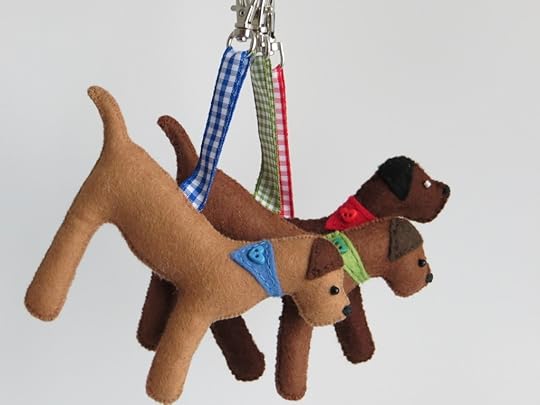 I get ideas from my surroundings and nature but a lot of my designs come about through customer requests. Many of my Dog Breed keyrings and the other accessories I’ve designed come about after someone has sent me a photograph of their dog. I can’t do every breed but the ones I’ve successfully completed get named after the dog they were created after and the owner gets a little mention in my Etsy Shop Listing for that item too. At the last count I think there are 23 breeds in my ‘Kennel’ now!
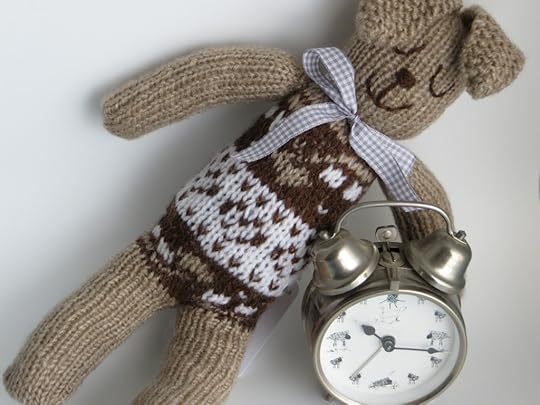 I also take custom orders from anywhere including Twitter and Instagram but mainly through my Etsy Store where people can click Request Custom Item and I build the order through Etsy Convos with the customer. Some of my favourite custom orders have been 40ft of Terrier Bunting for a Narrow Boat, Brazil Dog Bandanas for the Brazil World Cup, a sweet little heart cushion for a Yorkshire Terrier owner, a Welsh Terrier Duffle Bag and Christmas Stocking, and even a knitted Pug! Carrier bag holders are the latest thing now after one customer’s request has resulted in more orders for different breeds of dog. I love that I never know what I’ll get asked to make next!
Top Tips
I’ve only been doing it a year but in my case I had to set up quickly to get some income in. If you have more time consider your business theme, name, shop logo, style of photographs for product photography and postage rates, business stationery, gift wrapping etc – my own shop is undergoing photographic improvement at the moment as my family bought me a camera for my birthday, but I’ve had to use my phone till now. Despite that I was thrilled to be chosen to be one of the shops in the recent EtsyUK TV Advert but I couldn’t attend the filming day. Use social media, but don’t spread yourself too thin. I love Twitter and Instagram and they work for me, join Etsy teams, check the forums, learn from others and just do it, and have fun!
♥ – ♥ – ♥
With all those cute puppy designs it is no surprise that I’m a huge fan of Helen’s makes – be sure to go and check out her store to see the entire range or to request your own custom make!
Do you run an Etsy Store? Do you want to share your story? Be sure to get in touch, leave a comment with the details of your store below I’d love to showcase your unique handmade goodies too!
The post Guest Post: Helen Rogers from MisHelenEous appeared first on Made Peachy.
August 5, 2014
Pinterest: What They Did With Pom Poms
Adorable Statement Pom Pom Necklace DIY from Momtastic
It makes me more happy than I can tell you that one of my tasks for this week is to make a collection of pom poms! So, for me the days will be spent at the Festival of Quilts on stand M8 talking and demonstrating all things quilting for Vilene and my evenings will be curled up in a lovely guesthouse drinking tea, reading and making pom poms – what fun!
These fun yarn additions are for part of a project I’m working on – but it got me to wondering, what other ways to creative folks use these cute accents in their makes? So, I headed over to Pinterest and there are some amazing ideas out there for using pom poms in your projects! Here are just some of my favourite Pom Pom makes over on Pinterest!
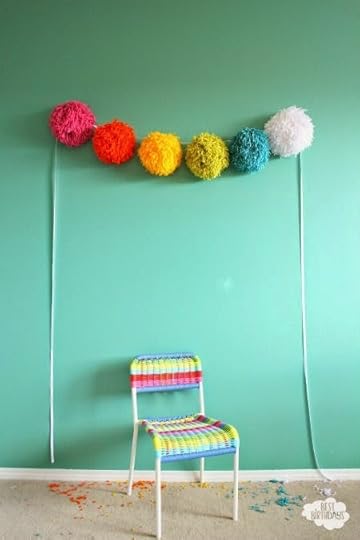 1 Super-Sized Pom Pom Garland ⇒ Best Birthdays
 2 Mini Pom Pom Magnets ⇒ ao at Home
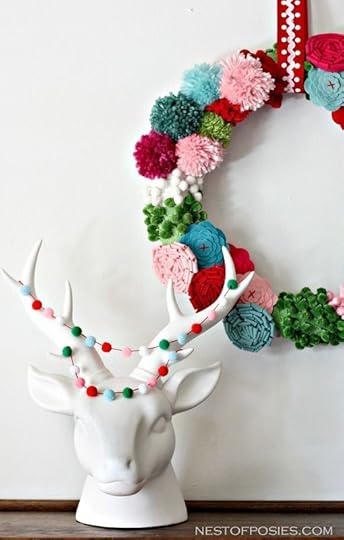 3 Pom Pom & Posie Wreath ⇒ Nest of Posies
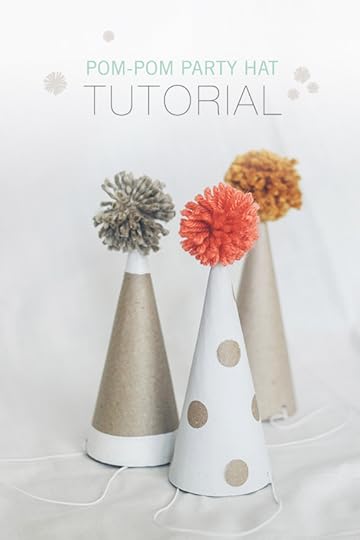 4 Pom Pom Party Hat ⇒ 100 Layer Cake-Let
 5 Pom Pom Book Mark ⇒ Design Mom
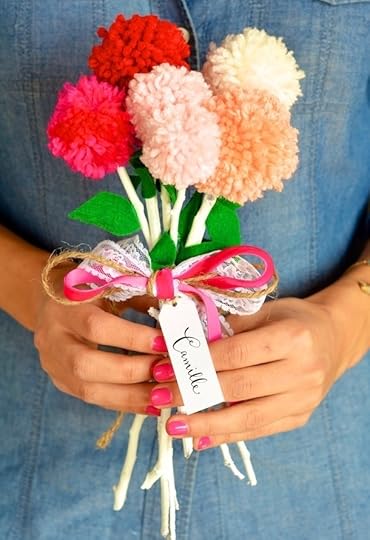 6 Pom Pom Bouquet ⇒ Camille Style
I’ve got the feeling that I’m going to be making a whole heap more pom poms now…only question which of these cute ideas to make first?!
Do you love Pinterest too? Be sure to swing in and see what else I’m pinning right now!
The post Pinterest: What They Did With Pom Poms appeared first on Made Peachy.


