
Laura Strutt's Blog, page 28
June 29, 2014
The Week That Was: Post Deadline V1.0
Ahh! That feeling when you’ve finished up a pretty large deadline. The weight that lifted off my shoulders when the first batch of knitting projects shipped out last week was sheer bliss. It might be only the first in a series of deadlines along the way to an epic project, but I’m all for celebrating the little milestones.
When you have to work with such keen focus on a deadline, it is often that you come out of the other side and realise that there are lots of things that you haven’t given your full attention to in a long time. The last few days have been focusing on getting things back in order. Starting with some much needed down time with family and friends. So, as soon as I was done at the post office, it was off to spend a few days (dodging the almighty rain showers!) at the coast – one of my very favourite ways to unwind and relax. There is something about the spending time in the rest outdoors that blows away the cobwebs like nothing else can…and it is always good for the soul to spend some time in the ‘wild’ with the hound!
 But, there are other things that need to be addresses. Let’s start with the house. I mean sure, there was a full Spring Clean earlier this year, but it’s amazing how quickly clutter seems to rack up, things seem to have wandered from their rightful homes and the place started to look altogether shabby. Gah! I can’t bear it! I know there are lots of online challenges that support and promote the process of decluttering – 40BagsIn40Days and 30DayMinimilasmChallenge – now these are great, I mean super great ideas. Ideas I can really get behind. So, what is stopping me? Well, time. Or, is it impatience? With the second part of this knitting deadline rolling around at the end of July, I am slightly worried that a final goal for decluttering and a deadline falling at the same time work work. One thing I have learnt is that the couple of weeks leading up to shipping out a large set of makes usually involves the collection of yet more stuff. So, I’d be essentially decluttering and recluttering all at the same time! Now, that can’t possible work…can it?
Somewhere in my post-deadline brain I figure that I can simply reduce the length of time for the project by doing two – yes two – sessions of decluttering every day! I know this has the potential to be bonkers. I for one know that it is all to easy to get sucked into one cleaning or decluttering task…I can’t seem to clear out my fabrics without unfolding each and every fat quarter to admire it in all it’s glory, before I know it, I’ve spent an afternoon looking at fabrics and it is time make dinner…and, worst of all, nothing has been cleared out.
So, here’s my plan!
15 Minutes a Day
30 Clutter Zones
2 Zones per day
That’s a whopping seven and a half hours of dedicated declutter time, that will result in a house that is back to its awesome clutter-free unshabby status in under a month. Is it possible? Let’s give it a go! Who’s with me?
The post The Week That Was: Post Deadline V1.0 appeared first on Made Peachy.


June 28, 2014
Style Sunday: High-Low Hem Maxi
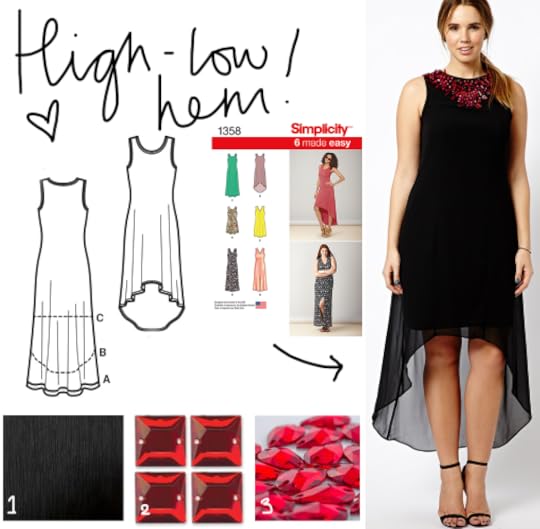
The high-low hemline has been catching my eye lately – it is pretty, feminine and just a little bit quirky.
For those, like me that are a little on the short side, it is a great way to wear a sexy maxi dress without looking as though you are drowning in fabrics. Which is a good thing! I adore this gem-encrusted design £85, AsosCurveCollection
How about a a little bit of inspiration for making your own with this Style Sunday Hi-Low Hem Maxi!
 The Pattern
Simplicity 1358, sizes, XXS – XXL, £8.15 SimplicityNewLook
This patterns offers six classic designs, select Design B for the scoop neck maxi style with the high-low hemline detail.
The Essentials
1 Black Crinkle Chiffon, £3.50 per metre, TexExpressFabrics
2 Red Sew on Acrylic Stones, £7.10 per pack of 144, JosyRose
3 TearDrop Sew on Stones, £17.44 per pack of 24, TwinkleRocks
Is there anything better than a little bit of sparkle at the neckline and a feminine high-low hemline?
The post Style Sunday: High-Low Hem Maxi appeared first on Made Peachy.
June 27, 2014
Mollie Makes Weddings – Exclusive Fabric Corsages & Boutonnieres
You guys – because I know that y’all will love the wildly inspiring Mollie Makes Wedding book I’m stoked to share with you a fabulous and exclusive fabrics corsage project!
A wedding wouldn’t be a wedding without an array of beautiful blooms. Now you can become your own fabric florist by making these beautiful vintage-style corsages and boutonnieres for all your guests. Gorgeous on the day, they make a lasting souvenir to take home. So, let’s make Fabric Corsages & Boutonnieres!
Grab your supplies…
Toning small-print fabrics of your choice
Sewing threads to match
Double-sided fusible webbing
Stiff wire for flower stems and decorative craft wire for leaf stems
Ribbon
Sewing needle
Pinking shears, dressmaker’s scissors and scissors for cutting wire
Safety pins and fancy-headed pins
Template
1 Start by making a corsage. Fuse your chosen fabrics together with fusible webbing. Use the petal templates to cut seven small petals and eight large petals on the bias by placing templates diagonally on the fabric. Cut a 2 x 30cm (¾ x 12in) fabric strip also on the bias.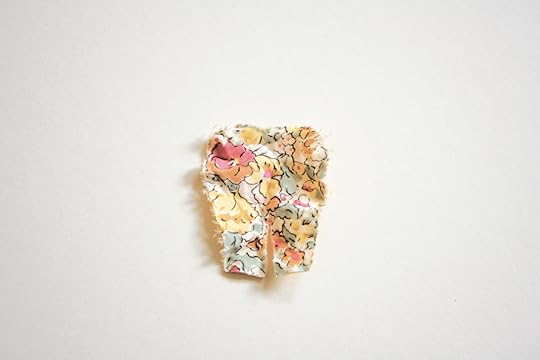 2 Snip into the centre of each petal. Gently fray the edges by using a pin to pull some of the threads free. Screw up into a tight ball and roll between your fingers. Open out, hold the corners and tug. Repeat along one long edge of the fabric strip.
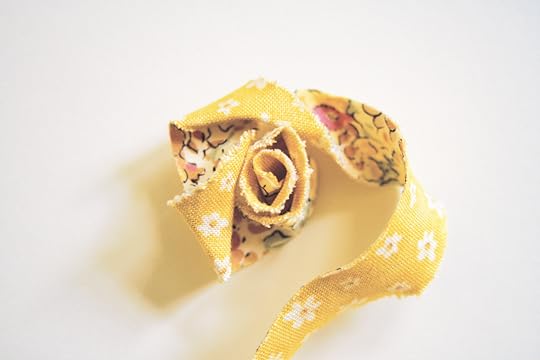 3 To make the flower centre, roll one end of the fabric strip to give you a tight start, then work outwards, coiling and twisting the fabric as you go. Tuck the loose end underneath and secure with a few stitches.
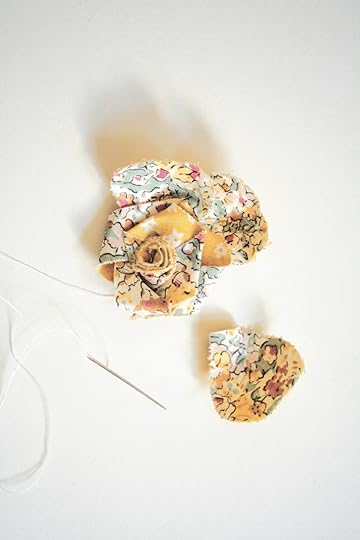 4 Add the smaller petals first. Overlap the slit fabric at the petal base for a curved shape and stitch to the back of the flower centre. Add the next petal slightly overlapping the first, repeating to add all the small petals.
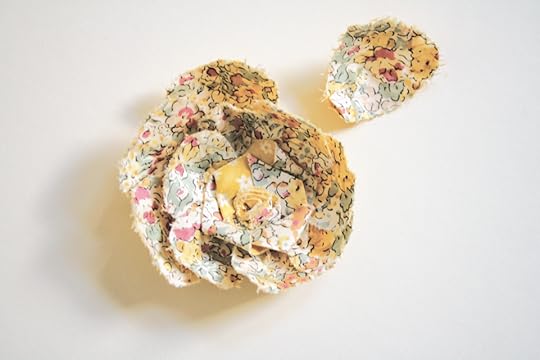 5 Attach the outer row of eight large petals as step 4. Use pinking shears to cut two large leaves from green fabric; fold in half and press the ‘vein’ lines. Snip into the centre at the base, overlap and attach to the flower back. Sew a fabric circle over the back to fix a safety pin to.
 6 To make a boutonniere, fuse fabrics together and cut out five large petals and a 4 x 30cm (1½ x 12in) fabric strip, all on the bias. Gather the fabric strip to make the flower centre: work small running stitches along one edge and pull tight. Start by rolling the strip tightly, then a little more loosely, until you reach the end; stitch through the base of the coil to secure.
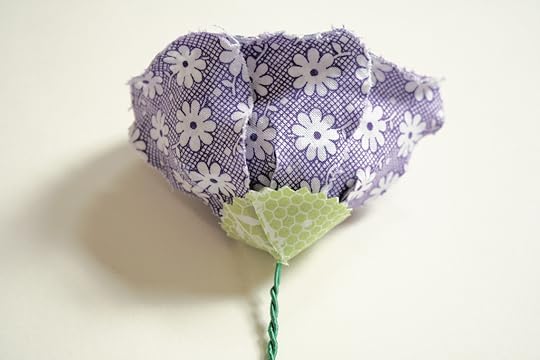 7 Add each of the large petals in turn around the flower centre: keep them close and upright, and overlap as you go. (To give a more realistic look, roll the top edge of the petals and crease with your fingernail to hold in place.) Cut a piece of wire for the stem and push it into the base. Cut a 4cm (1½in) fabric circle and make a snip to the centre. Fit the fabric circle around the stem and fold into a cone shape to fit neatly around the base of the flower, then stitch it in place.
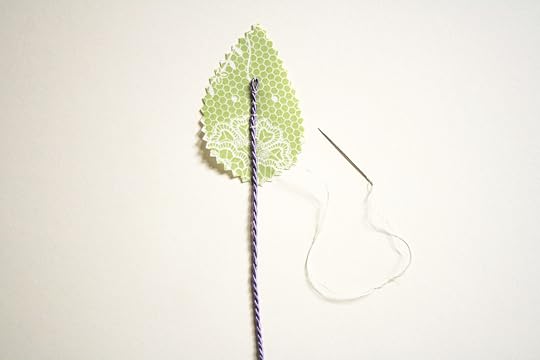 8 Use pinking shears to cut three small leaves from bonded fabrics. Take a length of decorative craft wire, double it, twist it and stitch it to the front of one of the leaves to create a central vein and stem. Repeat for the other two leaves, then twist the stems of all the leaves together to create the spray. Place the spray behind the flower and bind all the stems together tightly with ribbon, stitching the end to fasten.Use fancy-headed pins to attach the boutonnieres.
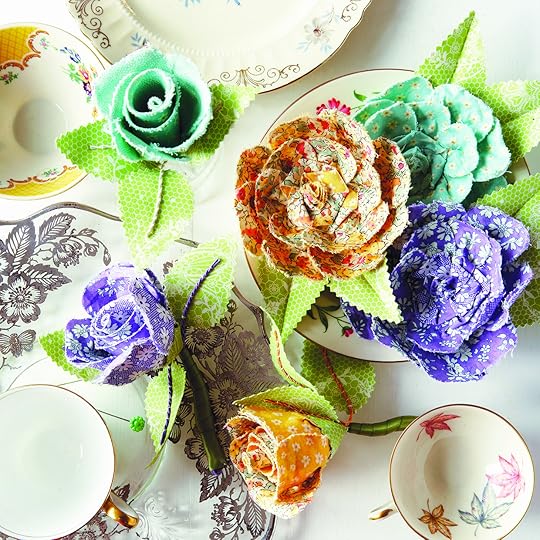 Top Tip!
To make the flower for each corsage or boutonniere, you will need two toning small-print fabrics each measuring approx 35 x 35cm (14 x 14in), as well as a little green fabric for the leaves. Cutting on the bias gives the petal shapes a little bit of stretch for a lovely curvy look.
 A craft journalist by trade, Jenny has always loved to make things. She is based in Bath in the UK, where she shares her home with an outrageously large fabric stash. Find her online on her blog!
[Psst! Get in quick you guys - this free project is from Mollie Makes Weddings, and will only be available here until January 2015...sounds ages away, I know, but if you plan on making it, be sure to get all the instructions and templates now!]
The post Mollie Makes Weddings – Exclusive Fabric Corsages & Boutonnieres appeared first on Made Peachy.
June 26, 2014
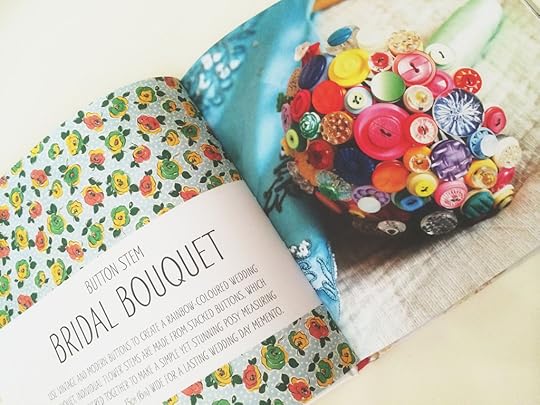
Creative Reading: Mollie Makes Wedding – PLUS Giveaway!
As a happily married young lady I should have got this whole wedding thing right out of my system by now, shouldn’t I? Well, that’s a whole lot easier said than done when stunning wedding craft books like this Mollie Makes Weddings lands on your desk – I mean, it’s beautiful, cover to cover and jam packed with inspiration for every style of wedding you can think of.
 So, while I might not be planning to get married again (although, I had such a blast, I would love to do it all again!) as we have all come to expect (and love!) this latest book from Mollie Makes has collected together some of the finest designer/makes, pro-crafters and creative folks the universe has to offer – you’ll find the likes of Laura Howard from BugsAndFishes, Emma Lyth from Beaubuttons and Clare Youngs…to name but a few!
There are 20 inspirational projects to makes for that Big Day – from the planning, and preparations, right through to the celebrations and reception. Stunning photography is teamed with easy-to-follow instructions and step-by-step guides to see you on the road to success whatever project you decide to make.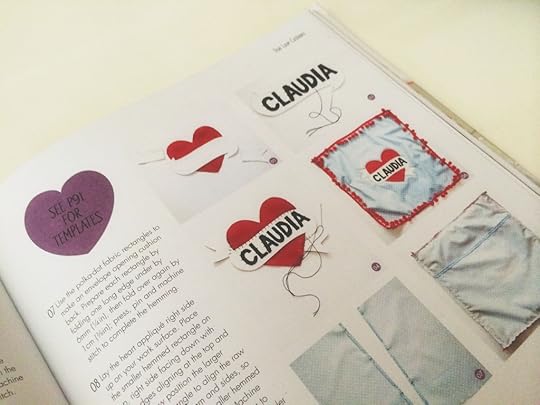 From crochet and paper craft, to stitching with felts and fabrics and even clay modelling and cross stitch – there is sure to be something to suit your individual style to add a unique touch to your wedding day. While, I might not be in the market for another wedding myself, there are lots of things that can be made as gifts to celebrate engagements or to give to the newly weds on their special day.
When it comes to making a special touch for your - or a loved one’s – wedding day, this book hits the nail on the head – over and over again, with makes that will be sure to inspire!
Now, here are some little treats for you lovebirds…I have two copies of this amazing book up for grabs to two lucky Made Peachy readers!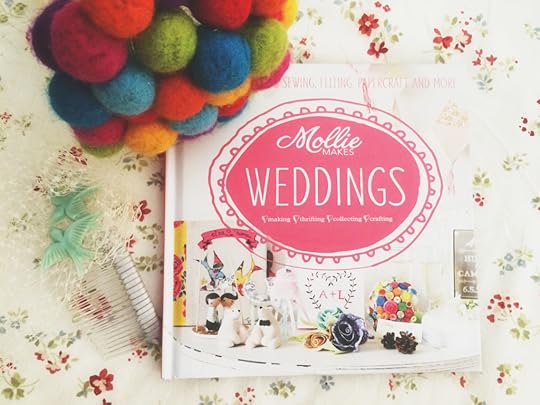 So, how do you enter? Easy! There are a number of ways you can enter this giveaway – and the best part is each one will be counted as 1 entry…so, do all three and you will be entered three times my friend!
1 Please leave a comment below sharing why you’d love to win a copy of this new Mollie Makes Wedding Book
2 Share this post on Twitter, tagging @madepeachy and using the hashtag #MMWeddingMadePeachy
3 Give the MadePeachy Facebook page a like, share the giveaway post and leave a comment on why you’d love to win!
Want a bonus entry? Then head over to the MadePeachy Instagram , follow and give the Mollie Makes Wedding post a like & comment!
The giveaway is open to everyone with a UK postal address, and the winner will be pick at random and announced on the 4 July - Good Luck!
[Psst! There's more!]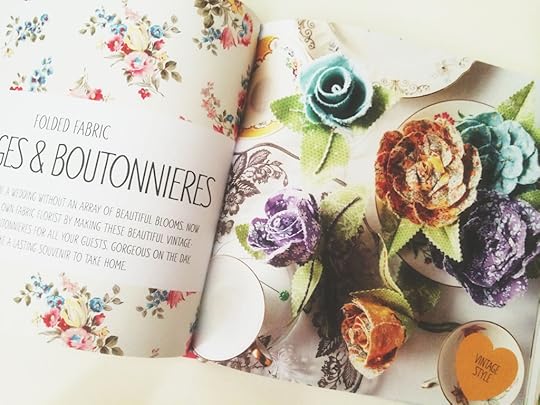 Can’t wait to get started on some inspirational wedding makes? Then, chill, because we have that sorted too – be sure to check back tomorrow for your exclusive step-by-step corsage project designed by Jenny from TheButtonJar!
♥ – ♥ – ♥
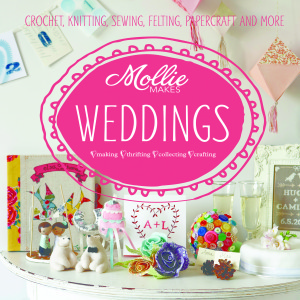 Mollie Makes Wedding, £11.99, Collins & Brown (Pavillion) Main project photography by Rachel Whiting
The post Creative Reading: Mollie Makes Wedding – PLUS Giveaway! appeared first on Made Peachy.
June 25, 2014
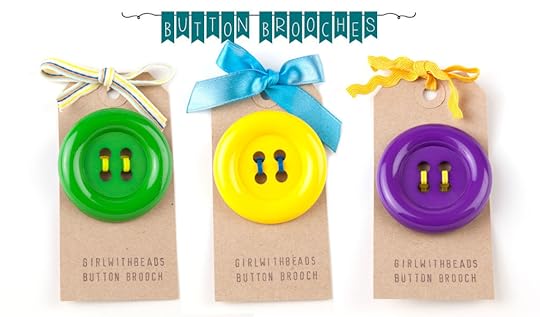
Guest Post: Rebecca Vorperian – Girl With Beads
It takes guts, hard work, and all-round enthusiasm, not to mention creative flair and skills, to run a creative business! Today, Rebecca Vorperian, the creative recycler behind Girl With Beads, is guest posting on the highs and lows of running a creative business!
♥ – ♥ – ♥
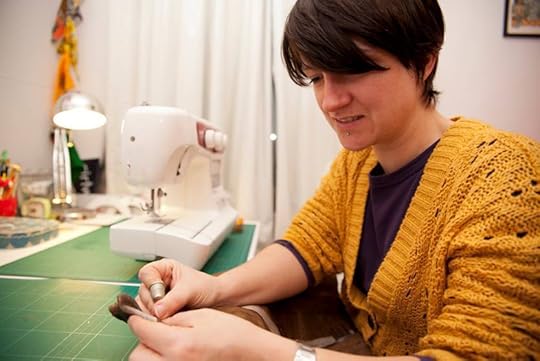 I have always enjoyed making things ever since I was a child and after choosing to go down a 3D Design route at University I became increasingly interested in sustainability and recycling. After leaving uni I continued to make bags from charity shop finds and began selling them at the newly opened Sunday Up Market at the Truman Brewery, East London. After years of juggling the market stall and a full time office job I took the plunge to run girlwithbeads full time. My ethos, as scribbled in the back of a university sketchbook, is ‘to make the ordinary beautiful, the ugly desirable and the unwanted wanted’. My design style is witty, British, recycled fashion.
 I tend to carry a notebook around with me and jot down ideas and sketches when they come to me, but I am also inspired by the materials/clothes I find in charity shops, often buying things because I find them interesting without knowing exactly what I’m going to do with them and keep them in my stash until inspiration strikes!
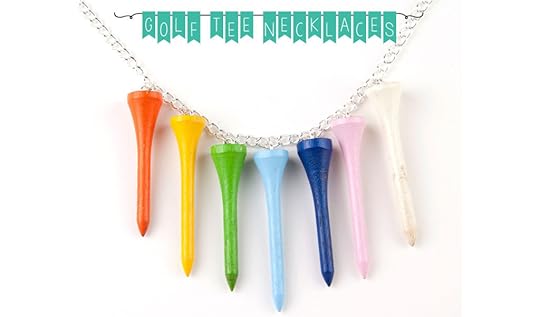 For example I bought a bag of golf tees from a charity shop in Skipton a few years ago, because they were bright and colourful, and have only just transformed them into fun jewellery.
 Being a one-woman business has its challenges and you need to learn book keeping, marketing and time management, as well actually making and designing your items. But it is great being my own boss. Give it a go! You can always start by working on your creative business part time, I always found it a great creative outlet when I had a boring office job, then when you are more sure of your product and market you can look to grow your business further.
 Pricing is tricky and makers are constantly undervaluing themselves, don’t be afraid to charge a high price if you can justify it with the workmanship thats gone into it. Remember that if a customer considers a price too low that might actually put them off as they are thinking “what’s wrong with it”. There are formulas you can use but a good guide is to look at what other similar products by successful makers on the market are priced at. A rough guide to pricing: Make sure you take into account all your material costs, time taken to make each item, plus add on your profit on top. Don’t expect to be designing and sewing 8 hours a day, its more likely you spend most of your time on marketing and admin!
♥ – ♥ – ♥
See more of Rebecca’s designs at Girl With Beads
The post Guest Post: Rebecca Vorperian – Girl With Beads appeared first on Made Peachy.
June 24, 2014
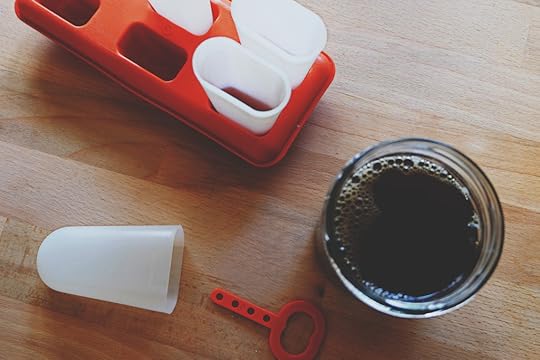
Sweet Ice Tea Ice Pops
If you don’t already know about my love for sweet tea, then let me enlighten you.
I’m besotted with this summertime drink (I say summertime as though I don’t drink it the whole year through!) but it is one of my favourite beverages of all time. I love to make it by the pitcher and sip it over ice the whole day through.
Sweet Ice Tea is the best refreshment on a hot summers day – try making these Sweet Ice Tea Ice Pops for a chilled twist!
 Grab your supplies…
Tea (your favourite blend)
1/4 teaspoon of bicarbonate of soda
1-2 teaspoons of sugar (optional)
Ice pop moulds
You’re going to need to brew up your favourite tea and let it set to chill – use the ice pop moulds to measure out the amount of tea you’ll need and into a jug, jar or mug, steep your favourite tea in boiling water for three to five minutes. Add in the bicarbonate of soda and the sugar to sweeten to taste. [pssst! I add a small dash of bicarbonate of soda to my sweet ice tea to give it that crystal clear finish and smooth, smooth taste - trust me, just try it!]
 Allow the tea to fully cool before topping up the ice pop moulds.
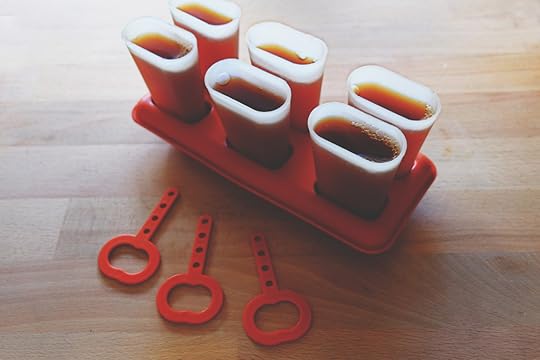
Yes, these are vintage Tupperware ice pop moulds and yes they really do take me right back to my childhood – any y’all remember these?
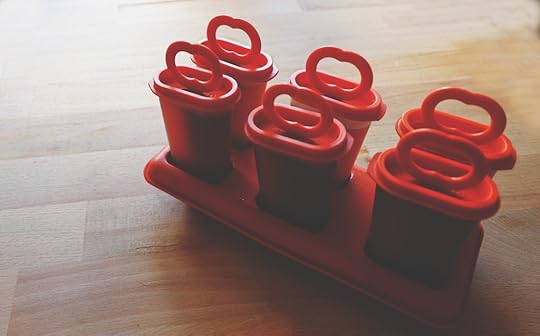 I set these in the freezer over night to get them all frosty and delicious – so yes, you will need to do a little bit of forward planning for these summertime treats…but, so completely worth it!
 What can I tell you – if you love ice tea, then these my friends are a real treat. Simple, tasty and so deliciously refreshing!
Why not add a twist of lemon to your brew before you freeze them for a citrus hit? Or, try these ice pops with Iced Peach Green Tea or how about an Creme Caramel Rooibos Iced Tea?
The post Sweet Ice Tea Ice Pops appeared first on Made Peachy.
June 23, 2014
Simplicity Sewing Tips with Wendy Gardiner –
Aloha to Tuesday my Friends! Guest posting today is Wendy Gardiner in the third part in her mini series of Simplicity Sewing Tips…

Pleats and piping
If you enjoyed the Great British Sewing Bee and feel inspired to recreate your own perfect piping and pleats – as seem in many of the garment on the show, then I’m delighted to provide some simple steps to follow as well as patterns to create your own pleated skirt or PJs!
Pleats – there are three main types of pleats, all formed by taking folds in the fabric and pressing in the fold to form a crisp edge. Knife edge pleats are all folded in the same direction and are often used to completely pleat around the skirt, or the back of a skirt (think kilt). Then there are inverted pleats, where two pleats are folded towards each other and meet in the centre and then box pleats, where two pleats are folded away from each other to form a flat centre panel. (Actually, if you turn an inverted pleat over, you will see it is a box pleat and vis versa). Here is a skirt pattern features elegant pleats, it’s Simplicity which can be made in two lengths and comes in sizes 4-20.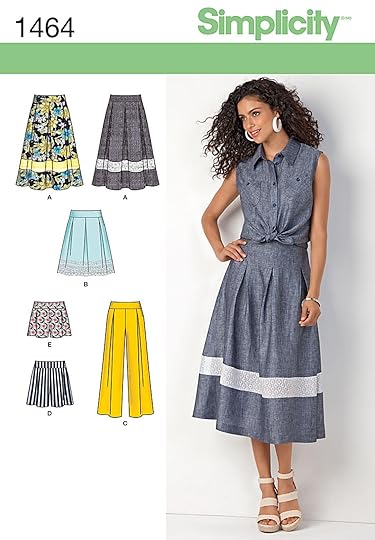 The trick with pleats is to ensure you are folding the fabric in a straight line so that the pleats hang down properly so do work on a flat surface. When pattern matching, it is advisable to cut the garment section larger to start with so if you have to take out more fabric in the pleat to match the fabric pattern, you can still have the right width left for the skirt front/back etc.
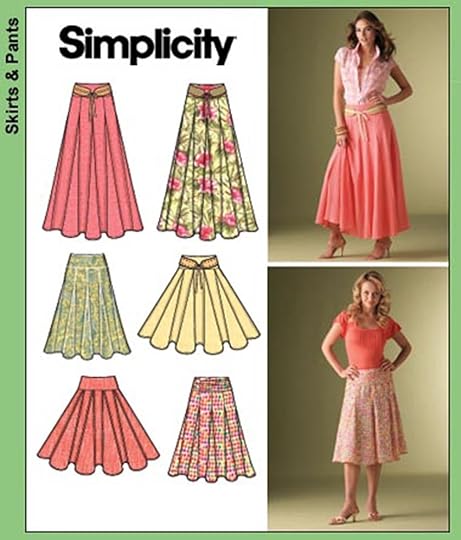 One point to note is that pleats can add inches to the silhouette, which I agree with, but do still love pleats. So, I tend to turn an inverted pleat into a box pleat if it is formed centre front (to lessen the fabric over the tummy area) and stitch down the pleat fold for a few centimetres, which again, minimises the excess fabric around the waist/upper hips. (See Simplicity 4188, sizes 8-24 for this style)
Perfect Piping
Piping defines the edge of a seam on a garment or the edges of cushions and seat pads and makes a simple project look professionally finished. You can buy ready made piping or make your own by covering cord with a bias cut strip of fabric. The advantage of making your own is that you choose the fabric/colour of course. The contestants on the GBSB made PJs recently, which do look great with a bit of piping. Take a look at Simplicity 2317, sizes 8-18 or XS-XL – this is a unisex pack of PJs for him and her.
Making your own piping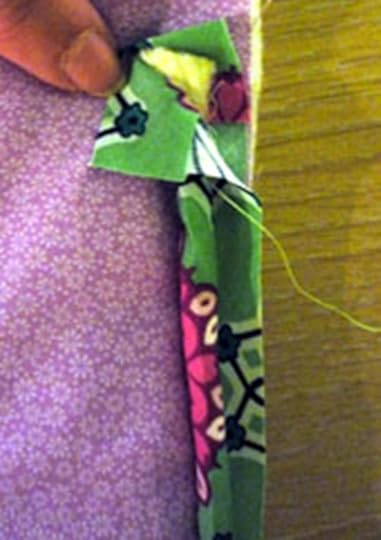 1 To find the bias of the fabric, fold the cut edge of the fabric up to the selvedge, the diagonal fold is on the bias, press to mark the diagonal line. Starting with this diagonal cut strips about 5cm (2”) wide x the length you need. You can of course join strips together to create the necessary length. To maintain the stretch in the fabric, do this by placing ends at right angles to each other, right sides together and then stitch from top left corner to bottom right corner. Trim excess off and open out.
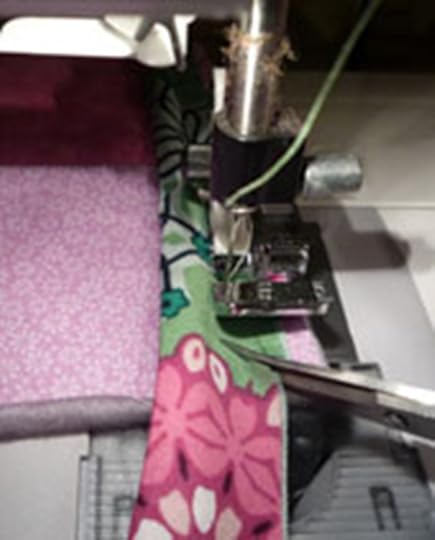 2 Fold the fabric strip in half, wrong sides together, and press. Sandwich piping cord within the strip pushing it close to fold. Machine stitch down strip to hold cord in place.
3 Pin and stitch piping to the right side of garment section to be piped, with raw edges of piping fabric and garment fabric even. Use a zipper foot to stitch close to the cord and stitch in place.
4 Now add the facing or other layer of fabric and sandwich the piping cord between them, again with all raw edges even. Move needle a bit further to the left if possible, and stitch again as close to the cord as you can, feeling it through the fabric which is on top as you go.
Attaching piping to a cushion cover – when attaching piping to a cushion cover, you will have ends that need to be joined as neatly as possible. To do this follow these steps:
1 First tuck the fabric end inside the folded strip and press. Starting in the middle of edge of the cushion front, pin piping, RST, matching raw edges, starting with the end that has been tucked inside strip. Start stitching approx 4cm (1 ¾”) from the beginning, stitching close to the piping cord.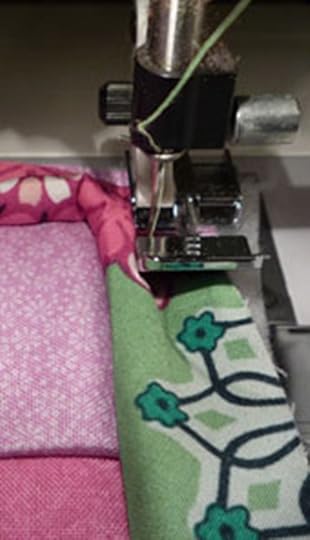 2 To smoothly take the piping around the corner, stop with needle down 15mm from the corner, raise the presser foot and carefully snip into the piping fabric only so that you can bend it around and along the next edge of the cushion. Take 2-3 stitches at an angle at the corner before pivoting and continuing to next corner.
 3 When you are nearly back to the beginning, stop with needle down about 4cm (1 ½” from the end and raise presser foot. Unfold the beginning of the piping strip that you left unstitched and lay the end inside the fold, trimming the cord so the ends meet. Refold beginning of strip to encase the end and continue stitching through all layers until you meet the start of the stitching.
4 You are now ready to sew the cushion back to the cushion front as step 4 above, sandwich the piping between cushion front and backs. Use a zipper foot and turn work over and stitch around the edges so cushion front is uppermost and you can see previous stitching. If possible, move needle position to the left so it is as close as possible to piping. Sew around the edges (leave a turning gap if working with a single back, or ensure zip is open for a zipped back).
So there you have it, pleats and piping!
♥ – ♥ – ♥
Wendy Gardiner is Simplicity’s Sewing Guru and loves to share tips and techniques to make sewing easier and fun.
For more tips, fitting advice and to browse and buy Simplicity, New Look and Burda patterns visit www.simplicitynewlook.com
Be sure to check out Wendy’s tips for Learning To Sew and Sewing with Knit Fabrics…PLUS check back next week for her final guest post sharing tips on Sewing with Special Fabrics!
The post Simplicity Sewing Tips with Wendy Gardiner – appeared first on Made Peachy.
June 22, 2014
The Week That Was: Work Hard/Play Hard
An epic deadline is fast approaching in the PeachyHQ and that means only one thing. Well, two actually. Work Hard, Play Hard.
I’m the kind of girl that like to make deals with myself. You know the drill. “As soon as you’ve cleared your inbox, you can go for a walk!” “Right after you have finished knitting this blanket you can have a cup of tea!” “If you get all ten things checked off of your To Do List you can chill out all weekend long!” I don’t know if this internal bartering system works for all y’all, but for me it is the only way to get through working when the sun is shining and there are eleventh billion things that I’d rather be doing.
 The sunshine is one of the universe’s biggest distractions. I can usually focus quite well on the task in hand, yes I can procrastinate as much as the next girl. But, seriously, after I have made a point of making a few lists, I can usually get my head down and work like a little machine.
The second the sun is shining, it is like all my good intentions disappear in the blink of an eye. I have to work on some pretty hardcore bargaining to get myself through the working week. I guess that is the good thing/bad thing about working from home and being your own boss. Yes – you can make the most of a sun shining day at a moments notice, but you still have all the work to do.
 As I’m motoring towards the first in a three part series of large scale deadlines, I have been focusing on making sure that I get some time to enjoy the finer things in life. I mean, I don’t want to get to the autumn and be all like, “Well, the summertime was rad…I worked the entire time!”
 For the last week, I have been peppering sprints of working with little treats – blue slushies are the best treat for the summertime, I don’t care how grown up you think you are. Go grab one and if after one slurp you are not feeling all the joys of childhood summers then I don’t think we will can be friends.
 I’ve been browsing the local second hand stores, because let’s face it a little bit of Op Shopping is great for the soul – whether you buy anything or not! In this instance, I didn’t actually part with any cash, but I did see a couple of real gems…Like records reminding us the importance of not copying music!
 And, there have been long overdue catch-ups and sunshine beers with friends – which as any adult will tell you is just about the best way to see in the weekend.
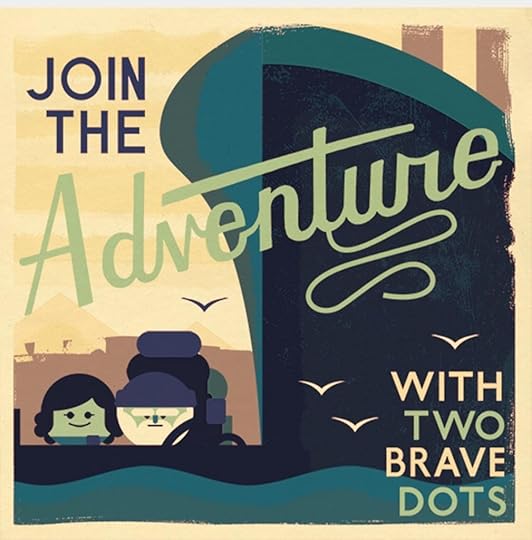 Finally, because we all love a little distraction in life…I’ve become obsessed with the TwoDots game. I am the first to admit that I’m not a gamer, by any stretch. But, ever since the Dots game came out on Kindle I’ve found it a really satisfying way to take a little break. Now that TwoDots is available on the iPhone, there is literally nothing stopping me…well, except the fact that you have to wait for new lives to regenerate! I’m hooked! Who else is playing?
The post The Week That Was: Work Hard/Play Hard appeared first on Made Peachy.
June 21, 2014
Style Sunday: Six Summertime Essentials
Yup! The sun is shining – and that can only mean one thing – it is summertime!
Looking for some inspiration for some your holiday wardrobe? The check out these Make-It-Yourself Summertime Essentials!
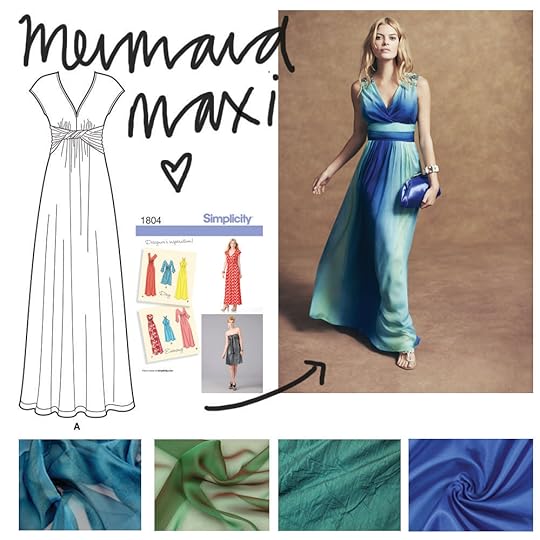 The Mermaid Maxi Dress
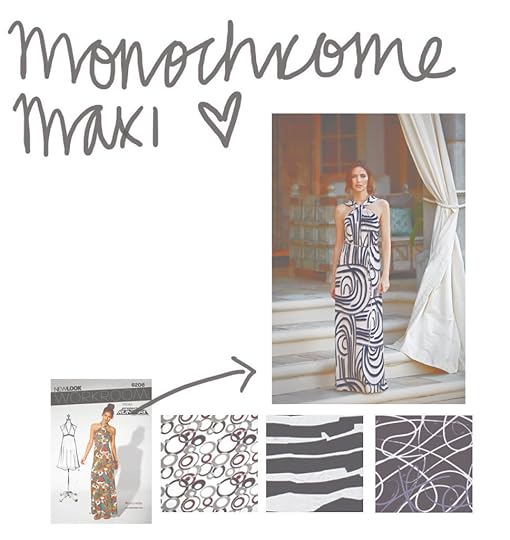 The Monochrome Maxi Dress
 The Bombshell Bathing Suit
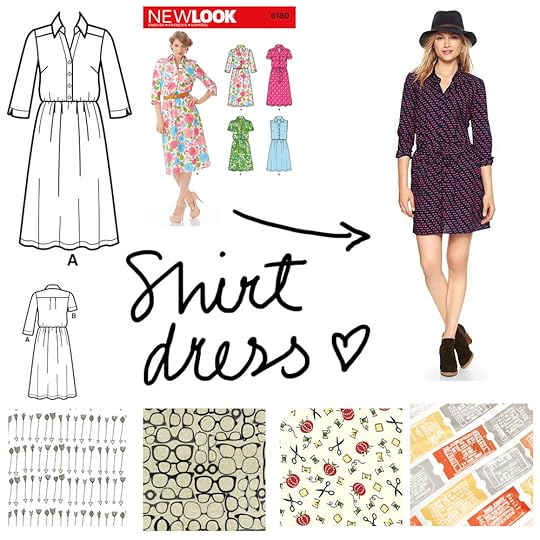 The Shirt Dress
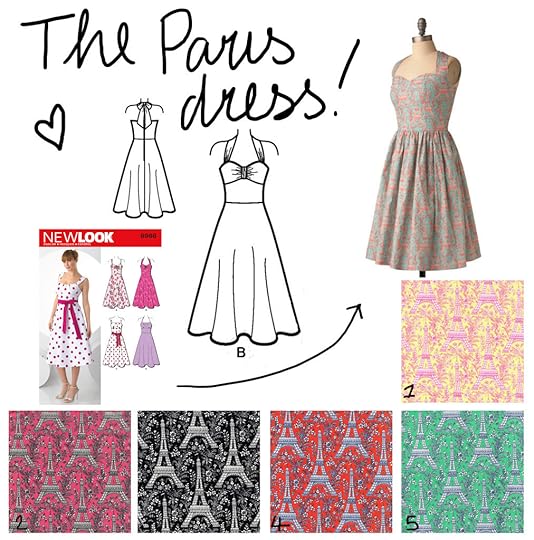 The Paris Dress
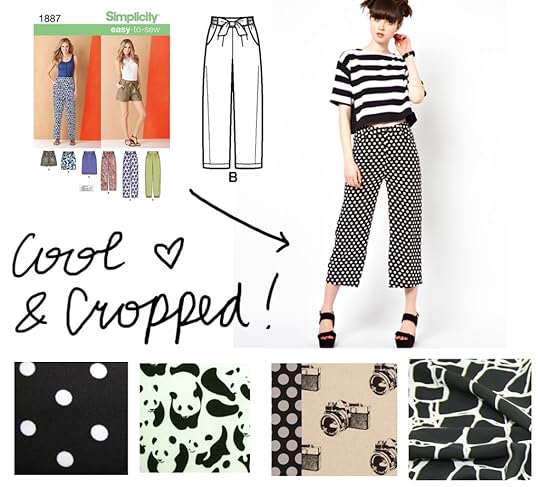 The Wide Legged Cropped Trousers
So, do you have a fave sewing pattern for the summertime – be sure to share, I’m always on the lookout for fab new frocks!
The post Style Sunday: Six Summertime Essentials appeared first on Made Peachy.
June 20, 2014
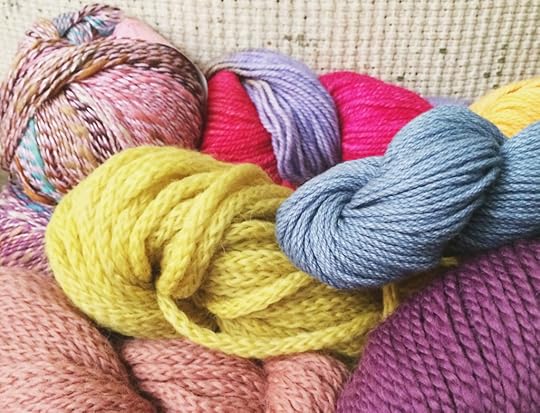
Can’t get enough of crochet!
Everywhere I look right now folks are crocheting – on my fave instagram feeds, all over Pinterest, I love it!
I’m on a huge knitting project at the moment and the deadline is looming, so of course all I want to be doing right at this very moment in time is crochet something. So, rather than busting out a something crochet, when I really must get this knitting all done and dusted, I thought it would be a great idea to share some rad crochet inspiration for all y’all that Love Crochet as much as I do!
Learn new skills…
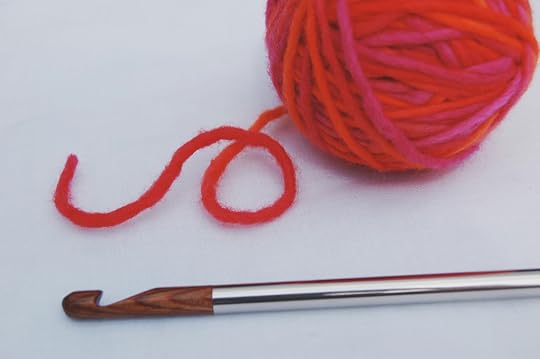
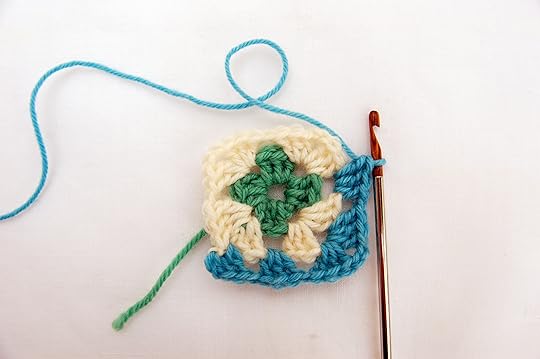 How to crochet Granny Squares
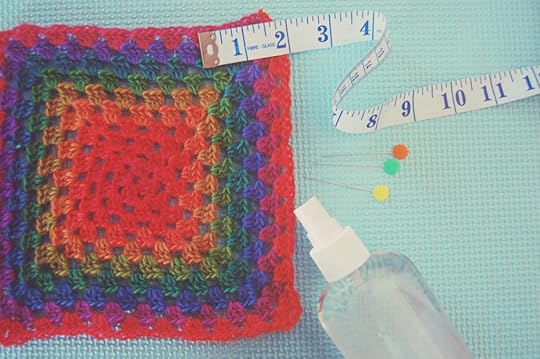 Blocking Granny Squares
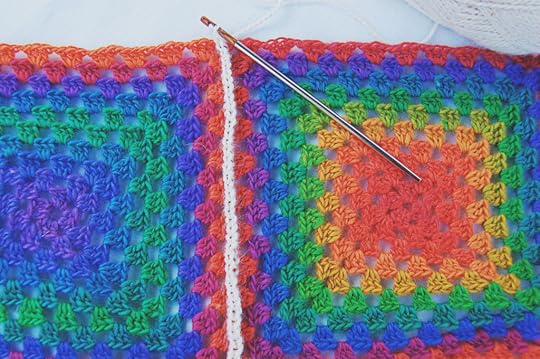 Seaming Granny Squares
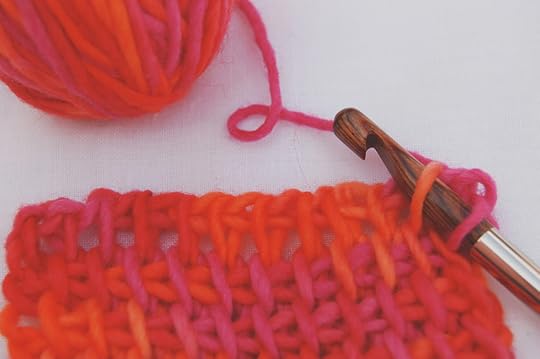 Learn how to Tunisian Crochet
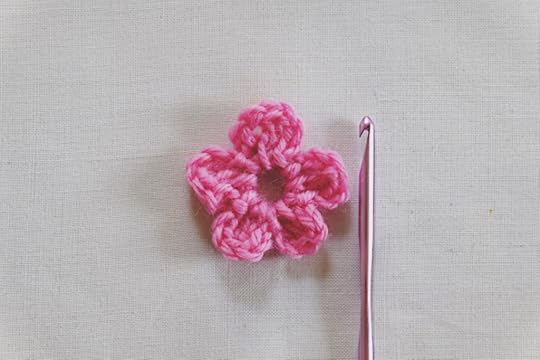 How to crochet a Mini Bloom
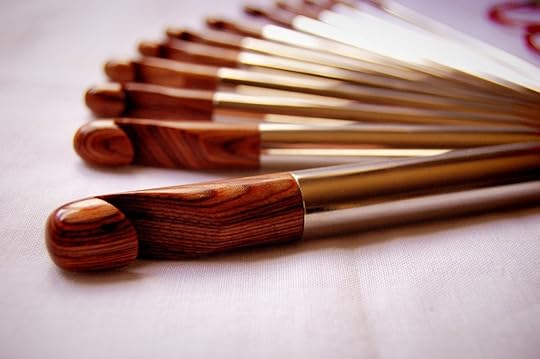 Essential crochet tools
 Master crochet abbreviations
Make New Projects…
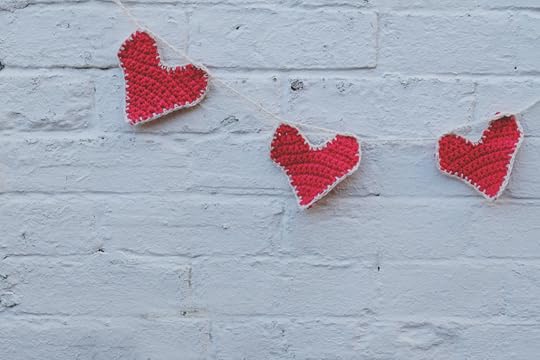 Crochet a Heart Garland
 Crochet a Star Garland
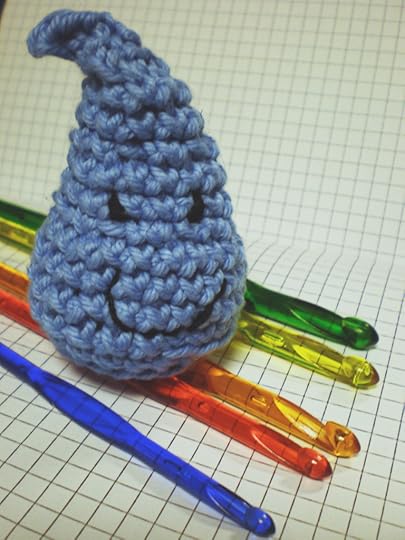 Crochet an amigurumi RainDrop Dude
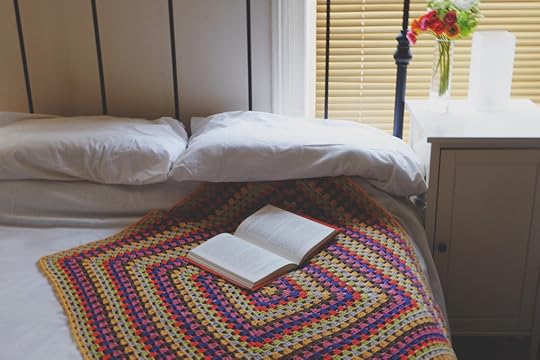 Crochet a super-sized Granny Square Blanket
I’m hoping that there is something there that will inspire y’all…after this week and this knitting deadline has passed, I think I’ll be trying to find some time to get my crochet on!
The post Can’t get enough of crochet! appeared first on Made Peachy.


