
Laura Strutt's Blog, page 29
June 19, 2014
DotComGiftShop Garden Candle Winner!
Happy Friday y’all! The sun is shining, the weekend is right around the corner – could it get any better than that? Well yup – how about announcing the winner from last week’s DotComGiftShop giveaway? Here goes…
CONGRATULATIONS! Mrs B
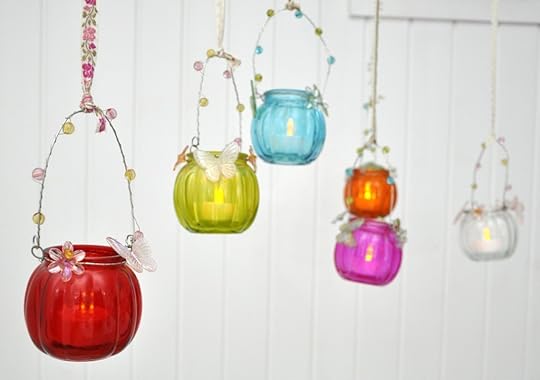 You’ve won the set of gorgeous glass tea light candle holders! Yay! Please email with you UK postal so that we can get this lush prize out to you! Didn’t win this time? There are lots of wonderful goodies for prettying up your home and garden this summer…not to mention fancy up your next picnic over on DotComGiftShop – go forth and threat yourself, I give you full permission! The weekend is set to be brimming with glorious sunshine, I don’t know about you but if you’re planning on spending some time out in the garden, be sure to check out these fab recipes perfect for al fresco dining! Have a great weekend folks!
The post DotComGiftShop Garden Candle Winner! appeared first on Made Peachy.


June 18, 2014
Five Fave Free Meal Planning Printables
Add some cute to your kitchen with this sweet free wall art printable from Banjelope
Healthy eating is top priority over here right now. But our daily lives are getting to be the brand of busy where they feel as though they are spiralling out of control, and usually the first plate to drop when your trying to keep all of them spinning is the one that hold the healthful family meal – and has us grabbing the phone to call out for pizza.
Getting a head start on the week’s eats is the only way that I can seem to stay on top organising the weekly groceries and shopping. I devour cookery books – but slipping in bookmarks on your chosen recipes for the week isn’t the most practical or efficient. So, how about getting busy with some meal plans – yup, jotting down the tasty dishes you planned throughout the week is a great way to make sure that you’re getting a delicious and balanced diet,plus it makes listing out your groceries a heap easier and it everyone at home knows what’s cooking. Now, that is something we can surely all get behind, am I right?
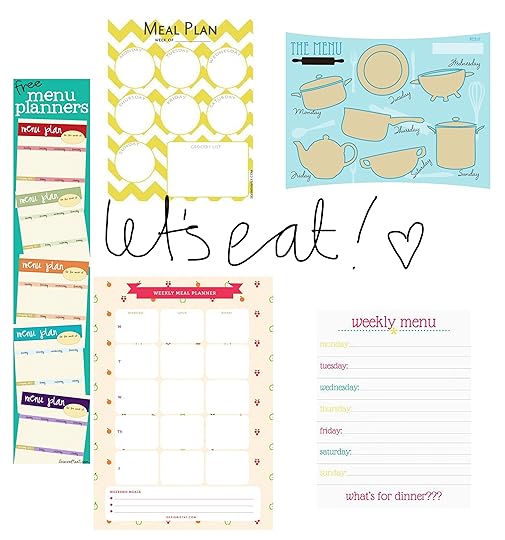 Meal planning needn’t be boring, I’ve found that using cute printables makes the process less of a chore, and it looks great pinned up in the kitchen. So, here are my Five Fave Free Meal Planning Printables…
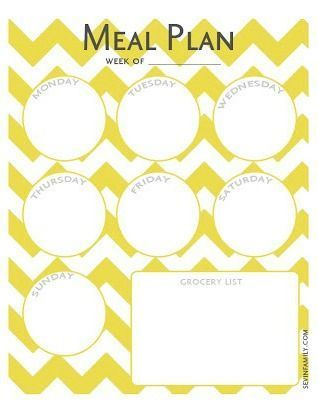 Chevron Weekly Meal Plan – with Grocery List (Pssst! There is a cute co-ordinating cleaning schedule too) SevinFamily
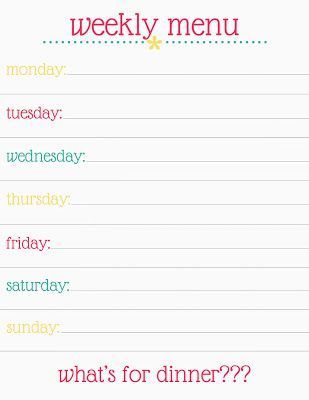 What’s For Dinner – weekly menu, there are three sweet styles to choose from TheMommaBearDiaries
 Fruity Printable Planner DesignIsYay
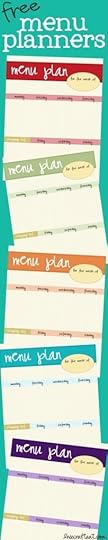 Colour Choice Menu Plan – pick your fave shade from LiveCraftEat
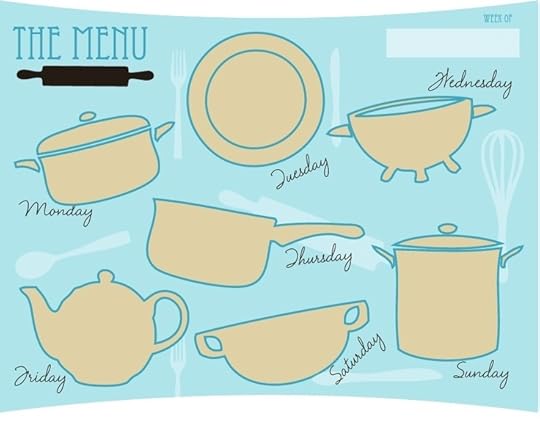 Pots & Pans Theme Menu Planner from LightRoomPresets
Now, if anyone needs me I will be eyeballing all the cookbooks in the bookcase filling out some delicious eats for the week ahead!
The post Five Fave Free Meal Planning Printables appeared first on Made Peachy.
June 17, 2014
DIY Striped Stair Makeover
We’ve had a scrappy stairway. It’s been this way for the longest time. And, sometimes, you get sick of the ugly and you can’t resist the urge to paint it!
That my friends, is exactly what happened to our stairs recently. When we moved into our home the ill-fitting carpet on our staircase was not only ugly, but it made getting up and down a little perilous. So, ripping it out was one of the first things on the agenda. I’d been stalling on getting a replacement carpet fitted, mainly because I wanted to do something a little different. I wanted to give them a flash of colour, wanted them to be more exciting than just a bland flight of stairs. I always thought that painting stairs would be super tricky, I guess that’s another reason why I have been dragging my heels on this little renovation task. But, it was surprising much easier than I thought! So, I thought I’d share this mini DIY project, to prove that painting stairs is less hassle than you might think!
 We wanted to have a white gloss border running along either side of the steps, with a band of grey running up the centre of the treads, so we got busy with the gloss, painting all the outer panels. This is the neat part of painting strips on stairs – there is never a point when you can’t walk up the stairs – yes, you have to be kinda careful not to tree on the wet parts, but you effectively still have functioning stairs…kind of important when you have to carry on living your life around the DIY!
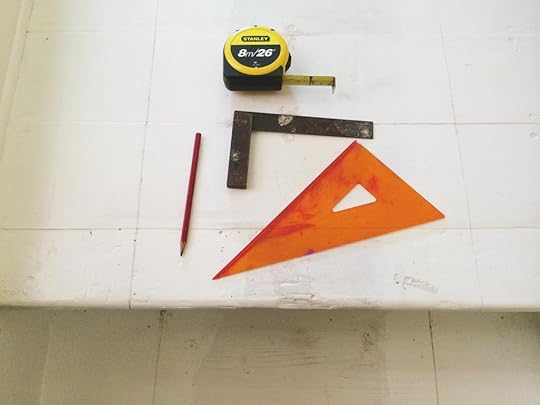
Once the two coats of gloss paint were fired and cured, it was time to get busy making the lines – it is so important to get these lines dead-on straight. The perspective of the staircase makes the strip look like it is decreasing in width as it runs up the stairs. A ruler, set square and tape measure are by far your best friends when trying to get these lines running central, parallel and equal the entire way up the stairs.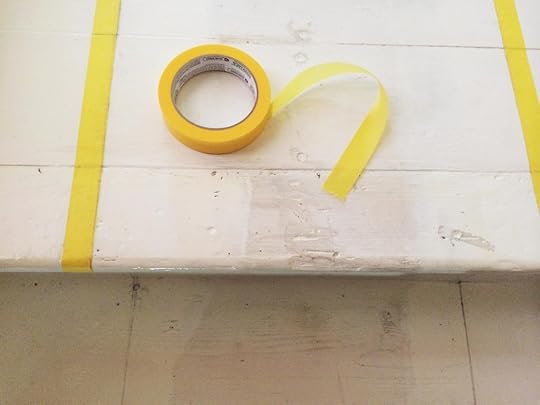 Ordinarily we would grab for the masking tape when it comes to shielding off sections during painting jobs, but kind of project calls for the highest level of precision. So we opted for FrogTape – and not just because of the cute name. This tape promised to fully mask of areas when painting, preventing any paint bleeding from one section to the next – which is just what you need if you want sharp accurate stripes!
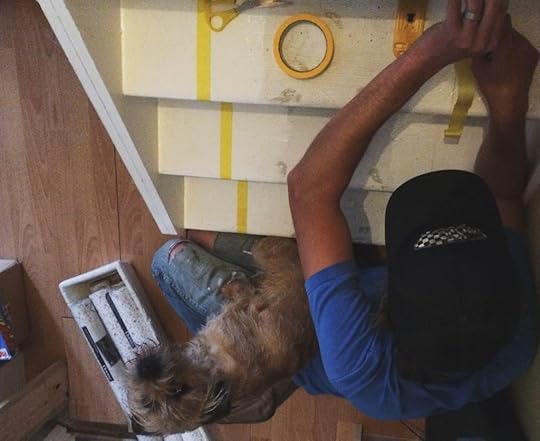 The tape needs to be secured with a precise hand, pulling it taught without over stretching it along the entire length of the staircase. Of course, you don’t need a pair of handsome helpers to assist with this part, but it sure does help!
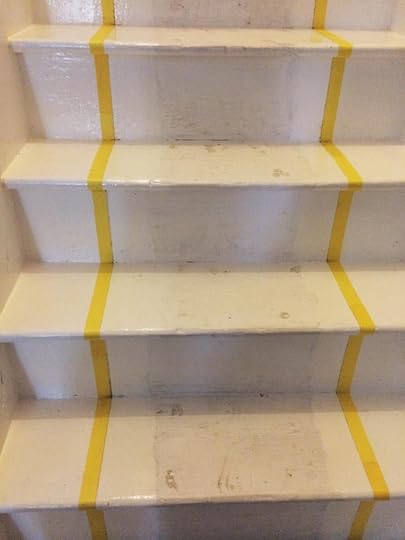 Before you know it, the stairs are marked up ready for the stripes – and now it is time to make that commitment to the painting!
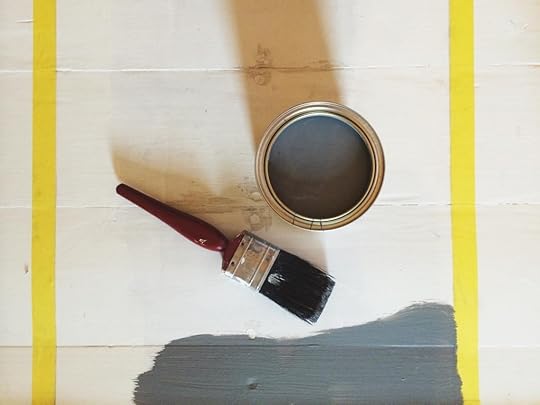 As stairs are a high traffic area we wanted the paint to have longevity on the treads, so we selected Ronseal Diamond Hard Floor Paint, in glorious Slate grey. Which goes on like a dream, and is dry to the touch in around six hours, and full cured – so you can walk on it – in 72 hours. Ok now that does sound like the stairway is going to be out of action for a fair while, but with the a bit of careful gymnastics, you can walk up the stairs stepping only on the already dried gloss sections. It’s not elegant, in the least, but it works.
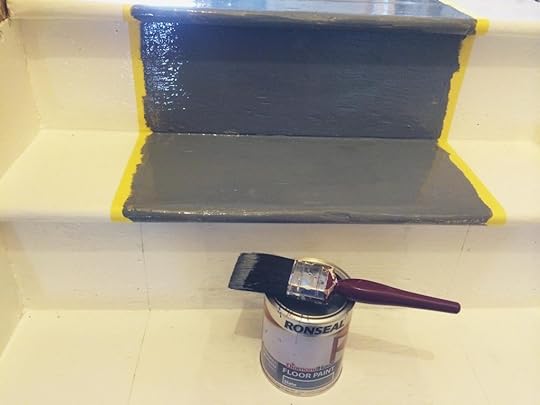 Three coats is the recommended coverage for high traffic areas, so over the course of a weekend, it is possible to paint, remove and replace the tape and repaint…and repeat.
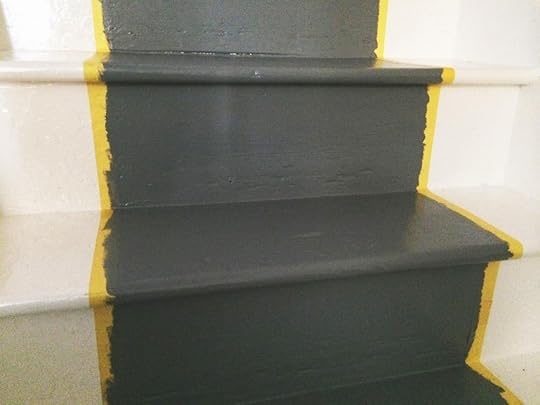 The FrogTape is recommended that it be removed promptly after the coat is applied to ensure the neat crisp line – and they aren’t wrong, pulling the tape in a smooth upwards motion is the best way to remove the tape without damaging the paint. Once the coat is dry there is a neat, straight edge along with to reposition the next portion of FrogTape to repeat the process.
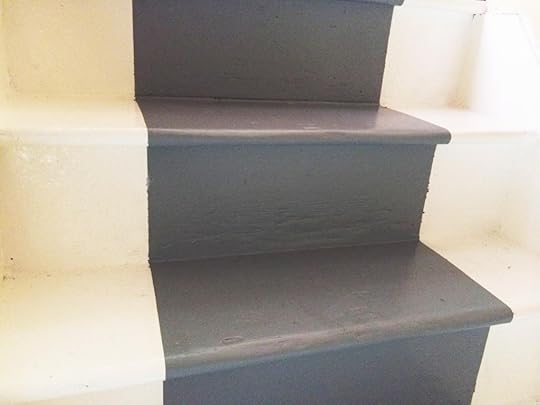 I love that you can actually paint over the tape without having to worry that it is bleeding onto the masked off area. It does make the things look super scrappy while your working, but it comes good, so have faith. Plus it means that you can just paint, paint, paint and get up some real speed with that paint brush!
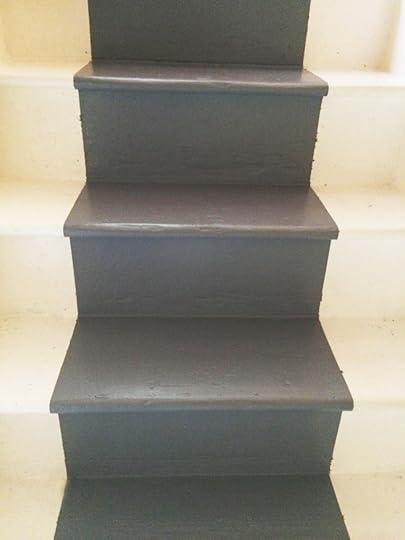 Three coats later and Tah Dah! I’m in love with our new stair way. While there are still a billion more renovation projects that we need to be working on, this is one small step for renovations, one giant leap for home happiness – and it has refuelled and reenergised my passion for DIY! I can’t wait to get stuck into more projects!
The post DIY Striped Stair Makeover appeared first on Made Peachy.
June 16, 2014
Simplicity Sewing Tips With Wendy Gardiner – Sewing Knit Fabrics
Happy Tuesday Y’all! Guest posting today is Wendy Gardiner in the second in her mini series of Simplicity Sewing Tips…
 Sewing with Knit Fabrics
I love to sew with knit fabrics so was delighted to see these fab fabrics being tackled on the Great British Sewing Bee. Garments that are suitable for stretch fabrics are quicker to make (as stretch fabrics often don’t fray, so don’t need seam neatening) and they are easier to fit as they stretch! I particularly love Simplicity 2369, (sizes 8-24). This dress has been on my radar for a while and I do have a wonderful printed stretch jersey that is just waiting to be turned into view B. The swooping tie at the waist is perfect for defining the waist (even if you haven’t got much of one!).
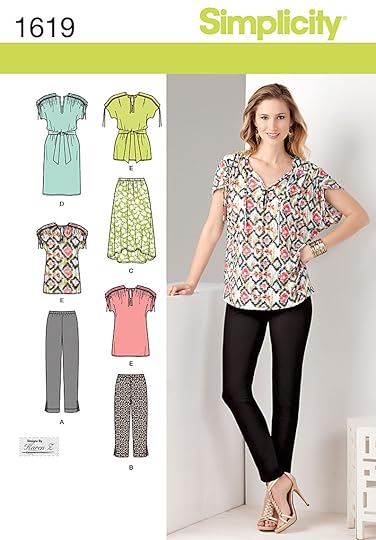 I also like to wear leggings with long tops, they are so comfortable and practical if you are doing something active. Simplicity 1619 (sizes 8-24) has a pair of leggings in the pack so if you are tempted too, have a go with these.
Stretch fabrics can be a little trickier to handle than woven fabrics but they are definitely worth the effort. Why are they trickier? Well, they stretch – and can stretch as you cut and sew, and you may get skipped stitches if you use the wrong needle – but these little hurdles can be avoided if you follow a few simple steps…
1 When cutting out, pin regularly, taking care to pin in the seam allowance only (and make sure you are using sharp pins as blunt ones might snag the fabric). You can also use tins of soup or beans to hold pattern and fabric layers firmly together as you cut out.
2 Use a ball point or stretch needle when sewing stretch fabrics. These needles have a slightly rounded tip which parts the fibres rather than piercing them, so you shouldn’t get the skipped stitches that may result when knits are sewn with a universal sharps needle.
3 On any horizontal seams, ie waist, hemlines etc, sew with a stretch stitch or small zigzag stitch so that the stitching will stretch with the fabric as you pull the leggings on or the dress over your head. A stretch stitch looks like a small slanted zigzag stitch.
4 To prevent the fabric edges curling, after sewing vertical seams with a straight stitch, sew again close to the seam with a widely spaced zigzag (increase the stitch length to 3.0) and then trim the seam allowances close to stitching.
So there you have it – sew stretch fabrics with confidence and enjoy!
♥ – ♥ – ♥
Wendy Gardiner is Simplicity’s Sewing Guru and loves to share tips and techniques to make sewing easier and fun.
For more tips, fitting advice and to browse and buy Simplicity, New Look and Burda patterns visit www.simplicitynewlook.com
Be sure to check out Wendy’s tips for Learning To Sew and check back next week for expert guide to adding piping and pleats!
The post Simplicity Sewing Tips With Wendy Gardiner – Sewing Knit Fabrics appeared first on Made Peachy.
June 15, 2014
The Week That Was: Inspiration & Rejuvenation
What can I tell you about the past week. Well, things have been hotting up here as I have just signed on the dotted line for a very exciting new project – one that has the mother of all tight deadlines. The last few days have been catching up and finishing up on prior commitments – which, let me tell you is perhaps the hardest things about working freelance and a new opportunity jumps out at you. It is almost impossible to focus on the ‘here and now’, when your head is off on the ‘what can be and what will be’. There is a lot to be said about clearing the decks before starting the next big project, a luxury we don’t see enough of in this game, that’s for sure. My focus lately has been for getting the right work/life balance - and things are starting to come together little by little. There has been more time spent relaxing. Which is strange for me, as down-time usually involves ‘working’ on a little project here or there. There has been reading, movie watching, dog hiking, coffee dates, renovation projects and hangs with friends. The kind of all the things that normal life should be including. Letting go of the ‘must work all hours’ mentality is a pretty hard one to shake, let me left you! But, I have to confess, I feel more energised, more excited about the weeks ahead and there is no frantic clock watching or list checking going on. For the next few weeks I’ll be stepping away from the sewing machine. Which is the oddest feeling as right up until now this has almost been my go-to workhorse. I know that it will be glad of the break from the constant stitching and seaming. While it will be good to work on something other than stitching, and getting busy with yarns for a pleasant change, it is also pretty strange. In fact, I did wonder if this might need to be surgically removed from my body! 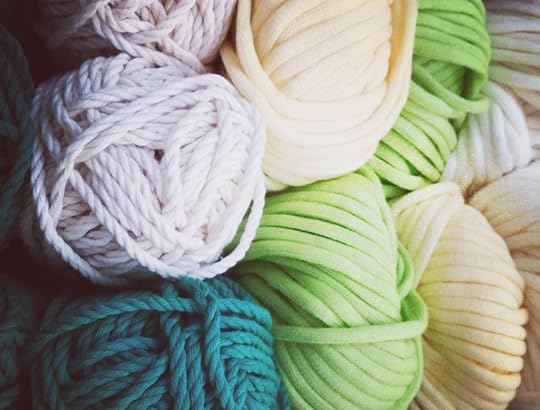 It is wall-to-wall new challenges round these parts. The lasers are set to supreme focus and my work game is going to have to be pretty tight to get everything done in time. Love them or loath them, deadlines are what makes this freelance world go round. One thing that I have learnt about managing deadlines is being organised, being on top of dates, briefs and schedules. It is like a game of Jenga sometimes, you have to keep on moving those bricks, carefully carefully hoping that the whole thing wont come crashing down on you. Time management spreadsheets, lists and keeping up-to-date with admin – Gah! I know what your thinking, win;t nothing sexy about a spreadsheet. Well, your half right on that one. I don’t find them the most exciting thing on the planet, but, I do find that it helps me to keep track of all those plates I’m juggling. I know where my headspace needs to be and when and so far deadlines and real life are working together more harmoniously. The last few days I have learnt that being creative and finding inspiration- to a brief – is both challenging and can feel a little haphazard at times. I mean, you want to approach a new project in the best possible way, but you can’t always guarantee you’ll have the ideas right when you need them. I wrote a while back about banishing a creative slump, and much in the same way, having a flood of inspiration and no means to organise them into a logical process can also result in getting nowhere fast! This time round I have been applying some organisation to the muddle of ideas for this new project, bringing them together to help me to work both creatively and efficiently. So, for those of you looking to find a way to focus all that inspiration and creativity here’s how I’ve been Organising My Inspiration (and not a spreadsheet in sight…well, not unless you want one that is!)
  Four Ways to Organise Your Inspiration 1 Smart Start What do you want to do – what have you been commissioned to do? Here is where you focus you thoughts on what it is you actually want (or need) to achieve. Note down a couple of sentences or scribble out some key phrases that sum up what you want to, or have been asked to work on. While this sounds lame, this is the first step in really honing in your inspiration. I mean, it is great if you are coming up with a billion new designs for quilt tops…unless of course you have been commissioned to create a menagerie of amigurumi animals. See, this is the first hurdle for creative folks! One sure fire way to get all the inspiration in the world is to have to focus on something specific. Don’t completely disregard your other, not-relevant-at-this-time, ideas – just make a notes of them someplace else to allow you to focus on the task in hand. 2 Sketch, doodle & draw I’m no artist, not by a long shot. But, I can work on sketches that communicate the initial ideas into a working guide (for myself and others) for each of the makes. Keep a notebook and pencil with you and be sure to make notes doodles or sketches as they pop into your head. Having them all stowed in one place will help you to note reoccurring themes, style points and can even highlight things that are missing for the design or collection of designs. No one needs to see these, if you a little sketch shy, or you can put them out there, ask others for advice and feedback which you’ll welcome a lot more than when your showing your finished piece. 3 Colours, Supplies & Tools Ok – so I’ll confess, I used a spreadsheet here…but, you don’t have to, you can create a simple list – the principle is the same. Once you have your ideas for the final piece, or collection of pieces. You can work over the pictures with ideas for colours, materials and accent that you might want to include. For commissions you might have set instructions for the materials you need to use, or you might have started out with a skein of yarn and that formed the inspiration for the sketch. Either way, this is the place where you can make a formal ‘shopping’ list of what you need and the tools and supplies that you must have to hand. Setting out all your materials upfront is a sure fire way to keep you on track. 4 Progress & Development There are very few creative projects that don’t teach us a thing or two – be it that you hate using the colour green or that you much prefer twisted rib over standard rib for you knits. During a make you will be learning lots of things about the materials you are using them and the techniques you are using. I find it handy to work back over my notes and add in any little updates or changes that I have made to the original design. This will prove to be a fantastic resource is you every want to remake the item, or if you need to create ‘how to’ instructions, or even for working back over the ideas when you are looking for fresh inspiration for a new make. This has been my creative process recently as I embark on a new project, how do you like to organise your creative inspiration?
The post The Week That Was: Inspiration & Rejuvenation appeared first on Made Peachy.
June 13, 2014
Quilting Inspiration Round-Up
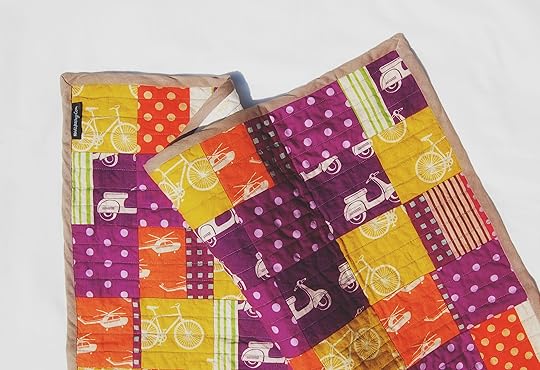
You probably know that I’m pretty obsessed with quilting right now. I mean there are so many amazing fabrics out there, not to mention all the rad designer/makers that are whizzing up some of the most breathtakingly stunning creations known to man! And, don’t even get me started on all the quilts pinned on Pinterest!
So, how about a healthy dose of some quilting inspiration?
First off, I thought I’d share some of my fave quilter I follow on Instagram… PinkSuedeShoe
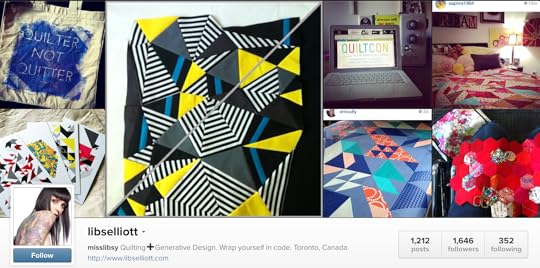
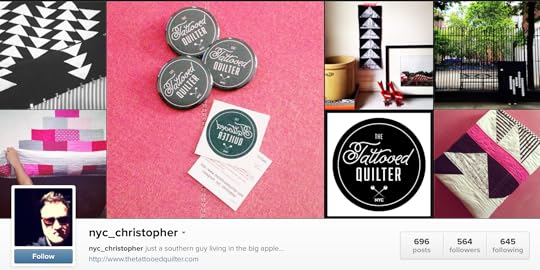
I’m certain that I have lots days checking out all the quilting pic over on Instagram – but seriously, you should check these guys out, they wont disappoint!
Don’t know where to start? Check out these quick and easy guides!
Beginner Friendly Baby Layette – this is the perfect first make for quilting newbies or those after a quick quilt fix!
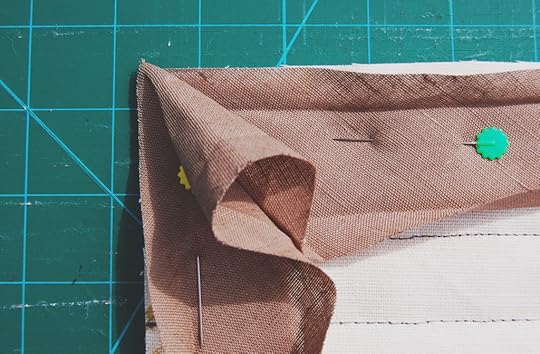 Master adding binding with this step-by-step guide.
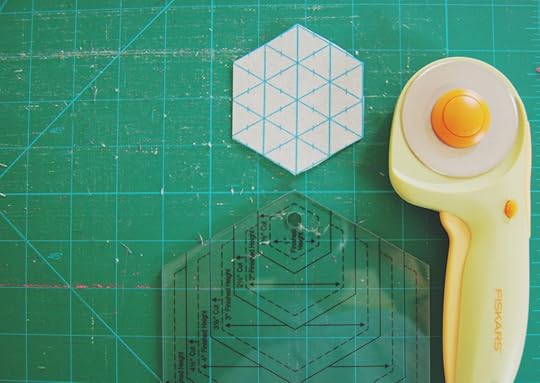 Learn how to make hassle free-hexi patchwork.
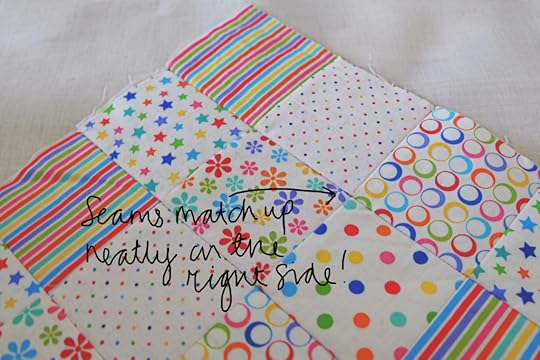 Master the art of neat piecing with Vilene Quilters Grid.
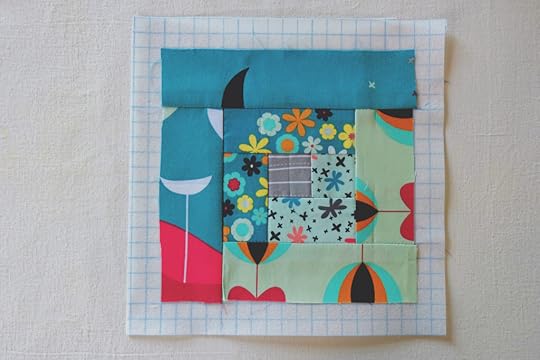 Fast track perfect blocks with Vilene Quickscreen Square.
Want to start stitching right away? Check out these free quilting projects!
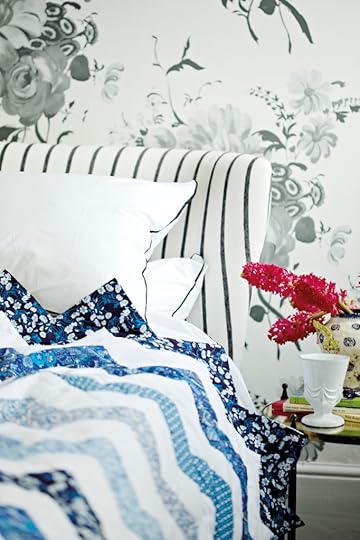 Liberty print chevron quilt.
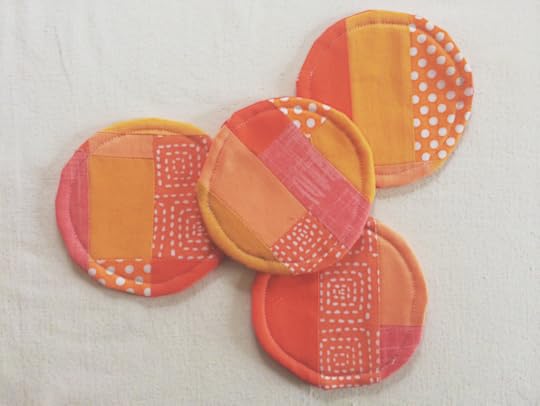 Crazy patchwork coasters.
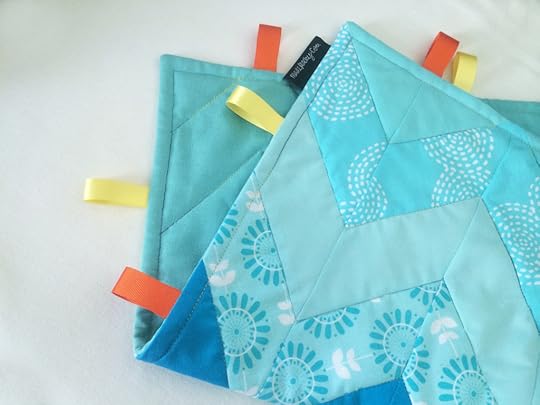 Mini baby ribbon tag quilt.
The post Quilting Inspiration Round-Up appeared first on Made Peachy.
June 12, 2014
Gorgeous Garden Candles: DotComGiftShop Giveaway
Sunny Fridays are my jam. I don’t think I care all that much that it is Friday the Thirteenth, I mean the sun is shining, I have a pitcher of Ice Latte on the go and the whole weekend spread out ahead of me. So, that’s a pretty lovely day in my book!
This week has been packed with finishing up projects, getting caught up on paperwork and the exciting task of getting ready and prepared for starting a brand new project next week. I don’t often get the time to take a break (all be it a really small one!) between finishing up one project and starting on the next, so this weekend is a luxury that I fully intend to make the very most of!
I have every intention of spending the entire weekend outside, lapping up some of those sunbeams – under the protection of a slathering of factor 50 and a huge brimmed sunhat, I’m something of a Freckle Farm in the summertime! I plan on spending time working on a few little garden projects that have been ticking away in the back of my head for a while, and I’m super excited to get the time to spend on them.
Who’s with me? Who plans on spending the entire weekend out in the garden, sipping icey beverages and generally giving the soul a bit of TLC? Long lazy evenings are perfect for entertaining, firing up the BBQ, mixing a few fruit cocktails and relishing every single second of fresh air and good company!
 How about a little treat to add some pretty to your garden this summer? I adore filling my garden with tiny fairy lights and twinkling candles (up out of reach of the dog, I hasten to add!) When I saw these beautiful glass and butterfly details tealight holders it was love at first sight! We we first began to work on the strip of barren dirt that was our garden I expressed that I wanted to create an Enchanted Garden. Yes! I actually said that when asked what I thought we should do with our garden – and what is more enchanted that smatterings of twinkling candles?!
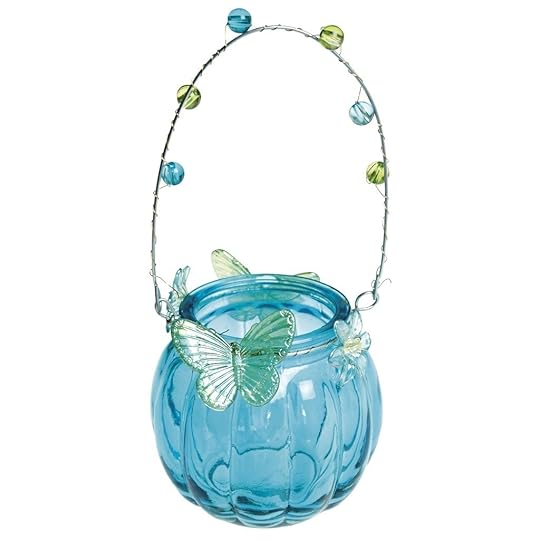 I don’t know how y’all feel about Friday the Thirteenth and all that, but if you are one of those superstitious folks, now is the time to give the universe a bit of a shake up and get yourself some lucky! I have one set of these gorgeous garden candle holders, £18.95 from fab folks over at DotComGiftShop to give away to one lucky Made Peachy reader!
What are you waiting for – get entering!
You can enter the giveaway in three ways – and each will be counted as 1 entry…so, do all three and you will be entered three times my friend!
1 Please leave a comment below sharing what your plans are for this long balmy summertime ahead of us
2 Share this post on Twitter, tagging @madepeachy and using the hashtag #DCGSMadePeachy
3 Give the MadePeachy Facebook page a like, share the giveaway post and leave a comment on why you’d love to win!
Want a bonus entry? Then head over to the MadePeachy Instagram , follow and give the DotComGiftShop post a like & comment!
The giveaway is open to everyone with a UK postal address, the winner will be pick at random and announced on the 20 June - Good Luck!
The post Gorgeous Garden Candles: DotComGiftShop Giveaway appeared first on Made Peachy.
June 11, 2014
Easy-Make Rubber Band Bracelet
Rubber band bracelets are all big news right now, and rightly so! Anyone can make them, you can customise them into any colours you want and they are fun, fun, fun to make! This is great craft for the Littles with their nimble fingers, so I thought I’d share my how to guide for creating your own funky rubber band bracelets…and there’s the best part – you don’e even need a loom, just a couple of bits and bobs I’m sure you’ll have kicking about at home! This is the perfect craft for sunny afternoons, so let’s have a go and create some Easy-Make Rubber Band Bracelets! 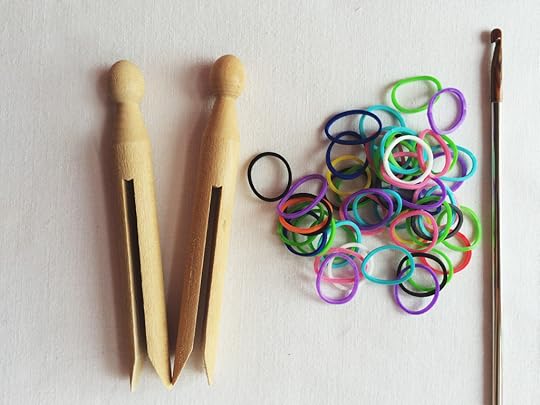 Grab your supplies…
A pack of mini rubber bands (for bracelet making)
2 Dolly pegs
Small crochet hook 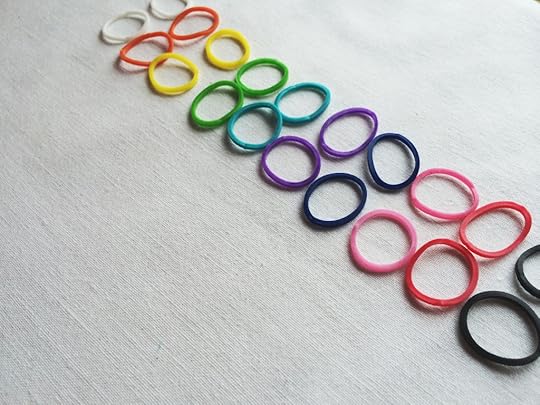 Set out your chosen colours. Sounds obsessive but it helps you to visualise the finished bracelet and you’ll find you can pick up some real speed if they are all set out right at hand! I’m working with two bands at a time, to create a thicker bracelet, but this also works with just one band, or three bands for super chunky!
 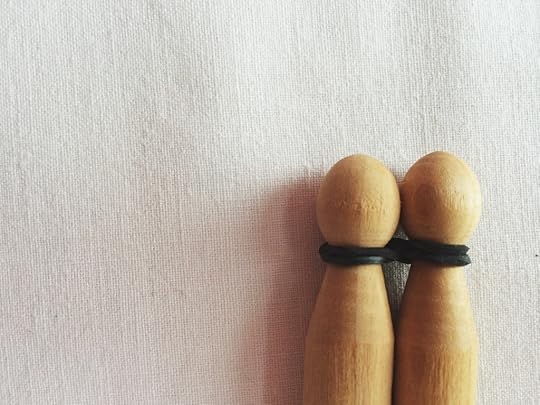 Start out with the first pair of bands, and twist into a figure eight and slide on to the top of the dolly pegs with the twisted section in the centre.
 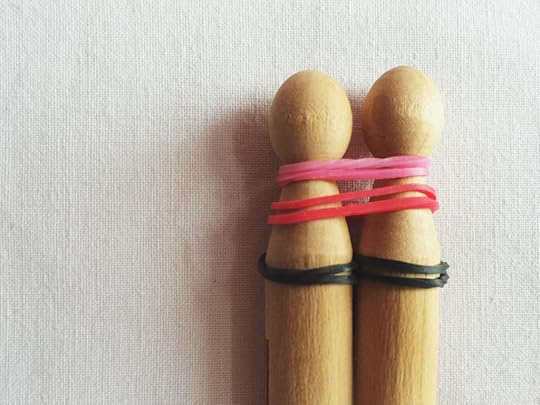 Slide the foundation band down and add the next two pairs of coloured bands in your colour sequence.
 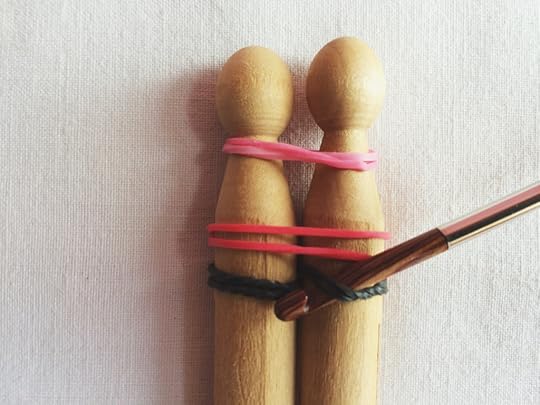 Using the crochet hook, Pick up the pair of bands on one side of the twist and bring it up and over the top of the peg.
 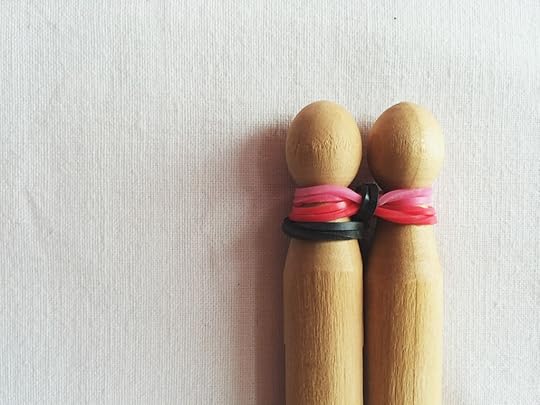 Unhook the bands and drop them in between the two pegs. You know what, if you have nimble little fingers you can always skip out on using a crochet hook – give it a try and see what feels best for you!
 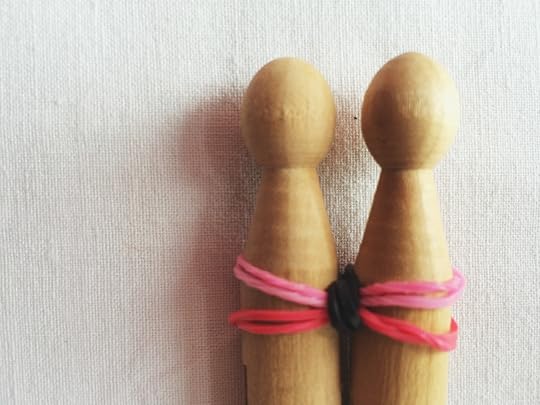 Repeat to bring the second side of the same pair of bands up and over the top of the peg to sit in the centre.
 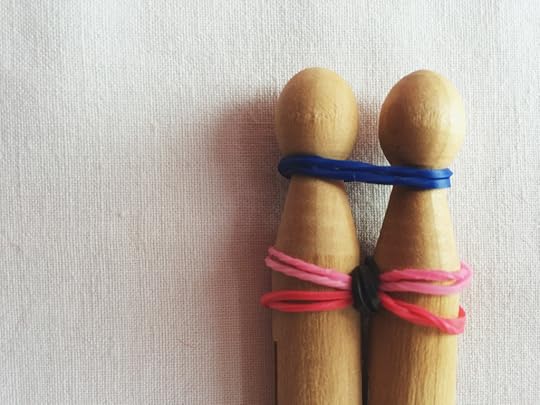 Add the next pair of bands in the colour sequence.
  Again using the crochet hook and working on the pair of bands lowest on the pegs, bring each side over the top of the peg and into the centre in turn.
 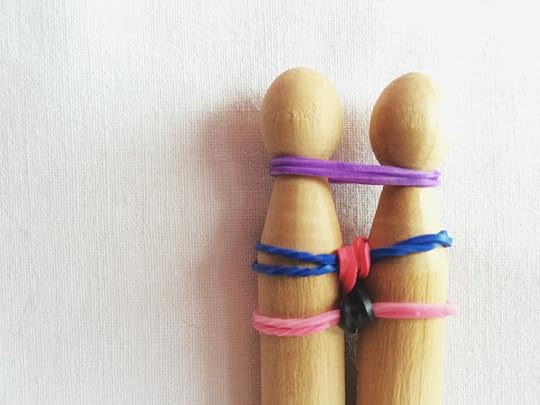 Once each side has been hooked over the pegs to the centre, add in the next pair of coloured bands.
 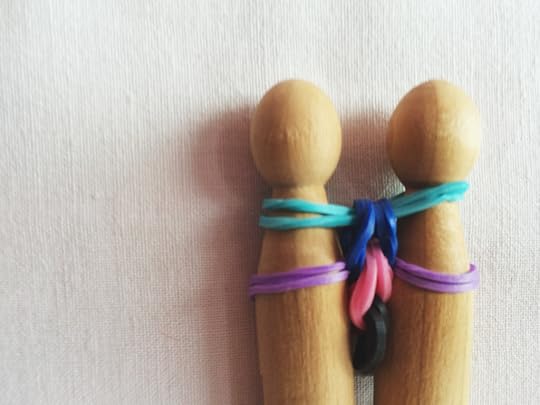 Yup! That’s it, keep on adding in bands and passing the lower pairs over the top of the peg each in turn.
  Pretty soon you’ll be flying through the bands and the length of woven rubber band bracelet will start to creep down the length of the pegs! You can measure as you go, so as soon as you have created a woven band to your required length, you’re ready to fasten off.
  When you have finished your required length or design, ending with the final pair in your chosen colour. Twist the final pair of bands into a figure eight and slide onto the top of the dolly pegs and use the hook to take the last bands over to the centre on each side, leaving with just the final band on the top of the pegs.
 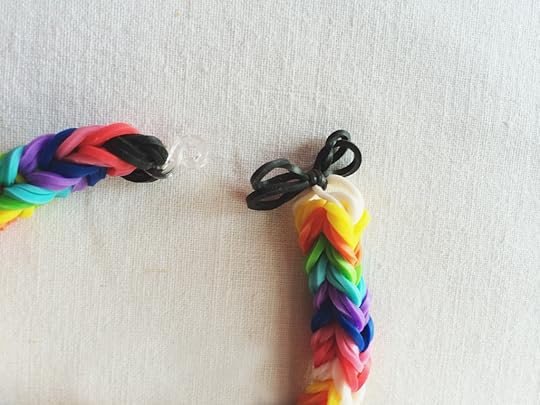 Use the crochet hook to create a small knot with the two loops of the final band.
 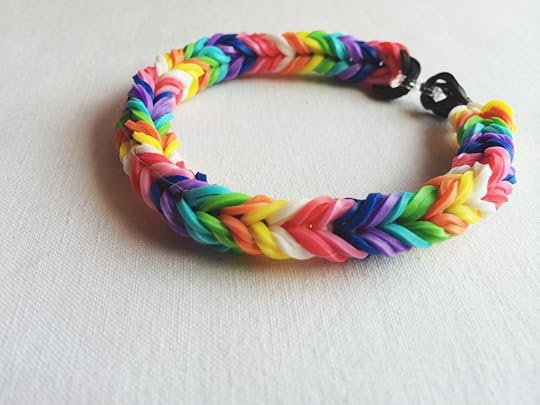 Many rubber band bracelet kits come with a simple hook fastening, add this in to secure the ends of the bracelet, or fix on a fancy clasp, and your rubber band bracelet is ready to wear! Sweet and so simple!
  You’ll be able to get three or four bracelets from one pack of bands – but, if your working with fancy colour combos, you might want to grab a few spare packs to make sure you have all the shades you need!
 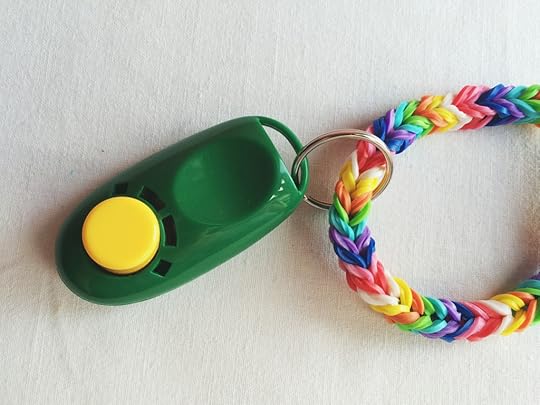 I’m pretty sure you can let your imagination run wild with this, create key chains and bag charms, or even necklaces and ankle bangles…I think I’m going to be using mine to carry my pup clicker, because let’s face it, puppy training should be just as cute as it possibly can be, right?!
The post Easy-Make Rubber Band Bracelet appeared first on Made Peachy.
June 10, 2014
Creative Reading: Cakes in Bloom
OK, so I’m currently in the throws of a summertime health-kick, and sweets and candies are most definitely off the menu. So, what does every gal do the second she focusing on eating lots of delicious super foods and banishing sweet treat from her life? Spend endless hours re-pinning desserts on Pinterest, and poring over cookery books. Yup! guilty as charged.
 Cakes in Bloom is the latest offering from Cordon Bleu trained bespoke cake guru, Peggy Porschen. Holy Sugar high batman this book is amazing!
 Fans of Peggy will be familiar with her breathtaking masterpieces in cake form. Will have been left wondering how in the wide world such incredibly life-life blooms can be created with the use of baking supplies. It’s just mind-blowing.
Well, be mind-blown no longer my friends! This book will give you all the specialist, insider knowledge to create your very own blossoms and blooms at home!
There are 30 ultra realistic blooms, including roses, peonies, pansies and poppies (plus many more!) that are so life like you have to remind yourself that you aren’t looking through the pages of a botany book. There are over 20 different cakes for you to try your hand at, including full-sized masterpieces and mini cakes – perfect for those with upcoming summer parties or planning a DIY wedding – plus there are lots of tips and inspiration for you to create your own custom designs using the techniques demonstrated.
 Peggy not only shares these wonderful designs, but actually the secrets behind creating them. Clear – and stunning – step-by-step photography clearly demonstrated the principles and skills used including moulding, balling, veining, frilling and dusting. These cakes are no-doubt as good to eat as they are too look at – with many of them looking too good to eat (well, almost!)
Never tried your hand at fancy bakes and sugarcrafting? Don’t fret! There is also a wealth of useful information stowed at the back of the book with provides a host of general baking and decorating information – so worry not my sugar-loveing chums, with a spoonful of sugar and a serving of enthusiasm this book will see you on the road to creating your own stunningly decorated cakes with your own fair hands! This already bestselling book is sure to become a bible of inspiration for bakers and sugarcrafters alike - not to mention those in the midst of a healthy-living regime seeking out a visual fix for those epic sugar cravings!
 Because I know y’all have a sweet tooth just like me, here’s a little special something for you! Readers of Made Peachy can buy Cakes in Bloom at the special price of £20 (normally £25), with free UK p&p.
To order, please call direct on 01256 302699 quoting reference AC8 and your credit card details.
♥ – ♥ – ♥
 Cakes in Bloom by Peggy Porschen (Quadrille, £25)
Photography: Georgia Glynn Smith
The post Creative Reading: Cakes in Bloom appeared first on Made Peachy.
June 9, 2014
Simplicity Sewing Tips With Wendy Gardiner – Learn To Sew
Wendy Gardiner is Simplicity’s Sewing Guru and loves to share tips and techniques to make sewing easier and fun. For more tips, fitting advice and to browse and buy Simplicity, New Look and Burda patterns visit www.simplicitynewlook.com
Wendy passionately believes in passing on sewing skills and knowledge so that more people can make their own fashion and furnishings and realise it’s a pastime that can be fast, fun, fashionable and affordable. With today’s modern equipment and sewing machines it really can be easy to sew – In this mini series Wendy Gardiner will share tips and trips for getting the most out of your makes!
Simplicity Sewing School With Wendy Gardiner – Learn To Sew
Dressmaking and all sorts of sewing is big news right now – but don’t worry if you are a newbie! Simplicity Creative Group have a whole range of patterns especially for beginners.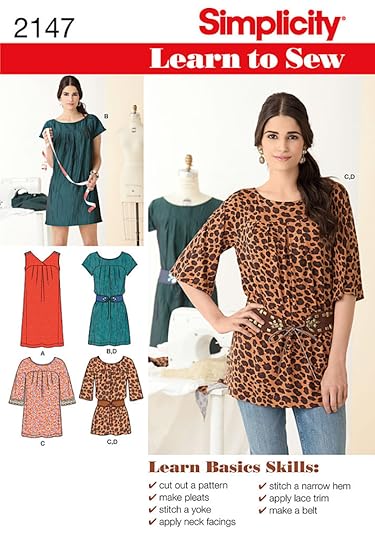 The Learn to Sew range in the Simplicity collection are specially created for those that have never sewn before. They include all the pattern pieces and easy to follow step-by-step instructions to complete the projects of course, but they also include some sewing tutorials to help you increase your sewing skills. The choices range from skirts, trousers, tops and dresses to PJs, kids’ clothes, bags and fancy dress costumes.
 Take a look at Simplicity 2286, suitable for absolute beginners this A-line mini skirt pack will help you learn to choose the correct size, cut out the pattern, stitch seams, apply trims, make elastic casing for the waist-banding and stitch a hem. All useful transferable techniques you will use again on your next pattern! Simplicity 2147 is another Learn to Sew pack which includes a dress or top, Simplicity 2061 is pack of trousers and Simplicity 1935 is a pack of easy bags – learn a little patchwork as you sew.
Simplicity isn’t alone in producing this new range of patterns, New Look has also got some Sew New, Learning the Basic designs such as 6004, an A-line elasticated waist skirt and Burda has classified many of it’s easy patterns as Super Easy so you know you can have a go, even if you are just starting to learn to sew. So, whatever you want to learn to sew, you can find it in the Simplicity, New Look or Burda ranges! So go on – have a go – and if you already sew, encourage your friends and family – point them in the right direction and watch as they get the bug too…
Take a look at SimplicityNewLook for more pattern choices and helpful tips!
Wendy’s Top Tips for Starting Sewing!
1 Choose and easy-sew pattern and don’t be put off by the fabric colour shown on the envelope. Remember what you make it in is your choice. Make sure you use the right size – check your measurements against the pattern envelope and opt for the size that closely matches your measurements. It is important to note, that you will probably not be the same size as clothes you buy from the high street. Remember, with multi-size patterns you can easily and quickly cut from a small waist to bigger bust or hips.
2 Invest in a sewing kit which includes good quality dressmaking shears and new, sharp pins. Also, use good quality sewing thread – ditch the old reels you’ve inherited – old and cheap thread can weaken, which will split or break as you stitch.
3 Read all the instructions and look at the cutting layout before you begin, it will give you an idea of how it will all comes together. Take care cutting out – get that right and the rest will be a breeze! Make sure that you follow the right layout for the style that you are making and the fabric width that you are using. mark it with a star or outline it so you don’t accidentally follow the wrong layout. Also, make sure that you place all the pattern pieces as shown – with the grain lines on the pattern pieces parallel to the selvedges or bound edges of the fabric. The grain line on the pattern piece is shown why a thick line with arrow heads at either end. This is so important – failure to cut on the grain can cause the seams to pucker, twist or ripple.
4 Use a new needle with every project. Blunt needles cause hellish problems, including skipped stitches, broken thread and more. Make sure you inset the needle ‘flat to back’ so the flat part of the shank is towards the back of the machine, and push it up into the holder as far as it will go. The tighten the needle screw with the screwdriver provided with your sewing machine’s tool kit, so it can’t work loose as you sew. Make sure the needle size is appropriate for the fabric, for example jeans needle for denim. Generally, light-weight fabrics need finer, sharp tipped needles and heavier fabrics need thicker needles – the lower the number on the needle the finer it is. Use stretch or ballpoint needle when stitching stretch fabrics as these have a rounded tip which prevents snags and skipped stitches.
5 Make sure the presser foot is raised before you thread your machine – this releases the tension discs so it is easier for the thread to slip between the discs as you follow the threading path. Also, make sure you insert the bobbin the right way round – incorrectly placed and you get skipped or broken stitching. Usually it is dropped with thread coming anti-clockwise from the bottom.
♥ – ♥ – ♥
Watch this space…Wendy will be back next week with tips on how to sew with knit fabrics!
The post Simplicity Sewing Tips With Wendy Gardiner – Learn To Sew appeared first on Made Peachy.


