
Laura Strutt's Blog, page 31
May 29, 2014
10 Free Birthday Printables
This is so true! I love this Not My Birthday printable from Cocalores
But…soon it will be time to party. Yup! My birthday is right around the corner. Only 1 more sleep – woop! Birthdays are a lot of fun, am I right? Whether your birthday is coming up, or you have a party for someone else to plan out, I figure that this collection of my Top 10 Free Birthday Printables will be right up your street – you know what, why not bookmark and thank me later!
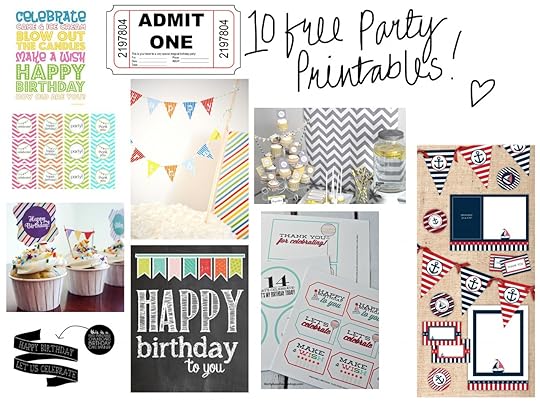
Check out these beauts!
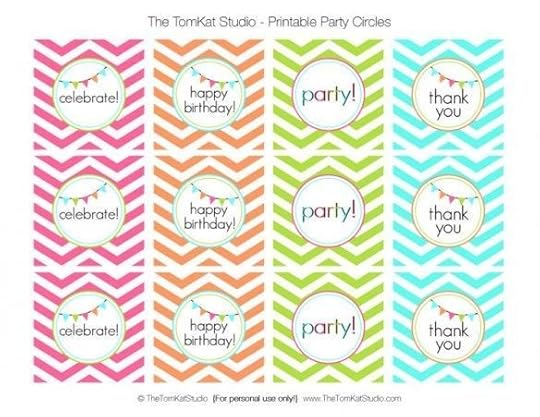 1 Birthday Party Printable The Tom Kat Studio
 2 Mini Cake Pennant Bunting Printable Kara’s Party Ideas
 3 Chalkboard Birthday Printable The Wood Connection Blog
 4 Birthday Treat Printable Balancing Home
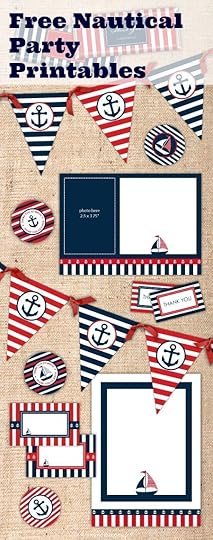 5 Nautical Party Printables Catch My Party
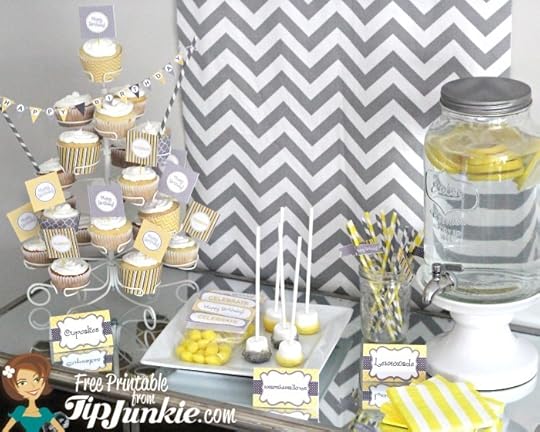 6 11 Piece Yell0w and Grey Party Printable Set Tip Junkie
 7 Rainbow Birthday Cake Toppers Strawberry Mommy Cakes
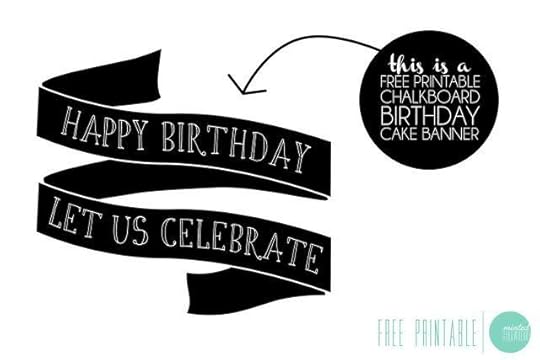 8 Chalkboard Cake Banner Minted Strawberry
 9 Admit One Party Invitation Invite Town
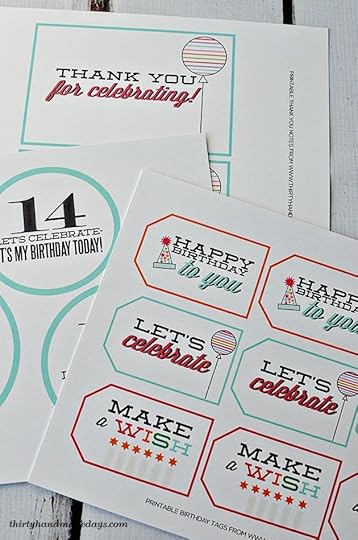 10 Printable Birthday Party Pack Thirty Handmade Days
Hip Hip Hooray – for having a birthday!
The post 10 Free Birthday Printables appeared first on Made Peachy.


May 28, 2014
DIY Wedding Mini Makes Videos
Light, Camera, ACTION!
They say that you should do something every day that scares you. Well, I guess that is true. Rather than spend every day hanging out with big, fat, hairy spiders (which scare me witless!) I prefer to think that this means to do something that is taking me right out of my comfort zone. Try something new, give things a chance.
Where am I going with this? Well, a few weeks ago the publishers of my latest book thought it would be rad to produce a selection of Wedding Mini Make Videos to support the DIY Wedding Manual. Now, as a girl that is most comfortable sat behind the sewing machine, or laptop; curled up with knitting and a good book and not – most definitely not – prancing in front of a camera, this fits right into the ‘getting out of the comfort zone’ for me!
Last week saw me buzzing over to Bristol, armed with a huge stash of supplies and a nervous smile – ready to make a set of mini how-to videos. And, you know what, I had a whole lot of fun!
Yes, I’m akward. Yes, I think I need a whole heap more practise. Yes, I was fighting the giggle fits (I actually said “four corners of the apocalypse” when I got into a huge tangle of veiling…this is no doubt on a bloopers reel somewhere!) But, most of all, I’m pretty chuffed! I did a whole thing that, ordinarily I would run screaming from and I had a good time – so, if you can bear with me on my general awkwardness I’d love you to check out this set of sweet Wedding Mini Make Videos!
DIY Ribbon Wedding Invitation
Discover to to transform simple designs created on your home computer into a fabulous wedding invitations accented with lashings of ribbons!
DIY Wedding Veil
Create your own shoulder-length veil – with just a few supplies – ready in minutes for you to customise to your hearts content!
DIY Table Candles
Customise classic pillar candles to create your own table centre pieces with a collection of ribbons and lace!
Thank you for watching!
♥ – ♥ – ♥
If you love these videos – awkwardness aside – and you are looking for more creative inspiration, practical tips and handmade wedding know-how I would be over the moon if you checked out my book the DIY Wedding Manual, £18.99, Haynes!
The post DIY Wedding Mini Makes Videos appeared first on Made Peachy.
May 27, 2014
DIY Sweet Sailor Knot Bracelet
I freaking love chunky bracelets! And, this Sweet Sailors Knot Bracelet actually easier than it looks to make…honest!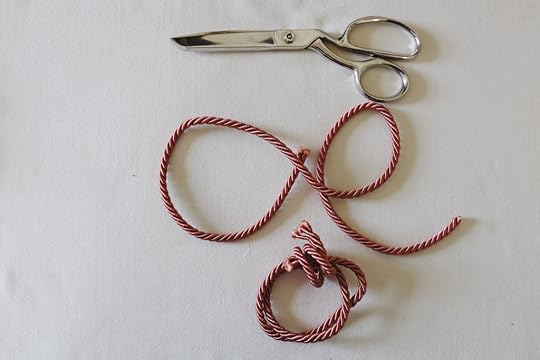 Grab your supplies…
Length of cord – at least 80cm
Scissors
Wide ribbon ends clamps & jewellery fastener
Jewellery pliers
First things first, you got to trim the length of cord into two equal parts.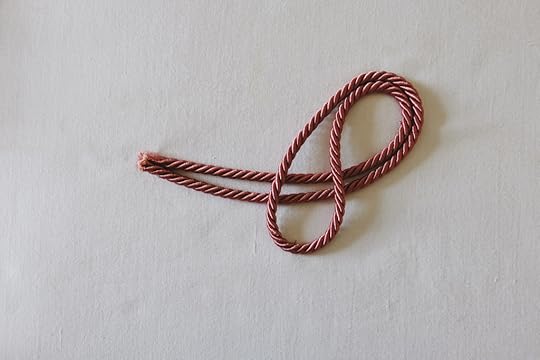 Fold both lengths of cord in half, take the first piece of folded piece of cord and create a loop by passing the centre fold over the tails.
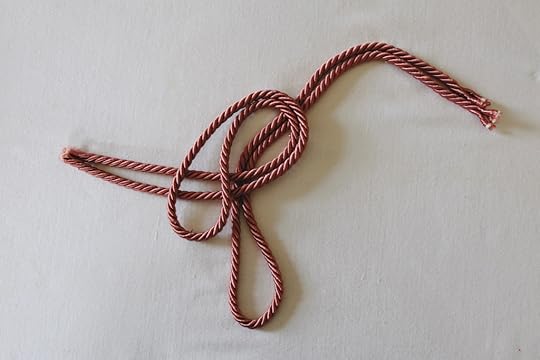 Take the second length of cord, and pass under the loop made in the first length of cord.
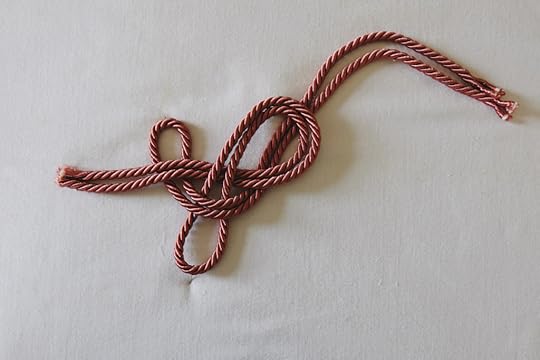 Bring this folded end of the second cord over the folded end of the first cord and then under the tails of the first cord.
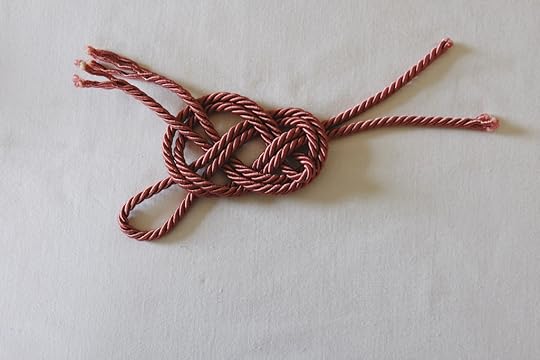 To finish the knot, the folded end of the second cord needs to be passed over the loop made in the first cord, under the tails of the second cord and then back over the second part of the loop in the first cord.
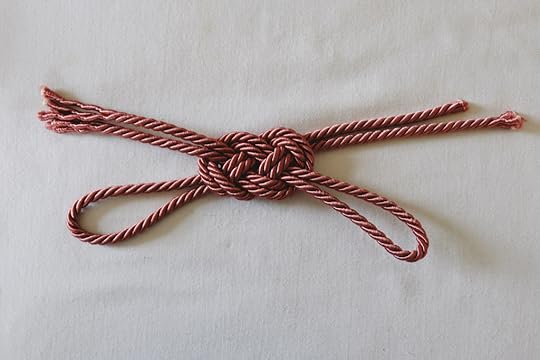 Pull up the the tails and the folded ends of the cord evenly on both sides to tighten the knot.
You with me? Let’s look again…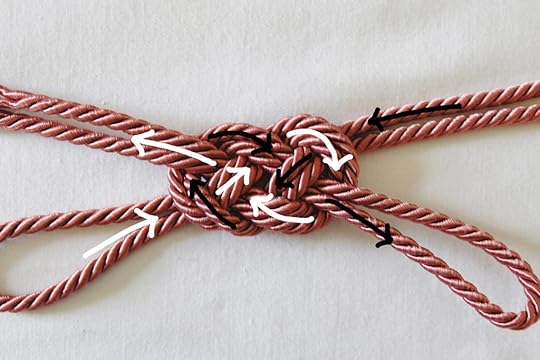 The white arrows show the direction and placement of the first piece of folded cord and the black arrows show the direction and placement of the second piece of folded cord.
You with me? Ok…how’s this…
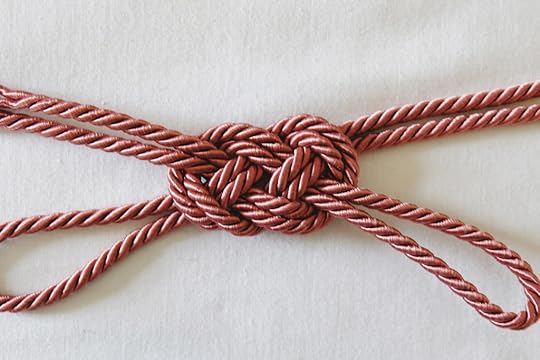 Awesome! Now you got it!
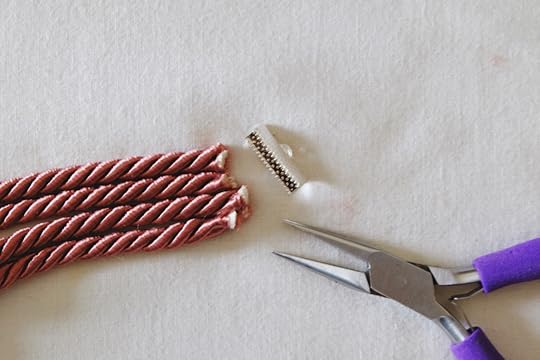 All that is left to do is trim the ends of cord to the required length and secure into wide ribbon ends with a pair of jewellery pliers and add your fastening and your bracelet is ready to rock!
Sweet – am I right?
This looks great made up in two different colours of cord, or made in to a necklace or even belt – I’m pretty sure the possibilities are endless!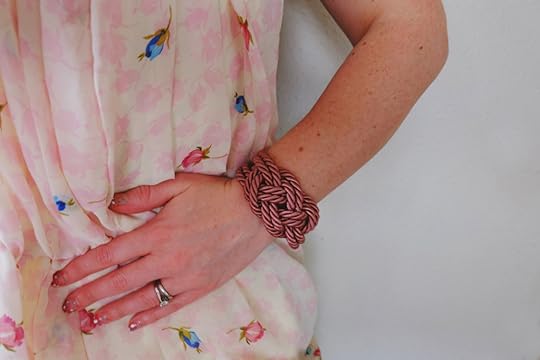 I’m pretty sure that I’ll be sporting one of these in a different colour every day this summer! Yay!
The post DIY Sweet Sailor Knot Bracelet appeared first on Made Peachy.
May 26, 2014
Quick Custom House Keys
It is a universal truth that if something sits still for even just a second too long in this house, it runs the risk of getting customised.
The long weekend was packed with plans, projects, home DIY and lots and lots of getting busy making home – my very best pastime! There are lots of tasks in house renovation that just take ages – there is no avoiding this, some projects no matter how you attack them need stripping, sanding, preparing, measuring, priming, building, painting and finishing. Yes, it’s rewarding work, but it is long – and often sloooow work. And, when I’m surrounded by projects that I’m in for the long haul I like to crack out a super-quick make, something that can be finished in mere minutes…because, let’s face it – is there really any feeling better than when you complete a project?
With all these home focused tasks, I decided I wanted to create some Quick Custom House Keys!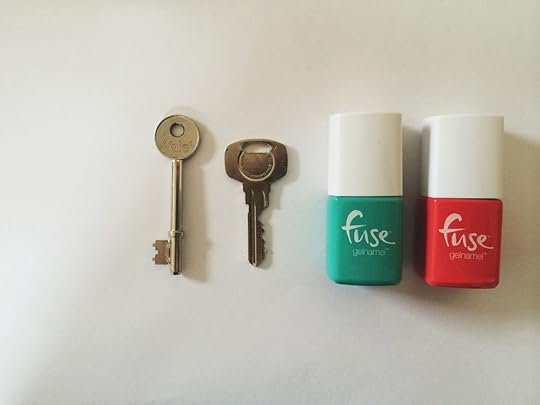 Grab your supplies…
News Flash Nail polish is not only for nails! Grab your fave colours to add a colour pop to your house keys!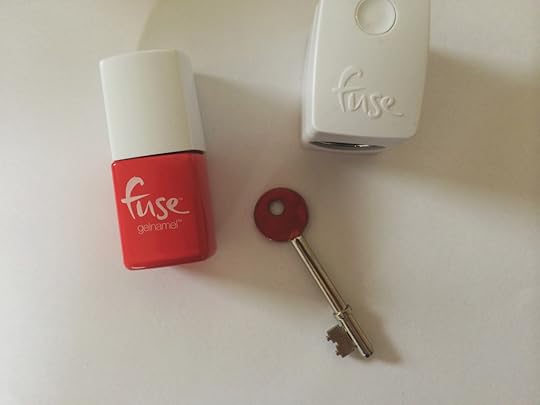 A quick swipe of colour across the top of your key will transform a boring house key in seconds -easy right?! I’m pretty sure that you can use any nail polish to cover you key…since using
 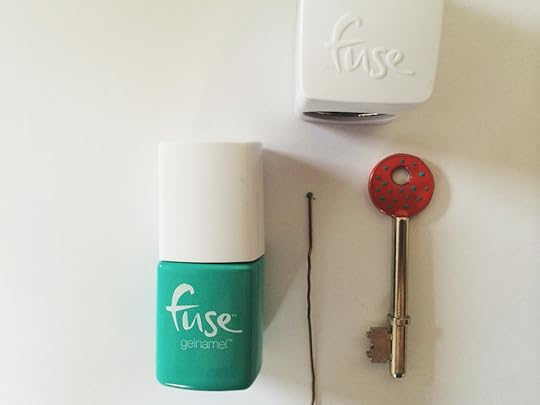 One colour not enough? Nope, not for me either! Add dots, hearts, stripes or flowers with a second – or, if your feeling wild, a third – colour!
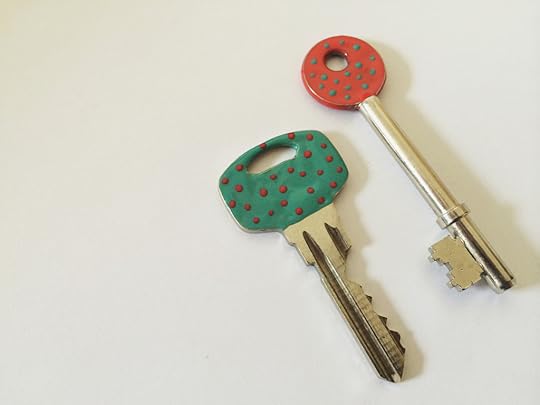 Because I simply can’t help myself – I’ve worked up a second key with the colours reversed, I guess I’m just that kind of gal! What colour combo will you use?
♥ – ♥ – ♥
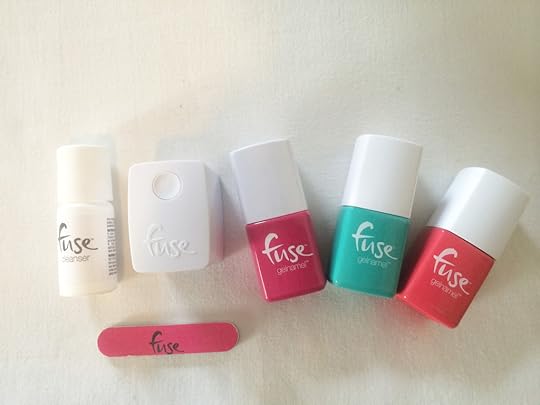
These house keys were customised using the Fuse Gelmanel Starter Kit, £35 & solo colours in Elec-tric or Treat & Intens -so-fly, £15 each c/o Sensationail
The post Quick Custom House Keys appeared first on Made Peachy.
May 25, 2014
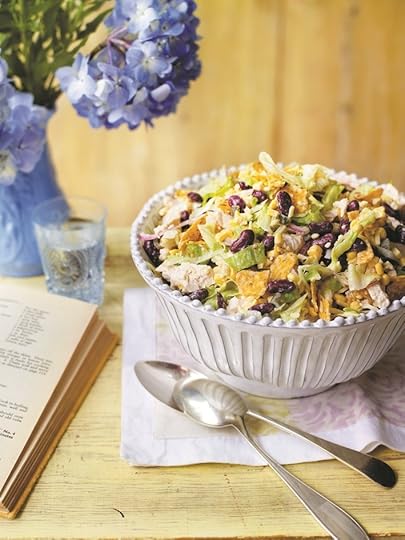
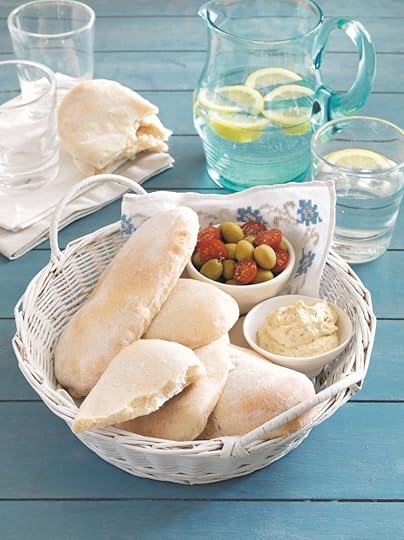
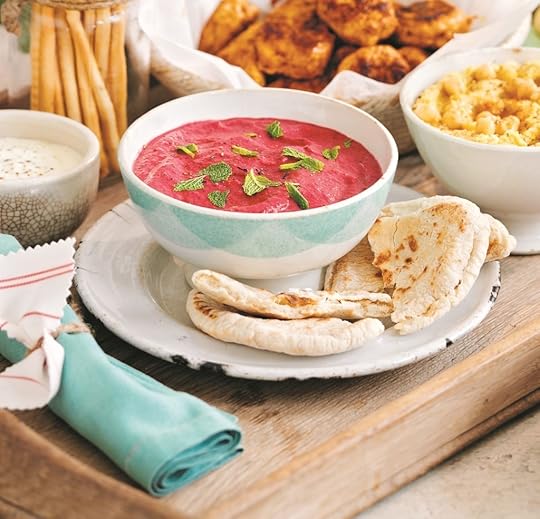
Eight Eats: Delicious Recipes for Long Weekends
Ahhh! It’s Monday, the sun is shining and we don’t have to go to work. Uh-maz-ing.
Long weekends are sheer indulgence – for lazing about with the family, for enjoying that extra free day of relaxation. And, if – like us – you’re in the middle of a renovation, perhaps catching up on some home DIY projects.
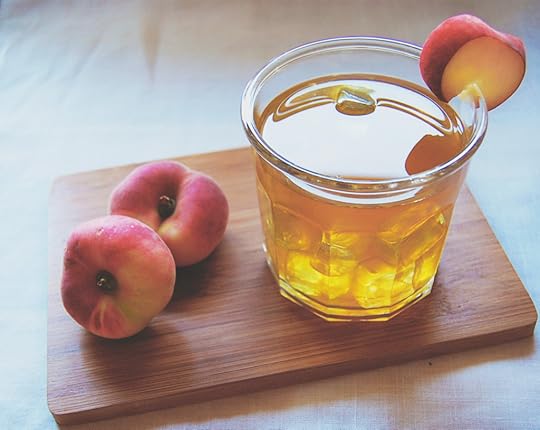
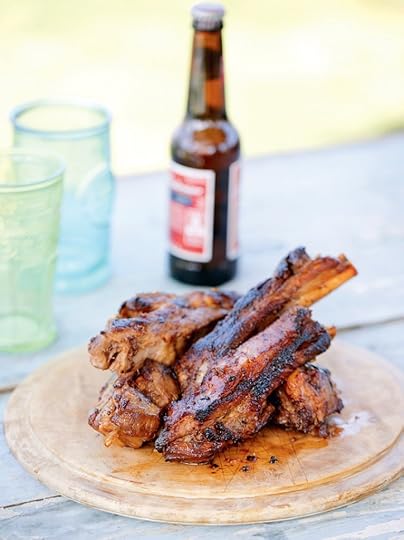
Whether you’re entertaining, or just chilling out with your people, sitting down to some delicious eats and drinks is one of the finest ways to enjoy this extra day of holiday. I thought that I would share a few of my favourite fun, delicious and sweet ideas that you might like to add into your long weekend. Here, friends, is my Eight Eats: Recipe Round-Up!
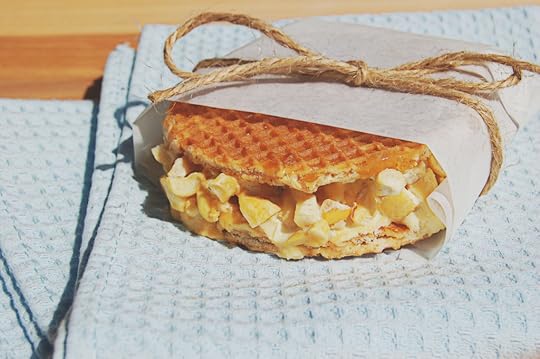 Stroopwafle Ice Cream Sandwich


Delicious! So, tell me – how are you spending your long holiday weekend?
The post Eight Eats: Delicious Recipes for Long Weekends appeared first on Made Peachy.
May 24, 2014
Style Sunday: The Lace Pencil Skirt
I love it when a style gets a bit of a shake up. The formal tailoring of the pencil skirt has always been one of these garments that is not only super-sexy but also gives you that,” I’m power dressing” feeling. But, what happens when the power dressing is toned down and the sweetness is amped up? It looks rad, that’s what!
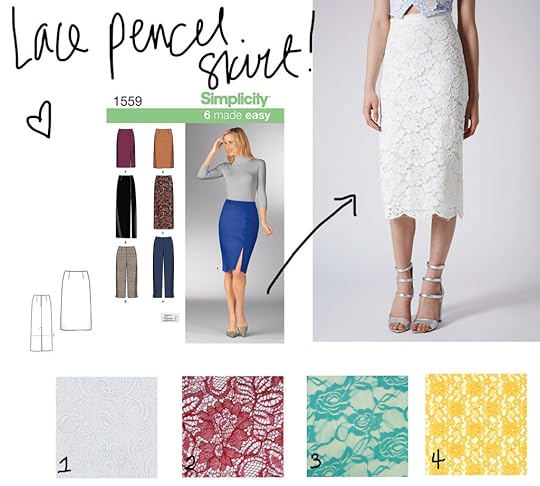
I am transfixed on the use of layered lace in the pencil skirt, £60, Topshop, it has everything that I want from a pencil skirt – it is fitted, it gives a nipped in waist, it’ll create a sexy swagger, but at the same time, it is so sweetly feminine, the hard lines are softened, all the sex-appeal but super enchanting too! I am in love!
 The Pattern
Simplicity 1559, sizes 8-22, £8.15 SimplicityNewlook
This pattern collection is a fantastic booster to the tailored essentials in your wardrobe. Select design D for the knee-length pencil skirt – team a lace fabric with a co-ordinating lining to create the feminine style.
The Fabrics
1 Santina Lace • £24.50 per metre • MyFabrics
2 John Kaldor Tocca Lace in Scarlet • £13.25 per metre • SewEssentials
3 Turquoise Lace • £6.99 per metre • TiaKnightFabrics
4 Raschel Lace Yellow • £2.78 per yard • Fabric.com
I don’t know about you guys, but even though I love the cool summery white lace – I’m a little tempted to go all out and make a pencil skirt in a buttery yellow lace or even a bright turquoise…perhaps even mixing things up with a contrasting lining fabric. Tell me, when it comes to lace, do you like subtle, classic colours, or do you prefer bold, bright shades?
The post Style Sunday: The Lace Pencil Skirt appeared first on Made Peachy.
May 23, 2014
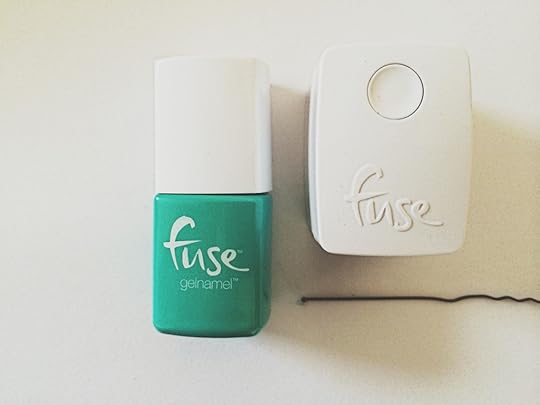
DIY Funfetti Mani Fuse Gelnamel
Hello weekend! Or, should I say Hello Loooong Weekend!
Bank Holiday Weekends are for hangs with friends, home renovation projects, and having some outdoor adventures – weather permitting, of course! As I’m not entirely sure what the weekend will hold in store for me, I figure the best way to be fully prepared for all eventualities is to get my mani on! I know, deal with the important matters first and foremost!
I’m a huge fan of gel manicures - it is just about the only nail colour that seems to be able to stand up to all the things that I busy myself on a daily basis, without getting all chipped and looking grim. But, sometimes you don’t want that kind of commitment from a nail colour – so, what about a gelnamel that works like a gel, but lasts for a full week? Yup – is like the universe is pandering to my fickle nail colour whims. So, in honour of all the fun things that will be taking place this weekend, I shall be sporting this super cute and colourful, DIY Funfetti Mani!
 Grab your supplies…
A bobby pin
And even a sprinkle of glitter, a crisp white polish and a top coat – but that’s totally optional!
 Y’all remember how I showed you how to make neat little dots with an opened out bobby pin? (That’s for us folks that don’t have fancy nail art tools!) Well, start out with your first colour and open out them bobby pin and start working little dots!
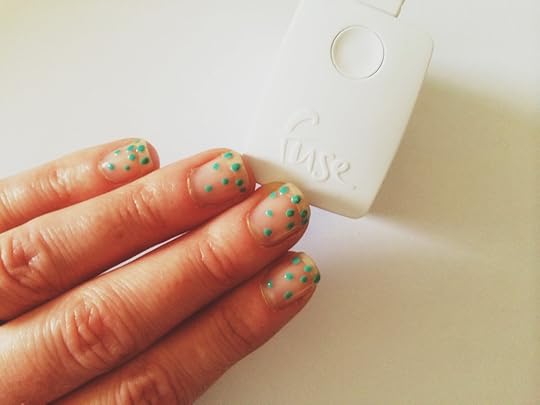 Dot little blobs of colour, applying a greater concentration at the top of the nail and getting increasingly sparse as you work down. Fuse Gelnamel is ace! You apply the colour to each nail, then cure it under the mini lamp – so when your doing fancy pants stuff like these little dots, it means that you can set each colour fully before moving onto the next one – neat, so no Smudgy McSudgersons here!
 Once the dots are cured, go ahead and apply the second colour of dots – in exactly the same way – more at the tip of the nail and a small scattering at the lower part. Get them under the lamp and cured quick smart!
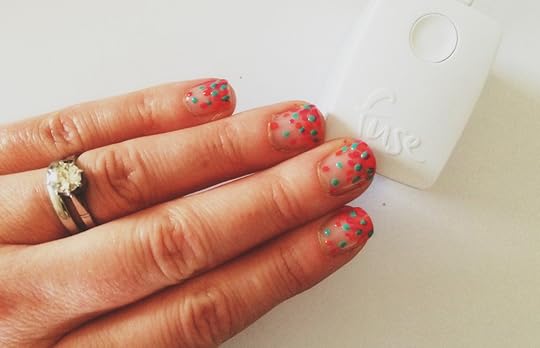 I’m guessing you have spotted (no pun intended!) the pattern here – yup, that’s right, dot, dot, dot with the third colour filling in the spaces at the nail tip and adding random dots lower down.
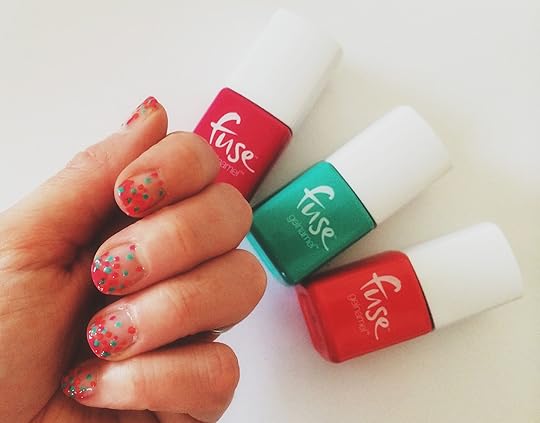 When these are all cured they will be a fiesta of colour – and, thanks to the super-speedy light, they will be set, dried and cured in seconds…I actually mean that too!
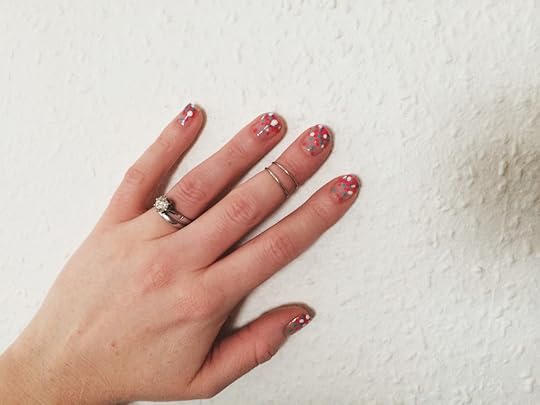 Want to add a little pop to the proceedings, and why wouldn’t you? use tweezers to add in dots of glitter to the surface and secure with a clear top coat. Or, like I’ve done, add in a few bright white dots to really jazz up those hands!
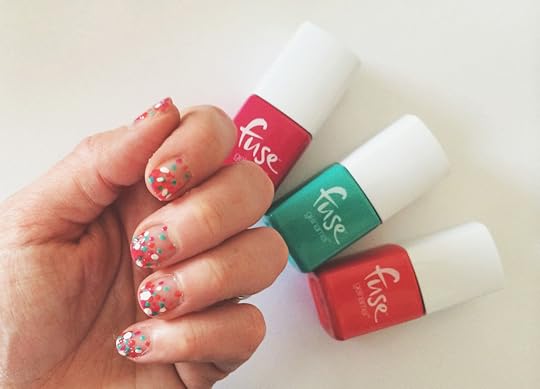 Tah dah! one Funfetti Mani done and dusted (on both hands in under 15minutes!) – so that’s me pretty much mani’s up for the whole long weekend – no matter what we get up to!
Happy Saturday you guys!
♥ – ♥ – ♥
This rad Fuse Gelnamel starter kit – complete with one nail colour – £35 c/o - there are 12 awesome shades to choose from priced from £15!
The post appeared first on Made Peachy.
May 22, 2014
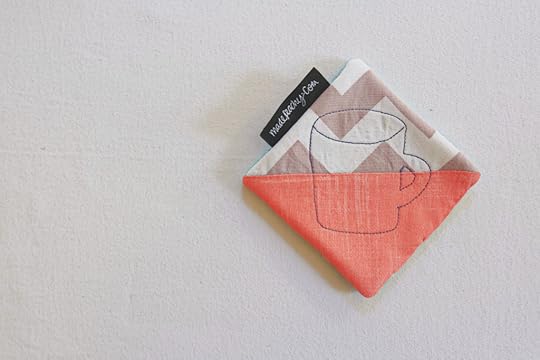
DIY Doodle Stitch Table Set
Hosting dinner parties and gatherings seem to be up on the list of priorities now that we have lovely long light evening to enjoy.
There is nothing more fun than picking out the menu, working on some new cocktail ideas and setting the place all lovely for guests! Even the most informal of gatherings can look pretty and unique with the addition of your own custom place settings with just a few simple supplies!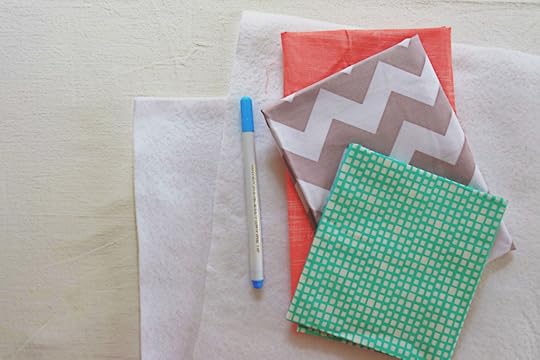 These place setting a bright and colourful and with a little bit of doodling and stitching you can completely customise them to your own style! You can find this step-by-step project in the latest issue of Sewing World Magazine!
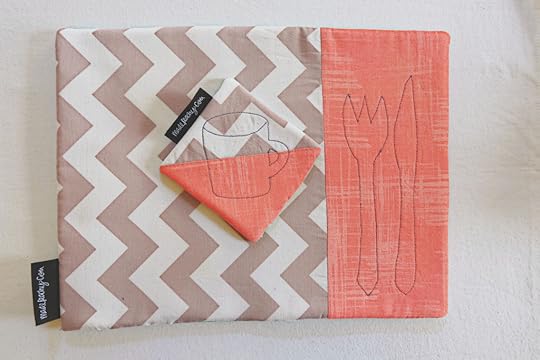 I always add in a layer of Vilene Thermolam when I make projects that need to insulate or to protect from heat – often layering with a soft cotton batting to give a lovely finish to the make. Doodle stitching is perhaps my new fave thing to do with the machine, if you’ve not tried it before give it a go! You will need to lower the feed dogs on your sewing machine – you know, those little teeth that help to draw the fabrics through the sewing machine.
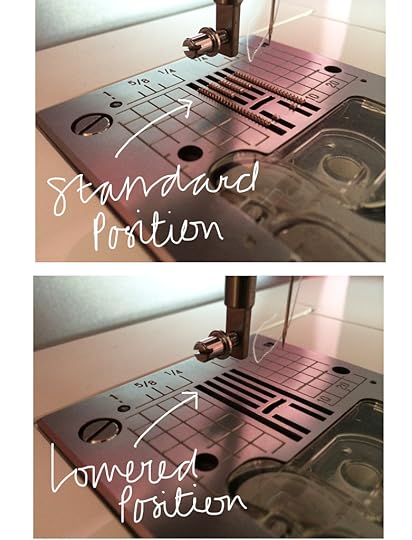 Most machine will have a small sliding switch or button on the underside of the machine, quite likely you’ll need to remove the free arm to get to it.
 Now, before you get stuck in, you will need to switch to a Free Motion Embroidery Foot – sometimes these are called Quilting Feet or Darning Feet – you’ll recognise them by the small circular section that skims over the surface of the fabrics and give you maximum visibility of what you are stitching.
 I won’t fib to you, free motion stitching can take a little bit of getting used to if you’ve not tried it out before…so here are my Top Tips For Success When Free Motion Stitching…
1 Swatch Stitch
Even if you are familiar with free motion work, alway make up a swatch of scraps of the fabrics as they appear in your finished make – so if you have cottons layered with batting, recreate a mini version. Work across the swatch to test out the stitching, you’ll be able to check and perfect the tension, and the stitching style before you begin on the finished piece.
2 Slow & Steady
There is something about free motion work that makes me want to put pedal to the metal – so to speak – and work the design at a 100 miles per hour. You know what, this can go wrong pretty fast! The key to balances and neat free motion is to get the pace at which you move the fabrics in time with the speed at which the machine is stitching – if these aren’t in harmony, the stitches will become irregular.
3 Presser Foot
Changing the presser foot is a must – these specialist feet are designed to make the task a whole lot easier, as you can see where you are stitching. Always check that you have lowered the presser foot, as this foot slightly skims the surface, it is all too easy to leave this up when you start stitching!
4 Avoid Tangles
When starting ease the needle through the fabric and draw the threads up to the surface, this means that you can push them to the side and out of the way of the stitching to help prevent you from getting into a tangled knot while you work.
5 Needle Down
Some sewing machine have a setting that allows you to select that when you stop stitching the needle is in the down position, so that it is through the fabric. This might sound like a really small detail, but you know, it’s pretty handy. I quickly found out that even if your design is small, it can be tricky to work the whole area in one smooth, consecutive motion. Stopping and starting while the needle is in the down position, means that the fabrics of your project are held in place, so when you begin again, there wont be any messy jumps in the stitching.
Boom! That’s pretty much all there is to it. Well, practice sure, but with free motion it’s a whole lot of fun to try out new doodles and designs!
Have you tried free-motion embroidery – have you got any rad tips to share?
ps - Remember to raise the feed dogs when you finish and switch back to your standard presser foot – or, chances are your next project will go a bit wonky!
The post DIY Doodle Stitch Table Set appeared first on Made Peachy.
May 21, 2014
The “One To Watch” – A Big Thank You
I like to call myself a Dream Chaser – like it’s actual profession. Which I’m certain that it should be!
It sounds like a 15 gallons of whimsy in a 12 gallon bucket, right? I get that. Made Peachy is all part of that dream that I find myself chasing down each and every day. It’s a whole lot of fun, but (and without popping any bubbles here) it is a whole lot of hard work too! Sometimes great things happen that remind you what all the hard work and challenges are for. One of these Great Things happened this week.
 Bloggers Required have launched a new campaign – The One To Watch – where bloggers nominate their favourite, most deserving blogs and bloggers to recognise the hard work, dedication and all-out awesomeness that the Internets has to offer. Yes this is a Great Thing. But, what has had me even more stoked, is to be selected directly by Bloggers Required as one of their first 15 bloggers to get the ball rolling! Feeling pretty honoured about that, my friends!
So, here’s a big thank you to the guys over at Bloggers Required – y’all sure know how to make this little dream chaser over here feel like her hard work is paying off! Hearing great things really inspires us all to move things forward, to go that extra mile and to try a little harder and to do a little better. I’ve been toying with a few (hopefully!) rad ideas of late, and sometimes you need a little confidence boost to give you that shove in the right direction. I think that this is just that.
As Made Peachy is fast approaching its first birthday it seems that now is the time to raise the game…in the coming weeks you can expect a few changes around here. Hopefully, for the better – there will be videos (yup! I know!), I’m going to build up the skills resources for those that are looking for new ways to learn and develop their creative skills, and I’m going to be focusing on making creativity a whole lot more accessible – wherever you are!
All in all this is going to be a busy summer for Made Peachy – and I hope that you will all be joining me on the next stage of this adventure!
Now to share the love!
The fun part of the One To Watch Award is that it gives each blogger the chance to give a shout out to the blogs that they really enjoy – so, friends, here are three of my faves…be sure to go check them out!
TinyGreyCat
The adorable Lily shares thoughts, fashion, recipes and reviews on her lifestyle blog.
TinyGreyCat – Twitter
TinyGreyCat – Instagram
Frugally Peachy
Join Emma on her fabulously frugal journey – with money saving ideas, crafts, recipes and much more!
FrugallyPeachy – Twitter
FrugallyPeachy – Instagram
KatieGetsCrafty
When it comes to crafting, Katie is giving it her all – join her creative journey on her crafts blog.
KatieGetsCrafty - Twitter
 Are you a blogger? Be sure to share your links in the comments below – I’m always looking for rad new reads to add to my Bloglovin’ feed – remember you can follow Made Peachy on Bloglovin’ too, so that you don;t miss out on any of these creative daily updates! Plus -be sure to check out the latest assignments, news and details of the One To Watch Award over on the bloggers outreach network, BloggersRequired!
The post The “One To Watch” – A Big Thank You appeared first on Made Peachy.
May 20, 2014
A Handmade Birthday Gift Wishlist
How rad is this Birthday Cake Quilt?! £4.84 instant download from KuuKuuDesigns Quilts and upcoming birthdays – that’s all I can think about round here!
I can’t begin to tell you how great it is to be back home. For the last week and a bit I have been up in beautiful Malvern at the Quilts UK show demonstrating and sharing the love for all that is Vilene.
I even managed too finish up my beautiful hand pieced hexi quilt top…well, that is to say that if we consider “finished” to mean the main centre panel minus that edging border that still needs to be cut, stitched and added. But, I’ll take that!
I love getting out and about and meeting some amazing folks – and man, where there ever sone amazing folks out at this show! My head was packed with ideas for new quilting projects before I packed my bags and hit the road, and now it is positively at bursting point. I mean, I literally feel as though my head is going to explode.
And, then there is my inbox. Gah! I would seem that when working away from home I’m the kind of gal that books a hotel that doesn’t have internet access but does have a spa. I either have my priorities bang on target or I’m so far off the mark it’s not even true!
So, the next couple of days, I fully intend to have my head down attacking this suddenly epic To Do List to clear the decks for the Bank Holiday weekend – because no-one wants to have to work on a public holiday, am I right?!
This month is rocketing past – as it usually does when you’re busy – and while I would greatly love it to slow down just a little, it does mean that my birthday is right around the corner! I know – birthdays are the best! Because we all like to pick out some pretties for our birthdays, I thought I’d share my Handmade Birthday Gift Wishlist…
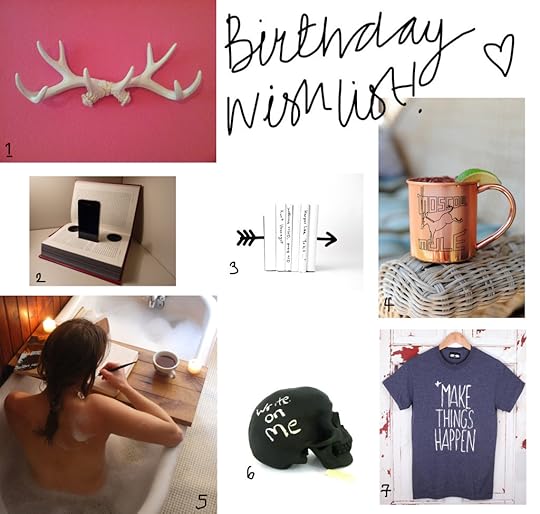 1 Faux Deer Antlers Jewellery Holder • £26.19 • InfiniteLoveDesign
2 Bram Stoker Book iPhone Speaker Dock • £200 • TheseOldBooks
3 Arrow Bookends • £27.42 • DesignAtelierArticle
4 Moscow Mule Copper Mug • £11.55 • CustomCopperMugs
5 Custom Bath Tub Caddy • £94.29 • PegandAwl
6 Chalkboard Memo Skull • £17.06 • Nashpop
7 Make Things Happen T-Shirt • £20 • Dontfeedthebears
Whether your birthday is right around the corner, or you just fancy a little treat – I’m sure that there is something there that will be catching your eye! Now, just to decide what to do to celebrate my birthday…any ideas?
The post A Handmade Birthday Gift Wishlist appeared first on Made Peachy.


