
Laura Strutt's Blog, page 34
April 29, 2014
The Vilene Sewing Club: Log Cabin Pot Holder
Add a modern twist to a kitchen classic with a fun blend of designer print cottons.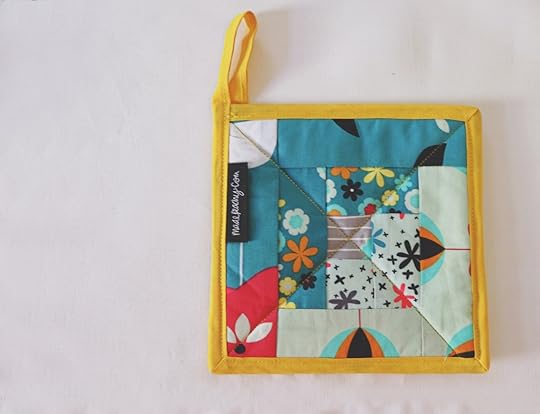 Skills you’ll master…log cabin piecing – using Vilene Quickscreen Square, layering elements for quilting, adding simple quilting, applying binding to finish raw edges
Grab your supplies…
Print cotton in five complementary designs, with two in a light shade, two in a darker shade and one accent for the centre
Vilene Quickscreen Square
Vilene Thermolam
Vilene Cotton Batting
Bias Binding
Dressmaking Scissors
Quilters Pencil
Sewing Machine
Let’s make a Log Cabin Pot Holder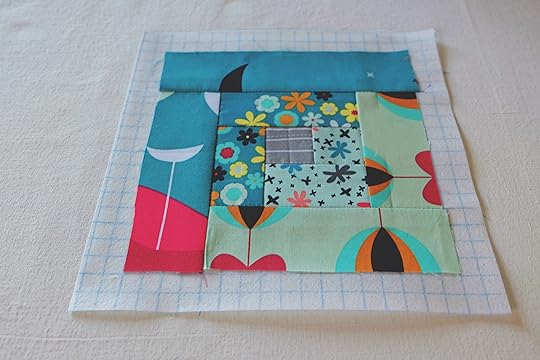 Step 1
Cut one 6.5inch square from one print cotton to create the backing fabric. Cut two 6.5inch square from the Vilene Thermolam and cut one 6.5inch square from the Vilene Cotton Batting.Trim the fabrics into 2inch strips. Divide the strips into piles of the lighter and darker shades. Working on the wrong side of the square of Vilene Quickscreen Square, so that the printed grid is on the underside, trim the fabric for the centre block into a 2inch square and position into the centre of the Vilene Quickscreen Square using the grid for accuracy.
Step 2
Place the first of the lighter shade 2inch strips of fabric,along the left-hand side of the centre block. This is going to be the first piece that is sewn into start the Log Cabin design. Align the strip onto the centre block, with the right sides of the fabrics facing and pin into place.
Step 3
Working with the right side of the Vilene Quickscreen Square uppermost (so the printed grid is clear) join the two pieces together with a straight machine stitch, working along the markers for one grid box – 1cm square – from the edge of the fabrics, and finish the line of stitching at the end of the centre square. Using the scissors, cut away the unstitched fabric at the base of the seam in line with the lower part of the centre block. Try to cut the strip as neat and even as possible – using the grid as a guide – as this makes adding in the next pieces of fabric easier. Finger press the fabrics open.
Step 4
Place the remaining strip of the same light fabric below the two joined pieces, this is where the next seam will be made. Place the strip over the two joined pieces with the right sides facing and pin in place. Working on the right side of the Vilene Quickscreen Square, stitch the strip in place along the length of the previously joined pieces using a straight machine stitch and working along the grid lines one box in from the edge of the fabric. Once stitched, turn to the wrong side, remove the pins, cut away the excess fabric and press the pieces flat.
Step 5
With the first of the dark fabric strips, position along the side of the last strip added. With the strip positioned right sides facing over the last strip and the centre block pin neatly in place. Working on the right side if the Vilene Quickscreen Square, join in along the length of the two previously joined strips using the grid as a guide, keeping the stitching one grid box from the edge of the fabric.
Step 6
Cut away the excess of the strip and remove the pins and press open. Place the remaining strip of fabric along the upper section of the block, this will be the position of the next seam. Position this fabric, with right sides facing, over the last joined strip and the centre square and pin in position.
Step 7
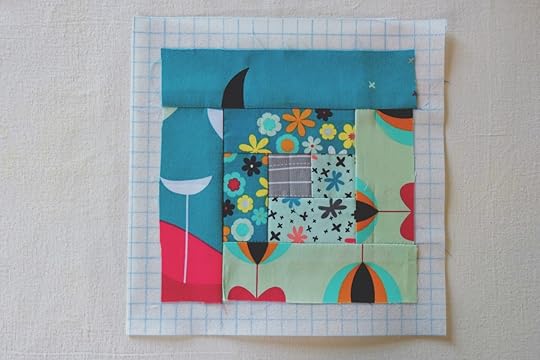
On the right side of the Vilene Quickscreen Square, stitch in place with a straight seam along the grid line. Always ensuring that you stitching on the first grid line in from the raw edges will ensure that all the seams throughout the block are even and neat. Once this section has been stitched the first round of the Log Cabin design is complete. Continue to add a second round in the same manner. First adding in the two light strips then the two dark strips, working around the centre square. Trim away the excess Vilene Quickscreen Square that borders the completed block.
Step 8
Place the backing fabric down with the wrong side uppermost. Create a sandwich with the Square of Vilene Cotton Batting between the two pieces of Vilene Thermolam, and place on top of the backing fabric. Finally add the log cabin block to the top with the right side outermost. Align the raw edges and pin in place. Using a quilters pencil mark out two lines across the block from once corner to the opposite one intersecting in the centre. Using a straight machine stitch work over these lines to quilt the design and to secure the layers together.
Step 9
Beginning at one corner, Pin the bias tape around the edge of the project, with one half sitting on either side of the pot holder and the raw edges secured in the fold. Fold mitres into the corners and pin in place. Work with a straight machine stitch, 5mm in from the edge of the binding to secure the binding into position on both sides. Stitch an additional 4inches of binding together following the same stitching line. Fold the excess binding back onto the pot holder aligning with the lower edge of the bias and stitch in place to create a hanging loop.
Made Peachy Tip
When using Vilene Quickscreen Square to create Log Cabin Blocks you can work either clockwise or anti-clockwise around the centre square when adding in the strips, the principle for joining in the pieces will be exactly the same, just remember which direction you are working if you are making multiple block and want to have them all appear the same!
Download the printer-friendly version!
 Pssst! Want an extra helping hand with the piecing of your log cabin block?
Check out this step-by-step tutorial!
I’ll be honest with you – these Log Cabin Blocks are pretty addictive – before you know it you’ll be making up a whole stack of them – why not create your own Log Cabin Quilt?
♥ – ♥ – ♥
 The Vilene Sewing Club In Association With…

All of the delicious fabrics for these makes are from the stunning range of designer prints from Art Gallery Fabrics – take a look over the range, I guarantee you won’t be disappointed!

The ribbons and trimmings for these projects were supplied by Berisfords, who offer a range of ribbons for sewing and decorative projects in a host of colours styles and finishes. Priced from 70p per meter and available from fabric and sewing stores. For more information visit www.berisfords-ribbons.co.uk or call 01453 883581

The buttons and fasteners for these projects are from Hemline, who provide a vast range of products for all aspects of sewing and crafting which are available nationwide from sewing and craft suppliers. For more information contact groves@stockistenquiries.co.uk or call 01453 883581
♥ – ♥ – ♥
I hope that you enjoy making your own Everyday Purse – you know, if you get in a knot you can always drop me an email with Log Cabin Pot Holder Help in the subject line!
This workshop project is for your personal use only, be cool you guys- you know the score, if your interested in scheduling a workshops or have any enquiries about the usage of this workshop material just give me a shout!
Watch this space - the next in the The Vilene Sewing Club Series will be posted next Wednesday!
The post The Vilene Sewing Club: Log Cabin Pot Holder appeared first on Made Peachy.


April 28, 2014
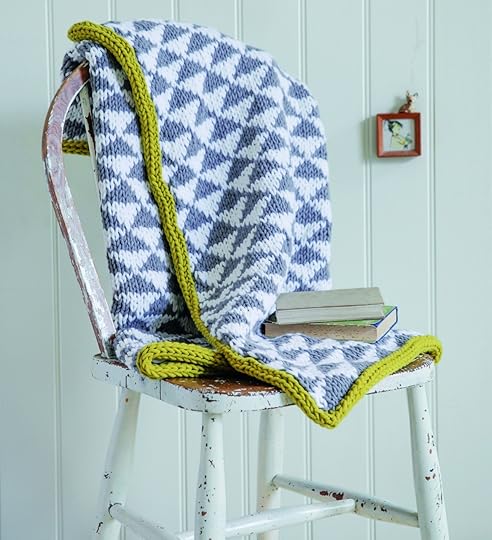
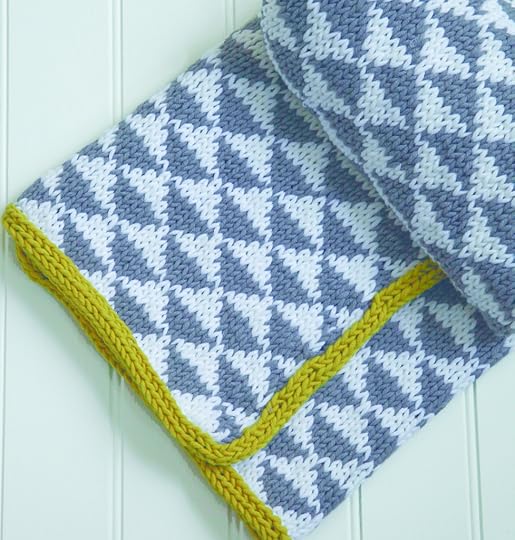
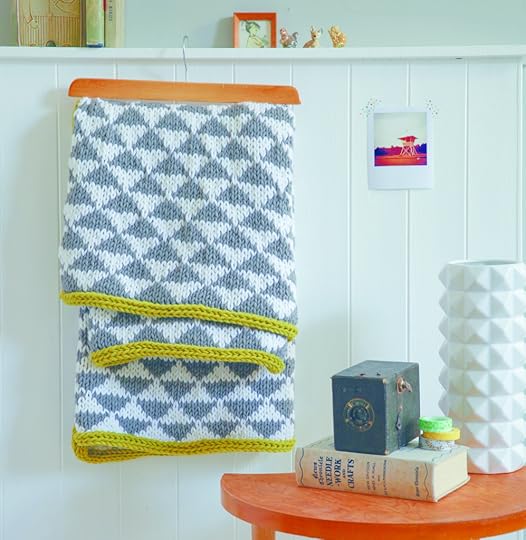
Triangle Motif Knitted Throw
Inspired by modern Scandinavian design, this triangle-motif throw is a stylish investment project, and a great way to hone your colourwork skills. Don’t worry about trying to achieve neat sides as the applied i-cord trim tidies up any unsightly edges!
Grab your supplies…
Rico Essentials Big 14 50g balls Light Grey (022) 50g , 14 50g balls Cream (001) and 2 50g balls Pistachio (006)
10mm circular knitting needle, 100cm long
Two 10mm double-pointed knitting needles
Tension
11 sts and 14 rows to 10cm (4in) measured over st st colour pattern using 10mm knitting needles.
This pattern uses standard knitting abbreviations!
Triangle Motif Knitting Chart
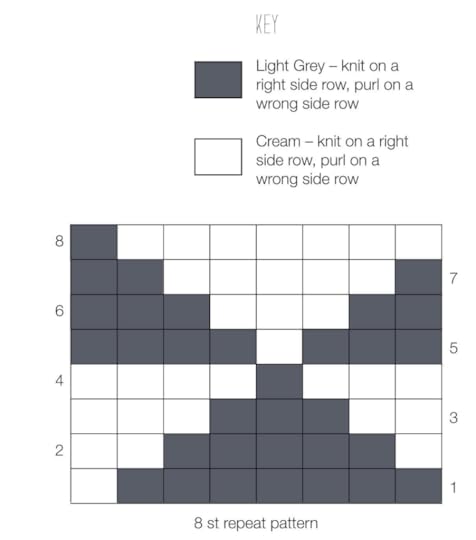 When working from the pattern chart, read from right to left on knit (odd-numbered) rows and from left to right on purl (even-numbered) rows. To switch to another colour, drop the working yarn and change to the second colour. Strand the colour not in use loosely across the wrong side of the work until it is needed again – this creates ‘floats’ on the wrong side. Avoid pulling the floats too tight as the stitches will pucker at each colour change. When floats need to span more than 5 or 6 stitches, as on 1, 4, 5 and 8 of the chart, twist the yarn not in use over the working yarn half way along the section, and continue in the current colour.
 Triangle Motif Knitted Throw
Using circular needle and Light Grey, cast on 120 sts.
Begin working back and forth in rows from the colour chart as follows:
Chart row 1 (RS): *K7 in Light Grey, K1 in Cream; rep from * to end.
Chart row 2: P2 in Cream, *P5 in Light Grey, P3 in Cream; rep from * to last 6 sts, ending with P5 in Light Grey, P1 in Cream.
The last two rows set the position of the chart.
Cont in st st working from the chart until all 8 rows of the chart have been completed.
Repeat chart rows 1–8 until your work measures 132cm from cast-on edge, finishing on chart row 4 or 8.
Cast off.
 Work the i-cord edging
Using Pistachio, cast on 4 sts onto a double-pointed needle using the single of thumb cast-on method. Wrap the working yarn around your left thumb from front to back and secure it in your palm with your other fingers. Insert the needle upwards through the strand on your thumb. Slip this loop from your thumb onto the needle, pulling the yarn to tighten it.
Slide the 4 sts to the right end of the needle and using a second double-pointed needle, work as follows:
Row 1: Pass working yarn behind sts and pulling yarn tight on the first st, K3, sl 1, yo, pick up and knit 1st from blanket edge (6 sts), pass 4th and 5th sts on right needle together over 6th stitch, as if casting off (4 sts), slide sts to the right end of needle so that working yarn is coming from the left.
Repeat last row all around the throw until you reach first picked up stitch. Cast off.
Cut off yarn, leaving a long yarn tail. Using the yarn tail, sew the ends of the edging together with a basic whip stitch. Weave in any stray yarn ends.
 Block the blanket
To set the stitches and smooth the edges of the blanket so it lies flat, block it with a steam iron. Lay the blanket on a flat surface with a towel underneath. Hold the iron a few centimetres above the knitting and move it slowly over a small section at a time, patting the stitches gently to encourage the process. Pay particular attention to the outside edges.
♥ – ♥ – ♥
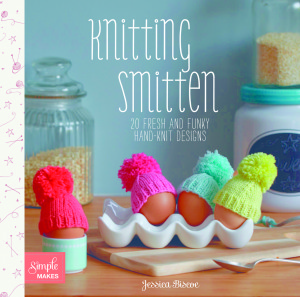
This pattern one of 20 contemporary and colourful designs in Knitting Smitten by Jessica Biscoe £12.99, Quadrille.
The post Triangle Motif Knitted Throw appeared first on Made Peachy.
April 27, 2014
Guest Post: Jessica Biscoe from Jessica Joy
Knitting is one of those pastimes that will never cease to make me smile.
Once of the things that I love the most about this craft is the wealth of exciting and contemporary designers out there, firing out rad patterns to challenge, delight and inspire all us yarnheads the world over. Once of the hottest modern knitting designers is the supremely talented Jessica Biscoe of Jessica Joy , knit designer and author of the amazing new knitting book Knitting Smitten!
I’m stoked to have a special guest post from Jessica, sharing her passion for all things knitting!
♥ – ♥ – ♥
I love the rhythm of knitting! Even after years of doing it, for both work and pleasure, the motion of shaping and creating fabrics from yarn and two needles is hugely gratifying. There are endless design possibilities to explore as well, which excites me. Every time I see a pattern, technique or texture that I like, I’m always thinking of ways to adapt it into a design.
 It’s really important to take the time to find the materials and methods that work best for you. Every knitter is different and you may prefer to hold the yarn in a particular way, or to use bamboo over metal needles. There are many different ways to achieve a result in knitting – you just need to find what works best for you. As a relatively recent learner I remember the techniques and tips that were most valuable to my learning process so I love that I can now pass these on, in my online tutorials, in the hope that they’ll be useful to others.
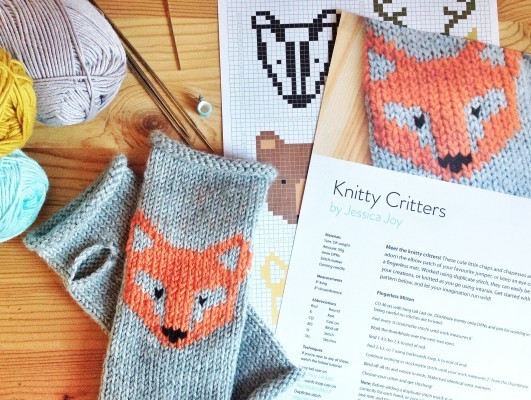 Knitty Critters Pattern • £4 • JessicaJoy
My style is modern, but playful; I try not to take things too seriously and create designs that are eye-catching but also practical and easy-to-use. My favourite part of designing for Knitting Smitten was the development stage, for sure. Once I had an idea in mind for a project I really enjoyed playing around with different construction techniques, trying out different yarns and colourways to see what worked best. The biggest challenge was probably the fast-pace. It was a ferocious few months of knitting but I think that helped to keep the momentum going and, being an organisation geek, it gave me an excuse to draw up lots of lists and schedules!
In the beginning knitting was definitely a stress reliever for me and this was one of the main reasons why I decided to learn. Over the years it’s developed into a whole new creative outlet and has brought me many opportunities. It’s still a very relaxing process – I do my best thinking with two needles in my hands!
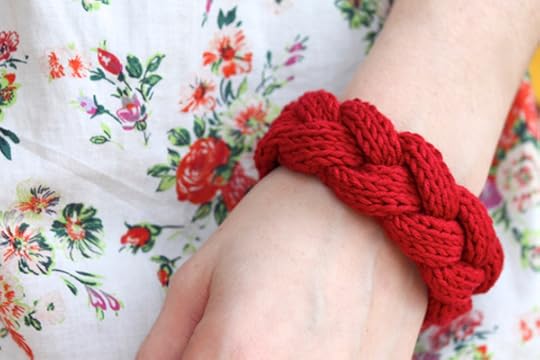 Braided Bracelet Pattern • £3.50 • JessicaJoy
I couldn’t live without circular needles. They serve so many purposes and open up a lot of possibilities, in my mind, for designs and easier construction techniques – I particularly love my little 9” circular needles. I have a lot of designs on the go right now, which I’m really excited about. Some of these will be released on my website, along with more tutorials and techniques, and some others through an exciting new channel. I can’t give too much away, but it’s a really fantastic project that I’m having so much fun working on.
♥ – ♥ – ♥
You can buy Jessica’s awesome designs in her online store, brush up on your knitting techniques with her handy tutorials and find out more about her on her blog!
That’s not all my knitty loving friends! Be sure to pop back tomorrow for an exclusive pattern from Jessica’s new book Knitting Smitten, £12.99, Quadrille!
The post Guest Post: Jessica Biscoe from Jessica Joy appeared first on Made Peachy.
April 26, 2014
Style Sunday: The Tutu Skirt
Nothing is more whimsy than the tutu. I am fully aware that I should have hung up these frothy frilly skits a loooong time ago. But, nope. I am, proud to say that I still have two tutu skirts in my wardrobe and still wear than more regularly than I probably should!
I adore the styling of this Midnight Ballerina Skirt, $64.99 from ModCloth - I mean that is a genuine My Little Pony Shirt right there…and those lavender tights – I’m totally bewitched!
Tutu skirts are just as fun to make as they are to wear. You can go off piste on this and design this little number yourself, or check out this Style Sunday Moodboard for Tutu Skirts and release your inner prima ballerina!
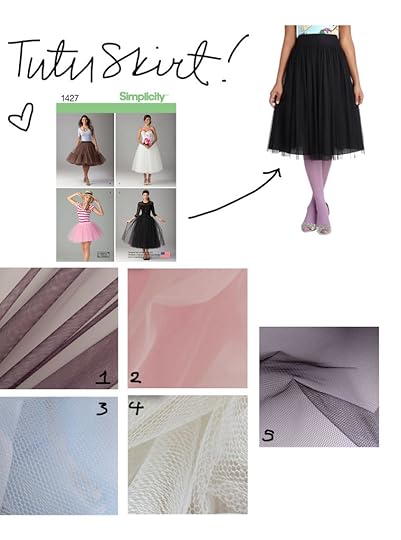 The Pattern
Simplicity 1427, sizes 4 – 22, £8.15 SimplicityNewLook
This fun tutu skirt is the statement piece your wardrobe has been longing for! Misses’ tulle skirts in three lengths are perfect for any occasion. Dress it up for an evening out, or dress it down for a sweet everyday look – select Design C for the classic mid-calf length.
The Fabrics
1 Aubergine Poliam Tulle • £11.90 per metre • JoelAndSonFabrics
2 Powder Blue Tulle • £3 per metre • TextileExpress
3 Rose Tulle • £5.50 per metre • PlushAddict
4 Ivory Silk Tulle • from £19 per metre • BridalFabrics
5 Black Tulle • £5.65 per metre • Abakhan
Don’t leave me hanging on this one – what colour tutu are you going to wear?!
The post Style Sunday: The Tutu Skirt appeared first on Made Peachy.
April 25, 2014
At Home Gel Manicure – Tried & Tested
At home manicures is one of the quickest and easiest ways to feel pampered after a long week – and wouldn’t it be great if you could paint your nails on a Saturday and have that super fresh look last all right through to the next weekend – I mean, think of the time it would save not having to remove and refresh chipped nails paint, not to mentions looking presentable. But me, nope. I love to paint my nails all fancy and then, often in a matter of mere hours, they are scuffed, chipped or have weird indentations from fabrics pressed into the surface.
So, when the folks at Sendationail said their DIY gel nail manicure system can be done at home, and isn’t a complete hassle to apply, and gives a lasting salon-style finish, I thought I’d put them to the test.
Ladies, I’d like to you meet the Nailene Sensationail Invincible Gel Polish Starter Kit…
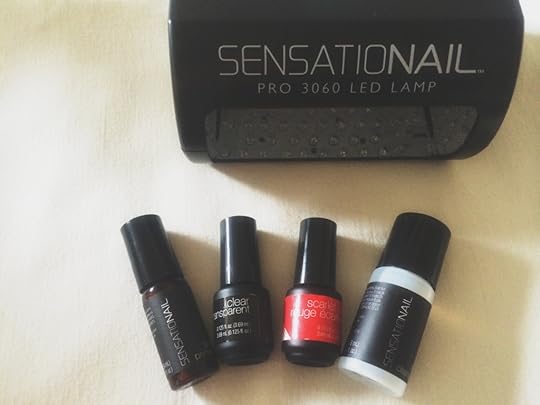 Sensationail Starter Kit £69.99 c/0
Sensationail
Sensationail Starter Kit £69.99 c/0
Sensationail
I quit visiting nail salons a long, long time ago. For the simple reason that no sooner than I had got home and sat at the sewing machine, I’d scrape a pin down that beautiful glossy surface. Or, I’d get knitting and find that I’d managed to get some kind of fibre impression dented into the not-quite-rock-hard-dry polish.
As a girl with perpetually chipped nail polish, I can say hand on heart, that there is nothing quite as scruffy as manicure that is sorely in need of a refresh!
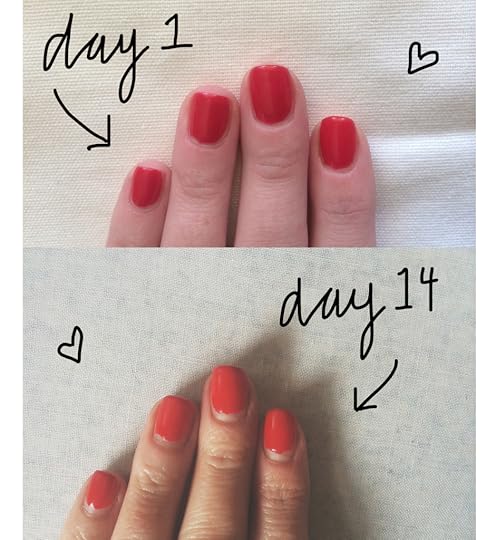
Two weeks ago I was sent this rad kit promising a salon-finish manicure in a box…and, like most gals I figured, what have I got to loose! I prepared for an evening of pampering…which – despite there being a process of cleaning, buffing, base coat, two coats of polish and finishing with a glossy top coat – the whole manicure took less than half an hours start to glorious finish! Now, a pamper treatment that leaves me enough of my evening left to work on a neglected hexagon patchwork project is my kind of treatment!
Yes- it was easy to apply. Yes – the finish was glossy, glamorous and super professional-looking. But, does it really stand up to two full weeks wear?
I’m brutal on my hands – probably why a standard manis don’t seem we through a single day – and the best way for me to see if this manicure has the staying power was to get stuck in to all the things I usual do!
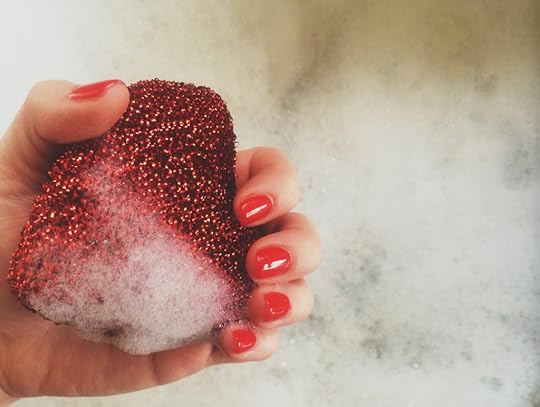 So, yup, there was house chores, the usual washing up, cleaning, vacuuming – and all those day-to-day tasks that usually leave my nails with some kind of scuff or damage. Nope. Stuck firm. (And, yup, that is a heart shaped washing up scrubbing sponge…of, course it is.)
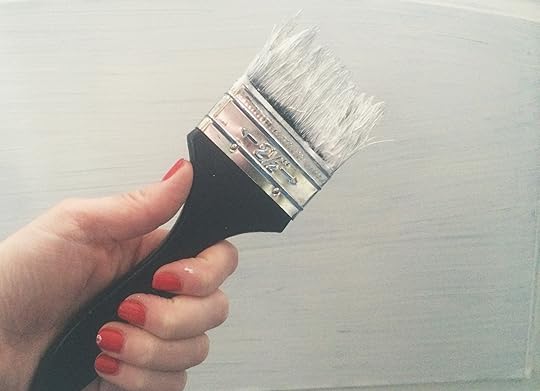 During the two weeks of road testing this mani, we decided that it was a brilliant time to get stuck into some renovation projects – even though I got completely covered in paint – scrubbing the paint off didn’t damage the finish of my super cute nails!
 As with any other fortnight of my life, there was lots of stitching (in this case late, late into the night to meet a deadline.) There was a bit of crocheting, some baking and even a spot of paper craft. Oh yeah…and lots of bashing away on the laptop, writing, writing, writing. Again…not a single mark, chip or graze. This my friends is some kind of witchcraft, plain and simple.
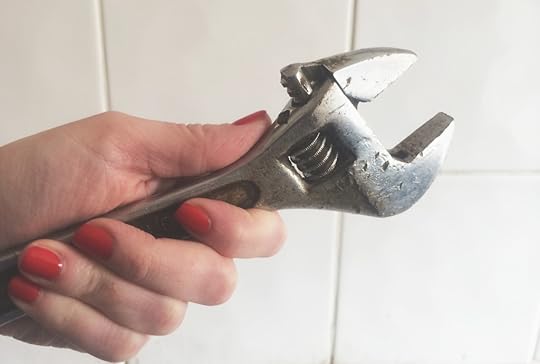 The final test of the main was a spot of emergency plumbing right before we headed off for a weekend of camping in the Norfolk countryside. Even wrestling with tools, putting up and taking down a tent didn’t make a dent in this mani. Holy wow! This is like the answer to my eternal quest of “try to have grown up looking hands!”
It is safe to say that this fortnight of road testing has been a tough one. No point in going easy on something that claims to be Invincible, right? The results speak for themselves on this one. After two weeks the glossy, brilliant finish hadn’t cracked, chipped or flaked off – despite my efforts to give it a real run for it’s money! By day 14 the only sign that this mani was due a refresh was the slightly scrappy half-moons of nail growth at the base of my nails – not too shabby at all!
 All in all – what can I say? I’m sold! I’ve been looking for a nail polish that will see me though the brutal set up for all the knitting and stitching shows that I work at throughout the year, and still look great when I’m demonstrating stitching on the stand – and this my friends is it! Now…what colour shall I go for next?
The post At Home Gel Manicure – Tried & Tested appeared first on Made Peachy.
April 24, 2014
Fab Fabrics Friday!
I’m going to just go ahead and call it like it is…Today is a Fab Fabric Friday!
Just like all y’all, I know deep in my heart that I already have more fabrics than I will ever be able to use in my lifetime…no matter how fast I stitch. But, that being said, it never seems to stop me falling in love with yet more amazing designs!
When a bounty of fresh new fabric bundles arrived on my desk this week, I knew that they were just to sweet not to share! Let me introduce you to the latest collection from Art Gallery Fabric!
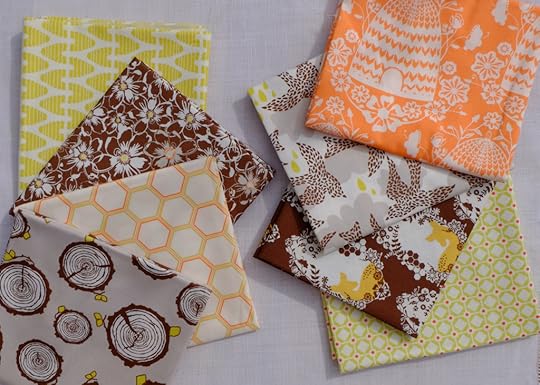 Sweet As Honey – Bonnie Christine
Nature is bursting from every fibre with freshly picked flowers, hidden swallows, darling deer and bees, beehives and sweet sweet honeycomb!
 Chromatics - In-House AGF Designers
An essential mix’nmatch collection of all time favourite Art Gallery Fabrics prints – floral, geometric, subtle, bold, the perfect boost to every sewing stash.
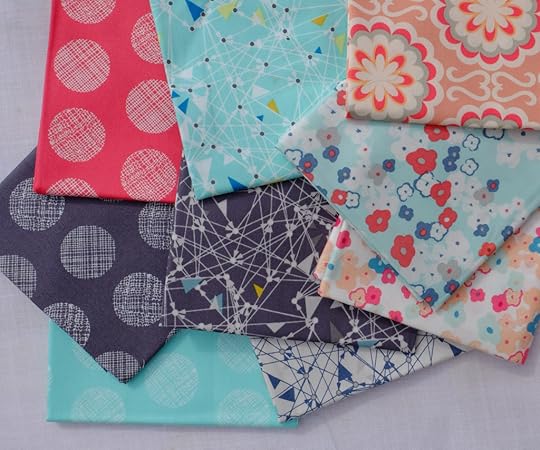
 Rapture – Pat Bravo
A collection bursting with vivid colour -red, blue, yellow – dramatic, passionate and wildly feminine. Striking contemporary with a timeless poetic feel.
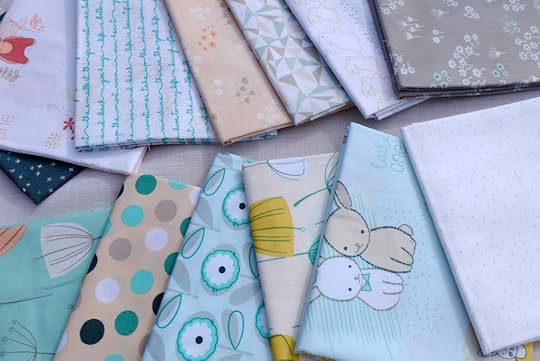 Littlest – In-House AGF Designers
Soft grey, powder blue, dusky pink and blushing peach team with the darling and the whimsy to create a collection of prints that is perfect for the Littles (and the young at heart!)
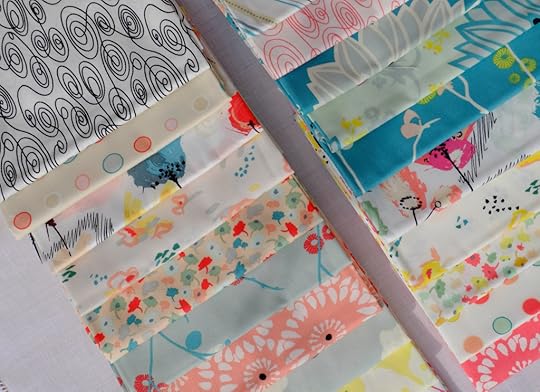
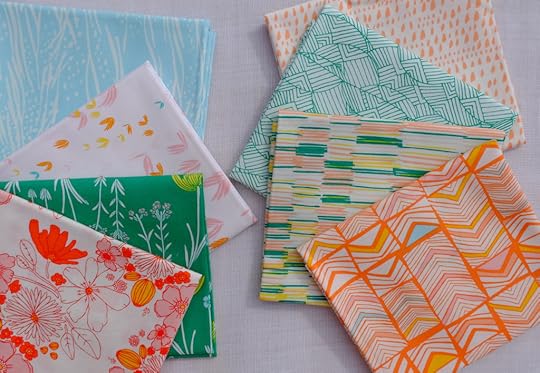 Meadow – Leah Duncan
Folkie florals get a breath of fresh air with a contemporary palette and modern geometrics – singing of long hot summers days.
Love these prints? Want to find some inspiration for these latests designer prints? Then look no further my friends than Art Gallery Fabrics brand new LookBooks!
These fabulous print cottons retail at around £12.50 per metre – check out your local stockist!
The only real dilemma now is what to make first?
The post Fab Fabrics Friday! appeared first on Made Peachy.
April 23, 2014
Guest Post: Love Sewing Magazine Editor – Helen Mclaughlin
When two of my favourite things come together, I know it is going to be a happy day! And, when those two things are sewing and reading – well, that’s definitely a very happy day!
I am chuffed to bits to be one of the contributors to the exciting new stitching magazine Love Sewing – on sale right now – because this is a real beaut that I just know you’re going to love!
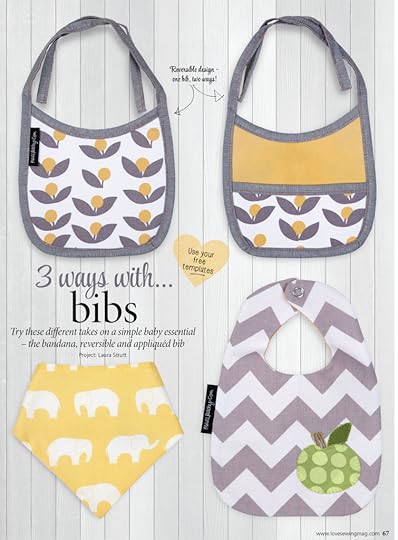
Putting together a national sewing magazine, packed with patterns, project, how-to guides, collecting together fresh inspiration and ideas to try is no mean feat – and I speak from experience on this one friends! It blows my mind to be able to bring you this guest post from none other than the Editor of Love Sewing magazine Helen Mclaughlin to share with you some insights in to this rad new magazine! (…and, because I just can’t help myself, there are a couple of peeks at some of the designs I worked on!)
♥ – ♥ – ♥
 The idea for the magazine was inspired by that famous (and famously well-used!) quotation by William Morris: “Have nothing in your houses that you do not know to be useful or believe to be beautiful.” I wanted to make a magazine for the novice or busy stitcher, with projects that show you how to use your sewing skills and time wisely – making beautiful, practical things. There just seems to be lots of magazines showing me how to make stuff I don’t need, so I wanted to create a magazine full of stuff people would be interested in making, largely because they’re practical, or really stylish. In terms of dressmaking, I was also keen to use patterns by independent designers, rather than the major brand names. There’s so many talented designers producing patterns for really great clothes, but they don’t seem to get the exposure they deserve.
Working with all the talented women who have helped to put the issue together has been one of the highlights of working on this launch issue. There’s so many brilliant makers and designers out there, quietly creating and sewing wonderful things – it was a pleasure to be able to share their handiwork with a wider audience.
 The fabrics are something that I hope that readers will love. Even though it’s essentially a practical craft magazine, we’ve tried to make it as aesthetically pleasing as possible, so we’ve spent a long time sourcing the working on the design and photography, to create the right kind of look and palette to inspire you to make the stuff we’ve featured. I think that even if you’ve been sewing a long time, the fabrics will inspire you to make the projects, or try something similar. I really hope they appreciate the really detailed illustrated instructions. We’ve tried hard to make each project easy-to-follow, with as many practical tips as possible.
 We’re really excited about the dressmaking patterns we have coming up. They’re really stylish and flattering without being too trendy/high street. People also tend to equate sewing patterns with really fuddy duddy designs, but these are anything but! If you’ve not seen Love Sewing yet, you can expect a broad varied range of projects, from clothes and accessories to bags, toys and quilts, and lovely stuff for your home, along with projects that will help develop your skills!
♥ – ♥ – ♥
 The first issue of Love Sewing is on sale now! This very special launch issue comes with a Kirstie Allsopp fabric fat quarter and 52 page Liberty sewing project book! Plus (yup! There’s more!) Subscribers also get a copy of Tilly Walnes‘ gorgeous new book Love At First Stitch – for FREE!
You know what else? If you have a sewing, quilting or dressmaking question why not send me an email at letters@lovesewingmag.com and I’ll do my very best to help you out!
The post Guest Post: Love Sewing Magazine Editor – Helen Mclaughlin appeared first on Made Peachy.
April 22, 2014
The Vilene Sewing Club: Easy Baby Bib
Create a reversible baby bib using a combination of stunning contemporary prints.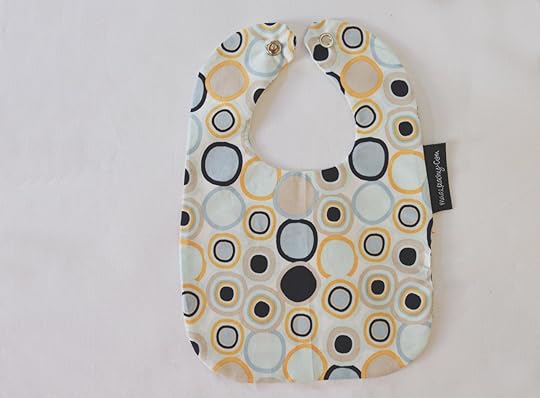 Skills you’ll master…piecing contrast panels, working curved seams, neatening and clipping seams, slip stitch, top stitching, applying a snap fastener.
Grab your supplies…
Print cotton, three complementary designs
Vilene G405 medium-weight white fusible interfacing
Grosgrain ribbon
Dressmaking Scissors
Sewing Machine
Snap fastener
Iron
Use these pattern pieces for the front and the back of the bib to cut the fabrics and the Vilene G405 medium-weight white fusible interfacing
Let’s make an Easy Baby Bib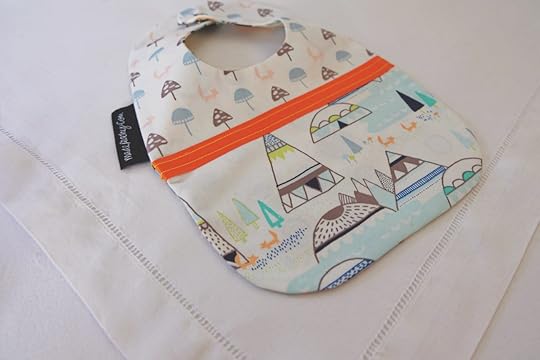 Step 1
Using the full bib pattern piece, position onto one of the print cottons and align the grain with the marking on the pattern. Pin in place and neat cut one from the fabric. Use this pattern piece to cut an identical piece from the Vilene G405 medium-weight white fusible interfacing. Place the upper bib pattern piece onto the second print cotton and align the grain, pin in place and cut one from the fabric. Place the lower bib pattern piece onto the third print cotton and align the grain, pin in place and cut one from the fabric.
Step 2
Working with the two pieces for the upper and lower parts of the bib, place together with right sides facing. Ensure that the raw edges along the lower portion of the upper section align with the upper raw edges on the lower section and pin in place. Working with a straight machine stitch and taking a 1cm seam allowance join the two pieces together.
Step 3
Press the seams open and position a length of grosgrain ribbon centrally over the seam. Pin in place. Working with a straight machine stitch, secure the ribbon in place with two lines of top stitching, each positioned 5mm from the outer edge of the ribbon.
Step 4
Place this stitched section down with the wrong side of the project upper most. Position the piece of fusible interfacing onto the wrong side of the project. Ensure that the adhesive side is in contact with the wrong side of the fabric. Use the iron to bond the Vilene G405 medium-weight white fusible interfacing into place, by pressing and holding on the surface for 12 seconds, before repositioning and pressing again until the whole section is secured.
Step 5
Position the two bib pieces together with the right sides facing, aligning the raw and pin in place. Working with a straight machine stitch and taking a 5mm (1/4in) seam allowance, join the two pieces together. Begin at the upper part of one side, working around the top of the bib before stitching down the second side and along the base. When working the last side of the bib, be sure to leave a small, 5cm, gap in the line of stitching – through which to turn the bib through.
Step 6
To create a neater finish, work around the seams of the curved sections of the bib making small V shaped cuts, by clipping the seam in this manner the fabrics will lay neatly on the finished piece. Draw the bib to the right side through the opening left in the side seam. Press the bib flat, ensuring the the seam allowance along the gap in the seam is press inside. With a needle and thread work along the opening to join the gap with neat hand slip stitches.
Step 7
Using the markings on the pattern piece to mark out the position of the snap fastener onto the back neck section of the bib. Secure one side in place before securing the corresponding half to the second snap.
Made Peachy Tip
When sewing around curves, look at the place where the fabric are aligned on the needle plate of the sewing machine, by carefully keeping this raw edge of fabric aligned with this point on the machine, you will be able to stitch a neat curve.
 Download the printer-friendly version!
♥ – ♥ – ♥
The Vilene Sewing Club In Association With…
All of the delicious fabrics for these makes are from the stunning range of designer prints from Art Gallery Fabrics – take a look over the range, I guarantee you won’t be disappointed!
The ribbons and trimmings for these projects were supplied by Berisfords, who offer a range of ribbons for sewing and decorative projects in a host of colours styles and finishes. Priced from 70p per meter and available from fabric and sewing stores. For more information visit www.berisfords-ribbons.co.uk or call 01453 883581
The buttons and fasteners for these projects are from Hemline, who provide a vast range of products for all aspects of sewing and crafting which are available nationwide from sewing and craft suppliers. For more information contact groves@stockistenquiries.co.uk or call 01453 883581
♥ – ♥ – ♥
I hope that you enjoy making your own Easy Baby Bib – you know, if you get in a knot you can always drop me an email with Easy Baby Bib Help in the subject line!
This workshop project is for your personal use only, be cool you guys- you know the score, if your interested in scheduling a workshops or have any enquiries about the usage of this workshop material just give me a shout!
Watch this space - the next in the The Vilene Sewing Club Series will be posted next Wednesday!
The post The Vilene Sewing Club: Easy Baby Bib appeared first on Made Peachy.
April 21, 2014
Strawberry & Kiwi Coconut Water Cooler
NEWSFLASH! THIS JUST IN: EASTER CHOCOLATES ARE NOT PART OF YOUR FIVE A DAY!
I know, I am just as shocked to find that out as you are! The Easter break has been one of hard graft for us. We have used the time to get stuck in to some of our many renovation projects. There have been lots of long days sanding, painting, cleaning and building. When you’re busy and there are lots of Easter chocolates laying about it is all too easy to grab for the nearest sweet treat when you are starting to feel like your energy reserves are flagging. Needless to say, I have devoured an entire haul of Easter choccies in record time. I mean, I have been scarfing down those chocolates like they are going out of style. Trust me, they aren’t. Now I have the Chocolate Regrets. That is to say, I’m wishing I’d been a bit more ca’ canny wi’ the sweeties! Not, only would they have lasted me a little longer so I could have truly savoured them, but, I might not be feeling quite so sick right now. So, there is only one thing for it…time to break out the mini detox!
This week I’m going to be switching up my sweet treats to something a little more healthful.
Coconut water is the health drink of the moment – praised for its antioxidant, rehydrating properties, offering vitamin B and potassium as well as being low-calorie – but the first time I enjoyed coconut water was fresh from a coconut whilst I travelling in Fiji, where you could order a fresh coconut, watch it being chopped open and served with a straw. I have to confess, I was not ordering this beverage for it’s health properties (I’m not sure that I was even aware of them!) I was ordering them because it was just about the most tropical drink I could imagine – second only to a piña colada served in a hollowed out pineapple with a cocktail umbrella! 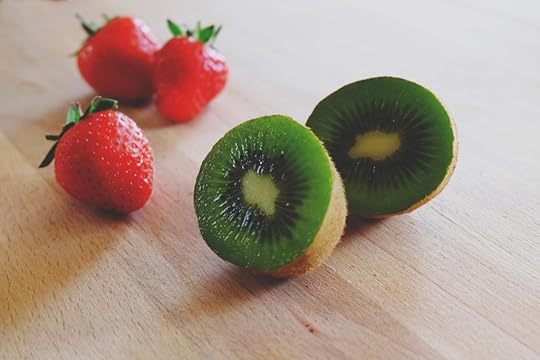 Strawberries are delicious, am I right? They are also packed with nutrients, vitamins and some even say wrinkle fighting properties. Kiwi fruits are a tasty little bomb of vitamin C and are often linked to glowing skin. Now, you see where I’m going with this, right? These two fruits taste delicious together, and if the hype is to be believed the combo will make us all zingy on the outside and the inside too! That’s a win/win situation right there my friends.
I get that some of y’all aren’t super keen on the taste of coconut water – well, if you’re expecting it to taste like a Bounty Bar or a shot of Malibu, then you will be disappointed! It has a ‘green’ taste – yes, I’m aware that is a colour, but it is light, fresh and has only a hint of the coconut flavour to it. If you’re not a huge fan of this taste, then you’ll be pleased to hear that the strong sweet flavours of the strawberries and kiwi fruits are the most prominent flavours in this little juicy beverage! So, after a long weekend of heavy duty DIY and equally hardcore chocolate eating – my little body is in need of a fresh, fruity healthful boost – so, here’s my recipe for a Strawberry & Kiwi Fruit Cocount Water Cooler…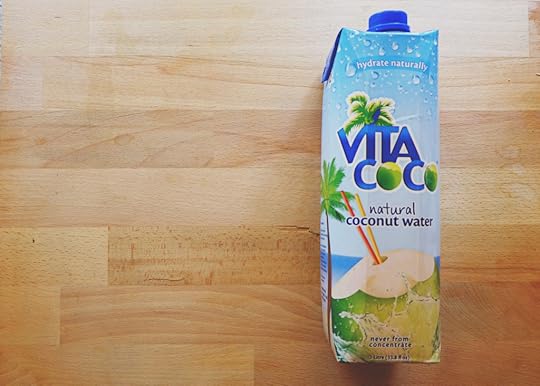 Grab your supplies…
Carton of fresh coconut water – don’t confuse this with Coconut Milk, that’s something entirely different. Coconut Milk is made from shaving the flesh from the inside of the coconut and pressing out the liquid.
A handful of fresh strawberries
Two fresh kiwi fruits
Freezer-safe food box
Ice, lots and lots of ice
Hand blender
This recipe make a large pitcher of cooler, to increase the yield by simply the quantities proportionately.
This recipe requires some preparations ahead of time – you might want to get a head start the night before so you can wake up to this awesome fruity creation in the morning!
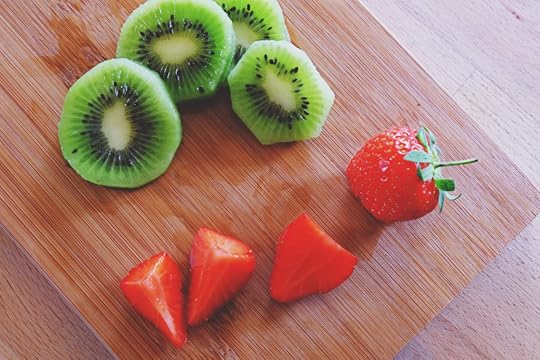 Prepare the fruit by chopping, peeling and slicing. Chop the kiwi fruit to slices and remove the outer fuzz. Remove the greenery from the strawberries and slice into quarters. Pop the fruit pieces into a freezer-safe food box and tuck into the freezer overnight.
 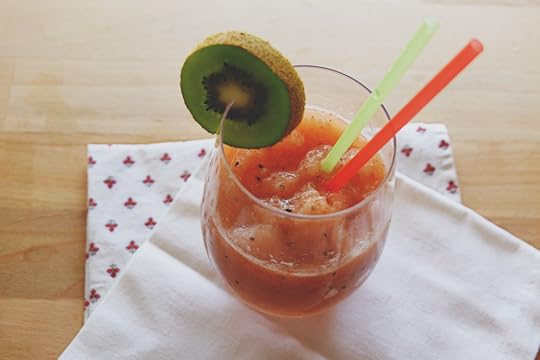 Crush the ice and fruit together- some folks own fancy pants smoothie machines – I do not. I own a hand blender and a milkshake cup. Does the same job! Fill milkshake cup with the ice and a handful of the frozen sliced kiwi fruits and the strawberries and top up with coconut water, muddle the whole thing together with the hand blender. The fruits will blend with the ice to create an delicious fruity cooler!
 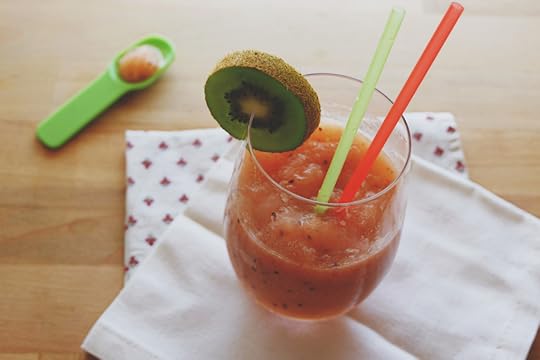 Serve with a slice of kiwi, sup through a straw, or eat with an sundae spoon and a enjoy, enjoy, enjoy!
The post Strawberry & Kiwi Coconut Water Cooler appeared first on Made Peachy.
April 20, 2014
Sewing World Magazine: Hand Embroidery Special
Over the last few weeks, amongst other things, I have been keeping my head down working on something a little special for the latest issue of Sewing World magazine.
Spending my days working on something a little pretty and fun – what kind of project is better than that? Well in the latest issue of Sewing World you will find a bonus 16 page Hand Embroidery Special – put together by yours truly!
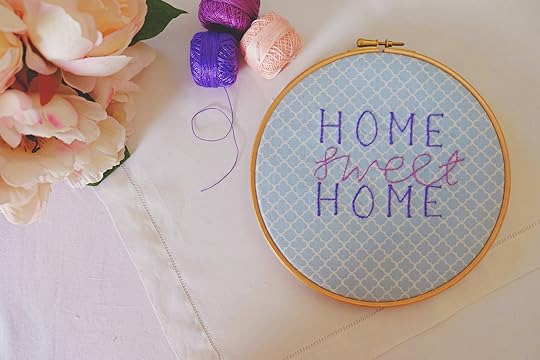
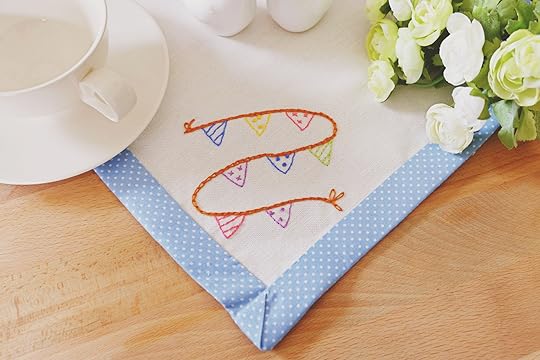 I love embroidery projects – by their very nature they are a slower make. They encourage you to take a breath and just slow down…which in these busy times, is a real blessing. I’ve shared a couple of quick and easy hand embroidery projects that you can work on in an afternoon – alongside this Bunting Table Cloth Motif & Home Sweet Home Wall Art designs, you’ll find a number of free designs and projects on InspiredToMake…so, what are you waiting for?!
I love how you can create fancy pieces, statement wall art projects and even add customisations to clothing with the addition of just a few simple stitches!
 So friends, be sure to check out the latest issue of Sewing World magazine – on sale now – for your 16 page Hand Embroidery Special!
The post Sewing World Magazine: Hand Embroidery Special appeared first on Made Peachy.


