
Laura Strutt's Blog, page 26
July 22, 2014
Five Fab & Free Online Resources for Calligraphy
I think that it is all too apparent that I have a new found love for hand lettering! I mean I literally can’t go a day without thinking about it. I had always believed that to get really good at modern calligraphy you need to spend hours and hours patiently working on your letterforms, flourishes and penmanship. Time that I simply wouldn’t have to dedicate to something new. In the very brief time that I have been working on my hand lettering skills I have come to realise that this is very true. There isn’t a quick overnight fix that will suddenly have the ink flowing over the page in the most elegant and stylish manner. Yes – this my friends is a slow burn skill. But, I also realised that the practise is not the chore that I had expected it to be.
I was under the impression that this was the type of creative pastime that would only really become fun once I’d mastered it. How wrong I was. The process of learning is incredibly relaxing and rewarding. I don’t find that I have to force myself to sit and work on the letterforms, far from it. I have found that I am continually looking at ways in which I can fit in a little practise each day. Squeezing in an hour here and even a quick ten minutes there!
Learning is fun, discovering new things is always going to be one of my favourite things to do.
I am lucky enough to be enrolled on to the Molly Jacques Skillshare Modern Calligraphy course – and just as soon as I’m done I’ll share a class review with y’all. But, in the meantime, I thought that I would share some of the great (and free!) Online Resources for Calligraphers in the making!
1 Crash Course 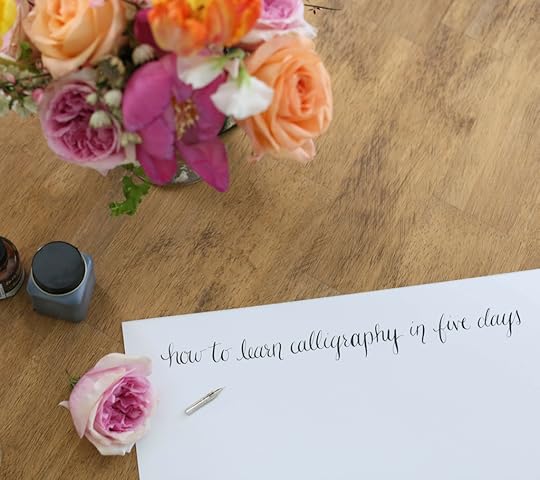 This is a fantastic introduction to learning elegant penmanship – and if you are prepared to put in some practice time you can learn Calligraphy in a week with Julie Blanner’s How To Learn Calligraphy in 5 Days series
2 Fabulous Flourishes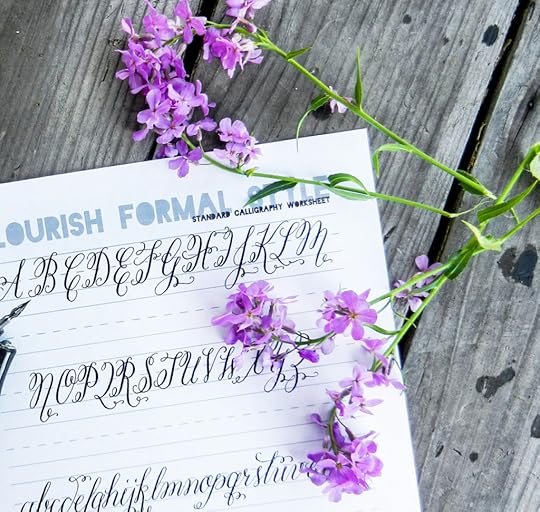 Designer and master calligrapher, Lindsey Bugbee’s free Flourish Alphabet Worksheet is ideal for adding some elegant charm to your lettering.
3 Calligraphy Community The Flourish Forum is an online community bringing together calligraphers, from beginners right through to experts. Registration to the forum is free and will allow you to view and post on the forum boards and also access a wealth of free calligraphy tutorials.
4 Glorious Guides
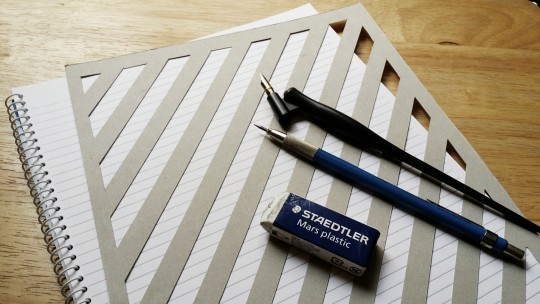 Alongside the letterforms the placement and position of each letter is key to elegant calligraphy. While there are a number of pre-printed notebooks with guides for calligraphers, practice seems to burn through paper super fast. These handy diagonal cut-out guides available as a free download from The Fozzy Book are a great way to customise your own notebooks for calligraphy.
5 Excellent Exemplars
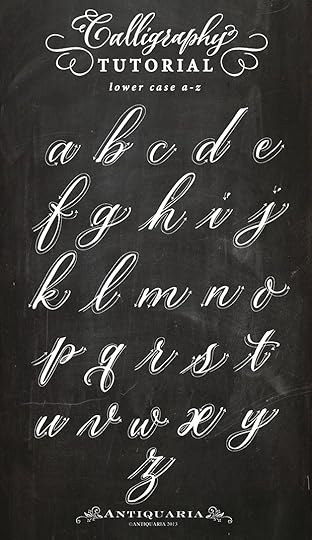 You don’t have to look to hard to find a whole host of calligraphy alphabet exemplars online. However, when you find one with a video tutorial that runs alongside it is proves a valuable tool for mastering the flow of the letters. I love this lowercase pointed pen alphabet exemplar and demo video from AntiquariaVintage
Oh! And, if you’re a Lovely Leftie, don’t think that you aren’t able to master this beautiful creative skill – there are lots of excellent tried and testes tips over on the Flourish Forum with boards dedicated to left-handed calligraphers.
Do you have a favourite internet hangout for enhancing your lettering skills – be sure to share in the comments below! Now, let’s write something lovely today!
The post Five Fab & Free Online Resources for Calligraphy appeared first on Made Peachy.


July 21, 2014
Sewing World Patchwork & Quilting Special!
You guys! It’s finally here! The latest issue of Sewing World magazine is now on sale and (this is the exciting part for me!) it comes with a 16 page special patchwork & quilting special mini mag…put together by yours truly!
It is always so exciting when new magazines arrive through the letterbox – but this one I am particularly proud of!  There are six stunning and fun patchwork and quilting projects to try – including a set of super cute pincushions designed by quilting queen Laura Jane Taylor from her new book Quiltopedia!
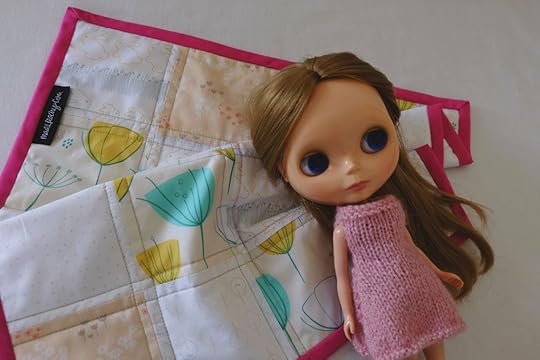 Plus there is this quick and easy beginner’s projects – with a step-by-step guide to creating your own mini dolly quilt! Not only is this a fun make to gift to your favourite Little it is a great introduction to learning the process of making a simple quilt.
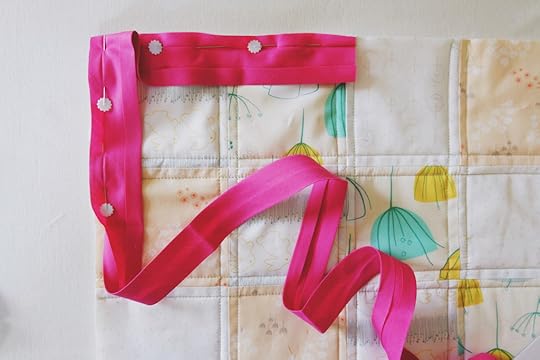 So, if you’ve always fancied trying your hand at quilting this is just the project for you!
Have you got your hands on the latest issue yet? I’d love to hear what you think!
The post Sewing World Patchwork & Quilting Special! appeared first on Made Peachy.
July 20, 2014
The Week That Was: Yarn, Yarn & Photoshoots
In a week where we found ourselves in the middle of a glorious heatwave, I have been up to my elbows in yarn, yarn and yet more yarn. With the only time I came up for air was to attend a photoshoot in a sweltering studio in London.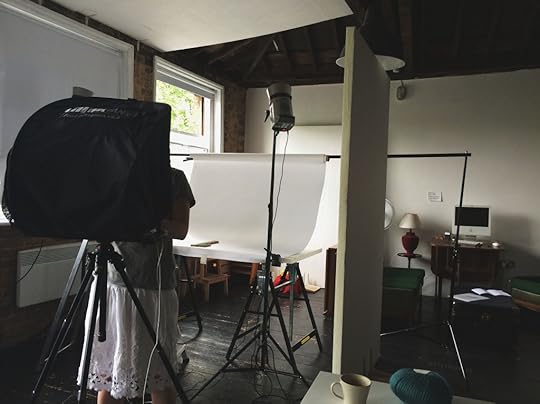
Yes it was hot, yes it was surprisingly exhausting. But, It was such a fantastic experience working with the supremely talented Penny Wincer – here’s hoping that some of the amazing tips and skills that I picked up on during the course of the day actually stick in my head!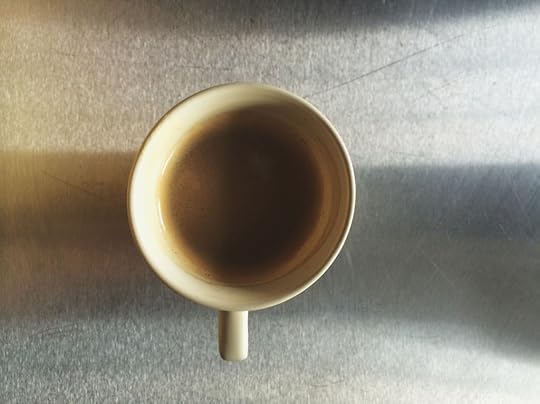 This summer will be remembered as the summer when the deadlines were so crazy that even in a heatwave I needed to keep the coffee flowing. I’m aware that of late I have been talking around a subject, there is much chat about working towards secret deadlines, mystery projects and hush-hush commissions. One of the things that I find so hard is to keep something a secret that I am really and truly bursting to share.
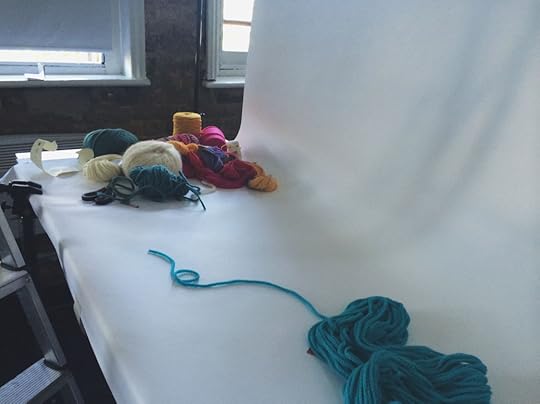 But, this week has taken me one step closer to being able to spill the beans exactly what it is that I have been working on for these last few weeks…not long now, I promise!
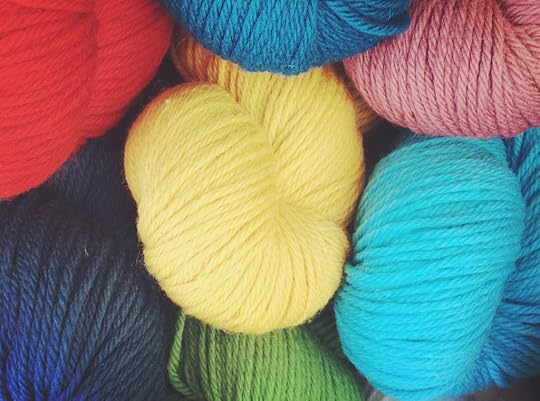 The amount of yarn that has been arriving at Peachy HQ is phenomenal! After spending so long at the sewing machine for the last few years, I had almost forgotten just how exciting it is to open up a package crammed full of beautiful, bold coloured yarns. I have almost reached the half-way point of this project, it’s been a huge challenge, both creatively and also for self-discipline. There is a lot to be said for striving to be prolific in your work…without neglecting the rest of your life, like shopping for groceries, spending time with friends and family and even (dare I say it) relaxing with a good book!
They say that hard work never killed anyone, and as I approach the final straight it is looking like this is true – or at least I hope that it is. Whilst I’m looking forward to working on the challenges of the remaining part of this project, I also can’t wait to dedicating more time to the other aspects of my work – there are so many ideas just waiting to be transformed into real-life makes and projects and I can’t wait to get stuck in. Till then, It’s eyes down and keep on keeping on!
The post The Week That Was: Yarn, Yarn & Photoshoots appeared first on Made Peachy.
July 18, 2014
Create Your Own…Crashed Fabric Bag!
Happy Saturday Y’all!
Learning new skills and techniques is something that I never get bored with. I mean it is a fantastic way to add some fun and fresh challenges into your creativity and your current projects!
I recently shared a tutorial on How To Guide To Crash Fabrics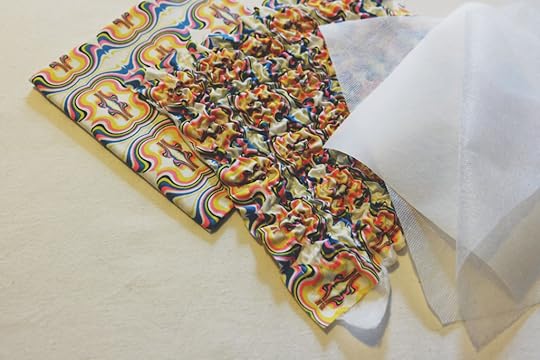 This techniques combines Vilene Solufleece and Vilene Bondaweb with some simple stitching and a healthy dose of steam to draw in the fabrics to create wildly exciting textures that can be added into your sewing projects.
Whilst it is great to learn new techniques, it is even better to have a project created using these techniques to really inspire you! So, when Sewing World magazine asked if I’d like to design an evening bag featuring this textured textile technique (say that three times fast!) I jumped at the chance!
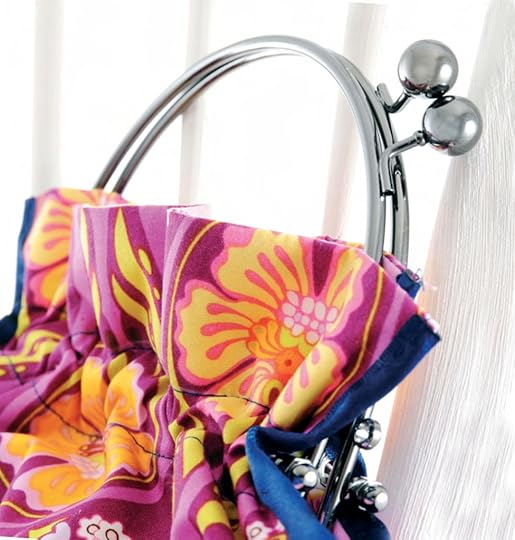 Friends, this evening bag was a heap of fun to make and you can see the whole step-by-step guide for sewing your own in the August issue of Sewing World magazine! I hope you enjoy making it as much as I enjoyed designing it!
 Have you tried your hand at crashing fabrics yet?
♥ – ♥ – ♥
This evening bag was made from the Art Gallery Fabrics collection – be sure to check out the full range and LookBooks for more inspiration!
Find out more about the range of Vilene Products or contact crafts@stockistenquiries.co.uk to find your local stockist!
The post Create Your Own…Crashed Fabric Bag! appeared first on Made Peachy.
July 17, 2014
Obsessed with…wanderlust
Can’t get enough of this super wall art poster £13.87, oflifeandlemons
It’s that time of year when if we aren’t jetting off on our summer holidays, we sure are dreaming about them. I will be falling into the category of dreaming of sunshine holidays this year, unless of course there last minute getaway that we decide to snap up!
Travel is one of my passions. I love to explore new places, go sightseeing and check out local beauty spots. Just the thought of snatching up my boarding card, throwing some essentials into a bag and picking out a book for the journey are enough to give me the travel bug!
Here are some of my handmade favourite wanderlust goodies for all you lucky folks that are planning to jet off some place sunny and fancy this summertime!
 1 Aqua & Pink Chevron Pasport Case • £7.20 • FireboltCreations
2 Correspondance Purse • £17.39 • RosieArmoire
3 Cigar Box Travel Painting Set • £88.76 • BlackOakArtisans
4 Hand Stamped Leather Luggage Tag • £15 • AbercrombieCrumbs
5 Bug repellant All Natural Handmade Soap • £4.20 • N4youSoaps
6 Travel First Aid Kit • £11.99 • WildFernMedicinals
7 Paper Plane Necklace • £16 • TheVulpeculiar
8 Travel Documents Holder • £19.93 • dedalopedal
9 Your Greatest Adventure Travel Journal • £12 • BookishlyUK
If that doesn’t give you a serious case of the travel bug – then I don’t know what will!
♥ – ♥ – ♥
You can see more of my handmade favourites in my Creative Clippings column in the latest issue of Sewing World magazine – the August issue is on sale today!
The post Obsessed with…wanderlust appeared first on Made Peachy.
July 16, 2014
Tried & Tested: Swatch Buddies
Sometimes in life it is the littlest things that turn out to make a huge difference.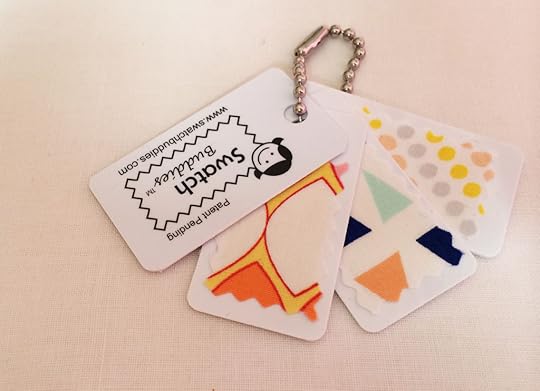 That my friends is exactly what happened when I got my hands on a pack of Swatch Buddies a couple of weeks ago. I’m going to go right ahead and admit it, when I first saw these I thought that they were a bit of a gimmick. Sure a purpose-designs fob for carrying your fabric swatches is pretty cute, but it is really necessary? Lemme tell y’all I was wrong!
 Swatch Buddies c/o Hantex RRP £8.30 per pack of 24
Using Swatch Buddies is easy breezy! Remove the backing paper from the adhesive sheet
 Apply the adhesive to the wrong side of the fabric and trim the fabric with pinking sheers
 Remove the remaining backing from the adhesive and secure to the tab
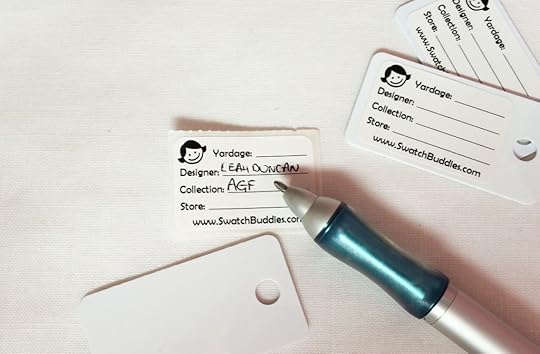 Add your fabric notes to the reverse
 Feed onto the neat little key chain and your ready to rock to the fabric store!
These are fabulous for quilters, yes, because you can keep your swatches with you, in your purse, all neatly marked up ready for buying yet more fabric. And, who doesn’t like buying more fabrics? Exactly! Not all of us love to quilt, but my friends these little beauties aren’t just for quilters! Nope! I would, hand on heart, say that Swatch Buddies will be useful for pretty much all fabricaholics!
 Whilst I love to make quilts, I work on a wide range of sewing project – most often commissions and will regularly be heading to the fabric store with a half finish project in search of the perfect accent, backing or lining. Heading supplies shopping mid-make is never ideal, even less so when you have to pack up your project and tote it along with you. Trust me, it’s a disaster waiting to happen! So, these little babies are by far the most convenient to whizz along with to the fabric store.
 One of my very favourite things about the Swatch Buddies is the little sticker that lets you not the fabrics. When I’m working on commissions I try to keep a clipping of the selvedge if it’s printed with the designer’s name, print and collection – which is great when it comes to writing up the pattern or project instructions because it is surprisingly difficult to remember exactly what you’ve used when you work on a lot of different makes. While this system of clipped selvedges stick into my notebook of design notes is great, it’s not as inspiring as looking at a swatch of the fabric knowing that all the essential information is right there with it.
For me the Swatch Buddies are a complete game changer – have you tired them out yet? What do you think?
The post Tried & Tested: Swatch Buddies appeared first on Made Peachy.
July 15, 2014
Love Sewing Magazine: Issue 3!
Happy Wednesday Y’all! We’re part way through the working week, which means that the weekend and all the good things that go with that are right around the corner! I have a lot to finish up before the weekend, and I have an exciting photoshoot scheduled for Friday, so I’m on a self-imposed calligraphy ban until the weekend.
One of my very favourite things about my work is the challenge of contributing designs to some super magazines. I love being given briefs that are exciting, modern and are often not something that you might think to make for yourself. I’m so stoked to be a contributor to Love Sewing Magazine - this issue is a pretty rad one too!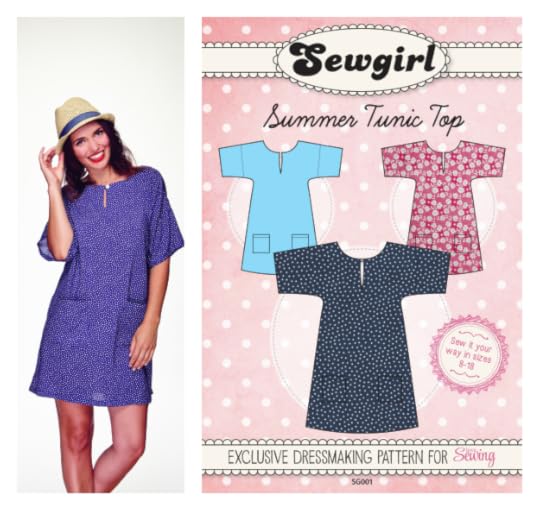 Issue 3 of Love Sewing magazine come with an exclusive summer tunic sewing pattern (perfect for long sunny days at the beach!) and a pair of cool tortoise-shell effect bag handles.
Statement bags are a great sewing project, not just for building your sewing skills but stylish accessories always get noticed - I hope that you love the Jackie O bag I designed for making with your free bag handles as much as I enjoyed making it!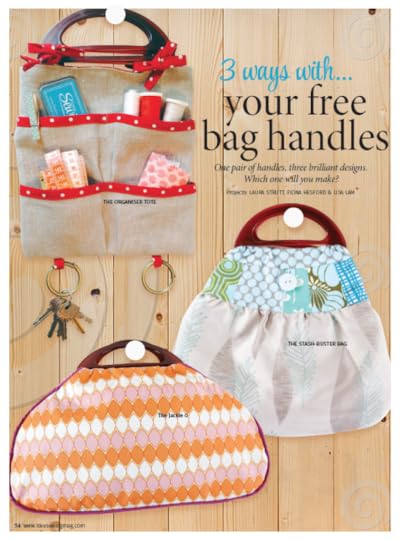 Plus – I’m over the moon to be in such good company – with this collection of three designs for using the free bag handles by Lisa Lam & Fiona Hesford!
Got a stitching question?
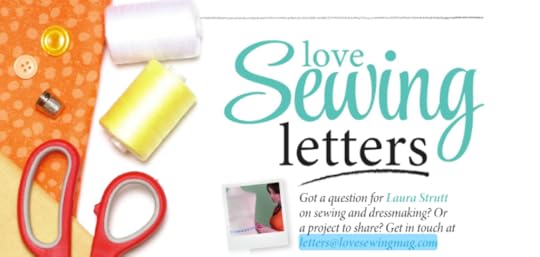 Not only that – if you have a sewing question, or are looking for some help with a new technique be sure to send over your questions to letters@lovesewingmag.com and I’ll do my super best to answer these in the upcoming issues!
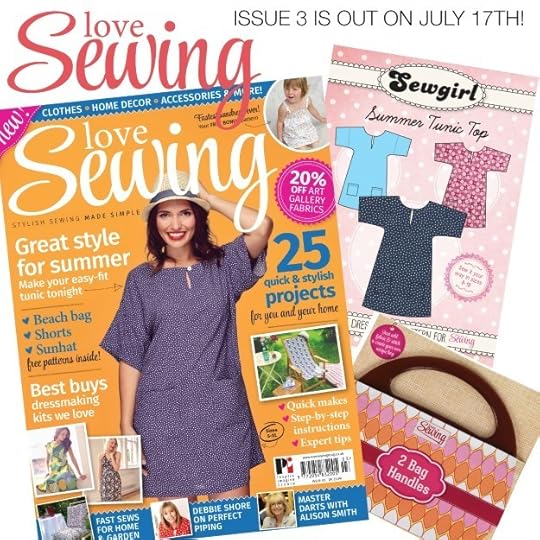 The latest issue of Love Sewing magazine is dropping through subscribers letterboxes right now and will be hitting the newsstand on the 17th June – if you’re searching out some modern stitching inspiration, you really won’t be disappointed!
Have you got your copy yet? I’d love to hear your thoughts!
The post Love Sewing Magazine: Issue 3! appeared first on Made Peachy.
July 13, 2014
The Week That Was: Mini Camping Holiday
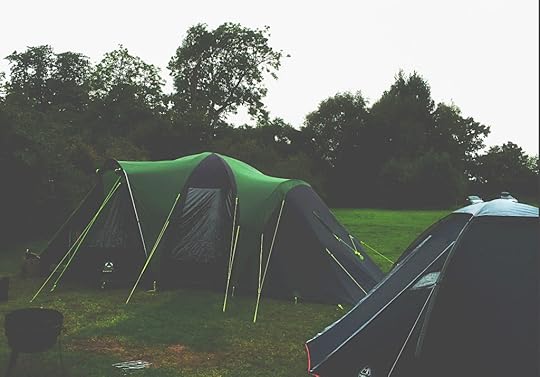
With all of the camping posts lately, it will come as no surprise that last week we packed up the tent, the dog and headed off with our dearest friends for a couple of nights of adventure under canvas!
Our destination – Swattesfield Campsite in Suffolk. I get that not everyone loves the great outdoors – or not to the extent that they’d like to sleep out in a soggy old tent (I’m pretty sure that it is time we upgraded our small secondhand tent for something little more roomy now that we have a pup in tow!) But, this campsite really does have it all!
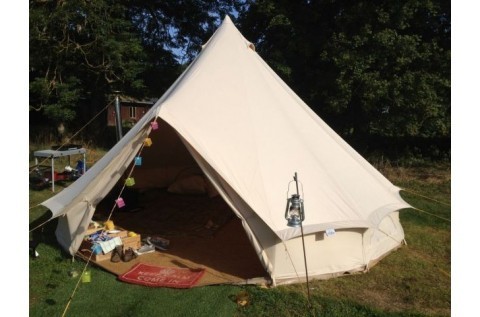
Image: Swattesfield Campsite
There are pixie cabins, a shepherds hut and even a few beautiful bell tents – so if you’re not the roughing it kind, then those glamping options might be more to your liking!

Image: Swattesfield Campsite
And…of course, bunting covered amenities with hot water – so you’re never really slumming it!
 Our holiday full to busting with very happy times!
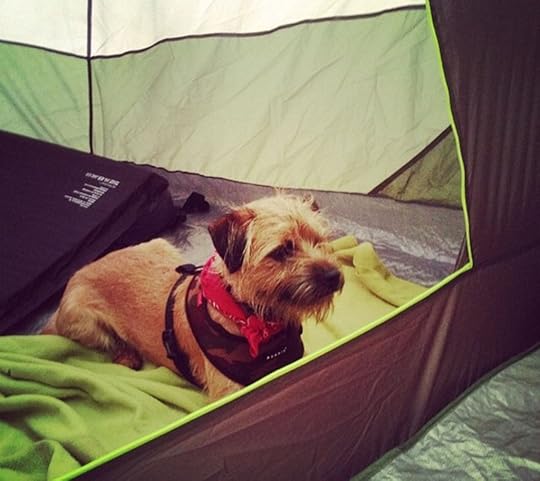 Fish ‘n’ chips under canvas during an epic rain storm, walking along the beach hunting for pretty pebbles, Waffle’s very first (and highly successful) pub dog experience while we ate scrummy lunch, campfires and roasted marshmallows.
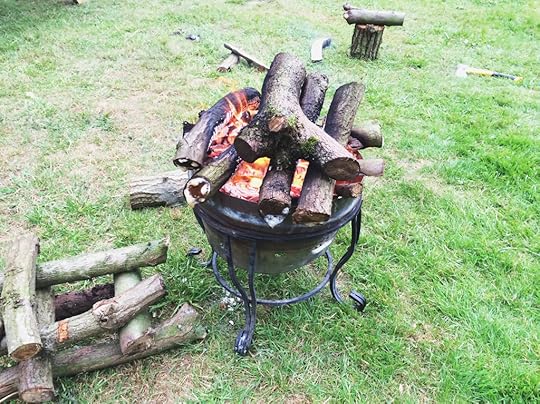 It was perfect! I learnt that glow sticks and empty beet bottles make for pretty campsite lamps, that Border Terriers are at their happiest when they are having adventures and adore camping (he is still napping hard on his new puppy bed recovering from all the excitement!) and that three year old Littles with a passion for the movie Frozen are my favourite type of Littles. If our mini holiday had a sound track, it would most definitely be “Let it go!” (Although I think that we all only really know a handful of the words between us!)
 Two nights, especially in such a fantastic location and with such good company, is nowhere near enough! I can’t wait to plan another trip really soon…well, just as soon as I get though the mountain of soggy laundry that smells of campfires that is!
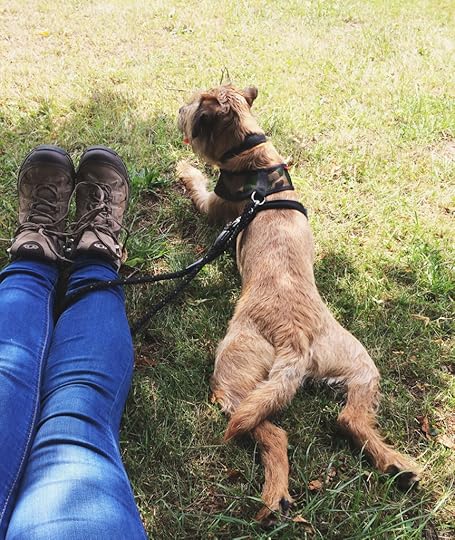 While I’ve been off on a bite-sized adventure y’all have been busy entering the Art Gallery Fabrics Bundle giveaway on last weeks TWTW post – thank you!
So…without any further ado…it is time to announce the winner!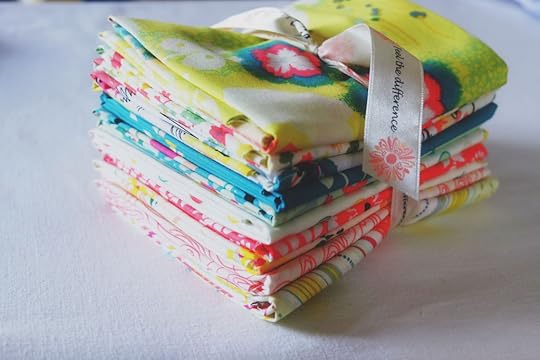
CONGRATULATIONS
Mary Emmens!
Be sure to send over your postal address so that this rad fabric bundle can wing it’s way over to you!
You can see the whole AGF range online – be sure to check out the LookBooks too for heaps of creative stitching inspiration!
The post The Week That Was: Mini Camping Holiday appeared first on Made Peachy.
July 11, 2014
Quick-Make Puppy Bed
If you were to say that our little pup Waffle is spoilt rotten I would ferociously deny it. Then I would take a moment and realise that, yes, this is almost definitely the case. Well, I’m a firm believer that the whole reason having a pup (or any pet for that matter) is to love it and cherish it with all your heart. It’s all about making life fun for them, taking care of them and enjoying the unique brand of crazy that they bring into your life.
It will probably come as no surprise that I am always thinking of little treats to make for little Waffle – remember on his birthday I baked him up a monster batch of Pup-Safe Cupcakes & Cakepops! Well, as we seem to be out of the other side of the ‘chew-up-your-dog-bed-in-5-minutes-flat’ phase (or here’s hoping!) I figured that it was high time that I made him has very own custom pup bed.
I wanted to make a simple bed that would be easy to bring along when we travel places, I wanted to make sure that it would be washable too – because, let’s face it puppies can attract a lot of stink.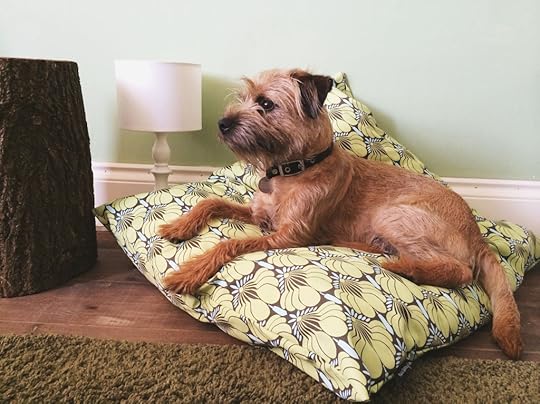 So, this over-sized cushion bed features a small zip opening, so that the cushion pad can be removed for easy washing! This step-by-step guide will show you how to make your own Quick-Make Puppy Bed!
 Grab your supplies…
Cushion pad - these come in so many different shapes and sizes. I opted for two separate pads, a firm one for the bottom and a puffy fluffy one for the upper section (yup, he’s a spoilt pup!)
Heavy-weight cotton – I’ve had this Amy Butler Forest Imperial Fans fabric in my stash for the longest time!
Zip – I use a really small zip for my fastening as I wanted to make sure that there was less ‘stuff’ that might look good to chew! Smaller zips mean that inserting the cushion pad is a bit tricky, I used cushion pads that could roll up easily to slide into the opening – you can always use a larger zip to make stuffing the bed easier or if you have faith in your puppy’s ability to resist chewing on things! Begin by trimming the fabrics to 2.5cm larger than the cushion pads (if, like me, you’re layering two pads, you may need to cut the fabrics to 3cm larger than the cushion pads to allow for the bulk).
 Trim two offcuts into 3cm x 6cm strips. Fold the strips in half and press, the fold the raw edges in to the fold and press again to make two zip end tabs. Place a zip end tab over each end of the tip and pin in place. With a zip foot and a straight machine stitch, work a line of stitching across each of the zip end tabs in turn to secure to the zip.
 Work on one fabric panel at a time, place the zip face down to the centre of one side – the zip teeth will be facing the right side of the fabric . Align the raw edge of the fabric and the edge of the zip and pin in place. Stitch to secure using the zip foot to get the stitches close to the teeth of the zip. You will need to stop half way and raise the presser foot to move the zip tab out of the stitching line to get a really neat street seam. Turn to the right side and press the fabric and the seam allowance down away from the zip.
 Repeat to secure the zip onto the corresponding section on the second piece of the fabric in the same way and press the fabric and seam allowance down away from the zip. Once the zip is in place, open it fully before aligning to the two fabric parts with right sides together and pin in place. [Pssst! This whole 'opening the zip' thing is probably the most important part of making this dog bed. Leave the zip shut and once the remaining seams are stitched you'll have a really tricky (sometimes impossible!) job of undoing it from wrong side to turn the project through to the right side!]
 With a standard sewing foot, stitch the two pieces together with a 1.5cm seam allowance. Trim away any excess seam allowance and clip the seam allowance at corners to make them neat when turned though.
 Turn through to the right side, through the open zip fastening – see, this is why it needs tone left open! be sure to push out each of the corners fully, and press to neaten before inserting the cushion pad (or pads) and fasten the zip!
 Tah Dah! Puppy Bed in no time!
 I think it is safe to say that this little beastie really likes his new comfy bed – I hope your special hound does too!
The post Quick-Make Puppy Bed appeared first on Made Peachy.
July 10, 2014
Obsessed with…Camping Trips
If one look at this amazing Camp Cooking Tripod, £15 ArrowSmithForge fills you with excitement at the prospect of a little adventure, then I think we’re friends!
Camping trips are my fave way to get away from it all, even if it is only for a few nights. There is definitely something about sleeping out under canvas in the great outdoors that really does make my wee heart skip!
If, like me, your planning some camping trips and adventures into the great outdoors this summer time, then I know you’re going to love this round up of Handmade Summertime Camping Trip Essentials!
 1 Leather Blanket Strap • £14.98 • TexturableDecor
2 Marshmallow Roasting Forks • £13.78 • Theweldedkeller
3 I Heart Camping Bamboo Necklace • £13.18 • Truche
4 Neon Orange Accent Slingshot • £20.37 • HellaSlingshot
5 Waterproof Chevron Picnic Blanket • £83.86 • ModernCabin
6 Camping Theme Hand Stamped Wooden Cutlery • £8.63 • LolaLovesAparty
7 Camping Theme Hip Flask • £11.98 • LiquidCourage
8 Camping Zip Pouch • £8.99 • liltinpurse
9 Tent Rubber Stamp • £4.50 • Bymelimelo
So, what are you waiting for? Whose planning an adventure this summer?
The post Obsessed with…Camping Trips appeared first on Made Peachy.


