
Colin McCrate's Blog, page 18
November 11, 2016
Encyclopedia Botanica Podcast, Episode 21: Microgreens

Microgreens are a great way to produce food all year long with minimum space and time. In this episode we'll discuss how to grow microgreens and crops that are best suited for this type of production.
HOW TO LISTEN:Listen right now in your browser by clicking above.Subscribe in iTunes (or your favorite podcast player) to have our podcasts sent directly to your device.SHOW NOTES:In this episode, we discuss:
What microgreen areWho to grow microgreensWhat crop varieties are best suited for microgreen productionImportant take-aways:
Microgreens are essentially edible seedlings that are packed with nurients.Popular microgreens crops are arugula, mesclun mix, mustards, sunflower sprouts, just to name a few. Many crops can be grown as microgreens, but it is important to note that some are better suited than others. For example, any brassica crop can be easily sprouted but the seeds for brassicas such as broccoli and cauliflower are much more expensive and slower growing than mustard greens. Our book, High Yield Vegetable Gardening contains a chart that lists the easiest and best crops for microgreens.To grow microgreens you need:FlatsSoil mixLighting - Microgreens grow well in a window sill, but if you’d prefer to set up grow lights, 8 bulb T5 grow lights set about 6' above the tops of the flats work really well.Overhead watering works when first seeding the greens, but you’ll want to bottom-water after the seeds are germinated to avoid breaking the stems and covering the plants with dirt.Depending on the type of greens you’re growing, microgreens take 1-4 weeks from seed to harvest.For photos of us seeding microgreens, follow the link to this blog I posted a few years ago: GROW YOUR OWN MICROGREENS
Heard on the Episode:“Sunflower seeds produce some of my all-time favorite micro-greens. The tiny sprouts are succulent and full of nutty flavor. The only issue is that sunflower seeds can be really expensive. Luckily, you can use seed saved from the sunflowers that grow in your garden. One head can sometime produce enough seed for 5-10 flats of greens!” - Hilary Dahl
“I have some winter basil going inside right now, just on my windowsill. The plants are looking a little leggy, but mostly they are doing great. I have noticed that they tend to lean toward the outside light, so I just flip the container around every couple of days. As a side note, I always think it's totally cool to watch plants actually grow toward the light! ” - Kellie Phelan
A few great resources on sprouting: [image error] [image error] [image error] [image error]Like what you hear? Please share our podcast with a friend. Subscribe on iTunes or your favorite podcast player so you never miss a beat. And we'd really appreciate you showing us some love by leaving a rating and review on iTunes.
Have a topic you'd like see us dig in to? Leave us a note in the comment section below or #EBpodcast on Instagram and Twitter!
We need your support to keep make fresh, quality weekly content! Support us here:


November 4, 2016
Encyclopedia Botanica Podcast, Episode 20: Fall Garden Journaling

Spending a little time in the fall taking notes on what happened in your garden over that past season is a great way to get a jump start on your garden planning for the following spring. In this episode we are going to briefly introduce garden mapping and then Kellie and I will share our favorite crop varieties of the 2016 garden season.
HOW TO LISTEN:Listen right now in your browser by clicking above.Subscribe in iTunes (or your favorite podcast player) to have our podcasts sent directly to your device.SHOW NOTES:In the episode we discuss:
How to make a garden map.Basic information to include on your garden map.Our favorite crop varieties of the 2016 growing season.Important Take-aways:
Garden mapping enables you to keep track of what happened in the past and project the best ways to use your garden in the future. We highly recommend you create a map of your garden at the beginning of each season so you can accurately track what you planted and where each crop was located in your garden.The first thing you need to do when preparing to map your crops is to make an enlarged base map that consists of a simple outline of your annual garden beds.Our stand-out varieties of 2016:Beans: ‘Fortex’ (pole beans) and ‘Provider’ (bush beans)
Broccoli: ‘Bay Meadows’
Brussels: ‘Doric’ and ‘Gustus’
Carrots: ‘Nelson’
Peppers: ‘Anaheim’, ‘Padrone’, ‘Shishito’
Squash: ‘Tromboncino’
Tomatoes: ‘Golden Rave’
Heard on the Episode:“Let's be honest, for a gardener, digging into a seed catalogue in the dead of winter is one of the great joys of the off-season. These beautiful publications, with all their colorful images are a incredibly inspiring! However, it is important to remember that, no matter how eloquent the description of the variety in the catalog, not every variety will live up to your expectations.” - Hilary Dahl
“...get ready for this dorkiness - I do my garden planning in Excel! Since I grow my veggies in raised beds, they are a nice rectangular shape - either 4x8 or 4x10 or 2x8 - so it's easy to make each cell in Excel equal to one square foot. ” - Kellie Phelan

'Fortex' pole beans

'Doric' Brussels

'Nelson' carrots

'Provider' bush beans

'Shishito' peppers

'Bay Meadows' broccoli side shoots

'Anaheim' peppers

'Golden Rave' tomatoes on a galette
Like what you hear? Please share our podcast with a friend. Subscribe on iTunes or your favorite podcast player so you never miss a beat. And we'd really appreciate you showing us some love by leaving a rating and review on iTunes.
Have a topic you'd like see us dig in to? Leave us a note in the comment section below or #EBpodcast on Instagram and Twitter!
We need your support to keep make fresh, quality weekly content! Support us here:

October 28, 2016
Encyclopedia Botanica Podcast, Episode 19: Garden Soil pH

Support Encyclopedia Botanica Podcast
This episode we are going to delve into the wonderful world of soil pH. Managing the pH of a garden may sound super complicated or perhaps a bit over-the-top for the beginning gardener. However, checking and adjusting the pH of your garden soil is actually very easy and very important.
HOW TO LISTEN:Listen right now in your browser by clicking above.Subscribe in iTunes (or your favorite podcast player) to have our podcasts sent directly to your device.SHOW NOTES:In this episode, we discuss:
What is soil pH?What does soil pH mean for our vegetable garden?How you can amend soil pH.Important Take-aways:
The pH of your soil affects the availability of nutrients to your plants. This means that, even if you have added compost and fertilized your garden soil with everything imaginable, if the pH is way off, the plants will not actually be able to absorb and use these nutrients.For almost all annual vegetable crops a pH between 6.2 and 6.9 is ideal.Adding Calcitic lime and Dolomitic lime will make your soil more basic. Adding elemental sulfur will acidify your soil. The advantage of Dolomitic lime is that it also provides magnesium and calcium to your soil, both essential plant nutrients. However, if applying Dolomitic lime, you need to be careful because over-applications or too frequent applications can throw the calcium-magnesium balance out of whack, which can lead to all sorts of plant health issues.4.5-5.5 is a good range to shoot for in your blueberry patch.You have three basic options for testing your soil pH. You can use a pH testing kit at home that uses litmus paper; you can use an electronic pH tester at home; or you can send a soil sample into a lab. All of these are good solutions, but I think for the average home gardener, it probably makes sense to both use a home tester and to send in a soil test to a lab.If you'd like to learn the make-up of your soil, get a soil test! Here are two labs that we use on a regular basis:King Conservation District Soil Testing ProgramA&L Eastern Laboratories
Applying lime to a garden.

Keeping perennials and annuals separate helps keeps amending soil pH simple
Heard on the Episode:
“Some perennial crops like blueberries actually prefer very acidic soil conditions, way more acidic than vegetables. This is another good reason to keep perennials in a separate planting area from your annual vegetables.” - Hilary Dahl
“My soil test results showed I was in the mid range for magnesium, so it sounds like calcitic lime would probably be the best amendment for me. And if you're not sure, that's the one to use so you don't inadvertently add too many minerals to your soil.” - Kellie Phelan
Like what you hear? Please share our podcast with a friend. Subscribe on iTunes or your favorite podcast player so you never miss a beat. And we'd really appreciate you showing us some love by leaving a rating and review on iTunes.
Have a topic you'd like see us dig in to? Leave us a note in the comment section below or #EBpodcast onInstagram and Twitter!
October 21, 2016
Encyclopedia Botanica Podcast, Episode 18: Applying Compost to the Fall Garden

Over-wintered broccoli in early March. The plant was surrounded with compost and the empty spaces in the garden were covered in compost.
Support Encyclopedia Botanica
This week we will be discussing how to use compost as a fall garden amendment. In particular, we're going to talk about it how you can use compost to improve and protect your soil over the wet winter months.
HOW TO LISTEN:Listen right now in your browser by clicking above.Subscribe in iTunes (or your favorite podcast player) to have our podcasts sent directly to your device.SHOW NOTES:In this episode, we discuss:
What is compost and why is it good for your garden?What’s the difference between compost and soil?What is mulch?Important Take-aways:
When cleaning up your garden in the fall (or at the end of your growing season), we recommend applying a 2-3 inch layer of compost to the top of your beds.Compost is essentially another word for decayed organic matter. And organic matter is one component of soil.A typical natural soil is made up of about 45 percent minerals, 25 percent water, 25 percent air, and only 5 percent organic matter.In a garden, organic matter content can be much higher. In fact, in many gardens we use a soil mix that is 50% compost and 50% sand. Other growers will plant into 100% compost. Generally speaking, an organic matter content of 10-50% is appropriate for a vegetable garden.If you'd like to learn the make-up of your soil, get a soil test! Here are two labs that we use on a regular basis:King Conservation District Soil Testing ProgramA&L Eastern Laboratories
Composting a garden in the fall

Planting right into a fall-composted garden in the spring.

Spring spinach growing in a fall-composted garden

Kale trees!!
Heard on the Episode:
“High quality compost will have been managed so that it reached a temperature of at least 160 degrees during the decomposition process. This high temperature kills the pathogens and the weed seeds in the organic matter. This is crucial because their’s nothing worse than top-dressing your garden just to have it sprout in the spring!” - Hilary Dahl
“Don’t throw your food scraps directly into the garden!” - Kellie Phelan
Like what you hear? Please share our podcast with a friend. Subscribe on iTunes or your favorite podcast player so you never miss a beat. And we'd really appreciate you showing us some love by leaving a rating and review on iTunes.
Have a topic you'd like see us dig in to? Leave us a note in the comment section below or #EBpodcast on Instagram and Twitter!
October 14, 2016
Encyclopedia Botanica Podcast, Episode 17: Cover Cropping
Share on Facebook //
Share on Twitter
Cover cropping is the practice of growing a crop specifically to generate organic matter, protect the soil, and increase soil nutrient levels. On production farms, fields may be planted in cover crop for an entire season to allow the soil to rest and build back up nutrient stores which have been depleted by intensive plantings.
In this episode, we discuss how cover crops work and why they are an incredibly important and effective way to maintain soil health and capture soil on site, but also why the practice of cover cropping can be tricky to employ in a home garden.
HOW TO LISTEN:Listen right now in your browser by clicking above.Subscribe in iTunes (or your favorite podcast player) to have our podcasts sent directly to your device.SHOW NOTES:In this episode, we discuss:
What cover crops are and how they are used.How to plant cover crops.Ways in which cover cropping can backfire in a small garden.Important Take-aways:
When it comes to protecting your soil over the winter, planting cover crops is one of the best things you can do. As they grow, the cover crops take up excess nutrients left in the soil, which prevents them from leaching away over the winter. The roots provide a haven for beneficial mycorrhizal fungi throughout the winter. Mycorrhizal fungi form a symbiotic relationship with the plants roots and help them absorb nutrients from the soil. When the cover crops are moved down and turned back into the soil, they release usable nutrients and help build up organic matter.Many plant species can serve as cover crops. Your choice will vary based on your cover cropping goals, soil conditions, and the time of year.Plan to turn in your cover crop about a month before you want to plant vegetables.Due to the challenges of coordinating cover crop planting and decomposition schedules, they can create more problems in the home garden than they solve.
Buckwheat at our production farm. You can see the massive amount of organic matter that some cover crops produce, making it more difficult to turn into the soil using hand tools and working on a small backyard scale.
Heard on the Episode:
“Good soil structure has loft to it and is friable, it's what people call tilth! You need space and air between the soil particles for roots. Insects move through the soil creating passageways and roots follow those trails. It's like a deer moving through the woods creating pathways and then people end up following those pathways...” - Hilary Dahl
“My cover crop has definitely re-sprouted in the past...I’m always impressed at how resilient it is. You really need to stay on top of breaking it down.” - Kellie Phelan
Support Encyclopedia Botanica
Like what you hear? Please share our podcast with a friend. Subscribe on iTunes or your favorite podcast player so you never miss a beat. And we'd really appreciate you showing us some love by leaving a rating and review on iTunes.
Have a topic you'd like see us dig in to? Leave us a note in the comment section below or #EBpodcast on Instagram and Twitter!
October 7, 2016
Encyclopedia Botanica Podcast, Episode 16: The Organic Seed Alliance Field Day

Last week Kellie and I went to a community field day and variety tasting event put on by the Organic Seed Alliance. The event celebrates the second annual harvest at OSA’s Washington research farm, which serves as the hub of OSA’s Pacific Northwest organic plant breeding, seed education, and variety trial program.
In this episode, we’ll discuss OSA’s mission and some of the work they do and we’ll also share their technique for saving tomato seeds.
HOW TO LISTEN:Listen right now in your browser by clicking above.Subscribe in iTunes (or your favorite podcast player) to have our podcasts sent directly to your device.Stream from SoundCloudSHOW NOTES:In this episode, we discuss:
What the Organic Seed Alliance (OSA) is and their mission.Why organic farmers and gardeners are reliant on organizations like the OSA to help develop seed adapted to their specific farm conditions and climates that don’t require the use of synthetic pesticides and fertilizersHow to save tomato seeds.Important Take-aways:
Seeds are a living, natural resource that need careful management to meet food needs now and into the future.The Organic Seed Alliance’s work is crucial to the future of organic farming. Research demonstrates that varieties developed under non-organic growing conditions are not always successful in organic and other low-input systems. Organic growers need crop varieties developed specifically for low-input systems – crops that mitigate pest and disease pressures, and that are adapted to their local conditions and climates.” The OSA is partnering with farmers all over the country to identify seed needs and to trial varieties and collect data.Label any seeds you save with the variety and date!Heard on the Episode:
“It’s not everyday that you get the opportunity to try seven different types of kale...sided by side. It’s just a good reminder of all of the different vegetable varieties and flavor qualities that are out there.” - Hilary Dahl
“I have to say, this was just such a cool experience...I’ve never really done anything like this before. I learned way more than I expected about the importance of seeds in our culture...honestly, I know it’s fall but it got me super jazzed up for planning my spring garden…!” - Kellie Phelan

Scooping out the inside flesh of tomatoes for seed saving.

The fermented tomato seeds ready to be decanted.

Phacelia tanacetifolia in front of the Brassica fields at the OSA test farm.
Like what you hear? Please share our podcast with a friend.Subscribe on iTunes or your favorite podcast player so you never miss a beat. And we'd really appreciate you showing us some love by leaving a rating and review on iTunes.
Have a topic you'd like see us dig in to? Leave us a note in the comment section below or #EBpodcast on Instagram!
September 30, 2016
Encyclopedia Botanica Podcast, Episode 15: Woody Herbs

Growing herbs can be a great way to dip your toes into gardening. If you’re already a gardener, you know how convenient it is to have many of the herbs you need for cooking just steps from your front door. Herbs can provide an almost overwhelming bounty of flavor that can be easily stored and used all year long.
In this episode, we focus on woody perennial herbs. These easy-to-grow plants tend to get neglected, but they’re actually really easy to keep nice and tidy. With a few simple steps, you can care for your herbs while also harvesting your crop! Join us as we chat about pruning herbs, using lavender, sage, and rosemary as examples.
HOW TO LISTEN:Listen right now in your browser by clicking above.Subscribe in iTunes (or your favorite podcast player) to have our podcasts sent directly to your device.Stream from SoundCloudSHOW NOTES:In this episode, we discuss:
The differences between the 3 categories of herbs: annual, biennial, and perennial.The importance of cutting back perennial herbs to prevent the stems from turning woody and affecting the growth habit of the plant in subsequent seasons.Best practices for cutting back herbs, with specific guidance for lavender, sage, and rosemary. Important Take-aways:Perennial herbs come back each year and generally will have a long life if properly cared for.Prune your perennial herbs at least once each season. If you are planning to harvest your perennial herbs for culinary use, you’ll want to cut them back before they flower. Or, if you like to enjoy the colorful displays and the pollinator attracting capacity that most perennial herb flowers provide, cutting them after they have flowered is fine too.Don’t be afraid to prune! In general, perennial herbs should be cut back by a third to a half every growing season. This is the best way to prevent woody, unruly growth.Heard on the Episode:“Your perennial herbs don’t have to turn into unwieldy monsters, they’re actually really easy to keep nice and tidy, and by caring for them in this way, you’re also harvesting your crop!” - Hilary Dahl
“I like to cut my lavender back when there is still some life left in the flowers so I can use them for DIY projects. I hang the stalks to dry, and then collect the lavender blooms. This year, I'm making some lavender salts and sugars for holiday gifts.” - Kellie Phelan
Like what you hear? Please share our podcast with a friend.Subscribe on iTunes or your favorite podcast player so you never miss a beat. And we'd really appreciate you showing us some love by leaving a rating and review on iTunes.
Have a topic you'd like see us dig in to? Leave us a note in the comment section below or #EBpodcast on Instagram!
September 23, 2016
Encyclopedia Botanica Podcast, Episode 14: Hops

It may be a surprise to some listeners that, not only are hops relatively easy to find a place for in the home garden, but they are also beautiful and really rewarding to grow. I love the way hops look and smell! As with many crops we discuss during the fall, now is the time to harvest hops if you have already have them growing in the garden, so we'll cover how to do that today, but we'll also discuss a little bit about how to grow them and how to use them.
HOW TO LISTEN:
Listen right now in your browser by clicking above.Or subscribe in iTunes (or your favorite podcast player) to have our podcasts sent directly to your device.Stream from SoundCloudSHOW NOTES:In this episode, we discuss:
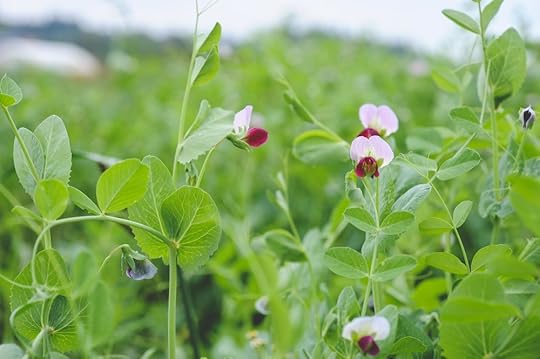
How hops growBines vs. VinesWhat to look for to determine when your hop cones are ready for harvestHop varietiesHow to use hopsImportant Take-aways:
Like most of the crops in your edible garden, hops prefer to get as much sunlight as possible. They prefer sandy, well drained soil with a pH of 6.0-8.0. As you would for any perennial, make sure to loosen up the soil and prepare the space ahead of time, and add a little bit of balanced fertilizer to the bed.The first season you shouldn’t expect to see much growth and you’ll likely not get any flowers from the plant. But the second season onward, each vine can produce between 1 and 2 lbs of flowers each year.Hops can grow up to around 25 feet so you want to set up a trellis or support system for your hops to grow on.Hop vines are actually called “bines,” which is a term that is used to differentiate plants by their growing habit. A bine is a plant that wraps itself around a support in a helix, basically spiraling itself around the pole or wire. This is in contrast to a “vine” which uses some alternate growth like a tendril to grab onto the support. A sugar snap pea is a good example of a vine.Knowing when hop flowers are ready to harvest can be a bit tricky. Here is the basic procedure: First, squeeze a cone between your fingers. If the cone stays compressed, it’s not quite ripe. You want them to feel light and dry—and spring back after a squeeze - that is how you know they are ready. They should be sticky and you should be able to see the lupulin, which is a yellow powdery substance that forms on the inside to be visible on the outside. Also, try rolling a flower in your hands and then smell it. You want it to have a pungent and strong smell. You can also try rolling the hop next to your ear. People say it should sound like a cricket when they are ready to pick. Generally, most hop varieties are ready to pick somewhere between late August and mid-September, depending on the variety and weather conditions.At the end of the season, the hops will start to brown and die back. You can cut all of the bines at ground level and simply wait for them to spring back up next season.


RESOURCES:
These are some of the hop varieties we discussed:
Cascade hopsGolden hopsCitra hopsCentennialNuggetWillametteHeard on the Episode:
“Each species of bine will always grow in the same direction and for hops, its clockwise. What is actually totally crazy is that scarlet runner beans wrap clockwise and other standard garden pole beans grow counter clockwise!” - Hilary Dahl
“I had no idea that hops were so easy to grow at home.” - Kellie Phelan
Like what you hear? Please share our podcast with a friend.Subscribe on iTunes or your favorite podcast player so you never miss a beat. And we'd really appreciate you showing us some love by leaving a rating and review on iTunes.
Have a topic you'd like see us dig in to? Leave us a note in the comment section below or #EBpodcast on Instagram!
September 16, 2016
Encyclopedia Botanica Podcast, Episode 13: Winter Squash

Fall weather means one thing… cozying up with a good book and a cup of squash soup. It’s too late to plant winter squash this season, but it’s never too late to learn all about this awesome storage crop.
The ‘winter’ in winter squash refers to the time of year the crop is eaten, rather than planted. The winter squash category includes to storage squashes (butternut, spaghetti, and acorn), as well as pumpkins. In today’s episode, we cover everything you need to grow perfect winter squashes, including the lifecycle of the plant, when to harvest, and how the fruits should be cured for storage.
HOW TO LISTEN:Listen right now in your browser by clicking above.Or subscribe in iTunes (or your favorite podcast player) to have our podcasts sent directly to your device.Stream from SoundCloudSHOW NOTES:In this episode, we discuss:
How and when to plant these ‘long-season’ crops, which take around 100 days to mature.What to look for to determine when your squash is mature and ready for harvest.Everything you need to know about storage - from wiping the fruits to checking them weekly to the storage potential of different varieties.Our favorite winter squashes to grow at home!Important Take-aways:
To determine when to plant your winter squash, figure out the average last frost date in your area and work backwards from there, considering the days to maturity of the variety you’re planting. You’ll want your fruit to be mature 2-3 weeks before a frost, so in most temperate climates, this means planting sometime between mid-May and mid-June.Winter squash can be direct seeded or transplanted, and your mature plants should be spaced at least 3 feet apart.Winter squash is susceptible to powdery mildew.The fruit is mature when it is full-size, properly colored, has a tough skin, and the stem looks dry. Harvest by using sharp pruners or a knife to cut the stem, leaving about 5-6 inches.For storage, wipe the fruits with a mild bleach solution to prevent rot, then store dried fruits in a dry, dark location. Check your storage squashes about once a week to look for signs of decay, and, if needed, use those fruits first.Different winter squash varieties have different storage potentials. Softer-skinned varieties like delicata and acorn will generally last a month or two, while tougher-skinned varieties like butternut can store for 3-4 months.
Resources:
These are some of the favorite winter squash varieties we discussed:
New England Pie PumpkinHoney Bear Acorn SquashBlack Forest Kobocha Red Kuri SquashSmall Wonder Spaghetti Squash


Heard on the Episode:
“Even if your squash already appears mature and takes on the color and size you expect, I highly recommend leaving the fruit on the vine while the plant dies back. The warm temperatures of late summer and early autumn will help cure the fruit and increase the storage life. You can pretty much wait until your plant is entirely dead before removing your winter squash fruit.” - Hilary Dahl
“One of my all-time favorite winter squashes is called Small Wonder. It's a single-serving sized spaghetti squash. It's easy to grow, and then you can roast a couple up for dinner and use them just like you would use pasta.” - Kellie Phelan
Like what you hear? Please share our podcast with a friend.Subscribe on iTunes or your favorite podcast player so you never miss a beat. And we'd really appreciate you showing us some love by leaving a rating and review on iTunes.
Have a topic you'd like see us dig in to? Leave us a note in the comment section below or #EBpodcast on Instagram!
September 9, 2016
Encyclopedia Botanica Podcast, Episode 12: Planting Garlic

Today’s episode is all about planting garlic! Garlic is a member of the Allium family, which also includes onions, leeks, scallions, and chives. In most climates, garlic is planted in the late fall and harvested mid-summer the following year. That means this is perfect time to start sourcing garlic seed, and we’re here to help you get ready. Join us as we chat about selecting garlic seed, explore the differences between softneck and hardneck garlic, and, of course, discuss planting techniques and tips.
How to Listen:Listen right now in your browser by clicking below.Or subscribe in iTunes (or your favorite podcast player) to have our podcasts sent directly to your device.Show Notes:In this episode, we discuss:
Garlic seed propagation and local adaptationThe garlic life cycle, and what that means for timing your plantingDifferent types of garlic, including softneck, hardneck, and elephant garlicHow to plant and care for your garlicImportant Take-aways:
Source your seed now, particularly if you are looking for organic types!Garlic has a different life cycle than just about any other crop in the annual garden. It is planted in the fall because it requires a period of vernalization in order to successfully differentiate, meaning divide into new cloves. If you live in a region where the temperatures do not dip below 50 degrees for an extended period of time, you can simulate natural vernalization by leaving your seed in the refrigerator for 6-12 weeks before planting.There are three types of garlic: Softneck, Hardneck and Elephant. When selecting which types to plant, you'll want to consider the different qualities of each type and plant based on your goals. For example long term storage vs. big cloves or very strong taste.Plant your garlic in loose soil, 5-6 inches apart and 2-3 inches deep with the pointy side up. If you are planting in a region where the ground freezes and thaws regularly, you may want to plant a little deeper to keep the cloves from being pushed out of the soil during the temperature changes.Garlic will stay in your garden until mid-summer, so plan accordingly!Heard on the Episode:
“Garlic seed producers run out of seed pretty quickly, particularly if you are looking for organic types. So that you have the widest range of options when selecting varieties, it’s best to order sooner than later.” - Hilary Dahl
“The first time I planted garlic, which was only a couple of years ago, I remember thinking, how can one clove grow into a whole head... it's like magic!” - Kellie Phelan
Like what you hear? Please share our podcast with a friend. Subscribe on iTunes or your favorite podcast player so you never miss a beat. And we'd really appreciate you showing us some love by leaving a rating and review on iTunes.
Have a topic you'd like see us dig in to? Leave us a note in the comment section below or #EBpodcast on Instagram!


