
Colin McCrate's Blog, page 16
April 21, 2017
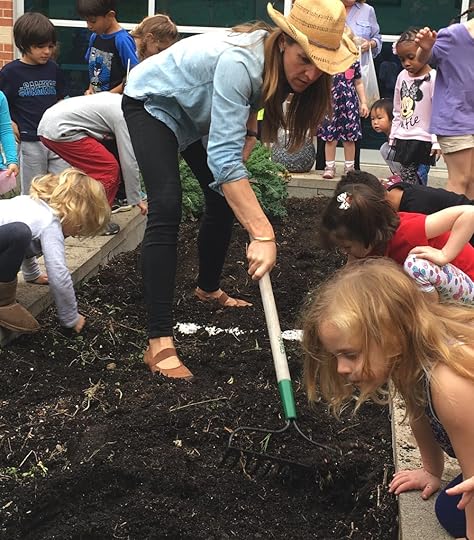
Encyclopedia Botanica Podcast, Episode 41: Gardening with Kids featuring Nicole Burke

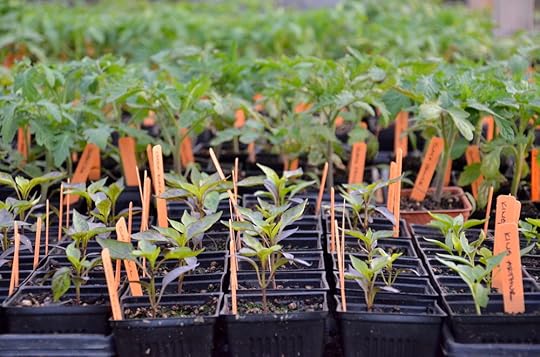
Growing food with kids of all ages can be fun and rewarding. On today’s episode, Nicole Burke from the Rooted Garden joins us to share her mission of getting everyone growing their own edible garden. As a mom to 4 kids, Nicole is an expert on the best ways to engage kids in this process, from planning to planting to harvesting and maintenance.
HOW TO LISTEN:Listen right now in your browser by clicking above.Subscribe in iTunes (or your favorite podcast player) to have our podcasts sent directly to your device.SHOW NOTES:In this episode, we discuss:
Getting kids from toddlers to teenagers involved in gardeningNicole's three best tips for gardening with kidsThe best crops for kids to grow
Important Take-aways:
Nicole’s top three tips for gardening with kids are:
Surrender your plans for a perfect garden! If you want a picture perfect garden, you'll have to build a fence to keep kids out and that's just no fun. Over time, kids will learn to preserve the beauty of it, but in the beginning, you have to release the need for everything to be perfect.
A great way to engage kids is to involve them in the planning period of the garden. Tell them what's growing in the coming season and see what things they'd like to grow most. Involve them in the research or seed order. Every decision you allow them to join in on is one they will most likely care about more.
Give kids a job, chore, or area of the garden that's particularly theirs. For example, pick one crop for each child to tend to. Or, if it's a particular work day, let each child know what you're expecting them to do. Set expectations at the beginning of the time and let them know why their job is important.
Your approach should vary based on the children’s ages:
For children under the age of 3, it’s best to have a separate space that's just theirs where they can turn the dirt, drive their trucks, etc.
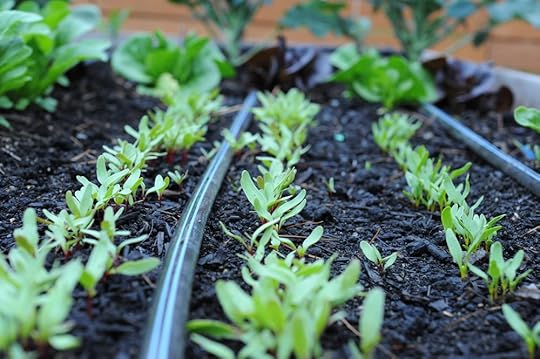
Kids between the ages of 3 and 5 are able to help with planting bigger seeds, turning soil, and spreading mulch.
Primary school aged children can distinguish and pull weeds, hunt for pests like cabbage loopers and aphids, harvest lettuce, peas, tomatoes, and clean up the garden area. The trick at this age is finding the things that motivate and interest your child and drawing them in at the right moment.
As children hit the ‘tween’ years, you've got to make it more interesting for them. This is a great stage to have them help with planning the garden, designing the area, and selecting plant varieties.
In the teenage years, kids really should start becoming the leader in planning, designing, and planting the garden.
Nicole recommended three categories of crops to plant with kids:
Crops that hide underground, like potatoes, carrots, and radishes. Kids love digging and finding treasure, and root crops are perfect for that.
Crops that grow tall. Kids enjoy reaching for things, so, do a teepee or arch that's full of beans or cucumbers.
Fun varieties that aren't available at the store, like yard long beans, lemon cucumbers, or purple snow peas.
For more, find Nicole on Instagram @rootedgarden, or on her website rootedgarden.com, where you can sign up and her free ebook, Five Things to Grow with Kids.

Like what you hear? Please share our podcast with a friend. Subscribe on iTunes or your favorite podcast player so you never miss a beat. And we'd really appreciate you showing us some love by leaving a rating and review on iTunes.
Have a topic you'd like see us dig in to? Leave us a note in the comment section below or #EBpodcast on Instagram and Twitter!
We need your support to keep make fresh, quality weekly content! Support us here:
Become an Encyclopedia Botanica Patron!Featured Guest:
Nicole Burke
Rooted Garden, Houston, Texas
Nicole is a kitchen garden designer based in Houston, Texas. She's on a mission to get everyone growing their own edible garden, and she's also a mom to 4 kids. Nicole's business, Rooted Garden, has designed and installed over twenty gardens and provided consulting, design and resources for more than one hundred gardeners. Nicole grows her own kitchen garden right alongside her clients.


April 14, 2017
Encyclopedia Botanica Podcast, Episode 40: Container Gardening

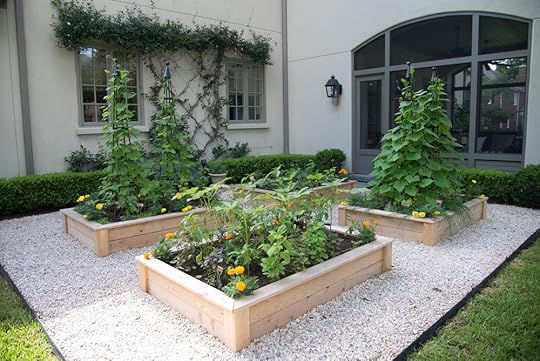
Containers are a great way to grow food in a small or otherwise unusable space. They can turn a sunny patio, deck or even a driveway into a custom-sized, productive garden. If container gardening is the best option for you, don't look at it as a limitation. Yes, not every crop is well suited for container planting, but many will thrive if properly tended. The key to container gardening is knowing what will grow best and giving your crops the resources they need.
HOW TO LISTEN:Listen right now in your browser by clicking above.Subscribe in iTunes (or your favorite podcast player) to have our podcasts sent directly to your device.SHOW NOTES:In this episode, we discuss:
Siting your container gardenTypes of containers best suited for growing vegetablesSoil for container gardensIrrigation for container gardensOur favorite crops to grow in containersImportant Take-aways:
Vegetable gardens love sun, and your container garden is no exception.Containers tend to dry out more quickly than in-ground beds because they only hold a relatively small amount of soil, and that soil is directly exposed to the heat of the sun.Plant pots can be made of just about anything, including plastic, wood, ceramic or metal. Personally, I tend to like glazed ceramic and wood because they hold up and you can find nice big sizes at a reasonable price. Look for pots that are wide, without sacrificing depth! Here are a few links to the types of containers we recommend: Corten Steel Containers:[image error][image error]
Cedar Boxes: Ceramic Pots:UV-Resistant Plastic:Drainage is essential to plant health. If you're pot doesn't have holes, drill a ¼ in hole every 4 inches across the bottom of the container.A common reason that people have limited success with potted plants is lack of fertilizer. Since these plants are growing in a pot, they only have access to the food that you provide for them. As we've mentioned before, vegetable plants are very hungry, and if we want them to produce a bountiful harvest, we need to give them the resources they crave.On that note...you want to be sure not to OVER fertilize pots because potassium salt build-ups can damage plants and excess nitrogen forces them to grow too quickly.My favorite crops to grow in containers tend to be fruiting crops (such as tomatoes, cucumbers, bush beans and peppers) and short season salad greens. Our book, Food Grown Right, In Your Backyard, includes a chart with detailed information on each crop's adaptability to container gardening. It's a great resource if you want a more comprehensive picture than we can include here.One thing to keep in mind with crops such as tomatoes and cucumbers, is that they will climb and grow to be tall, so you want to be sure you have some support as your plants grow. This is a scenario where you might choose a determinate tomato plant, which are types that are bred to grow to a compact height.It's crucial to clean your pots each year before planting, even if you didn't experience pest and disease problems the previous year. Aphid eggs and other pest larvae can sit dormant in the dirt and on the sides of your containers, just waiting to feast on next years crop.


Like what you hear? Please share our podcast with a friend. Subscribe on iTunes or your favorite podcast player so you never miss a beat. And we'd really appreciate you showing us some love by leaving a rating and review on iTunes.
Have a topic you'd like see us dig in to? Leave us a note in the comment section below or #EBpodcast on Instagram and Twitter!
We need your support to keep make fresh, quality weekly content! Support us here:
Become an Encyclopedia Botanica Patron!April 7, 2017
Encyclopedia Botanica Podcast, Episode 39: April Listener Q + A

In this episode we're giving custom answers to questions some of the listeners in the Slack group. Stay tuned for more on seed starting, drip irrigation, and raspberry pruning, and join our Slack group to get your questions answered!
HOW TO LISTEN:Listen right now in your browser by clicking above.Subscribe in iTunes (or your favorite podcast player) to have our podcasts sent directly to your device.SHOW NOTES:In this episode, we discuss:
Damping offDrip irrigationCut wormsRaspberry pruningSeedling heating matsImportant Take-aways:
Damping off is a seedling disease, and infected seedlings don't usually survive. Signs of damping off to look for include seedlings not emerging from the soil, or if they do, the leaves might appear water soaked, soft, mushy and maybe brownish. To prevent it, let the surface of the soil dry out once your transplants have germinated. Make sure you have good air circulation and water less frequently!With drip irrigation, check your soil water levels throughout the season by digging a few inches below the surface of the soil and looking for moisture. As the season progresses and the weather warms up and the rains start to be less frequent, you may want to run your system for longer.It’s important to identify potential garden pests before removing them. Cut worms are a common pest and you’ll want to remove them before they can impact your plants. Hand-picking always works best!Pruning raspberries is an important spring chose. For June-bearing berries, cut down all of the dead canes to the ground each fall. New green canes should come up each year during the summer, these are the canes that will fruit the following season so do not cut these down until a year later after they have fruited. For ever-bearing berries, each cane fruits twice. The first year it grows, it will fruit on the top half of the cane. At the end of the year, cut these canes down to about 1/2 their height. They will fruit on the bottom half the following season. Then you can cut them to the ground at the end of their second season.Heating mats are a helpful tool to warm the soil to a temperature range that will allow the seeds to germinate. After they've germinated, seeds will grow faster if the heat mats are left on, but the soil will also dry out more quickly, resulting in a more needy plant nursery and higher water usage. Heat mats work well for shallow seeding flats or trays, but not so well for larger containers because they will only heat a limited volume of soil.Like what you hear? Please share our podcast with a friend. Subscribe on iTunes or your favorite podcast player so you never miss a beat. And we'd really appreciate you showing us some love by leaving a rating and review on iTunes.
Have a topic you'd like see us dig in to? Leave us a note in the comment section below or #EBpodcast on Instagram and Twitter!
We need your support to keep make fresh, quality weekly content! Support us here:
Become an Encyclopedia Botanica Patron!April Listener Q + A
In this episode we're giving custom answers to questions some of the listeners in the Slack group. Stay tuned for more on seed starting, drip irrigation, and raspberry pruning, and join our Slack group to get your questions answered!
HOW TO LISTEN:Listen right now in your browser by clicking above.Subscribe in iTunes (or your favorite podcast player) to have our podcasts sent directly to your device.SHOW NOTES:In this episode, we discuss:
Damping offDrip irrigationCut wormsRaspberry pruningSeedling heating matsImportant Take-aways:
Damping off is a seedling disease, and infected seedlings don't usually survive. Signs of damping off to look for include seedlings not emerging from the soil, or if they do, the leaves might appear water soaked, soft, mushy and maybe brownish. To prevent it, let the surface of the soil dry out once your transplants have germinated. Make sure you have good air circulation and water less frequently!With drip irrigation, check your soil water levels throughout the season by digging a few inches below the surface of the soil and looking for moisture. As the season progresses and the weather warms up and the rains start to be less frequent, you may want to run your system for longer.It’s important to identify potential garden pests before removing them. Cut worms are a common pest and you’ll want to remove them before they can impact your plants. Hand-picking always works best!Pruning raspberries is an important spring chose. For June-bearing berries, cut down all of the dead canes to the ground each fall. New green canes should come up each year during the summer, these are the canes that will fruit the following season so do not cut these down until a year later after they have fruited. For ever-bearing berries, each cane fruits twice. The first year it grows, it will fruit on the top half of the cane. At the end of the year, cut these canes down to about 1/2 their height. They will fruit on the bottom half the following season. Then you can cut them to the ground at the end of their second season.Heating mats are a helpful tool to warm the soil to a temperature range that will allow the seeds to germinate. After they've germinated, seeds will grow faster if the heat mats are left on, but the soil will also dry out more quickly, resulting in a more needy plant nursery and higher water usage. Heat mats work well for shallow seeding flats or trays, but not so well for larger containers because they will only heat a limited volume of soil.Like what you hear? Please share our podcast with a friend. Subscribe on iTunes or your favorite podcast player so you never miss a beat. And we'd really appreciate you showing us some love by leaving a rating and review on iTunes.
Have a topic you'd like see us dig in to? Leave us a note in the comment section below or #EBpodcast on Instagram and Twitter!
We need your support to keep make fresh, quality weekly content! Support us here:
Become an Encyclopedia Botanica Patron!March 31, 2017
Encyclopedia Botanica Podcast, Episode 38: Green Garlic

Green sprouted garlic is somewhat of a delicacy and is usually only found at farmers markets, but is also very easy to grow! It grows fast and adds an incredible, fresh flavor to any traditionally garlic-laced meal.
HOW TO LISTEN:Listen right now in your browser by clicking above.Subscribe in iTunes (or your favorite podcast player) to have our podcasts sent directly to your device.SHOW NOTES:In this episode, we discuss:
The difference between green garlic and bulb garlicHow to plant and grow green garlicGreen garlic vs. garlic scapesImportant Take-aways:
Typically garlic cloves are planted in late fall and then harvested as a full head the following summer. However, it is also possible to plant garlic cloves in spring in order to produce a green shoot during that same season, which we call “green garlic”
Green garlic and garlic that you plant in the fall come from the same source - garlic cloves planted in the ground - but they yield much different results.
If you are growing green garlic, which means growing the crop for a thin, fresh shoot rather than a bulb for storage, the planting, timing and care of your crop will be a bit different from what you would expect when growing garlic for bulbs.
Green garlic is a short season crop, so it’s great for gardeners who didn’t get a chance to plant garlic the previous fall, or who are gardening in smaller spaces.
It's safe to start planting green garlic as soon as the ground has thawed and because of its growth habit, there is a long window of planting opportunity each season, so there is no rush
To plant green garlic:
Separate all the cloves for your head (or heads) of garlicLoosen the soil in the area where you plan to plantPlant each clove (pointy side up) about 3" deep, and 1-2" apartCover with soilFertilize with a balanced liquid or granular fertilizer once plants emergeYour garlic should start to sprout a few weeks after planting (depending on soil temperature), and is ready to harvest at any stage of its growth! We usually like to wait until the plant is around 6-8" tall so that the stalks long, but still tender. If your stalks start to become tough, trim them off.
Green garlic vs. garlic scapes: Green garlic is an entire young garlic plant that is harvested early in the season before the bulb is fully formed. Garlic scapes are the flowering stalk that the plant sets towards the end of it's lifecycle.
Sprouting garlic, ready to be planted

Garlic scapes
The best book on growing garlic, ever!!
[image error] [image error]
Like what you hear? Please share our podcast with a friend. Subscribe on iTunes or your favorite podcast player so you never miss a beat. And we'd really appreciate you showing us some love by leaving a rating and review on iTunes.
Have a topic you'd like see us dig in to? Leave us a note in the comment section below or #EBpodcast on Instagram and Twitter!
We need your support to keep make fresh, quality weekly content! Support us here:
March 24, 2017
Encyclopedia Botanica Podcast, Episode 37: Strawberries
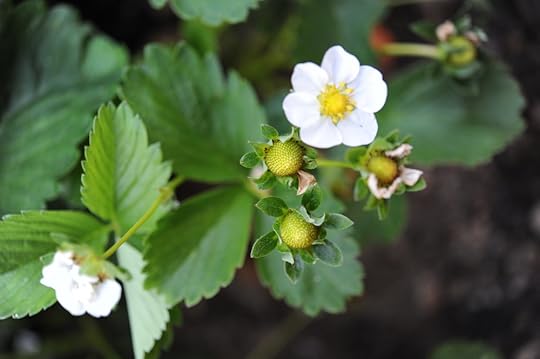
This week we are going to talk about one of the most popular crops for the home garden: Strawberries. Strawberries are easy to grow at home and can be highly productive even in relatively small spaces.
HOW TO LISTEN:Listen right now in your browser by clicking above.Subscribe in iTunes (or your favorite podcast player) to have our podcasts sent directly to your device.SHOW NOTES:In this episode, we discuss:
Types of strawberry plantsHow to plant and care for your strawberry patchImportant Take-aways:
Strawberries fall into two general categories based on when they set fruit. The two main types are June-bearing and Everbearing. June-bearing plants generally produce a large fruit set over a period of only a few weeks, usually in early summer (thus the name June-bearing). Everbearing plants set smaller-sized fruit over the course of an entire growing season.While a strawberry plant can live for 5-10 years, most growers choose to replace plants every 3 or 4 years because the plants eventually succumb to fungal disease, and removing and replacing plants every few seasons will help keep your crop healthy and productive.When cleaning up strawberries in the spring:Remove all dead foliage: Not only will this help make your strawberry patch look tidier, but removing the old, decaying leaves will help control disease.Weed area thoroughly: Weeding will only become harder as the plants begin to fill back in, so a thorough weeding in the spring will go a long way in reducing the time your spend on strawberry maintenance the rest of the year!Thin plants to 4-6 inches apart: Remove some runners and older plants. Strawberries plants are most productive in their first 1-3 years. There will be many runners, and most likely you will need to remove some, but if your mother plants are getting old, allow some of the runner to root and become new plants.Add fertilizer: Ours is 4% Nitrogen(N), 4% Phosphorus(P), 3% Potassium(K), but any all-purpose organic vegetable garden fertilizer will work.

Like what you hear? Please share our podcast with a friend. Subscribe on iTunes or your favorite podcast player so you never miss a beat. And we'd really appreciate you showing us some love by leaving a rating and review on iTunes.
Have a topic you'd like see us dig in to? Leave us a note in the comment section below or #EBpodcast on Instagram and Twitter!
We need your support to keep make fresh, quality weekly content! Support us here:
March 17, 2017
Encyclopedia Botanica Podcast, Episode 36: Attracting Beneficial Insects & Pollinators

Hopefully you already agree that flowers add appeal to any garden by providing beautiful color, shapes, textures, and scents. However, in addition to aesthetic value, flowers can be also be edible, medicinal, and perhaps most importantly, they can be beneficial for the rest of the plants in your garden. In this episode we talk about growing flowers specifically to attract beneficial insects to your garden. This topic ties a lot of things together. Growing flowers, organic pest management, and pollination for your veggies.
HOW TO LISTEN:Listen right now in your browser by clicking above.Subscribe in iTunes (or your favorite podcast player) to have our podcasts sent directly to your device.SHOW NOTES:In this episode, we discuss:
Creating a diverse habitat for beneficial insects and pollinatorsImportant Take-aways:
Flowers are are helpful addition to the edible garden because they attract pollinators, increase biodiversity, and encourage populations of beneficial insects.Pollination by insects is essential for many plants to produce healthy fruits and seeds. While there are a few home garden crops that are pollinated by wind (for example corn and other grasses), the majority of your crops are pollinated by flying insects. Without insect pollination most fruits and vegetables will not set fruit at all or the fruit will be incomplete and likely to rot or fall off the plant.Each species of insect prefers a different set of plants as their source of nutrients, breeding grounds, and habitat. Increased biodiversity of plantings will prevent any one insect species from taking over the garden and help you attract a diverse population of beneficial insects to help create a more balanced garden ecosystem.There are both annual and perennial beneficial flowers- the types you choose will depend on what makes sense in your space. We always suggest, whatever size your garden is, to keep the perennials in a designated area for ease of maintenance and crop rotation.We recommended that you designate 5-10% of your garden for beneficial flowers and that you plant the flowers in clusters.When choosing what flowers to plant, it is important to remember that different flower species, colors and shapes will attract different insects, so make sure you have variety.If your primary goal is to attract bees: choose plants with blue, purple, and yellow flowers (bees find these colors the most appealing).The Xerces Society is an international nonprofit organization that protects wildlife through the conservation of invertebrates and their habitats. Their website is a great resource if you'd like to learn more about habitat conservation and restoration, species conservation, protecting pollinators, contributing to watershed health, and reducing harm to invertebrates from pesticide useFor photos and details on the flowers we recommend in this episode, check out PLANNING FOR SPRING: BENEFICIAL FLOWERS
Like what you hear? Please share our podcast with a friend. Subscribe on iTunes or your favorite podcast player so you never miss a beat. And we'd really appreciate you showing us some love by leaving a rating and review on iTunes.
Have a topic you'd like see us dig in to? Leave us a note in the comment section below or #EBpodcast on Instagram and Twitter!
We need your support to keep make fresh, quality weekly content! Support us here:
March 10, 2017
Encyclopedia Botanica Podcast, Episode 35: Listener Q+A

In this episode we're covering Q+A from some of the listeners in the Slack group.
HOW TO LISTEN:Listen right now in your browser by clicking above.Subscribe in iTunes (or your favorite podcast player) to have our podcasts sent directly to your device.SHOW NOTES:In this episode, we discuss:
What to plant whenStarting seeds at homeDrip irrigationBecoming a beet ninja!Important Take-aways:
Q: “How do you know when to plant seeds and when to transplant? Last year, my first year planting a veggie garden, I just went to my local big box nursery and picked up what they had in stock.”
A: (Hilary) There are two different categories of crops that can be transplanted. The first is a group of crops that must be transplanted in order to have a long enough growing season to reach maturity. The second category of transplantable crops are those that individual gardeners choose to transplant because they either perform better or it makes their garden easier to manage or more productive. These crops can be direct seeded into the garden if that is preferable, but many gardeners find it advantageous to transplant them.
Our latest book, High-Yield Vegetable Gardening, helps make planning your direct seeding and transplanting simple by providing charts with our recommendations for each crop.


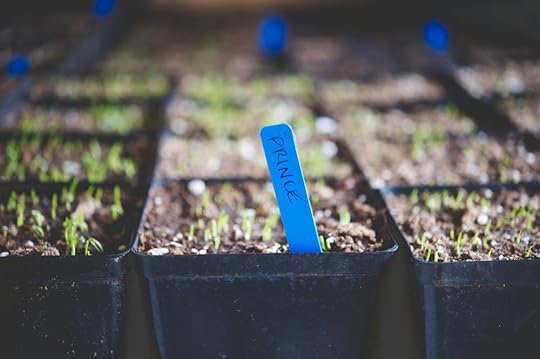
Q: “When you start your seeds indoors, do you put them by a window or do you use lights? If you use lights; what type of lights? Also, do you use heat pads? Total newbie here to starting seeds indoors, but I'm just trying to figure out a simple/cheap set up.”
A: (Kellie) My home seed starting set-up is basically metro shelving from the Home Depot, and then I hung two shop light fixtures with T5 lights from the shelves. I do use heating mats this time of year, especially for my warmer weather plants like tomatoes (eventually I wean them off the mats as I'm getting ready to harden them off for planting outside). I like to place my seedlings a few inches from the lights. The easiest way to do that is to prop them up on extra trays or pots, and then remove those as the seedlings get taller (it's easier than changing the position of the lights).

Q: "I'm hoping to sit down and get my planning squared away this weekend. This will be my first time growing anything! The house we bought came with a few small beds, and your resources have been so helpful. I'm getting to the stage of narrowing things down, and now I'm trying to figure out where to buy things. I don't have the capability to start things indoors, so I'm trying to figure out what I can grow from seed outside, and what I can buy that has been started elsewhere (for example, should I just buy a tomato plant and move it to my raised beds?)."
A: (Hilary) First of all, I want to say: keep it simple!!! If you just have a few raised beds I'd encourage you to pick out a handful of crops to try out this year... make a list of what you're thinking about growing, and then research if it should be direct seeded or transplanted. The a seed website or catalog can help with that, and so can the Slack group! From there, you'll have a sense of what seeds to buy now and what transplants to buy later. You might designate one of your beds to a couple of short season, direct-seeded crops, and then seed another bed in beets and carrots, and transition the first bed to peppers and tomatoes that you buy as transplants later in the season.


Q: “When we first moved to this small farm/homestead last year, I had no idea how to deal with these huge expanses of tilled land (well, huge compared to my previous backyards)... so I built raised beds because they were familiar to me and I knew how to arrange a small raised bed. But this year I pulled out the raised beds and I'm going to try doing reeeeallly long rows, probably just 1 or 2 at the most of each variety. I think it will be easier to do successive plantings this way. It's been a hard transition to figure out how to plan my garden on this comparatively giant expanse of soil... Also! I really want to do drip irrigation but I don't think it makes sense on a plot of land -- parts of it are always getting turned in, and it seems like big parts wouldn't be covered by the drip hose. Plus the expense! Also I think they lose their water pressure if a line is too long... #firstgenerationfarming #clueless'”
A: (Hilary) The drip irrigation we use in our urban farms is actually designed for large farms. The drip lines we have at our Woodinville farm span beds that are 150 feet long and is the exact same line we use in our residential gardens, so water pressure shouldn't be an issue! But, you're right, they are an investment on that scale…


When it comes to figuring out how to plant these really large spaces, I think it depends on the crop, what your goals are and how active you are in your garden. If it were me, I'd probably think about planting in blocks, as opposed to rows. Let’s say your beds are 4 x 50 feet and you have drip tapes spaced every foot across the 4 foot span. You'll still plant in rows along your drip tapes, but instead of planting one long 50 foot row of beets, you'll plant 8 (one on each side of the drip tape) 5 foot rows of beets, and then 8 5 foot rows of carrots next to that, and so on. In my opinion, this makes harvesting, maintenance and succession planting a little easier.
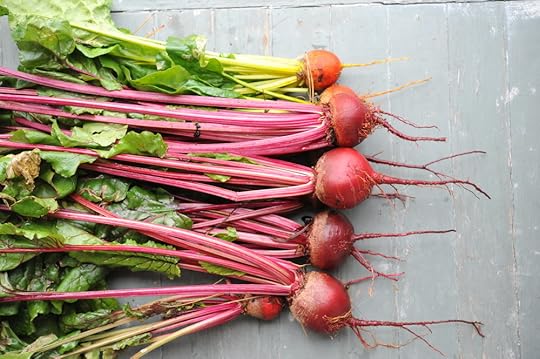
Q: (@christian) "Okay, I have a confession - I'm having some serious Beet envy right now watching the Aussie instagrammers, and feel ready to expose my deep insecurity around the size of my former roots. I have grown them successfully and tried multiple techniques (increased/decreased light/soaking seeds/more soil fertility/less soil fertility/early sow/late sow) but, lack consistency. Any go-to wisdom/tips for growing down some fat beets are welcome!!”
A: (Hilary) Here's how I grow beets:
chose a spot that gets full sun - soil temp should be at least 50 degrees, 77 degrees is optimalwork the soil so that it's nice and looseuse my finger to make furrows along the drip tape, spacing the rows at least 6 inches apartseed at a rate of about 1-2 seeds per inch - very overseeded!cover with about a ¼ inch of soilwateronce seedling are about 2 inches tall, thin to one plant every 3-4 inches- crucial step!!fertilize every 3-4 weeks with a liquid fertilizer.Response @christian: Shall we have a ninja-beet challenge? Who can produce the fattest beet this spring while following Hilary's method. Winner earns a coveted place in Ninja-Beet hall of fame? Are you in?
Join Kellie and @christian as they face off for some friendly beet-growing competition this season! They've agreed on growing Touchstone golden beets, so if any of you listening want to get in on the challenge. We can post pics and check in on each other's progress. It will be a blast. Hashtag your photos with #beetninja
Like what you hear? Please share our podcast with a friend. Subscribe on iTunes or your favorite podcast player so you never miss a beat. And we'd really appreciate you showing us some love by leaving a rating and review on iTunes.
Have a topic you'd like see us dig in to? Leave us a note in the comment section below or #EBpodcast on Instagram and Twitter!
We need your support to keep make fresh, quality weekly content! Support us here:
Become an Encyclopedia Botanica Patron!
March 3, 2017
Encyclopedia Botanica Podcast, Episode 34: Phosphorus and Potassium

Welcome to part 2 of our 2-part series on organic fertilizer! In the first part of the series, we talked about Nitrogen as an essential nutrient for healthy plant growth. This week we're talking about Phosphorus and Potassium. These two nutrients are responsible for many vital plant functions, including root growth, flower production and fruit development. As we discussed in part one of this series, the NPK ratio is a tool for informing gardeners of the relative percentages of nitrogen, phosphorus and potassium in a fertilizer. So this week's podcast is all about the P and the K of that ratio.
HOW TO LISTEN:
Listen right now in your browser by clicking above.Subscribe in iTunes (or your favorite podcast player) to have our podcasts sent directly to your device.SHOW NOTES:
In this episode, we discuss:
Phosphorus and Potassium (P + K of the “NPK” ratio)The roles Phosphorus and Potassium play in the health of your gardenOrganic sources of Phosphorus and PotassiumBalanced fertilizerKelpImportant Take-aways:
Vegetable crops pull a lot of nutrients out of the soil, so no matter where you're growing, those nutrients need to be replenished.Phosphorus and potassium, are responsible for many vital plant functions, including root growth, flower production and fruit development.PhosphorusCompost can contain a significant amount of phosphorus. Compost also acts as a chelating agent and combines with iron. Basically, this means that it converts the micronutrient iron into a soluble form that the plants can absorb.Phosphorus can be unavailable to plants if your soil pH is out of whack, so if you are having issues with phosphorus deficiency in the garden, make sure to check the pH before just continuing to add more fertilizer to the soil. This element is most available to plants when the soil pH is between 6.0 and 7.0.Organic sources of phosphorus are rock phosphate, bone meal and compostPotassiumPotassium plays a crucial role in your plants ability to absorb water.Organic sources of potassium are greensand (which is more of a long-term investment in the soil) and sulfate of potash. (which releases nutrients more quickly).KelpWhile organic fertilizer ingredients like greensand do add micronutrients to the soil, many growers use Kelp Meal or other seaweed products to add micronutrients to the garden. We apply kelp to gardens in both a granular and liquid form.The idea behind a foliar feeding is that the fertilizer is sprayed directly on the leaves of the plant. Typically people try to do foliar feeding first thing in the morning when the stomata on the leaves are still open and they can most effectively soak up the nutrients in the spray.Like what you hear? Please share our podcast with a friend. Subscribe on iTunes or your favorite podcast player so you never miss a beat. And we'd really appreciate you showing us some love by leaving a rating and review on iTunes.
Have a topic you'd like see us dig in to? Leave us a note in the comment section below or #EBpodcast on Instagram and Twitter!
We need your support to keep make fresh, quality weekly content! Support us here:
February 24, 2017
Encyclopedia Botanica Podcast, Episode 33: Nitrogen

Over the next two episodes we will break down NPK, the acronym used to classify plant fertilizers. NPK stands for nitrogen, phosphorus and potassium. The letters used to represent each of these 3 nutrients are their symbols on the periodic table of elements. This week we will focus on Nitrogen, and next week we'll talk in depth about Phosphorus and Potassium. So, welcome to our 2-part series on organic fertilizer!
HOW TO LISTEN:
Listen right now in your browser by clicking above.Subscribe in iTunes (or your favorite podcast player) to have our podcasts sent directly to your device.SHOW NOTES:In this episode, we discuss:
The NPK ratioThe Nitrogen CycleThe role nitrogen plays in the health of your gardenOrganic sources of nitrogenImportant Take-aways:
Nitrogen is the nutrient that is most responsible for the vegetative growth of a plant. This means that nitrogen is especially important for plants early in their life, as they develop the vegetative structure that will supply your harvest later on in the season. Plant that are deficient in nitrogen often show a uniform discoloration of the leaves.The crop groups that seems to benefit the most from an additional application of nitrogen are Brassicas and Alliums.Some of the most common sources are Blood Meal, Feather Meal, Cottonseed Meal, Alfalfa Meal and Bat Guano.The ingredient that we use most is blood meal. It is a pure source of nitrogen with an NPK ration of 13-0-0. It is a dry powder derived from cow's blood which has been steamed or boiled to kill pathogens and remove impurities. It supplies crops with an immediate boost and continues to release useable nitrogen over the course of several weeks or months (depending on weather and soil conditions). Another reason why we love this product is because it is a by-product of the cattle industry- in other words, it's waste that's turned into a usable garden nutrient. For more about blood meal, check out Hilary's ORGANIC FERTILIZER BREAKDOWN PART ONE: BLOOD MEALLike what you hear? Please share our podcast with a friend. Subscribe on iTunes or your favorite podcast player so you never miss a beat. And we'd really appreciate you showing us some love by leaving a rating and review on iTunes.
Have a topic you'd like see us dig in to? Leave us a note in the comment section below or #EBpodcast on Instagram and Twitter!
We need your support to keep make fresh, quality weekly content! Support us here:


